Blog
How to Make a Tabletop Arcade Cabinet
One of the things I get told a lot is that people want a retro arcade cabinet in their home but that they simply don’t have a lot of room for it. Even bartop arcades take up a significant amount of space in smaller homes and apartments. So in this video, we’re going to make a tabletop arcade that’s portable and can even be stored in a closet or under a bed when not in use! Tabletop arcades are perfect for small spaces!
Watch the Tabletop Arcade Video
A Smaller Tabletop Arcade
In order to maximize our space savings for this arcade cabinet, we’re not only going to use a smaller 4 X 3 monitor, we’re going to liberate the LCD panel from the monitors case. This will allow us to save about another inch (~25mm) from the width and two inches (~50mm) from the depth of the arcade. This is a significant savings!
Parts List for this Project
If you’d like to build this project yourself, here’s a handy parts list to get you started:
- 1/2 sheet of 3/4″ MDF
- 4:3 LCD monitor
- Raspberry Pi 3
- Raspberry Pi power supply
- HDMI cable
- EasyGet arcade controls (Sanwa style)
- Power receptacle w/switch & fuse
- Cooling fan
- Mountable USB ports
- Buttons for LCD menus
- USB speakers
- T-Moulding
- Rust-Oleum filler primer
- Rust-Oleum flat black
- The Geek Pub Tabletop Arcade Plans
And here are some of the tools I used in this project:
- SawStop cabinet-style table saw
- Shop Fox 12″ disc sander
- DeWalt jigsaw
- Center punch
- Bosch router
- T-Moulding router bit
- Irwin clamps
- Bostitch brad nailer
- 1-1/4″ brad nails
- 220 grit sandpaper
- Cricut vinyl cutter
Liberating the LCD Panel
When I originally spec’d and bought this monitor, it never occurred to me that LCD panels would be glued into the bezel. Well, it turns out they are. When I opened the case of the monitor I was very disappointed at what I saw. However, I then did some research and found out that this is a new trend in monitor construction and it might be difficult to find a monitor that was not glued in.
The second thing I discovered is that simply buying the LCD panel is two to three times the price of buying a monitor and just gutting it! Ridiculous. I need my tabletop arcade to be somewhat affordable after all!
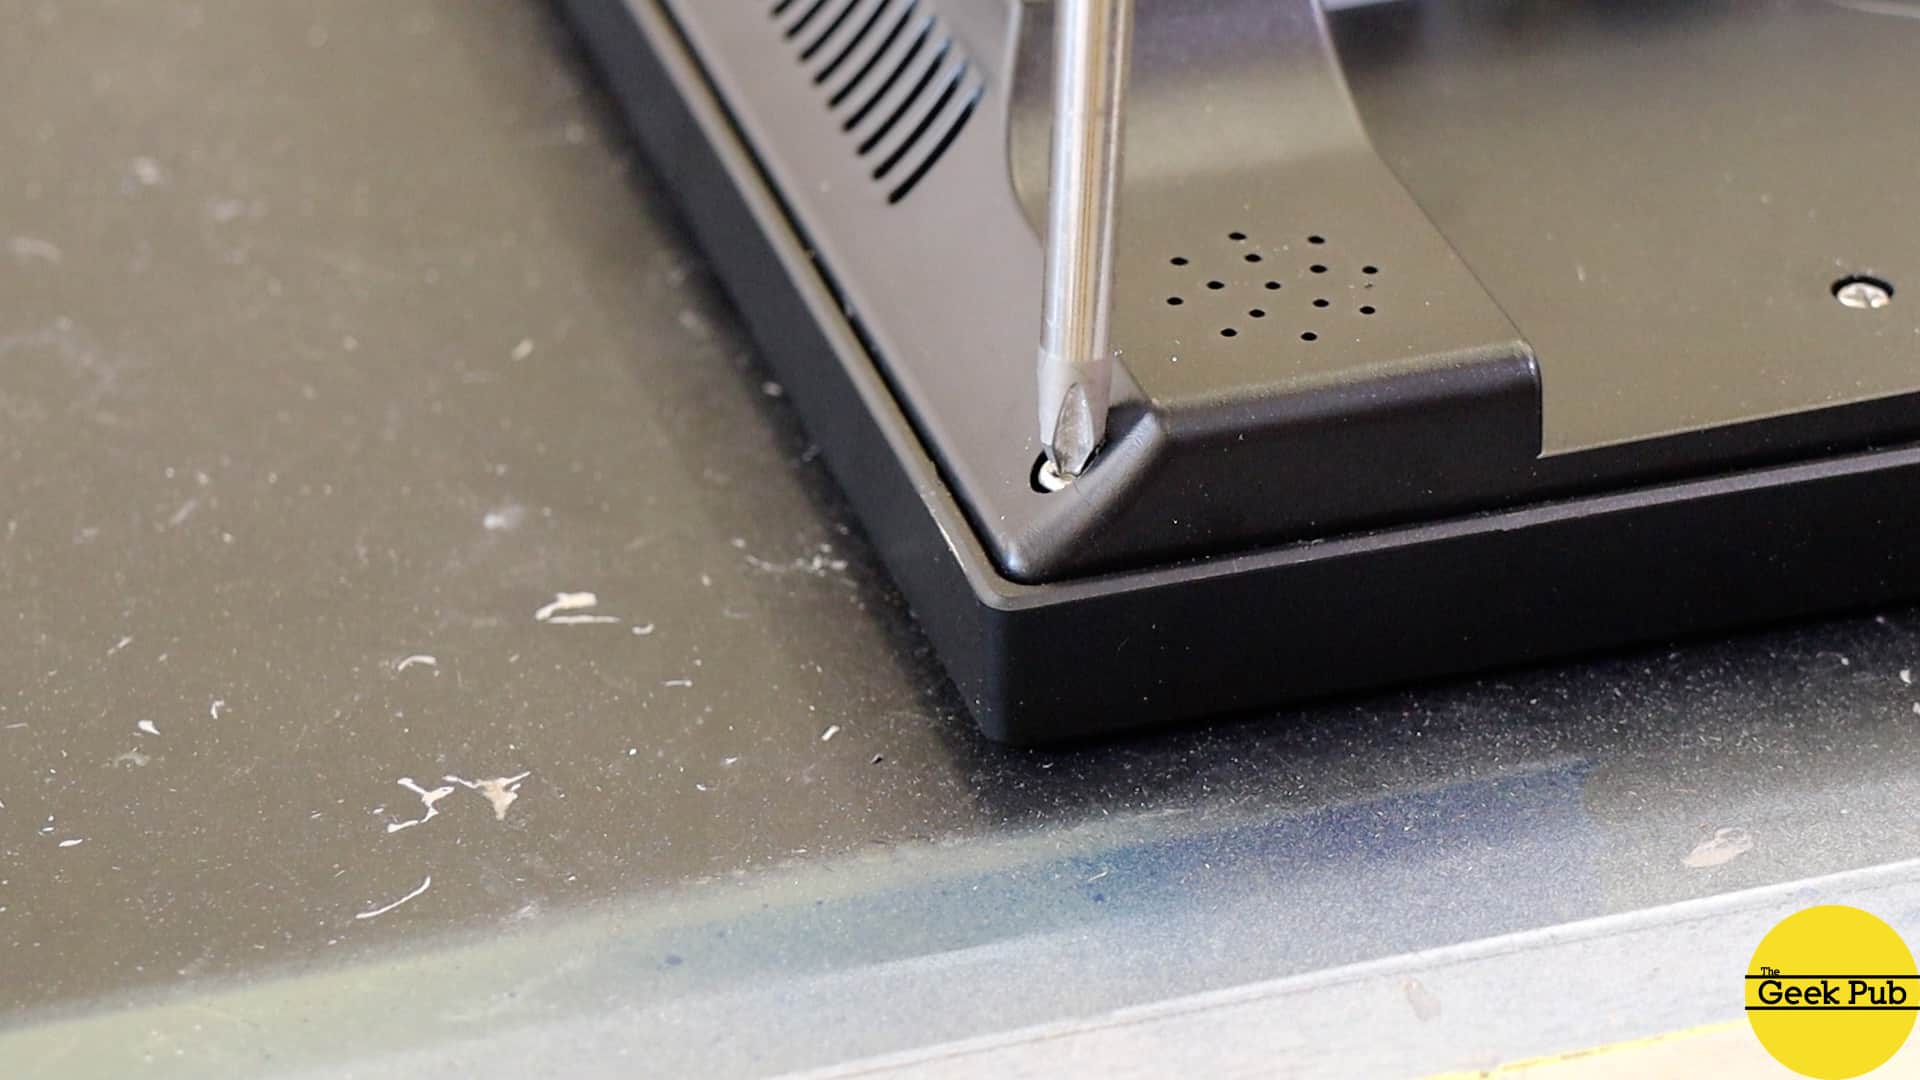
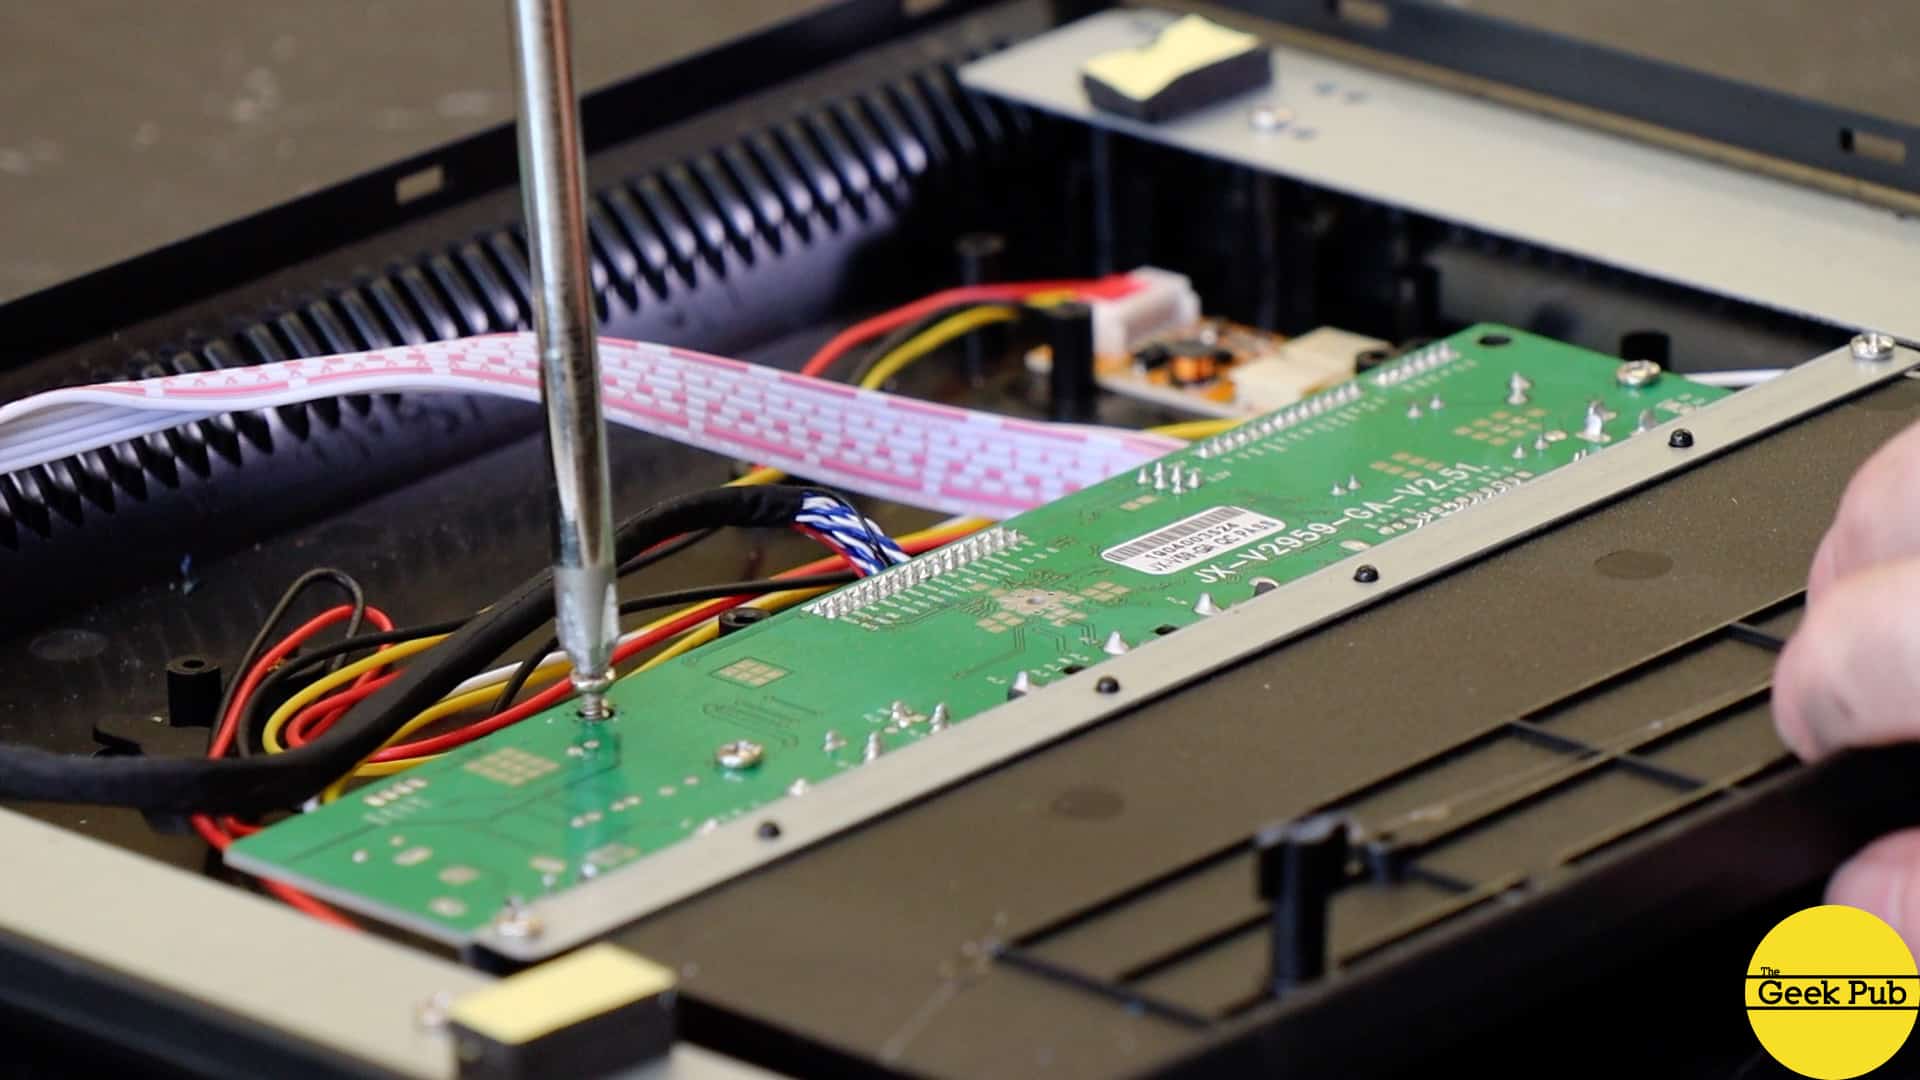
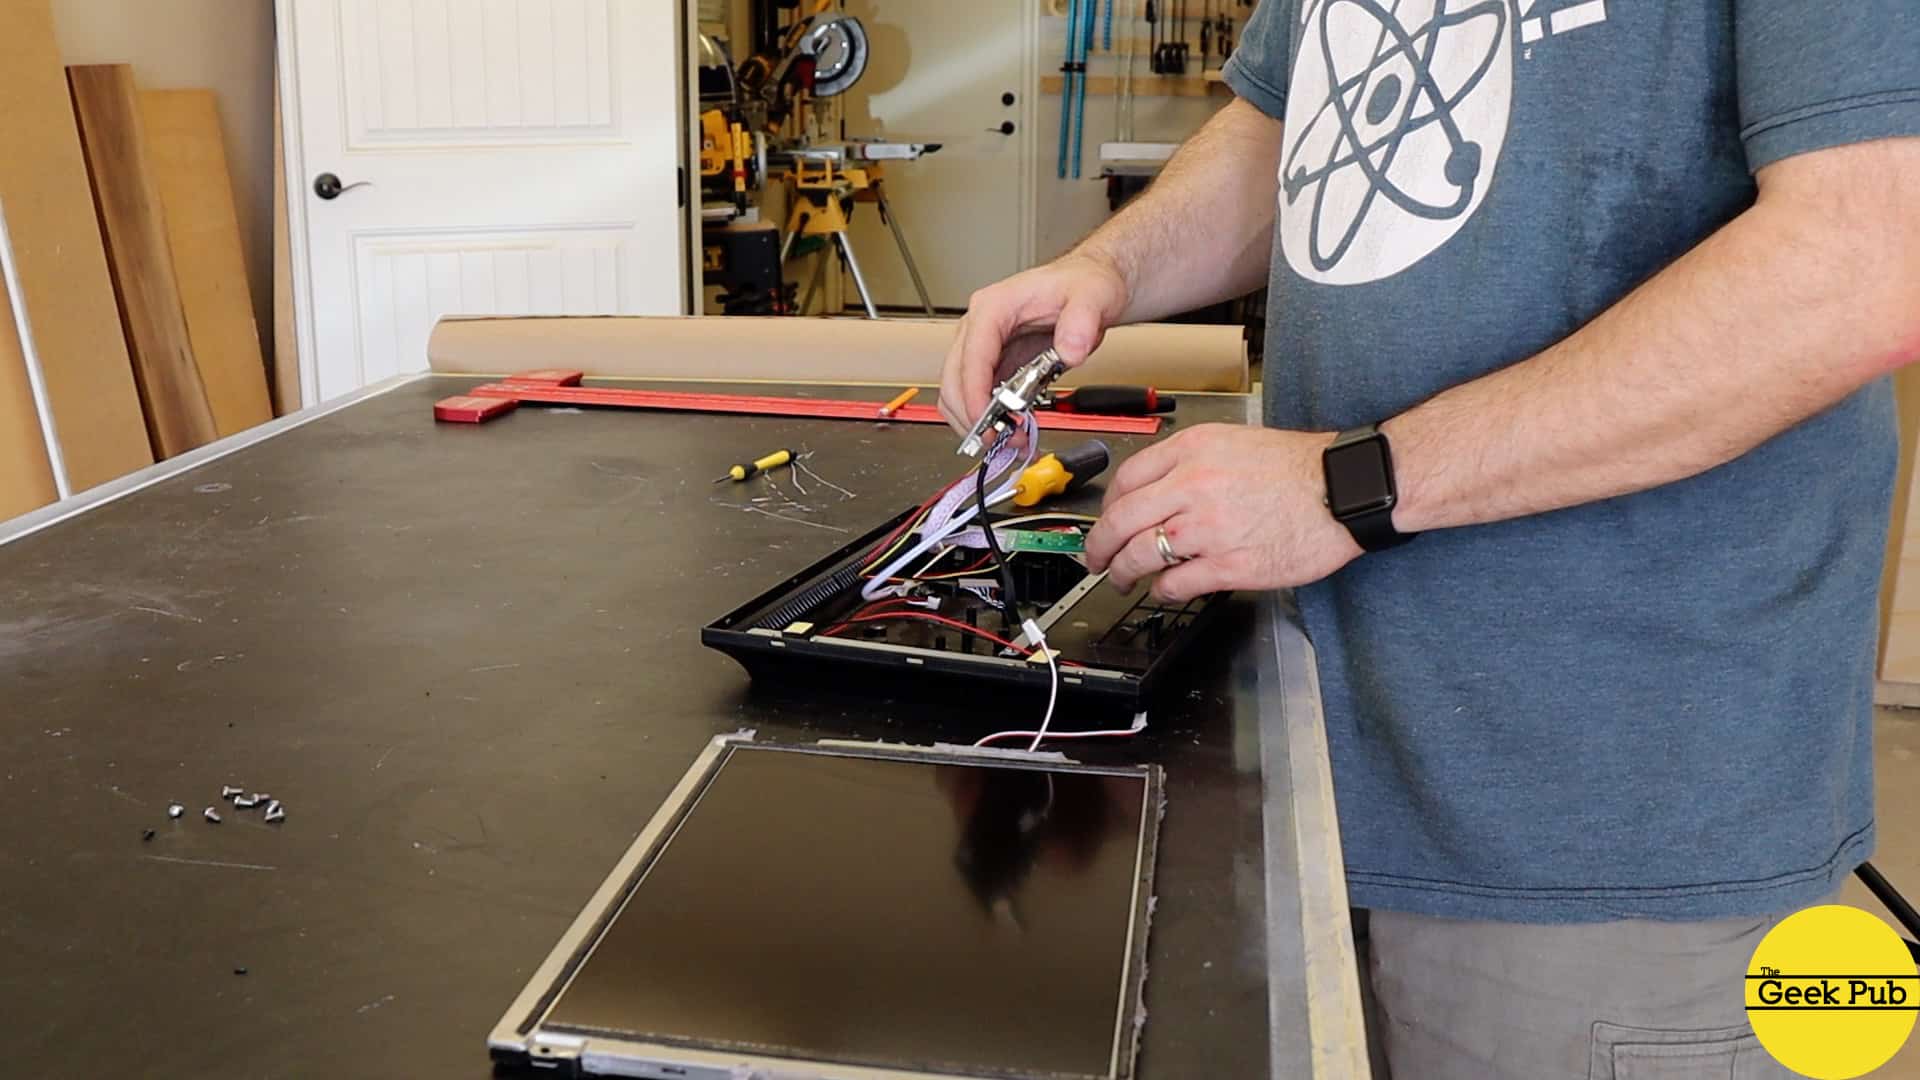
So first things first, I removed the back cover. This requires just removing three screws and then using a couple of screwdrivers to pop it open by going around the bezel.
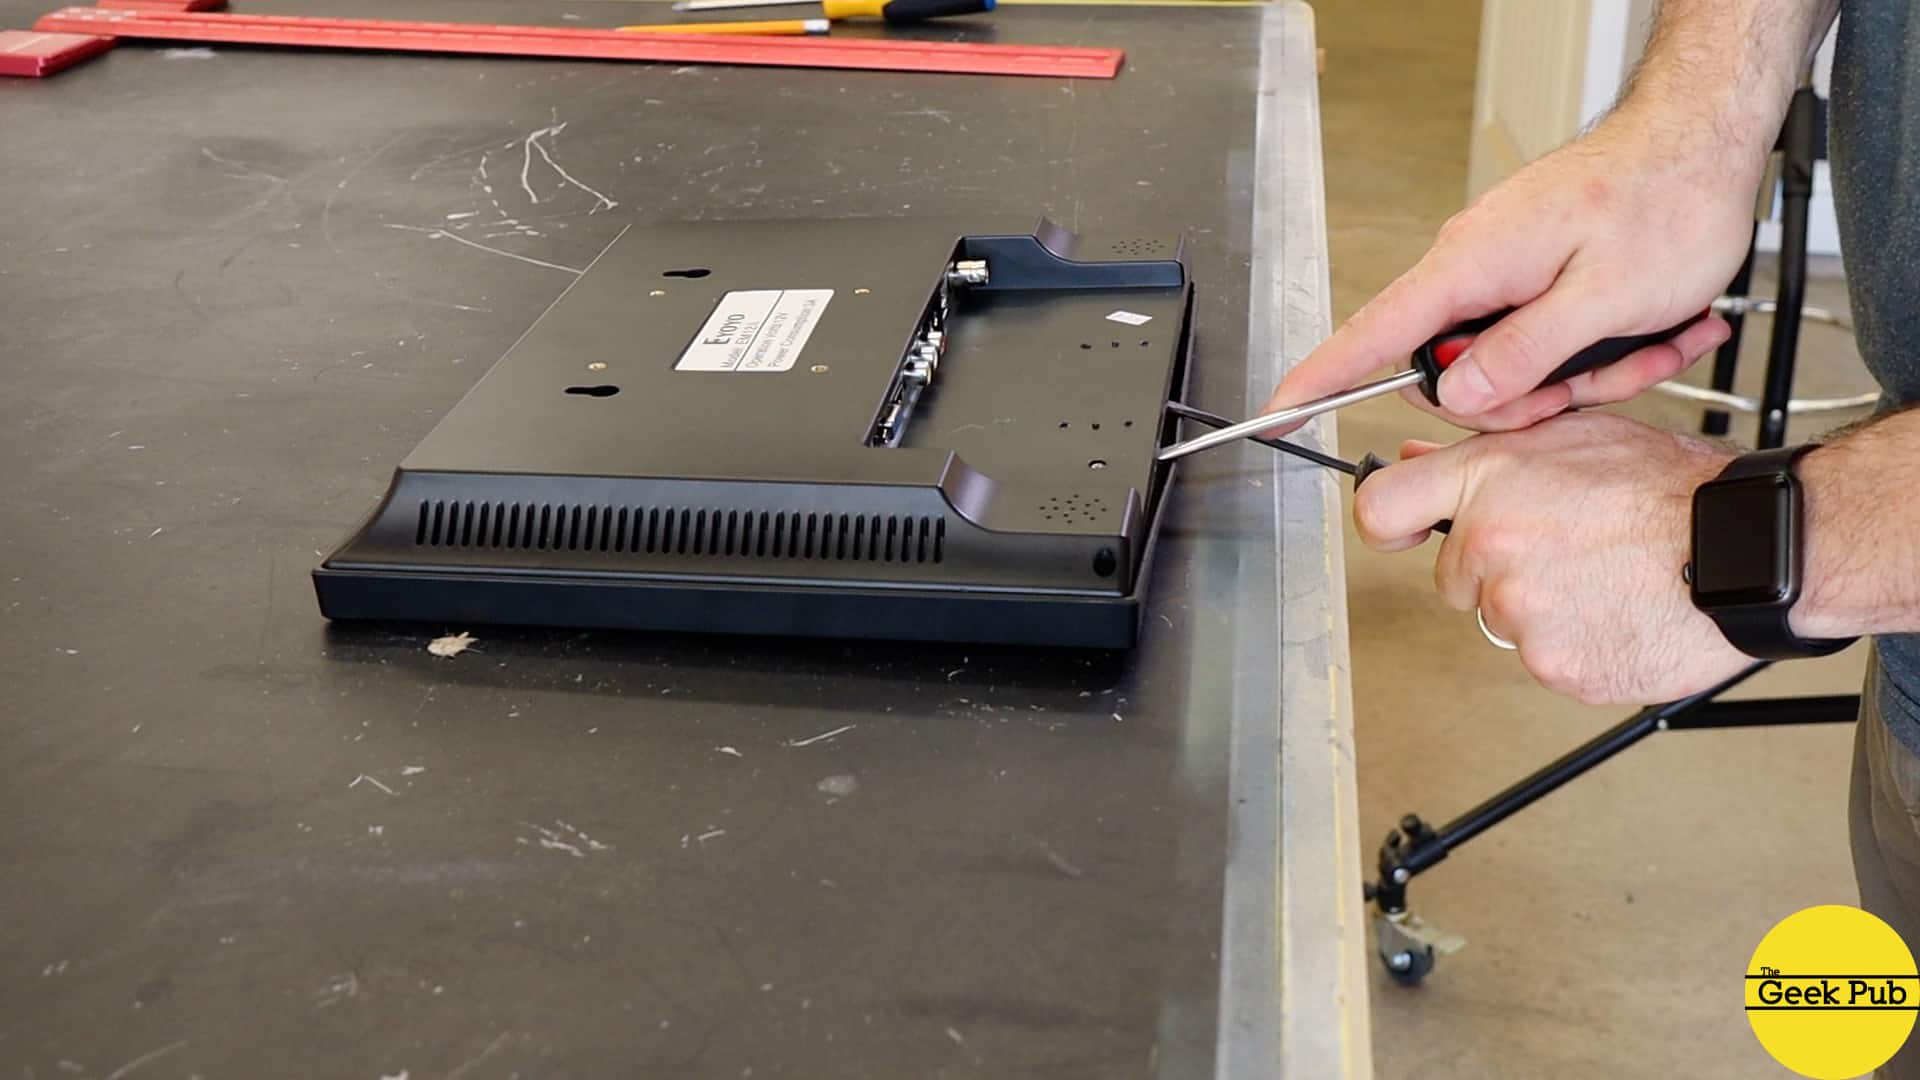
After that, I just unscrewed and removed all of the components inside the monitor. We’ll need to save all of these. They’ll get added to the inside of our cabinet in just a bit. If you bought the same monitor for your arcade, you should have four boards (still wired together).
- LCD main board
- LED backlight driver board
- Front panel buttons board
- IR receiver board
Removing the LCD Panel from the Bezel
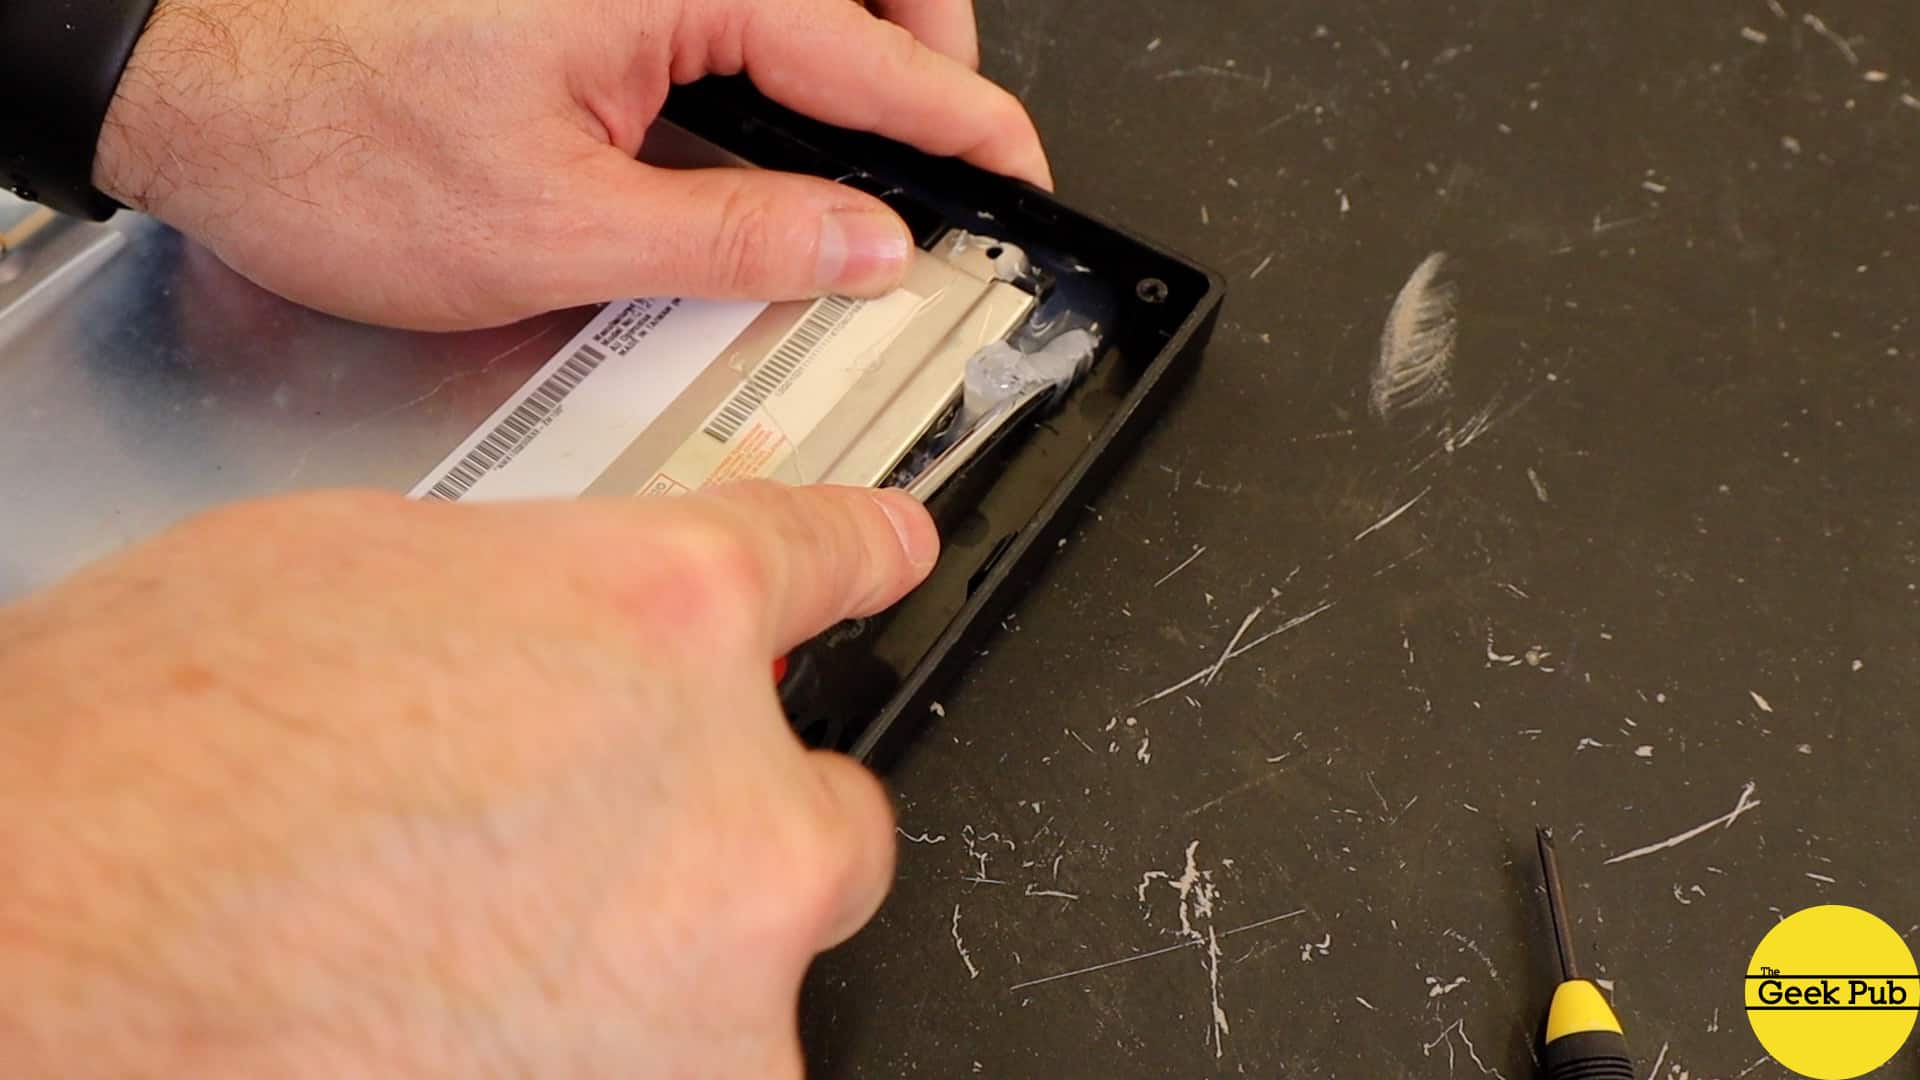
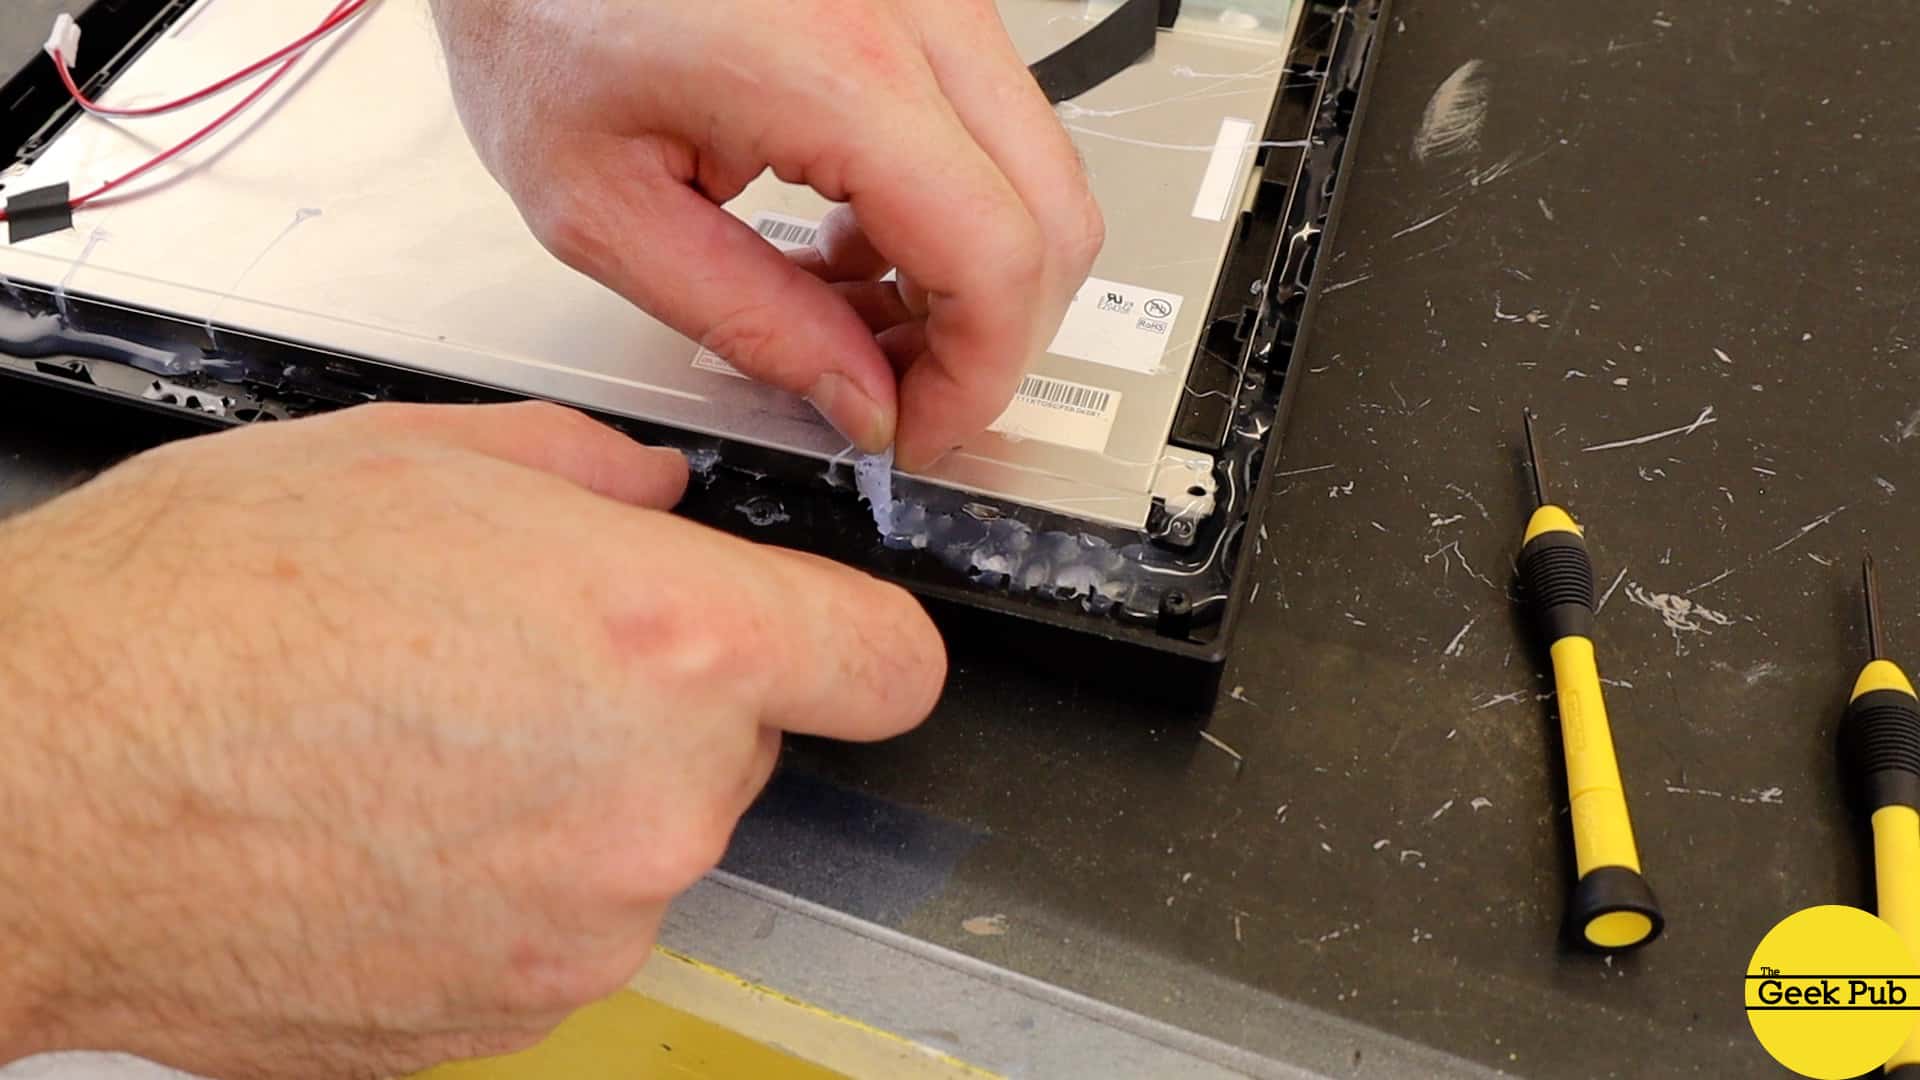
The good news is, removing the glue actually turned out to be super easy. All it took was a couple of flat tip screwdrivers and a little scraping. It was surprisingly easy to do! This is great because I wanted this to be a simple project anyone could do.
Just use a few different sizes of flat tip screwdrivers and slowly work around the edges of the LCD panel scraping away the glue. Once you get it all removed the LCD panel will simply lift up from the bezel. After that, I just went around the bezel with a razor knife and removed any remaining gunk.
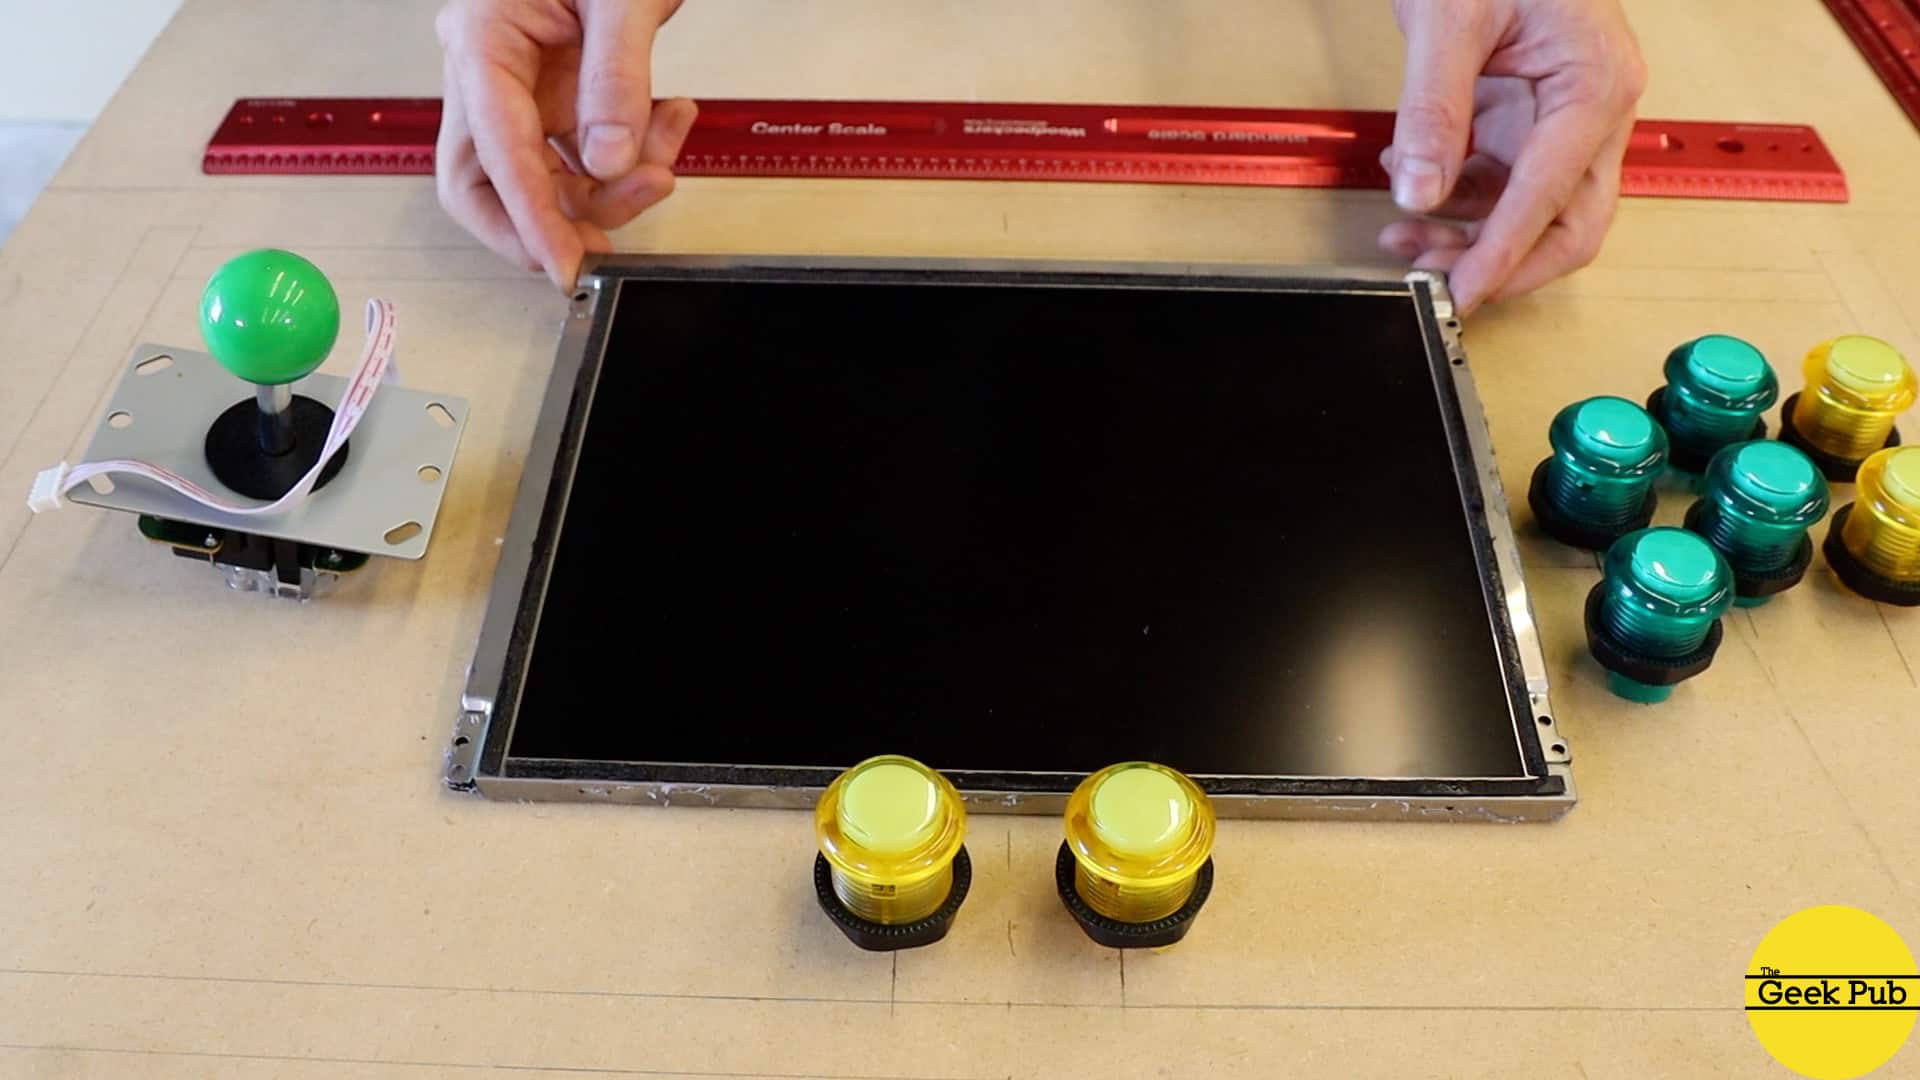
Laying out the Tabletop Arcade
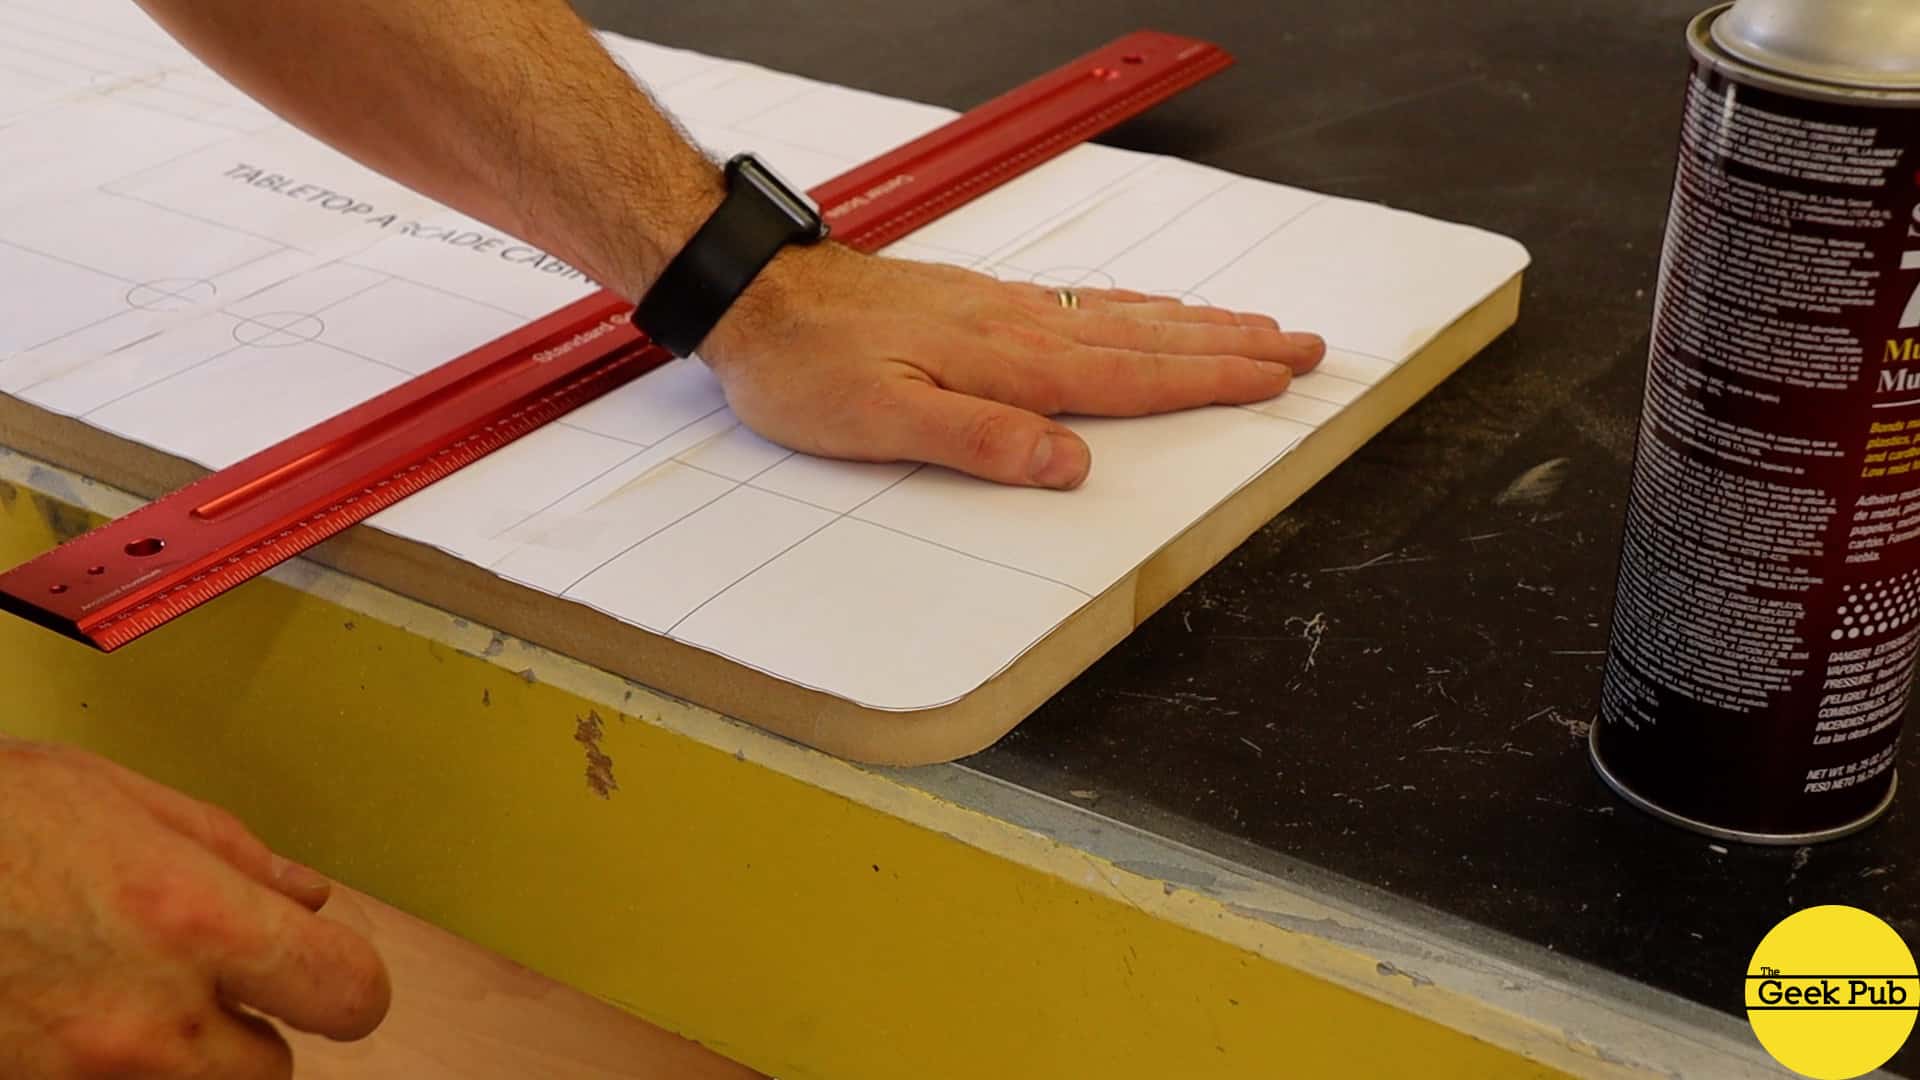
Next up I laid out the components on the MDF and came up with the mounting locations for the LCD, joystick and buttons. This took a bit of time to get everything sorted out where it would feel comfortable to play and still meet my strict size requirements (smaller the better!).
The thick outer lines are simply a reference I used for the cabinet walls underneath. This way I could make sure I didn’t do something dumb like put the buttons where the walls were!
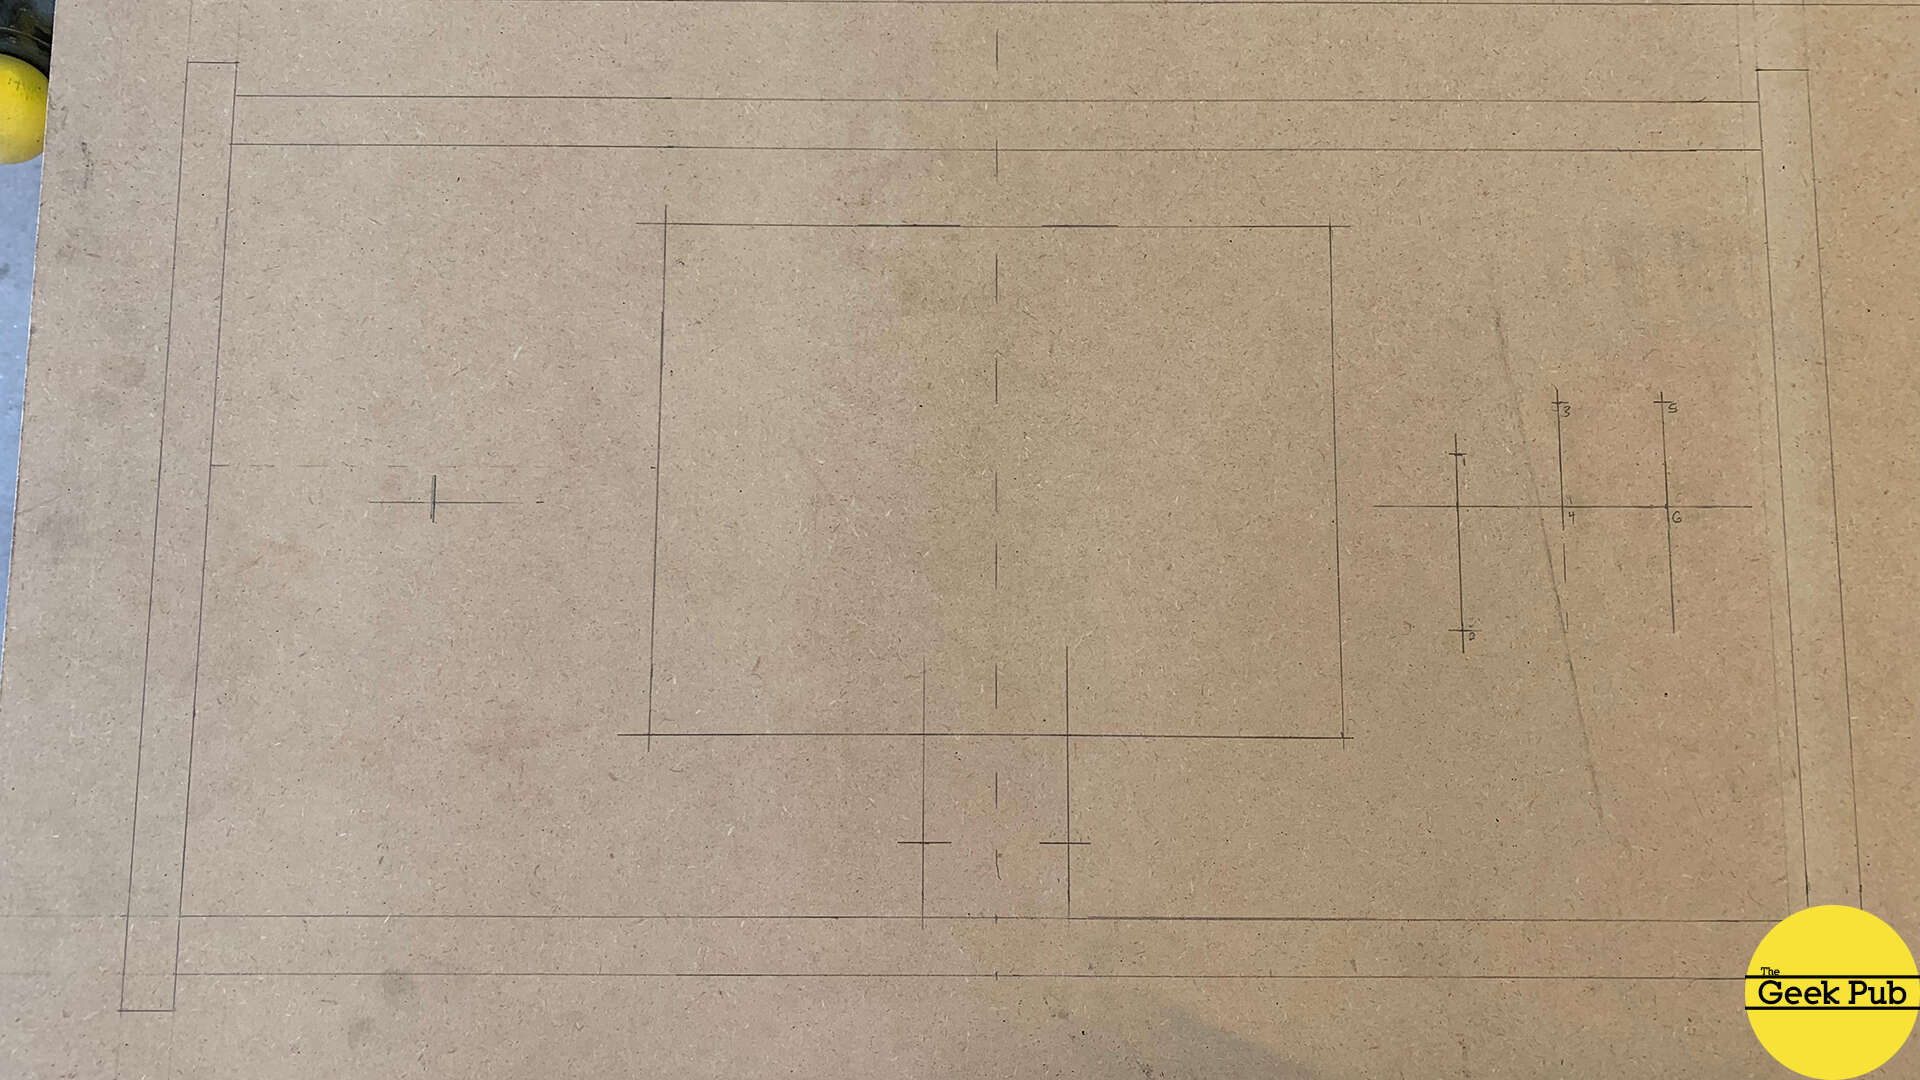
The good news you don’t have to do any of this, as you don’t have to do any of this, because I put everything into SketchUp and Adobe Illustrator and created an awesome set of Tabletop Arcade Plans you can use to make quick work of this.
Just print them out and glue or tape them to a sheet of MDF and cut/drill away.
[button link=”https://www.thegeekpub.com/product/tabletop-arcade-cabinet-plans/” color=”green” newwindow=”yes”] Get the Tabletop Arcade Plans HERE[/button]
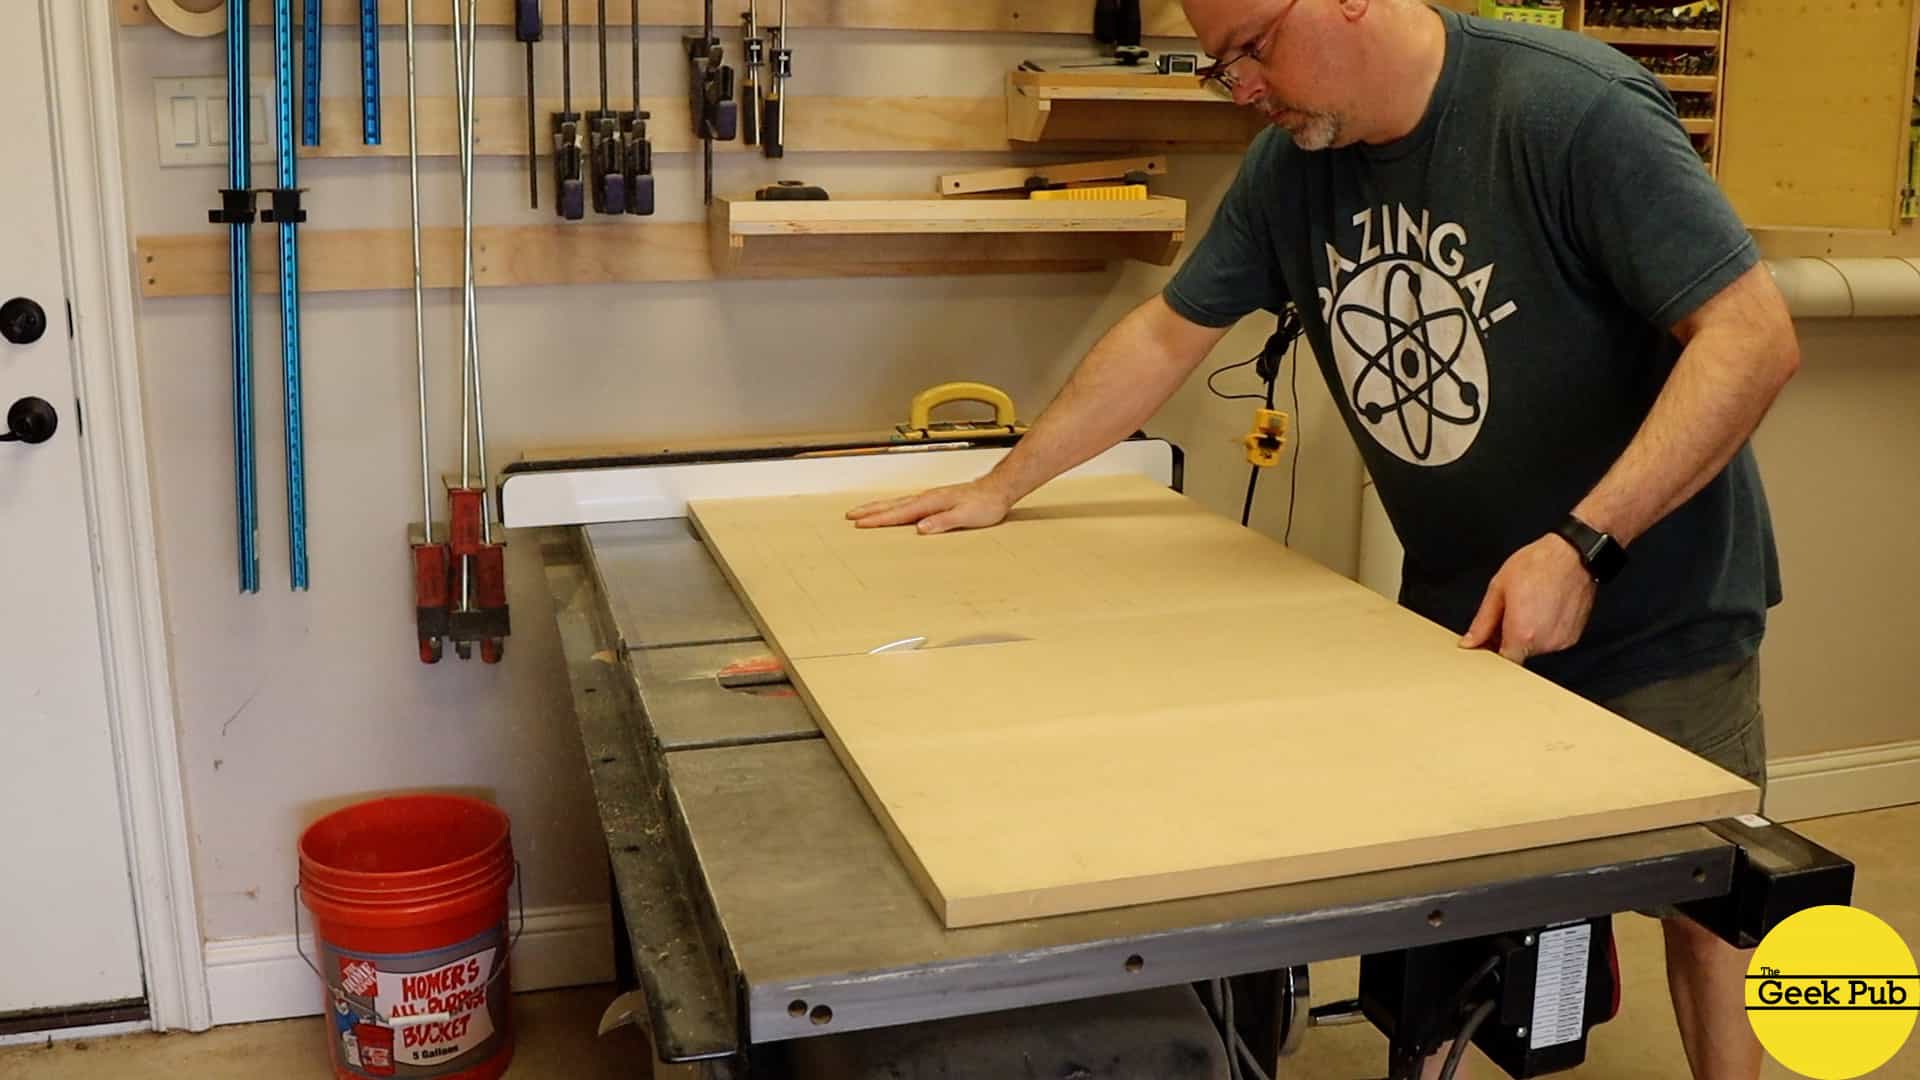
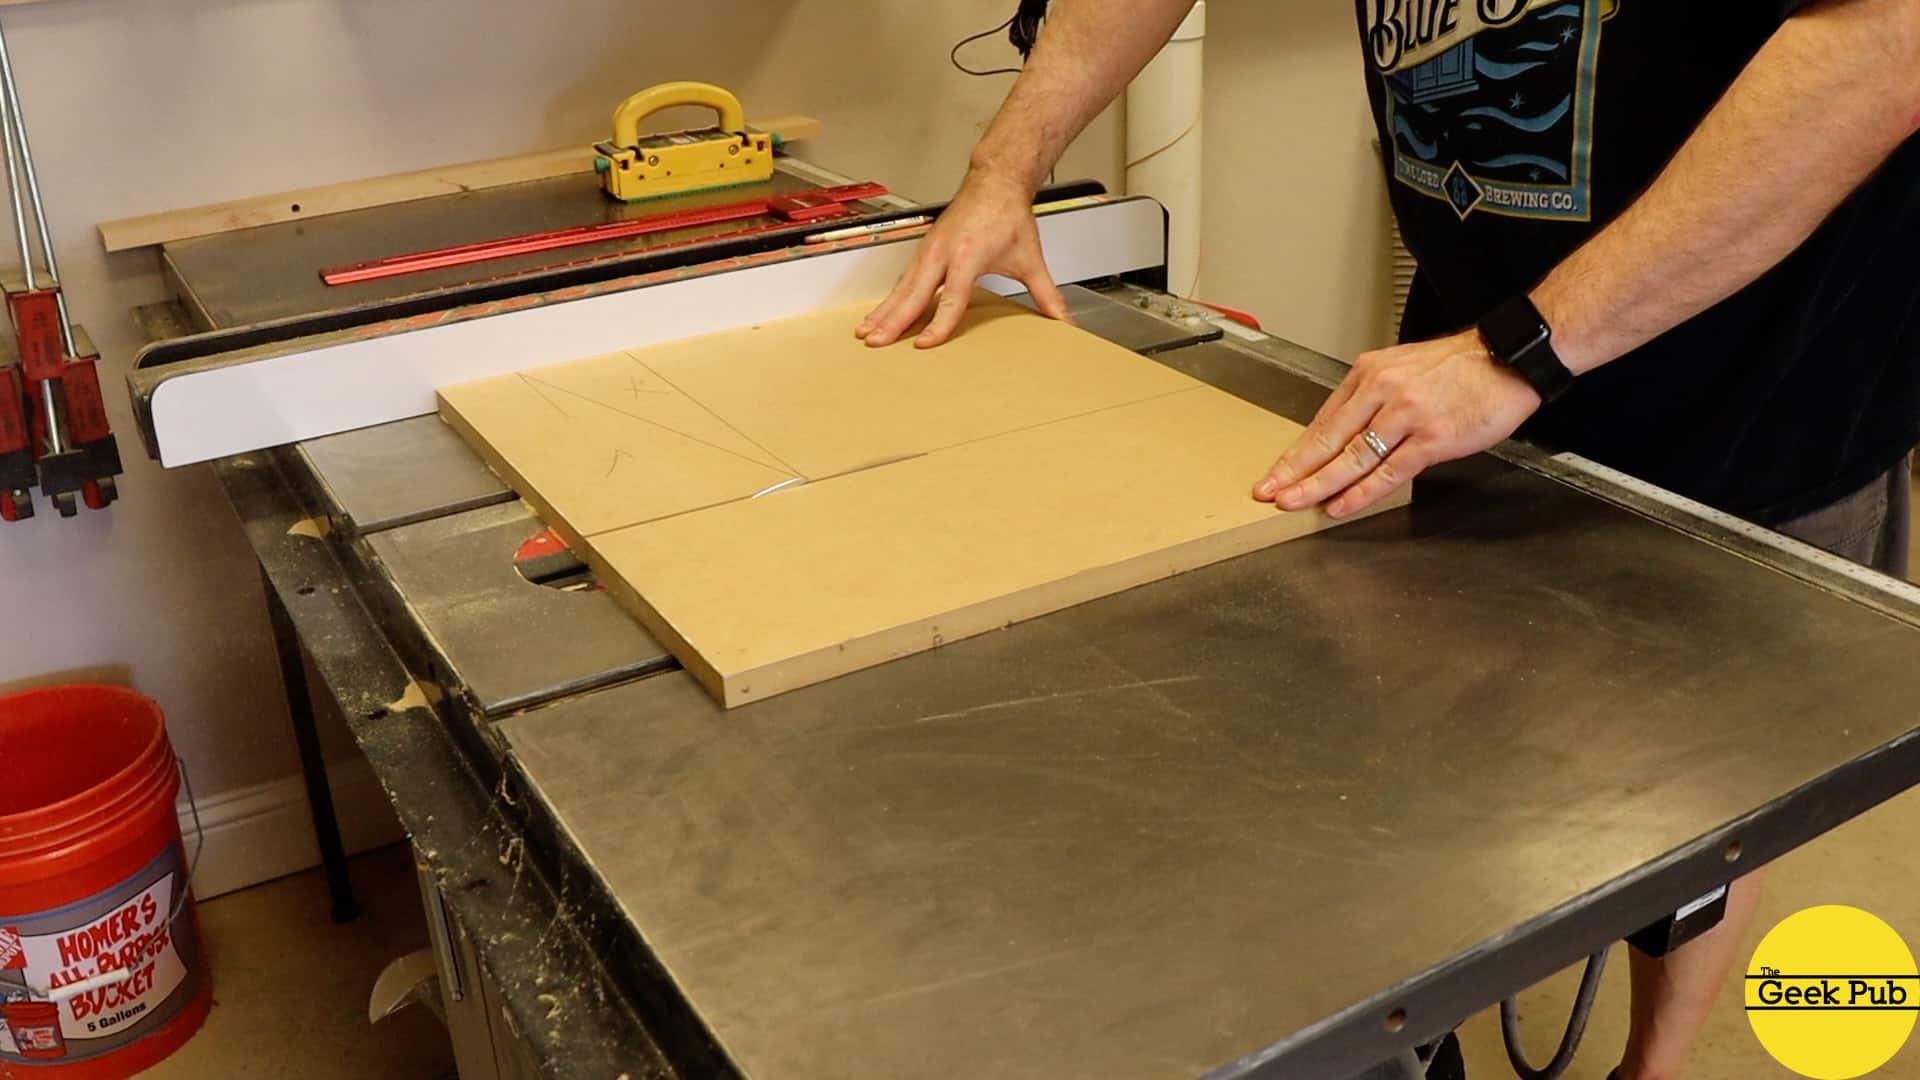
Cutting out the Arcade Parts
Next up I used my SawStop table saw to cut out the main section. One thing I’d like to point out though is that you don’t need expensive tools to make this project! I have received a variation of the following commend at least 100 times on my other arcade videos: “Well, if I had your tools I could make this too. This video is useless.”. The truth is quite the opposite though. The only tools you really need to do this project are a jigsaw (an quite honestly, a $12.99 Home Depot handsaw would work too!), and drill. Everything else is completely optional.
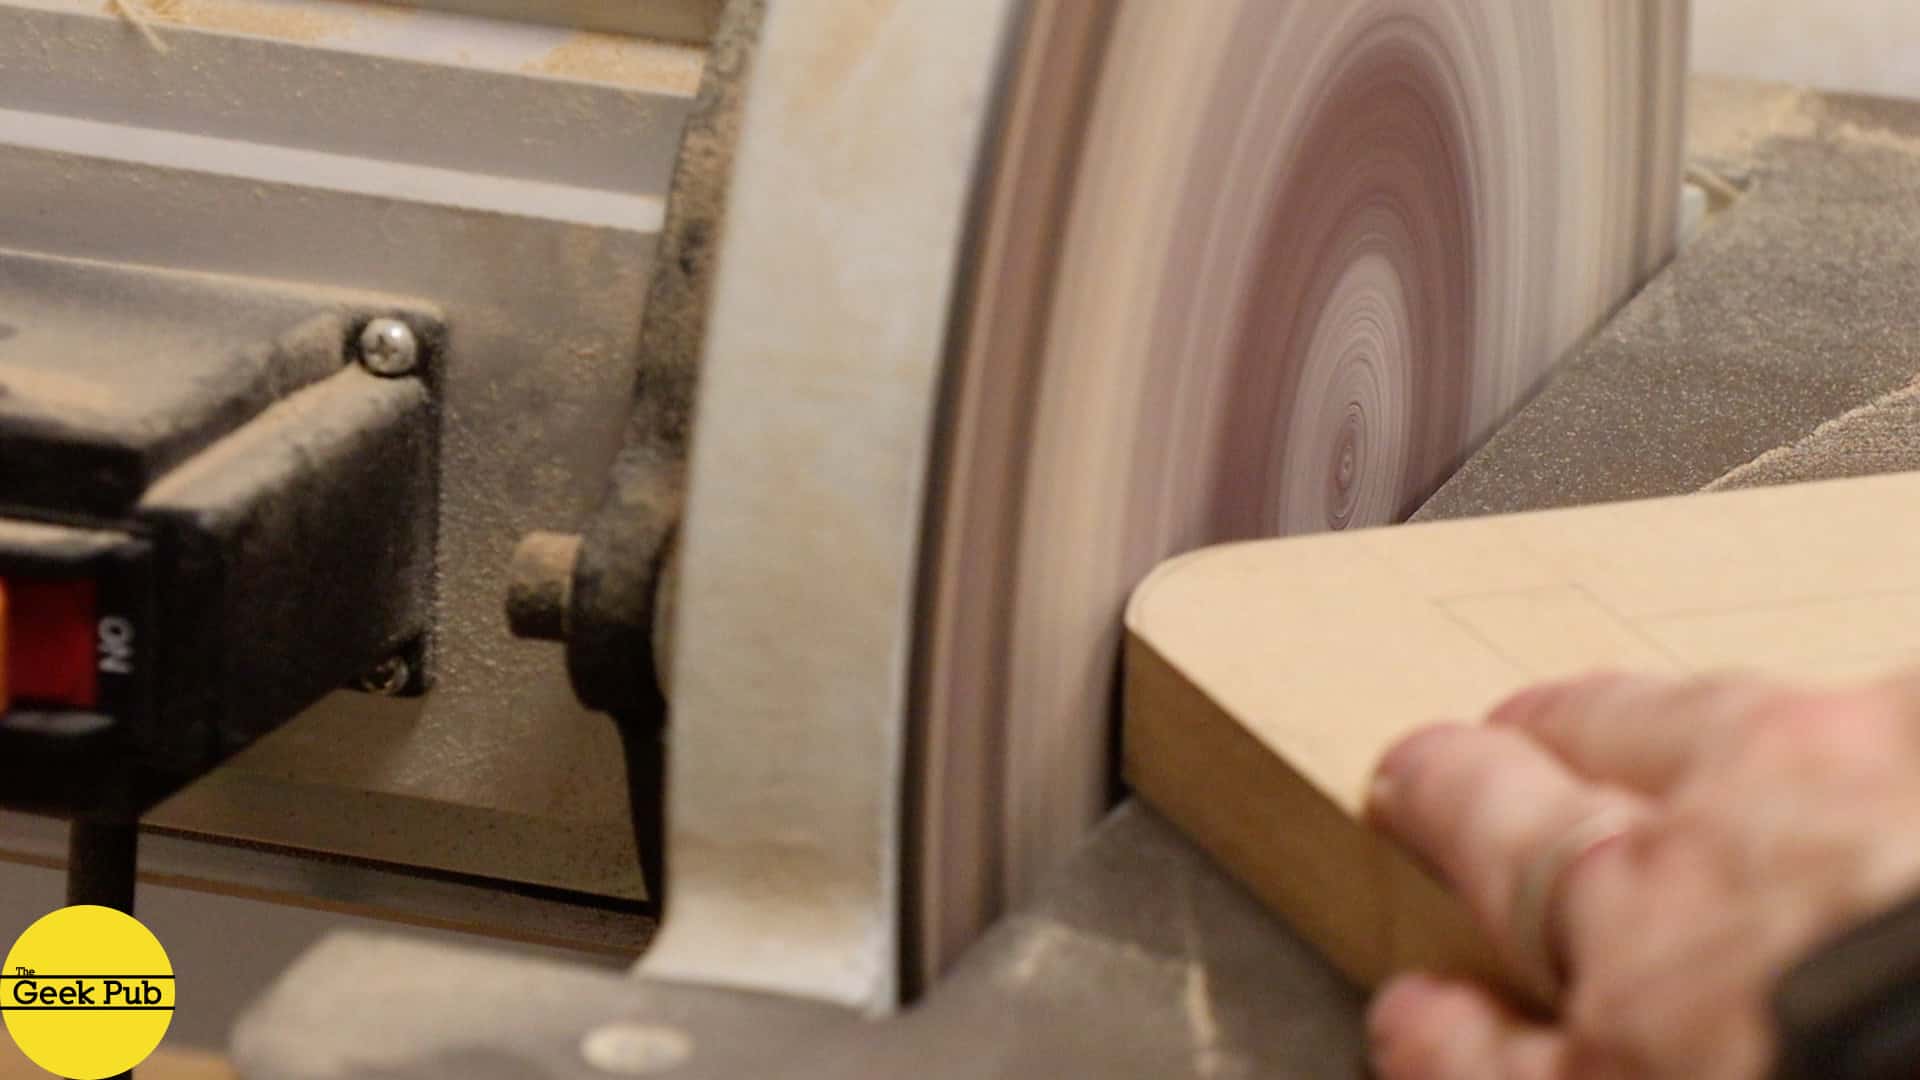
I used my 12″ disc sander to round the corners. You could use a jigsaw or a hand file for this as well. I like the disc sander because it gives me very precise control over the finished product and a super smooth edge. I do follow this procedure up with a little 150 grit sandpaper just to make it smooth since I am running 60 grit on the disc sander.
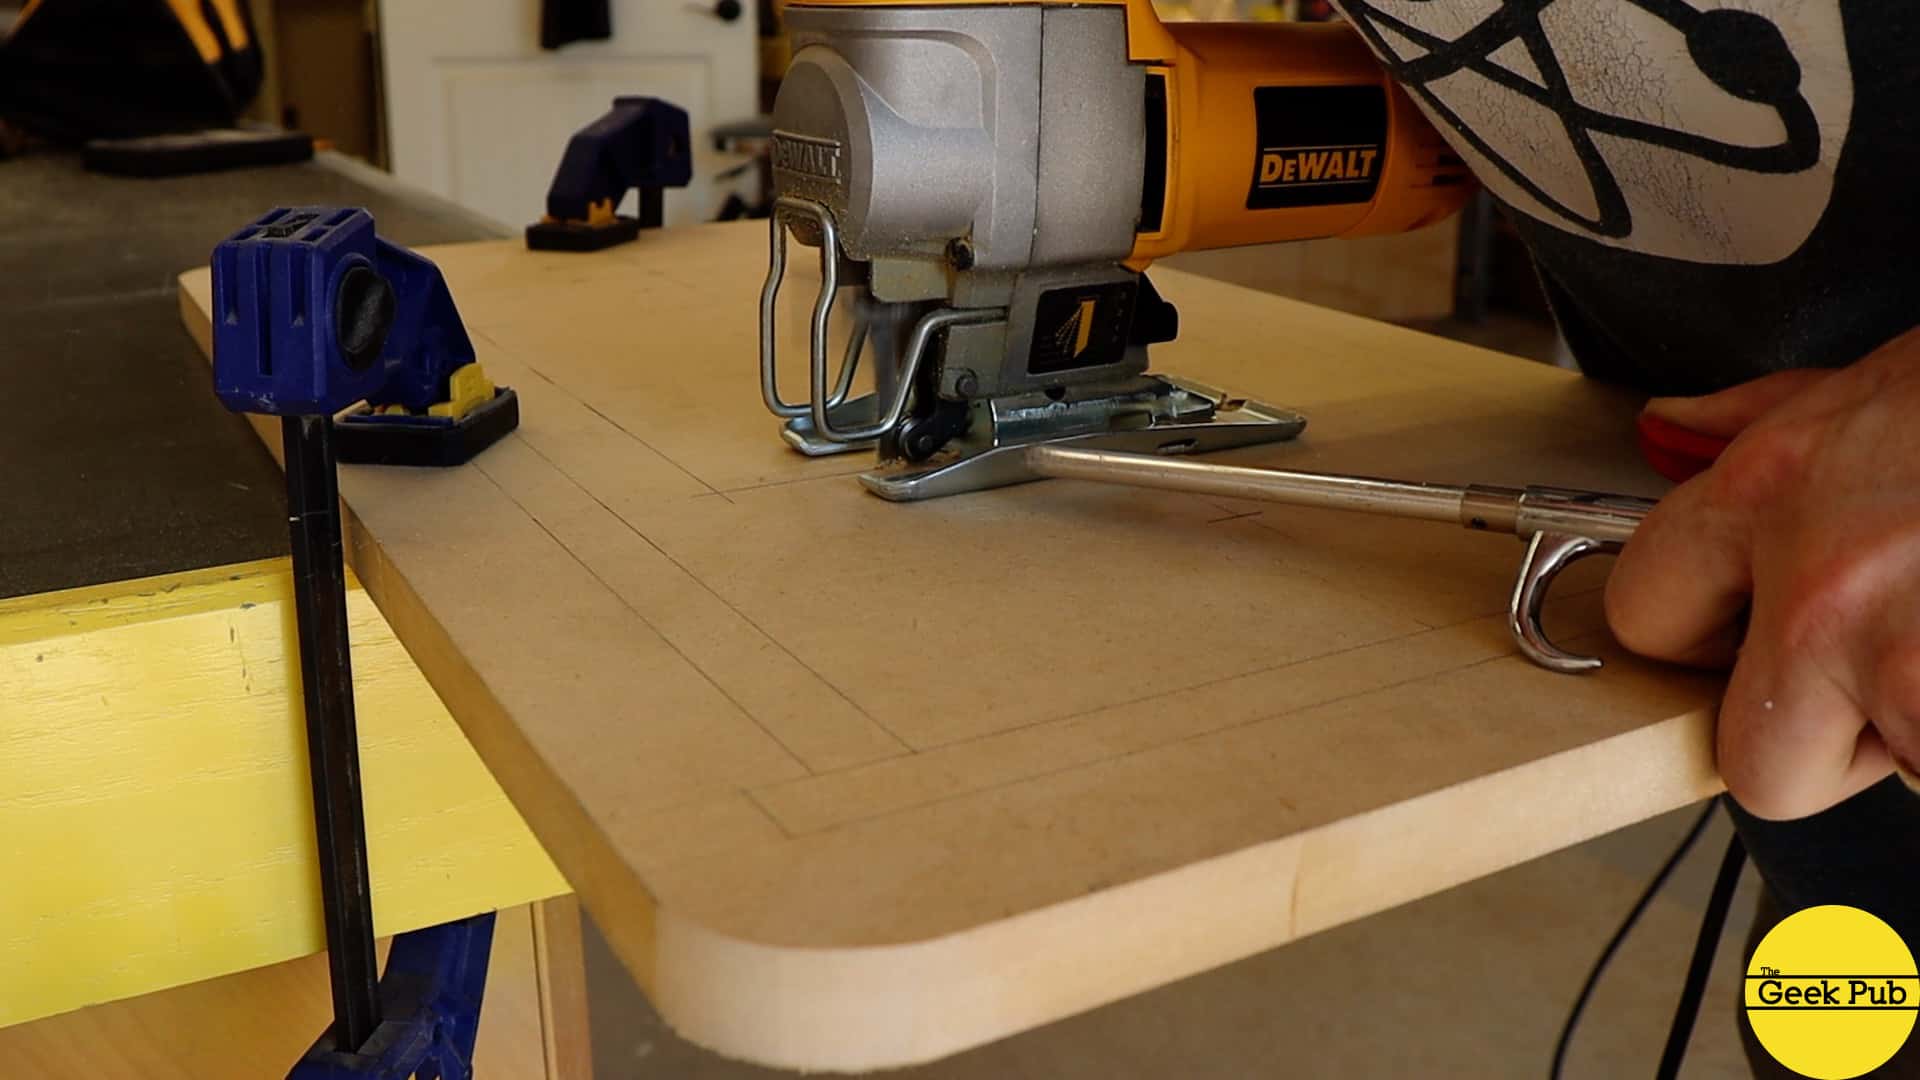
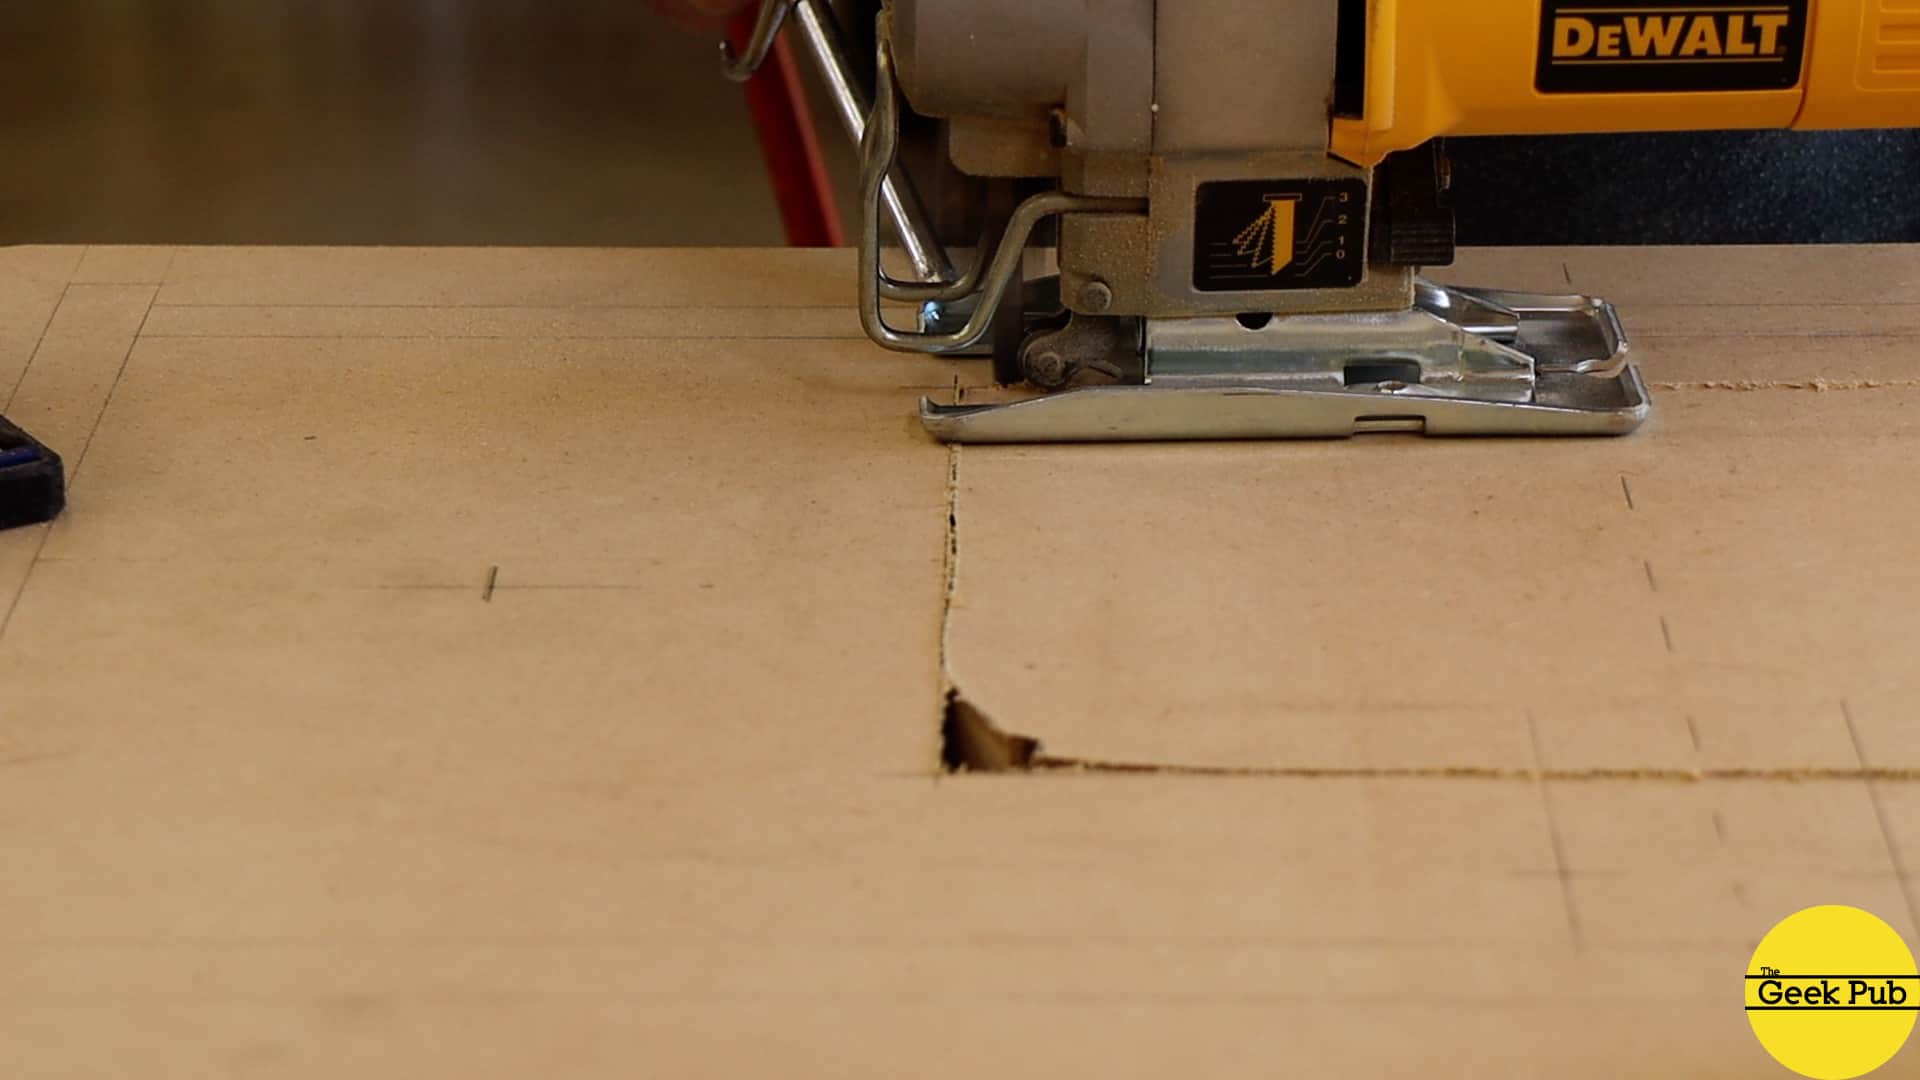
To cut out where the monitor goes, I used my DeWalt jigsaw. It’s the best jigsaw I have ever owned, and it is not even battery powered!
RELATED: Why your Jigsaw won’t Cut Straight
It’s super critical that you go slow here and make sure you get these lines as straight as possible. I actually made a slight error in two places and couldn’t figure out why I was struggling. After it the cut was finished I realized the blade was bent! Ugh. Well its good enough not to redo.
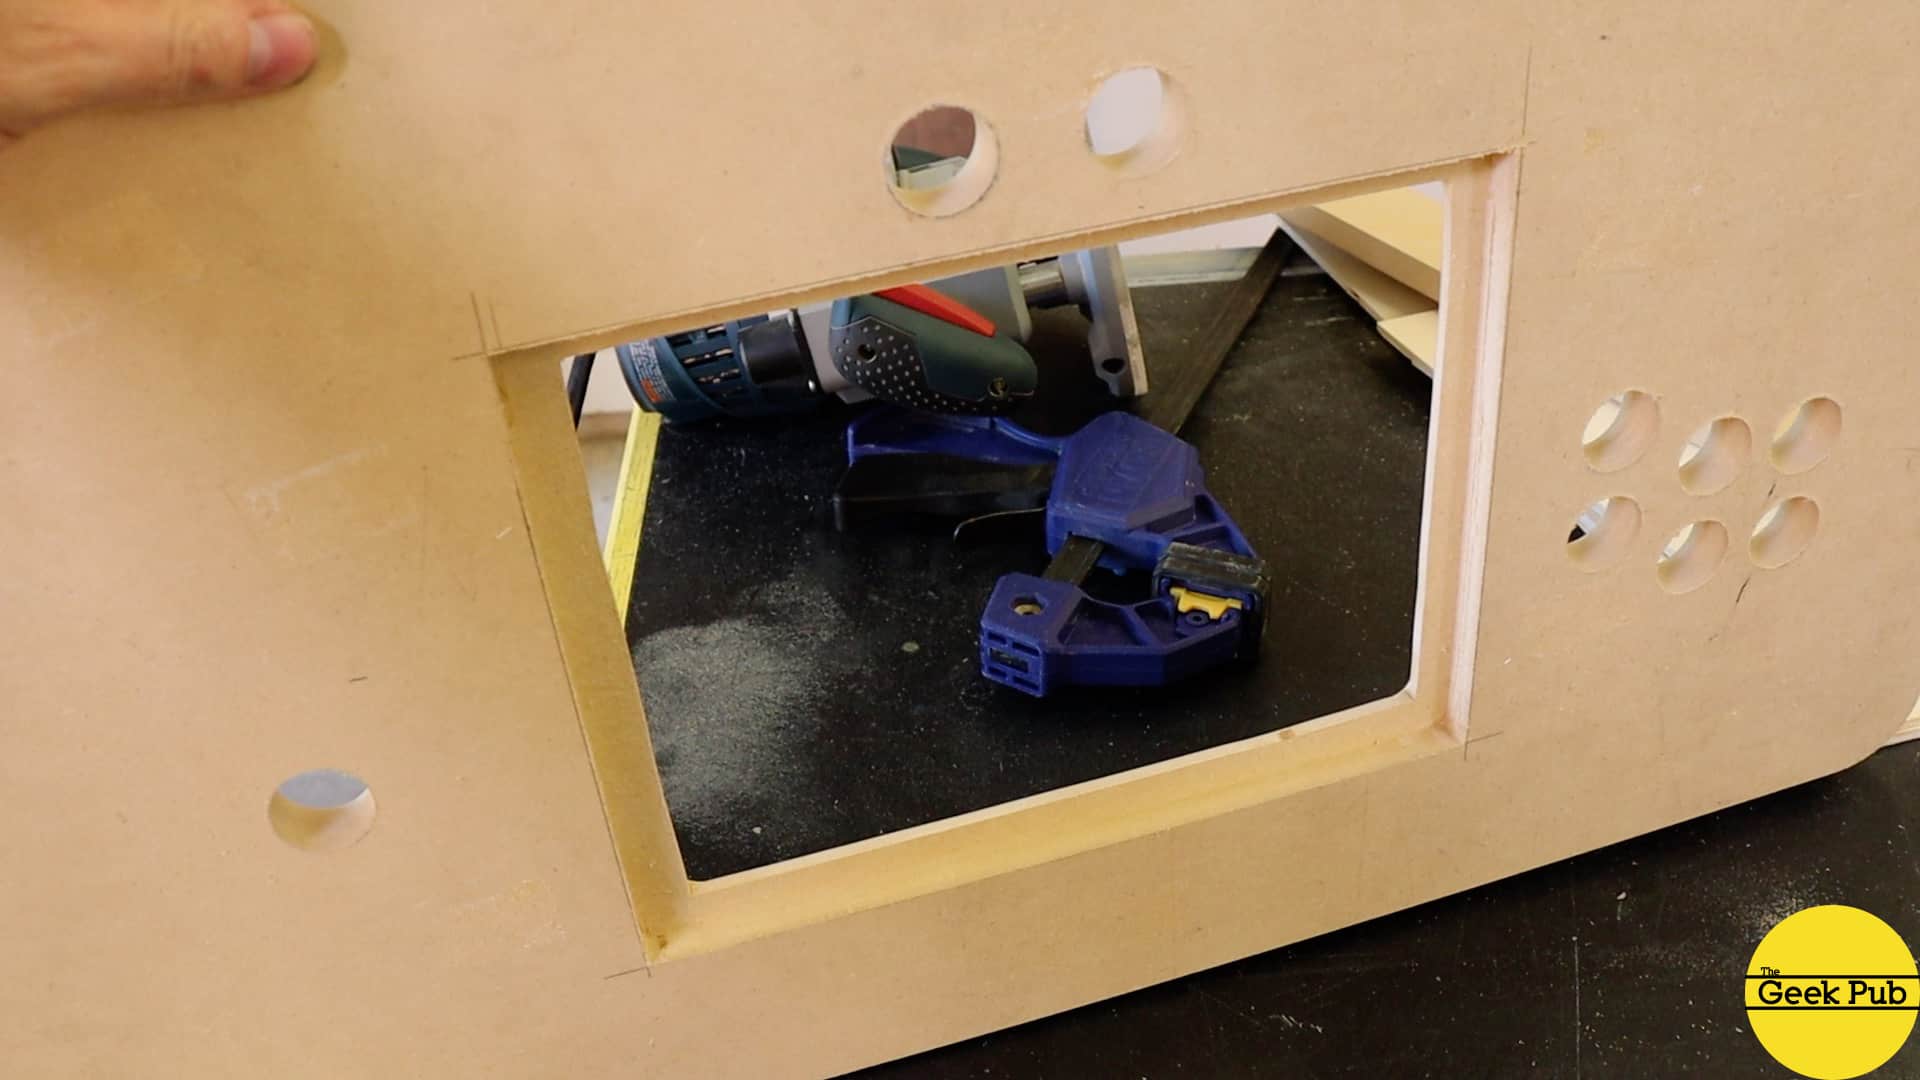
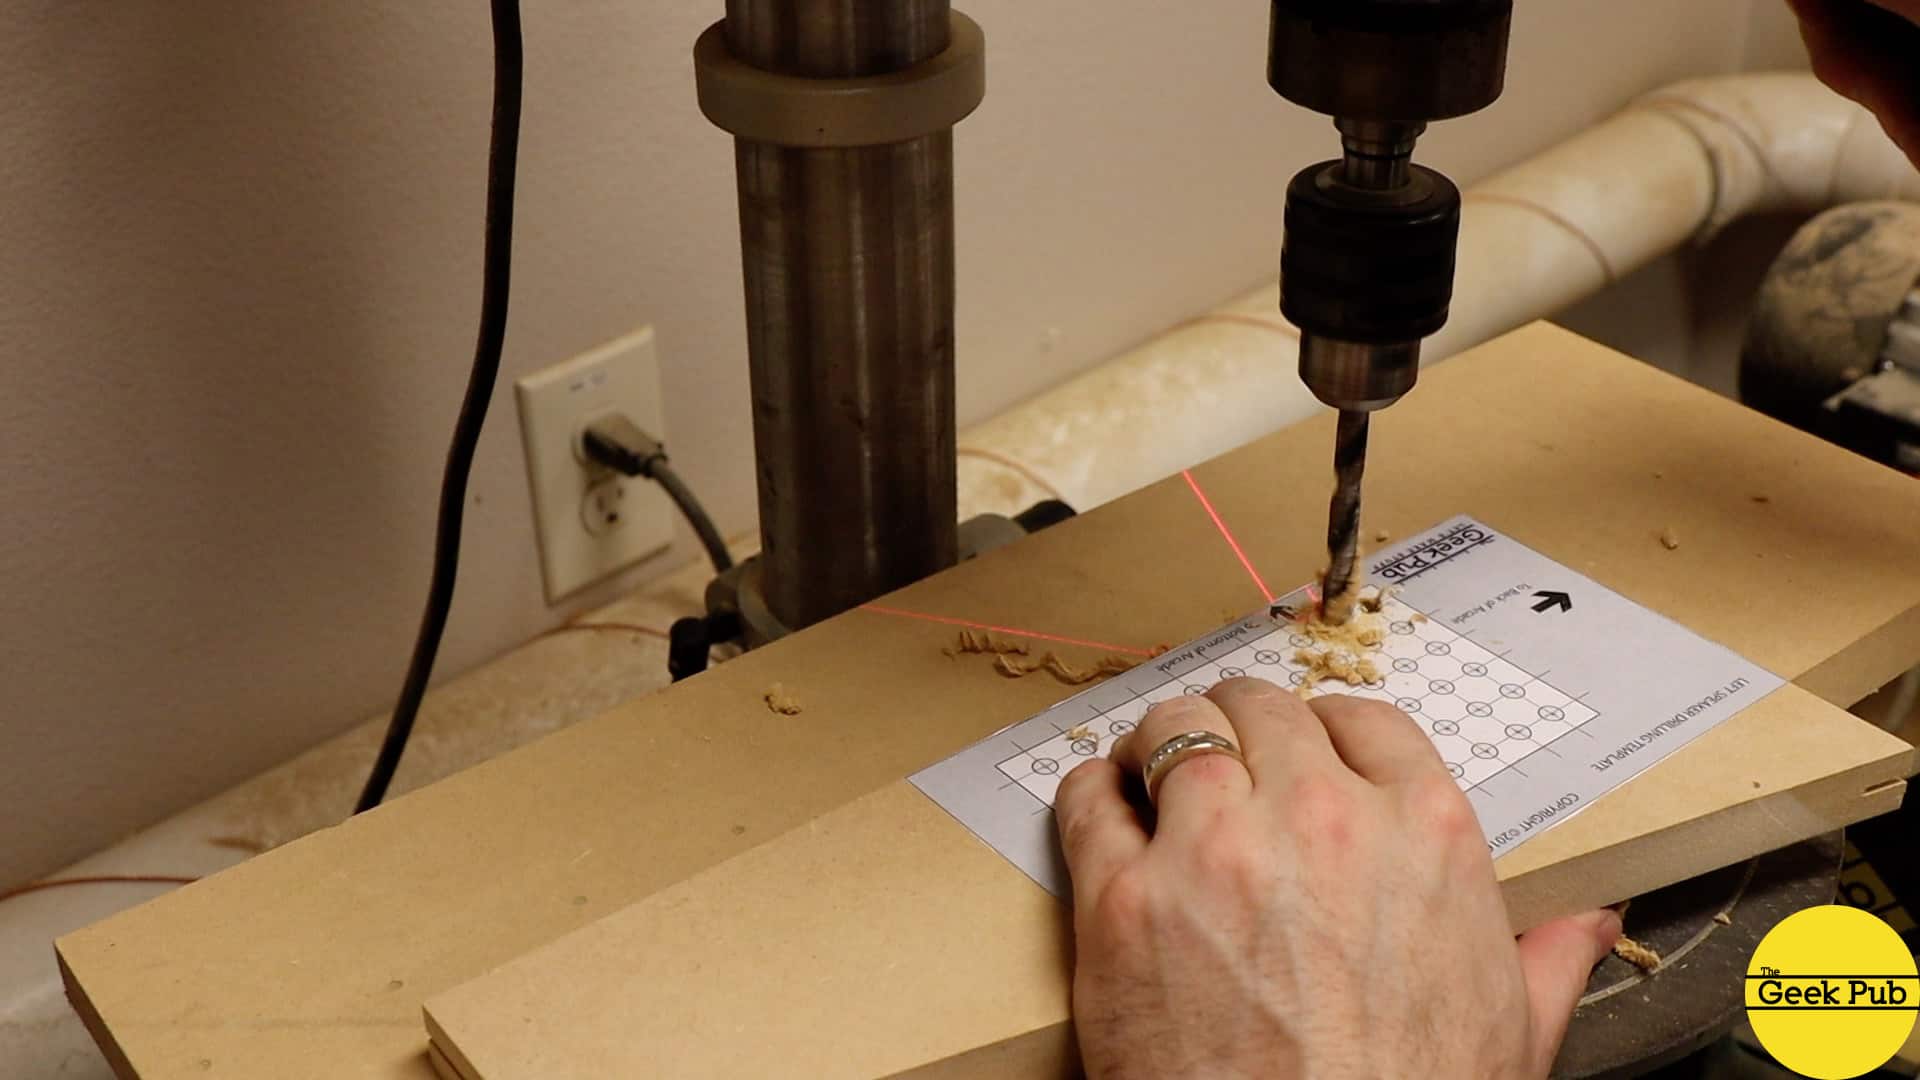
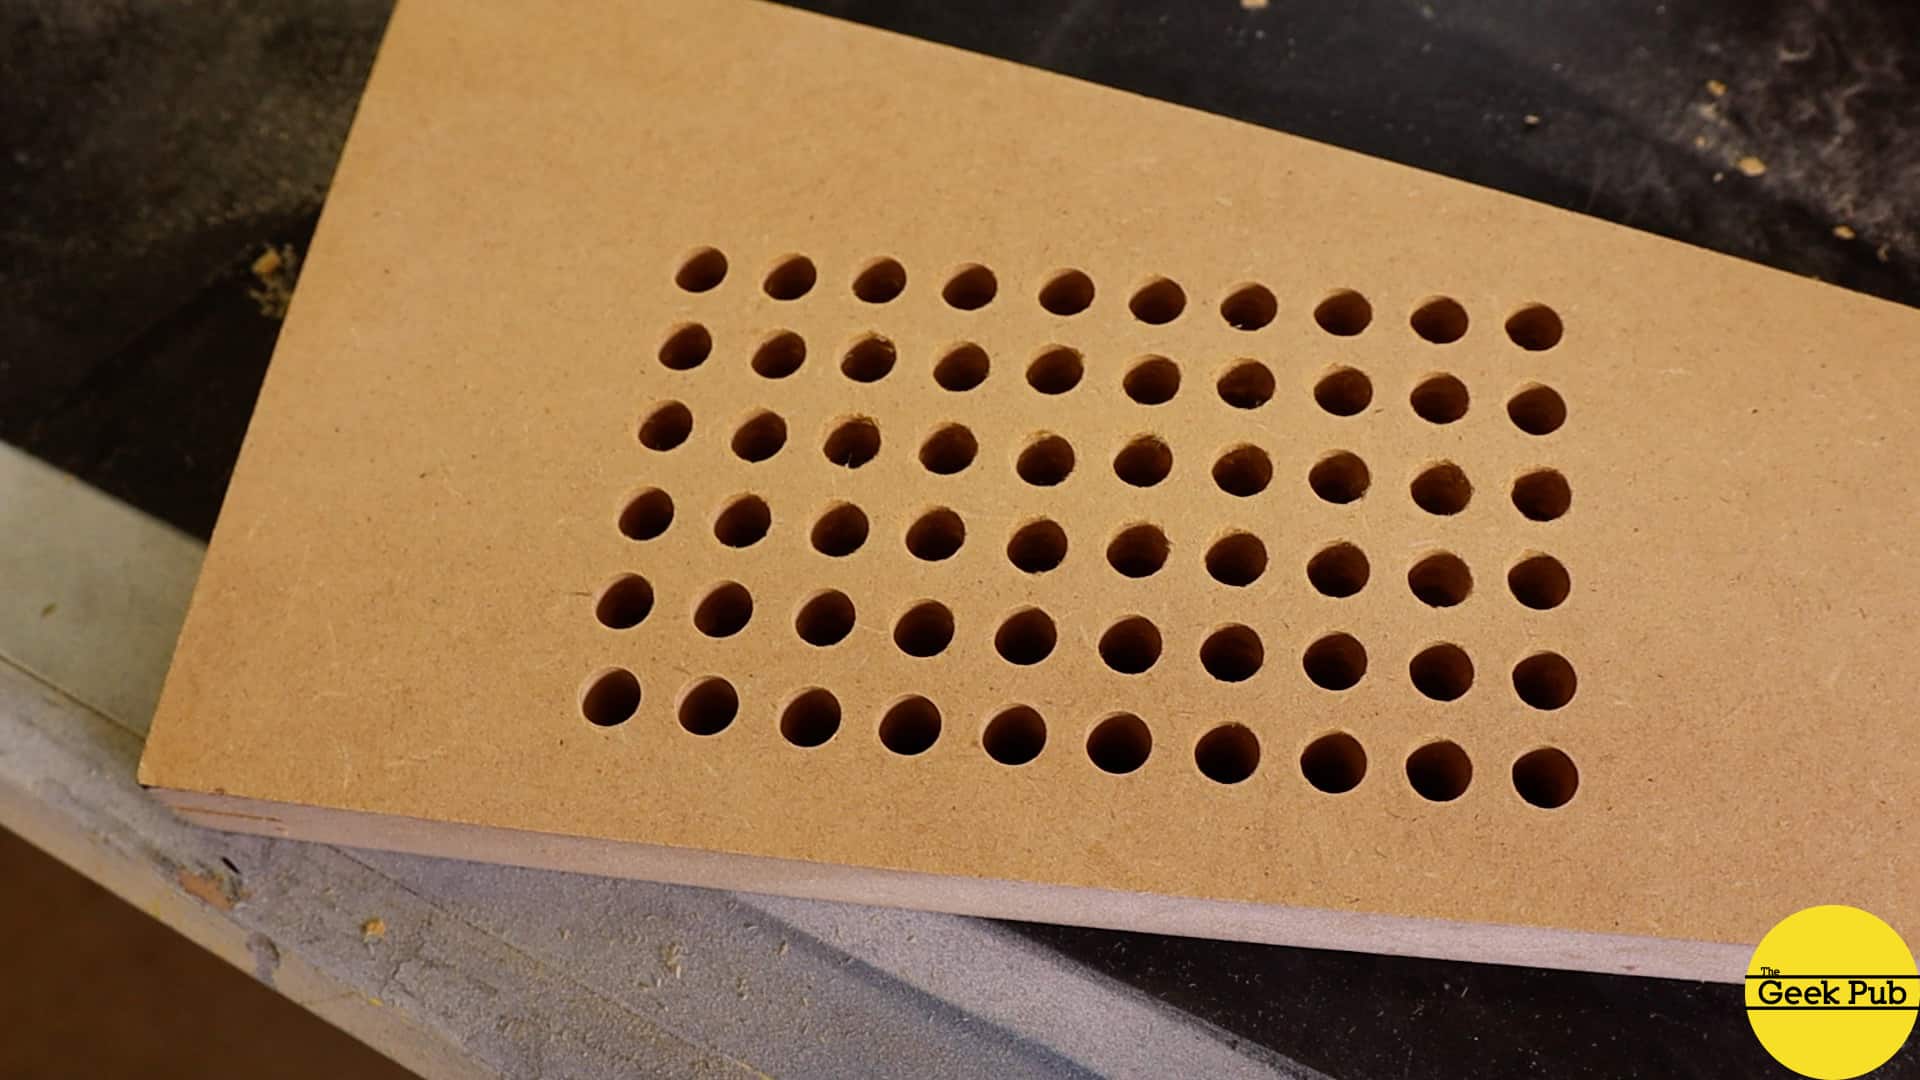
Drilling the Joysticks and Buttons
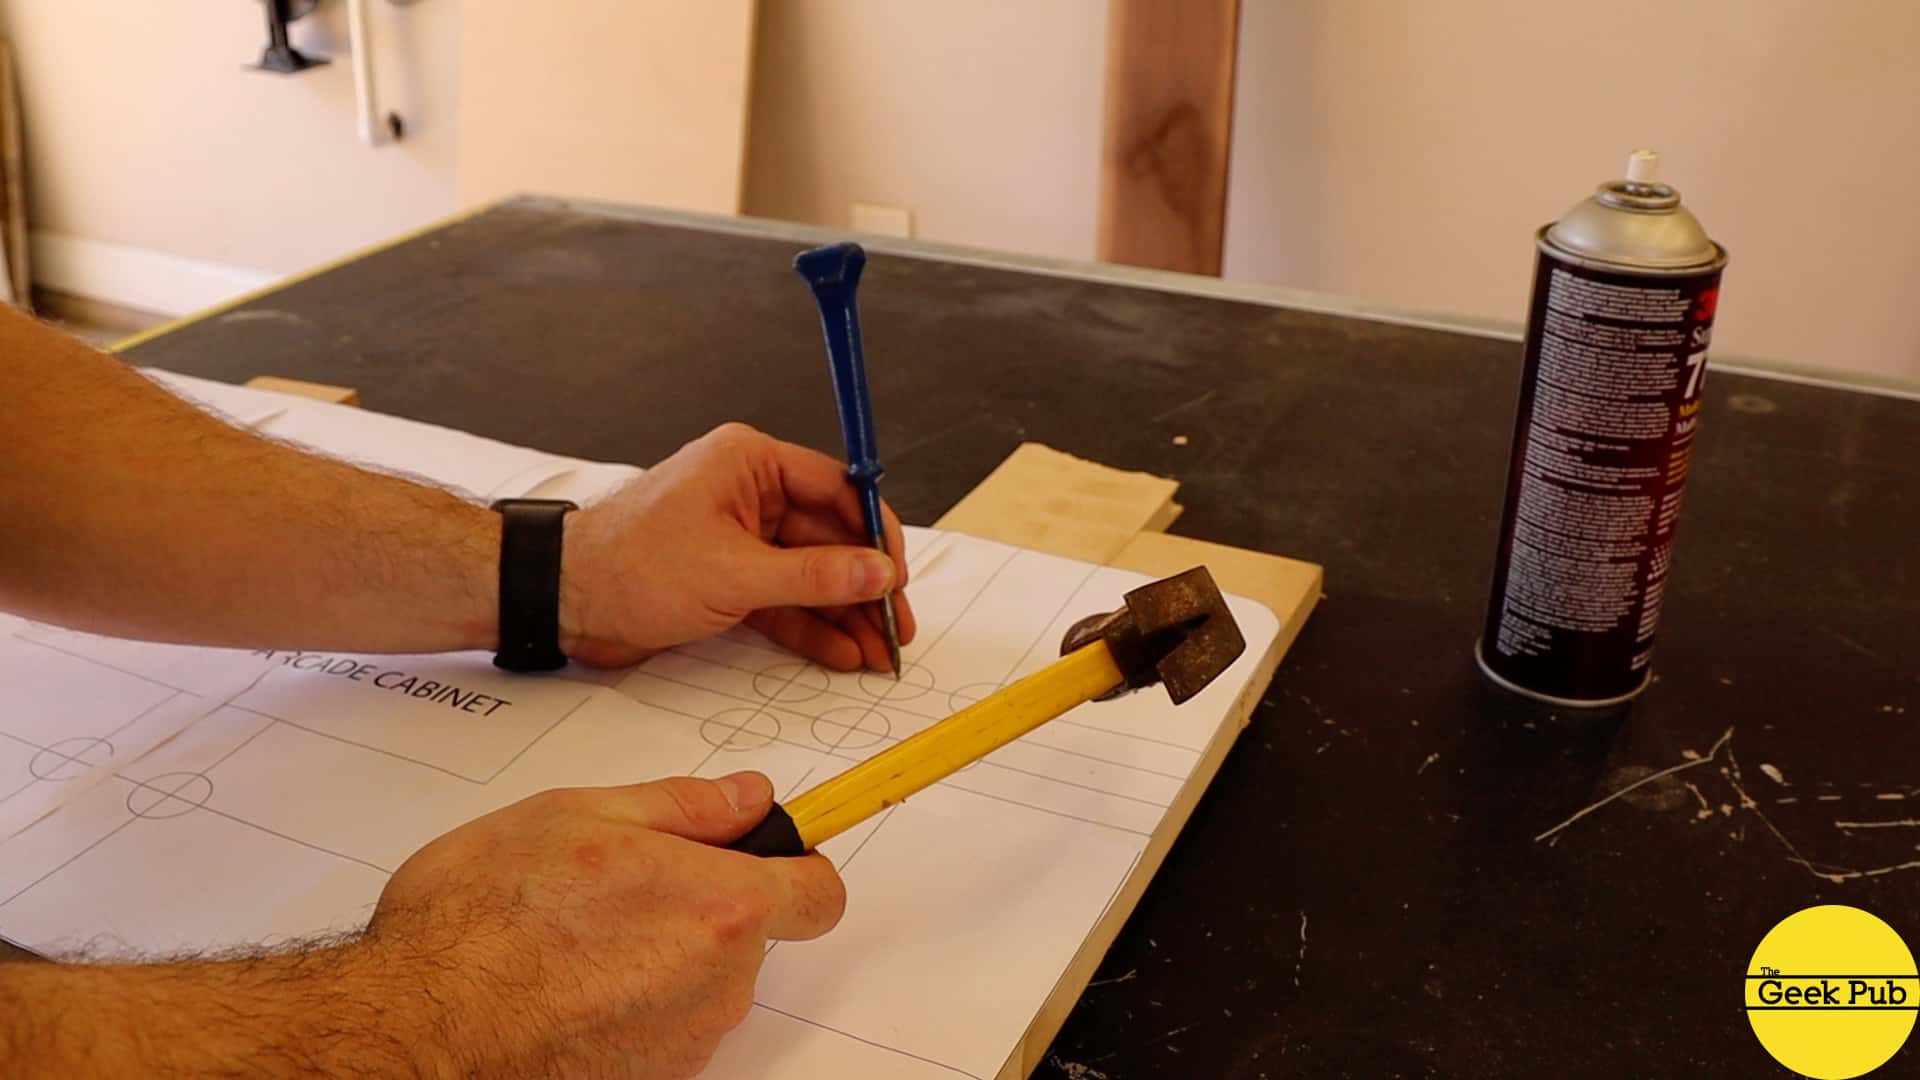
Next up I used my templates from the plans and some spray adhesive to prepare for drilling the holes. Without the template this is quite the pain to measure out.
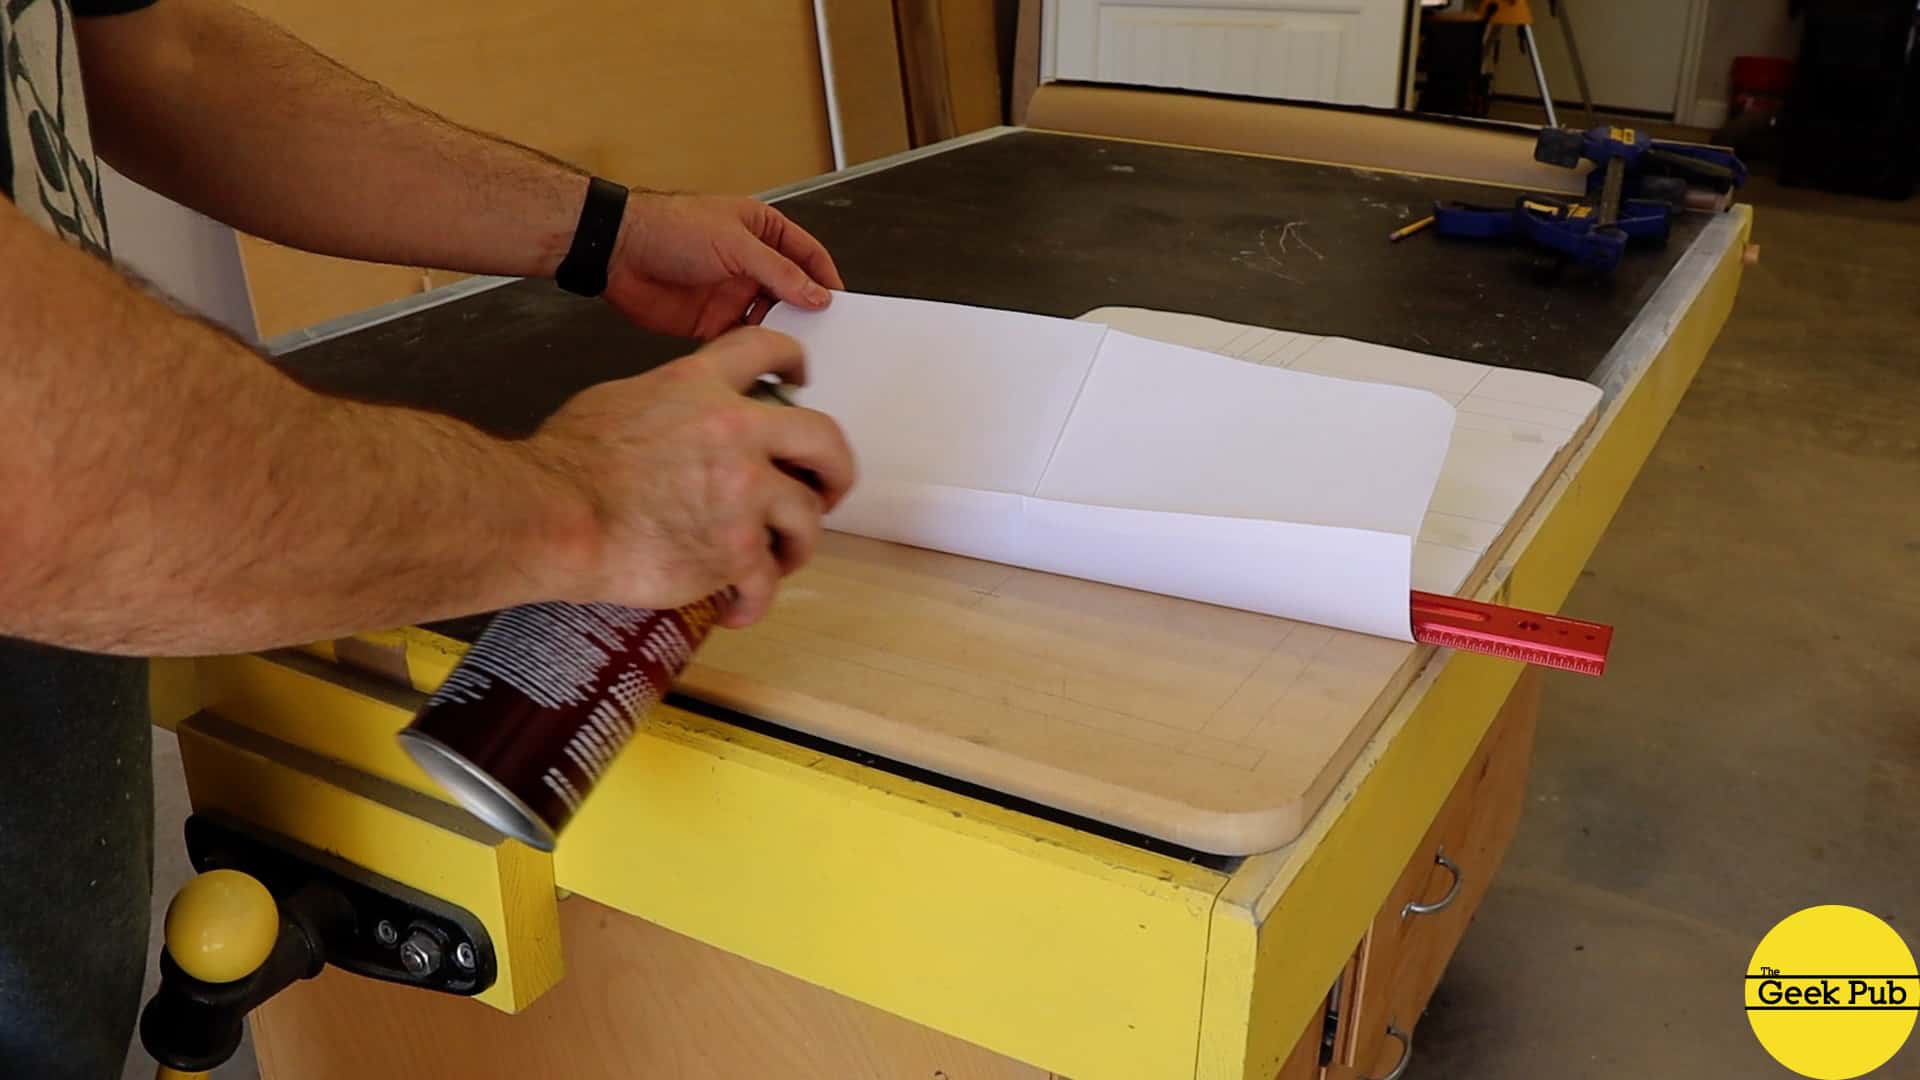
I centered punched the holes using my trusty punch. This makes it super easy to align the Forstner bit (or a paddle bit) to the template and drill the holes. I highly recommend you use a waste-board behind the top pane to keep the wood from blowing out during the drilling process.
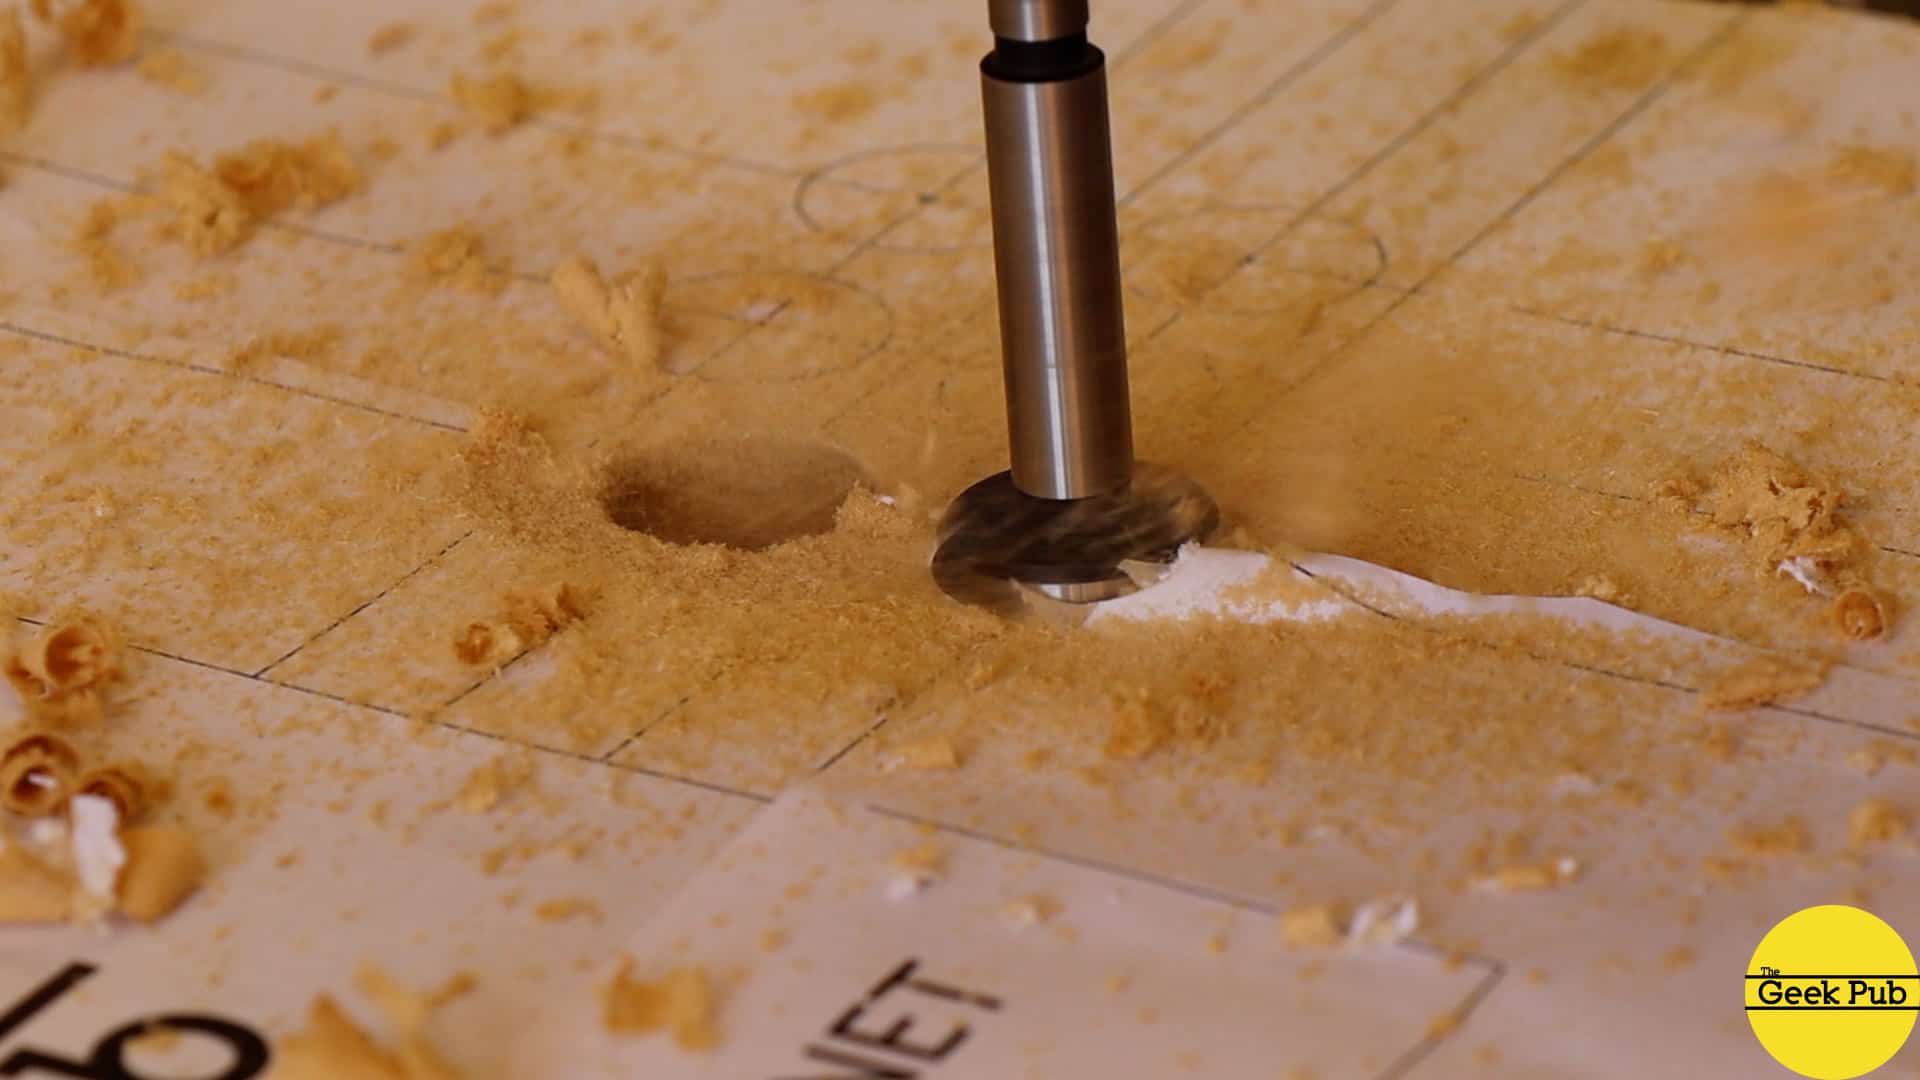
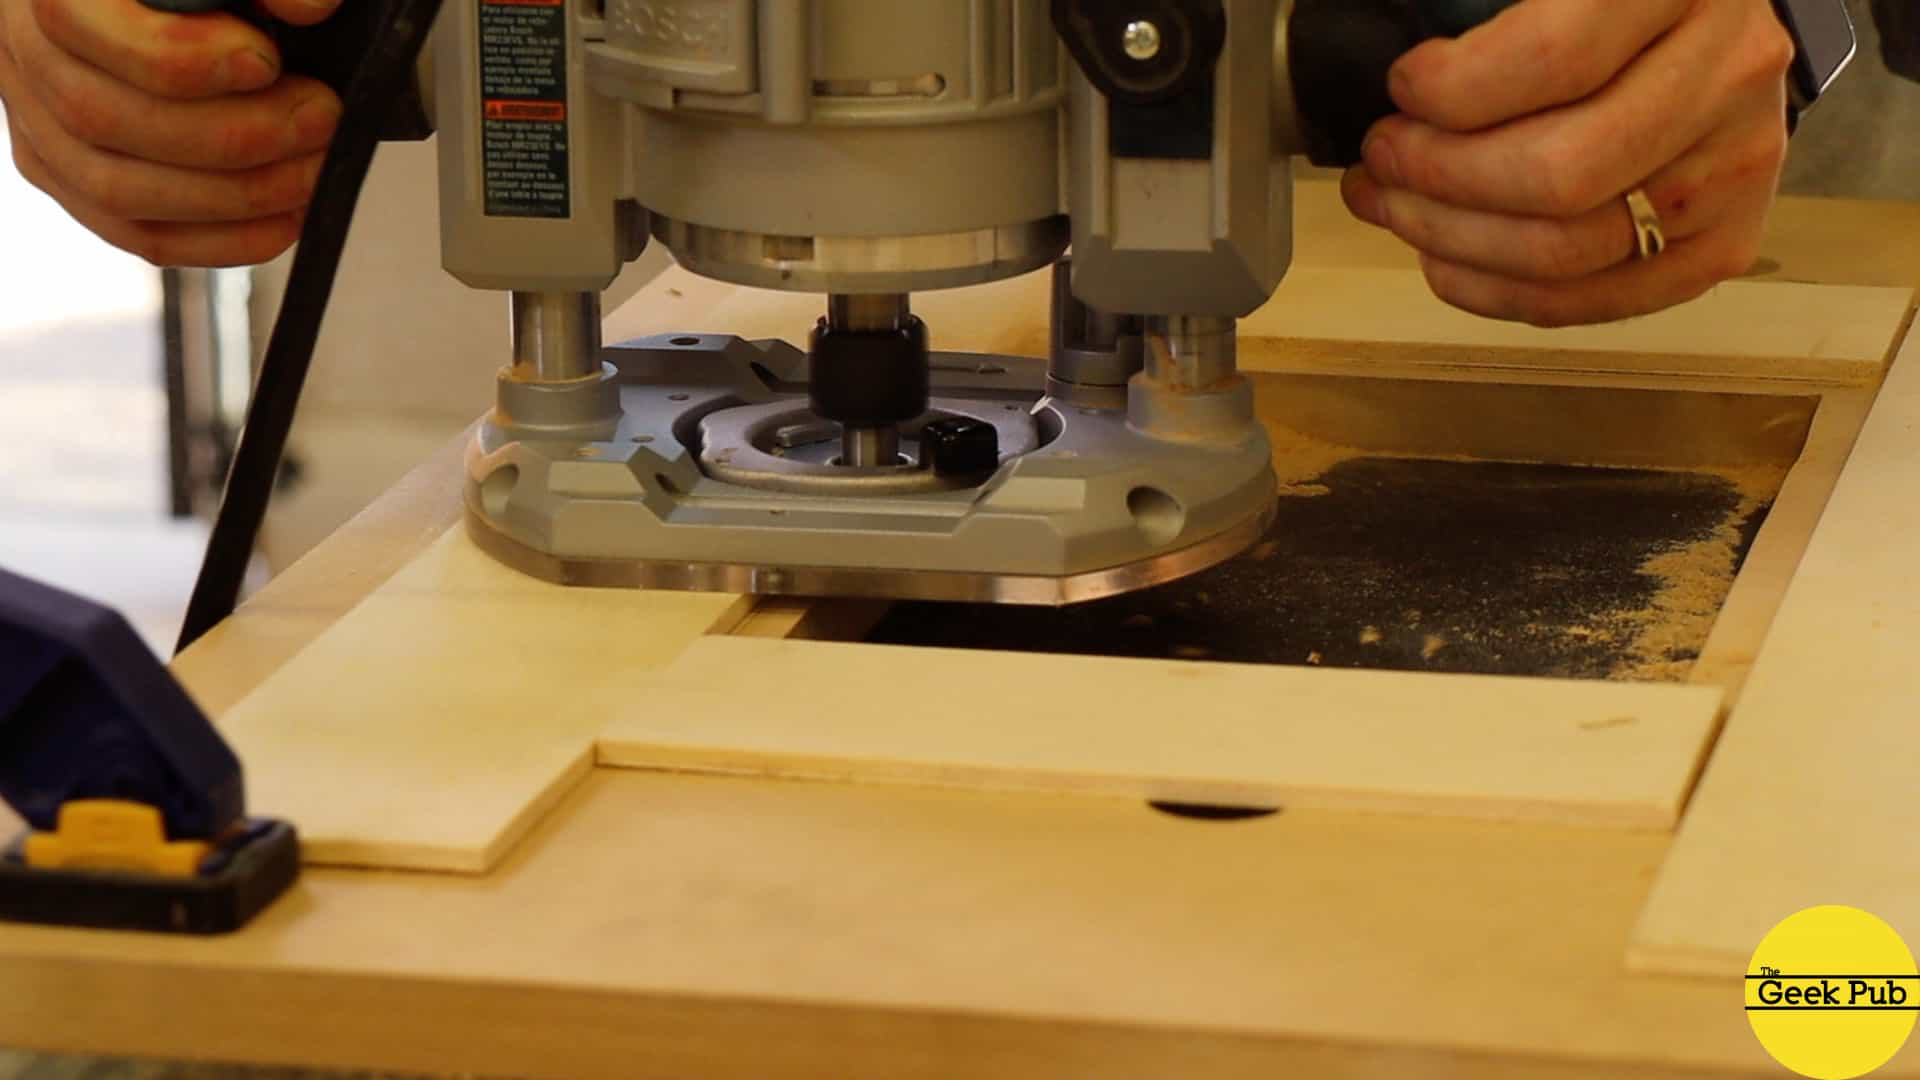
Reverse Counter Sinking the LCD Display
This part it completely optional, but I felt it would make the completed tabletop arcade look more finished. The MDF is 3/4″ thick. That’s a long way for the LCD panel to sit below the tabletop.
Using some 1/8″ strips of plywood and some carpet tape to hold them in place, I used my router to reverse countersink the LCD display about 1/2″ into the MDF. Then I used a 1/8″ round-over bit to finish the top side of the new MDF “bezel”.
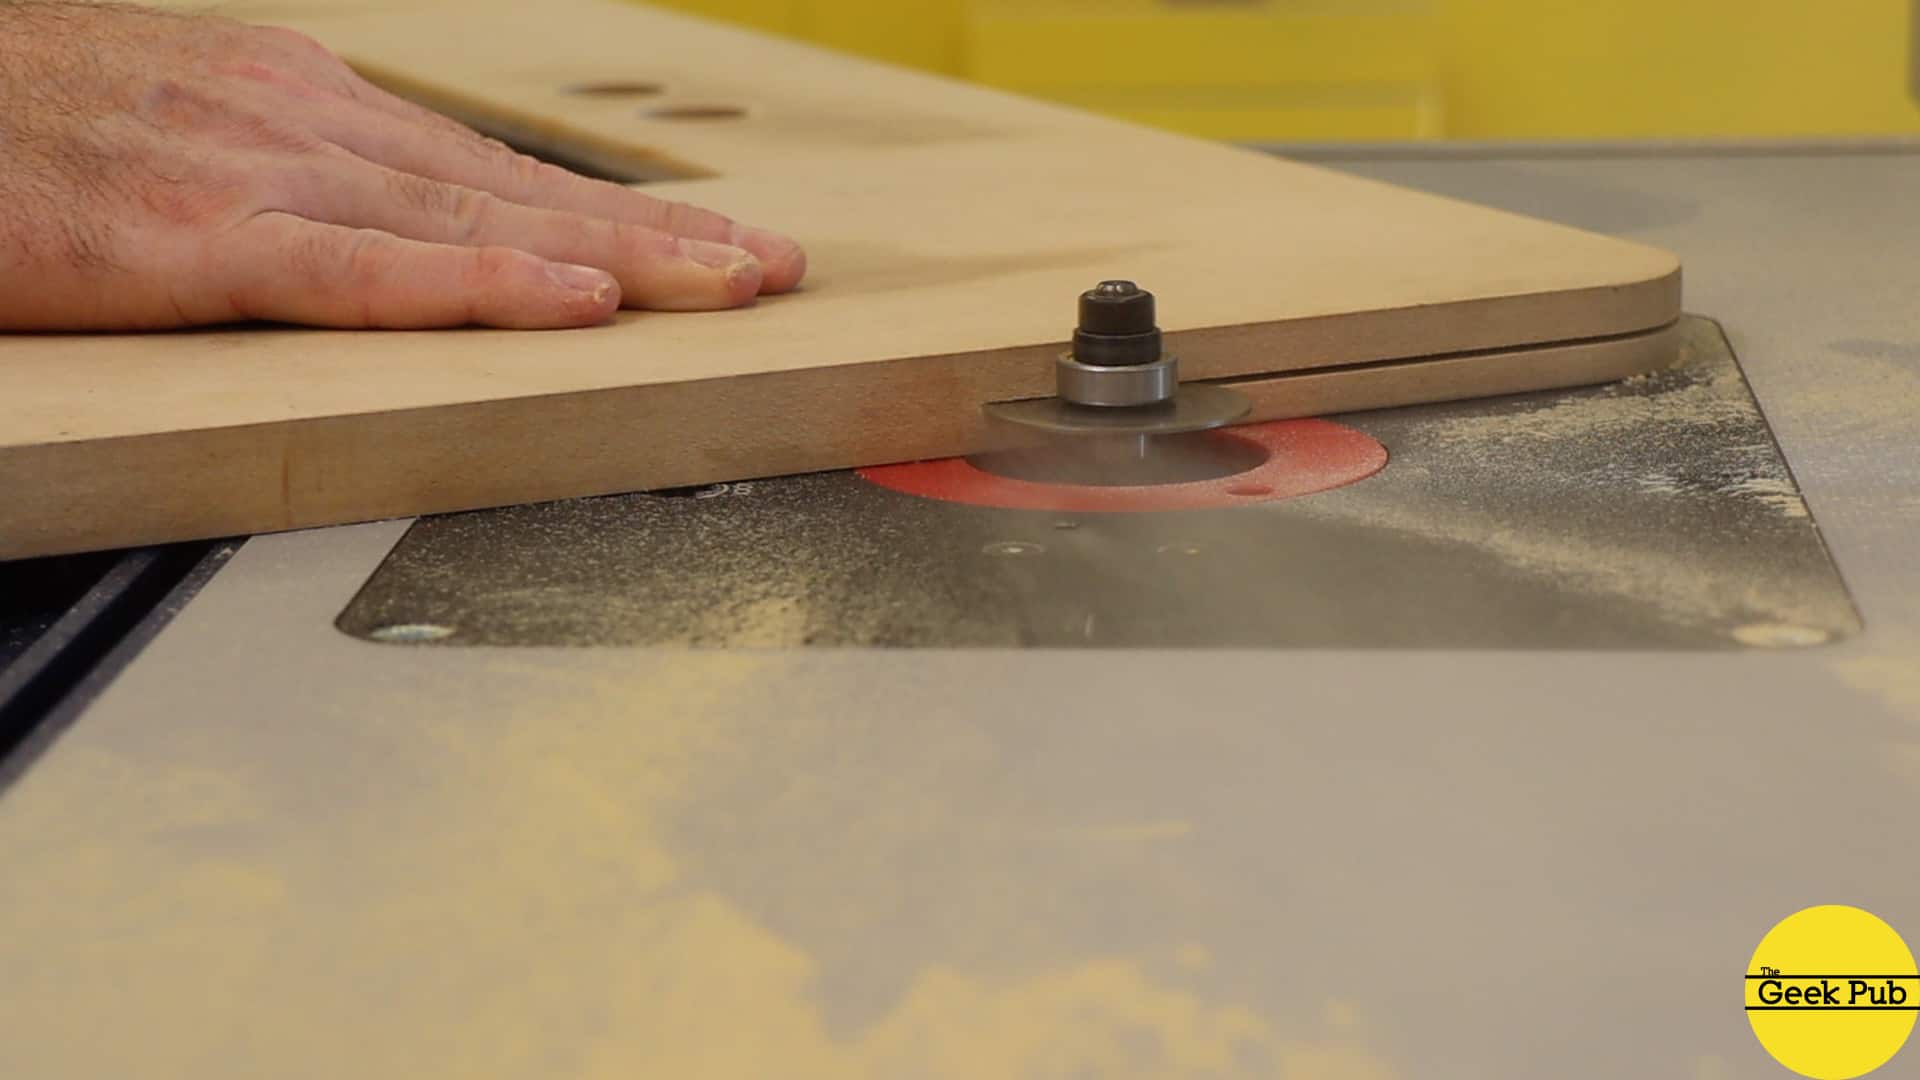
Slotting for T-Moulding
Our awesome tabletop arcade build must have t-moulding! T-moulding just has that awesome retro-look that! I’ll put t-moulding on both the table top as well as the side sections. I used a router with a t-moulding slot cutter.
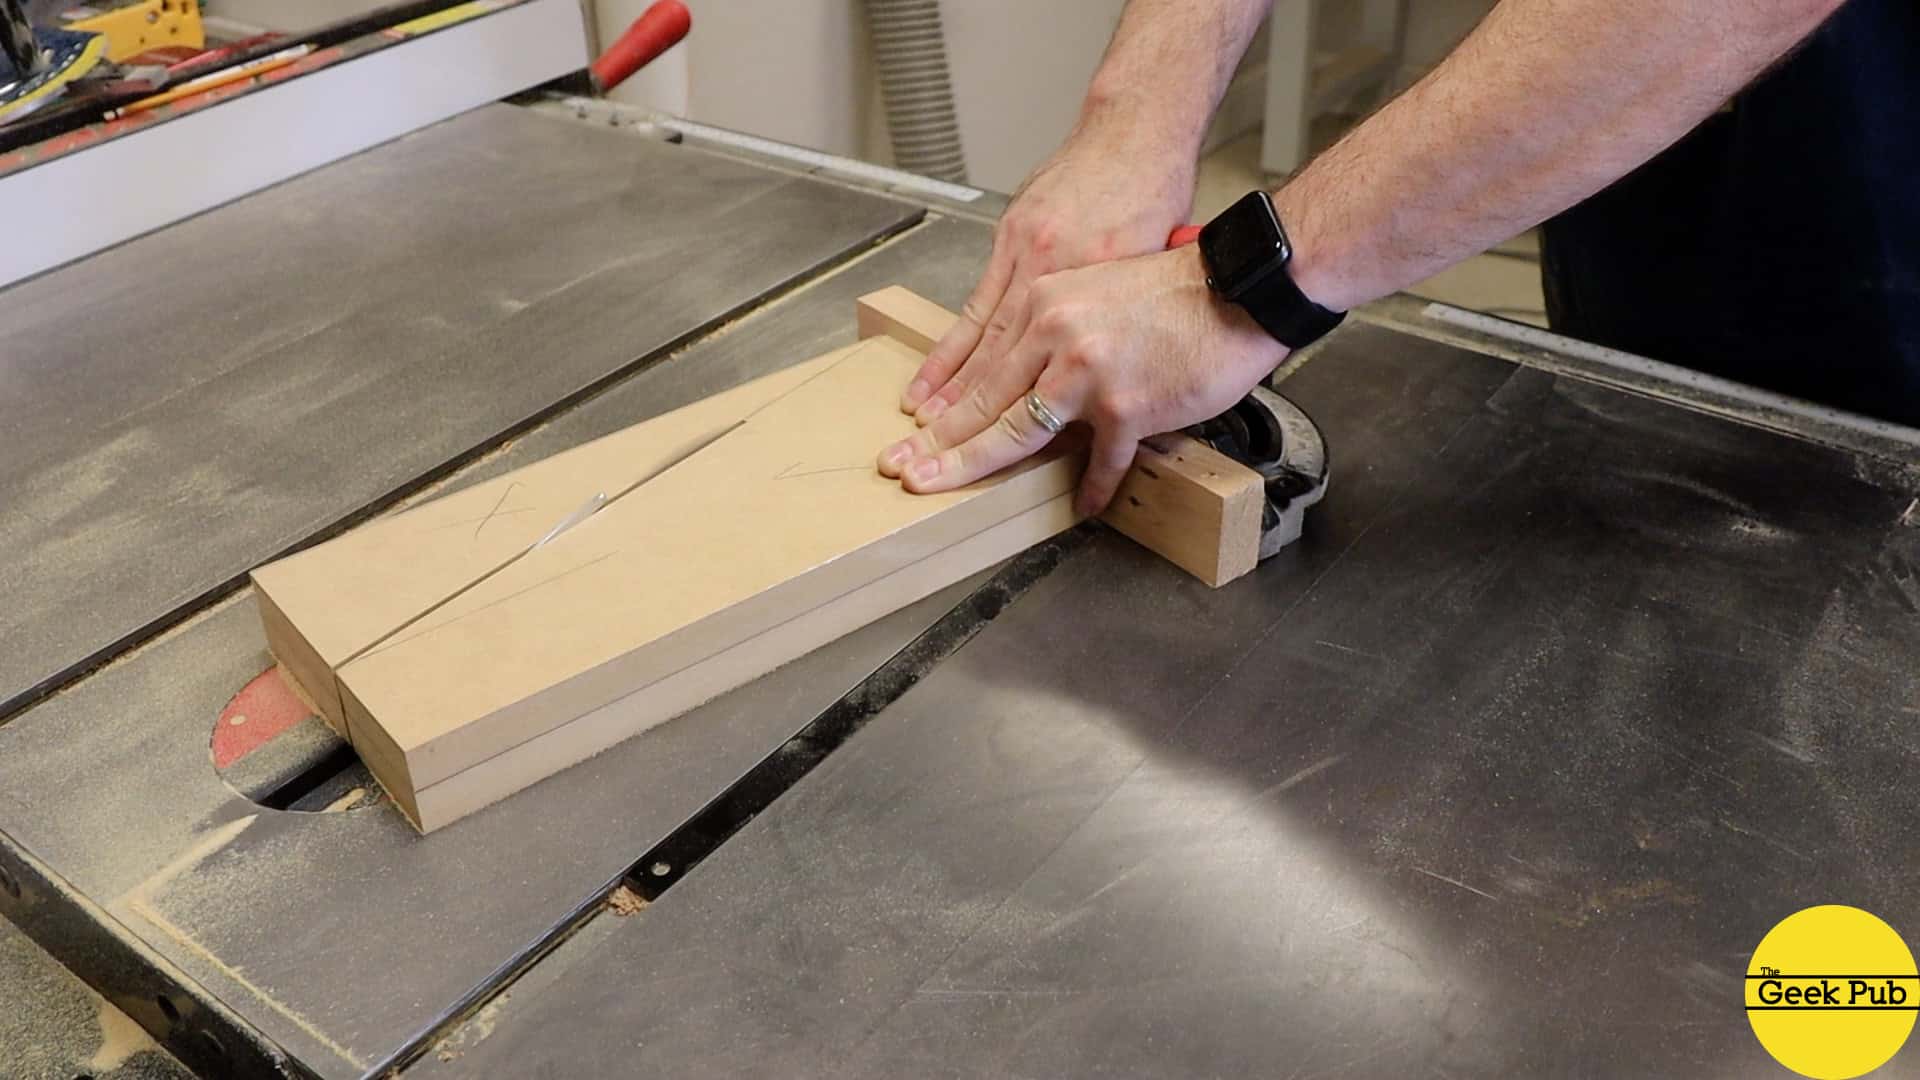
Tabletop Arcade Assembly
Over on the table saw I cut out the rest of the base. I needed a front section, back section, and two sides. I cut out the two sides together. This is both convenient and time saving, but also makes certain the sides are identical.
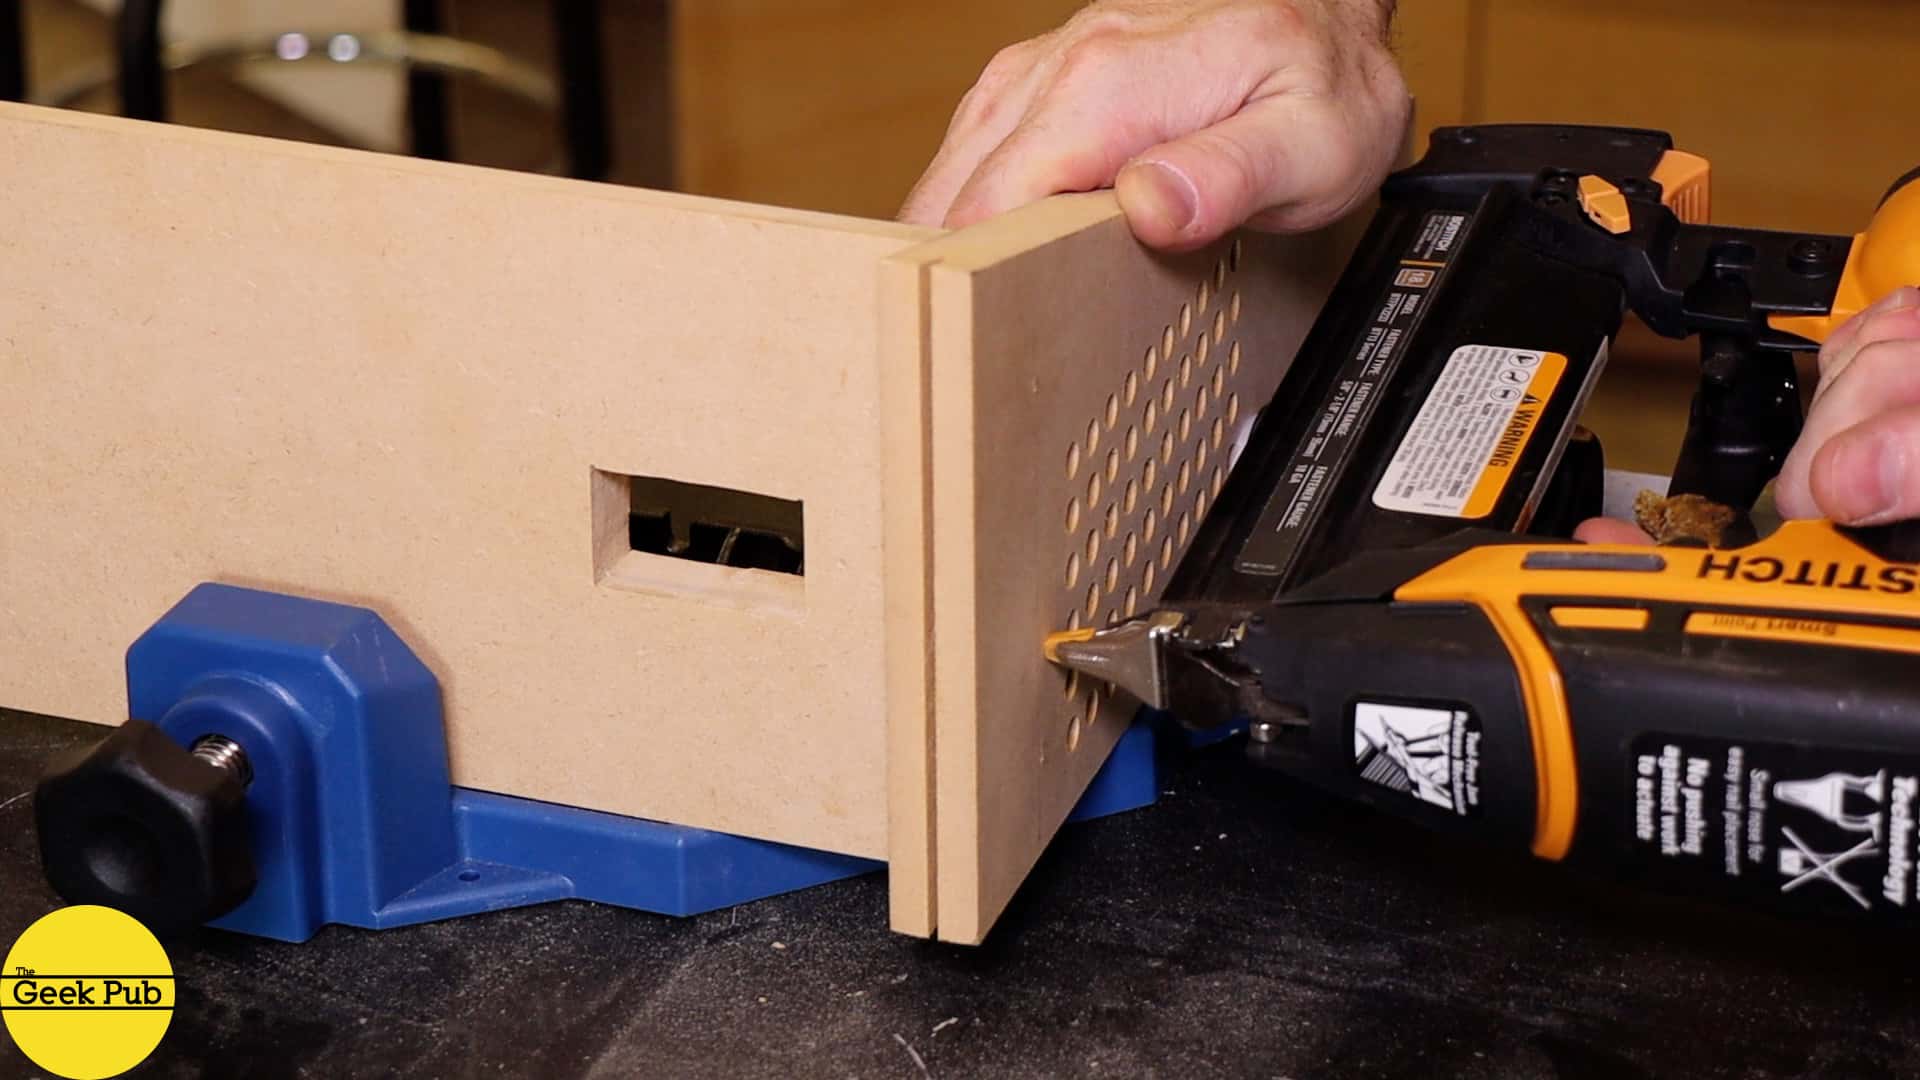
Next up I had to drill out the buttons for the back panel, and cut the power/fuse/USB ports. I’ve made this super simple with an awesome stick on template you can use.

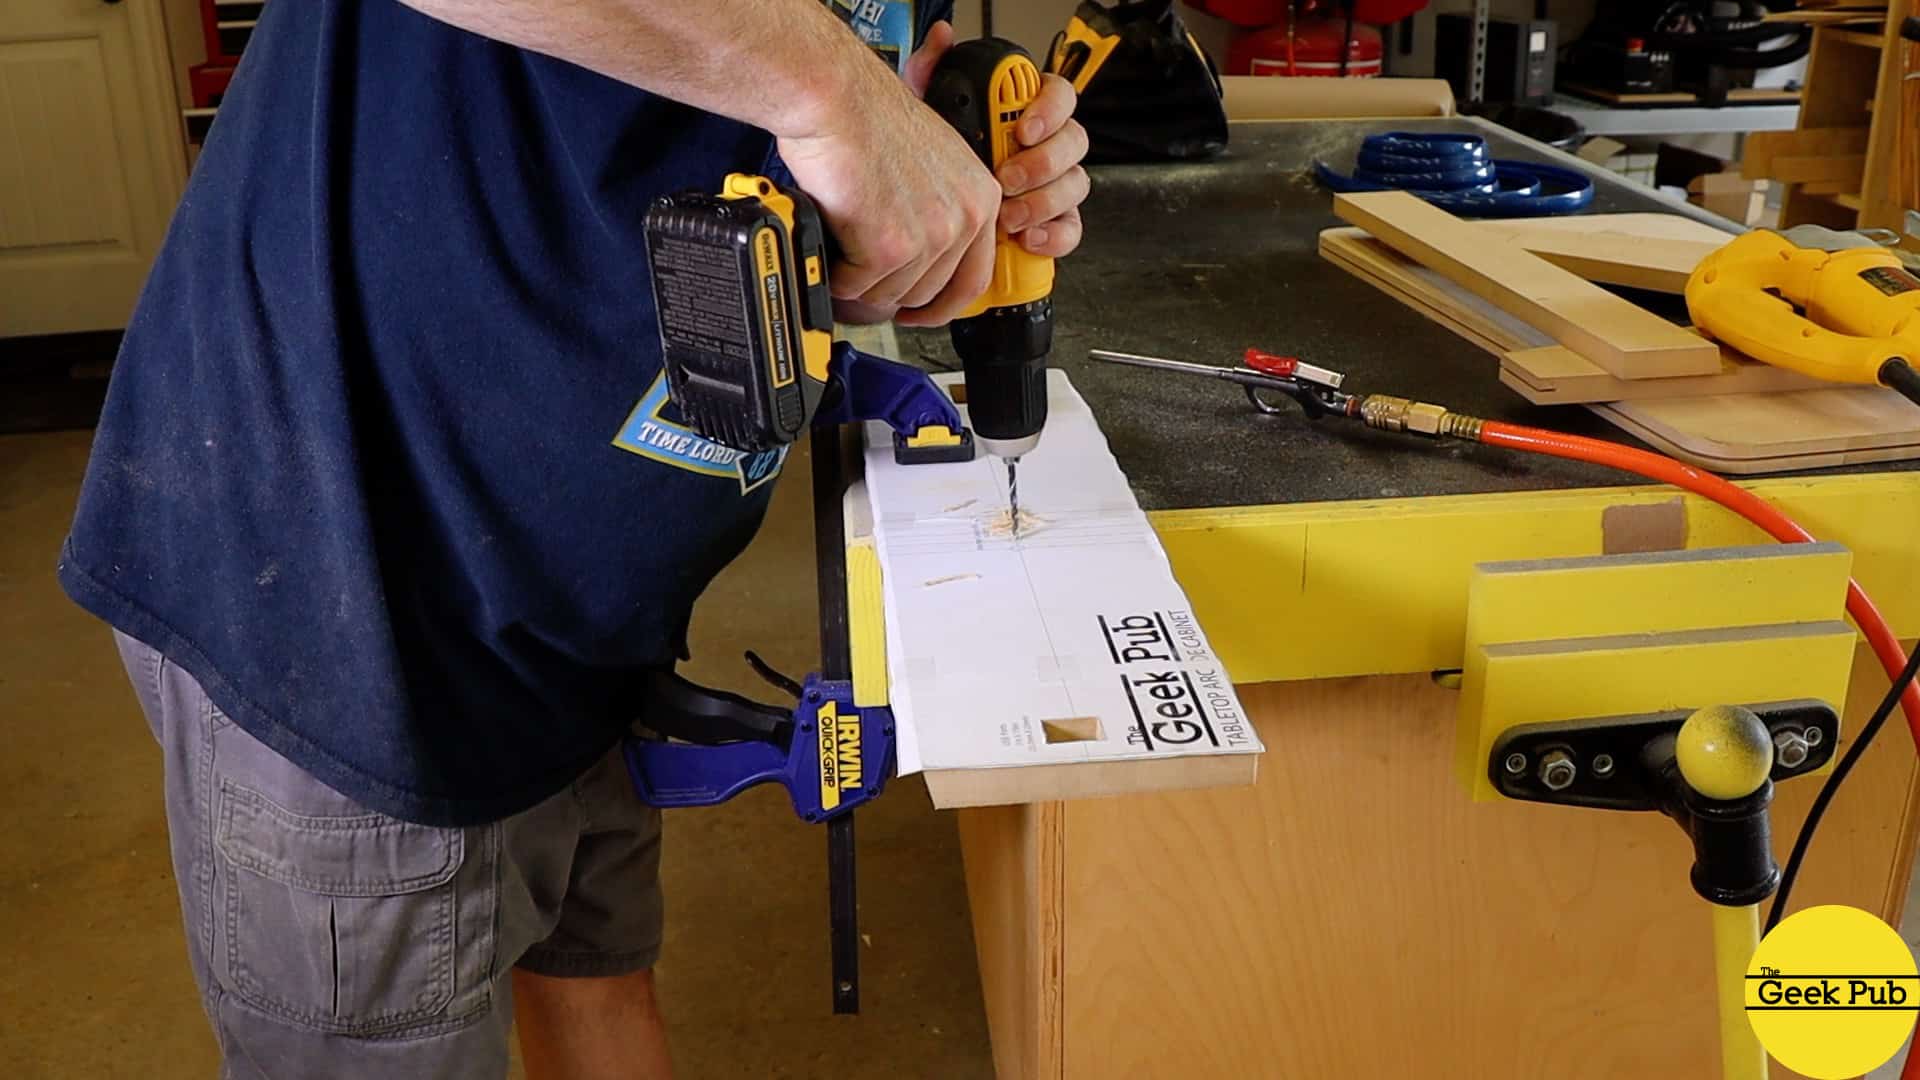
Lastly, we need drill the holes for the speakers. Again, super simple with a spray and stick template.
The finished product looks like it was made in a factory. If you don’t use my templates, you could also do this on a CNC machine.
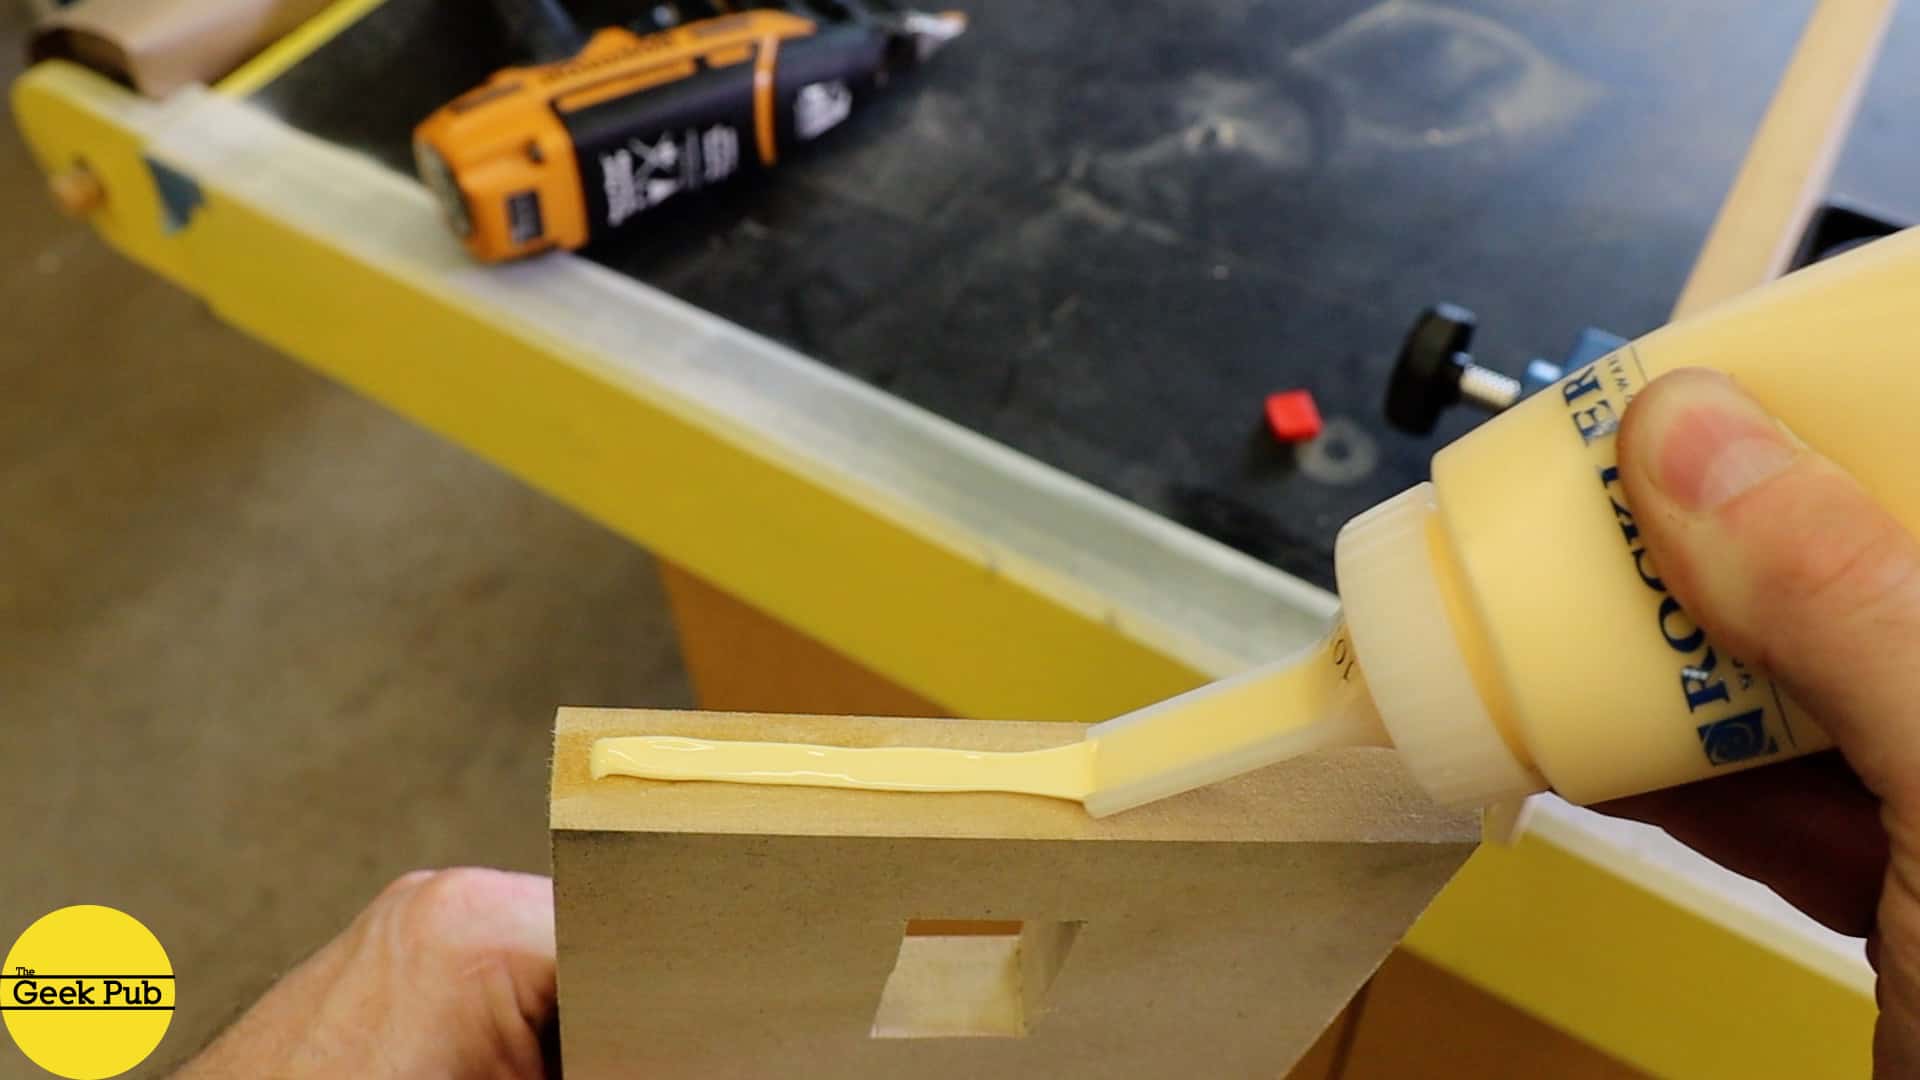
Finally its time to join all of the base sections together into a completed base. I used glue to join the sections and some Rockler clamps to keep everything lined up. Once it was together I tacked it with some brad nails.
People often assume brad nails are for structural integrity. That’s actually not the case all. Brad nails are fairly weak and pull out very easily. Brad nails are only there to keep the sections together while the glue dries. Another example of why the “If I had your tools” myth needs to die. Brad nails allow me to go faster and move on with the project without waiting 24 hours for the glue to dry. In other words, brad nails are completely optional and if you don’t have a nailer, you just need a little more time.

And my Major Screw Up…
And this is where I made my huge mistake. All of this work to get to this point to ruin the whole project? Thankfully not.
What I did was glue the base on upside down. Ooops. I was in a hurry with dinner cooking and family over and just needed to get this one last step complete. In my hurry I put the base on upside down!

I didn’t realize my mistake until about 10 minutes later. I’d already put the camera and lighting away. Off camera I quickly popped the base back off (luckily the glue hadn’t completely set yet) and flipped it over. I let the glue dry overnight and the sanded off the glue on the bottom of the base. All is well!
[button link=”https://www.thegeekpub.com/product/tabletop-arcade-cabinet-plans/” color=”green” newwindow=”yes”] Get the Tabletop Arcade Plans HERE[/button]
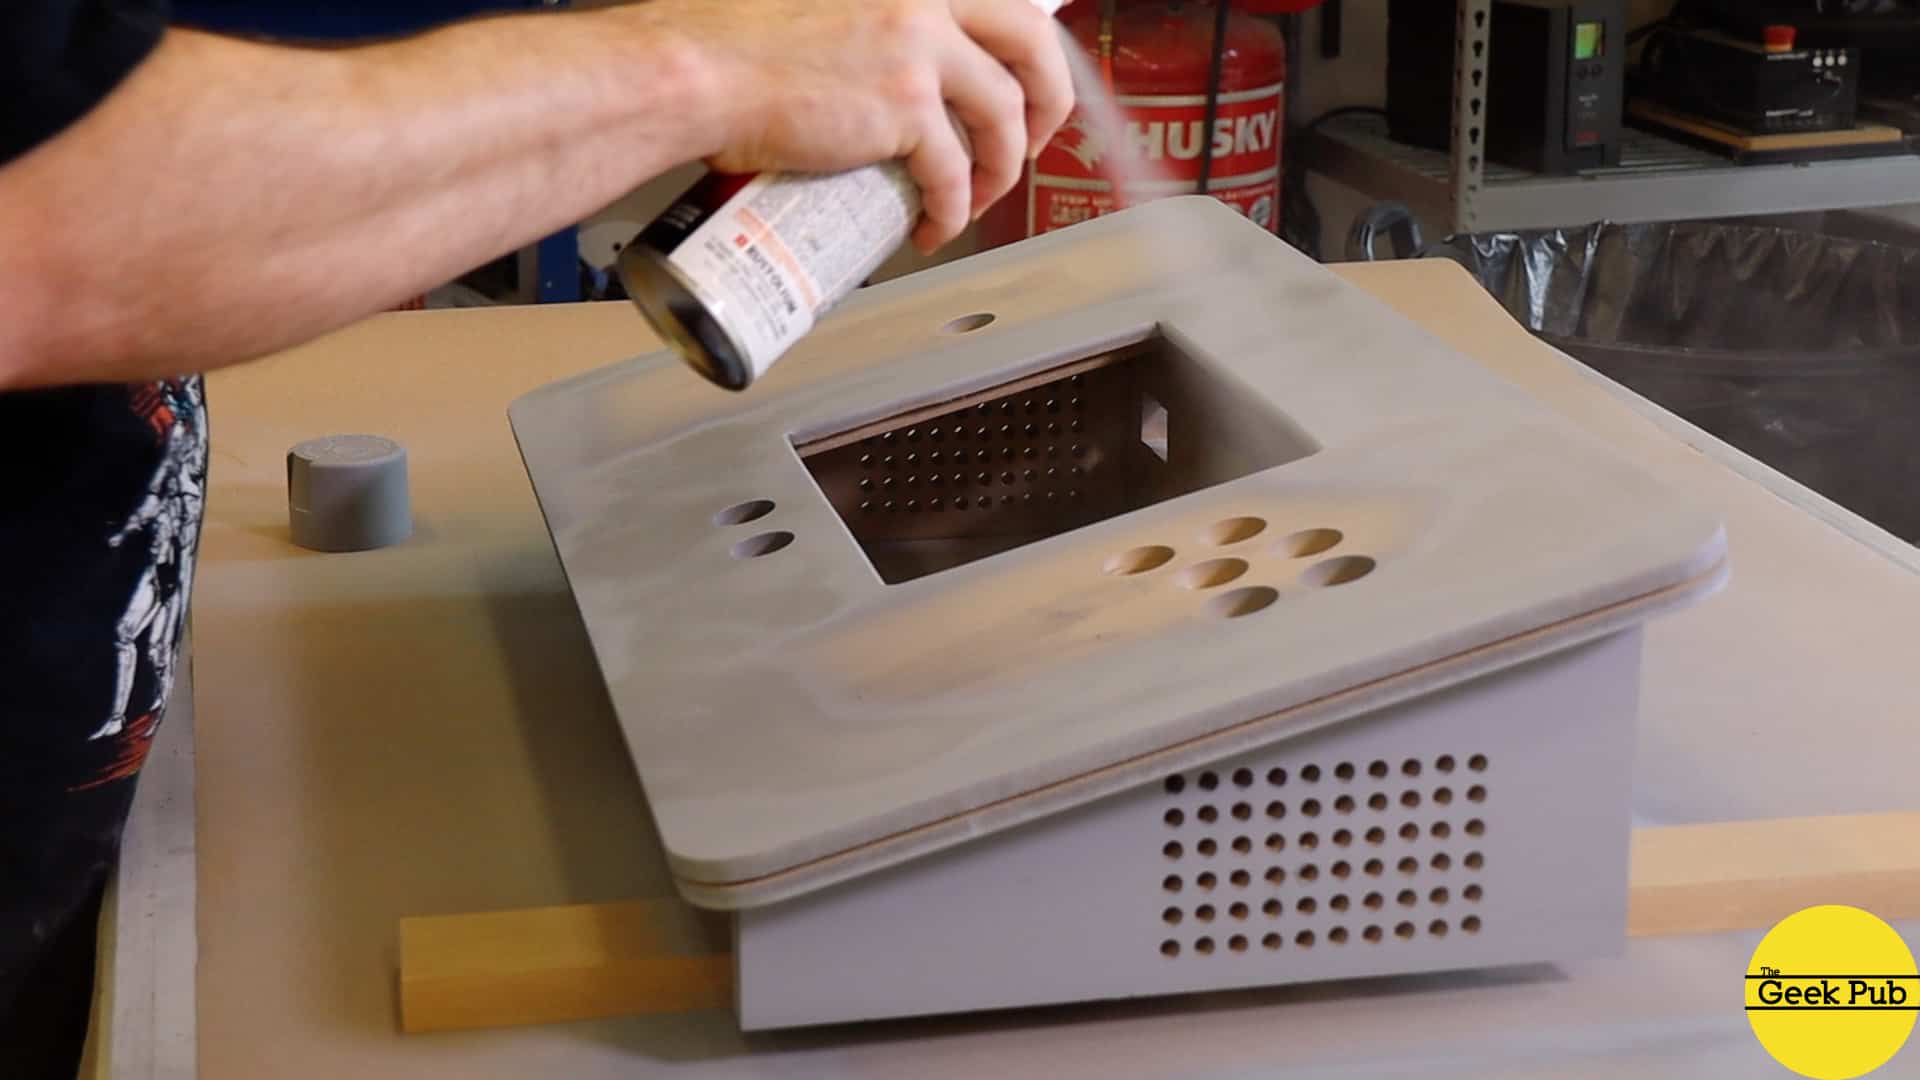
Painting the Tabletop Arcade
Next up we need to paint our tabletop arcade! When building things from MDF I like to use filler primer. Filler primer is just like it sounds, it fills gaps and imperfections in the material. It goes on a little rough and leaves a bit of a texture, but just 5 minutes with 220 to 320 grit sandpaper and its silky smooth and the MDF will look like glass. It’s fantastic!
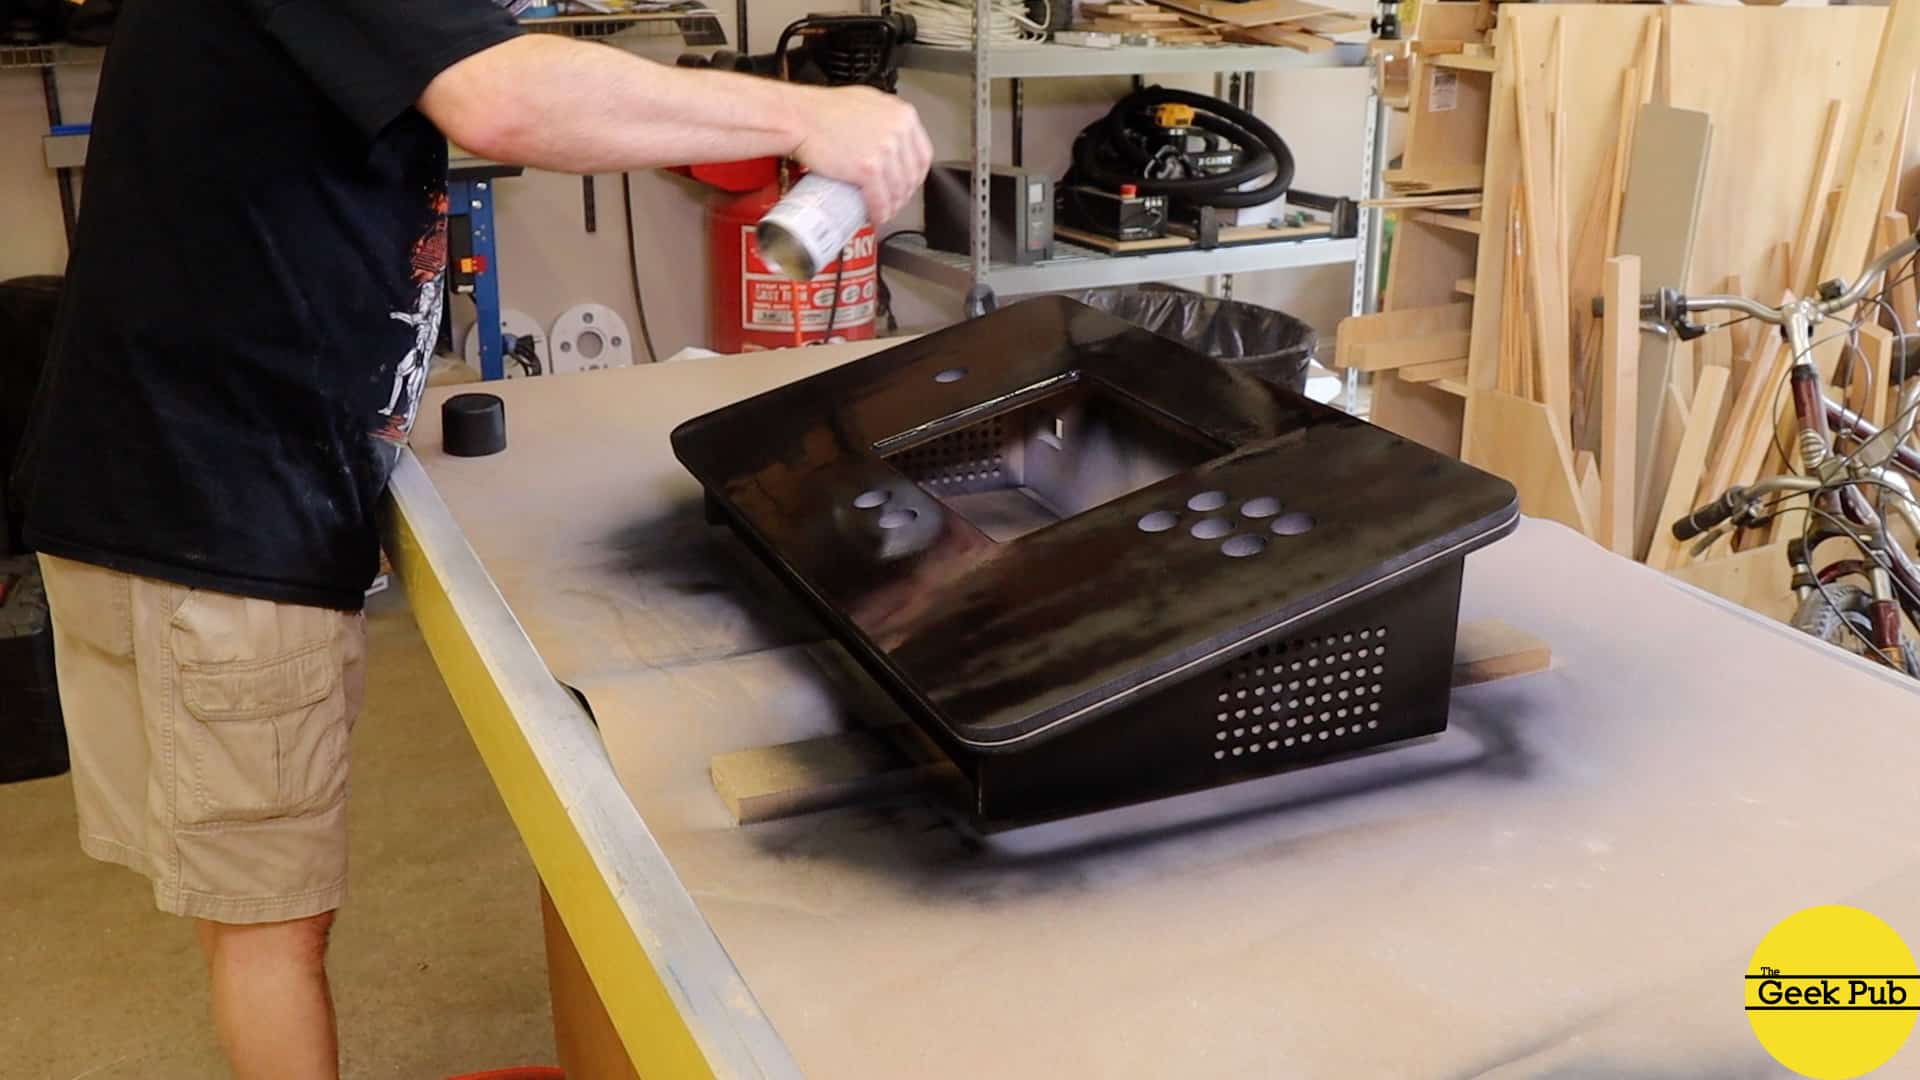
I painted the tabletop arcade with Rust-Oleum flat black. It goes on looking very glossy, but after it dries its got a very retro flat look to it.
One question I get a lot is why not use my HVLP sprayer? Honestly? It’s a giant pain in the ass and I can get close to perfect results with a rattle can. I just tend to go that route on smaller projects and save the HVLP sprayer for the big stuff.
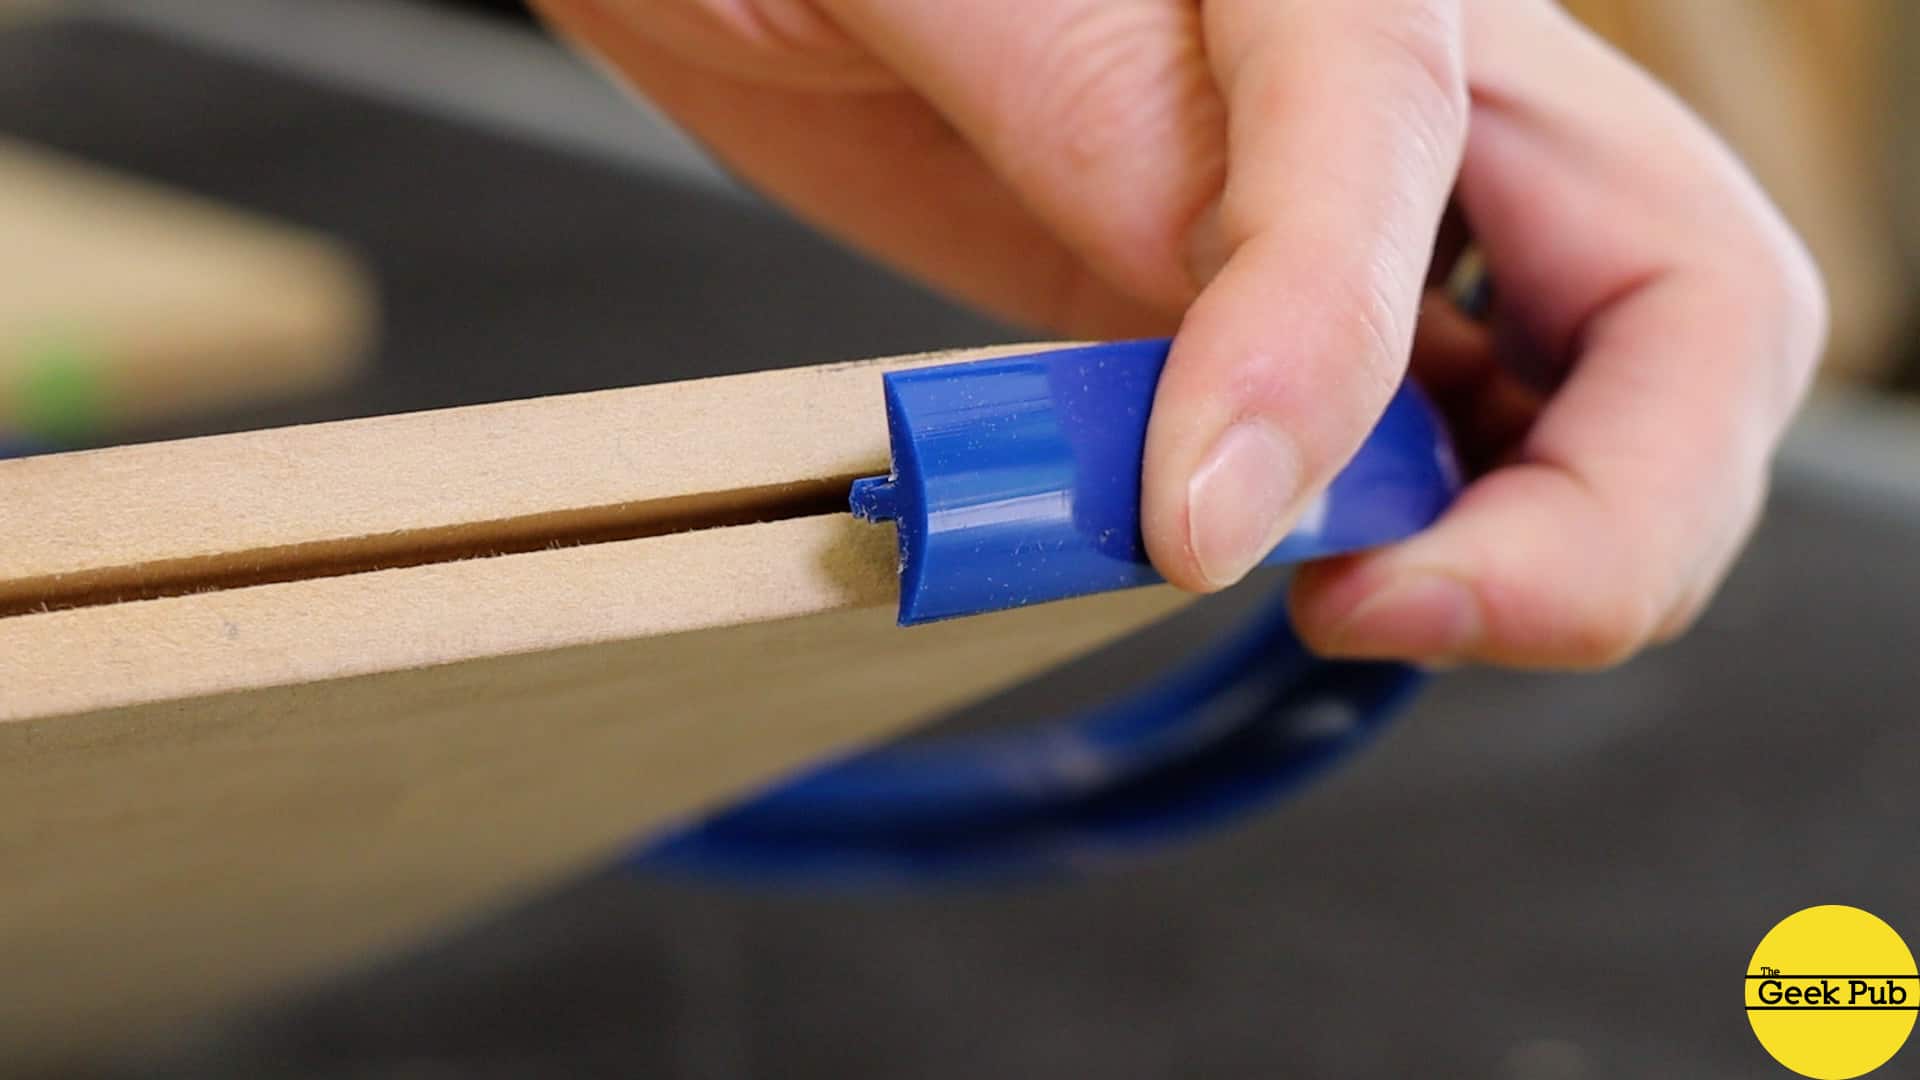
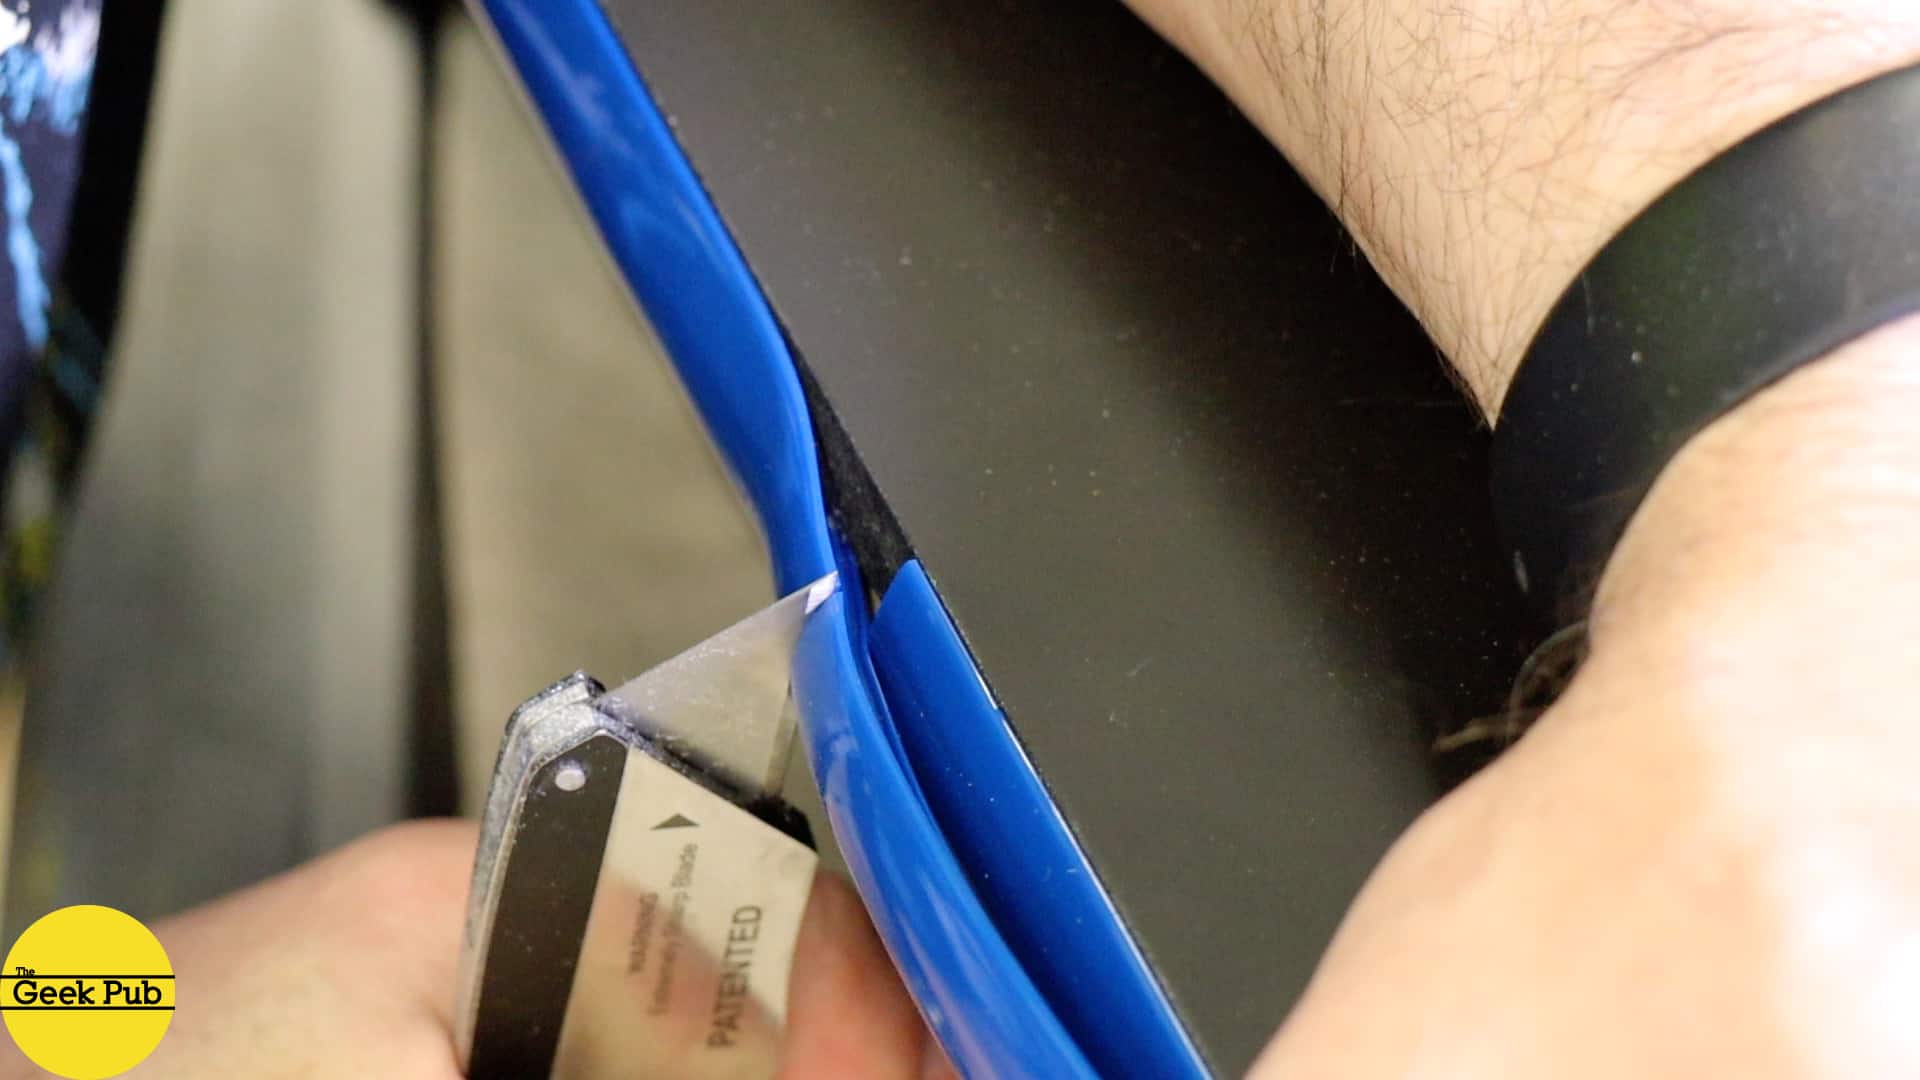
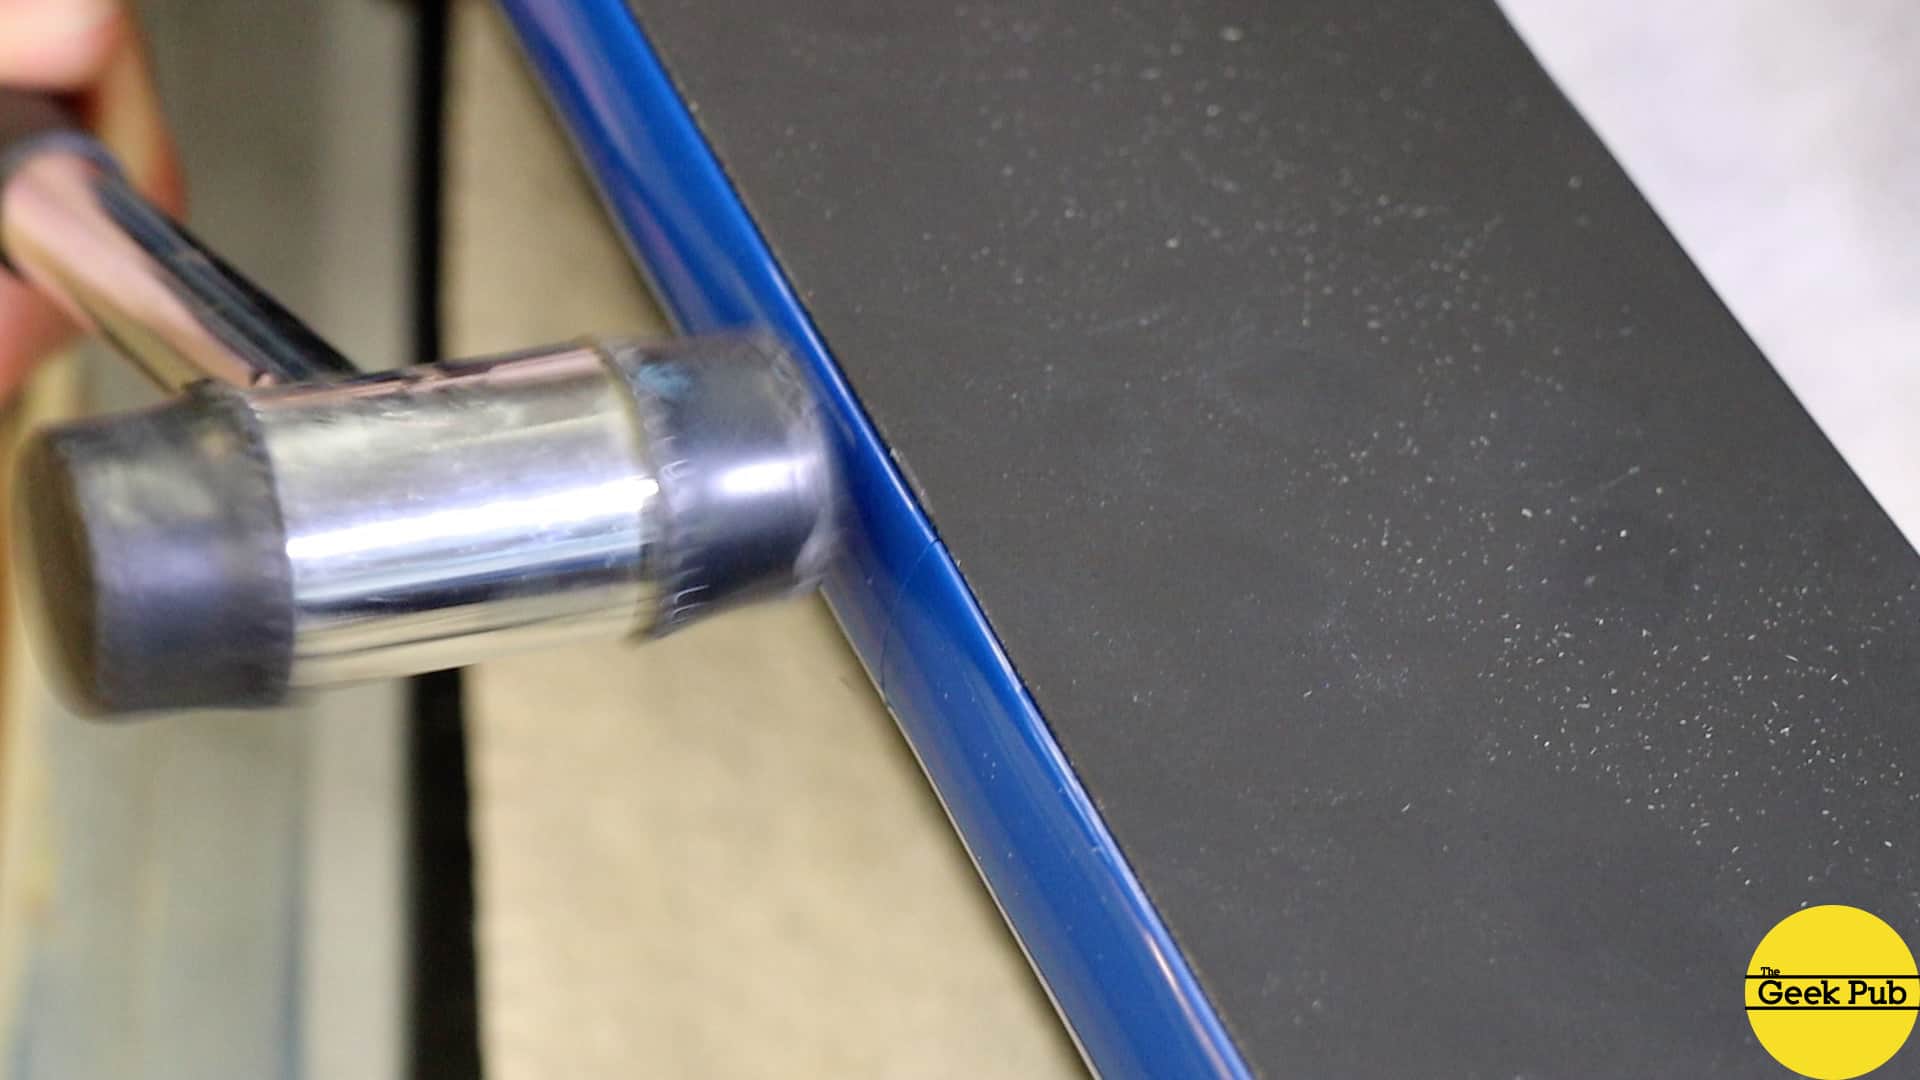
Installing the T-Moulding
Installing the T-Moulding is a pretty simple task. I like to use a little rubber mallet and just tap it into place. Try to drive the T-moulding in straight and not an angle. If you get too far off center you will damage the track and have to start over with a new section. How do I know? Yep. I’ve screwed it up before!

When you get to the end, use a very sharp razor knife to cut the t-moulding, using the ends as alignment tools. If you do it right, it should make an almost invisible seam.
Installing the Tabletop Arcade Electronics
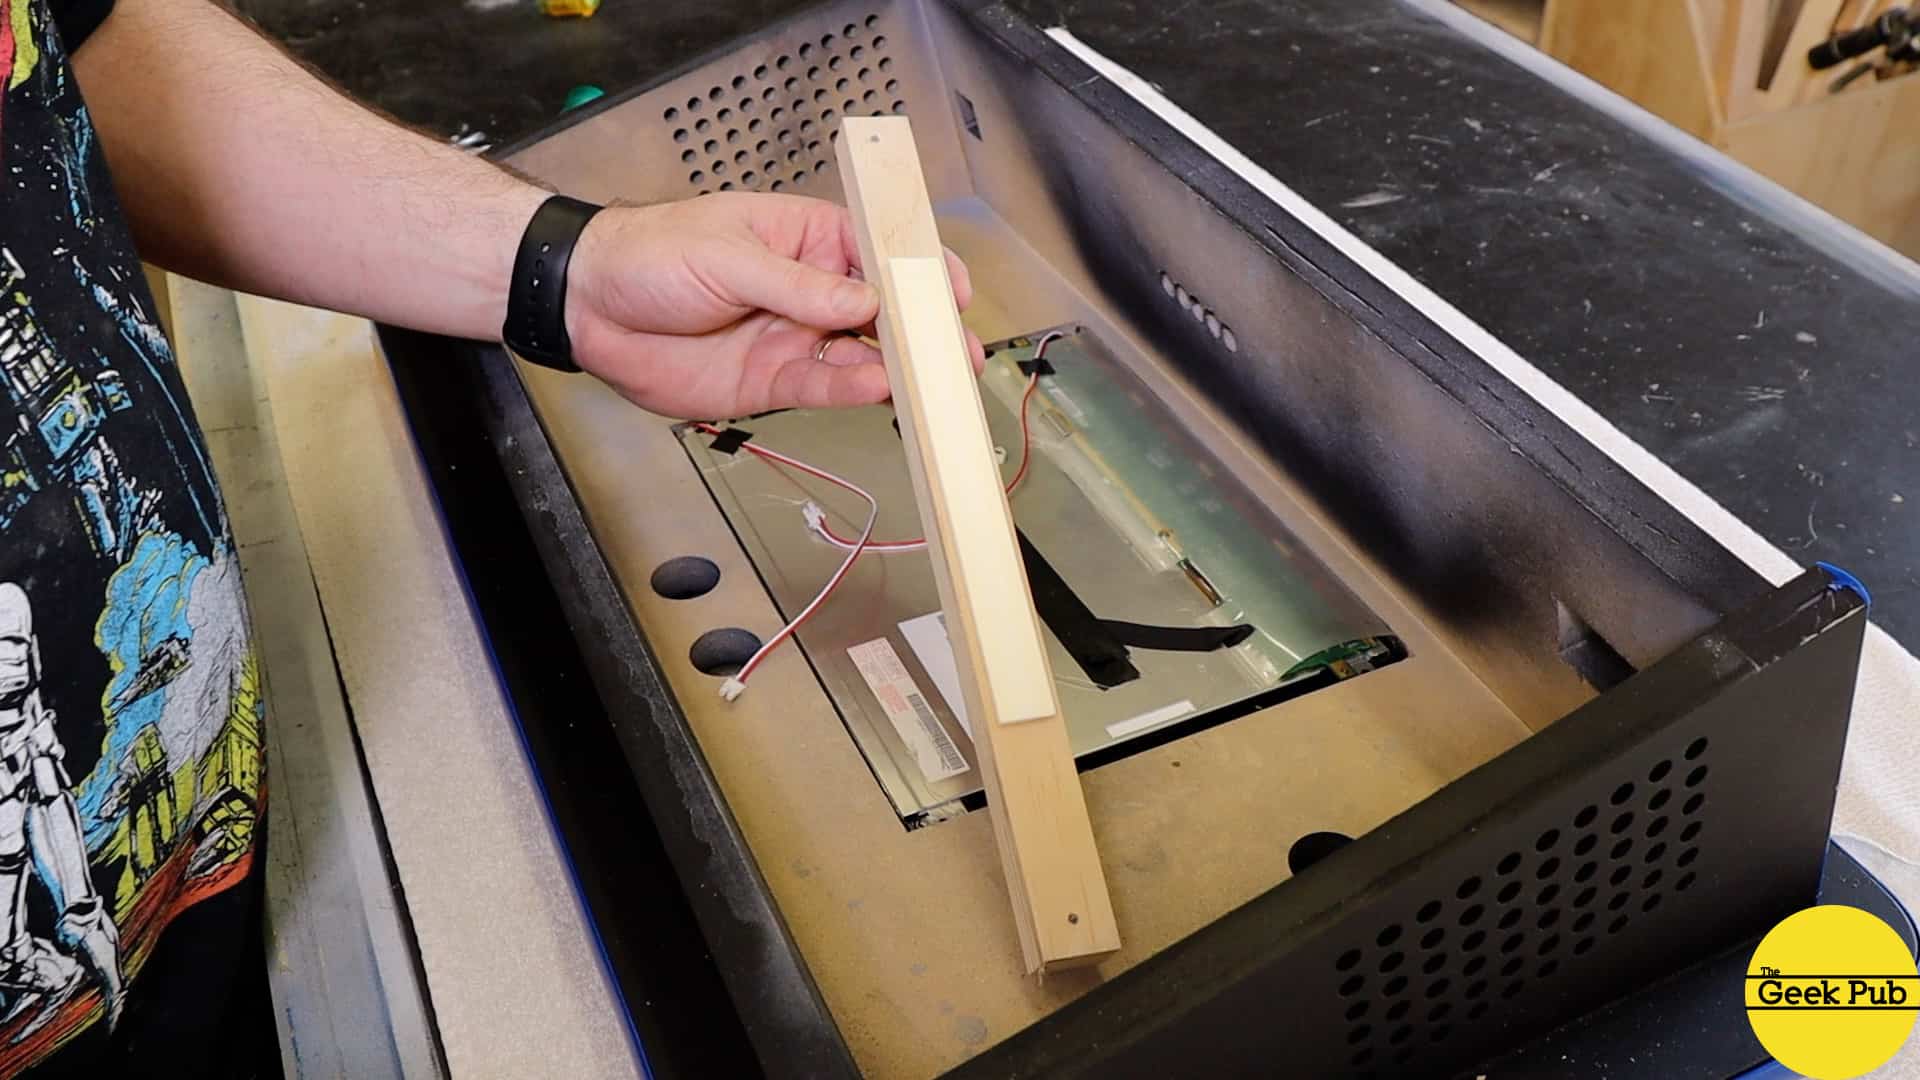
First up on the list is to install the monitor. It just sits in the recess that we routed out earlier. However, its going to need something to hold it in, and we’re going to to need a place to mount the guts of the monitor. We’ll handle this in one step!
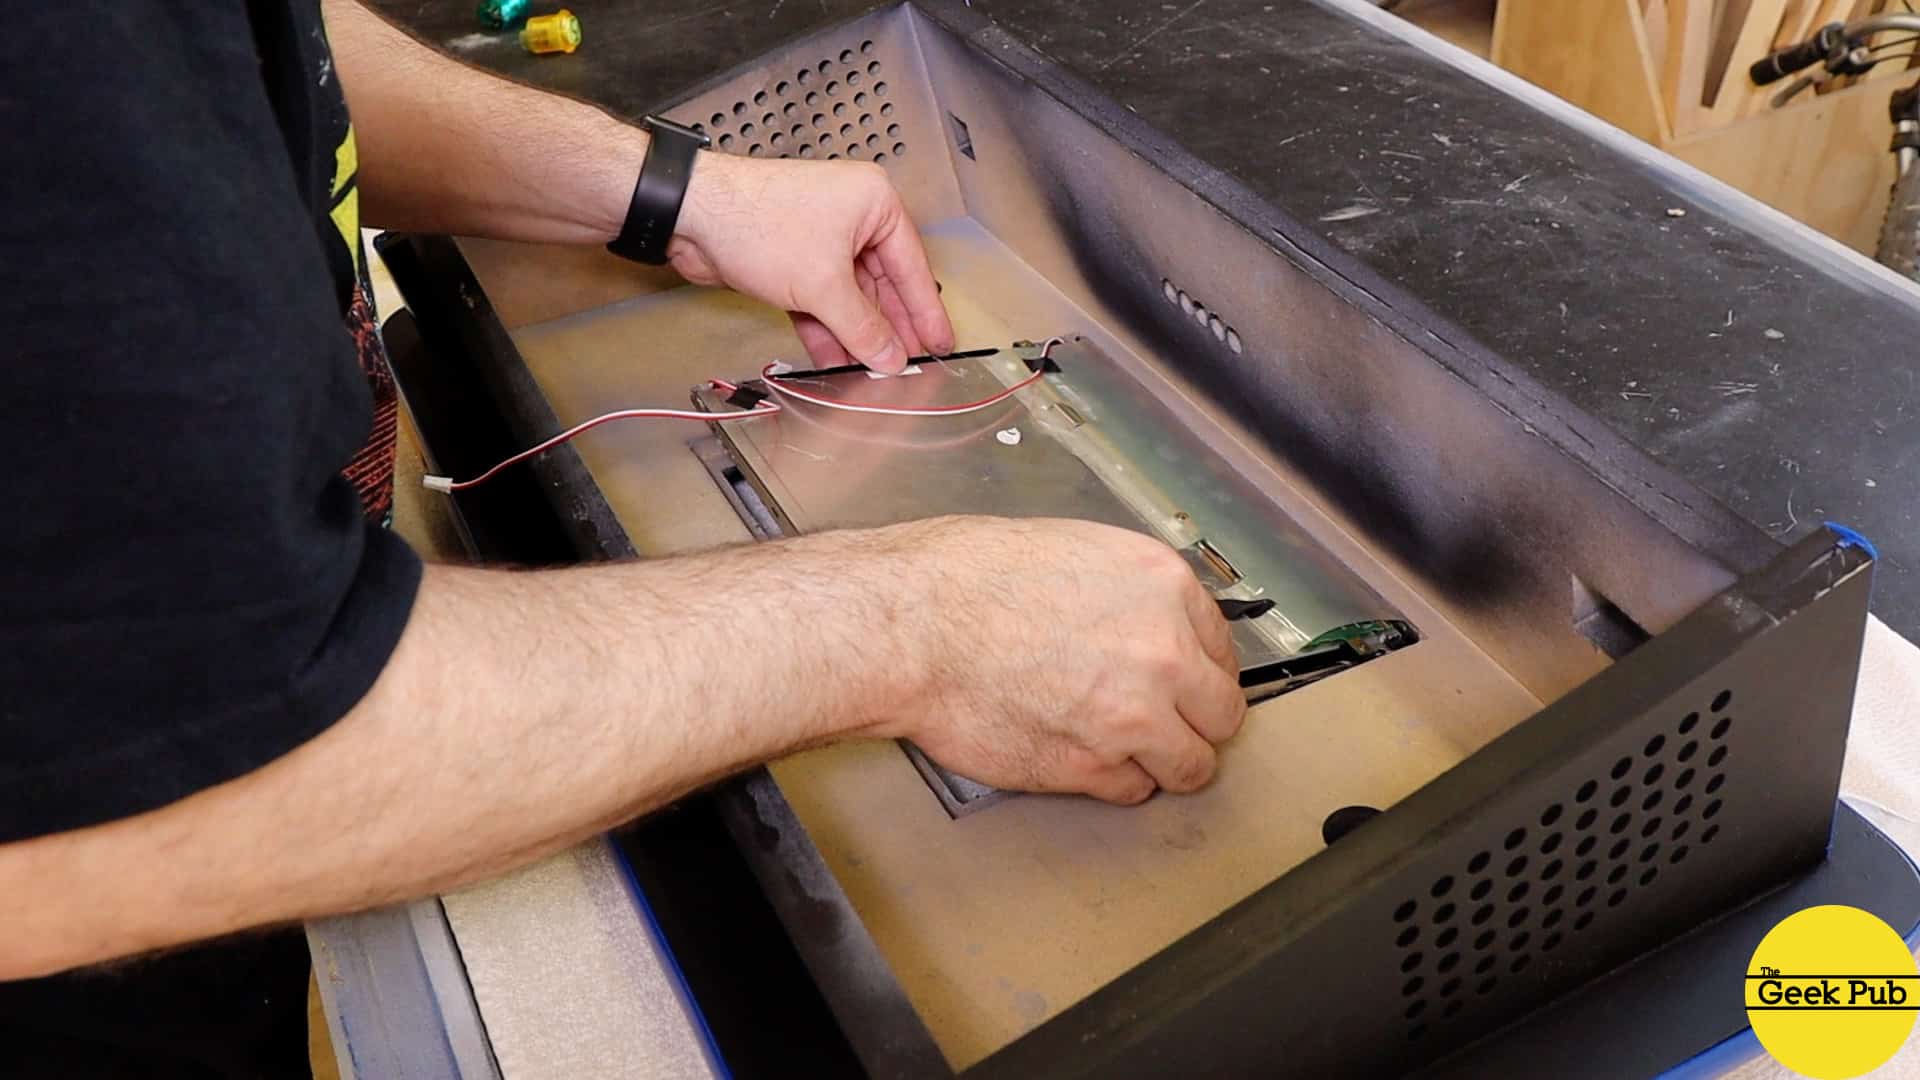
I cut a 3/4in by 12in piece of plywood out and added some double-sided tape on the bottom of it. This will will sandwich the monitor in place. The double-sided tape doesn’t support the monitor, its just there to keep it from moving or wiggling when the arcade gets some abuse.
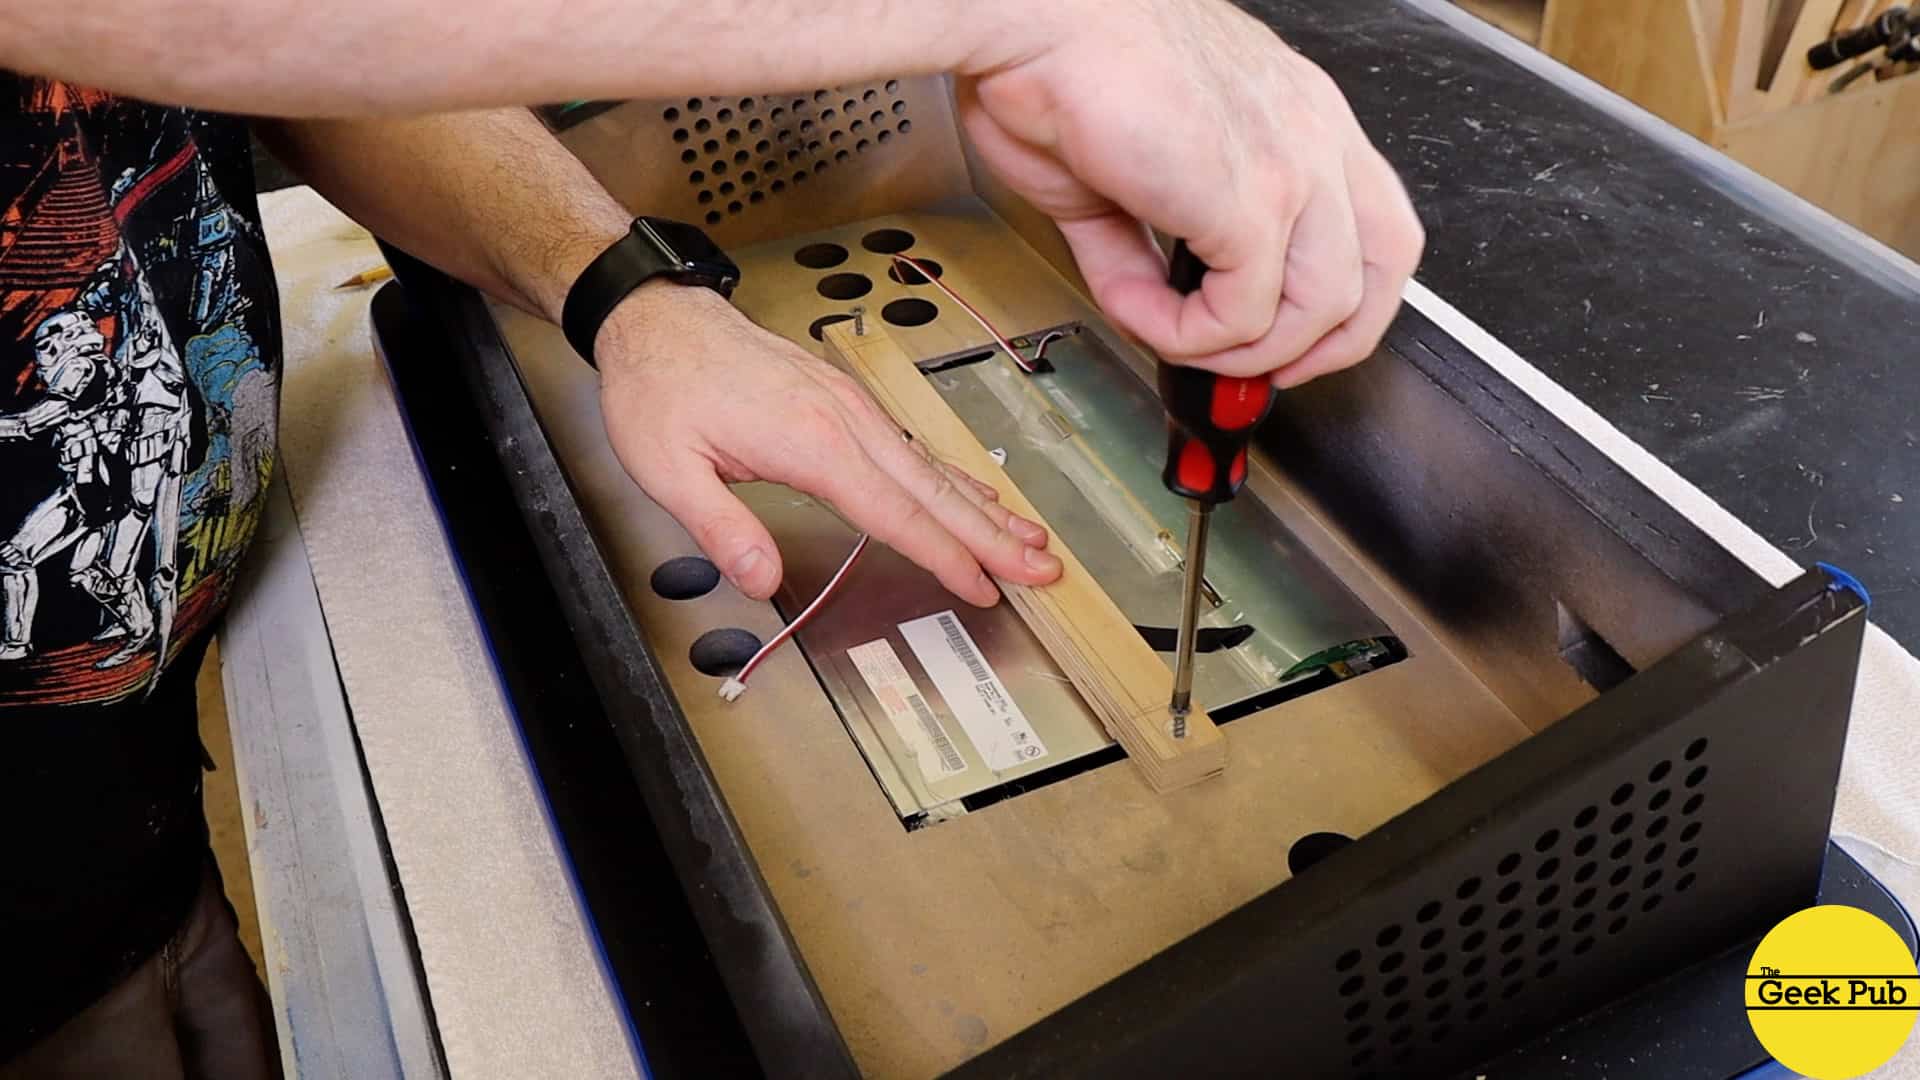
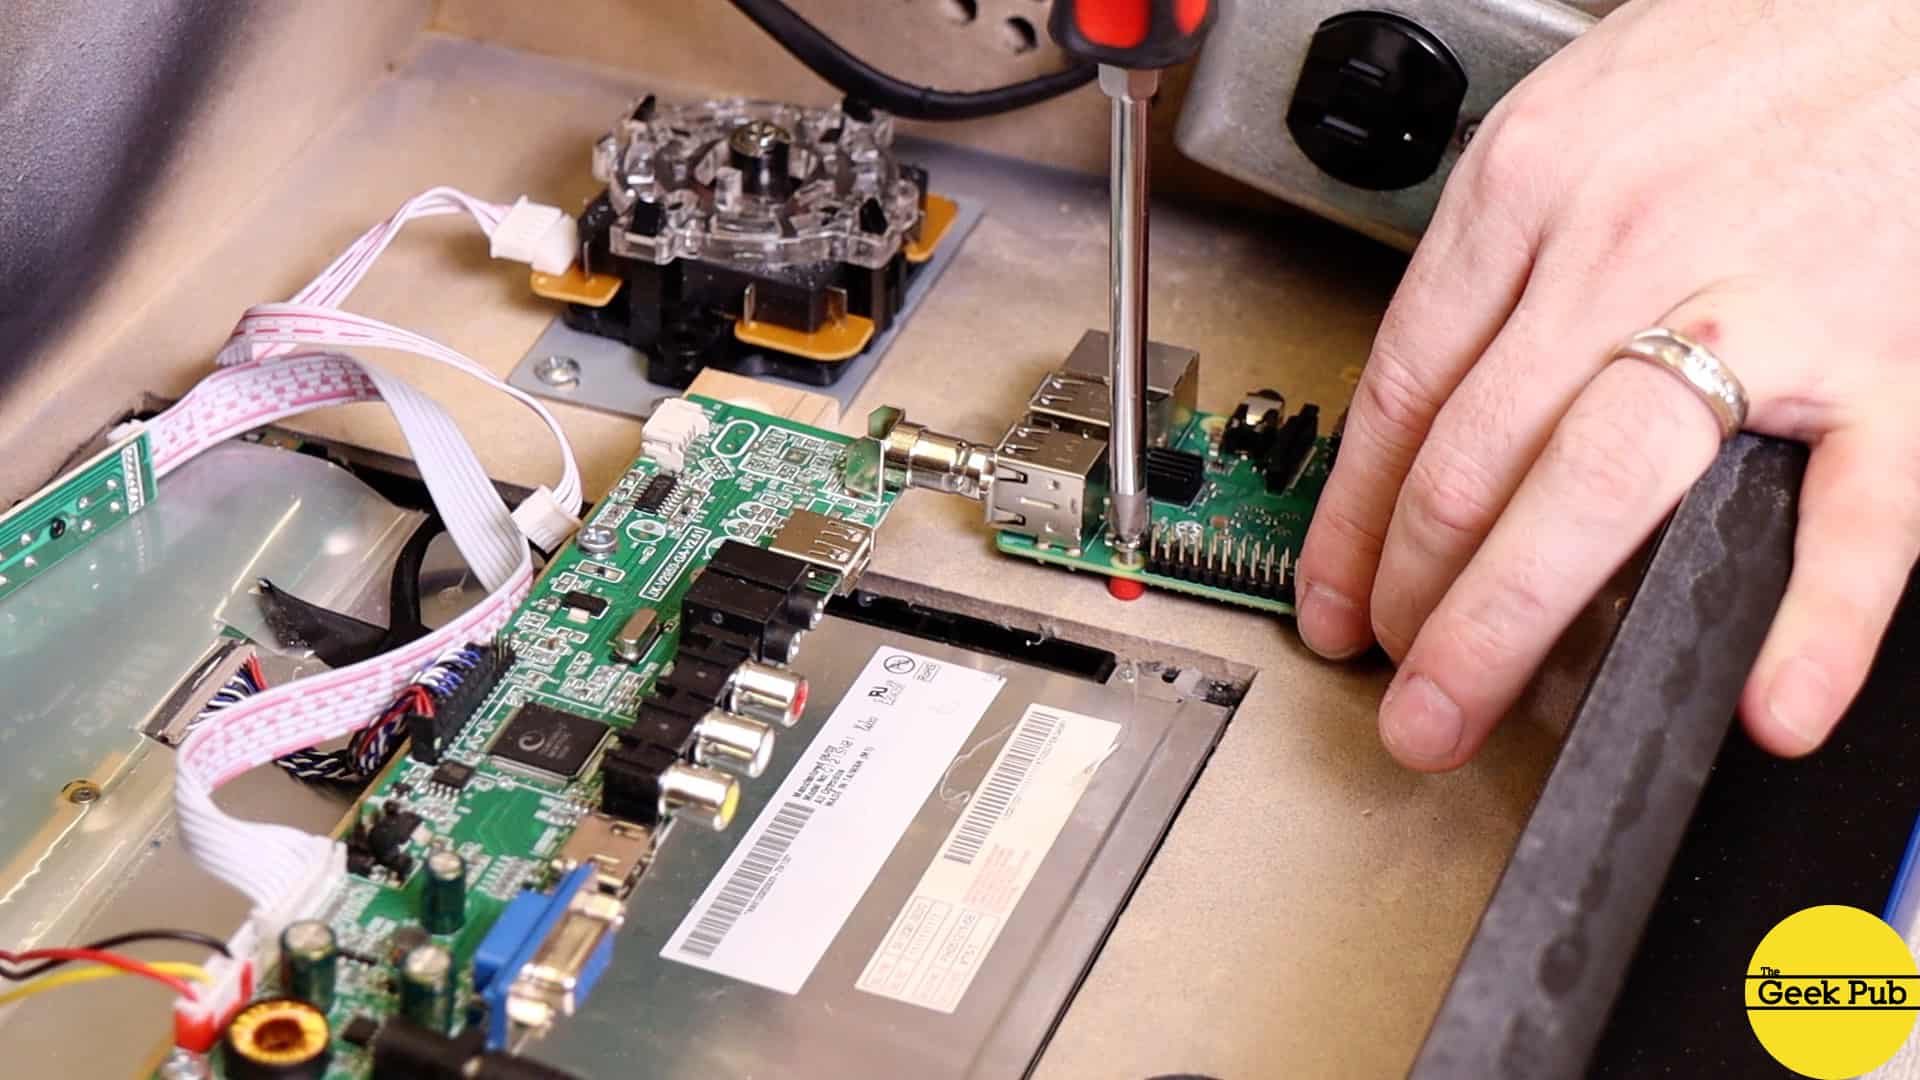
I mounted the LCD panel controller board and LCD backlight driver board on this same bracket. It’s the perfect location. I used some 1/8in plastic stand offs between the boards and the bracket just to provide some clearance.
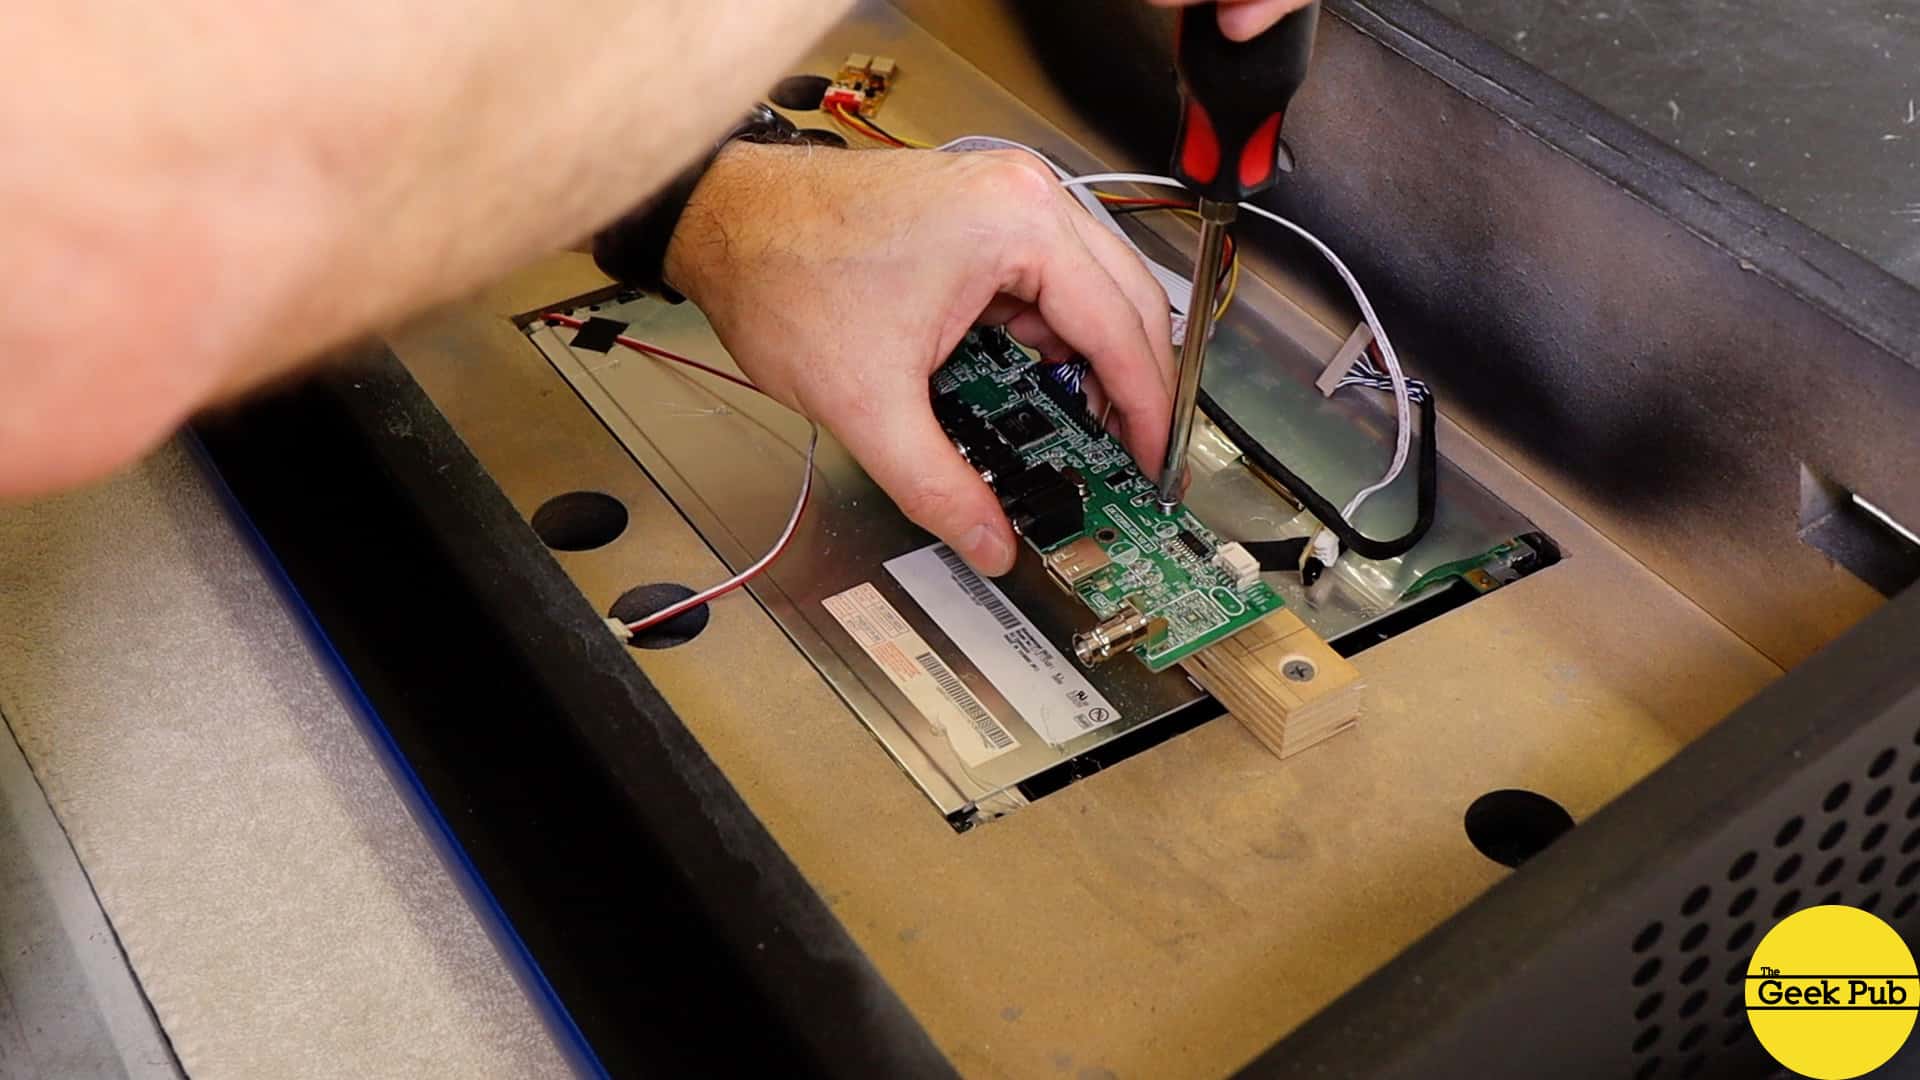

I used a similar mounting method for the LCD panel’s power supply.
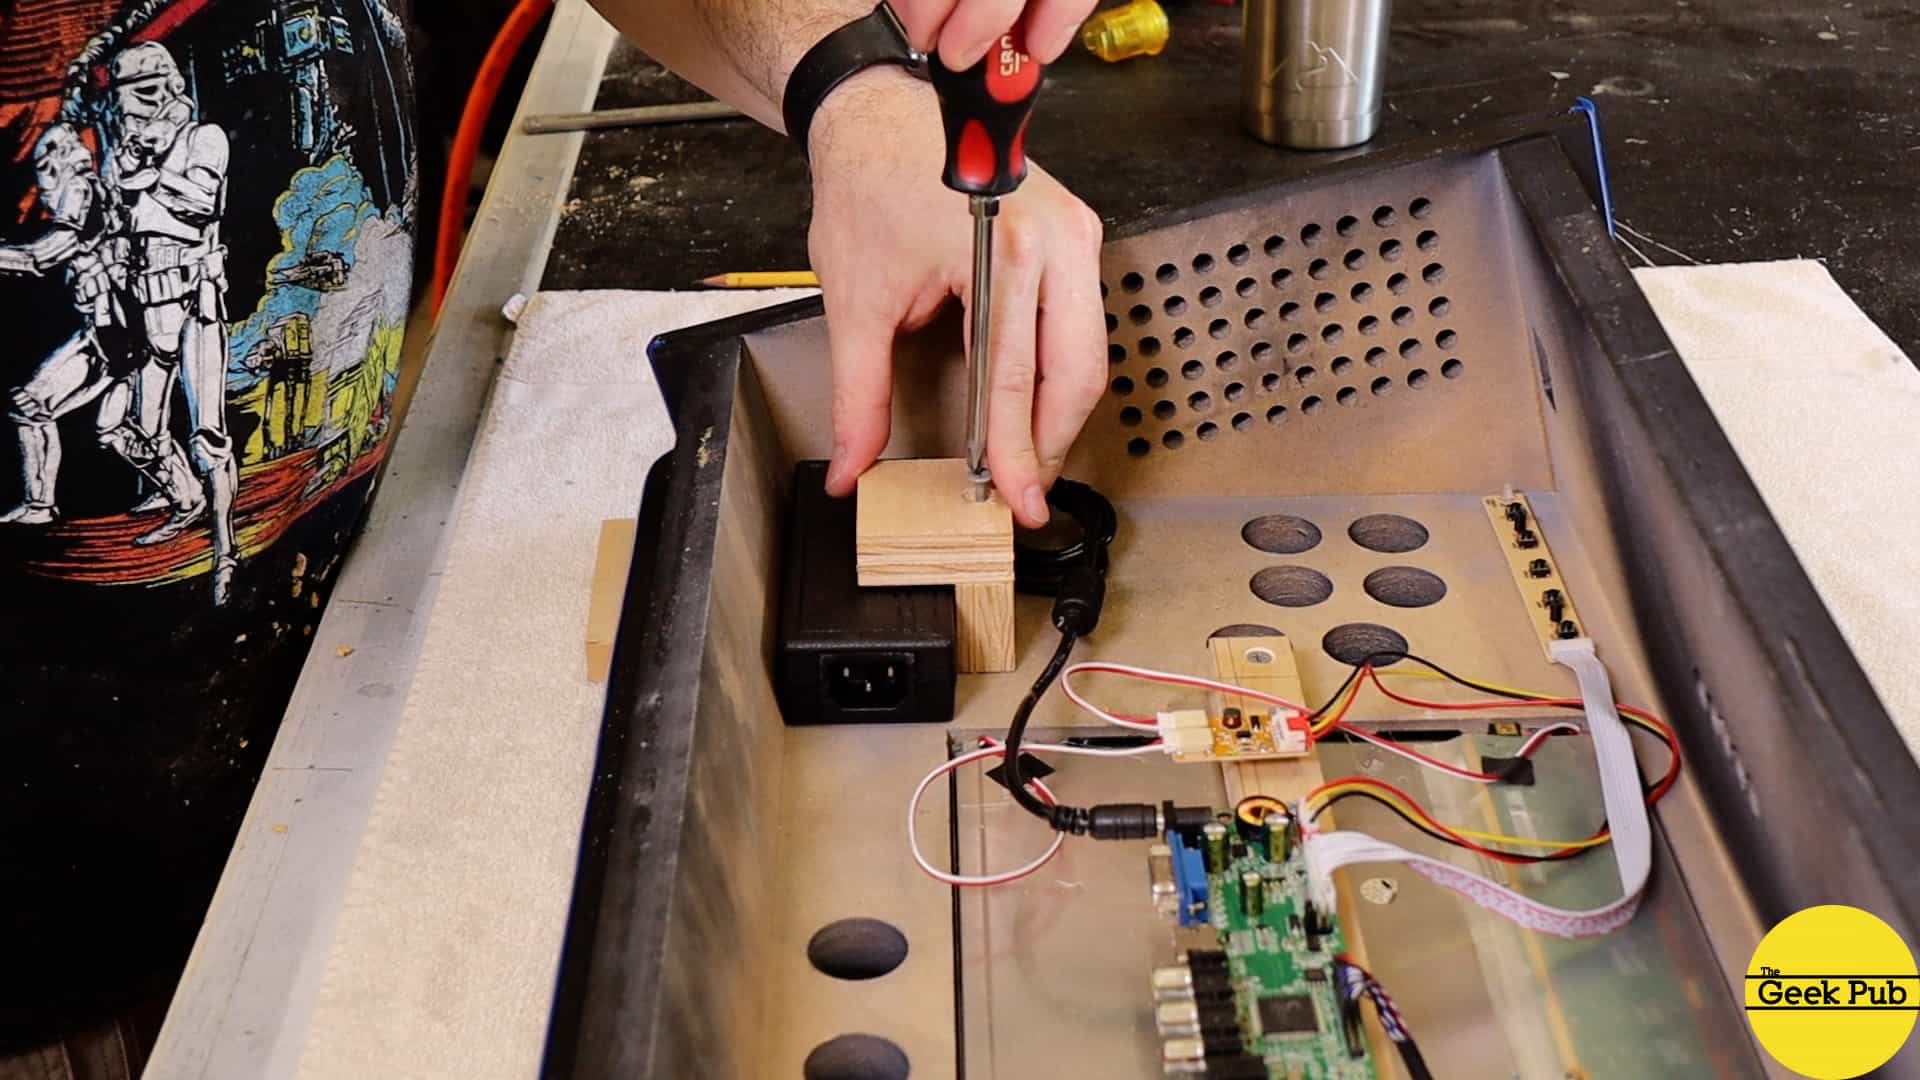
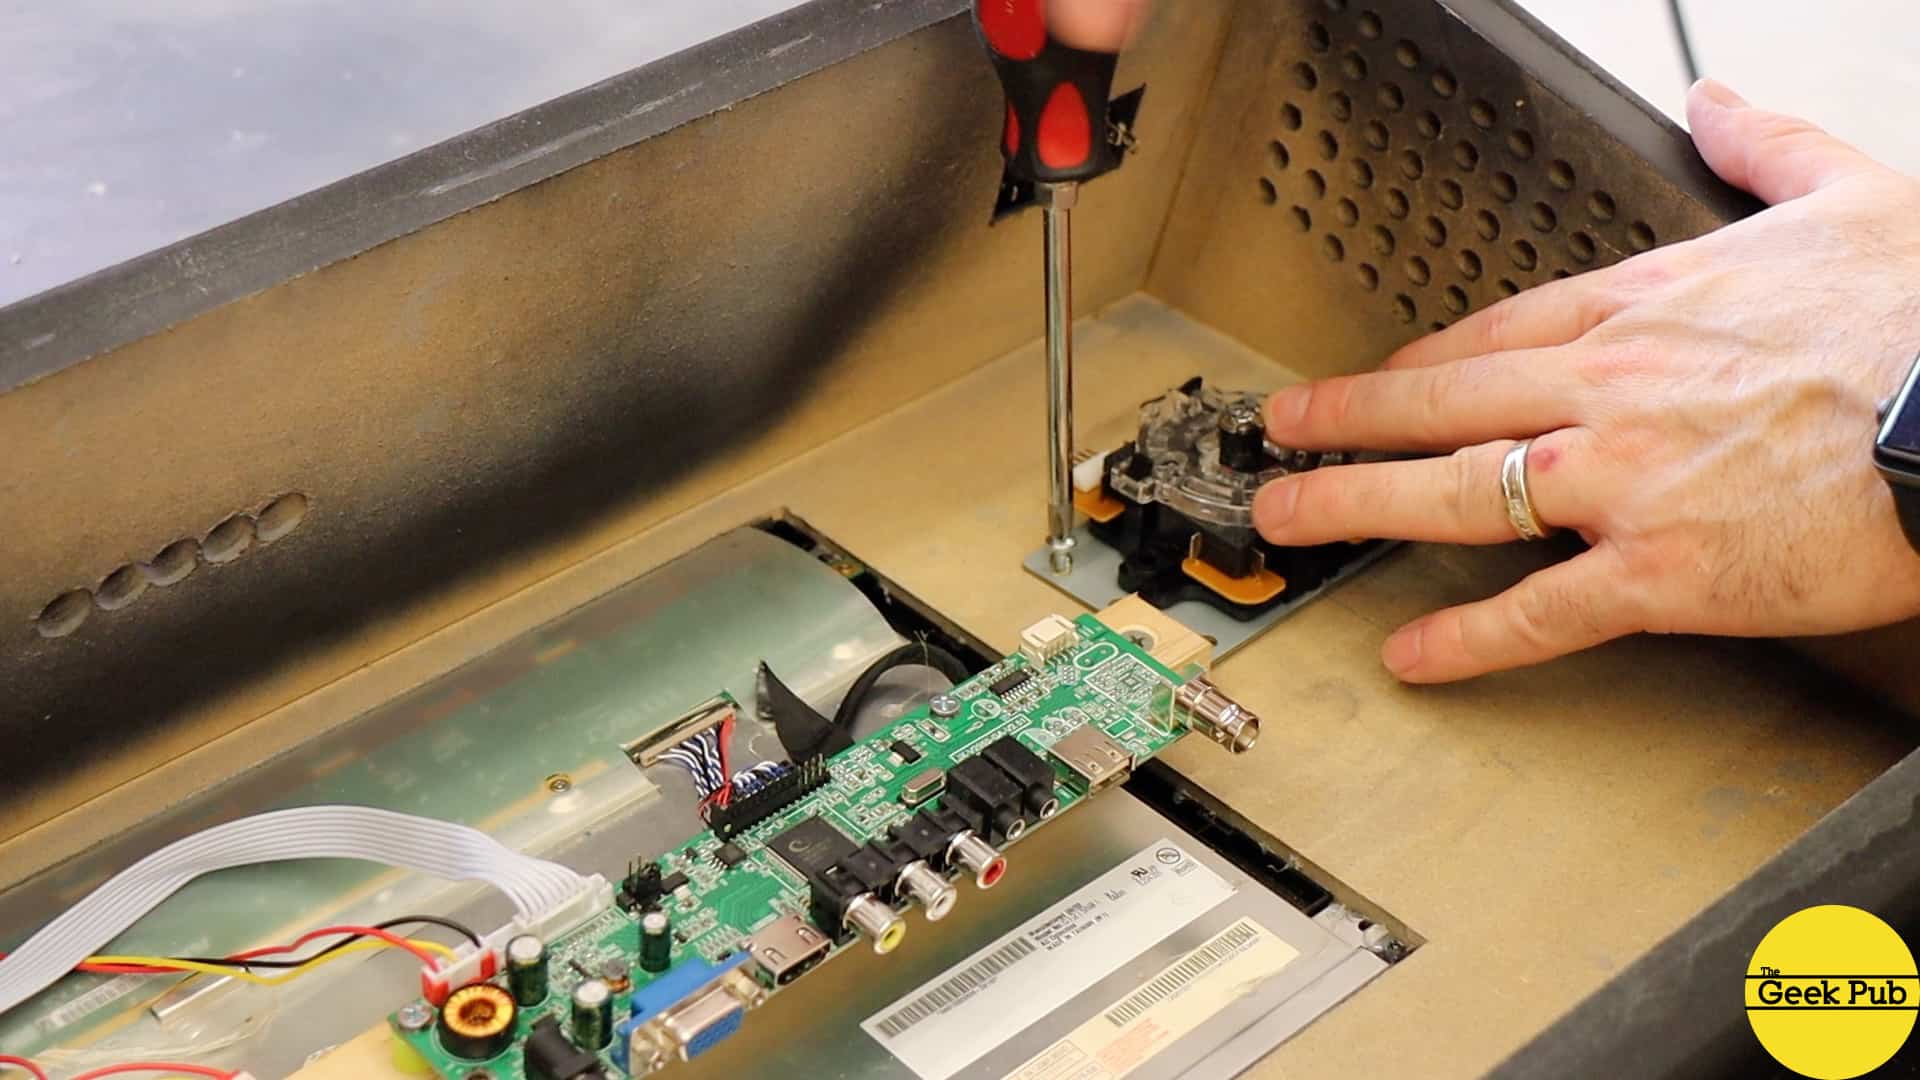
I went ahead and mounted the joystick at this point. Mostly because I would need to work around it with everything else and wanted to make sure it had plenty of room.
The instructions for the joystick say to use through hole carriage bolts, but I think those look just tacky as as can be, so I use #8 X 1/2in screws from the underside.
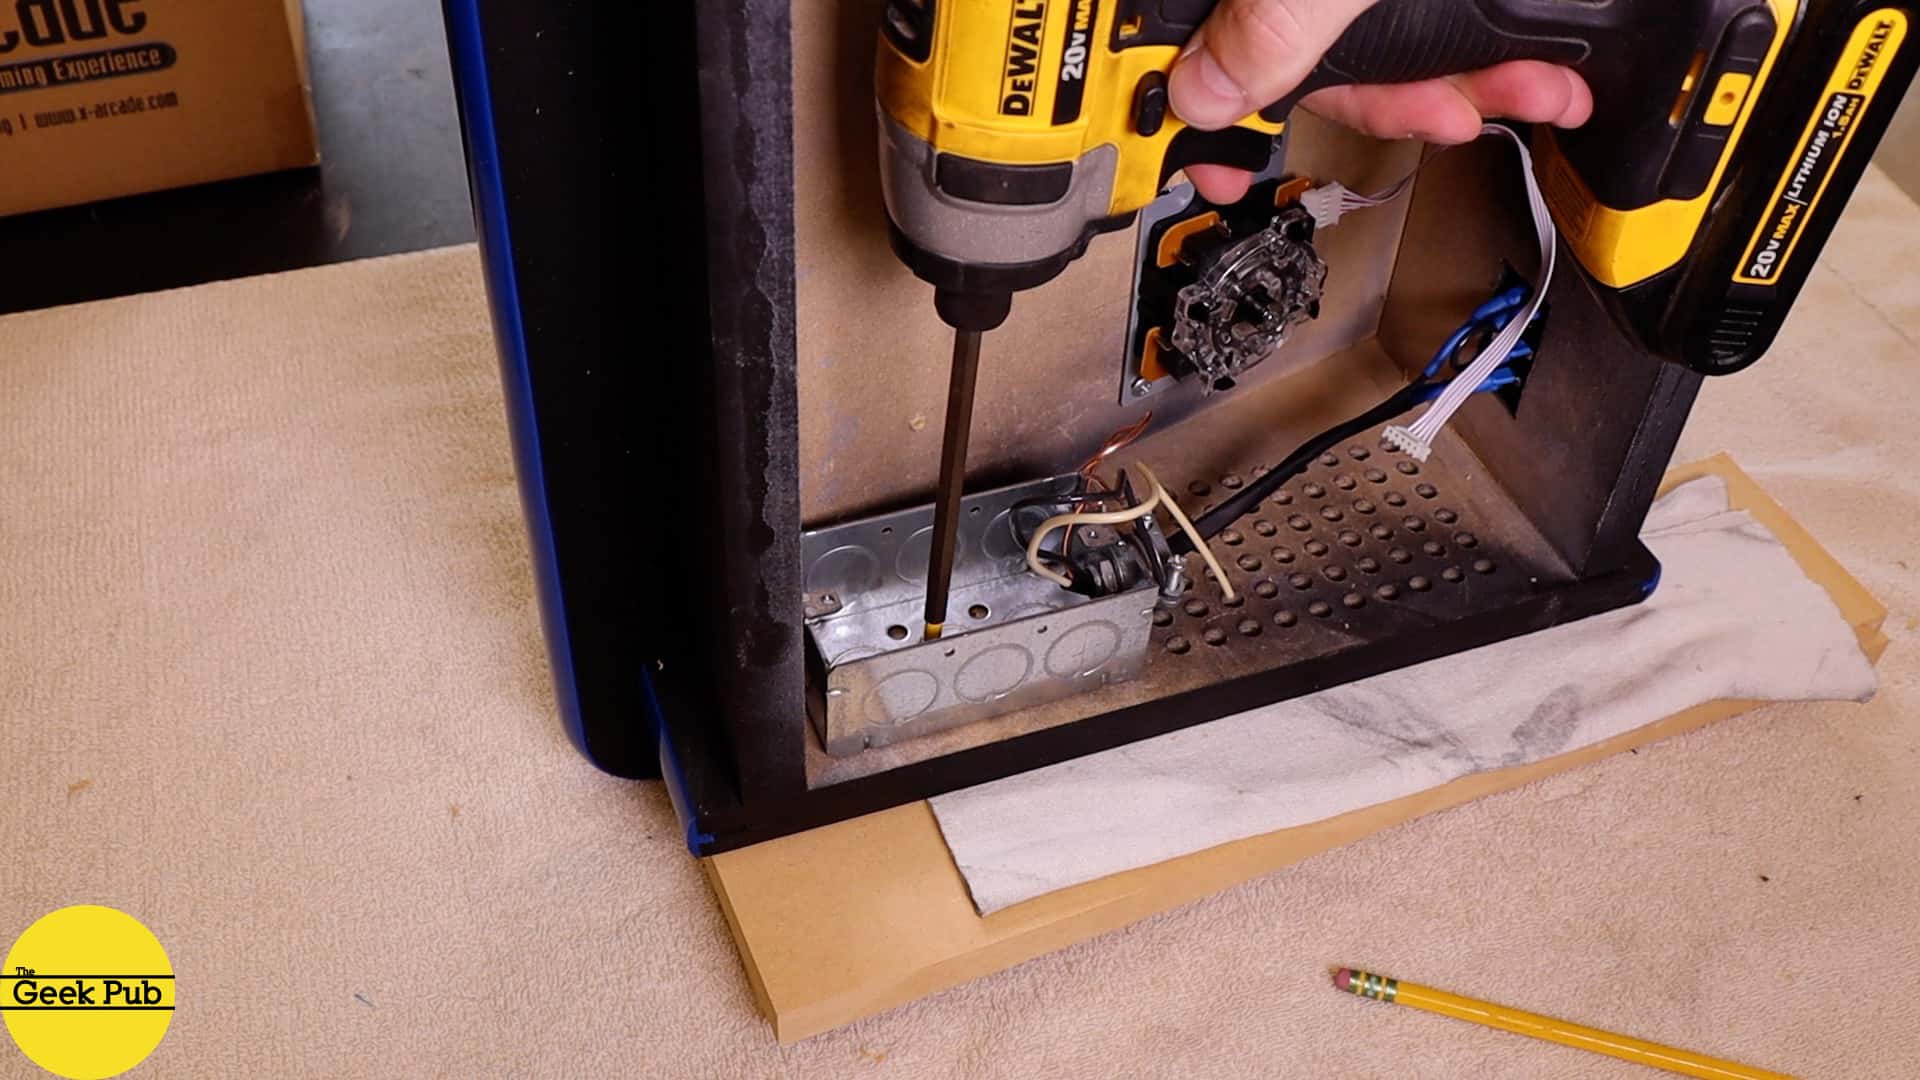
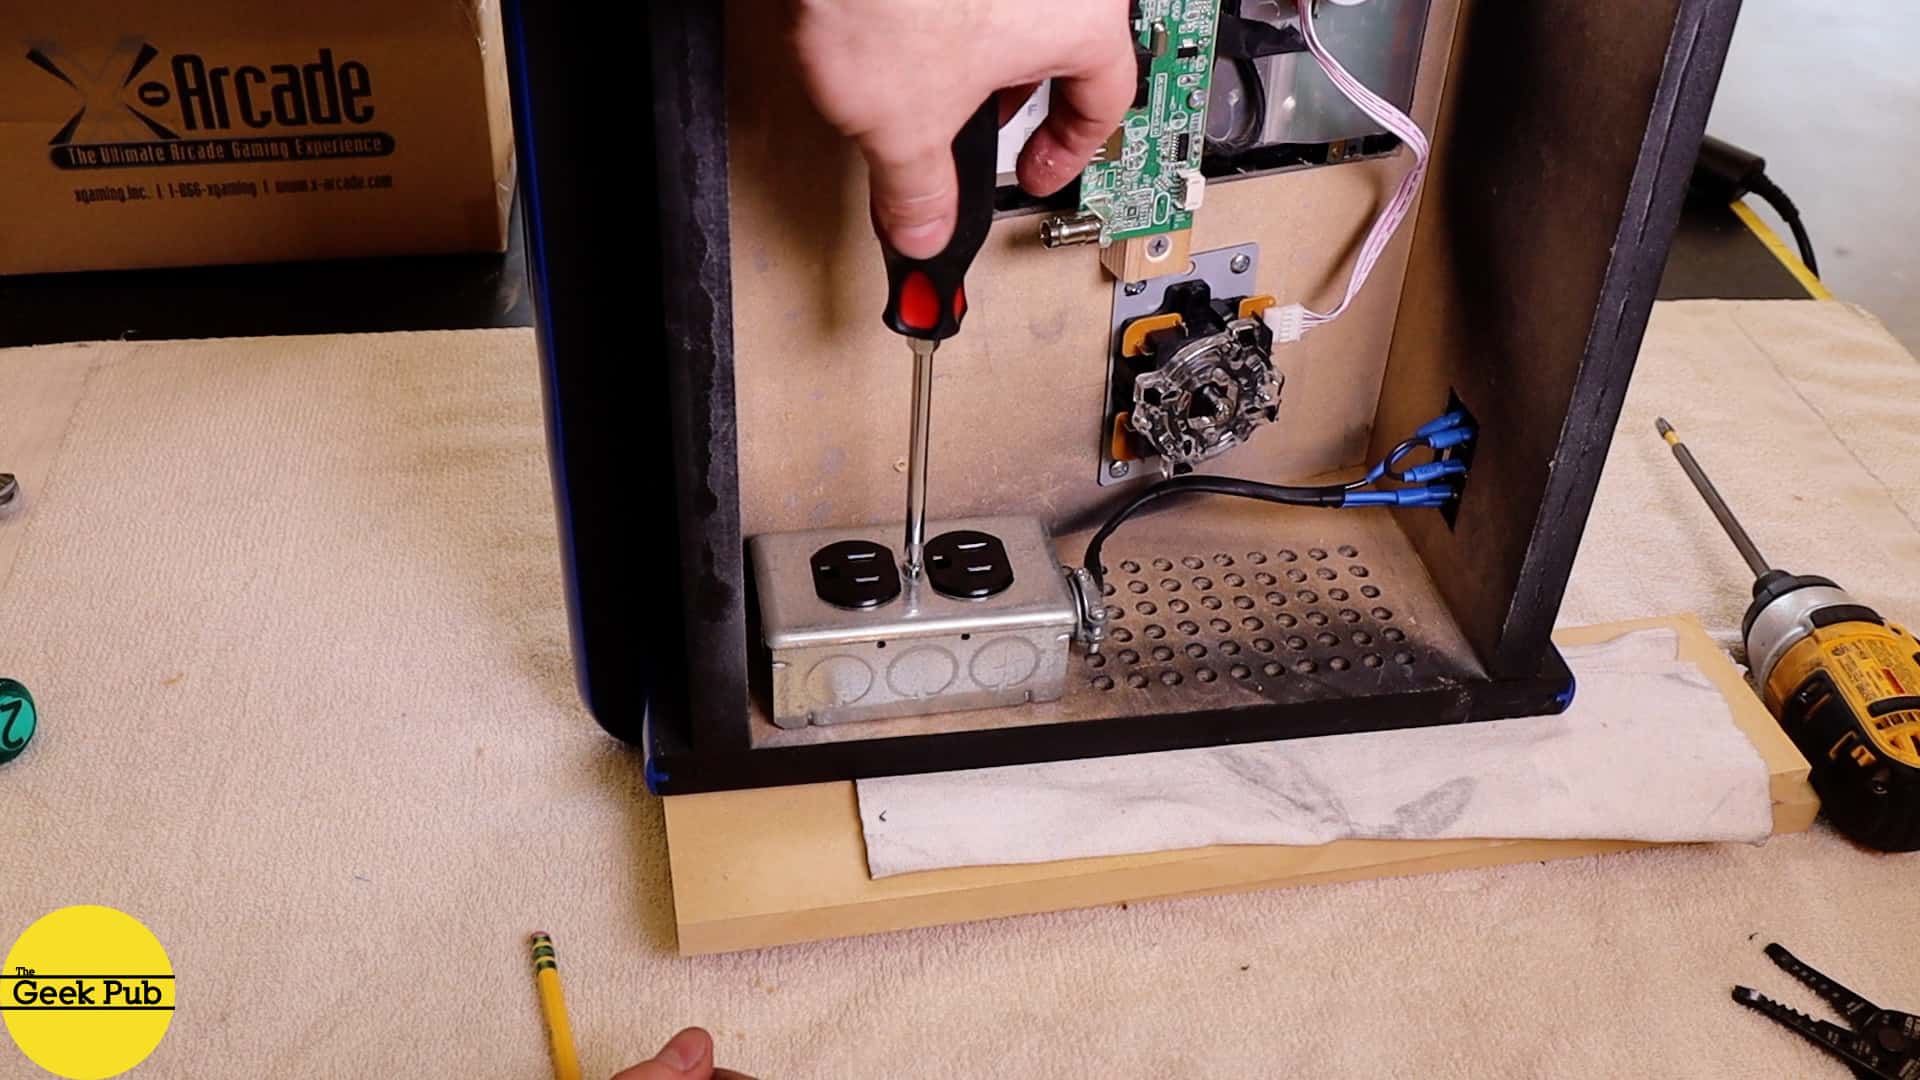
I used this IEC-13 power receptacle that has a switch and fuse. This is going to be my new method going forward for all of my arcades.
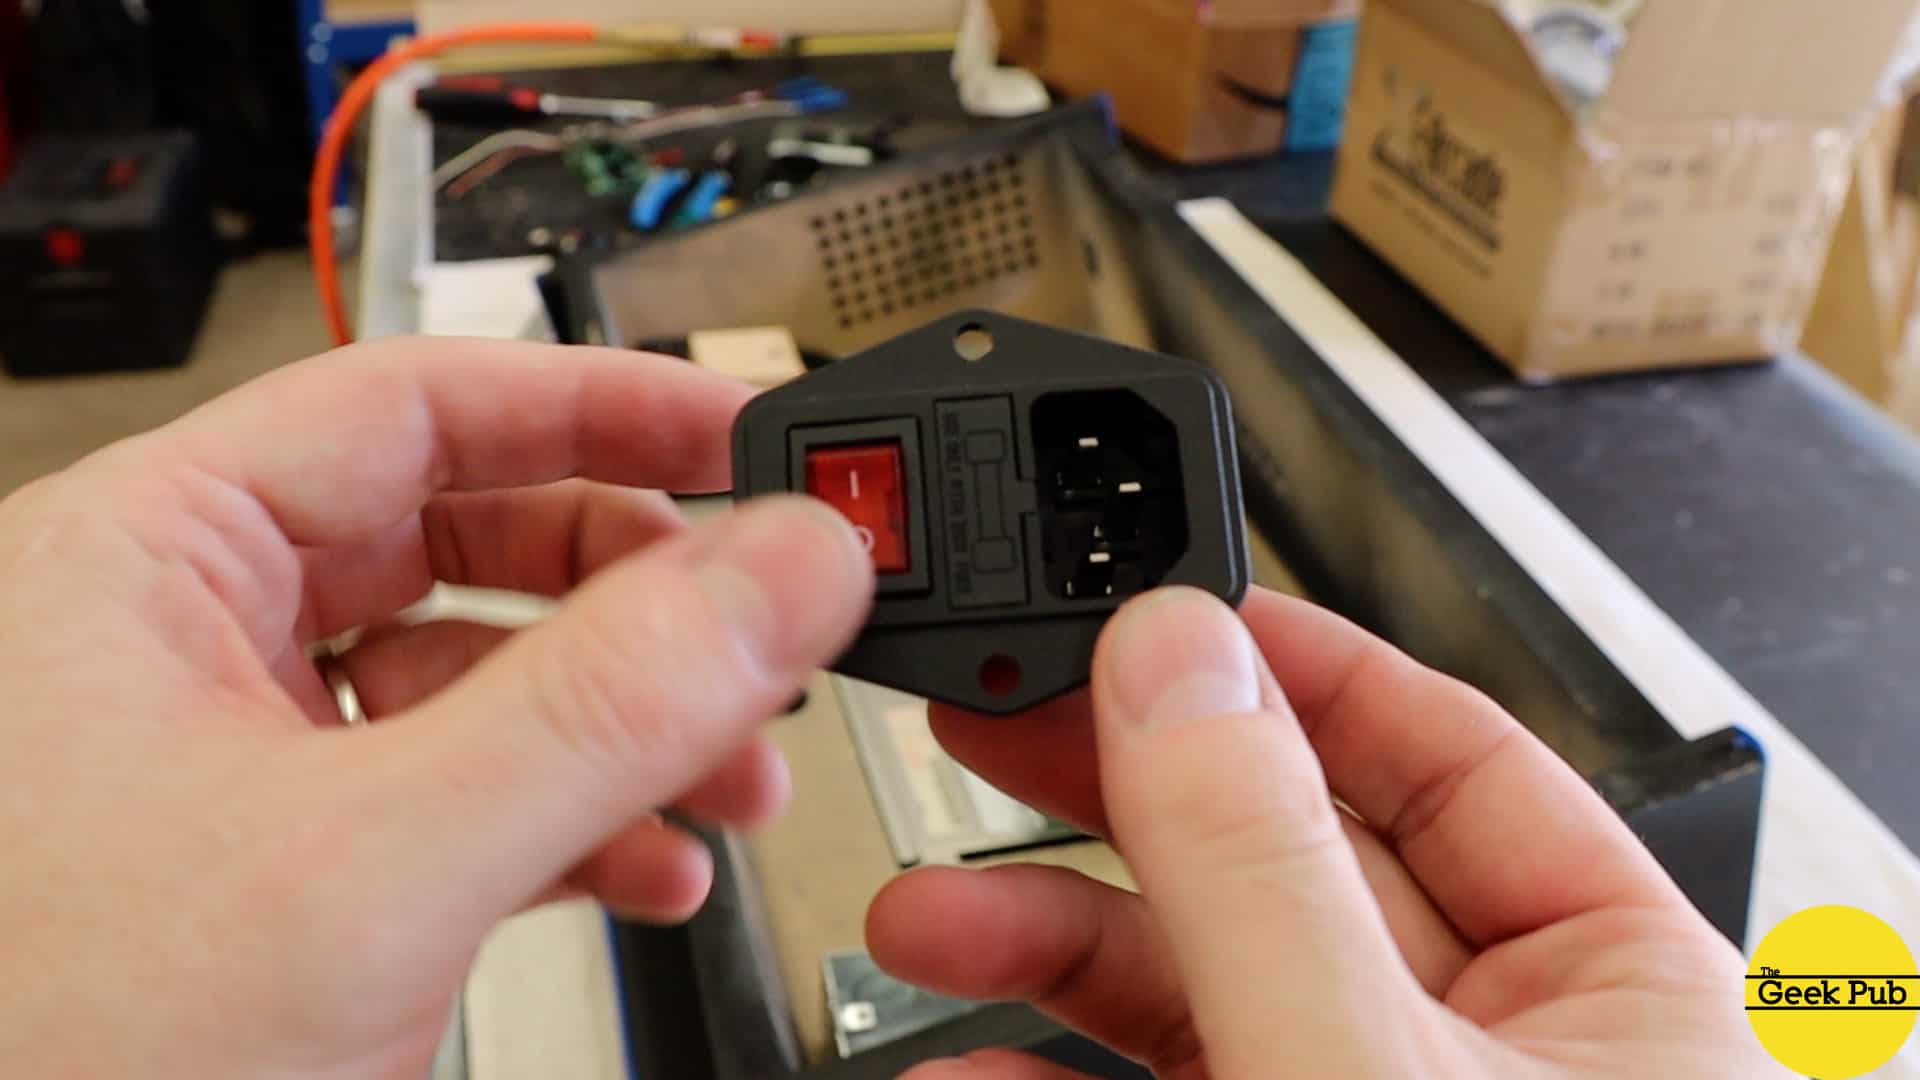
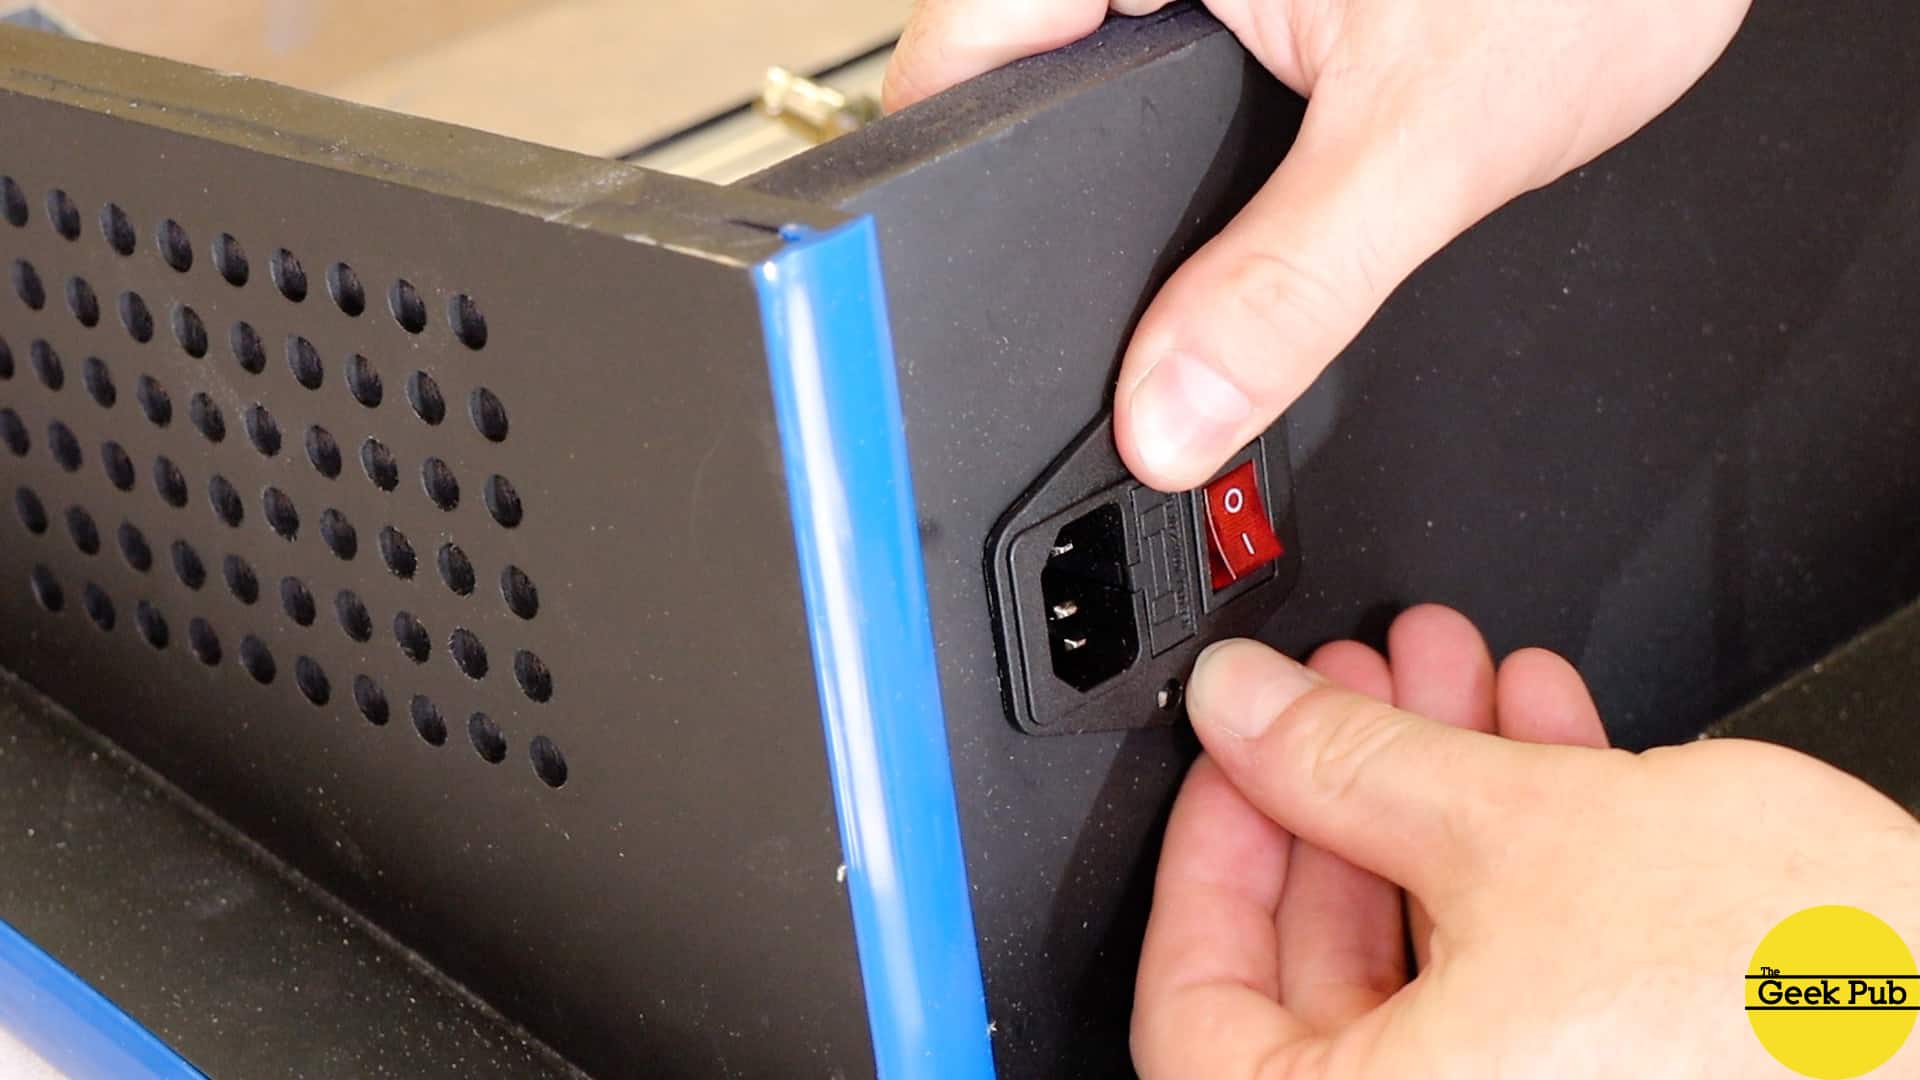
I wired the IEC-13 power connector to a single-gang box. Be sure the ground wire is connected to this box as well as the outlet!
Next to the power outlet is the perfect spot to place the Raspberry Pi 3 B+! Again, I used some small plastic stand-offs to lift the board off the wood and give it plenty of clearance.
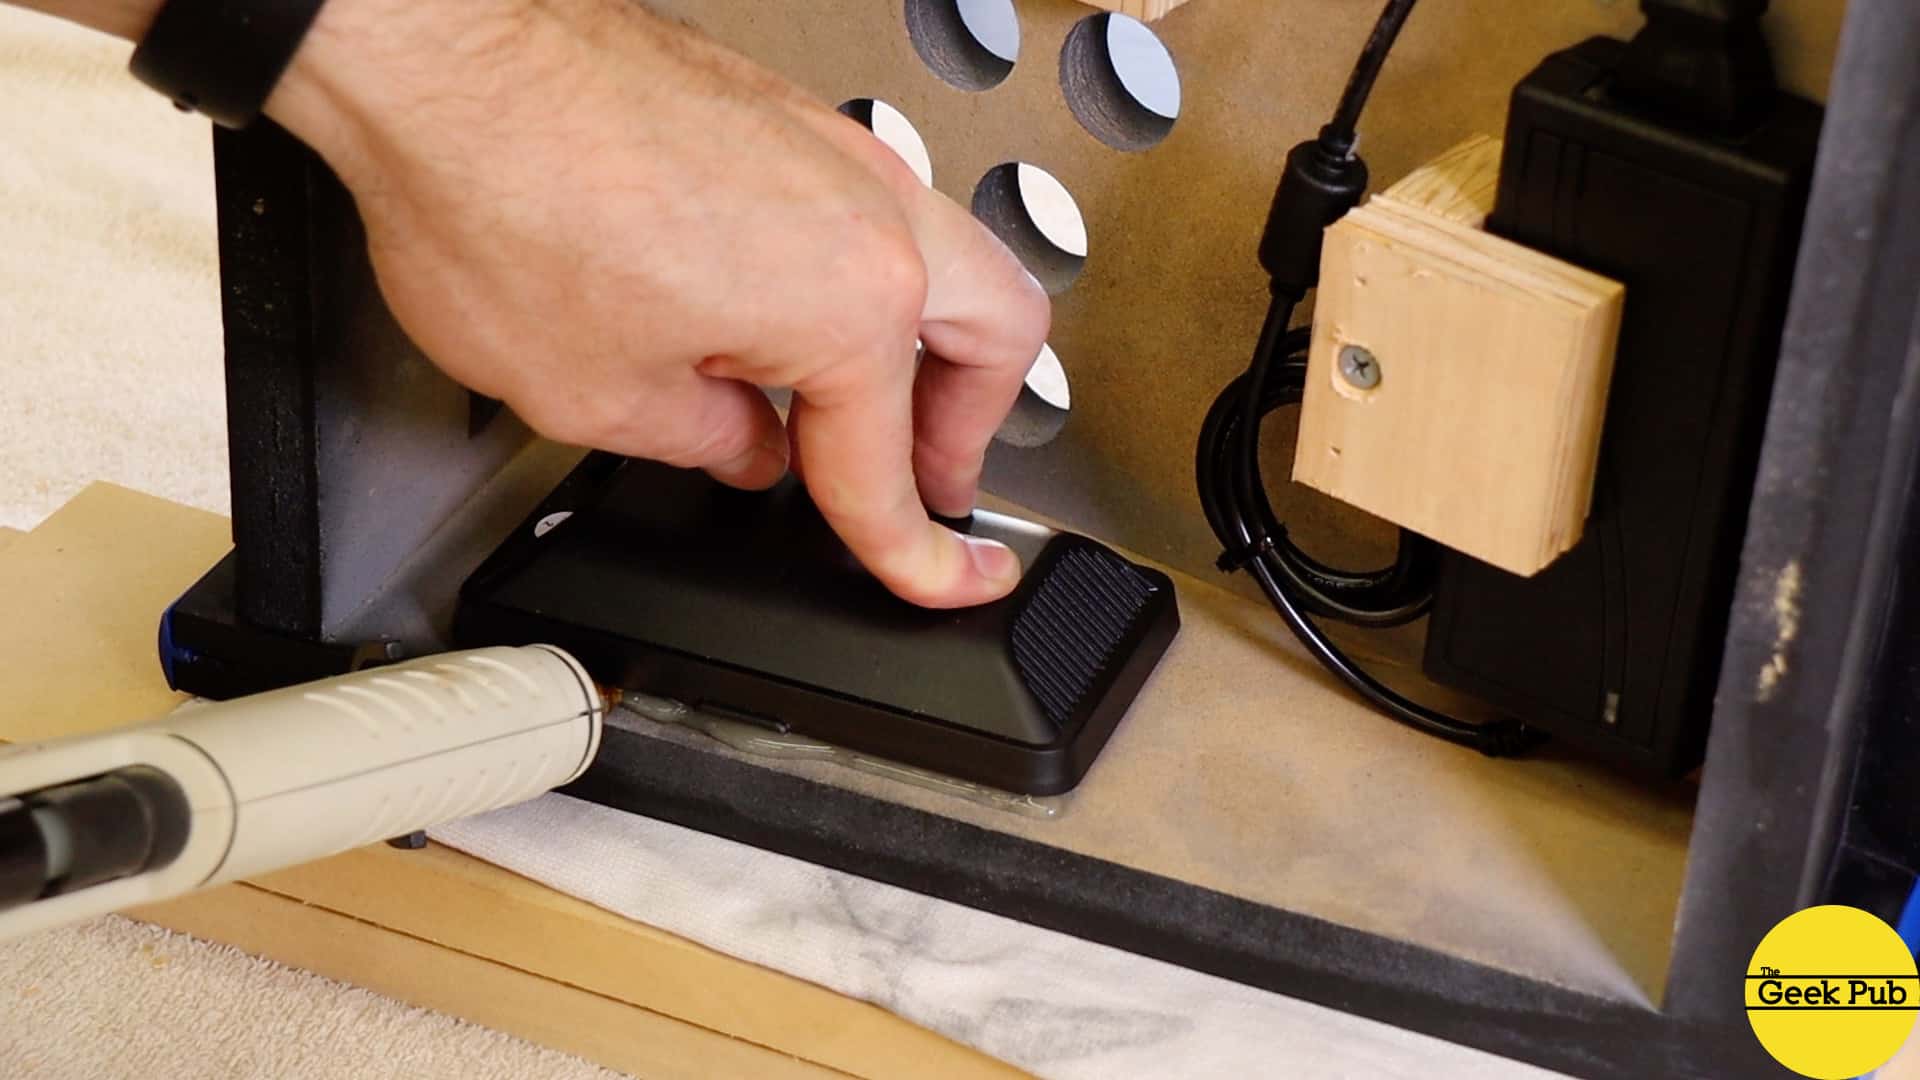
I use these awesome little USB powered speakers in most of my arcade builds. They rock because they sound pretty good and they are powered via USB. This eliminates the need for amplifiers or additional wiring. Of course, you can certainly install better speakers if you like.
There is a powered USB port on the back of the monitor’s control panel. This is the perfect place to get power for our USB speakers!

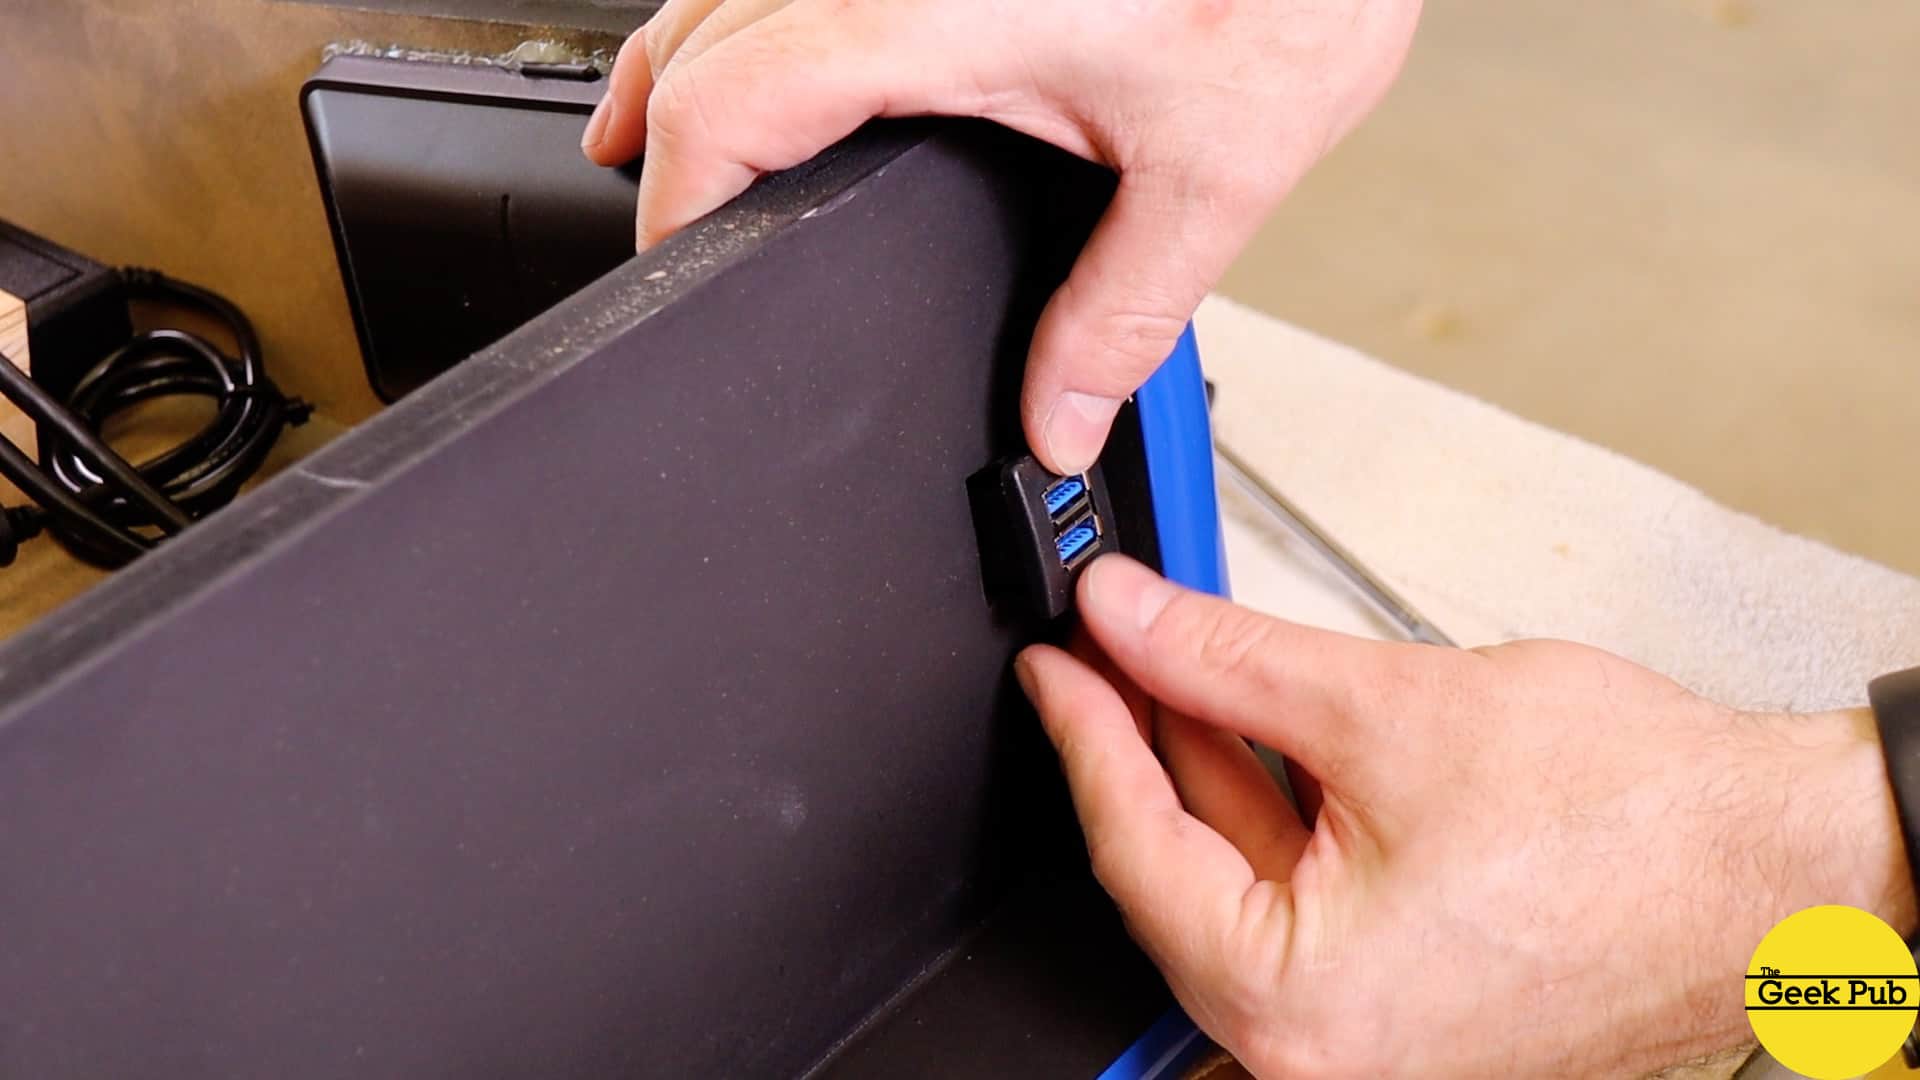
Speaking of USB, one thing I like to do is play console games on my arcade. Having some external USB ports makes this super easy. So I installed these surface mount USB ports on the back of the arcade. Perfect place to plug in my Atari and Nintendo clone controllers.
Installing the Tabletop Arcade Buttons
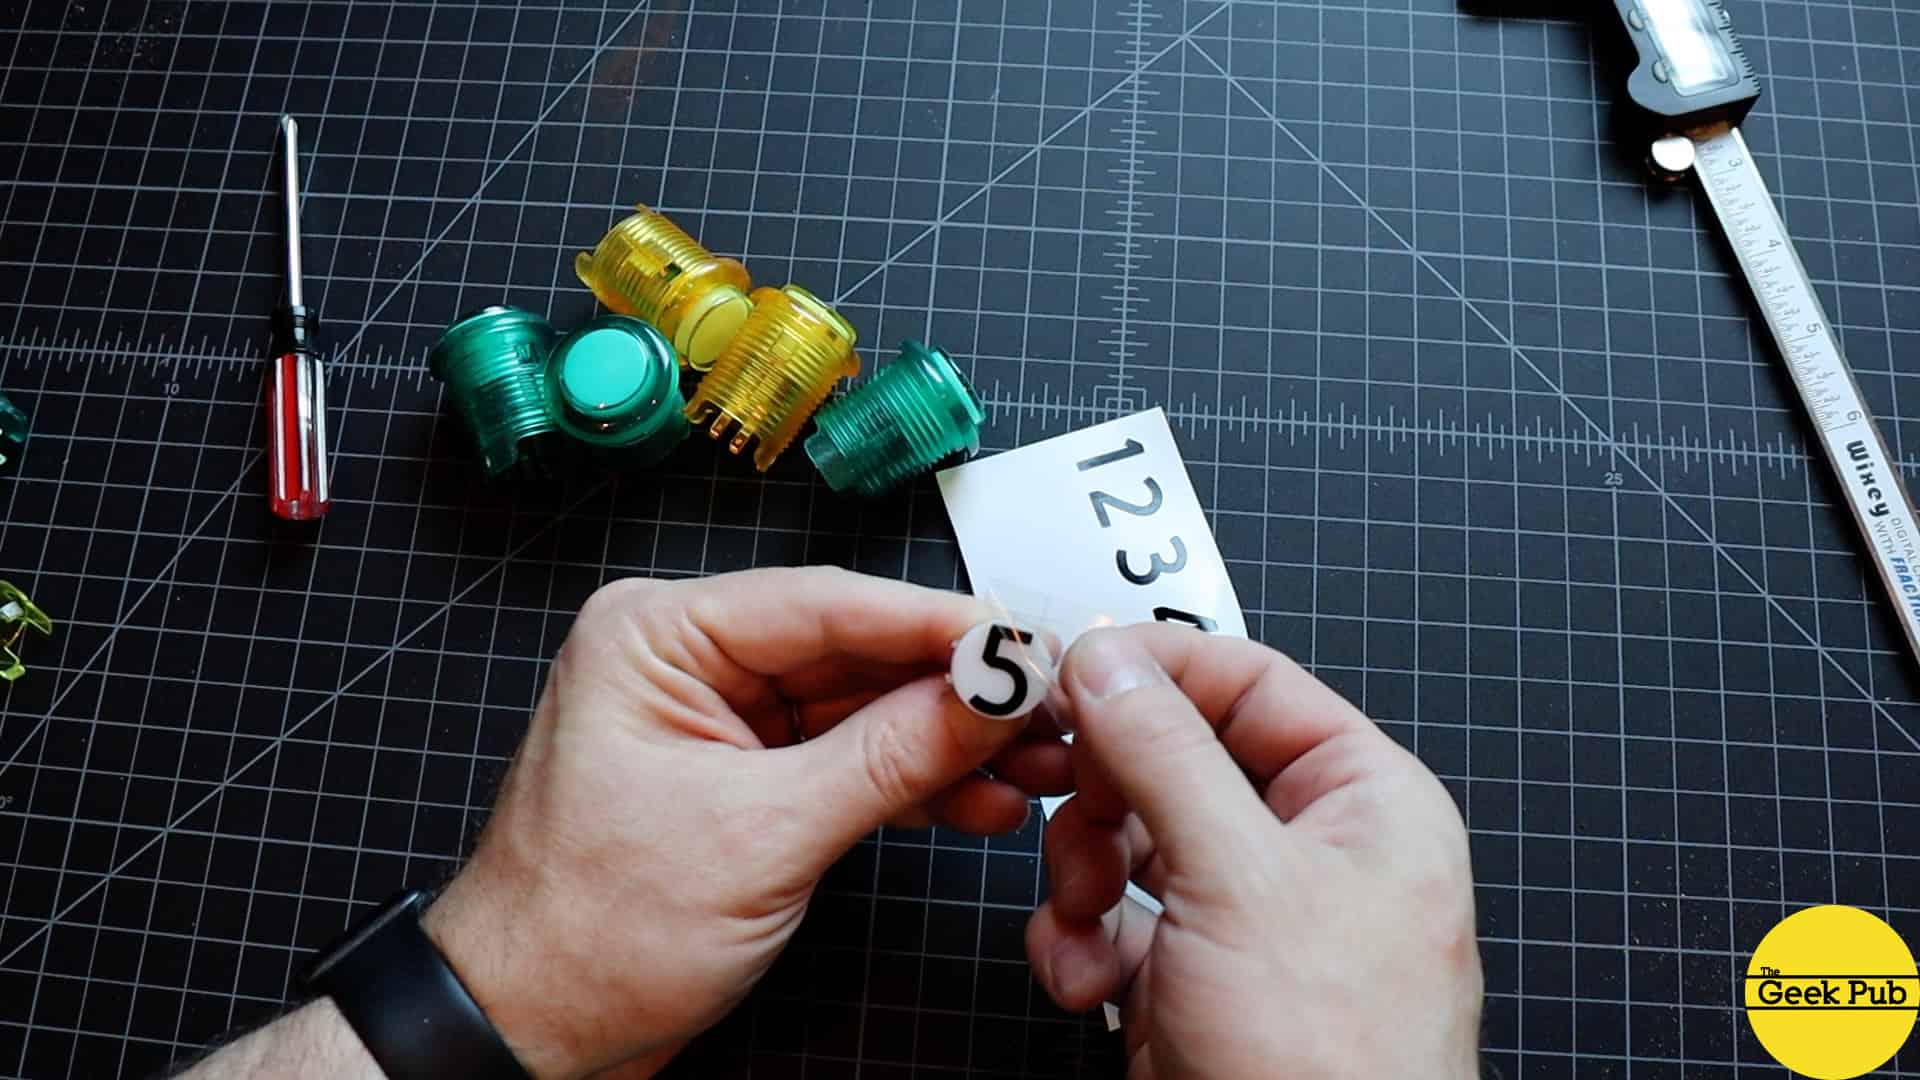
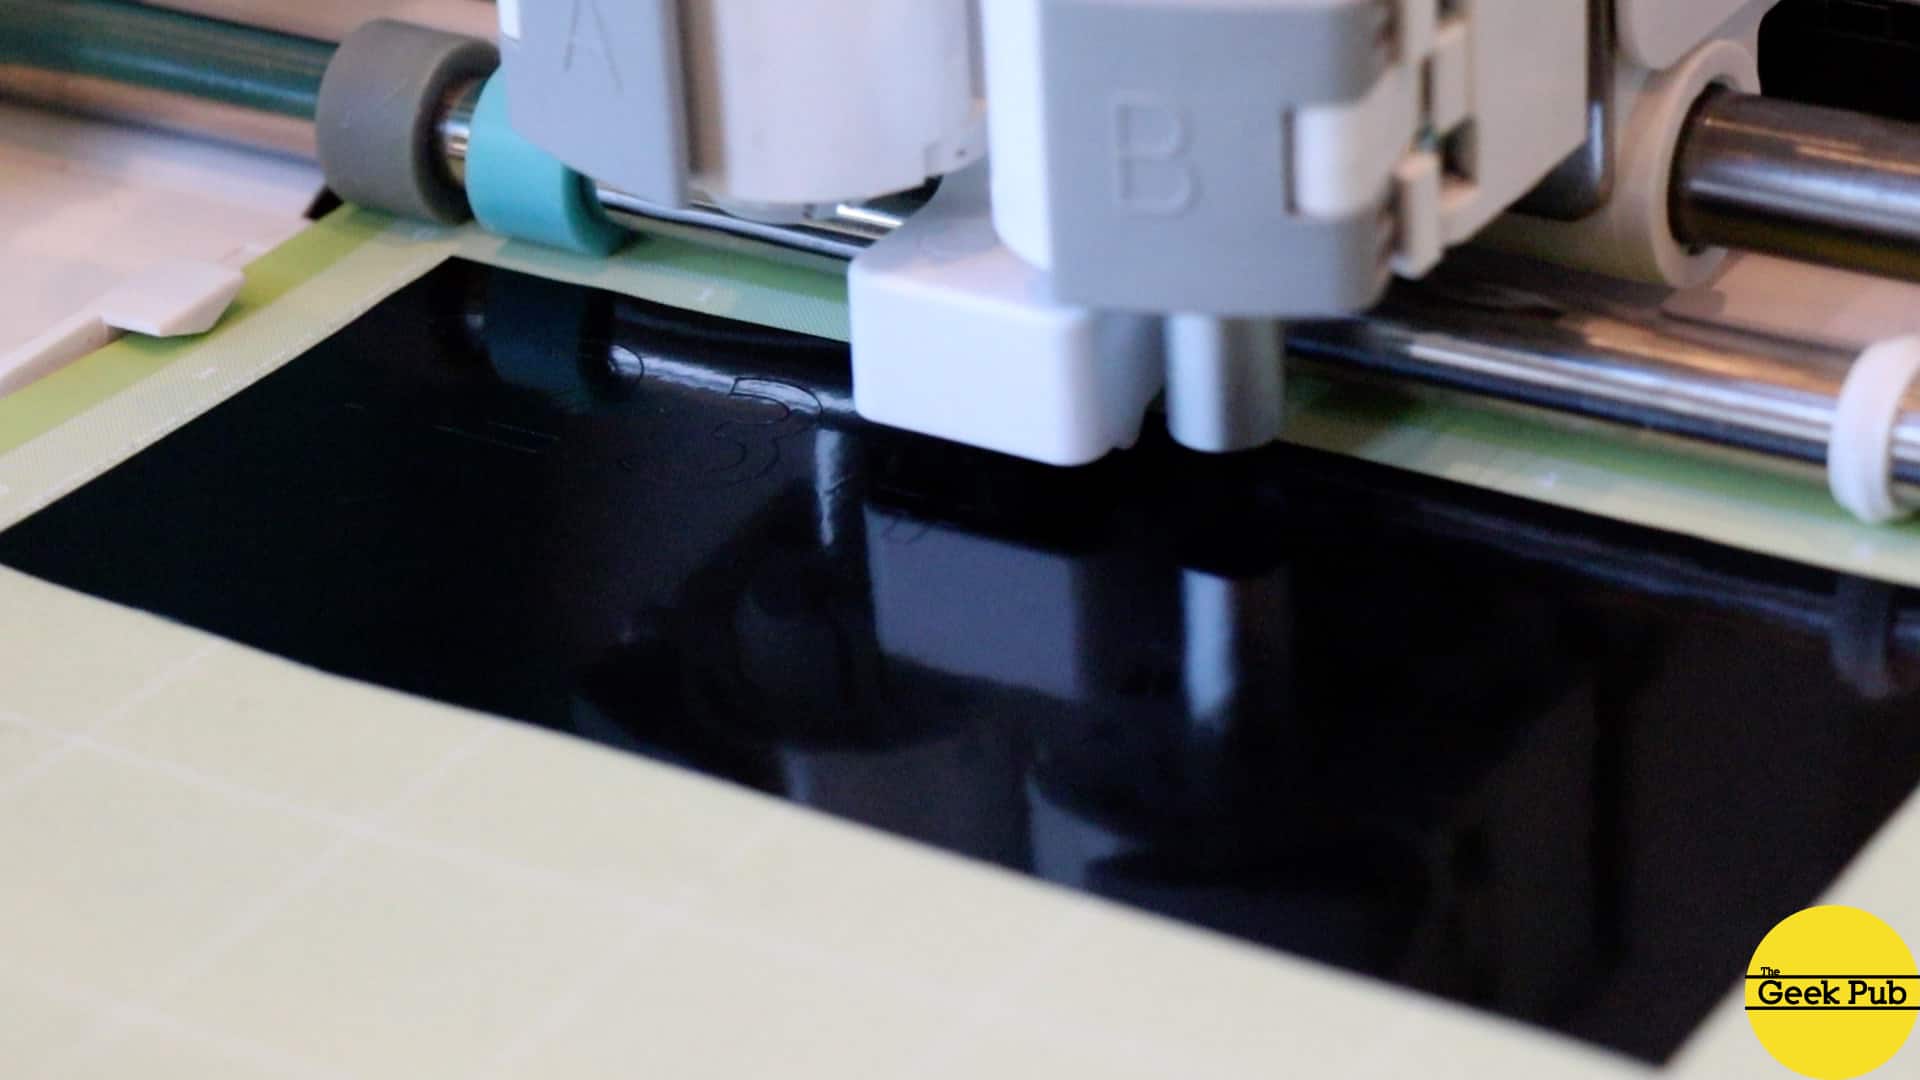
I used my Cricut vinyl cutter to create the numbering and lettering for my arcade buttons. You can make all kinds of cool designs, but I just went with standard numbers, ST, and SE (for Start and Select).
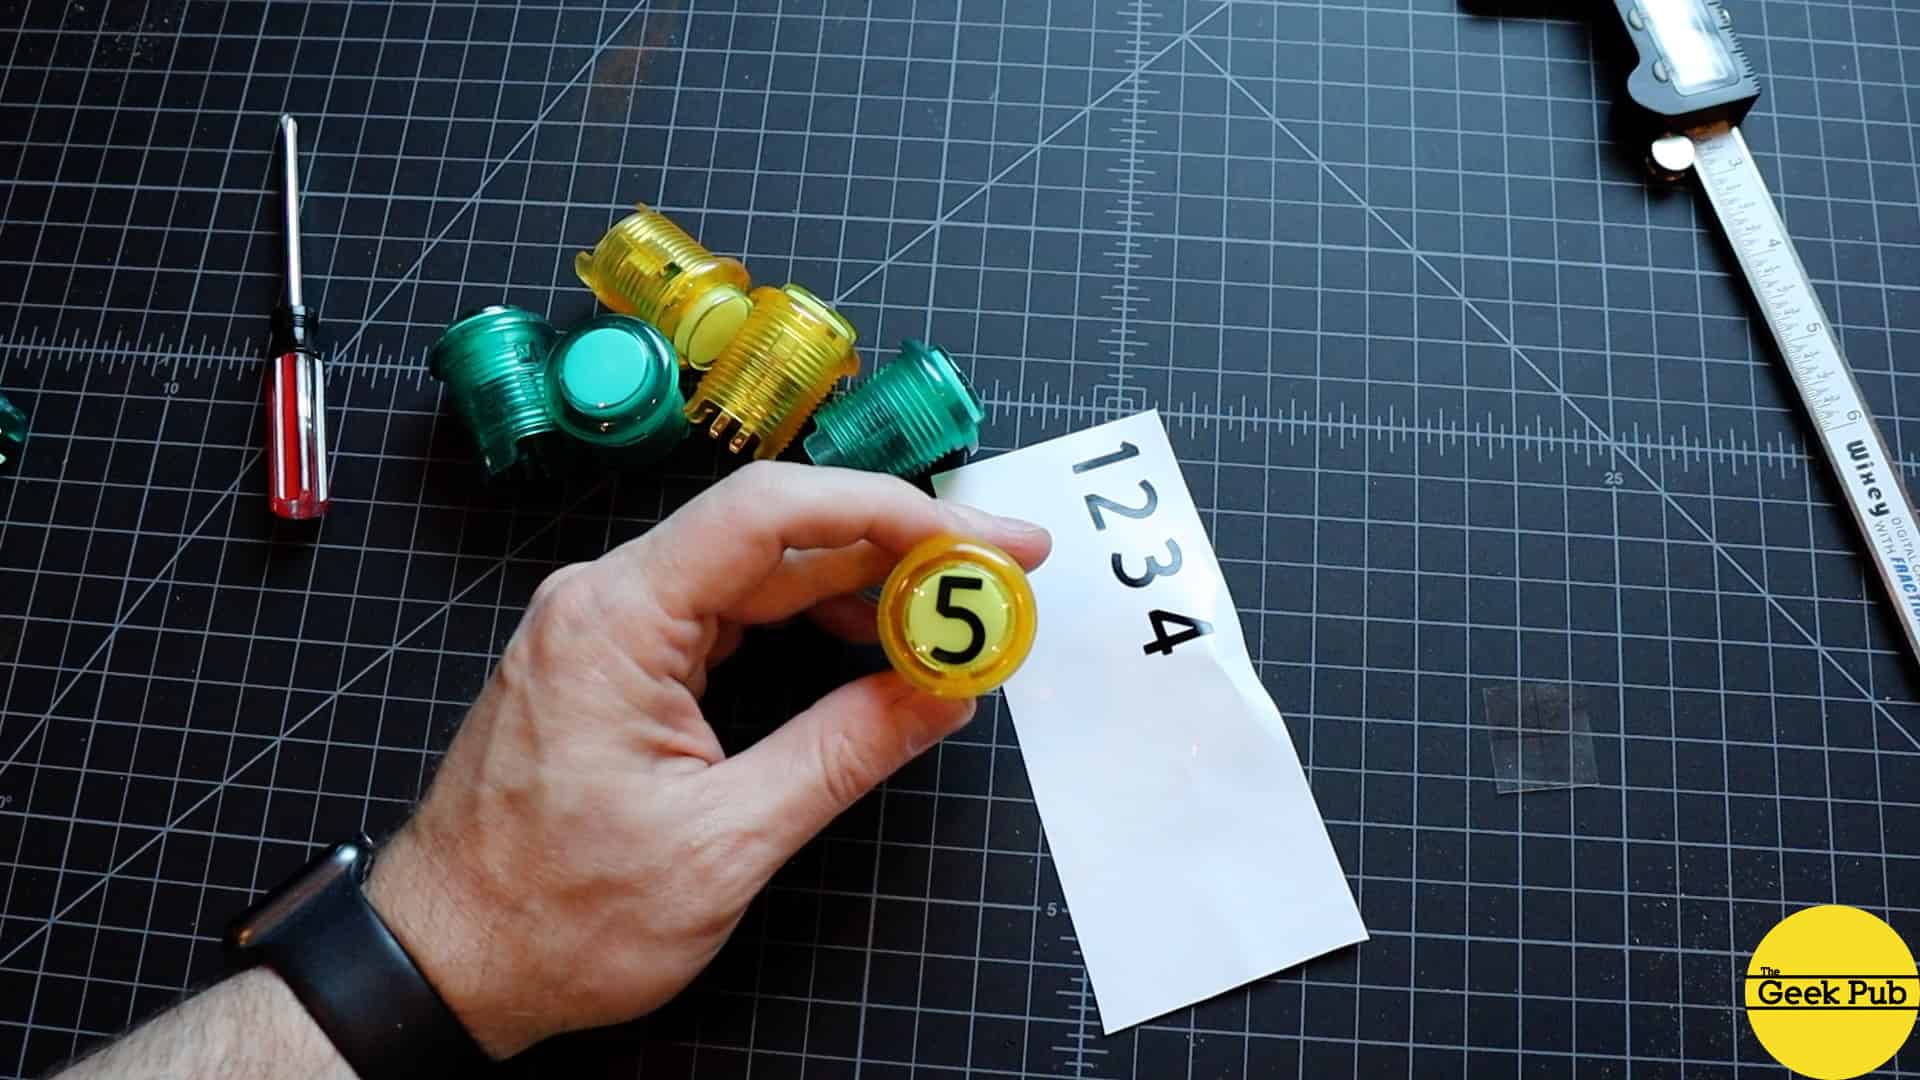
Then I set each button into place on the tabletop arcade to make sure everything looked right.
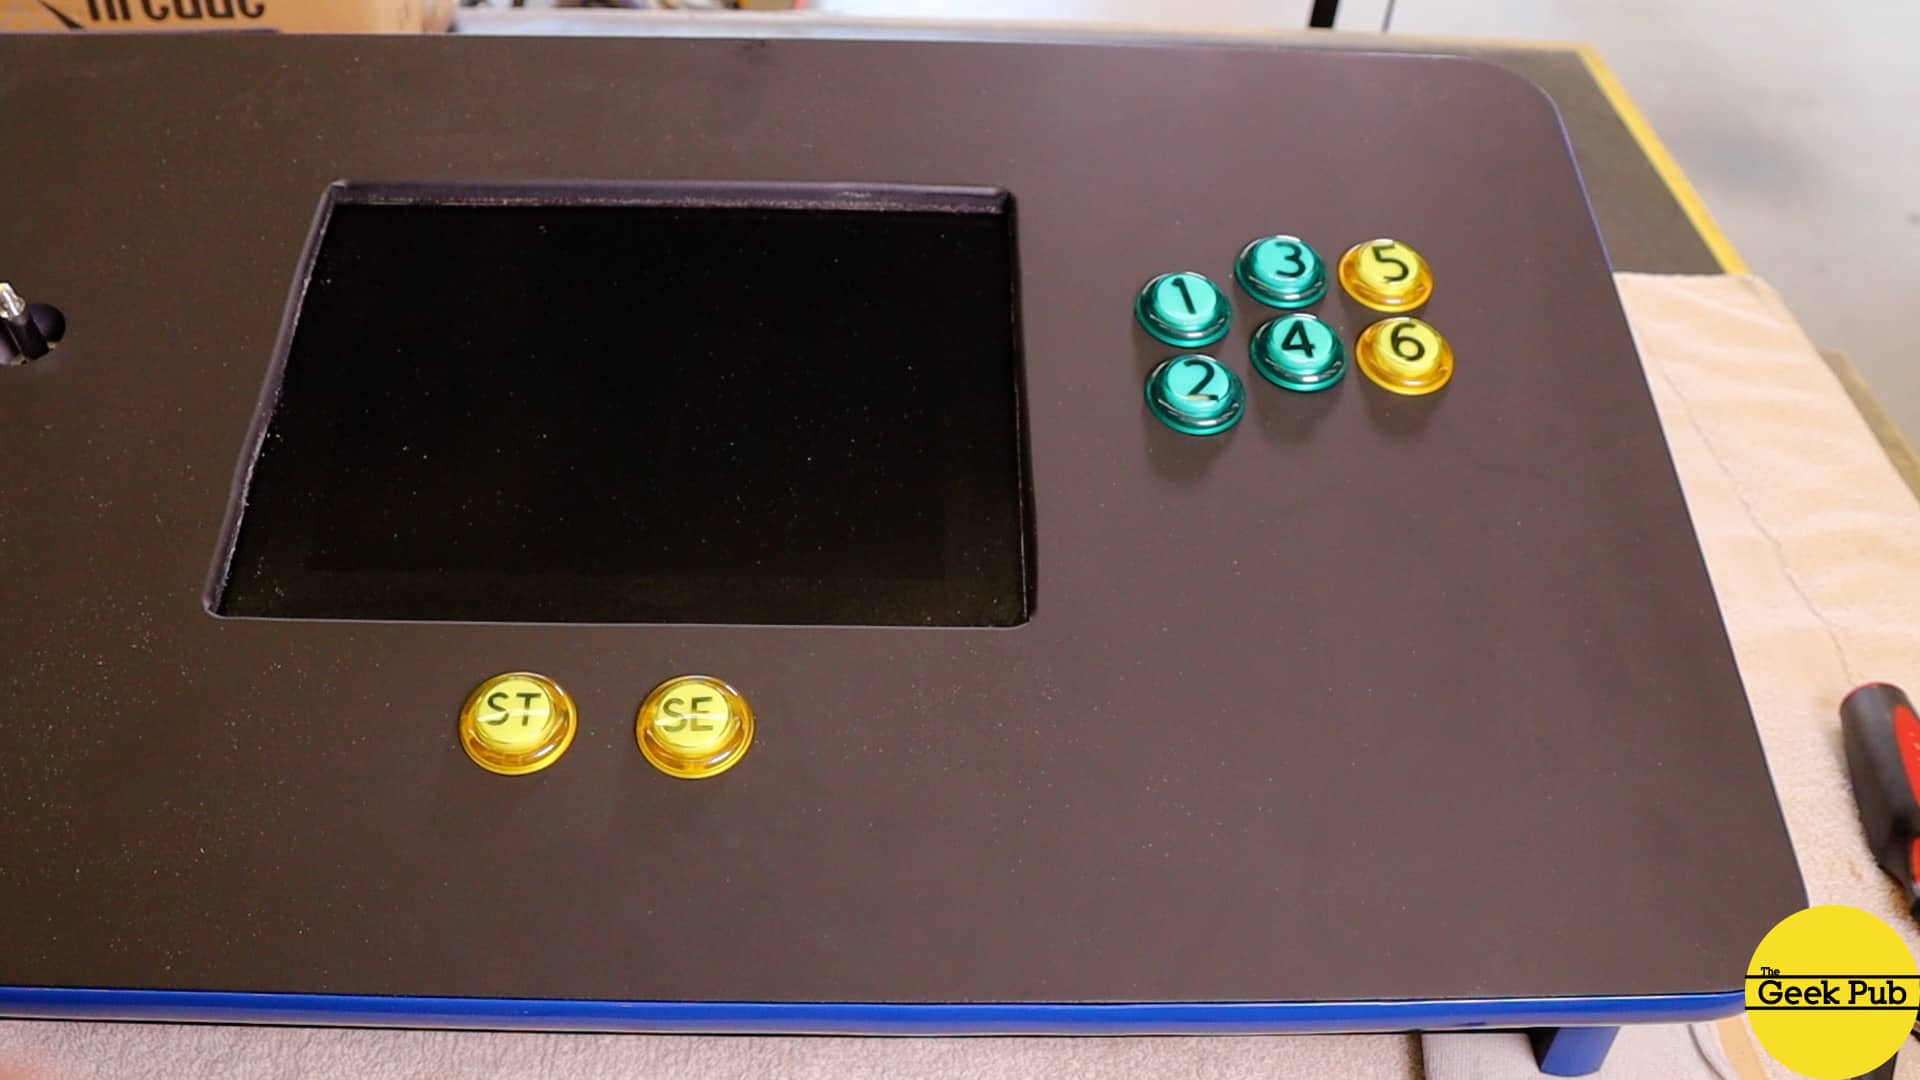
The buttons are secured on the backside of the arcade with plastic nuts. Just tighten them down until they won’t move when smacked around (cause you know they will be smacked!).
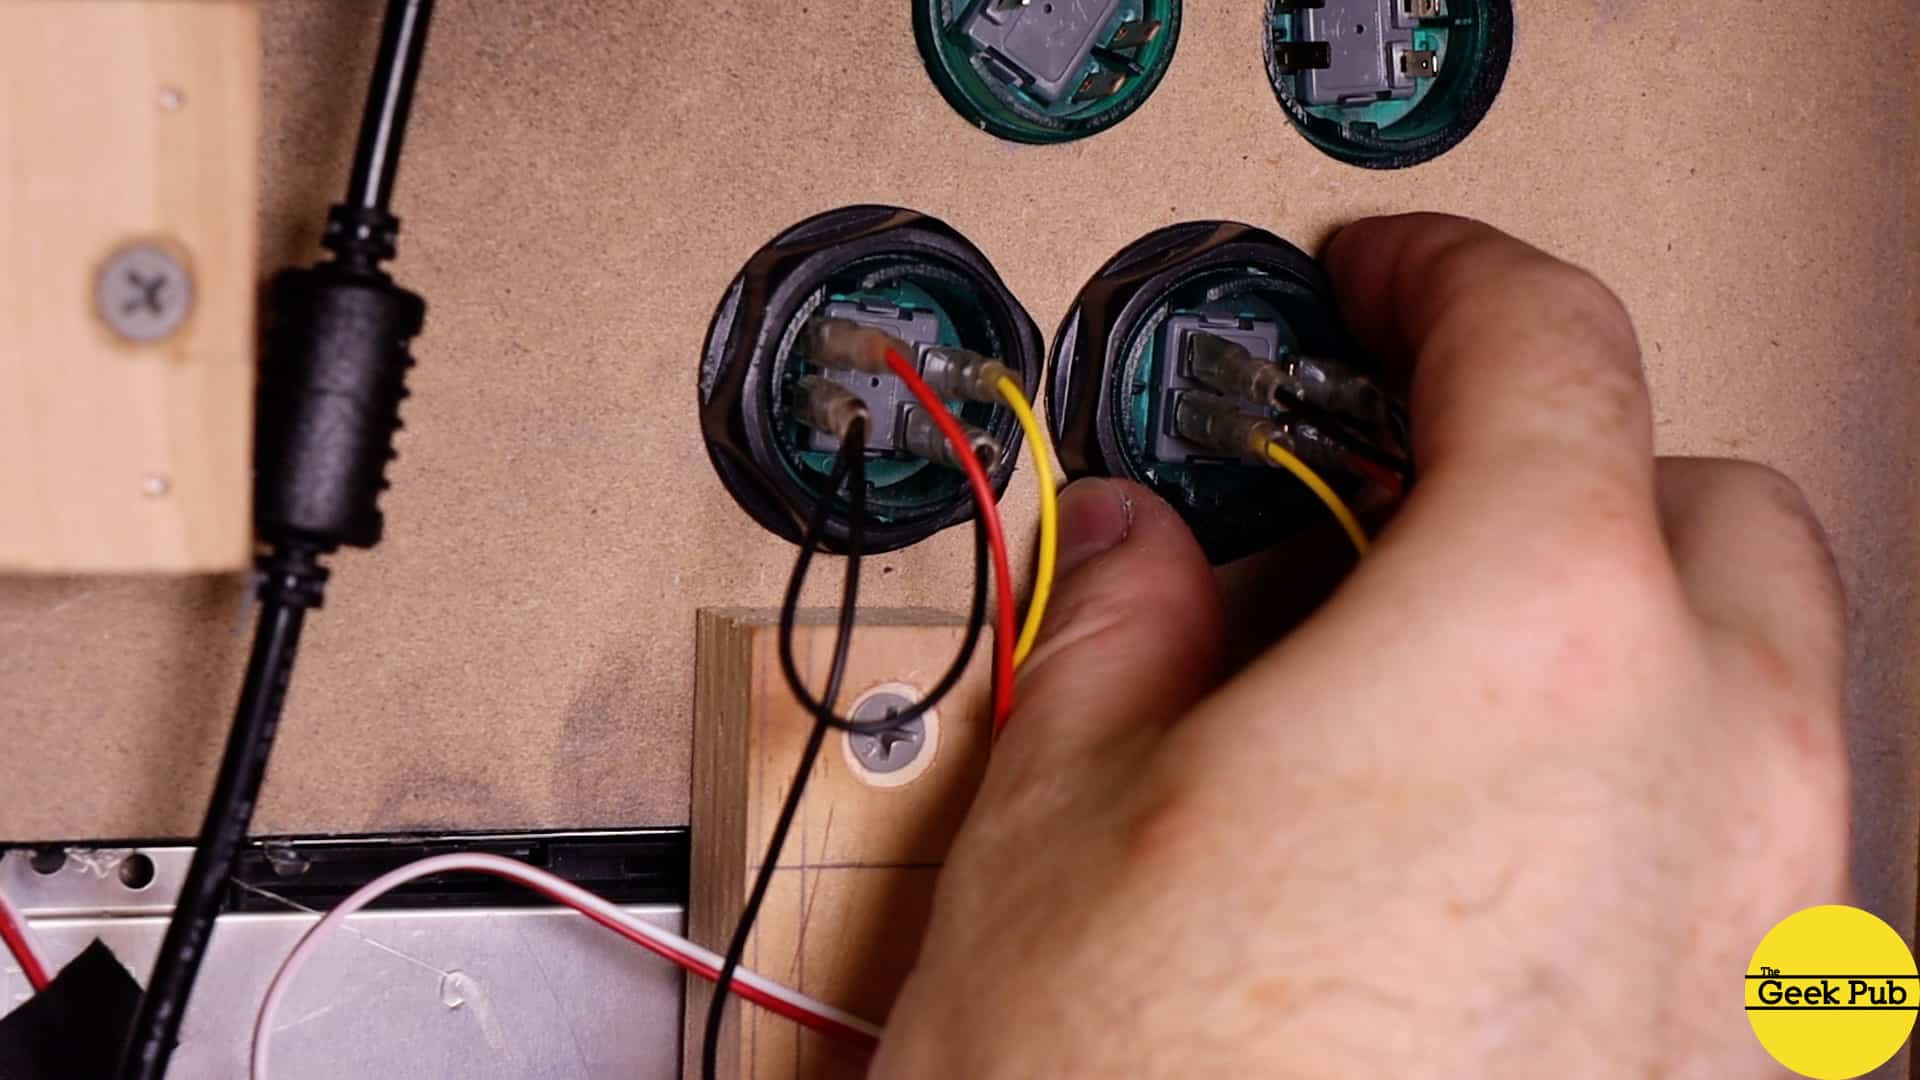
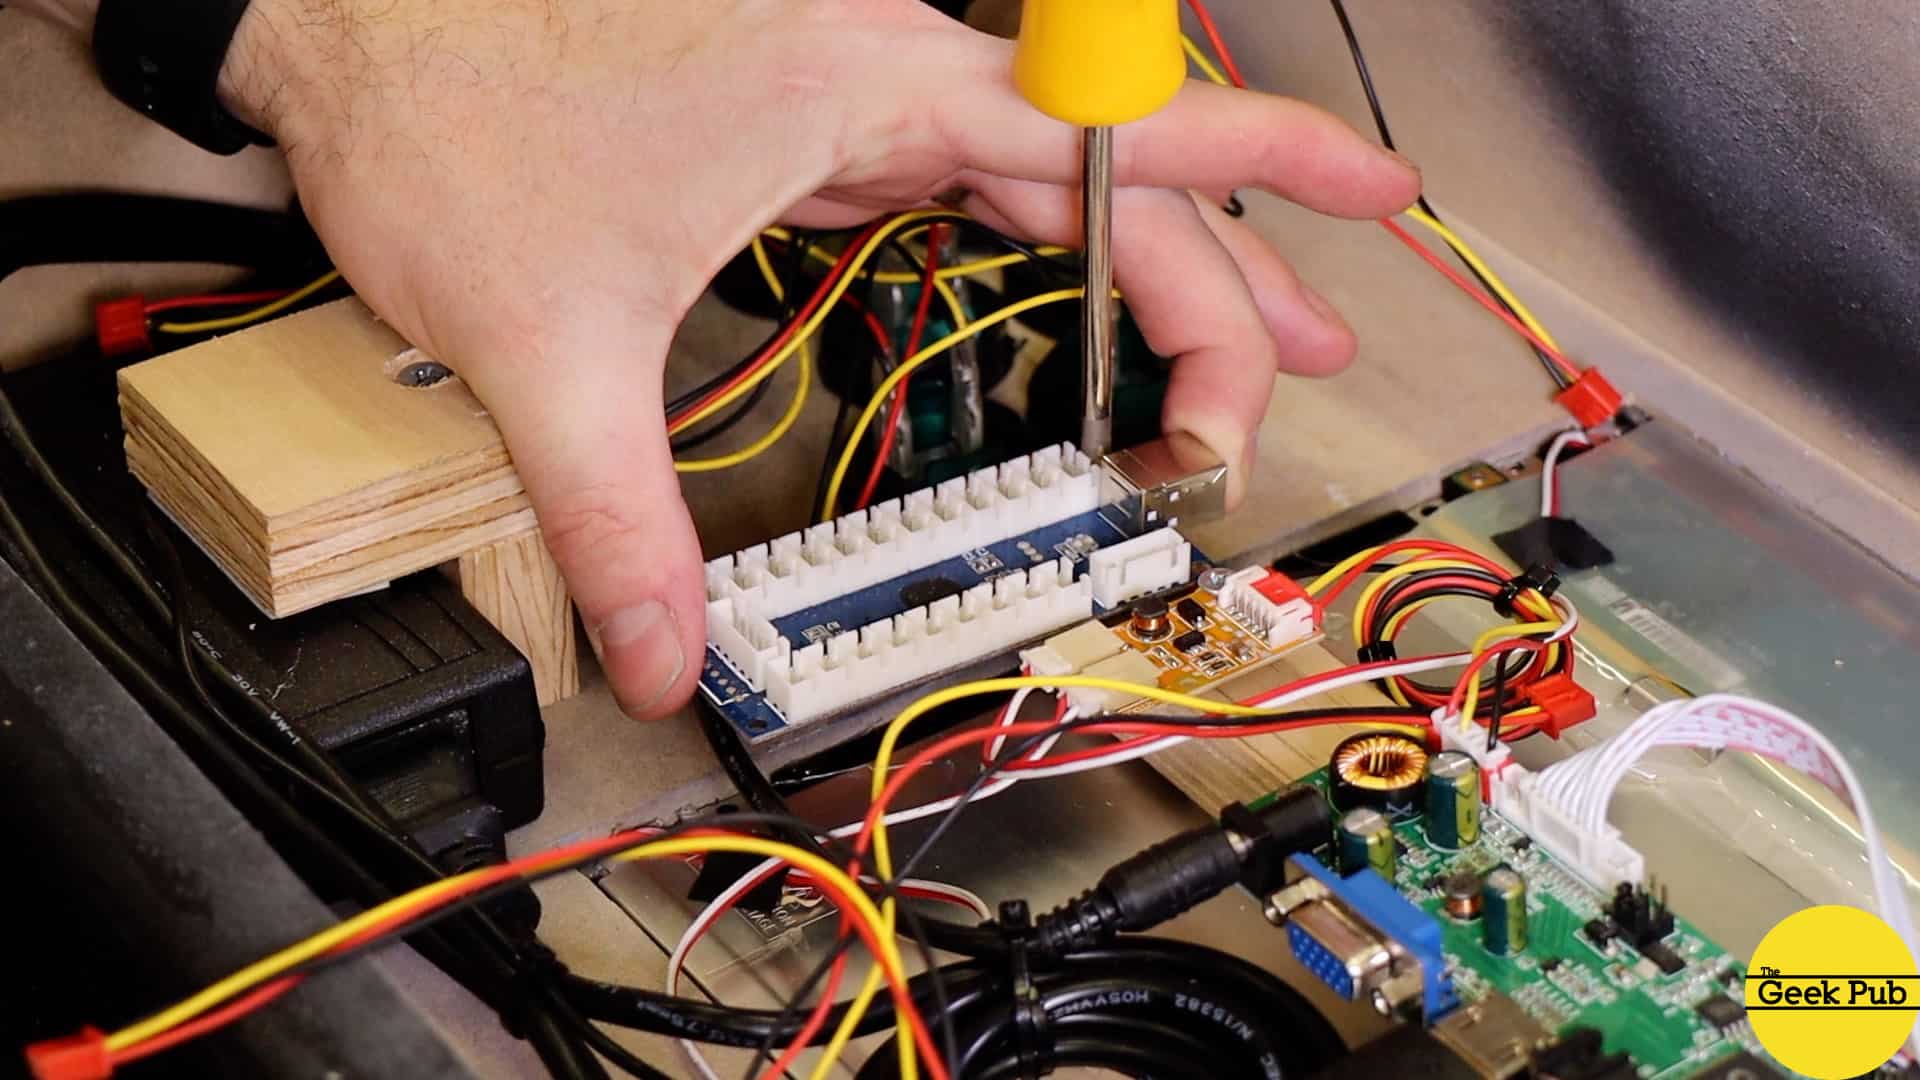
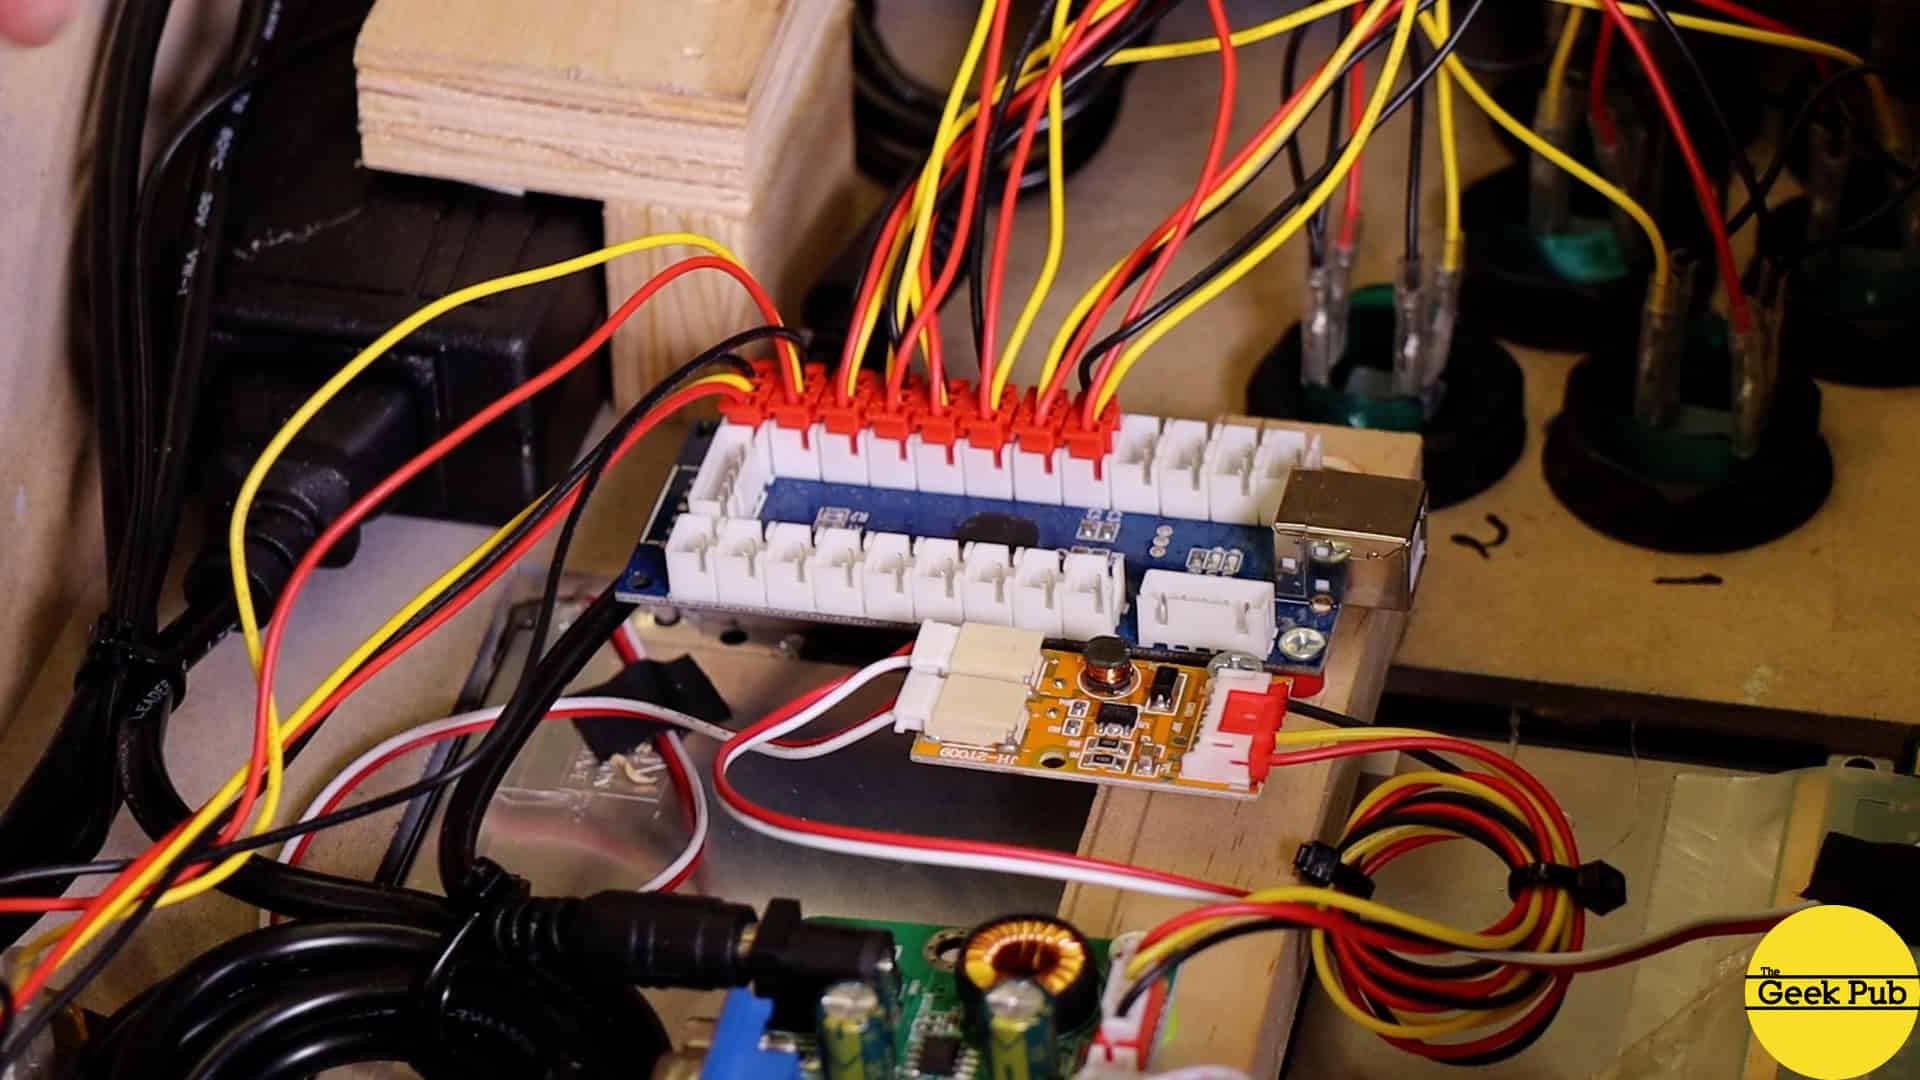
Last up, I connected all of the buttons to the EasyGet controller board. This board just plugs into the Raspberry Pi via USB.
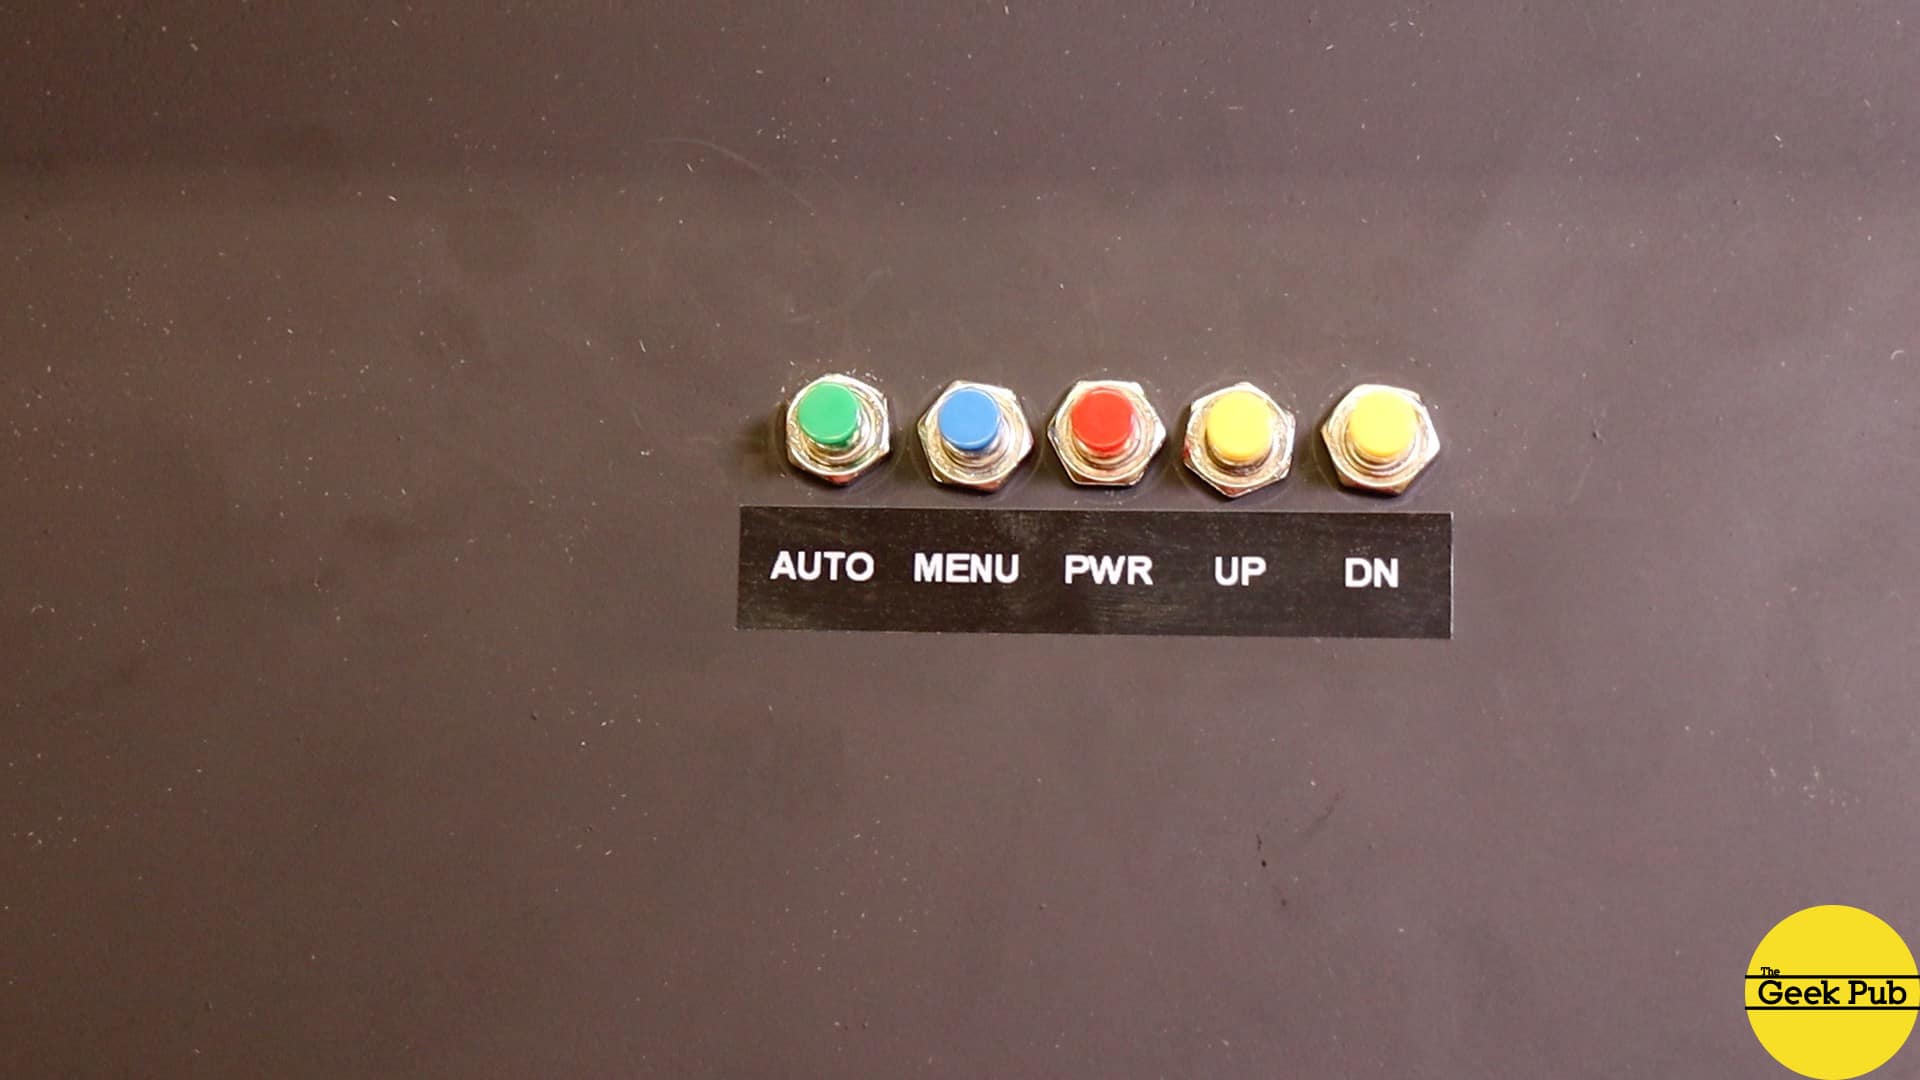
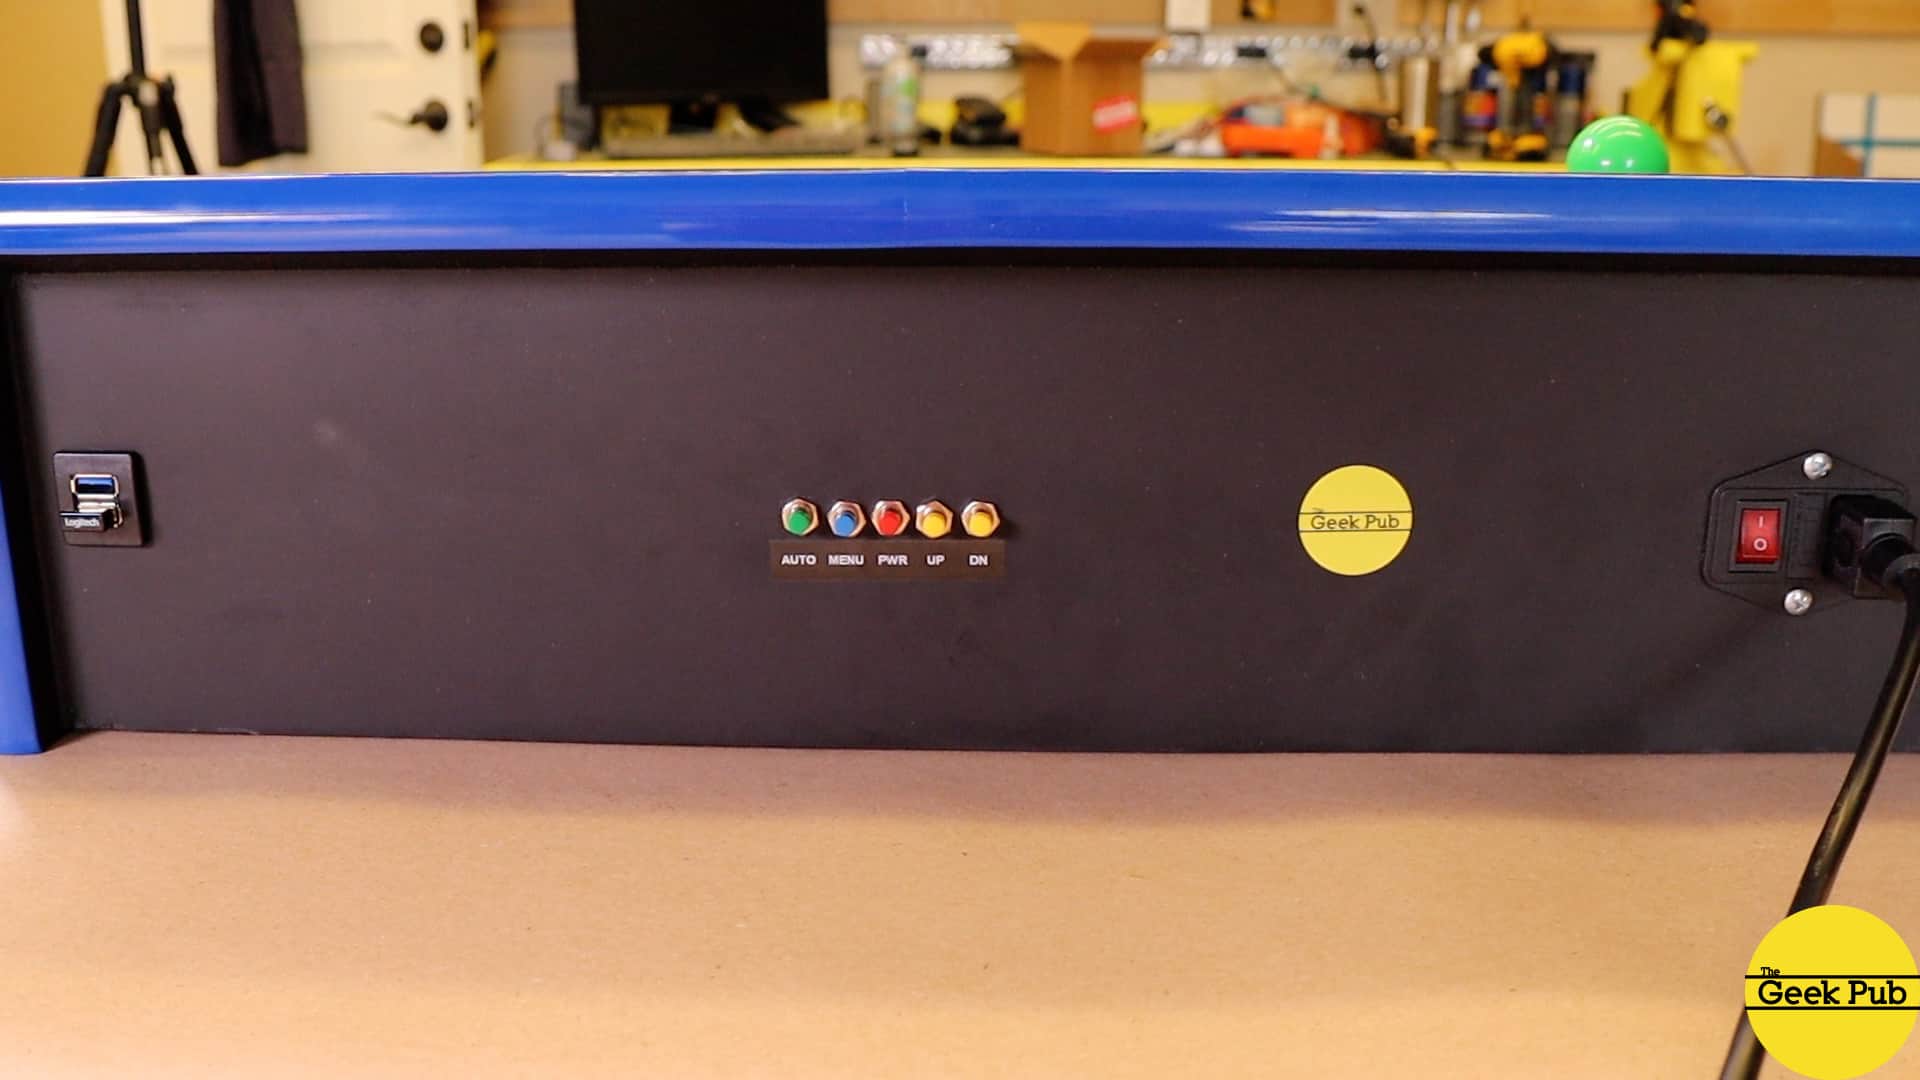
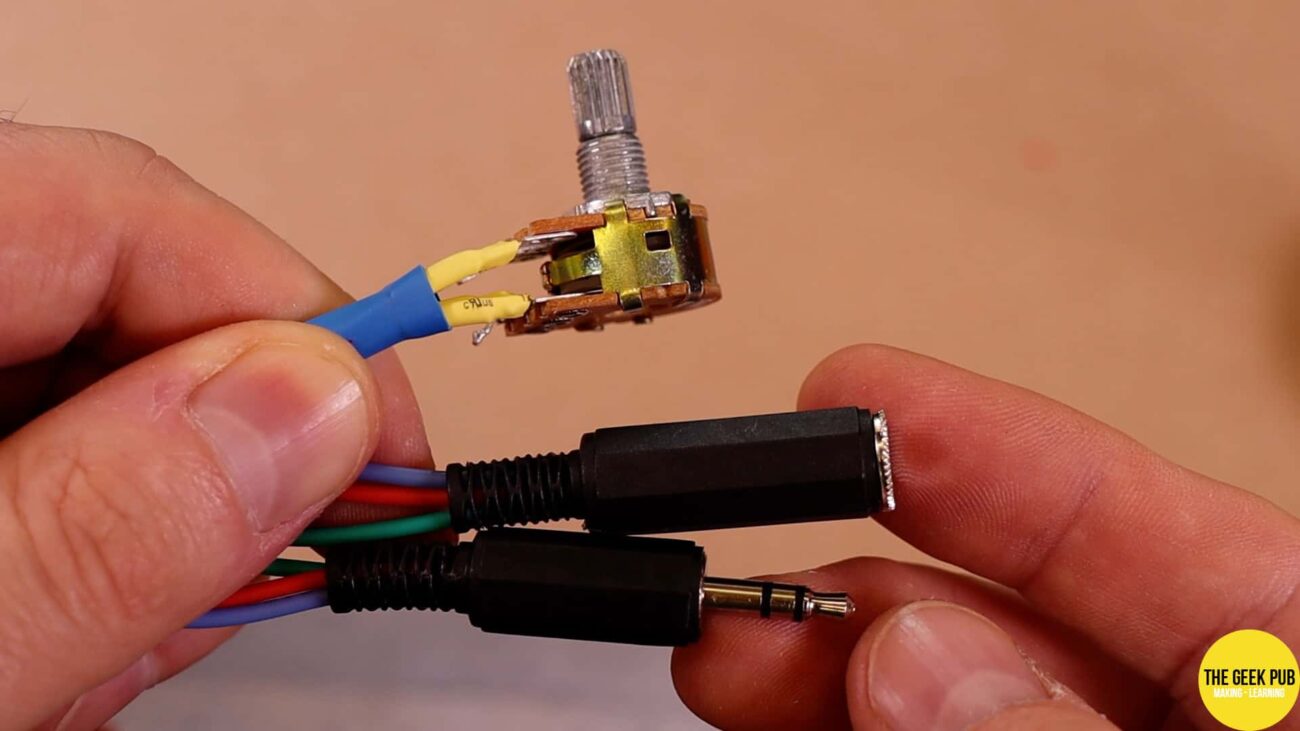
Connecting the LCD Front Panel Buttons
The monitor had 5 front panel buttons on it. These were Auto, Menu, Power, Up, and Down. They are what allow you to configure the monitor, change its inputs, and reset it if something goes wrong. I wanted to keep these, but I didn’t want to have to turn the arcade upside down in order to do it.
To make it easy, I added 5 new push buttons on the back of the tabletop arcade cabinet. These are just pin for pin soldered to the original control panel’s circuit board. This brings all of monitor controls to life on the back of the arcade!

[button link=”https://www.thegeekpub.com/product/tabletop-arcade-cabinet-plans/” color=”green” newwindow=”yes”] Get the Tabletop Arcade Plans HERE[/button]
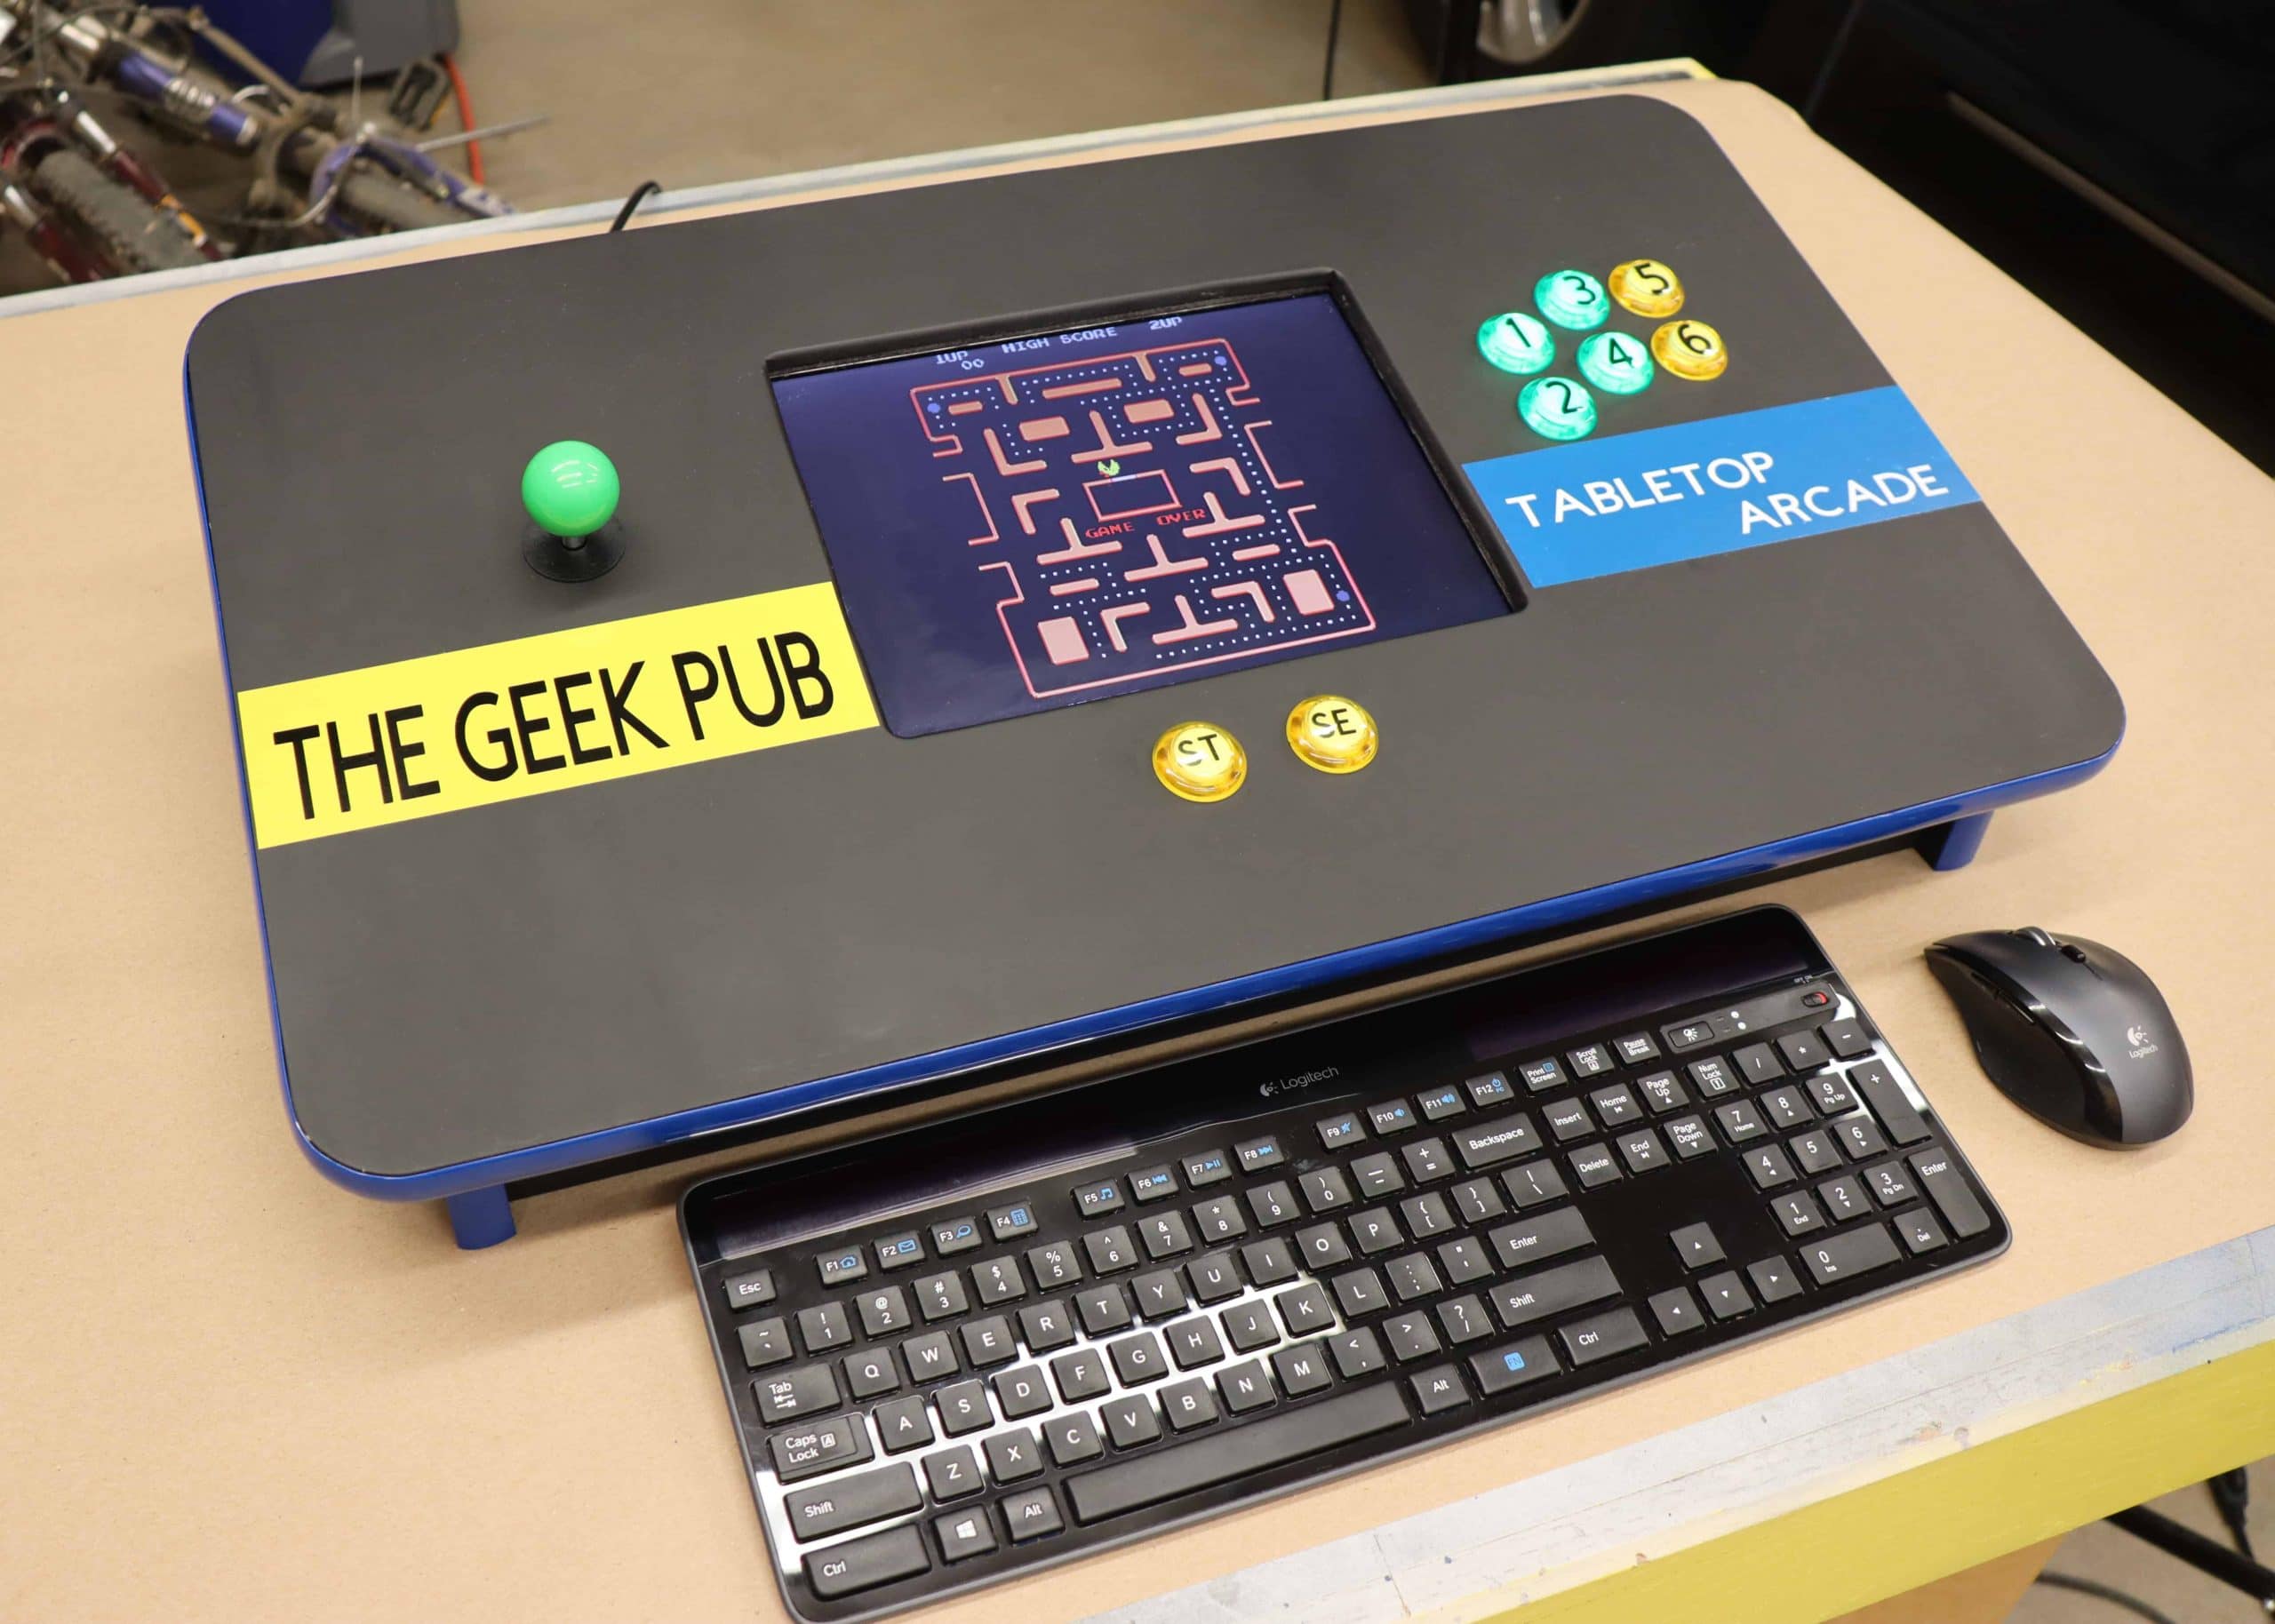
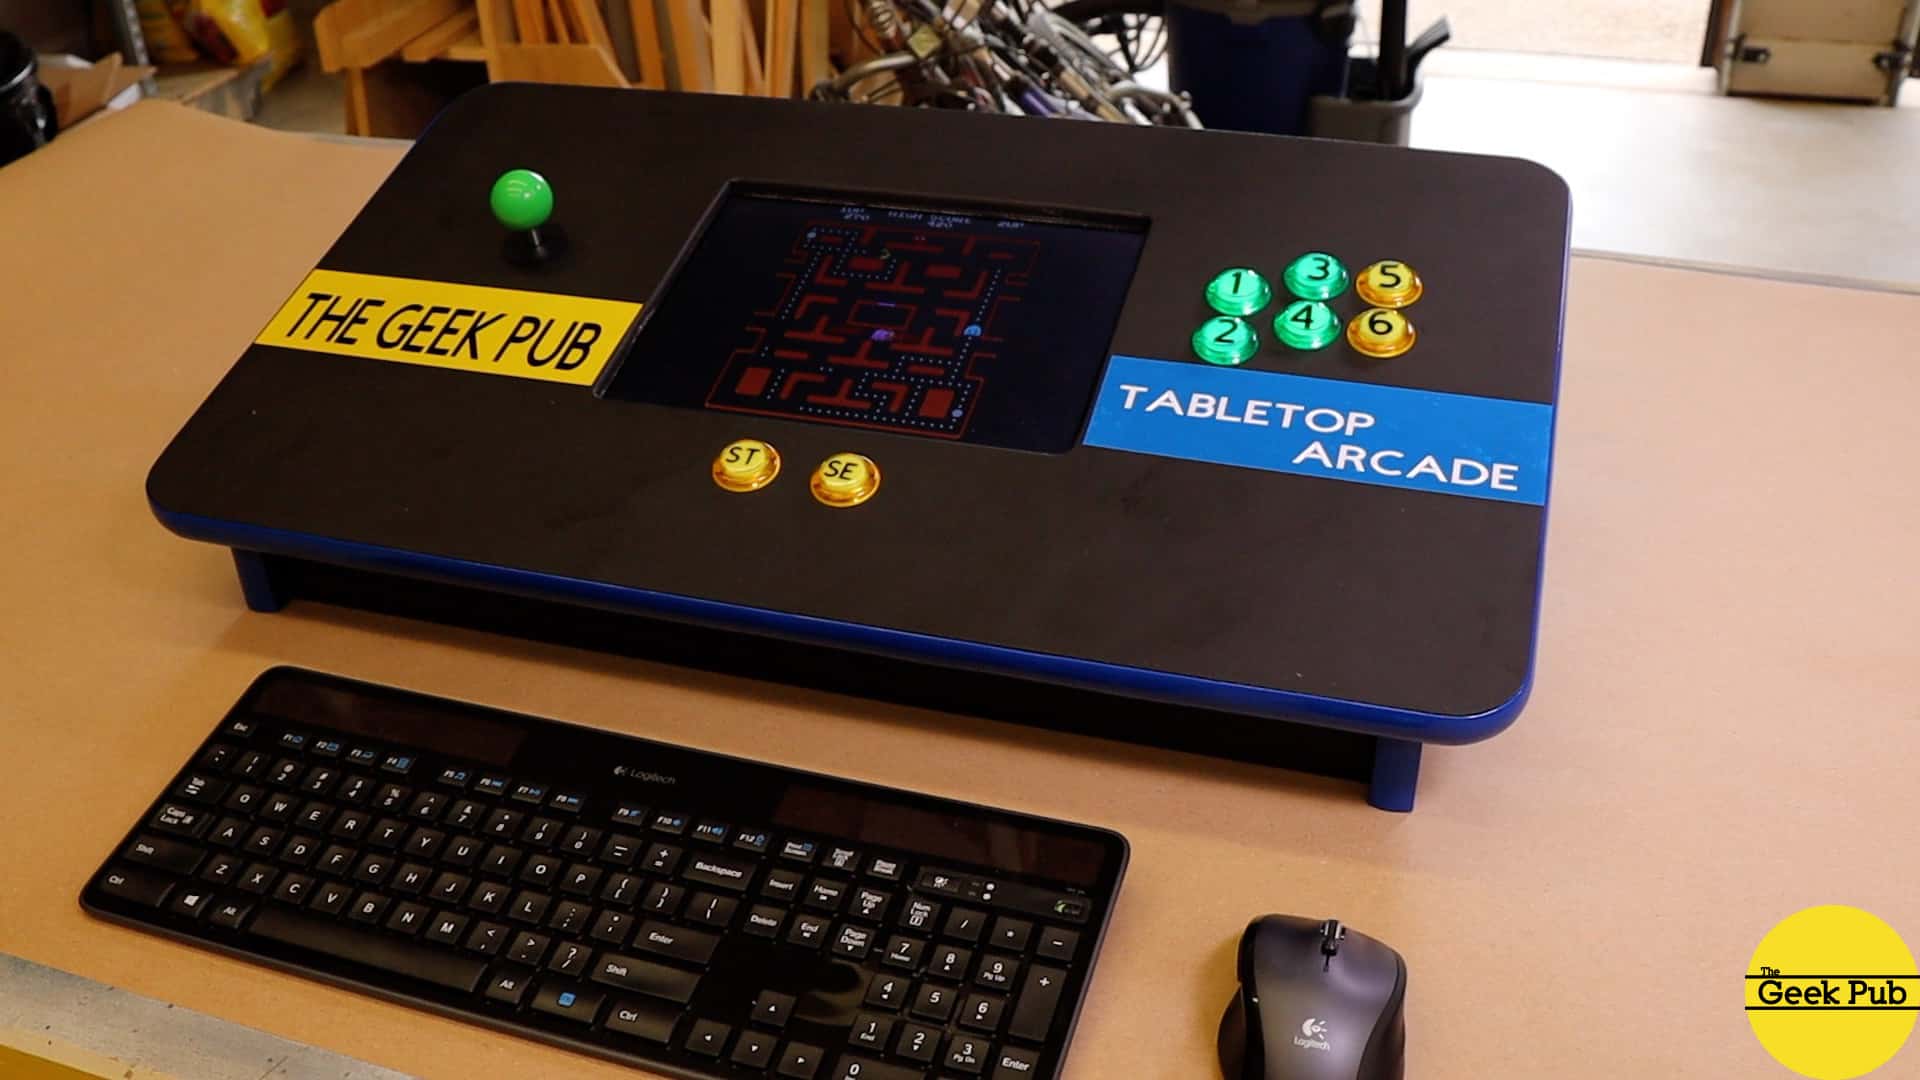
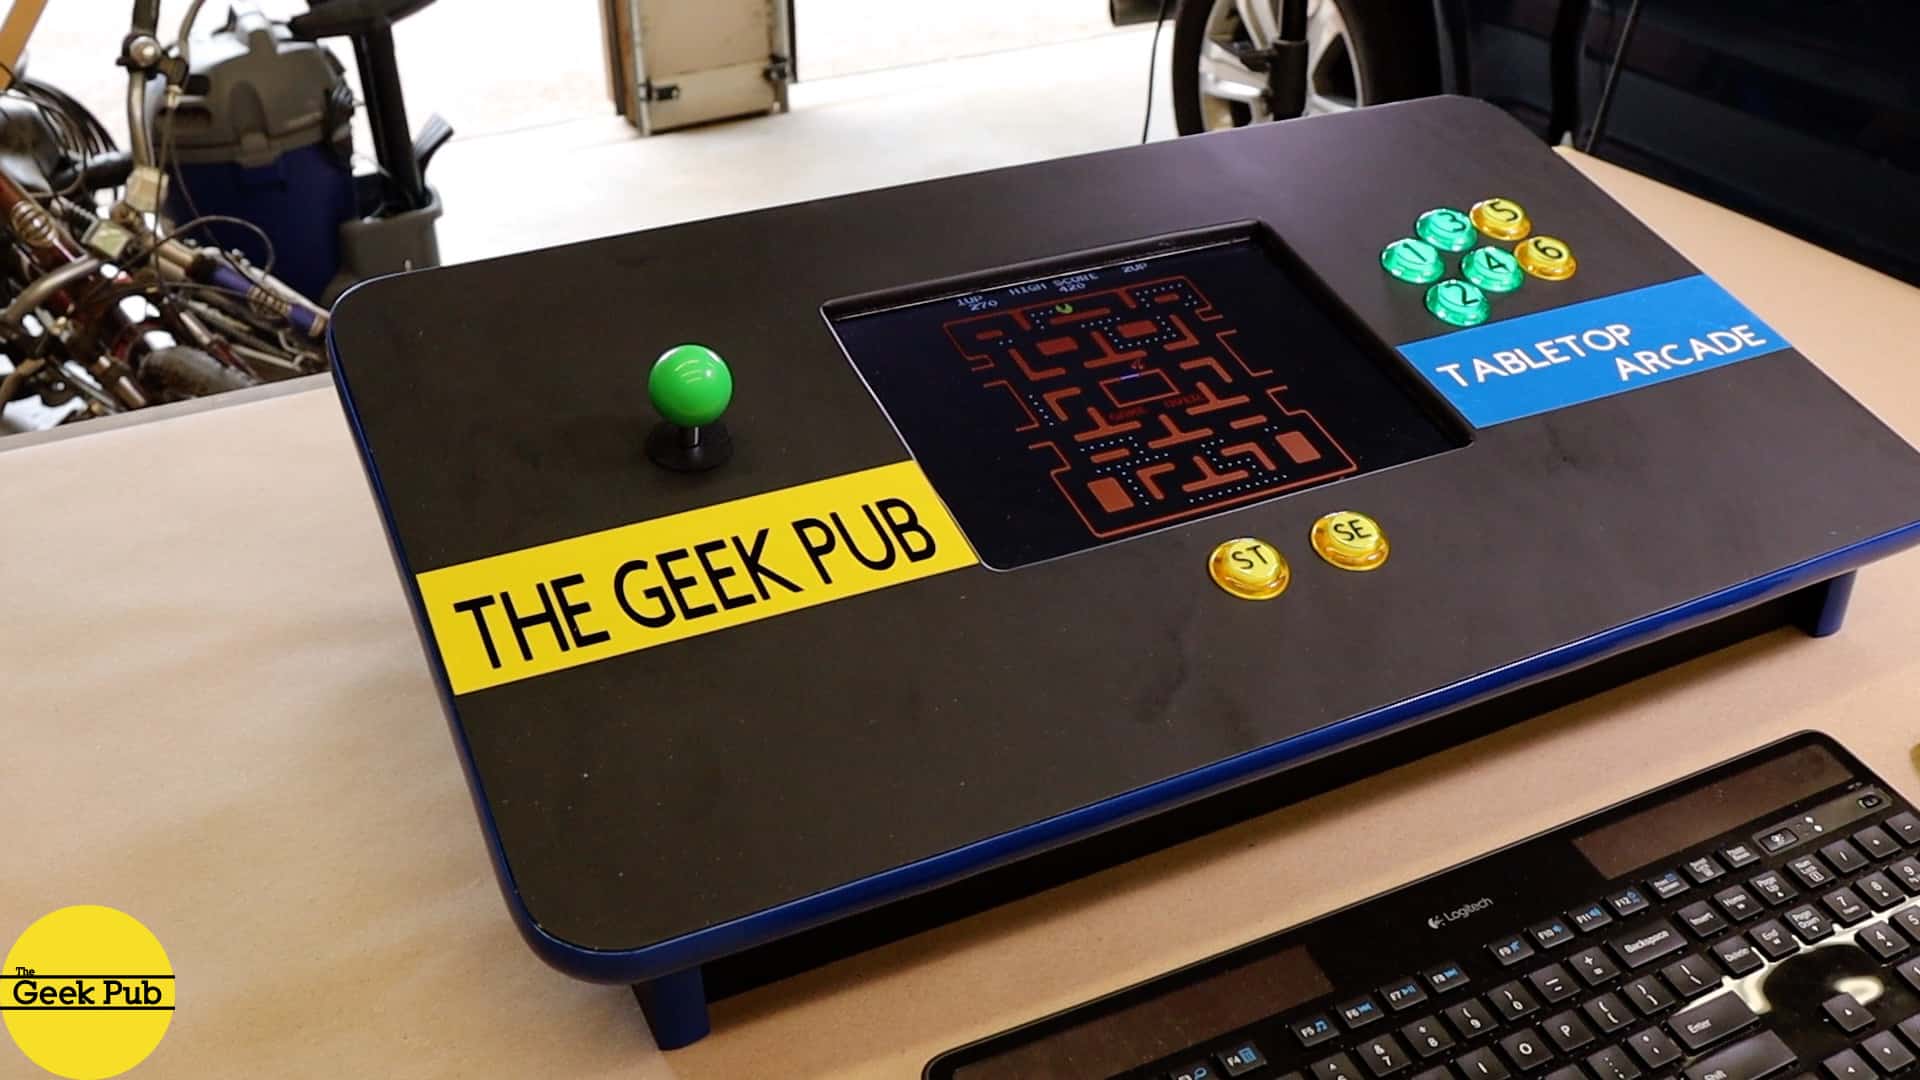
The Finished Tabletop Arcade Cabinet
And that completes this awesome tabletop arcade cabinet. As usual, the artwork I ordered didn’t make it here in time, so I just put my name and “tabletop arcade” on the front of it to give it some flair for the video! I hope this inspires you to make your own tabletop arcade!
We also have a great tutorial on installing and setting up RetroPie here.
[button link=”https://www.thegeekpub.com/product/tabletop-arcade-cabinet-plans/” color=”green” newwindow=”yes”] Get the Tabletop Arcade Plans HERE[/button]


4.5
Holy SH*****T!!!!!! Thank you! I have so been looking forward to this build!
Thanks Kevin!
This is my favorite project that you have ever made Mike!
What mame frontend you use? Or did you even use mame?
Retropie.
This is just bad ass. BAD ASS! I need one.
Looks really nice Mike . . .one small question though . . . . for the Joystick and buttons placements, to the left/right of the display, is this a comfortable location ? Looks a bit unconventional to me , and please don’t think this is a negative critique I am just interested in the choice of location . . 🙂
Super comfortable, or I would have put them somewhere else. They are only about 11-12″ apart. That’s a tiny monitor.
OK, Sounds good . . . . . thanks for the reply
Hi Mike-What are your thoughts on adding a pattern generator to arcade projects to make the old style arcade games (pac man etc) look better? Also those sound filers-are they worth adding? I did not notice much difference when I installed one.
Thank you!
Very interesting article!
That man has gold hands! 🙂