Blog
RetroPie PS4 Controller Guide for the Raspberry Pi
You can set up a RetroPie on the cheap with just about any USB controller, including super-cheap options like these ones. But just because you can doesn’t mean that you should! RetroPie supports games that demand the use of additional shoulder buttons and joysticks, which the super-cheap USB controllers don’t always have. Besides, great games deserve great controllers. And the PS4 controller — Sony’s DualShock — is arguably the greatest video game controller of all time. So why not enjoy using a RetroPie PS4 controller?
Setting up a RetroPie PS4 controller isn’t tough, but it takes a few simple steps to get everything working smoothly if you want to play wirelessly. Below, we’ll lay out everything you need to know about how to turn a PS4 controller into a RetroPie PS4 controller, step by step.
But first, let’s recap what you’ll need:
- A
Raspberry Pi with RetroPie installed. As of this writing, RetroPie does not yet support the brand-newRaspberry Pi 4, so your best bet is aRaspberry Pi 3 Model B. (You can also use older models or the lightweightRaspberry Pi Zero, among others, but be aware that some of these lack on-board Bluetooth support. We need Bluetooth to connect the PS4 controller wirelessly without a dedicated adapter.) As for getting RetroPie installed, that’s covered in our RetroPie Setup Guide. - Bluetooth capabilities on your RetroPie. As mentioned in the parenthetical above, newer and beefier
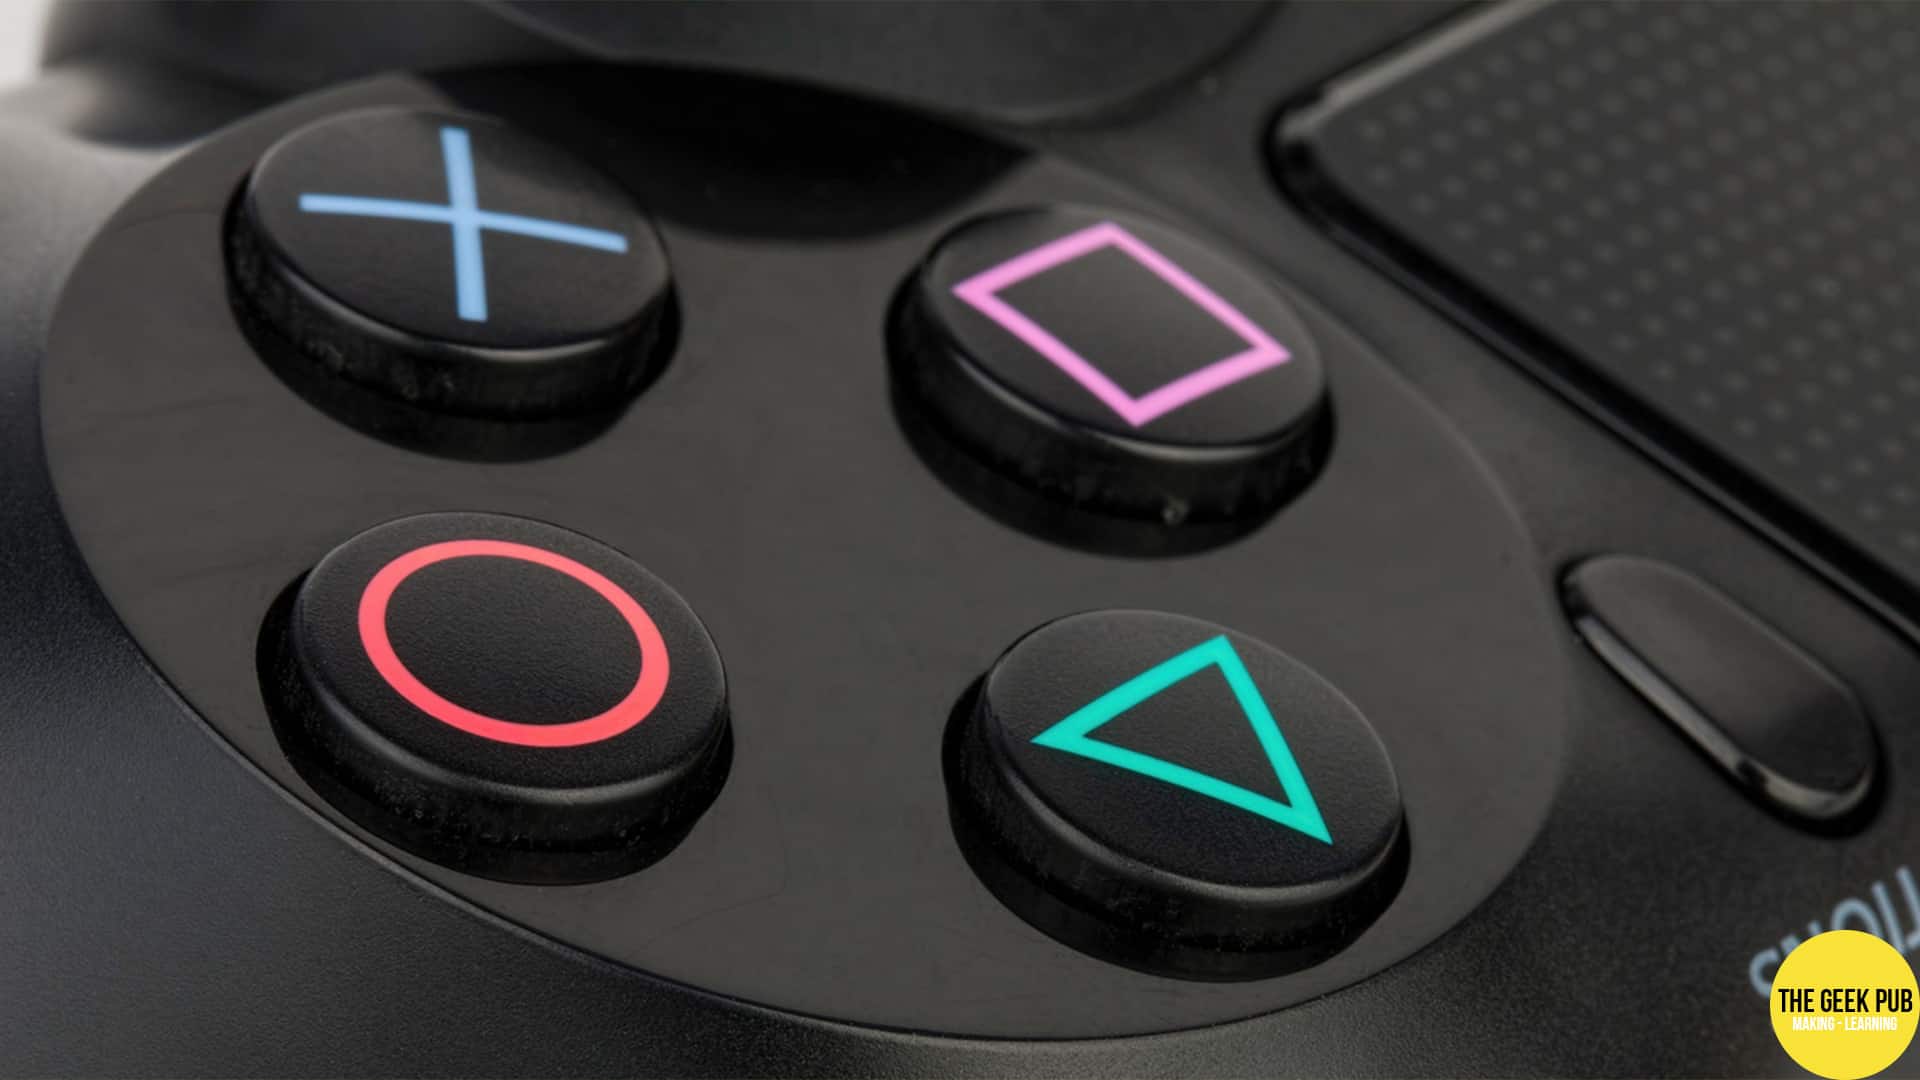
Raspberry Pi devices will have Bluetooth on board; for older and more lightweight ones, you may have to buy an accessory. (Note that Bluetooth is required for the RetroPie PS4 controller setup method laid out in the step-by-step instructions below, but not for the two quick-and-easy methods — though those have their own drawbacks, as we’ll discuss in a moment.) - A Dual Shock controller, of course!
- Something (else) to control your RetroPie with. We’ll be navigating menus within RetroPie in order to pair the PS4 controller with the RetroPie using Bluetooth. That means we need something else to control the RetroPie with while we navigate those menus. A USB keyboard or a simple USB video game controller will work fine. If you’re really desperate, you could try using your PS4 controller itself via a wired connection, then disconnecting it and trying to pair it as soon as you search for Bluetooth devices in Step 1.
Before we get started: A note about the easy way(s)
Before we get into the Bluetooth nitty-gritty, we should mention that there’s a stupid-simple way to get your RetroPie PS4 controller up and running: just plug it in! Use a USB-to-micro USB cable (it’s the same cable that you use to charge your PS4 controller — your controller should have come with one, but if you’ve lost it, you can get another here). Start up your RetroPie with the PS4 controller plugged in, and you’ll be prompted to set assign all of the button inputs just like you would be with any other controller. (If you skip this part, you can access it again by hitting the start button on your RetroPie PS4 controller controller). That’s it!
Of course, the DualShock is a controller that’s designed to be used wirelessly, so being tethered to your RetroPie isn’t the ideal RetroPie PS4 controller experience. Happily, going wireless with your RetroPie PS4 controller is pretty easy. The most cost-effective way to do so is via the steps we’re about to lay out, but if you don’t feel like getting into DIY mode today, there’s a big shortcut: you can just use the USB wireless adapter that Sony sells for PCs and other devices. It will work just fine with RetroPie. You can pick up one of those here. Plug in the USB wireless adapter and pair it with your DualShock (it’s an easy process — you just hold the Share and PS buttons together while the adapter dongle is blinking). Then just assign values to the inputs just like you would if you were setting up the DualShock with a wired connection.
Those are the easy ways, but each has its downside: you’re either going to be stuck with a wired RetroPie PS4 controller or will have to shell out some money. The good news is that there is a third option, and we’re laying it all out below.
RELATED: Configuring RetroPie for the Raspberry Pi
How to set up a RetroPie PS4 Controller
There are three basic ways to get a DualShock working with RetroPie. Two are pretty simple, so we’ll spend most of our time on the third, which involves setting up the controller with a Bluetooth connection. In broad strokes, here’s what we’ll be doing: we’re going to go into the settings on our RetroPie, search for Bluetooth devices, pair our PS4 controller, and then set up all of the inputs for our new RetroPie PS4 controller.
Step 1: Head into your RetroPie’s settings menu
Tab your way over to the RetroPie’s settings menu and then navigate to Bluetooth>Register and Connect to Bluetooth Device
This step used to be a bit different, but it was never too tough to find the Bluetooth settings. If you haven’t updated your RetroPie in a while, you might have to look for Configuration/Tools to find the Bluetooth menu.
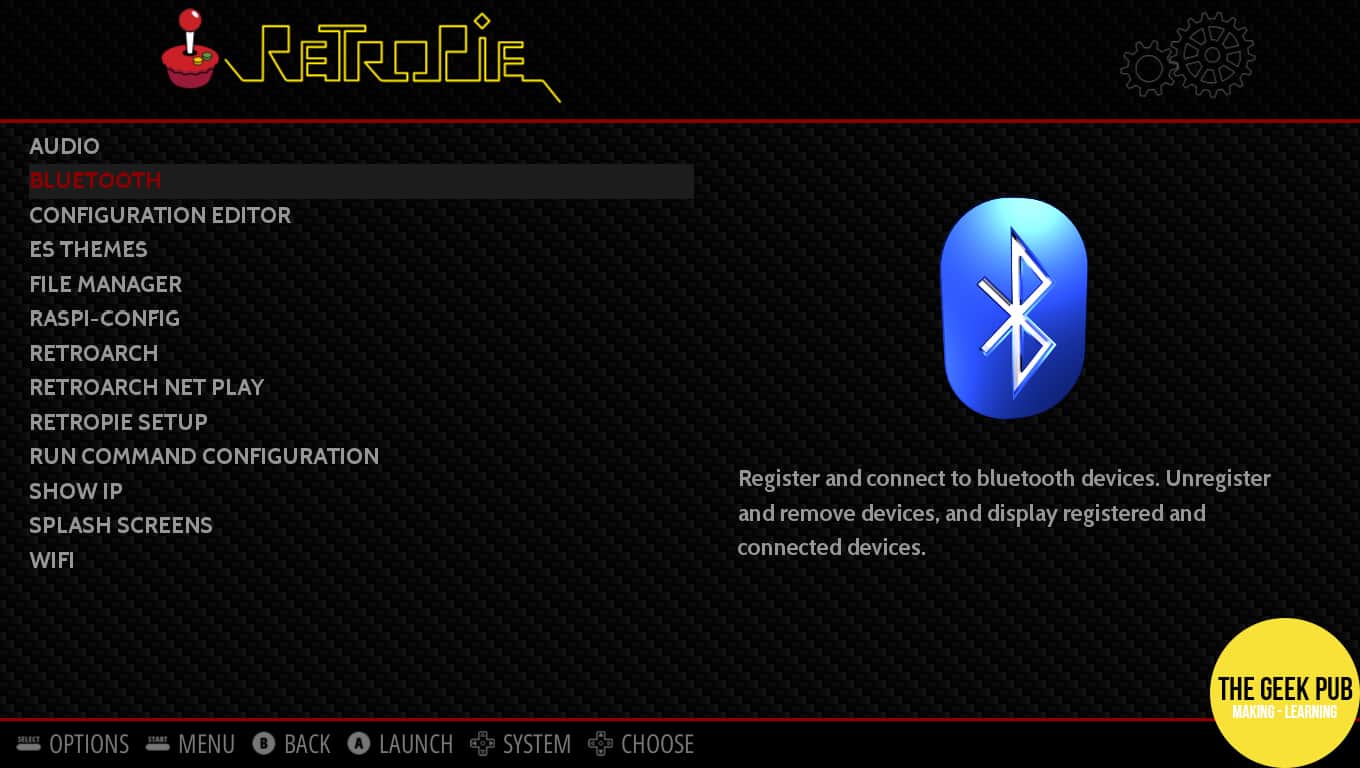
The moment that you select Register and Connect to Bluetooth Device, you’ll see a little box pop up and tell you that your RetroPie is “Searching…” But your RetroPie won’t find your PS4 controller unless you put it in pairing mode, so hurry along to Step 2.
Step 2: Use pairing mode on your PS4 controller
To enter pairing mode on your PS4 controller, just press and hold the Share button and the PS button at the same time and hold them down. If you’re doing it right, you should see the light on your controller blink.
You’ll have to do this at the same time as the RetroPie is searching for Bluetooth devices, of course. If you missed your window, no big deal: just repeat Step 1 and be ready this time.
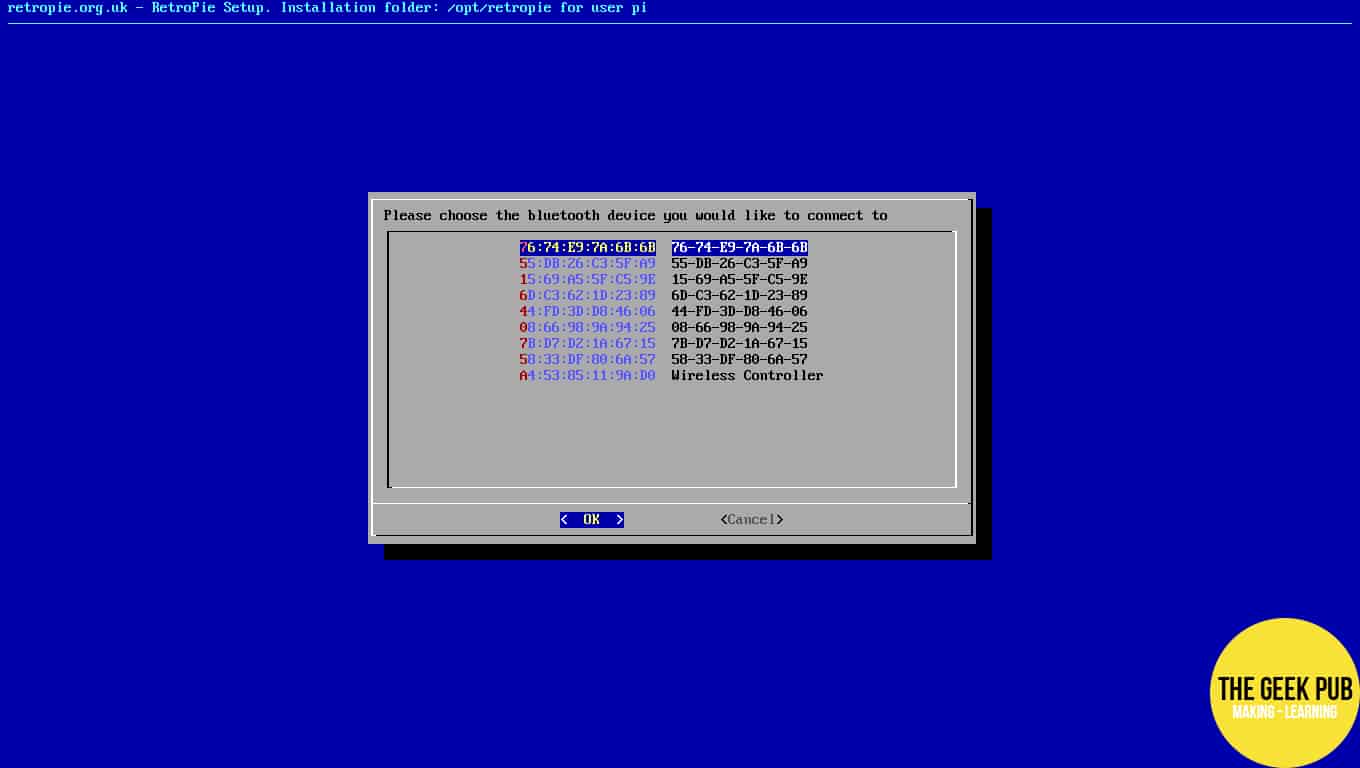
Step 3: Select your PS4 controller from the menu
After it has searched for a bit, your RetroPie will show you a menu of Bluetooth devices it has found. If everything has gone smoothly, you should see “wireless controller” or something similar. Select it!
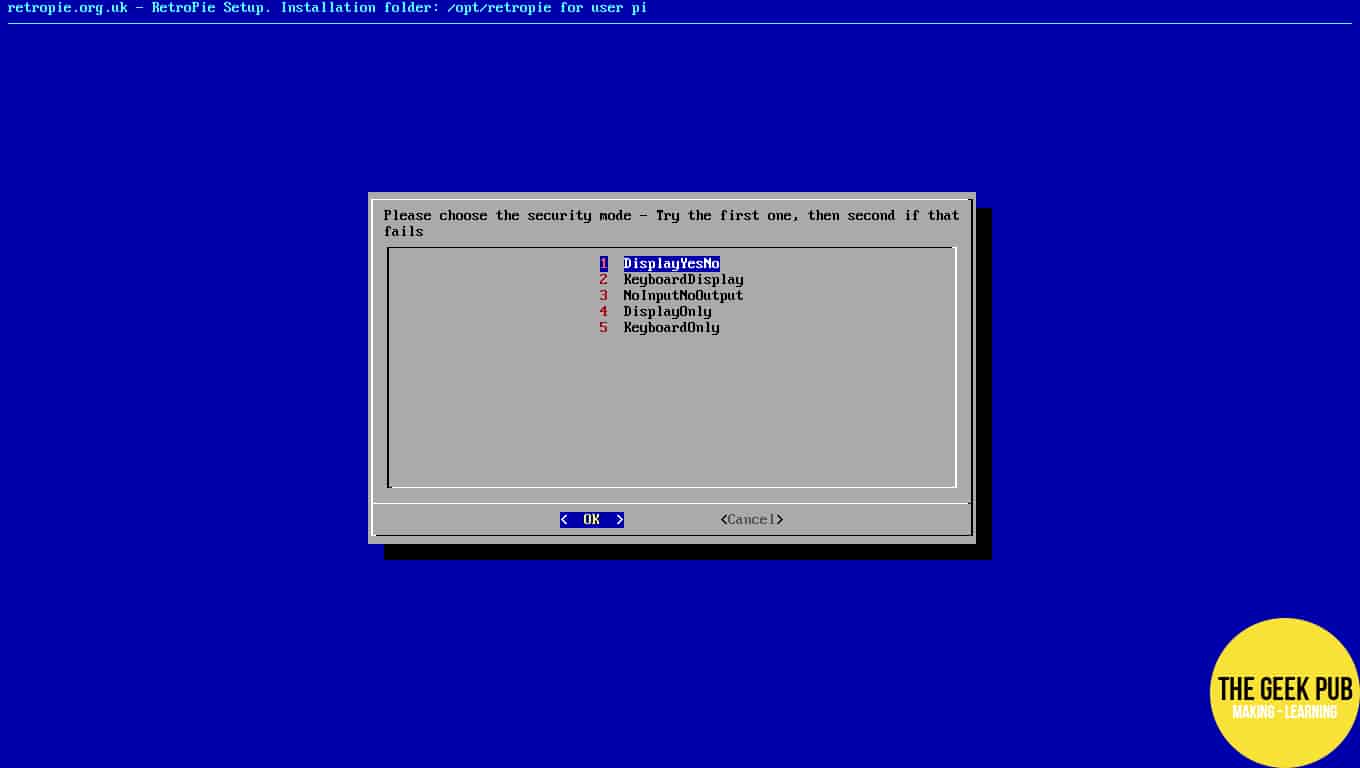
Step 4: Confirm security settings
Next, you’ll see a pop-up box asking you to confirm the “security mode.” The pop-up helpfully tells you to just pick the first one and, if that fails, move on to the second. So just do that. In our test, the first option (“DisplayYesNo”) worked just fine.
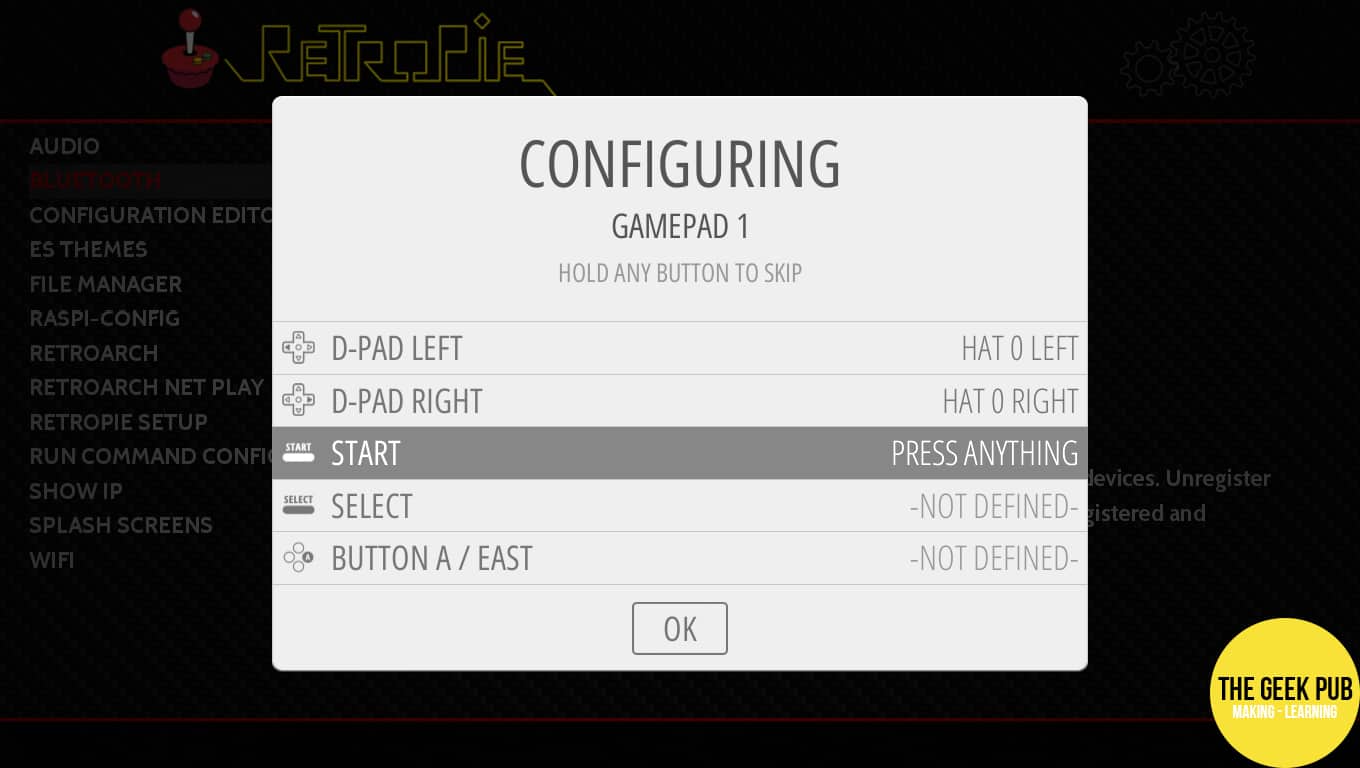
Step 5: Configure your controller’s inputs
You’re just about set! You’ve got your RetroPie PS4 controller connected now. There’s one problem let, though: your RetroPie doesn’t know which buttons are which. So head into the controller configuration menu (accessible via the start button or within RetroPie’s menus — you might want to use your other controller to get there, since your RetroPie PS4 controller won’t be cooperating well just yet). There, you can go ahead and press each button as prompted in order to teach your RetroPie how you want your RetroPie PS4 controller to work.
And that’s it! It’s ultimately a pretty simple process. Enjoy your next RetroPie PS4 controller!


4.5
Great article Mike! I love all this recent Retropie stuff. I use a PS4 controller exclusively on my Retropie arcade.
4.5
Thanks for the article! I set up my ps4 controller wirelessly awhile back (not sure if it was this same process), but I experienced lag issues. Any thoughts?
Which Pi are using? Onboard Bluetooth or dongle?
3 model b, on board bluetooth.
Strange. That’s exactly what I use. No lag. Can you describe the problem a bit for us? All games?
I’ll try it again as it was awhile back. But it was just a minor lag between button push and in game response. It made it impossible for me to play Mega Man (kept falling into pits….). Switched to corded and worked fine. I didn’t try it with other games as I was so frustrated!
Is your TV in game mode ?
0.5
Thanks for this. I only wish i found this before spending nearly 8 weeks trying to set up a pair of 8BitDo SN30 controllers on Retropie 3 and Odroid XU4 which initially worked ok when wired, but failed dismally with wireless connectivity and ultimately failed completely – ie no, leds, no signals-even with fully charged batteries; and needed to be returned.
If this reply helps someone and avoids much frustration and disappointment, and saves some time and money
All this was followed by a new pair of Xbox S/S controllers – with similar wired functionality but bluetooth connecting but NOT functioning as it should.
The Playstation PS4 controller CUH-ZCT1 was my next option. It connected in less than 10 seconds and needed buttons mapped as per connection process. It has worked without a problem since then. I am now considering a second PS4 controller… will update.
If this reply helps someone and avoids much frustration and disappointment, and saves some time and money