Blog
Making a Cocktail Table Arcade Cabinet
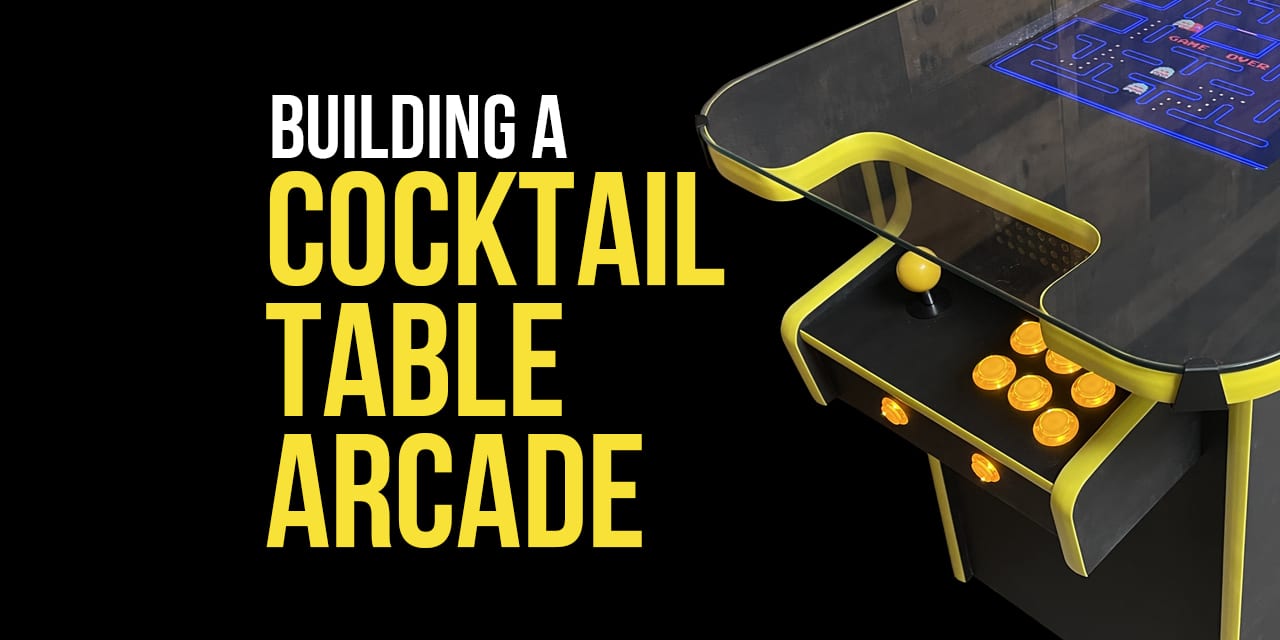
In this project, we’re going to make a cocktail table arcade cabinet that we think you’ll to love! I’ve wanted to build a cocktail table arcade since my very first arcade cabinet build back in July of 2015! A cocktail table arcade is something I always gravitated to as a kid. I think it was because of the socialization and two player aspect of it. You were literally duking it out with the person across from you. It’s time to finally make one!
Watch the Cocktail Table Arcade Cabinet Build Video
We highly recommend watching the Cocktail Table Arcade Build video as many concepts are much easier to communicate in video format.
Watch our Update / Part 2 Video
Building the Cocktail Table Arcade Cabinet
Building a cocktail table arcade is similar to building any other arcade. There are some basics you need to decide up front. Are you going PC based or Raspberry Pi based? Do you want to build it out of MDF or plywood?
I chose to build my arcade using Retropie (which is Raspberry Pi based). I feel like it has the most community support and it is drop dead simple. However, the Raspberry Pi can’t play modern PC games. So if you want to play Destiny on your arcade build, you’ll need to use a PC.
I also chose MDF for my building material. I often get questioned by people on this choice. Why not plywood? It is true that plywood is much lighter making for an arcade that weighs significantly less. It is also true that plywood isn’t near as dusty as MDF when cutting and sanding it (MDF for the most part is simply compressed sawdust). However, it is much easier to get a great finish on MDF than plywood. Plywood will need some additional work to remove the woodgrain texture from it. If you plant to 100% clad your arcade with vinyl artwork this may be a moot point for you.
If you want to build this arcade we a have a very detailed set of Cocktail Table Arcade Plans available that include templates, parts lists, and all of the dimensions.
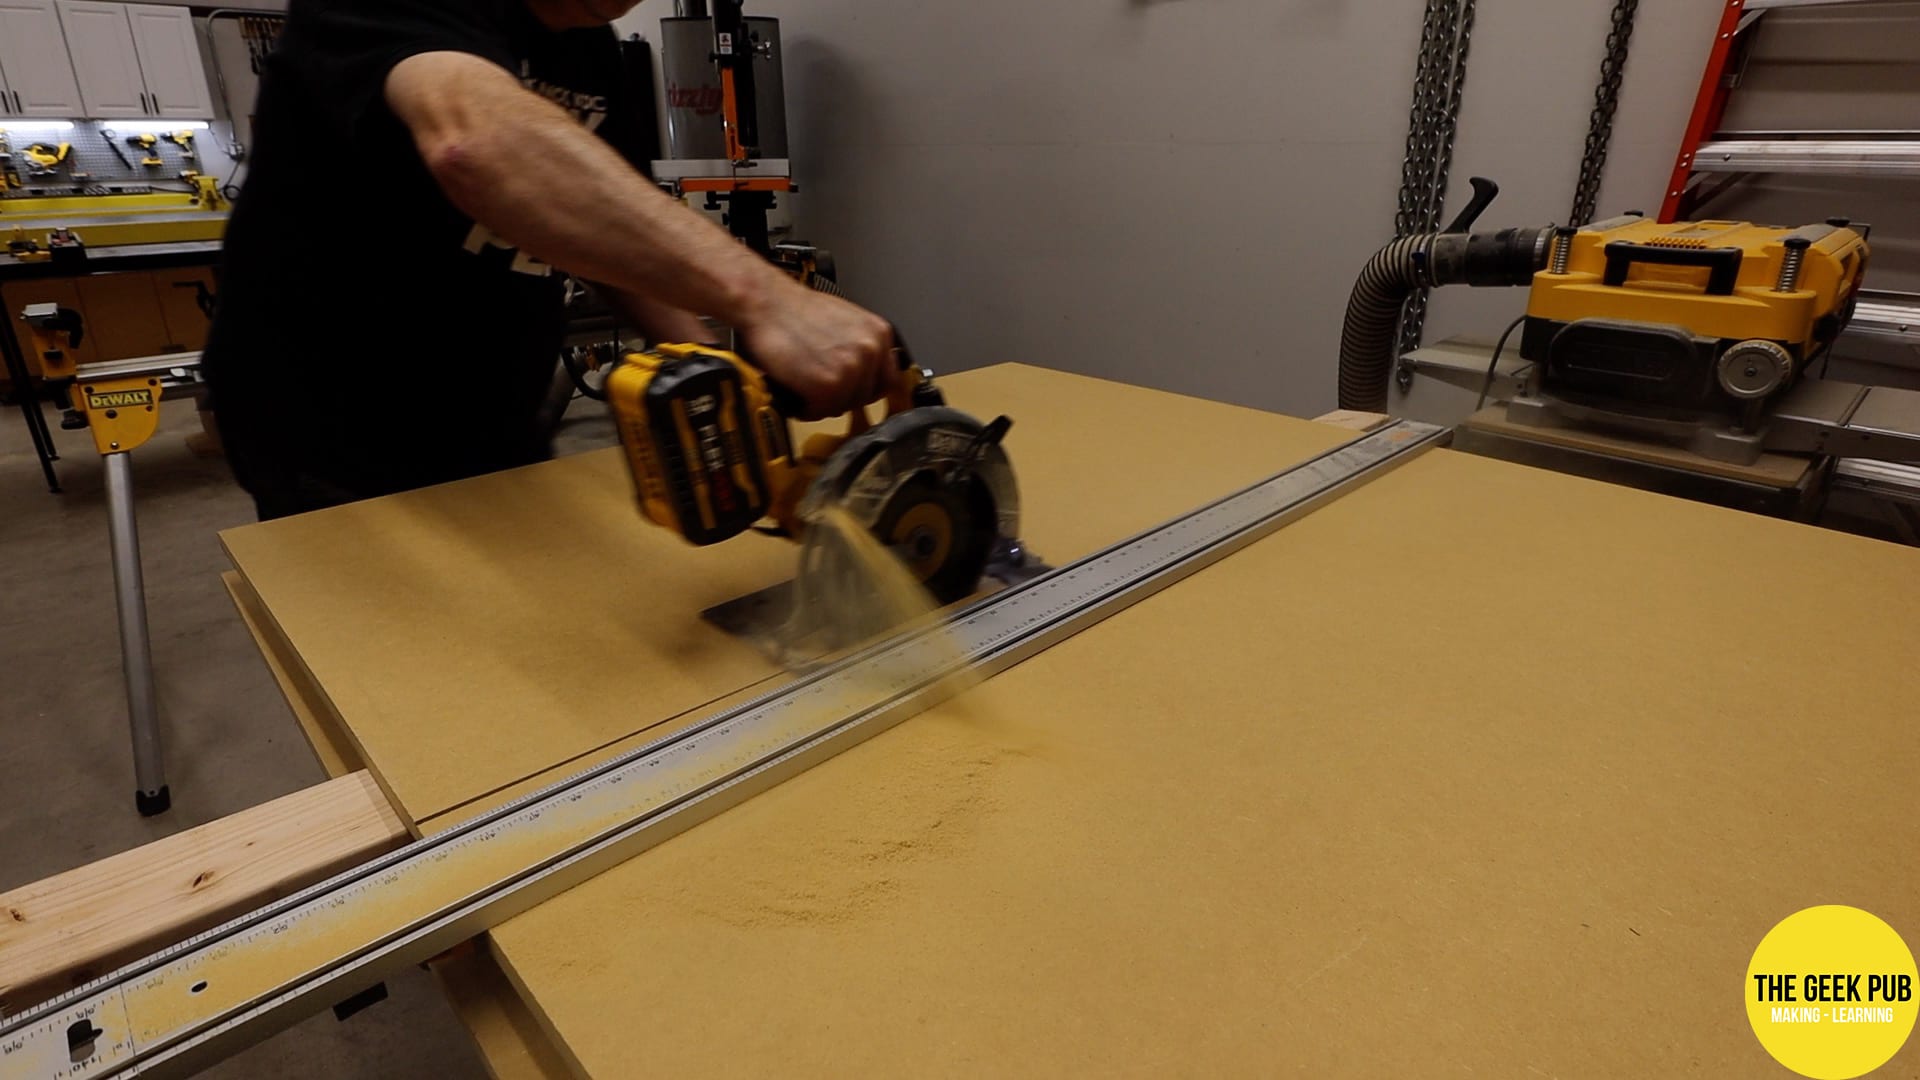
Cutting Down the Material
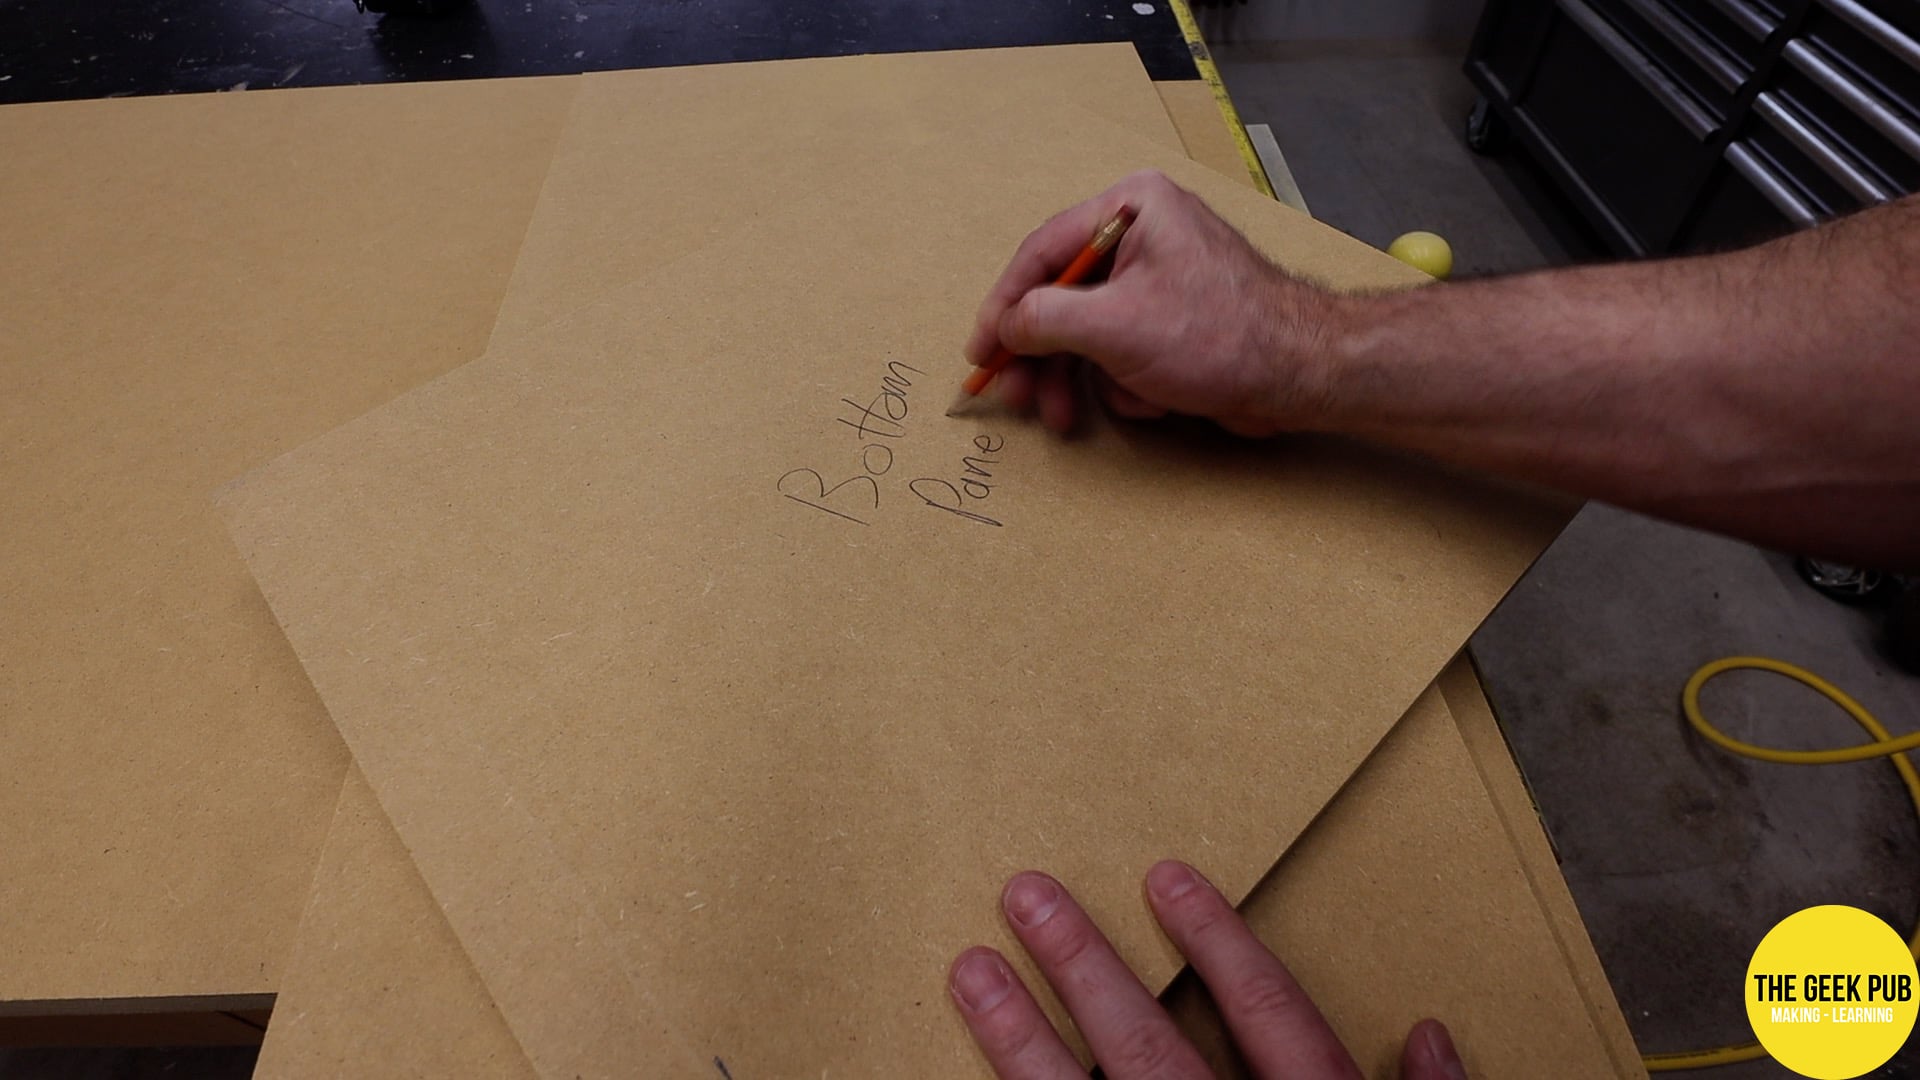
The first step in any arcade build is generally to cut down the material into usable sections. I started by breaking down the sheet goods. In this build there are three sizes of sheet goods needed. 1/2″, 3/4″, and 1″ (13mm, 19mm, and 25mm). However, you’ll see later I have a solution to avoid buying the larger of the three materials!
I cut the sheet goods down using a Bora saw guide. This is very handing for using a circular saw to get long straight cuts. The main thing I am doing here is attempting to get pieces that I can easily handle on the table saw. Though if you don’t have a table saw then you can use these guides to cut to exact dimensions.
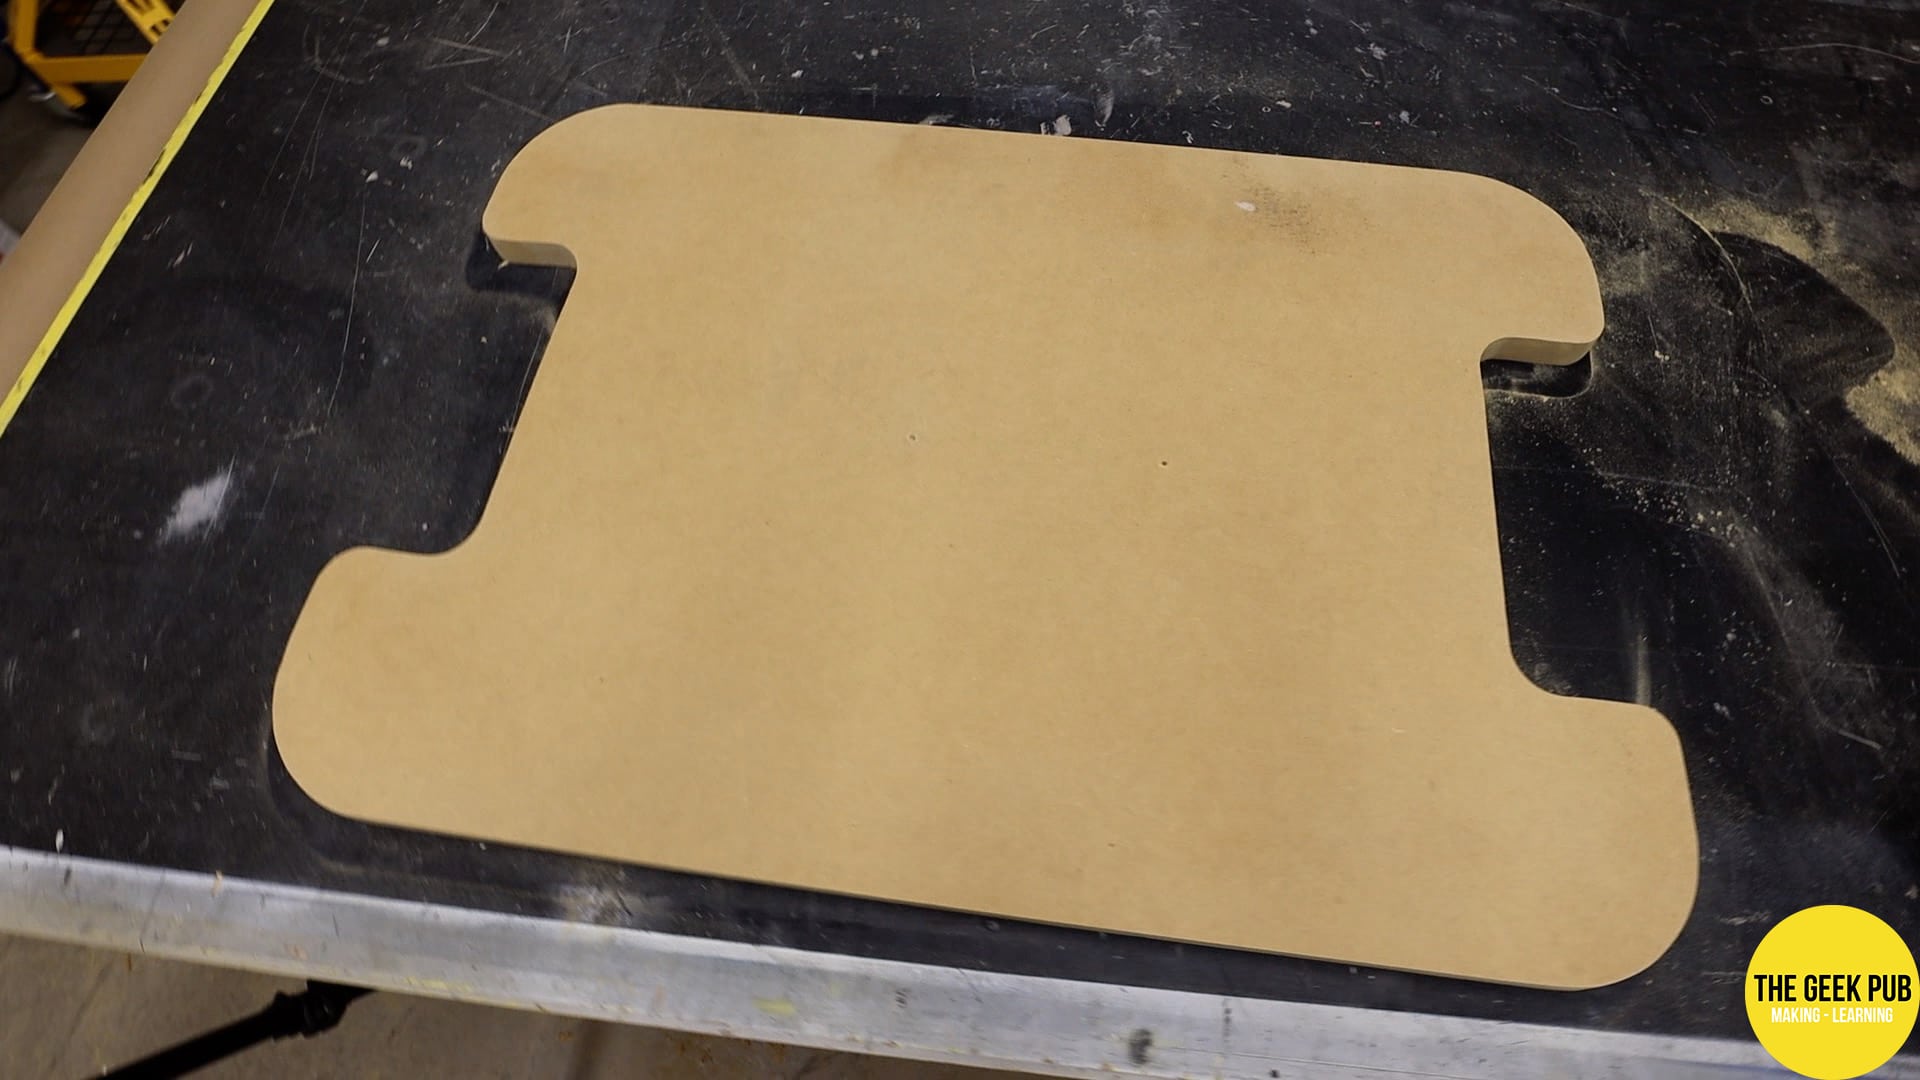
I then used the table saw to cut the side, bottom, and player panels down to their final dimensions,
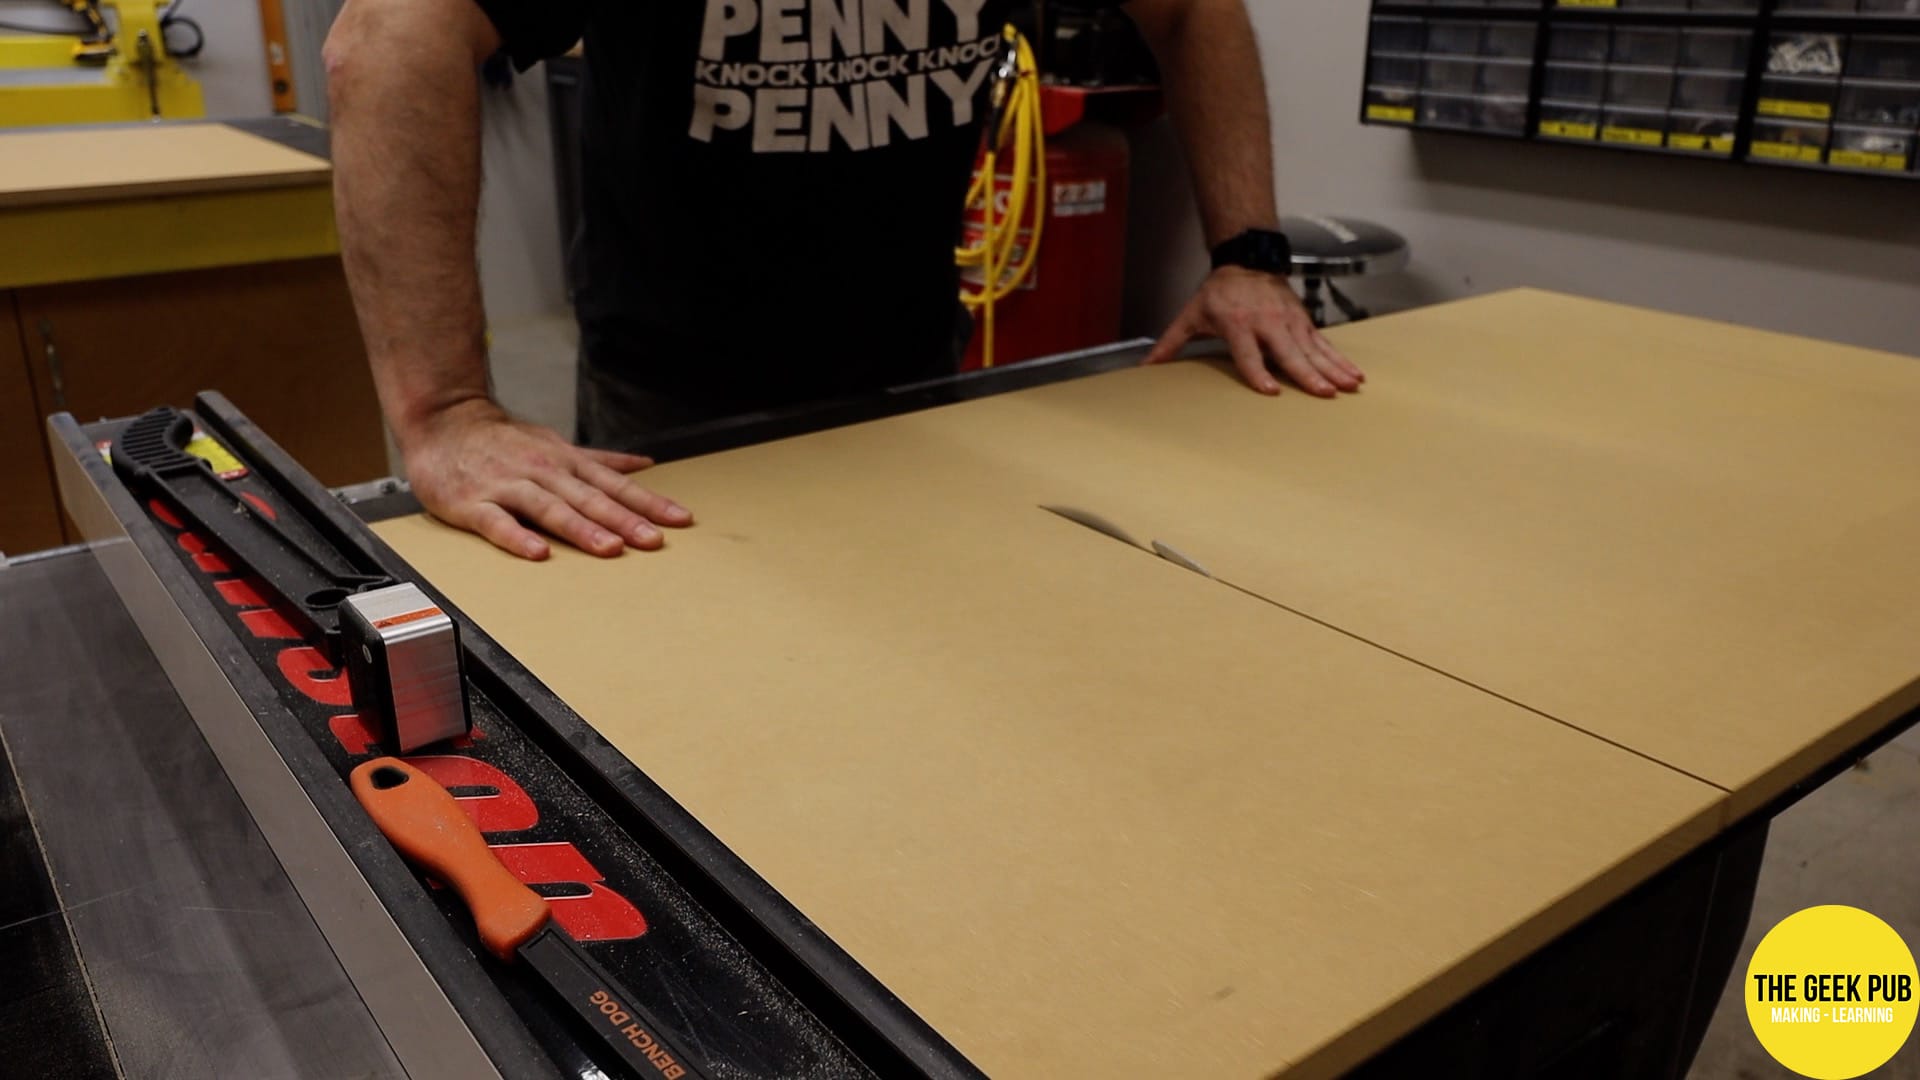
Pro Tip: Always label your parts as you cut them out. This will make all of the next steps much easier, faster, and less confusing.
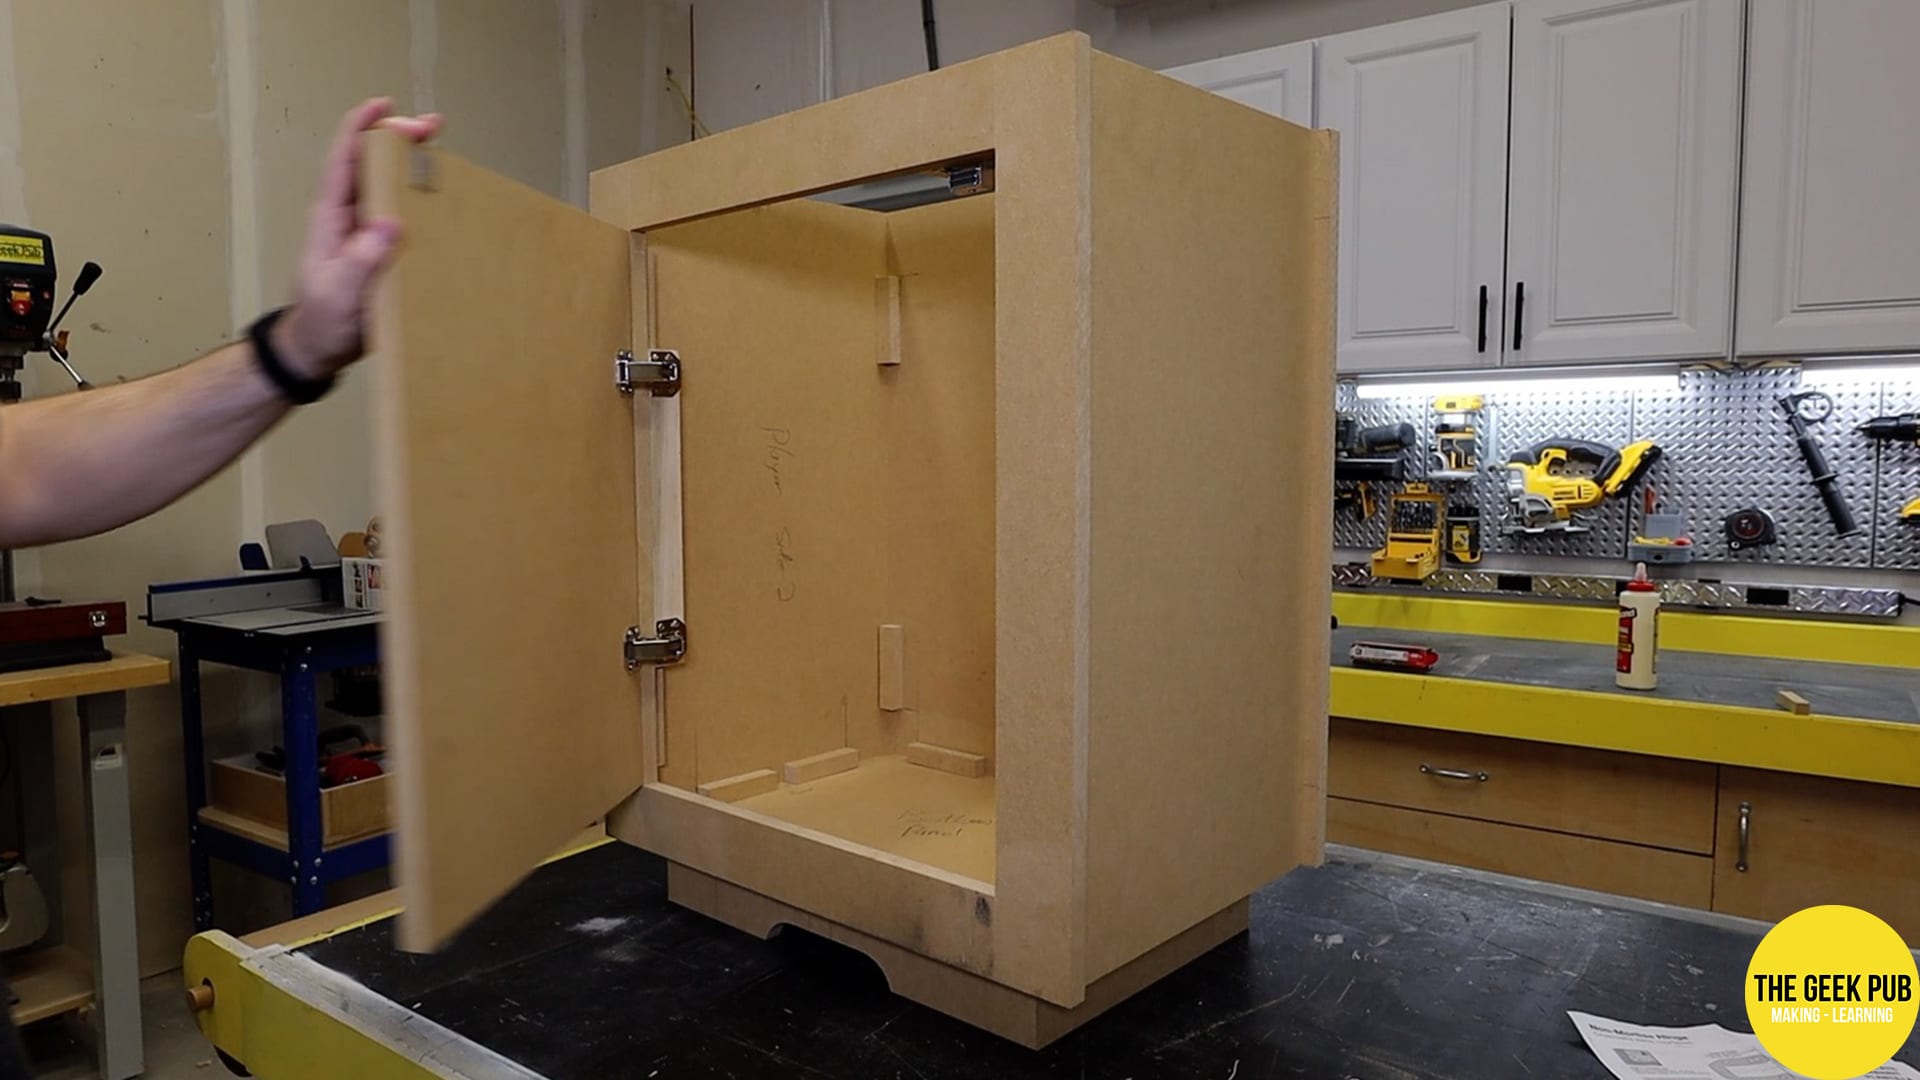
Using Cleats for Assembly
I almost always use cleats when assembling my arcades. I just feel like this extra effort makes for a much easier and cleaner assembly process.
The cleats add structural rigidity to the build. But more more importantly they turn all of your parts into puzzle pieces that all align and go together simply. No measuring needed.
I usually cut a small piece of scrap wood that is the exact size of the spacing required. For example, if the the side panel is inset by 1/2″, then I would cut a scrap board at 1.25″. That’s the thickness of our material, plus the inset. All you need to do then is line the cleat up using the spacer and nail it in place. Again. No measuring required and a perfect fit every time!


I use a combination of glue and brad nails to hold everything together. However, brad nails are purely optional. They just act like mini clamps that hold the MDF together while the glue dries. If you don’t have a nailer, just wait 30-45 minutes for the glue to dry.
And the finished cocktail table arcade cabinet base looks amazing!
Making the Control Panels
Cocktail arcade cabinets generally have two control panels. One on each side (although some have three). In our plans, I include “spray and stick templates” that make this process very simple. Just cut out the template and use some spray adhesive to attach it to the part to be cut.
I prefer to stack the parts and use double sided tape to hold them together. This way I can cut out more than once piece at a time. I used my bandsaw to cut these parts out, but a jigsaw works just as well.


I also include templates for drilling the control panels. This makes things go really fast.
I like to use a center punch to make a divot at the center point of every hole. This gives the brad tip of the drill bit a place to catch and keeps it from wobbling away from the hole’s center when it starts turning. I recommend using a Forstner bit for this operation, but a cheap Home Depot paddle bit will work fine.


Assembling the Control Panels
1/2″ MDF doesn’t do well with brad nails. It tends to crack and/or split. For this reason I decided to just use glue and clamps. This just means I’ll need to wait about 30 minutes before moving to the next steps.


Routing for T-Molding
Before final assembly of the cocktail table arcade cabinet we need to route the components that will receive T-Molding. It’s super important we route the T-Molding slots before we assemble, because the router will not be able to reach the components after glue up! This is a mistake many first time builders make.


Mounting the Control Panels
Mounting the control panels for our cocktail table arcade cabinet takes a little thought. We need to be able to access all of the wires and have a place to pass those same wires between the two different compartments.
To start, I cut out a 2″ (~50mm) tall access port on both sides of the cabinet. This is much easier to do on the outside of the cabinet than it would be later on the inside! I used my jigsaw for this operation.
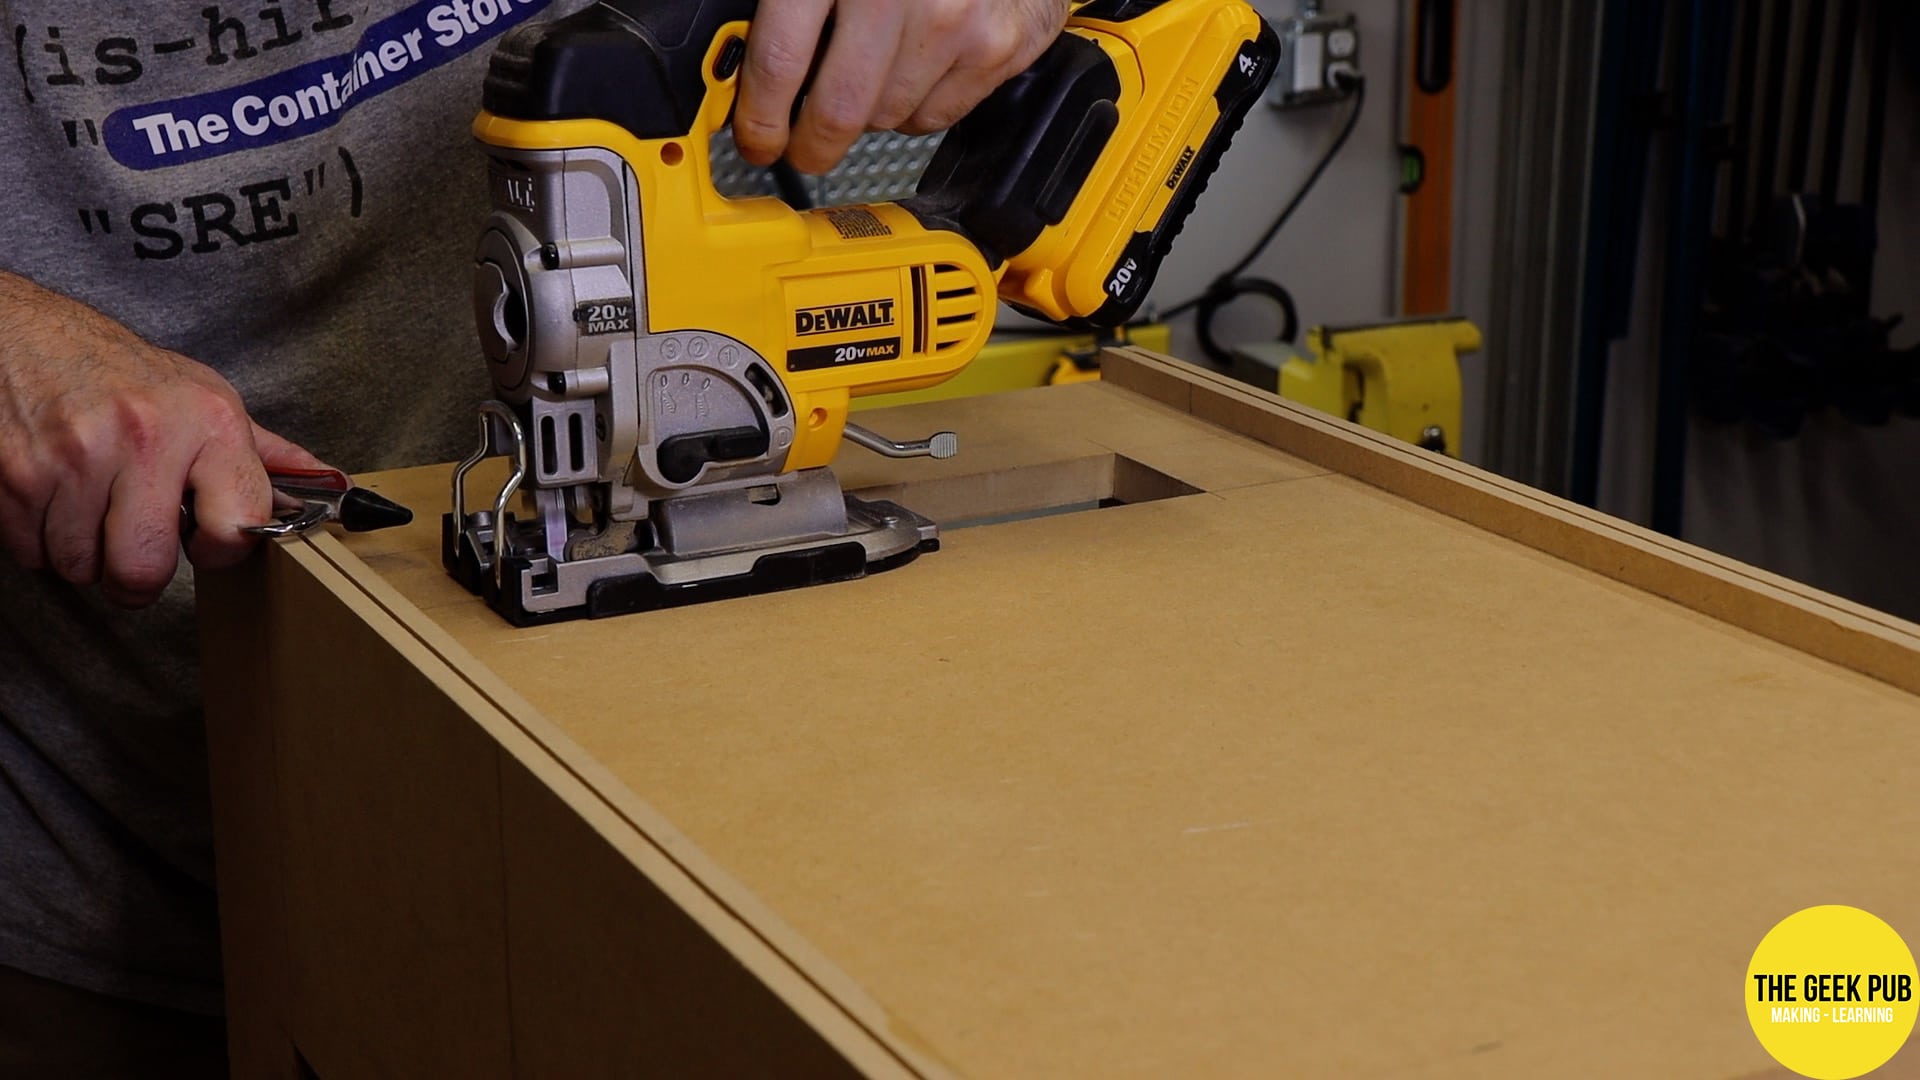
I then proceeded to carefully align the control panels, glue, and then clamp them into place. The access slots make a perfect place to pass the clamps through!


Making the Table Top for the Cocktail Table Arcade Cabinet
The table top of the cocktail table arcade cabinet is 1″ (25mm) thick. As I mentioned at the beginning of this build, I didn’t want to spring for a full sheet of 1″ MDF since that would cost a lot of money at today’s prices, and I only need just a small piece.
Instead I decided to just glue together (or laminate) two 1/2″ (13mm) pieces of MD to make a table top of the thickness that I need. This is a pretty common practice in arcade builds by the way!
I applied a liberal amount of glue to the entire top surface of one of the sheets, combed it out, and then sandwiched them together into a single larger lamination. I clamped it up and let it sit overnight.


The next day I trimmed the laminated top down to its final dimensions on the table saw and then applied my big ass tabletop template to the top of it using spray adhesive.
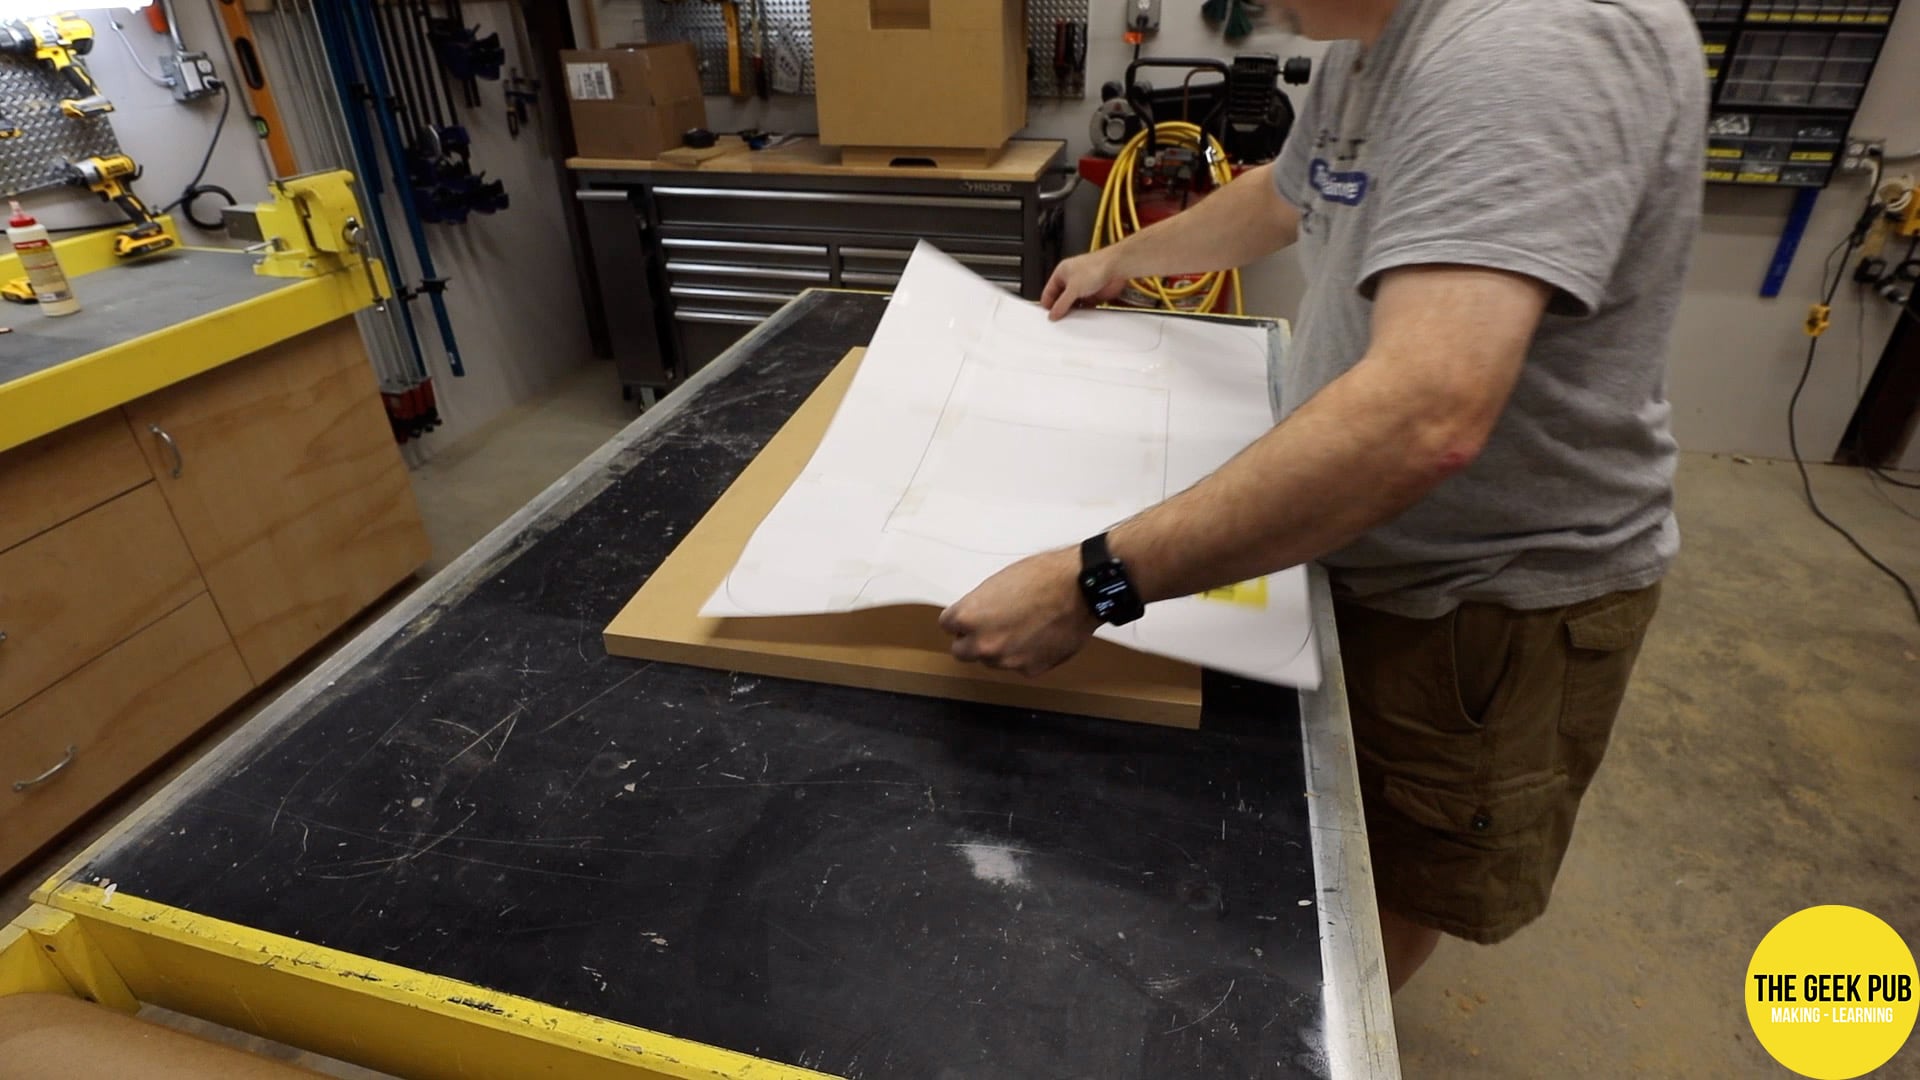
Cutting out the Tabletop
I cut the tabletop of the cocktail table arcade cabinet using my jigsaw. I tried to stay just slightly outside the line and then came back with my orbital sander in order to bring things back down to the line.


The finished tabletop looks amazing!
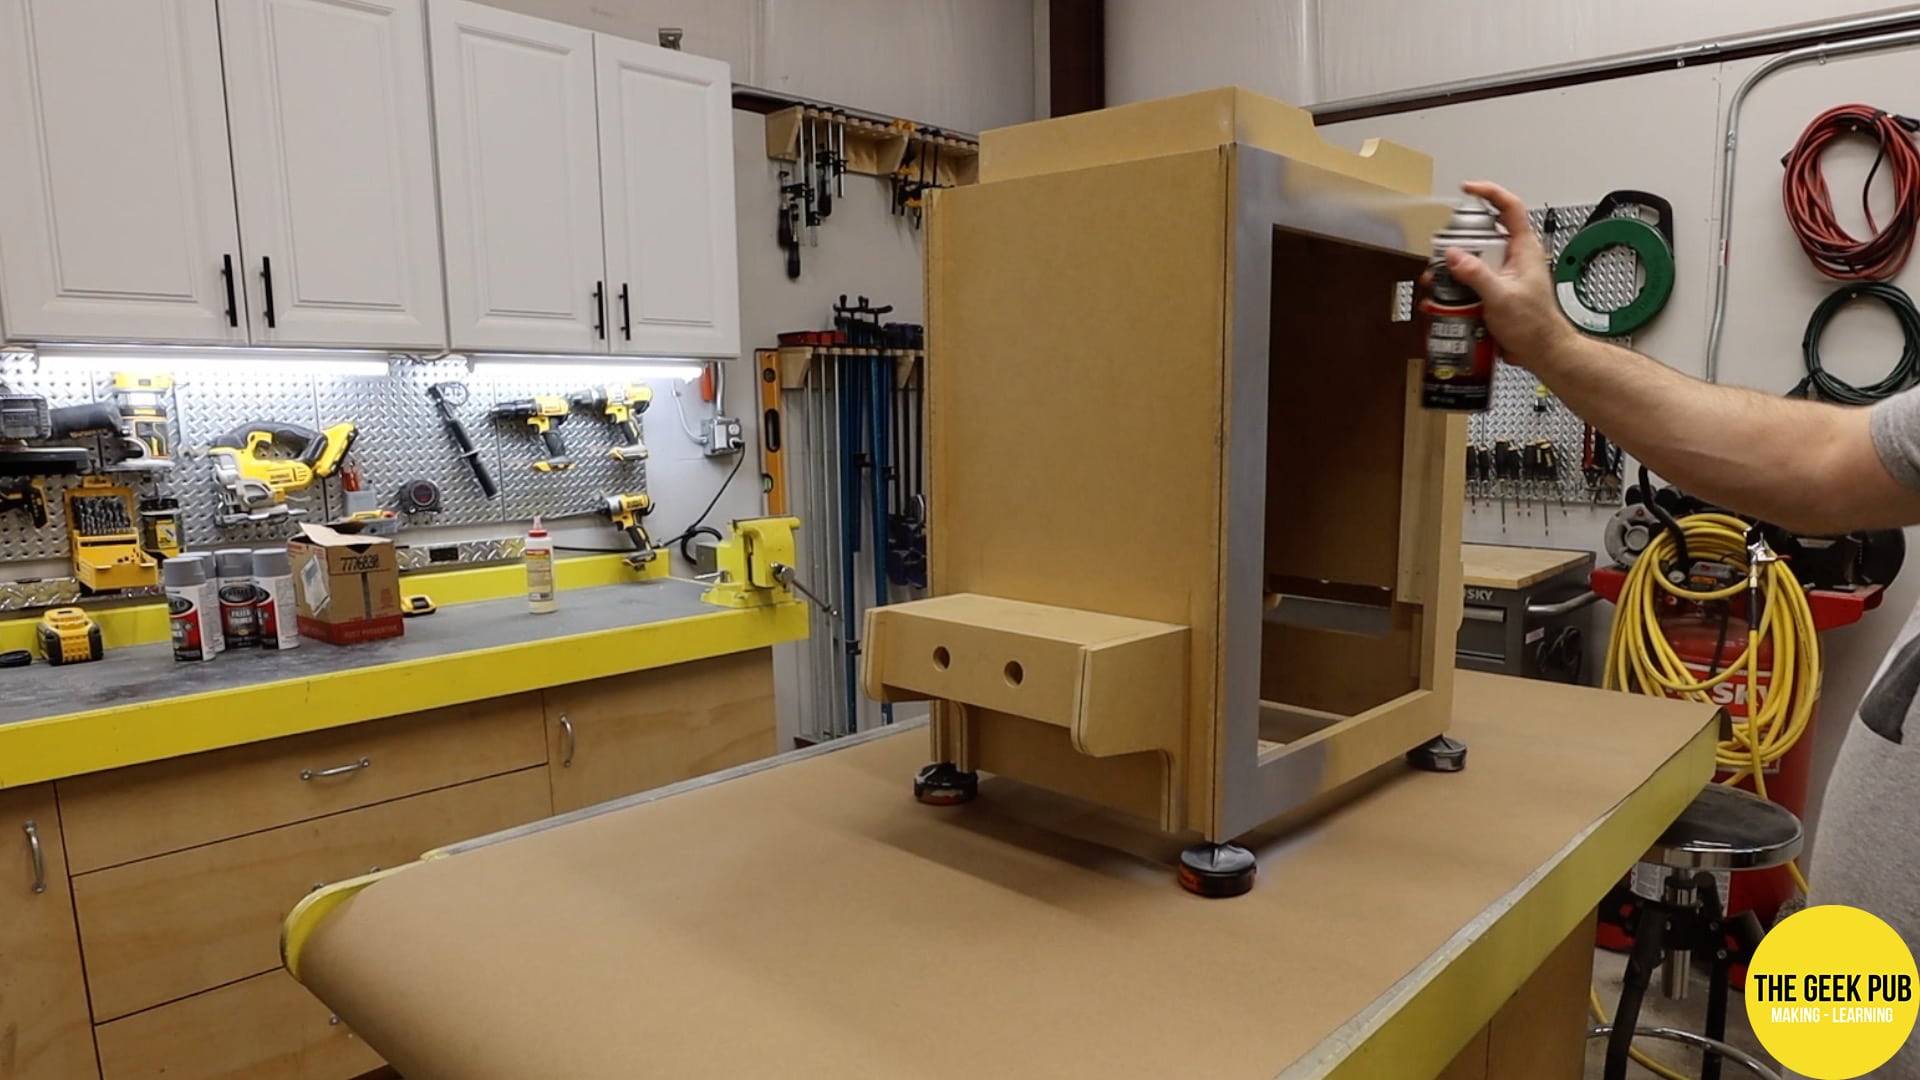
Priming and Painting the Arcade
I almost always prime my arcades with filler primer. (See Why I use Filler Primer.) Filler primer fills in all the little imperfections and when you sand it, leaves a finish smooth as glass. It’s awesome.
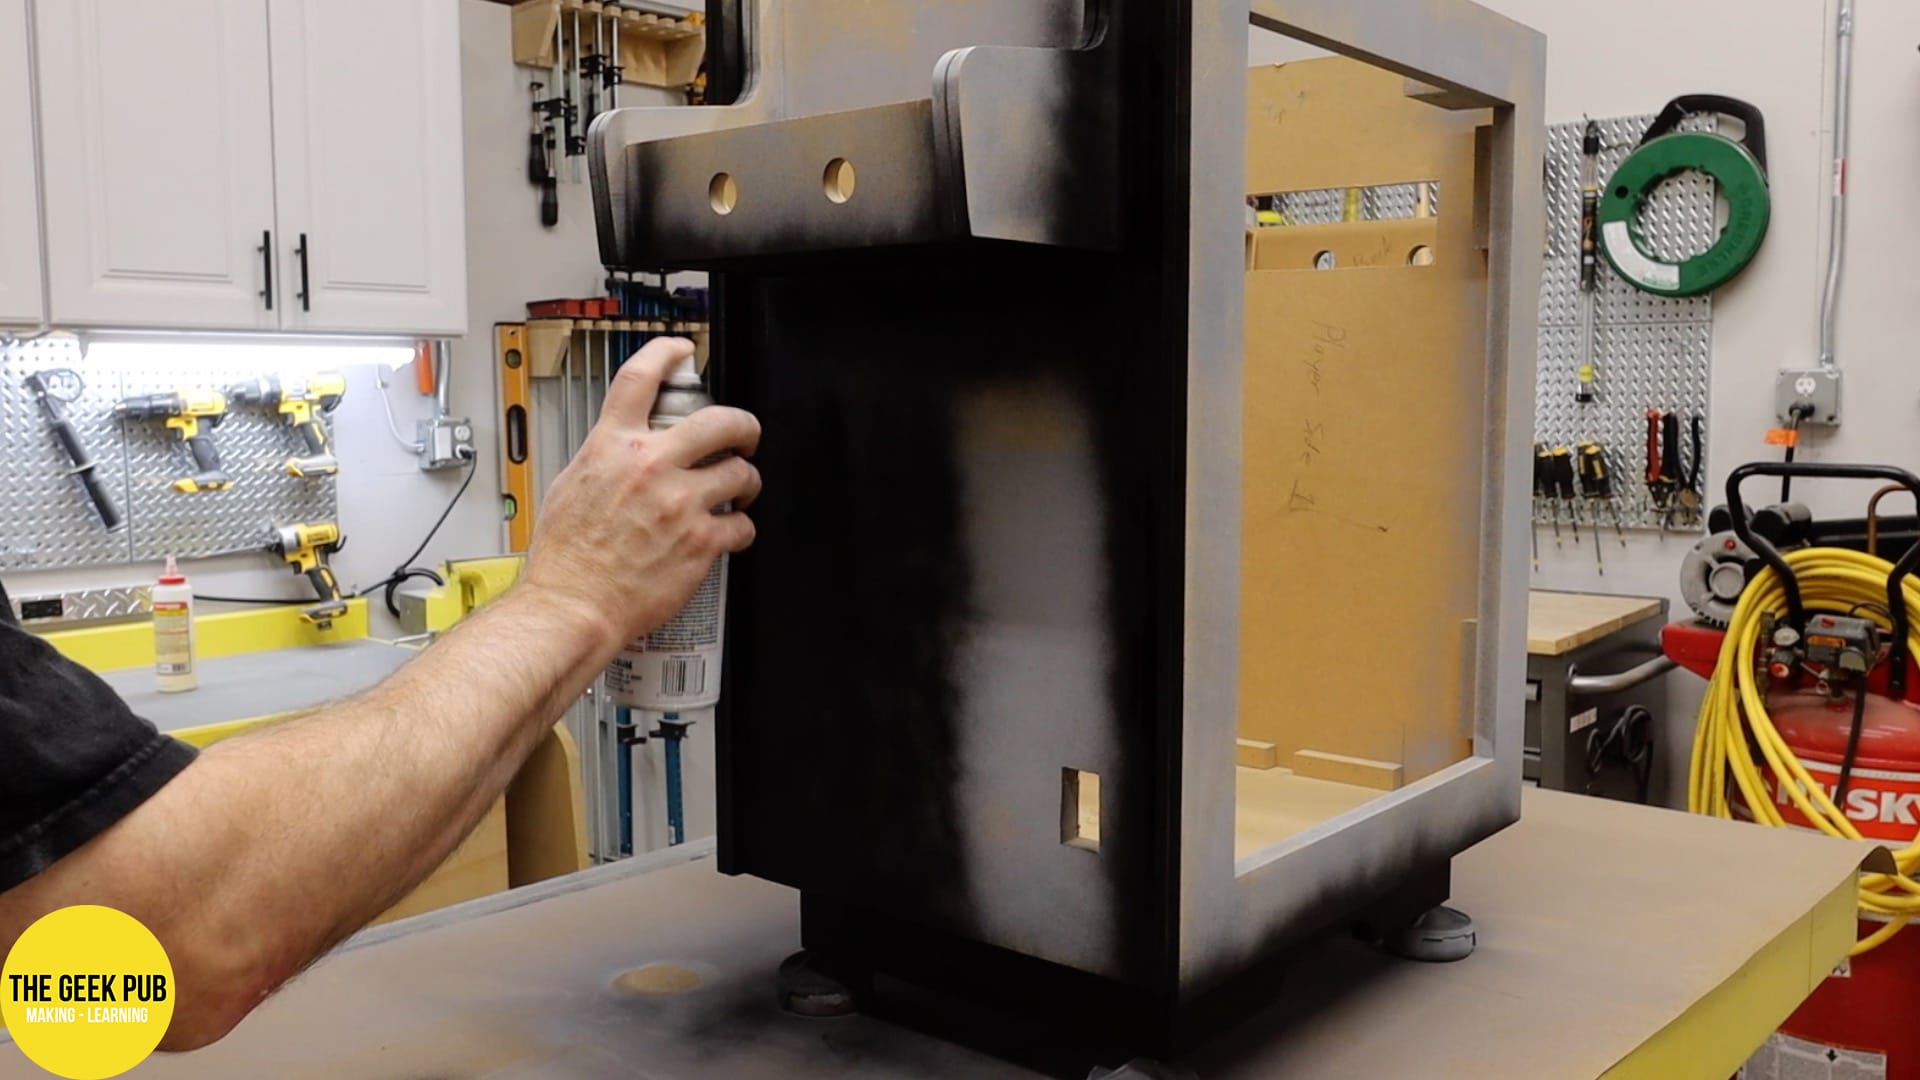
I then shot the arcade the arcade with flat black. All of this using rattle can paint from Home Depot. You’d be amazed how good the finish of rattle cans can be if you take your time and do it properly (using proper techniques that is).
I really like flat black finishes on arcades. Of course, it really makes no difference if you plan to clad your arcade with a vinyl graphic decal.
Installing the T-Molding

In my opinion, no arcade is complete without T-Molding. It just gives it that awesome retro-look! Be sure to check out our full line of Arcade T-Molding in The Geek Pub Store!
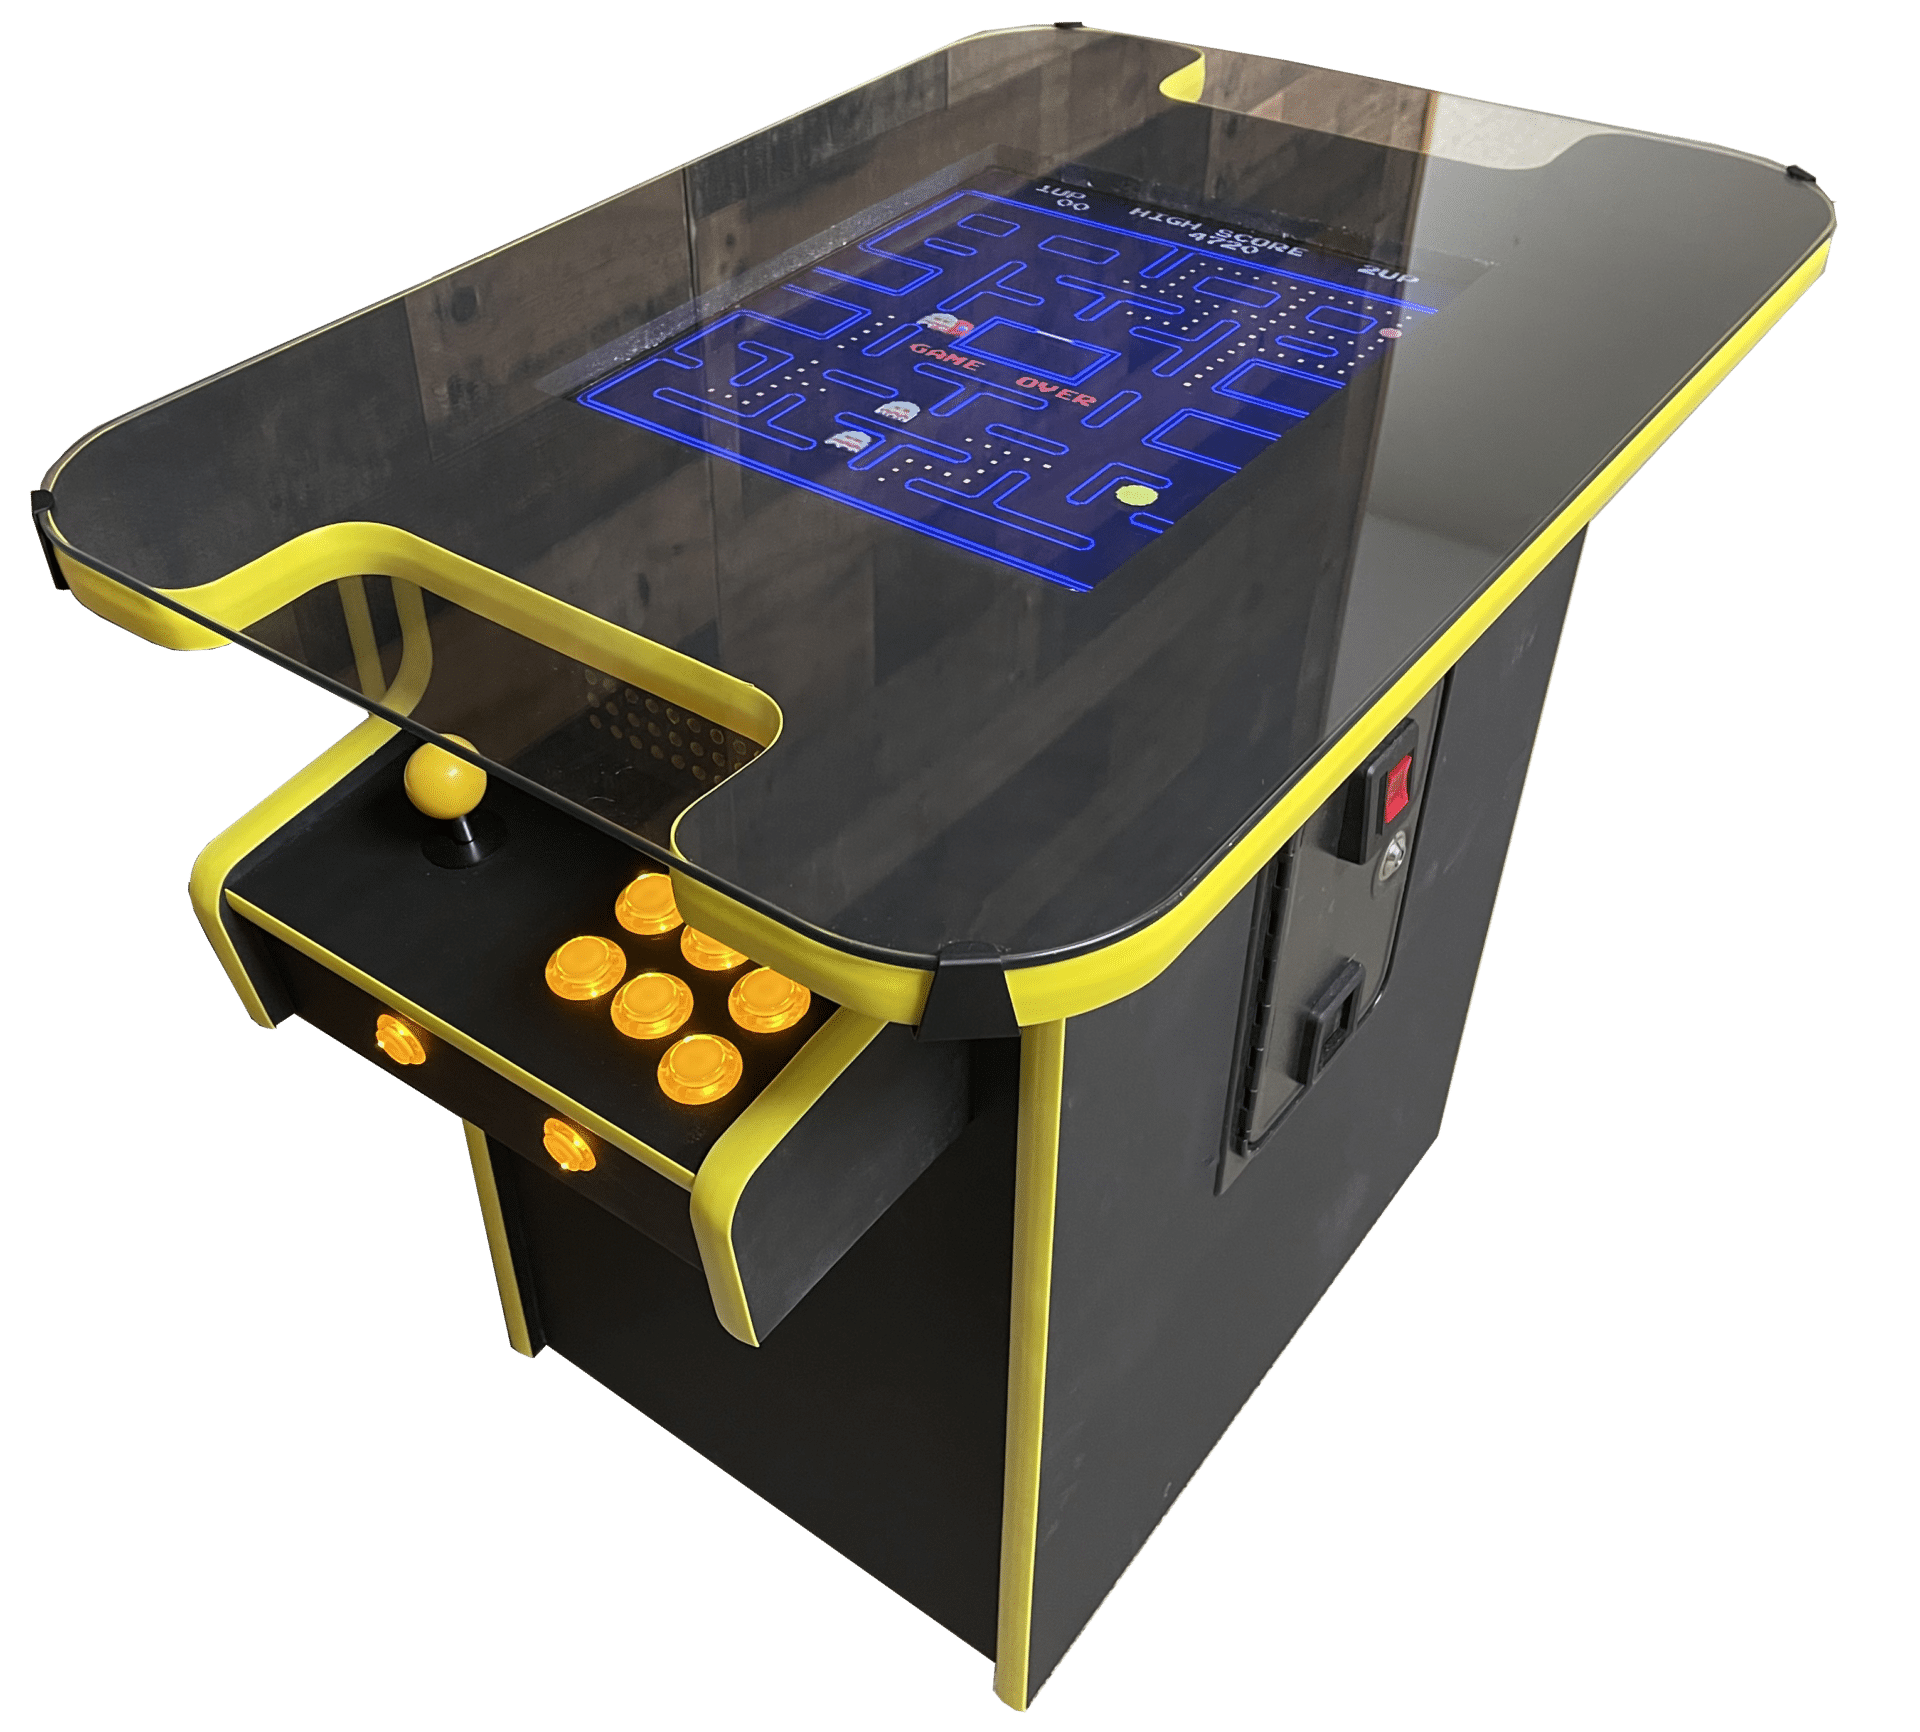
On our cocktail table arcade cabinet, we decided to go with our line of yellow T-Molding. We put it on the sides of the cabinet, the faces of the control pane, and around the table top. It looks amazing!
We used three different sizes of T-Molding to cover the different sizes of material. You’ll need to plan ahead unless you build all of your cabinet from the same thickness of sheet goods.


Installing the Cocktail Arcade Monitor
I bought a 4×3 CCTV monitor on Amazon and then removed the LCD panel from it. Finding the right monitor with a good viewing angle is important. It’s also a good idea to find a monitor where the panel is not glued in and can be easily removed with a few screws. You can find this info on this monitor in the plans.


Installing the the Controls and other Components
We’re in the home stretch now! Just need to install all of the components and controls for this cocktail table arcade cabinet! That includes the encoders, buttons, joysticks, coin door and of course the Raspberry Pi.
For our build we’re using the Yellow Arcade Controller Kit from The Geek Pub Store. This kit includes the large and small buttons, joystick, encoders, and all wiring. You kind the the arcade controller wiring instructions for these kits here.
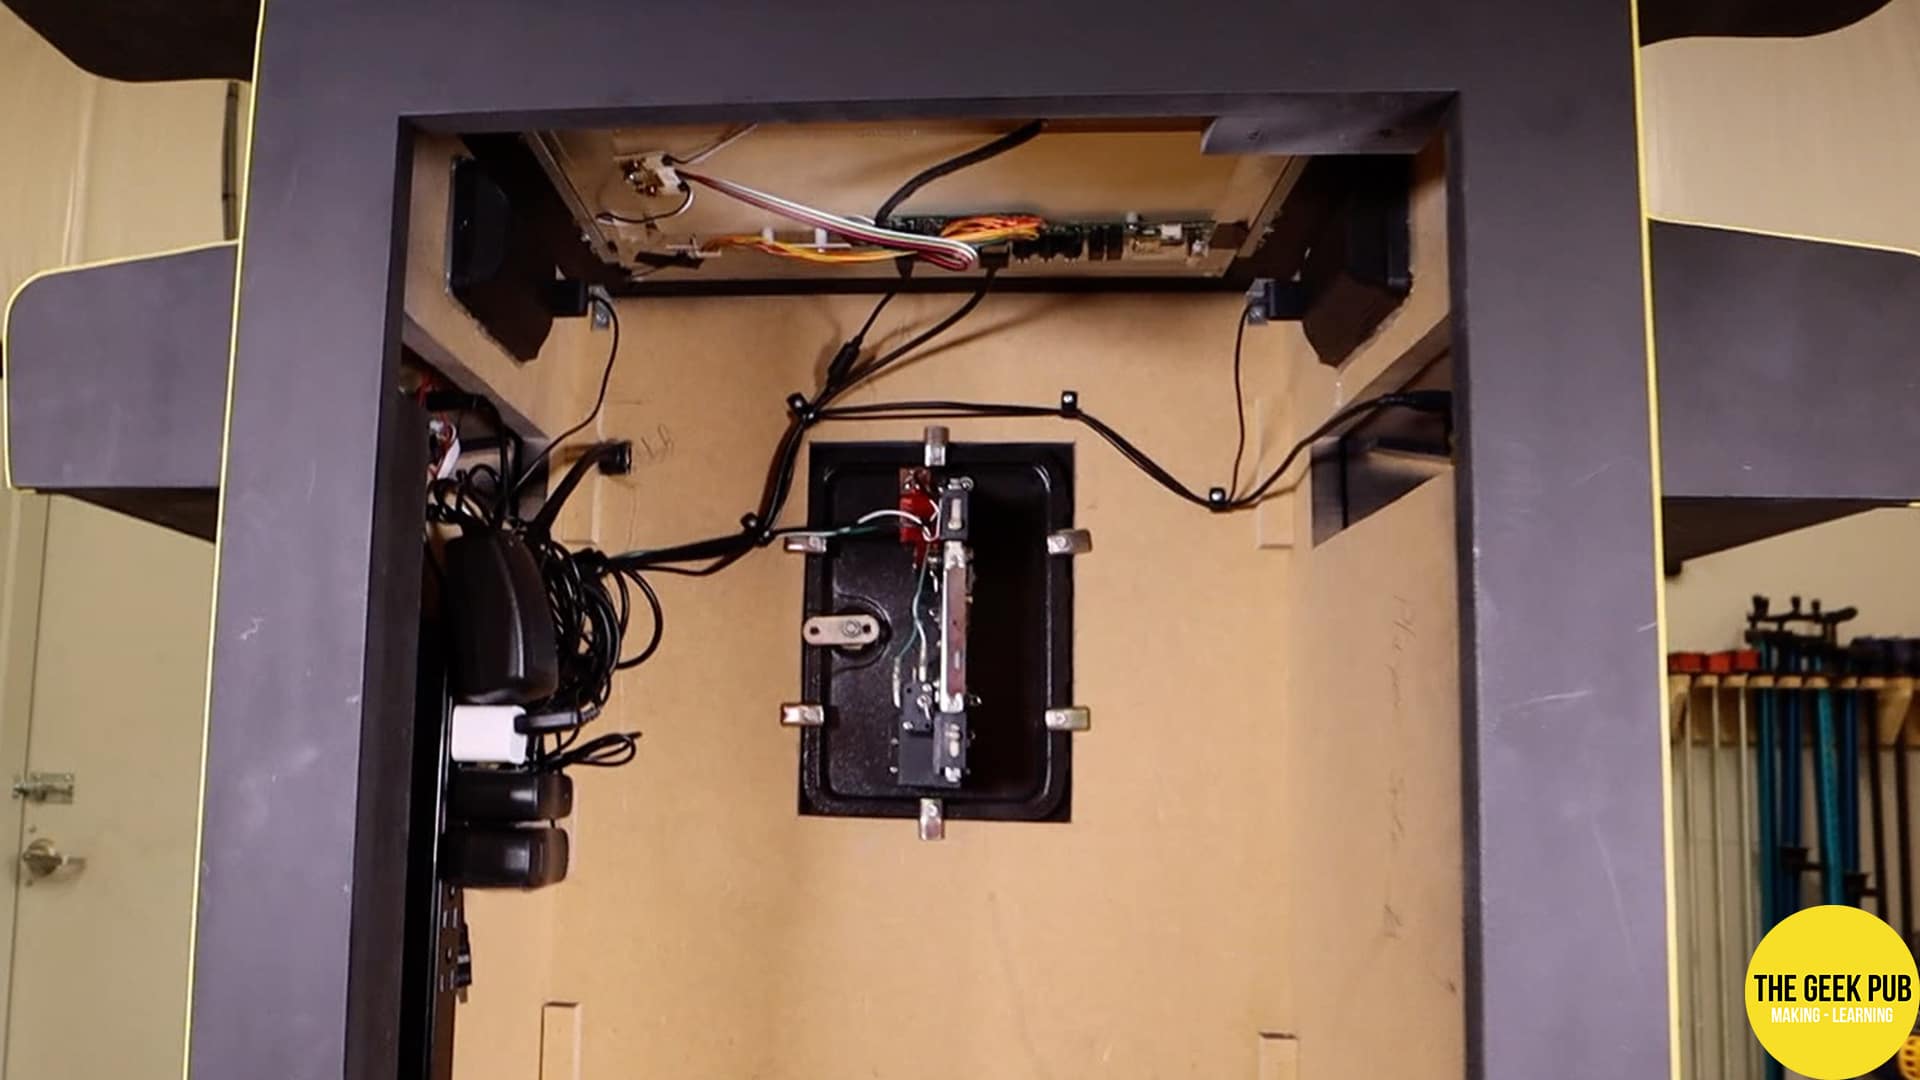
I started in this case by installing the coin door. It just slides into the hole and is secured by little brackets from the backside.


Then I installed the joysticks. They screw into the back of the control panel using four screws.


The buttons are next. They just slide through the holes and are secured by a plastic nut on the backside. The encoder is installed between the buttons and the joystick. The perfect place to hide it.


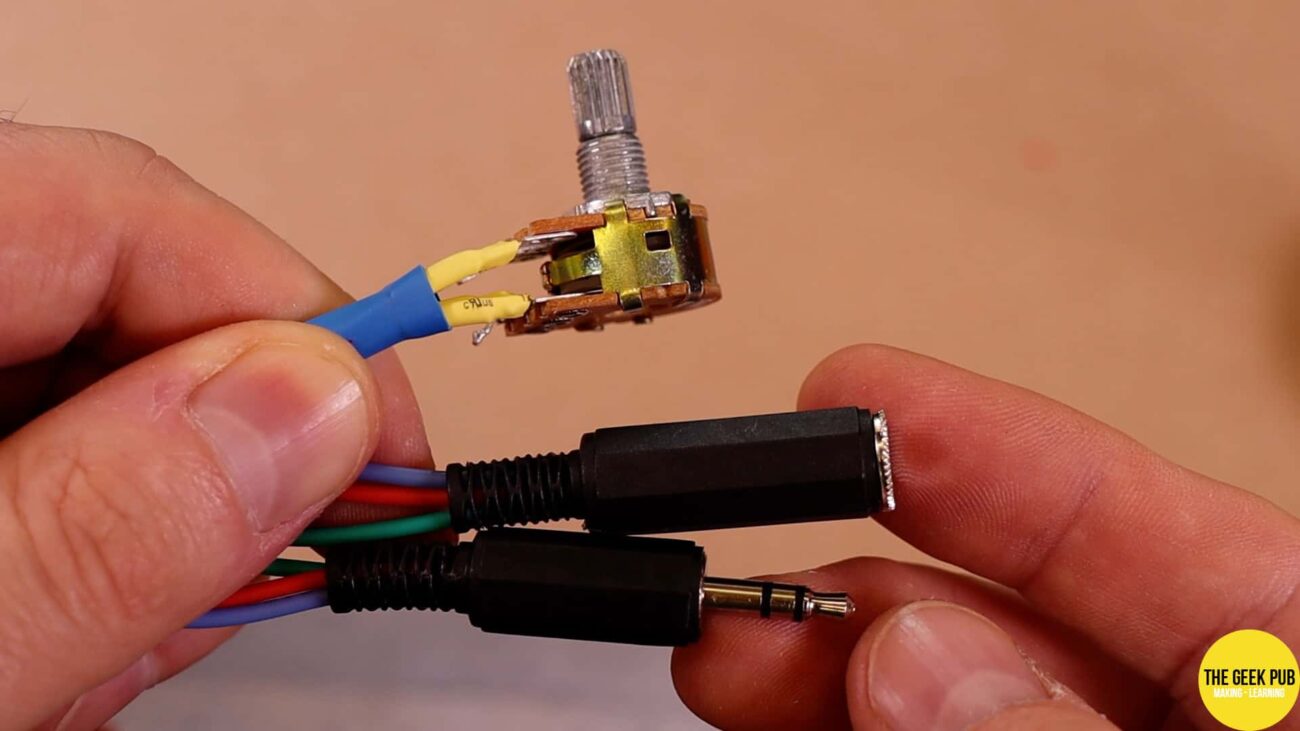
Each button gets a dedicated wire that connects to each button, along with a shared wire for powering the LEDs.


Once all wired up its time to install the control panel into the cocktail table arcade cabinet. I plugged the controller into a USB outlet just to check everything lit up and and it was a success! “Let there be light!”


You can see here the final wiring inside the cabinet. I tried to do a little cable management to keep everything organized. Mounted on the left side wall as a power strip, and the Raspberry Pi.
Installing the Glass Top
Every cocktail table arcade cabinet needs a glass top. When I see builds that skip this part I always shake my head!
I sat the glass top onto the cabinet and then gave it a really good cleaning with glass cleaner. I then attached it permanently at all four corners with tabletop arcade glass clips. These are just little U-shaped clips that screw in on the bottom side of the tabletop.


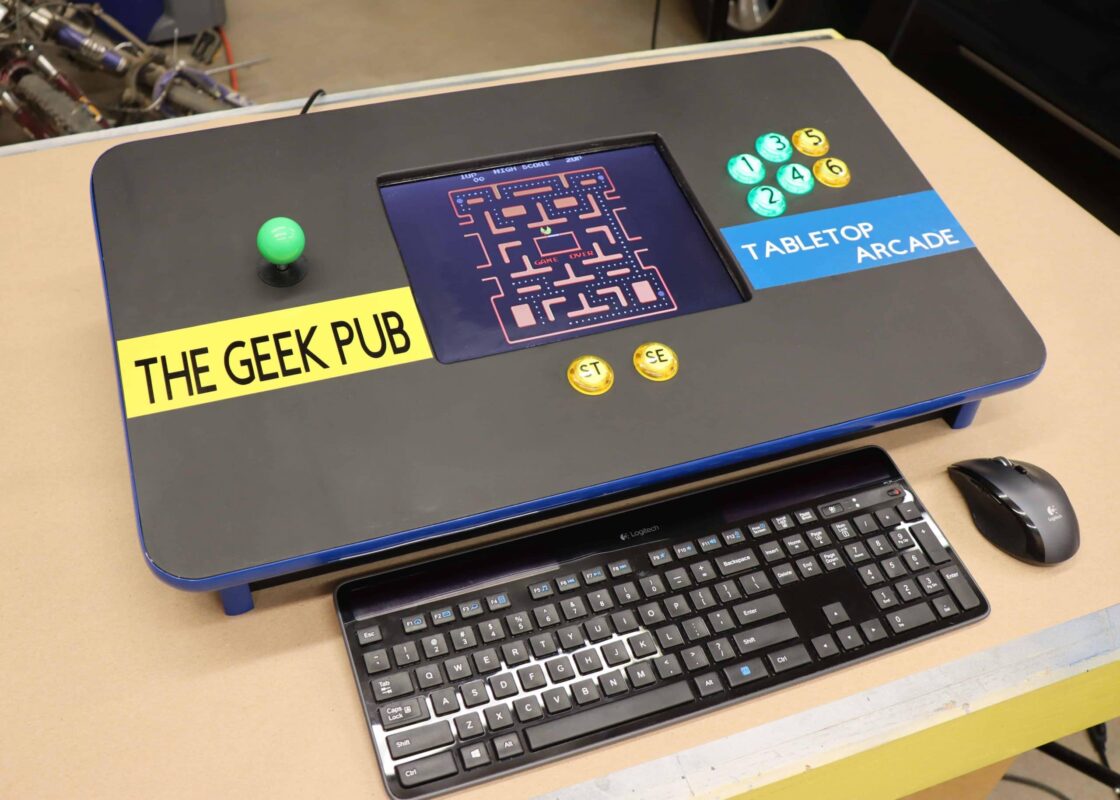
The Completed Cocktail Table Arcade Cabinet
I am so incredibly happy how well the completed cocktail table arcade turned out! It beat all of my expectations. Here’s a picture of it playing Pac-Man on MAME!


Superb
I ordered these plans and can’t wait to build this with my son. I’m considering moving the controllers to a single side on the long edge of the display, as we plan to play more side scrollers. Has anyone else done this already and would they be willing to share the plans? I feel reasonably confident in making the changes on our own, but would love to compare notes with anyone who’s already attempted it.
I just posted that I did just that. I set this system up as a four player system, with players 1 and 2 on the long side. I extended the side for this and had to adapt the plans, but it worked out great!
Thank you for giving me a place to start! I used your plans and updated them to allow for a four player version, with the first two players side by side on the long side and the third and fourth positions on the short sides. Looking at the possibilities of starting portrait games in traditional cocktail mode and landscape games in two-player/four-player side by side!
I’d love to see those plans, this is what I am planning to do.
Hi. I am almost done with the cabinet using the plans a a guide. I intend on adding a front two-player control panel for sideways games, and the top tilts up on a hinge like other arcades I’ve seen online. I’m curious what others have done regarding USB ports? Each player button set / joystick has a USB. I’m adding 4 spinners – each of those gets a USB. I have a single 3″ trackball – that will need a USB. The Pandora DX 3000 has only 2 (maybe only 1) USB, not clear if both are the same. Anyone do something similar? Ty
Any recommendations on where to get the cocktail top glass?