Blog
PETSCII Robots Arcade Cabinet Build
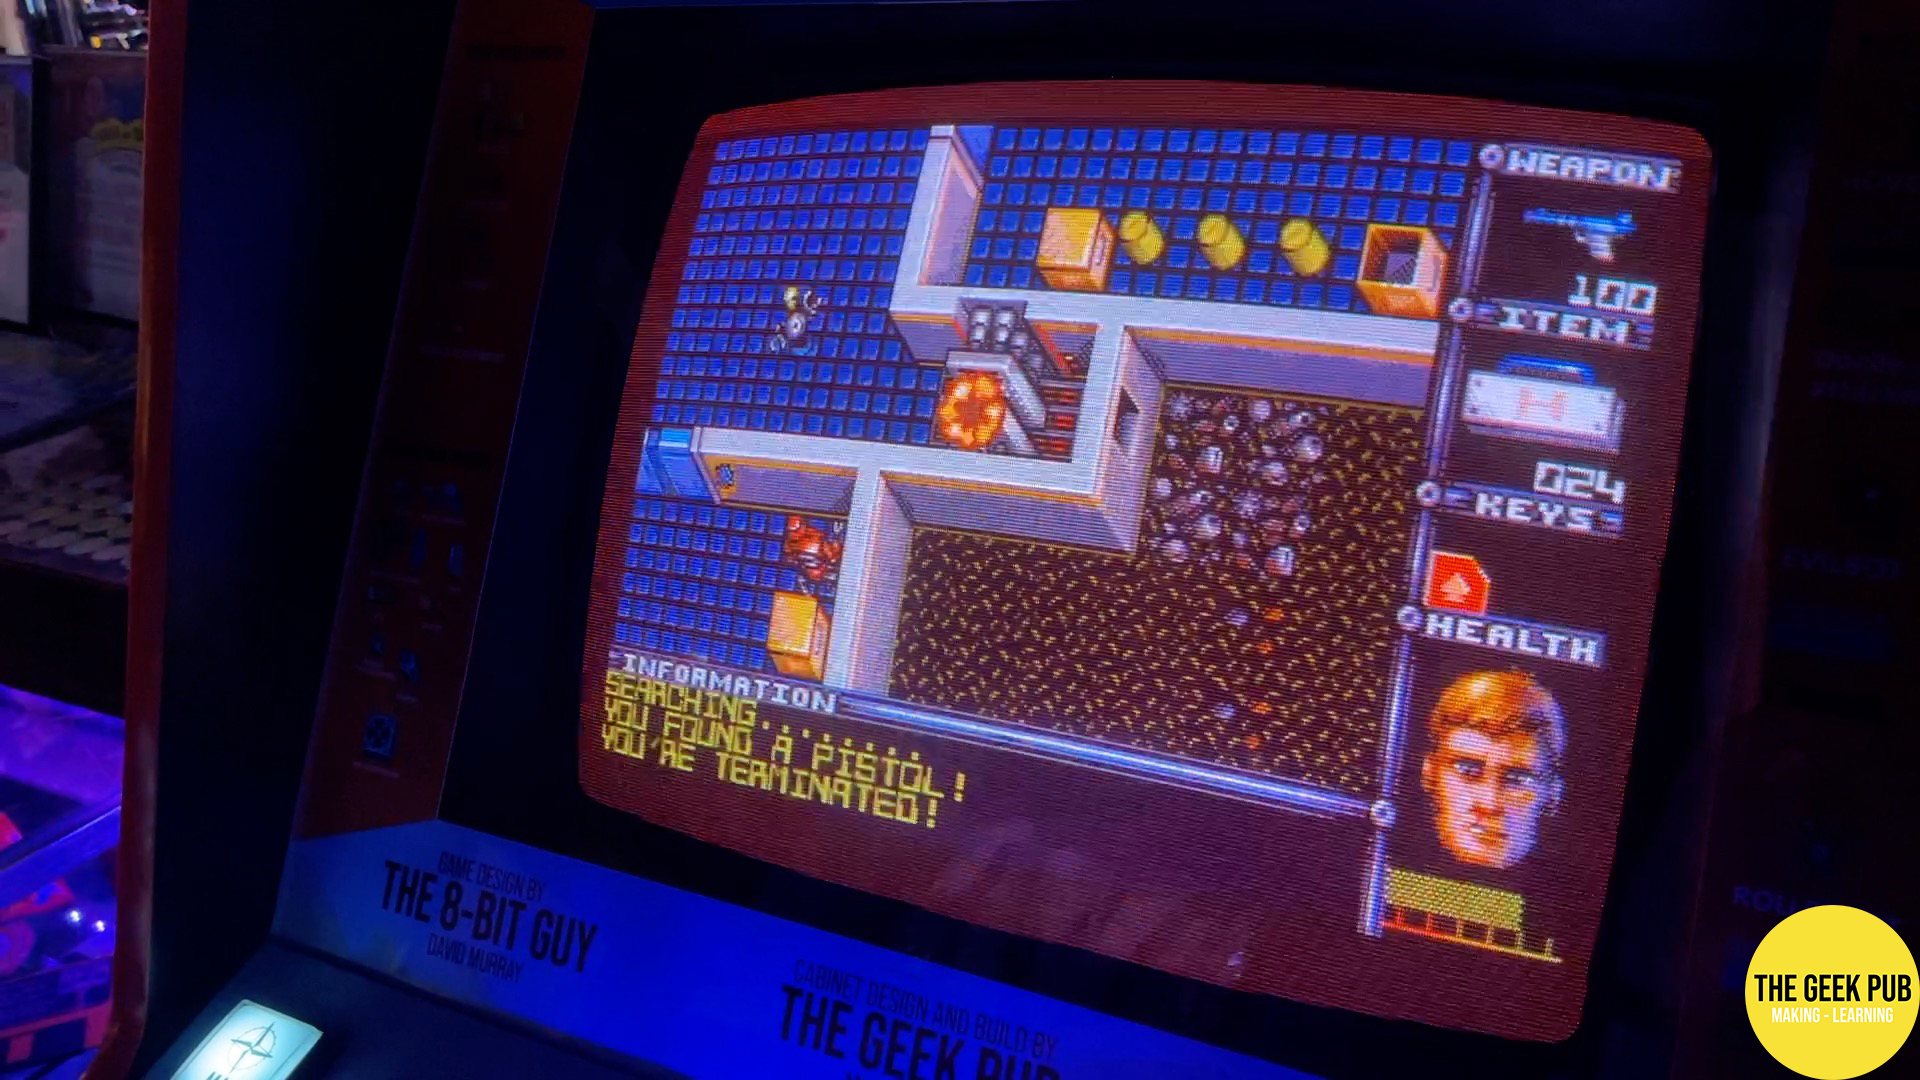
If you’re not familiar with a game called Attack of the PETSCII robots, it is a game created by my brother The 8-Bit Guy. It is a strategy game with a sci-fi theme, and plays somewhat similar to the Ultima games created by Richard Garriott although with many differences.
PETSCII is the name of the character set used on the Commodore PET computers of the late 1970s. This is a play on the term ASCII which is used on most modern computer. PETSCII Robots was originally designed for and released on the Commodore PET. Of course PETSCII is used as a play on the word “pesky”. Meaning Attack of the Pesky Robots, using PETSCII characters!
Attack of the PETSCII Robots may shortly become (if it hasn’t already) the game with the most ports to the most number of platforms! It’s available on Commodore, Atari, Apple, Nintendo, Sega, and many other platforms, including numerous architectures within those brands!
The 8-Bit Guy’s “Part One” PETSCII Video
A couple of months ago, David approached me about making a PETSCII Robots arcade. Of course I immediately knew this was something we had to do! You should watch David’s video on the build before finishing this article and video. It’s a Mega Update video, but he spends some time talking about the arcade version at the beginning of it.
The Geek Pub’s “Part Two” PETSCII Video
And here’s our video on the completion of the arcade and getting it up and running at The Electric Starship Arcade.
Designing the PETSCII Robots Arcade Cabinet
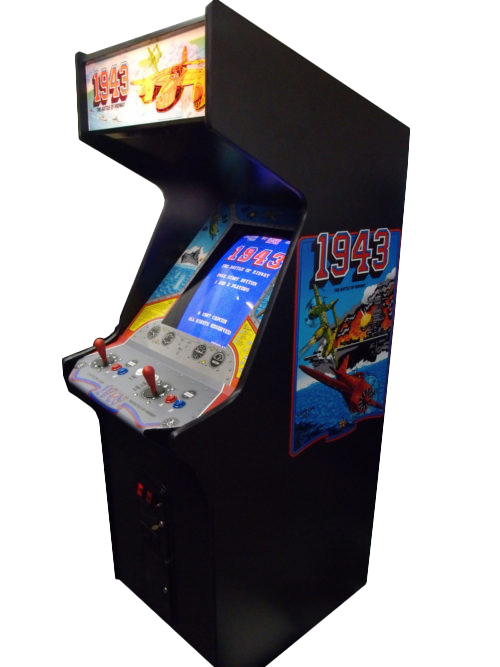
I got to work immediately and designed the cabinet in SketchUp! David gave me a list of cabinets that he liked and the one he liked the most was the one used by the the game 1943: The Battle of Midway. 1943’s cabinet however, is just a standard Dynamo HS-1 cabinet.
But! We wanted to change a few things. Mainly we chopped of the top so it would be about 5 inches (13 cm) lower. This allows it to roll under any standard doorway. The second thing we needed to change was the control panel. The Dynamo has a pretty cool looking control panel with a bunch of neat angles, but unfortunately that style turned out not to be compatible with the control layout we needed for PETSCII Robots.
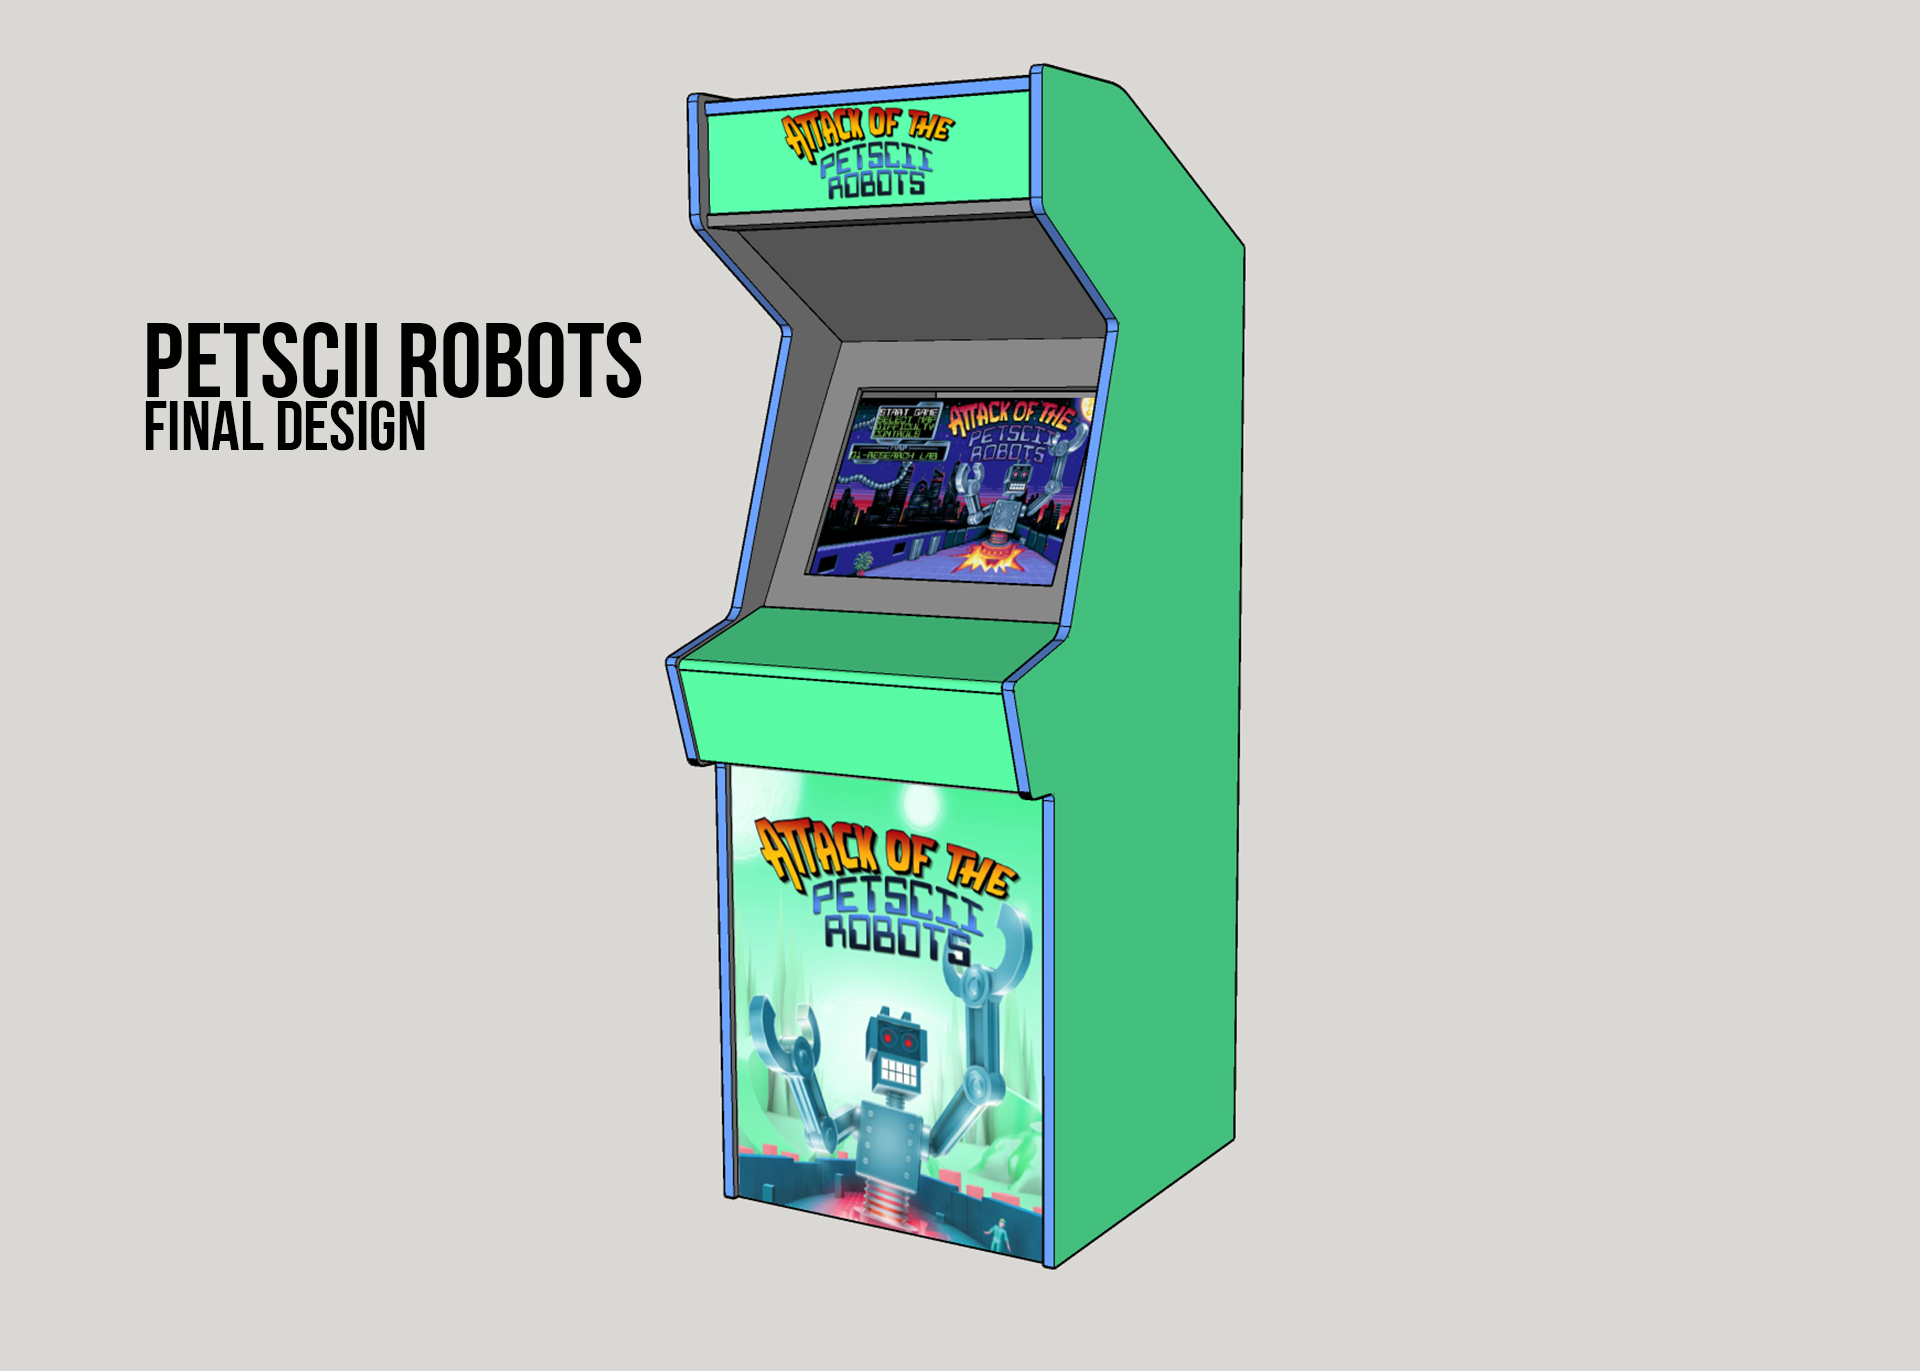
We went through a few iterations, changing up and softening some of the angles and dimensions. We finally landed on this design (although we significantly changed the artwork and color scheme during production).
This design looks really awesome and I think we were all pretty happy with the final version.
Building the PETSCII Robots Arcade Cabinet
Building any arcade cabinet is a weeks long project. At least for the first time I’ve built this specific design. I can usually spit out repeats pretty quickly. But let’s go through my process for a first time build.
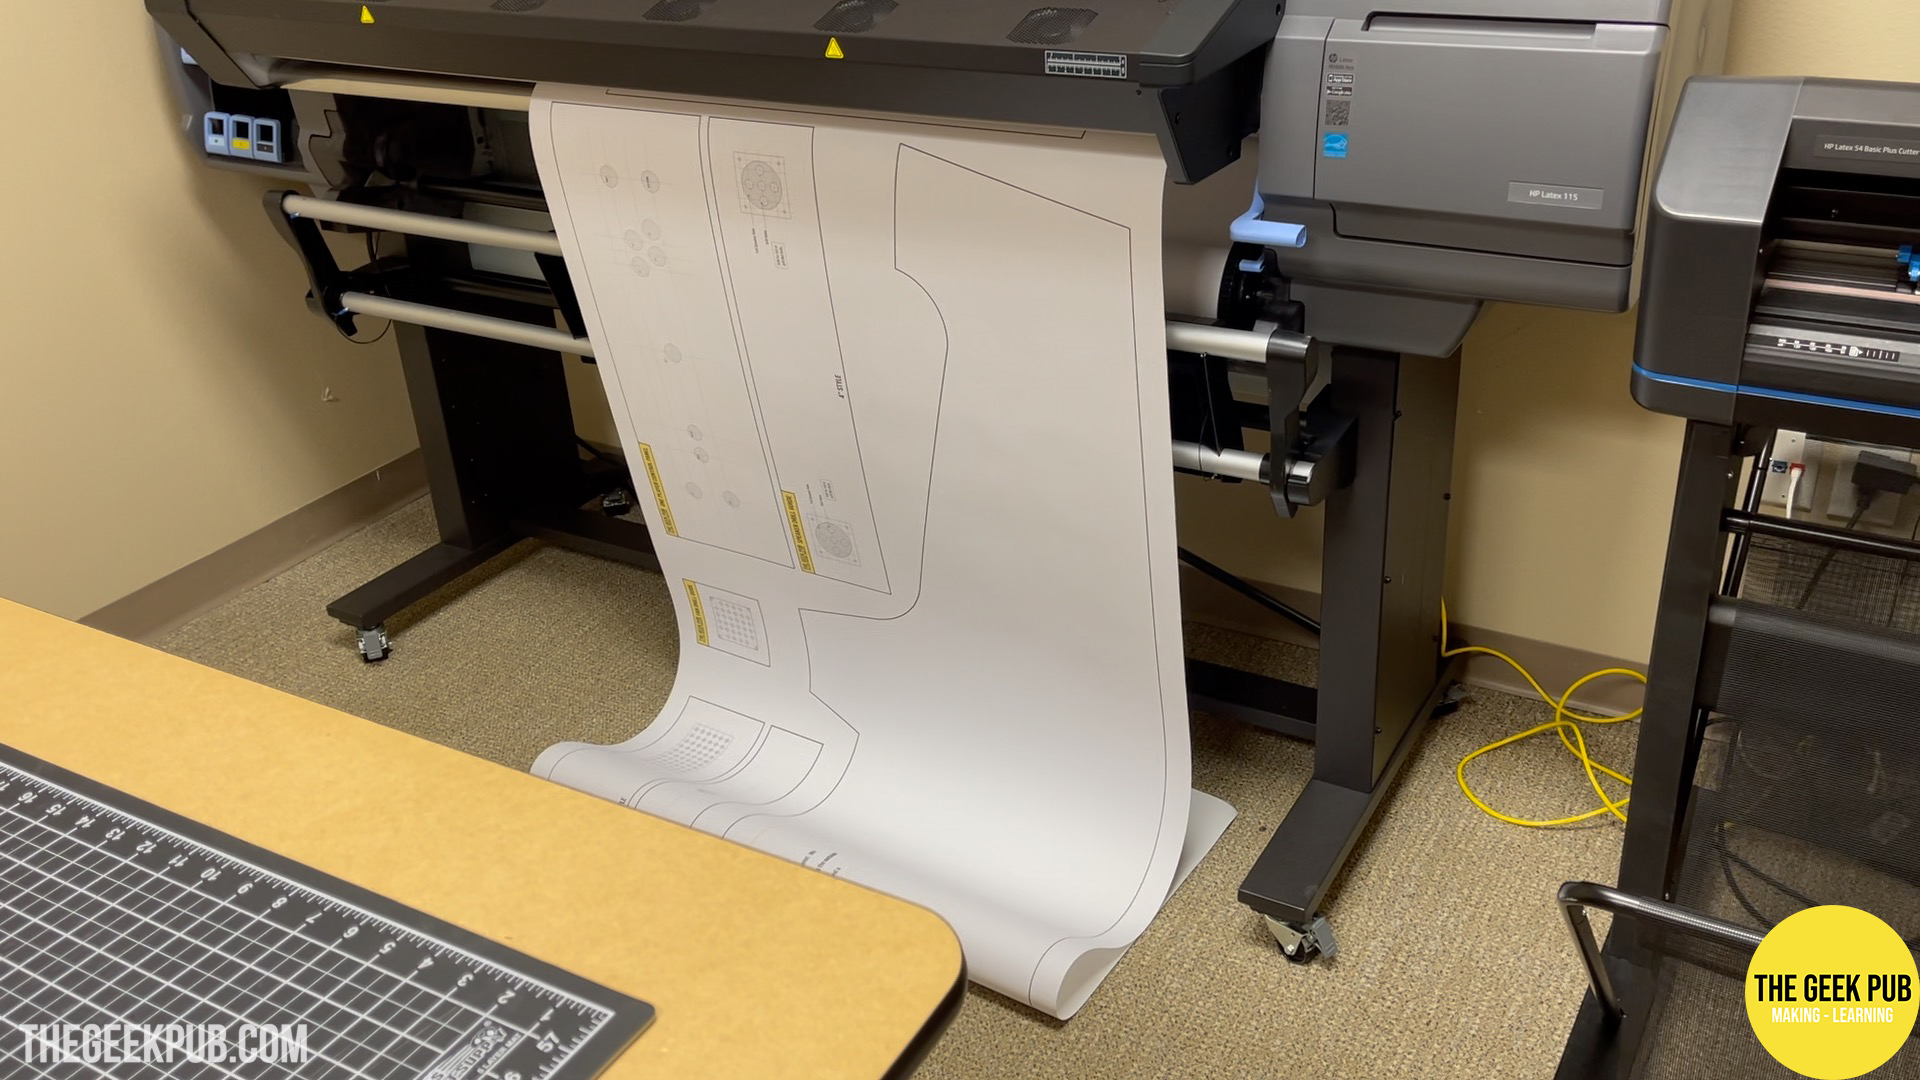
Printing an Arcade Cabinet Template
I have an HP Latex 115 large format printer and cutter combo unit for our business. This is the printer we use to print our very popular Arcade Button Labels, our Arcade Templates, and our Arcade Skins. It prints on paper, vinyl, plastic and banner materials, while the cutter is able to do die cutting (“perf cuts”) and cut through operations.
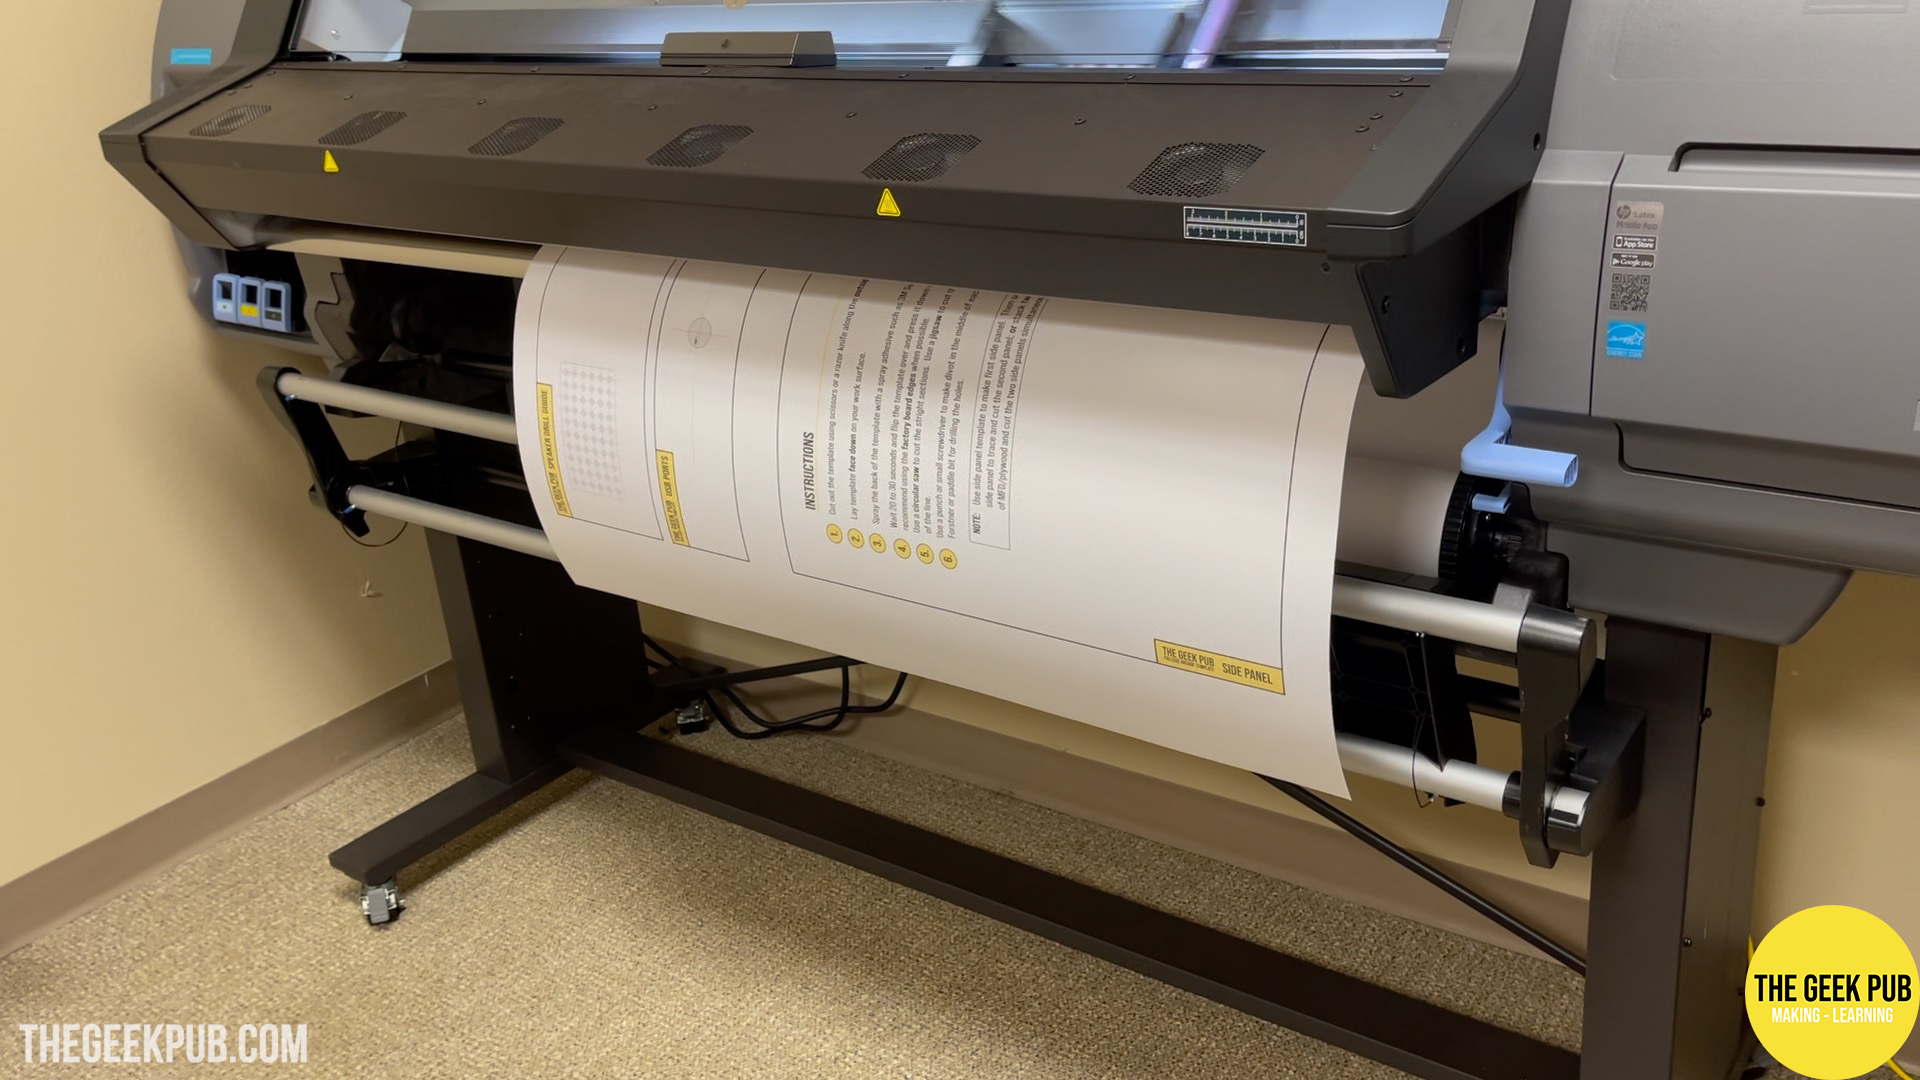
Having this printer has made it possible to really up our arcade game. Pun intended! It allows us to make better arcades and plans, and allows us to make better products for our customers.
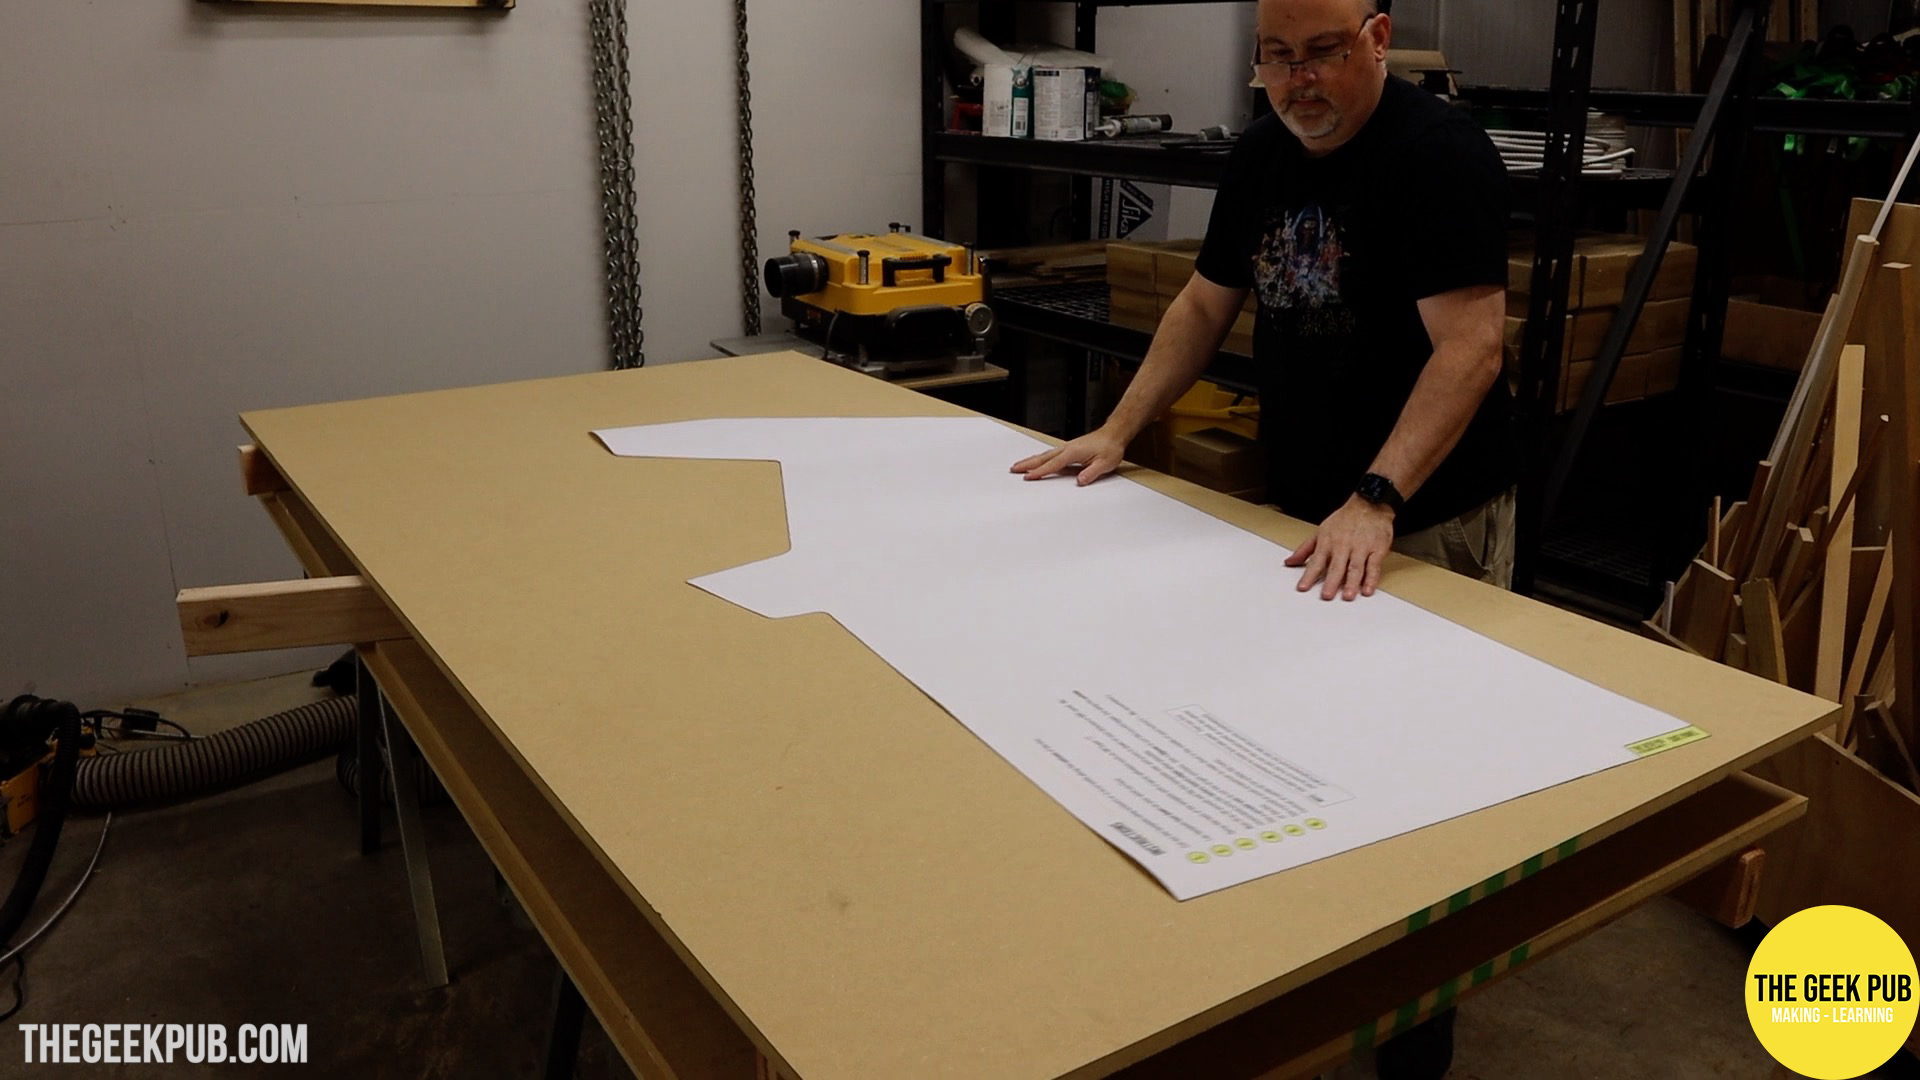
With the template printed, I can then place it on a sheet of MDF. I like to use 3M Super 77 spray adhesive.
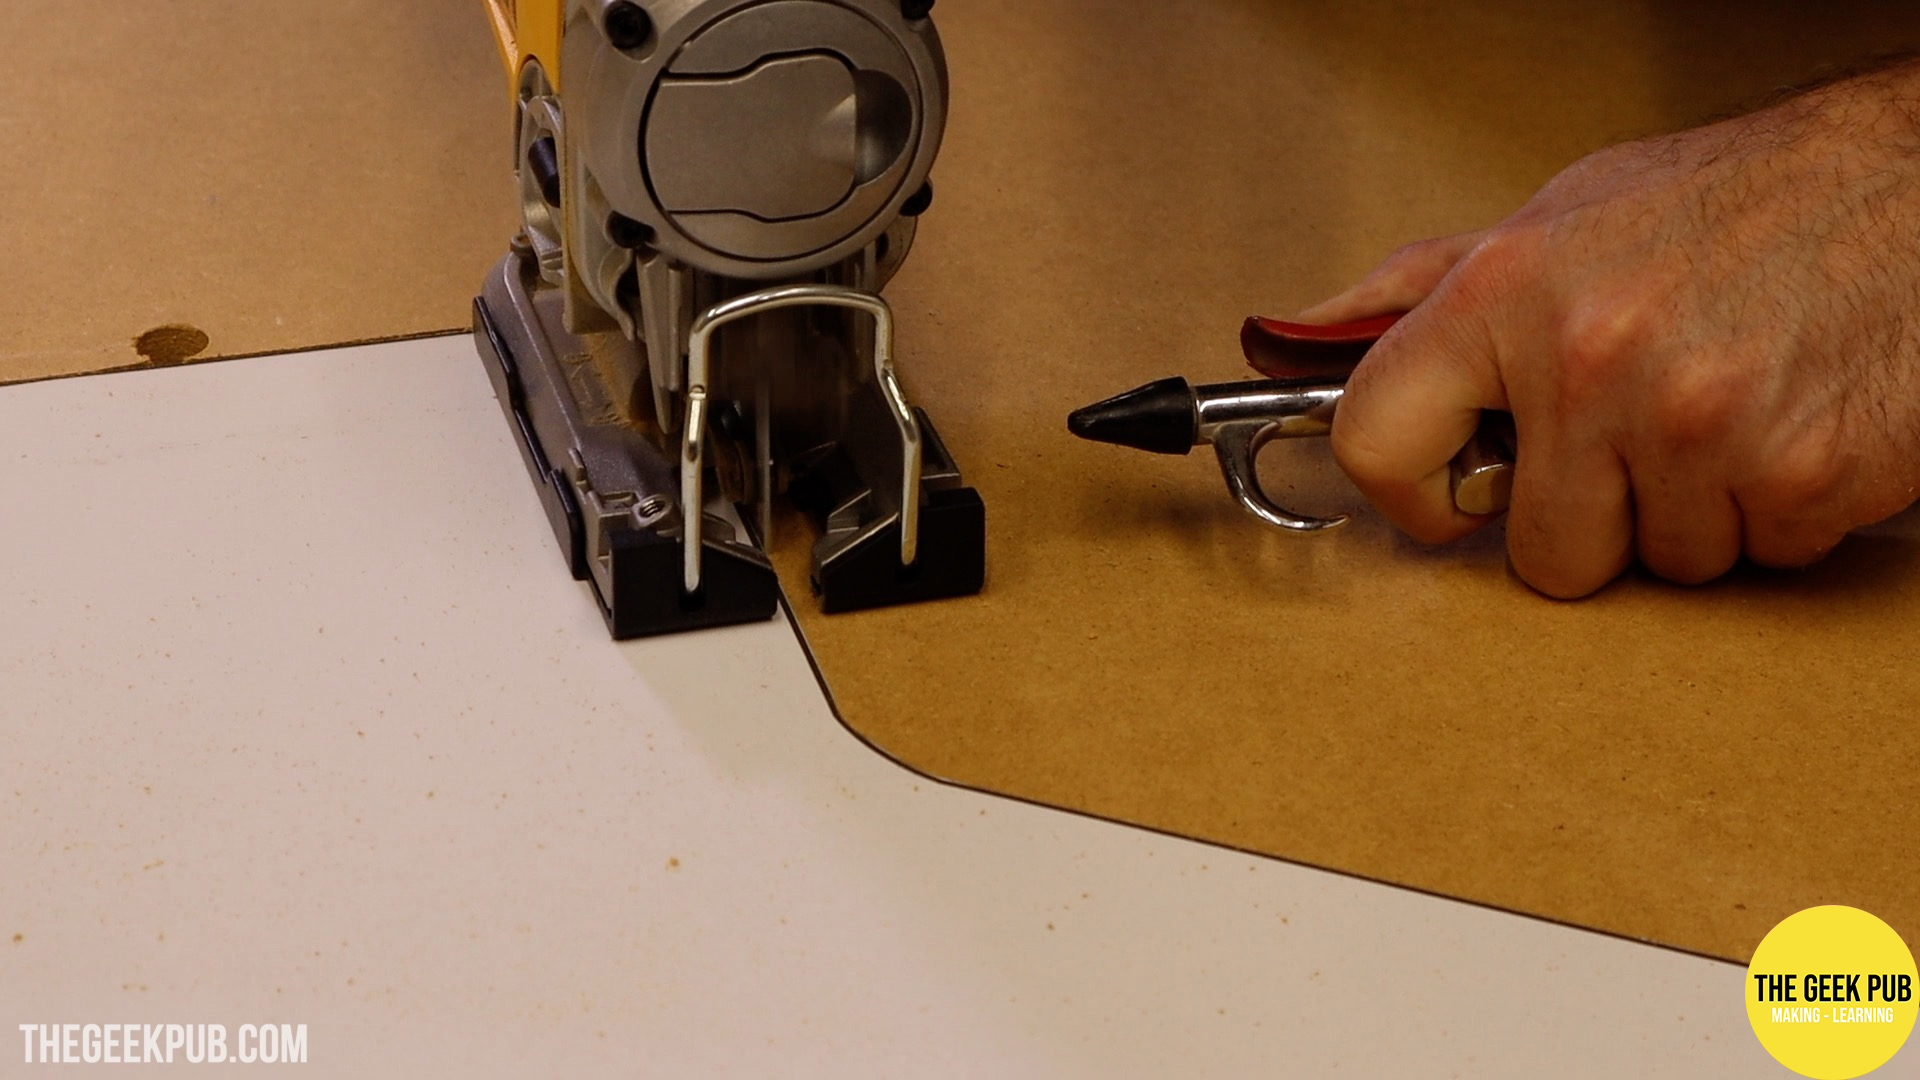
Cutting out the Side Panels
My tool of choice when cutting side panels for arcade cabinets is the Jigsaw. A lot people complain about not getting straight lines when using a Jigsaw. If that’s you check out our article on why your Jigsaw isn’t cutting straight! The main thing I have found besides having a good saw in the first place (with a blade guide bearing), is to resist the temptation to go faster. Keep the saw on medium speed and just go slow. This will allow you to keep the blade aligned to the material.

After a few minutes, the first panel is ready to go!
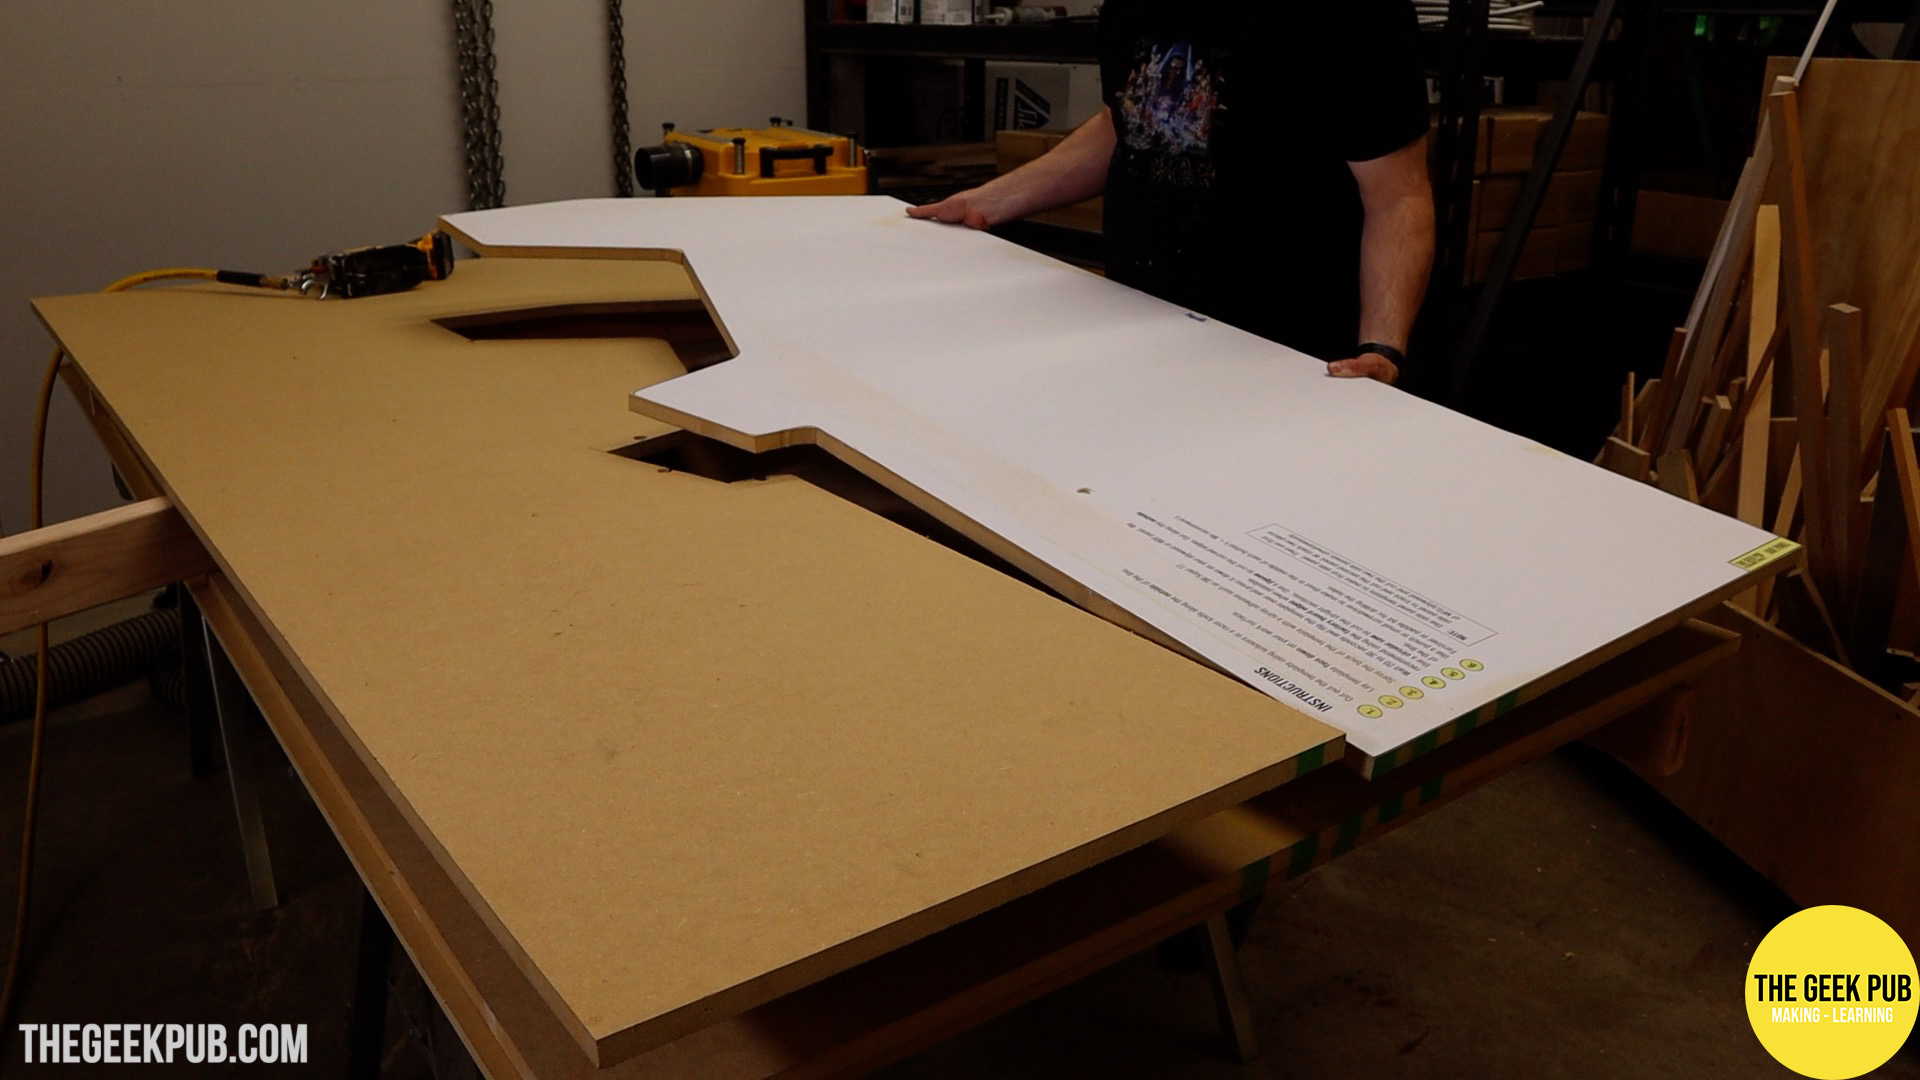
After making the first side panel, I needed to make a copy. A lot of times, I will just lay two sheets of MDF down and cut them together. Unfortunately on this PETSCII Robots build, I didn’t have a jigsaw blade that was 1.5 inches long (38mm).
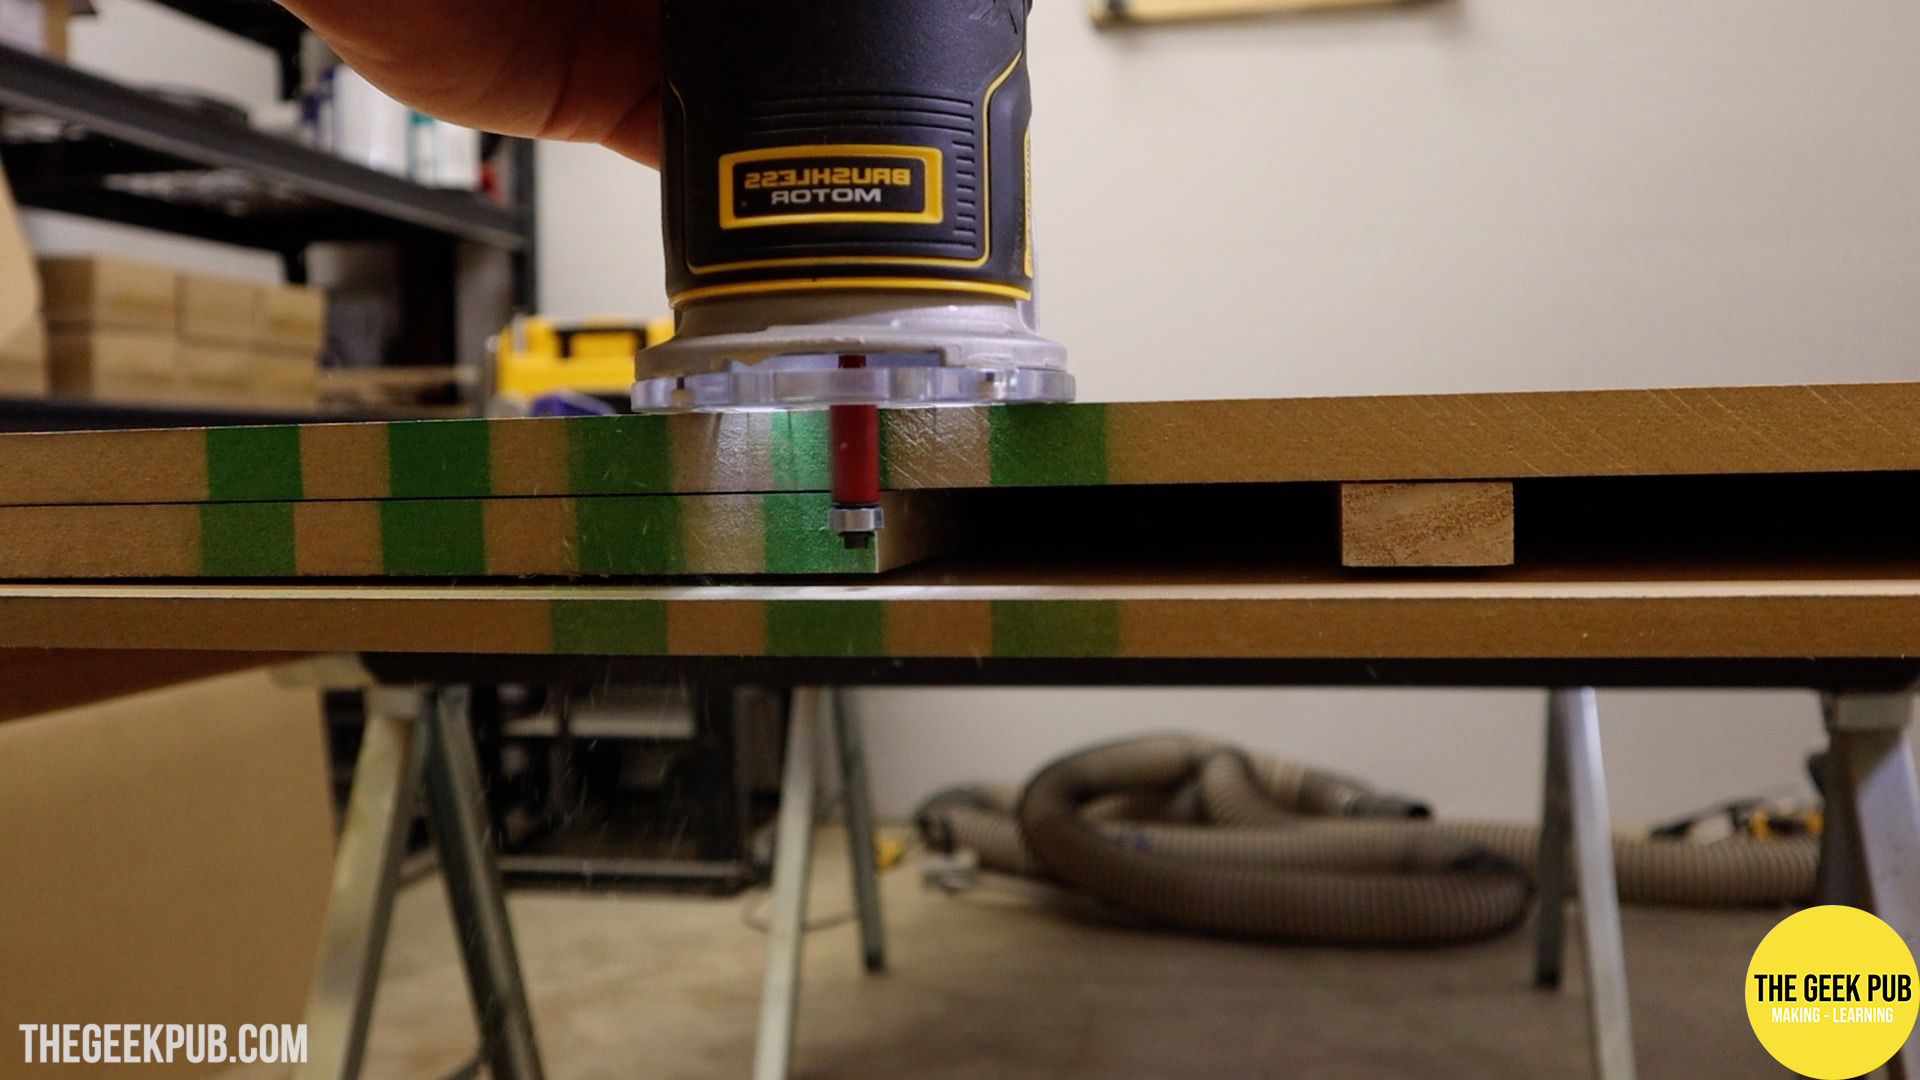
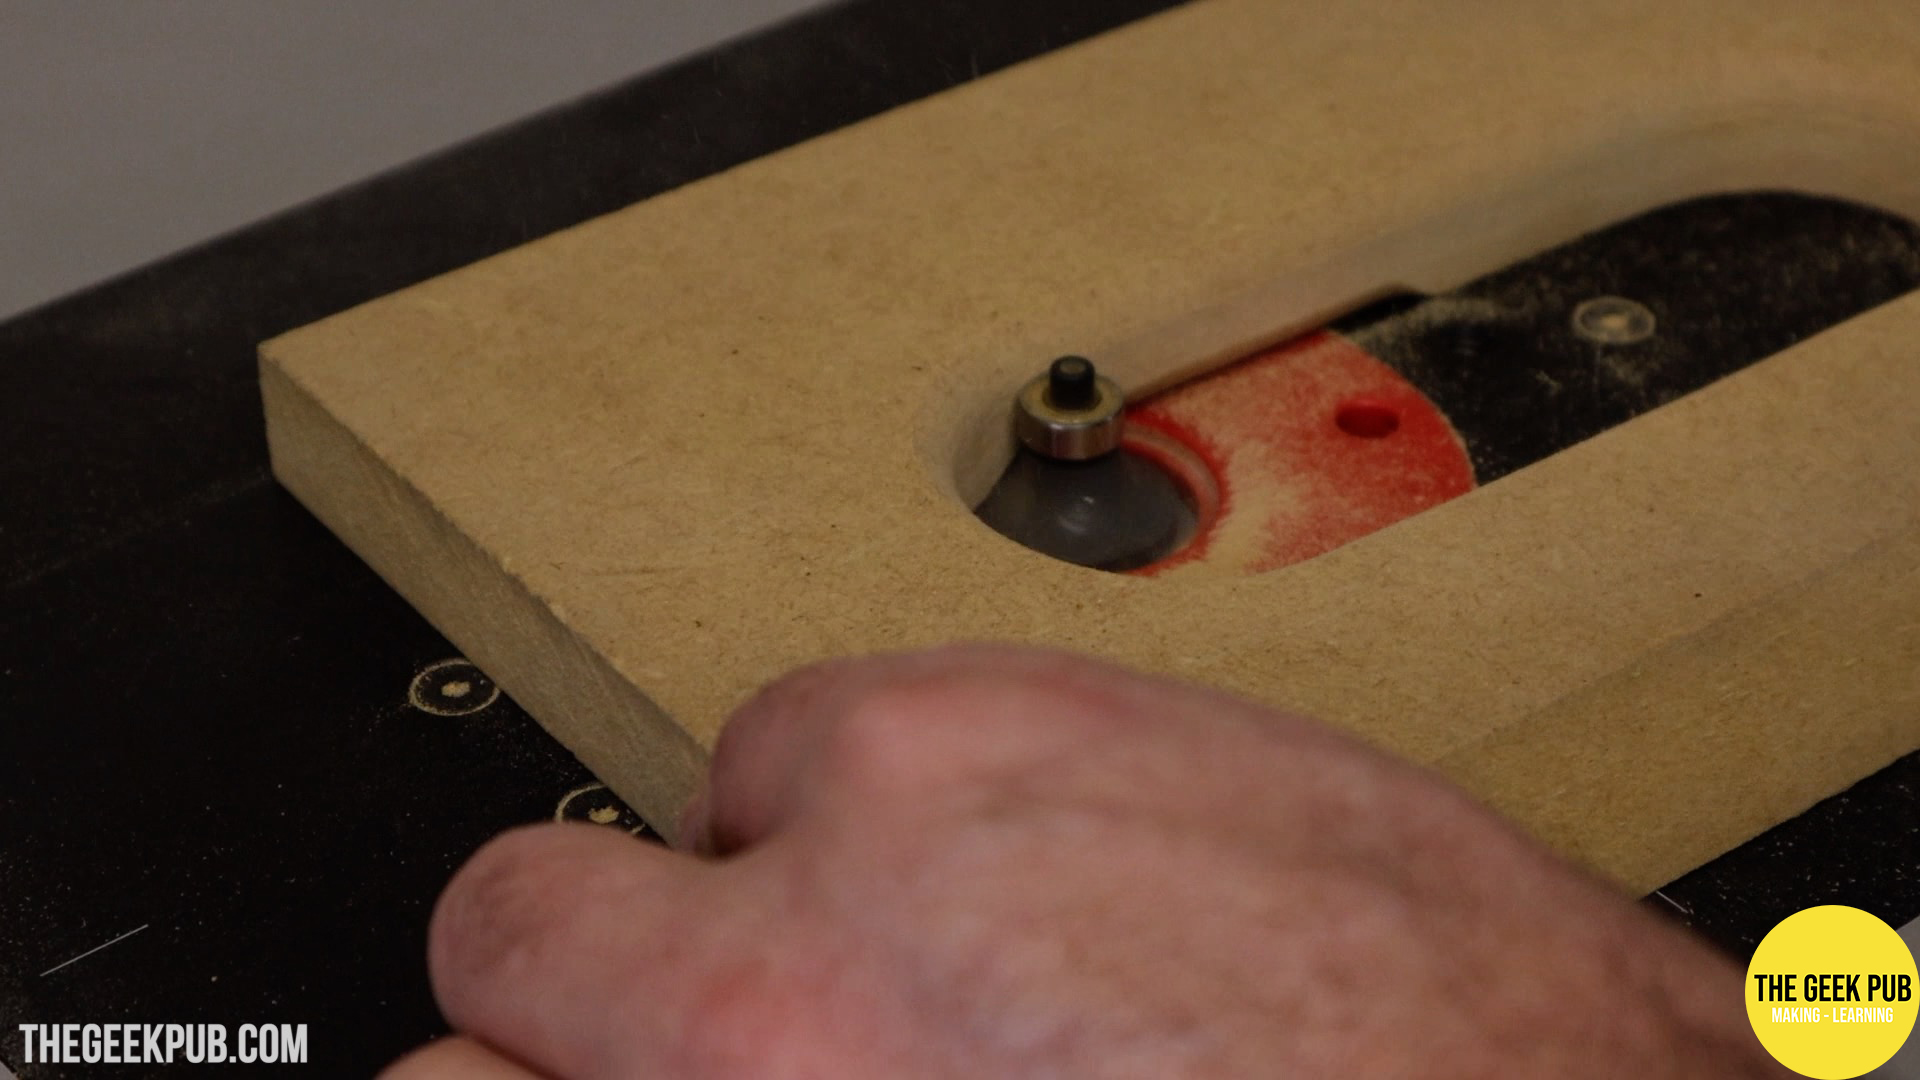
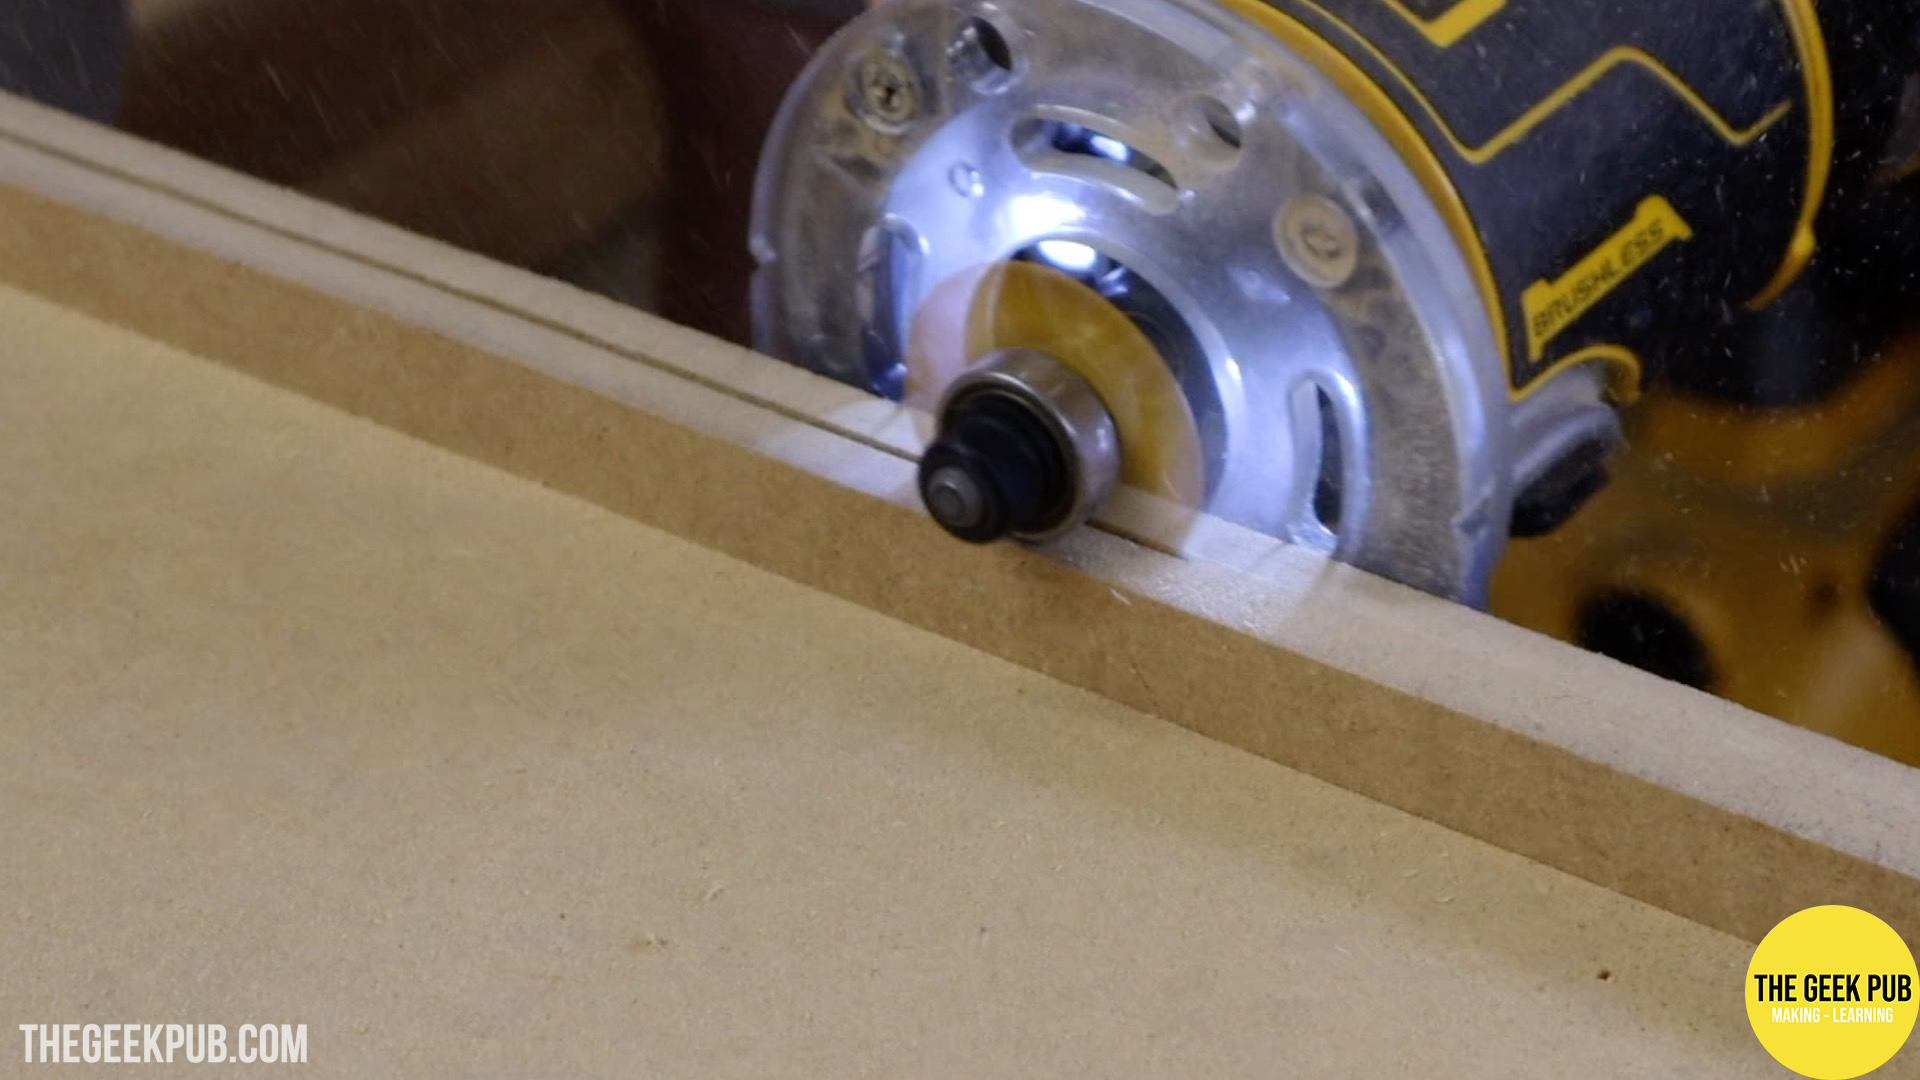
I could of course, print another template, and do this all over again. Instead, I decided to use the first side panel as a template and then cut the second panel using my router and flush trim bit. This is a super fast and easy way to make a copy of something. The bearing of the flush cut bit rides on the original side panel while the blade cuts out a copy on the fresh MDF.

Adding the Top and Bottom Panels
From here, I moved on to cutting and placing the top and bottom panels onto the PETSCII Robots arcade cabinet.
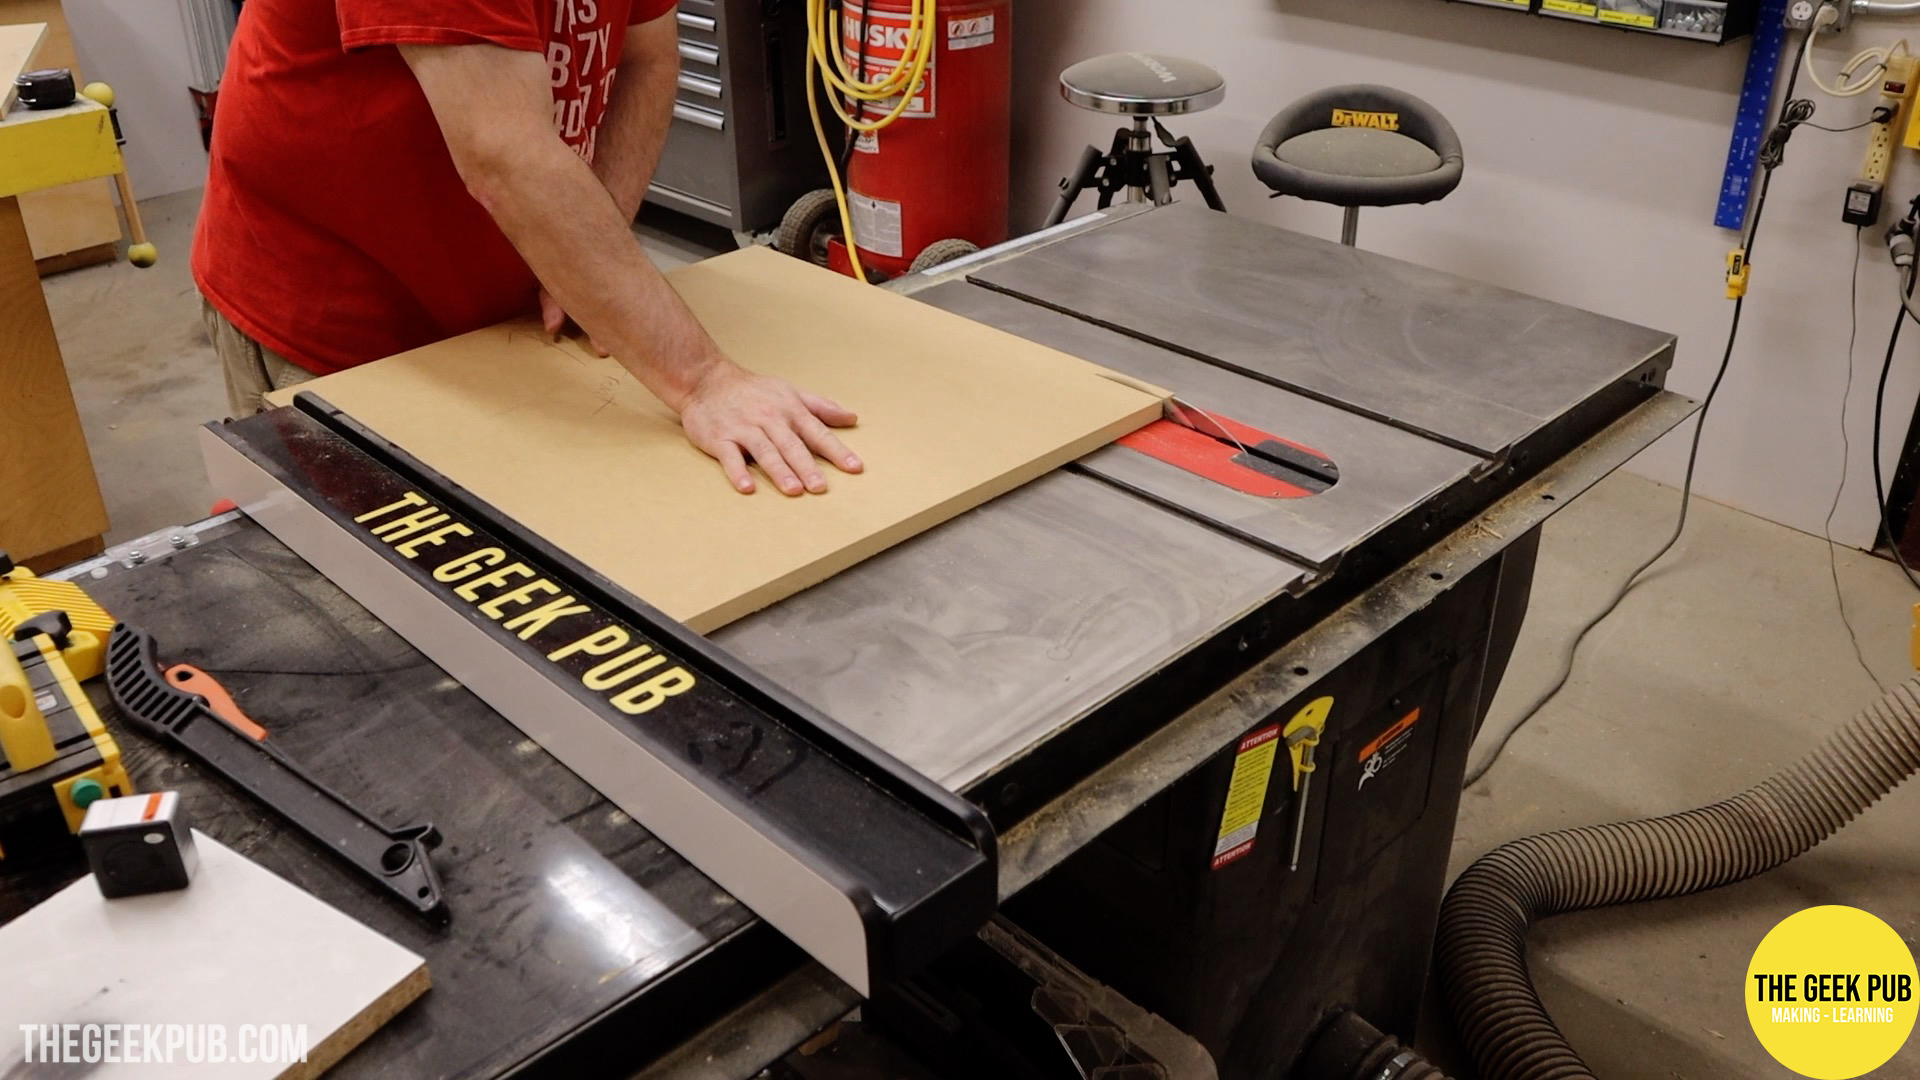
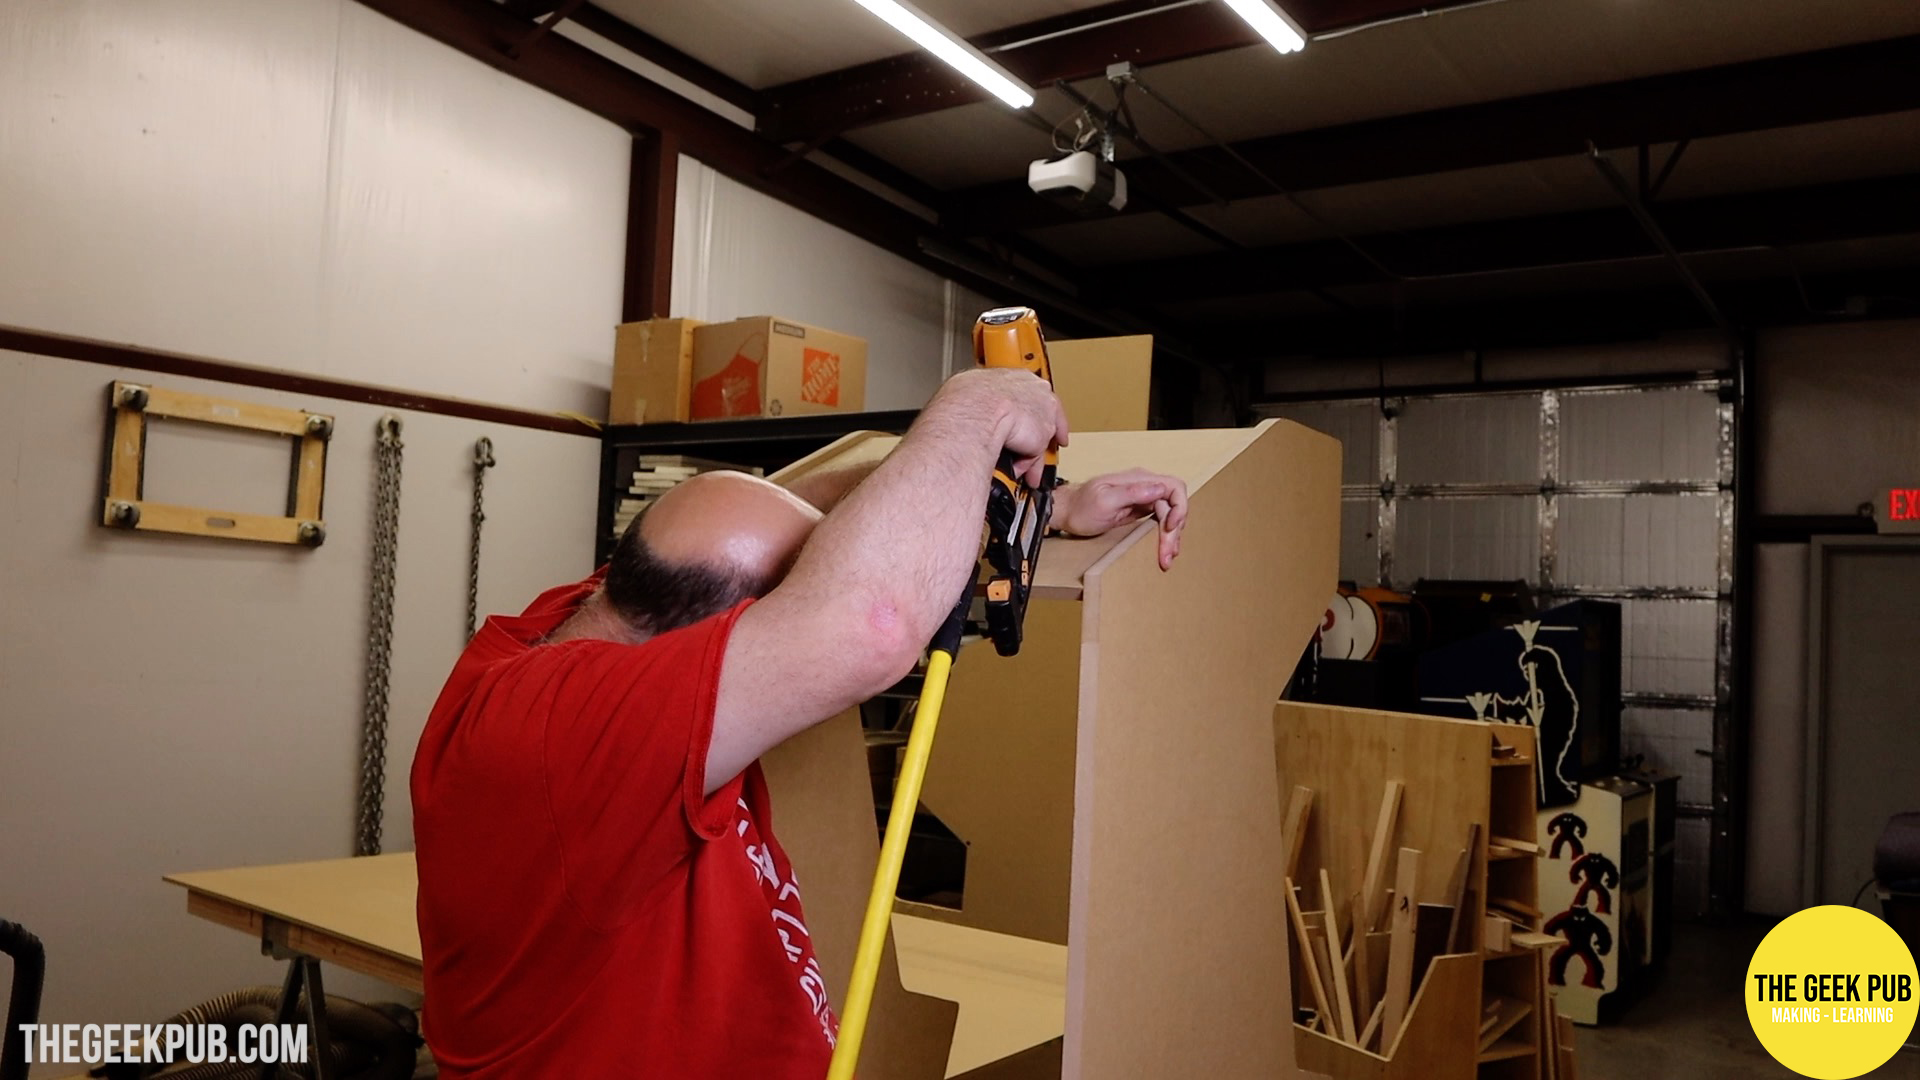
To cut the panels I always default to the table saw. But let’s be clear, you don’t need one to build this or any other arcade cabinet. All you need is the same jigsaw you used to cut the side panels. In a pinch you can even clamp on a scrap piece of wood as a guide to keep your cuts straight. Never let tools stop you from making something! Remember, it was only 100 years ago that people built some of the finest furniture known to man with only a hammer, a pocket knife, and a chisel.
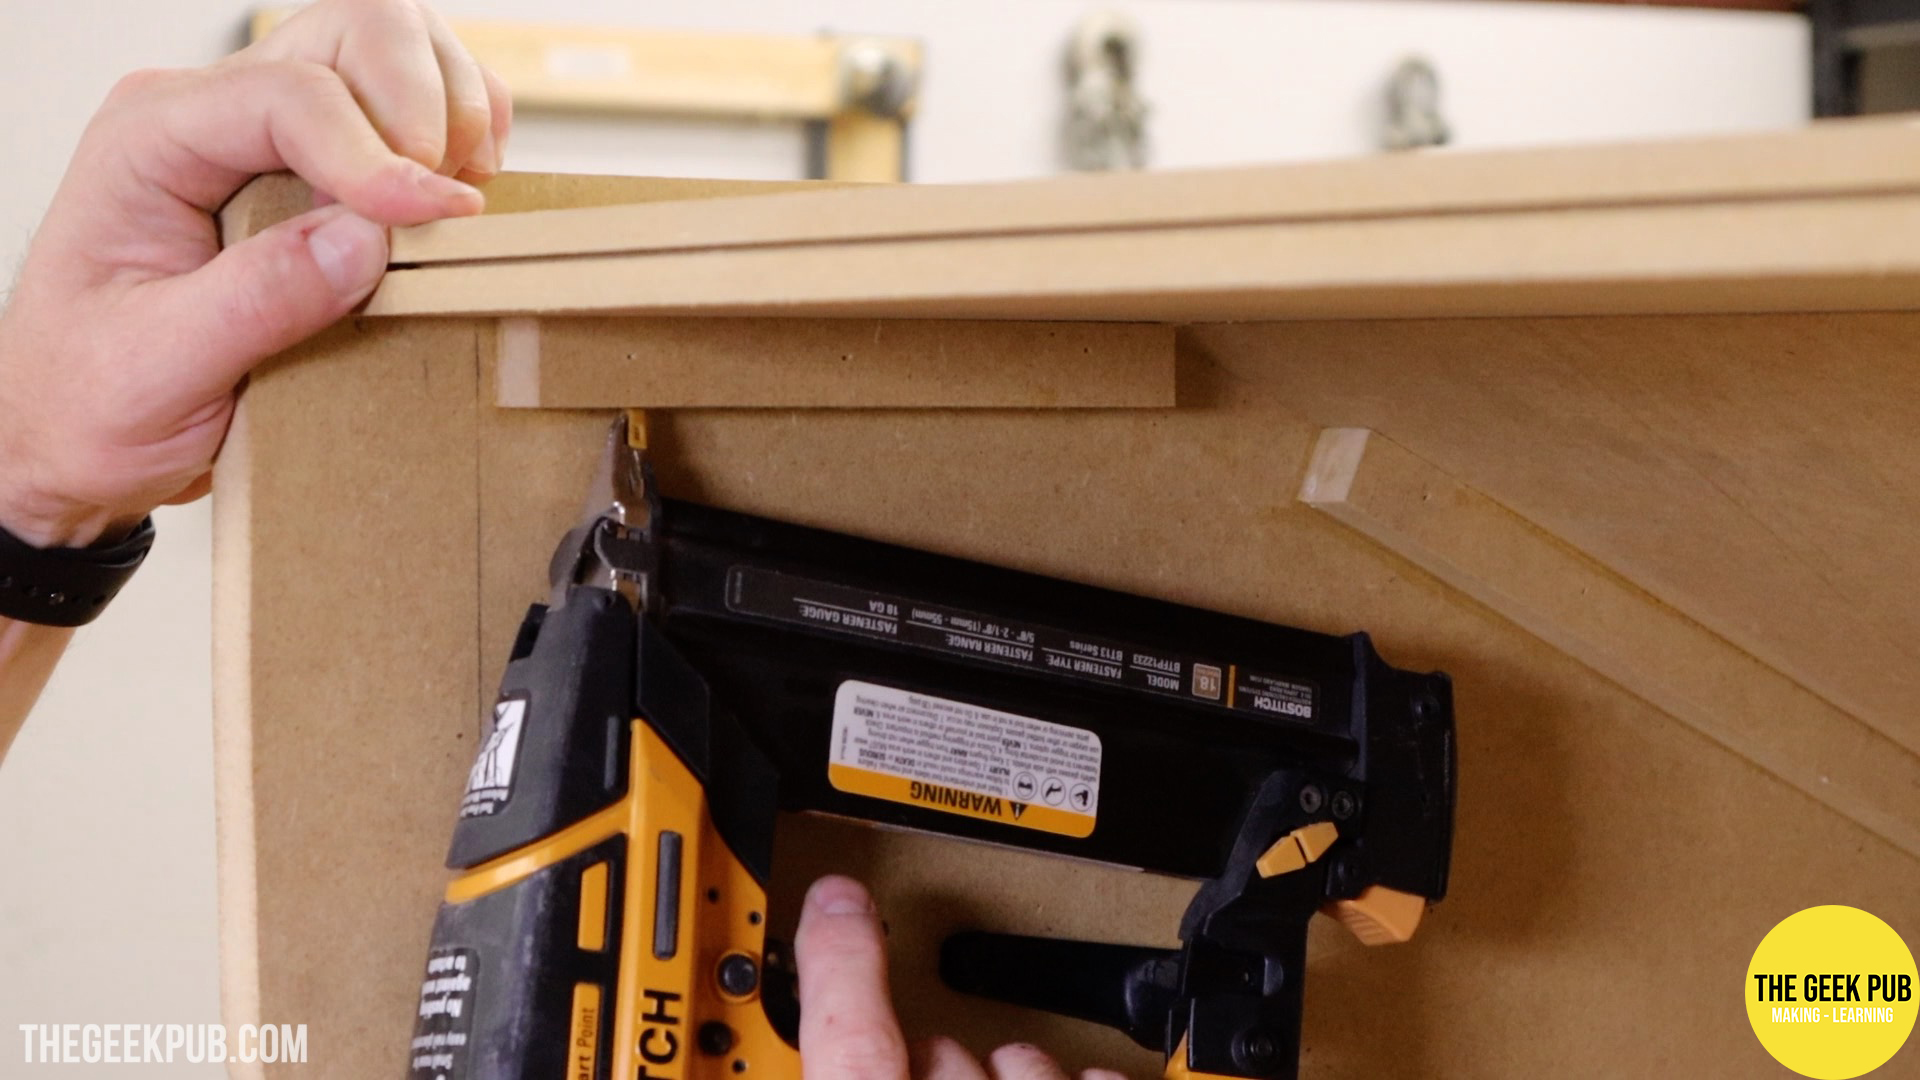
Another tool I like to use is the brad nailer. Again, totally optional. But if you have one you can move along with your build faster. Brad nails act like little clamps and hold the sections together while the glue dries. They really don’t add much additional structural integrity to the build, if any. Without a brad nailer just wait an hour or two after gluing before moving on to your next step.
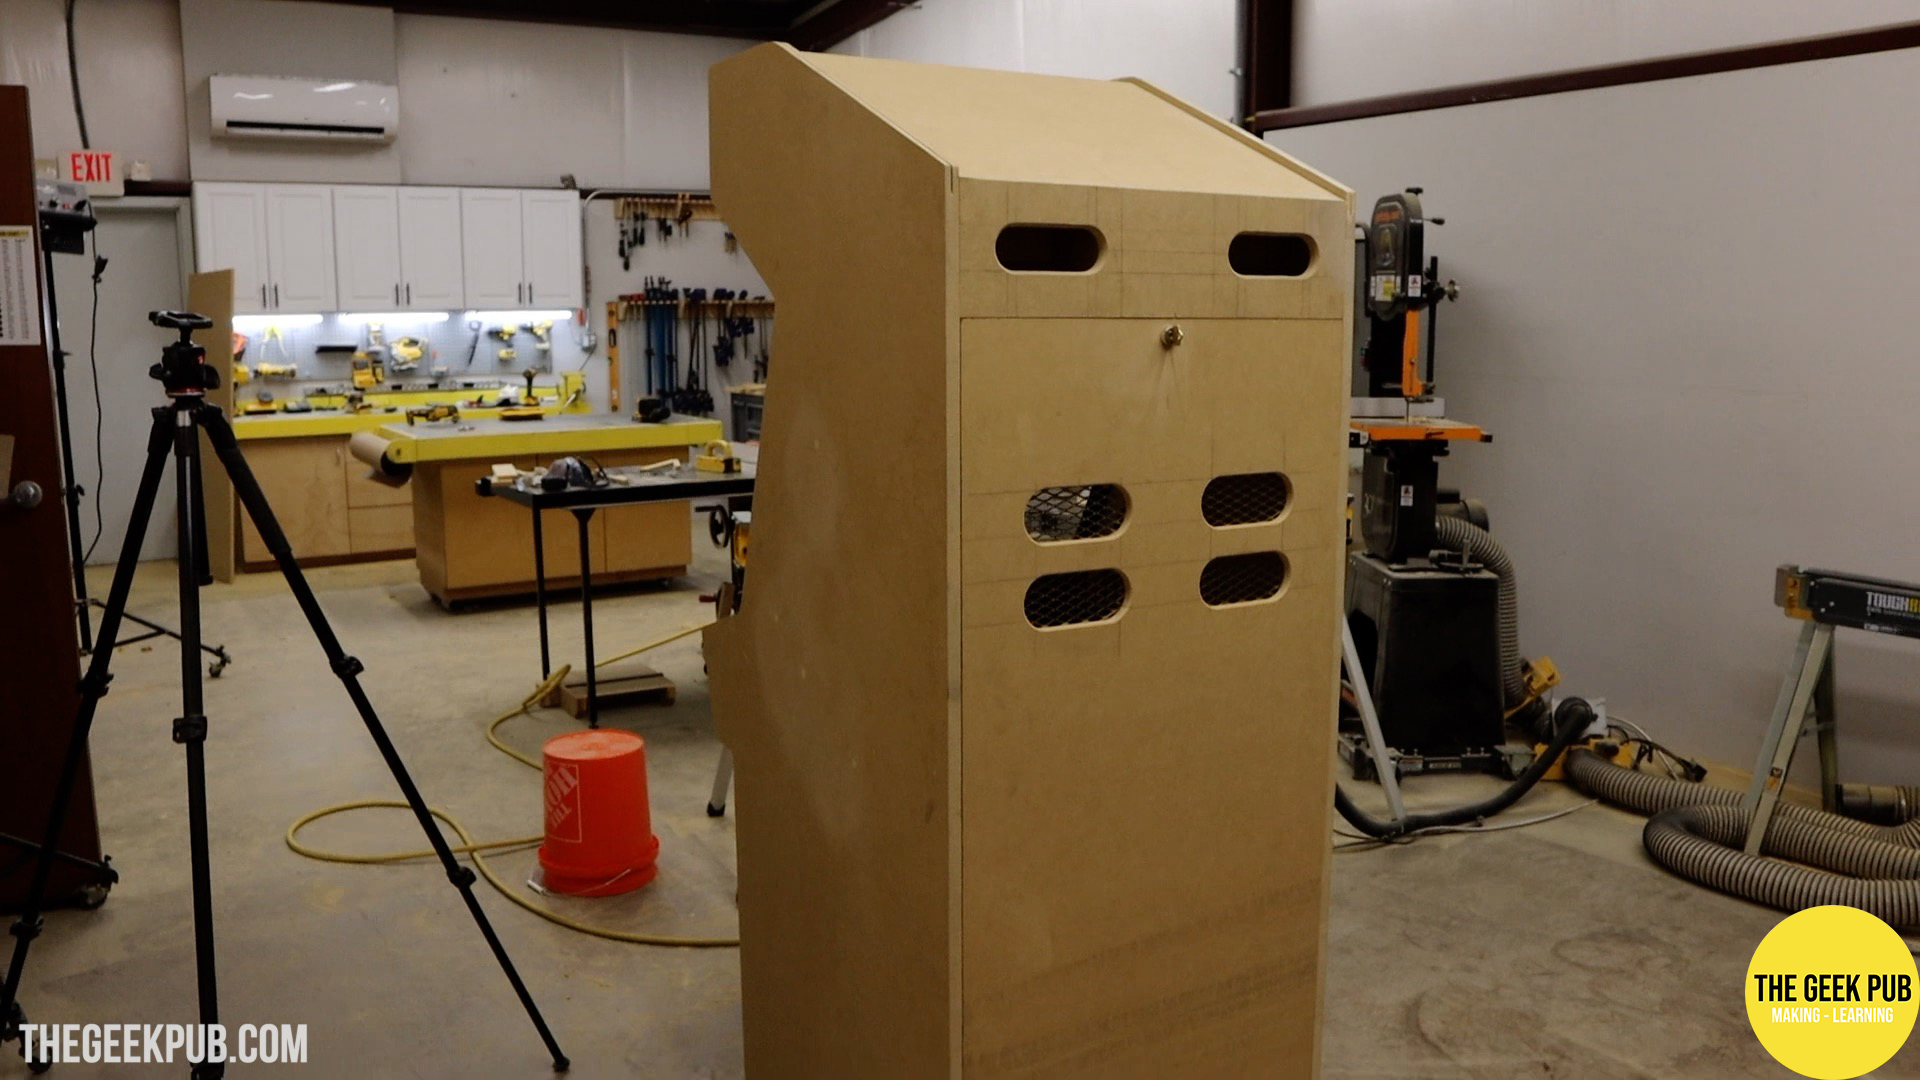
Grab Handles for Moving the PETSCII Robots Cabinet
This arcade isn’t a home build and will be used in commercial environments. Due to this I put some extra features on the cabinet that I wouldn’t normally put on builds for someone’s home.
Arcades move games around regularly. This is part of keeping the arcade feeling fresh and new. Games will move onto the floor and off the floor during different seasons. Additionally, PETSCII Robots may find itself moving around the country frequently visiting new arcades and venues.
For this reason, I decided to add grab handles to the back-top of the cabinet. This will be a place that someone can grab the cabinet and tilt it backwards onto the rollers (more on those in a bit).
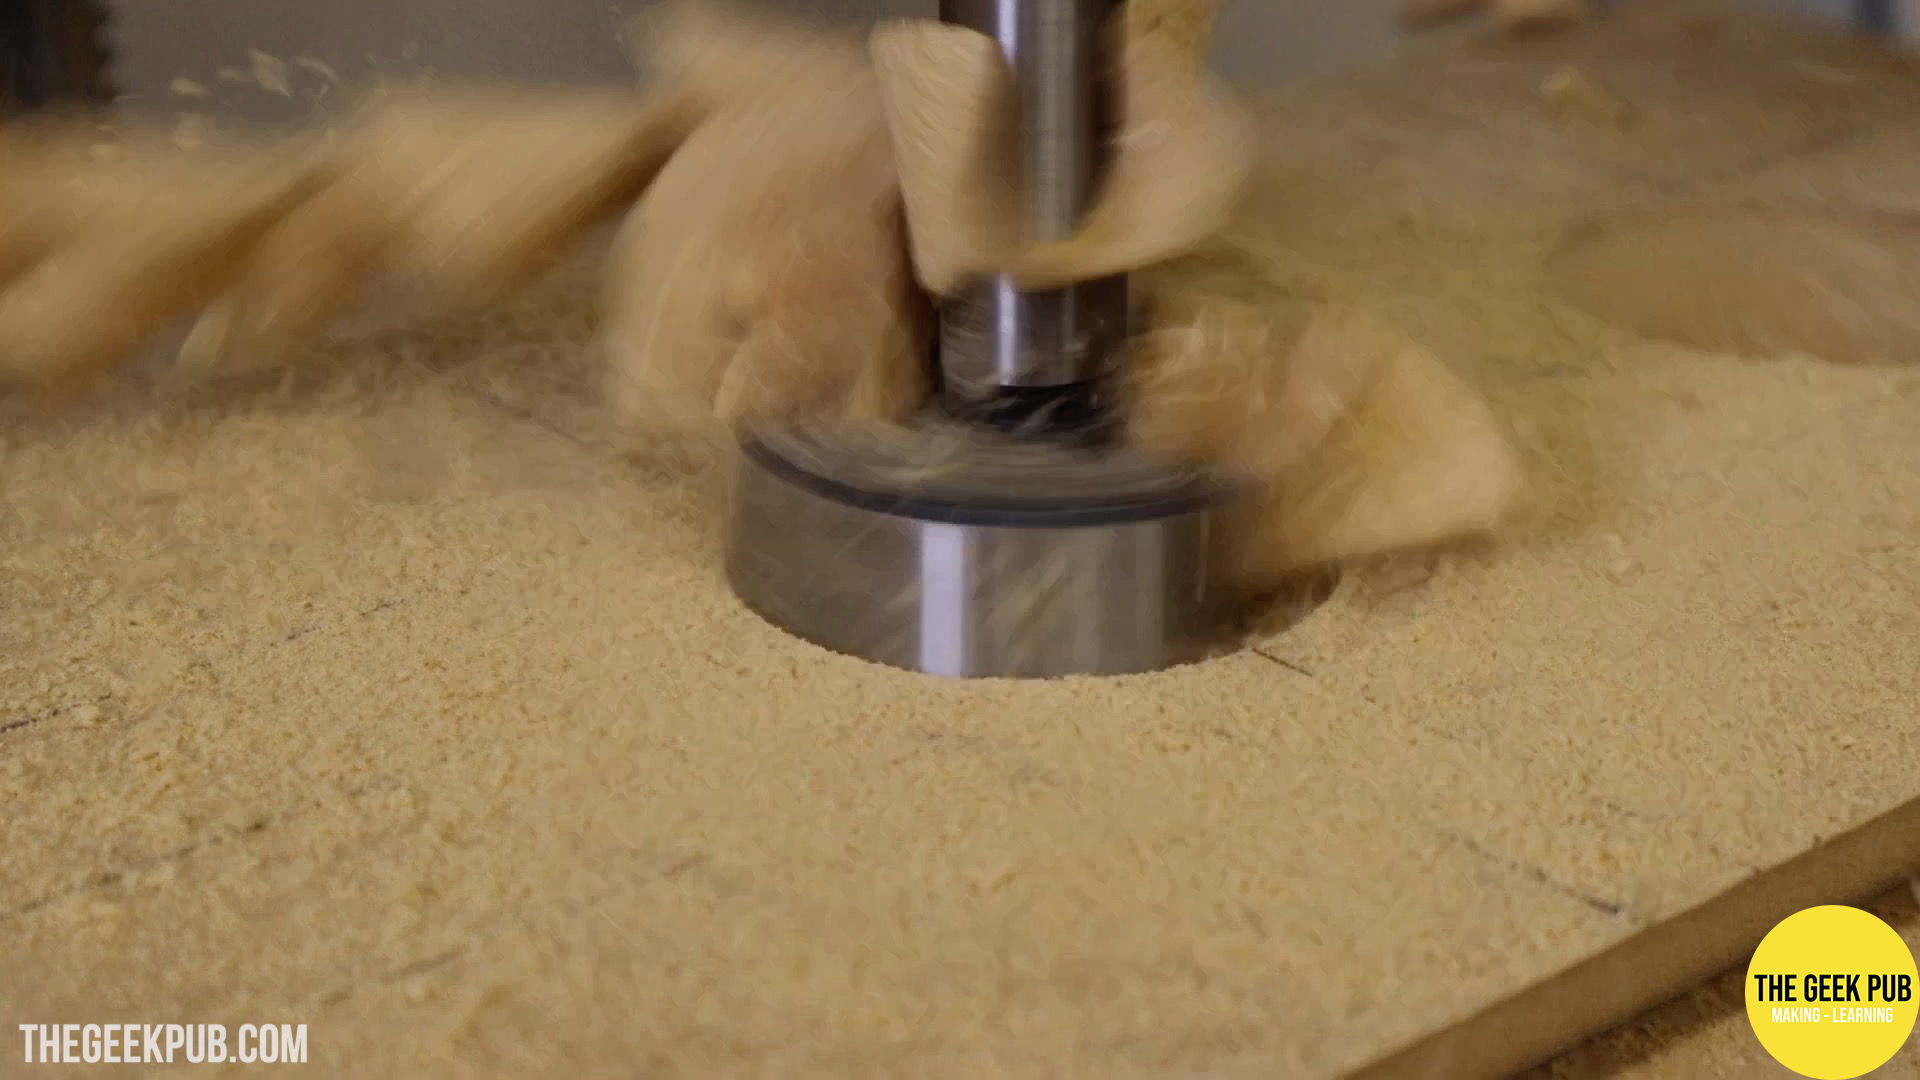
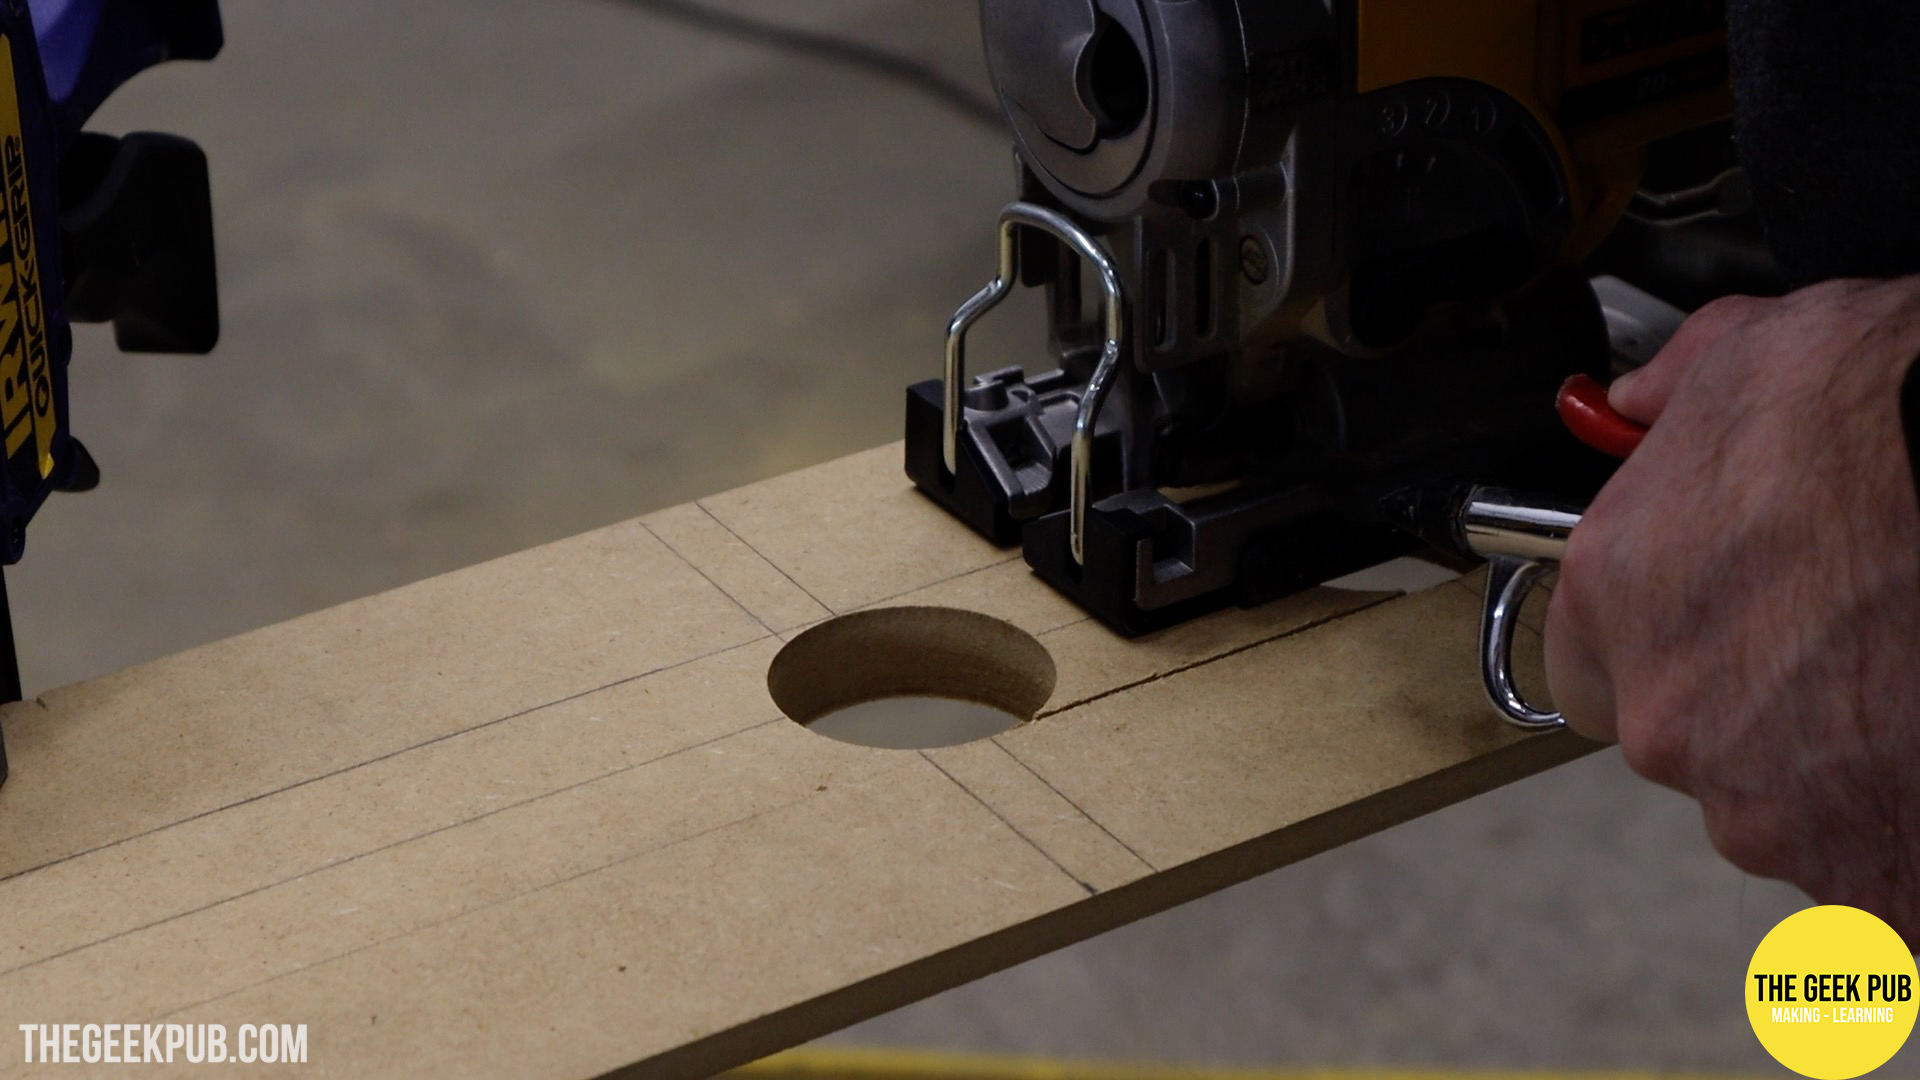
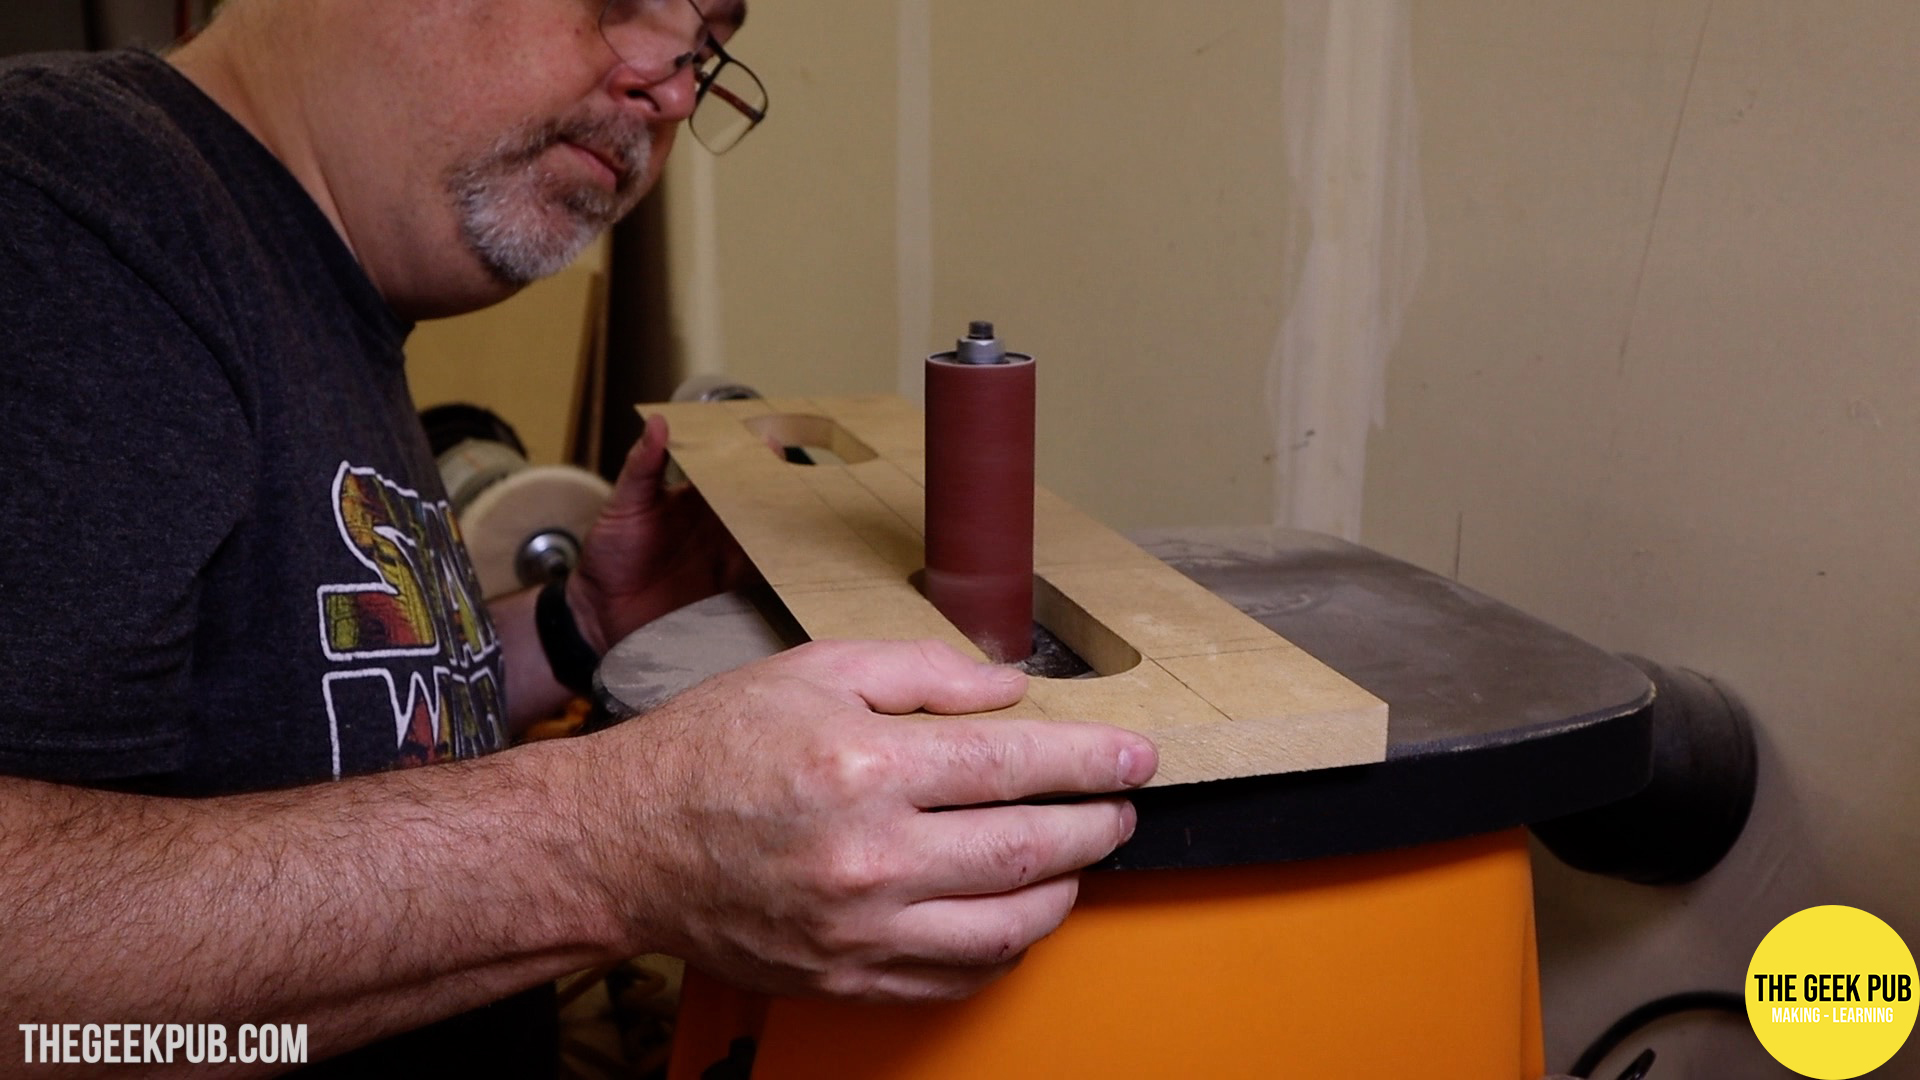
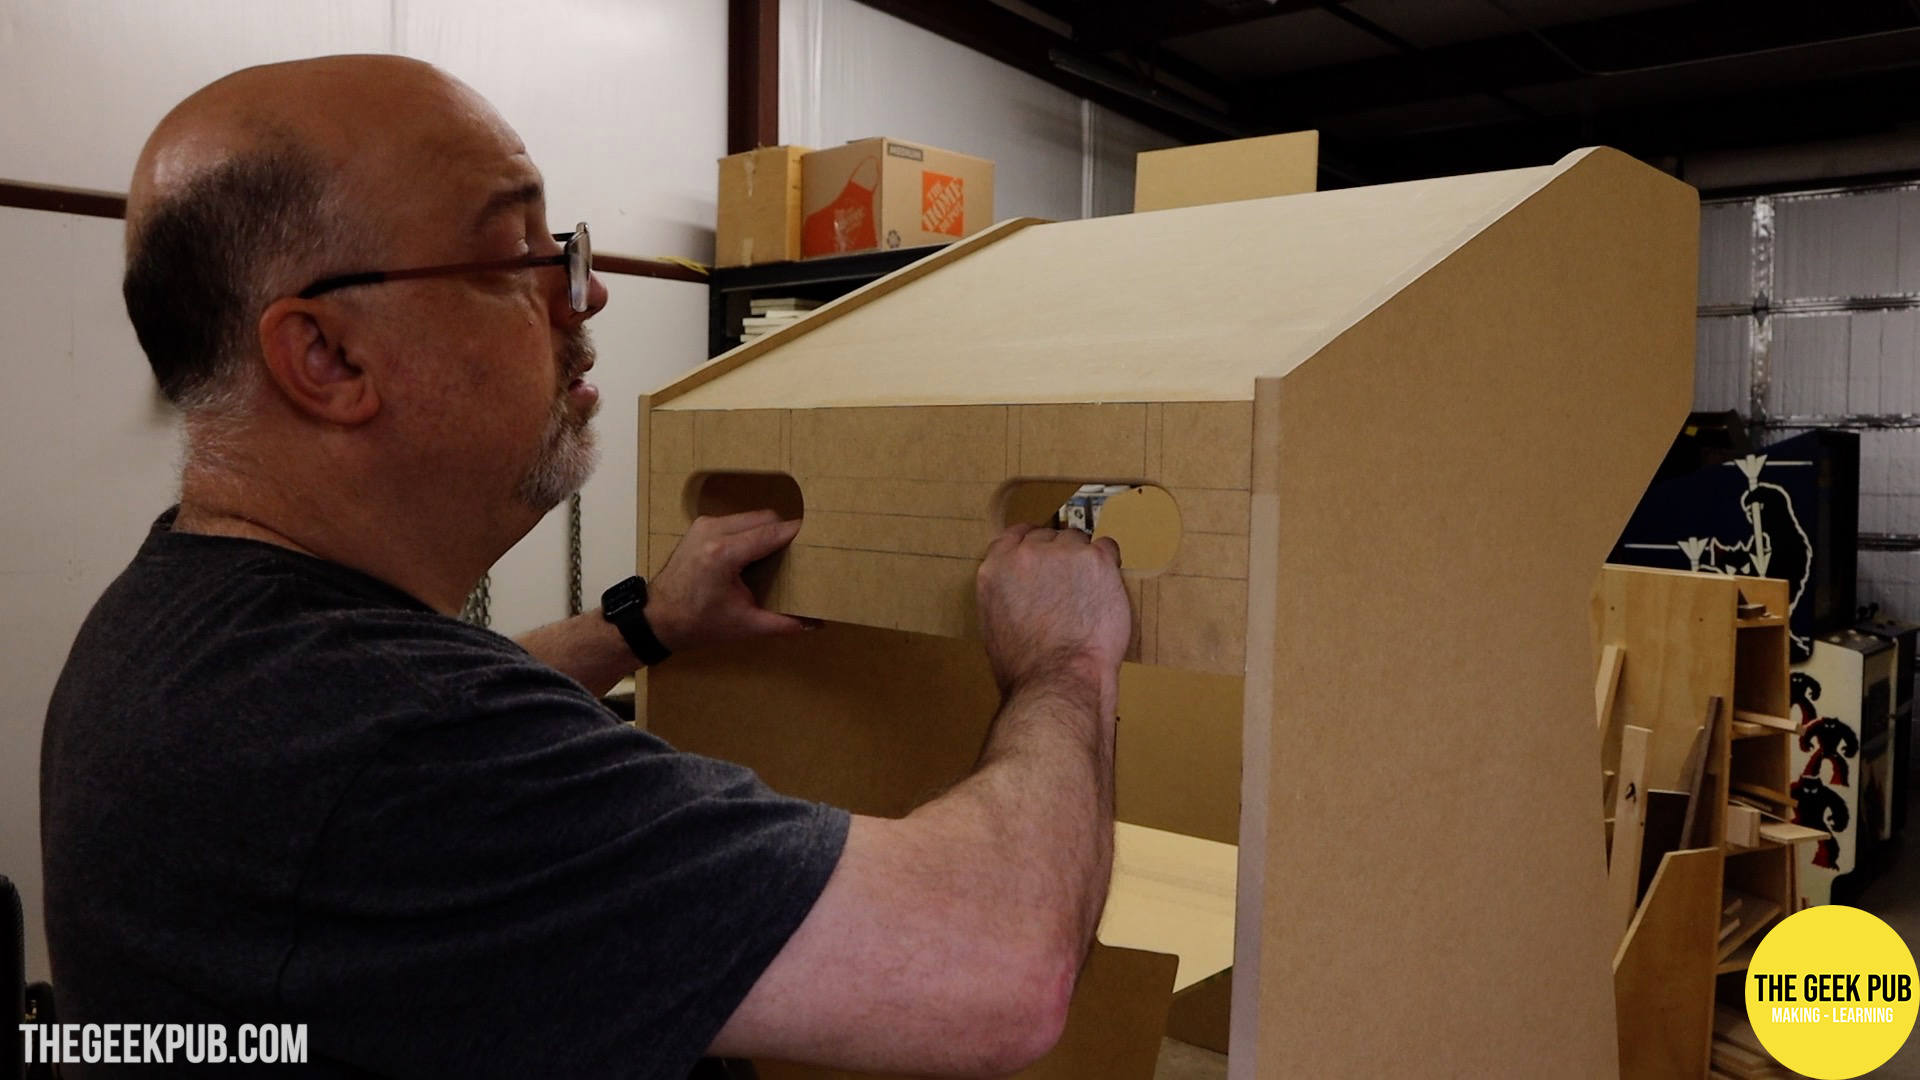
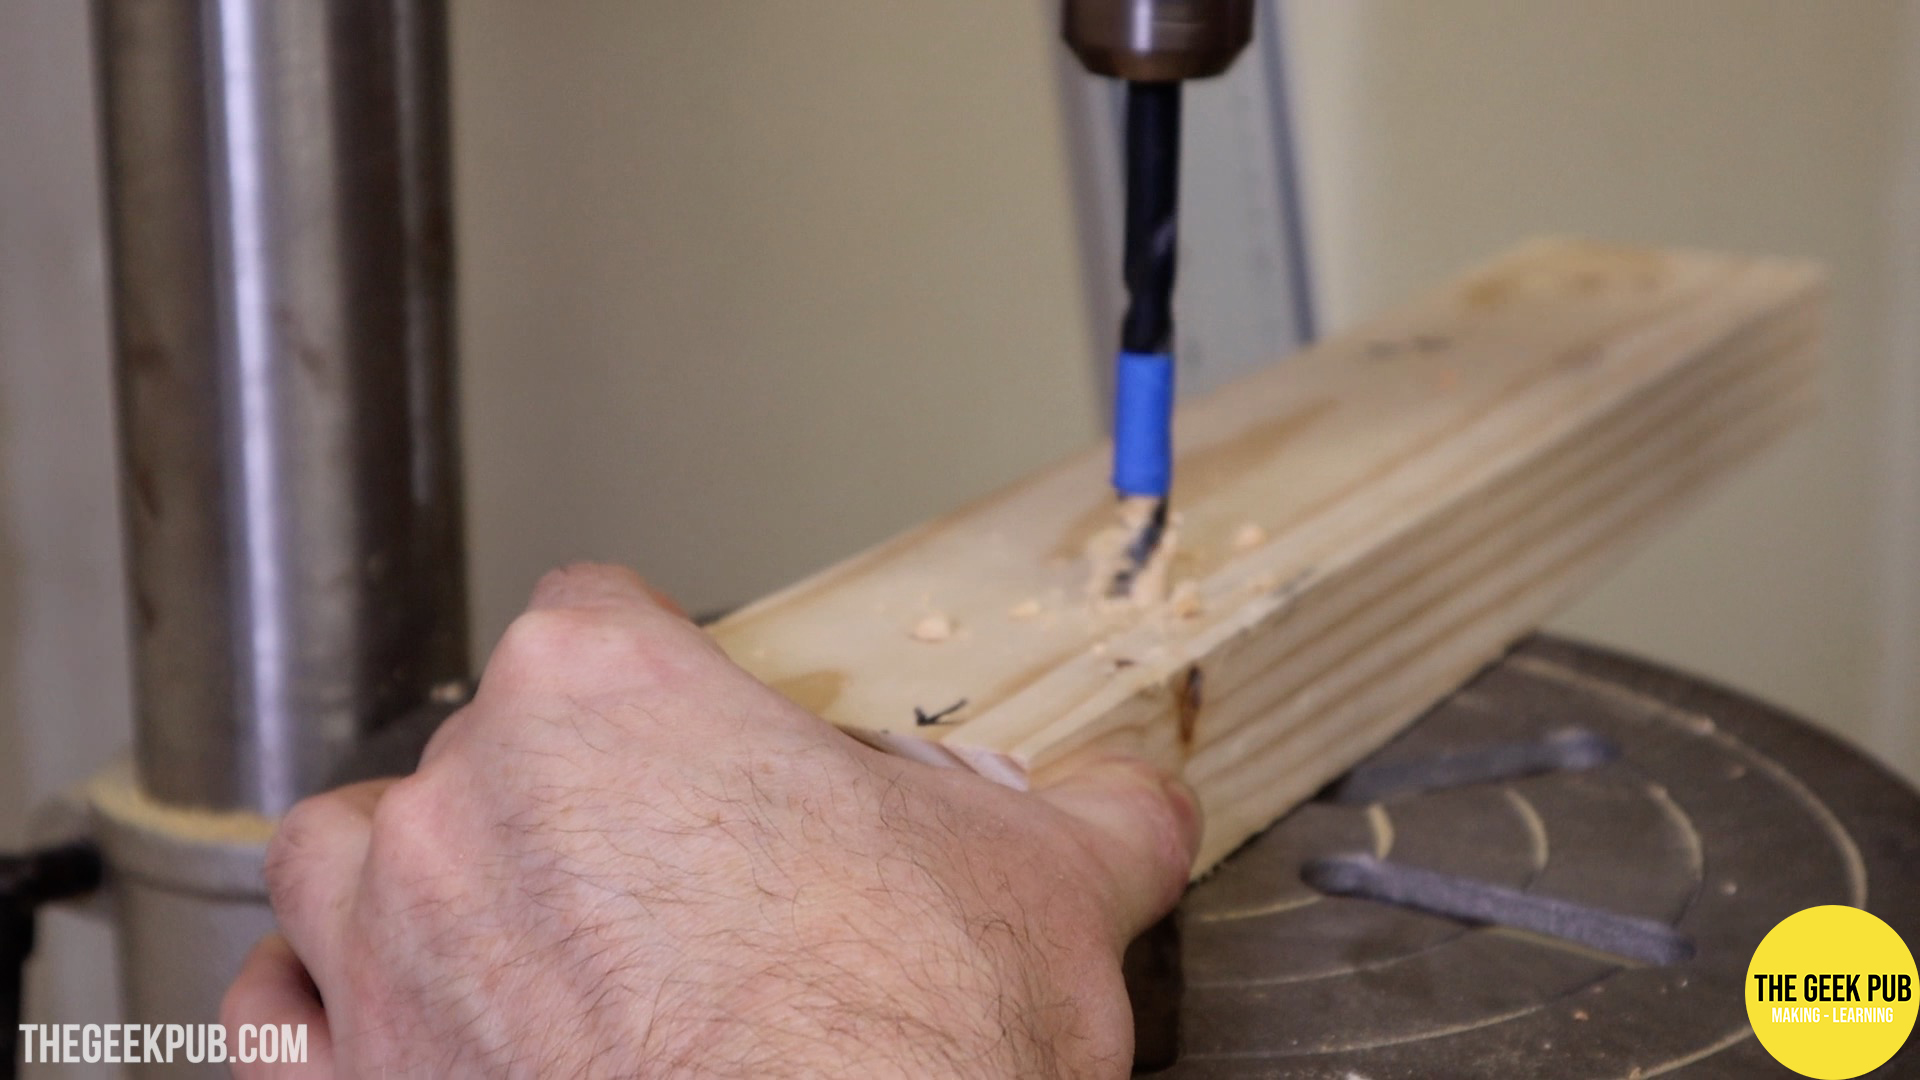
I used a large Forstner bit to drill four holes in the top of the grab handle panel. I then connected the holes using my jigsaw. I then sanded the holes to remove any marks from the jigsaw and rounded over the edges to make the handles easier on your fingers.
Once it was complete I added it to the back-top of the cabinet. I didn’t take pictures or video, but I did box these in later to make sure little kids (or adult jerks) wouldn’t be able to drop presents into the arcade cabinet that could mess things up.
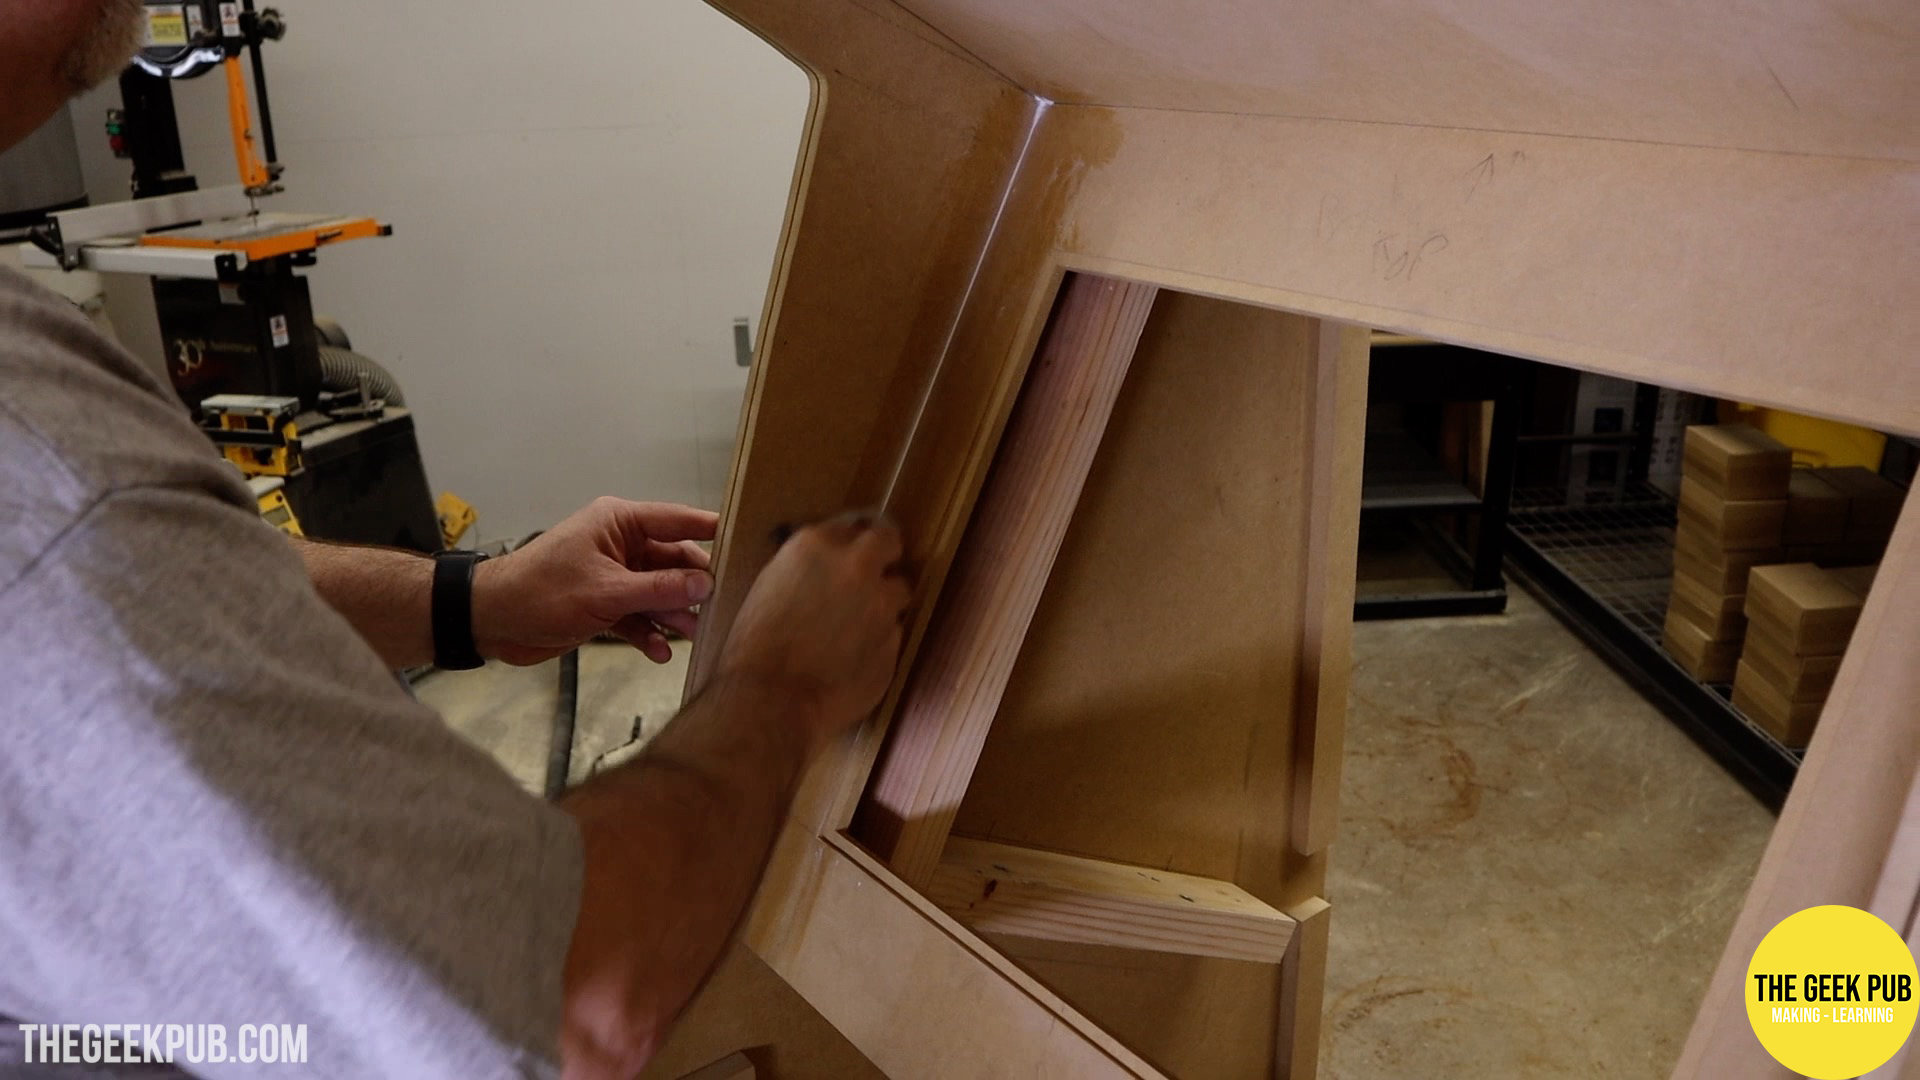
Using Cleats in Arcade Builds
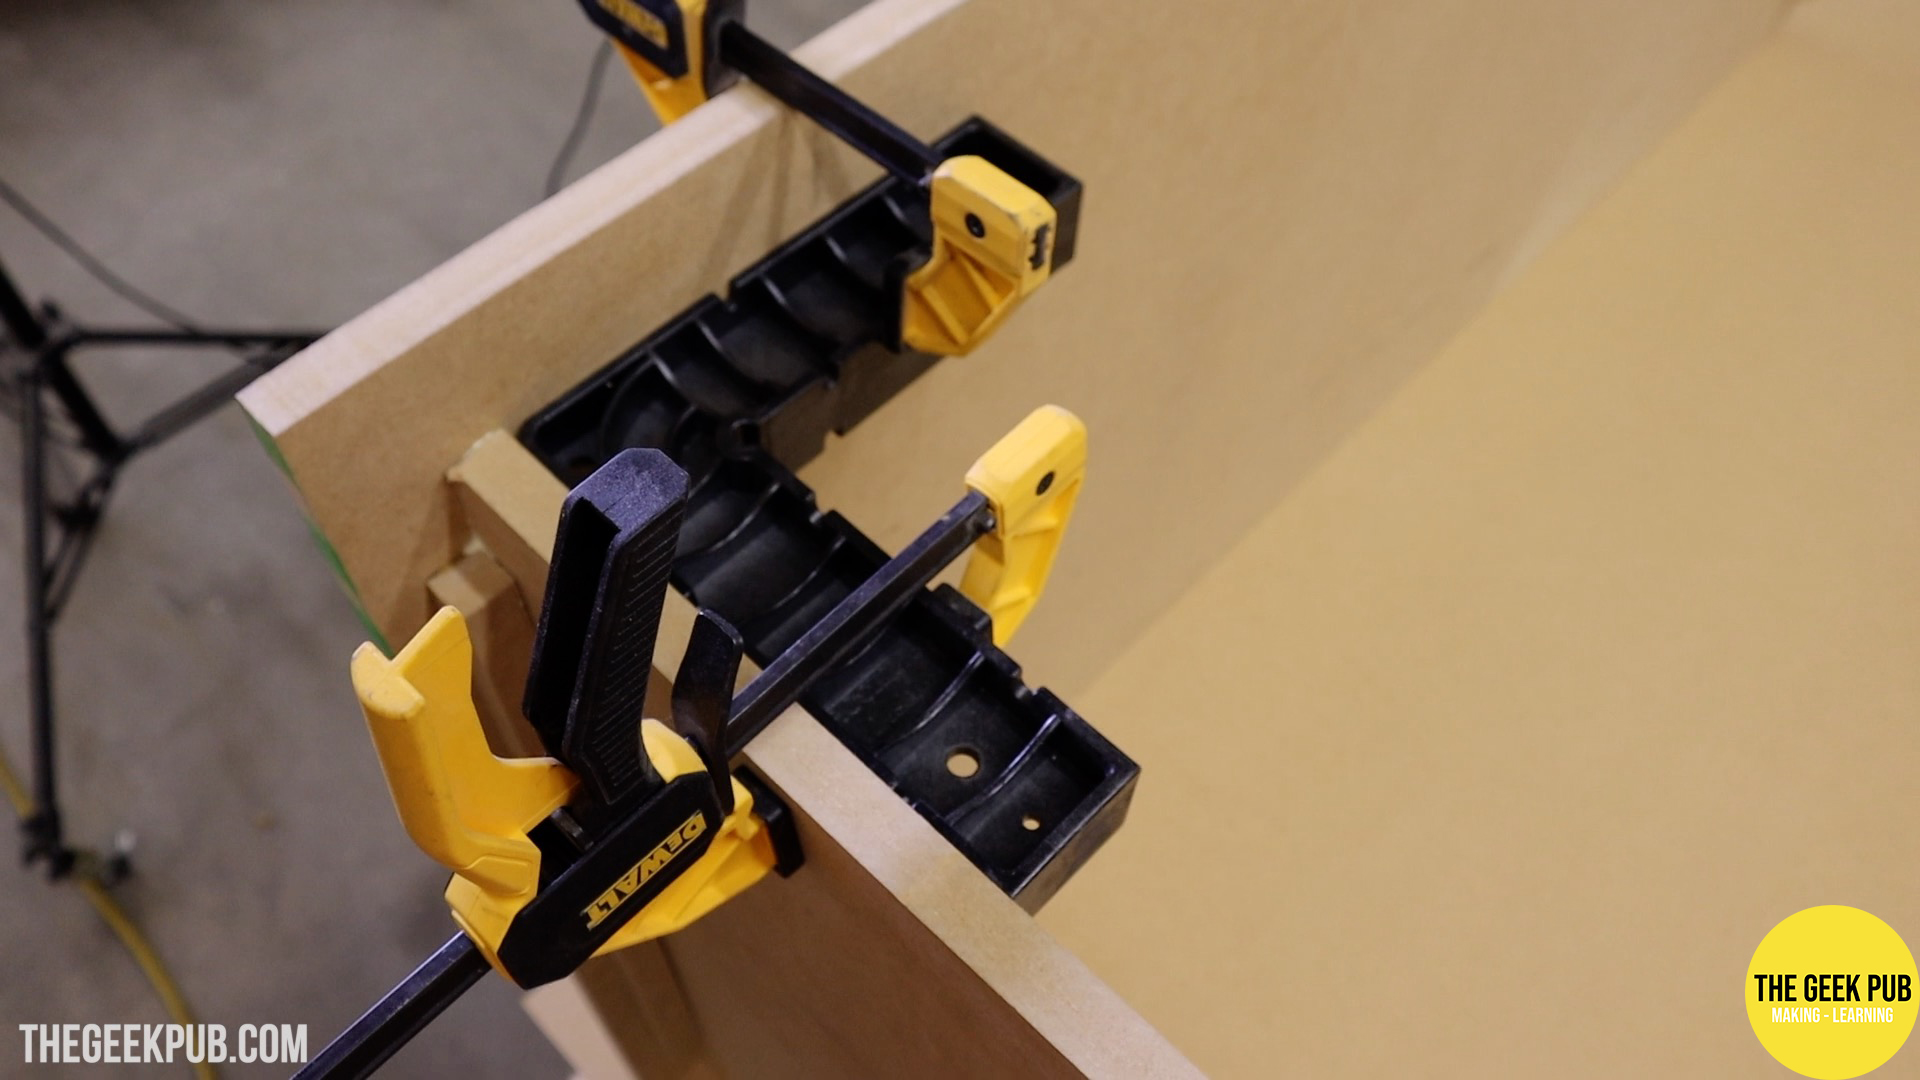
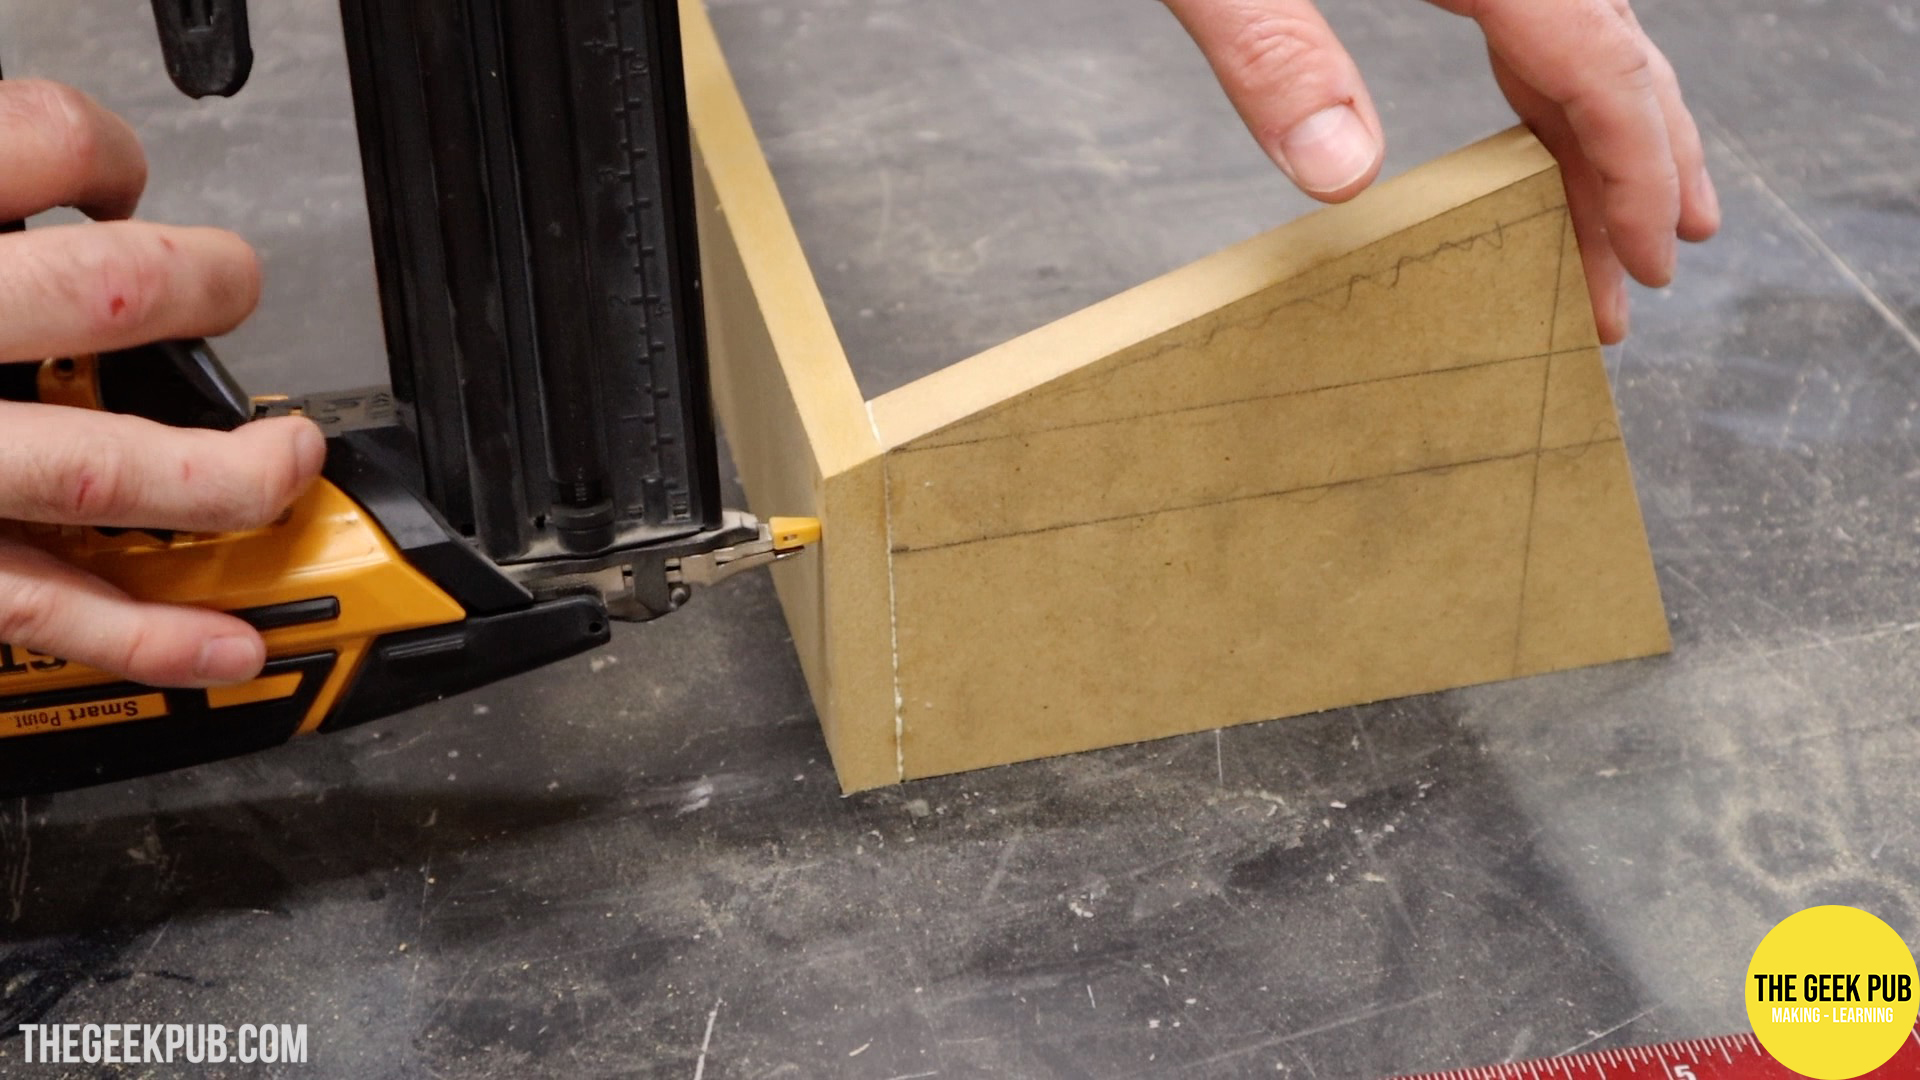
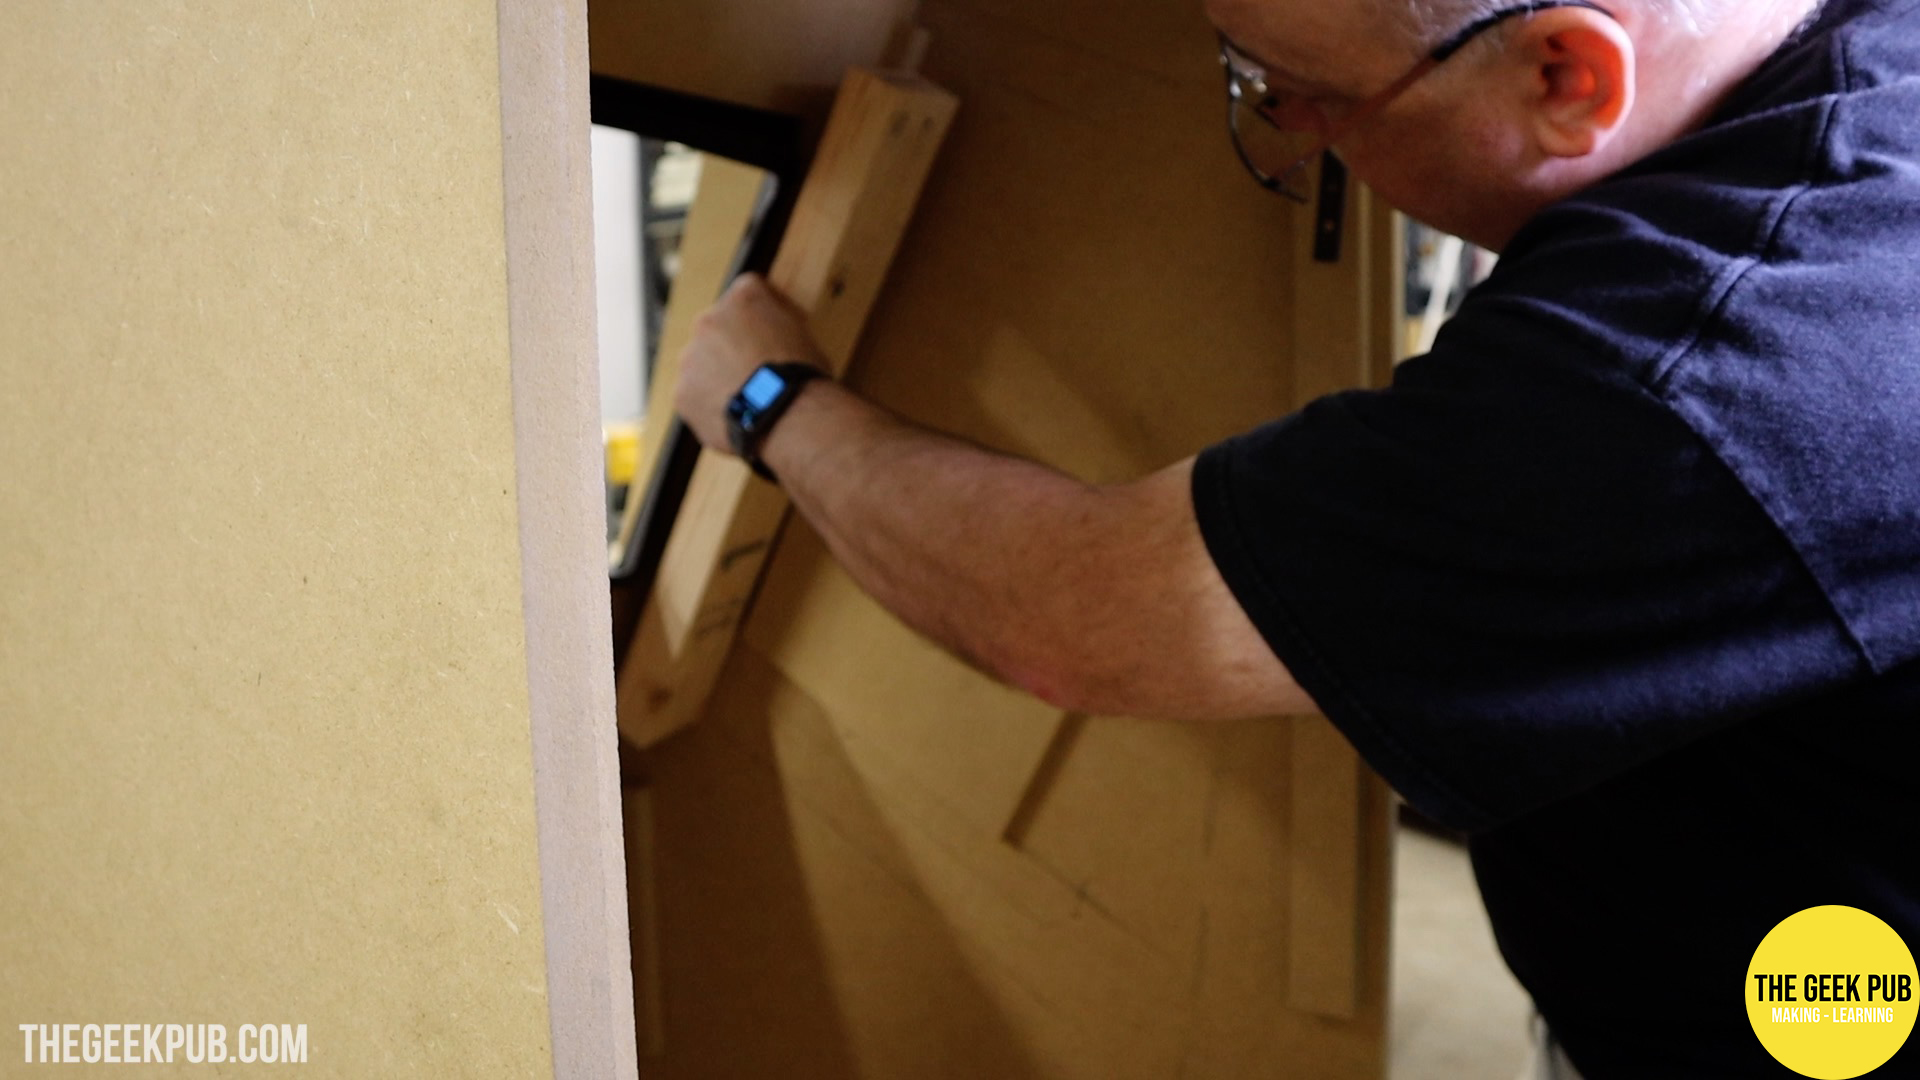
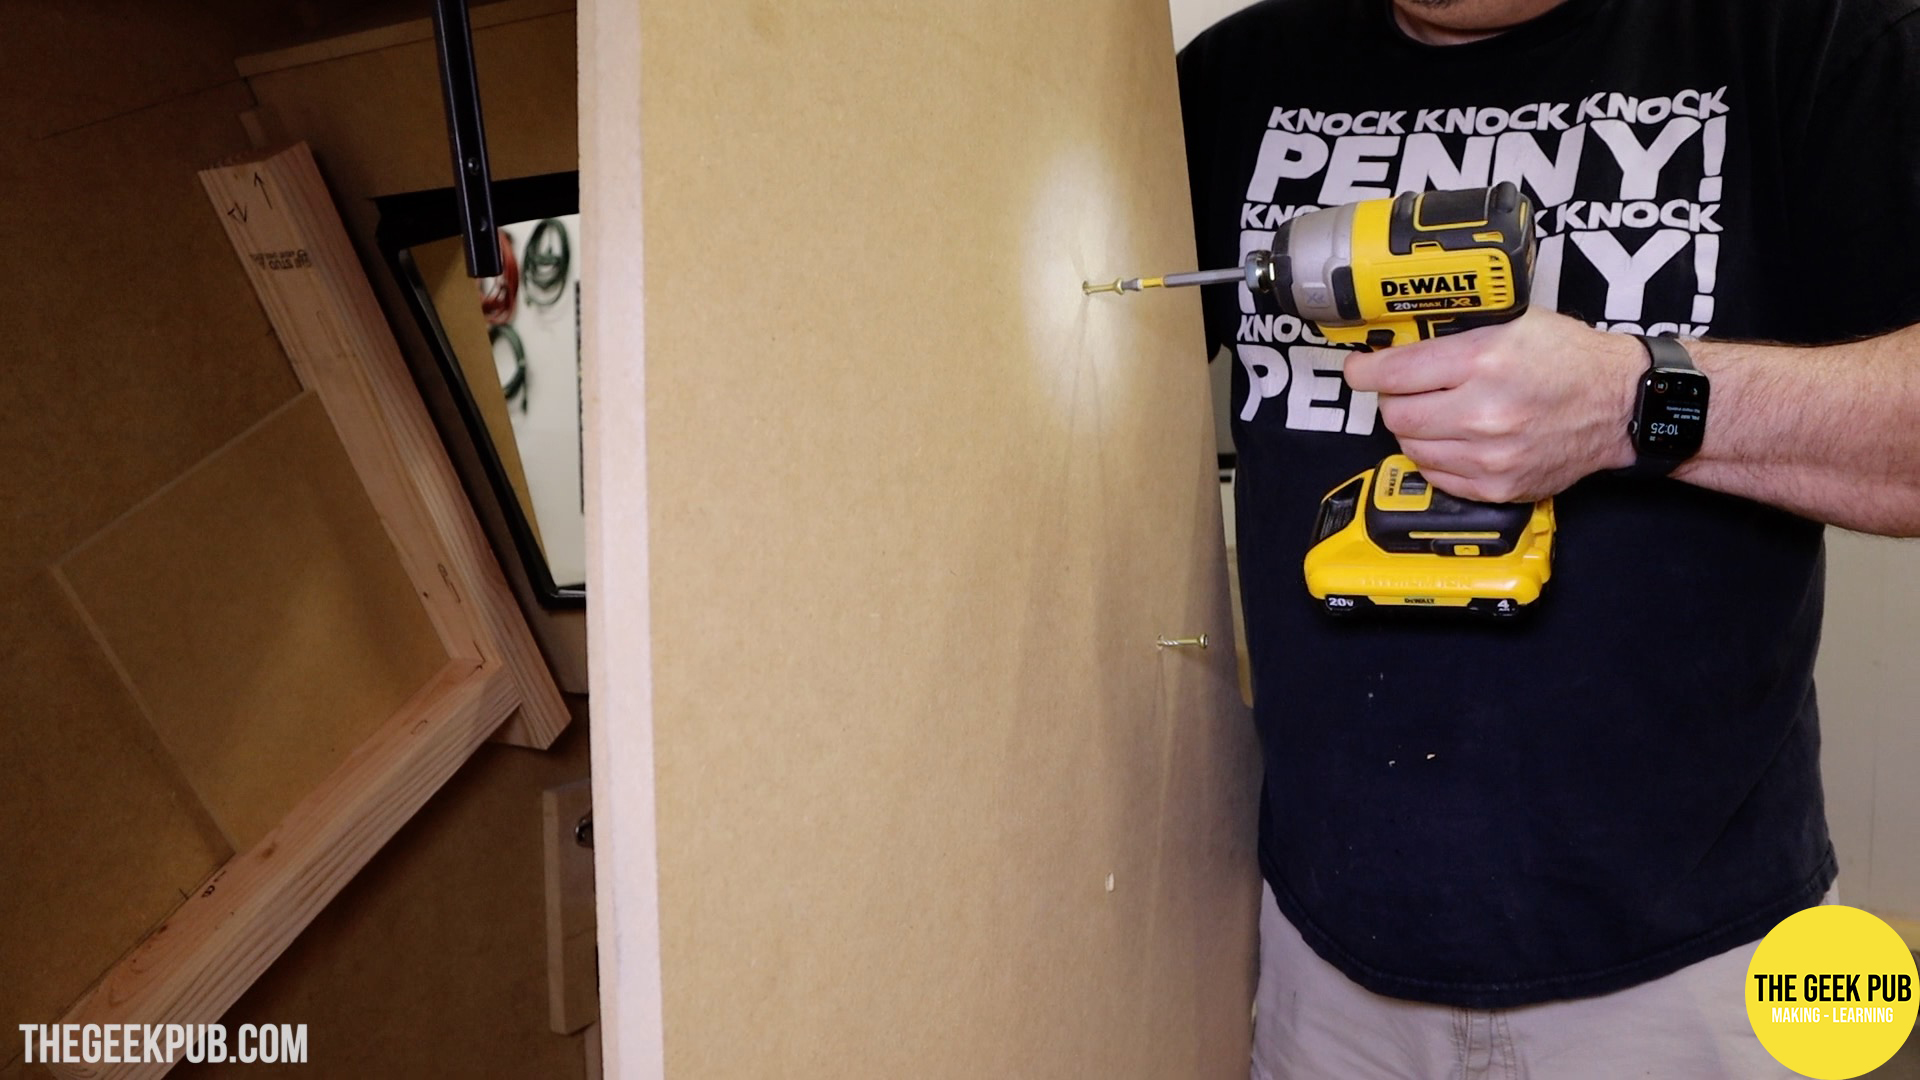
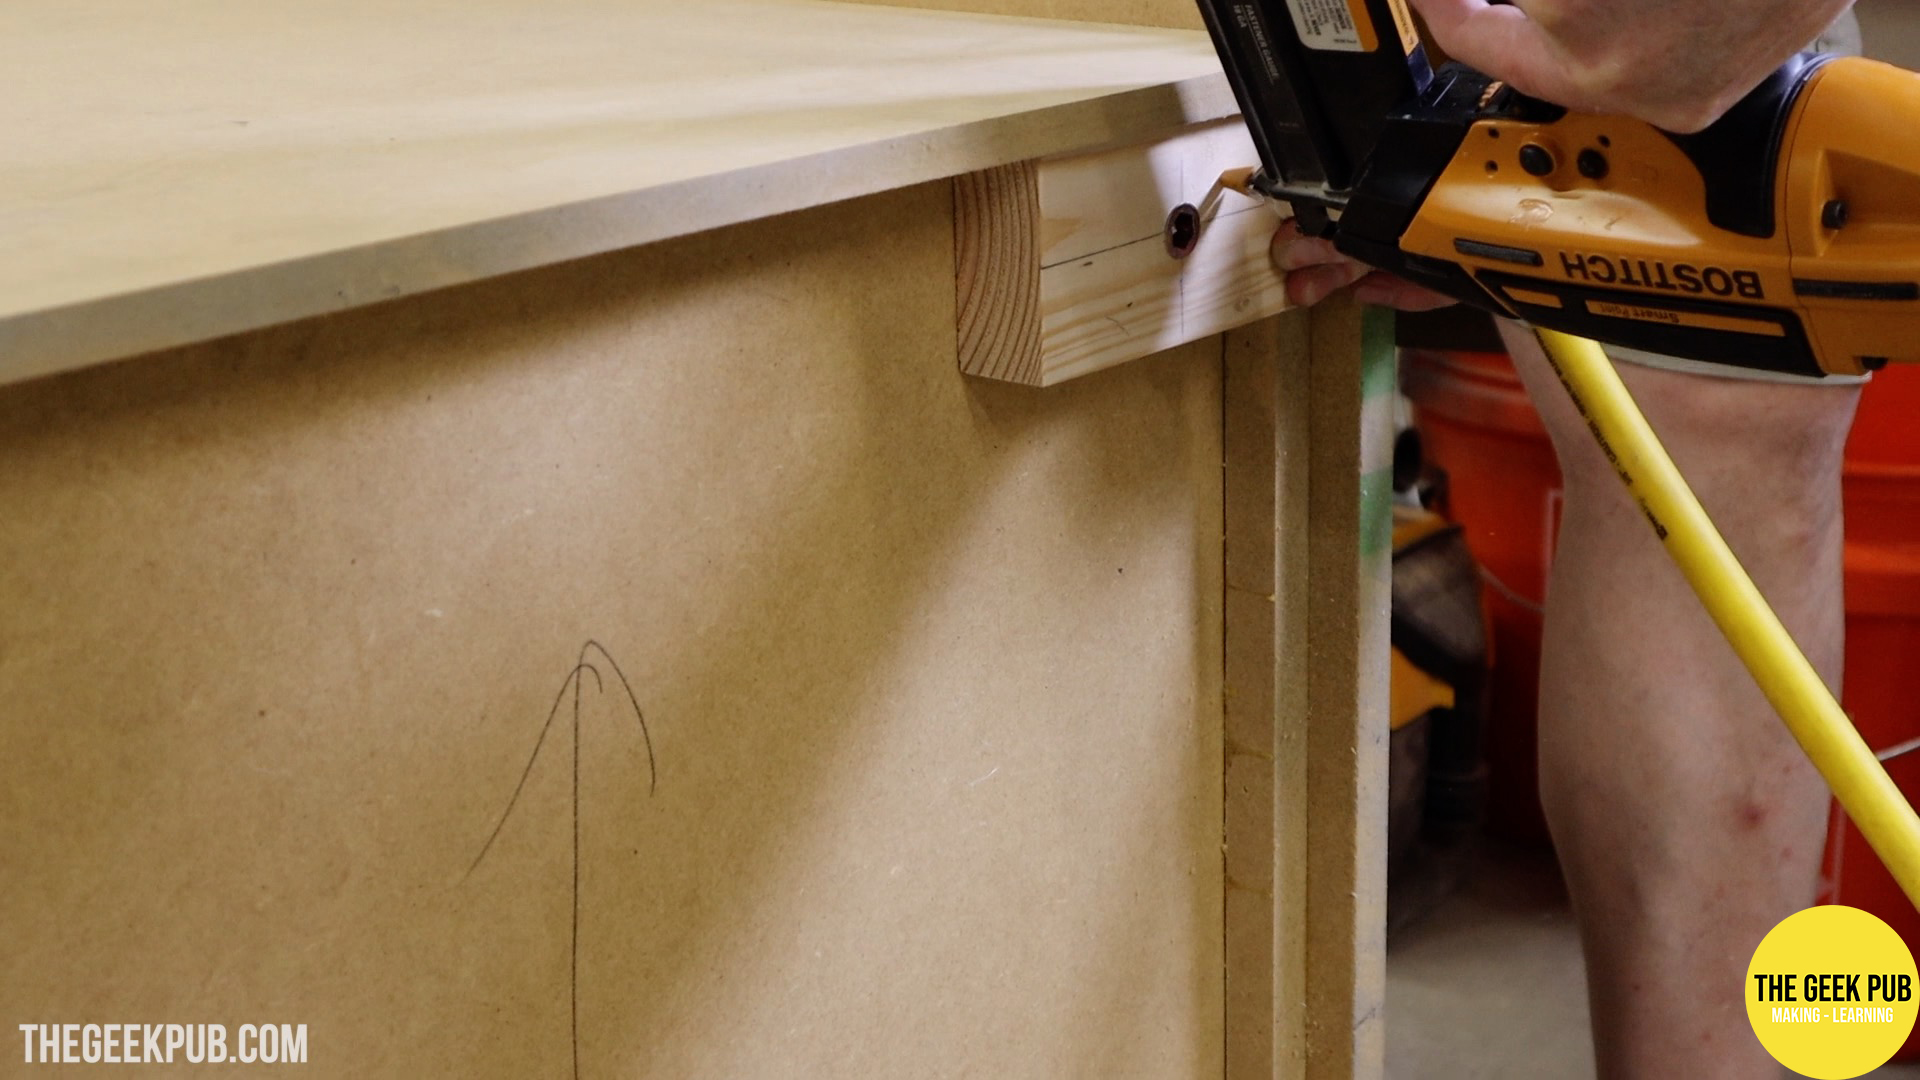
One thing I use in all of my arcade builds is something many refer to as cleats (or backer blocks). Cleats are small pieces of material that connect two other pieces of material. In my case they are 3/4 inch by 3/4 inch (19mm X 19mm). Cleats not only add structural rigidity, but they also make assembly so much easier since they align each section for you automatically.
I use a combination of glue and brad nails to hold my cleats in place, though many arcade builders will use glue and screws as a substitute.
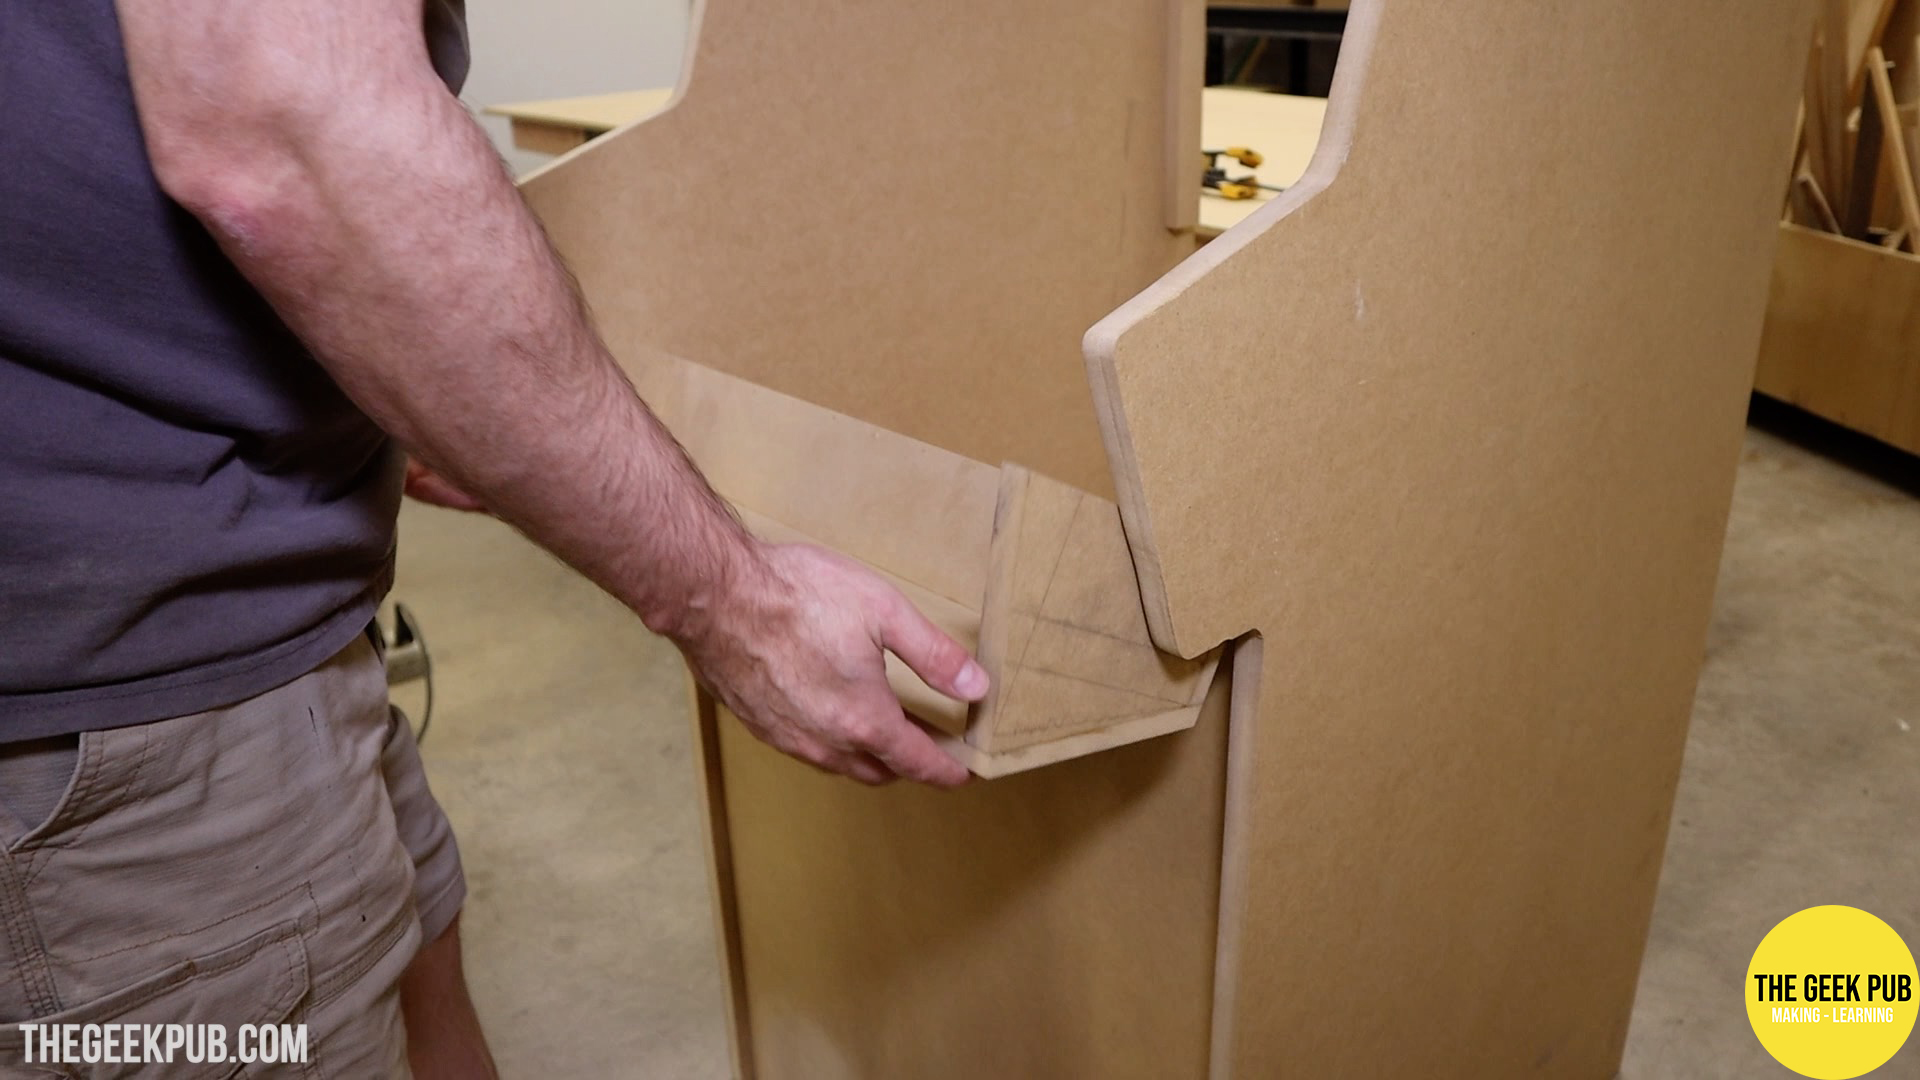
Building the PETSCII Robots Control Panel
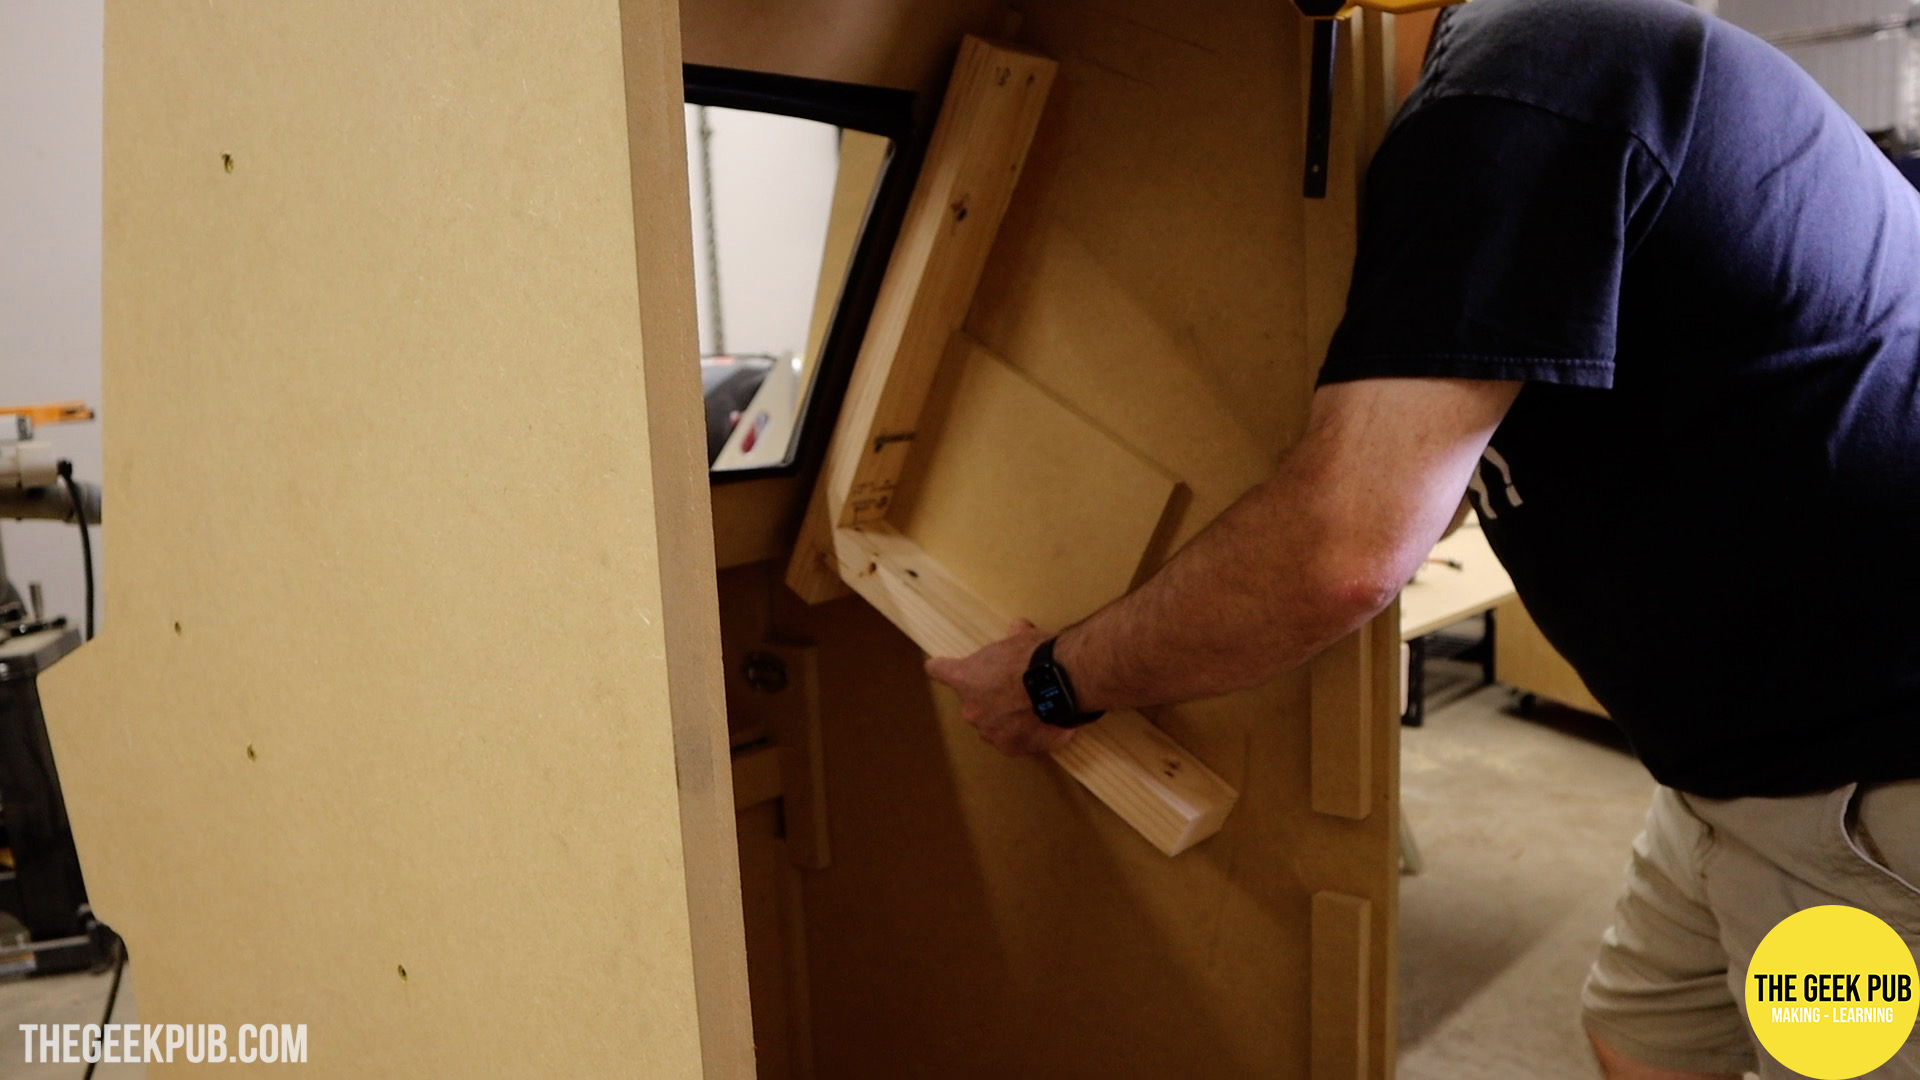
Next step in building the PETSCII Robots arcade cabinet is to build the base of the control panel. This is another change I made from my normal home builds. Normally I would make it so that the top of the CPO just lifts off. However, since this will be used in a commercial environment it is going to need some more industrial designs.
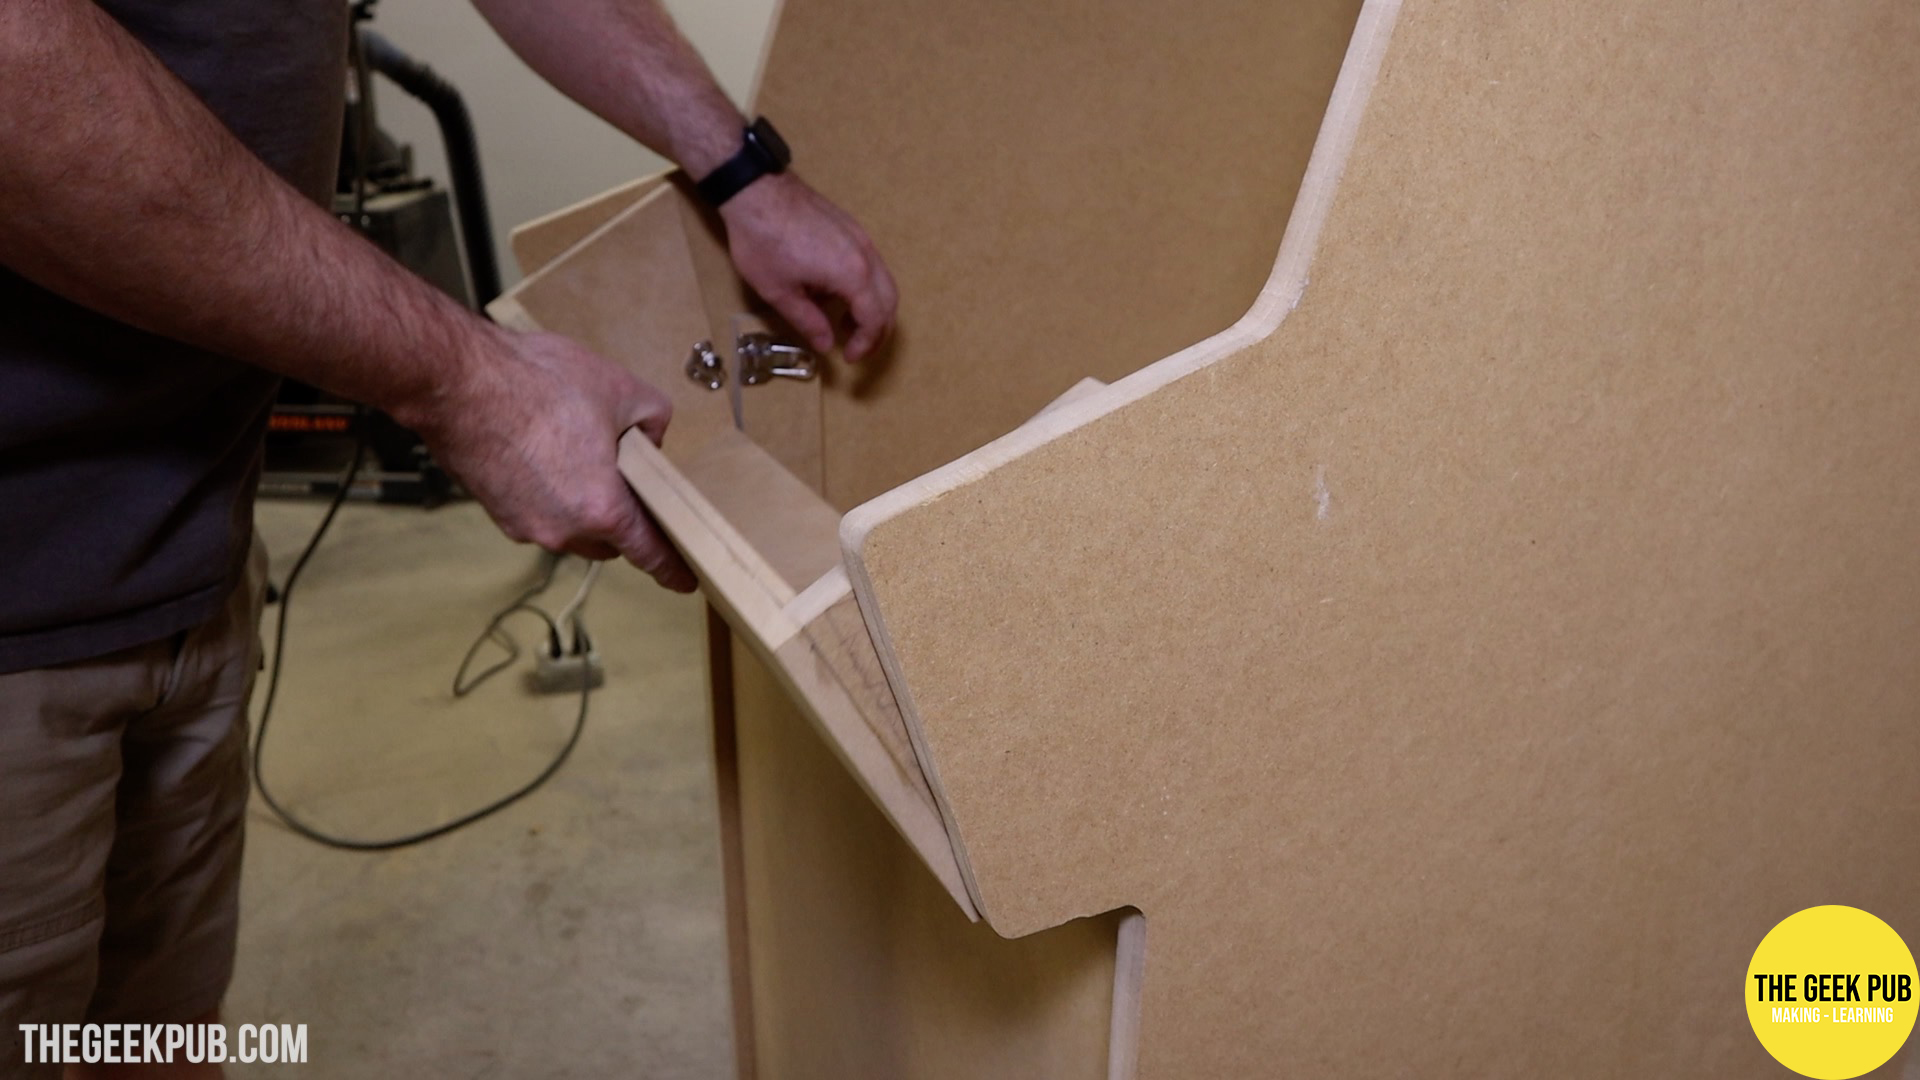
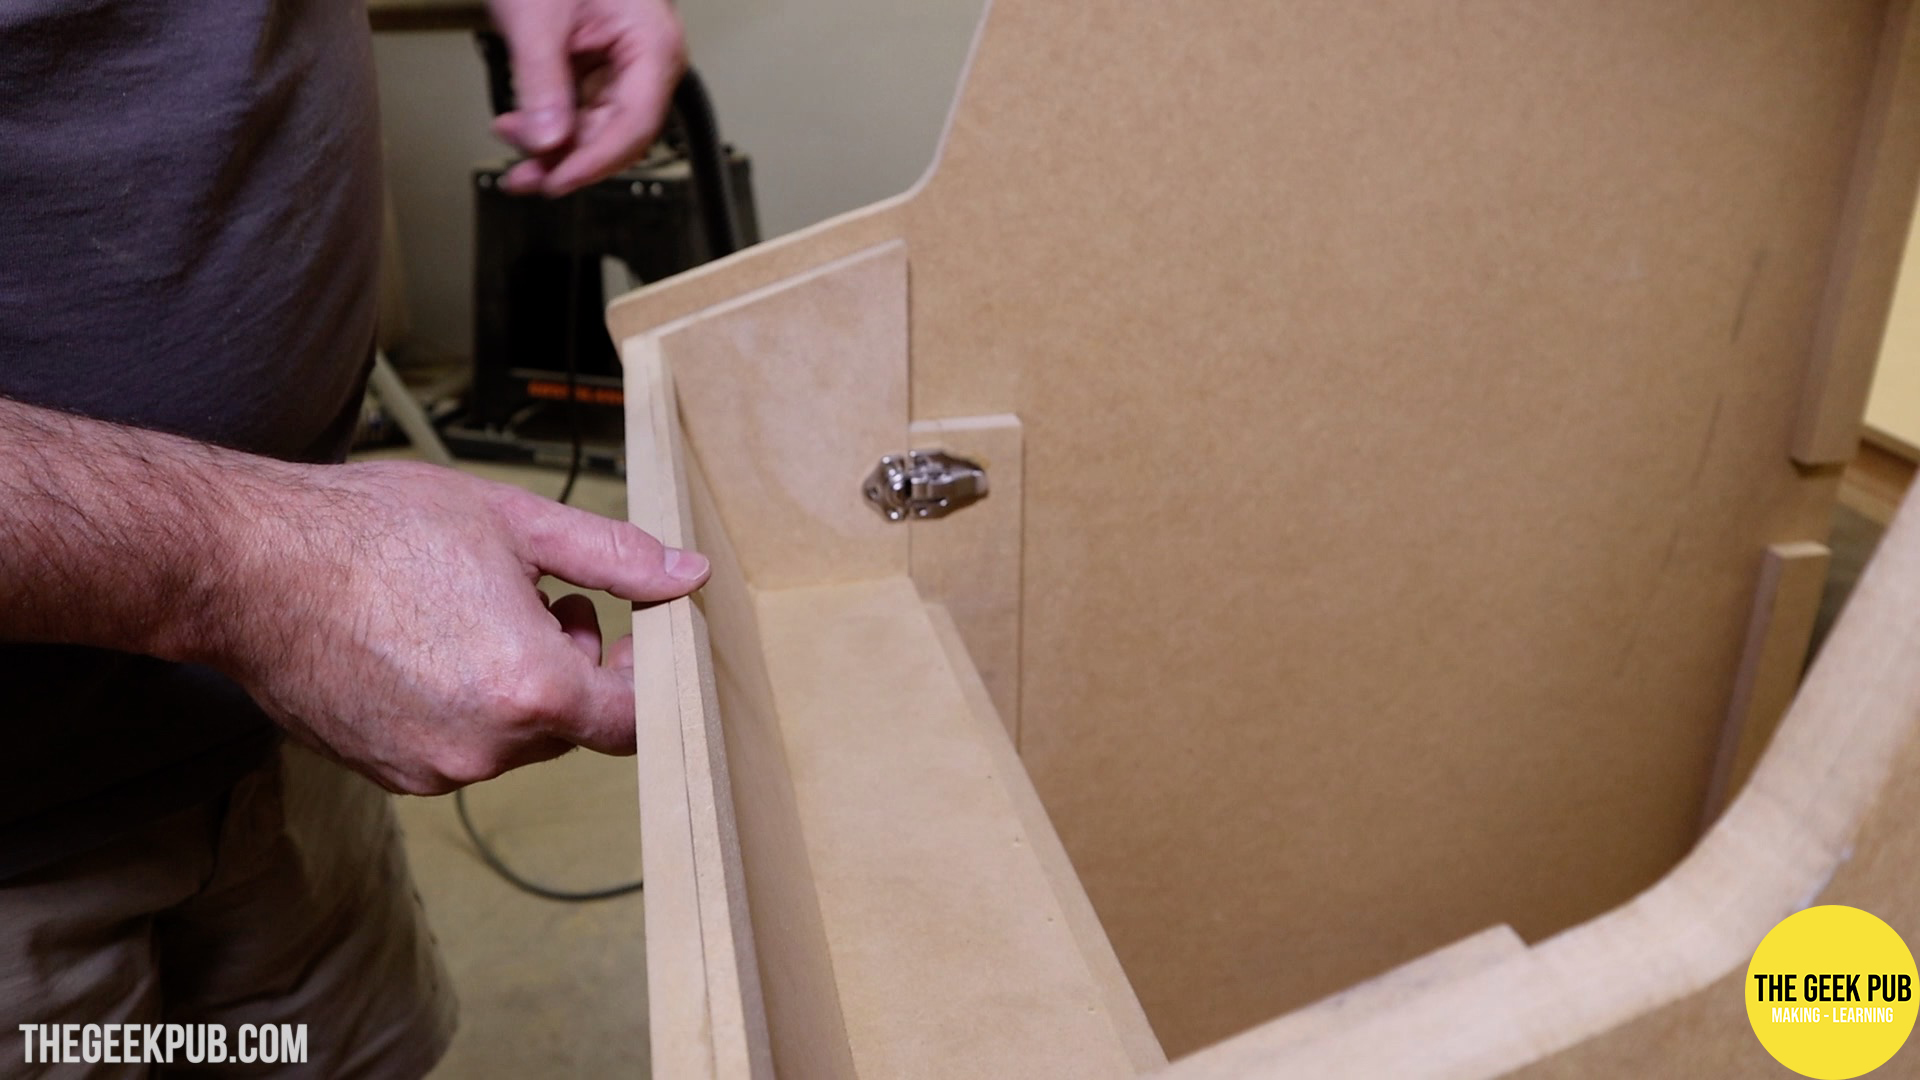
The PETSCII Robots arcade cabinet has a locking flip down control panel that is mounted on a piano hinge and locks with latches from the inside of the arcade.
This design allows for easy maintenance by being able to open the front of the cabinet to replace LEDs or failed buttons. It also prevents any unauthorized person from messing with it. The only way to open the latches is to use the key to remove the back cover of the cabinet and open the from the inside.

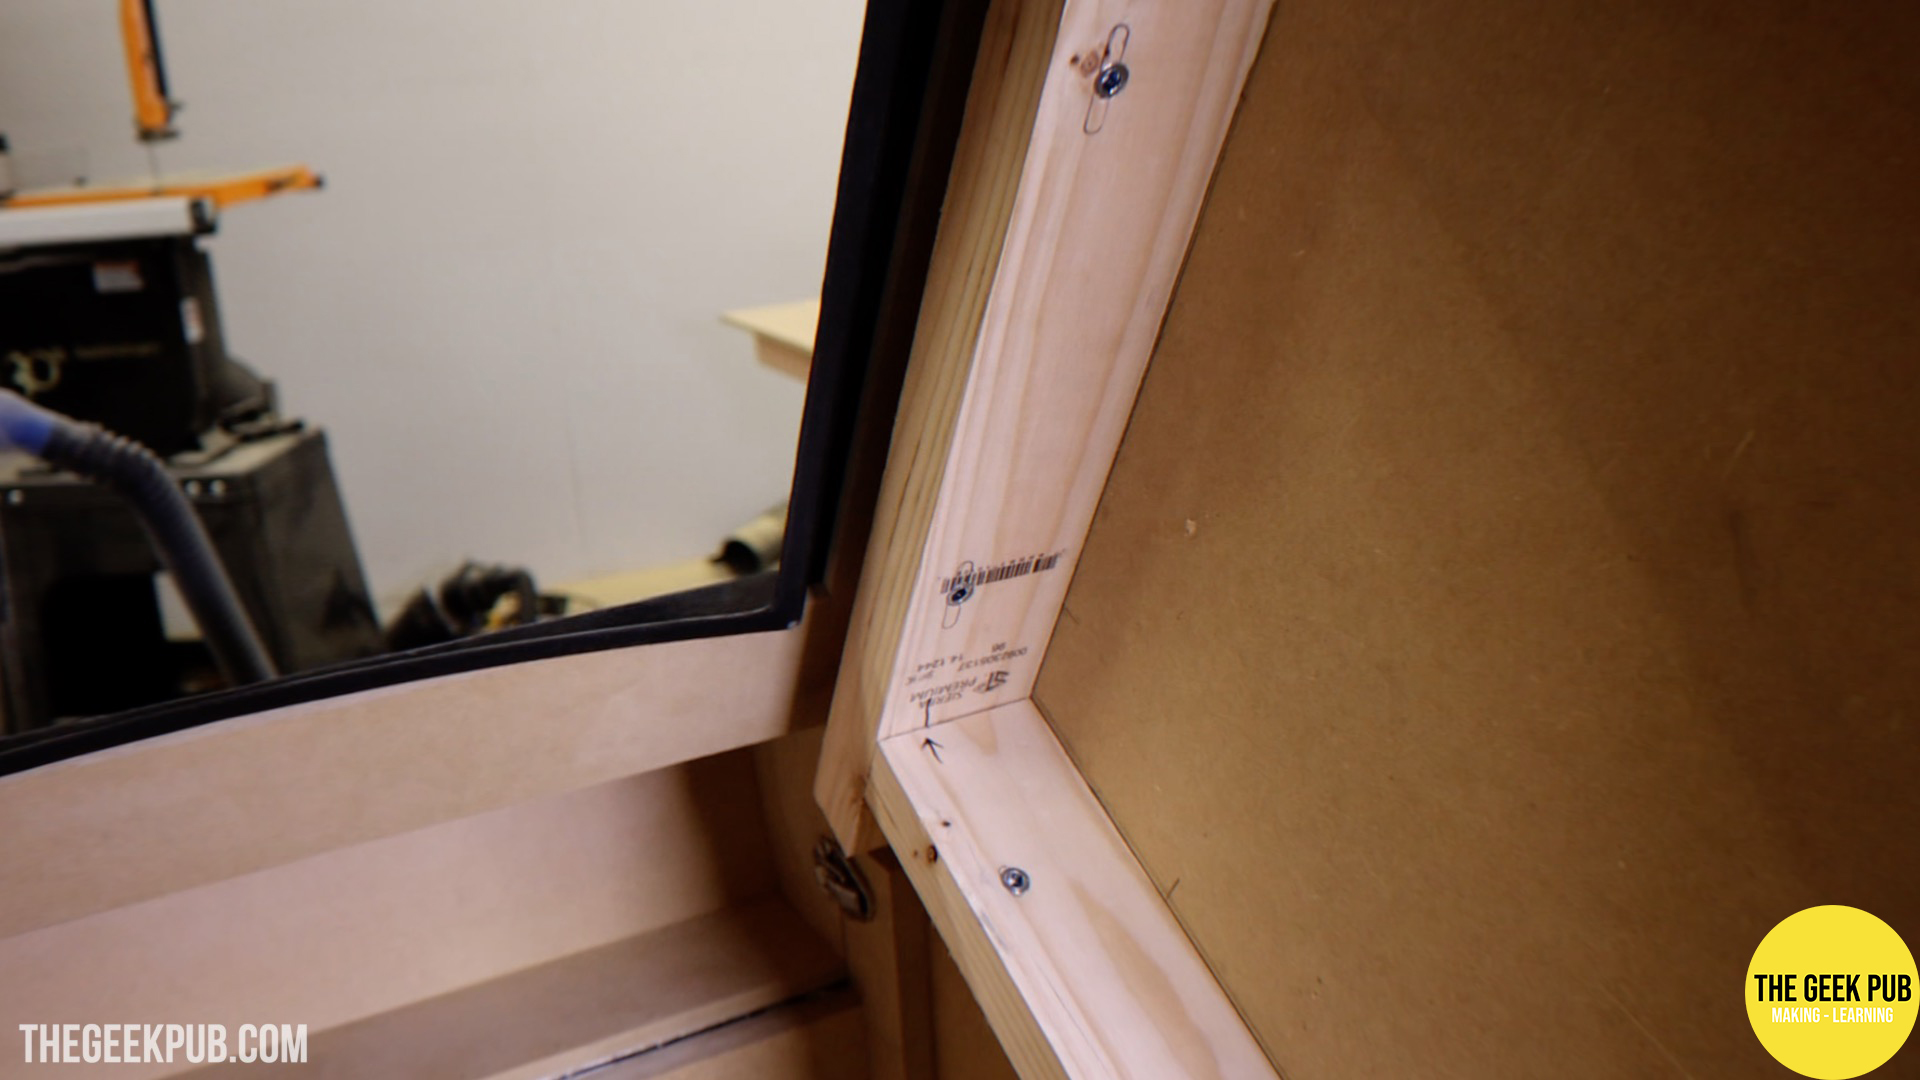
Making the Arcade’s Bezel
We decided the only way to go in PETSCII Robots was a CRT. An LCD just wouldn’t have the look and feel we wanted for a game that was designed in every way to be retro!
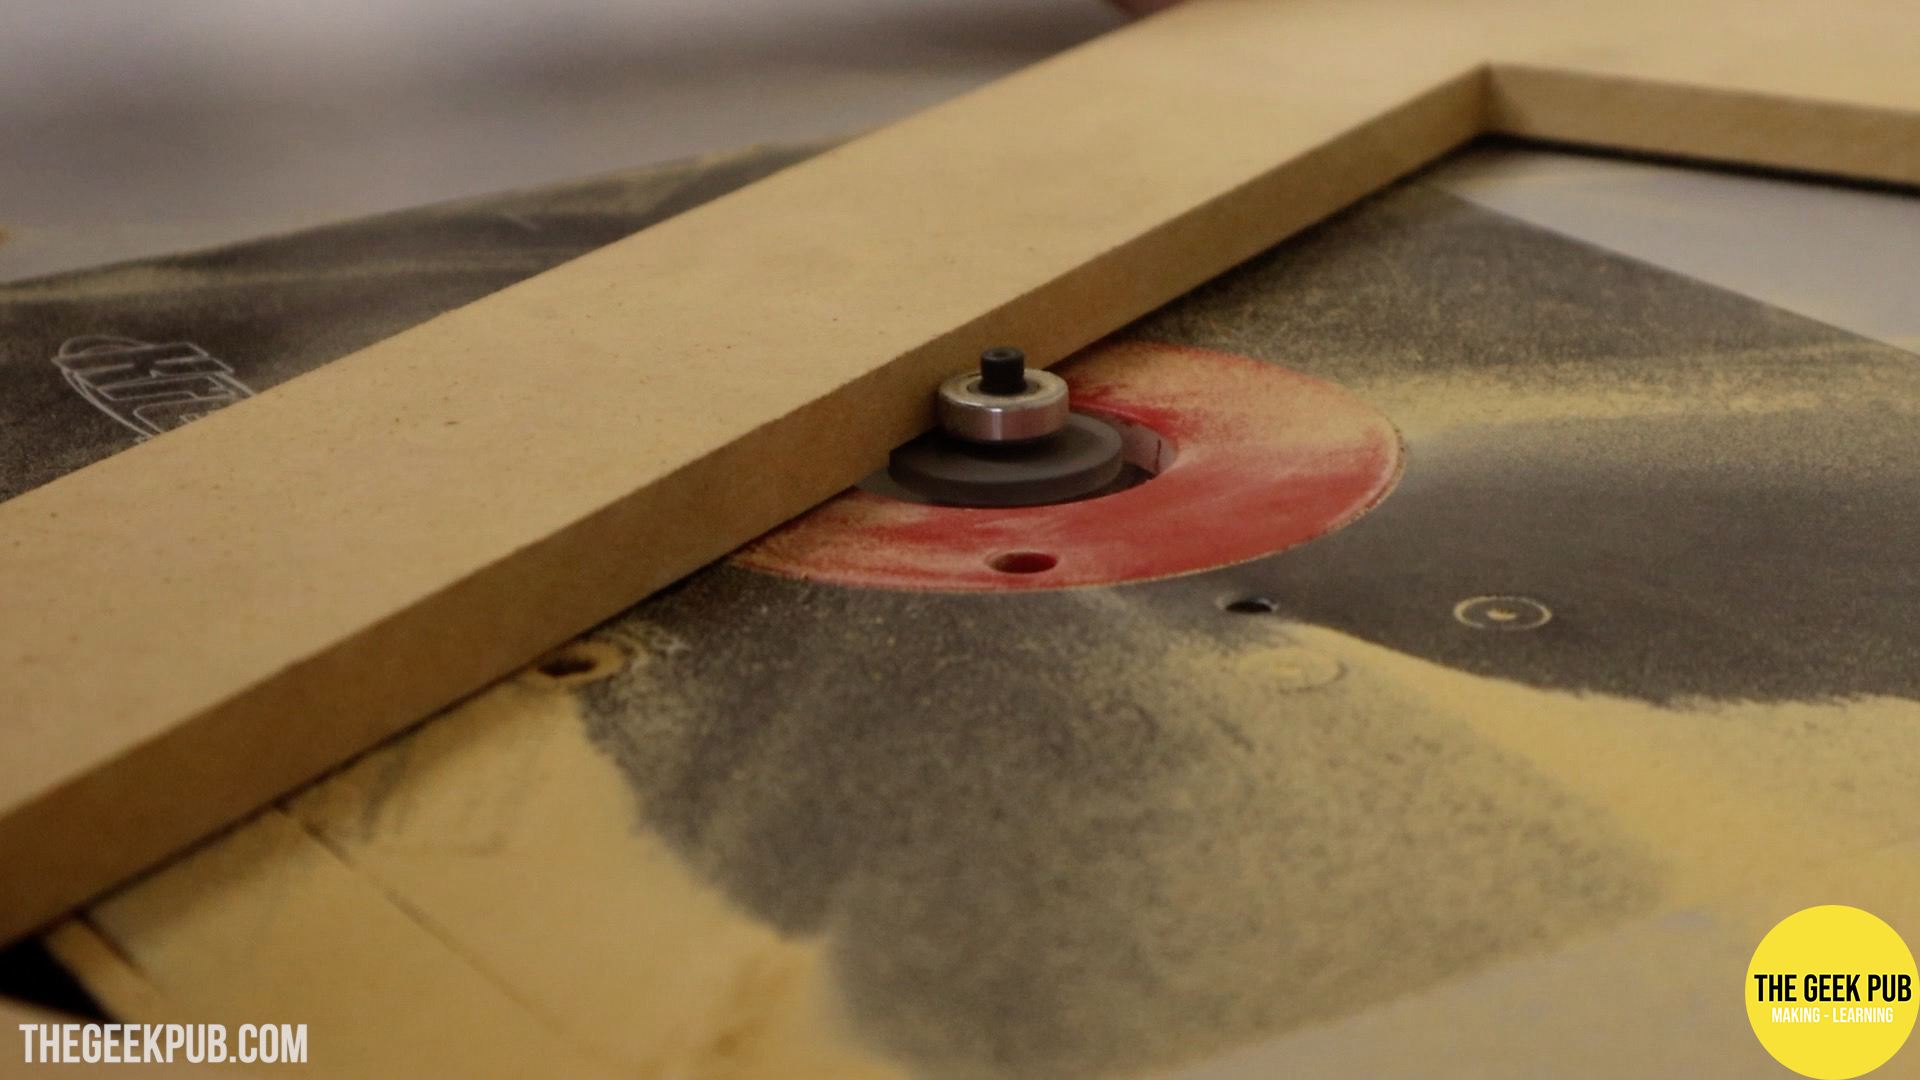
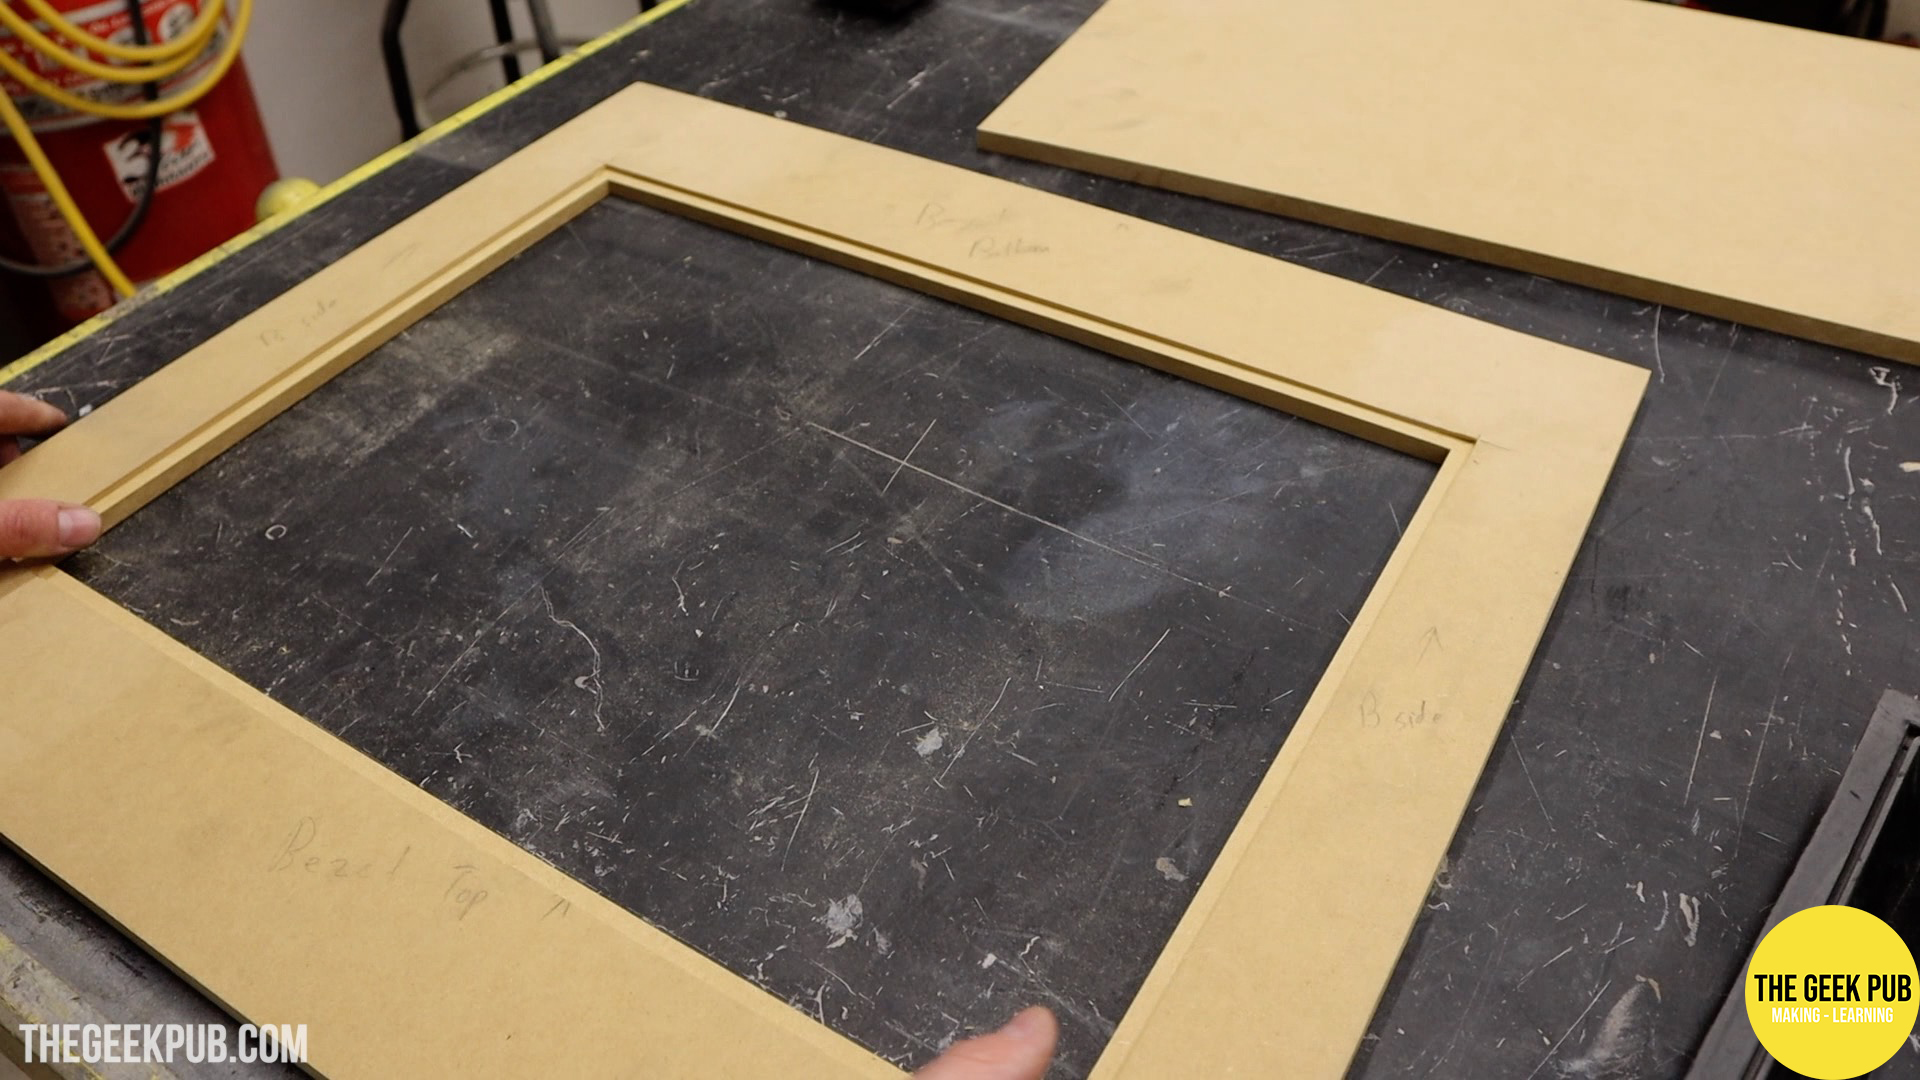
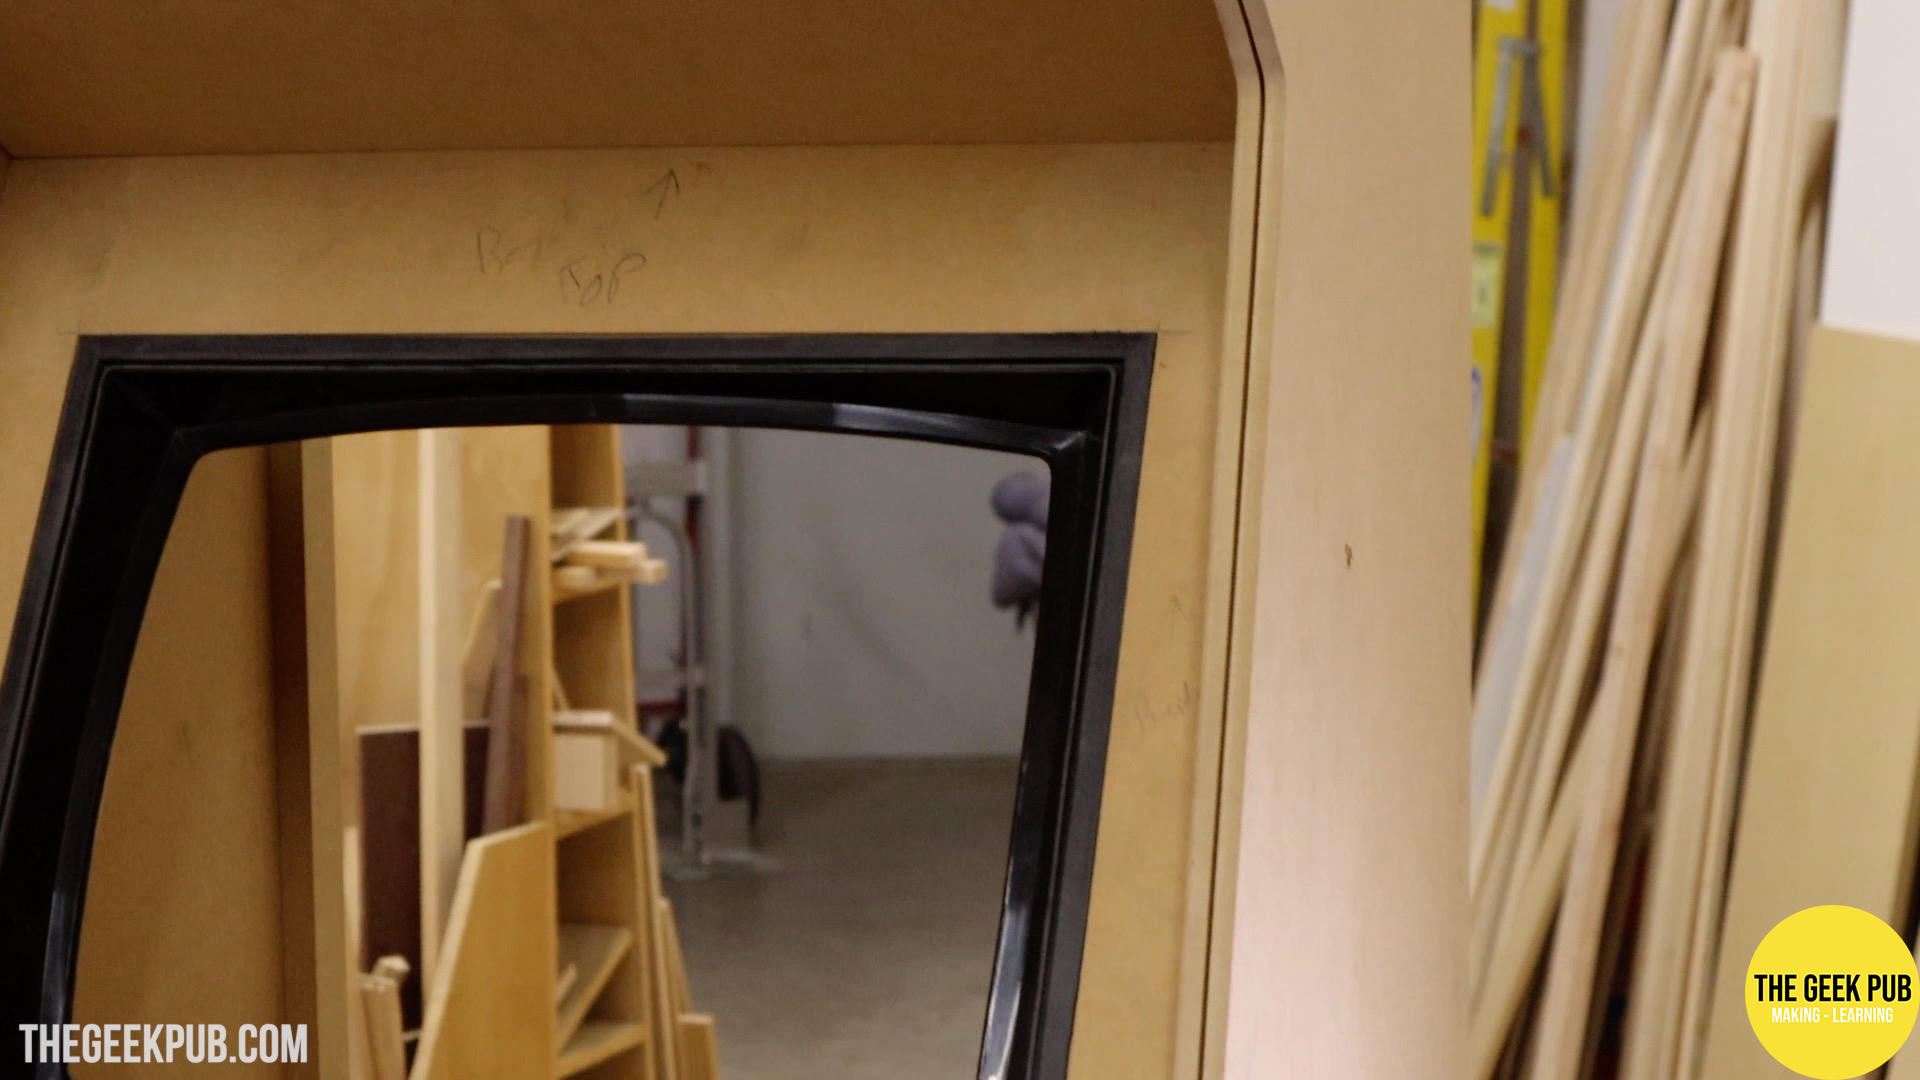
Mike Woods at Electric Starship Arcade found an old 19″ television set and removed the bezel from it. I was able to cut the bezel’s plastic down on the table saw and then make a frame from MDF to mount it in. It worked absolutely perfectly!
I just needed to route a small slot onto the MDF for the bezel to sink into.
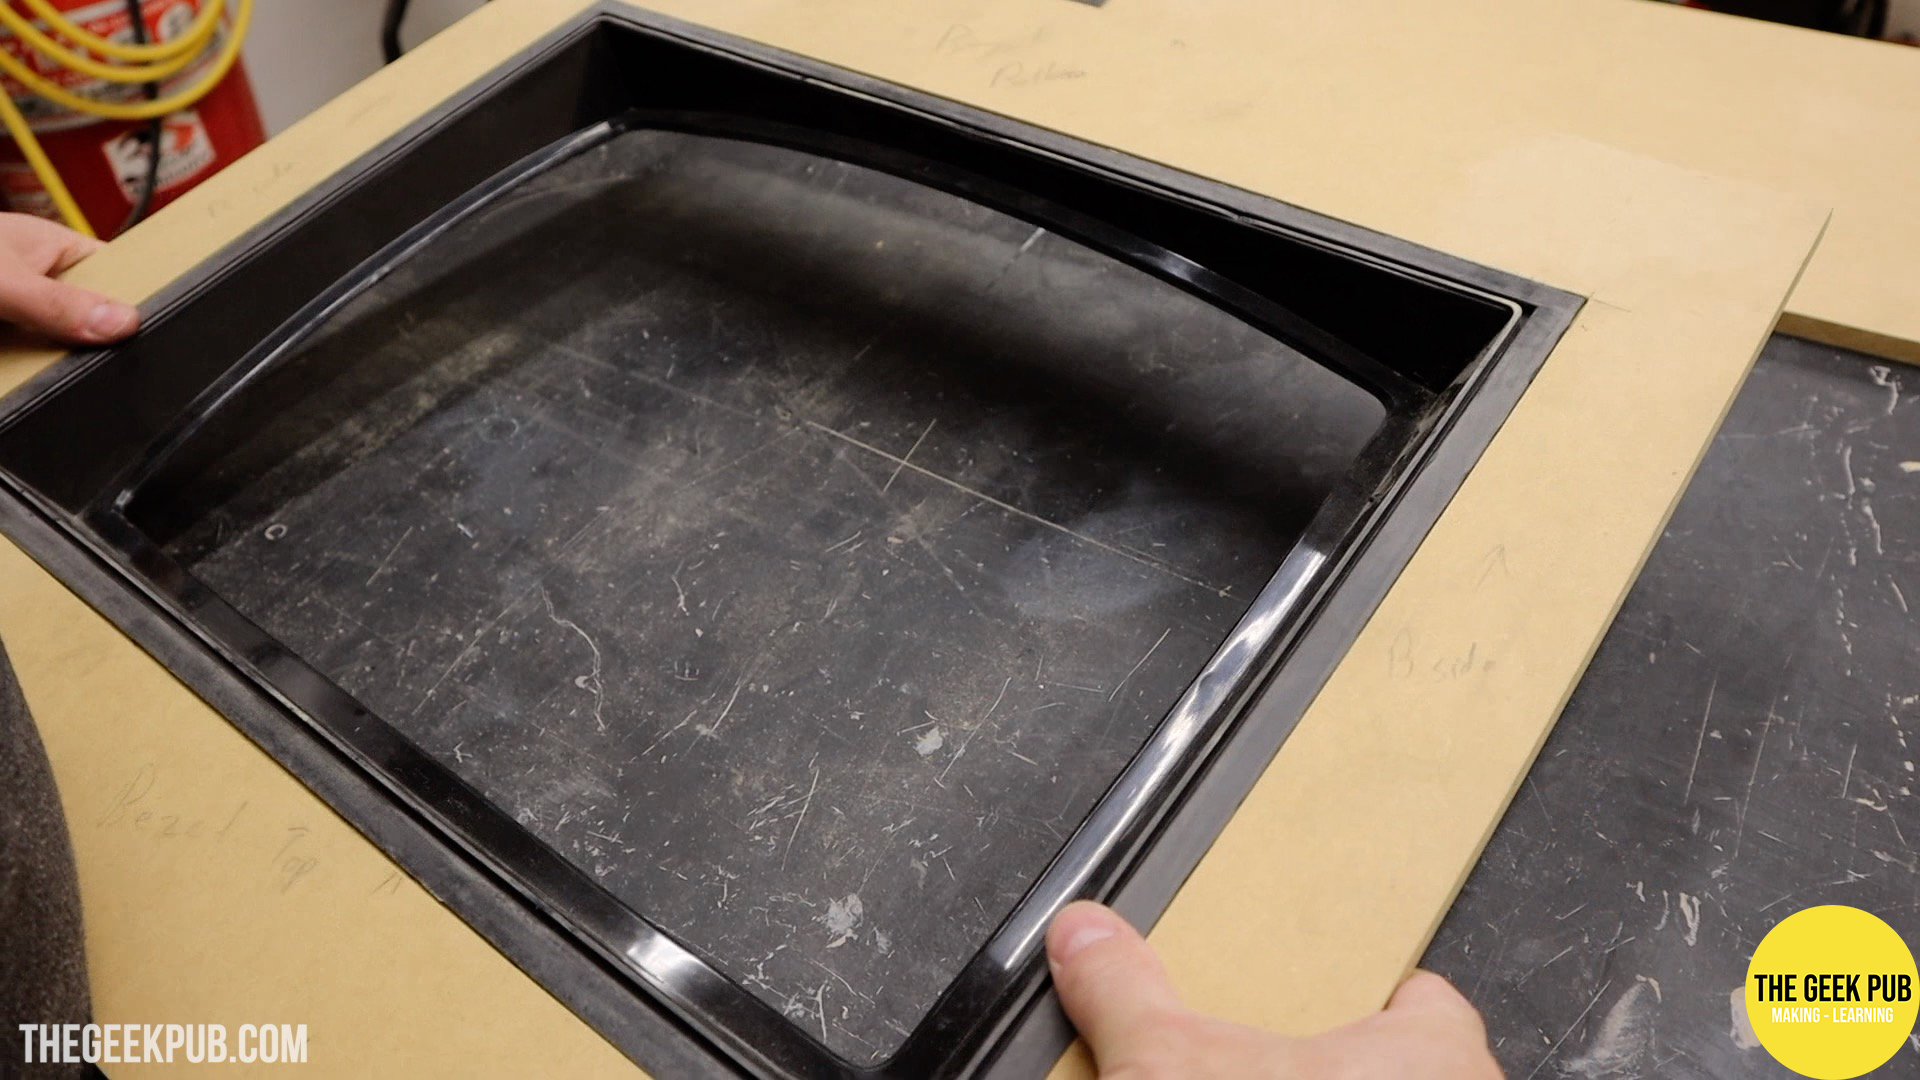
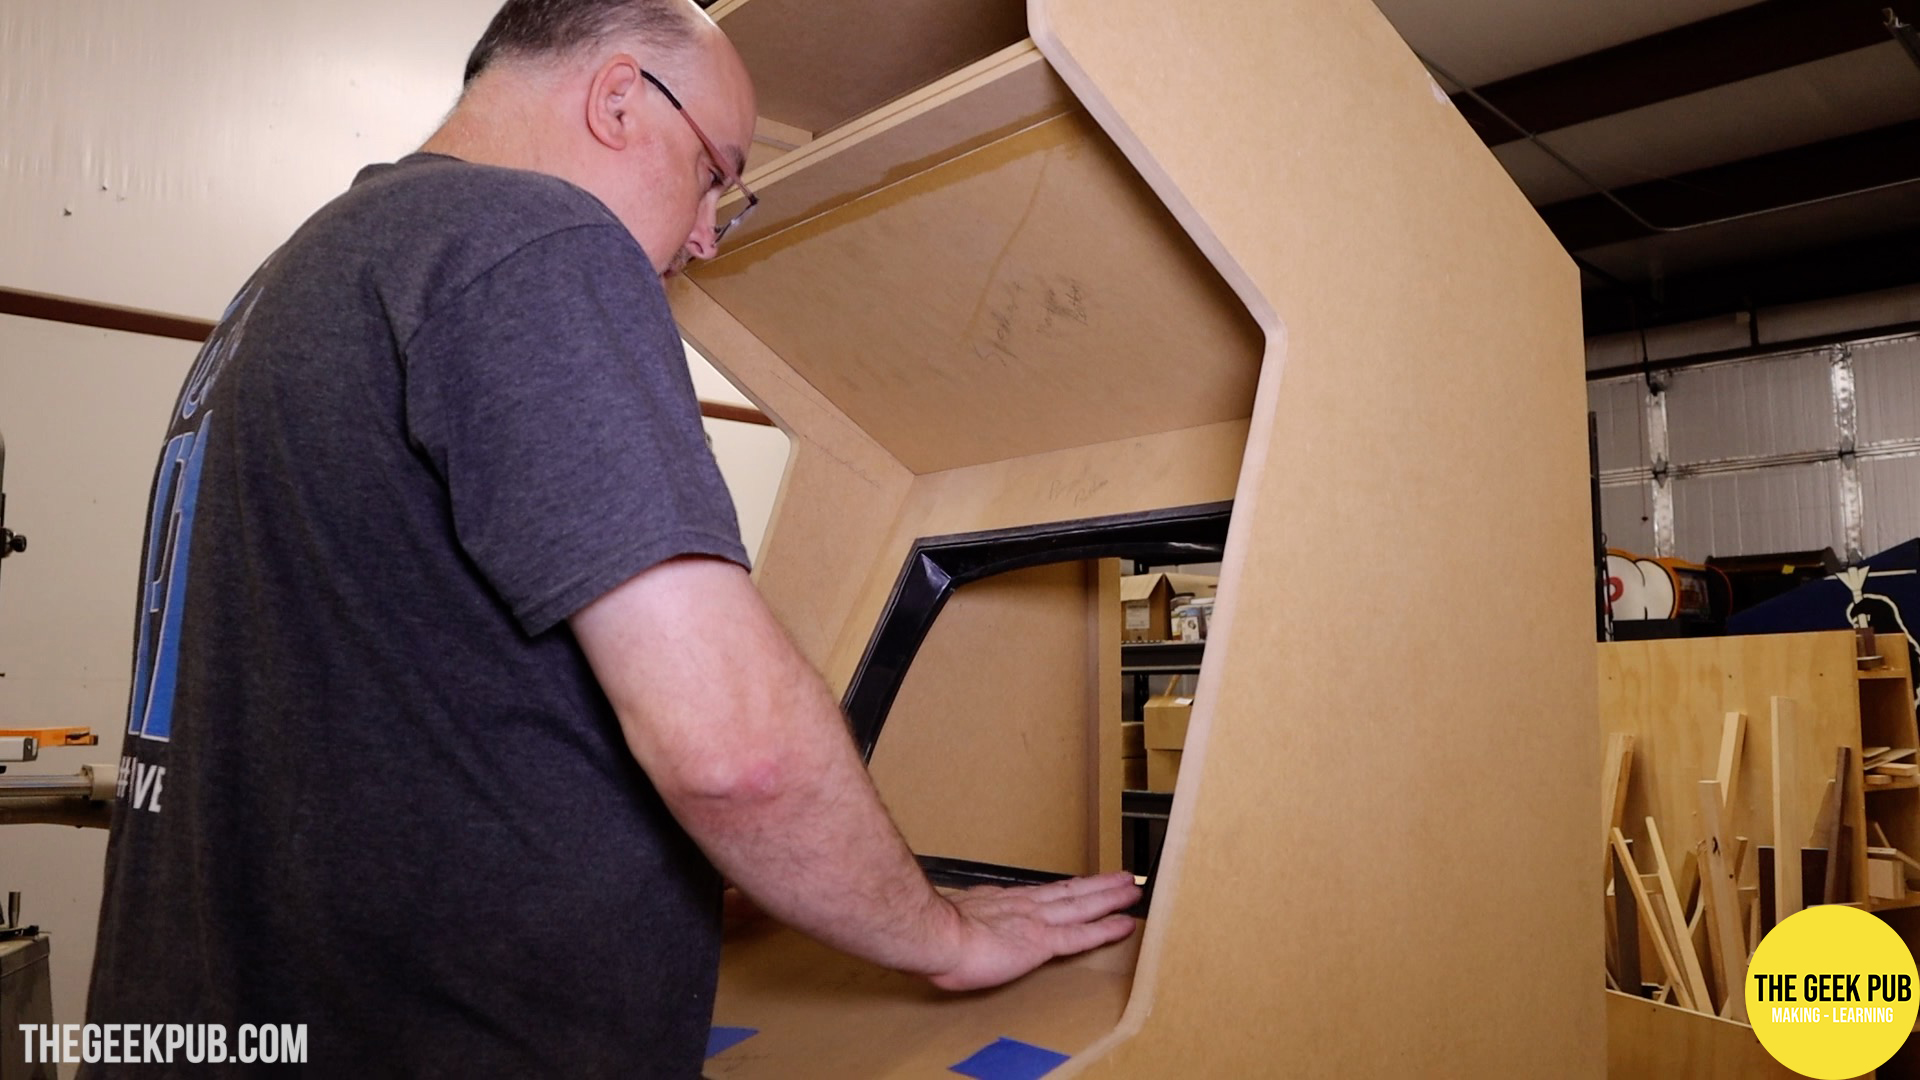
And installed into the arcade it looks gorgeous. You may notice some roughness on the plastic due to the machine work, but don’t worry. The entire top of the bezel gets covered by a bezel overlay graphic. You will never actually see those parts!
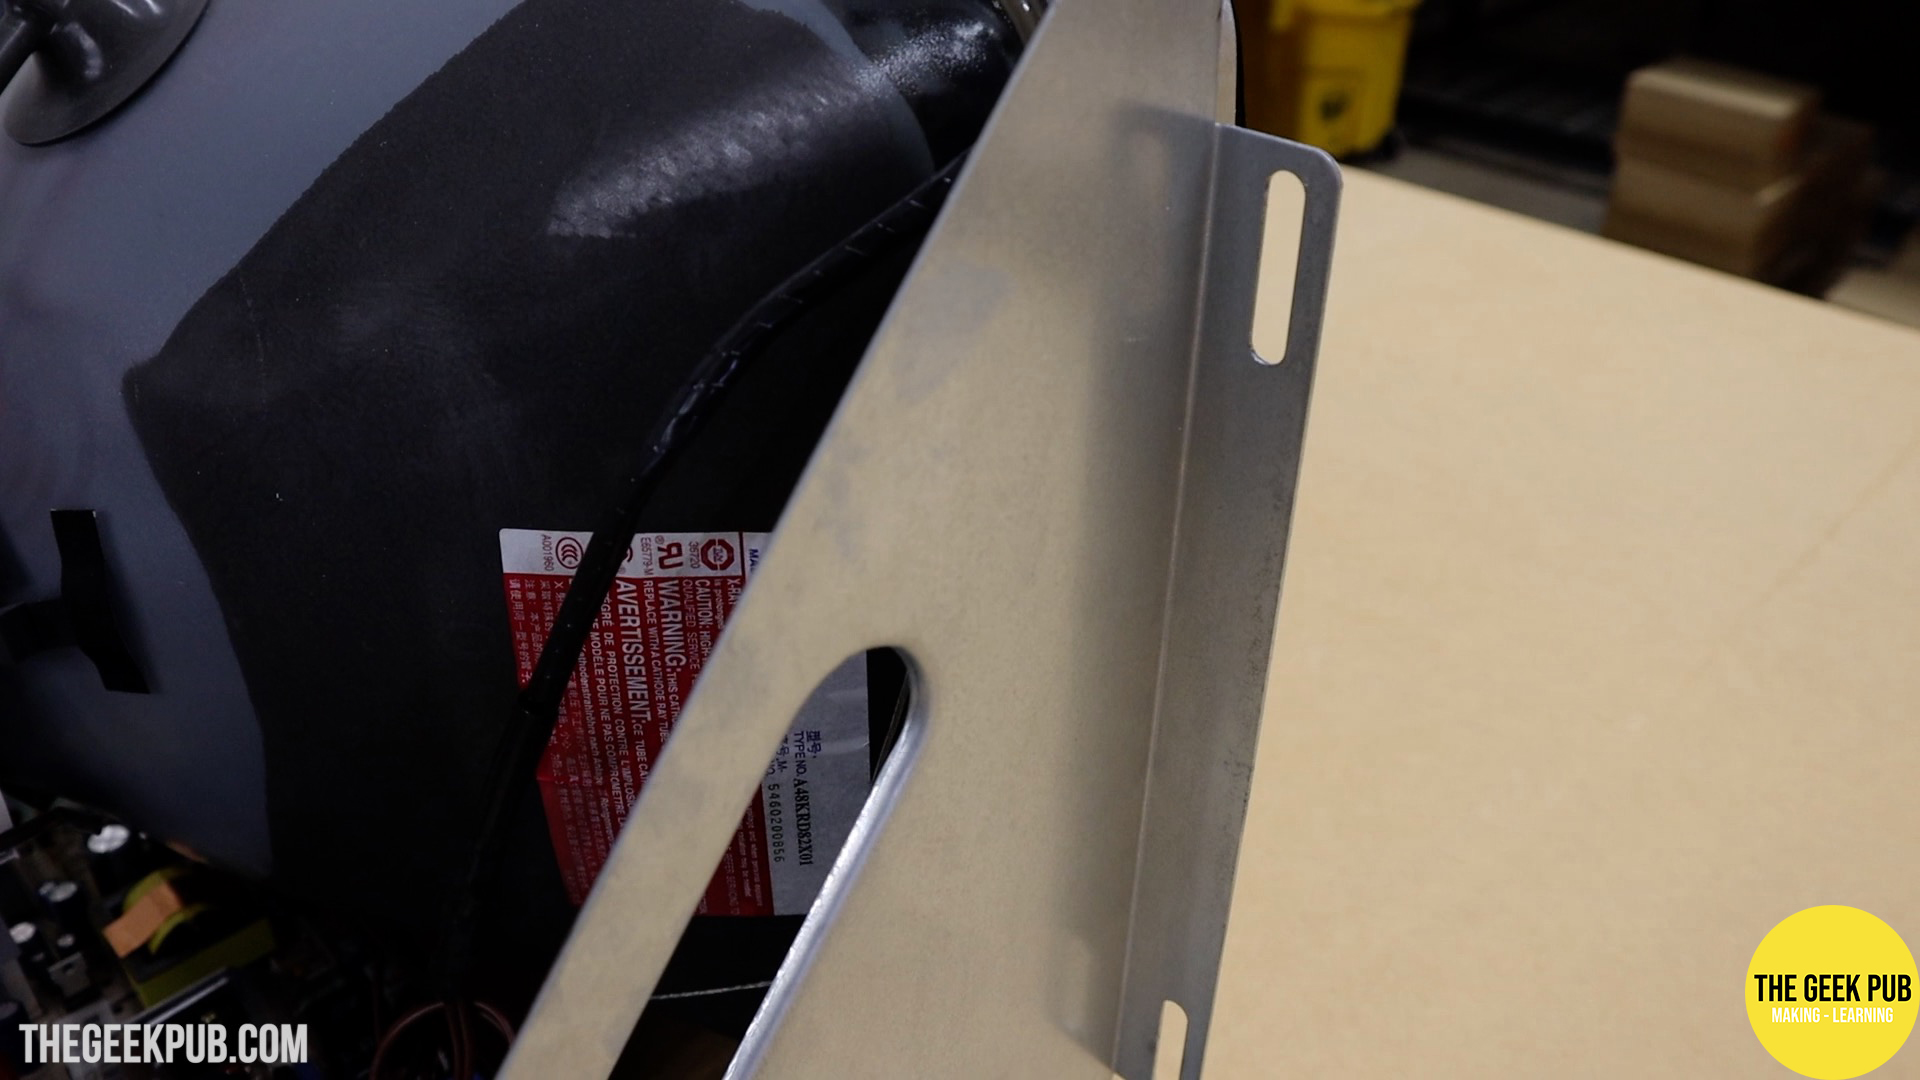
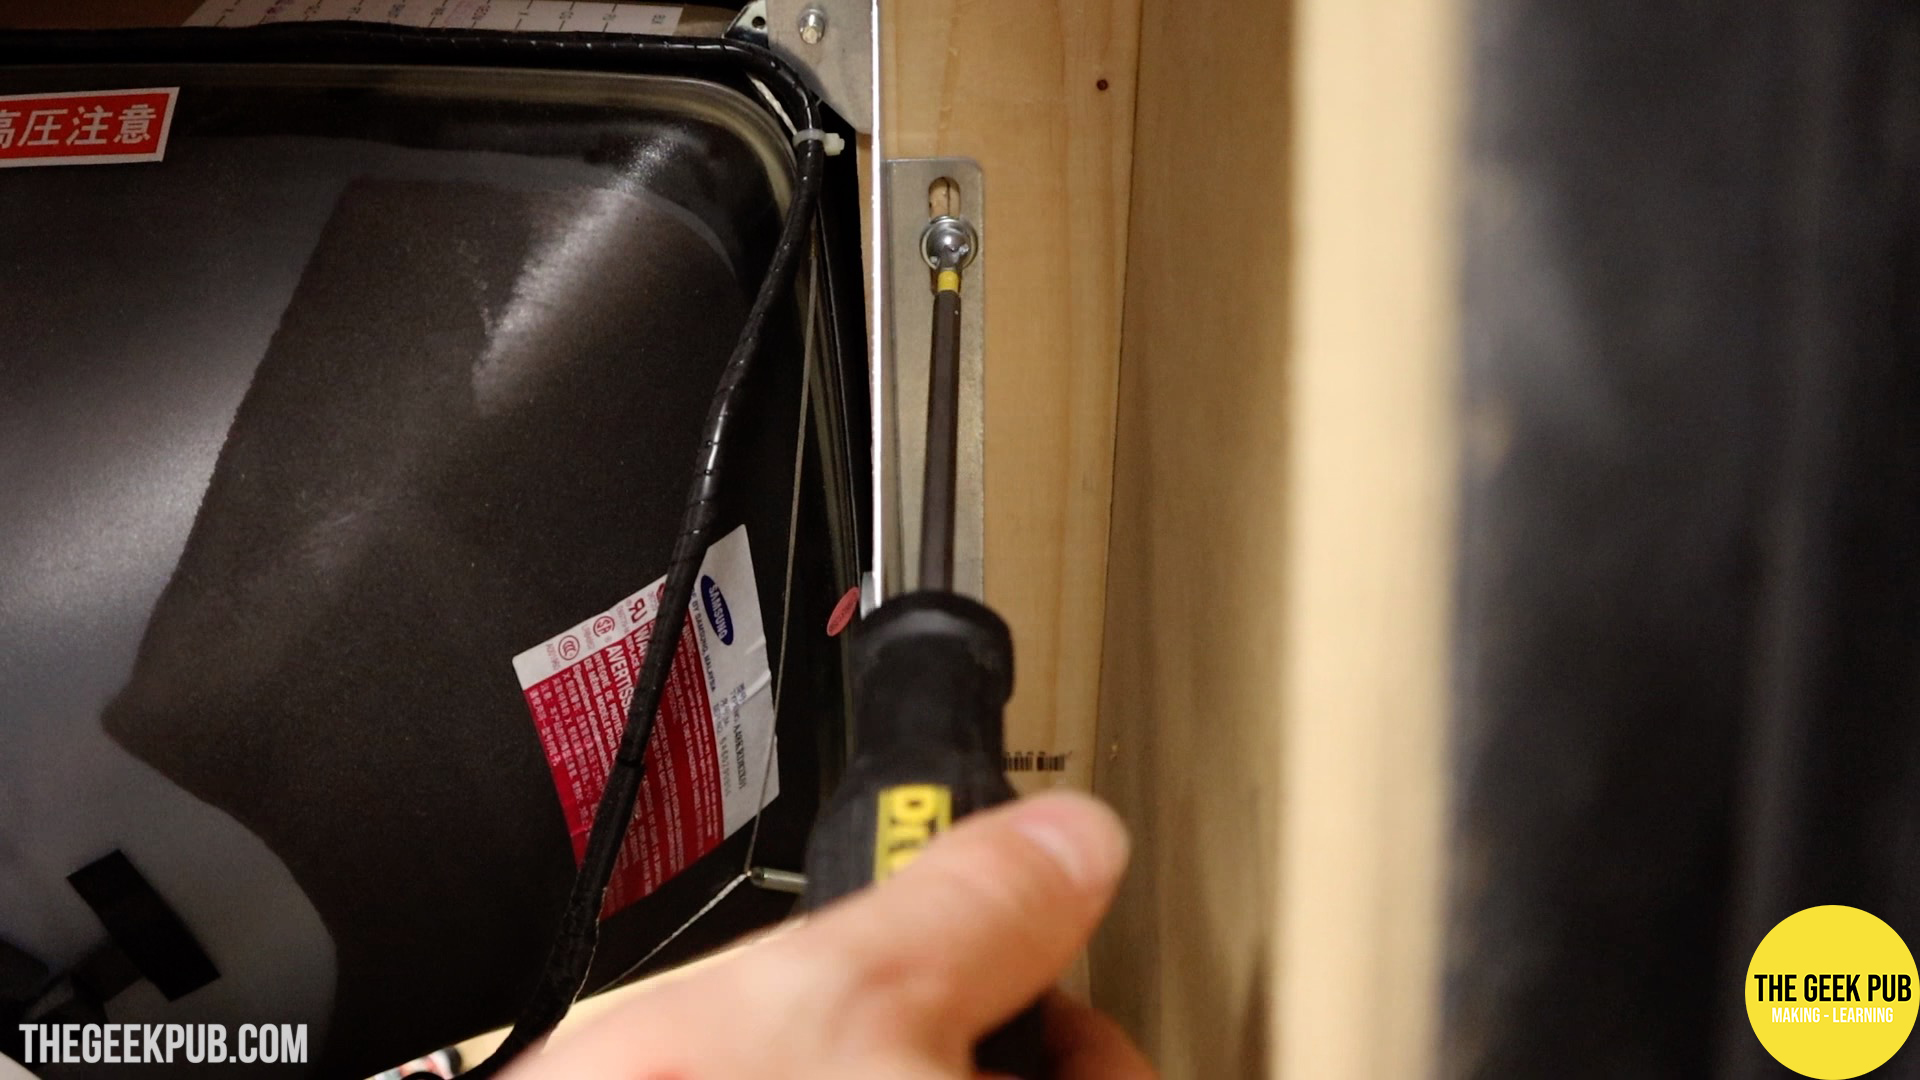
Making the Arcade’s CRT Mount
CRTs are big and heavy. Especially arcade CRTs since they are usually mounted in a large metal frame and beefier built to withstand the abuse they will receive over their lifetime.
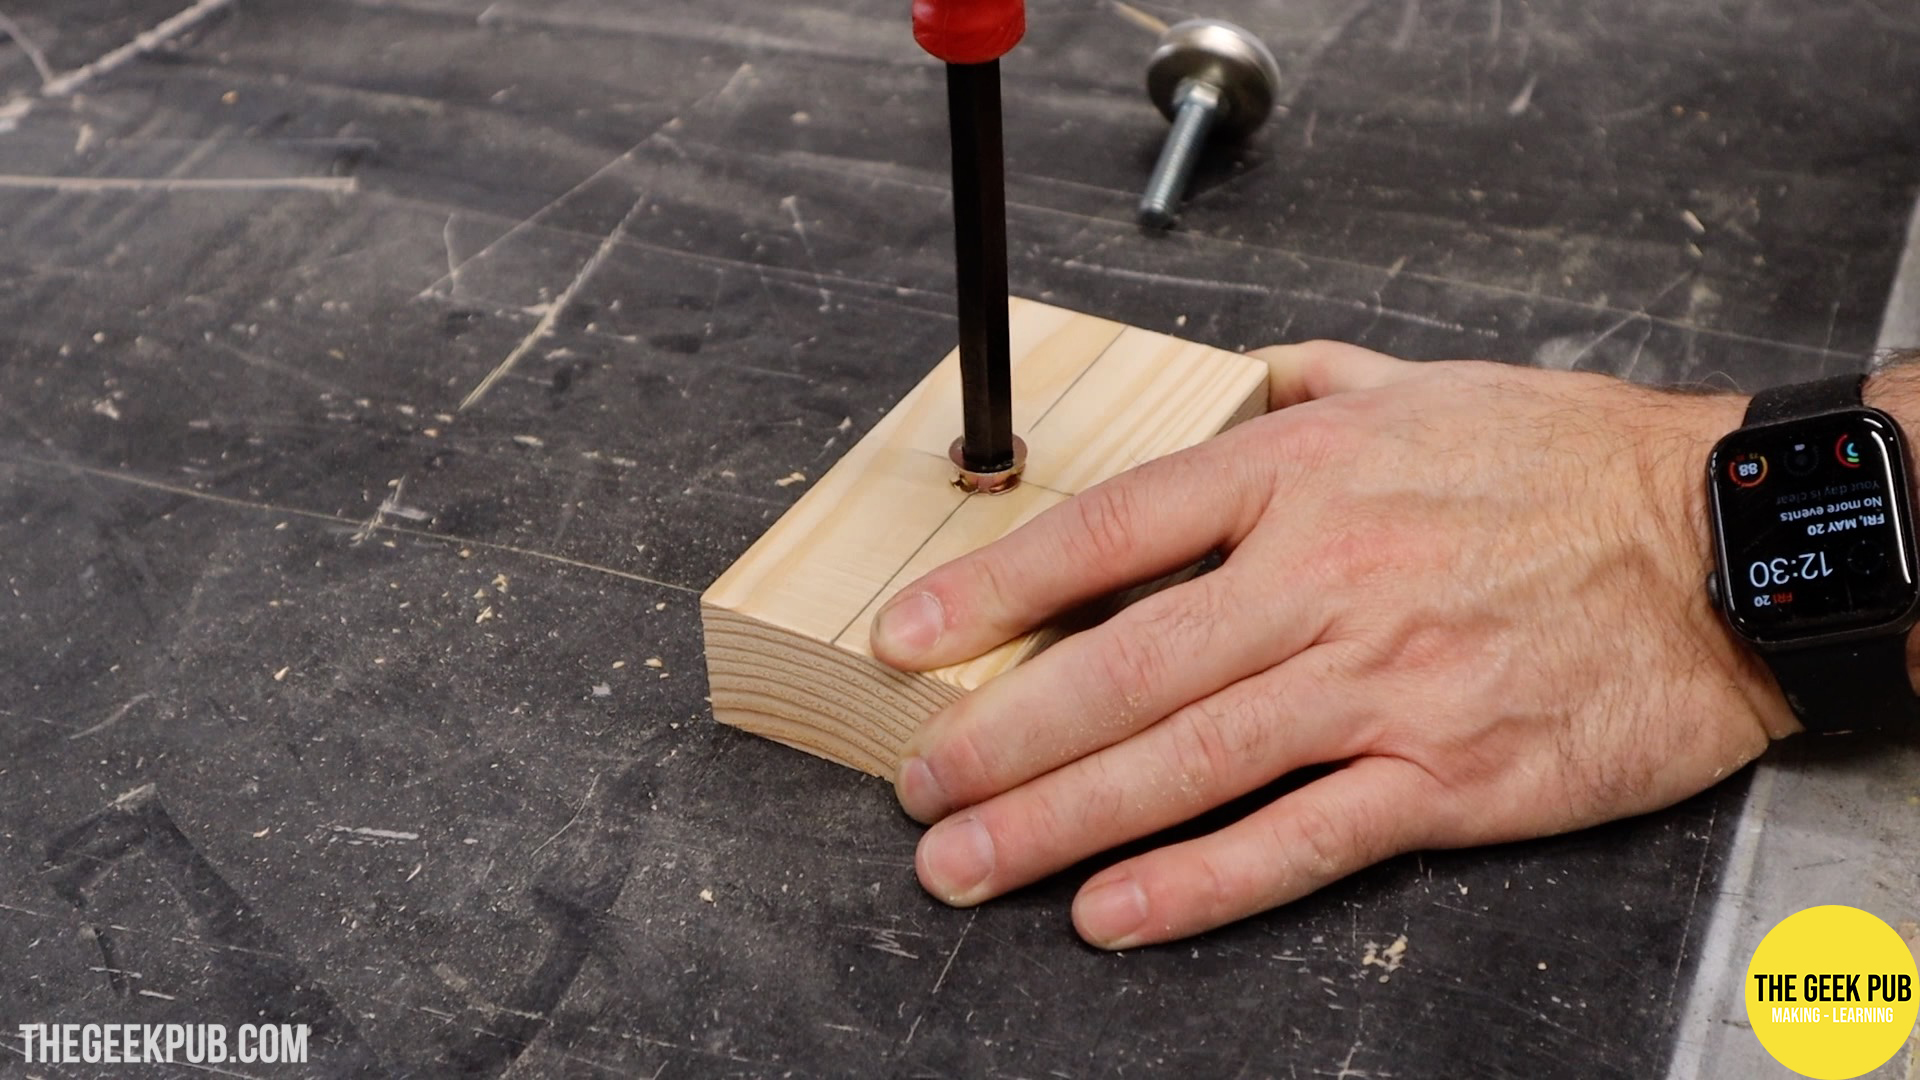
To compensate for this I made sure the mount in the PETSCII Robots arcade was just as big and beefy! I used some 2×4 material and cut the round-overs off of it. Scraps from my Electronics Workbench build. I first drilled them and added insert nuts for the monitor to bolt to.
To make sure they were extra strong, I not only glued them, but also used 3 inch screws from the outside of the arcade. I countersunk the screws on the outside of the cabinet and then used “plastic wood” wood filler to cover over them. I sanded it down and you can’t even tell there was ever holes there!
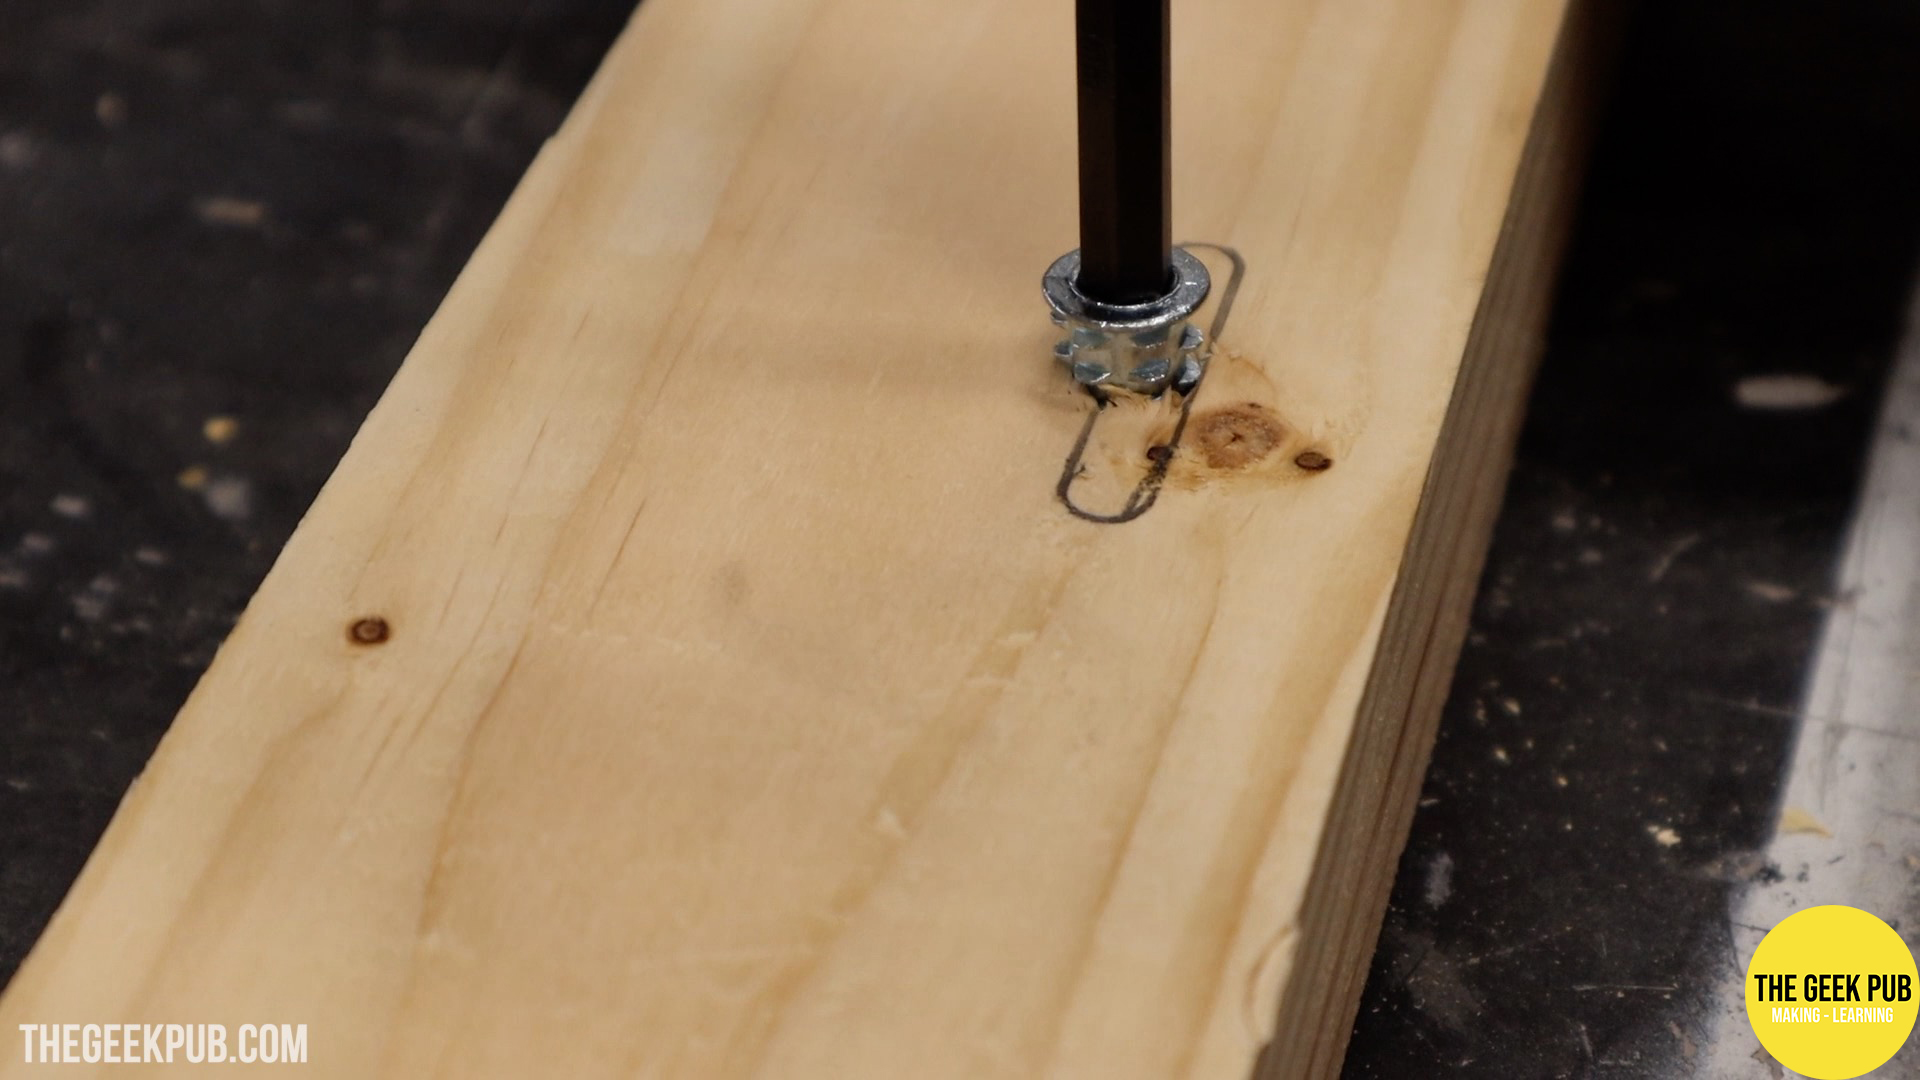
Arcade CRTs have 8 slotted screw holes on them. Four on each side, and then two front and two bottom. The insert nuts in our mount will align with the slots on the CRT (more on this later).
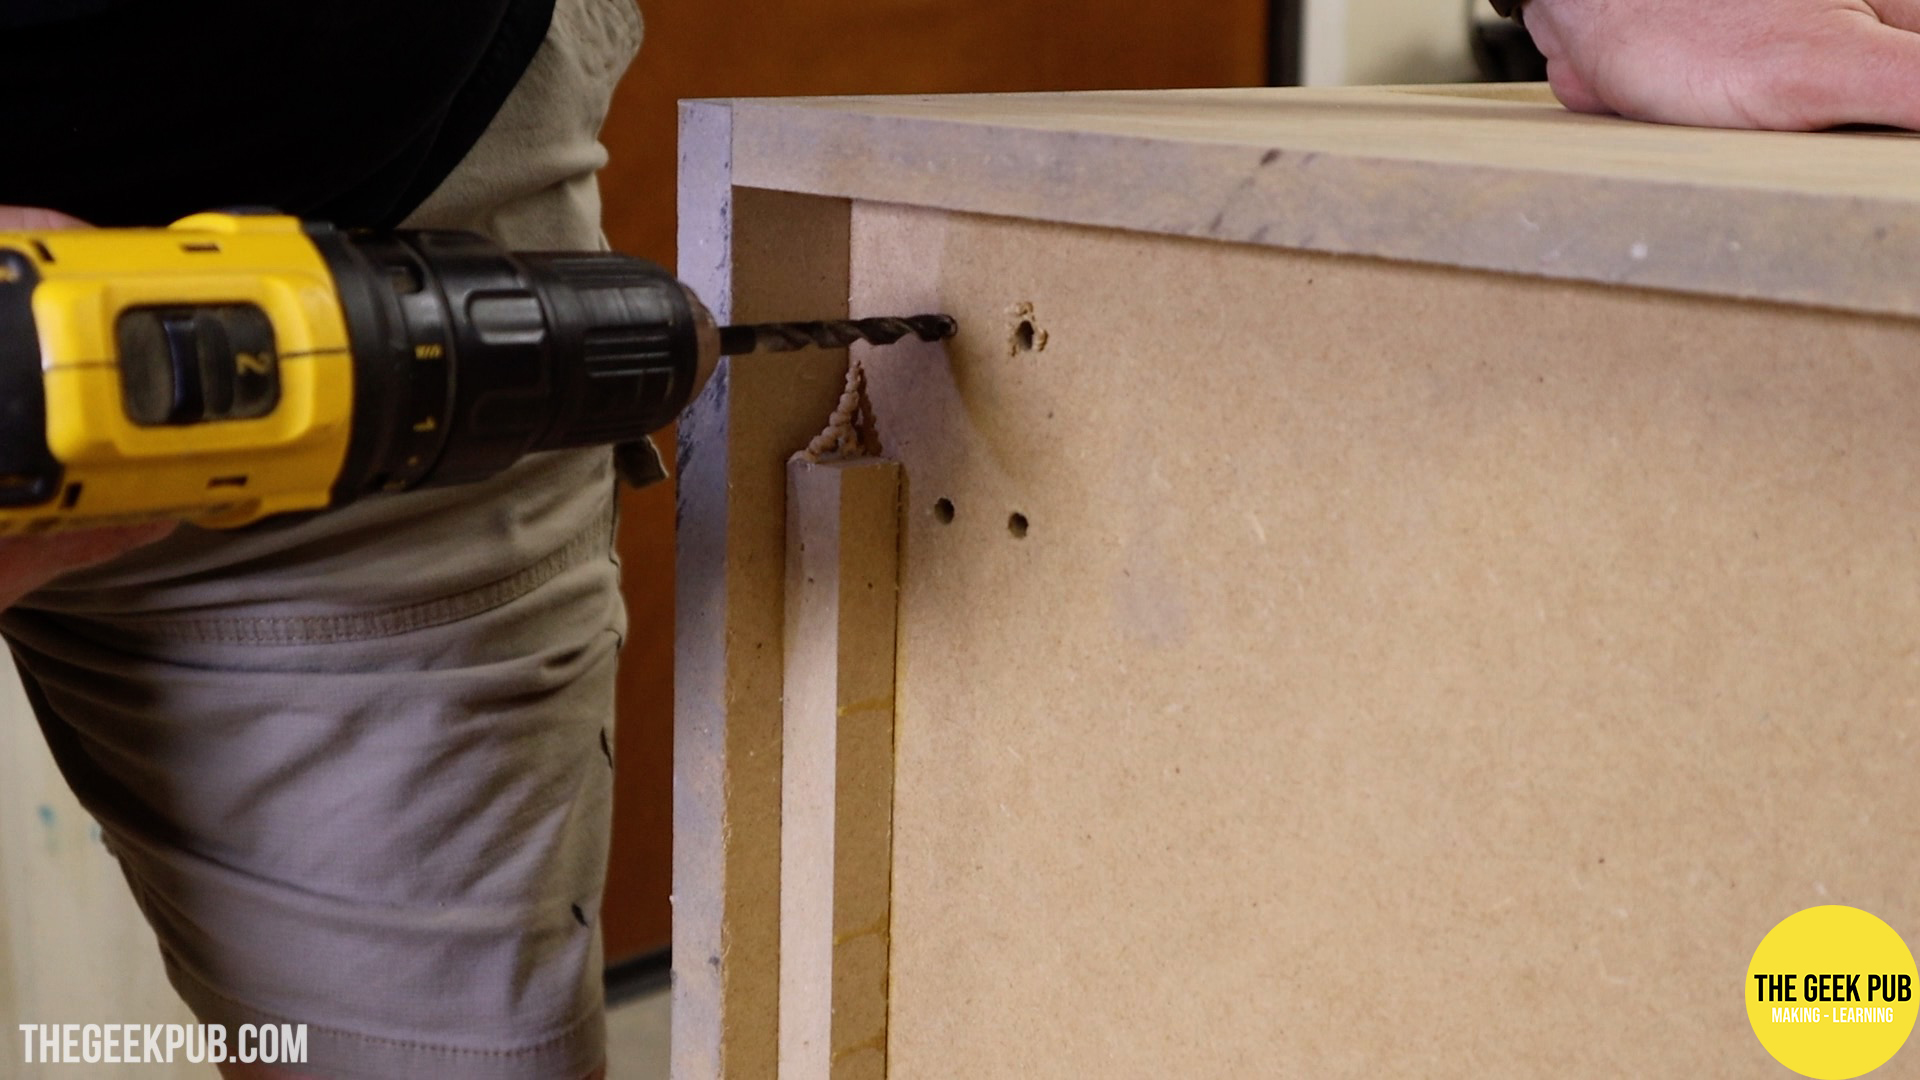
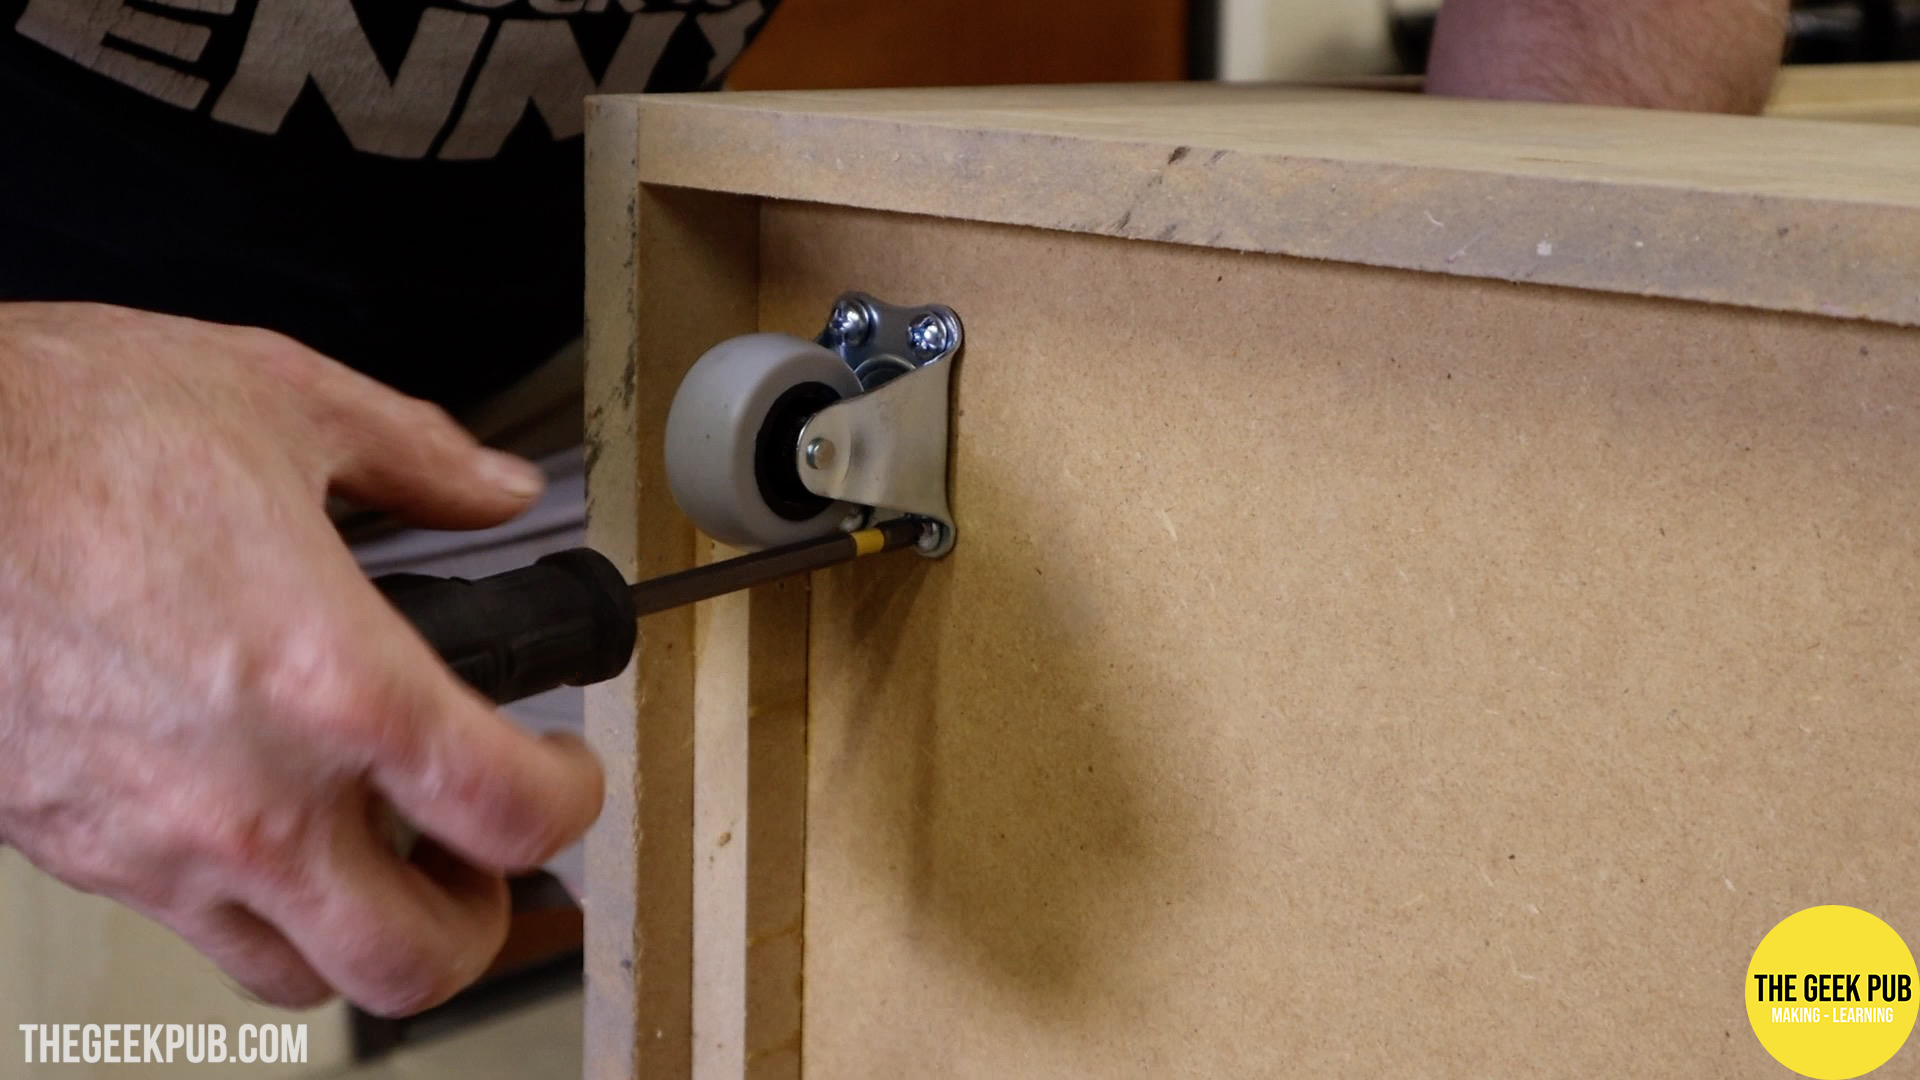
Feet and Casters for the PETSCII Robots Arcade
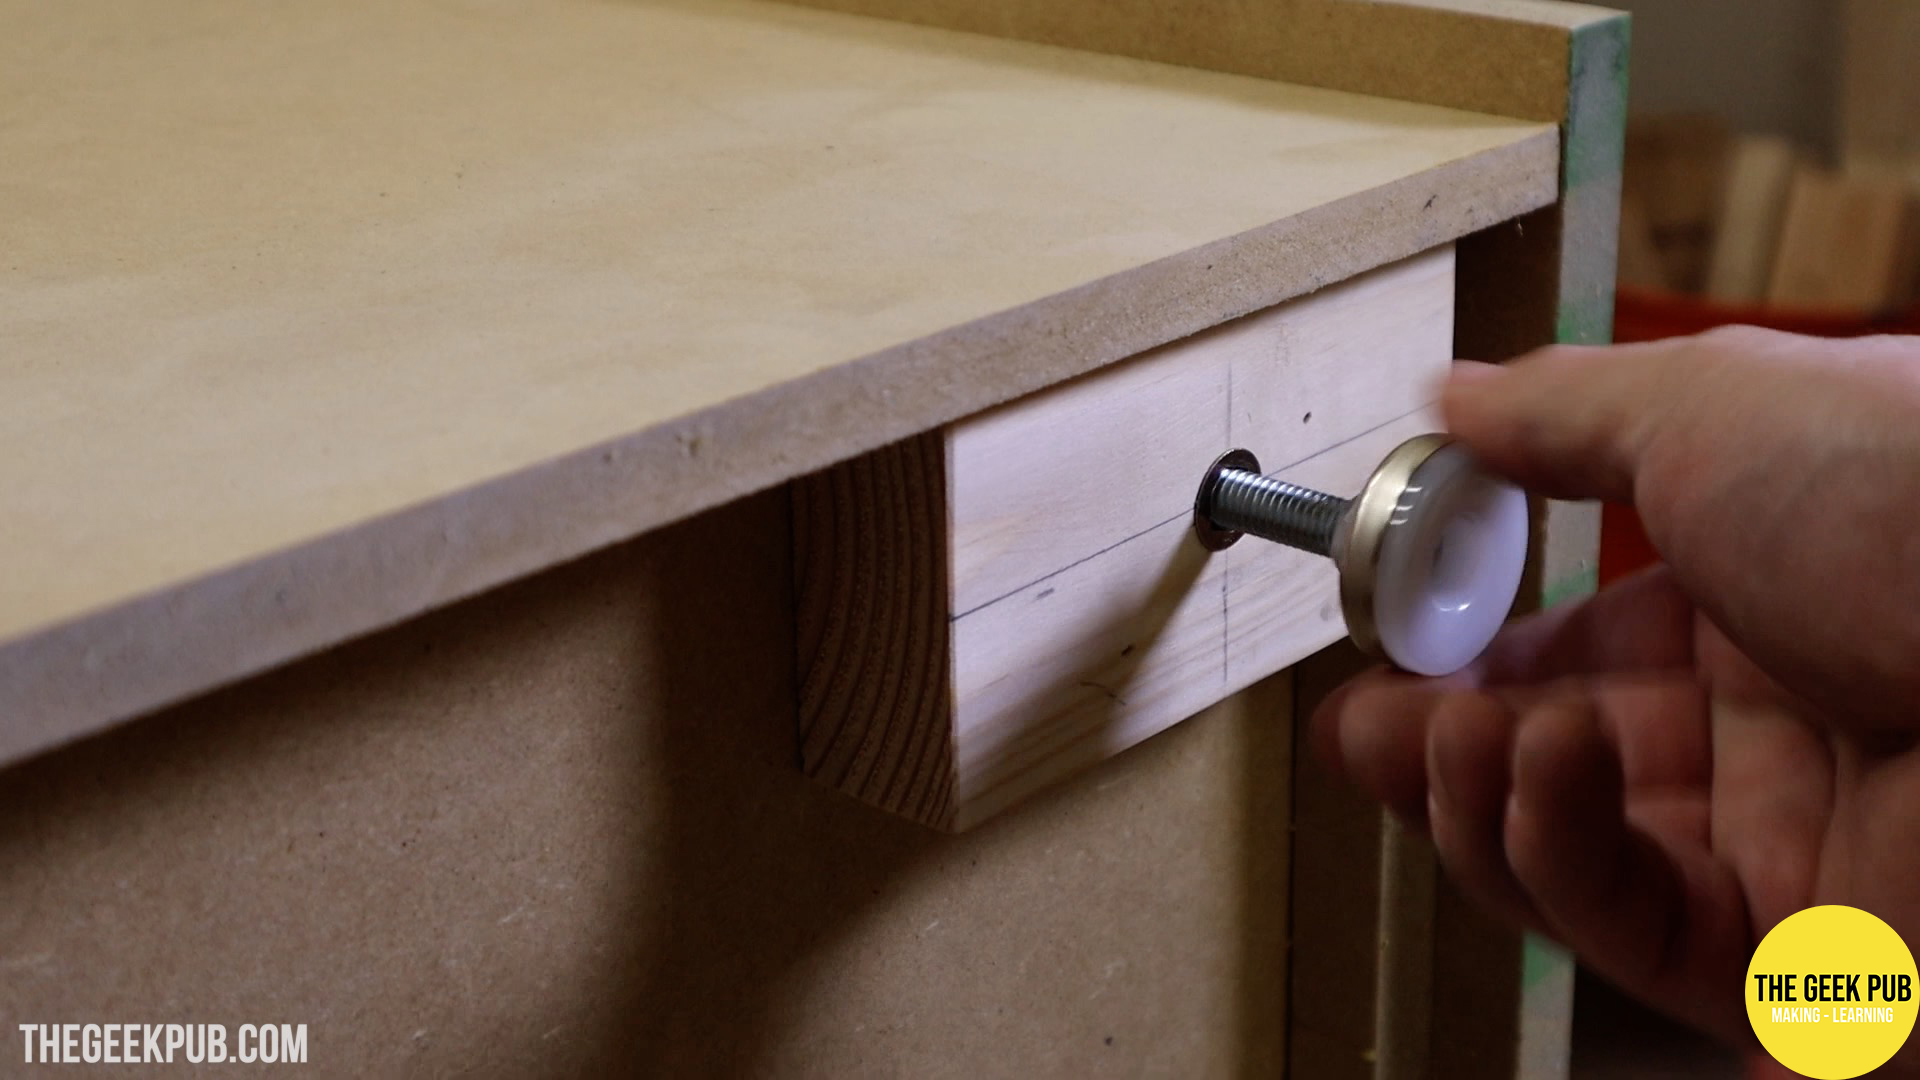
PETSCII Robots is going to need to be moved. A lot! And so to make this easier, I added casters to the back of the cabinet and feet to the front.
The casters will work in combination with the grab handles we made earlier. You can tilt the cabinet back and roll it around on the floor on two wheels. The front feet will keep it stable when sitting and being played!
The casters bolt to the back of the cabinet using four 1/4-20 bolts, washers, and nylon lock nuts. The feet use insert nuts and just screw in. However, the feet were a little short, so I added a 1 1/2 inch (38mm) spacer block to give them more adjustability for really slanted floors.

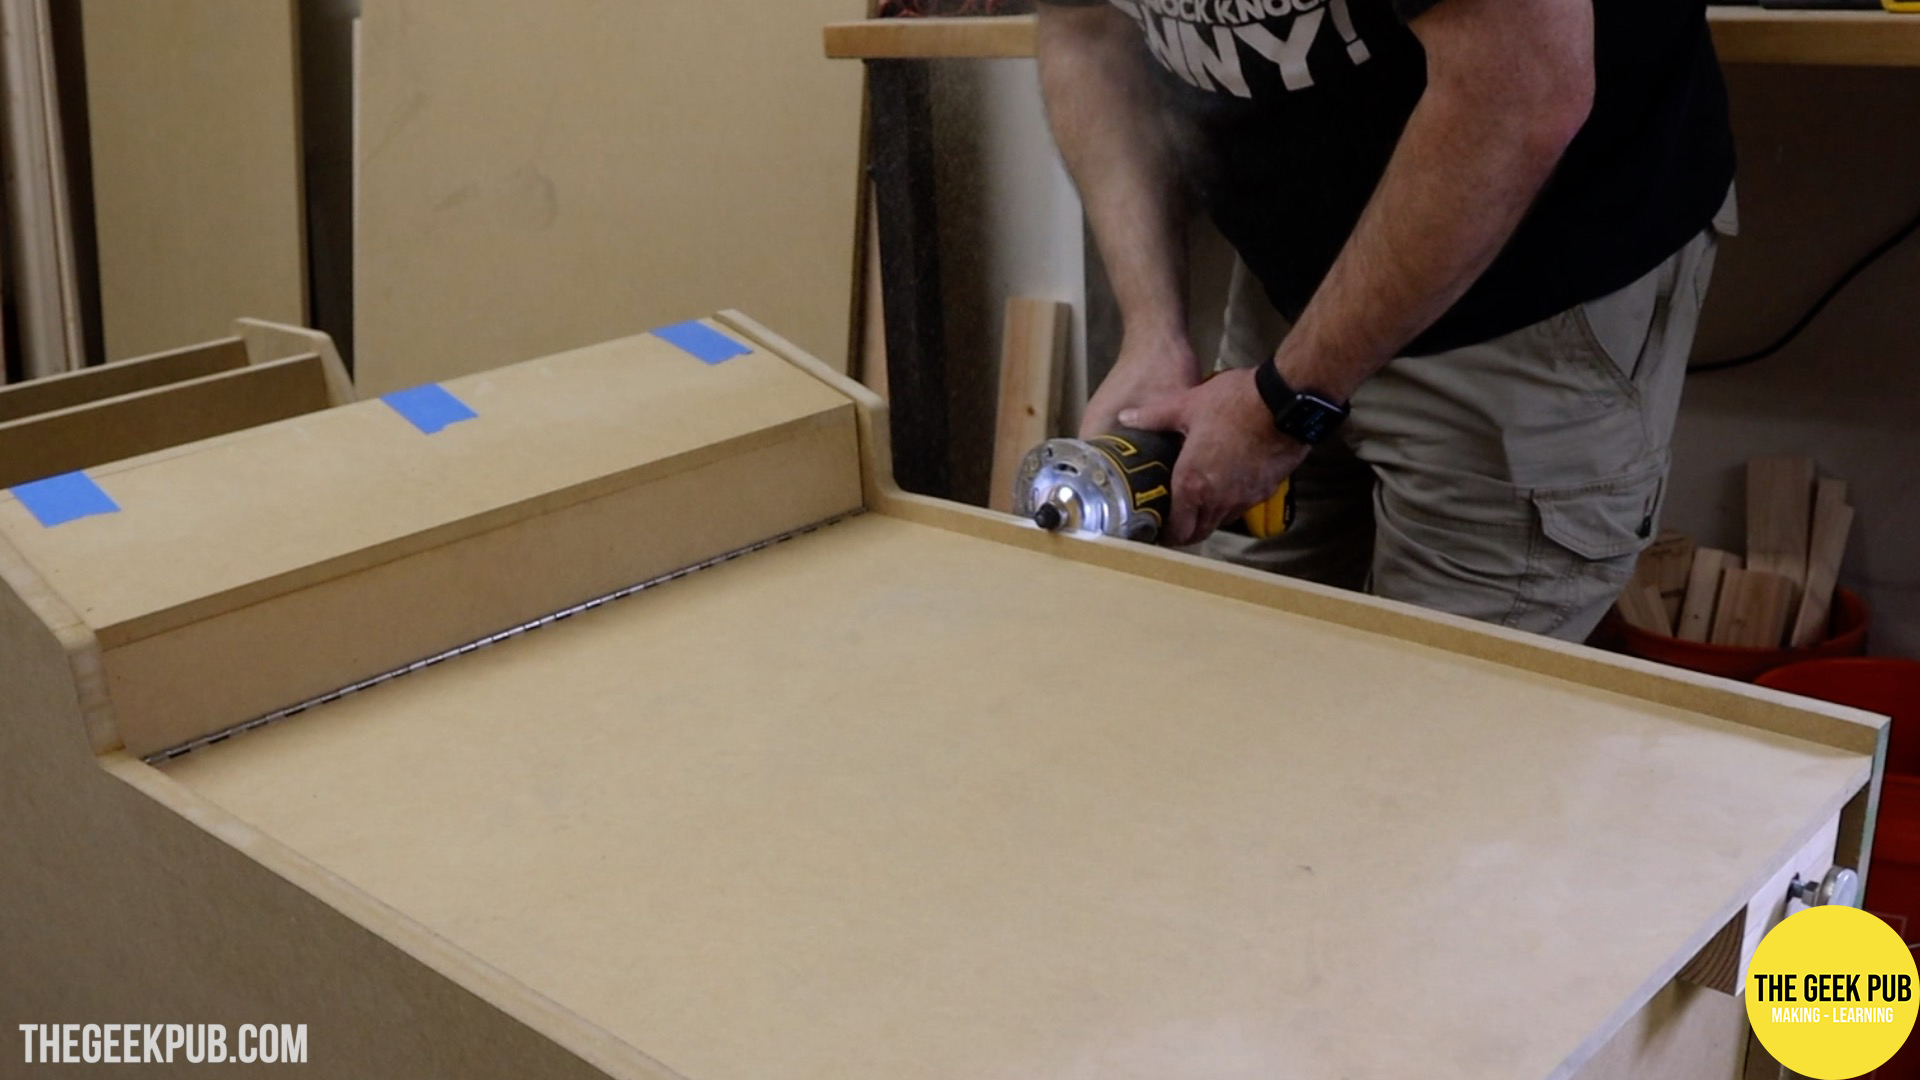
Routing for T-Molding
While I had the cabinet laying on the side, I took the opportunity to route the cabinet for T-Molding. T-Molding really makes an arcade cabinet pop. I never build one without it! We also offer high quality, but affordable T-Molding slot cutters in our store. A slot cutter makes easy work of installing T-Molding on your cabinet.
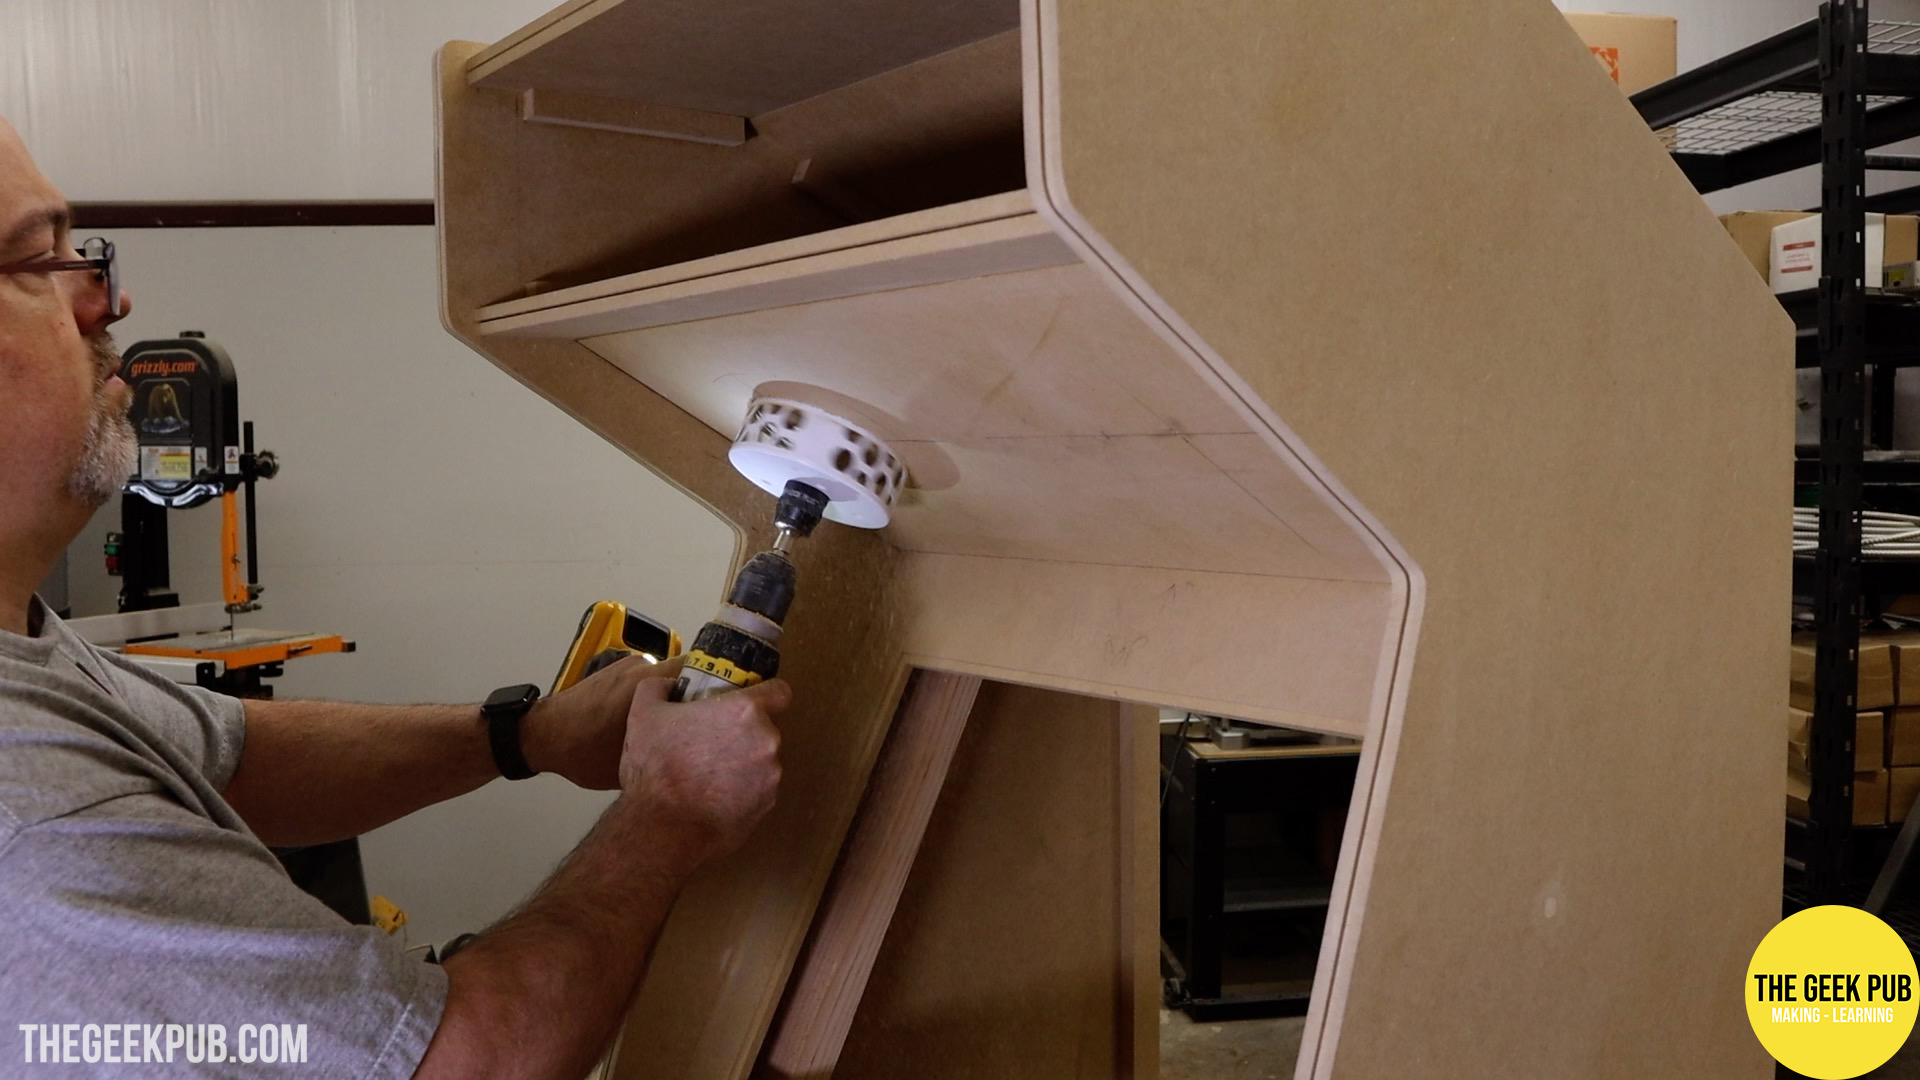
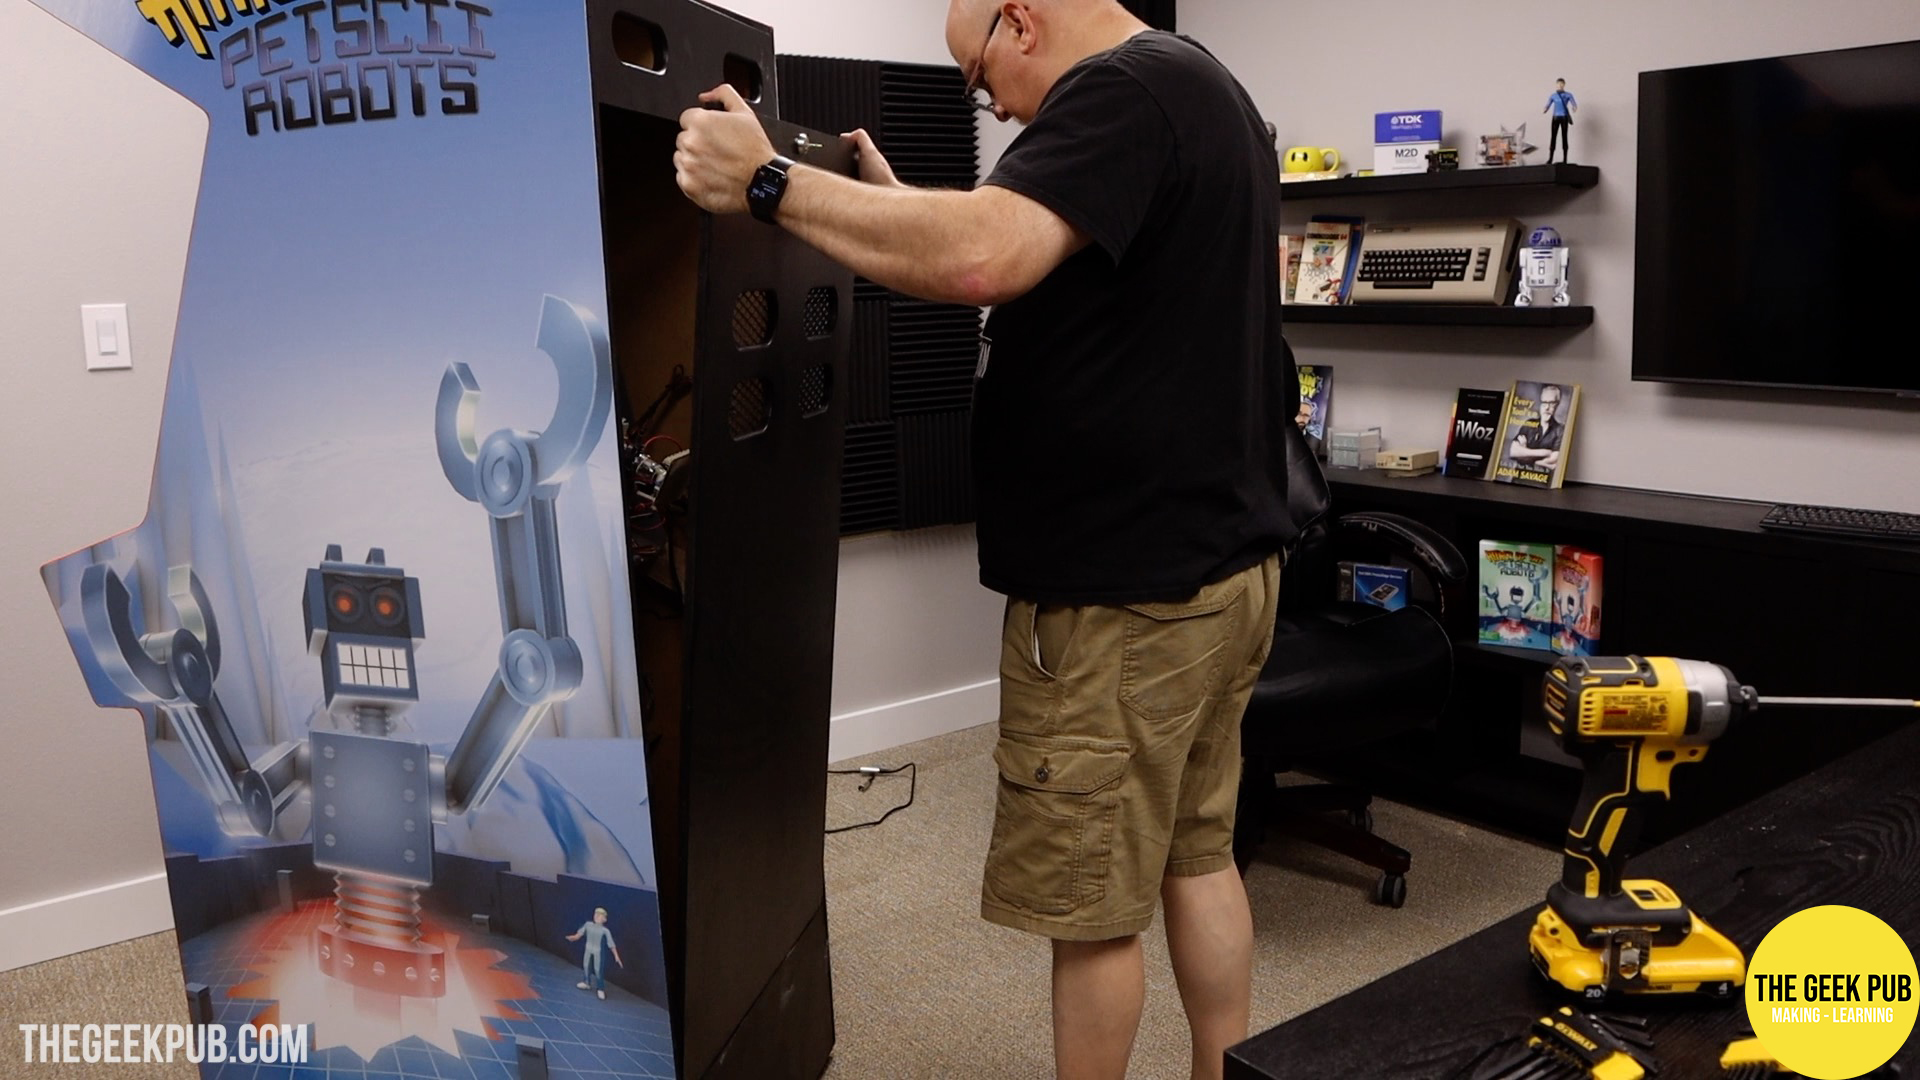
Building the Back Door for PETSCII Robots
Another commercial grade arcade cabinet feature I wanted to make for PETSCII Robots was the back door. The door needs to be removeable, lockable, and have vents for air flow (there will be a fan in the bottom of the cabinet).
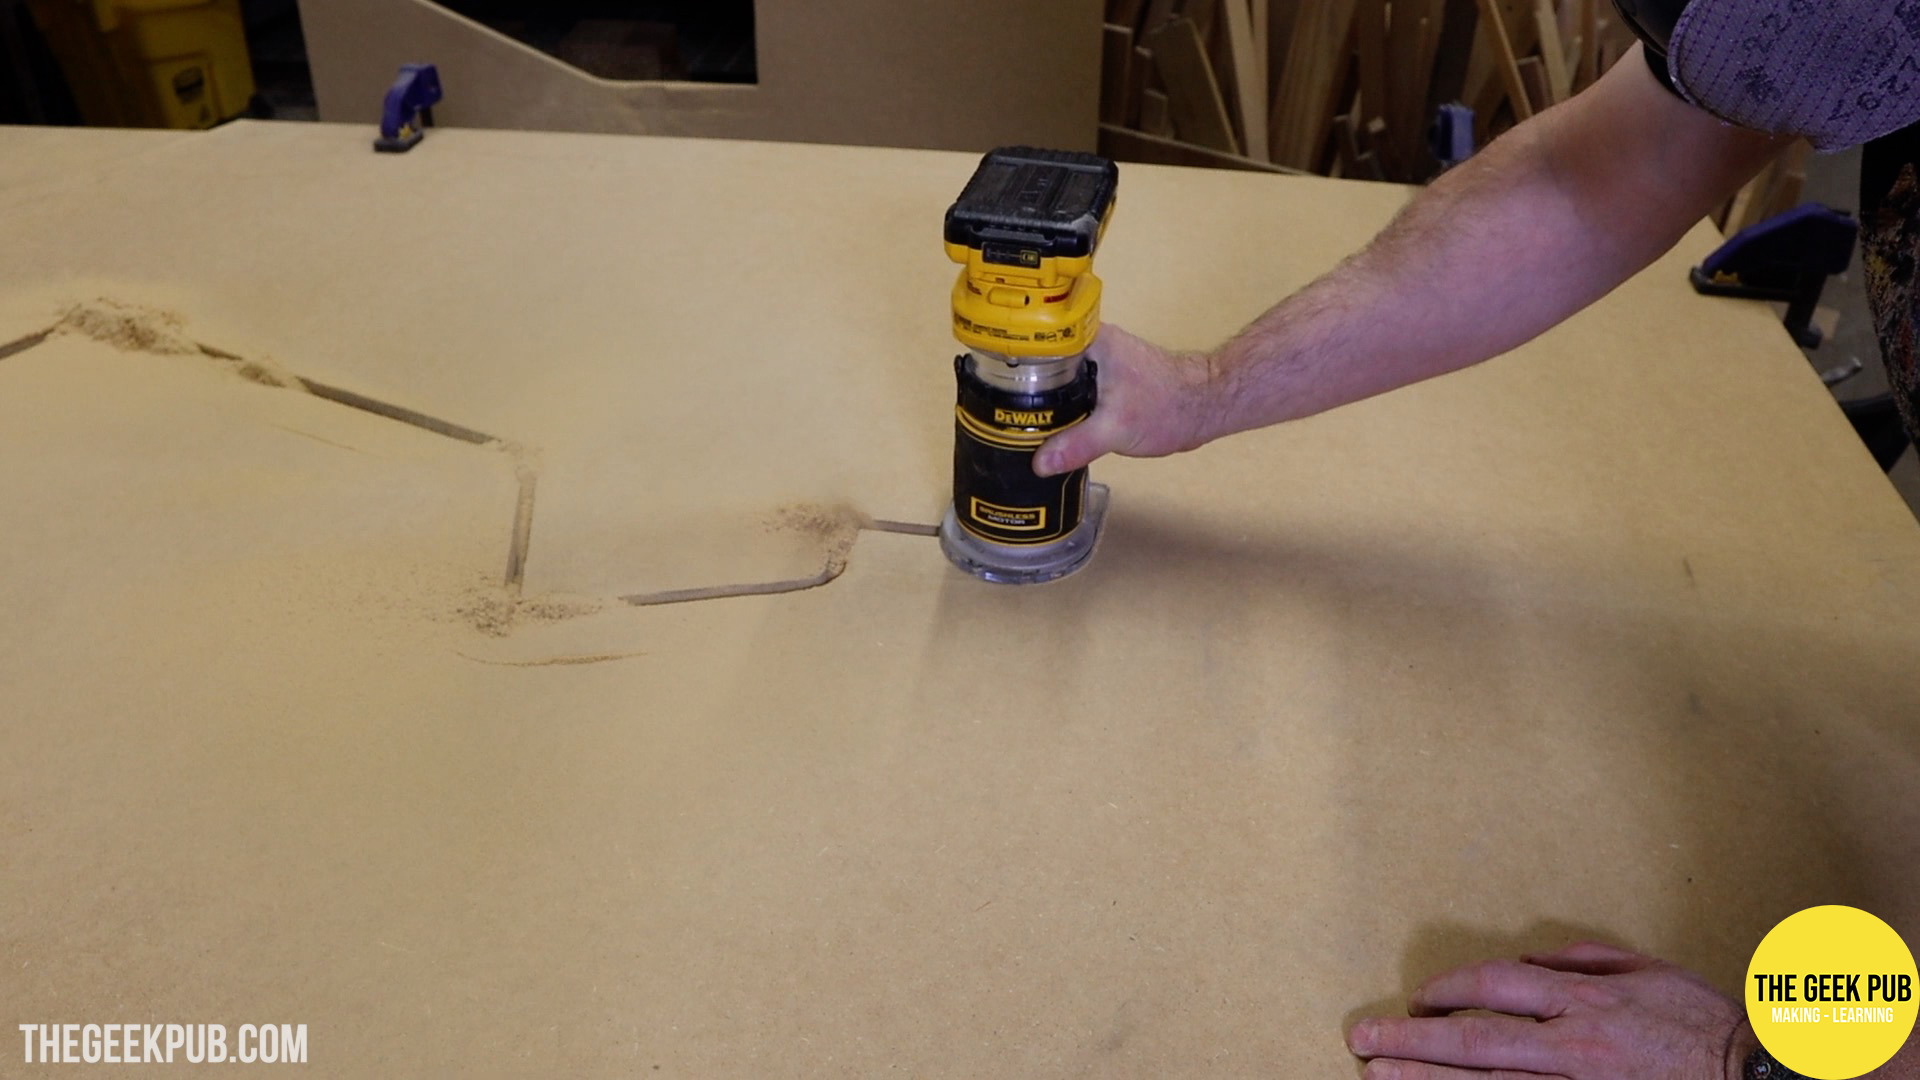
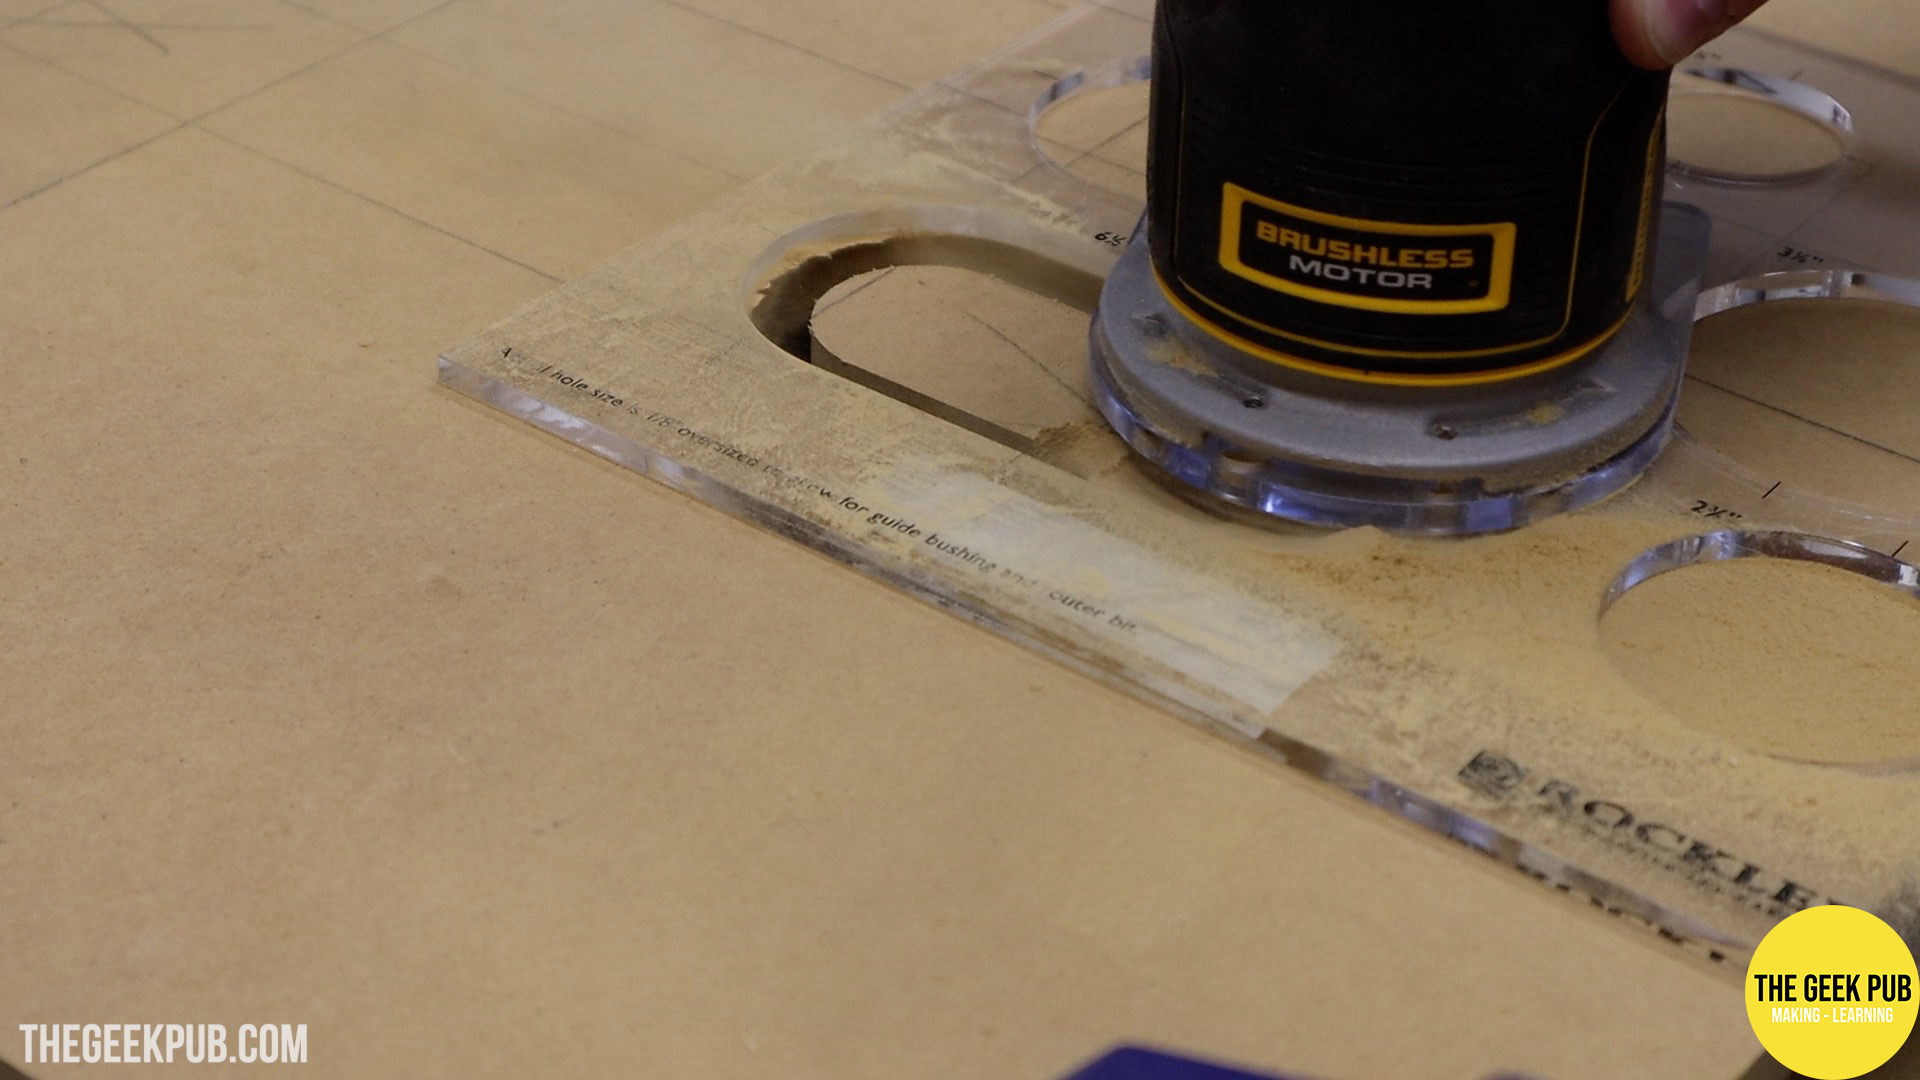
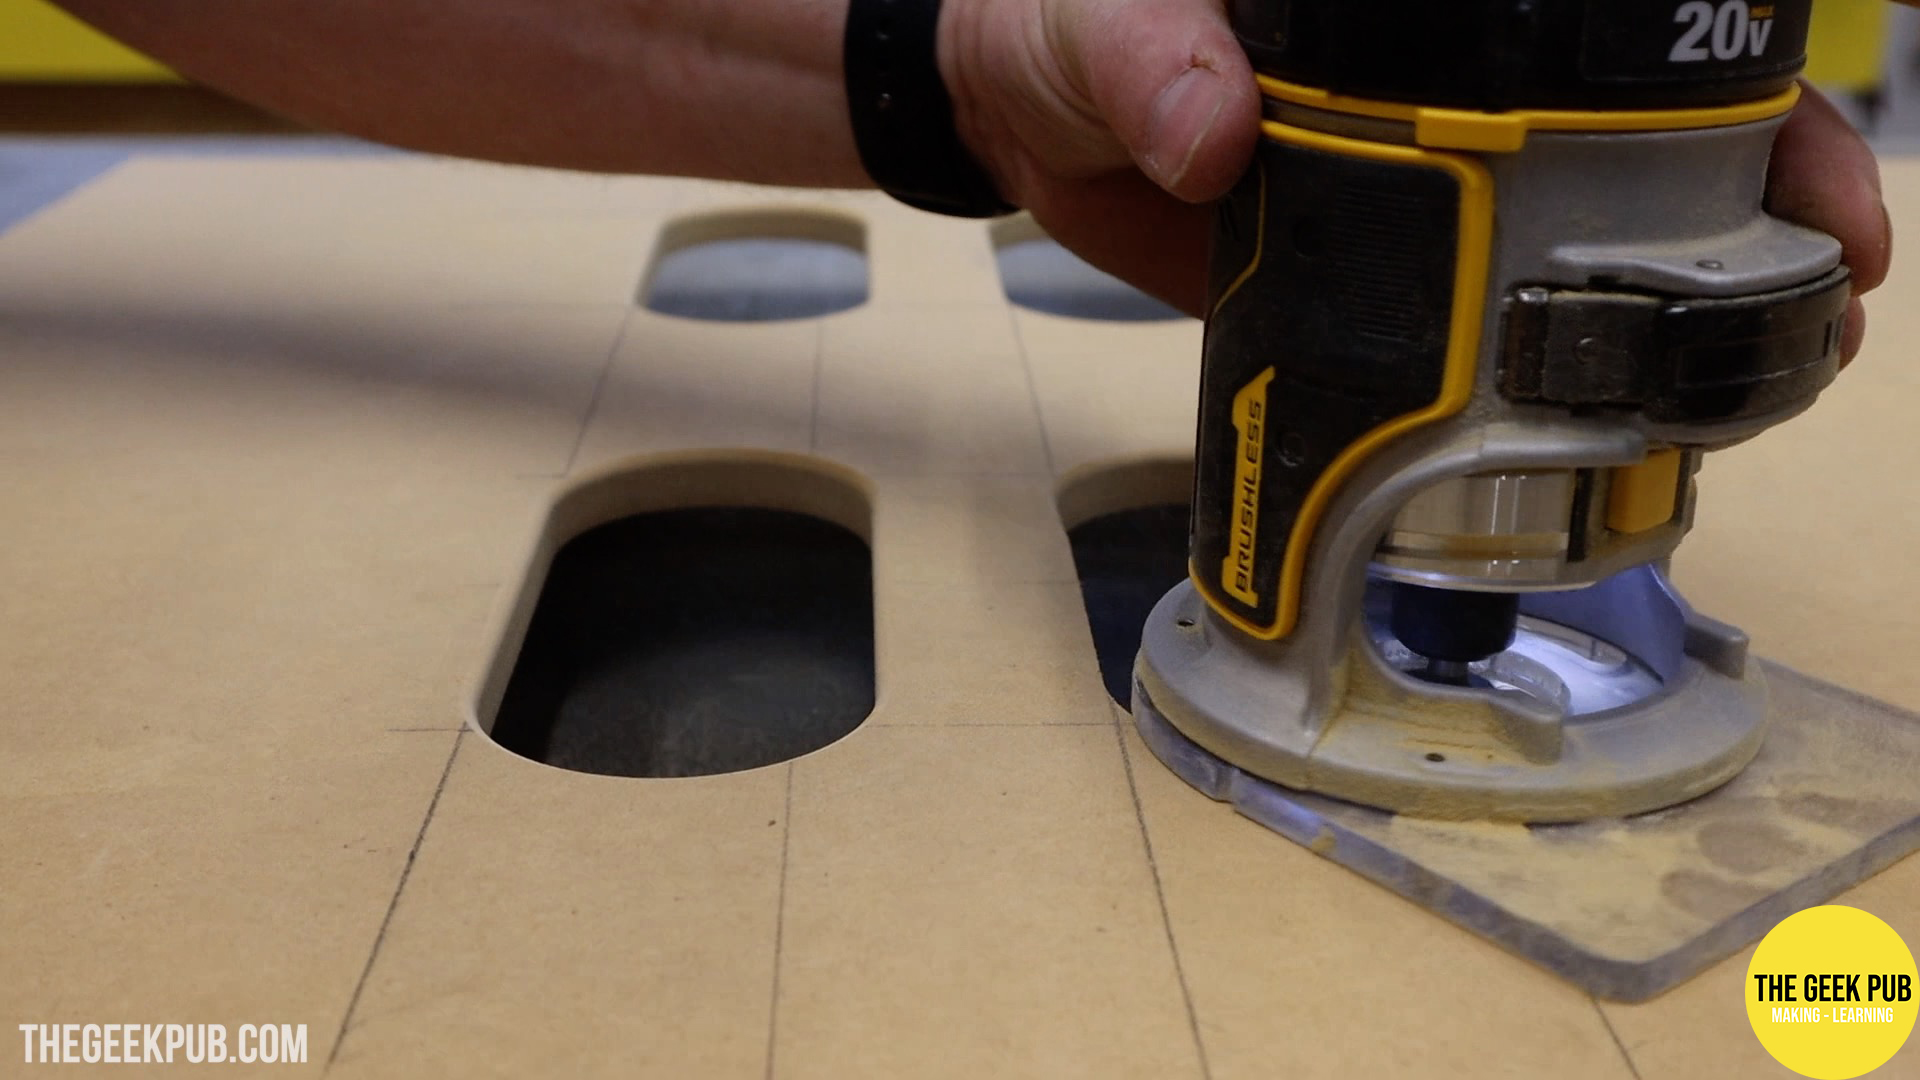
I used a circle jig I got from Rockler, along with a my router and a top bearing flush trim bit to make rounded rectangle slots in the back door. I also put a tiny round-over on them just for aesthetics reasons.
The Rockler circle template works best if you use double sided tape, carpet tape, or fabric tape to hold it to the workpiece. Clamps work, but then they get in the way of the router.
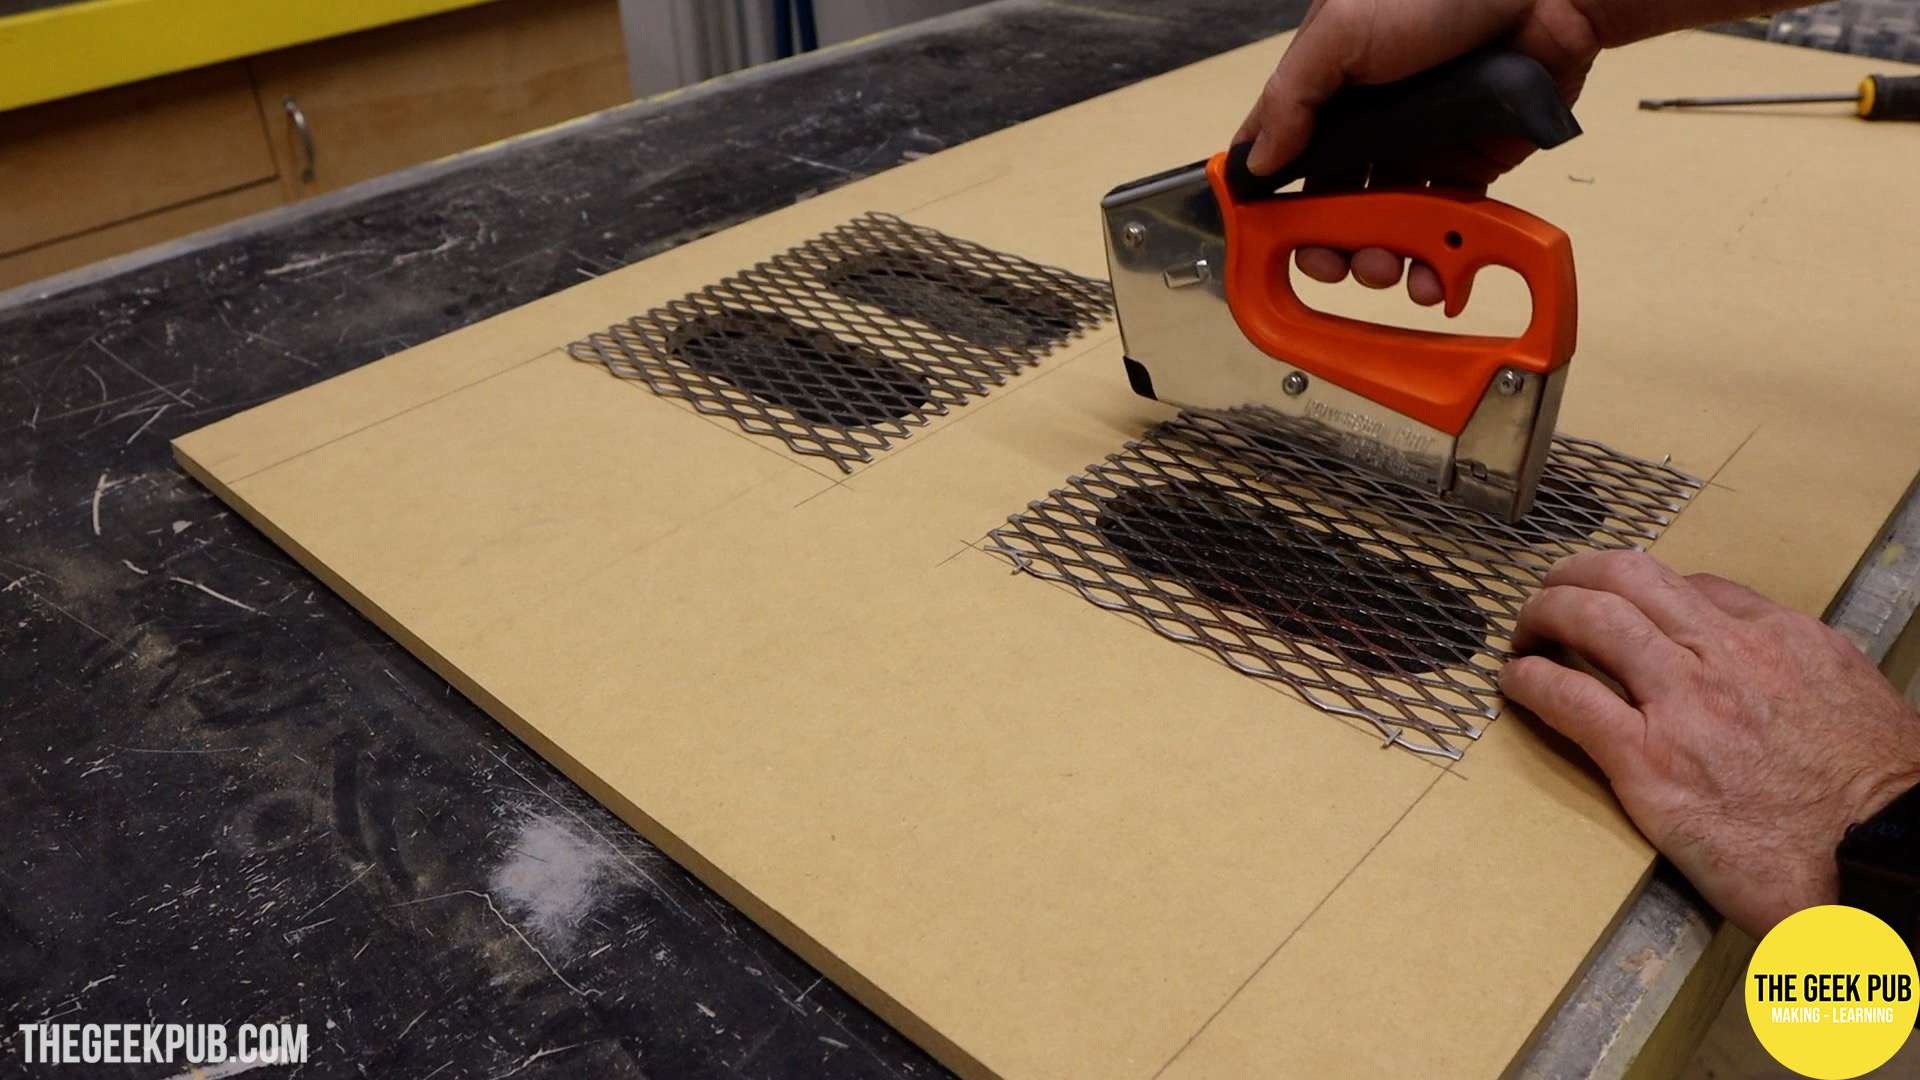
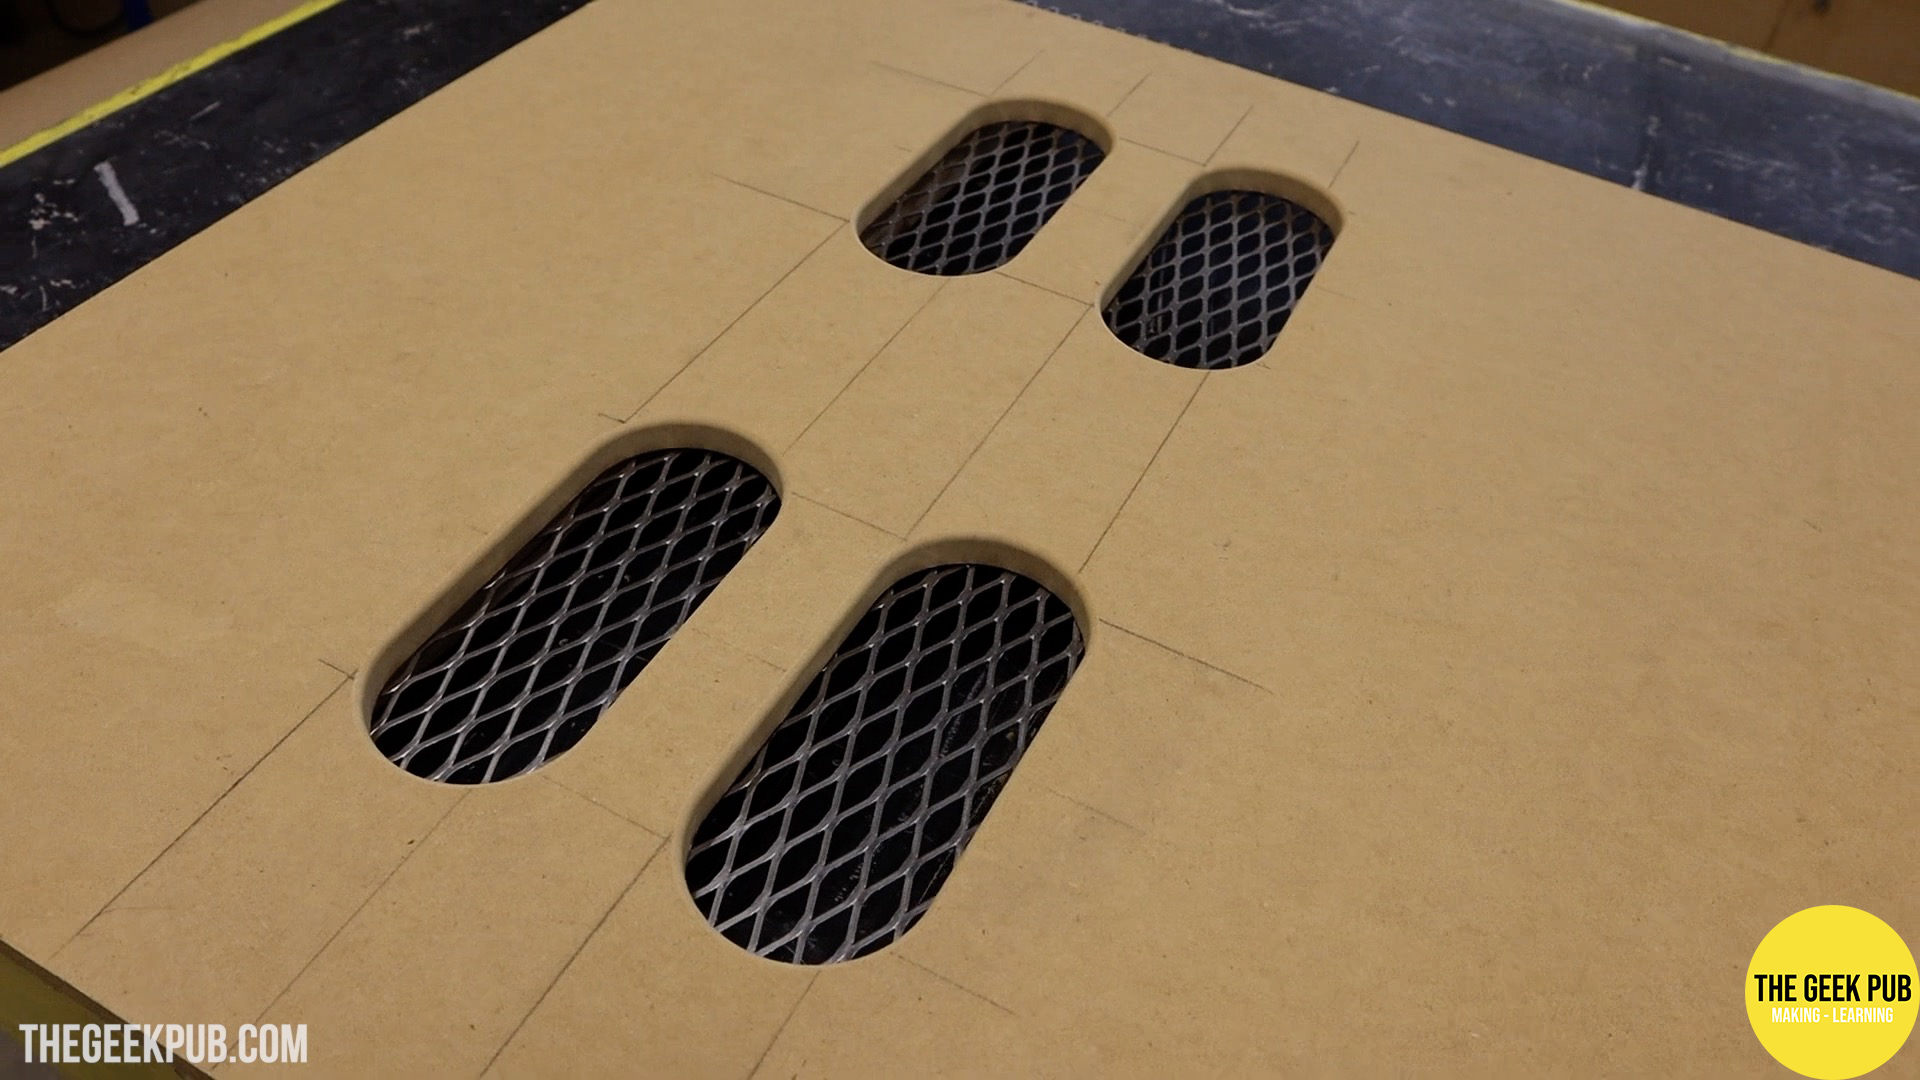
I bought some expanded wire mesh from a big box store and cut it into squares using some snips. I then use my staple gun and stapled them to the inside of the door. This makes for a super clean look, allows air flow with the bottom fan, and keeps little kids or a-hole adults from dropping things like candy or beer bottes into the arcade. It’s amazing what you have to plan for in commercial spaces.
The top of the back door also has a key and lock that keeps anyone from opening the cabinet without authorization.
Finishing the PETSCII Robots Control Panel
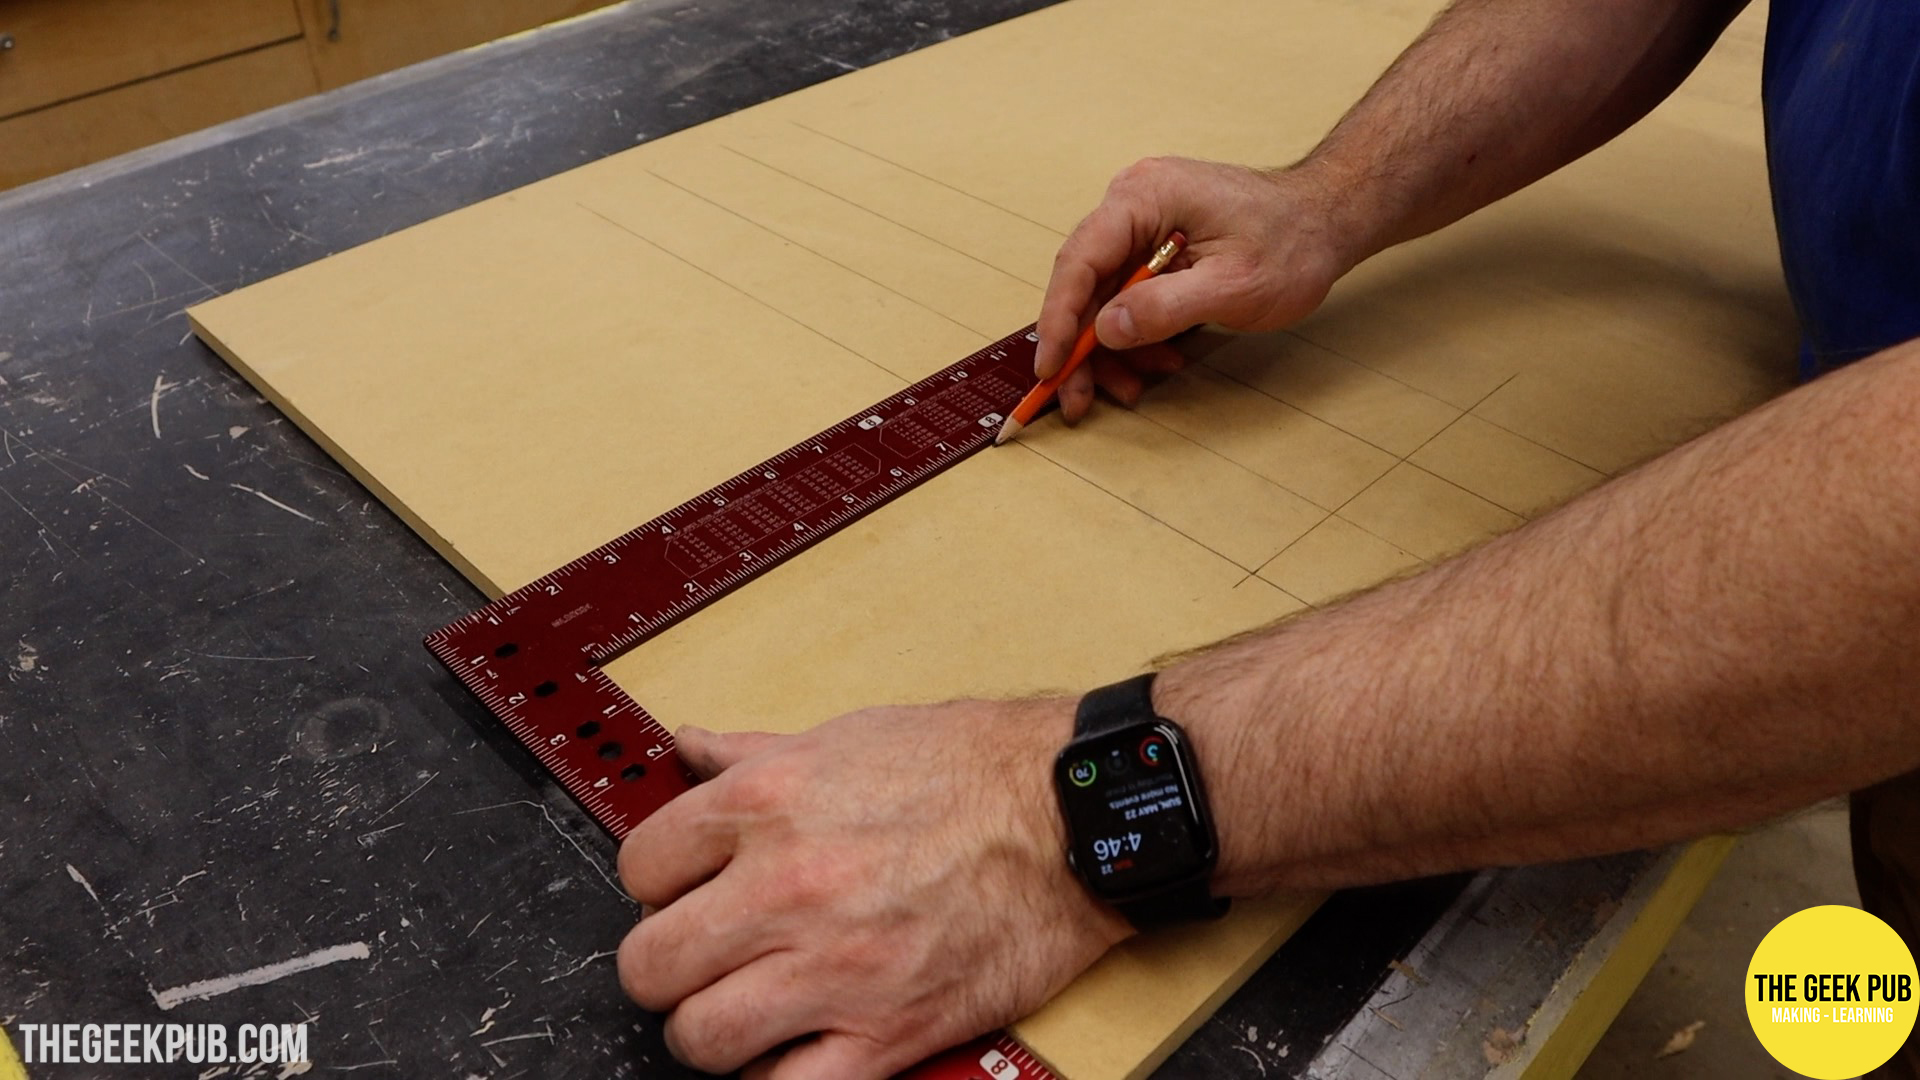
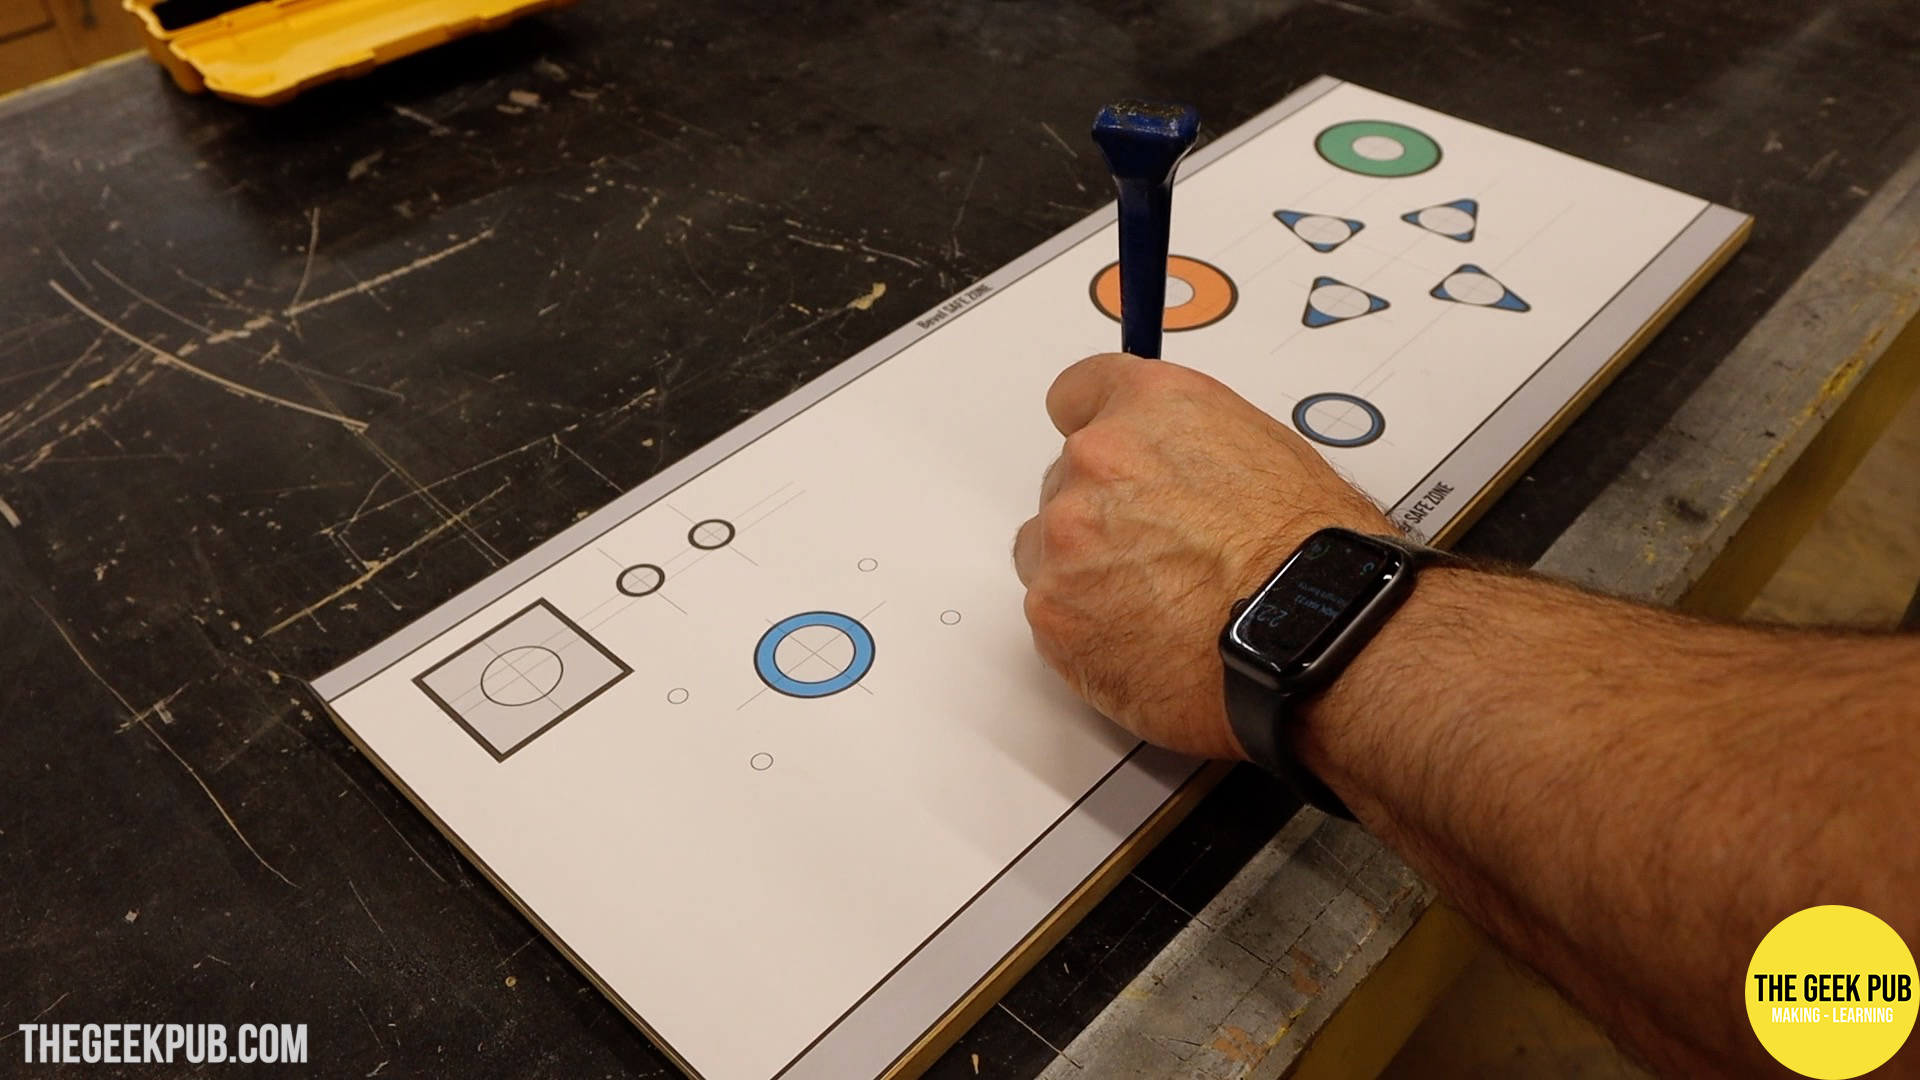
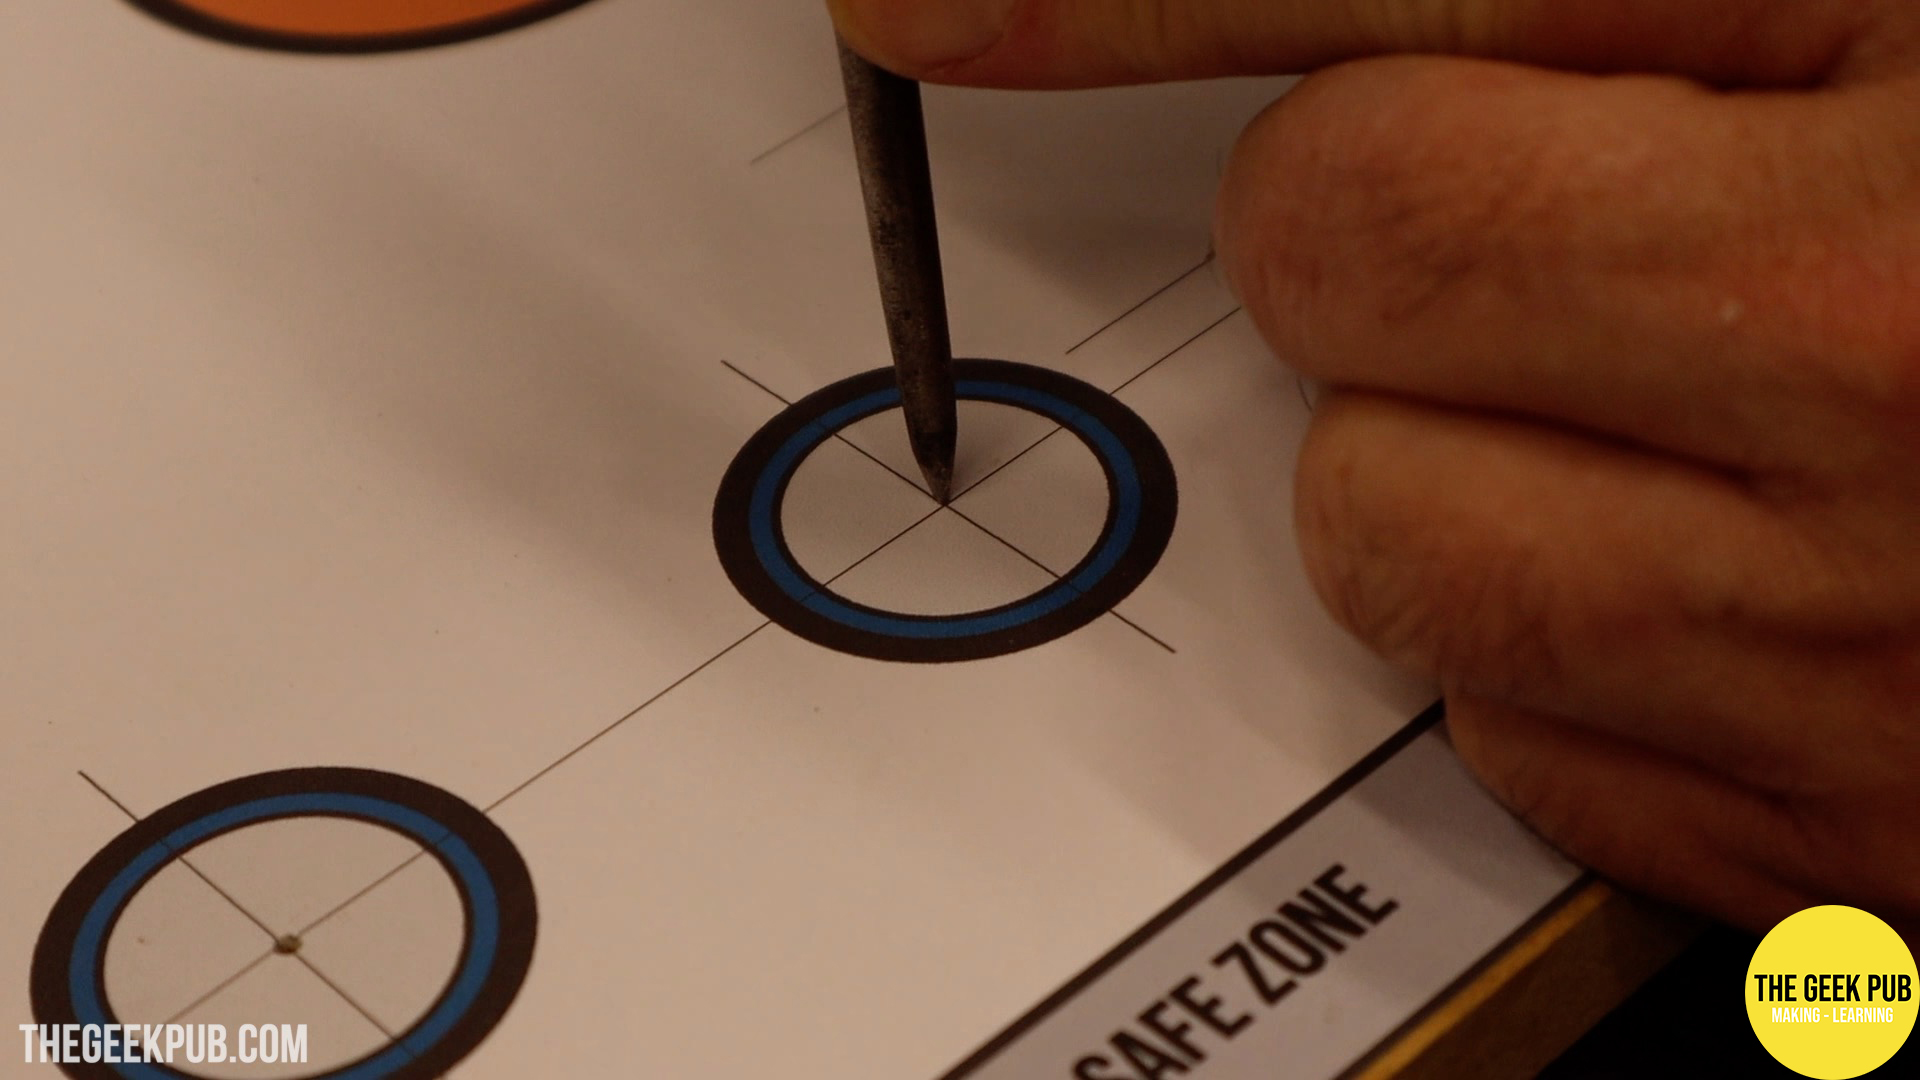
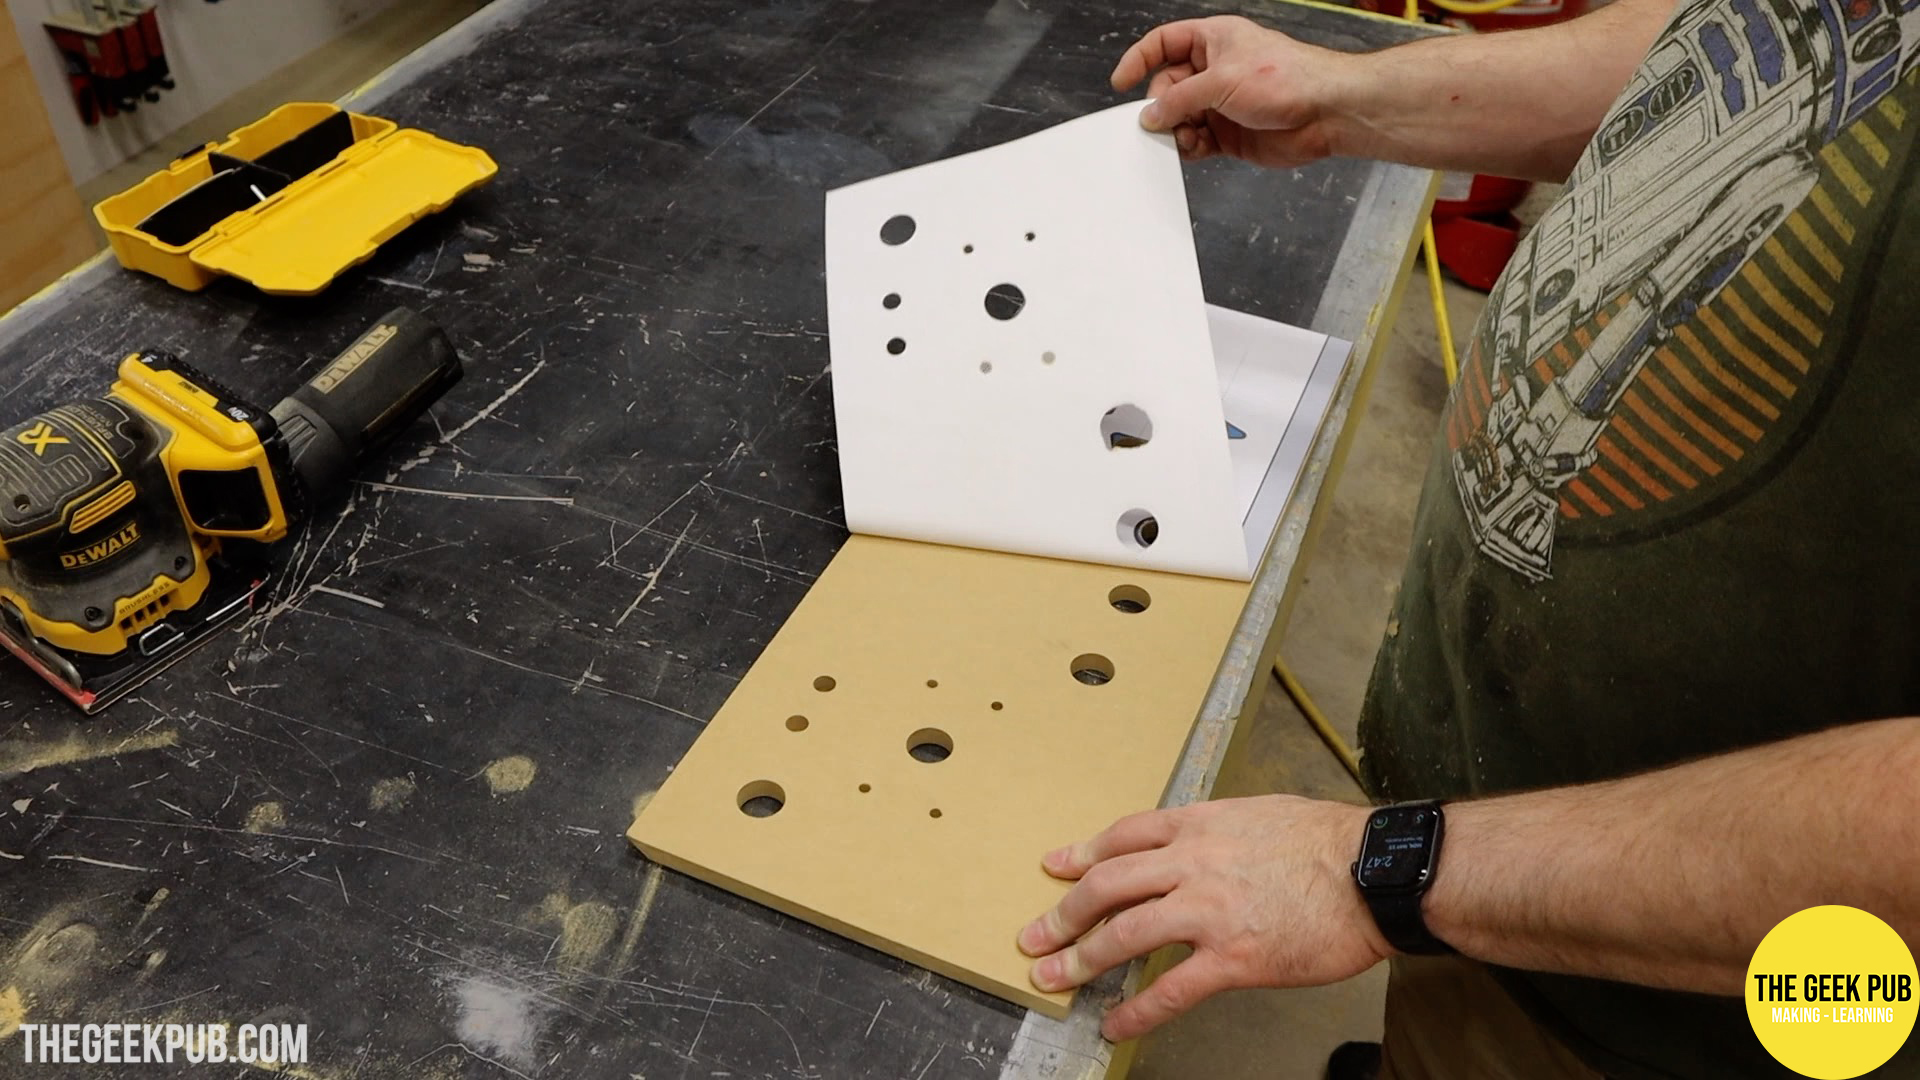
Again using my HP Latex large format printer, I printed a template for the PETSCII robots control panel. I quickly punched all of the holes to make it easier to align the drill bit properly.
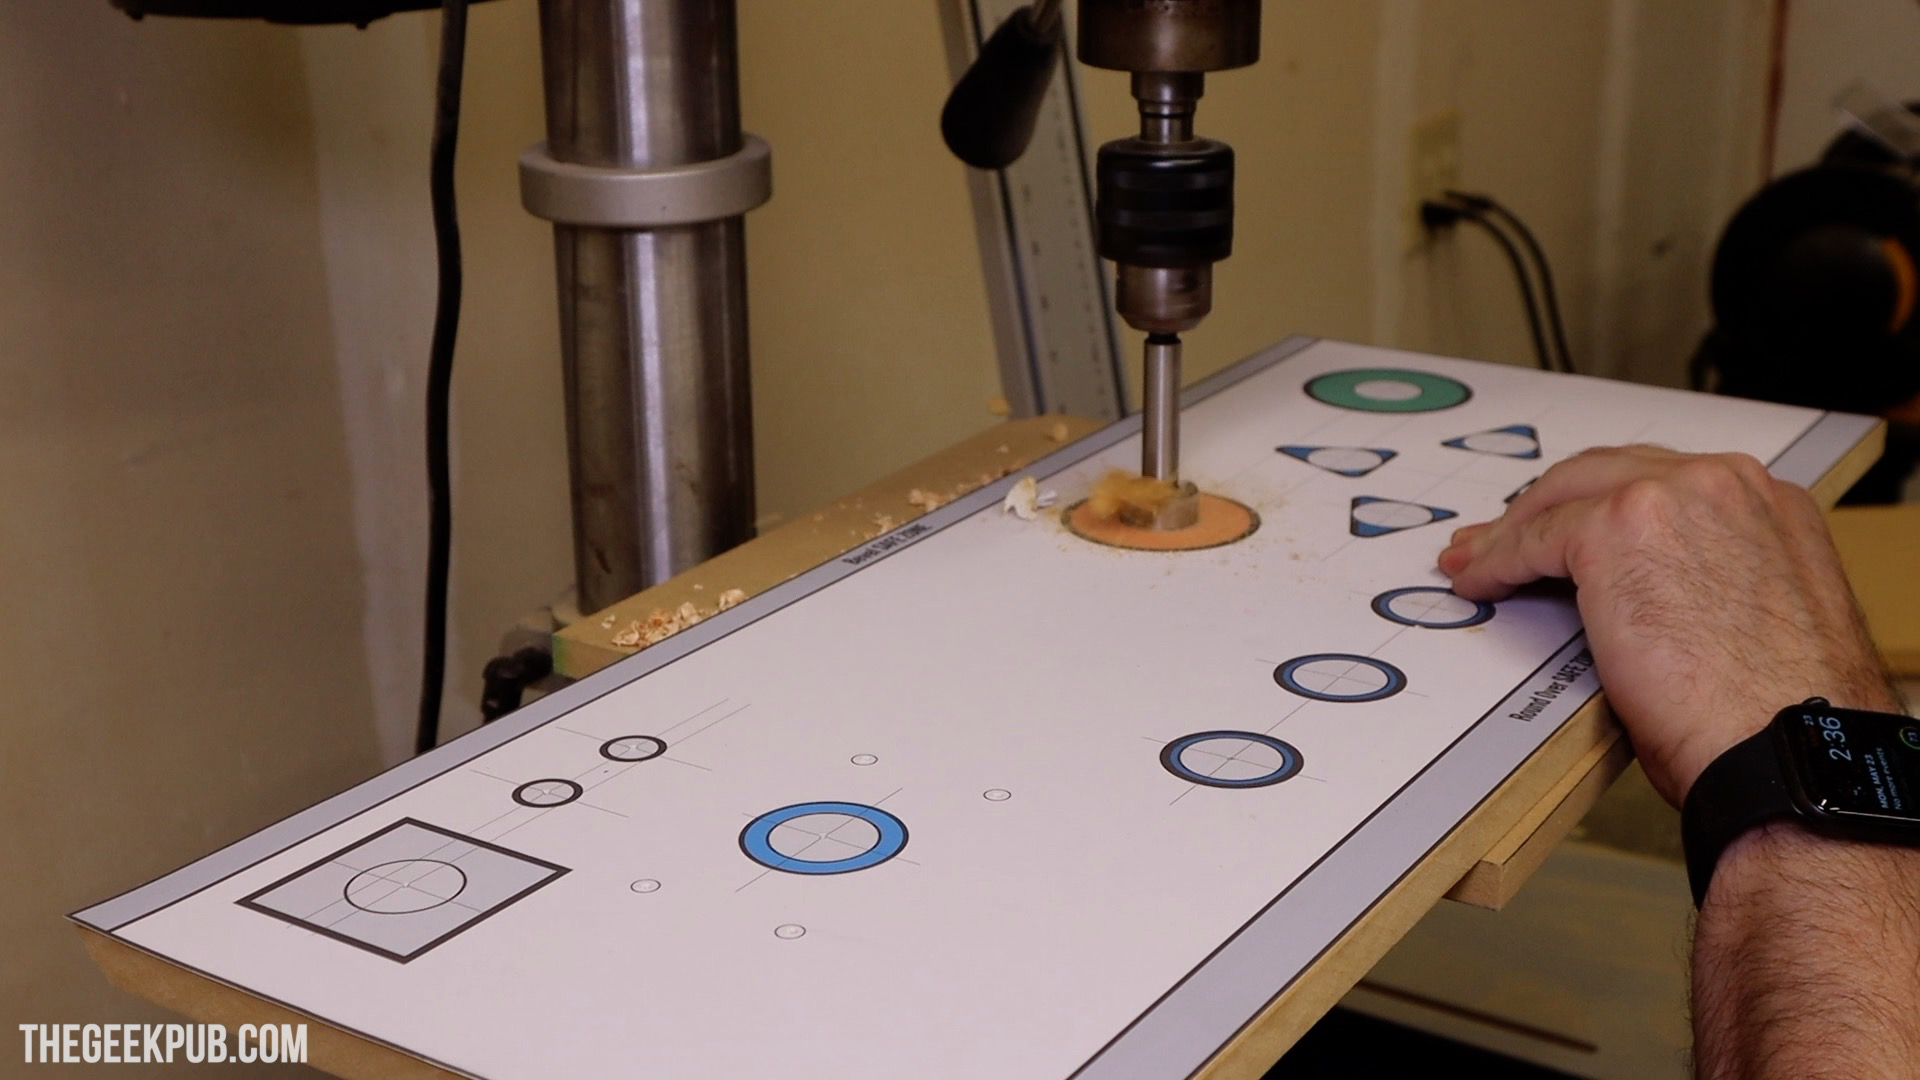
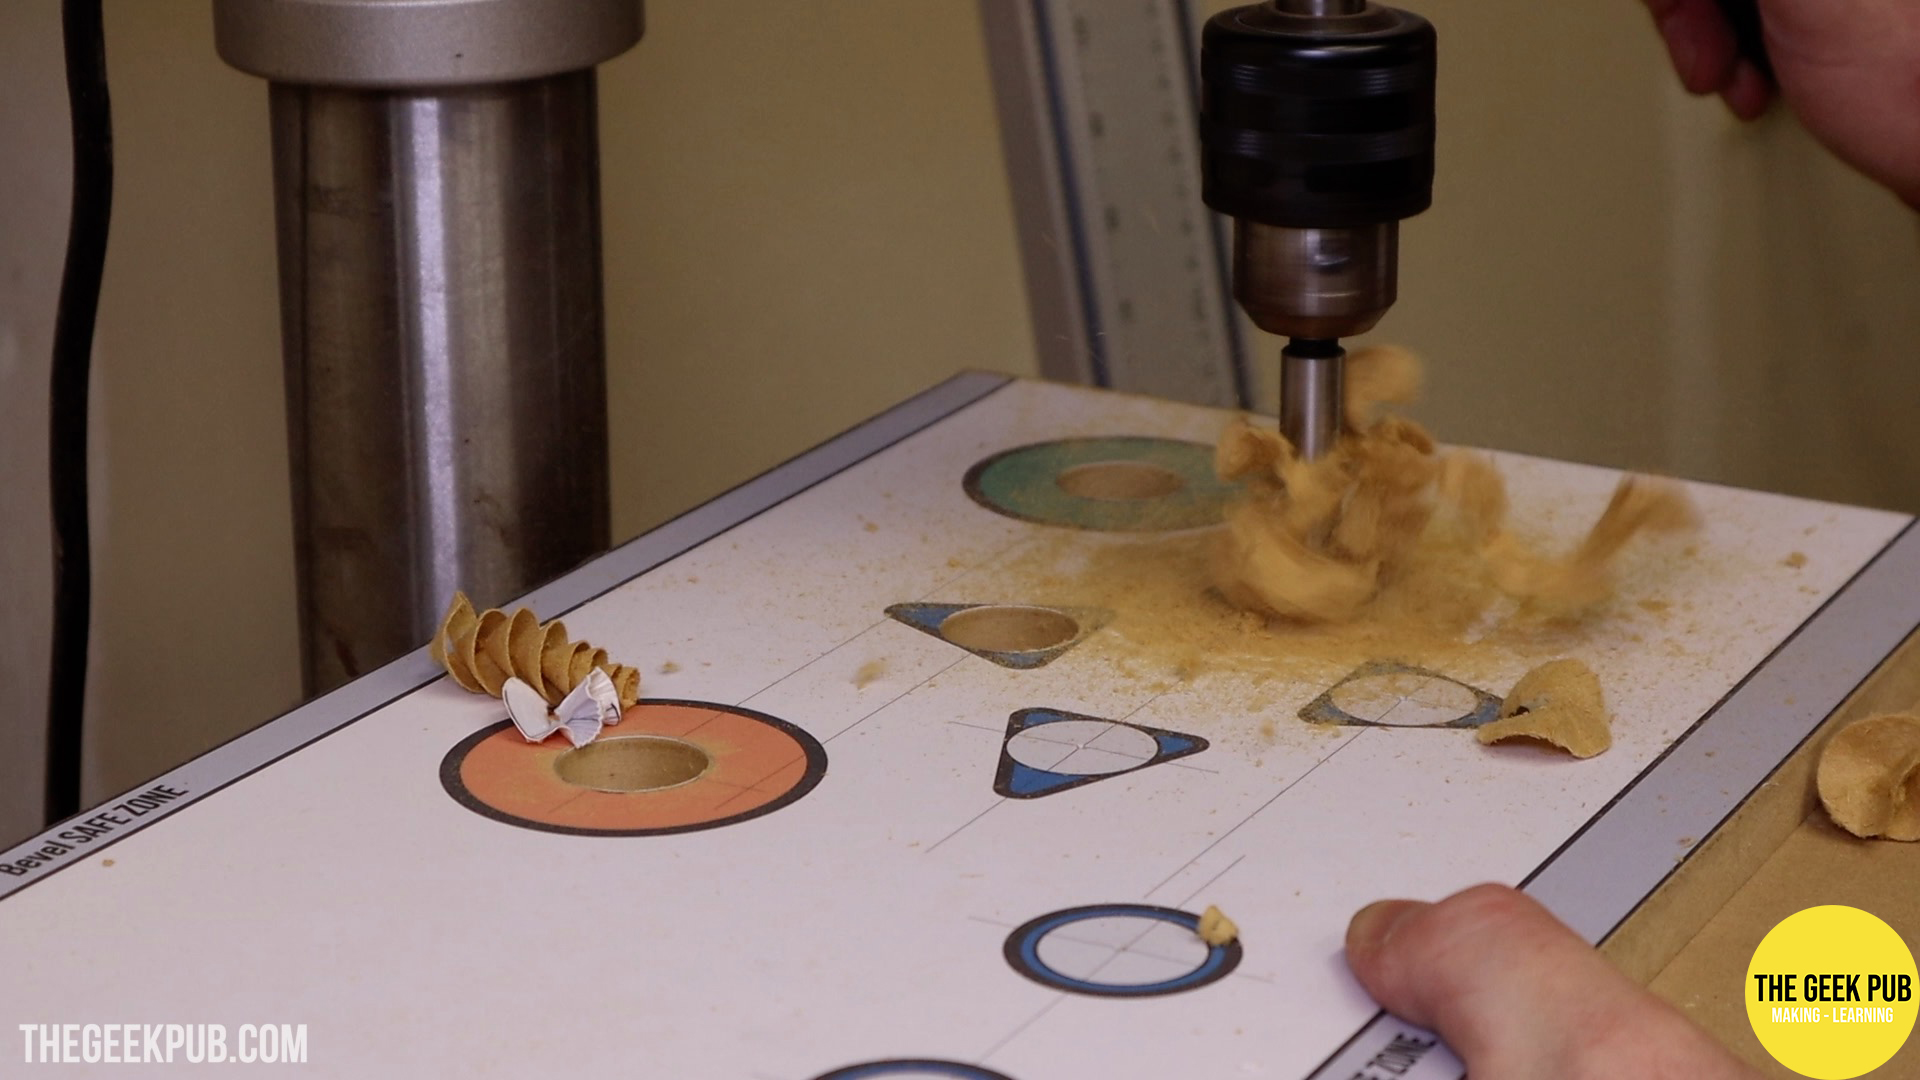
I then drilled all of the holes using Forstner bits on my drill press. Again, for this without a lot of tools, a handheld drill will work fine.
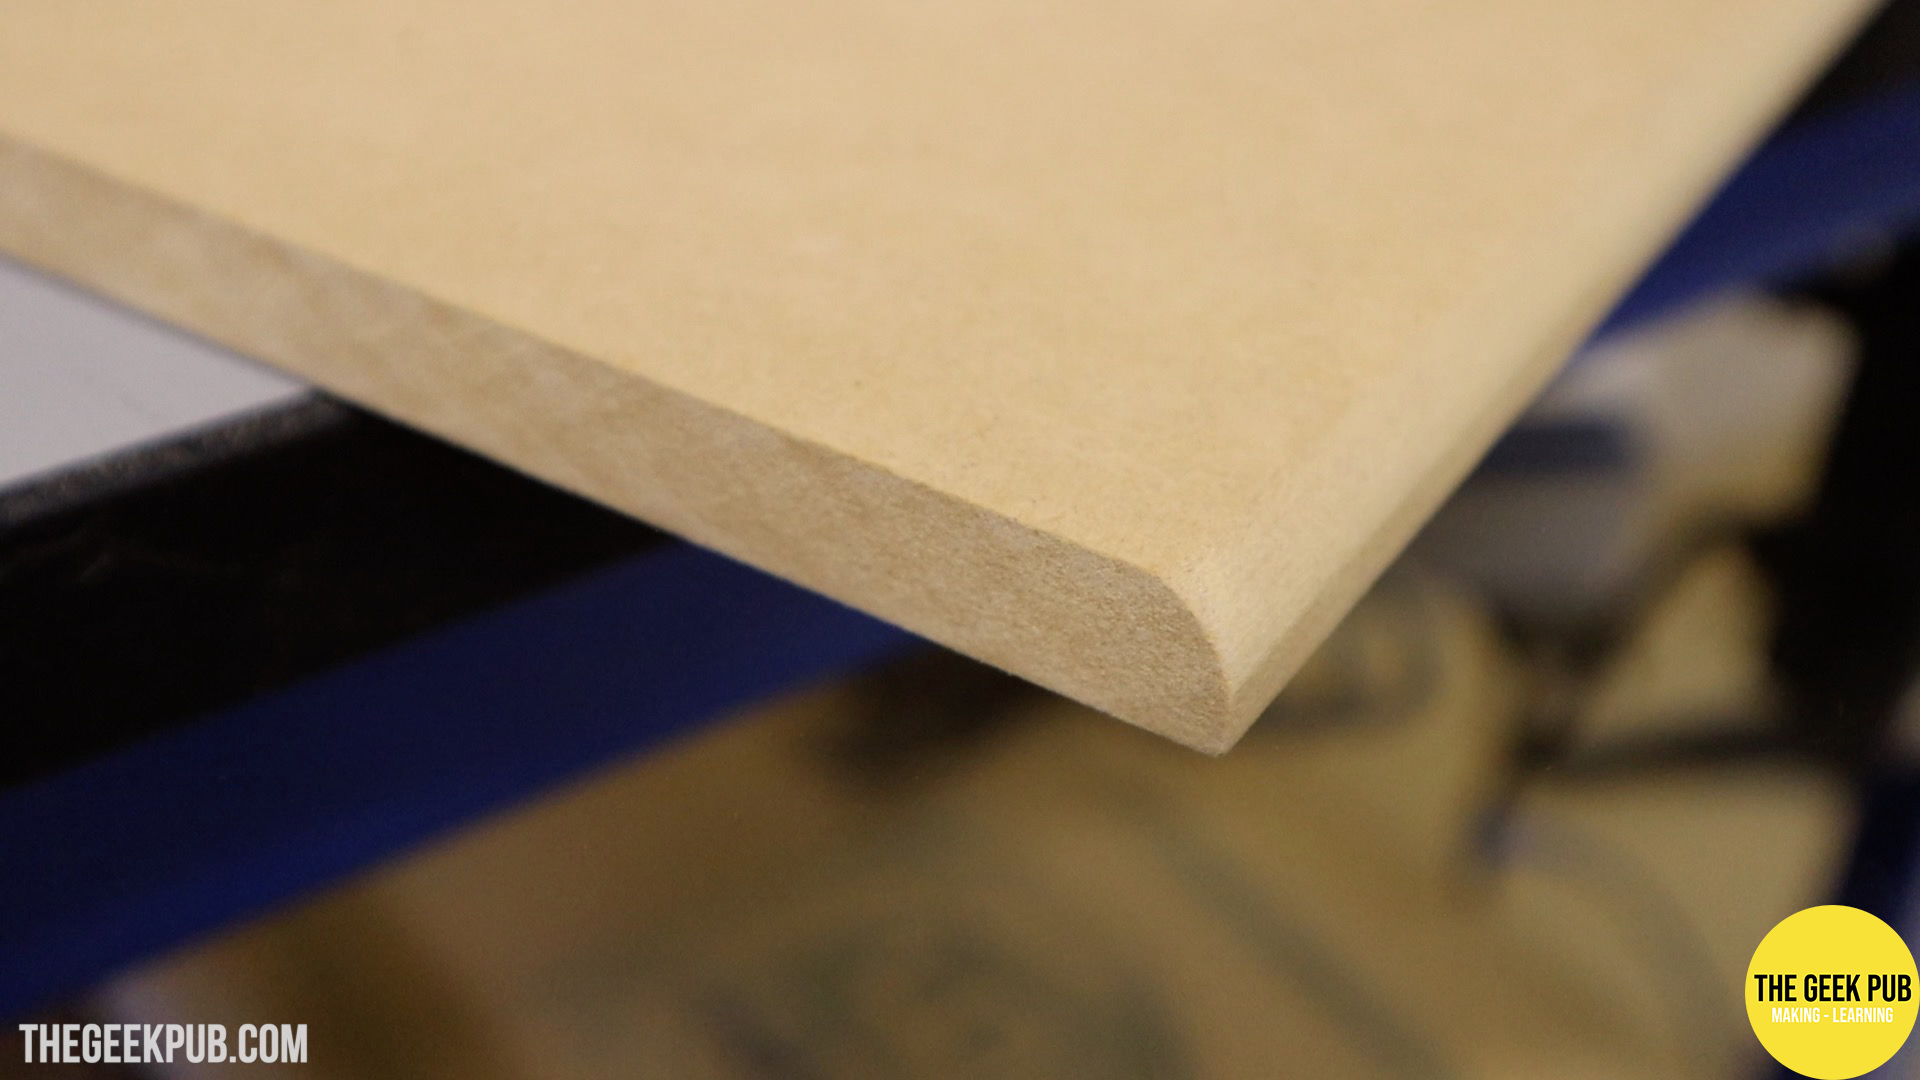
Because the artwork is going to roll over the front of the cabinet, I made a round-over on the front face of the control panel to make it look better.
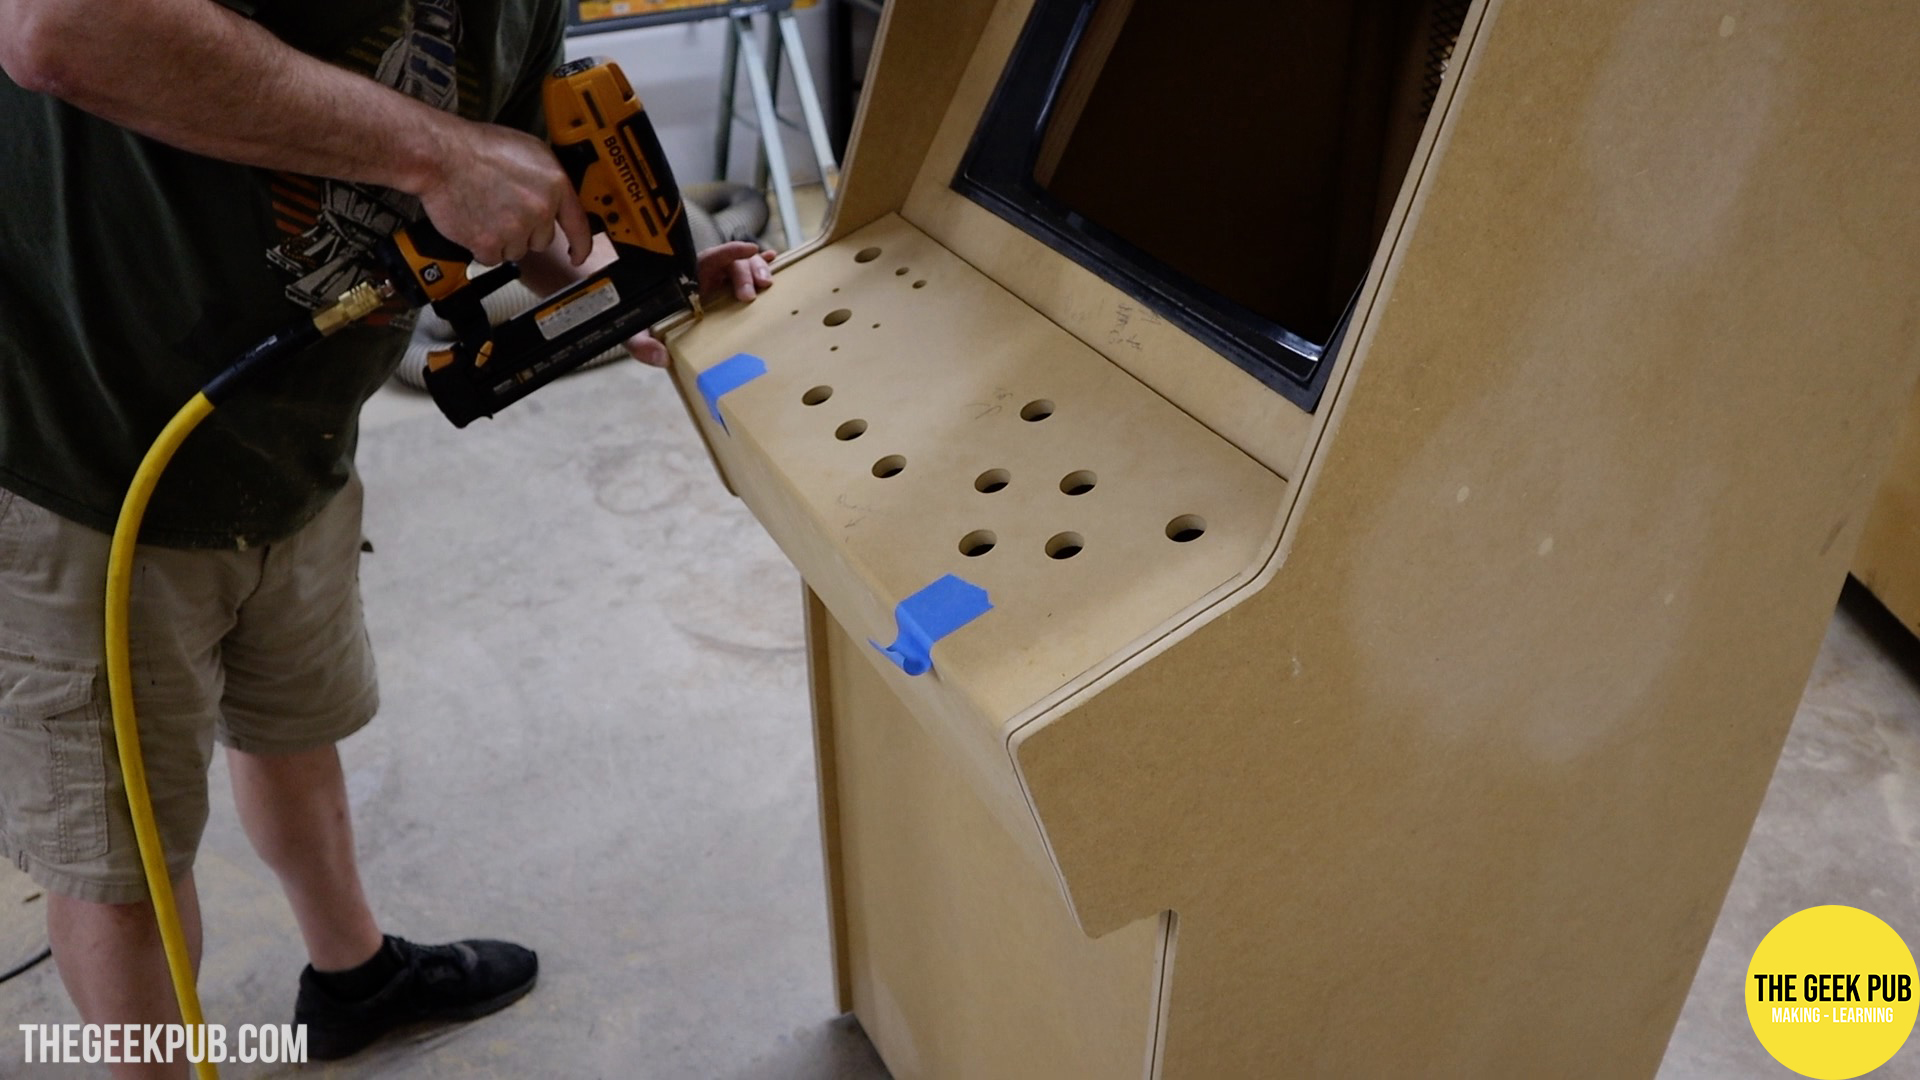
I then glued and brad nailed the control panel top to the rest of the control panel assembly.
The Midway Completion Point of the PETSCII Robots Arcade
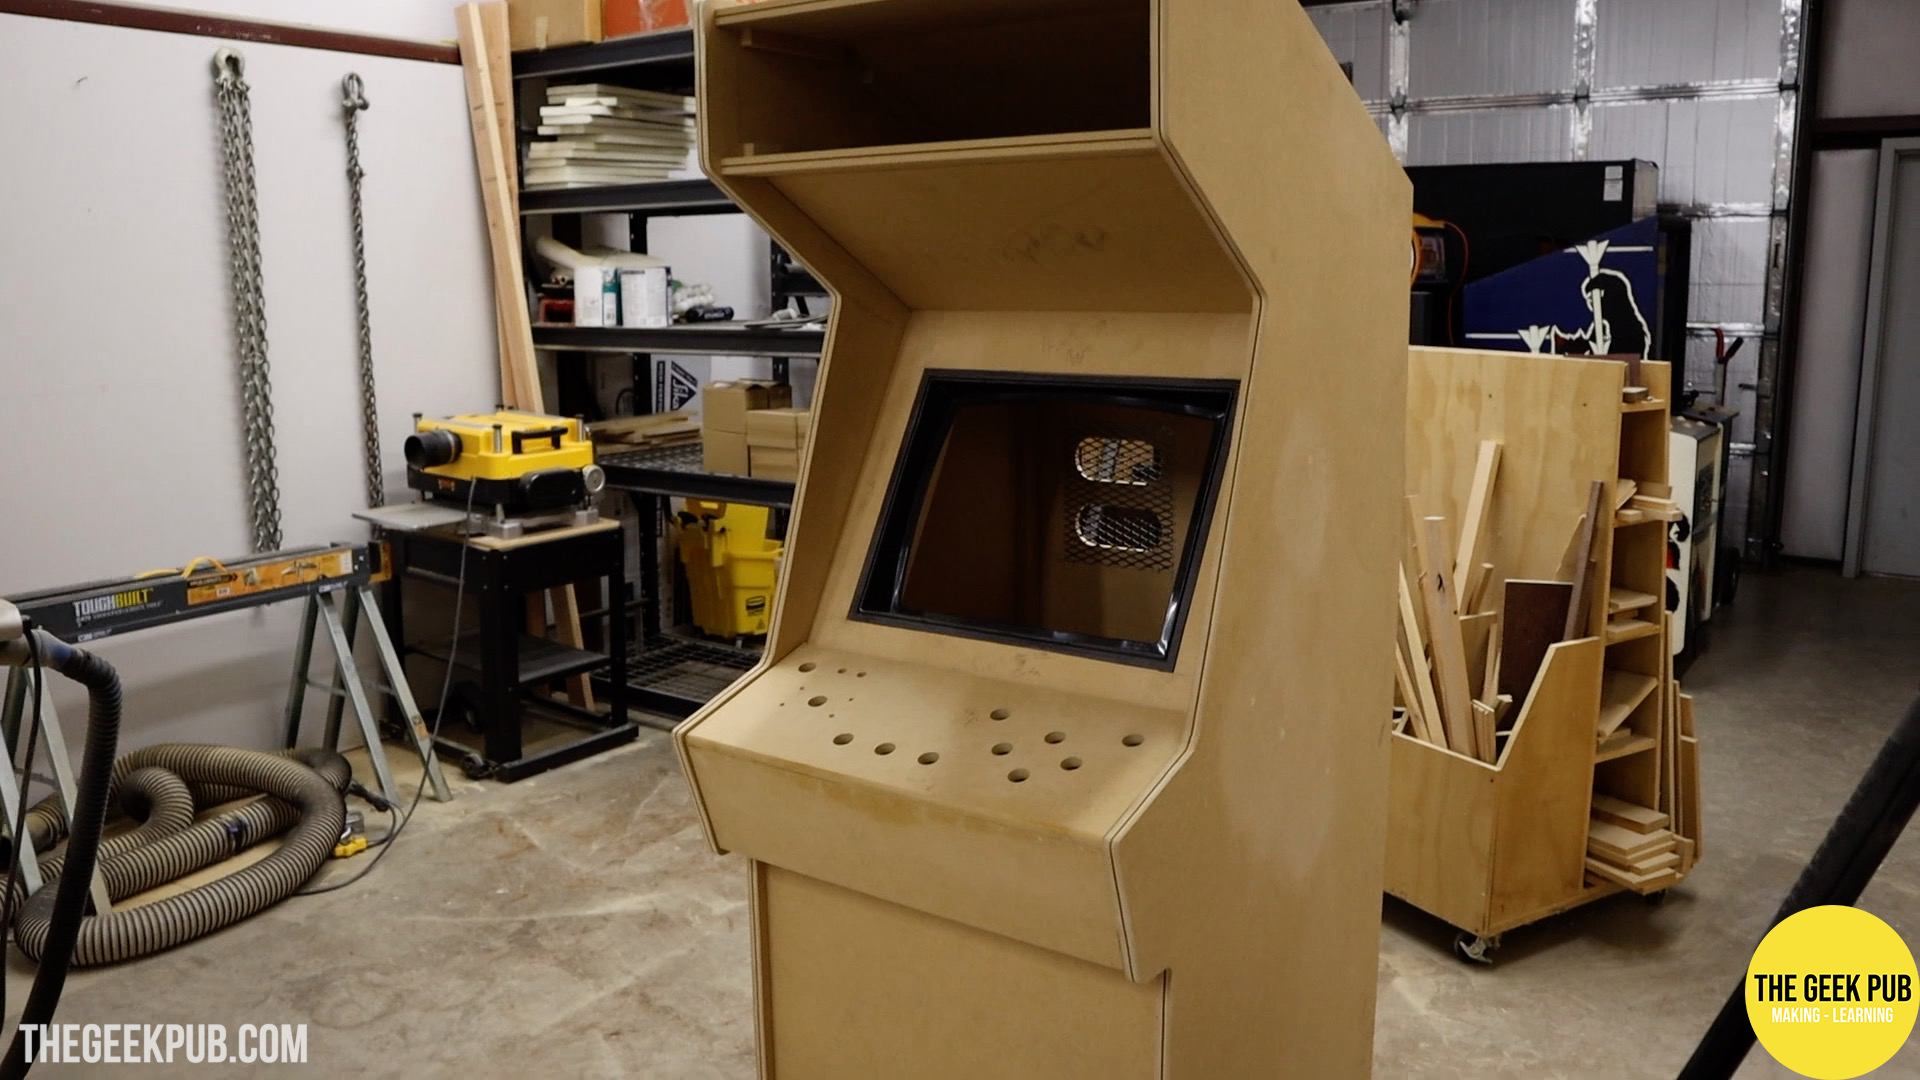
And we made it to the midway point! At this point the cabinet is mostly complete from a build standpoint. We just need to paint the cabinet and start the assembly process! And damn does it look good!
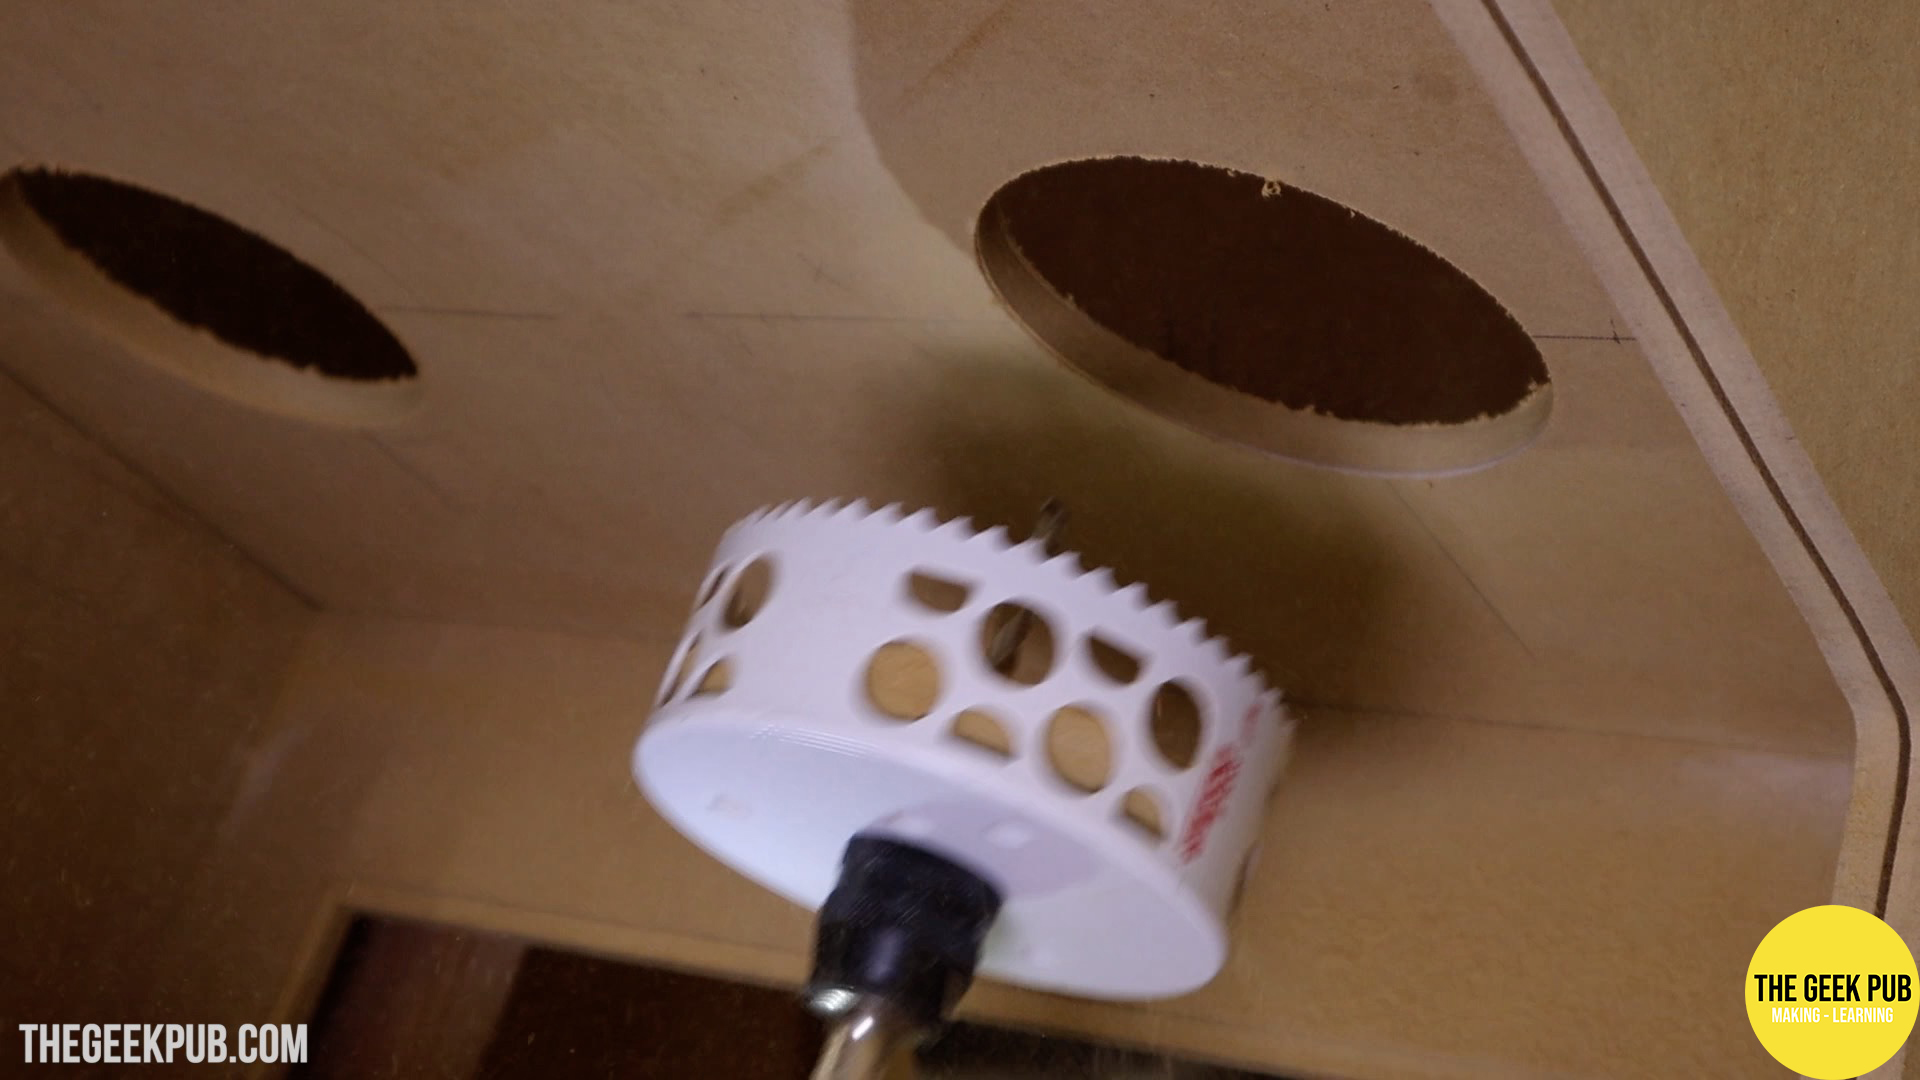
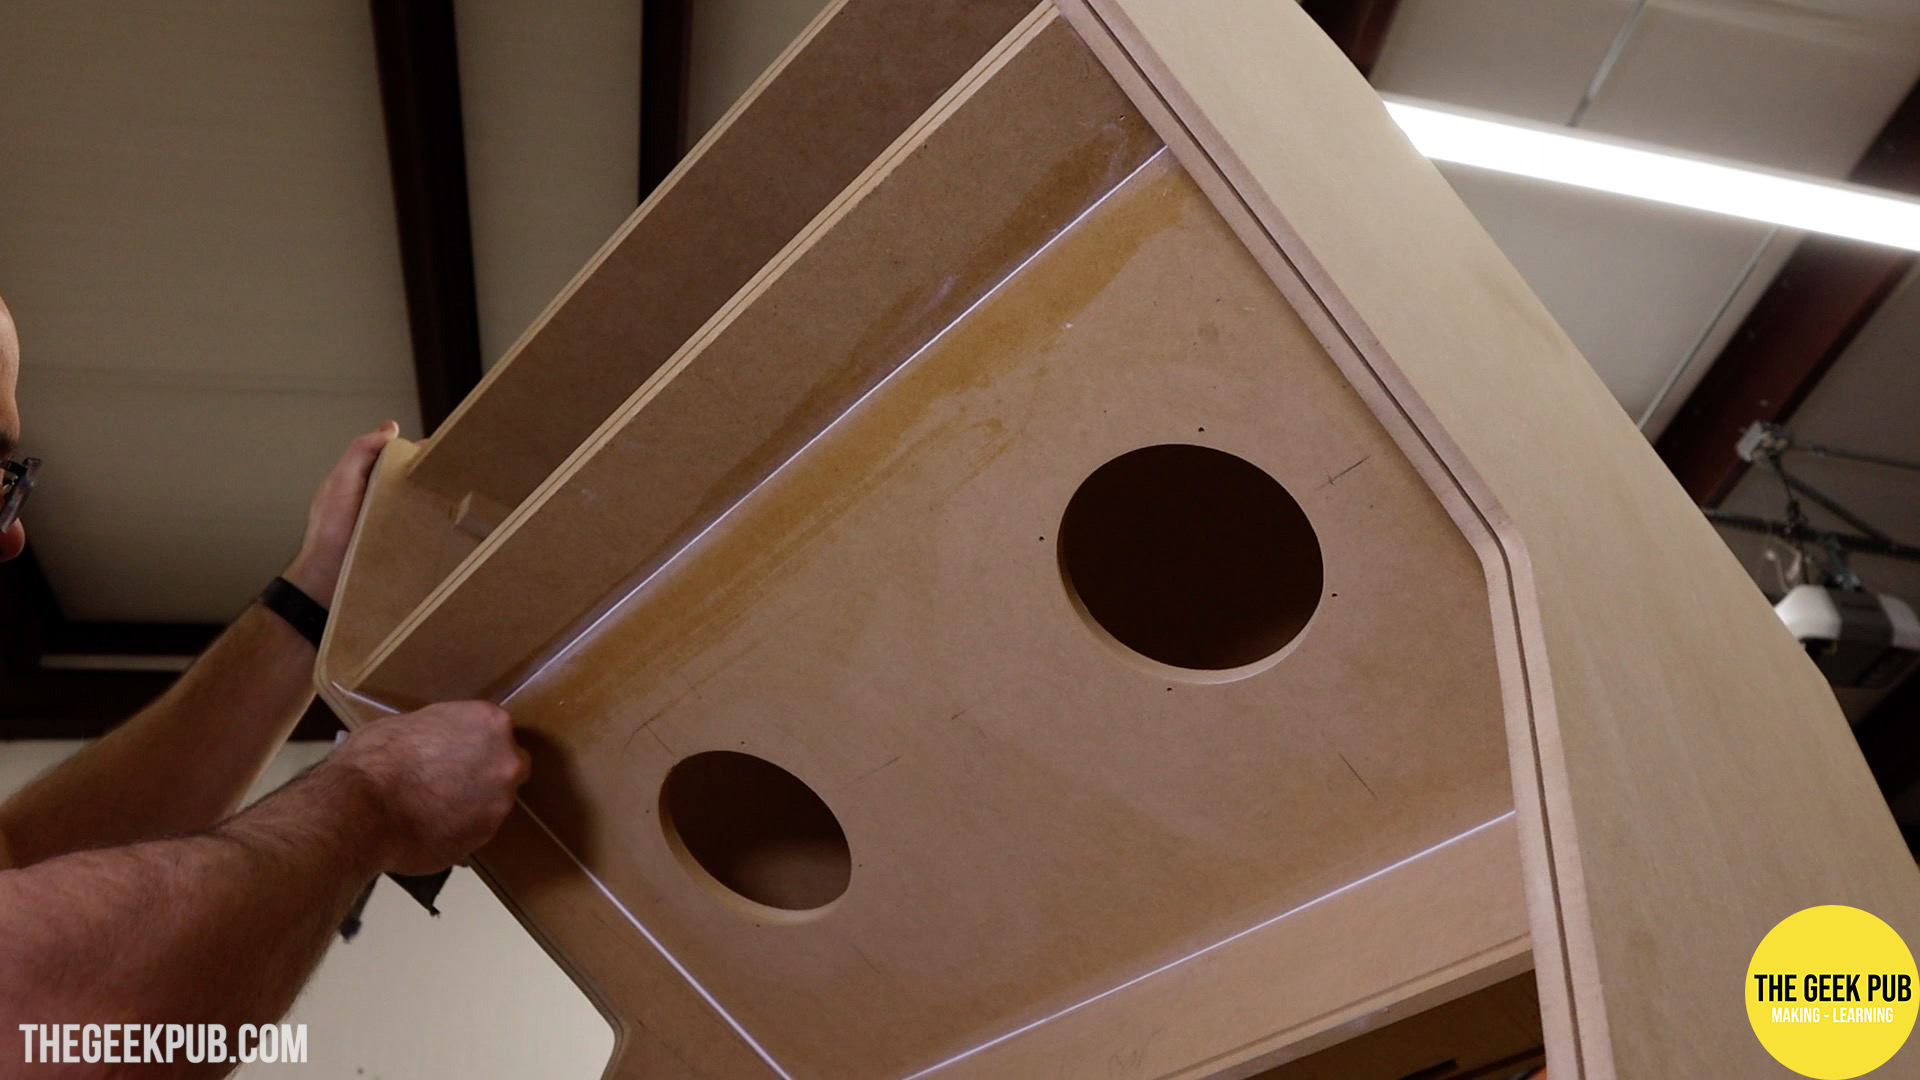
Drilling for Speakers
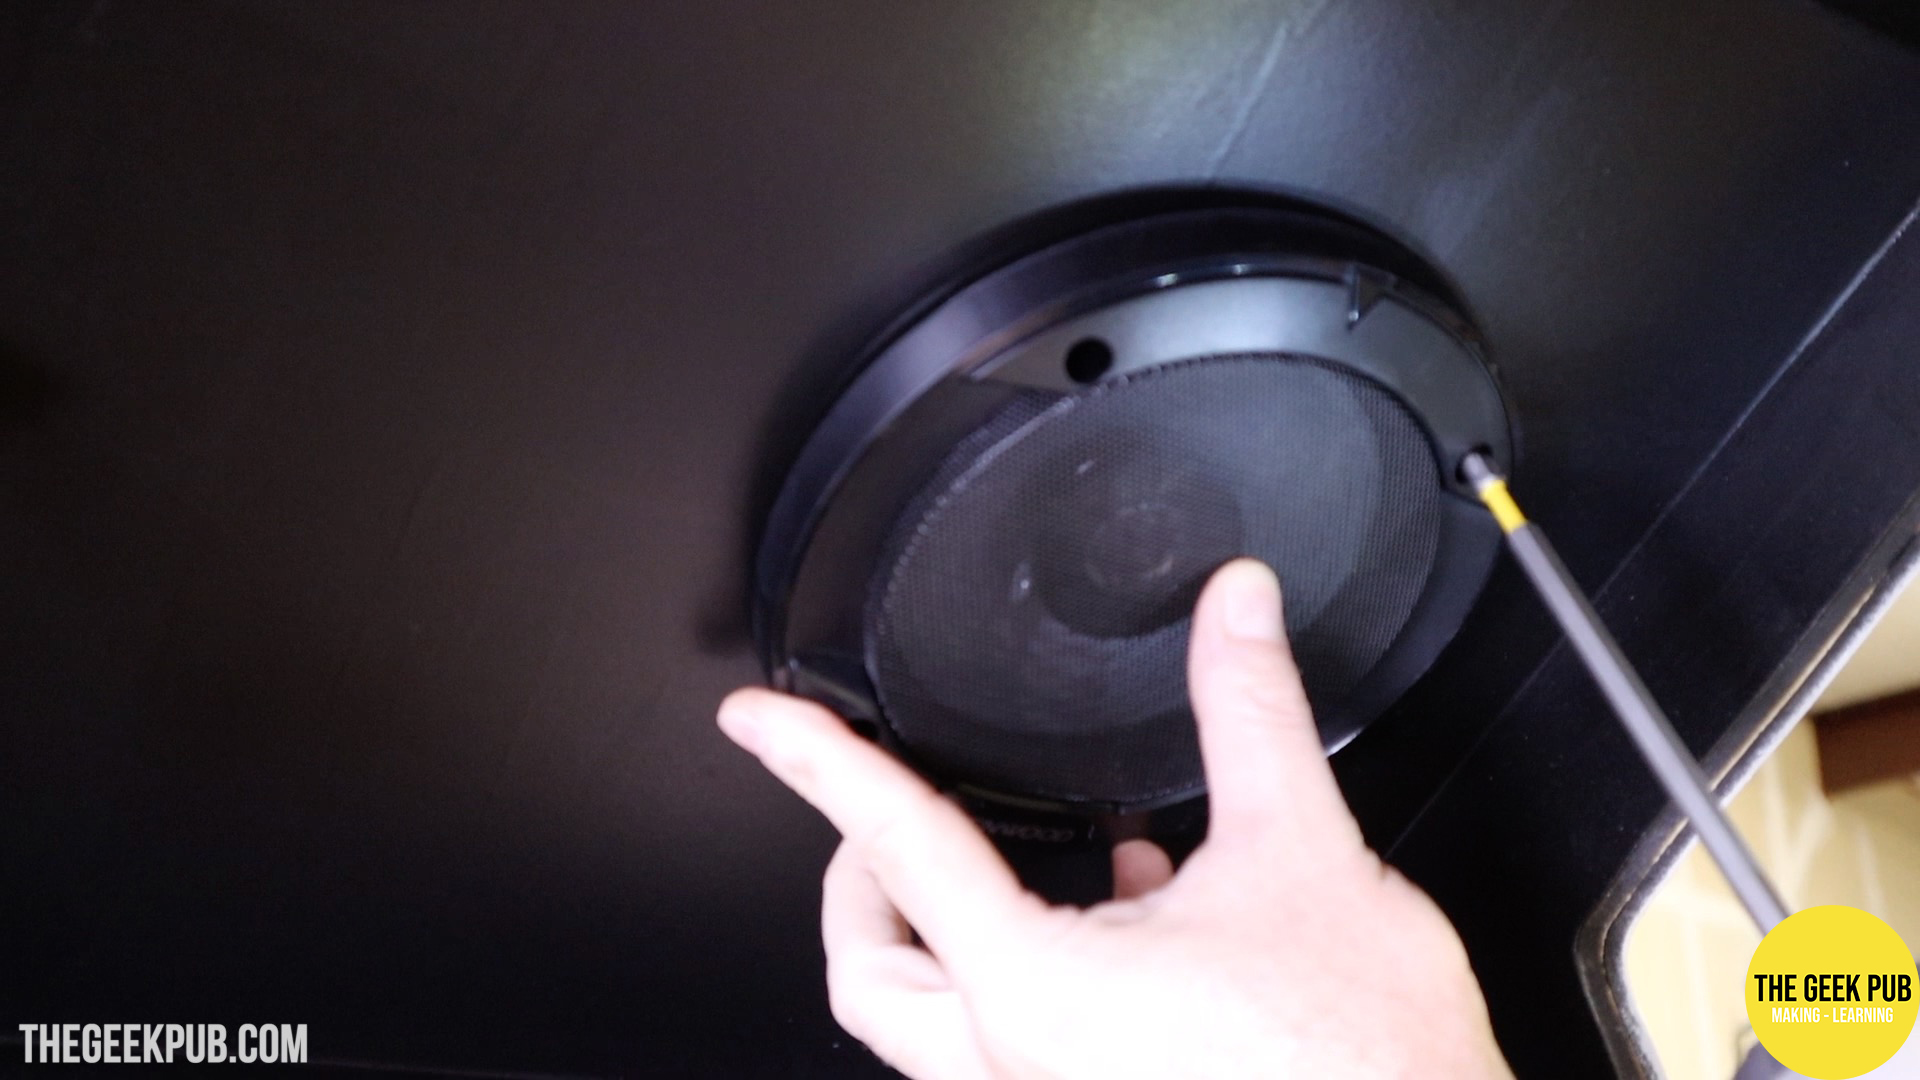
The one last thing we need to do before moving on to painting and final assembly is to drill for the speakers. We decided to go with these 6 inch (15 cm) Kenwood speakers in the arcade. They need a 5 inch (13 cm) hole to be drilled. To do this I used my drill and 5 inch “dozer” hole saw.
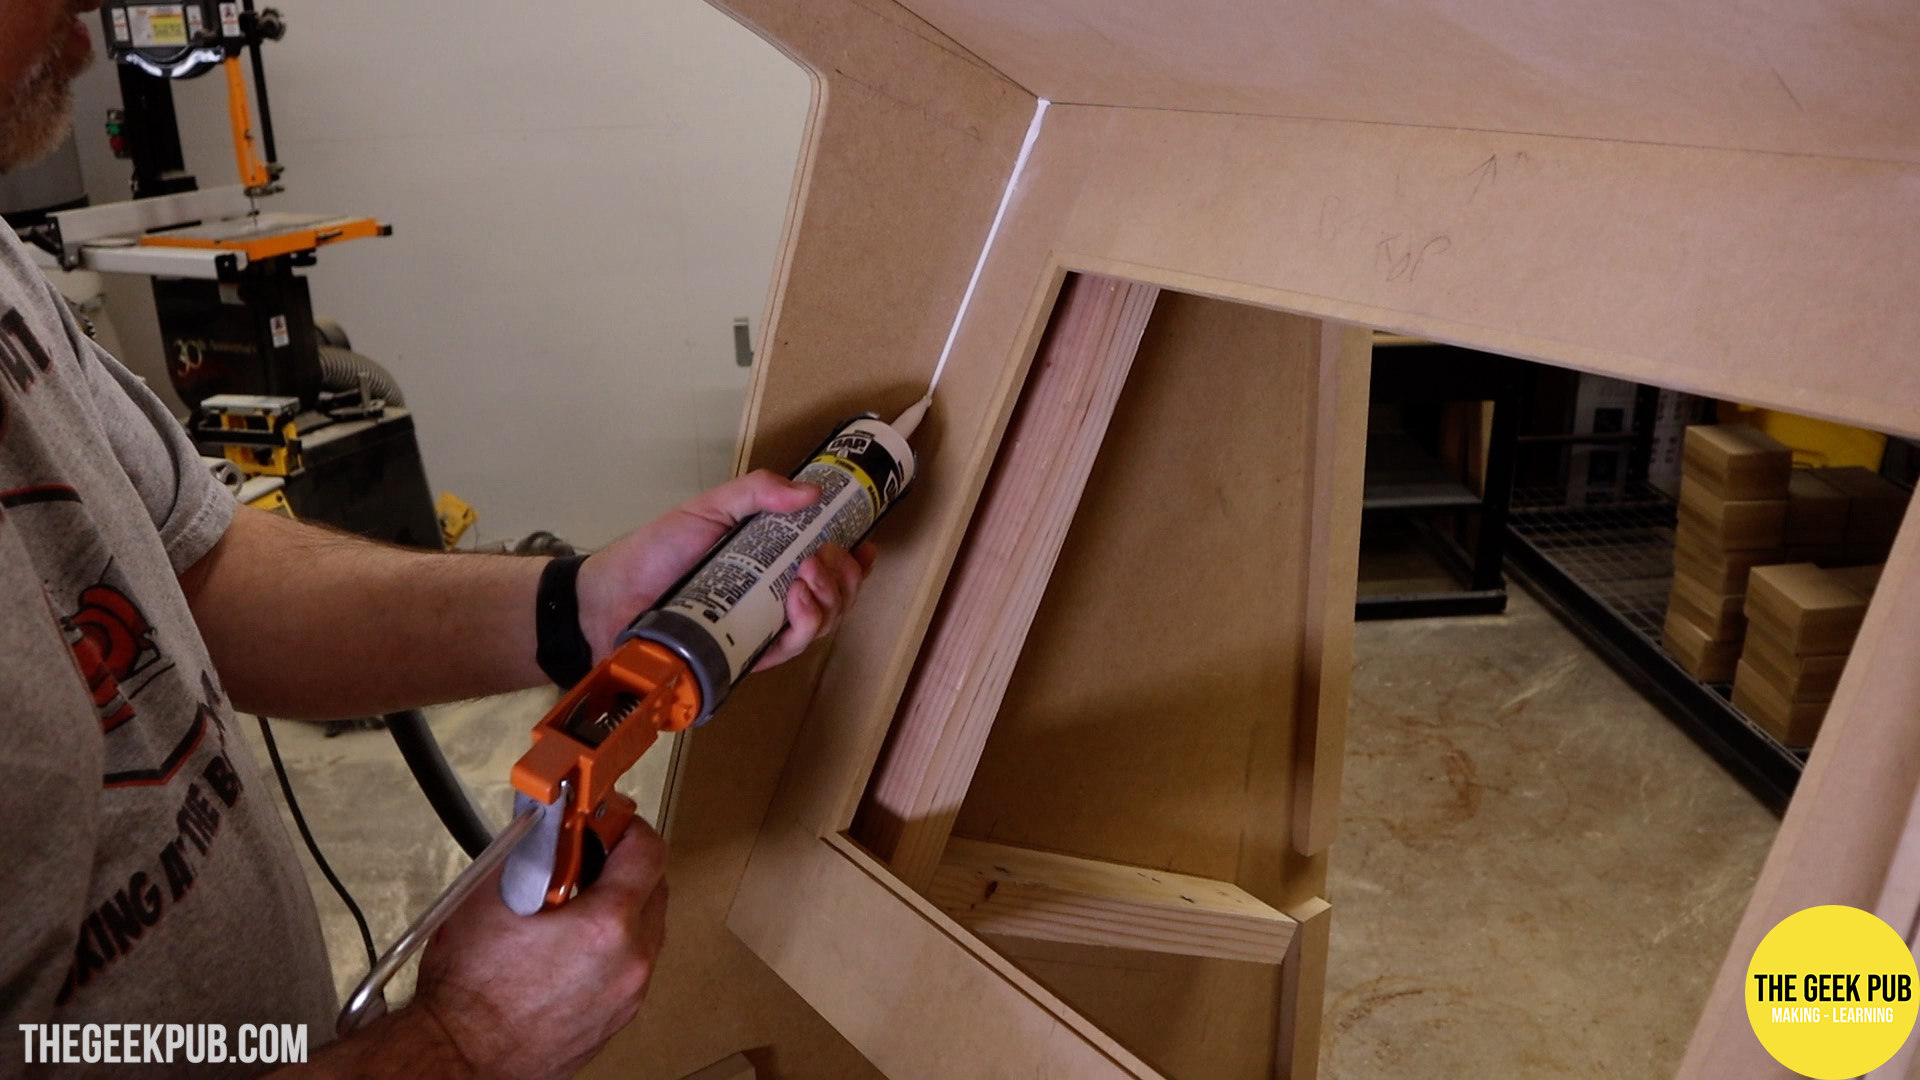
Caulking the Cabinet
Caulking all of the seams in your arcade is probably the most important item that get skipped by new builders. Caulking fills all of the gaps and cracks and covers imperfections in your cuts. This is especially true if you used most hand tools in your arcade cabinet build.
I caulked all of the seams on the PETSCII Robots cabinet and the wiped them off with a wet rag to remove any excess caulking.
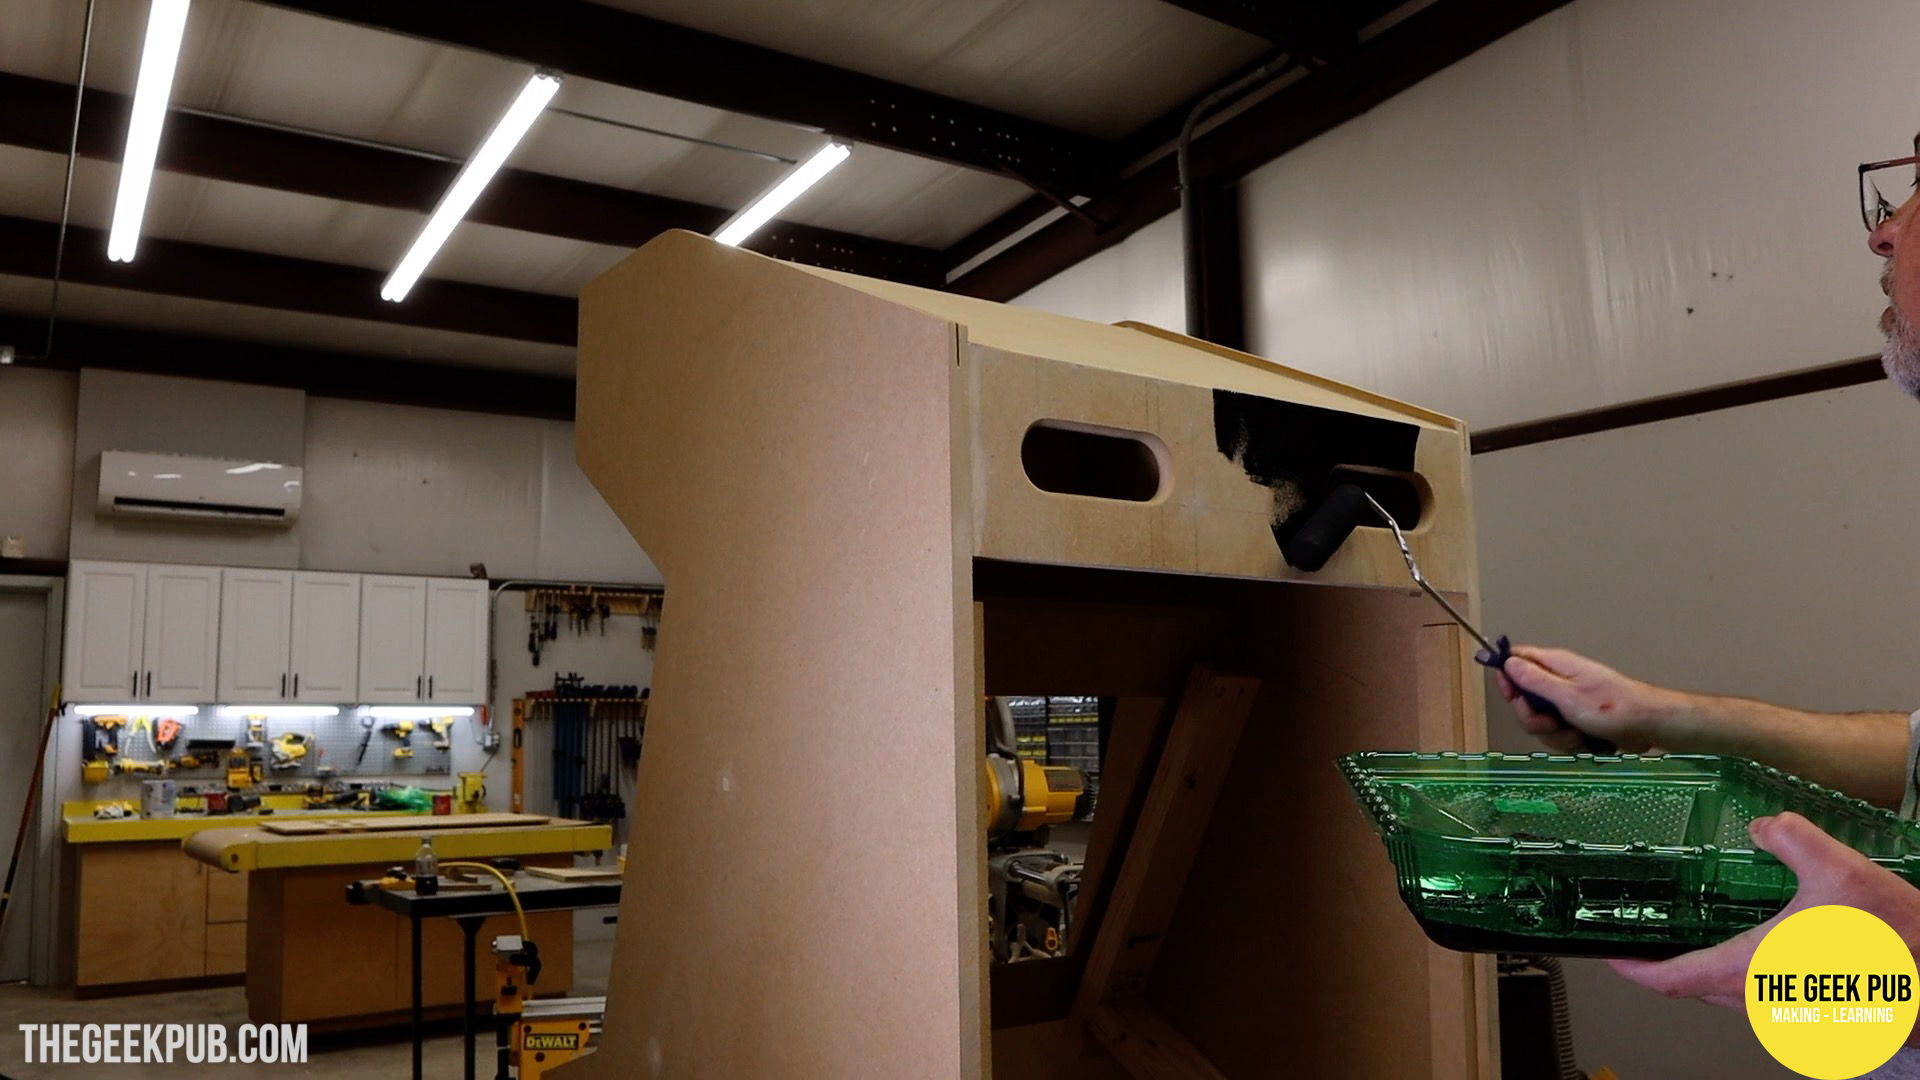
Painting the Arcade
Unfortunately I built this arcade right in the middle of an oil-based paint shortage. I was almost unable to find any paint at all, and there was no chance I would be able to get any compatible primer.
Because of this it became clear I would have to do this build without primer and that my first coat of paint would have to be the primer.
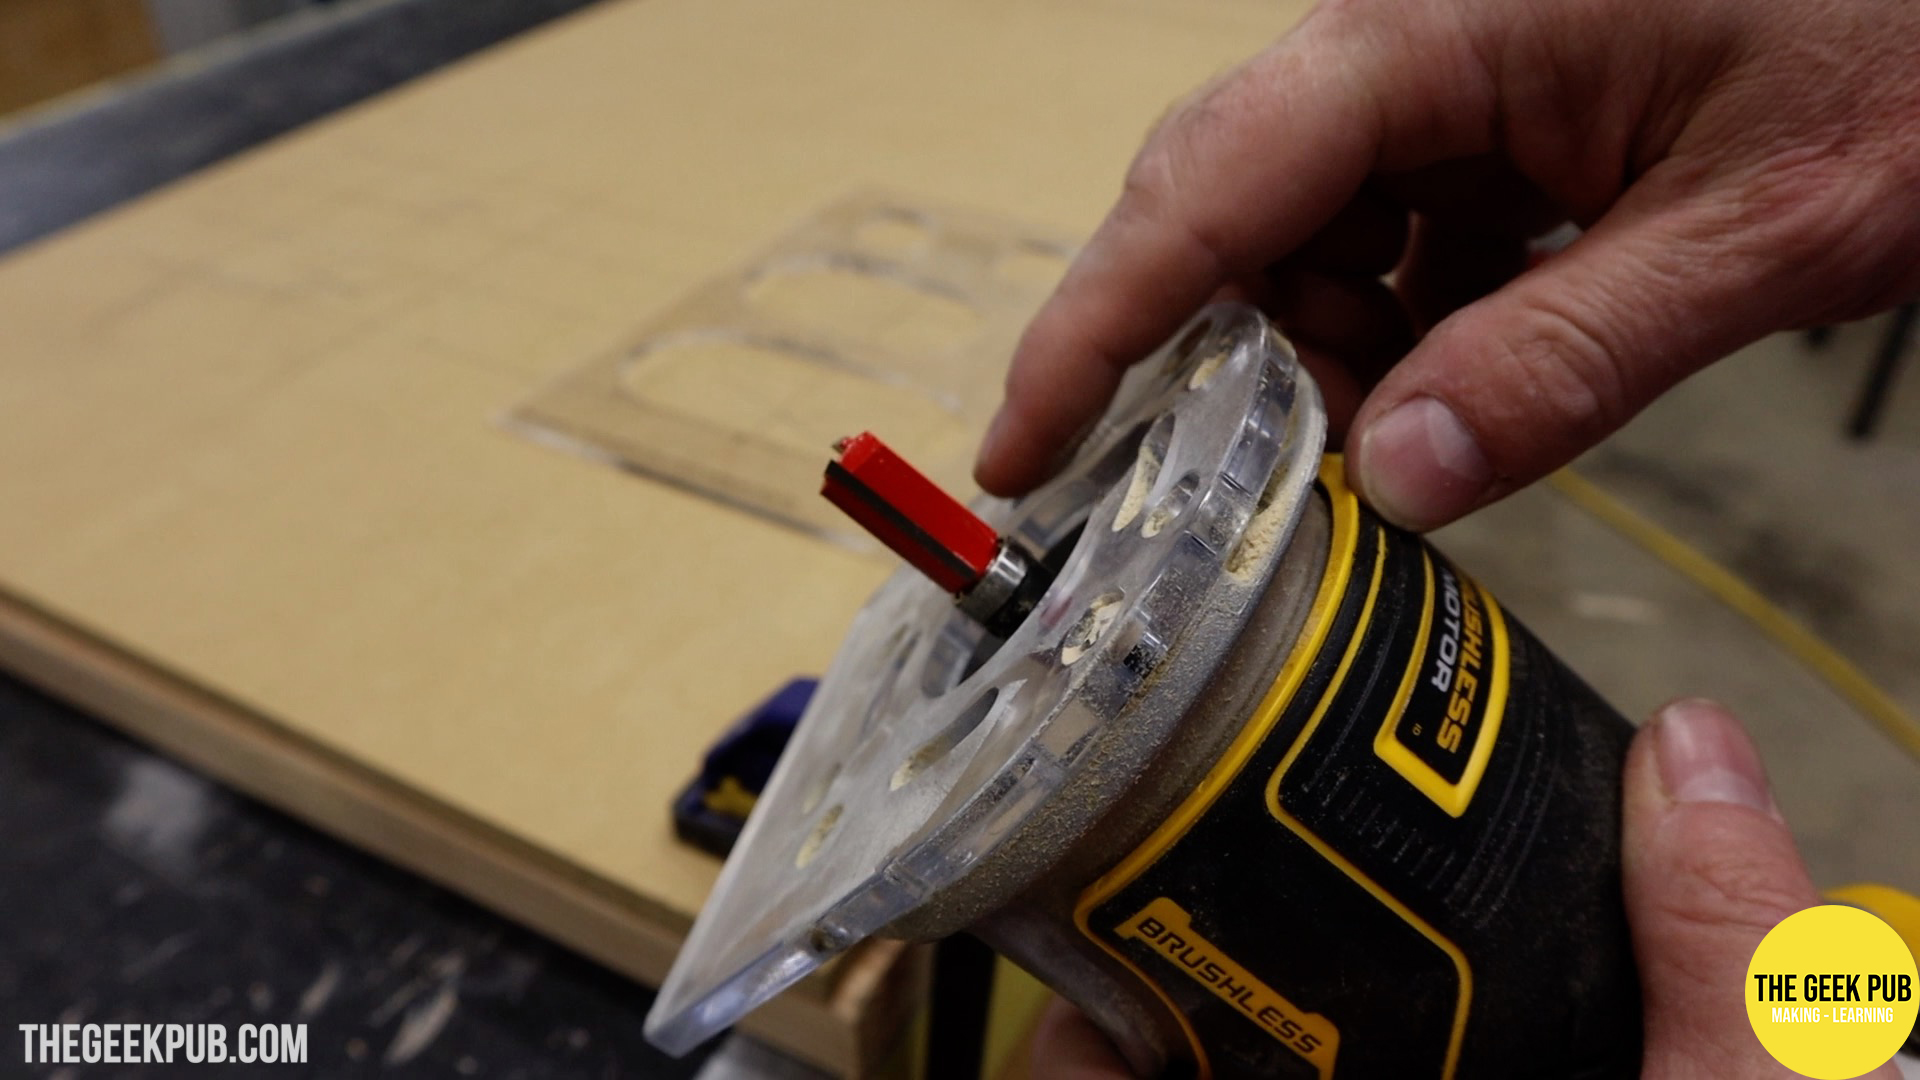
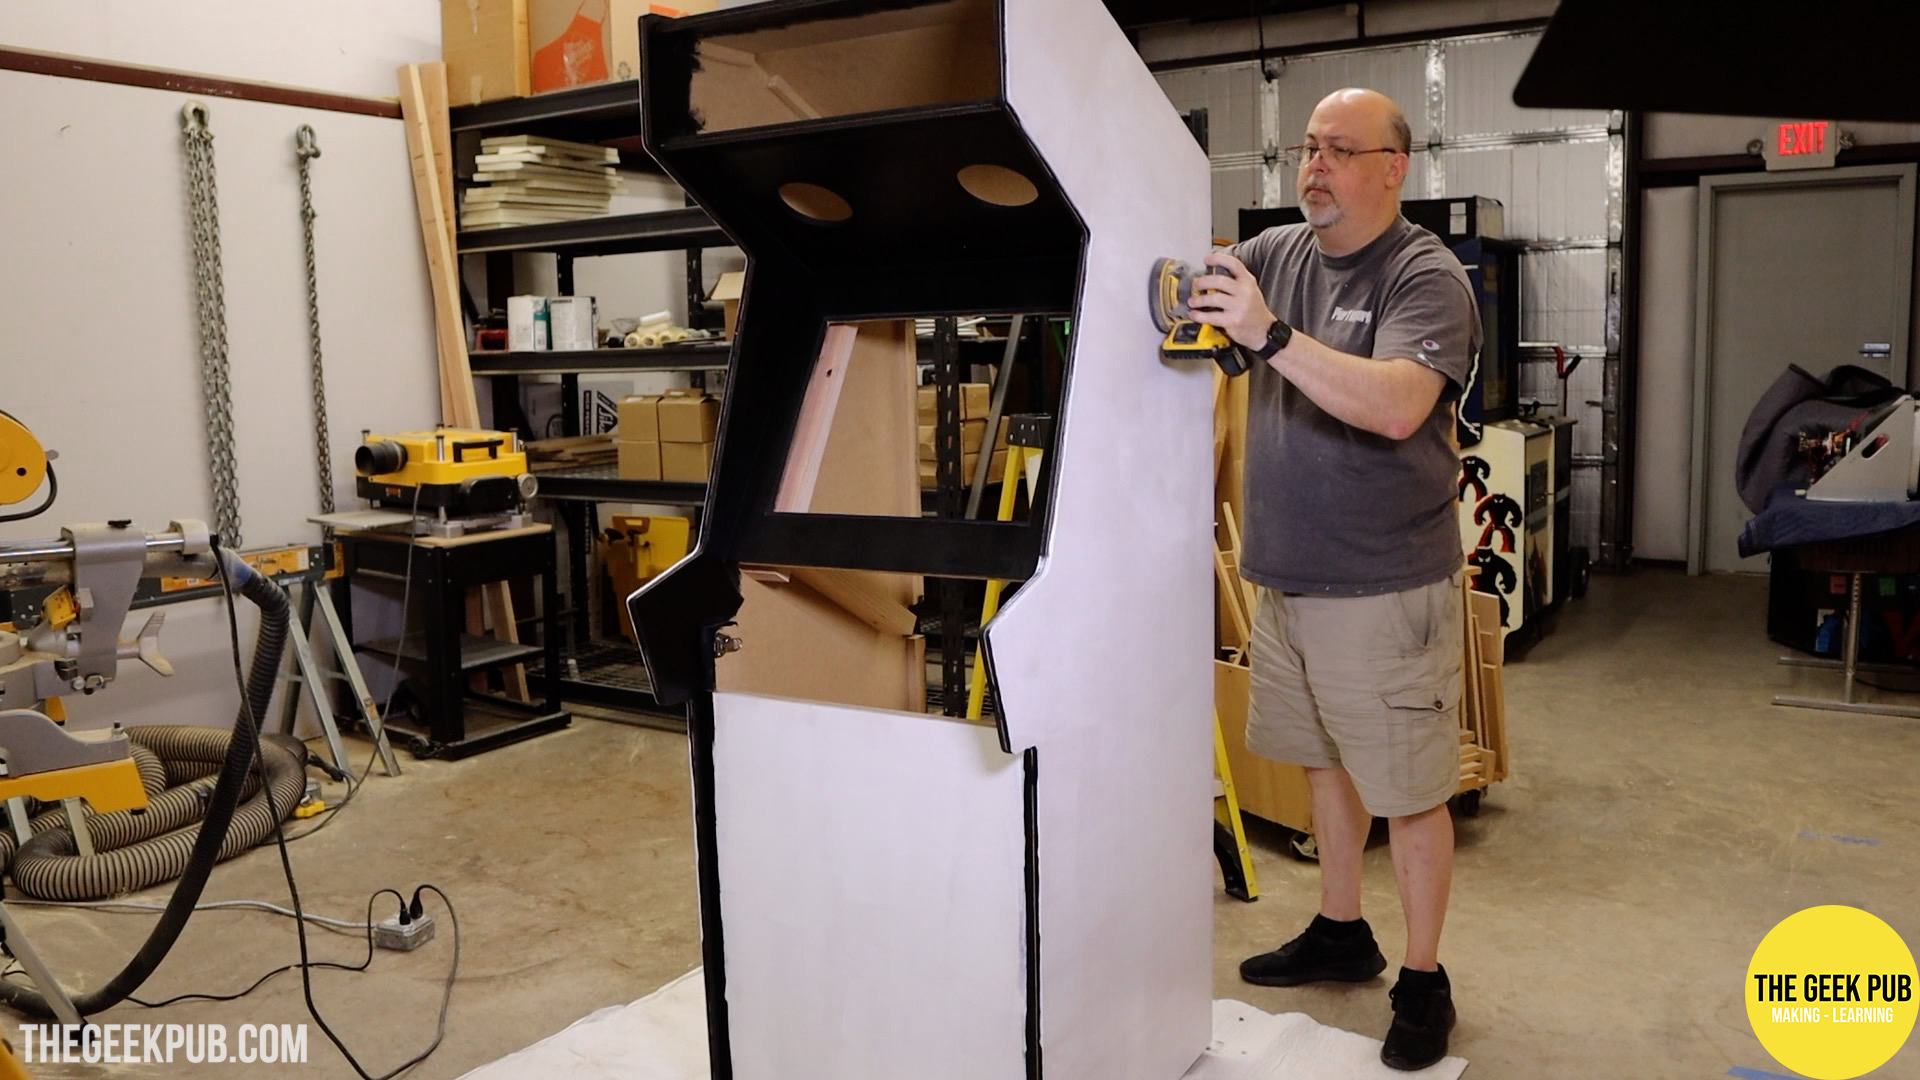
This is fine, it’s just going to mean a little more labor in the painting process. The paint will soak deep into the MDF and will leave it with a rough texture. Similar to what happens with dimensional lumber when people talk about “raising the grain. It just means I will need to sand between coats, and especially good after the first coat.
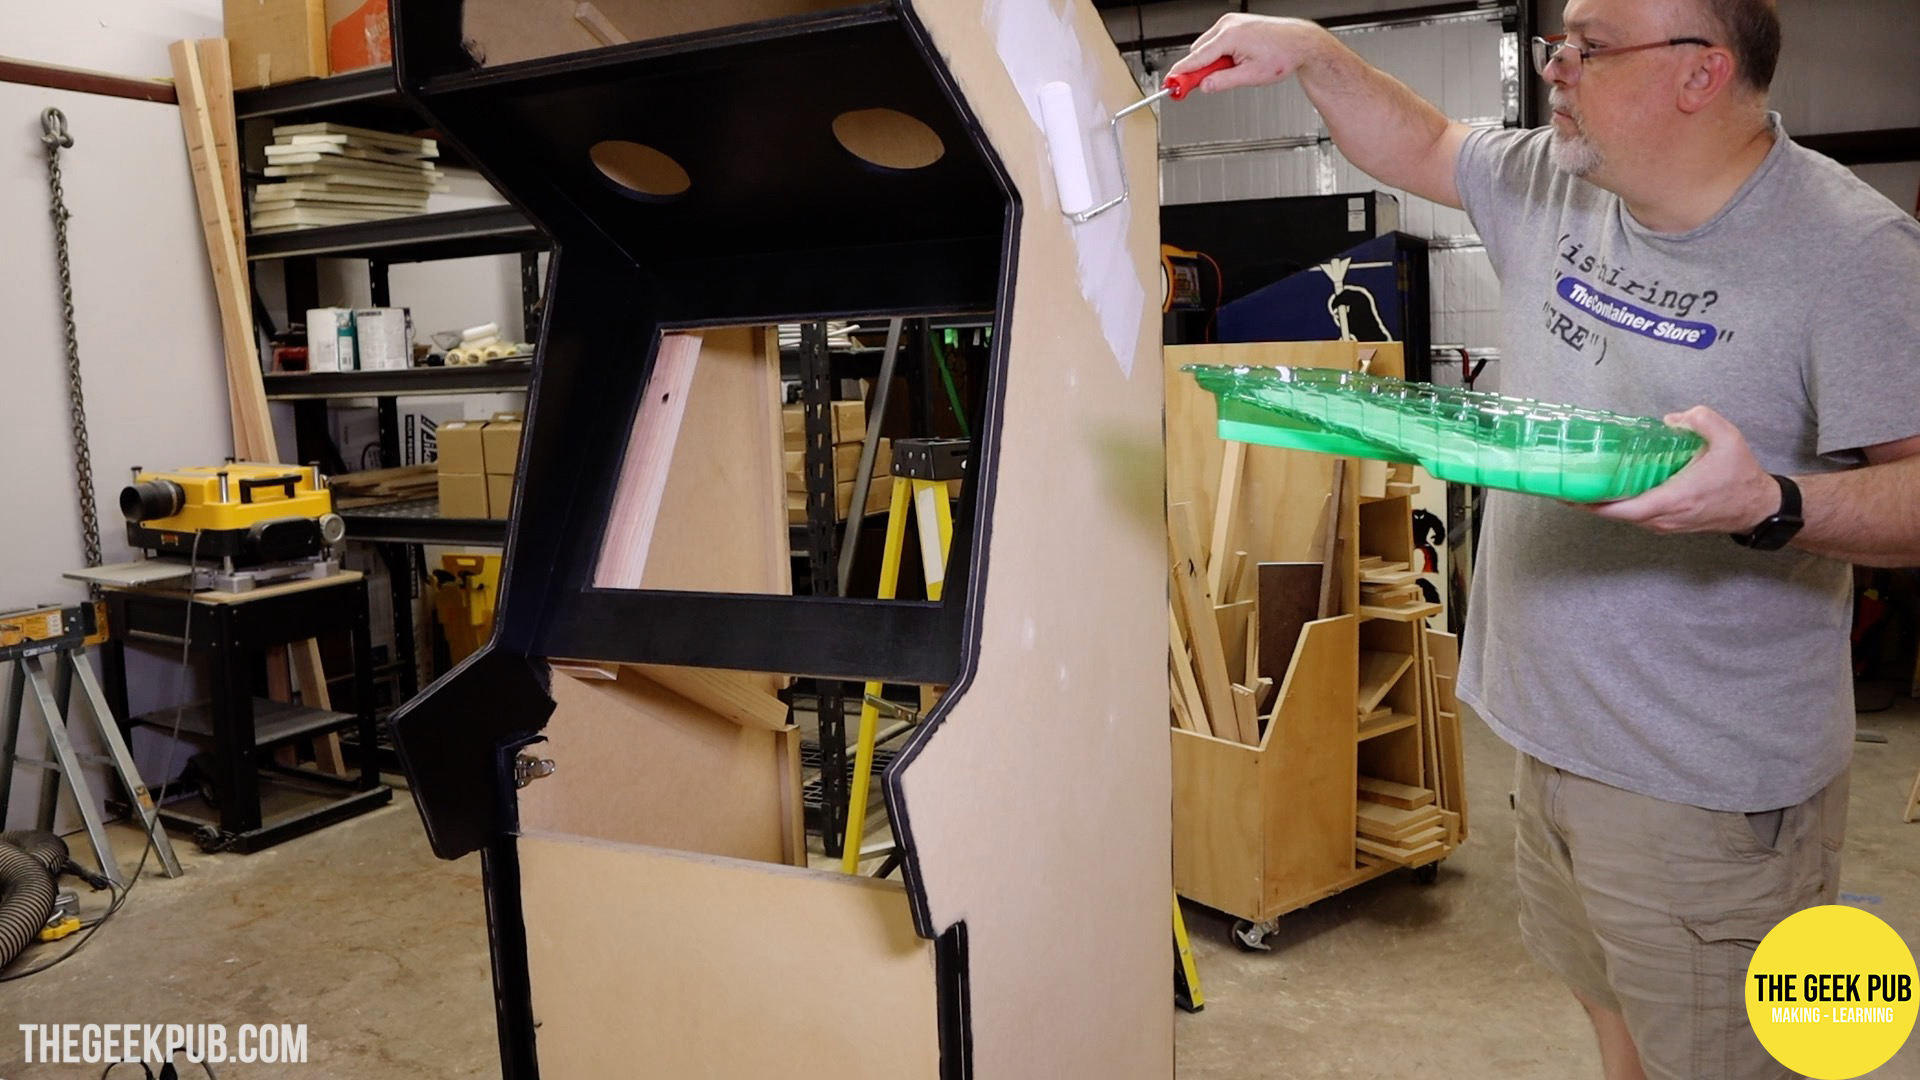
I went with a satin black on anywhere paint would be showing. This is mostly on the bottom of the marquee, the top, and back door.
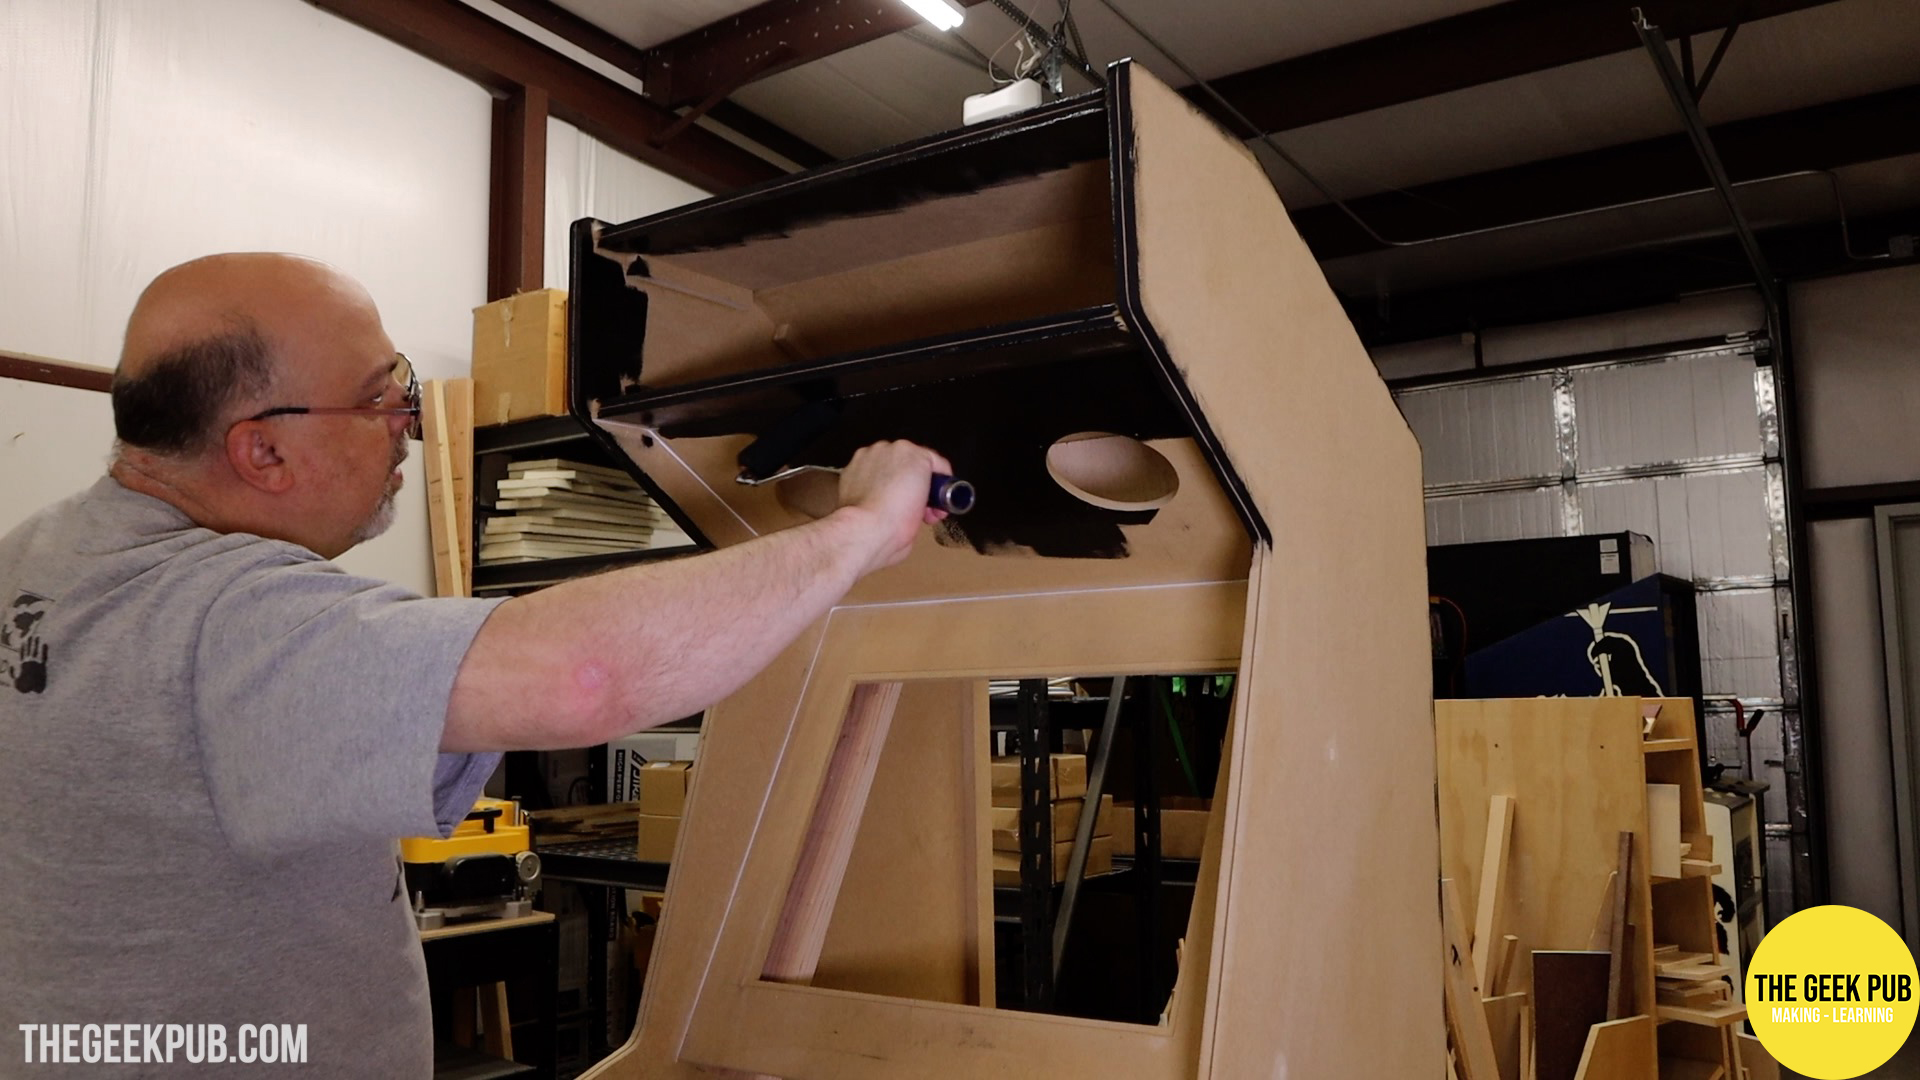
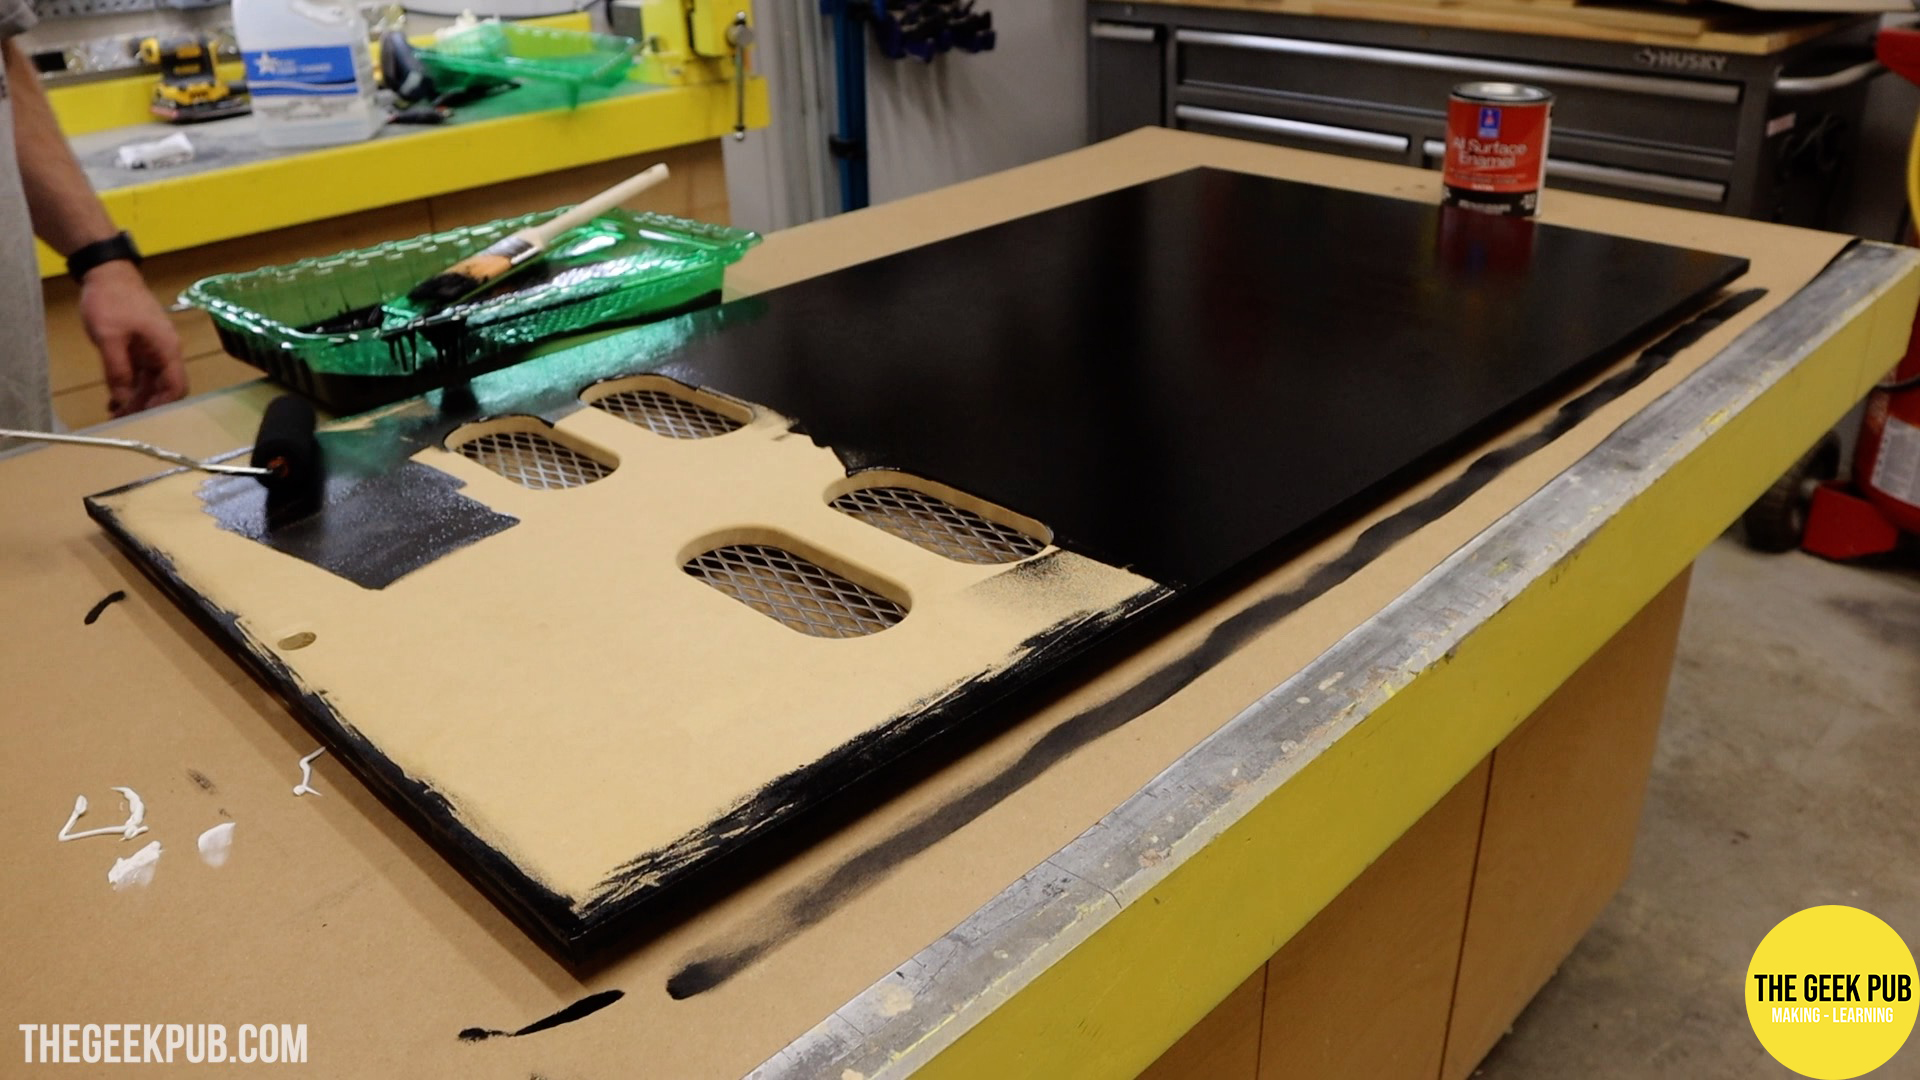
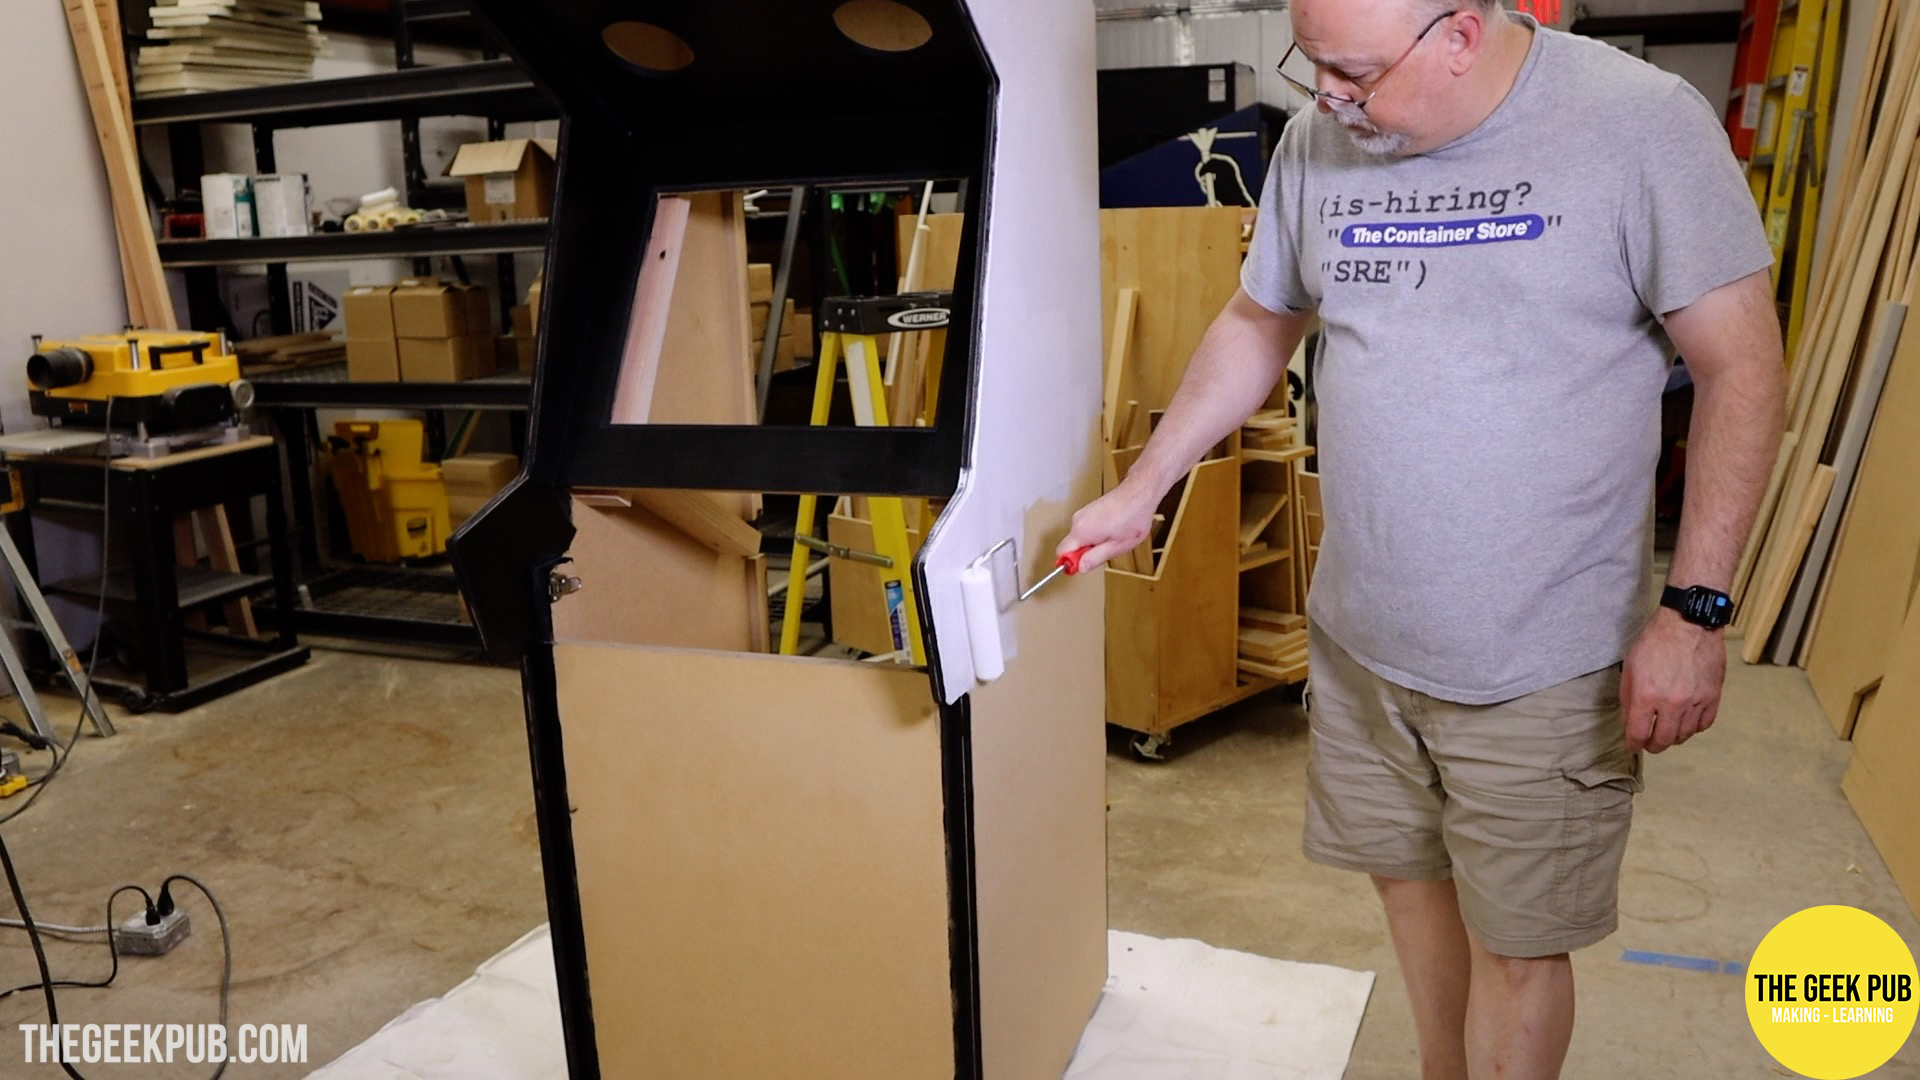
Since we’re going with really light colors on our vinyl, I painted the side panels and kick panel white. I was afraid if I painted them black there was a possibility that the black might “bleed through” and darken then vinyl artwork. In hindsight I don’t think it made any difference, Your results may vary. I did do a final sanding anywhere vinyl would be applied for better adhesion.
A lot of people always comment on my videos and articles claiming paint is a waste of time since I am applying artwork. That is a ridiculous claim. First, look a the instructions for any self-adhesive vinyl. Every single last one of them says not to apply to bare wood. Second, I’ve tried it. Six months later I was peeling the vinyl off and painting. It won’t last. The vinyl gets bubbles and starts peeling everywhere.
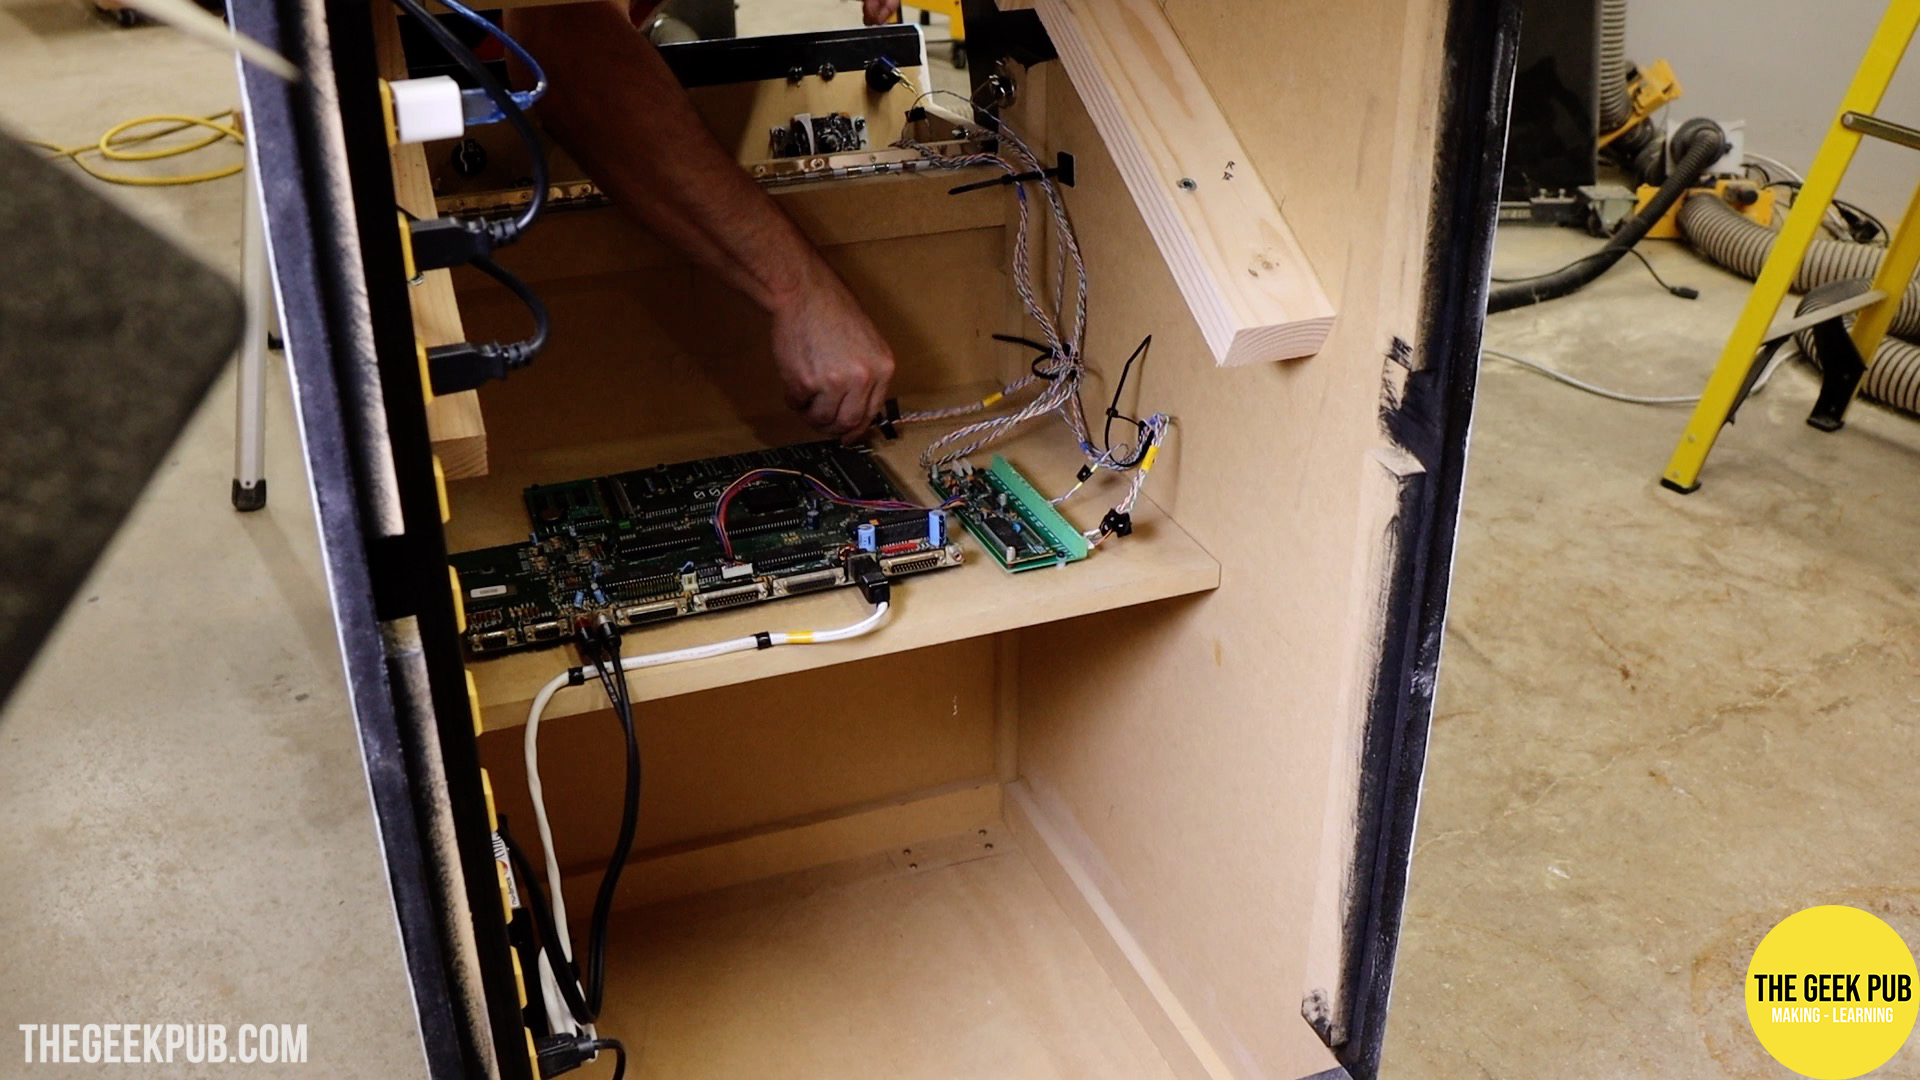
Mounting the Amiga 500 Motherboard
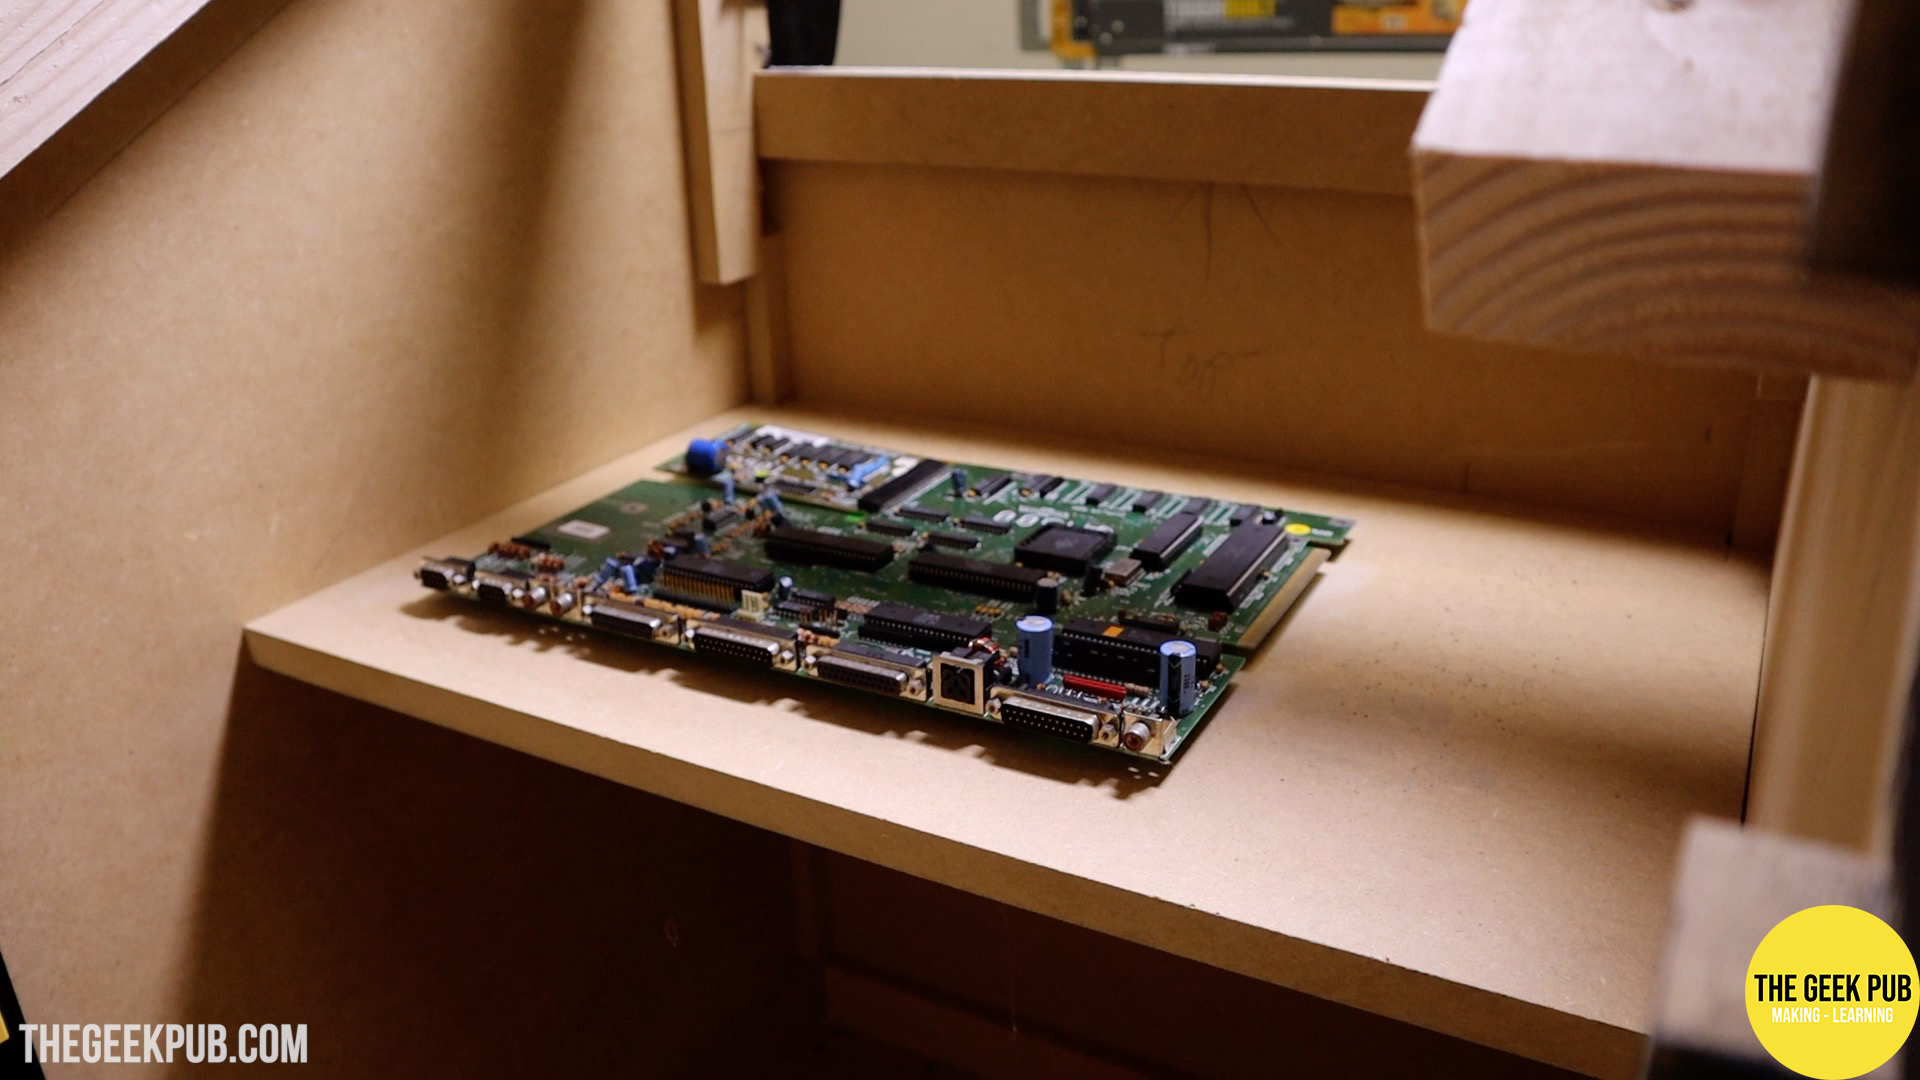
Since this PETSCII Robots Arcade is going to be powered by the Amiga 500, we need to put an Amiga 500 into the cabinet!
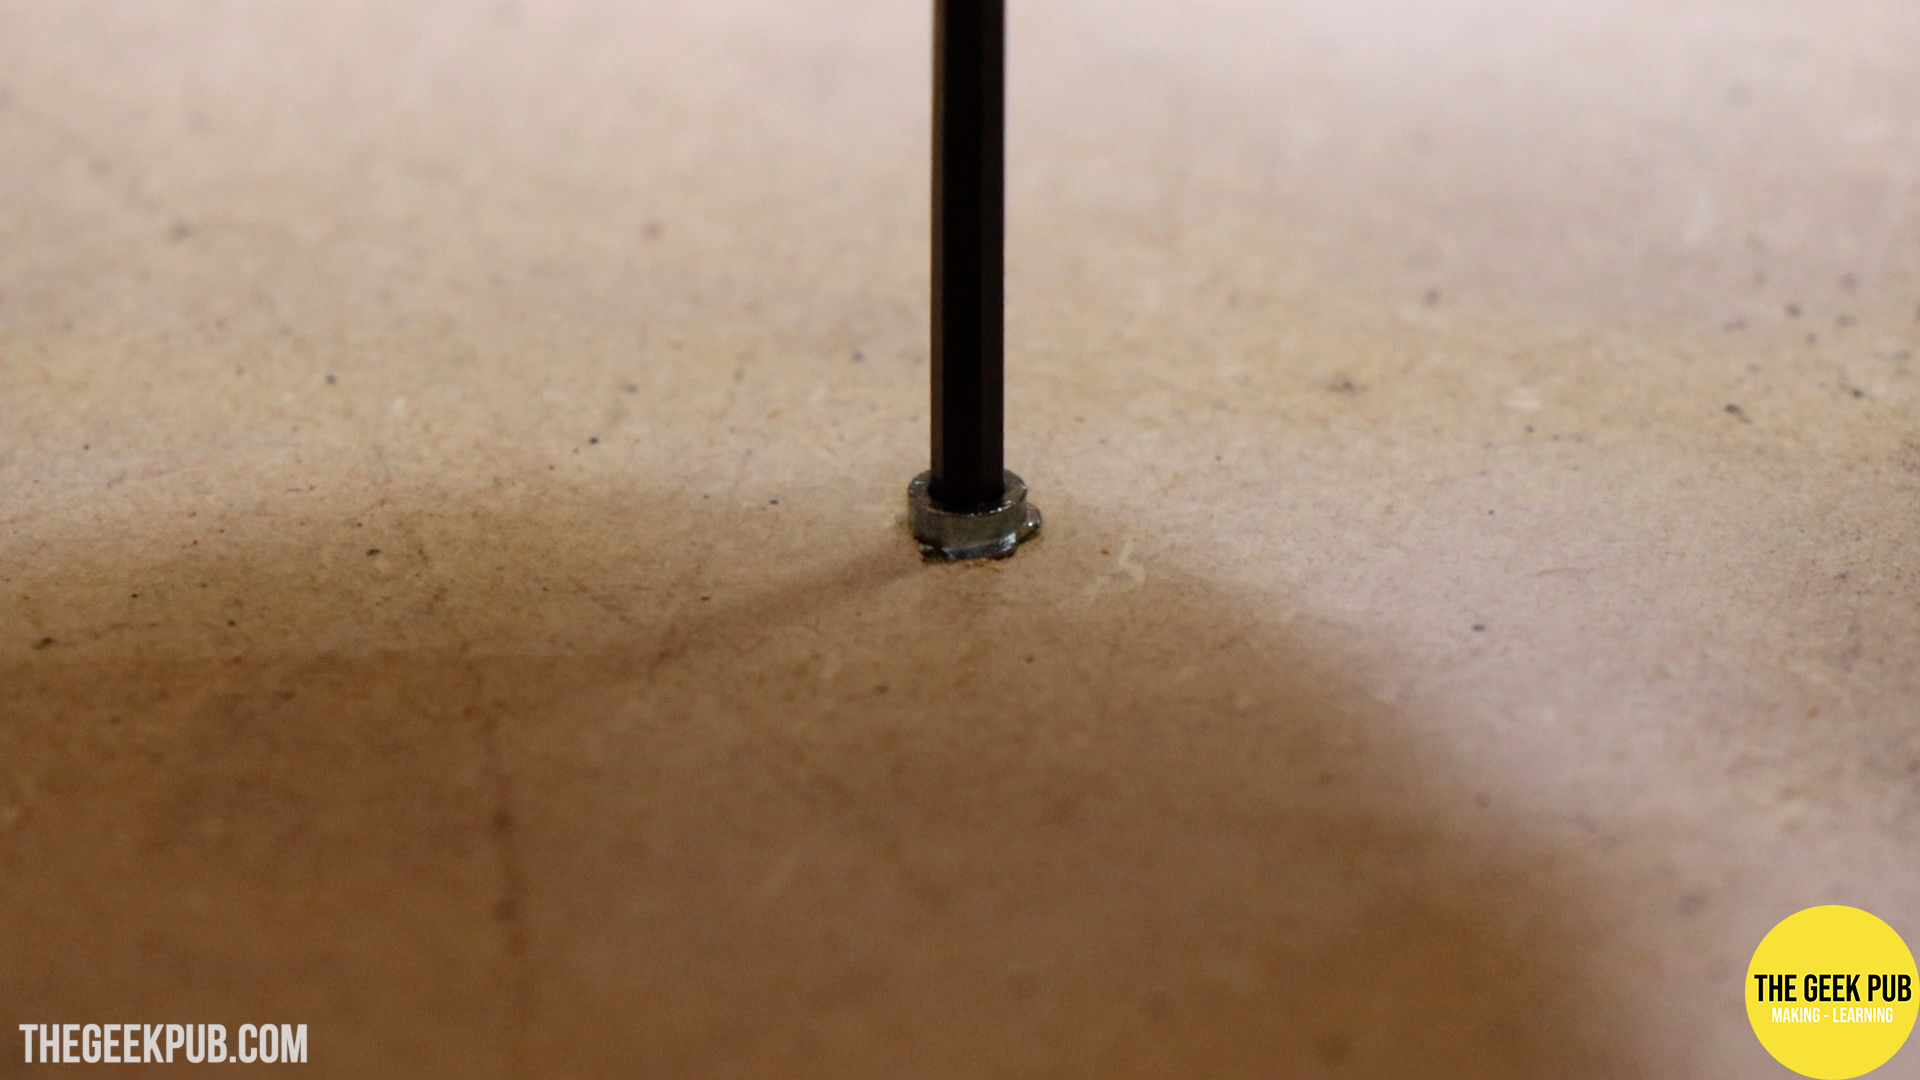
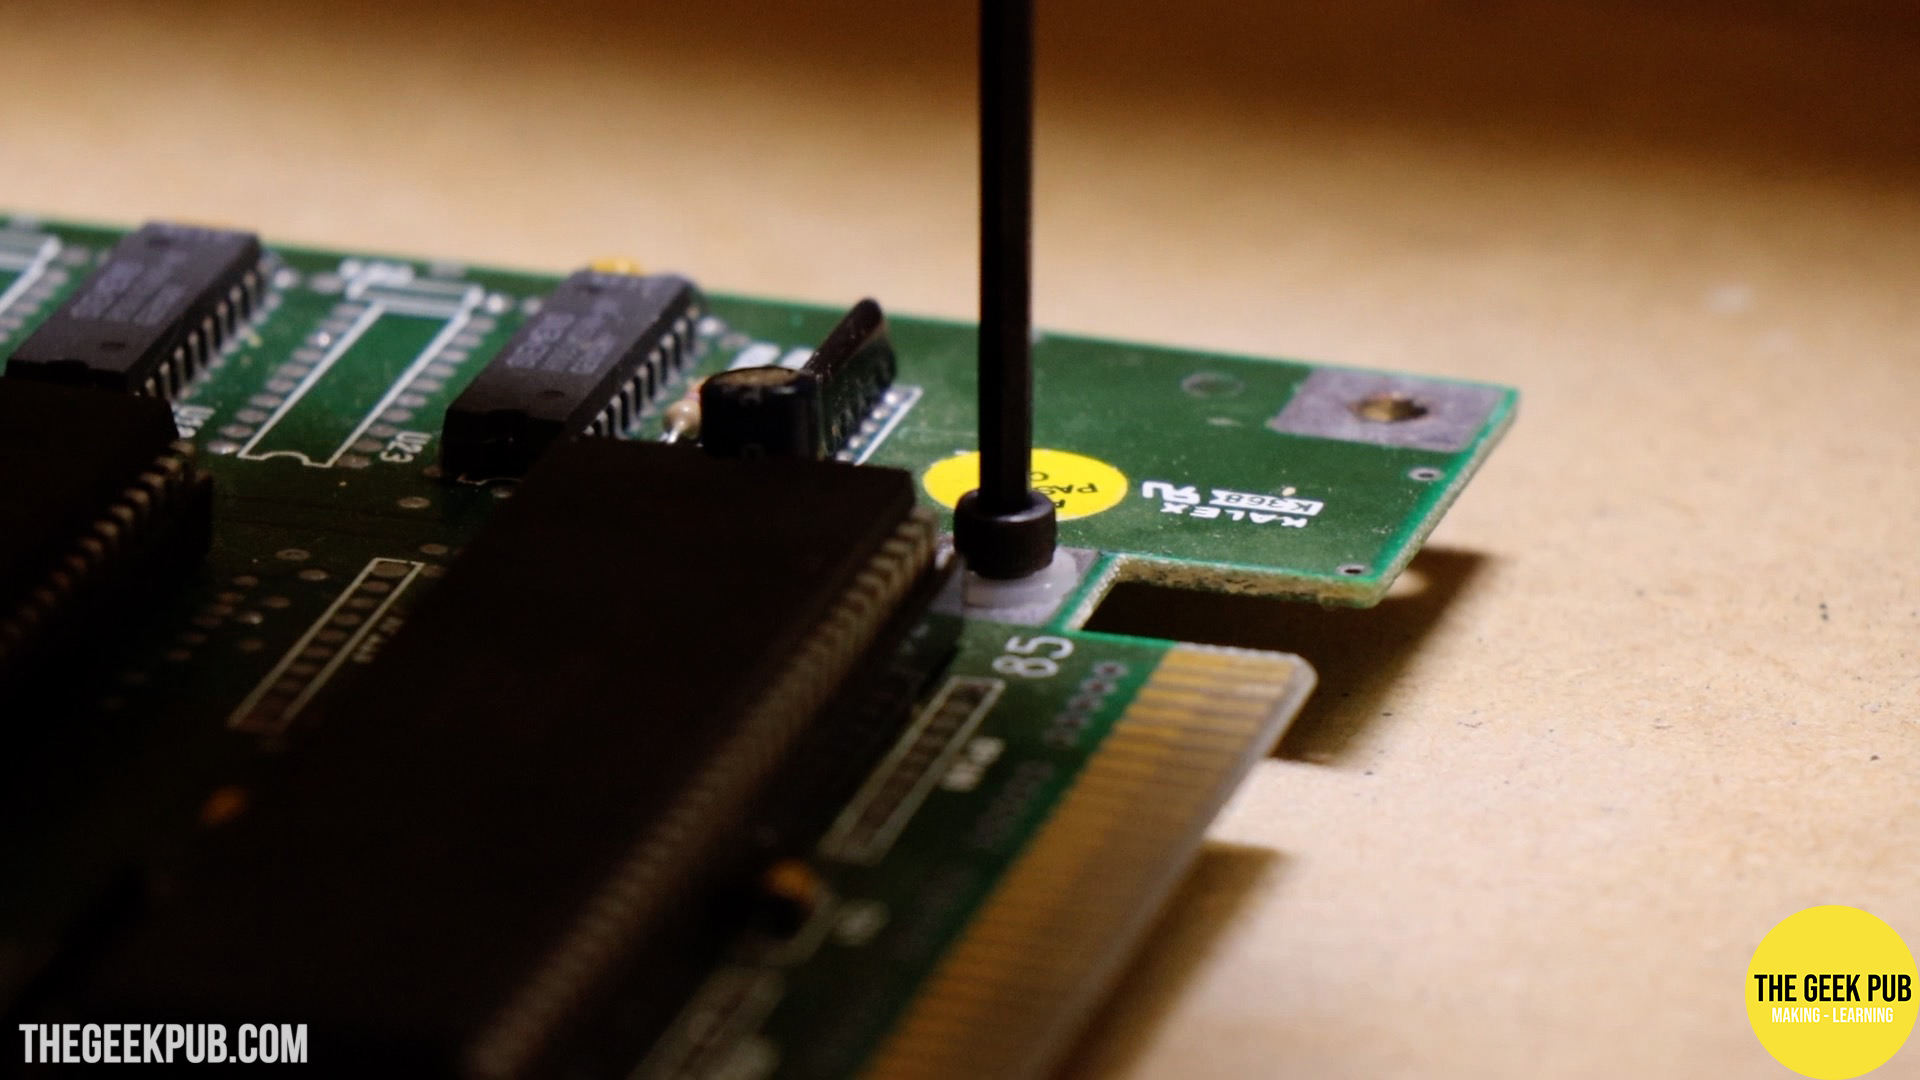
I drilled holes that matched the mounting locations on the Amiga 500 and placed insert nuts into the cabinet’s electronics shelf. The Amiga is attached with 3mm nylon stand-offs & washers, and hex-head cap screws.

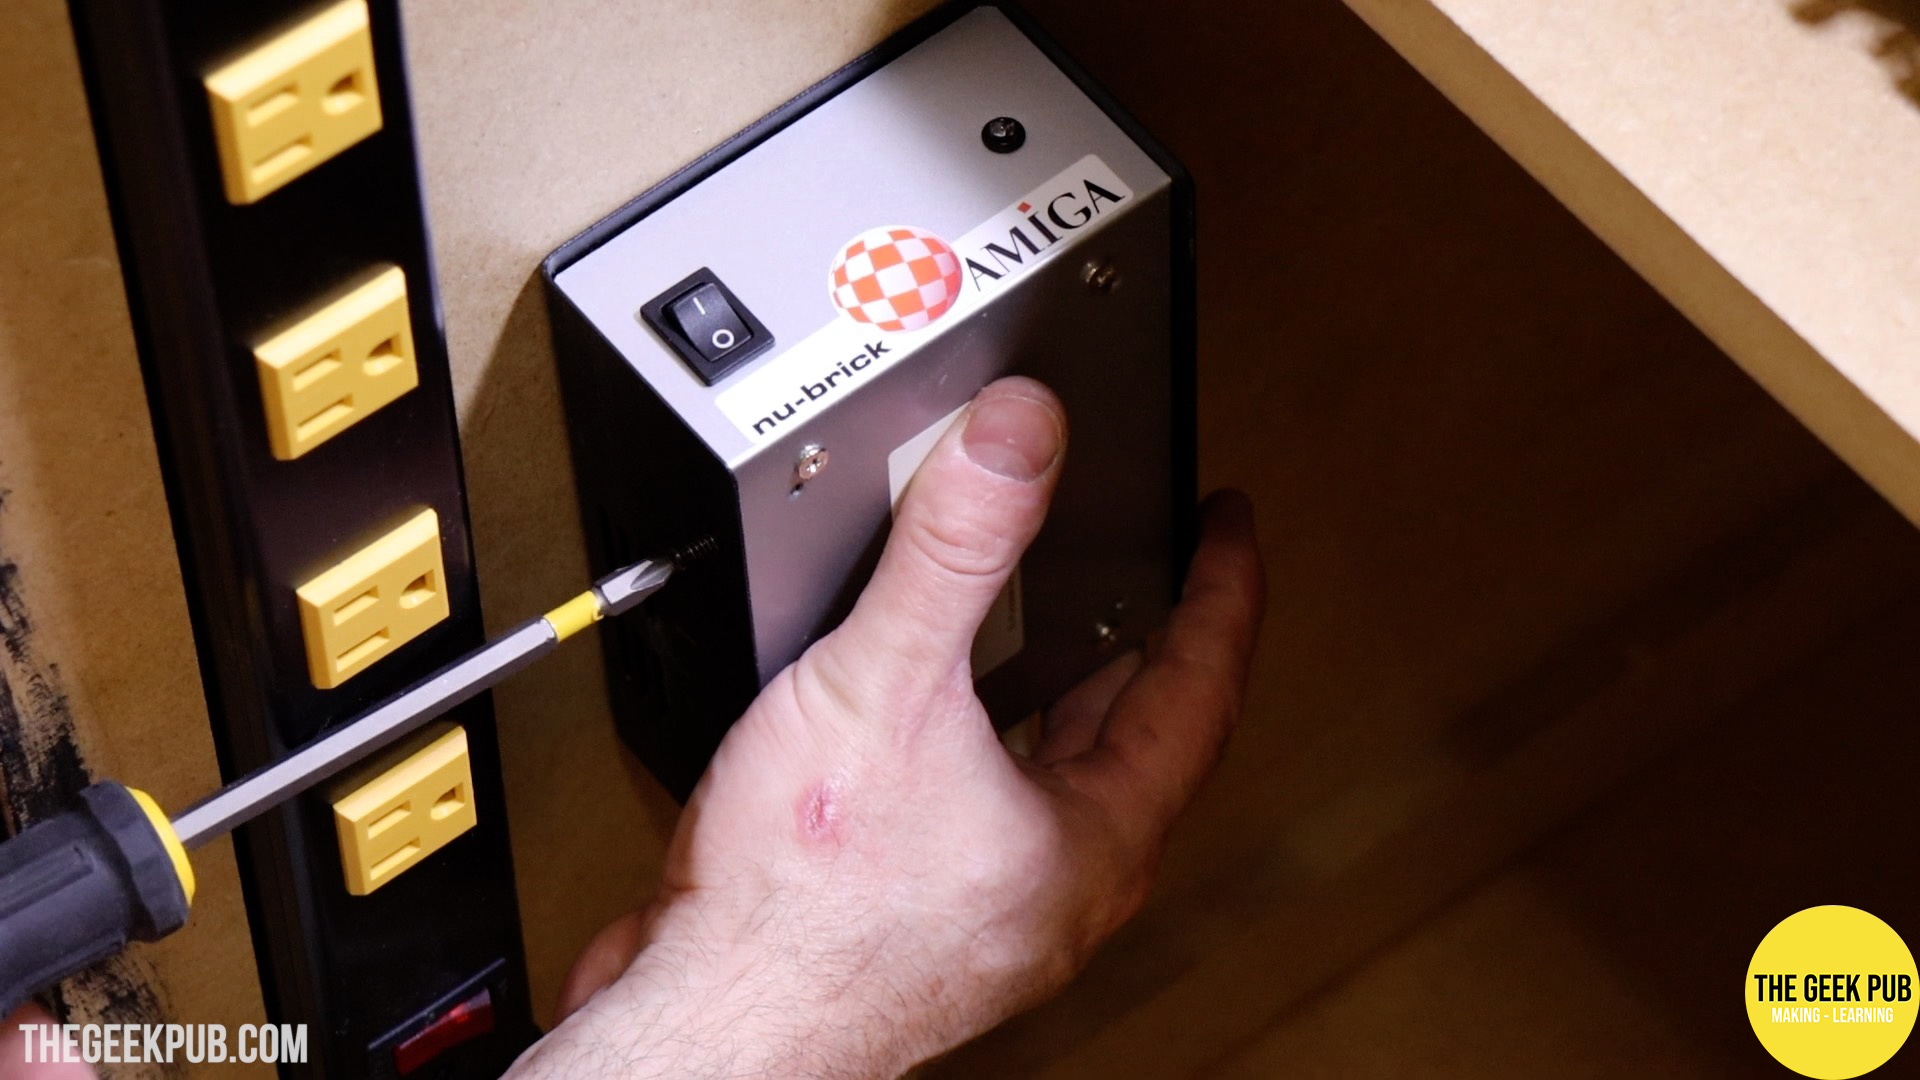
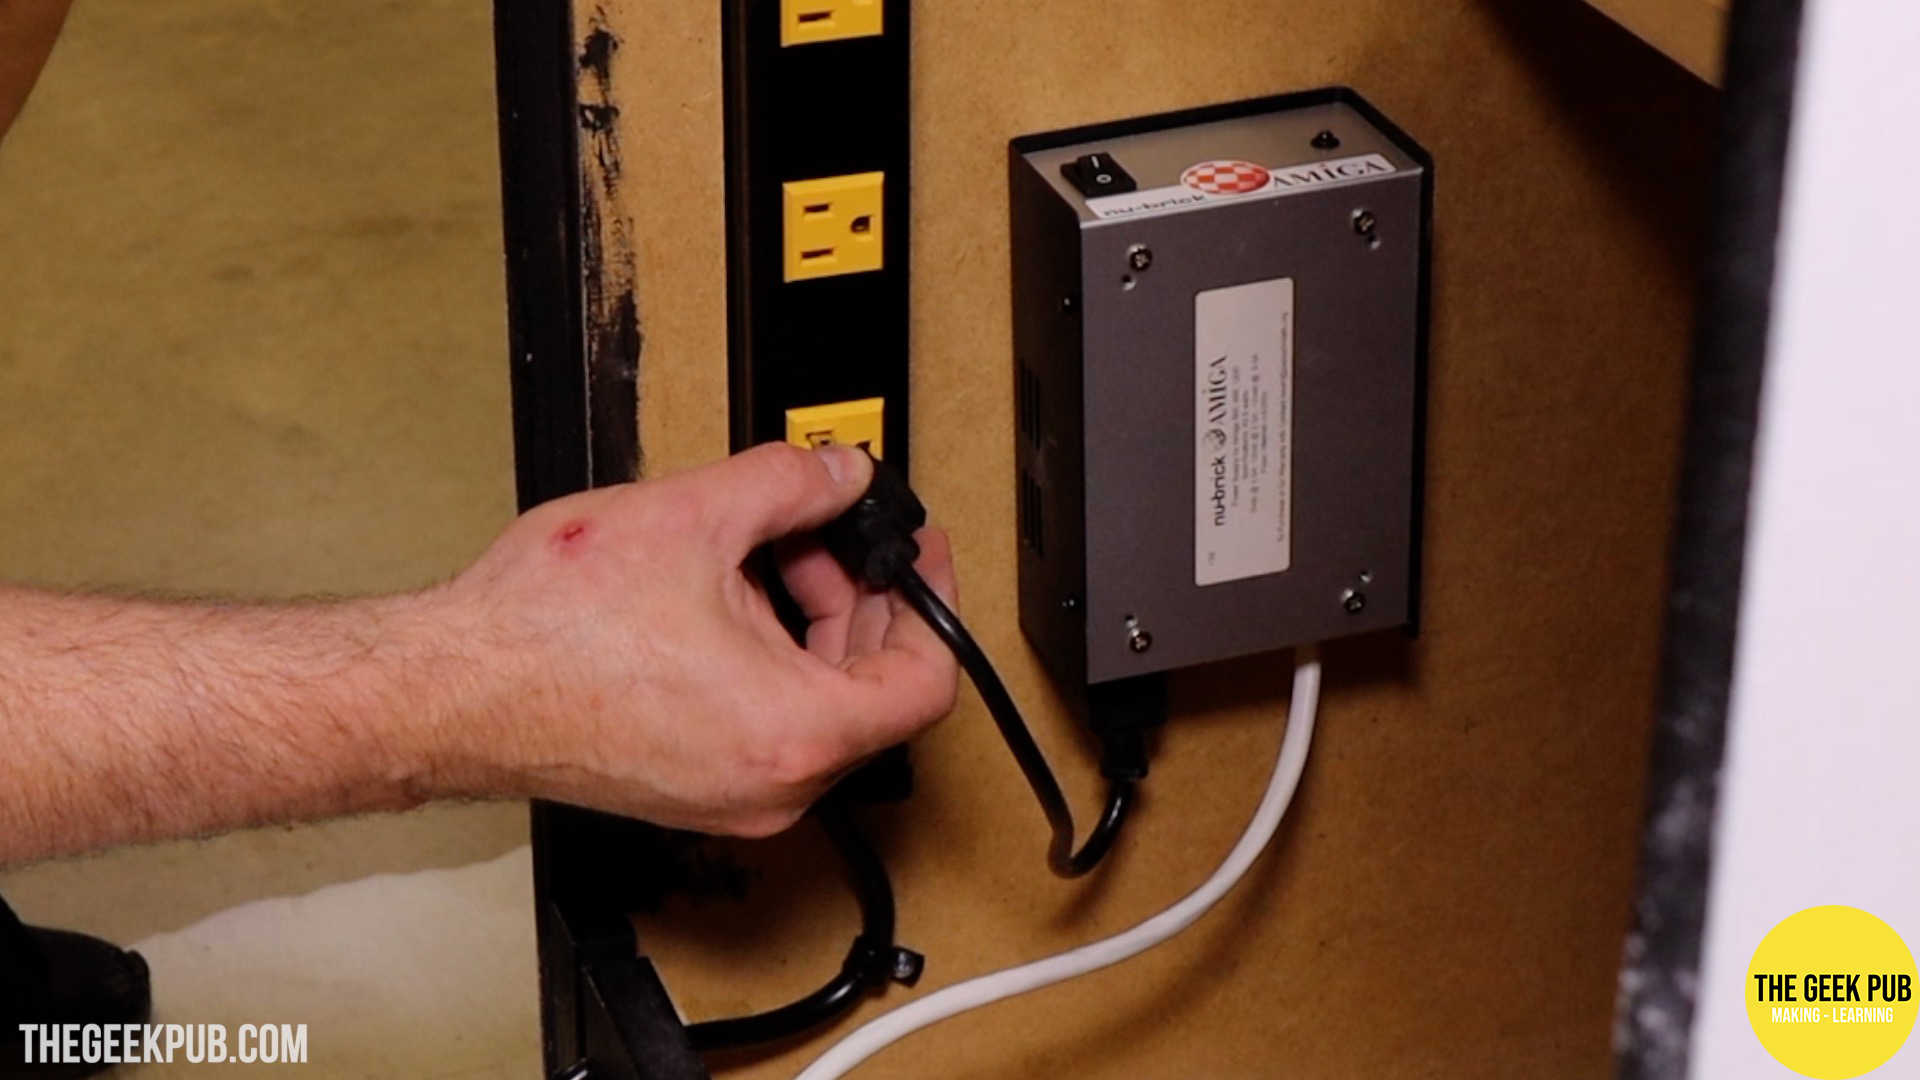
Rather than use the aging (and destined to burn up the Amiga) factory power supply, we opted for a Nu-Brick power supply. I drilled holes into the top of the case and mounted it to the wall of the cabinet. I also opted for these short 1 foot (30 cm) power cables to keep everything nice and tidy inside.
Speakers and Amplifier
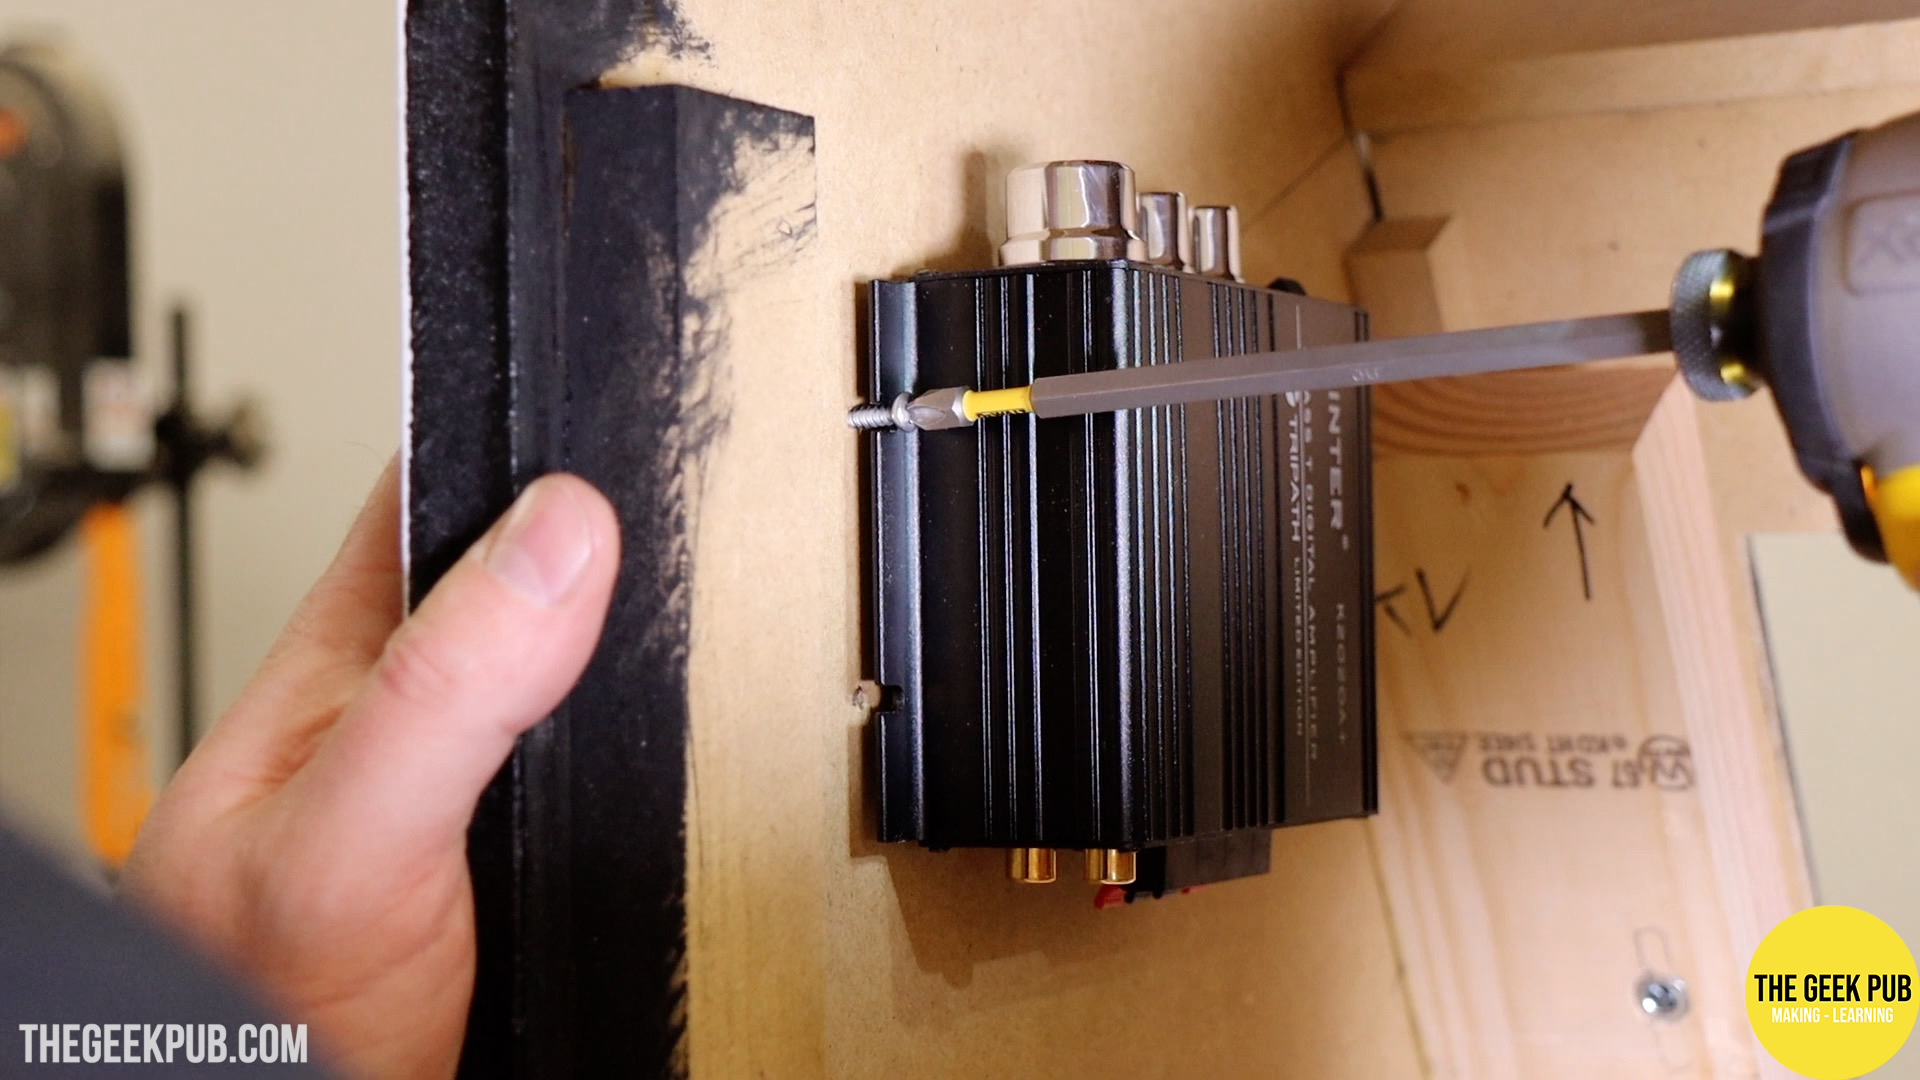
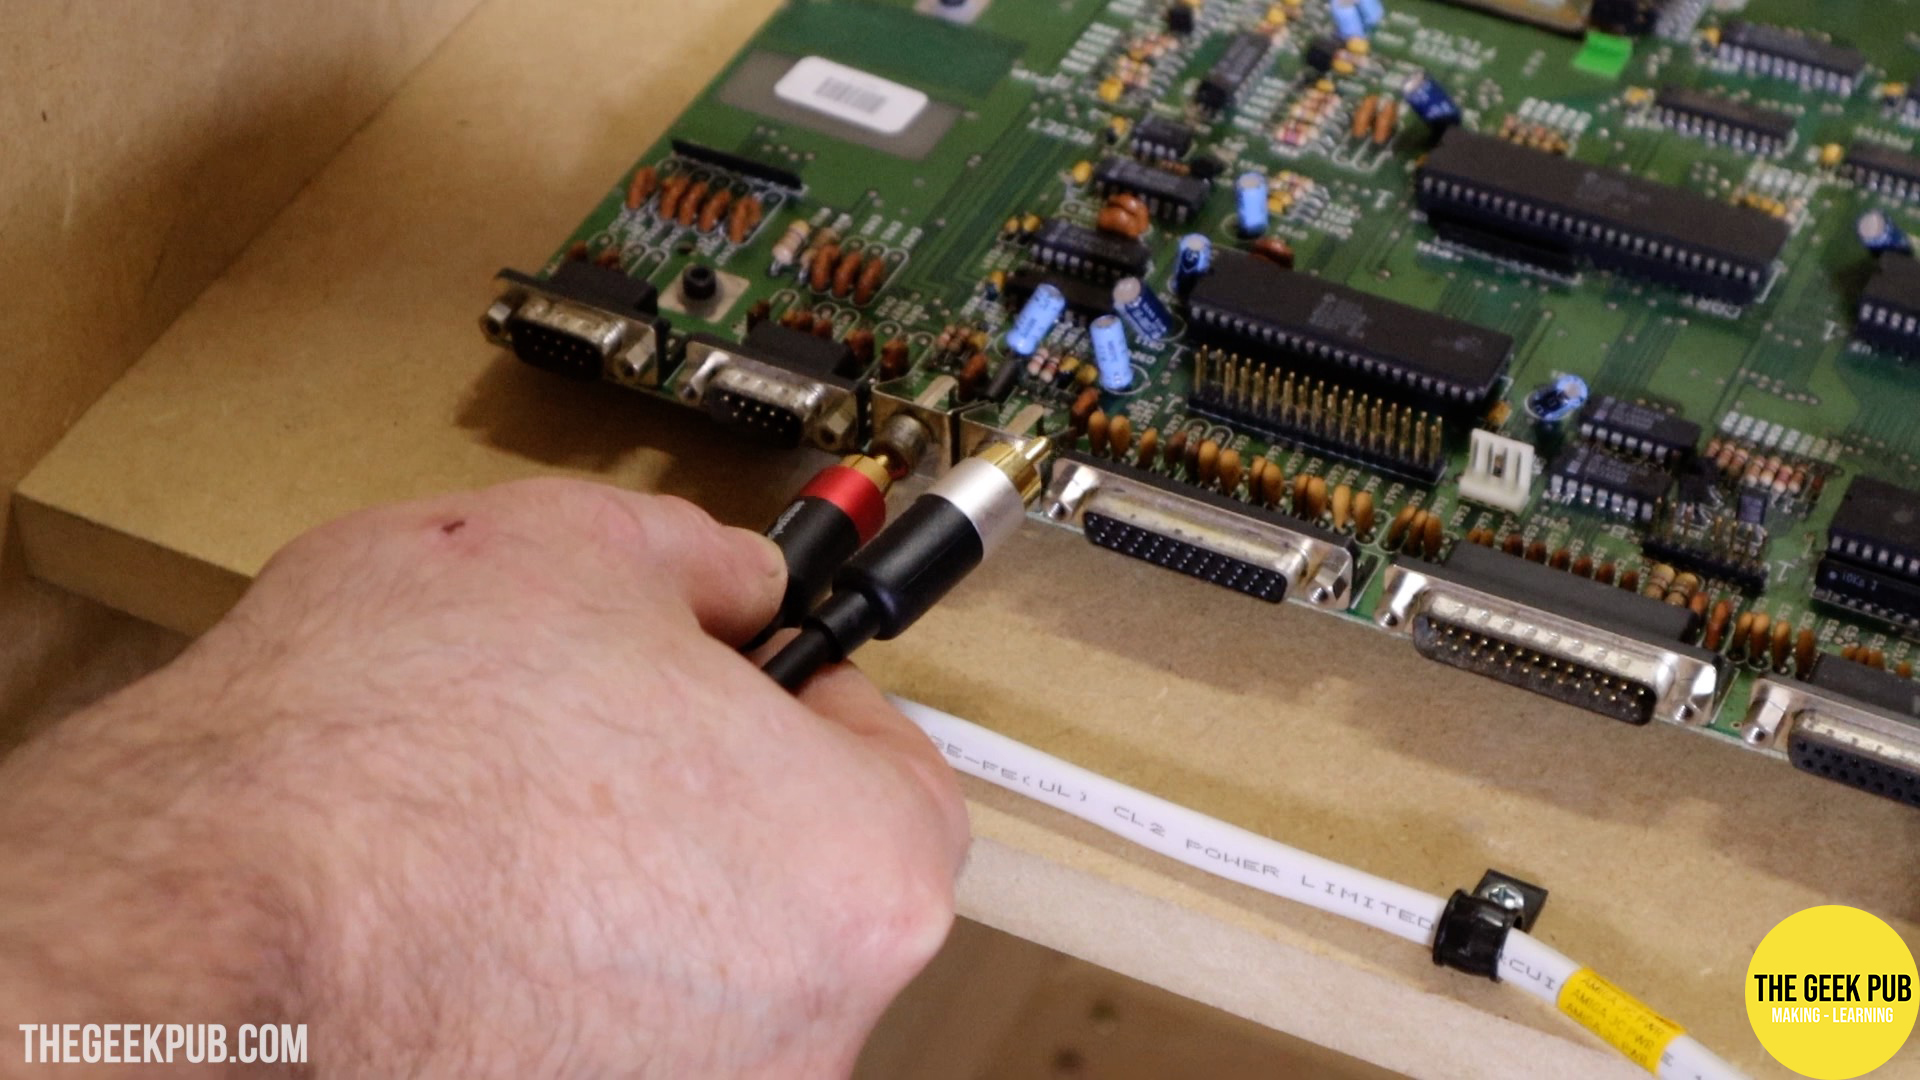
I mounted the amplifier at the top of the cabinet, and then wired it to the Amiga 500 using RCA cables.
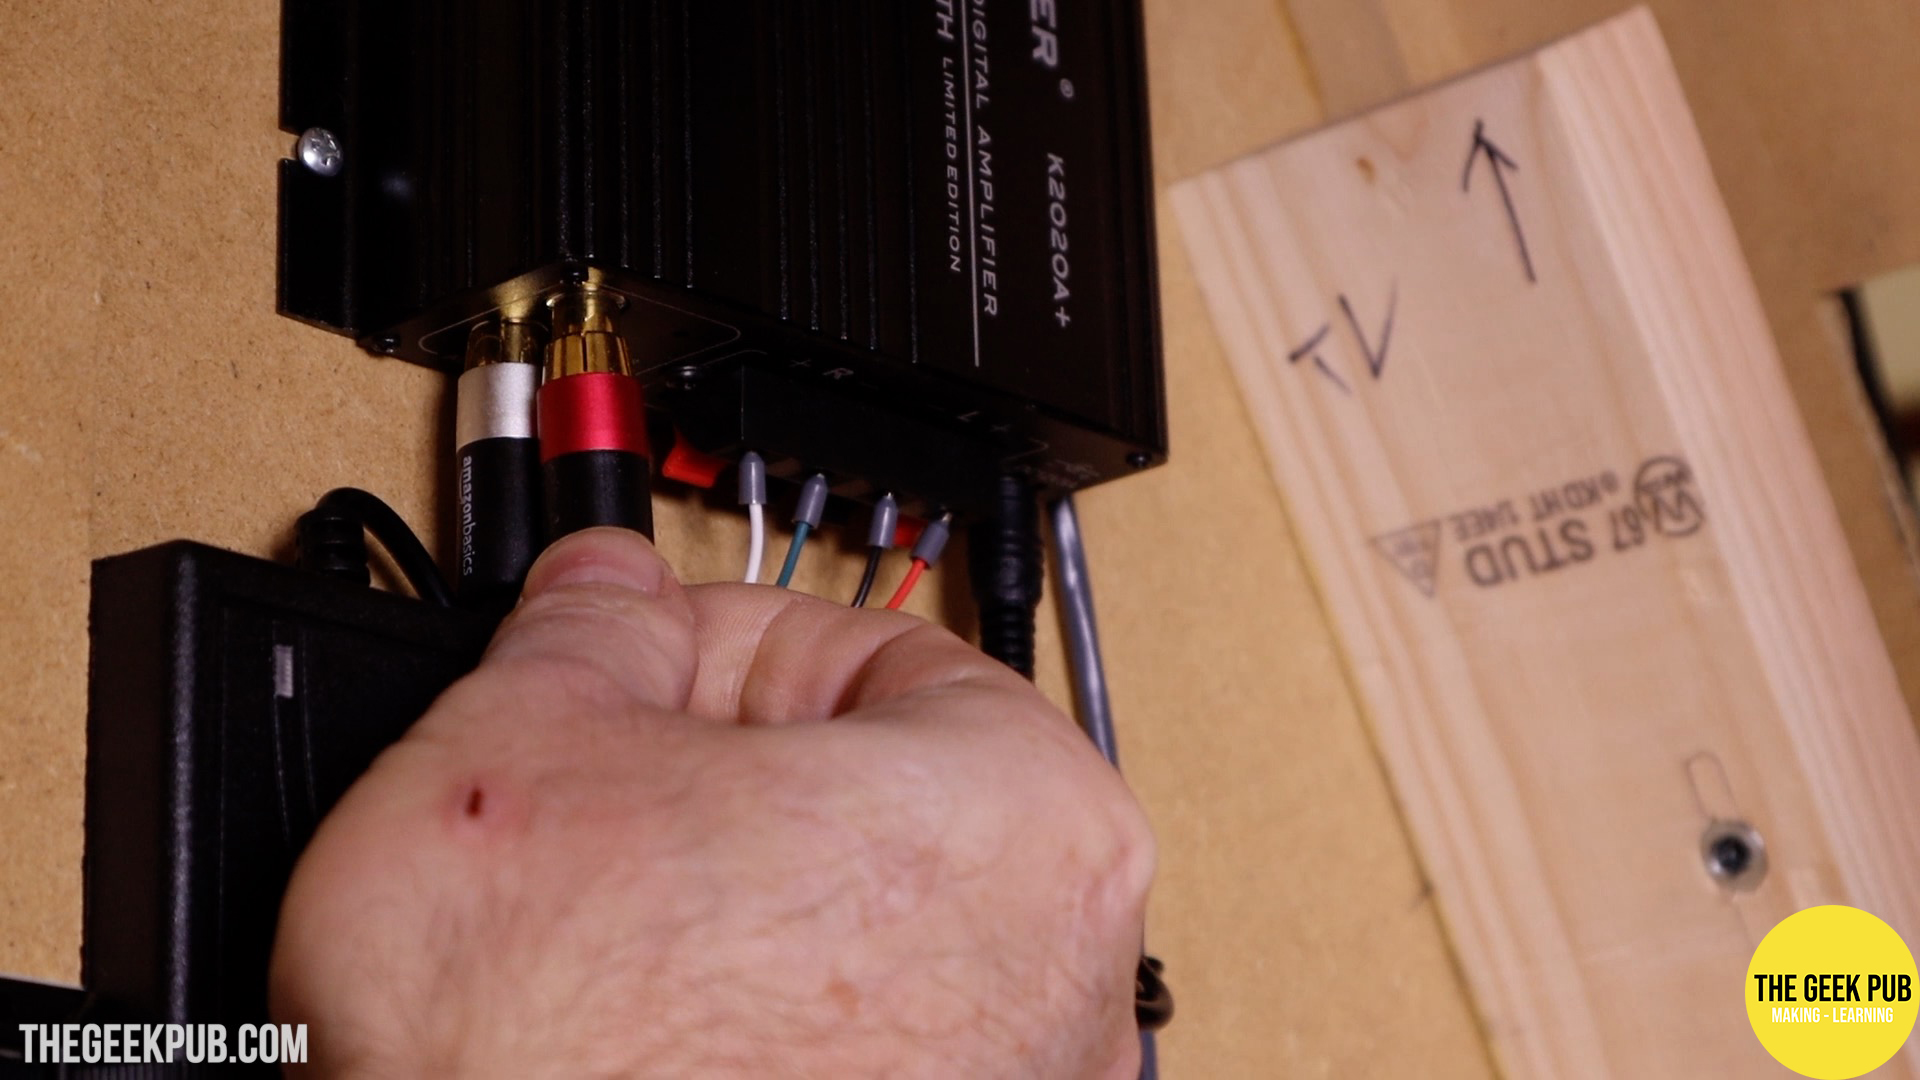
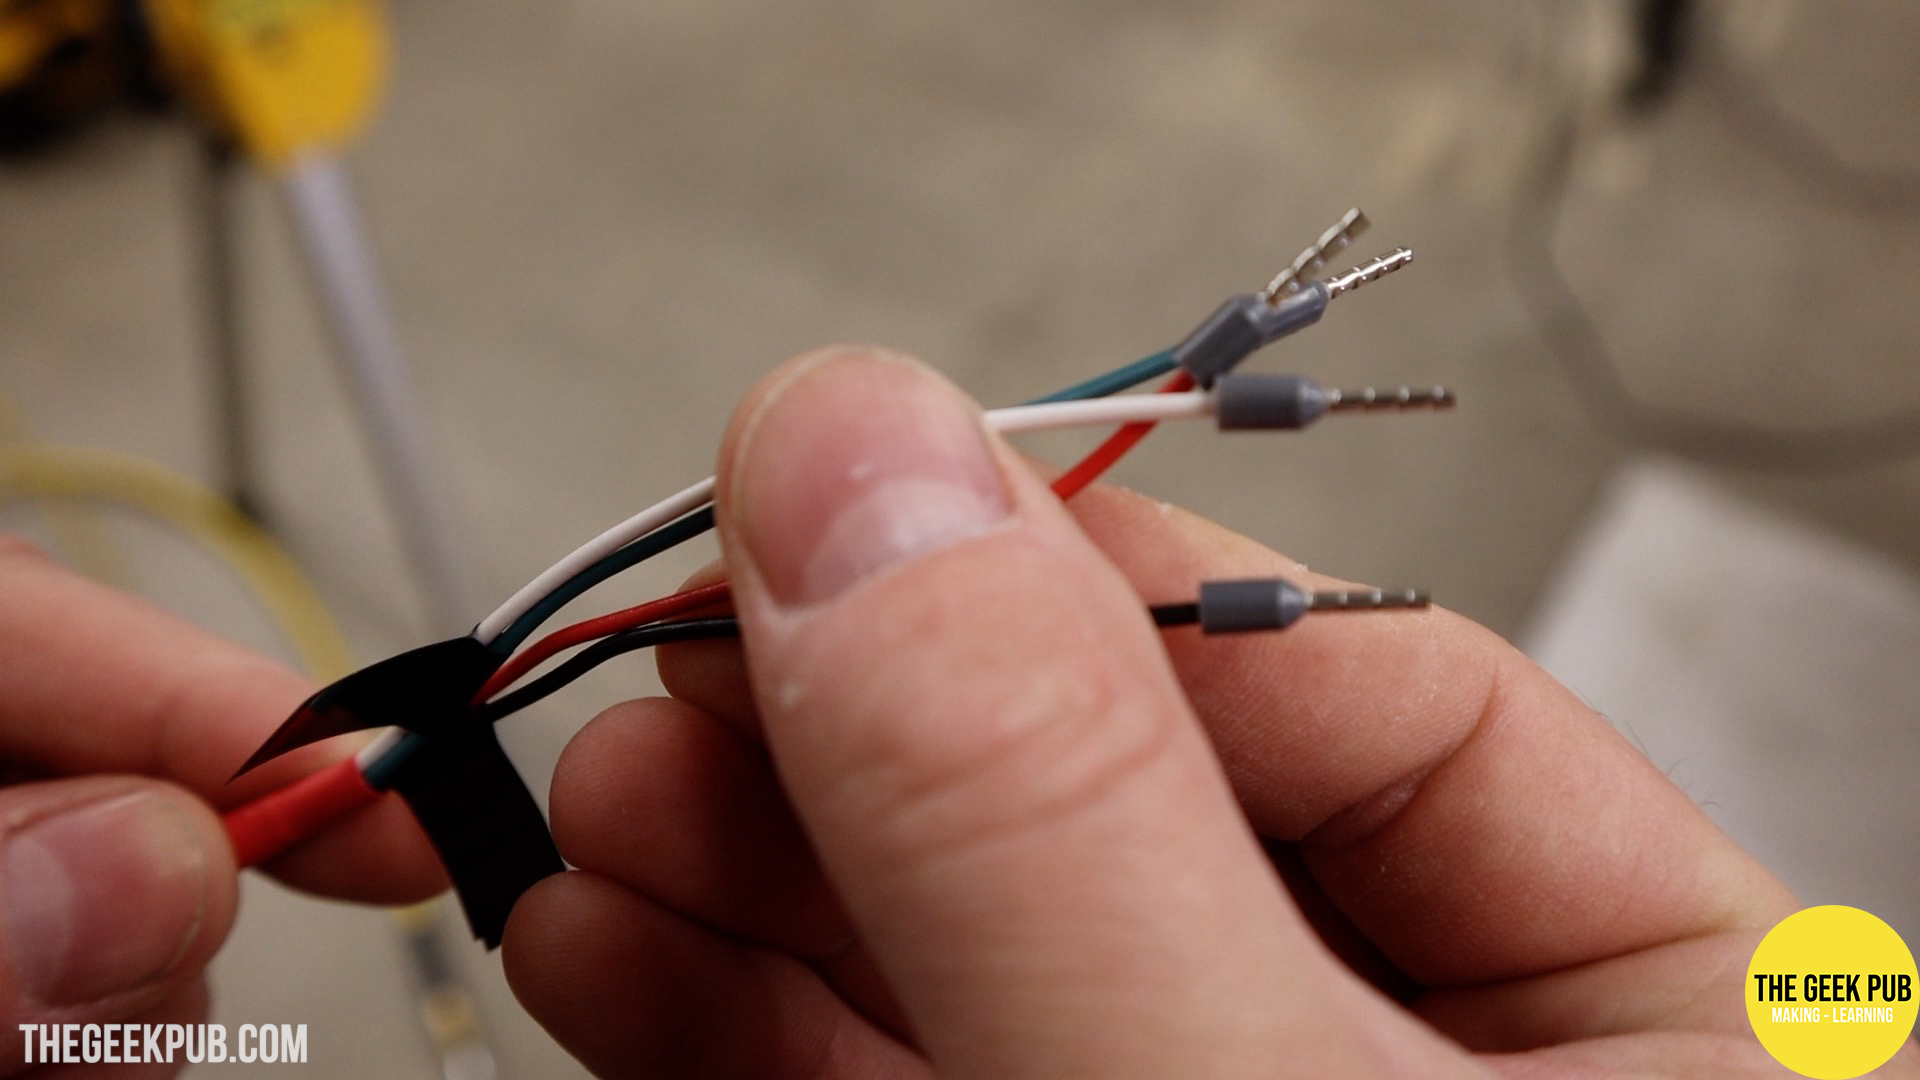
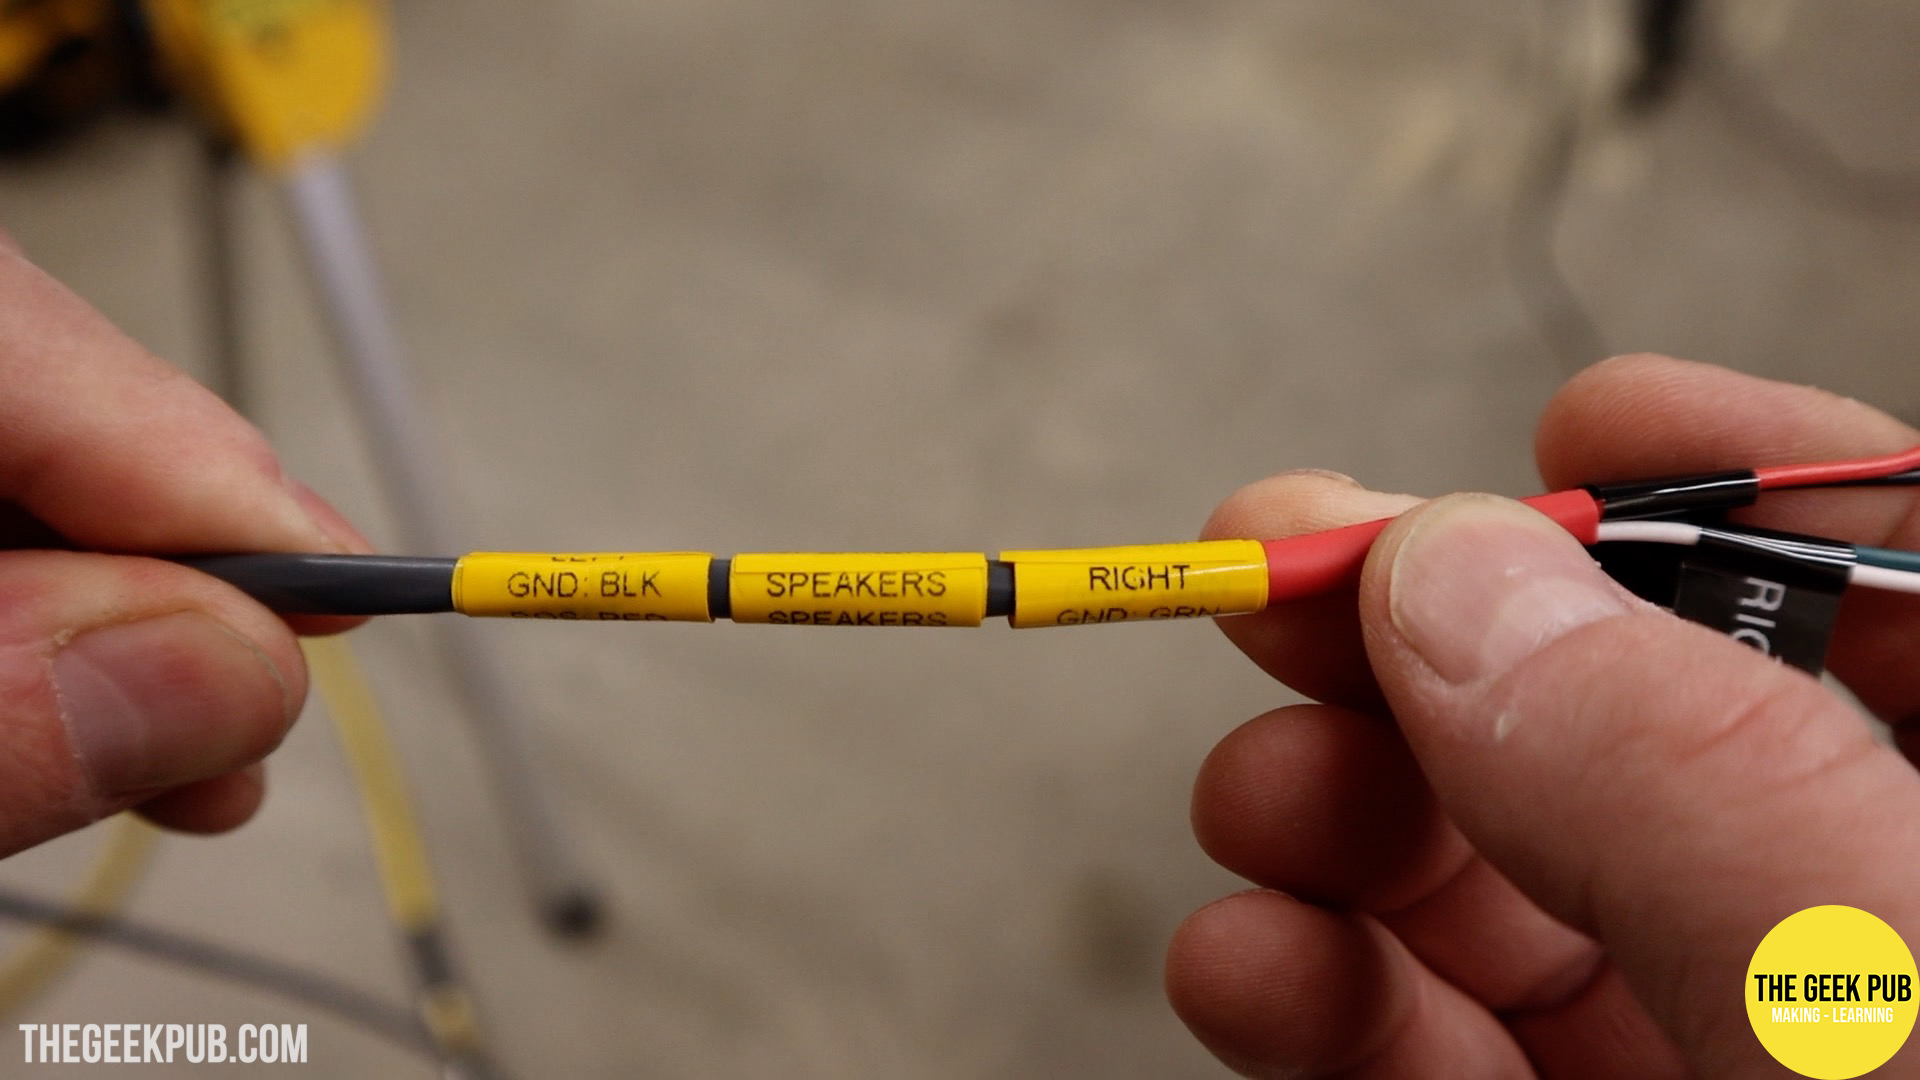
I always like to make custom wiring harnesses anytime I do a build. I used ferrell connectors on the amplifier side, and spade connectors on the speaker side. I always label everything to make troubleshooting easier. I won’t remember what wire goes where a year from now.
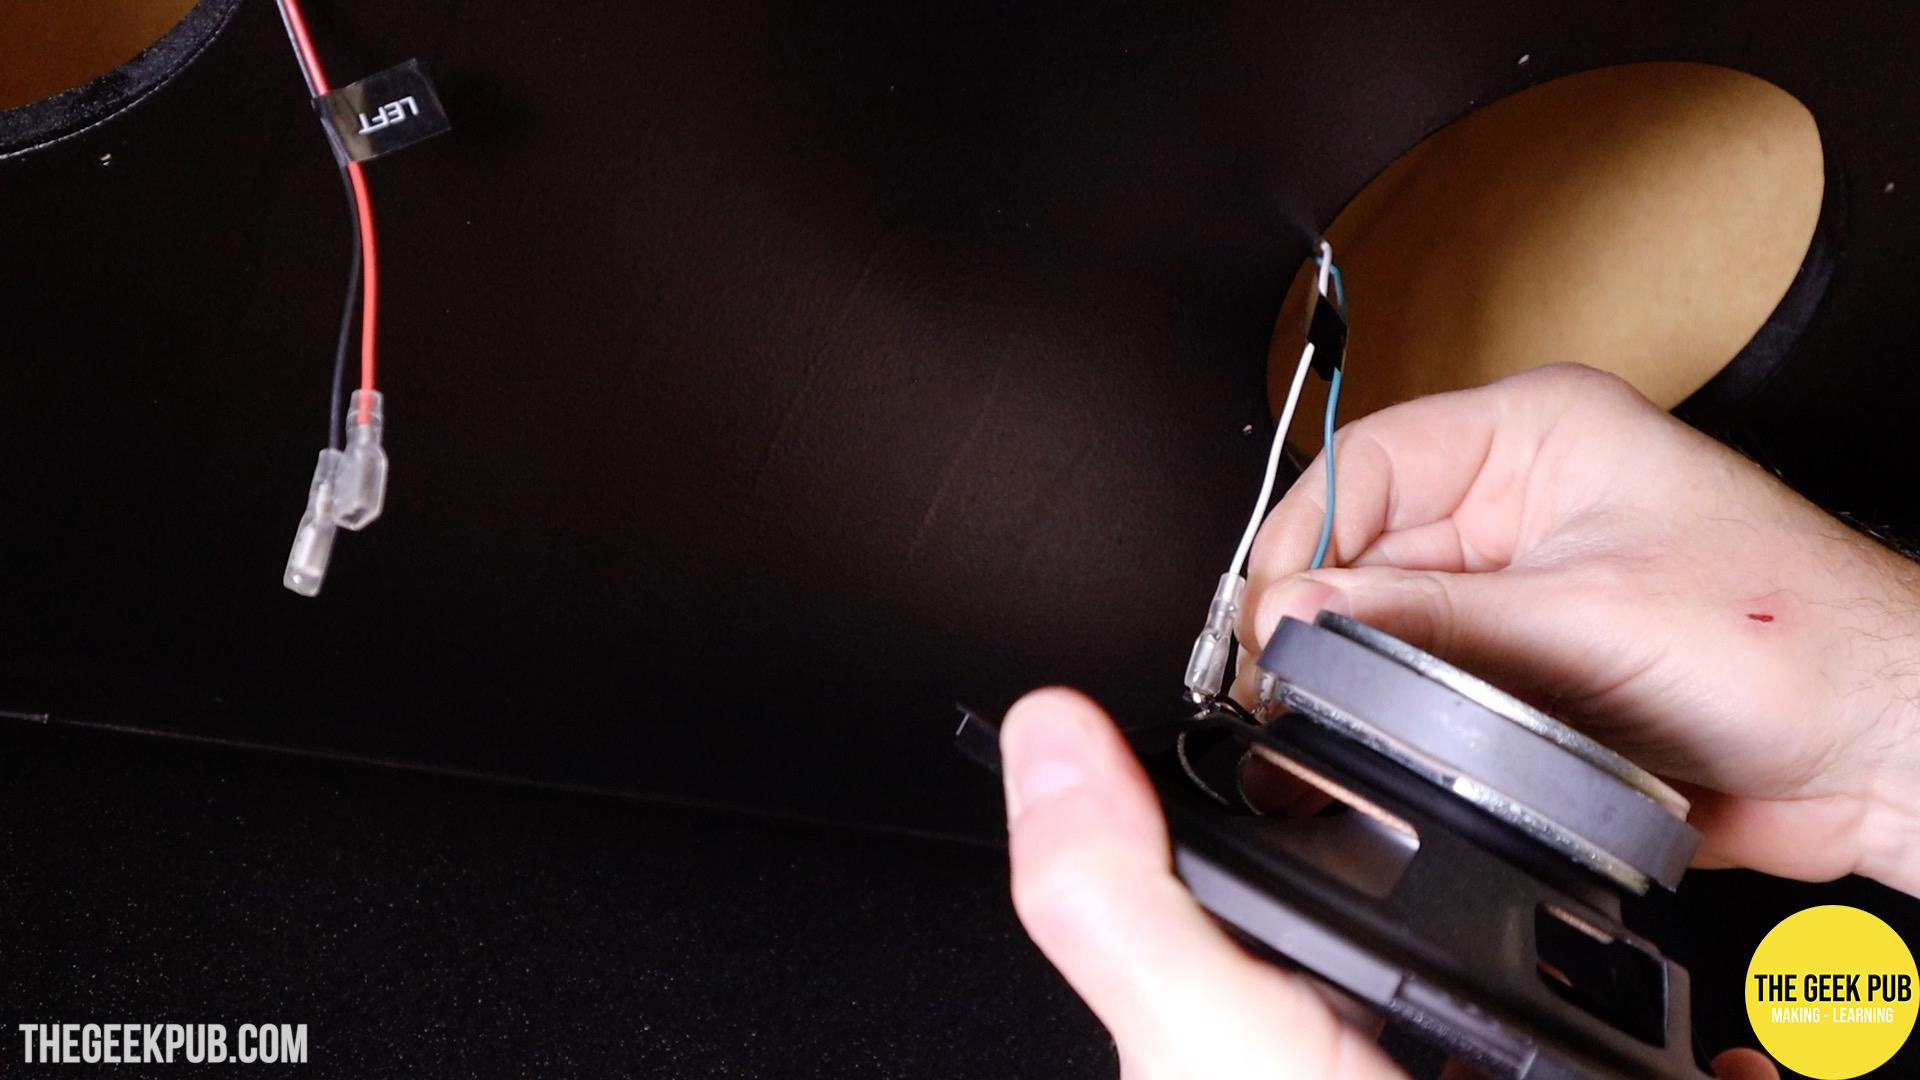
I then mounted the speakers into the top panel of the cabinet where we drilled the holes.
Making the Lighted Marquee
One thing our PETSCII Robots arcade cabinet needs is a bad ass marquee. And backlit! So I went to work on the table saw making it!
I used a special blade specifically designed to cut plastics and acrylics. This blade has a flat top and makes super smooth cuts in this material. It also won’t burn it which is a big plus for materials that like to melt! One note is I do have to disable the SawStop protection electronics when cutting acrylic as the static electricity could possible set it off. The chances are low, but its a simple key turn to save yourself a possible headache.

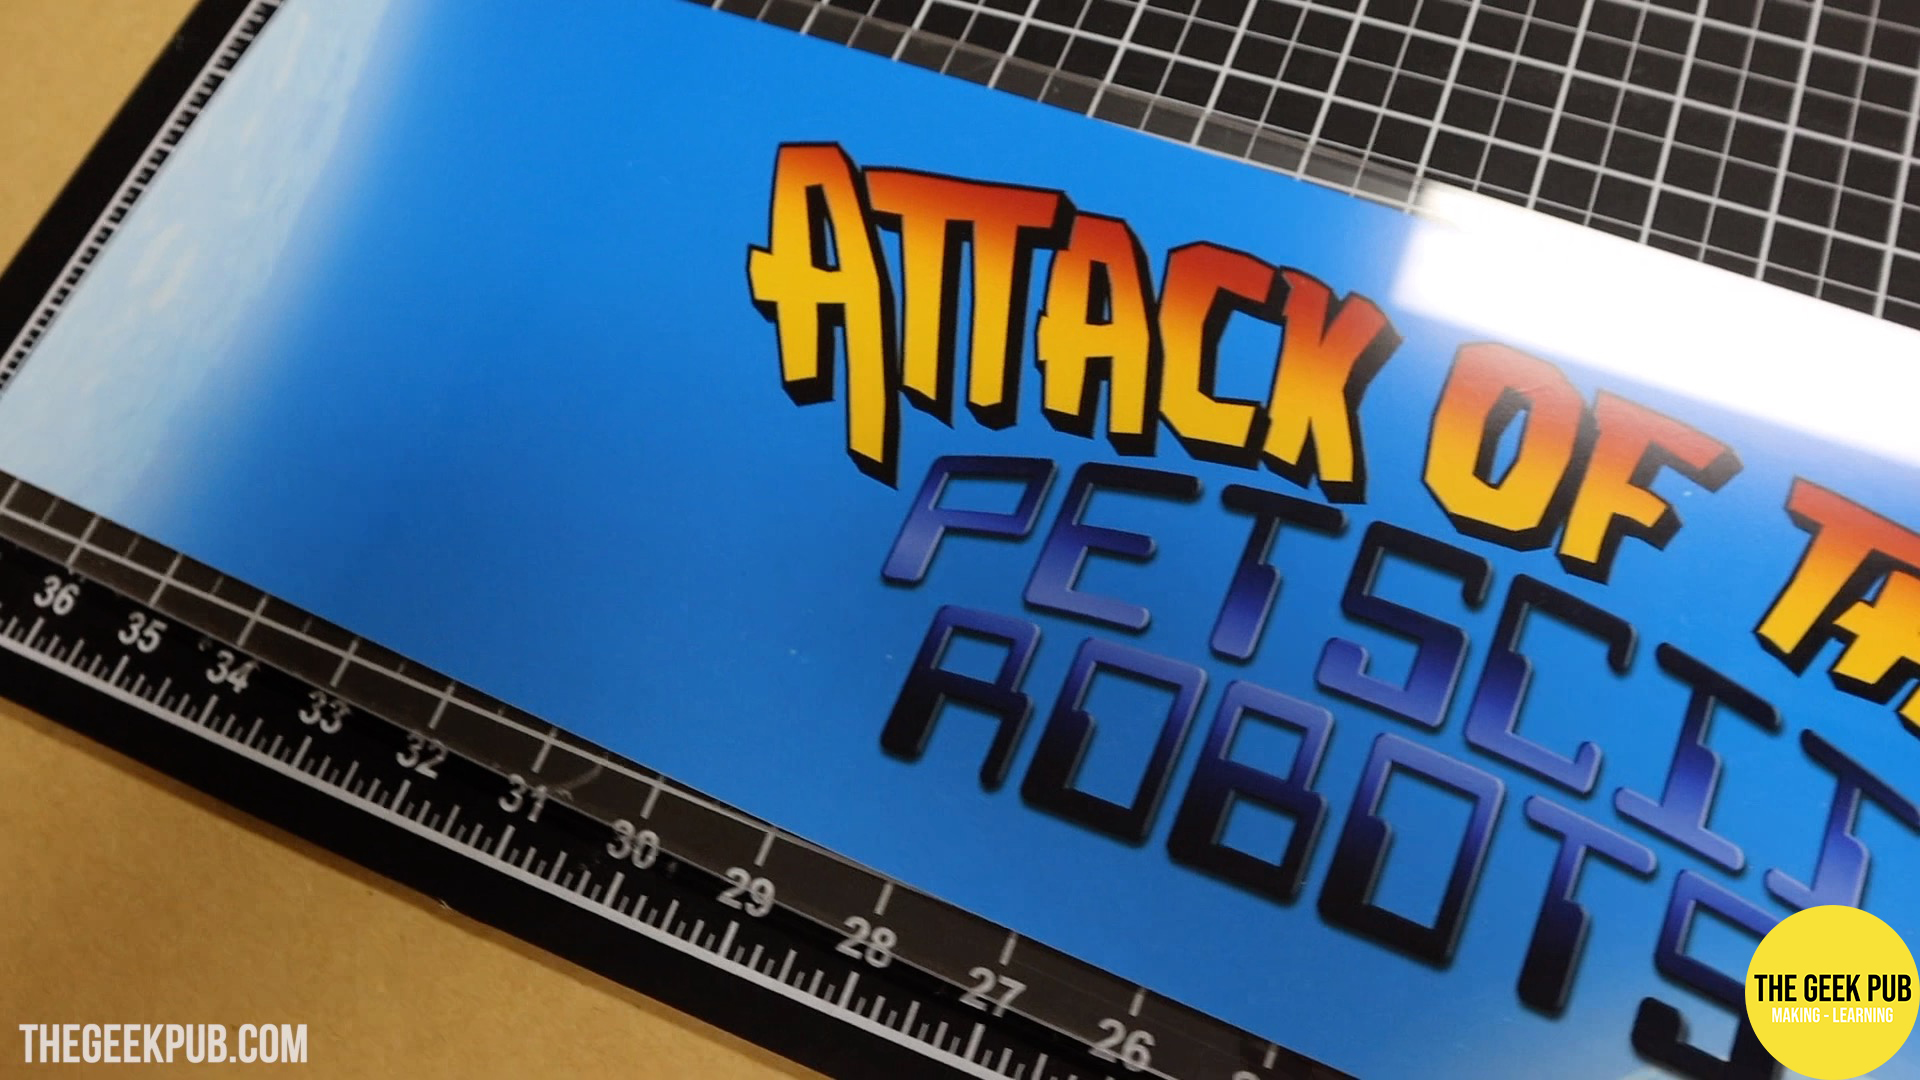
Next up I printed out the marquee on the HP Latex 115 and and applied it to the back sheet of acrylic. There are two sheets at play here. A backer and an overlay.
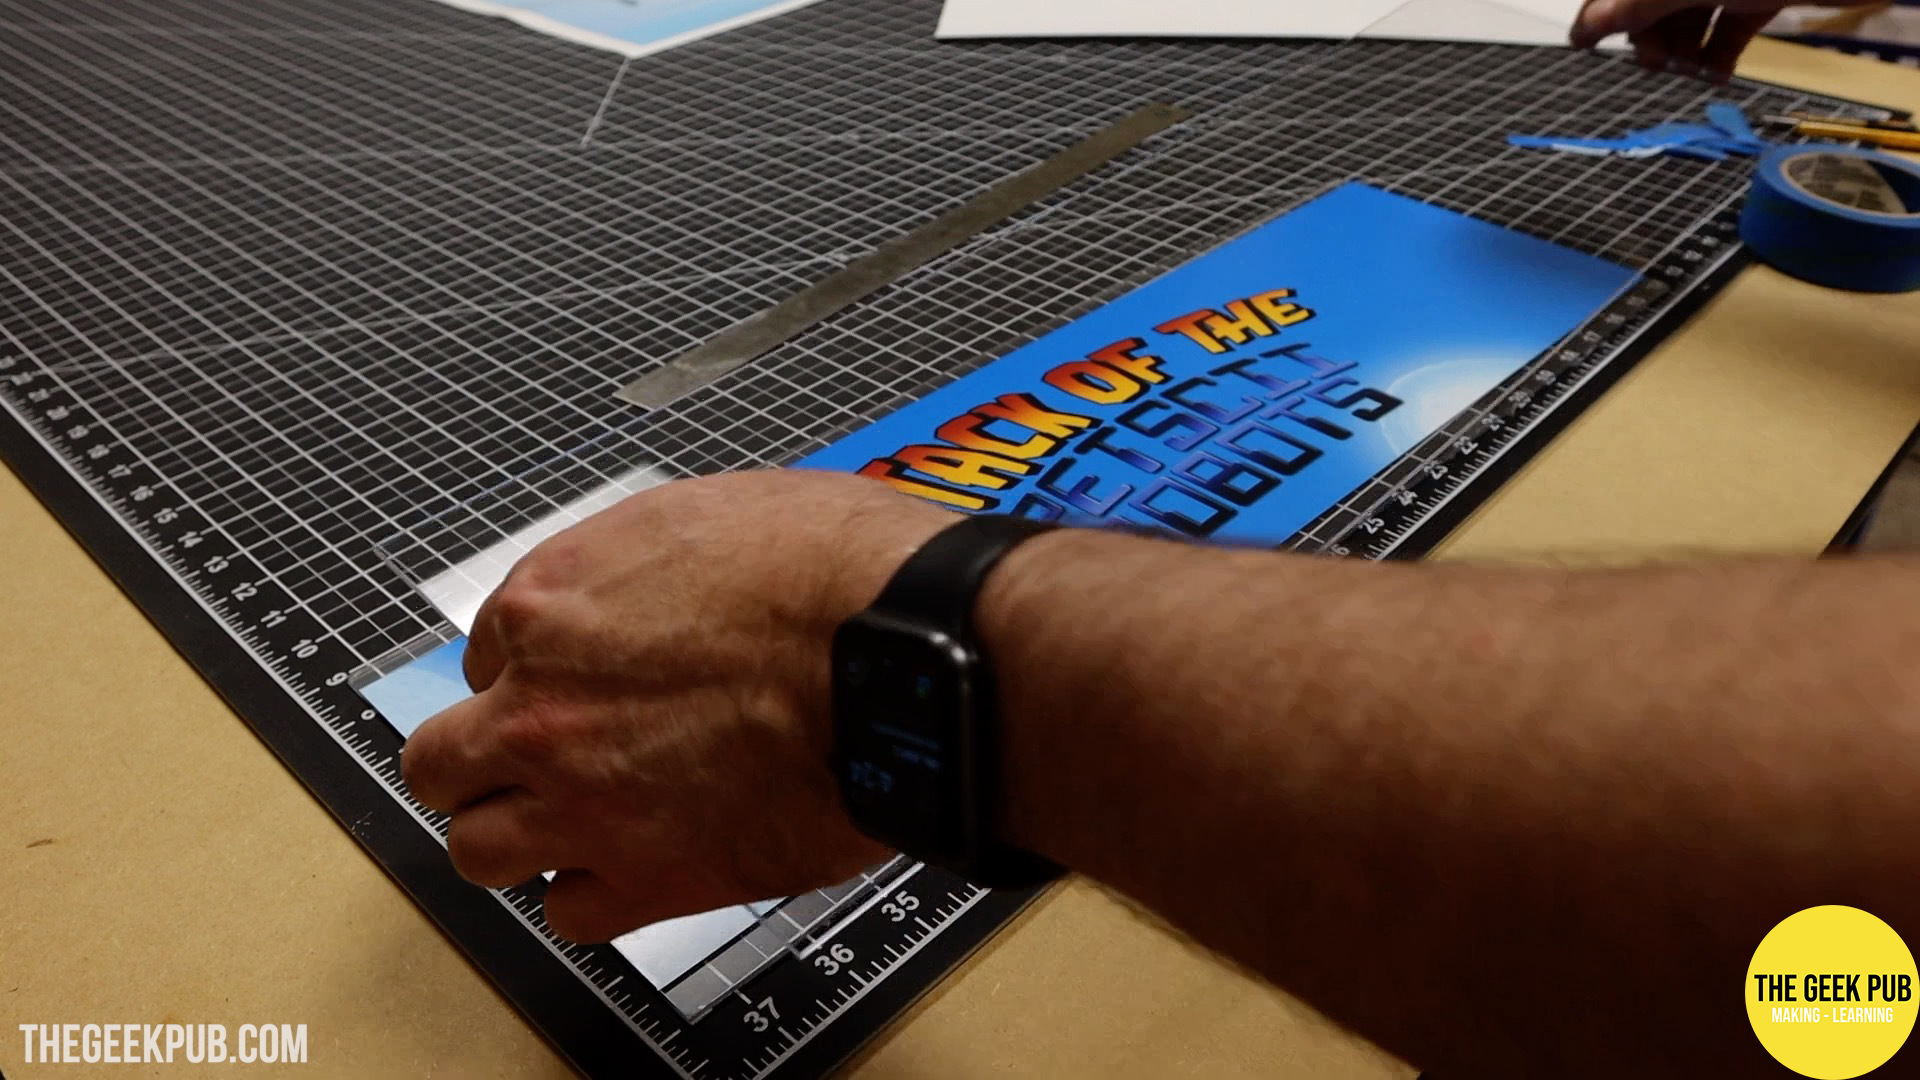
And dude. It looks amazing!
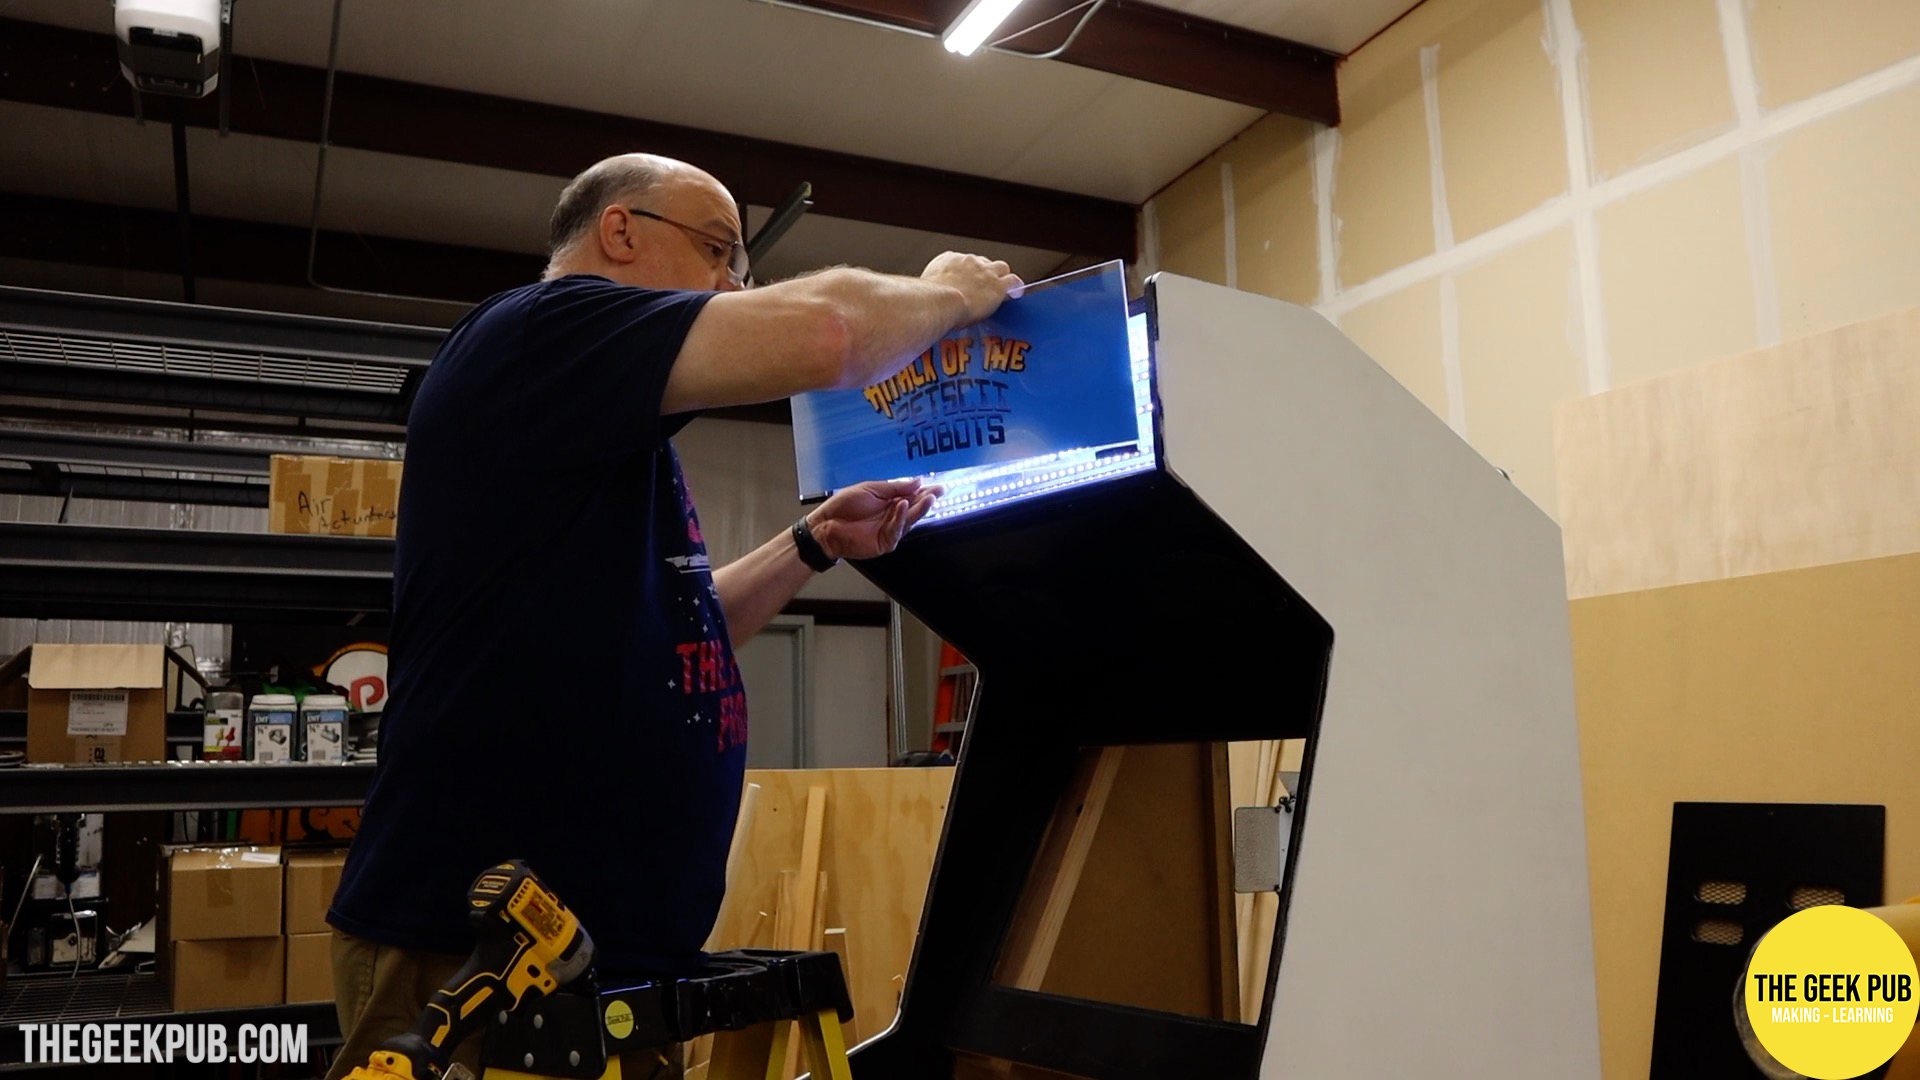
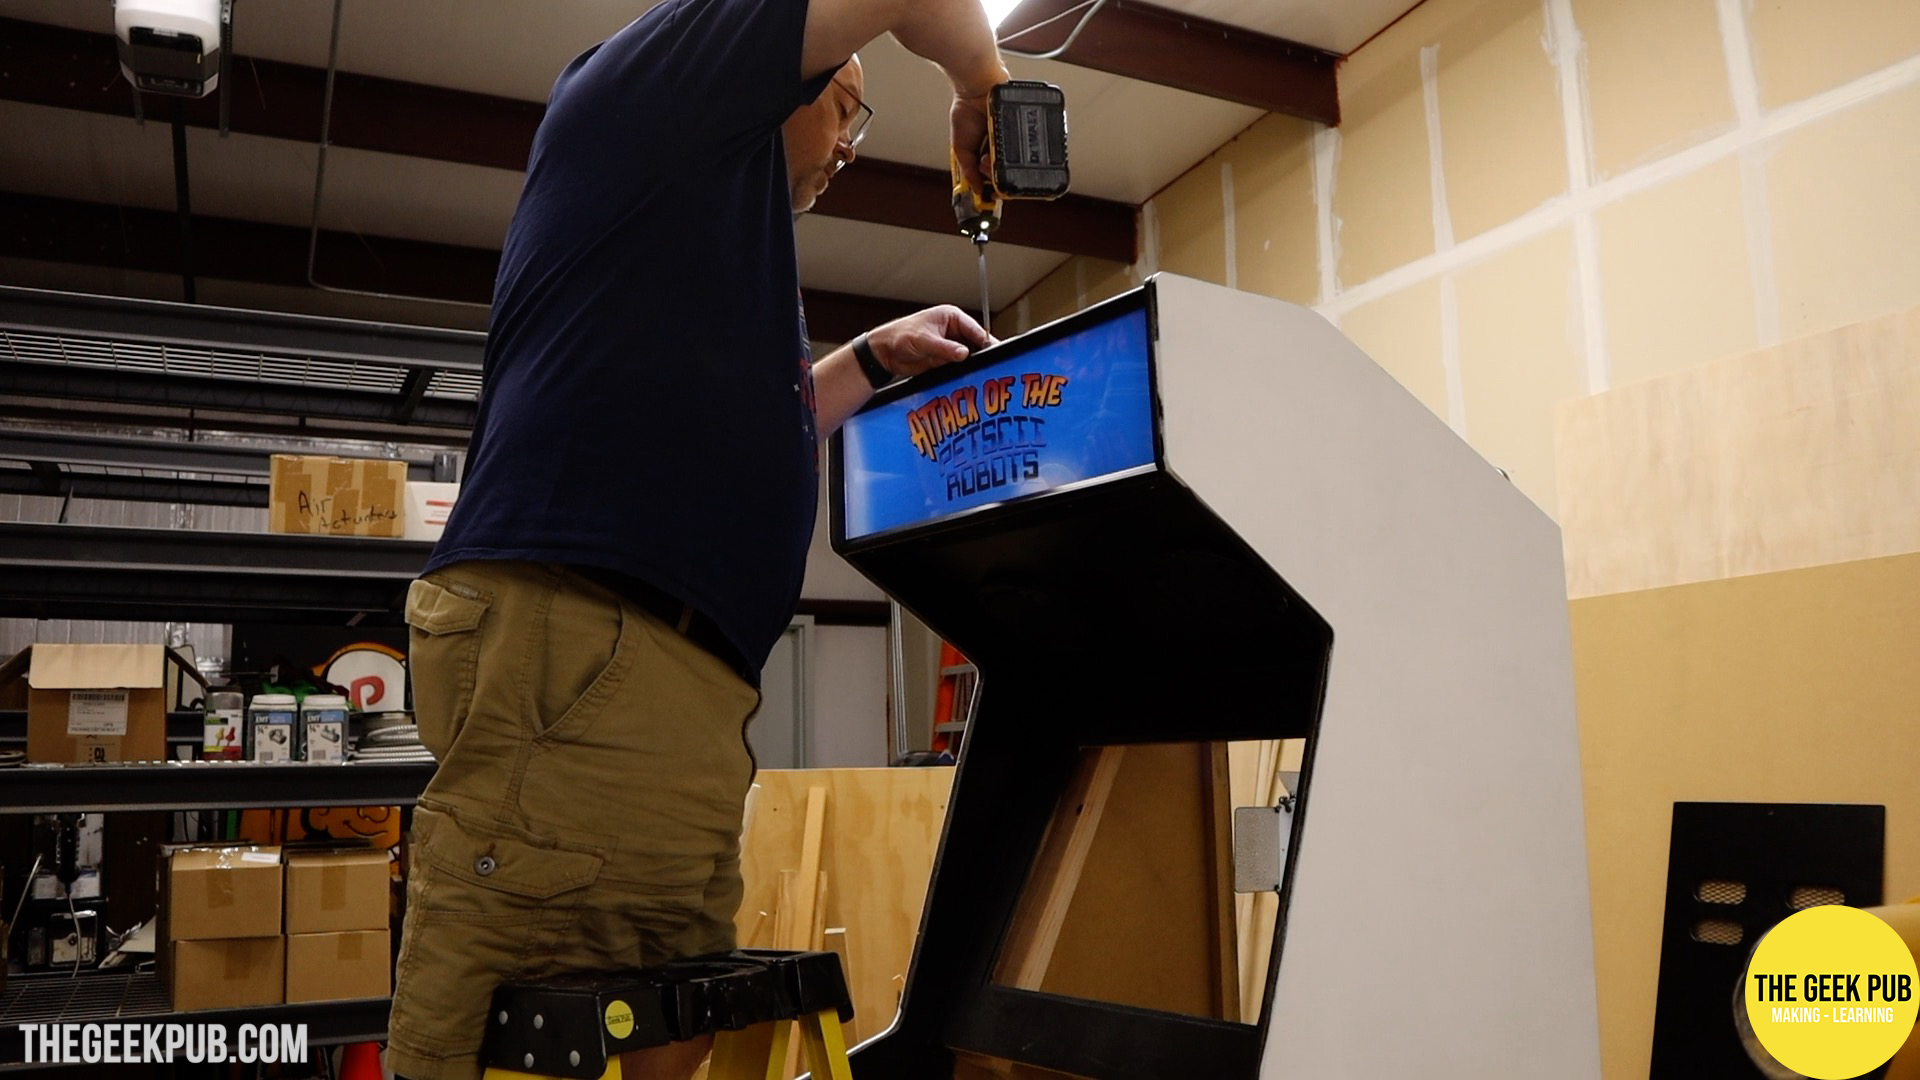
The two sheets of acrylic with the marquee sandwiched between mount into the marquee slots at the top of the cabinet using some plastic marquee trim molding. It just screws in from the top and bottom.
Wrapping up the Control Panel
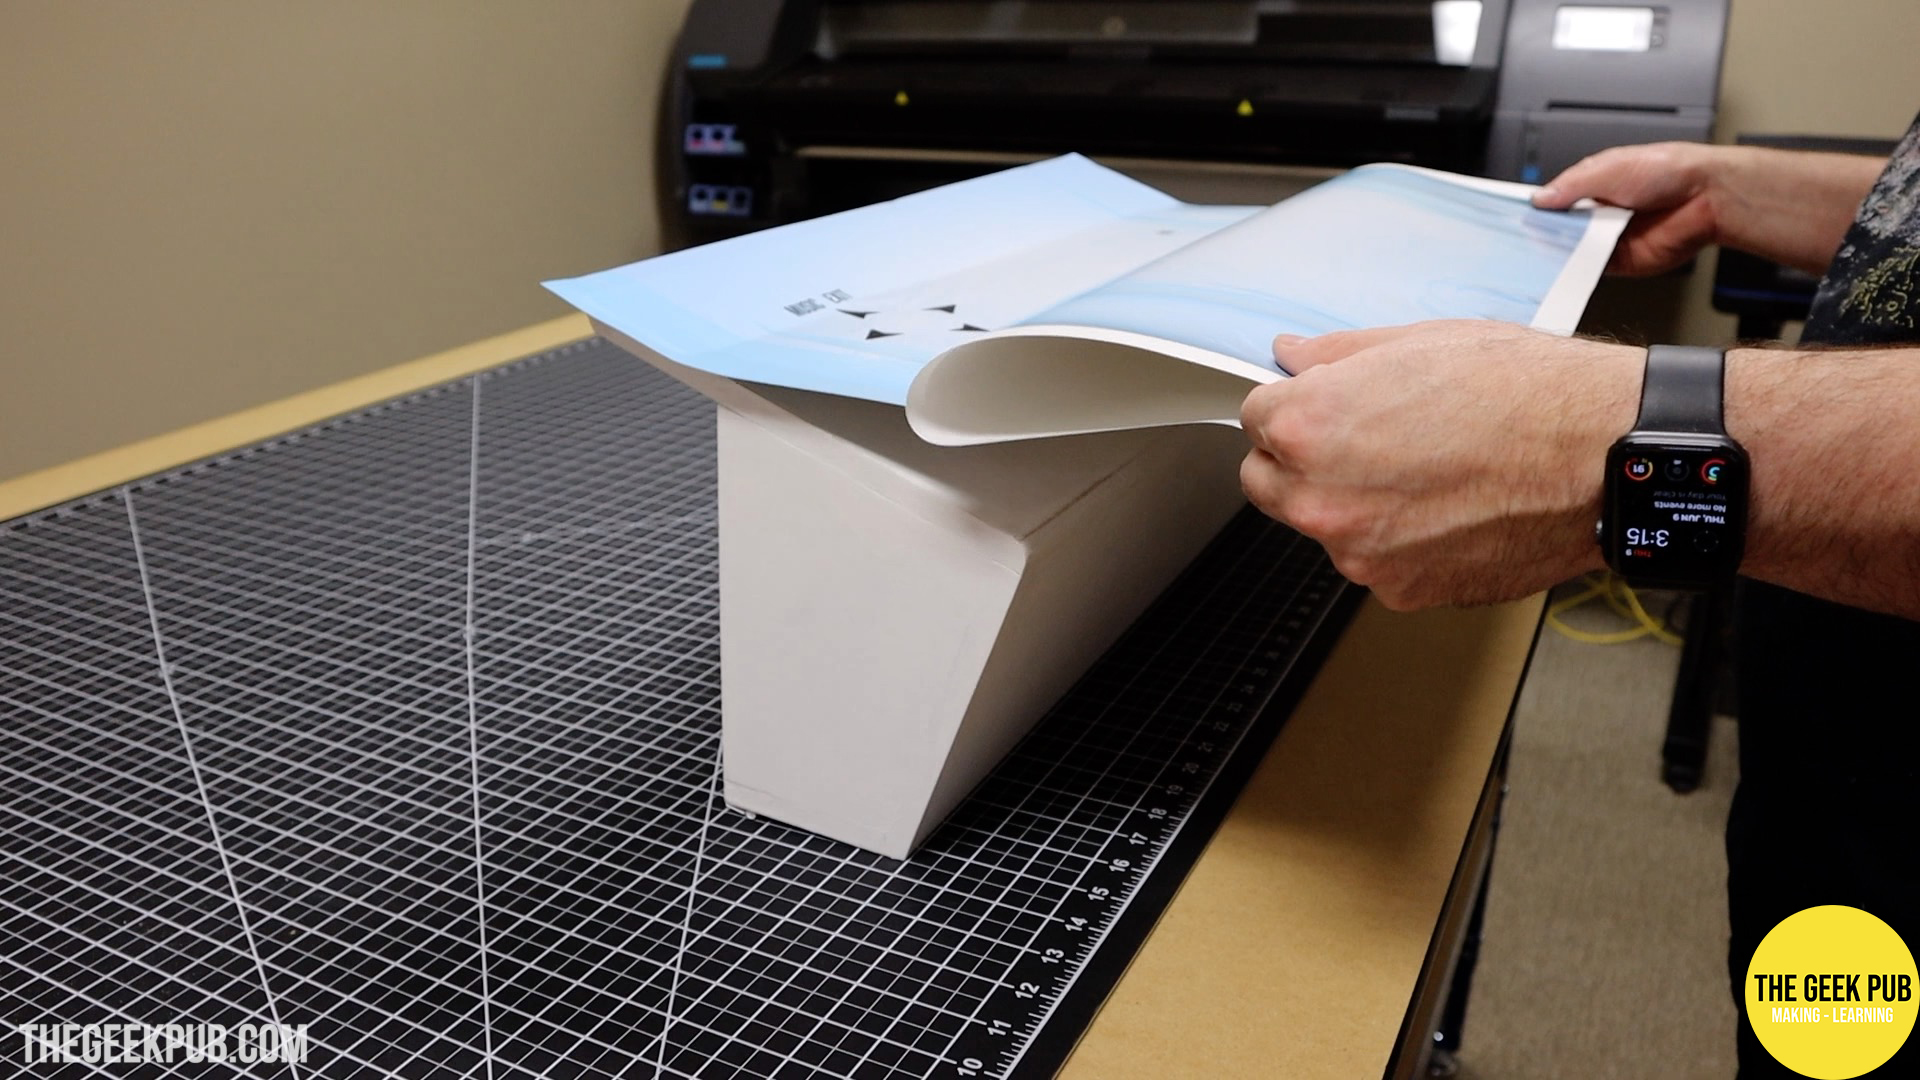
Now it is time to wrap up the control panel! Pun definitely intended! Many refer to this wrap as the “control panel overlay” or “CPO”.
Installing adhesive backed vinyl really isn’t that hard. Especially when you use air-egress vinyl that makes removing the bubbles super easy. We won’t print on anything else.
I wrapped the vinyl over the sides of the control panel. This makes for a super clean look. The folder over portions are hidden when the control panel is locked in place.
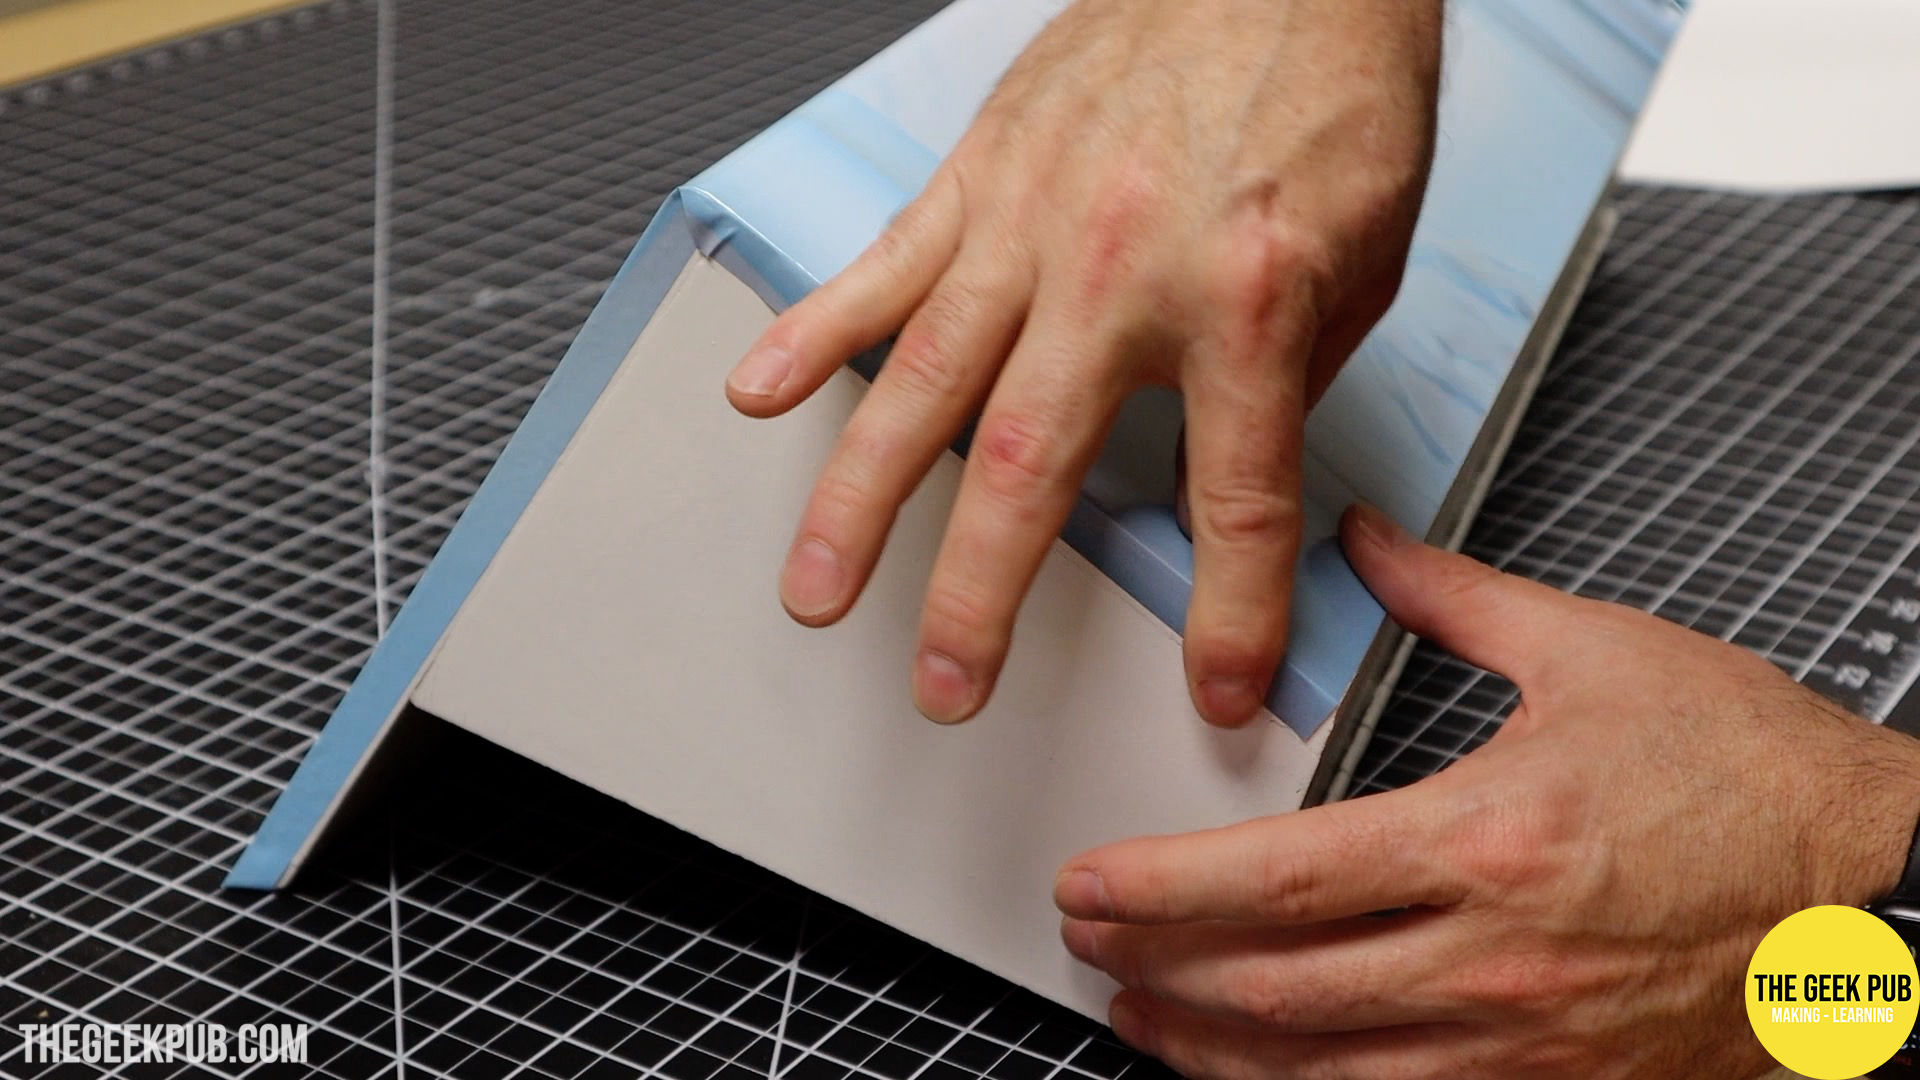
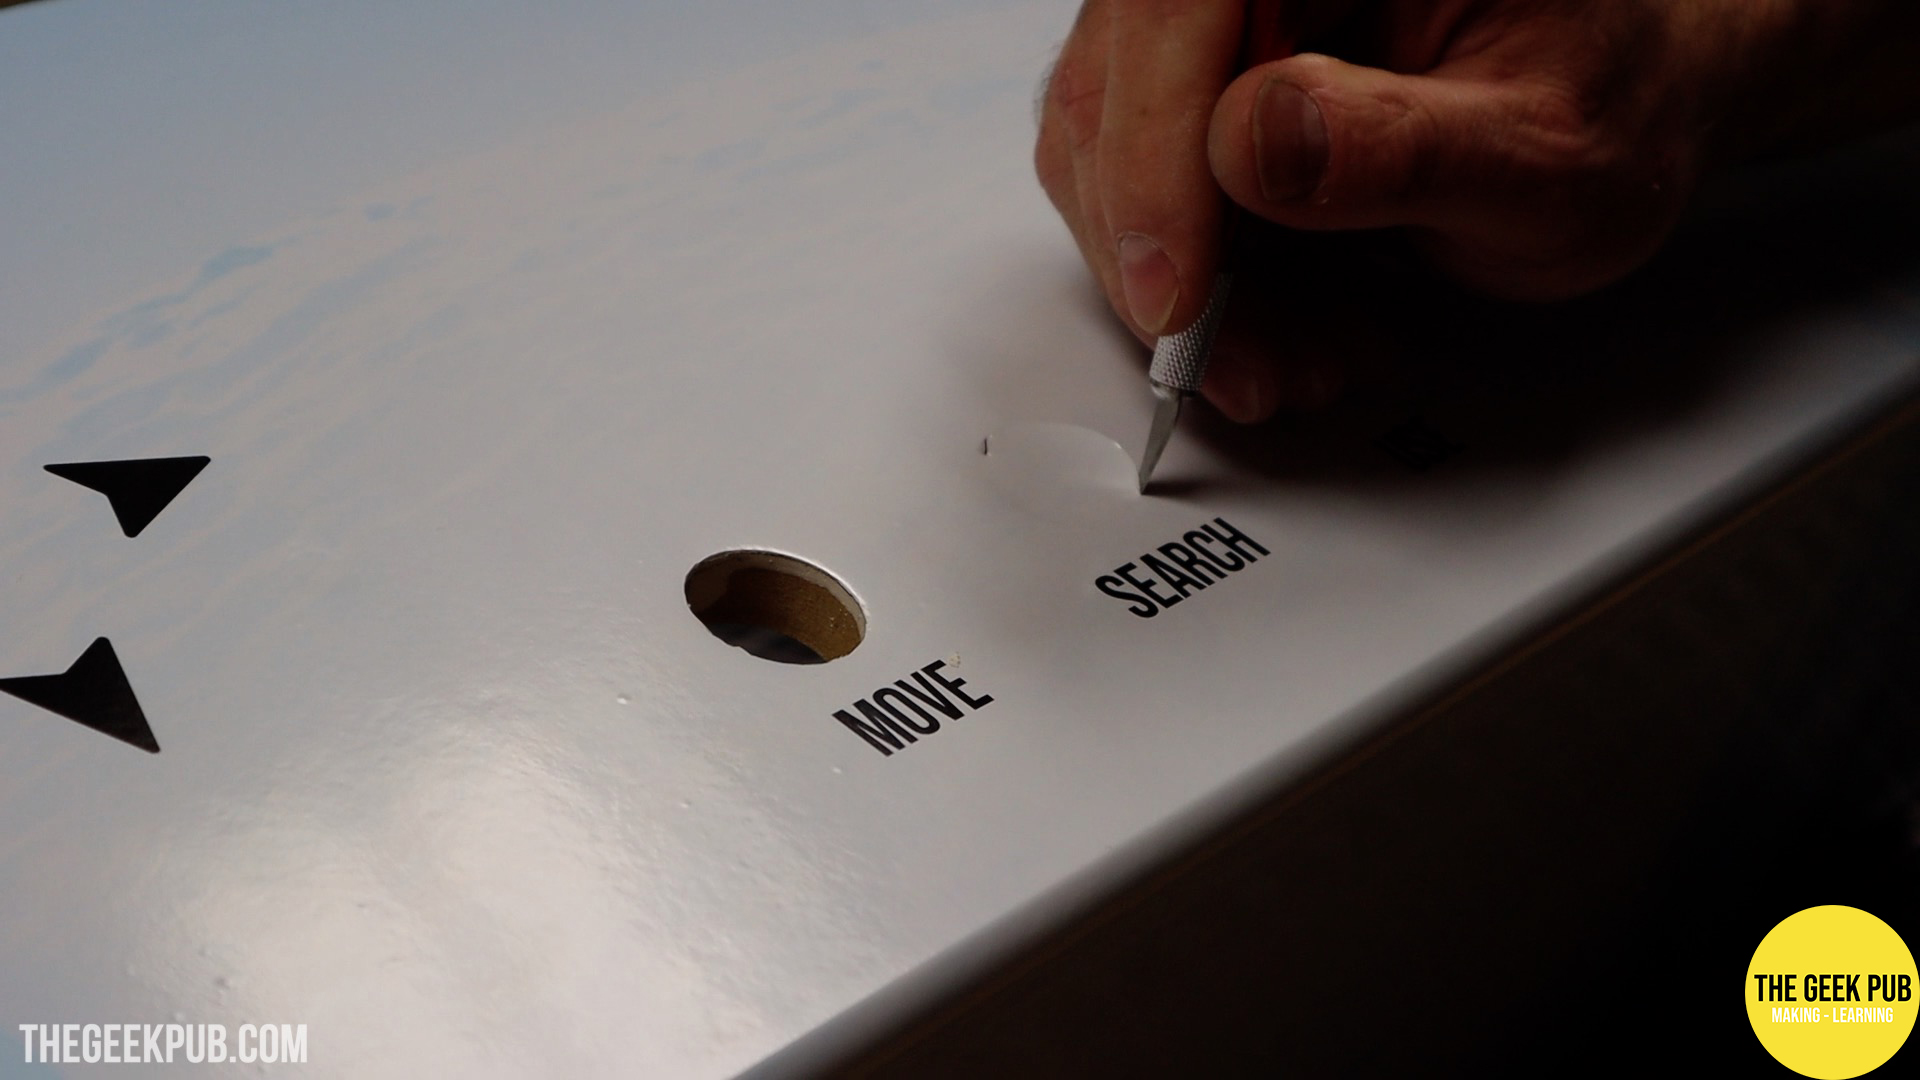
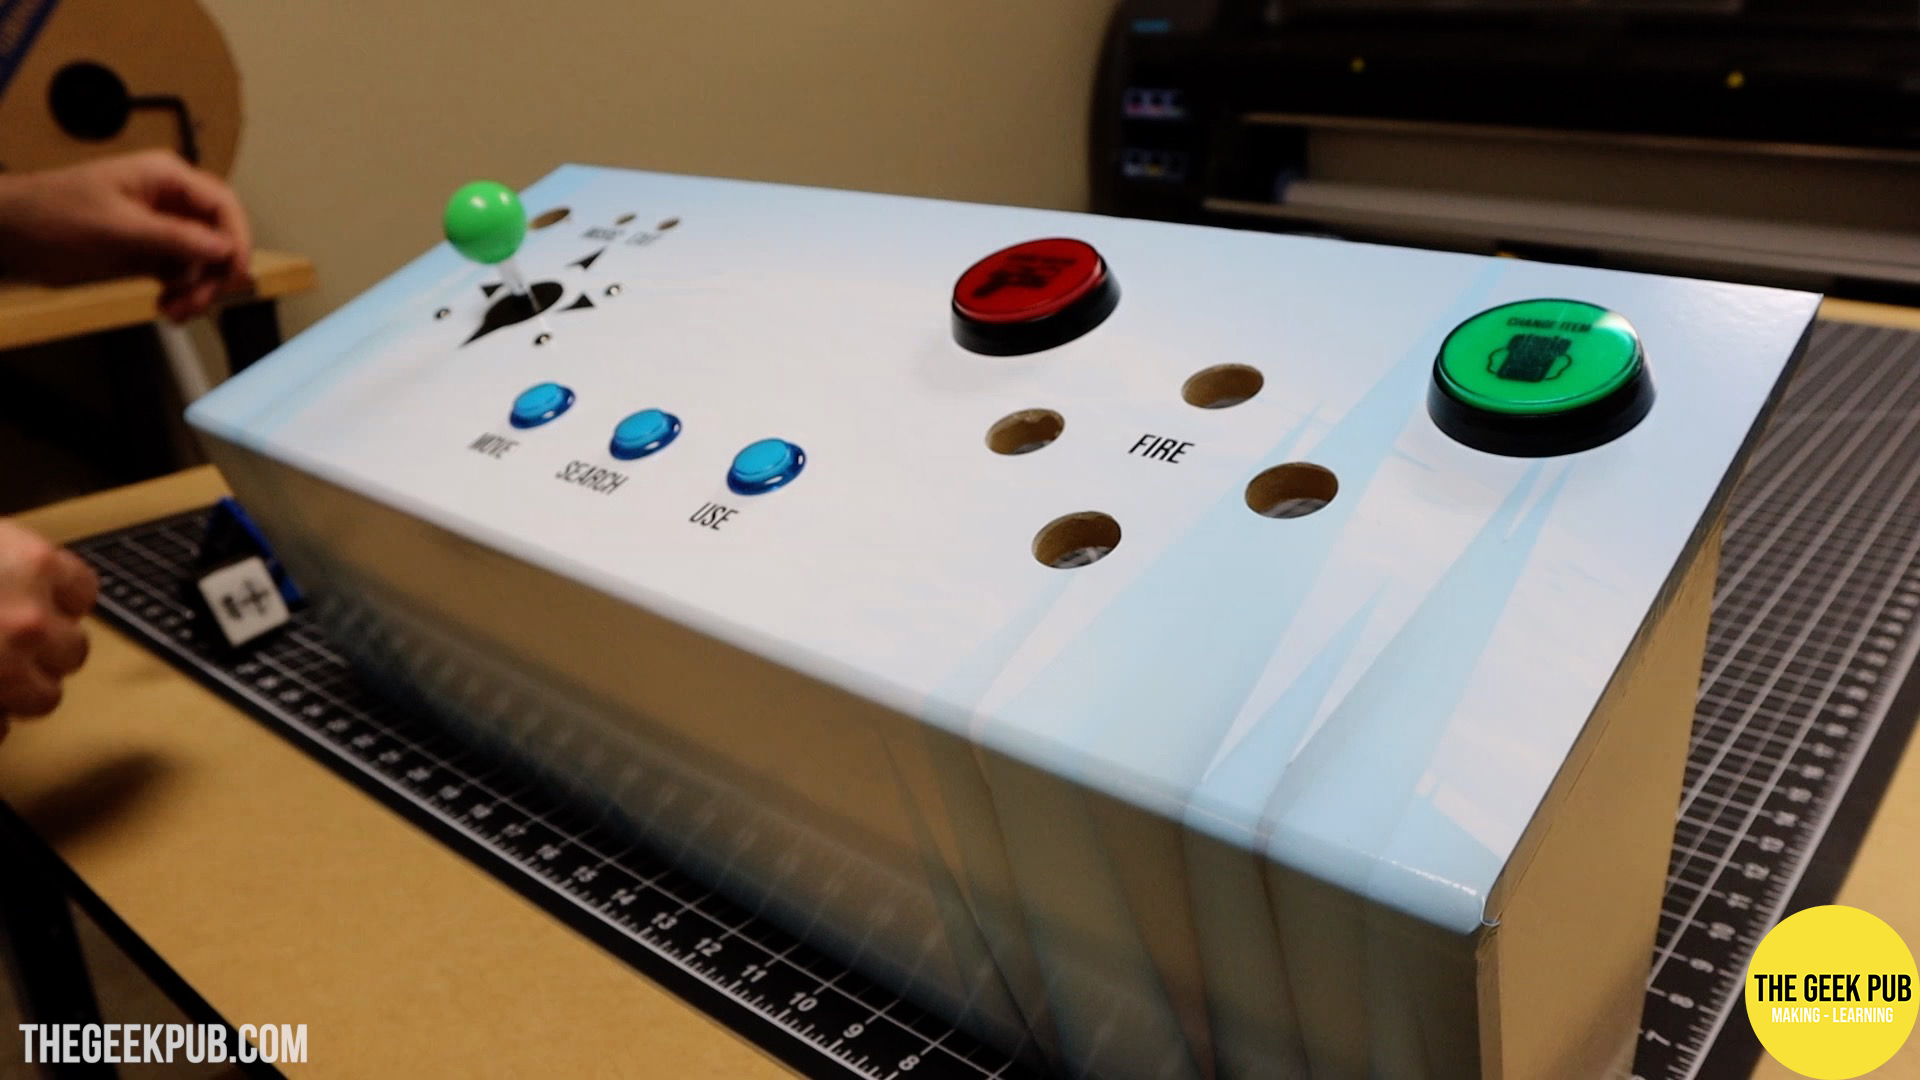
With the wrap done, I added all of the buttons to it.
PCBWay and TexElec Keyboard Adapter
We needed a way to connect the joystick and buttons on the control panel to the Amiga 500. Kevin Williams over at TexElec was nice enough to design us an Amiga 500 Keyboard Matrix adapter, and the sponsor of this article and video PCBWay produced and shipped it to us. Thank you PCBWay!
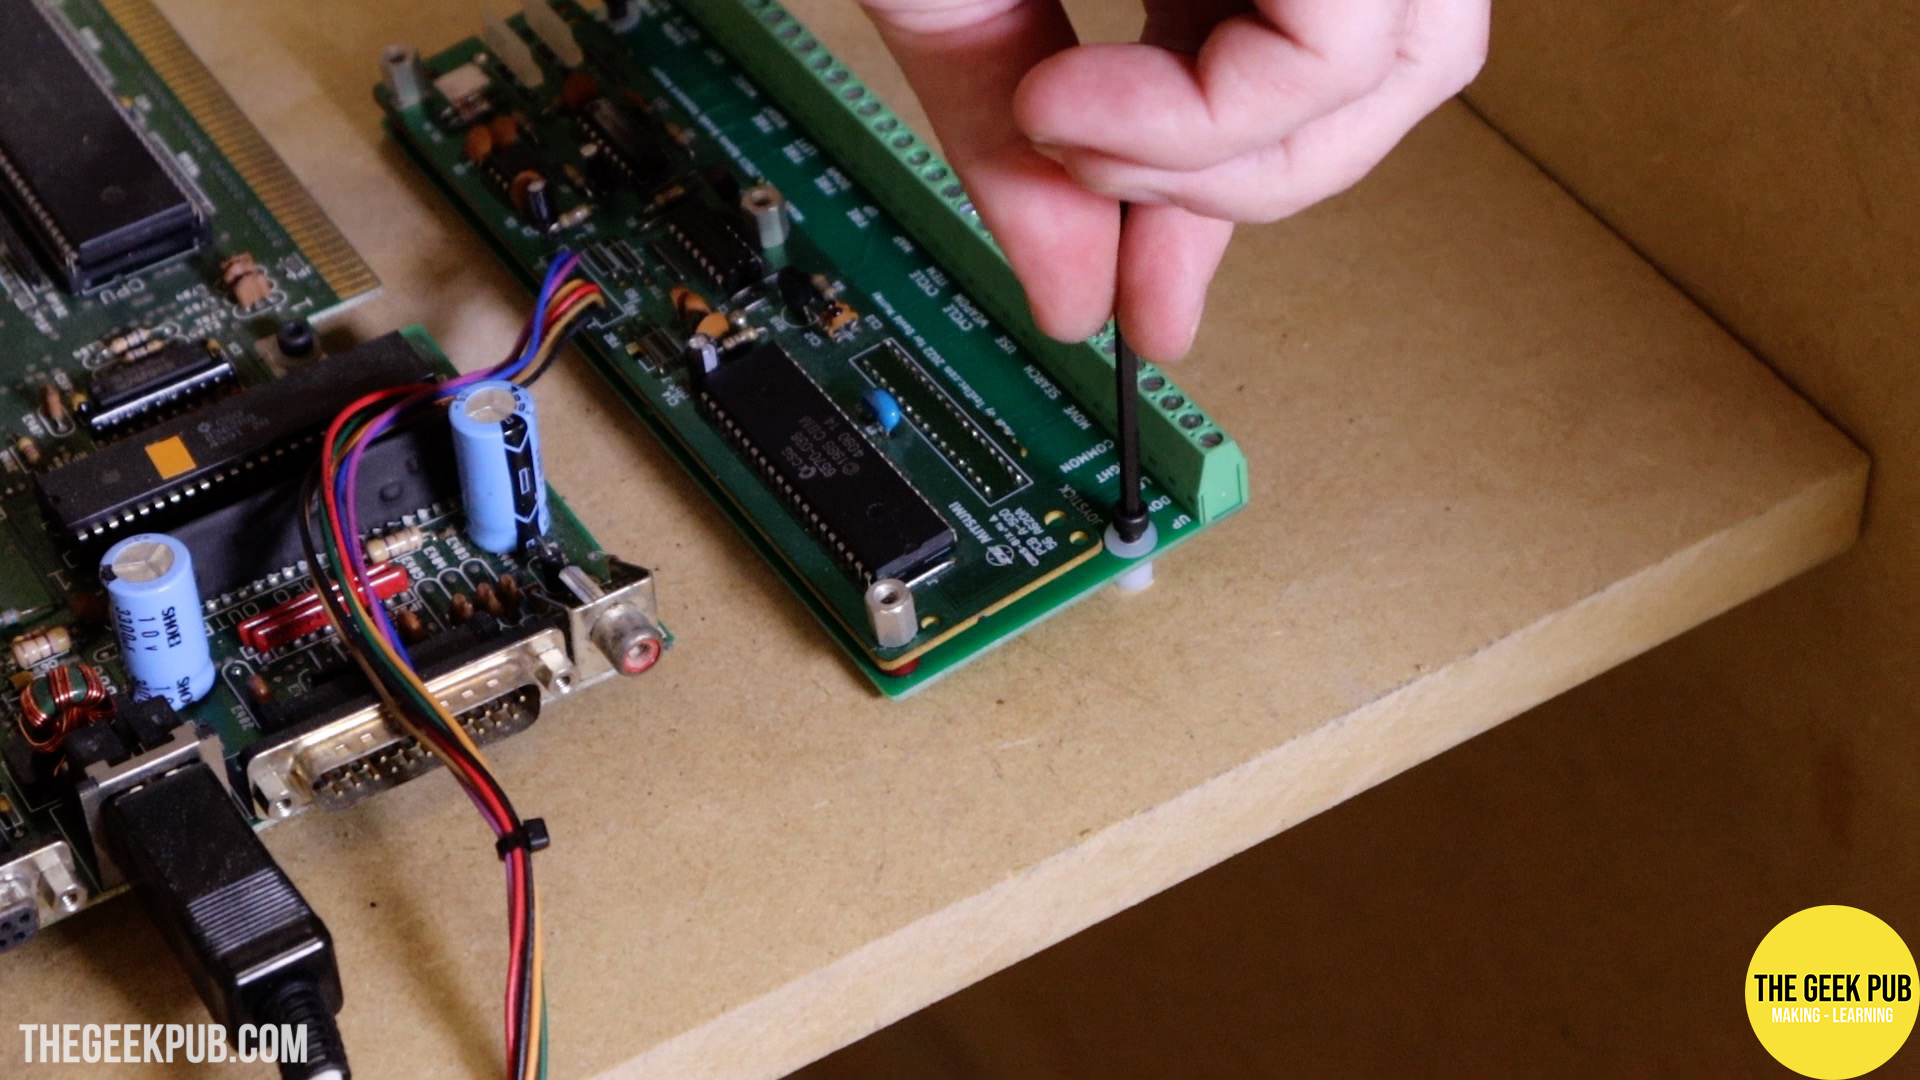
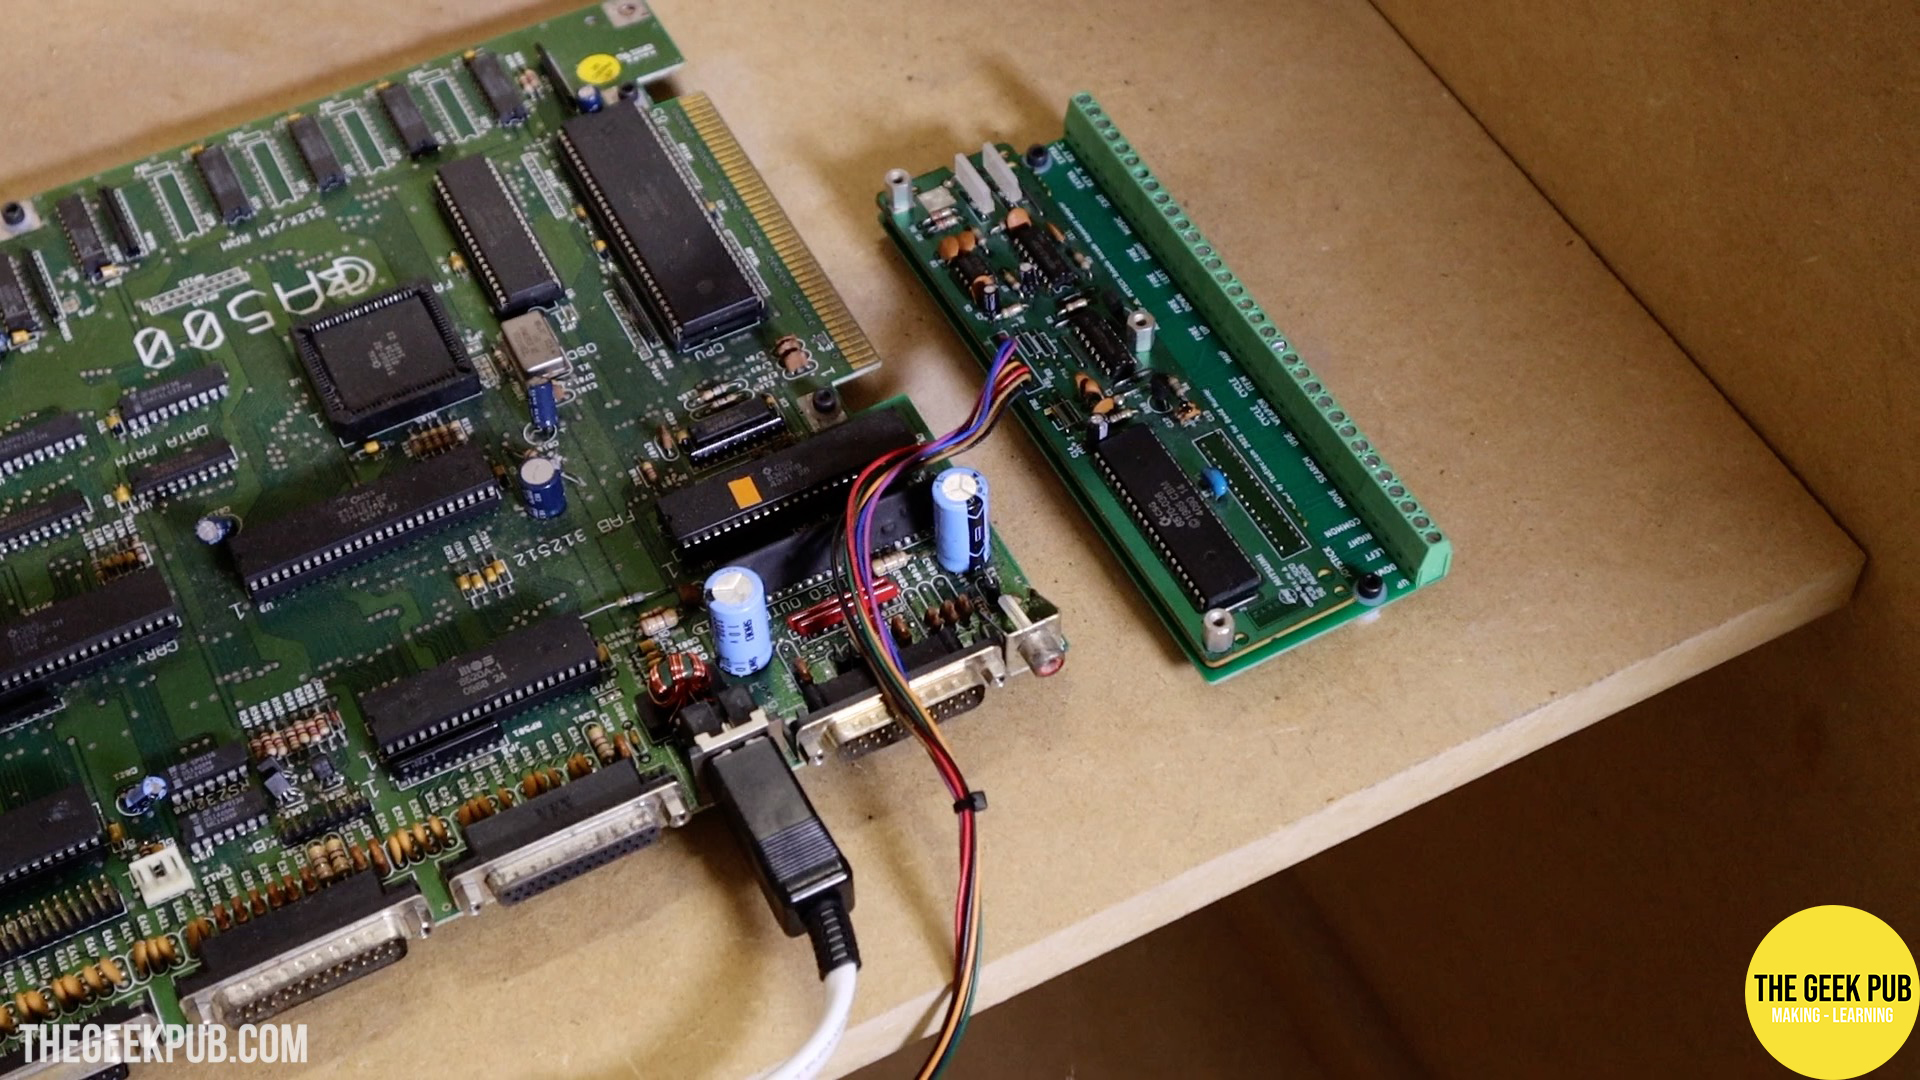
This adapter maps certain keys on the keyboard matrix to the input pins on the header, allowing us to connect our control panel.

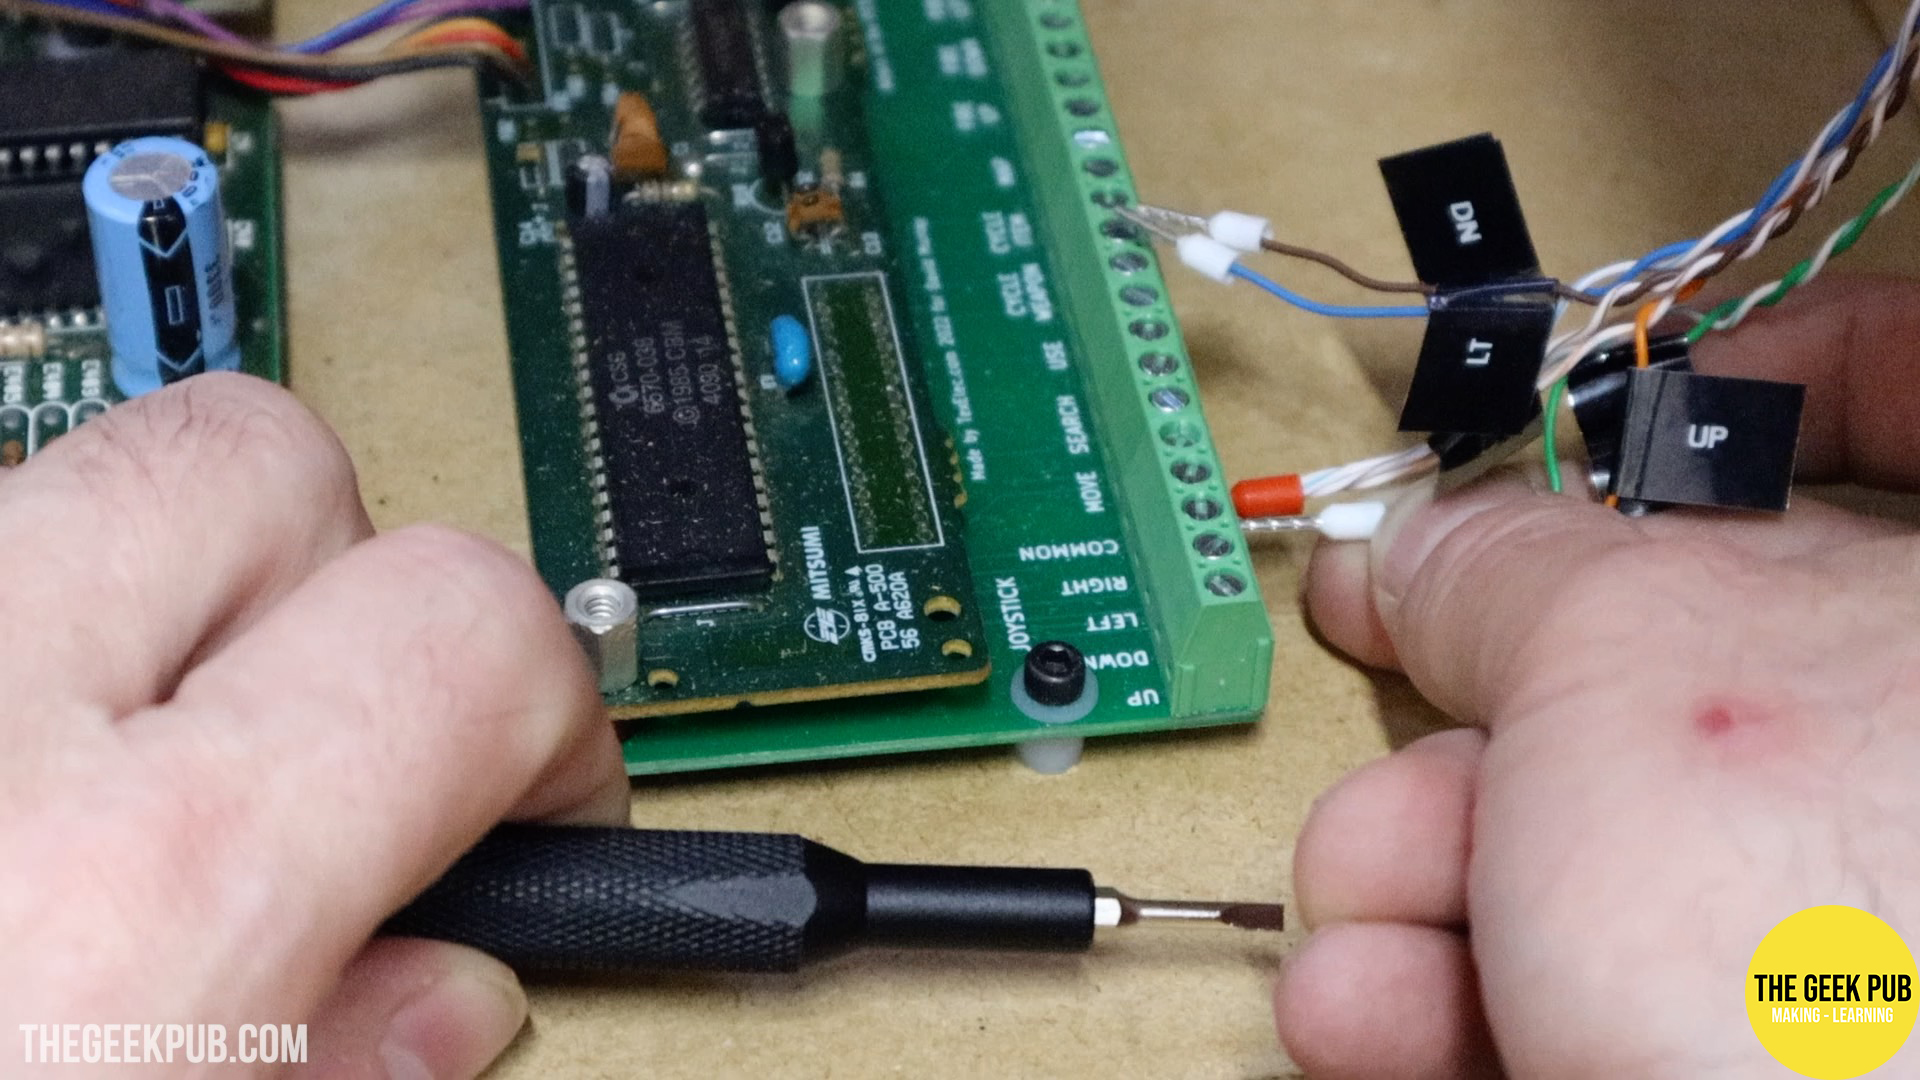
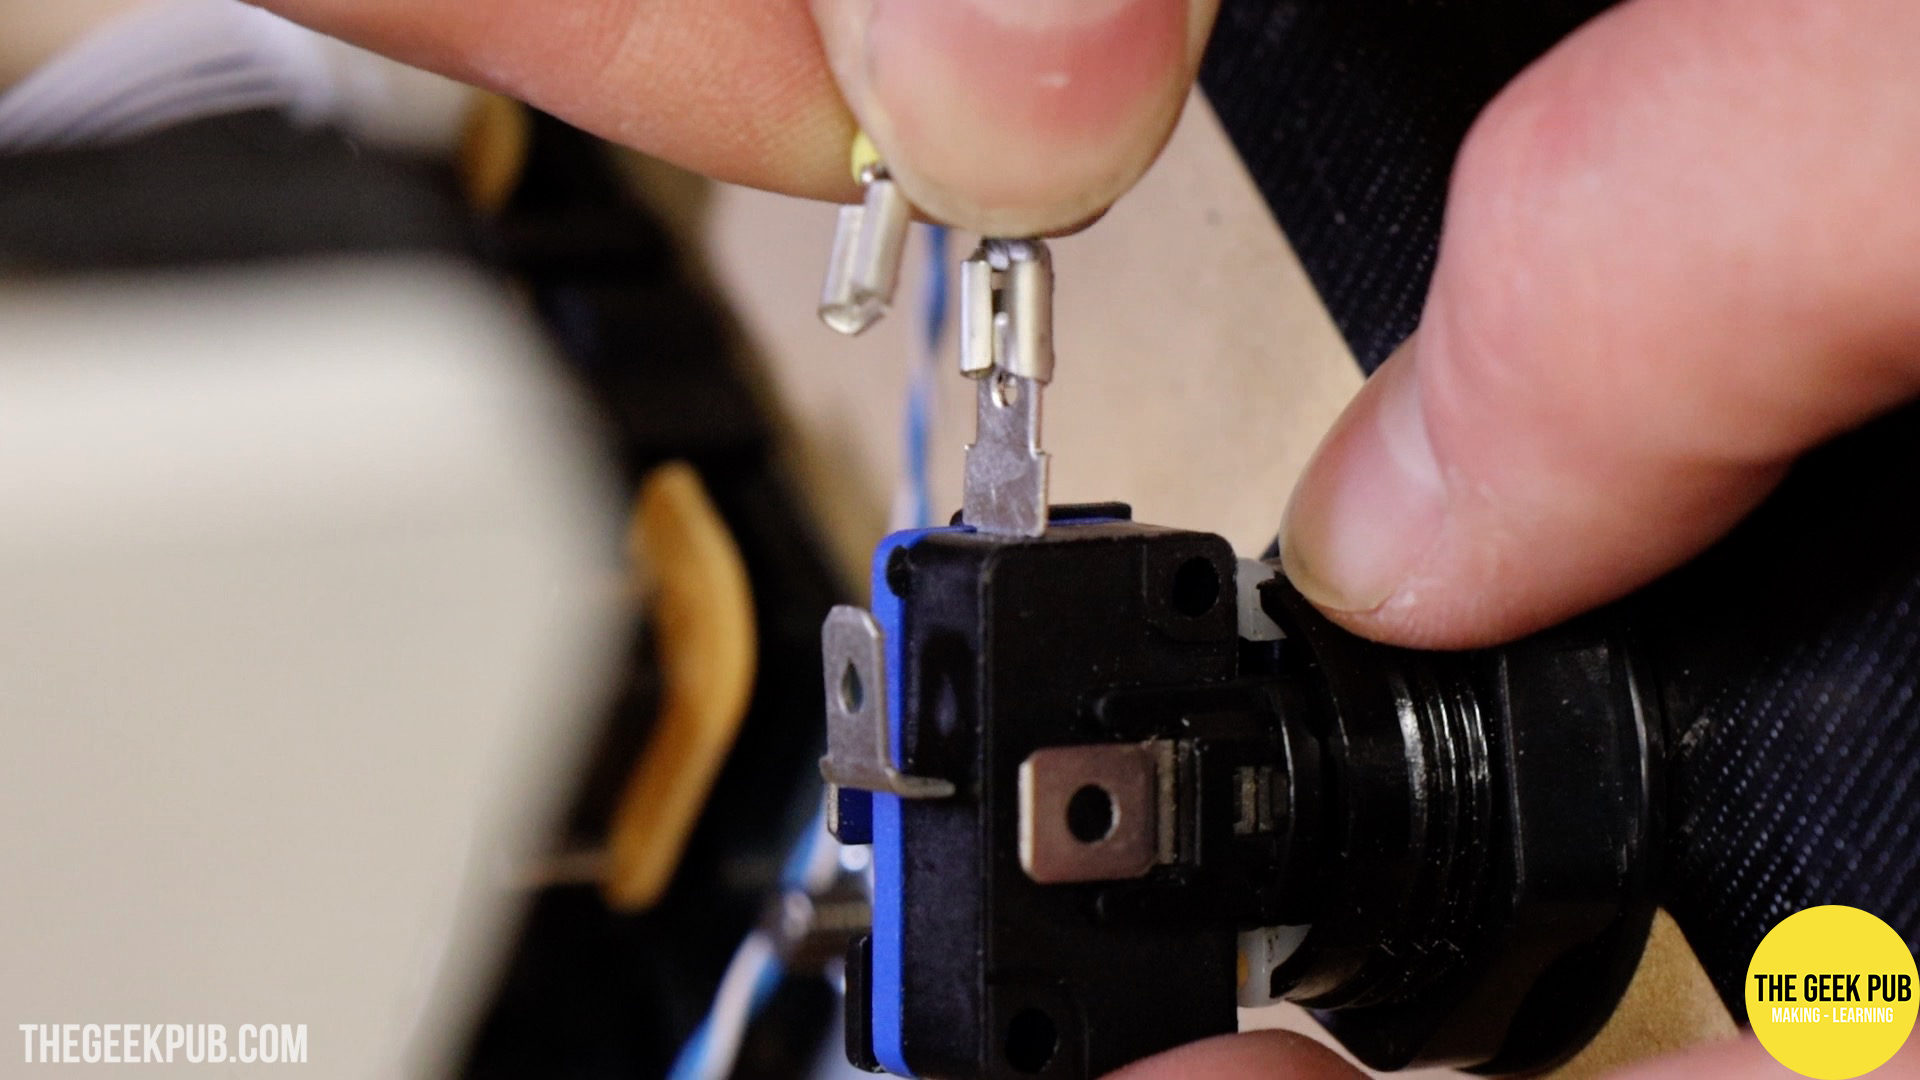
Wiring the PETSCII Robots Control Panel
The next thing we had to do is wire up the PETSCII Robots control panel to the keyboard adapter.
I made custom wiring harnesses for each section of the control panel out of CAT6 cable. I again added ferrell connectors on the screw terminal side and spade connectors on the joystick and button side. I labeled each harness to make future troubleshooting easier.
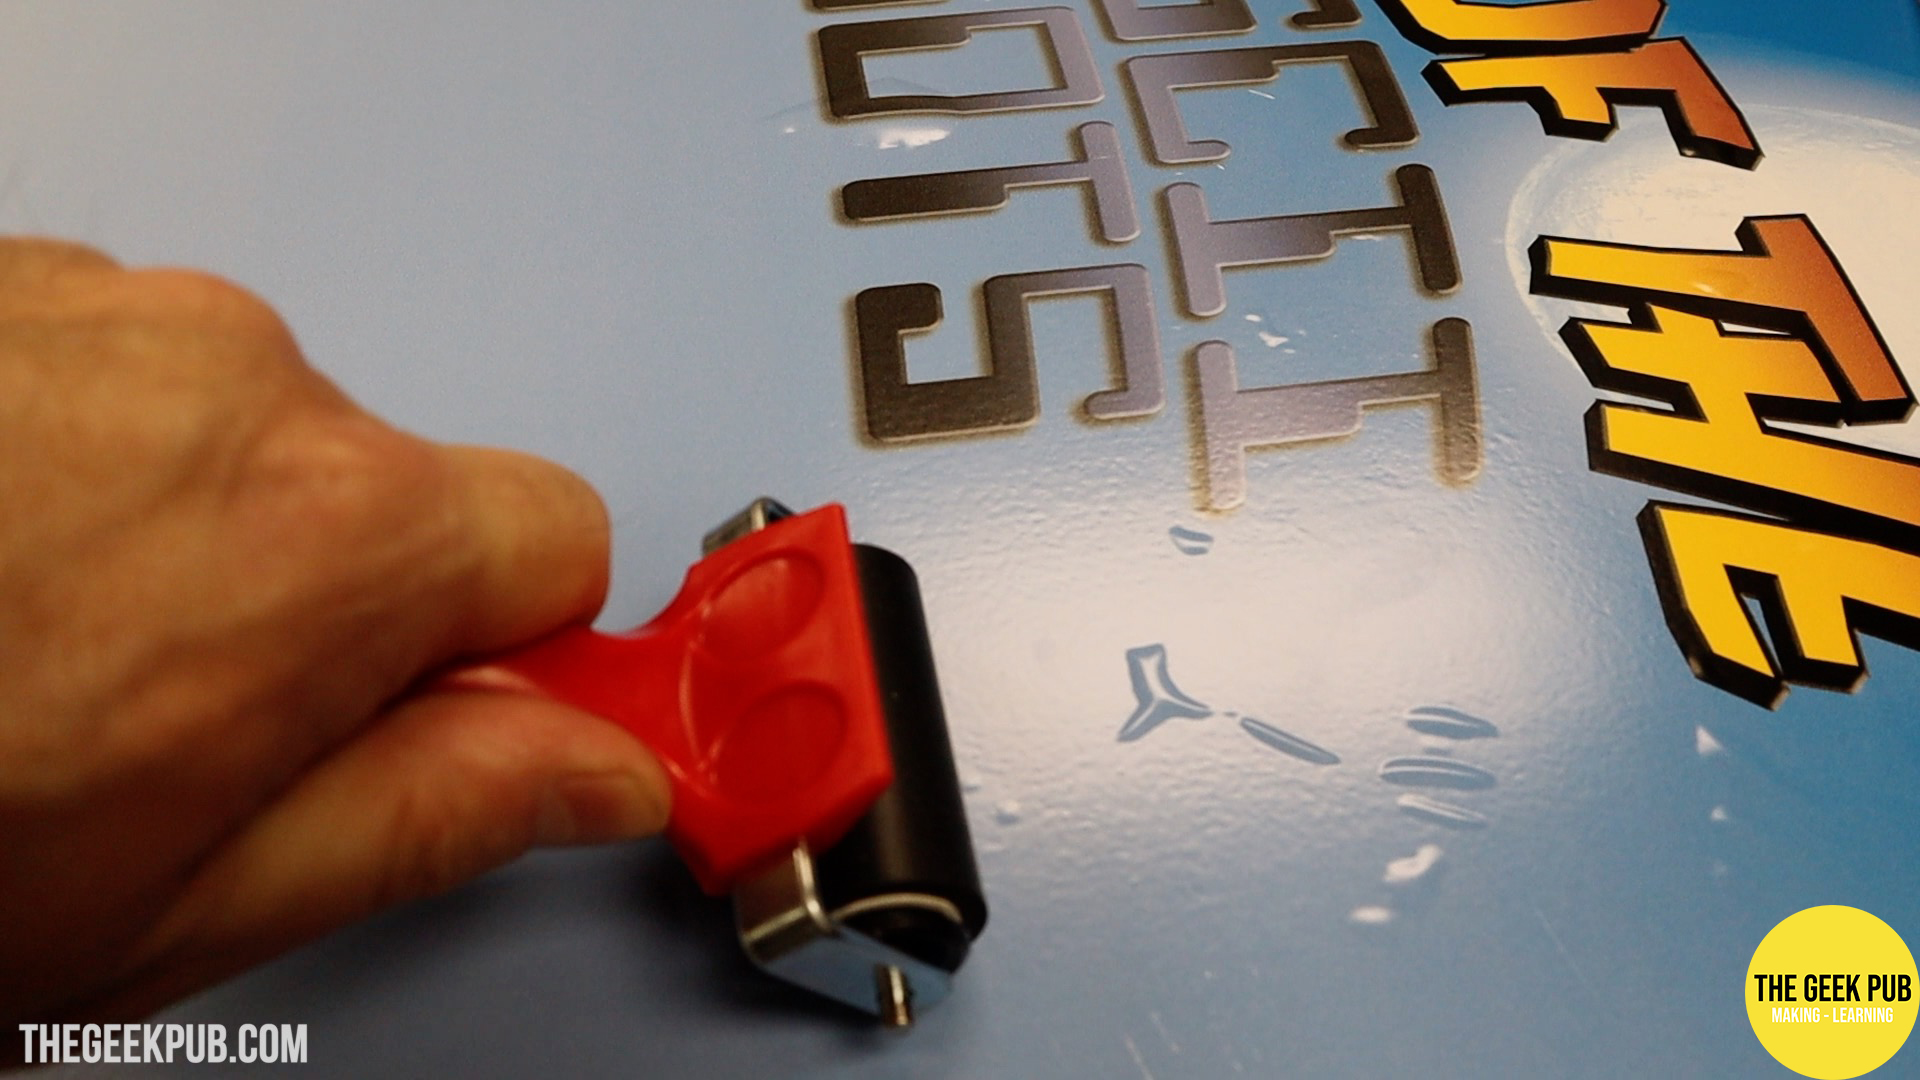
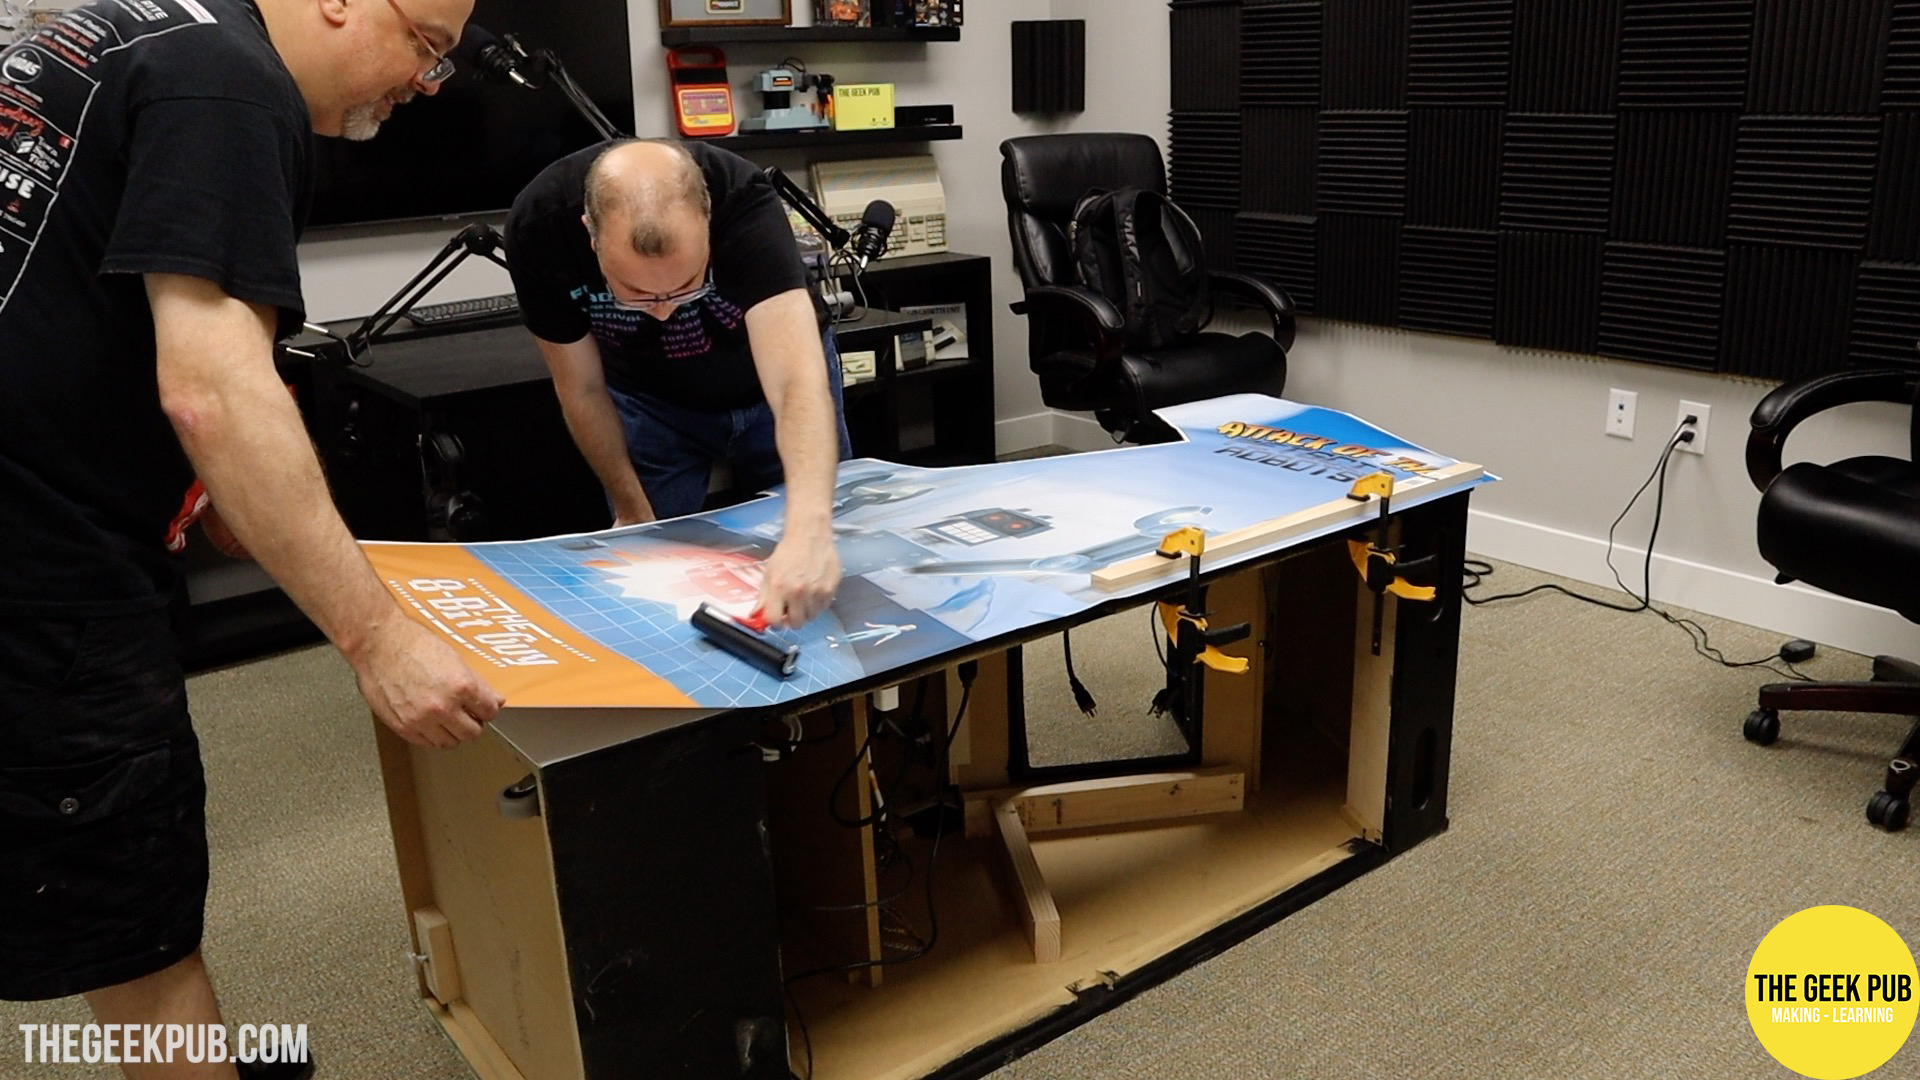
Skinning and T-Molding
Again using my large format printer, we created side panels for the arcade using air-release vinyl. We worked in sections (only removing portions of the backer at a time) and slowly installed the artwork.
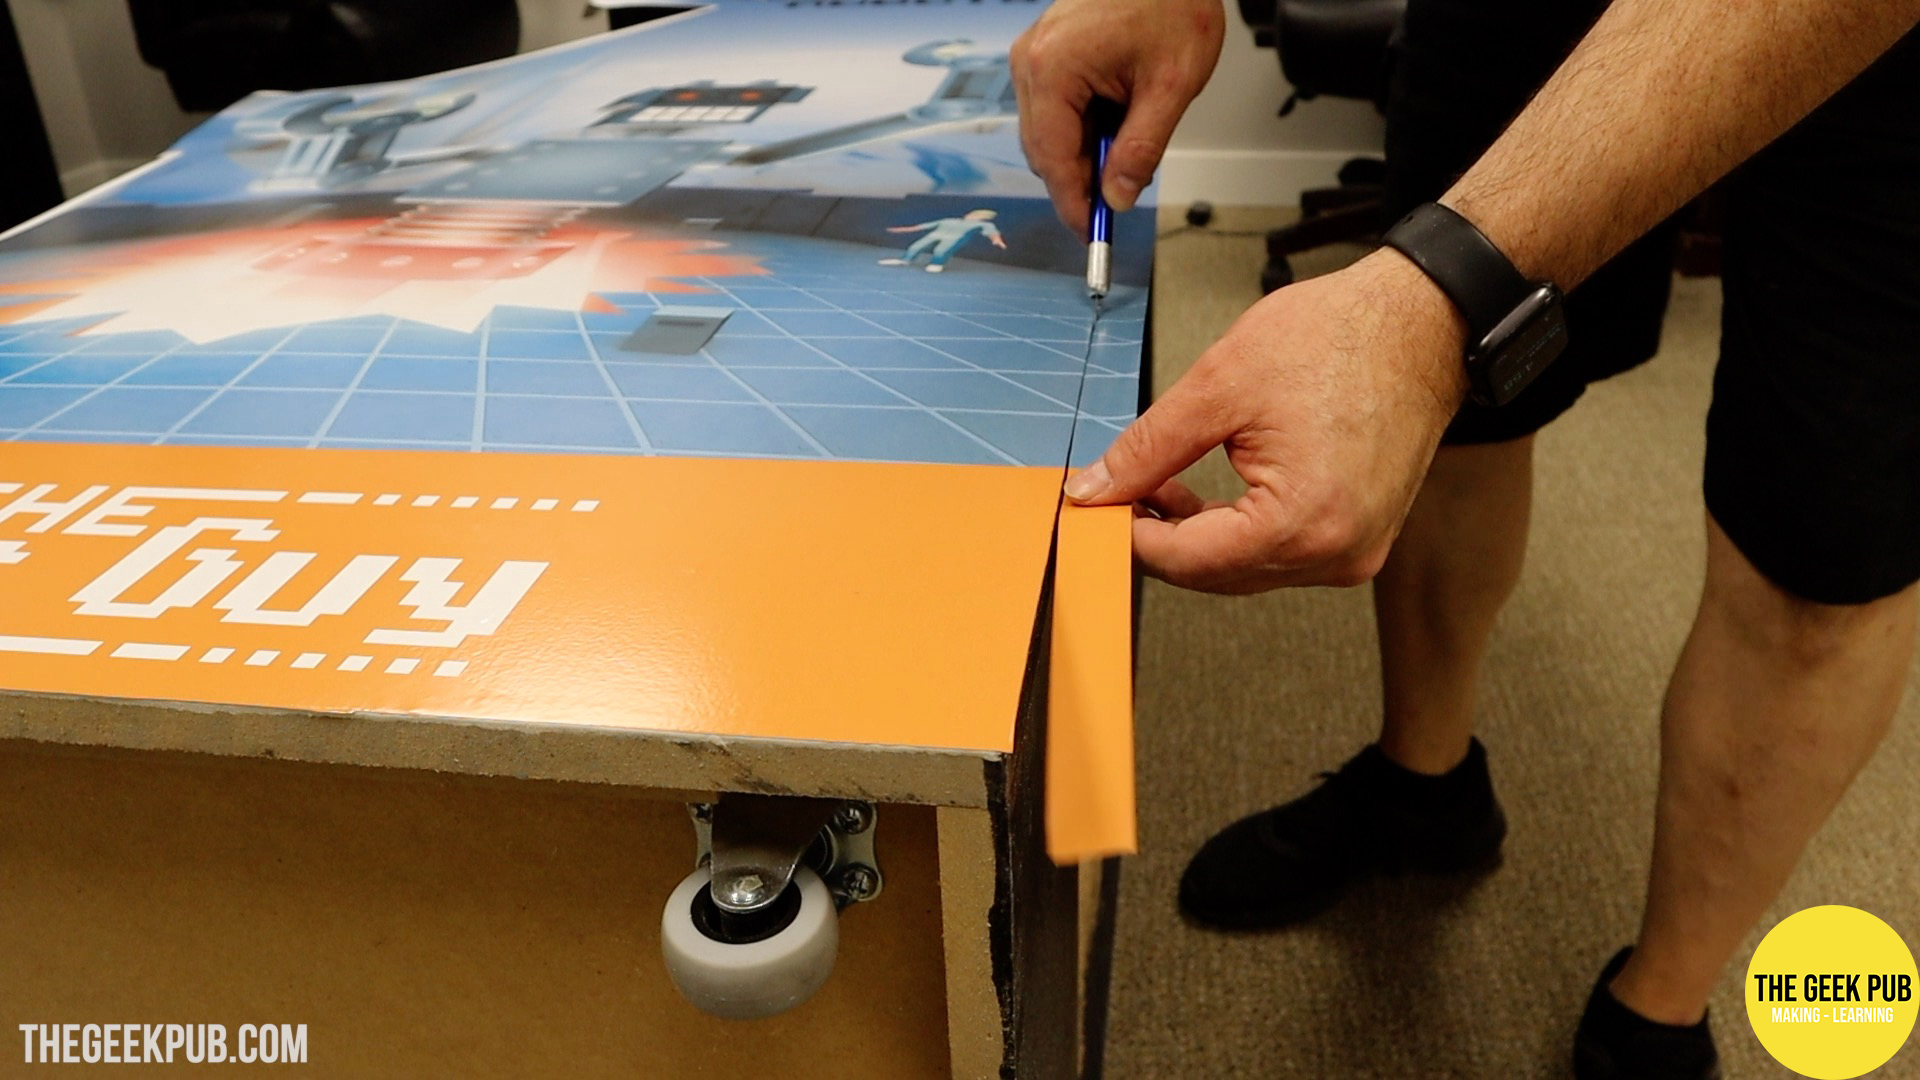
On the bottom and sides of the cabinet we cut the vinyl even with the cabinet. On the top and front we left the overhang and wrapped it over.
Again, with Air-Release vinyl, removing the air bubbles is as easy rolling over them with a hard rubber roller.
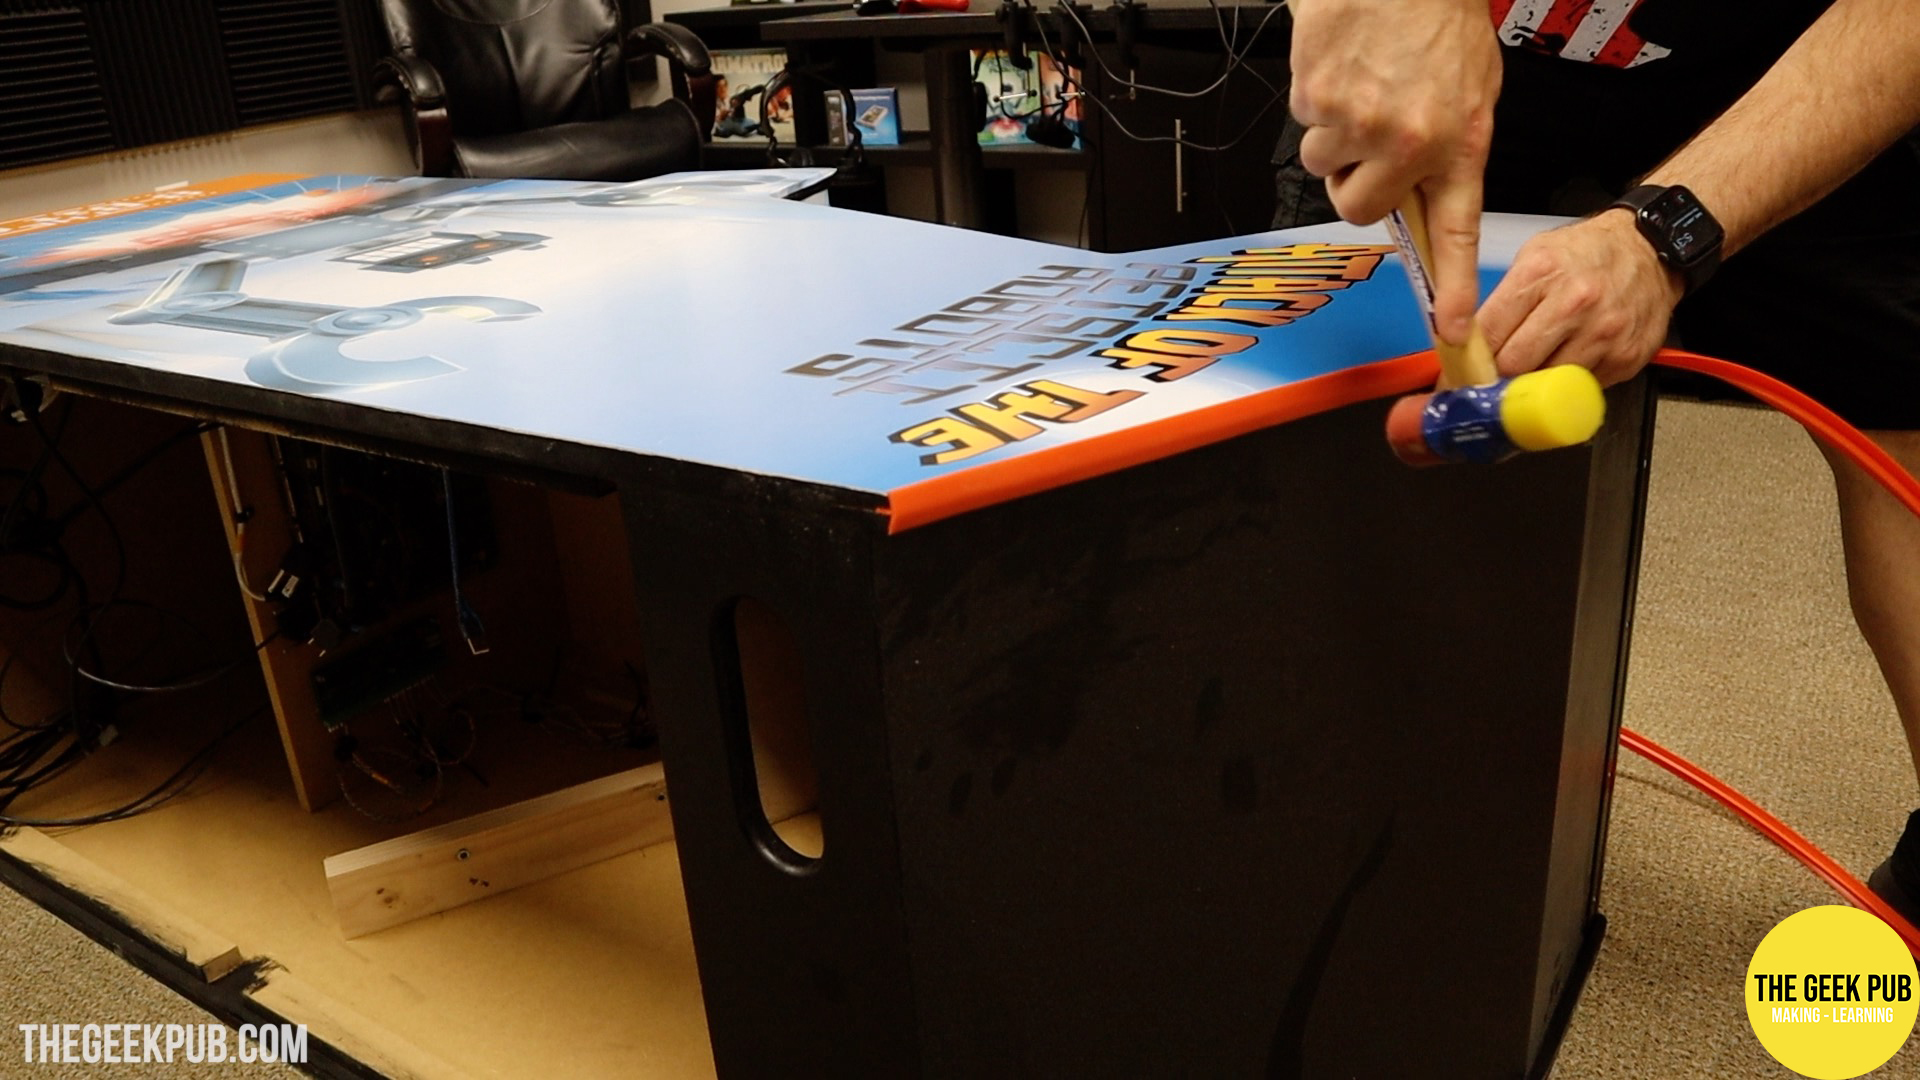
The arcade T-Molding then holds the folded over portions in place and makes it really pop.
RELATED: T-Molding Tips and Tricks
Installing the Monitor, Bezel Artwork, and Acrylic Protective Glass
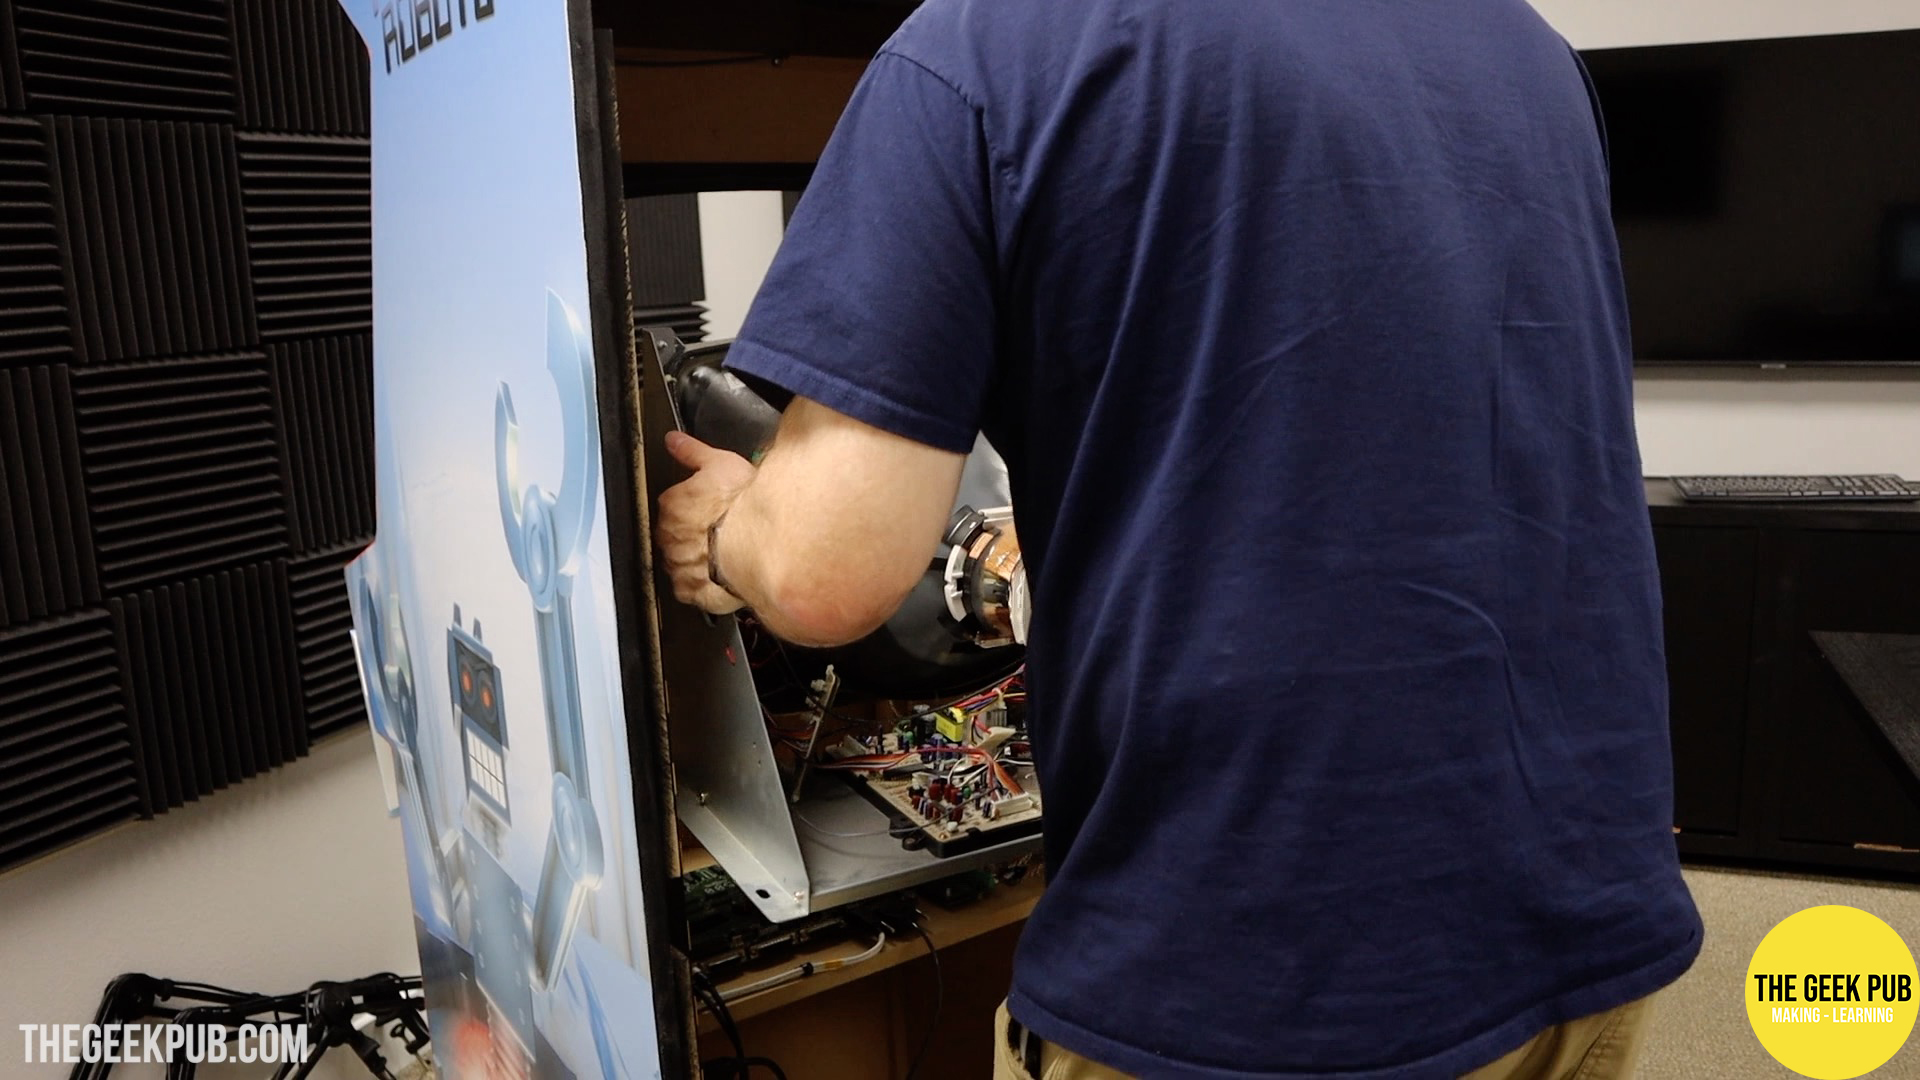
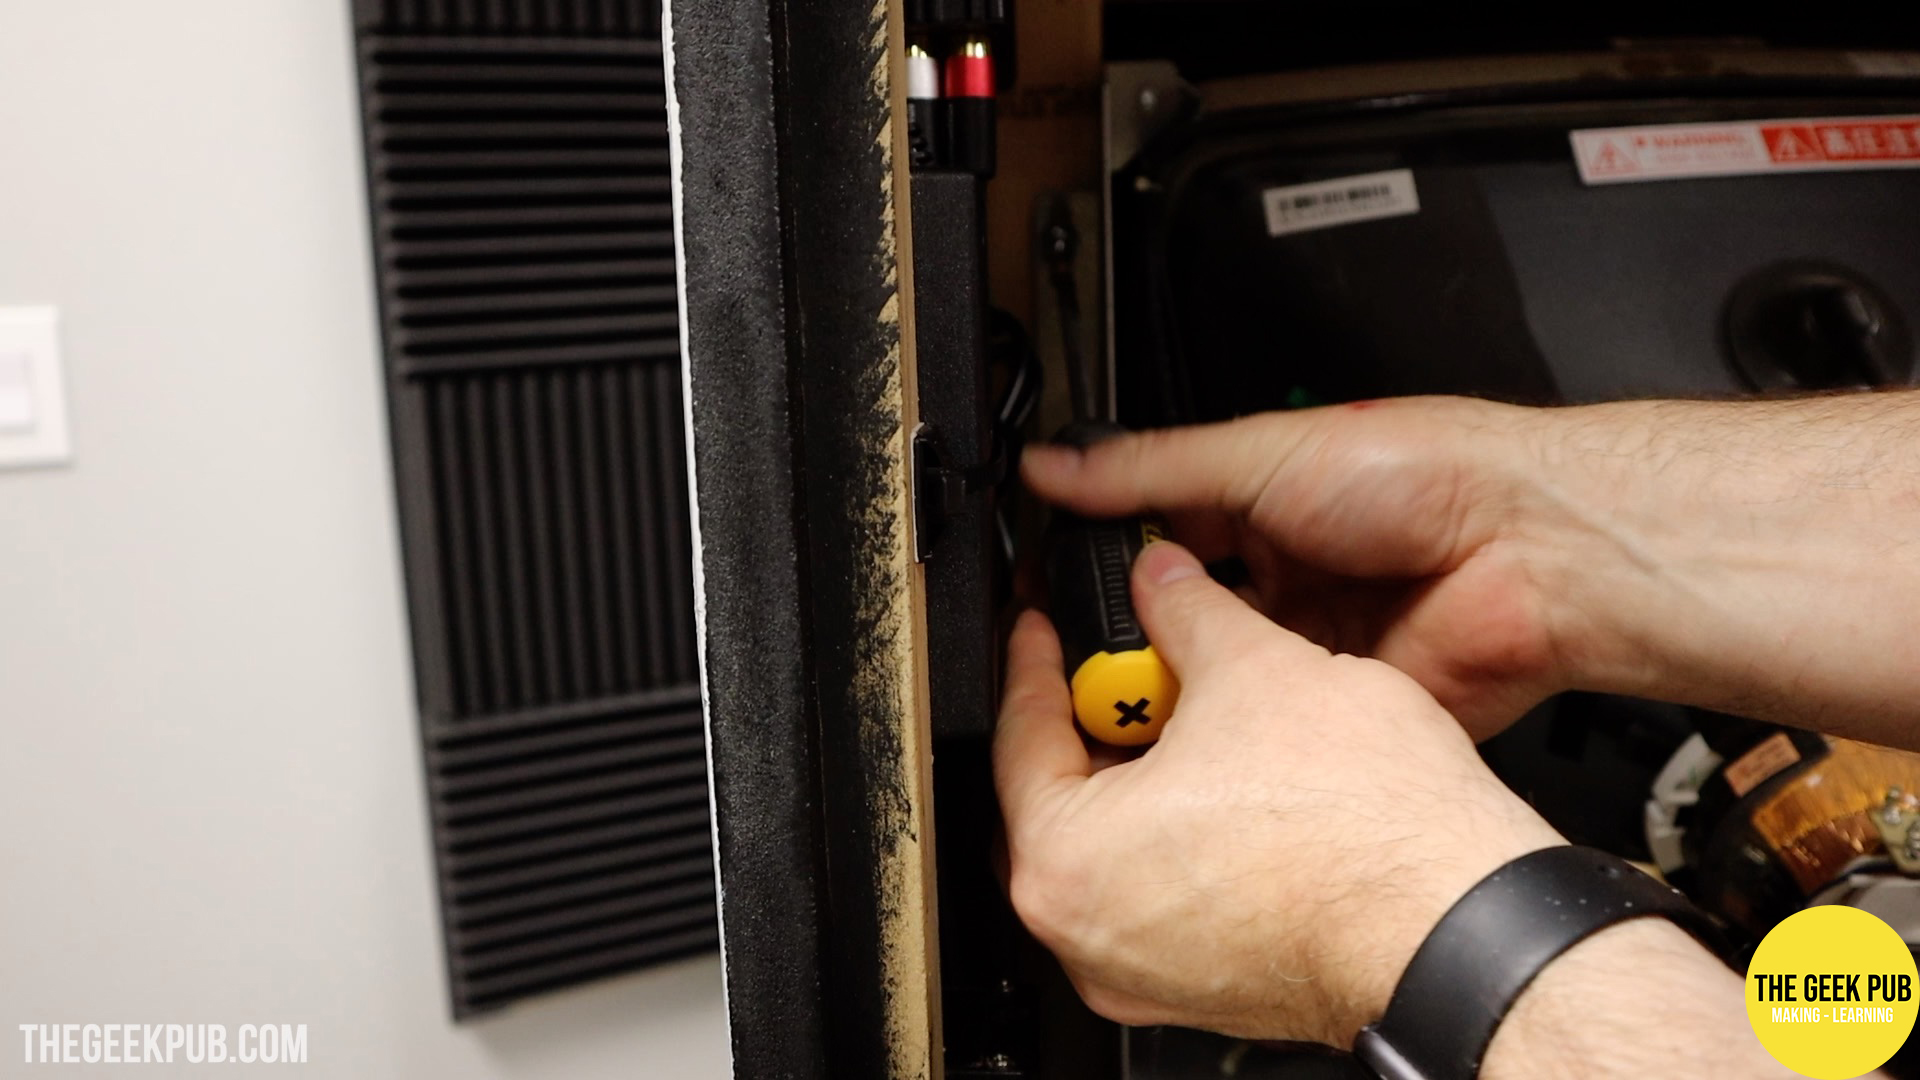
It was at this point that I decided to get my workout for the day and install the very heavy CRT into the cabinet. I waited till the very end to do this to make moving the cabinet easier (since it was lighter), especially knowing we’d need to tip it on its sides numerous times during the build.
The monitor just bolts in using those same four screws and insert nuts we added at the very beginning of this build
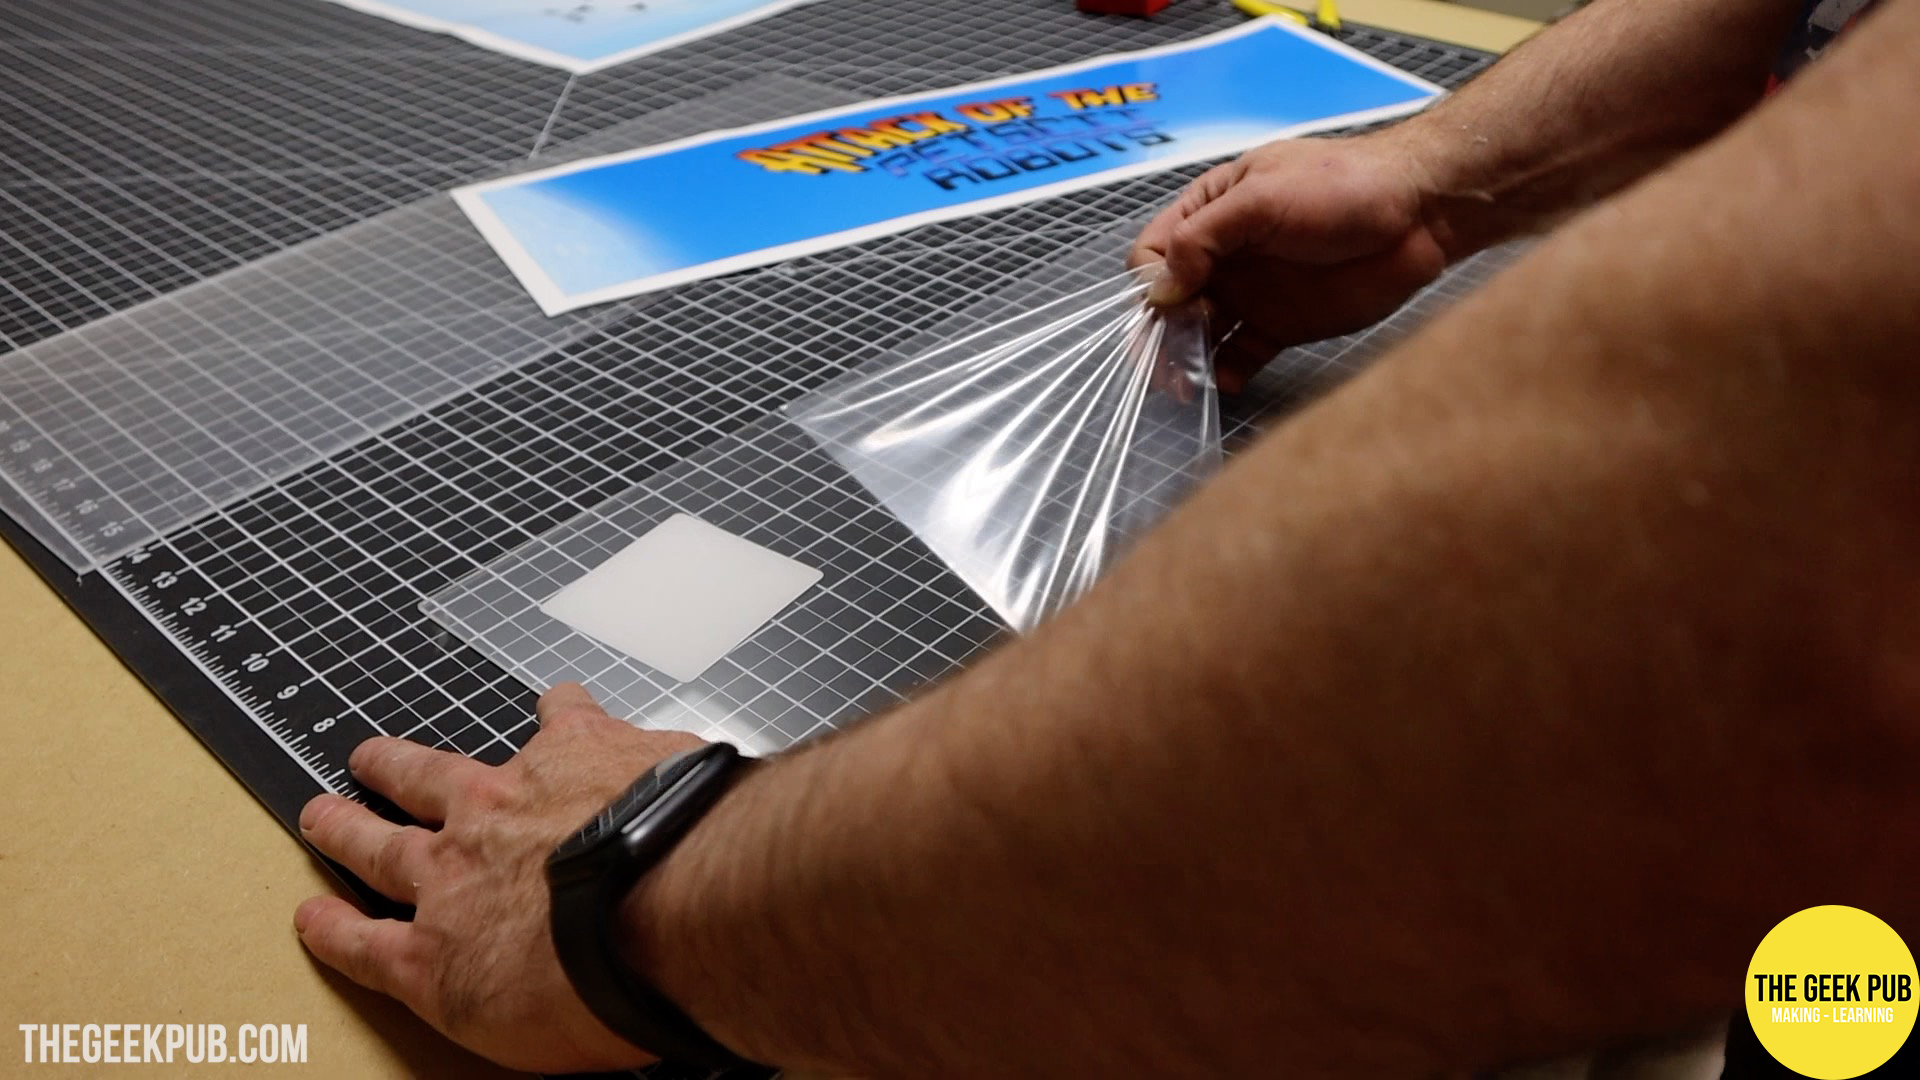
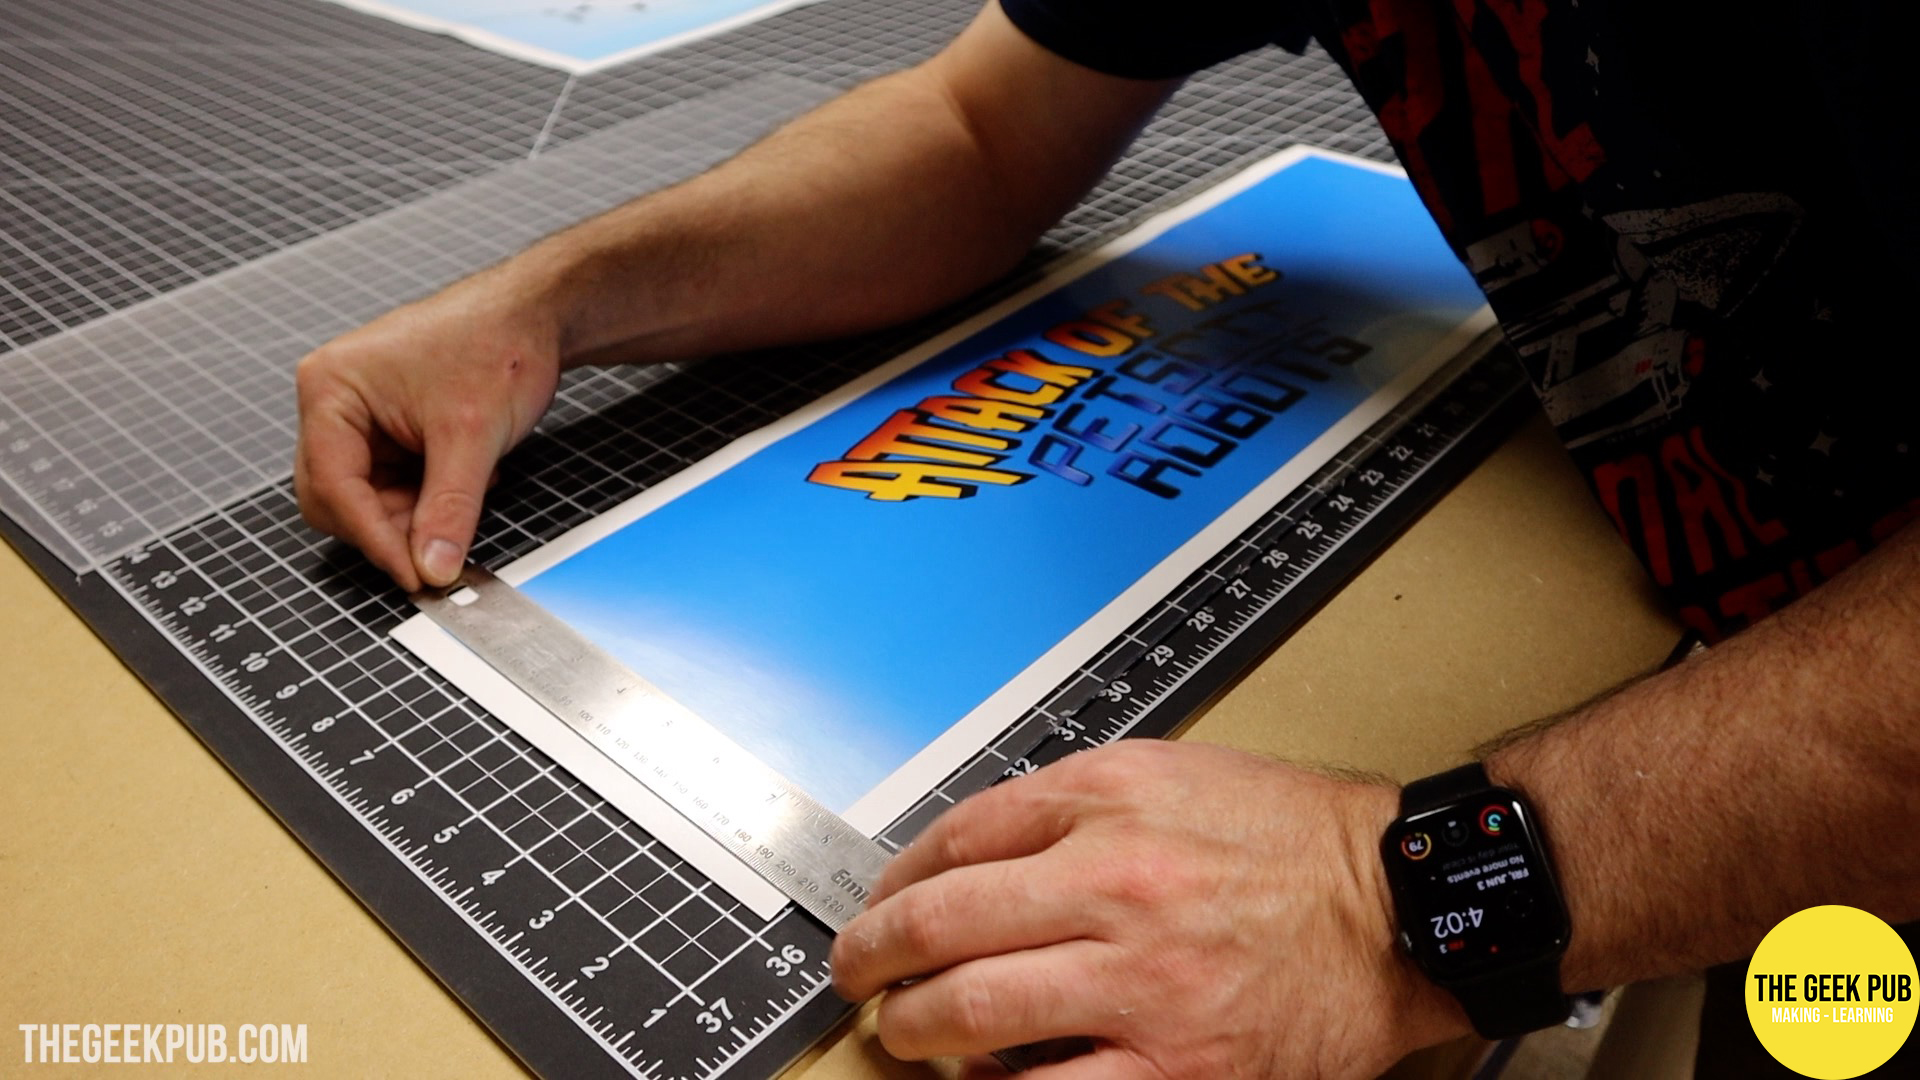
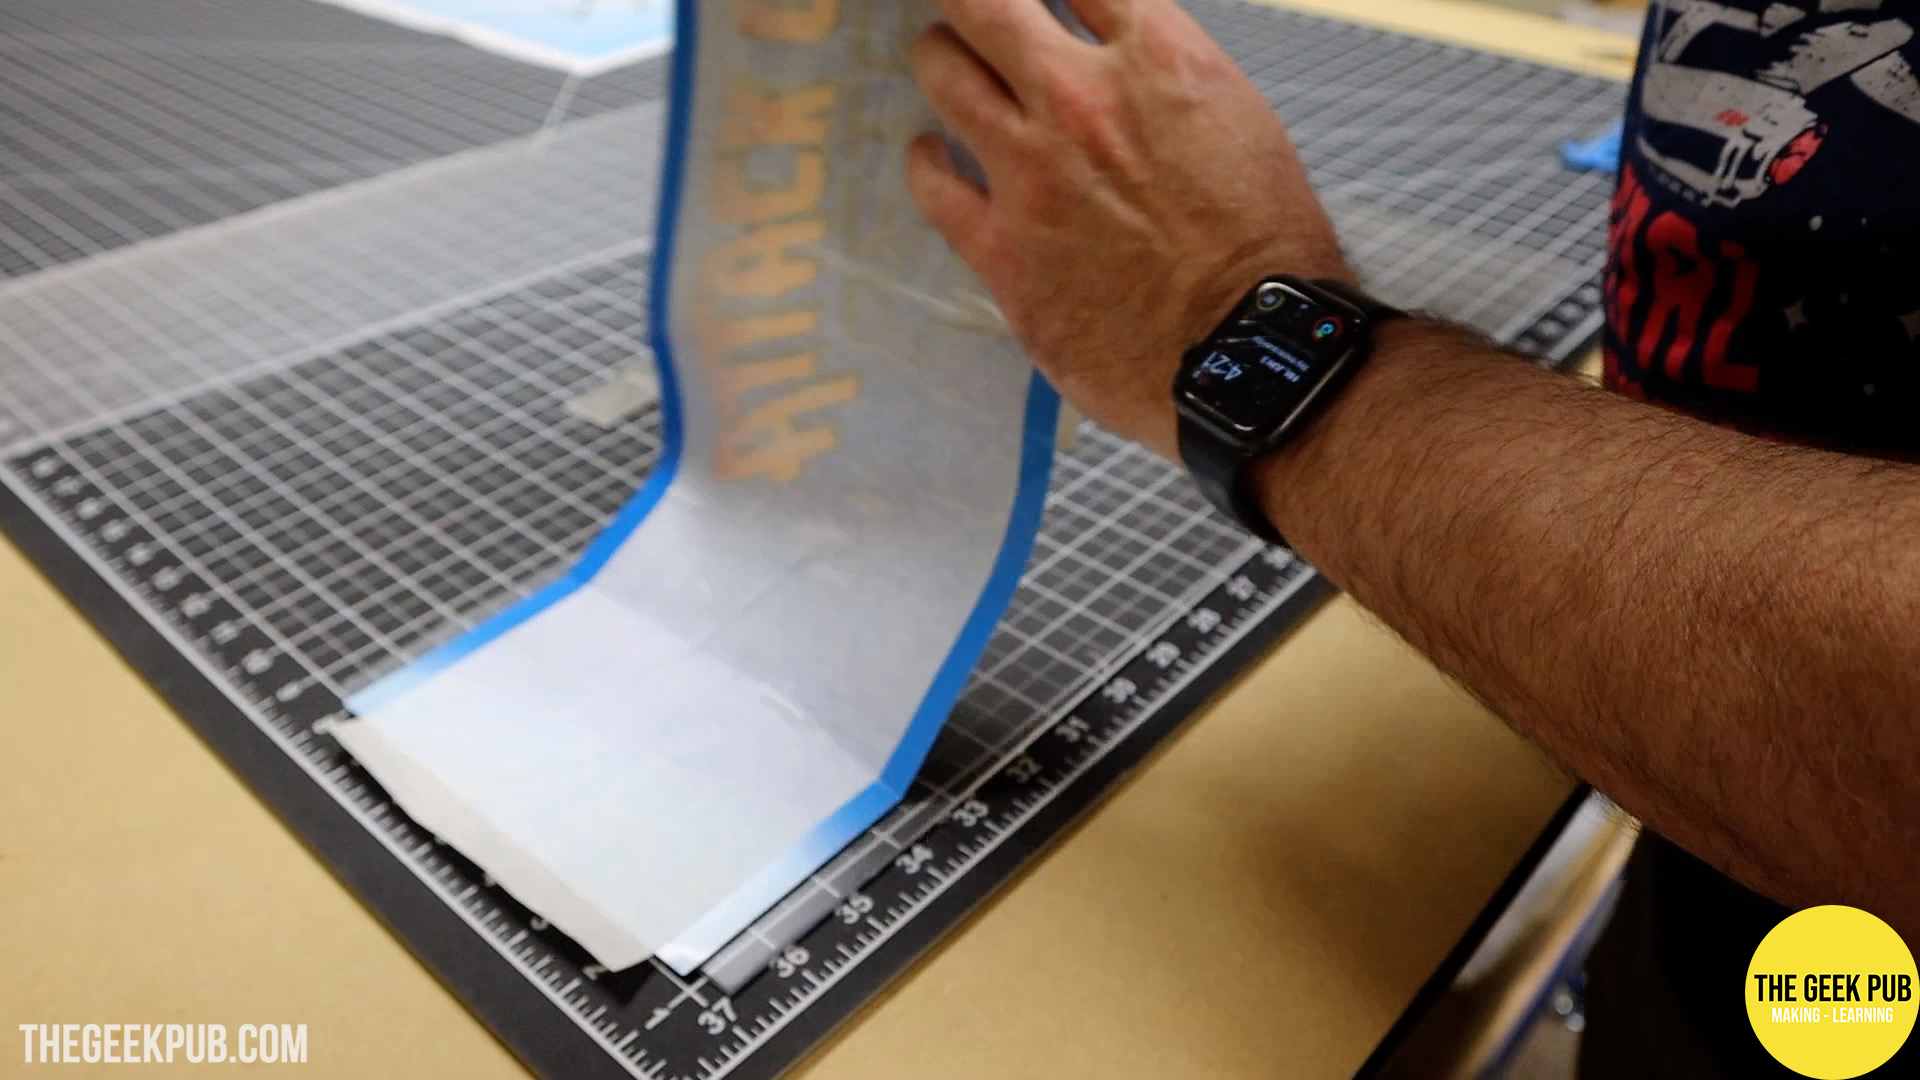
After the monitor was in place, I added the bezel artwork. This literally just lays in place. It also covers the ugly sections of the trash can 19″ TV bezel we used to make this arcade. You can’t even tell. It’s awesome!
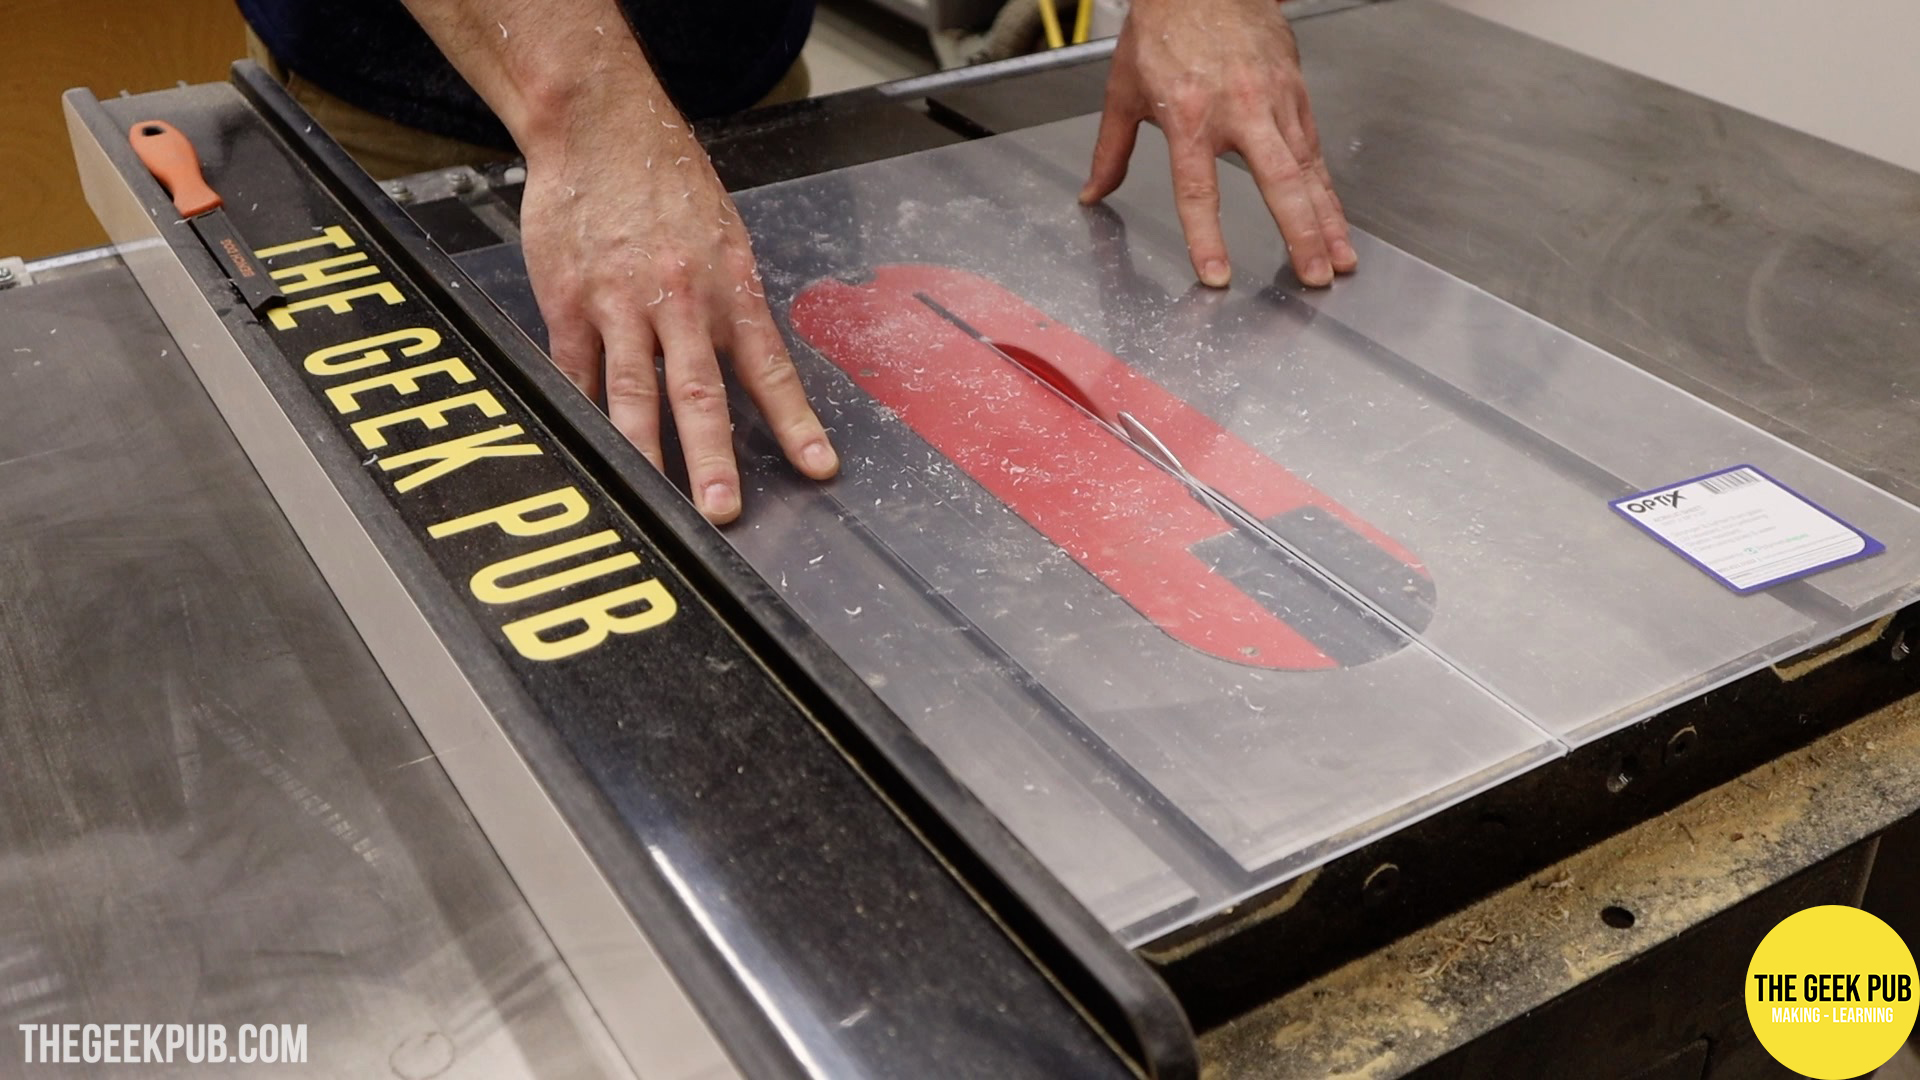
I cut out a thick piece of acrylic sheet to cover the CRT and artwork and protect them from damage.
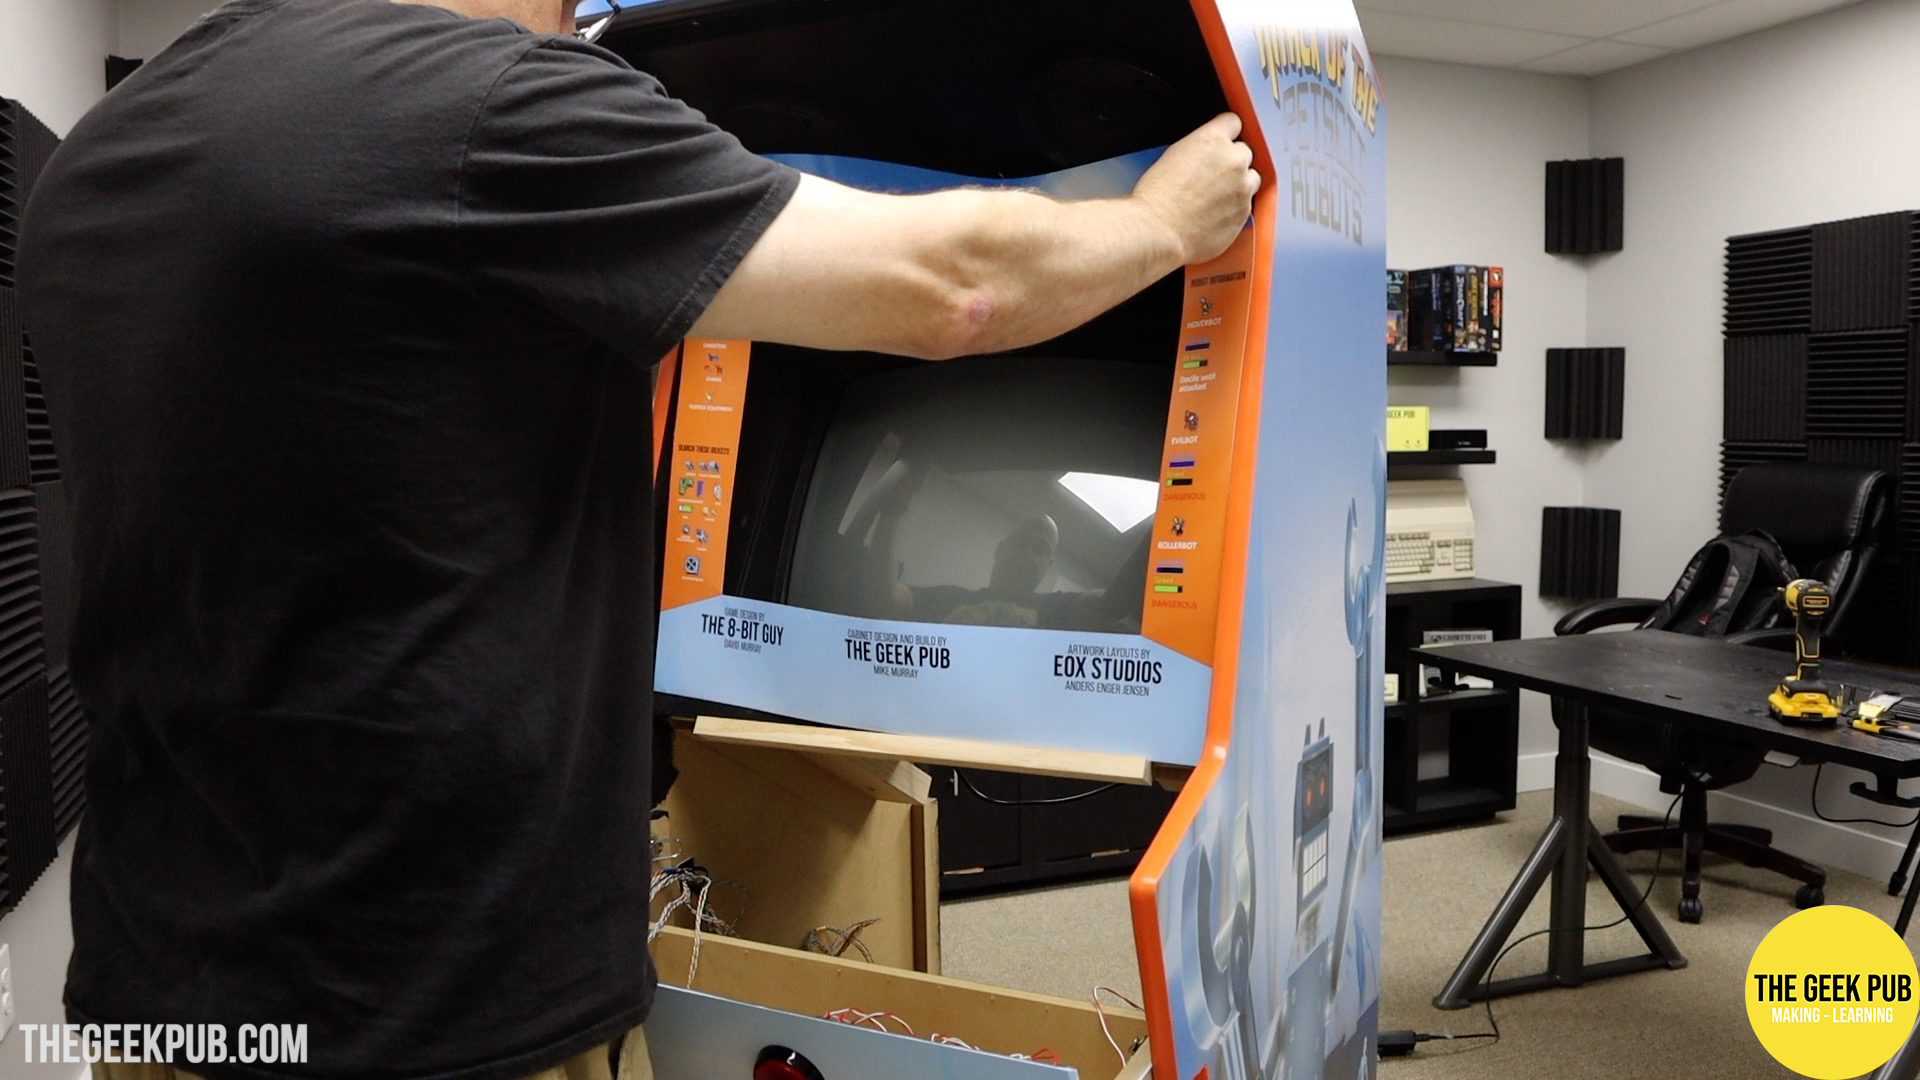
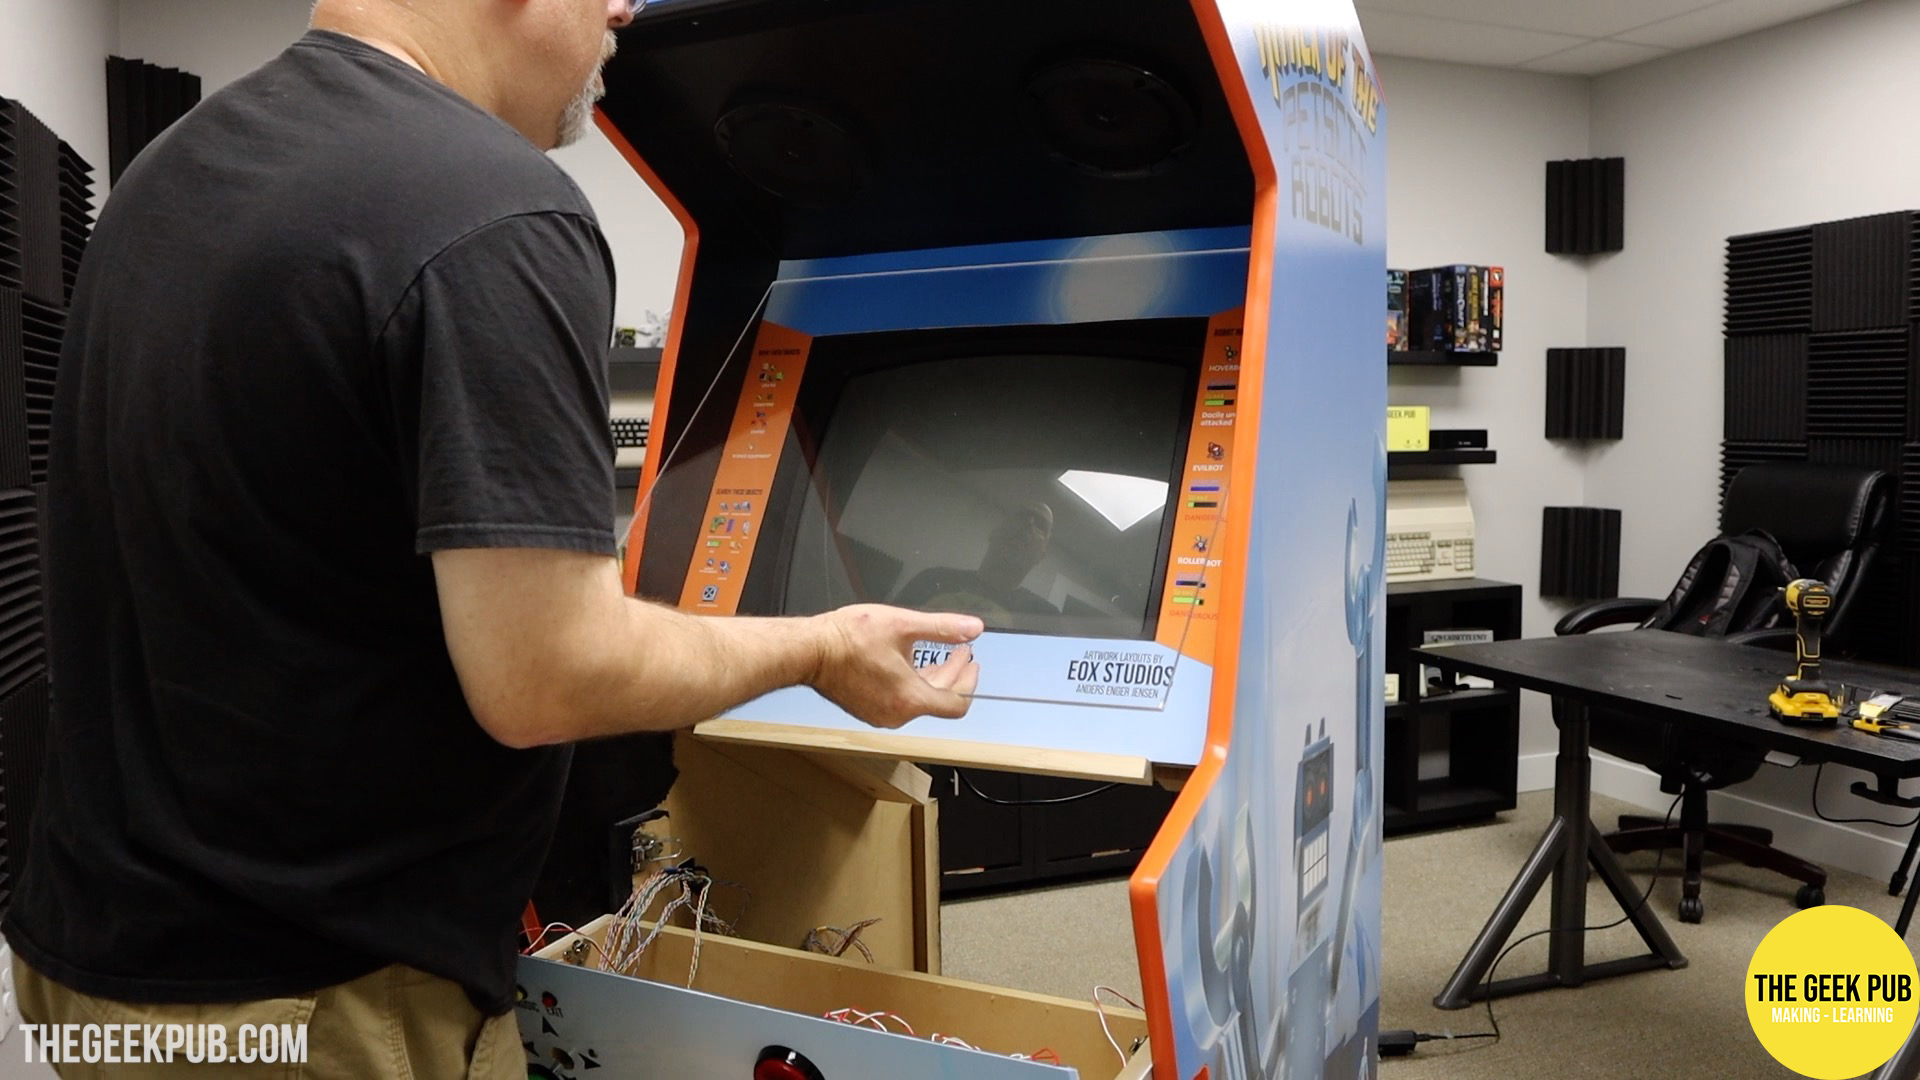
When you close the control panel, it locks everything in place. To change the artwork or clean the CRT glass all you have to do is unlock the control panel and open it.

Of course, the cabinet wouldn’t really be complete it we didn’t install the back door!
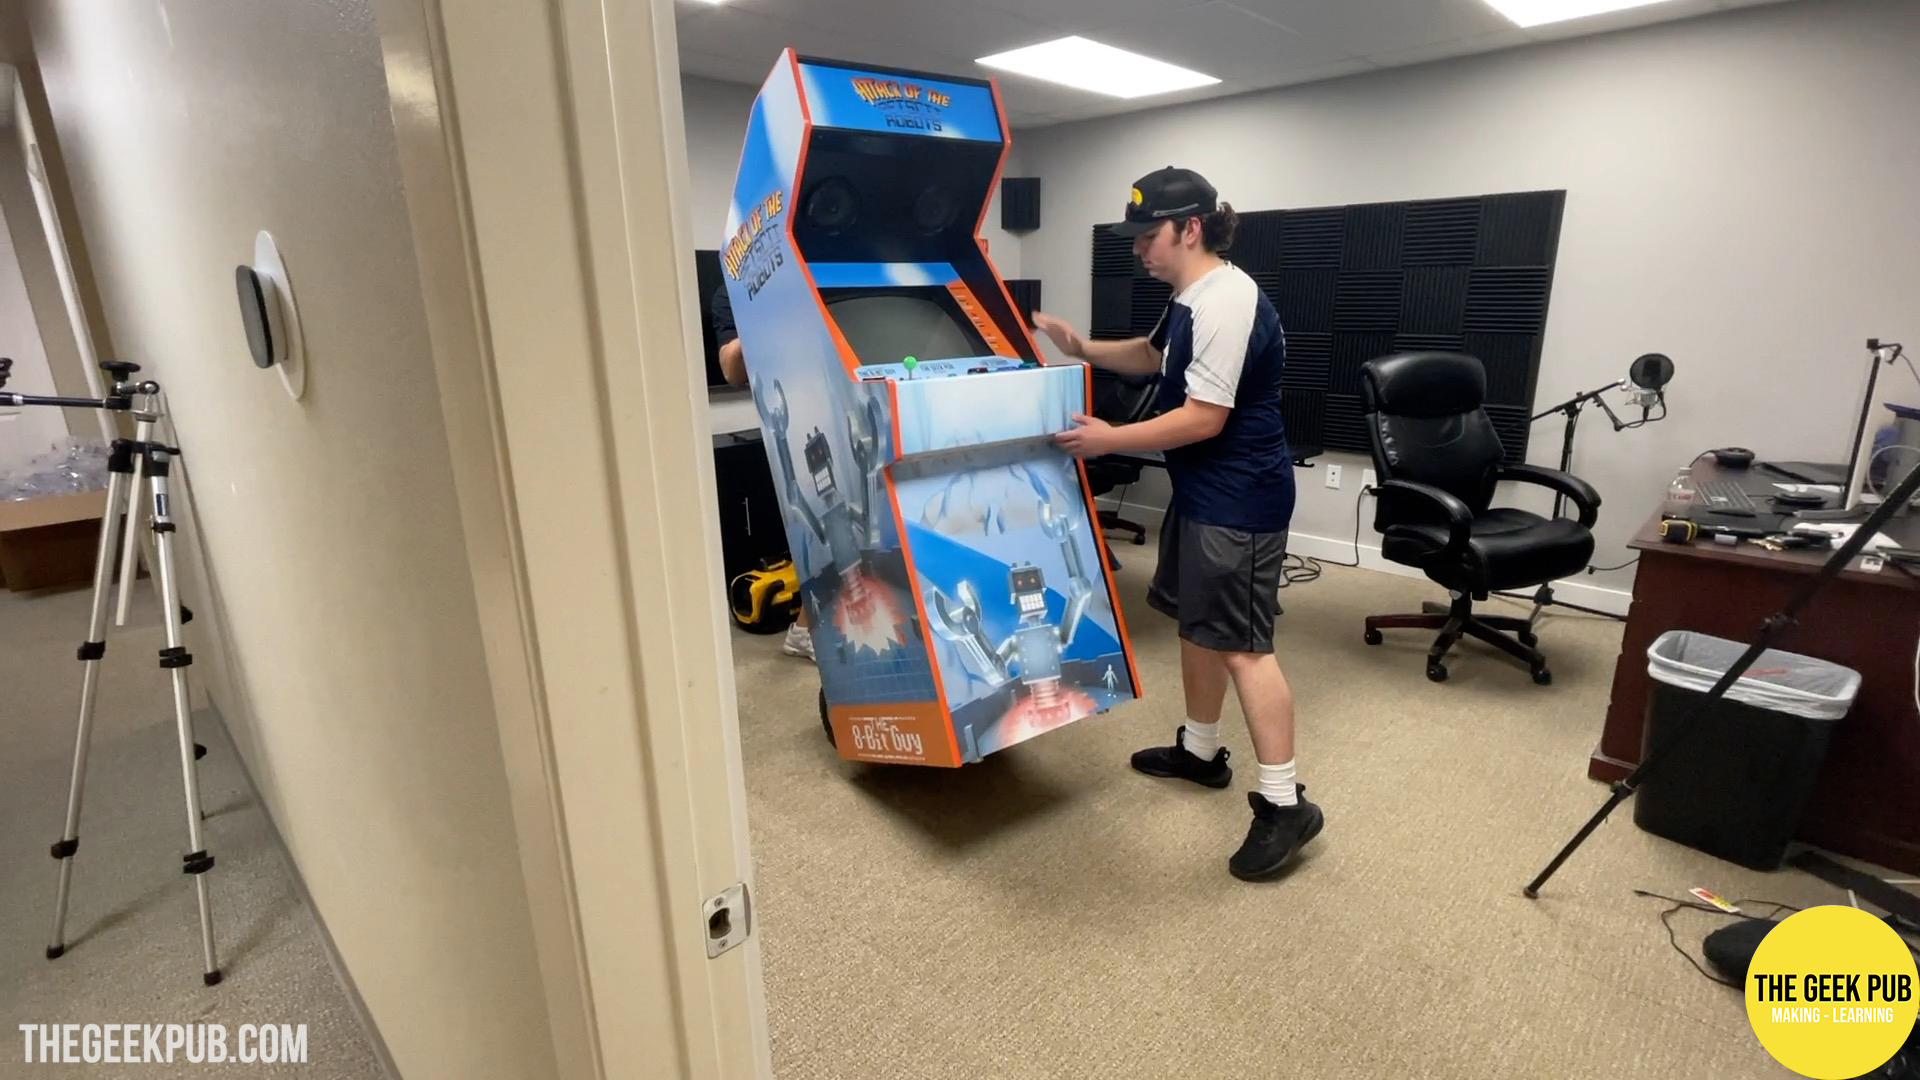
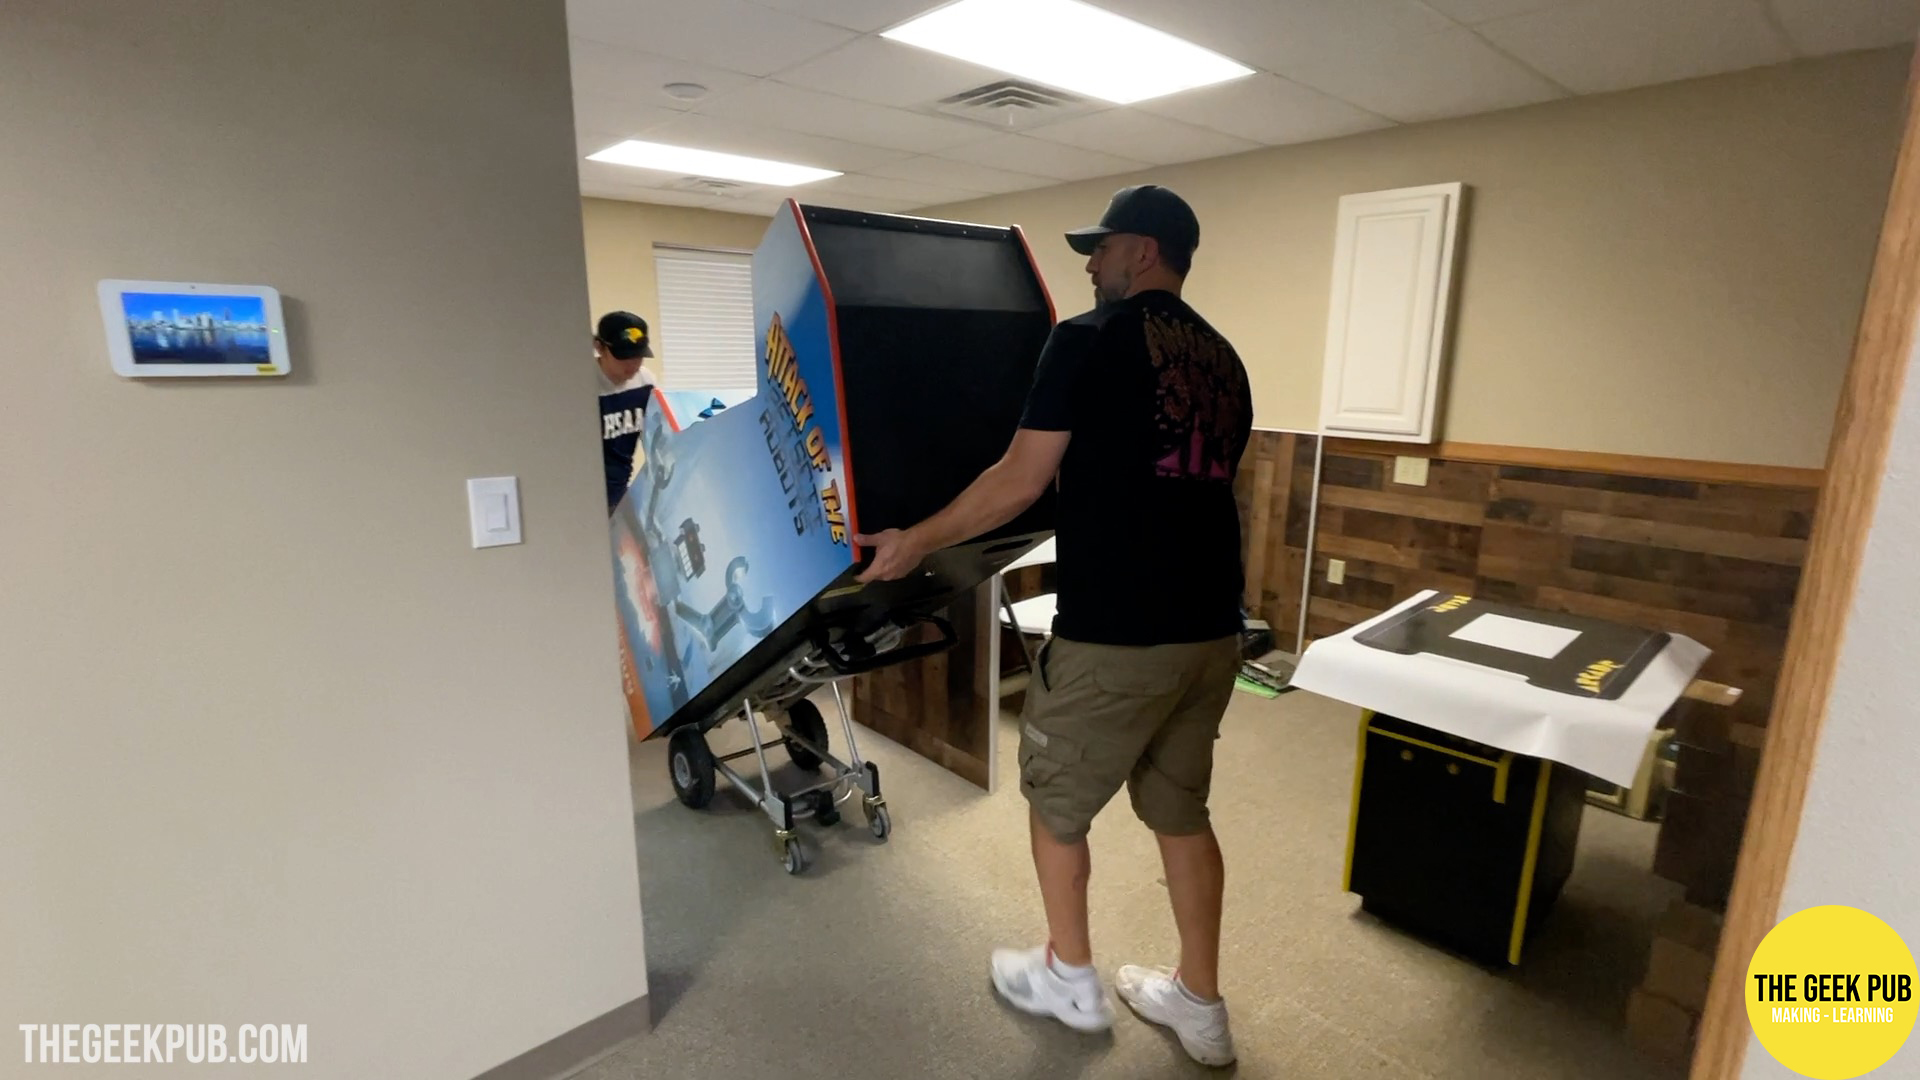
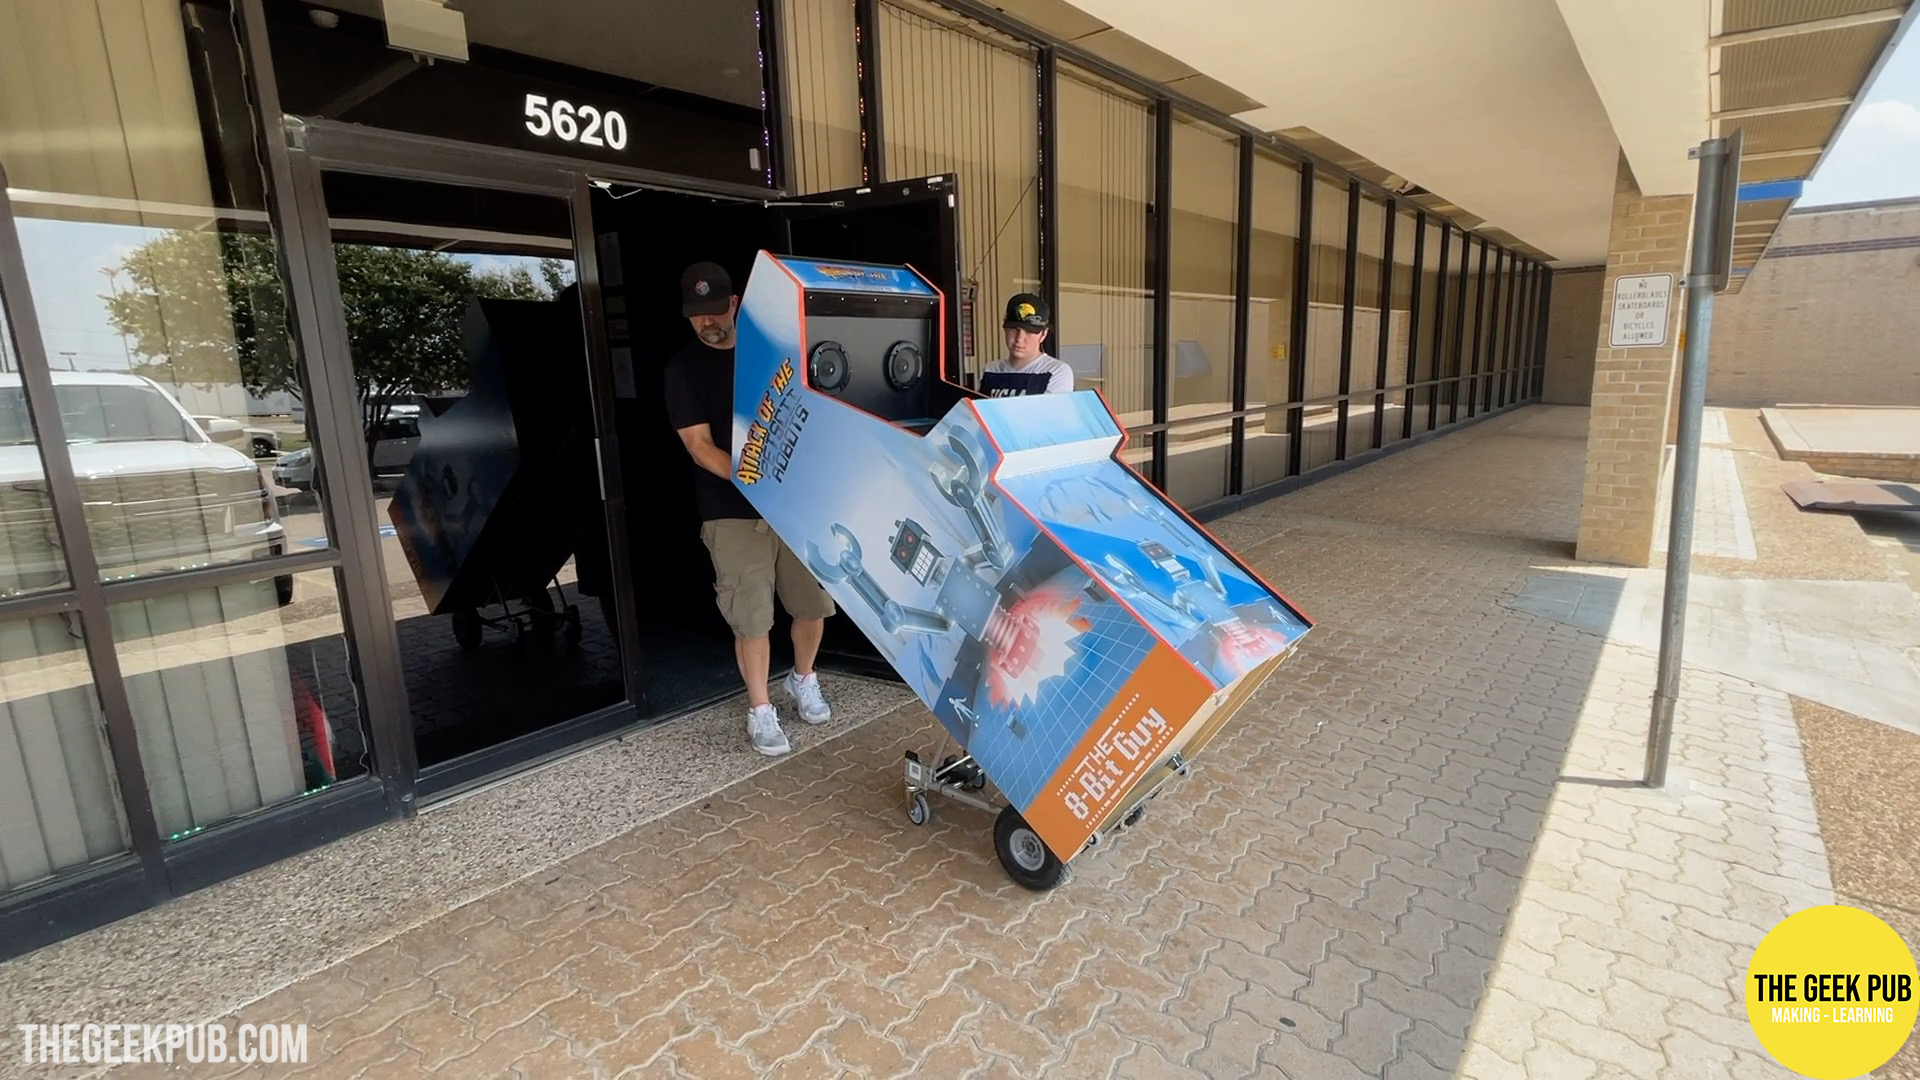
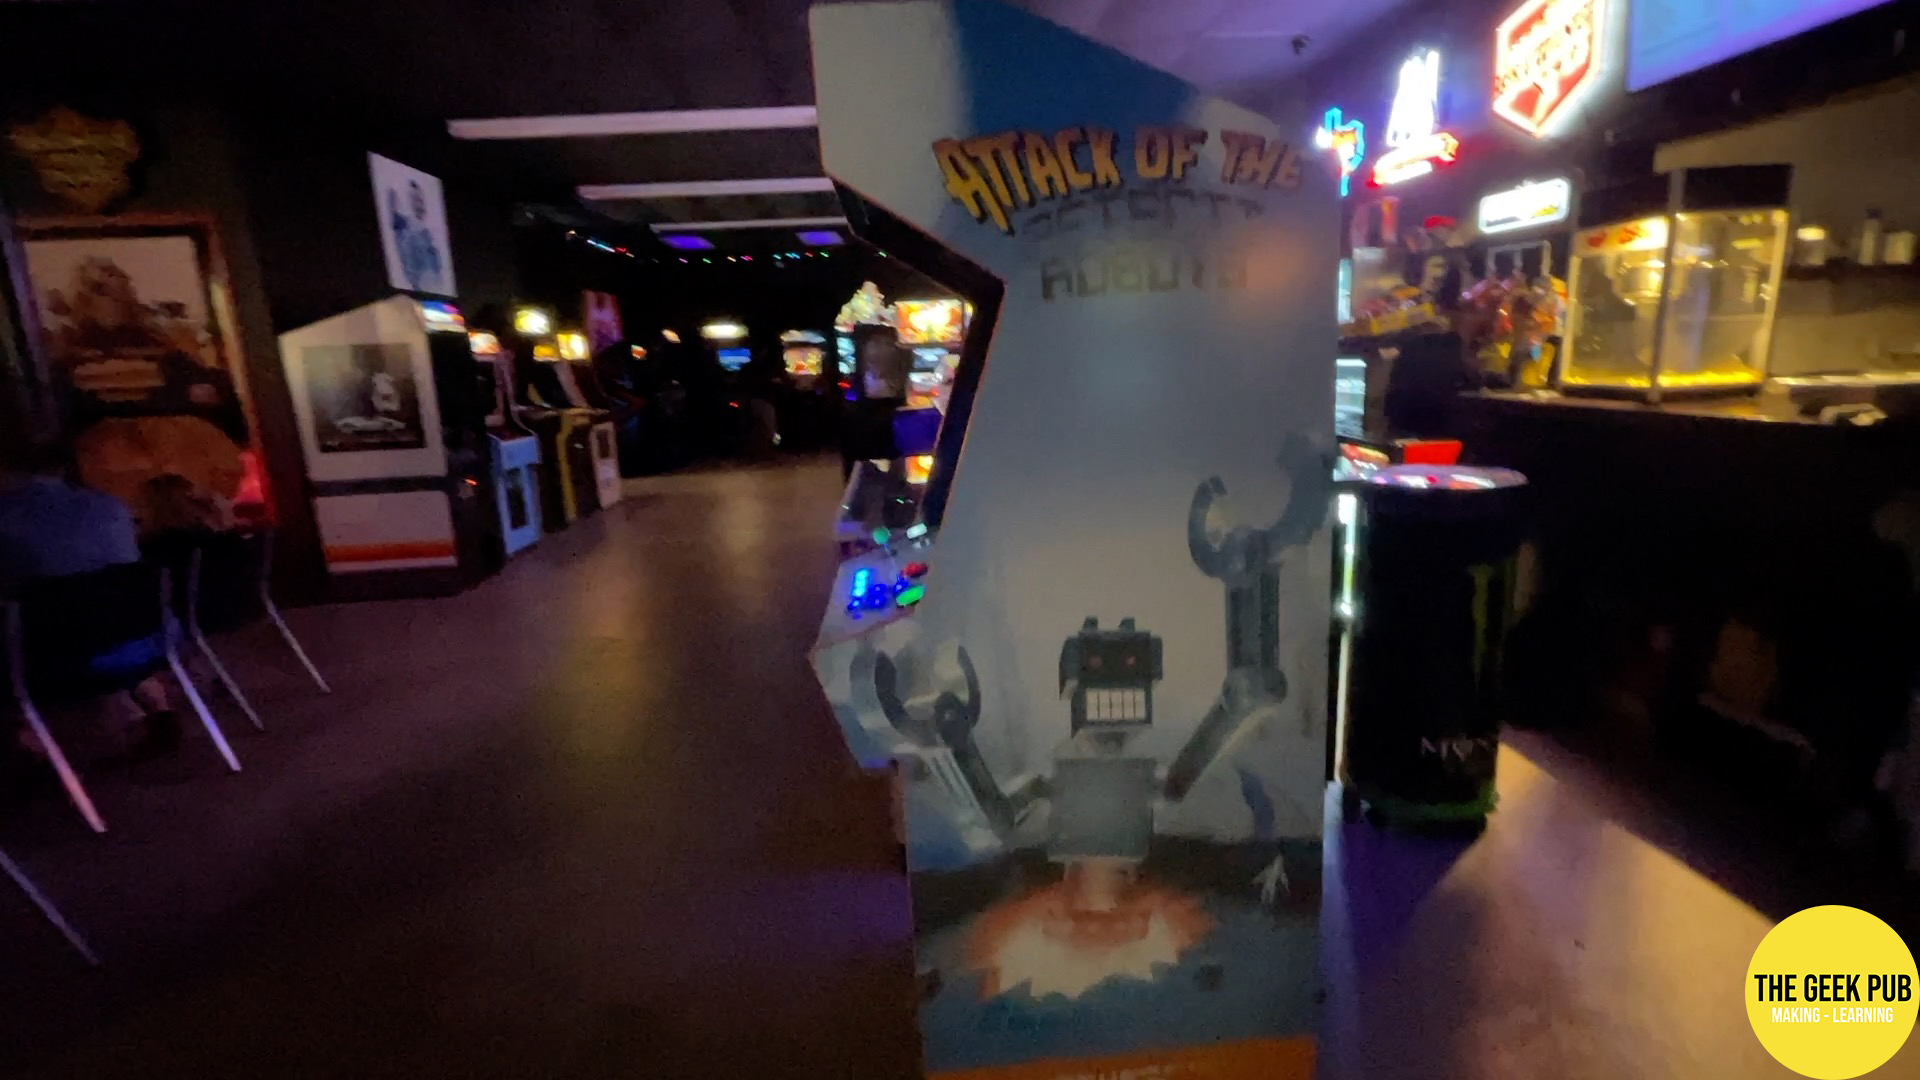
Moving PETSCII Robots to the Electric Starship Arcade
Mike and Brendan from The Electric Starship Arcade in Haltom City arrived just in time to pick the completed PETSCII Robots arcade and transport it Mike’s awesome arcade.
Luckily Mike has a big ass box truck with a lift gate on the back of it. That took a lot of work out of moving the cabinet to his place.

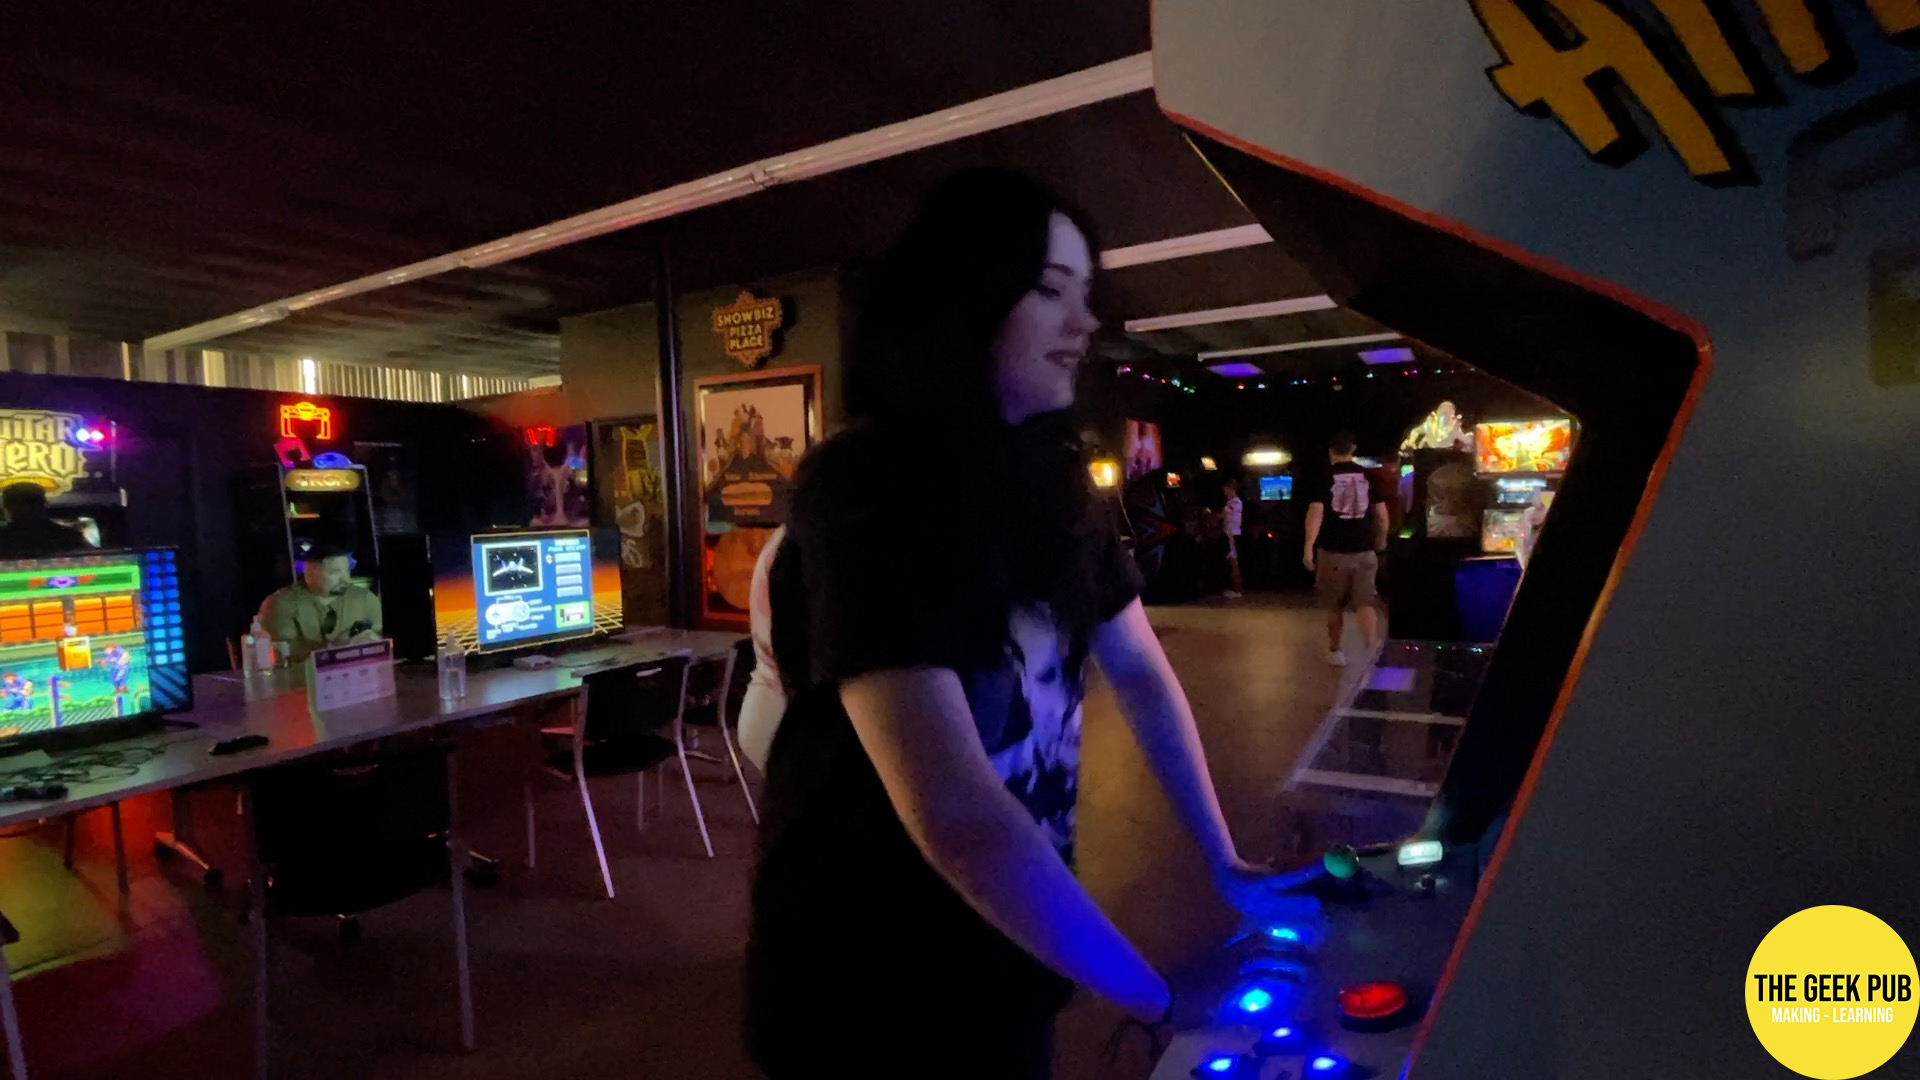
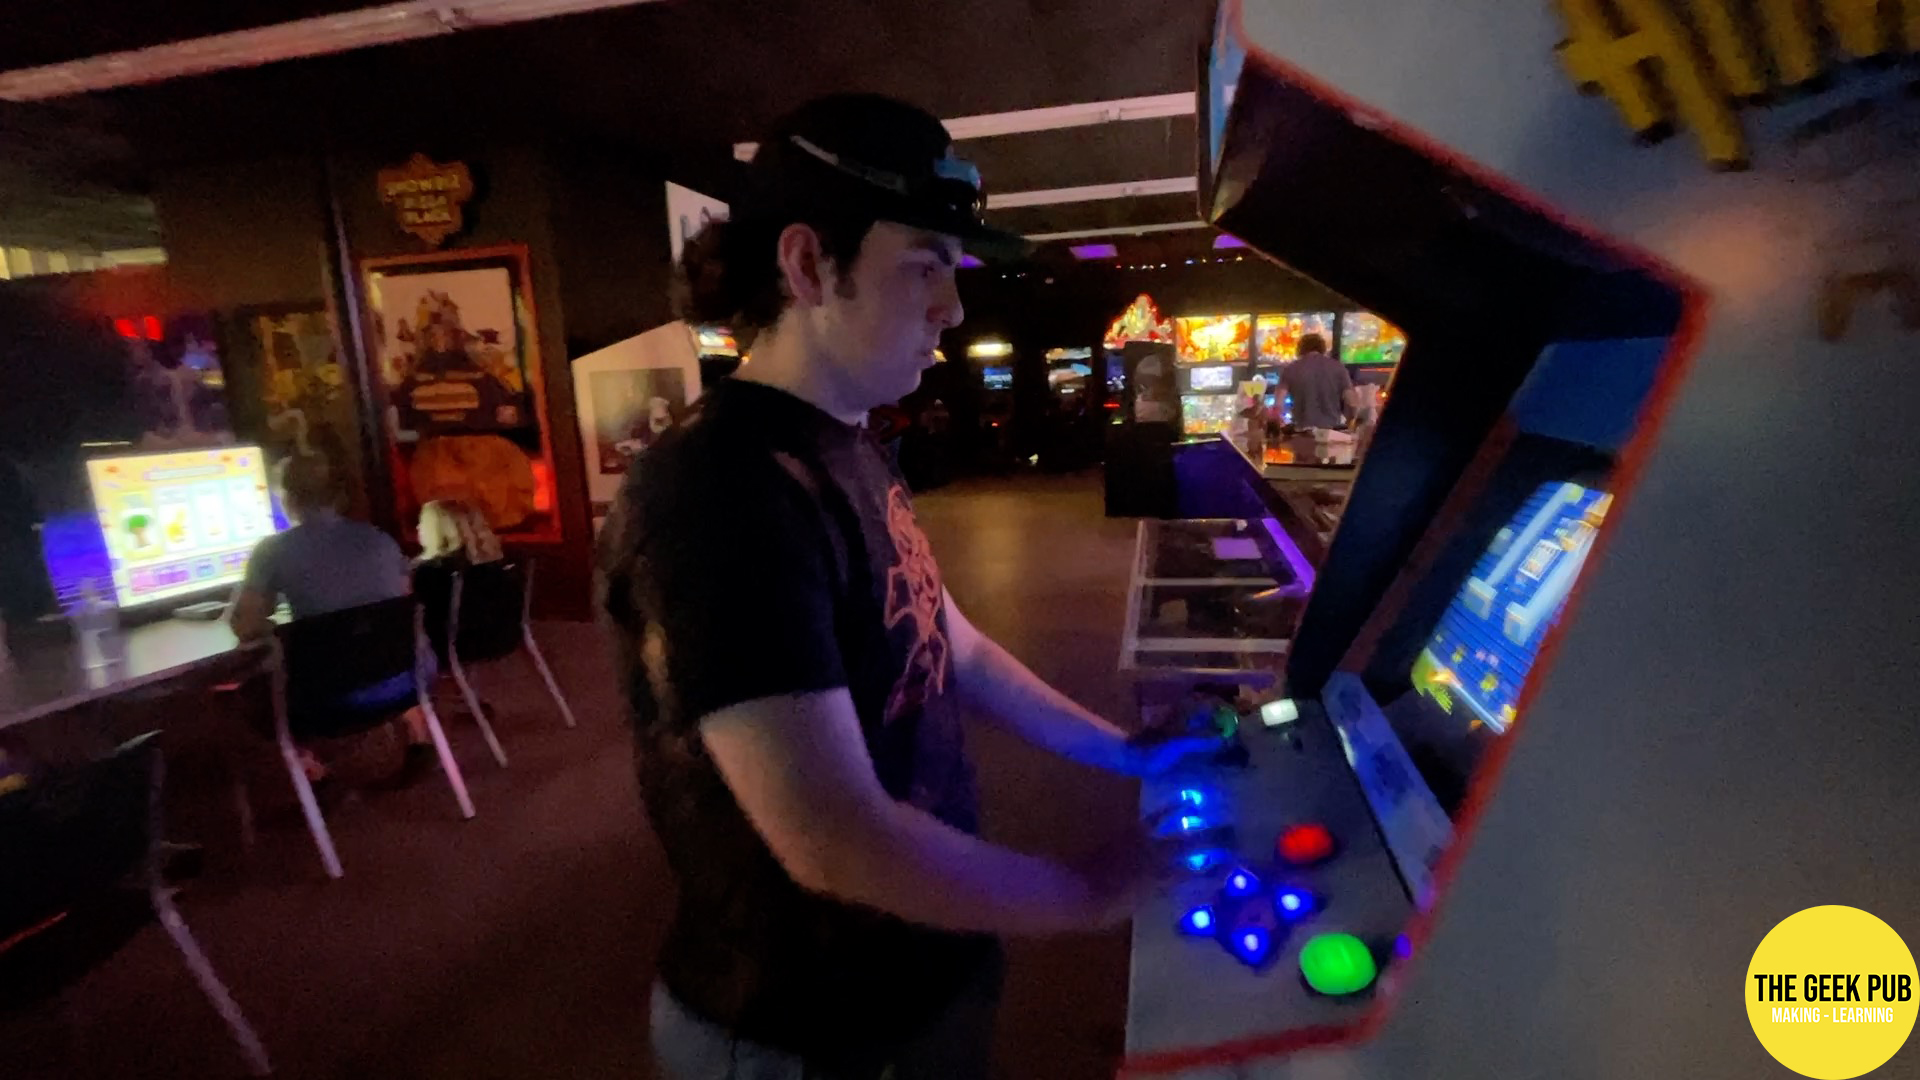
First PETSCII Robots Arcade Players
With the PETSCII Robots arcade all setup at The Electric Starship Arcade, it was time for people to start playing the game. One of the first people to play it w as the super awesome Brinley! She figured things out pretty quickly and was able to kill off a few robots before she accidently crushed herself in the trash compactor! Oops!


Next up Brendan had to give it a go. You’d think he’d be tired after the moving exercise but he had to see what this was all about!

And of course, David was on-site to welcome some of the first players and give them some pointers.
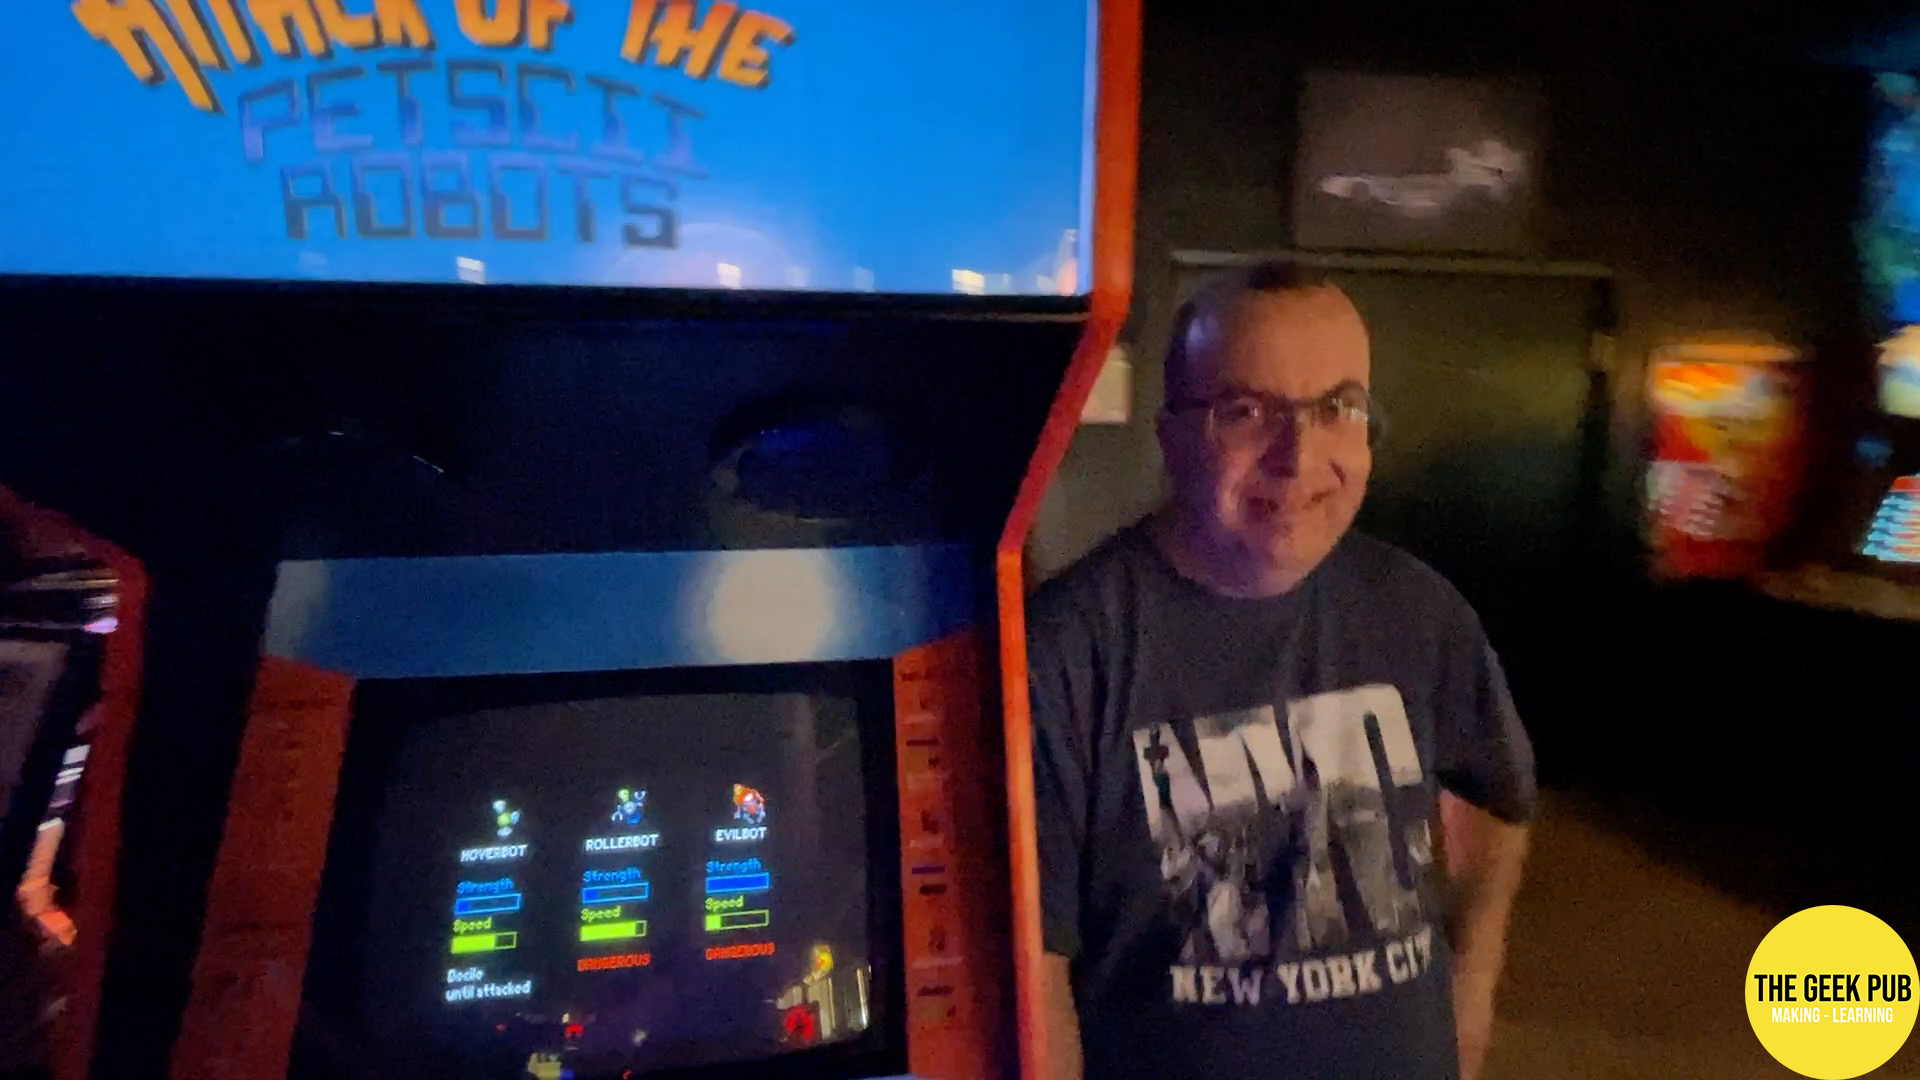
If you’d like to play the PETSCII Robots Arcade game, you can visit his page that tells the current location. As of this writing it’s still at The Electric Starship Arcade, but it may find its way to various arcades all over the country! If you’d like your local arcade to host PETSCII Robots, have their owner reach out to us to schedule its availability!
PETSCII Robots Arcade Plans Coming Soon!
There will be a set of PETSCII Robots arcade plans coming in the next month or two if you want to build your own, or you want to build a RetroPie/MAME cabinet using this design. Check back for that! Coming Soon!
Wow! I am just finishing my first Arcade build, and now I want to do this one next!
Awesome build. I am impressed with the arcade cabinet and the game!