Blog
Raspberry Pi Commodore 64
I’ve built a lot of arcades and packed them with
The Raspberry Pi Commodore 64 Setup
The setup for this project is pretty simple. I had an extra (working) Commodore 64 that I’ve been storing. To build the RPi C64 I didn’t want to alter the Commodore 64’s components in any way that would not be reversible. No cutting the plastic. No wiring or soldering changes. It had to be 100% capable of being turned back to stock. In the future, I might run into a Commodore 64 shell that I can transfer all of this componentry into and return this C64 to factory.
The other thing I wanted to accomplish with this project is a very clean look. Most of the projects I see on the web that slip a
Building the Raspberry Pi Commodore 64
So let’s get started and make this awesome project! I’ll take you through each step one at a time!
The Board Layouts
Let’s first discuss the board layouts, and then I will cover the individual components. Links will be in the article and full list at the bottom of the page if you want to build this same project!
We’re going to use several components to make this happen, and create a super clean Rasbperry Pi Commodore 64. First thing we’ll do is 3D print some covers for the existing Commodore 64 ports. These will also provide port placement for an HDMI port, a remote power switch, and a micro-USB port to provide power to the whole system. In the center of the C64 will be a
The Keyrah V2 – C64 Keyboard Interface Board
The Keyrah V2 is an interface board that translates the keys of the Commodore 64 to a standard keyboard interface (via USB). Simply put, it allows you to plug the C64’s Keyboard into the
For those of you who don’t want to do a Commodore 64
The Raspberry Pi 3 Model B – The New Brain
Our converted C64 will need a new “brain”. Since we’re removing the Commodore 64’s original motherboard, the Raspberry Pi will take it’s place. The
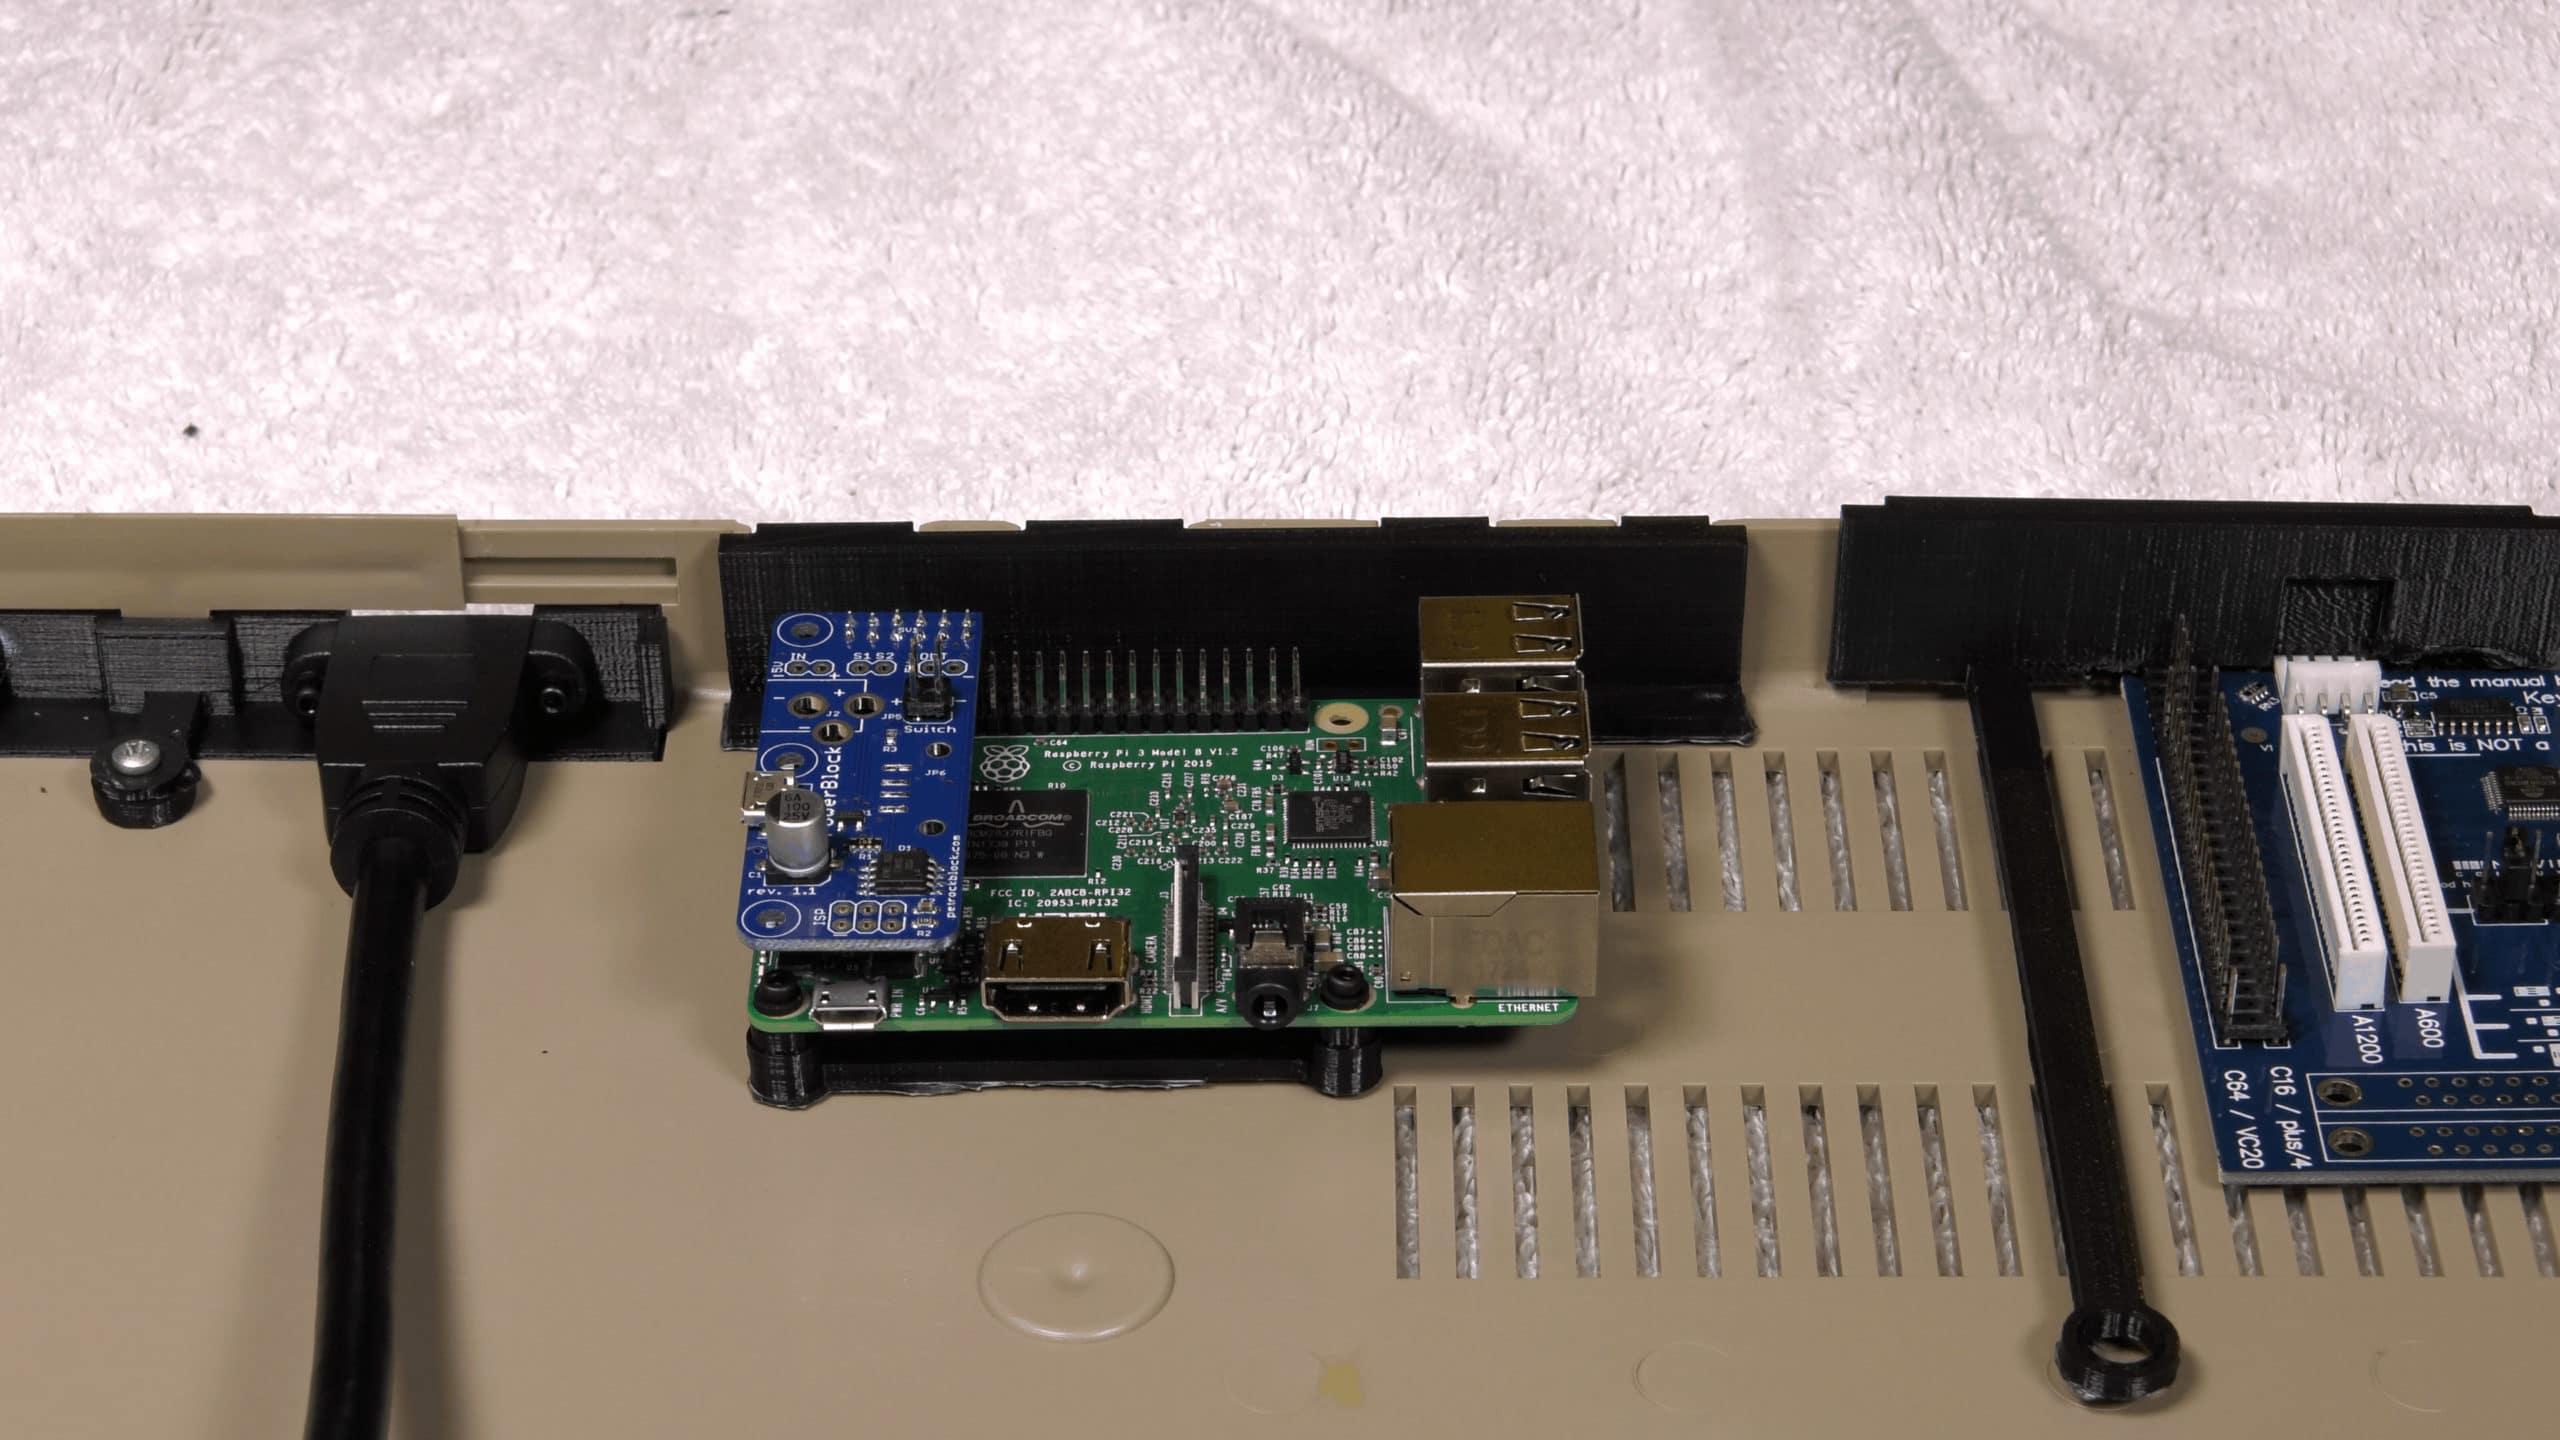
The PowerBlock – Remote Power Control
The PowerBlock from PetRockBlock is an optional component for this build, but really takes things to the next level! It mounts on the Pi’s GPIO header and does a few really cool things. The first is that it provides power to the Pi, rather than plugging the micro-USB into the Pi’s USB port. You plug your power source into the PowerBlock.
Turning on power, is no different than any other Pi with a remote power switch; the Powerblock simply provides 5 volts of DC electricity to the Pi. Where things get awesome is when you flip the power to the Pi off. The Powerblock continues to provide voltage to the Pi while it issues the system shutdown command and brings Raspian (the Pi OS) to a safe state. Once the Pi has completed shutdown, the PowerBlock stops providing 5 volts and powers down the Pi.
The PowerBlock will keep your Pi’s SD card from getting corrupted from repeated loss of power without a clean shutdown. I highly recommend this product for any
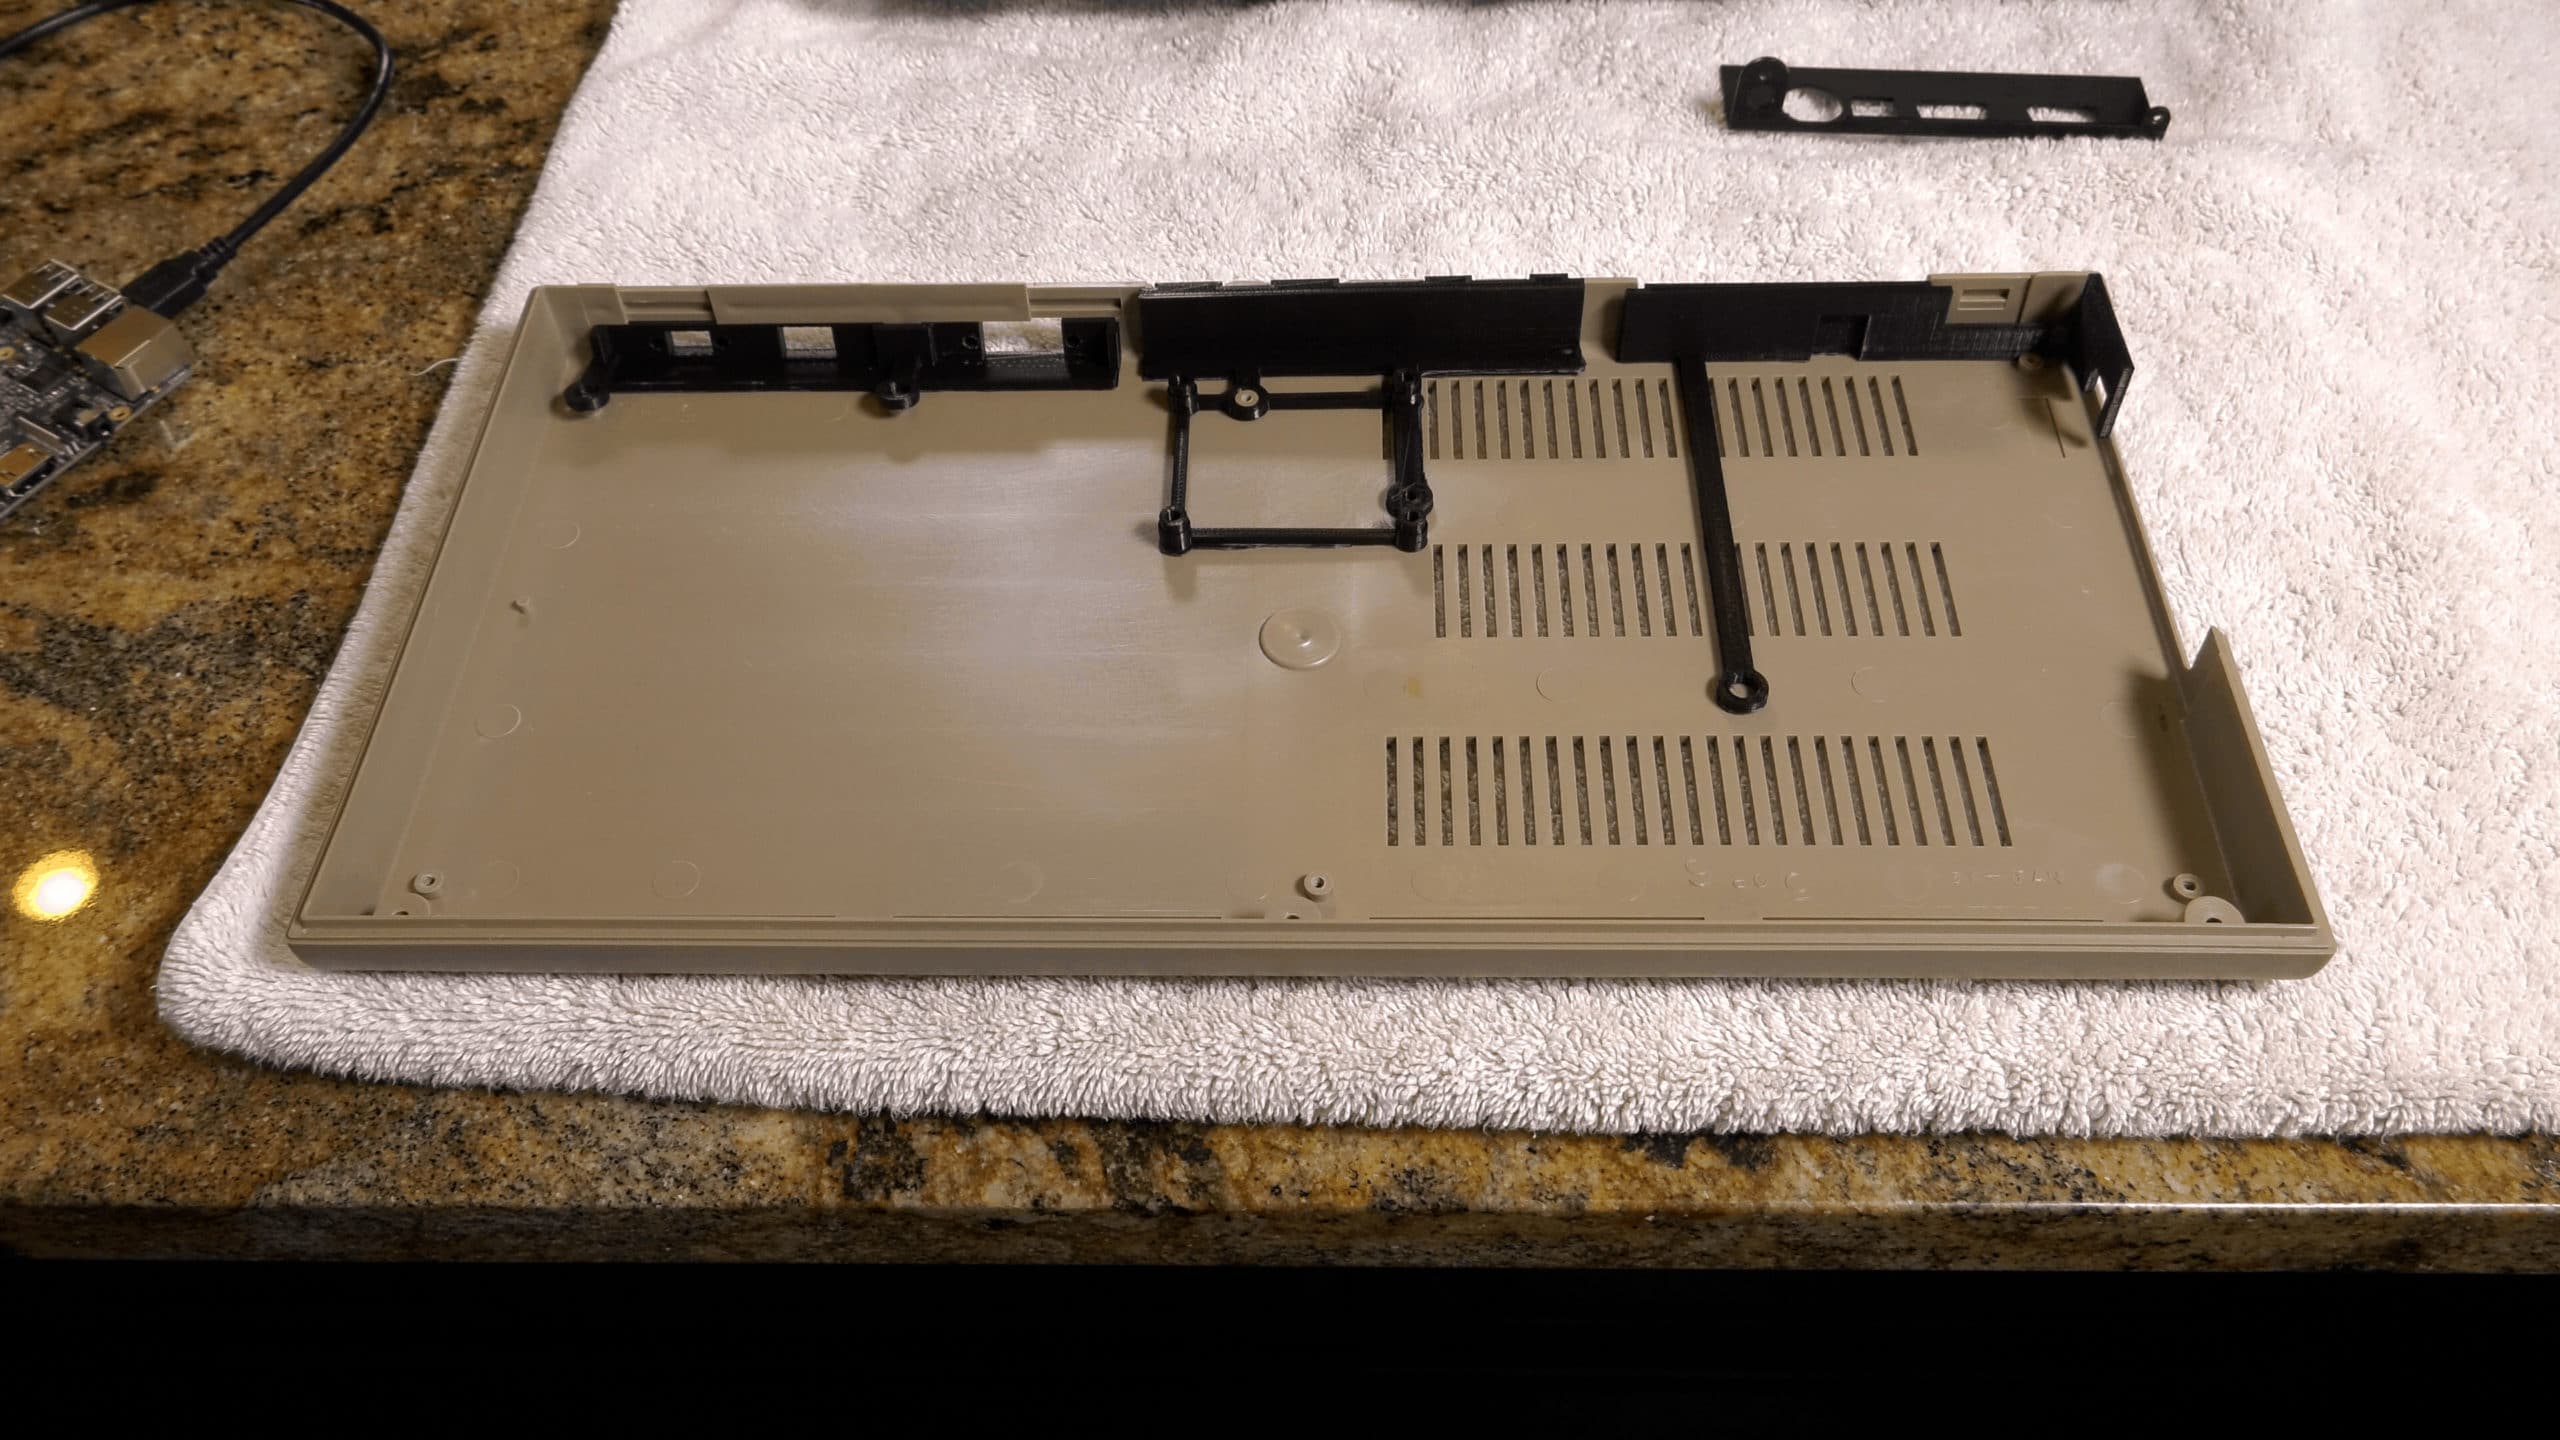
The 3D Printer Components – Making it Clean
As mentioned earlier, I 3D printed some freely available components from Thingiverse. These will make this
Assembling the Raspberry Pi Commodore 64
This is where things get really fun, assembling the
Installing the Knurled Hot Set Nuts
In order to make the 3D printed components last forever and make installation as simple as possible, we’re going to install knurled hot set nuts into the 3D printed components. The heat from the metal nuts will melt the plastic and result in a permanent bond to the plastic when they cool. These nuts provide mount points for all of our componentry.
To install the nuts, you simply hold them in place with some needle-nose pliers and heat them with a soldering iron. They will sink into the cavities and become permanently attached.
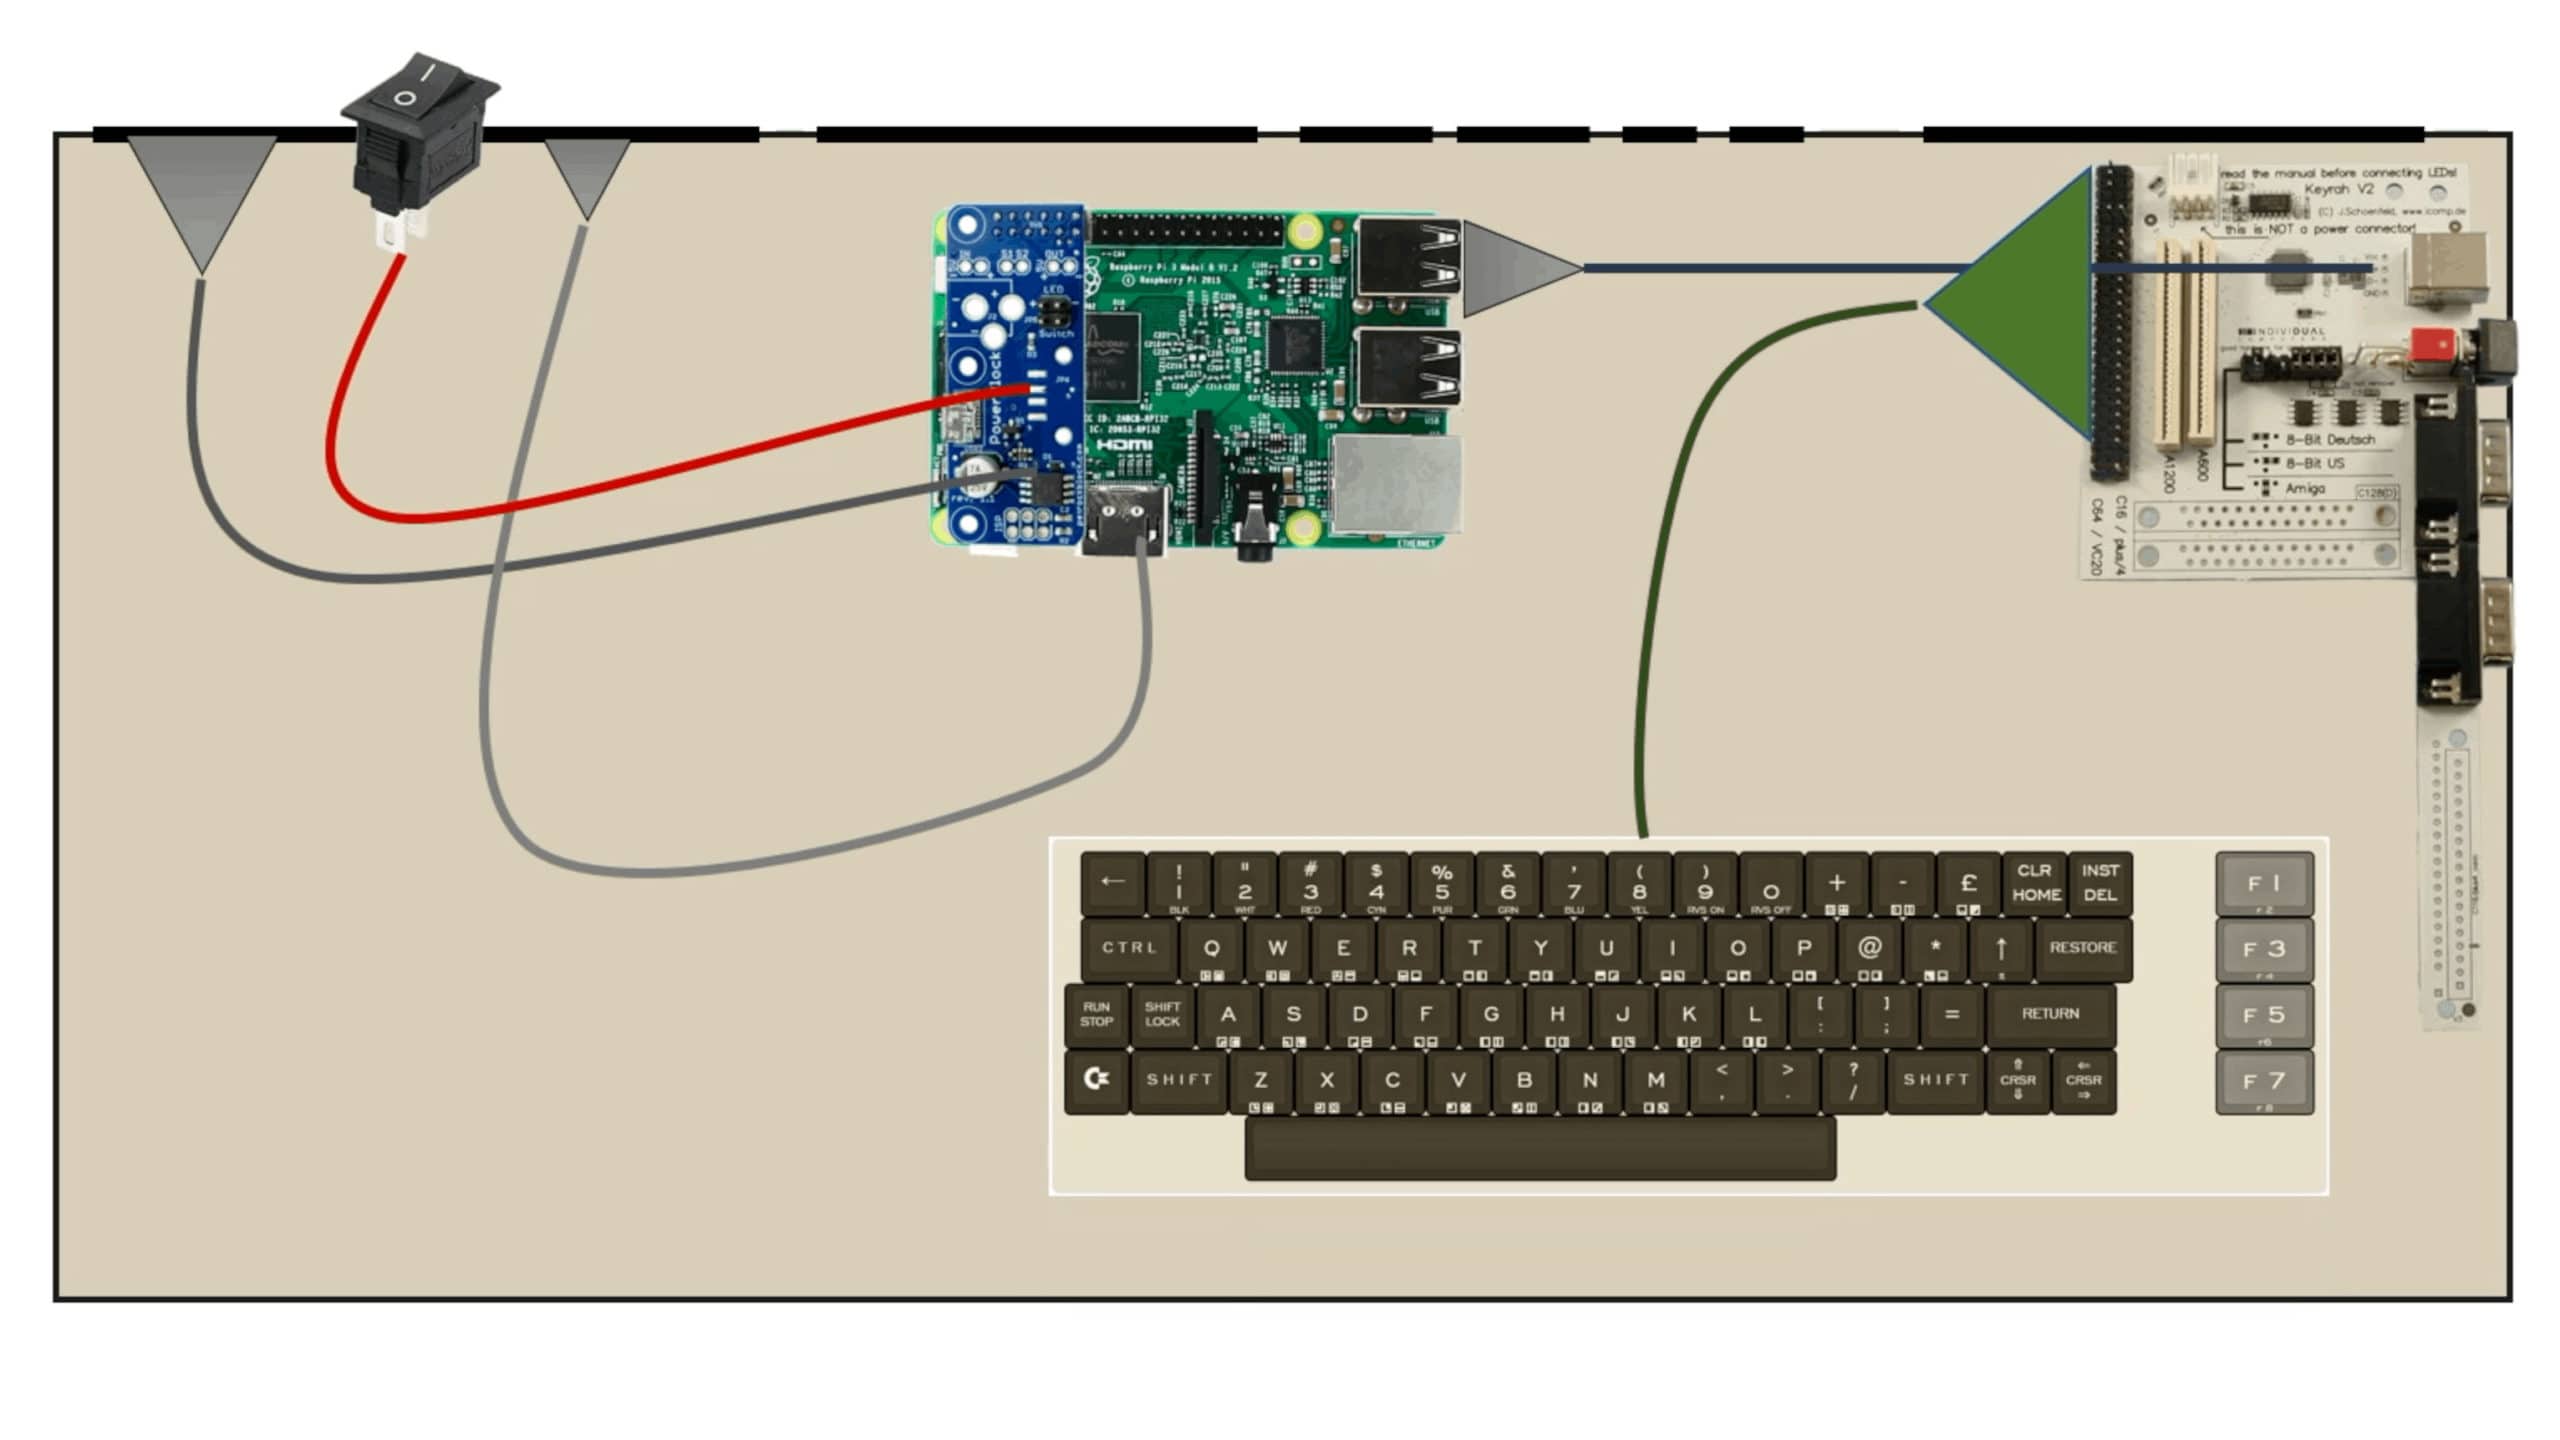
Installing the Cables and Switch
Once the hot set nuts are in place it’s time to install the HDMI cable, our remote switch, and micro-USB that will provide 5 volts to the PowerBlock. These just screw into the 3D printed left panel using the knurled hot set nuts we just installed and some cap screws.
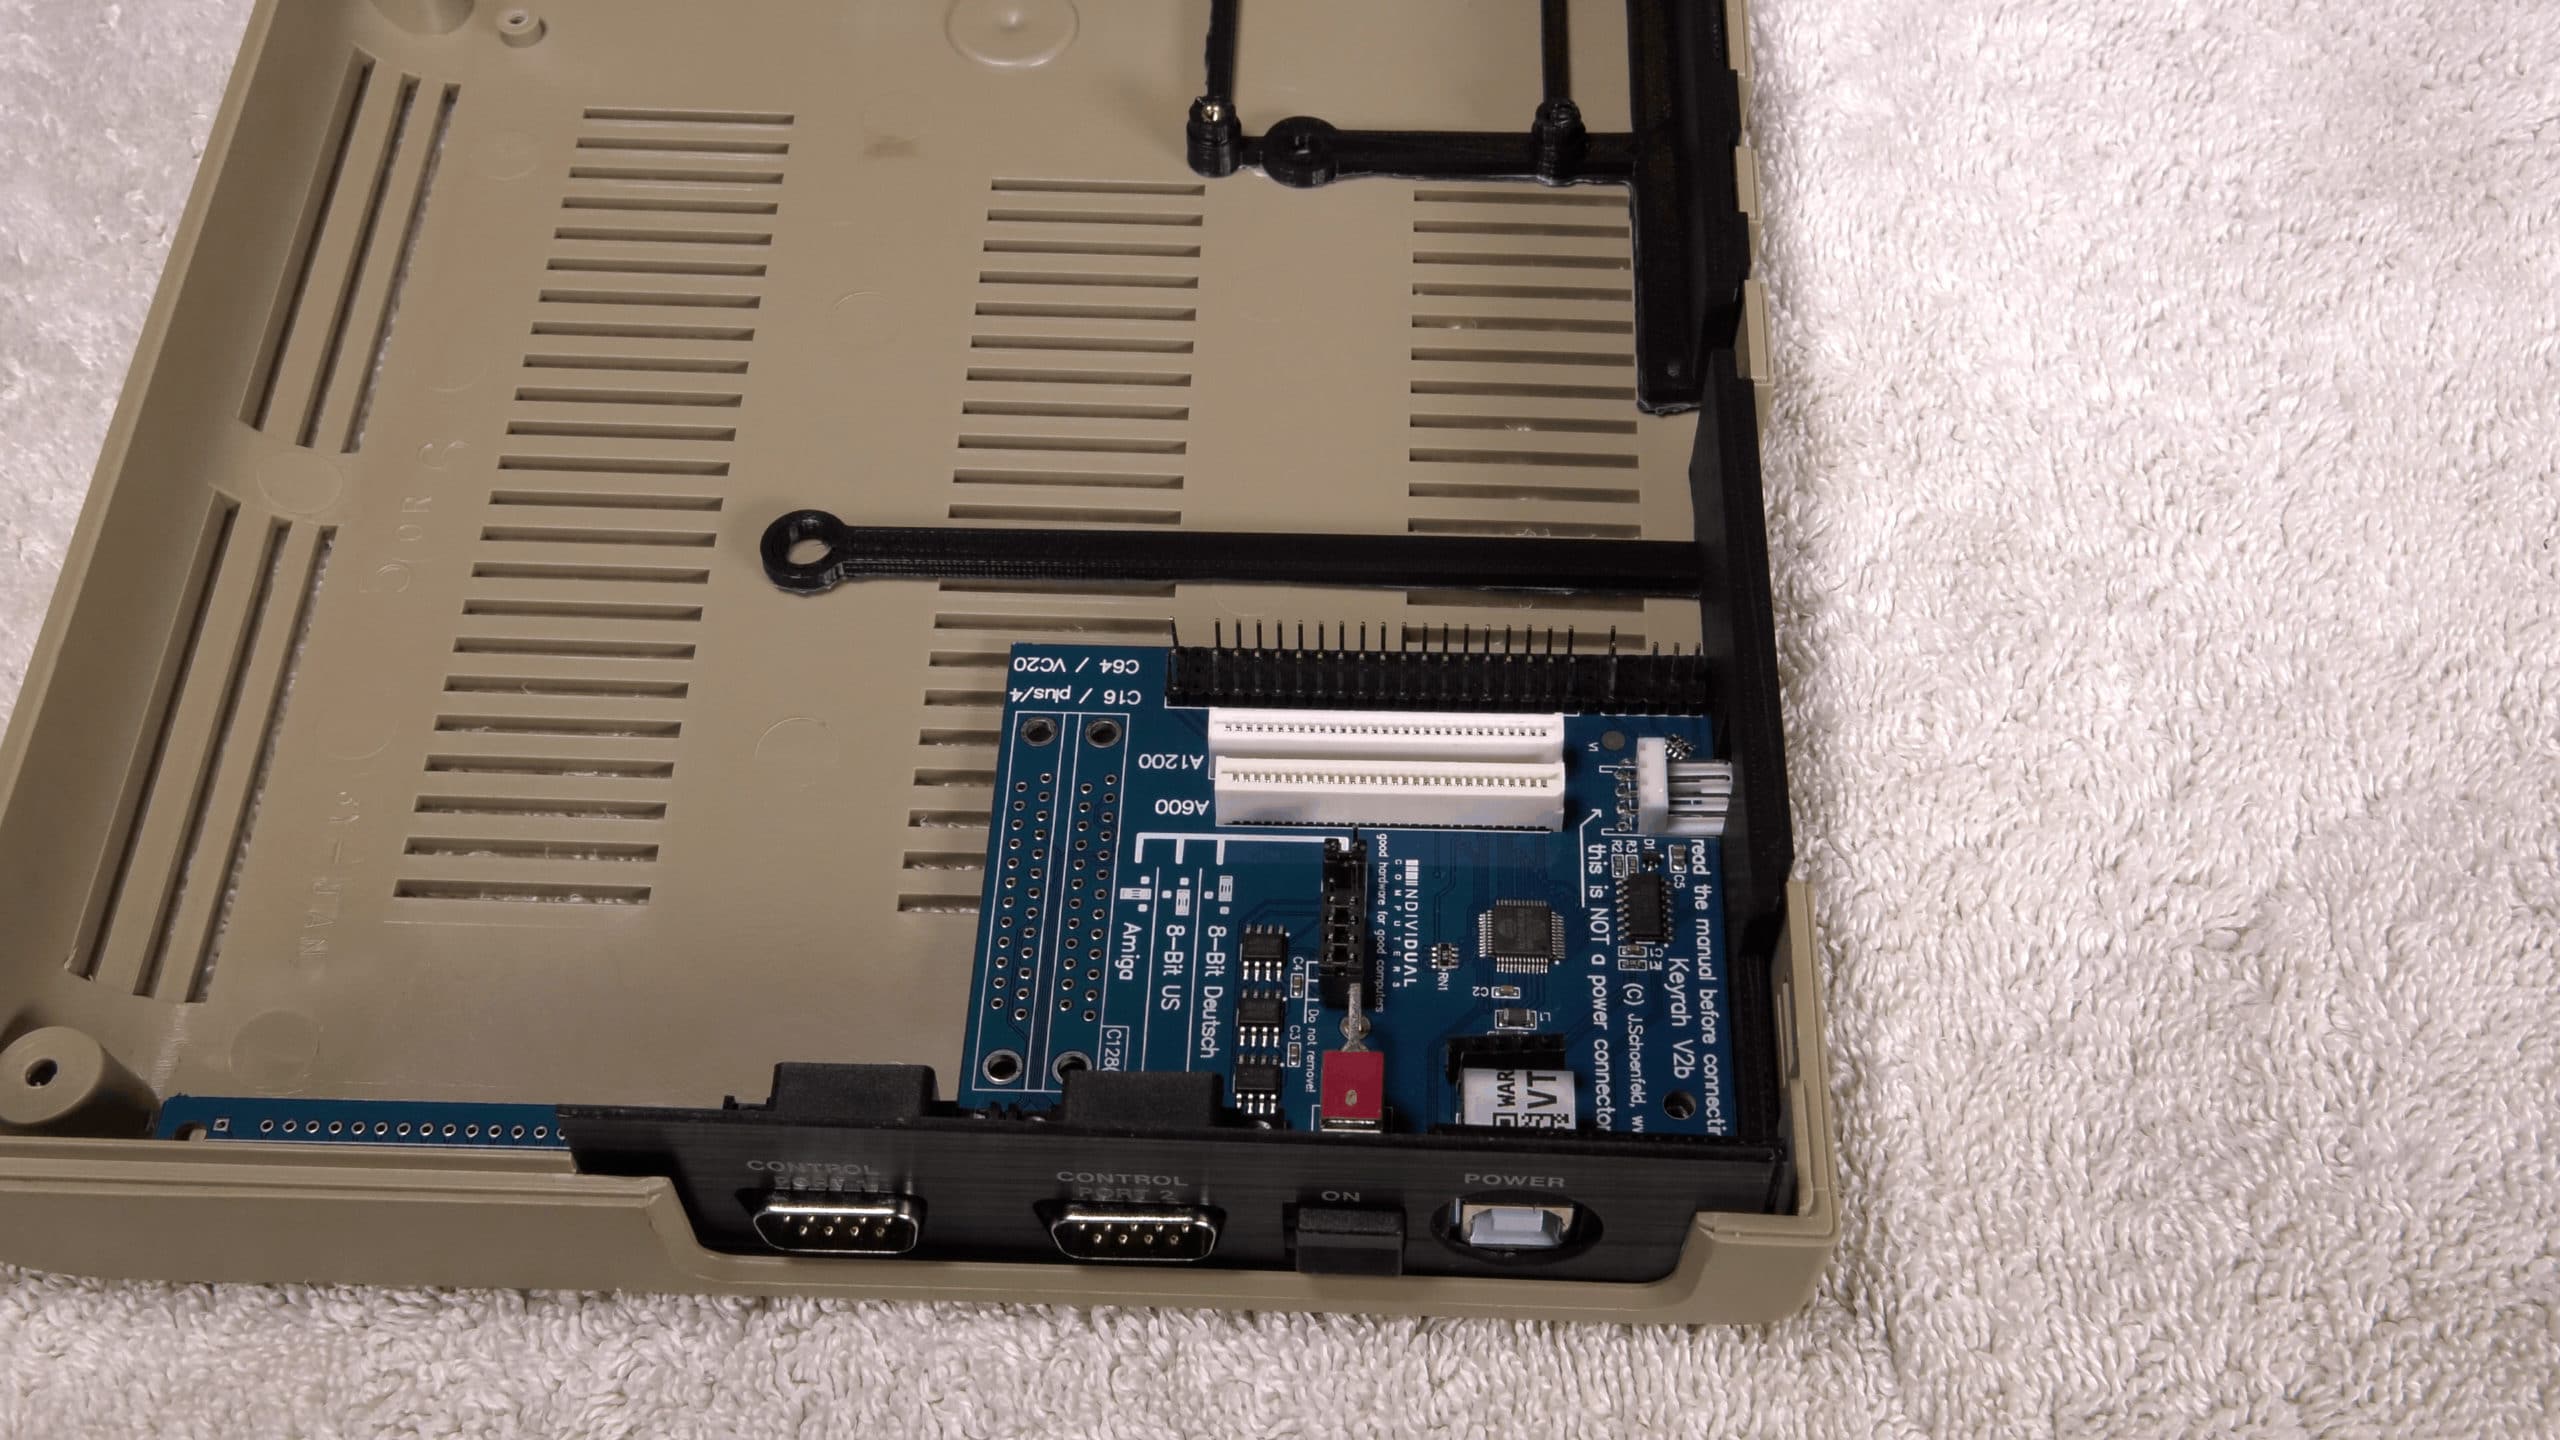
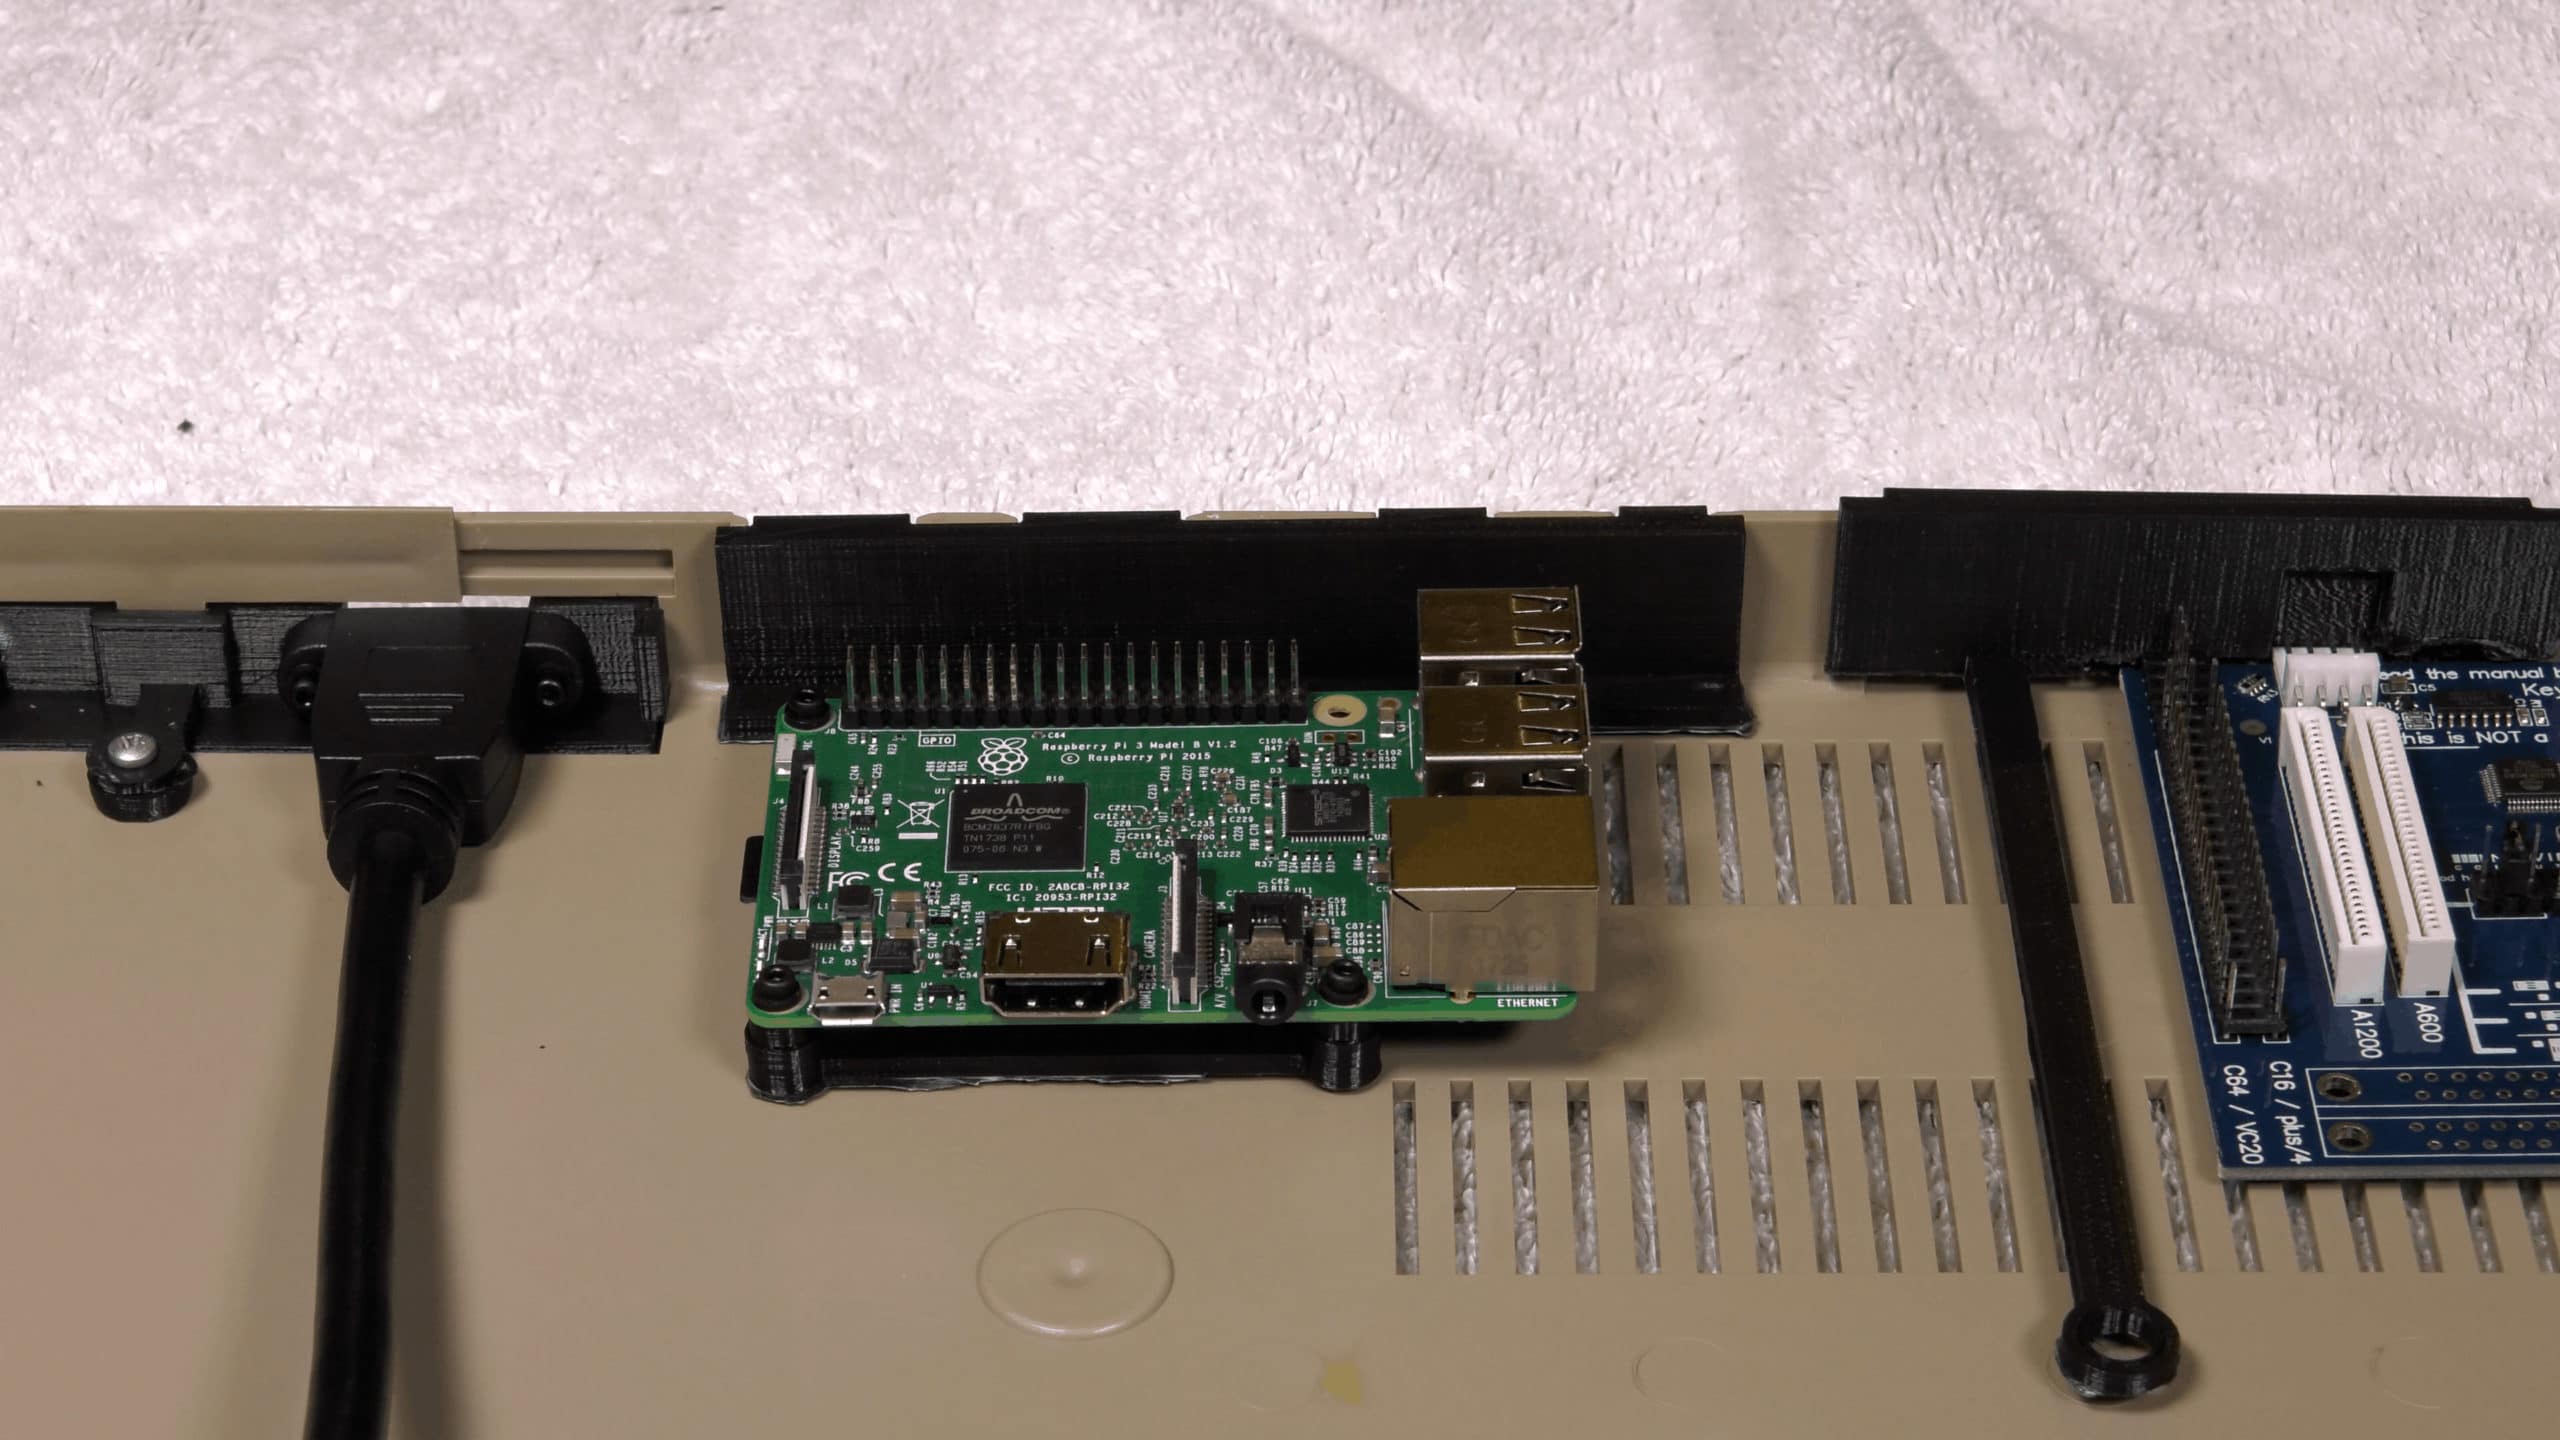
Install the Boards
The next step of the
Attatch the Commodore 64 Power LED and Keyboard
The final step before closing the case on this project is to connect the Commodore 64’s power LED to the PowerBlock’s LED header and the keyboard to the Keyrah V2’s C64 pin header.
The Finished Raspberry Pi Commodore 64 Conversion
After putting the case lid back on and screwing in the screws you have a completed
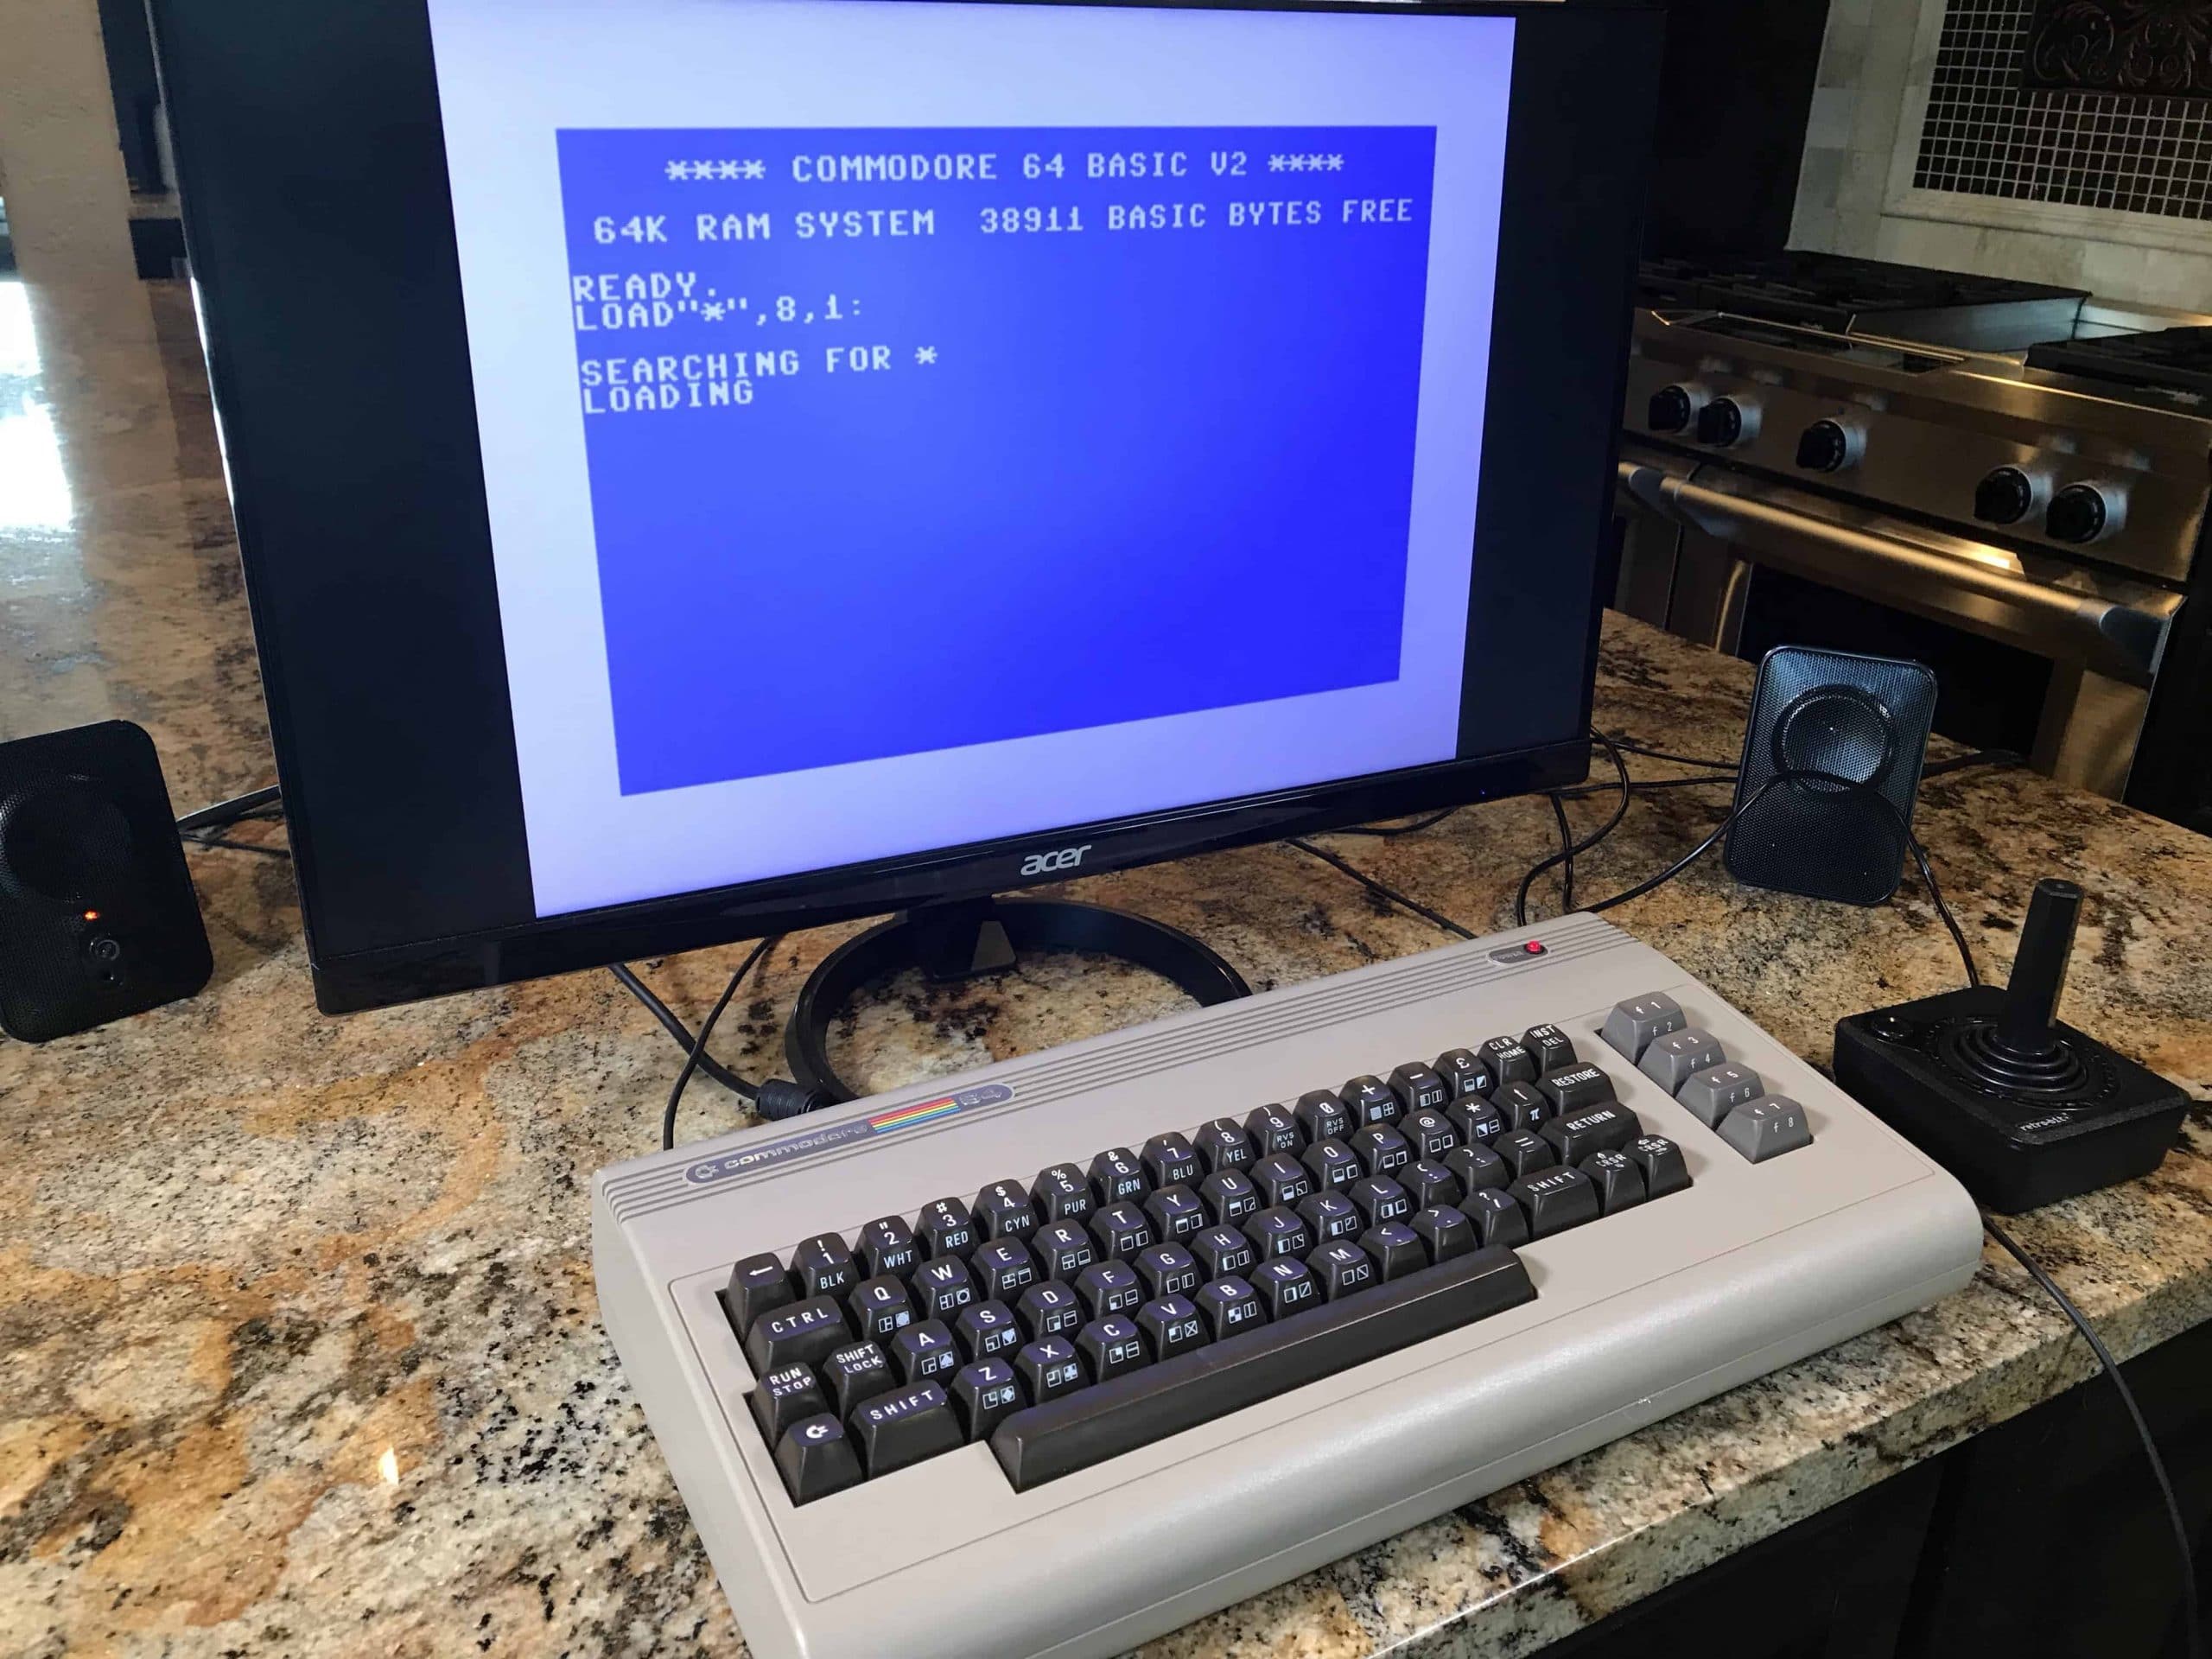
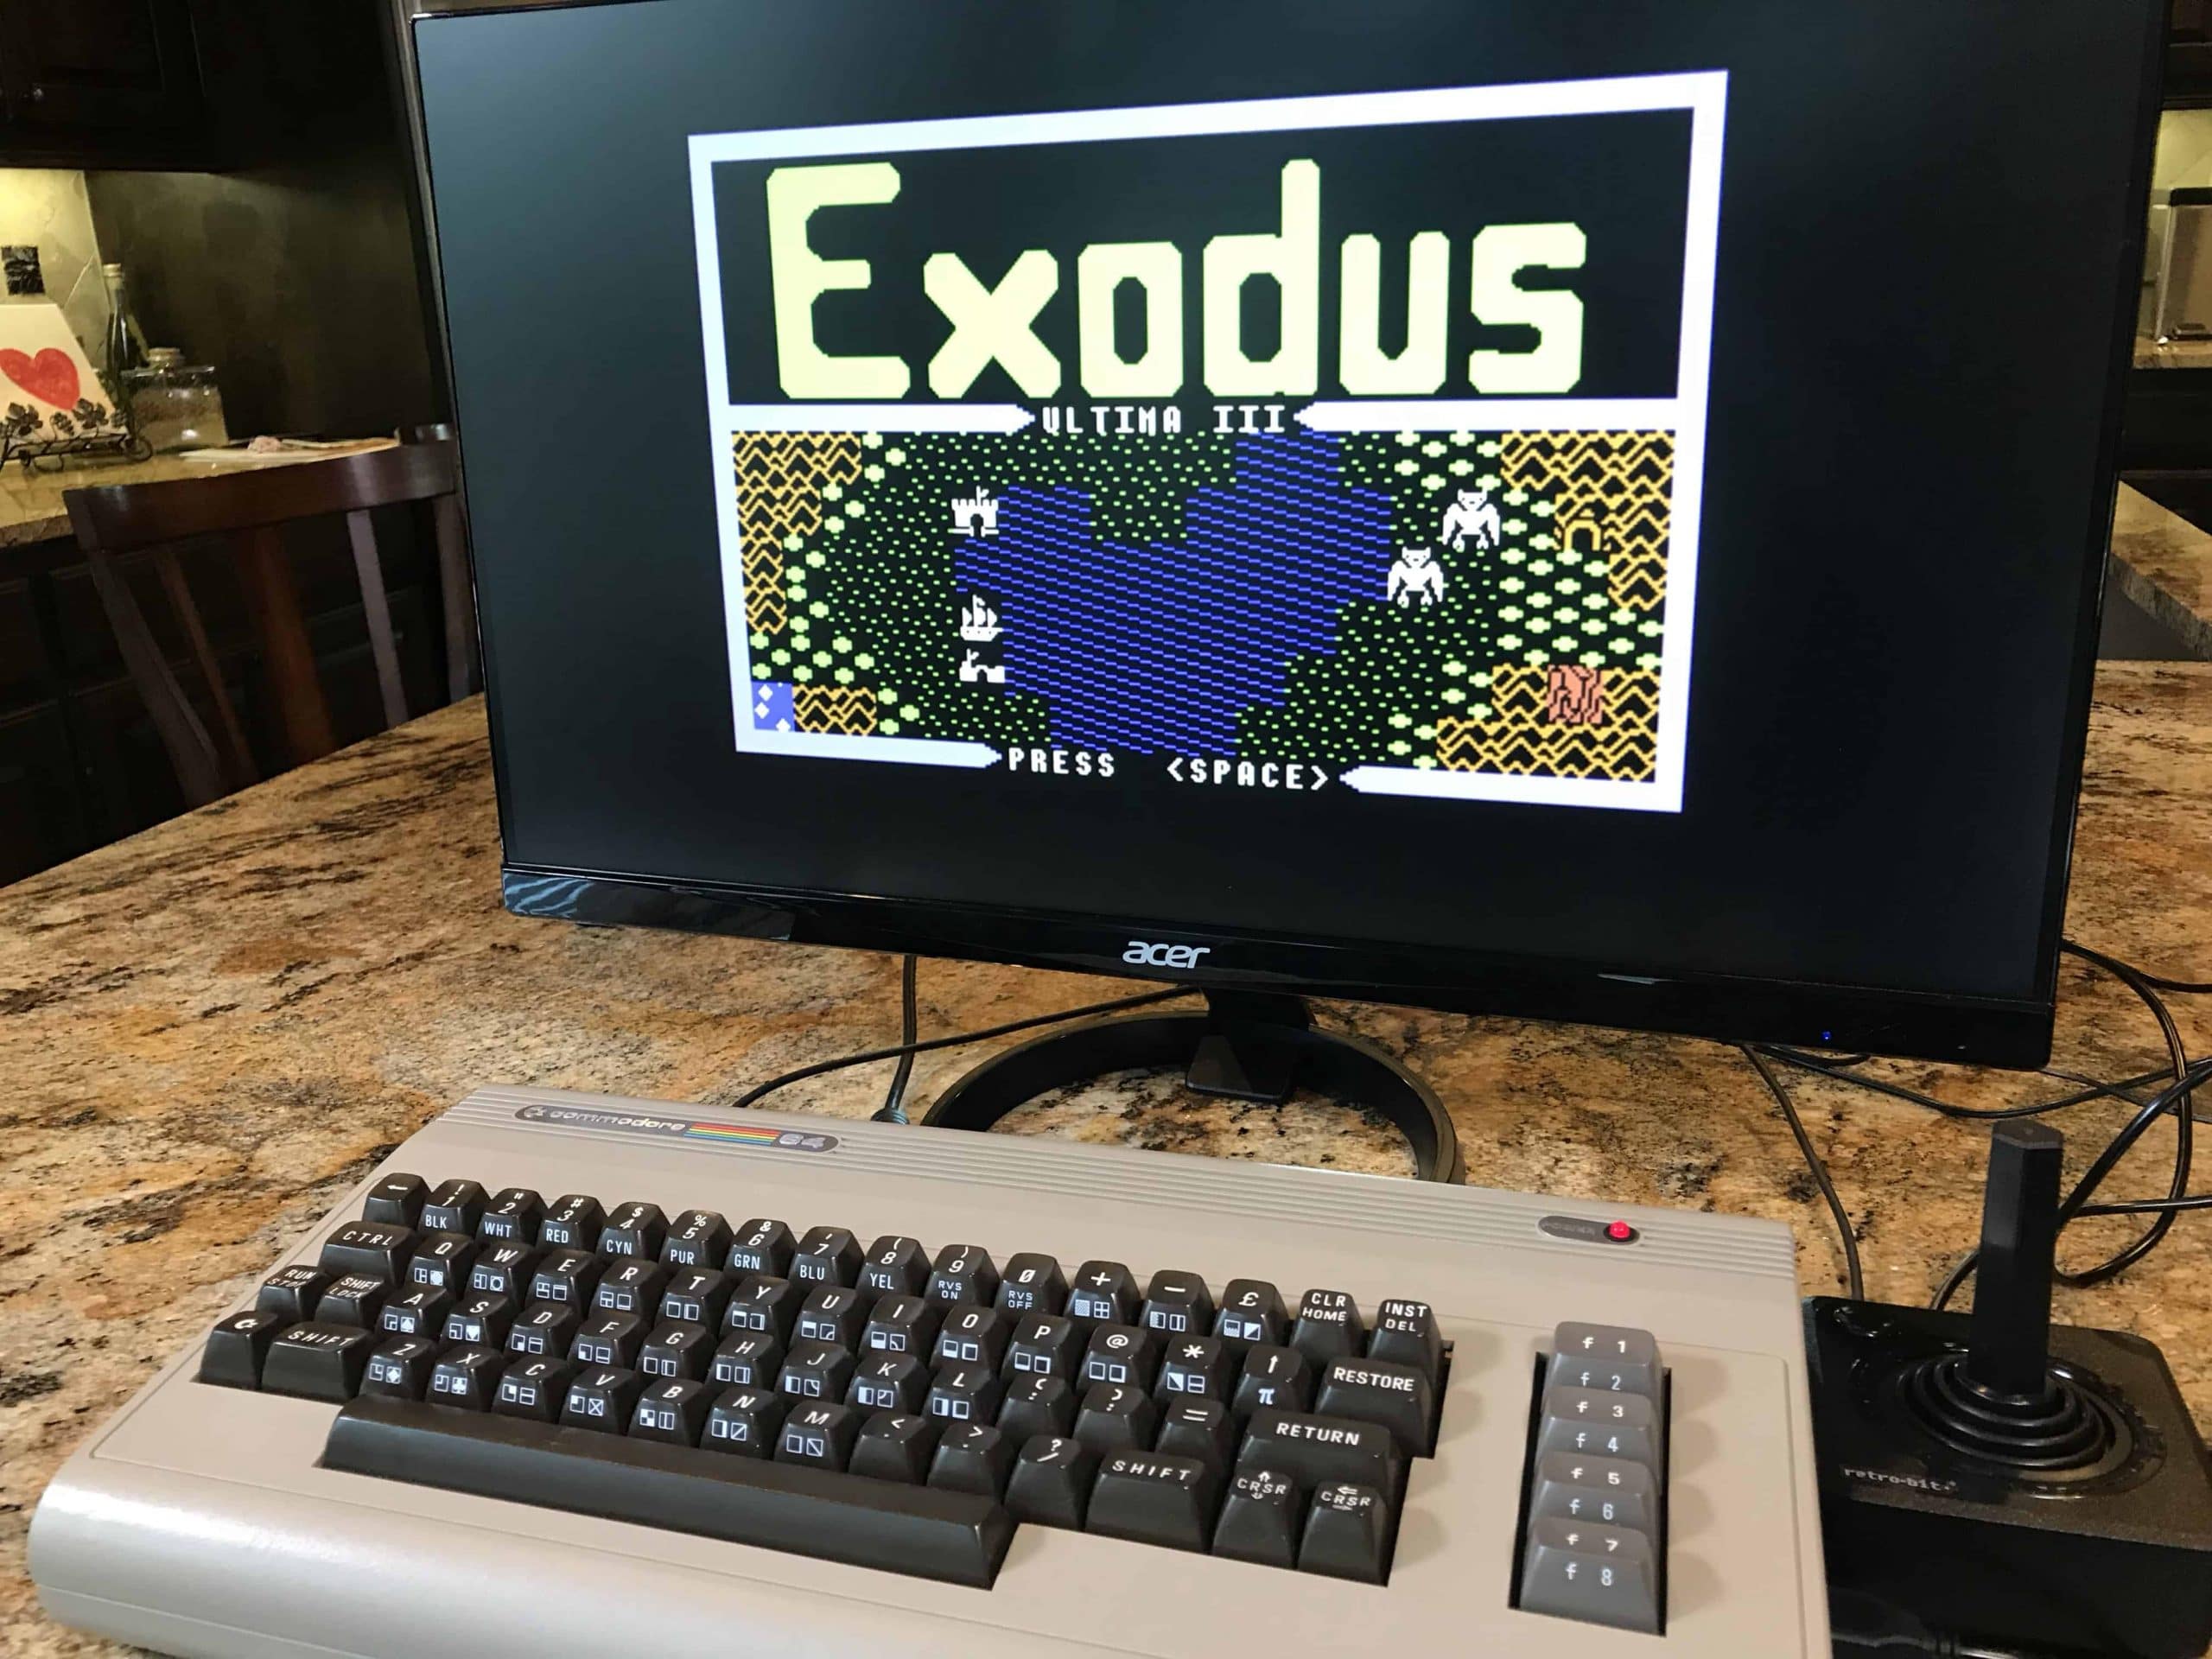
The completed conversion will allow you to run the VICE emulator on the Commodore 64. Play all of your old games, or simply write a basic program on the C64! VICE (optional install in RetroPie) will even emulate the Commodore disk drives like the 1541 allowing you to load or save your programs and games to the
Raspberry Pi Commodore 64 Parts List
Get all of the parts you need to build this project from the links below:
- Keyrah V2
- Raspberry Pi 3 Model B
- 32 GB micro-SD card
- PowerBlock
- HDMI extension
- Micro-USB extension
- SPST power button
- Knurled hot set nuts
- Cap screws
- Washers
- Headers
- USB-A to header cable
- Quad Hands
- Weller Soldering Station
Watch The 8-Bit Guy RPi C64 Video
Watch The Geek Pub RPi C64 Video
Some Things I Would Do Differently
If I were to remake this project I would change some things. Not significantly, but enough to make it significantly better for my uses. In fact, I may well go back and make these changes later.
The first thing I would change is to add a 3.5mm audio jack to the computer. It never occurred to me through this entire build that the monitor I was using doesn’t support HDMI audio. It doesn’t even have internal speakers. So a place to plug in external speakers would be a super nice addition.
RELATED: Geek Pub RetroPie Setup Guide
The second thing I would do is add one or two external USB ports. Probably in the cartridge port cover. This would allow me to plug in a USB keyboard or a USB thumb drive. The problem is that the C64 keyboard is missing a lot of keys found on the standard 101-key keyboards in the US and EU. Remember the keyboard combos and the keyboard Olympics required to type outside of the C64 emulator can be maddening. An external keyboard for configuration would be ideal! Of course there are two workarounds for this problem: a) SSH directly into the Pi, and b) Bluetooth keyboards.


I really like your video on the RASPBERRY PI COMMODORE 64.
However there are a couple of things I don’t understand. Why do you need 2 power switches? Can’t the one on the Keyrah power everything?
Why didn’t you mount the Raspberry Pie so the the 4 USB Ports and the Ethernet are exposed?
Thanks for posting this. I have mine all put together and installed, the only thing that remains is to get the joysticks and keyboard to work!
Same! Have you had any luck as Im really stuck!
Great project. Quick question, the usb-a to header has 5 prongs and the keyrah has only 4 holes to insert and solder. Did you clip the last black one?
Hello! Can you explain to me, this function of the Keyrah v2b:
“Now there’s a third switch position that allows you to send an ACPI signal to shut down/power up your computer. To avoid triggering the shutdown procedure by accident, this third position is not locked, so the switch will always flip back from it if not held in place. (The ACPI signal is only sent after remaining one second in this position.)”
So then use the PowerBlock?
Because the Raspberry Pi does NOT support ACPI. It’s there to support PCs.
At scott1176 February 11, 2019
Hi Scott did you ever get an answer or figure it out?
Thanks !
4.5
Such a great project Mike!
I haven’t made this project, but it sure looks like exactly that in the video.
The Keyrah is no longer sold or made according to an email I received from the people who used to sell it. What is another option?
This is my favorite RPi project ever!
@Sean that sucks!
Still available from https://amigakit.amiga.store/product_info.php?products_id=1144
Anyone selling the 3D prints as I don’t have a 3D printer but would love to keen it clean like above?
Hi, what do you think about the fact that the reseller wrote ” in the middle position you can use for daily use” and for real It’s IMPOSSIBLE? It’s totally crazy as you wrote, I bought It and cannot use with Raspbian, I have to use an external keyboard…
I have a extra set of the 3D prints if you want
@vatasala try using Combian it has a script made fro the C64 keyboard and the keyrah
5