Blog
The LattePanda Single Board Computer (Intro)
Whether you’re building an arcade or some other contraption, the goto board for most of these projects has been the
Well now there’s a single board computer running an Intel Atom processor that comes pre-loaded with a full copy of Windows 10. It has x86 GPIO and even includes an integrated Arduino. Let me introduce you to the LattePanda!
Watch The LattePanda Intro Video
The LattePanda Single Board Computer
Now many of you over the years have asked me if there is a Windows based computer that you can use in my arcade projects and other projects. And the answer has been “Sure! Just go ahead and build any Windows based PC and put it into your arcade. Well unfortunately when building a bartop arcade or some of my smaller projects a full-size PC isn’t really optimal and may not even fit. Well the good news is they guys over at DFRobot have been listening to us and they have come up with this single board computer that is slightly larger than a
Unboxing the LattePanda
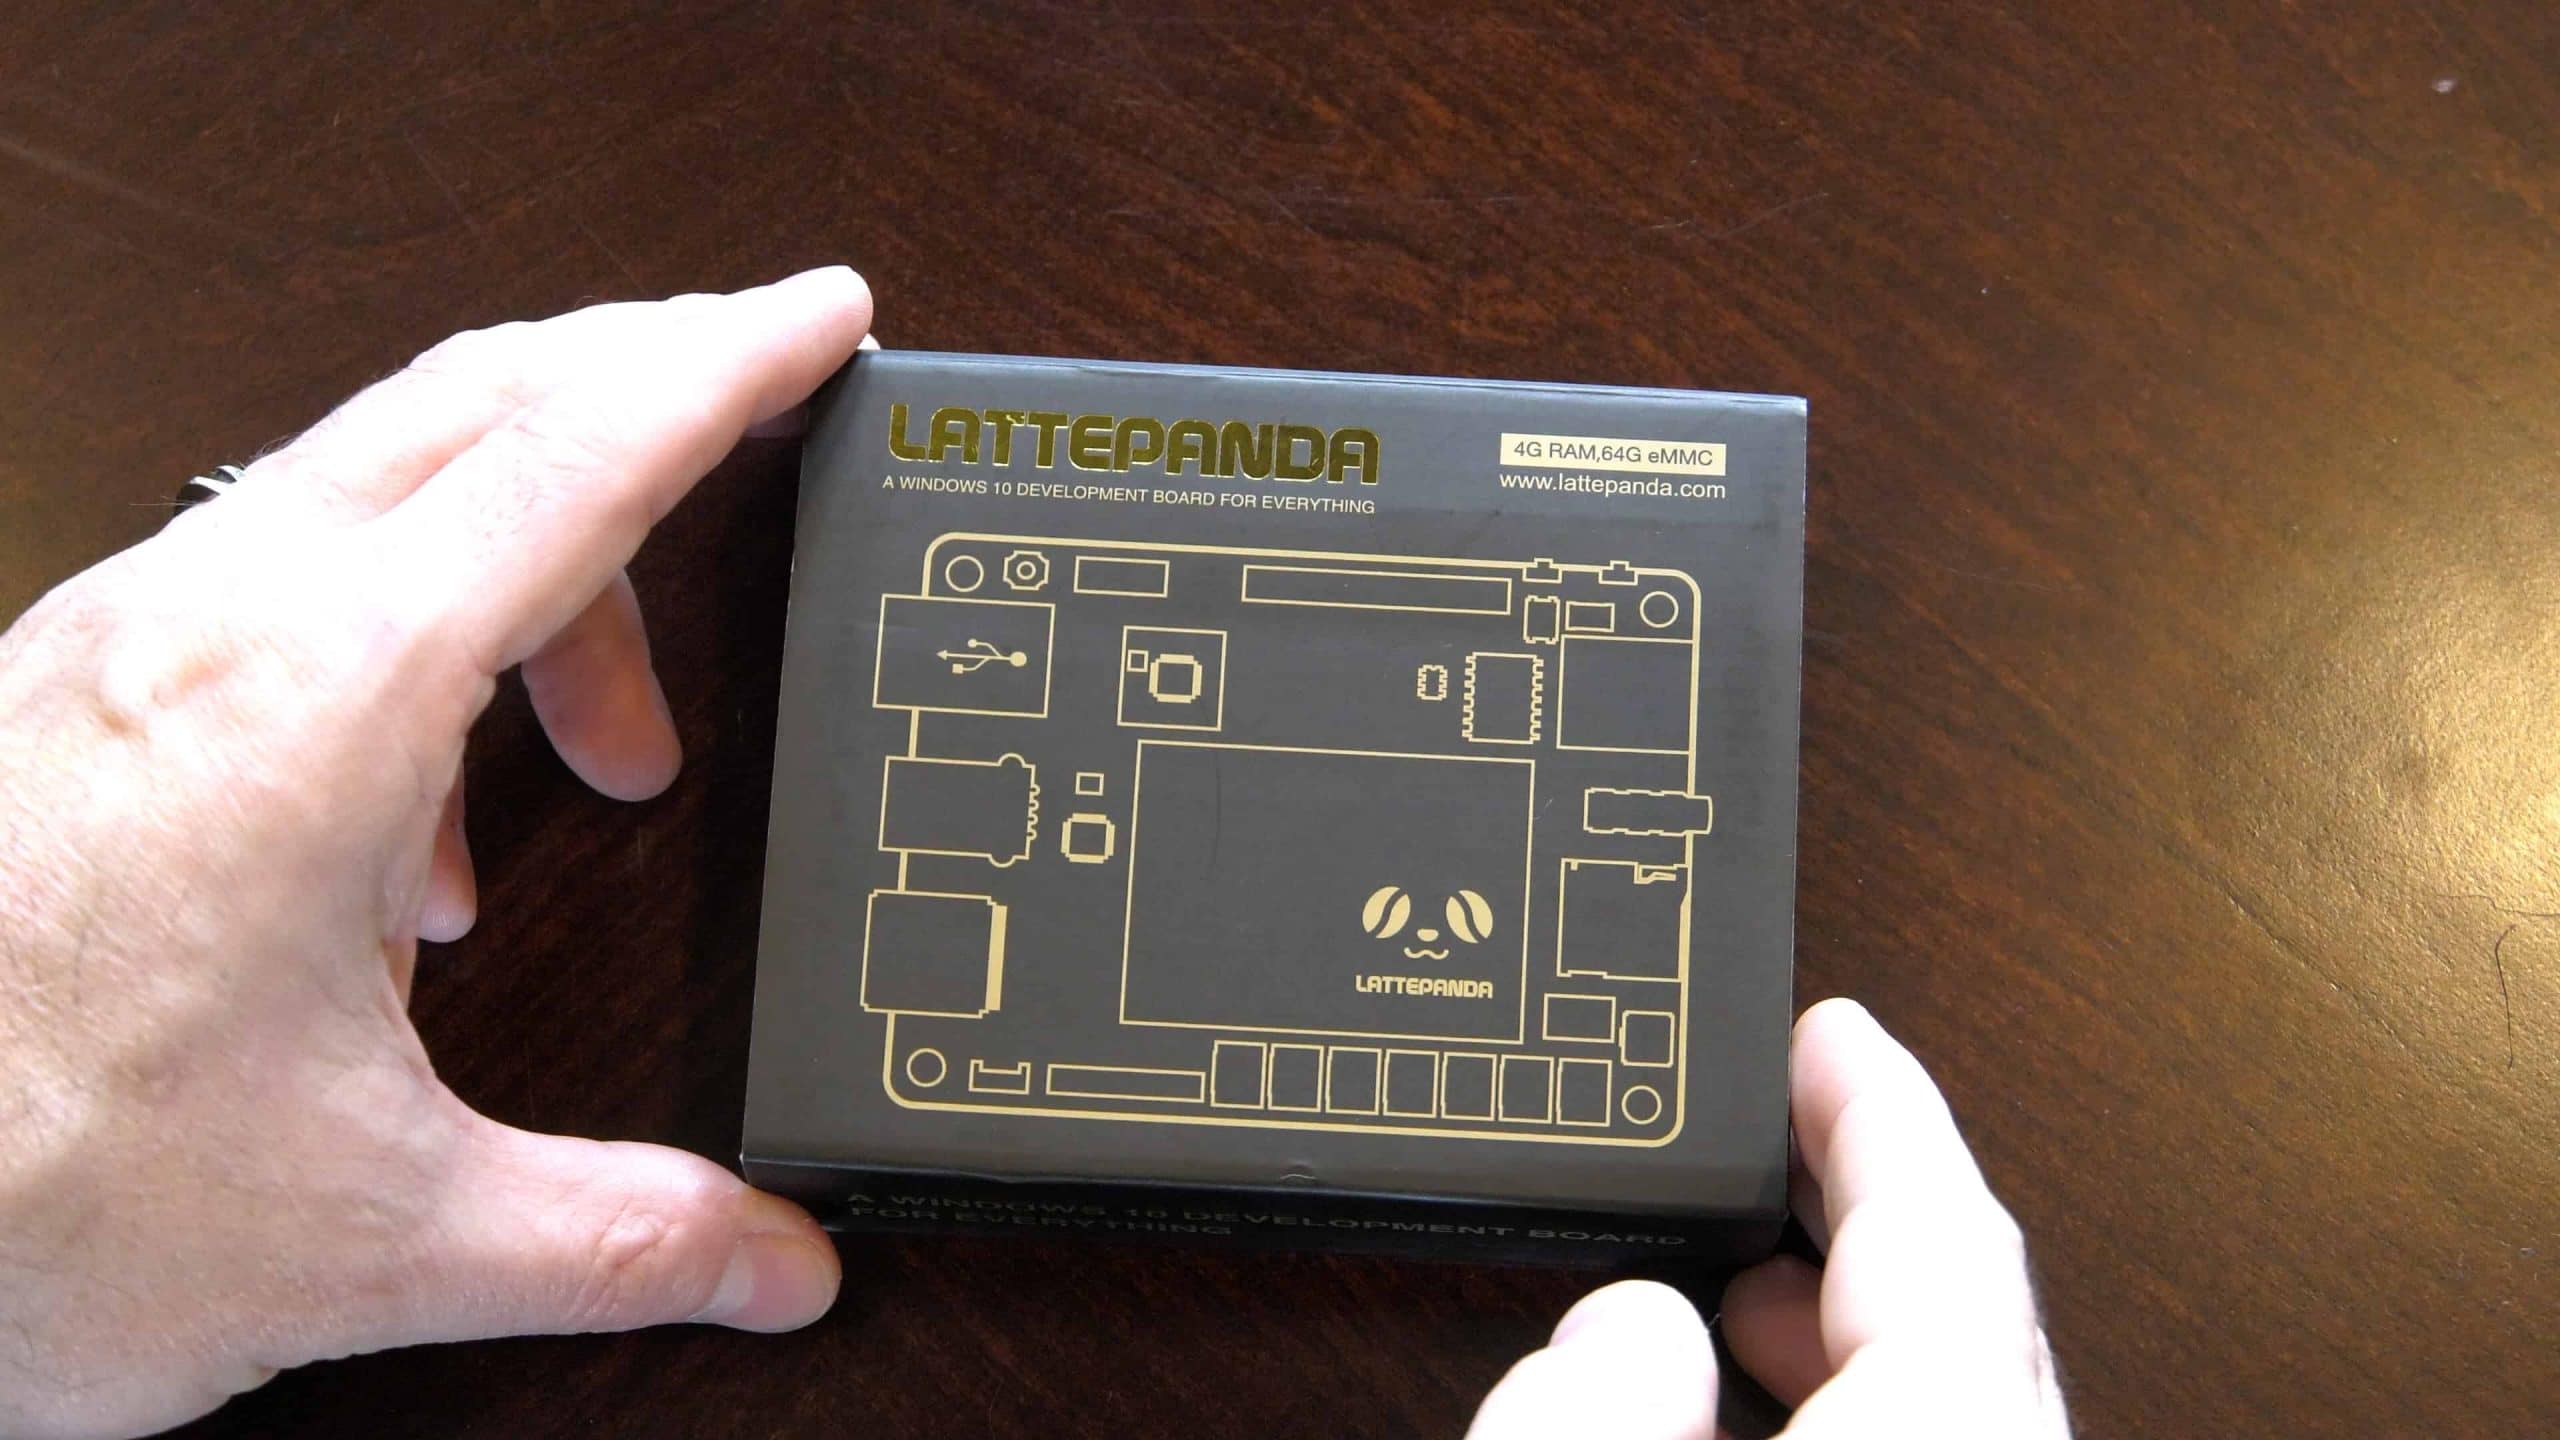
The LattePanda comes boxed in some pretty nice packaging. As you can see I purchased the enhanced version that has 4GB RAM and 64GB of flash storage. There is a cheaper version that comes with 2GB RAM and 32GB of flash if your looking to save a little money.
Besides the LattePanda itself, you’ll also find a wireless antenna in the box that can be remote mounted for better reception. Of course, you can certainly install a 3rd party antenna if you prefer.
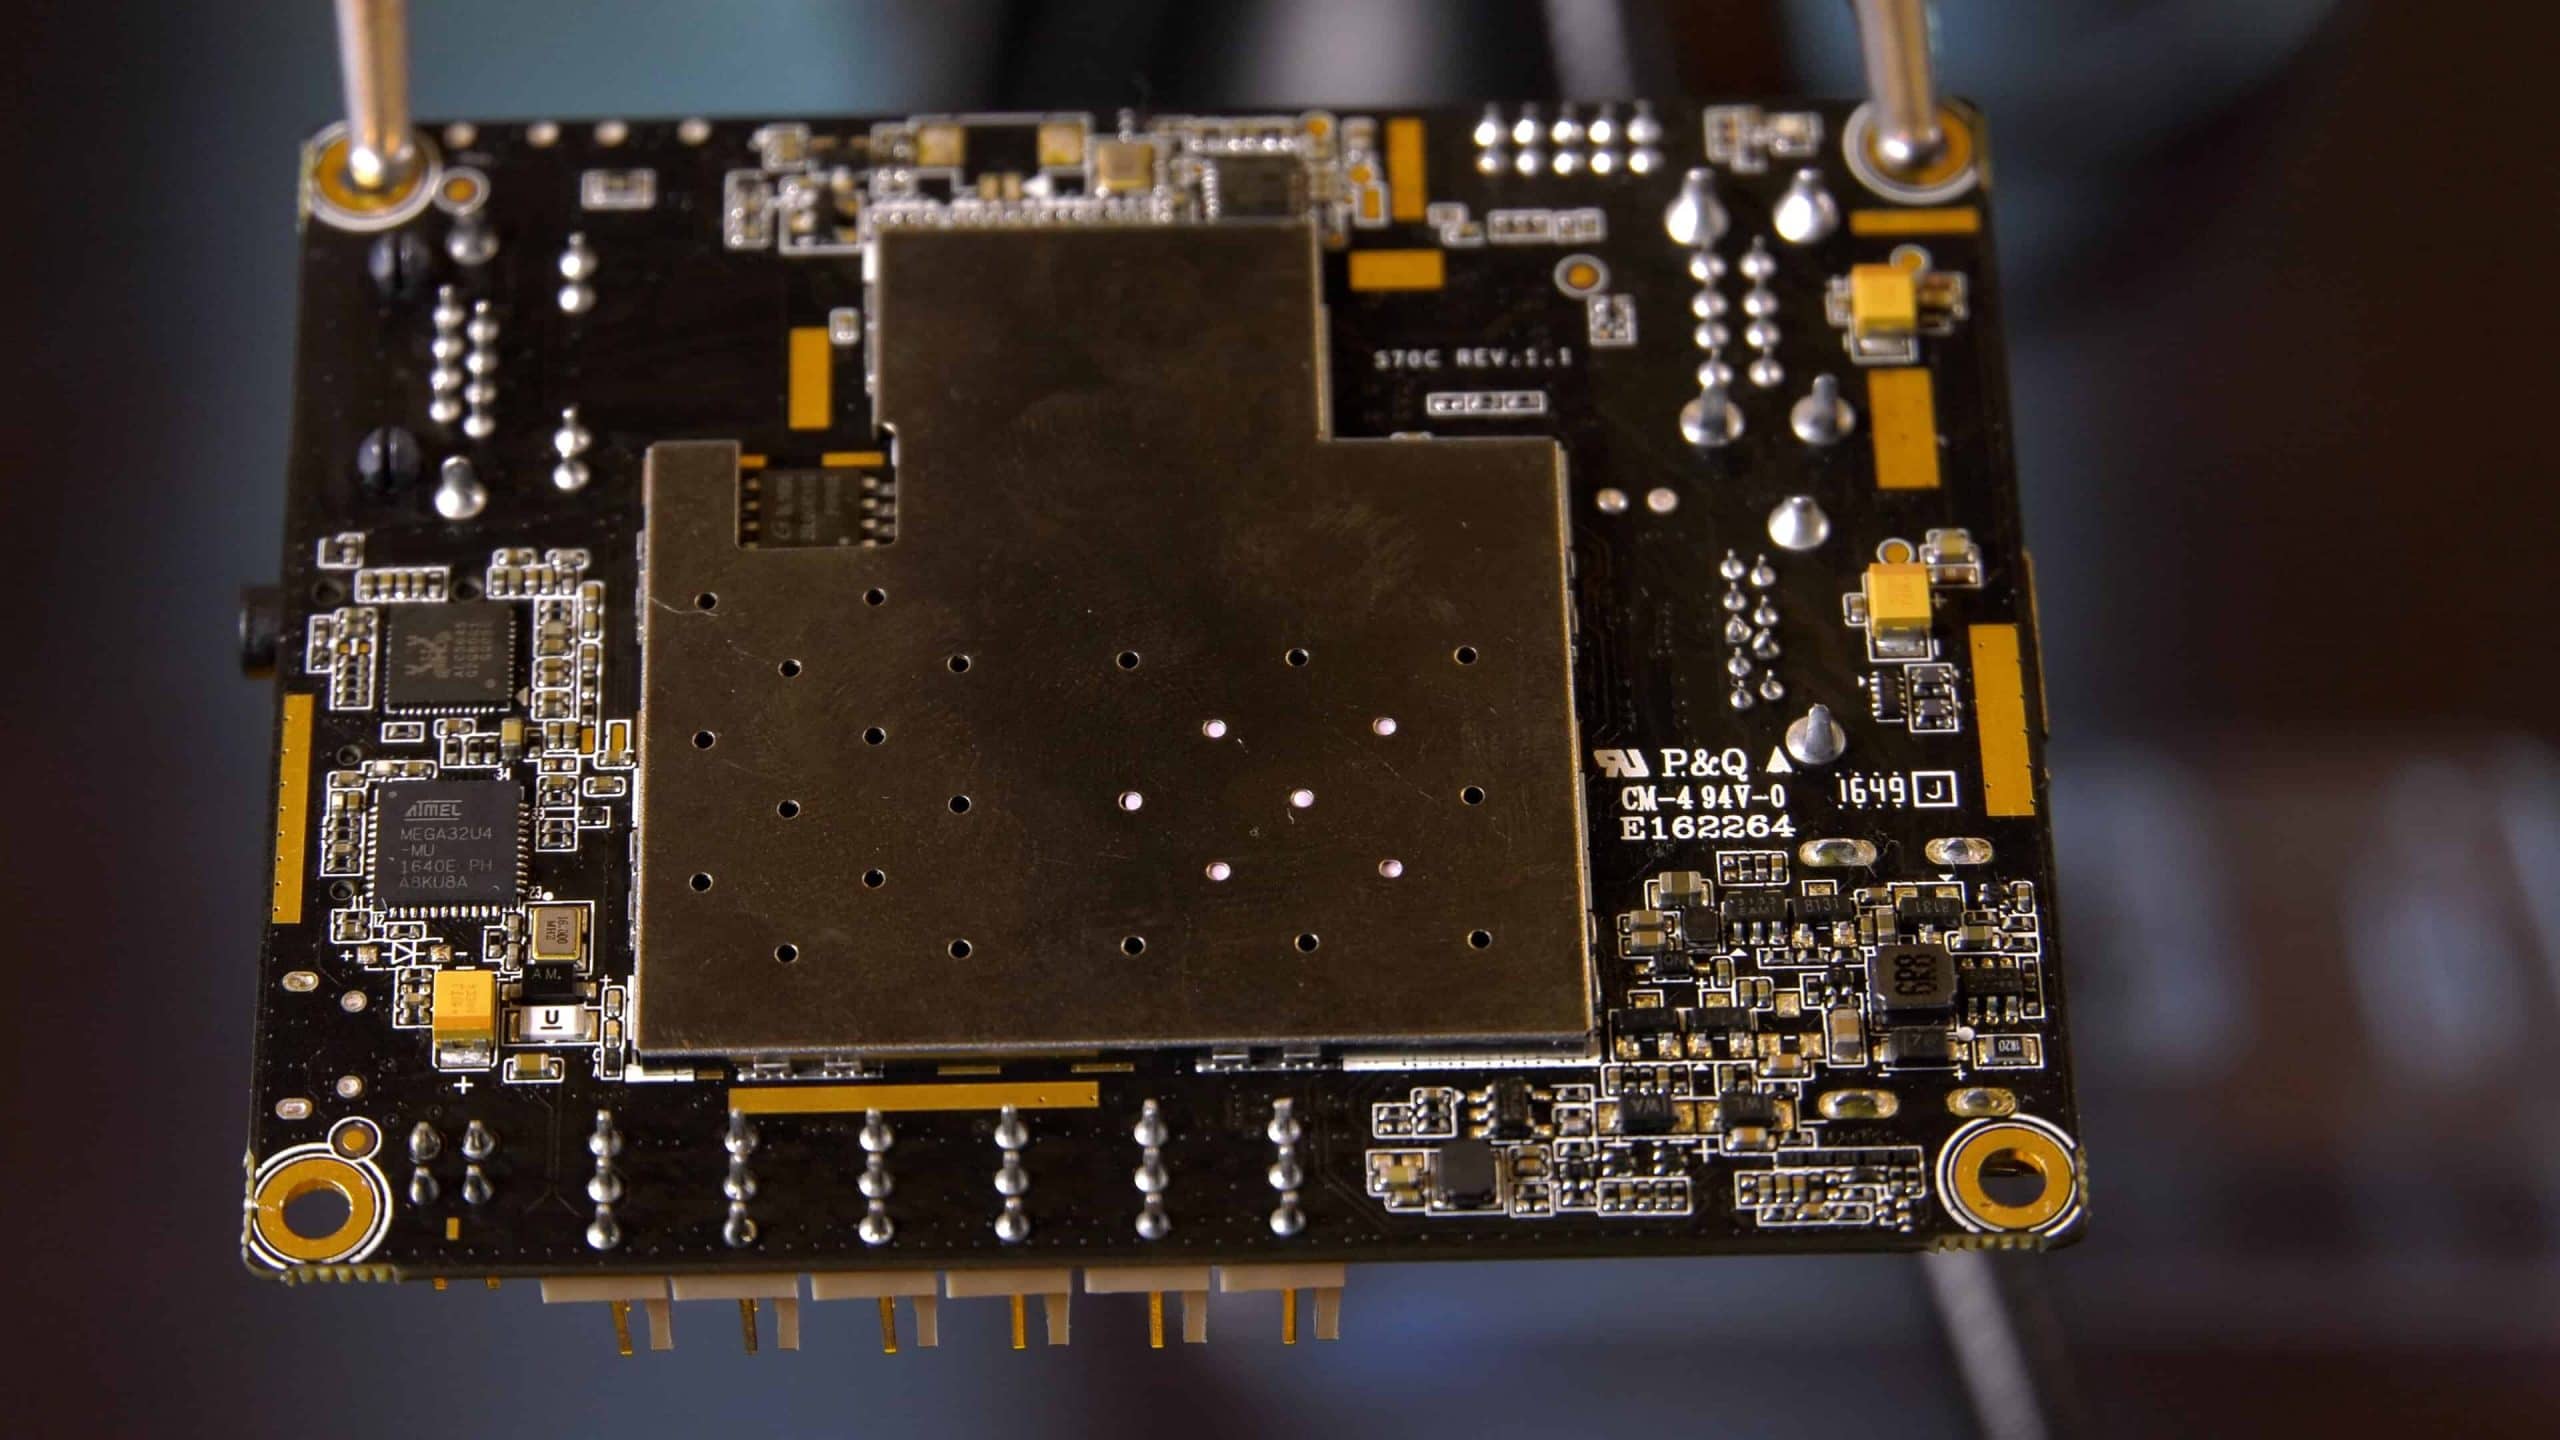
Tour of the Board
Let’s take a tour of the LattePanda from all four sides, top and bottom. It’s quite the fascinating little machine. I’ll place it in my Quadhands Helping Hands tool to photograph it for you.
Side One
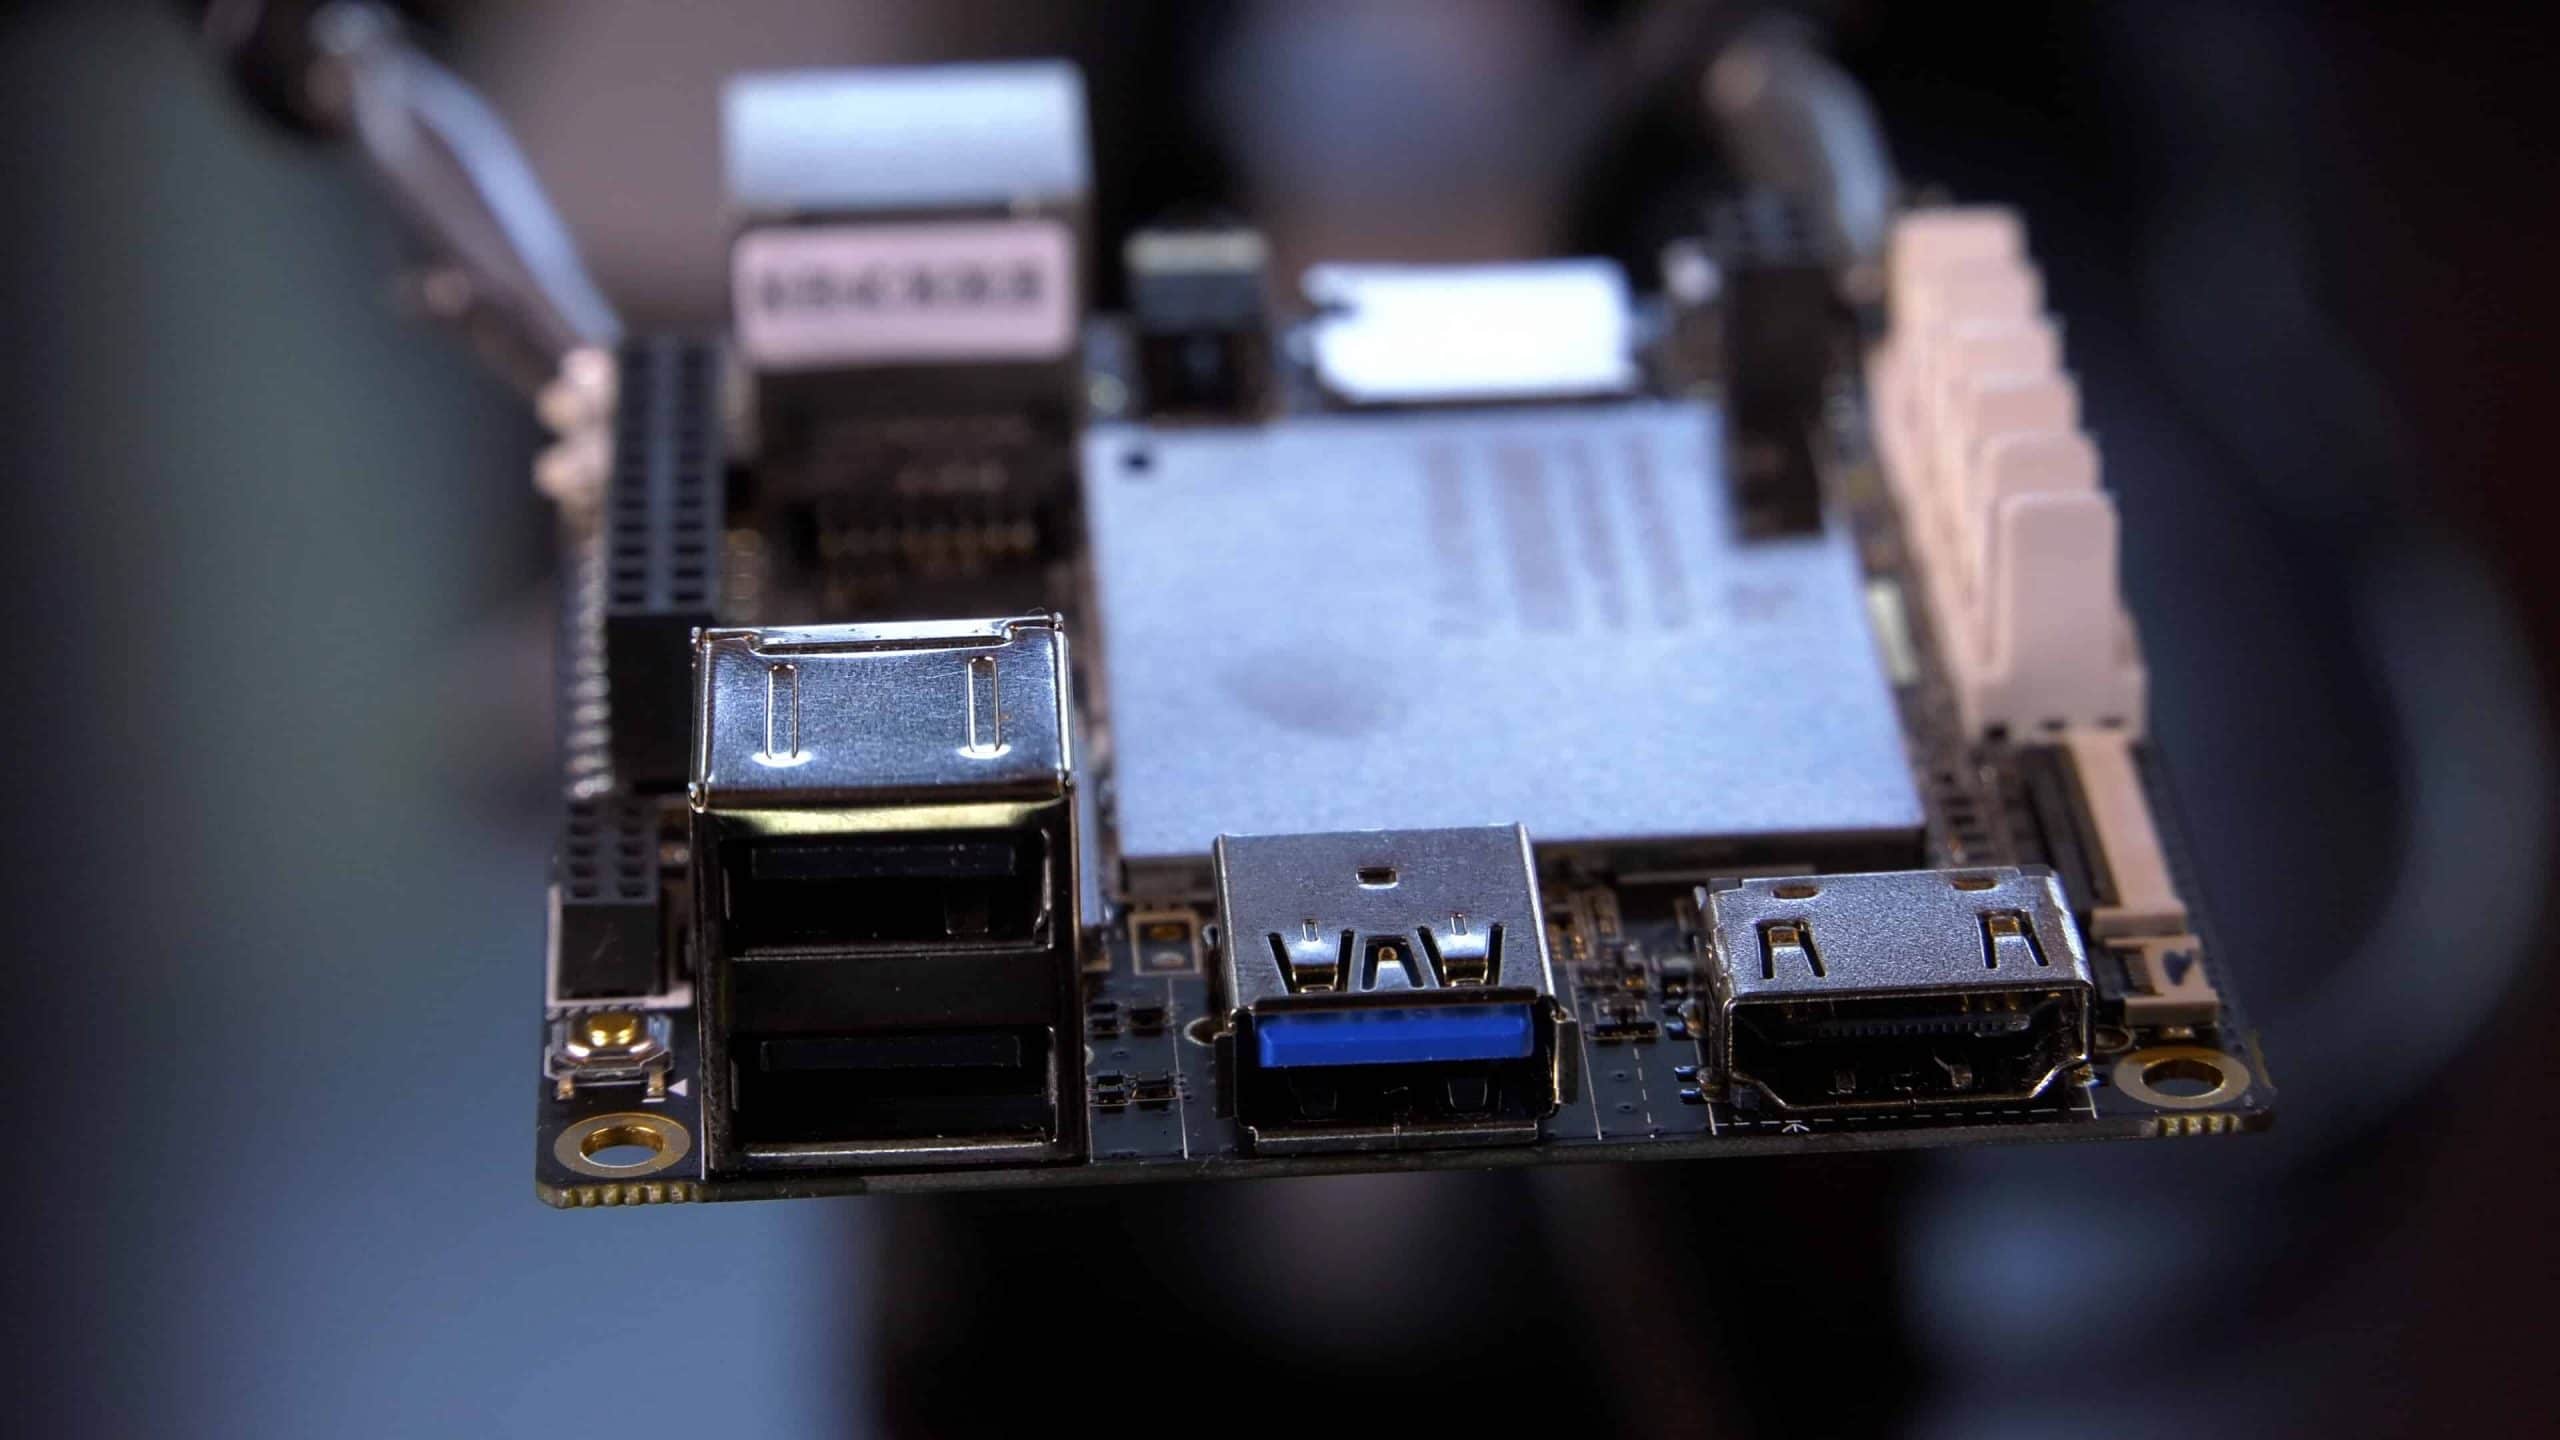
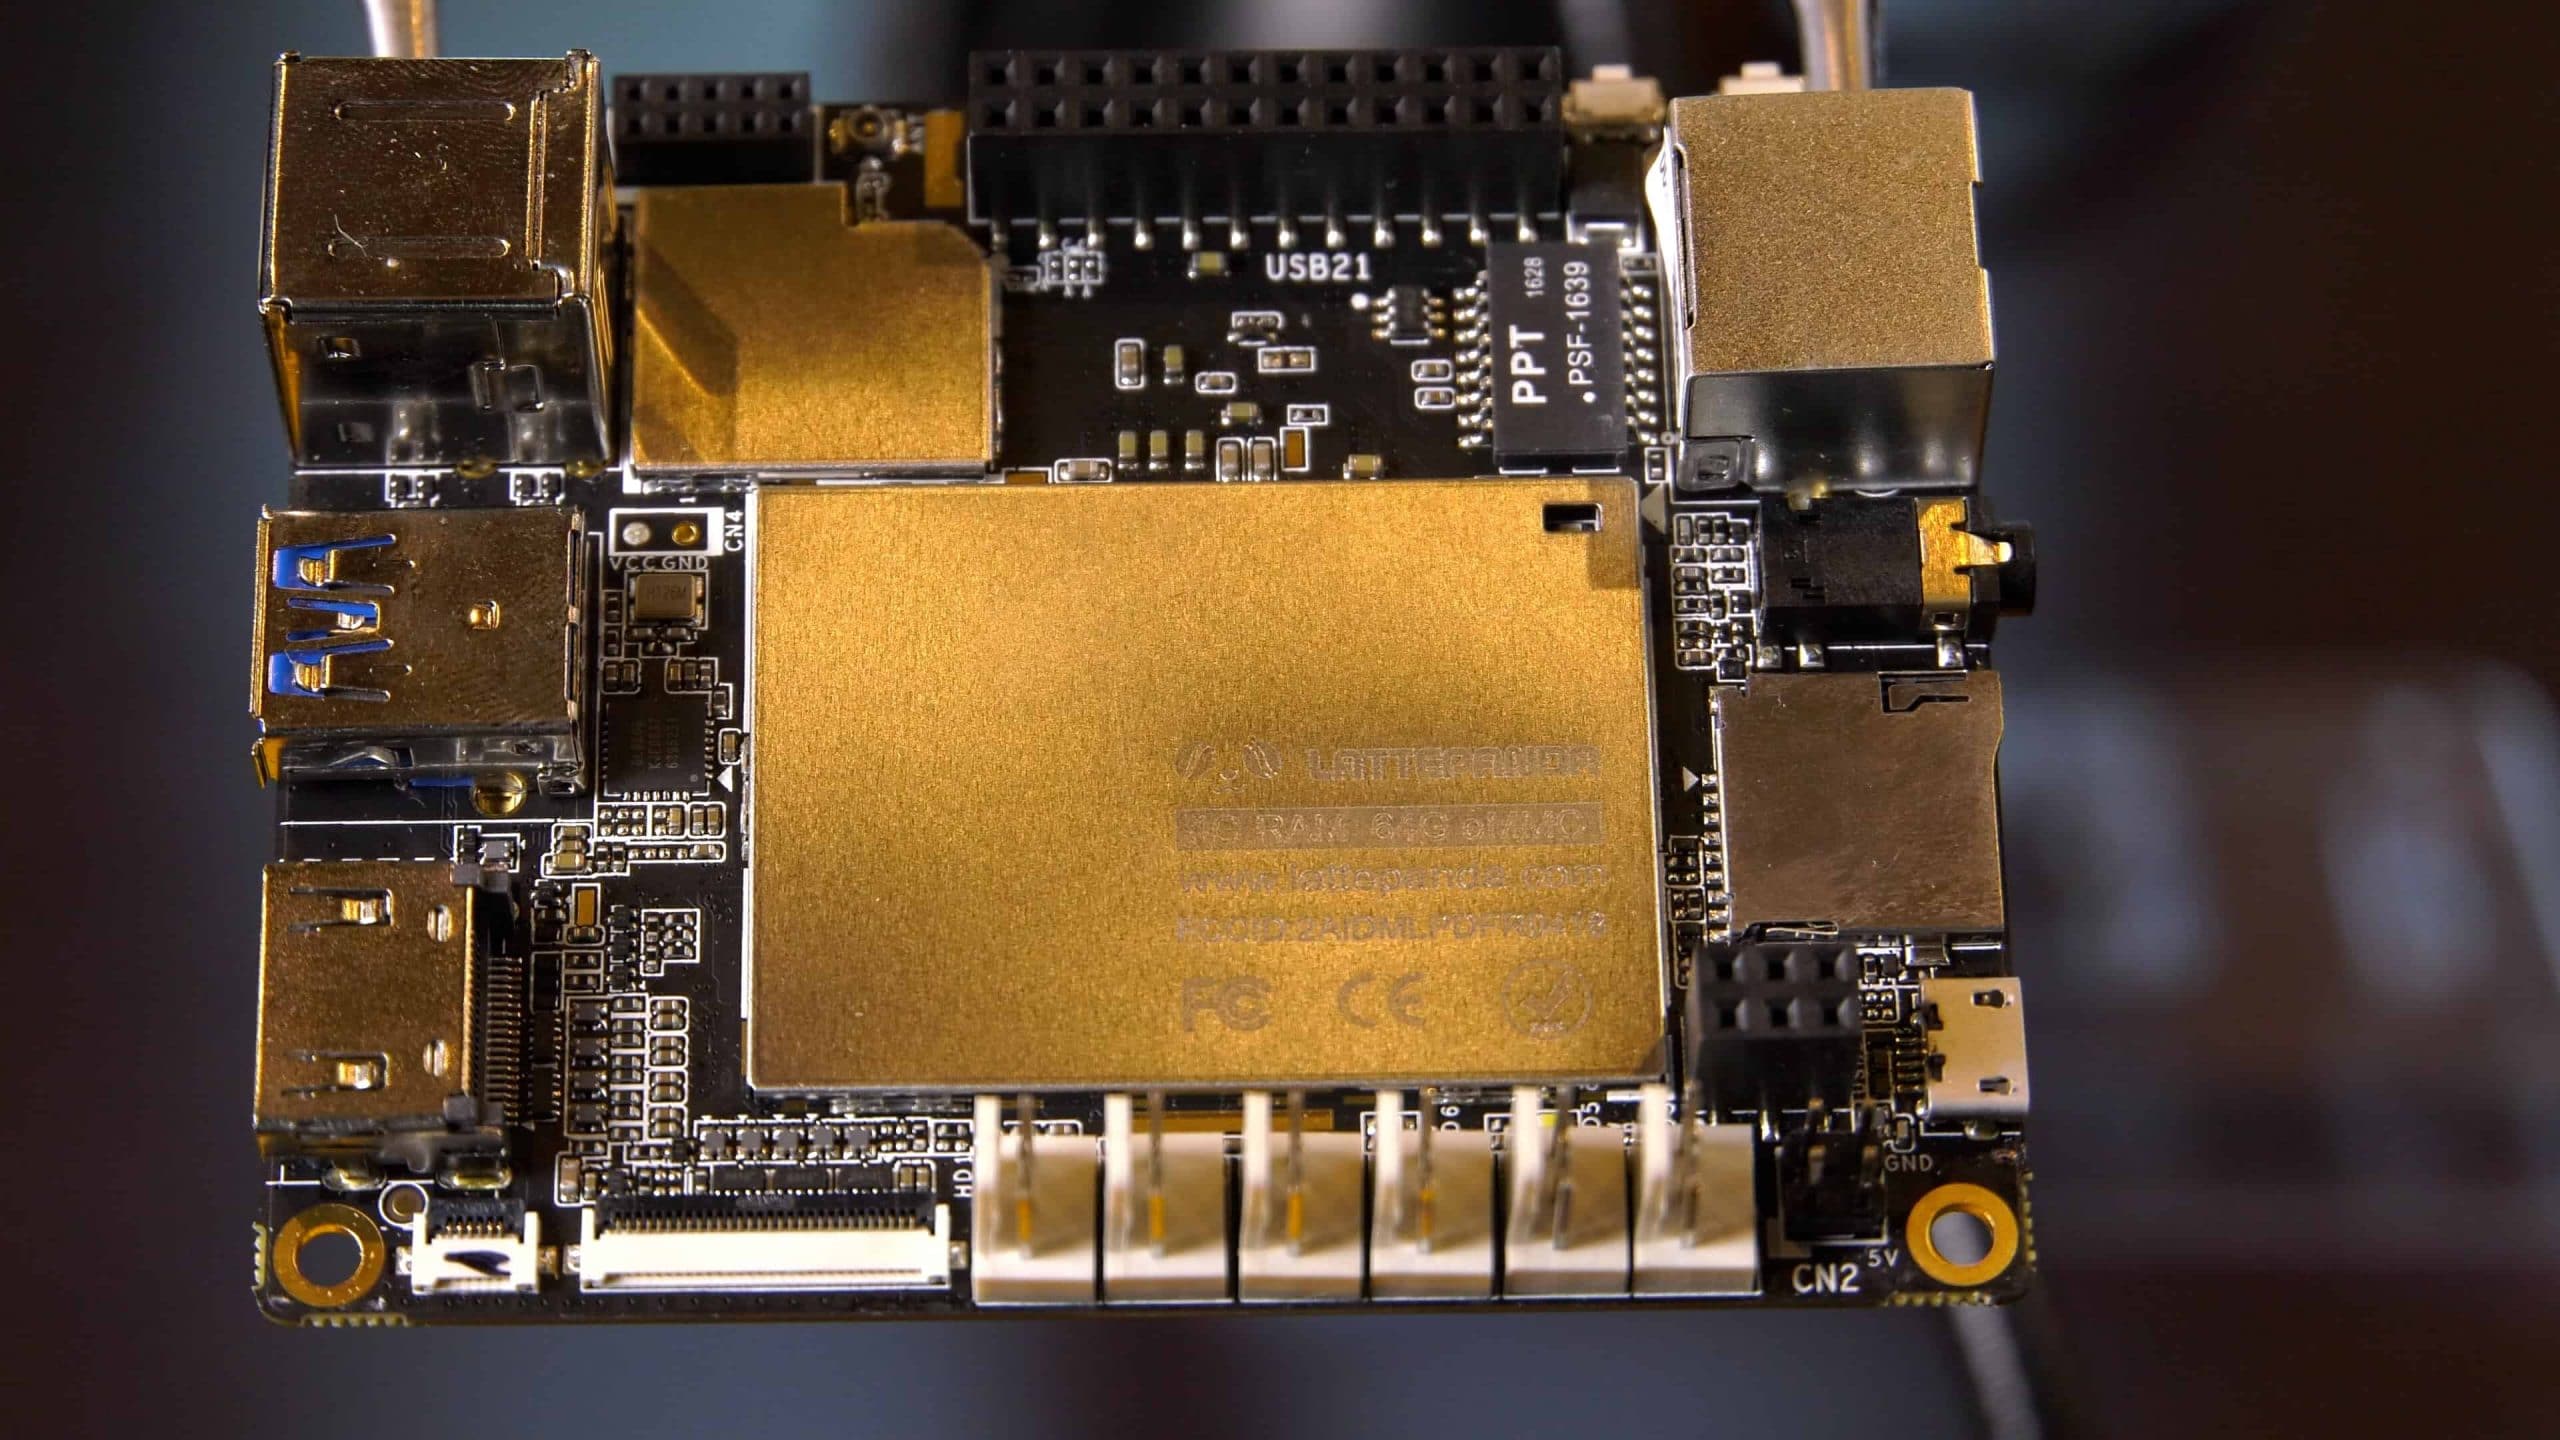
Let’s start the tour of the LattePanda on the side with the USB ports. On this side you will find an HDMI 1.4a port, a single USB 3 high speed port, and two USB 2.0 ports. I really like this configuration because it gives you USB ports for a mouse and keyboard, and leaves your USB 3 port open for peripherals such as external storage devices. The HDMI port is capable of 4K resolution, but only at 30 frames per second.
Side Two
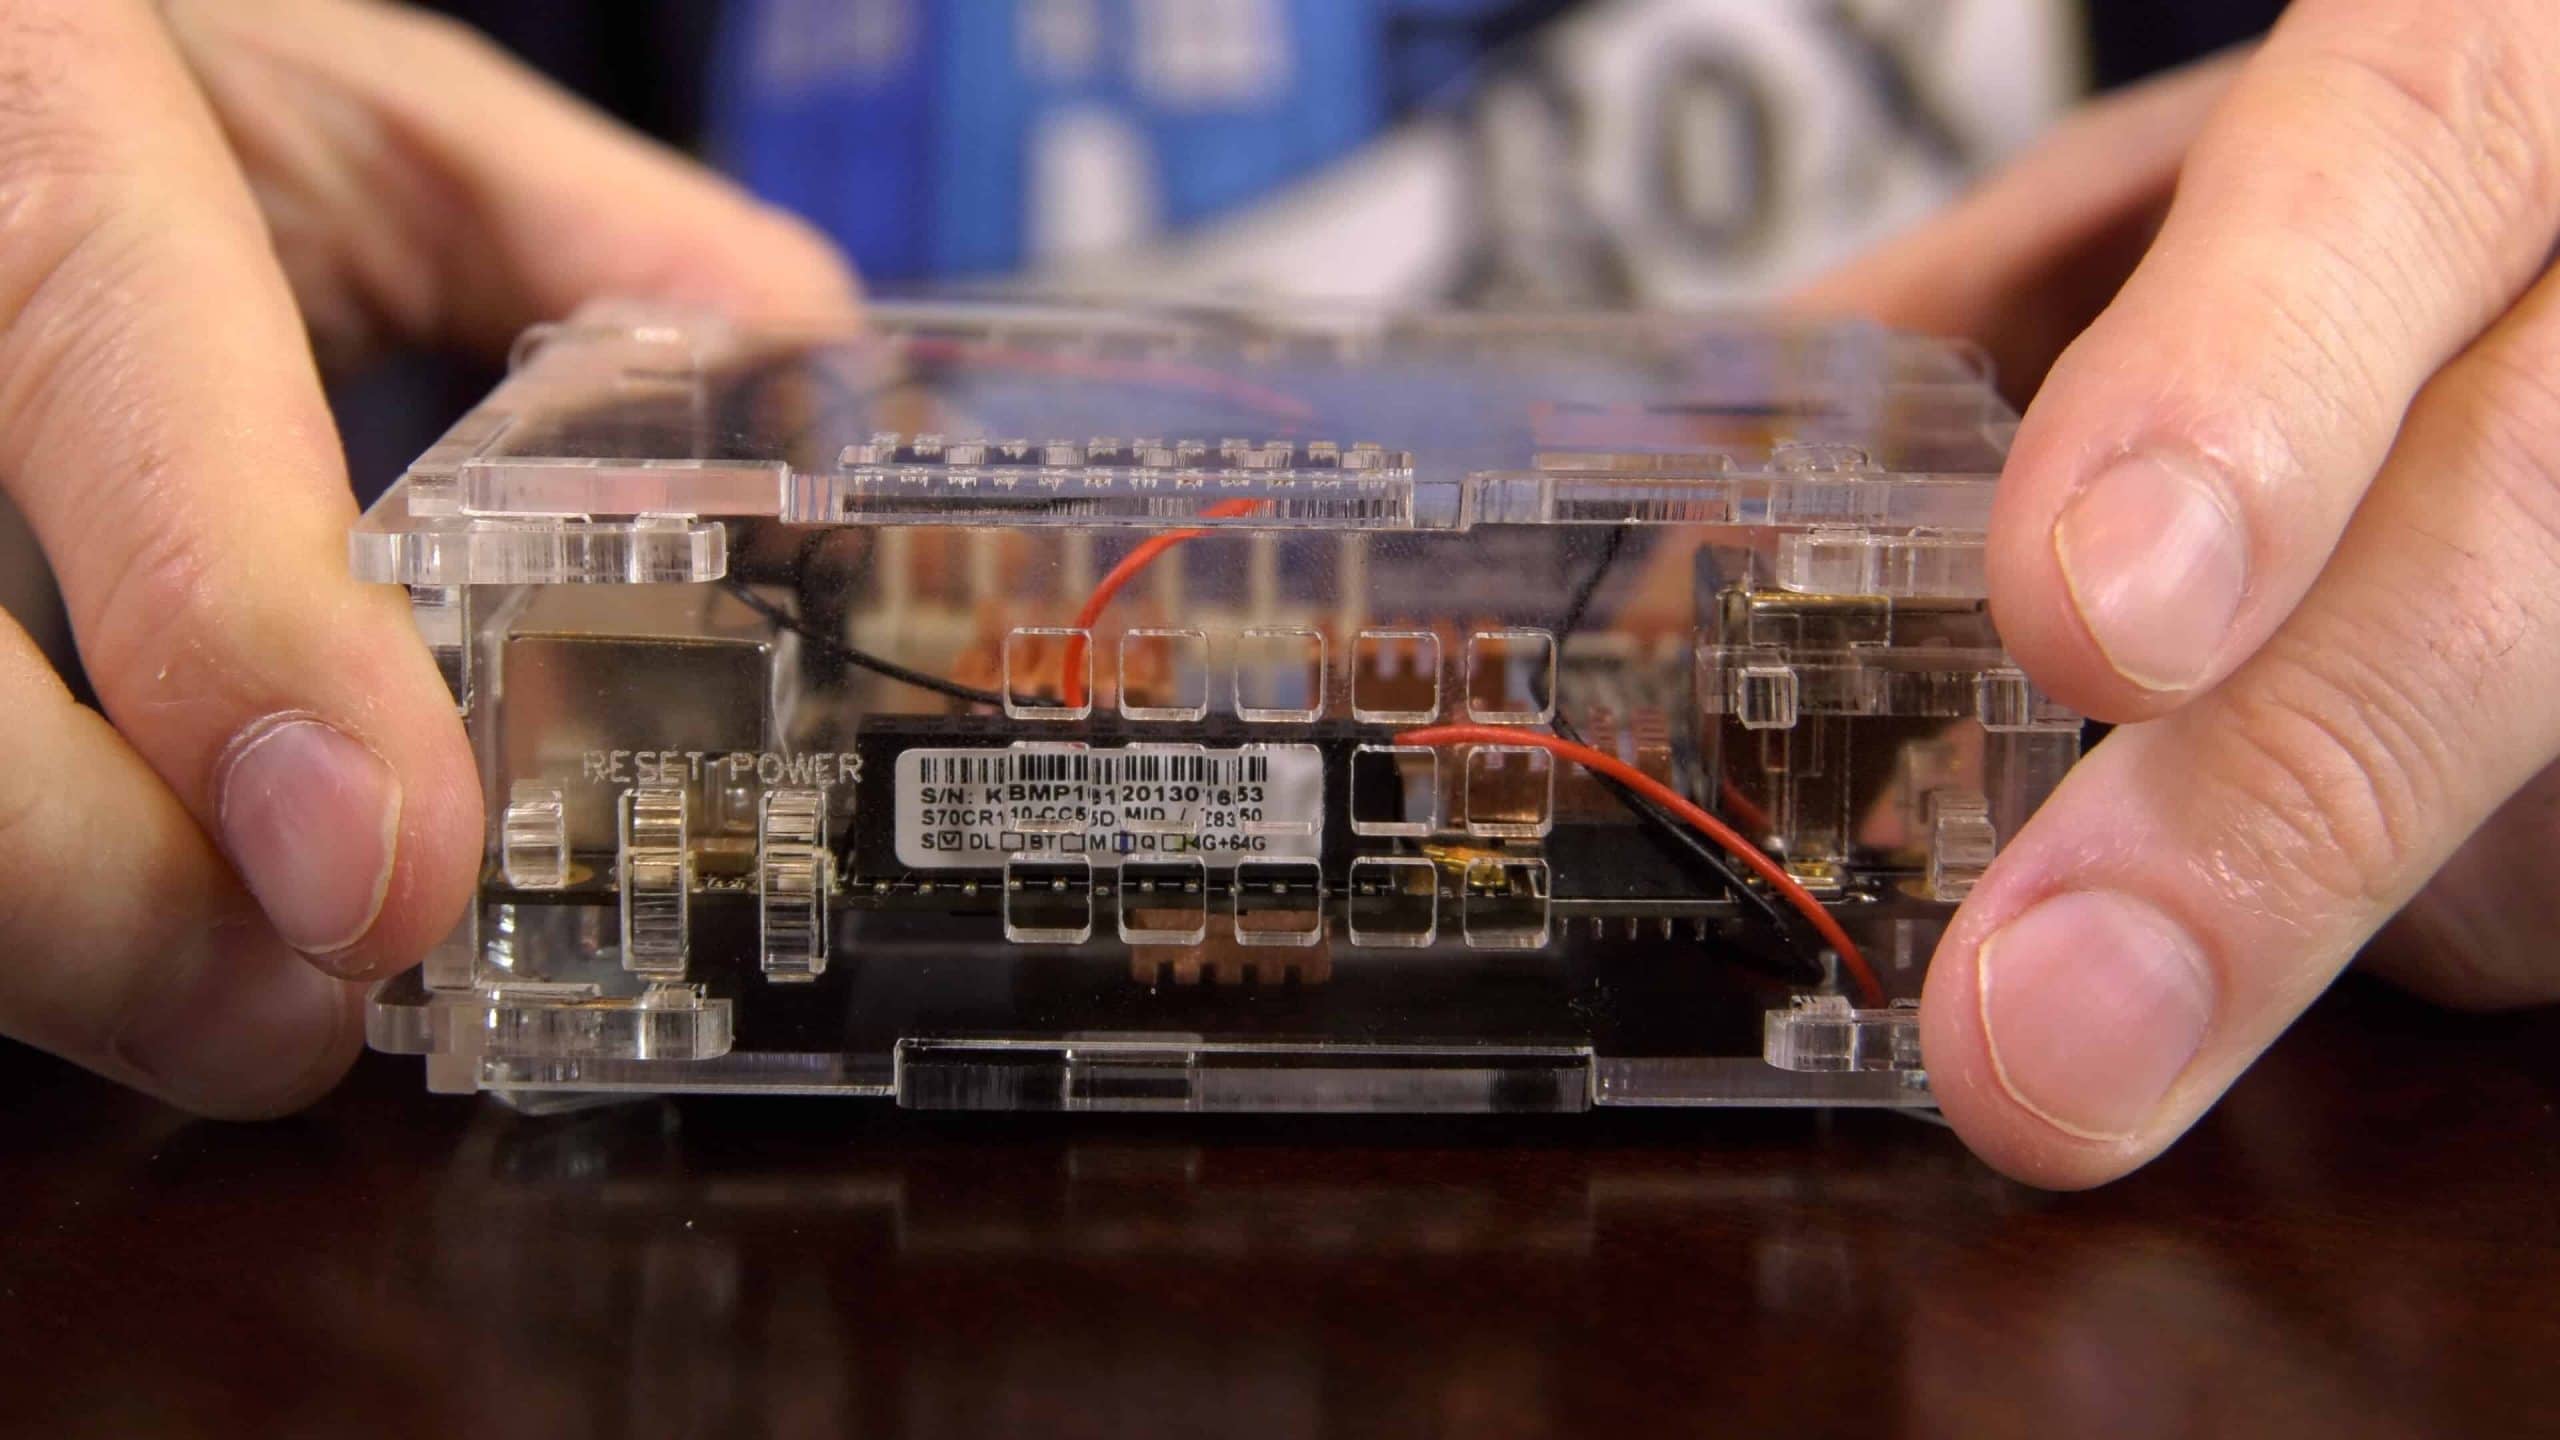
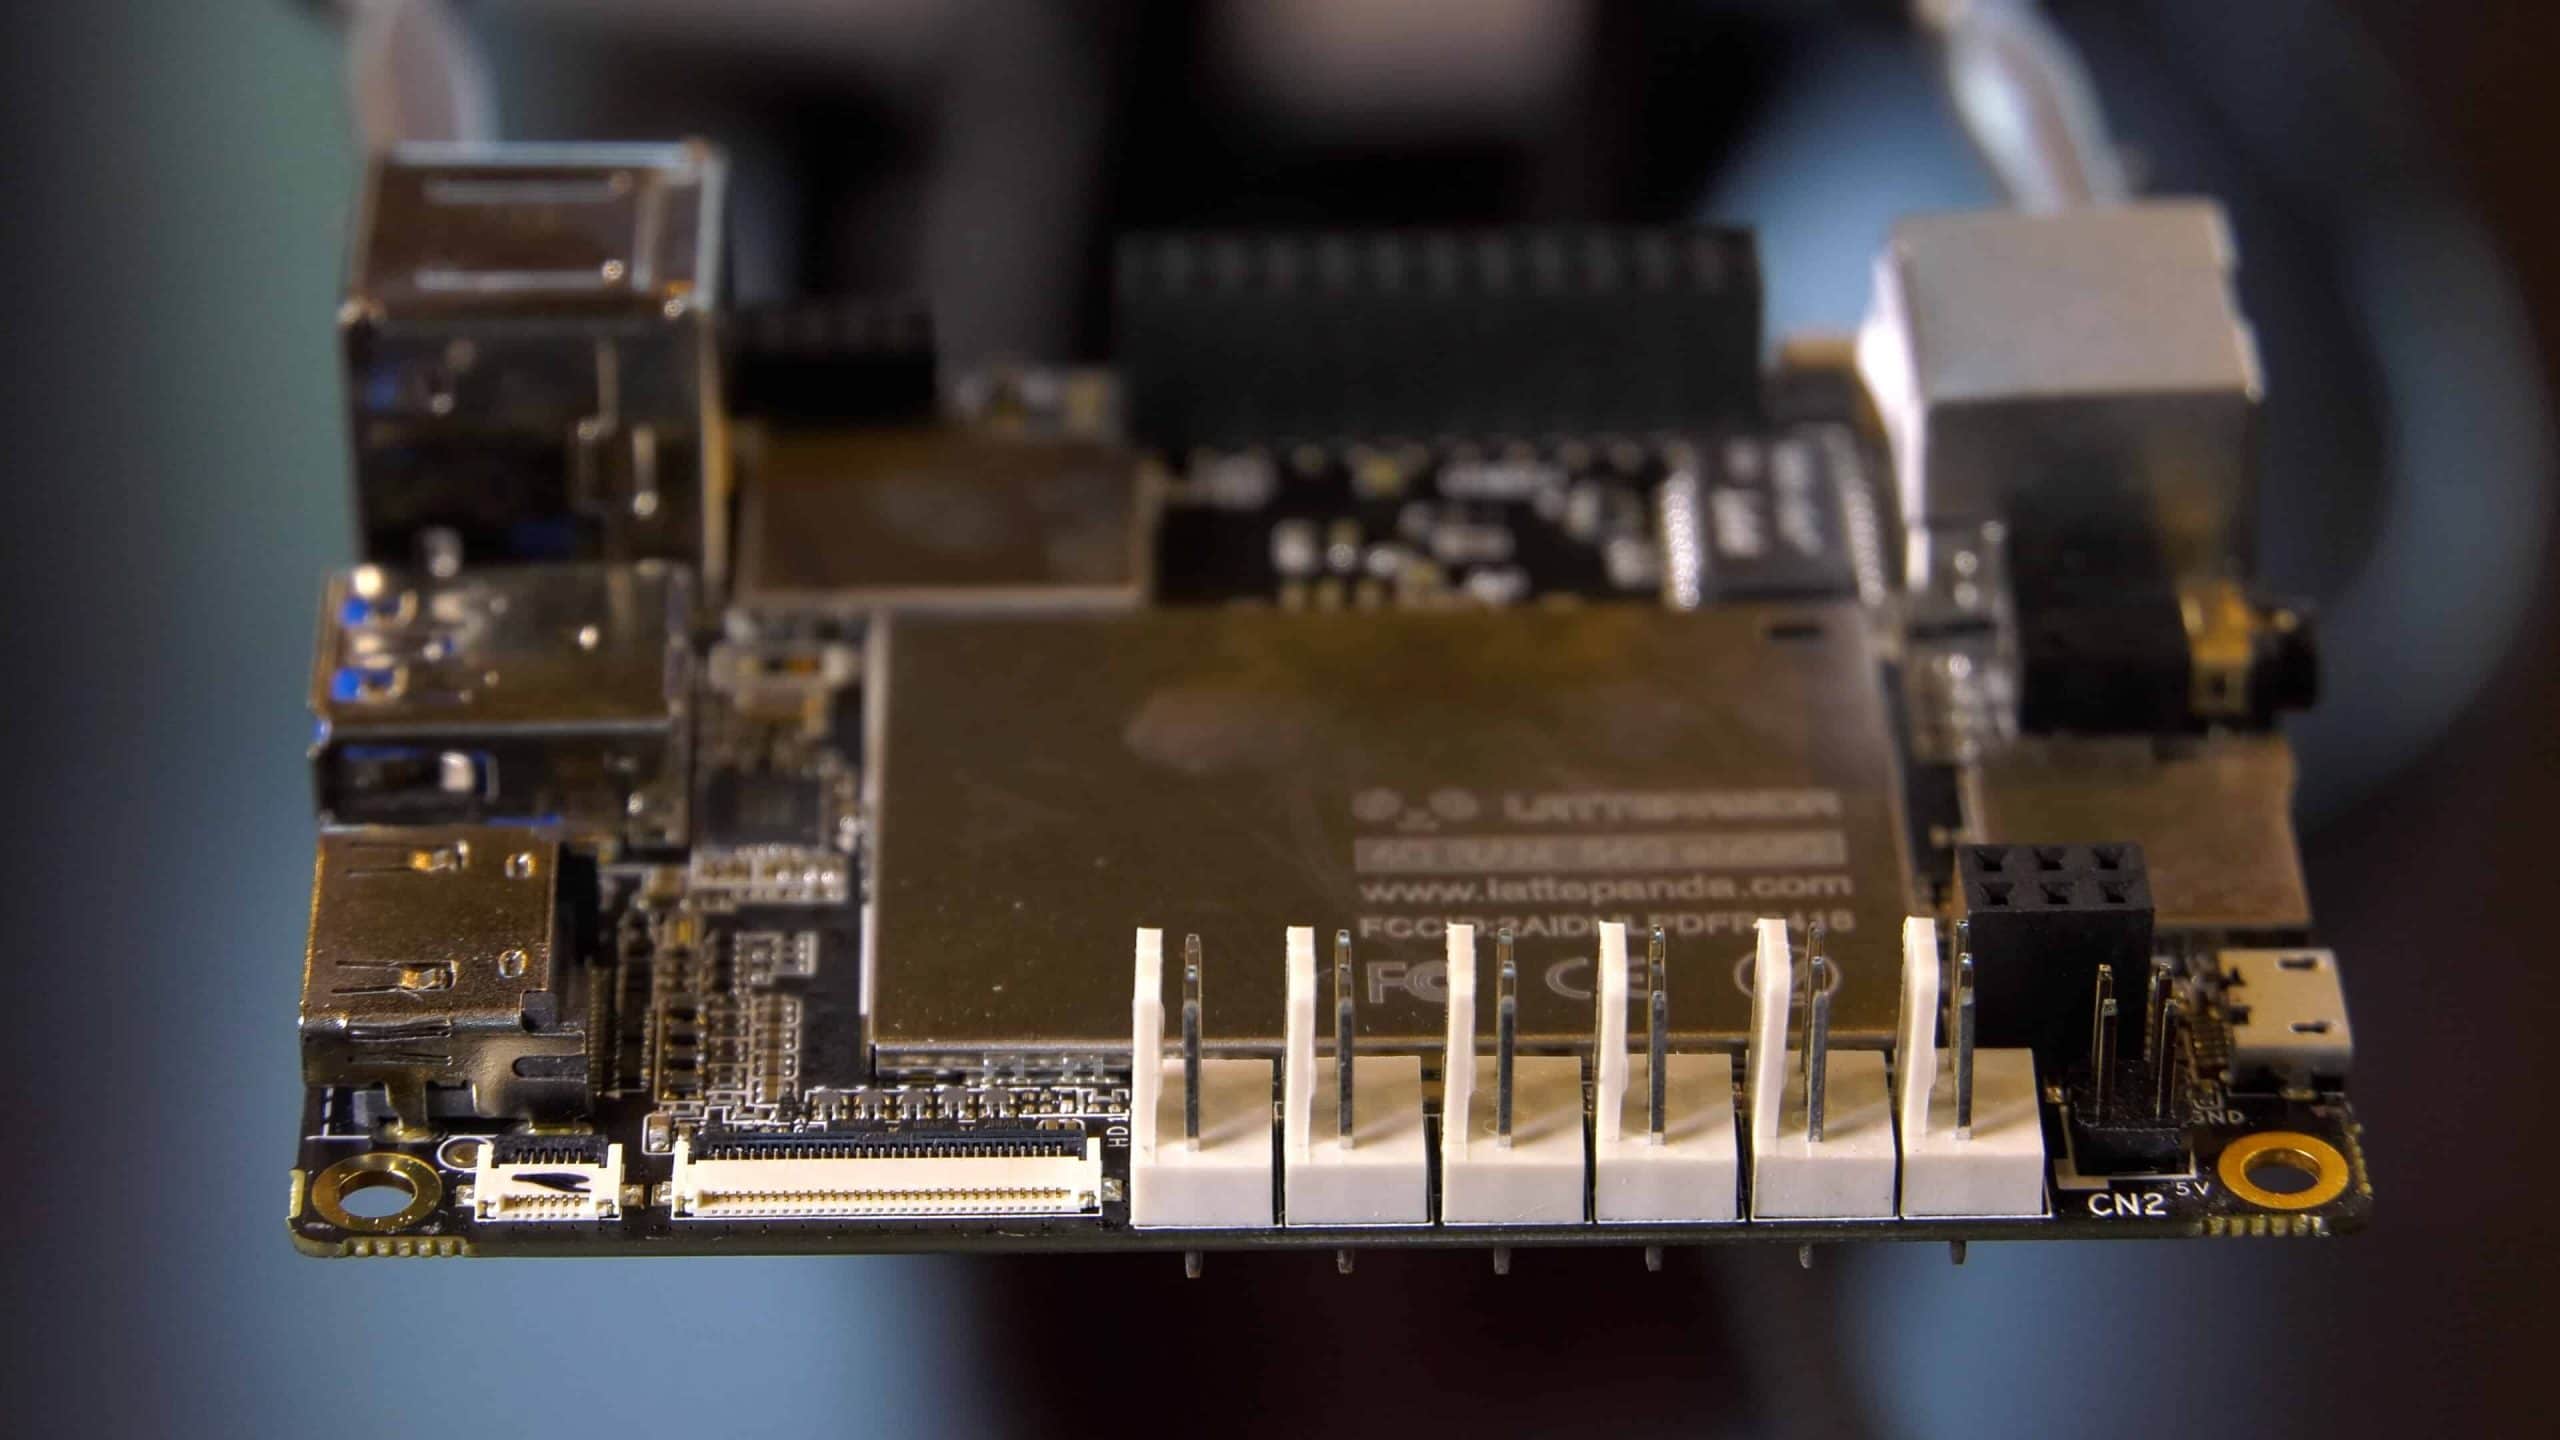
Turning the LattePanda counter-clockwise you’ll find a reset button for the Arduino chip along with the Arduino header which is where you would connect devices and breadboards for your projects. In addition to supporting a full Arduino you will also find a smaller header which contains GPIO directly from the processor. This opens a world of options for controlling external devices. If you were using this for an Arcade for example you could use the GPIO to activate and flash lights or run cabinet shakers. Additionally on this side you will find the power and reset buttons.
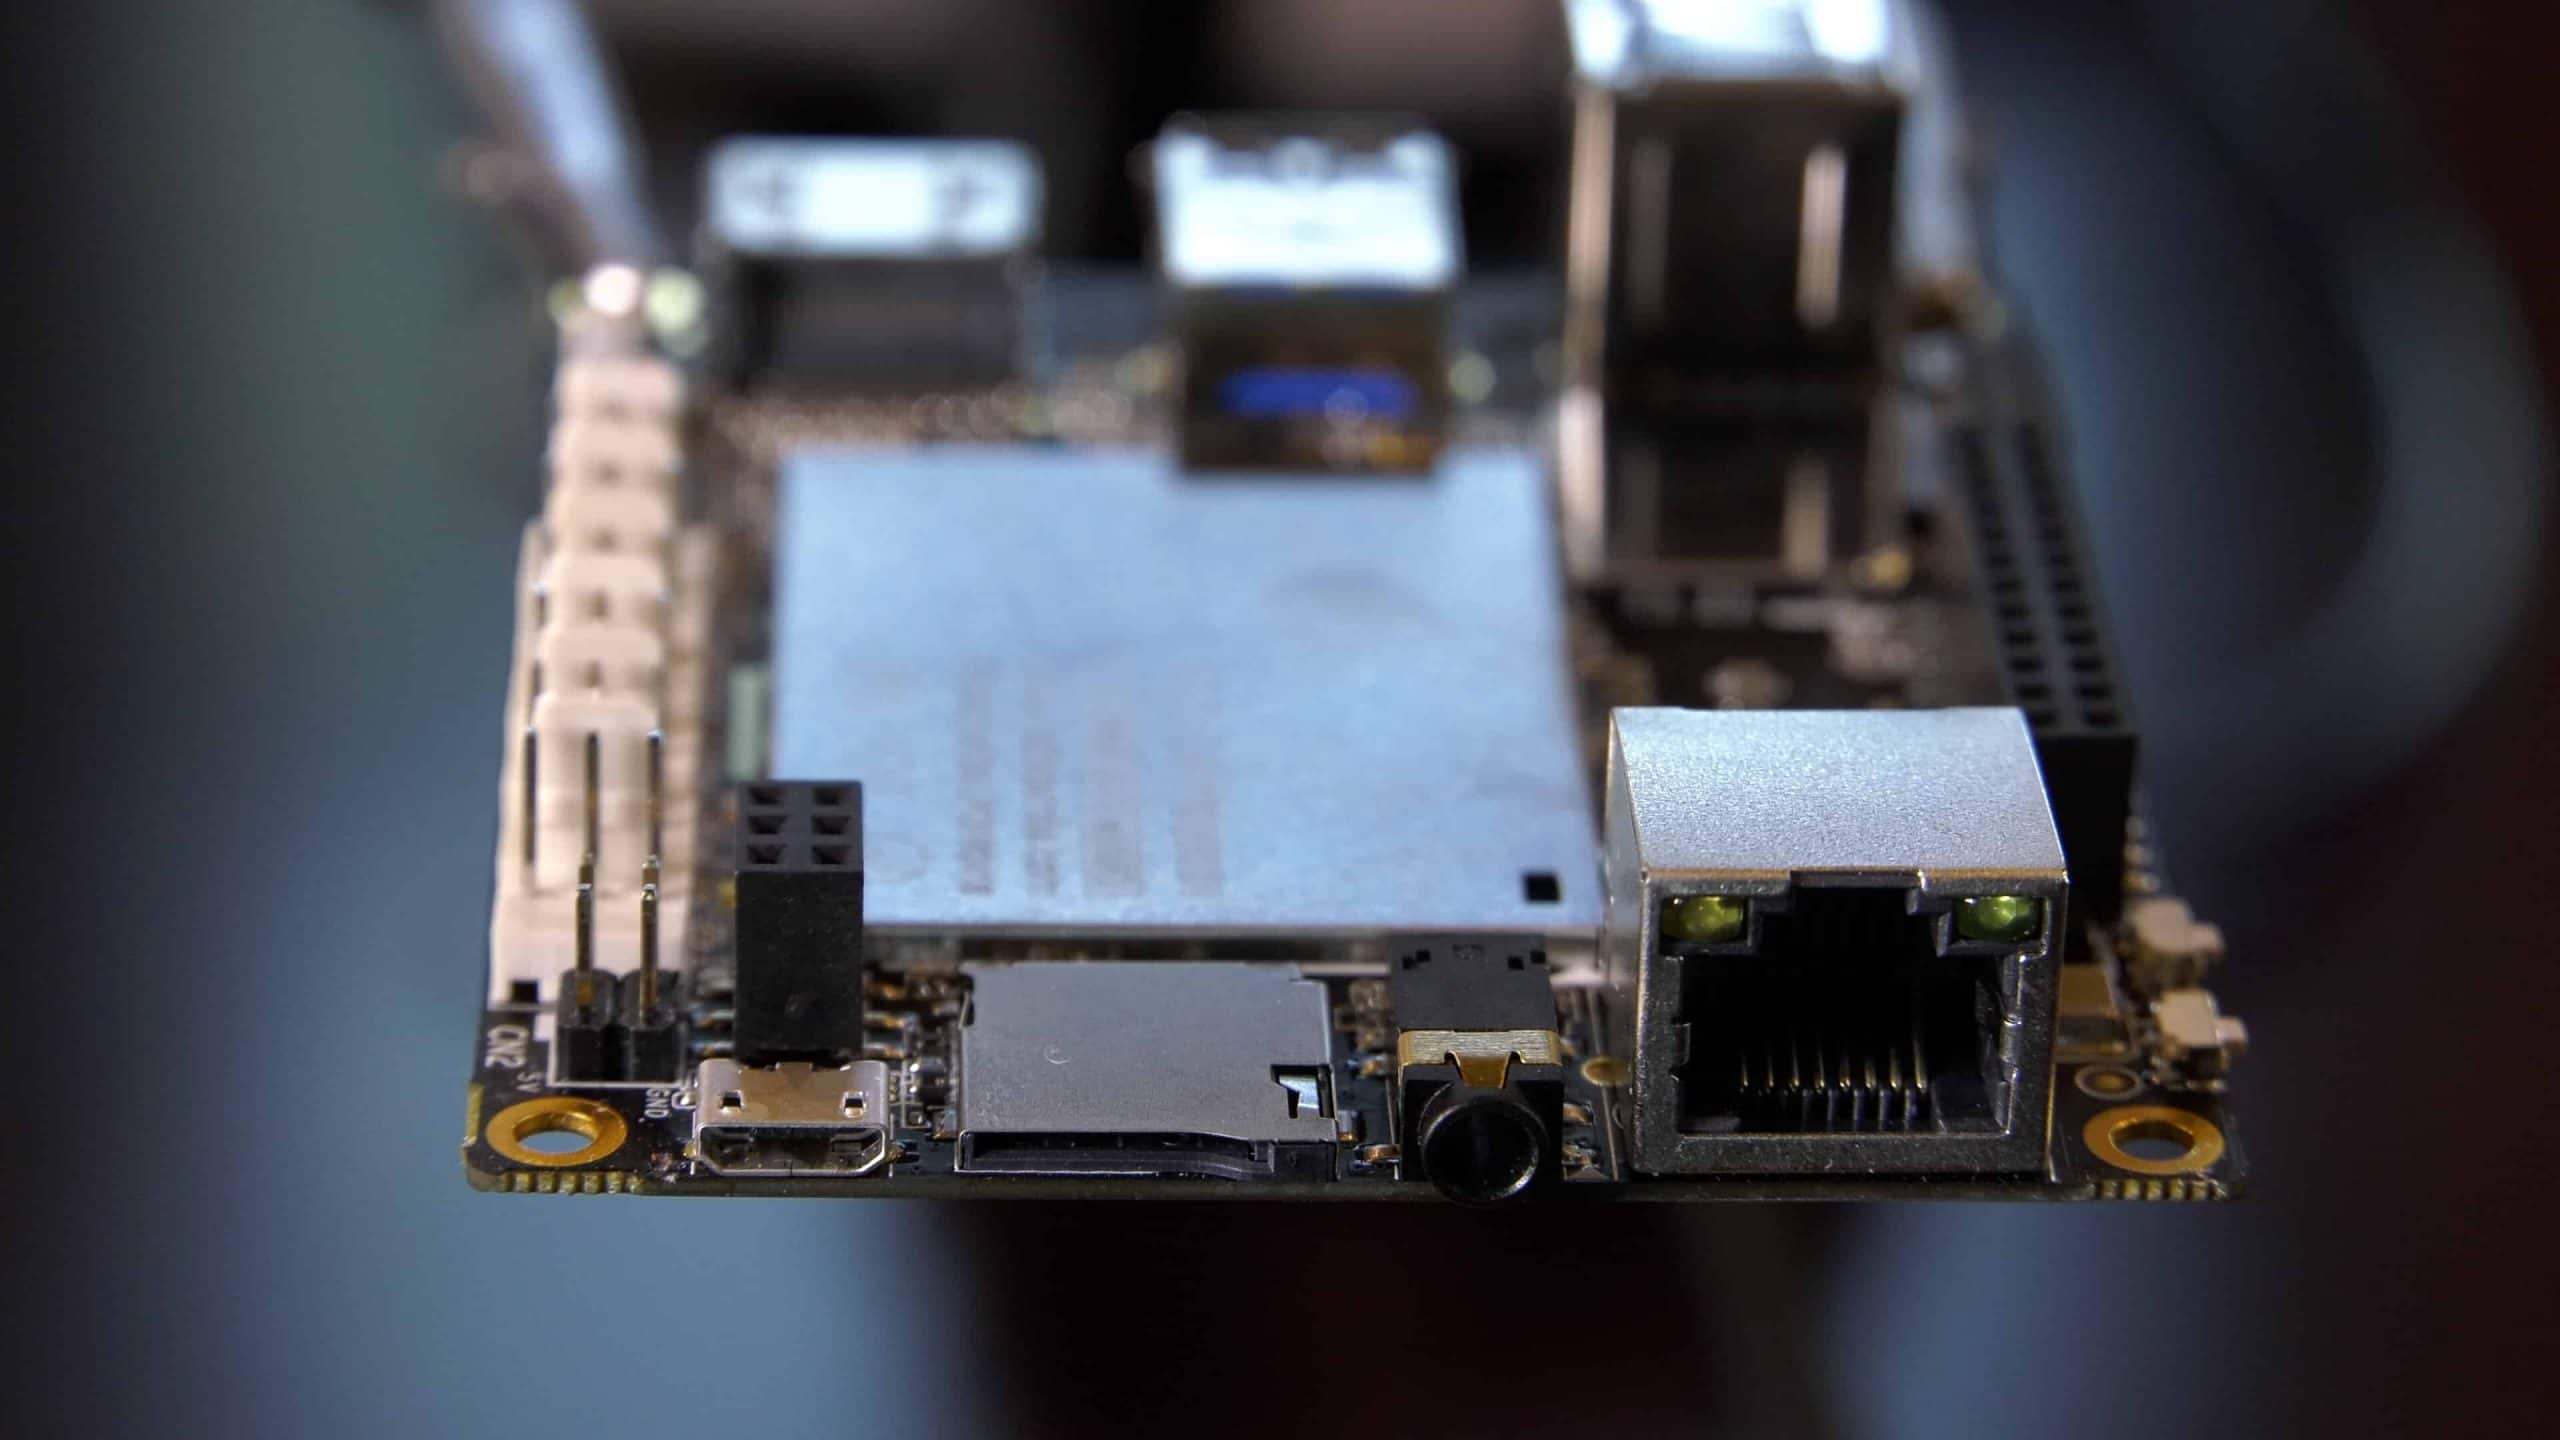
Side Three
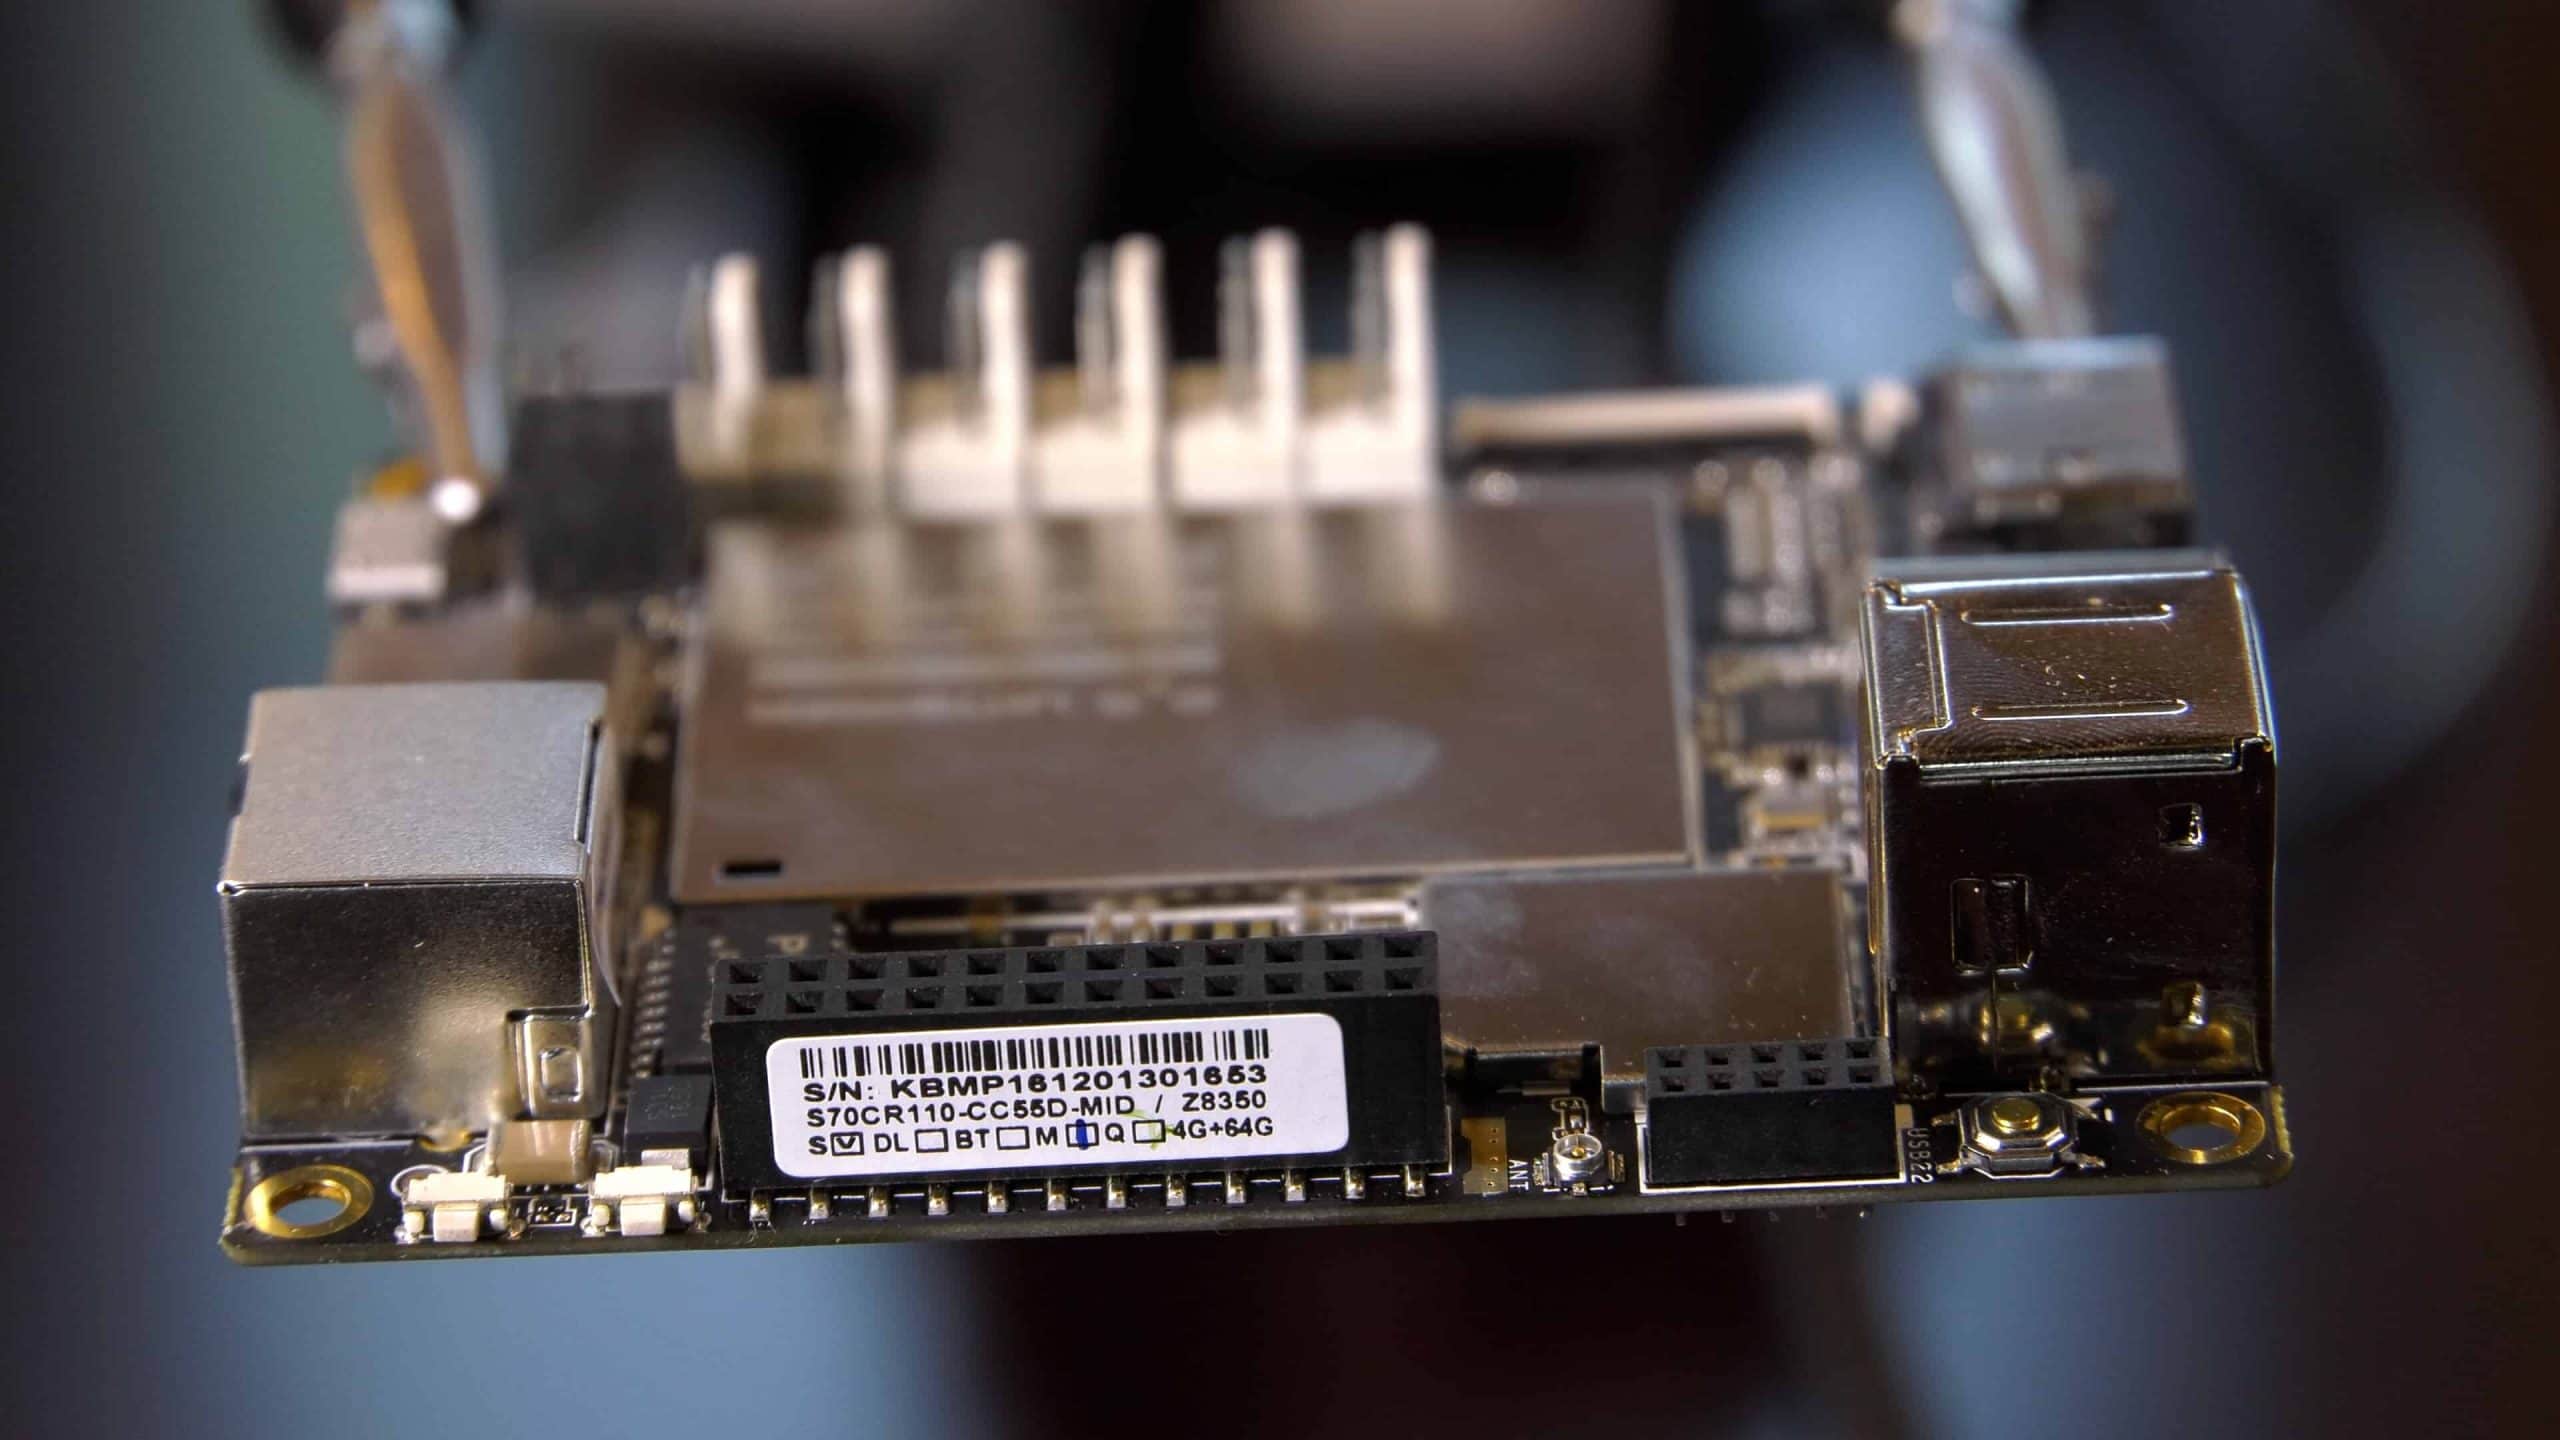
On the next side of the LattePanda you will find a 100 megabit Ethernet port, a 3.5 mm audio jack for connecting speakers or headphones, a micro-SD card slot for supporting additional storage, and a micro-USB connector for input power. The LattePanda requires a 5 volt 2 amp input minimum. If you’re going to run additional accessories I would recommend going for a 2.5 amp supply. Most of your fast charging cell phone adapters will meet this requirement.
Side Four
On the last side of the Latte Panda you will find the screen connectors for LattePanda’s 7 inch IPS display, and a connector for the touch screen overlay. This can be fantastic for adding a small display to some Internet of Things project. Here is something interesting about the LattePanda. They provide some of the Arduino inputs in a second form factor called Plug and Play Sensors Connectors. They sell an array of temperature, humidity, motion sensors, and other sensors that can easily be plugged into these connectors. They’ve basically idiot proofed them for use in schools and learning environments.
Additional Details
Some other things to note about the LattePanda are the inclusion of a Realtek wireless chip that offers BlueTooth 4.0 and 802.11n Wi-Fi for wireless connectivity. I was also quite surprised to learn that the CPU is actually located on the bottom of the device, rather than the top side. This causes some issues with venting the processor which we will see in just a minute.
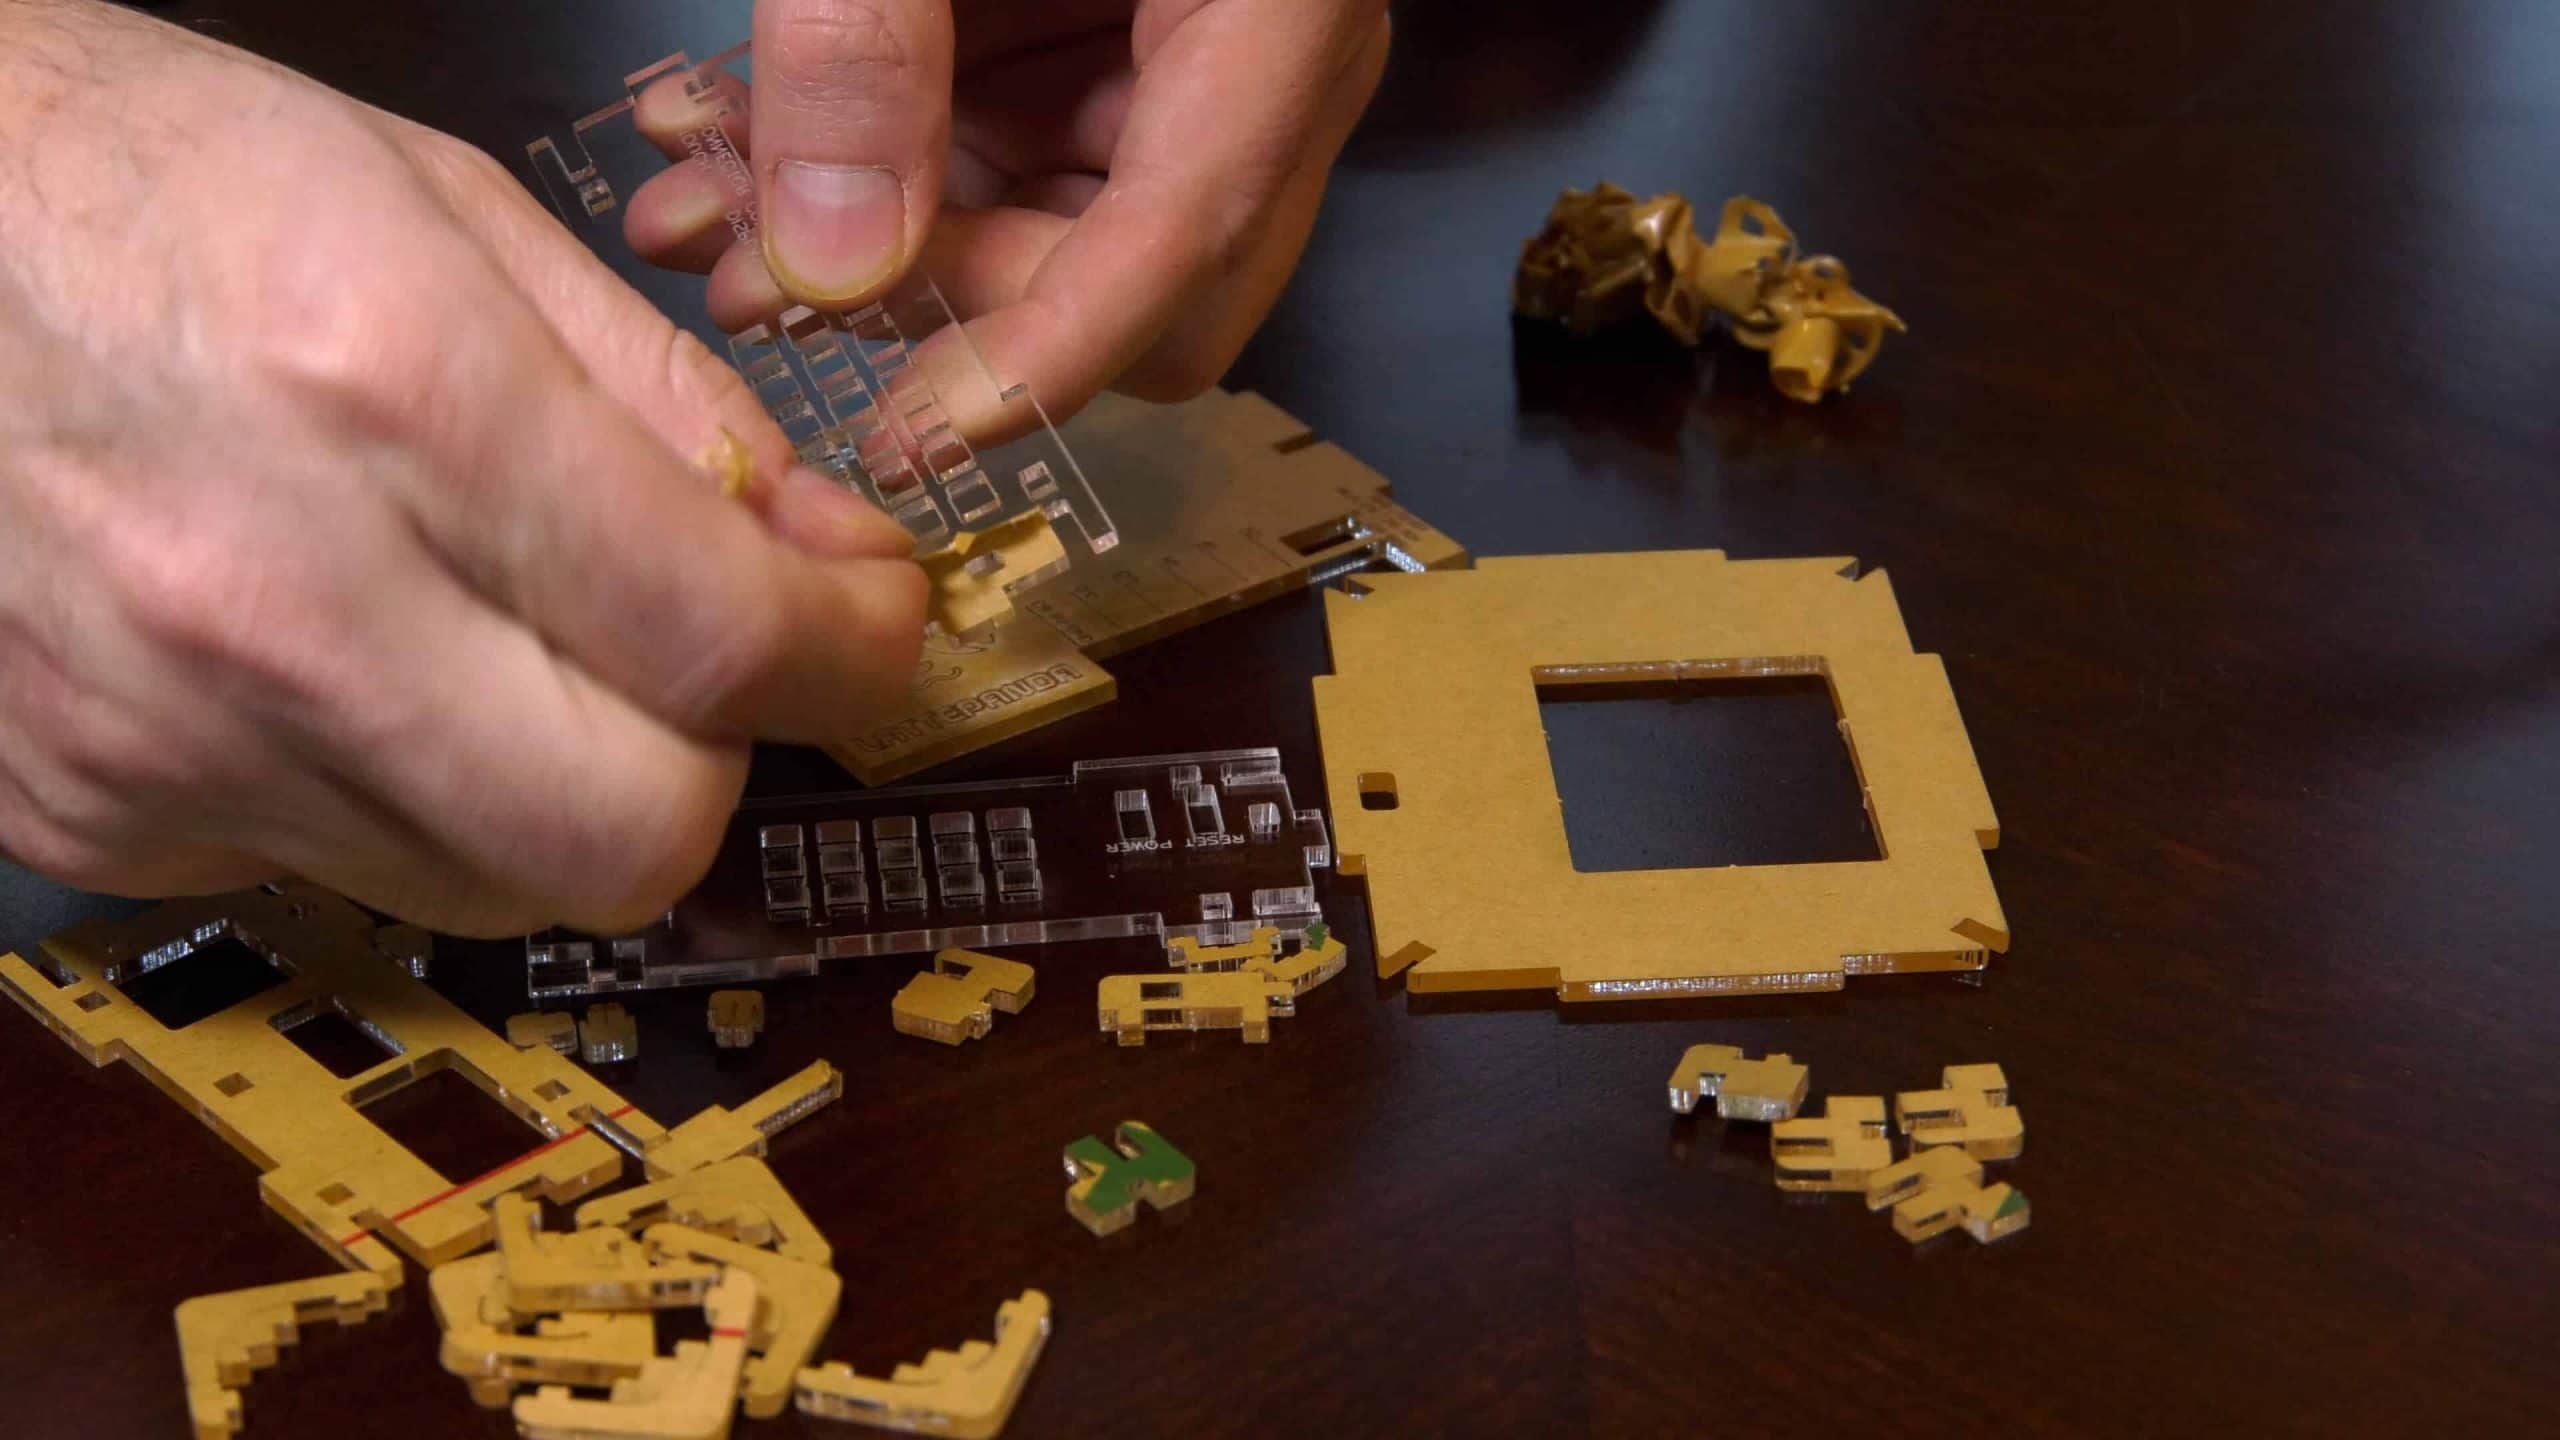
The case sold by DFRobot is made from laser cut acrylic that comes on these sheets. You’ll need to pop out all of the pieces from the larger sheets in order to build the case. It took me quite some time to remove the adhesive paper layers from all of the components.
Assembling the Case
Now I have to tell you, assembling the LattePanda case is like a Chinese puzzle. Putting one part in causes another part to fall off. But once you get everything lined up it goes together pretty easily.
I really recommend waiting until you’ve built the case before installing the board. This will allow you to precisely mount the CPU fan on the bottom of the case and everything will align much easier. The case is also available made from laser cut plywood.
Final Thoughts about the Latte Panda
So let’s talk about a few more things surrounding the LattePanda. So one thing I want to mention that I really find to be a flaw with the design of this is that the processor is on the bottom and the fan is also on the bottom, which means when you set the LattePanda down on a desk or surface the fan is almost obstructed. So if you were to set this thing down on anything like a towel for fabric or anything like that it would block the fan flow, er air flow from the fan and so I really don’t like that design.
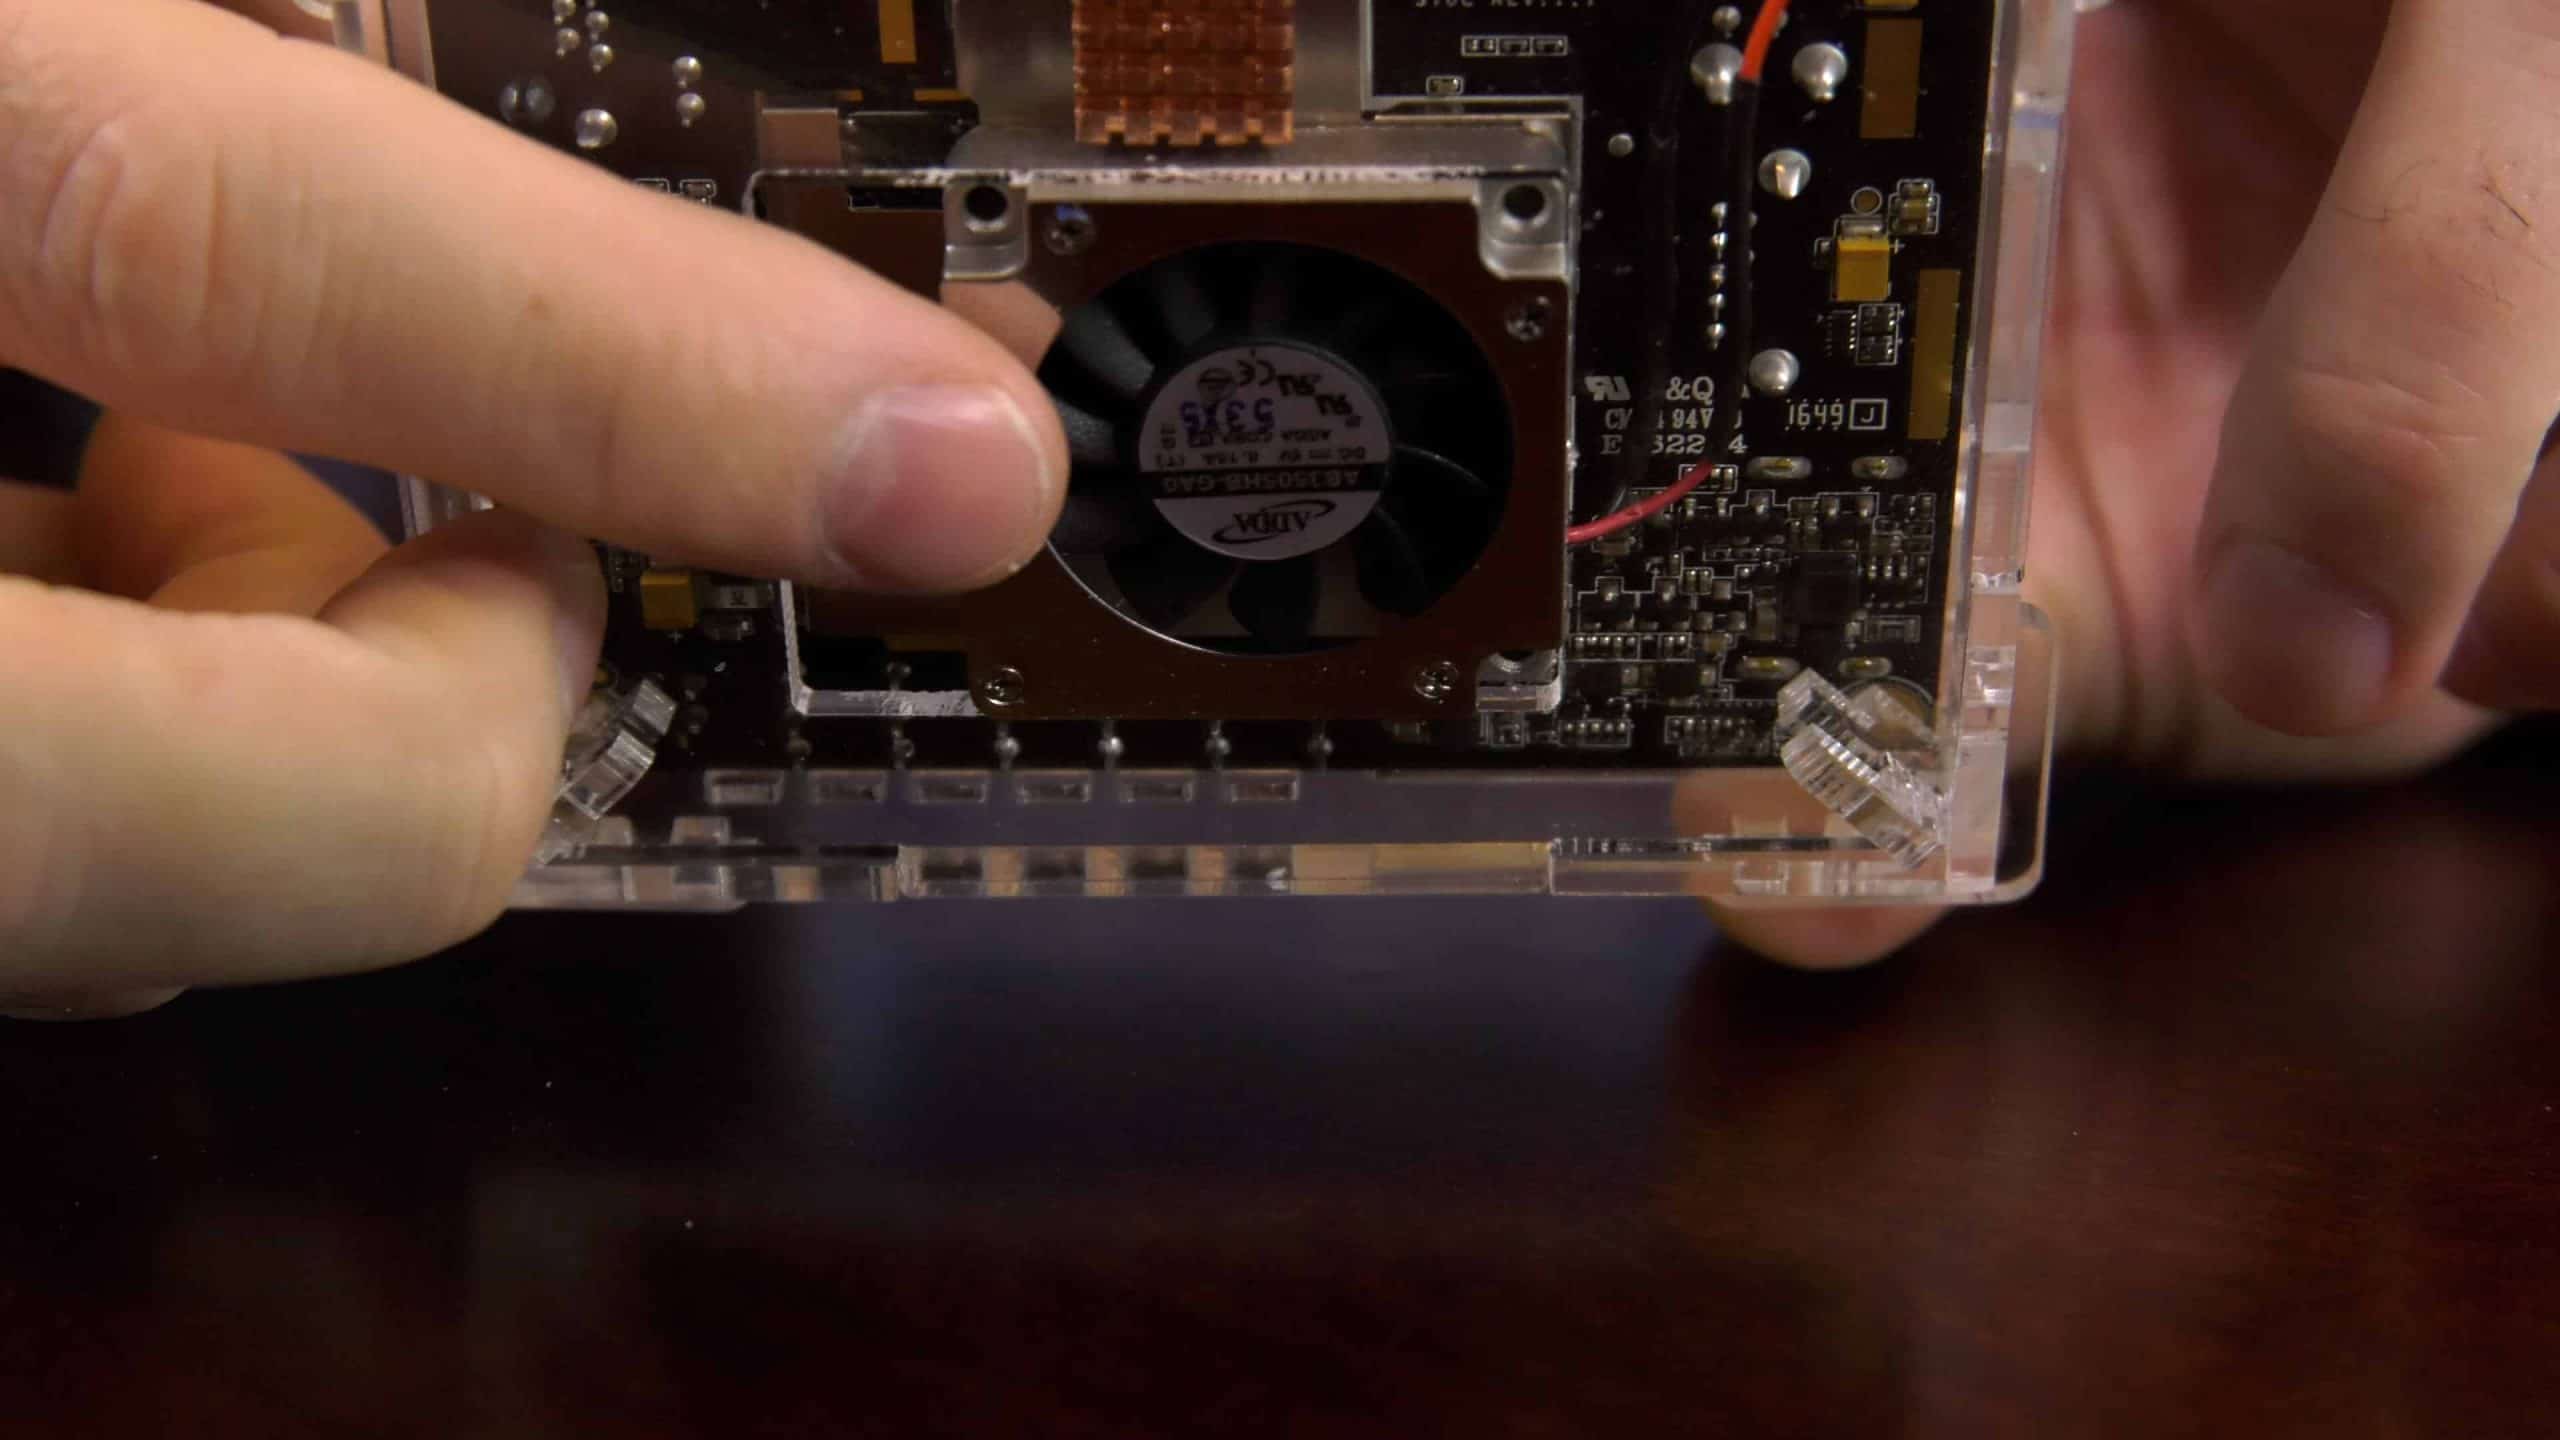
Here’s the good news. If you’re putting the LattePanda in something like an arcade cabinet, the case is really 100% optional. There is no reason to really have it all. Just put some standoffs in your cabinet and just mount the LattePanda directly to that.
The other thing I want to mention is that if you plan to use the LattePanda for something like an arcade, you should checkout RetroArch. It is actually what the Raspberry Pie version RetroPie was originally based on. It can emulate all of the same video game consoles and arcades that the RetroPie installation can emulate; only all on Windows. I highly recommend that you go check it out!
Get the LattePanda here:
- LattePanda 2GB RAM/32GB HD: http://amzn.to/2vp3r7A
- LattePanda 4GB RAM/64GB HD: http://amzn.to/2um7m8g
- LattePanda Acrylic Case: http://amzn.to/2trUb0Y
- LattePanda Plywood Case: http://amzn.to/2umFfFU
- LattePanda Fan: http://amzn.to/2t2JiUa
- LattePanda Heatskinks: http://amzn.to/2tXm4ji
- LattePanda 7″ IPS Display: http://amzn.to/2trMg3V
- LattePanda TouchScreen Overlay: http://amzn.to/2um3IuW
- LattePanda Gravity Sensor Kit: http://amzn.to/2uvvrd5
- Quadhands Helping Hands: http://amzn.to/2t2wixK


3.5
0.5