Blog
Arduino Piezo Buzzer Tutorial

A piezo buzzer is a fantastic way to add feedback to users of your projects. In this Arduino piezo buzzer tutorial, we’re going to dive into the different types of piezo buzzers, how they work, how to wire them up to your Arduino, and write a sketch to control them. Before you know it, piezo buzzers will find their way into many of your projects!
Understanding the Piezo Buzzer Types
There are two main types of piezo buzzers you will encounter: Active piezo buzzers and passive piezo buzzers. Let’s quickly talk about the differences.
Active Piezo Buzzers
Active piezo buzzers are exactly as they might sound. Supplying 3.3V or 5.5V to the positive lead of the active piezo buzzer will cause the piezo to start emitting an audible buzz. The active piezo has an internal oscillator.
Passive Piezo Buzzers
Passive piezo buzzers do not have an internal oscillator. If you supply DC current to the piezo literally nothing happens. For the passive piezo buzzer to make a noise you must use the PWM pins of the Arduino to send it an square wave signal. The frequency and voltage of this signal will determine the sound wave that the passive piezo buzzer emits. This makes it possible to emit different types of sounds!
Parts List for this Project
We’ve created this handy parts list for you if you’d like to do this project. Some of these might be affiliate links. Using them costs you nothing, but we may get a small commission that helps us to continue making content like this!
| QTY | PART / LINK | ||
|---|---|---|---|
| 1X | [icon name=”microchip” prefix=”fas”] | Arduino Uno | [icon name=”cart-plus” prefix=”fas”] |
| 1X | [icon name=”usb” prefix=”fab”] | USB Type B Cable | [icon name=”cart-plus” prefix=”fas”] |
| 1X | [icon name=”th” prefix=”fas”] | Solderless Breadboard | [icon name=”cart-plus” prefix=”fas”] |
| 1X | [icon name=”grip-lines” prefix=”fas”] | Jumper Wires | [icon name=”cart-plus” prefix=”fas”] |
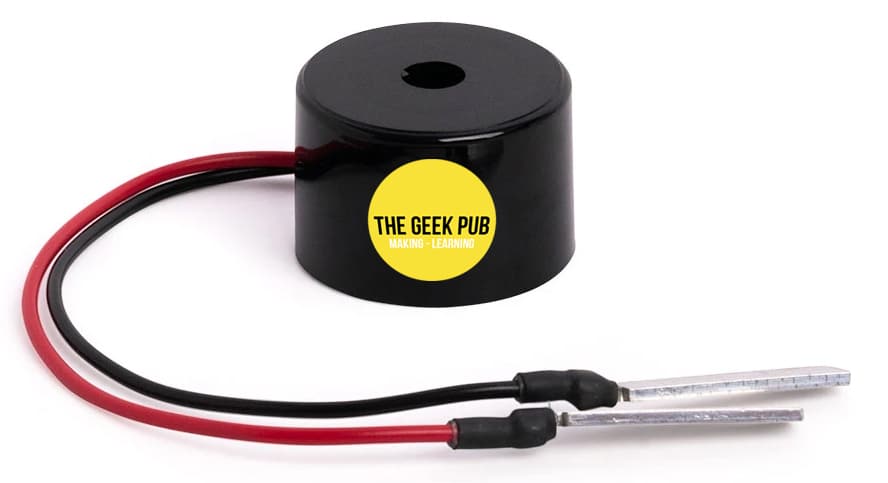
| 1X | [icon name=”volume-up” prefix=”fas”] | Active Piezo Buzzer | [icon name=”cart-plus” prefix=”fas”] |
| 1X | [icon name=”volume-up” prefix=”fas”] | Passive Piezo Buzzer | [icon name=”cart-plus” prefix=”fas”] |
Arduino Piezo Buzzer Tutorial Wiring
Next up in our Arduino piezo buzzer tutorial, let’s learn how to wire them up! They are mostly identical, with a slight variation.
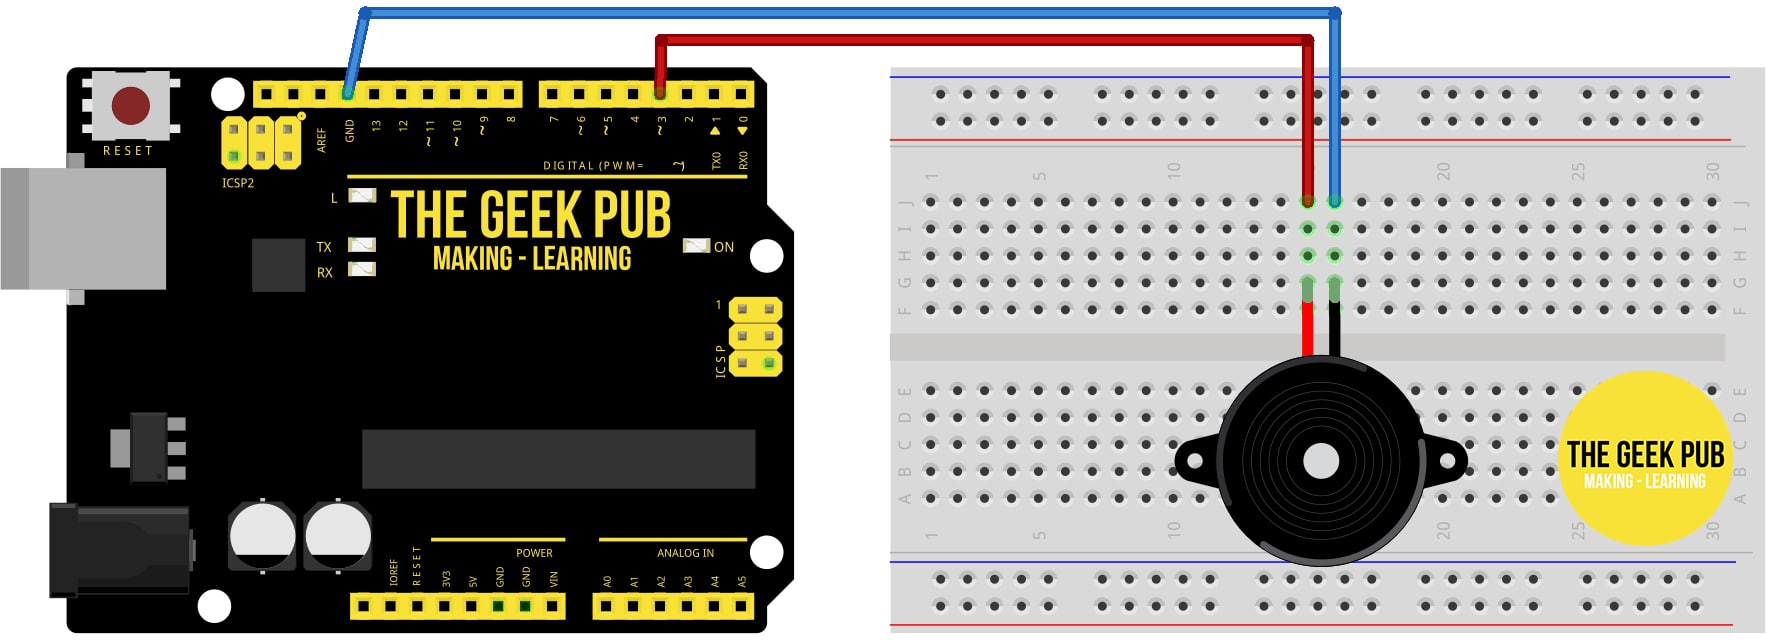
Active Piezo Buzzer Wiring
The active buzzer simply needs a 3.3V to 5.5V power feed. We can supply 5V from any of the digital pins on the Arduino. We’ll use PIN 3!
- Arduino PIN 3 to piezo buzzer red lead (+)
- Arduino GND to piezo buzzer black lead (-)
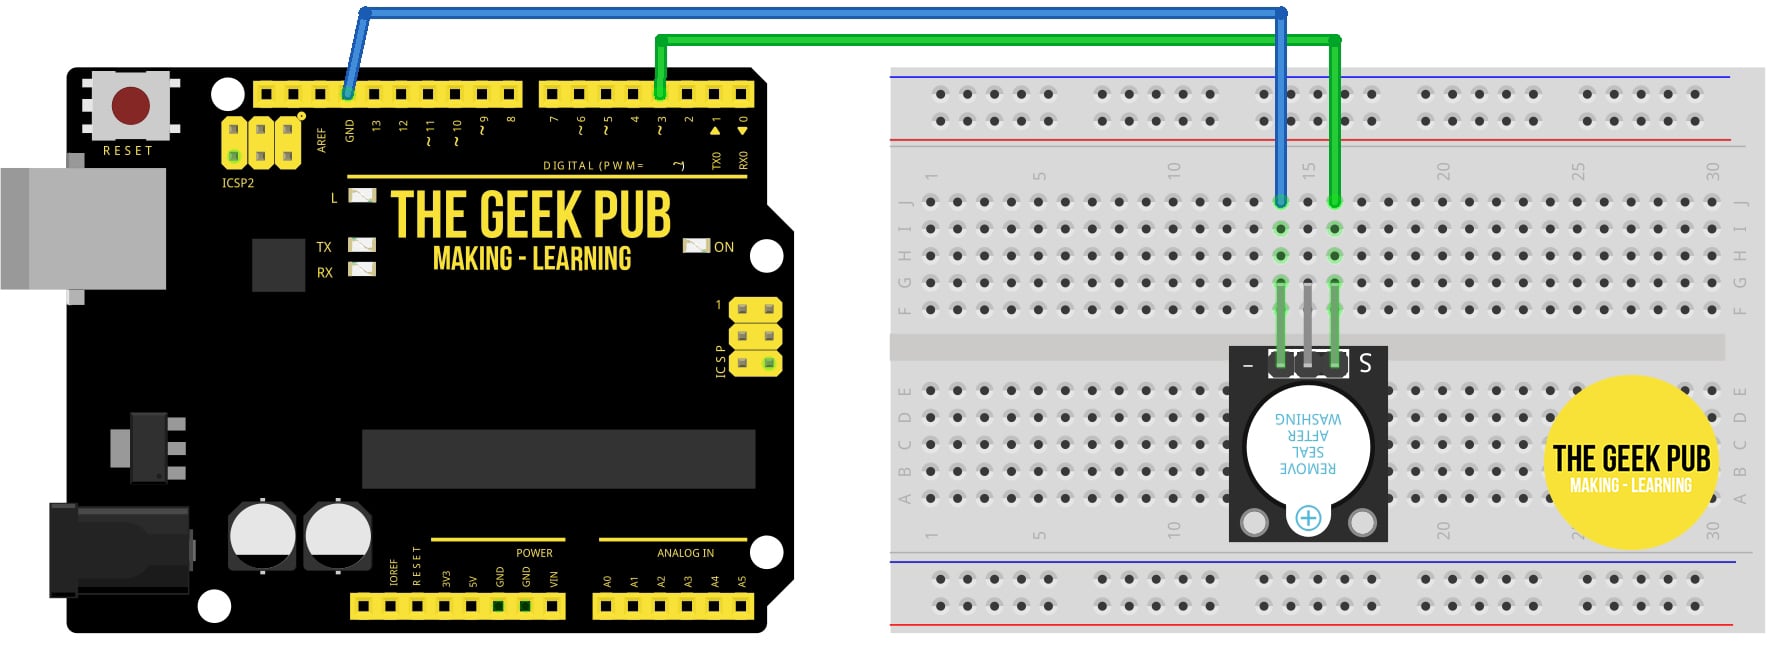
Passive Piezo Buzzer Wiring
The passive piezo is wired very similarly to the active buzzer. However, it generally has an extra center pin that is not used. It is also important to use a digital output on the Arduino that supports PWM. These will have a ~ next to them. We’re going to keep using pin 3 for simplicity.
- Arduino PIN 3 to piezo buzzer signal lead (S)
- Arduino GND to piezo buzzer GND lead (-)
Arduino Piezo Buzzer Code
Now it’s time in our Arduino piezo buzzer tutorial to put some code on your Arduino to make the buzzer do something!
Active Piezo Buzzer Sketch
This code will make your active piezo buzzer buzz on and off on a 3 second loop.
int gpActiveBuzzer = 3;

void setup ()
  {
    pinMode (gpActiveBuzzer, OUTPUT); // set pin to output mode
  }

void loop () //Main program loop
  {
    digitalWrite (gpActiveBuzzer, HIGH); // sound the buzzer
    delay (3000); // pause code for 3 seconds
    digitalWrite (gpActiveBuzzer, LOW); // stop the buzzer
    delay (2000); // pause code for 2 seconds
  }
Passive Piezo Buzzer Sketch
This code will make the passive piezo buzzer maker a standard alarm sound. Rising and falling buzzing.
// define the pin we will connect to
int gpPassiveBuzzer = 3 ;

void setup ()
{
  // set our pin to output mode
  pinMode (gpPassiveBuzzer, OUTPUT) ;
}

void loop ()
{
  // loop through frequencies to generate alarm sound
  unsigned char i;
  while (1)
  {
    //Frequency 1
    for (i = 0; i <80; i++)
    {
      digitalWrite (gpPassiveBuzzer, HIGH) ;
      delay (1) ;
      digitalWrite (gpPassiveBuzzer, LOW) ;
      delay (1) ;
    }
    //Frequency 2
    for (i = 0; i <100; i++)
    {
      digitalWrite (gpPassiveBuzzer, HIGH) ;
      delay (2) ;
      digitalWrite (gpPassiveBuzzer, LOW) ;
      delay (2) ;
    }
  }
}
Next Steps
Now that you’ve learned the basics of the piezo buzzer you can move on to the next tutorial or go back to the main list!


