Blog
WLED: How to setup and configure WLED

WLED is an awesome open source application created to control addressable LEDs (WS2811, WS2812b, WS2813, etc) from your iOS or Android smartphone, or literally any device which can send a command via http/https over a network! It runs on the ESP32 platform of microcontrollers, which although similar to the Arduino is different but mostly compatible if you understand those differences.
Installing and Configuring WLED
Before you get started installing and configuring WLED, you’re going to need a ESP32 based microcontroller to install it on, along with some addressable LEDs. You’ll also need to obtain the iOS or Android app if you want to control the LEDs from your phone.
Parts List for this Project
If you don’t already have everything you need for this project, here’s a handy parts list for getting started:
| QTY | PART / LINK | ||
| 1X | [icon name=”microchip” prefix=”fas”] | ESP8266 microcontrollers (no Bluetooth, but cheaper) | [icon name=”cart-plus” prefix=”fas”] |
| 1X | [icon name=”microchip” prefix=”fas”] | ESP32 microcontroller (adds Bluetooth and doubles GPIO, more expensive) | [icon name=”cart-plus” prefix=”fas”] |
| 1X | [icon name=”usb” prefix=”fab”] | Micro-USB cable (for programming) | [icon name=”cart-plus” prefix=”fas”] |
| 1X | [icon name=”plug” prefix=”fas”] | Micro-USB power supply (for stand alone operation) | [icon name=”cart-plus” prefix=”fas”] |
| 1X | [icon name=”lightbulb” prefix=”fas”] | WS2812b Addressable LED Strips 3.3V-5V | [icon name=”cart-plus” prefix=”fas”] |
Some of these links are affiliates. If you use them it costs you nothing, but we get a small commissions and that helps us keep making content for you!
Downloads for this Project
In addition, you’ll need a few pieces of software for this project.
What is an ESP32 Microcontroller?
Put simply, think of the ESP32 as an Arduino that has additional GPIO pins along with Bluetooth & Wi-Fi integrated onto the board. It’s a little more complicated than that, but that’s the simple way to look at it. In fact, you can even use the Arduino IDE to program for the ESP32 with an add-on called ESP32-Arduino Core. But that’s outside the scope of this article.
Getting Started with WLED
After getting your ESP32 out of its box (or bag), its time to get WLED up and running on it. Let’s walk through all of the necessary steps!
Installing the USB UART Serial Drivers
If you’ve never connected a device like this to your PC or Mac before it is very possible you won’t have the USB UART serial drivers installed. There two common driver for almost all microcontrollers. The very common CP2102 and the less common CH340G. You can find those drivers at these links:
If you used our links above to acquire your ESP32, then you will need the CP2102 drivers.
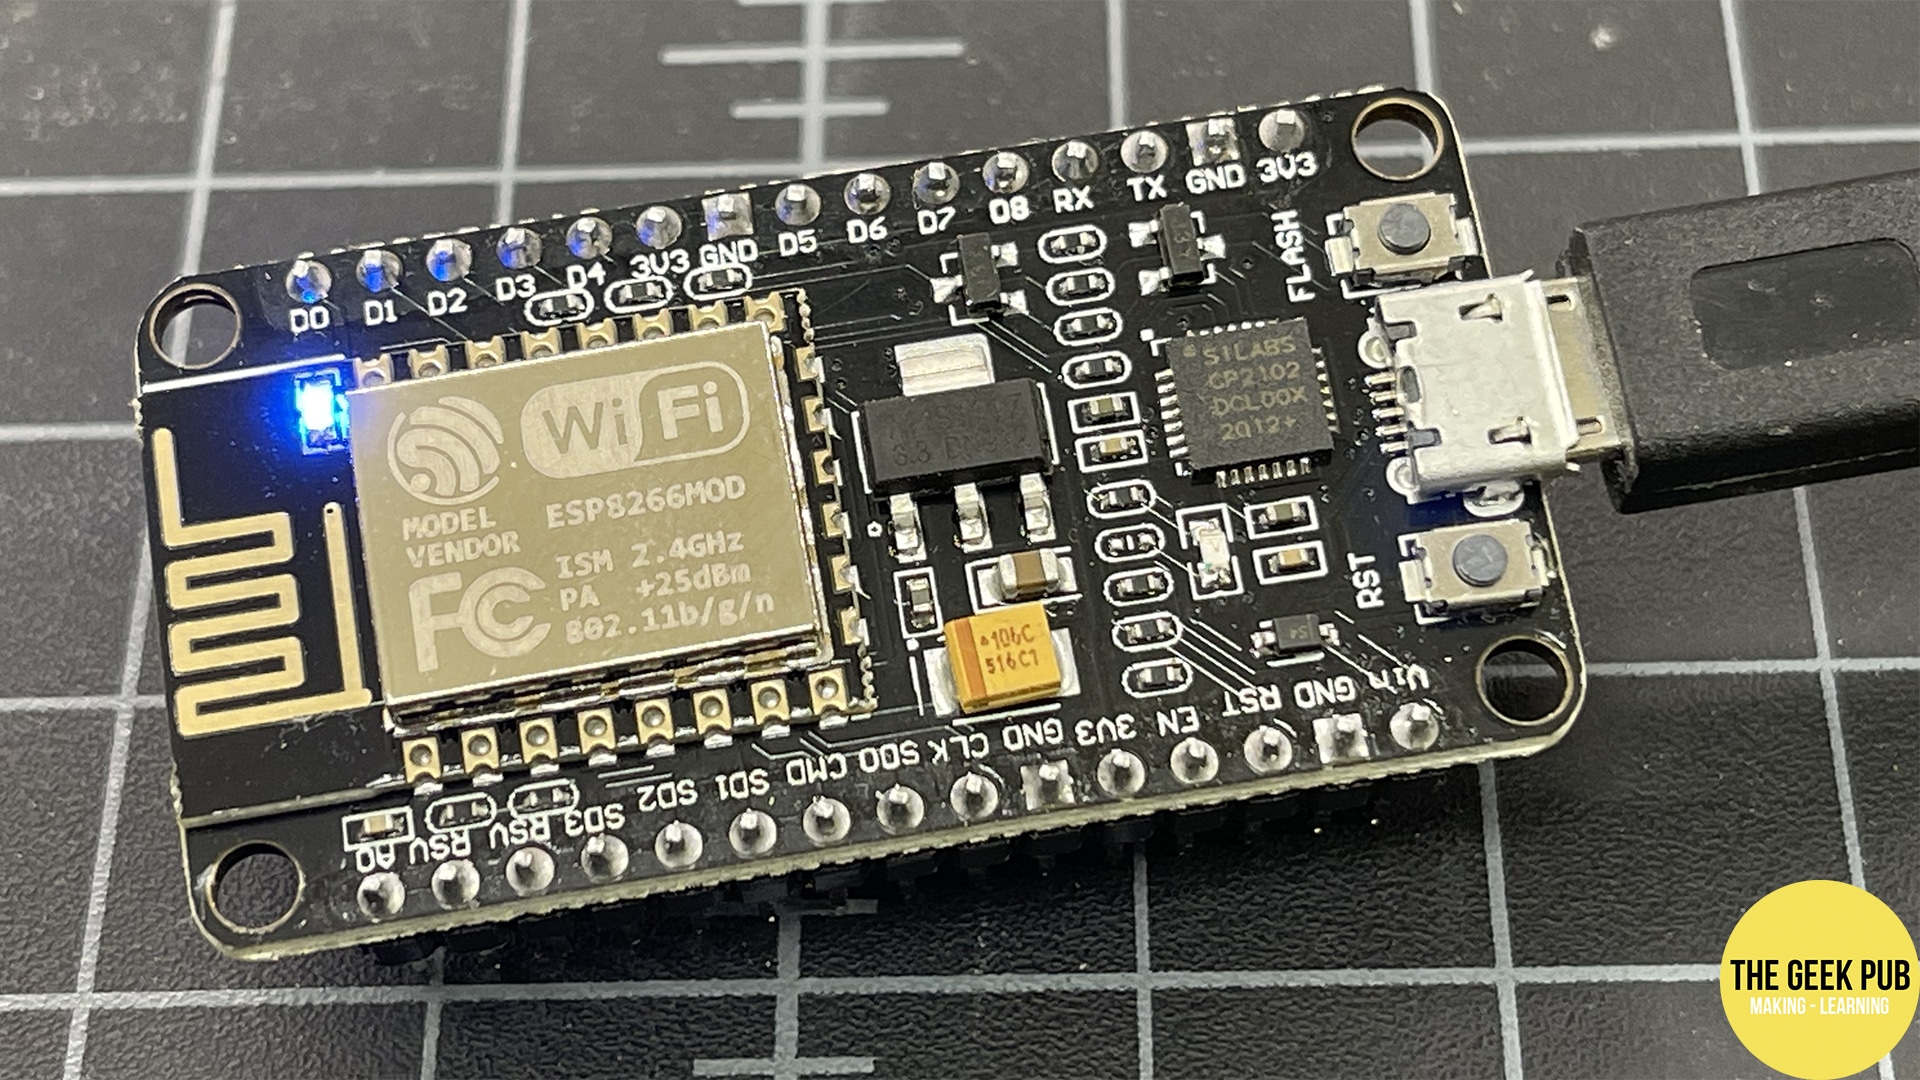
Connecting the ESP32 to your PC or Mac
Now that you have the drivers installed, you’ll need to connect your ESP microcontroller to a PC or Mac via USB. This requires a Micro-USB cable for most controllers. Connect one end to the ESP32 and the other end to your PC or Mac.
Installing WLED on your ESP32 Microcontroller
On the same PC or Mac you connected your ESP32 to, it is time use the WLED download tool to install WLED onto the ESP32. In your browser (preferably Chrome), go to http://install.wled.me.
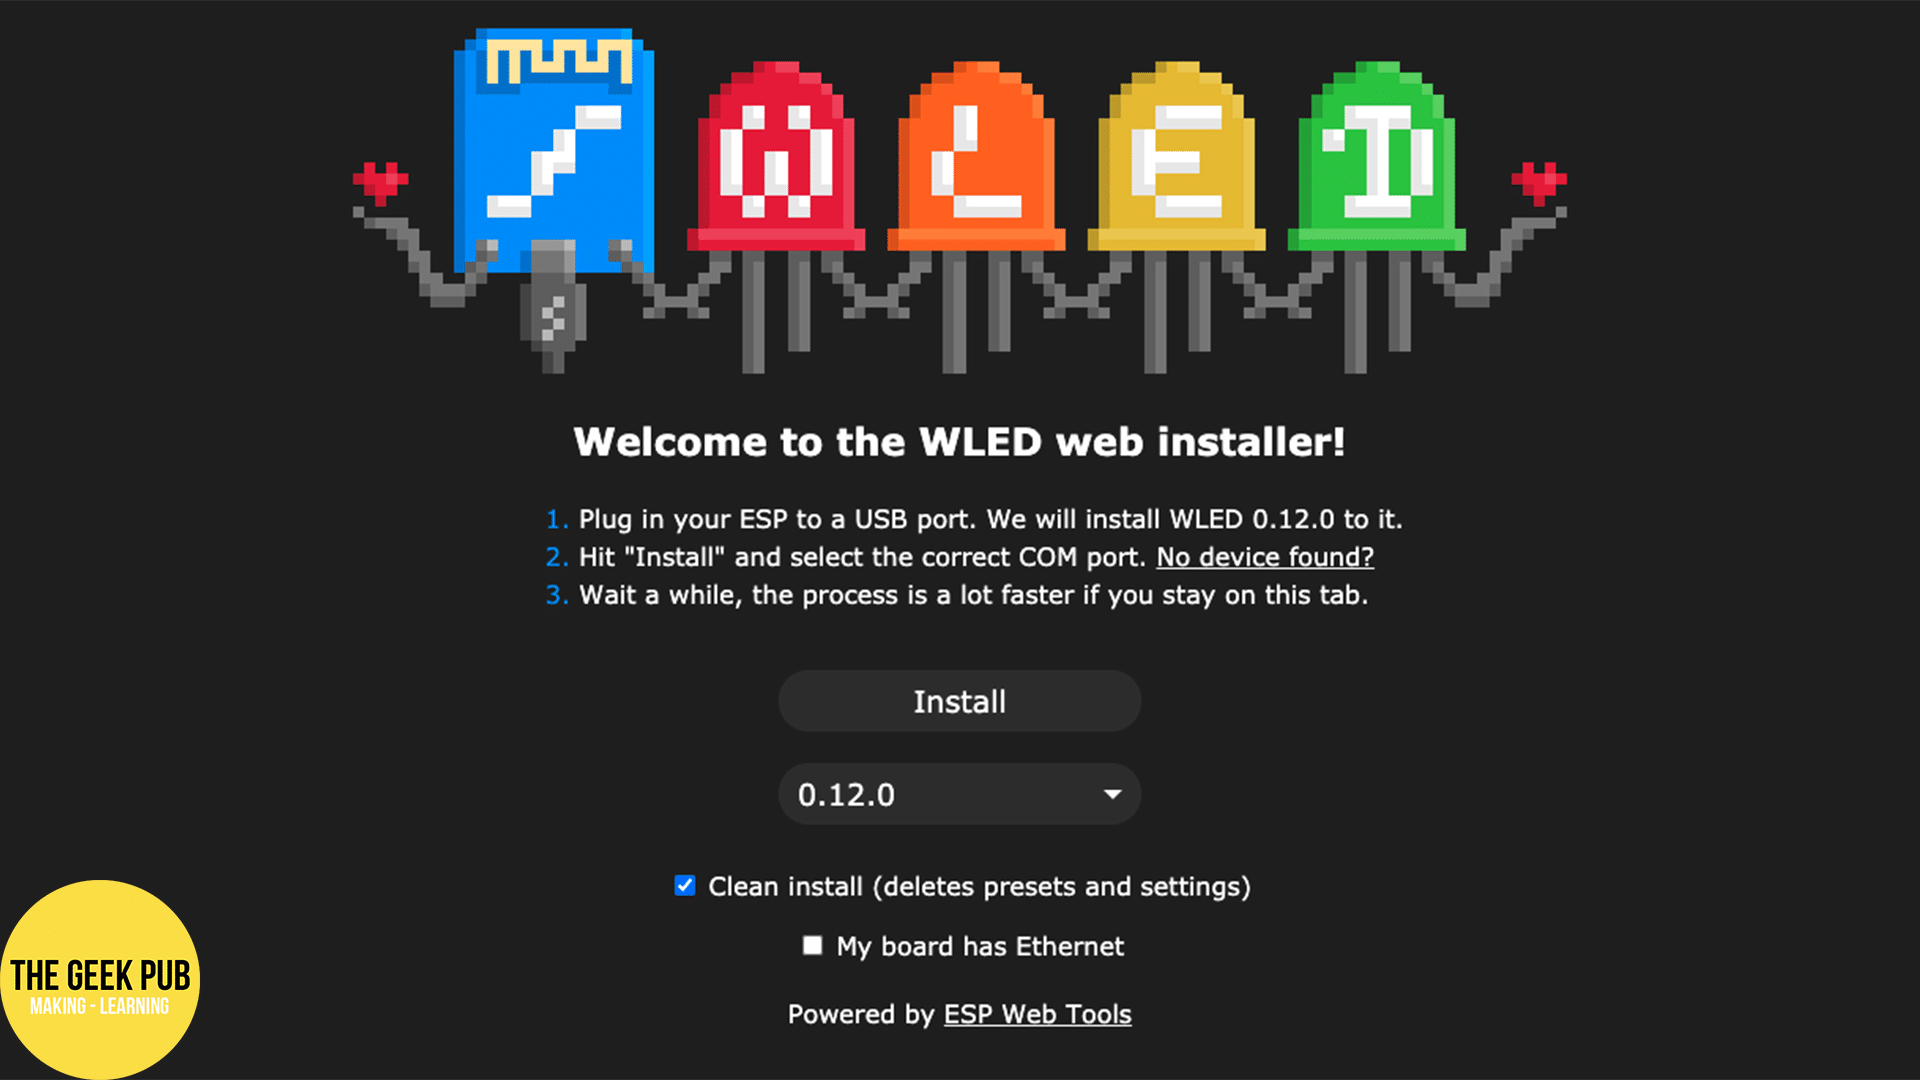
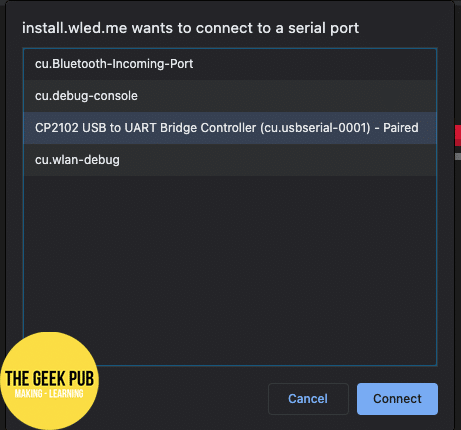
Next up click the install button. You’ll be asked which serial port you want to connect to. You’ll want to connect to one that has a name that represents your ESP32. It should say something along the lines of CP2102 or CH340G UART Bridge. Click that serial device/port and then click connect.
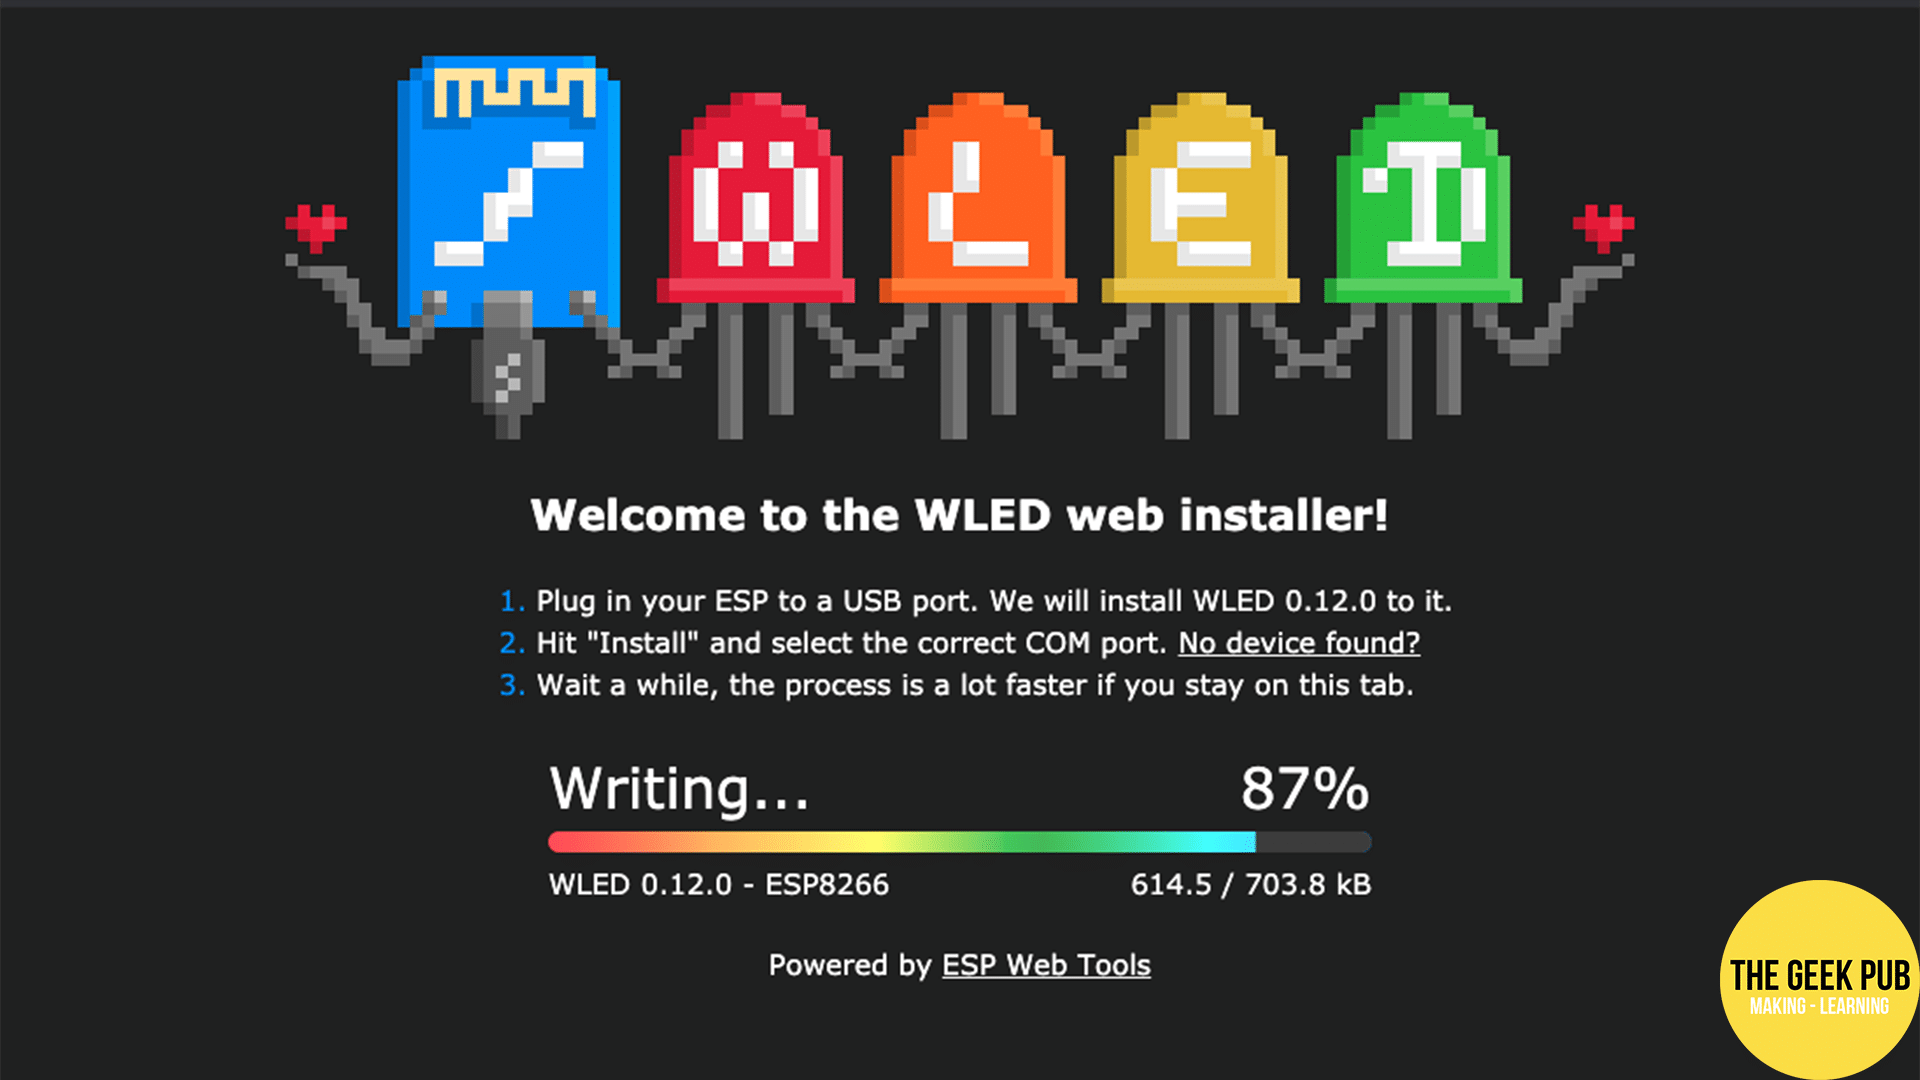
WLED will then say its initializing for a second and then begin the process of writing the image to the ESP32.
Once the installation has completed, you can leave the ESP32 connected to serial, or disconnect it and plug it into a dedicated power supply. Either way it is recommended to reboot the ESP32 microcontroller by unplugging it and plugging it back in.
Connected to the WLED Wi-Fi Controller
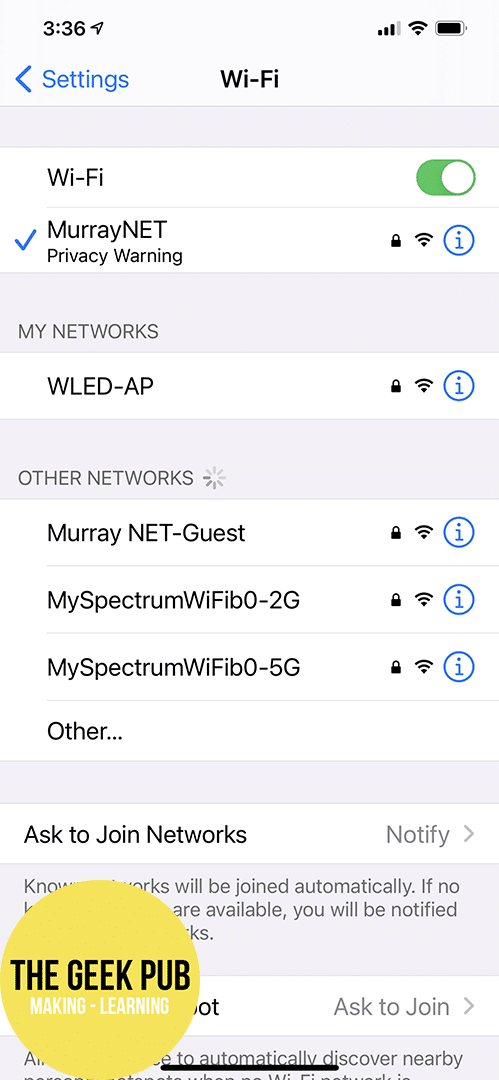
With WLED now installed, we need to get it connected to our own Wi-Fi network. To do this we must first connect to its private network and reconfigure it. On your iOS or Android device, open your Wi-Fi settings and look for a network called WLED-AP. WLED is operating as its own access point until we configure it. Tap the network and connect to it. The default password is wled1234.
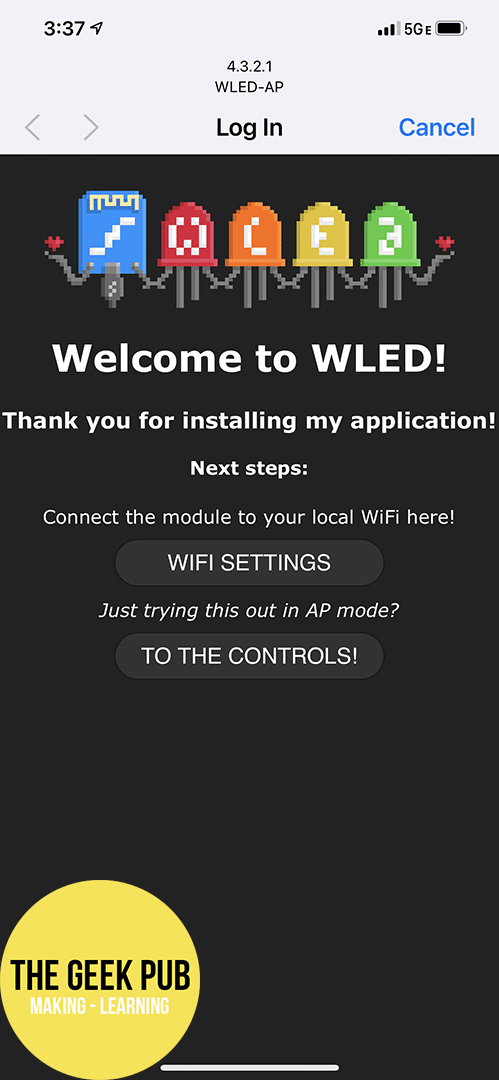
Once connected, wait just a second and a welcome screen will automatically pop-up. From here you will want to click on WIFI SETTINGS.
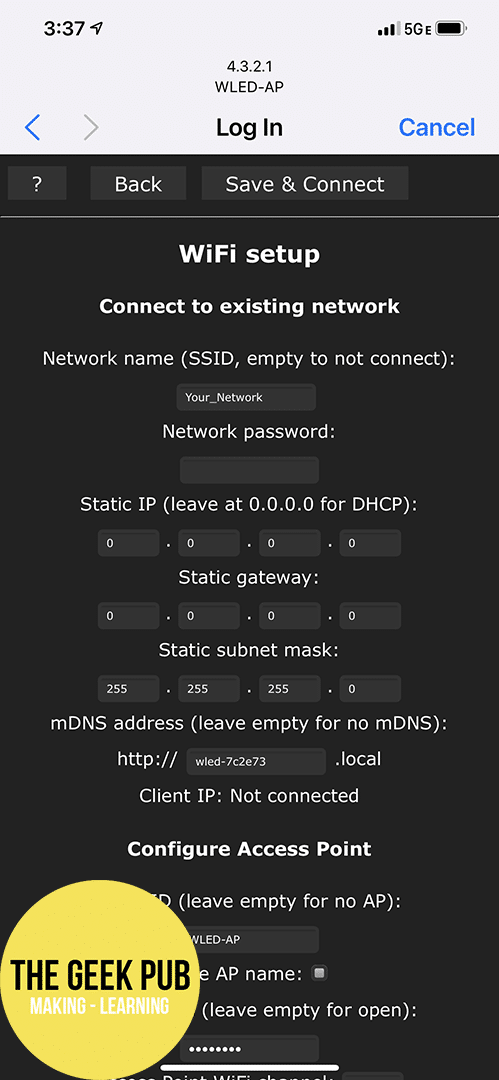
You’ll land on the Wi-Fi configuration screen for WLED. From here most people will only want to make changes to the SSID and to the Network Password. A word of caution here. Both of these are case sensitive. If you have any capital letters in your Wi-Fi’s SSID, you’ll need to enter them capitalized here. This is a ridiculous bug that many users run into. In our case MurrayNET has four capital letters and refused to connect until I made them capital on this screen.
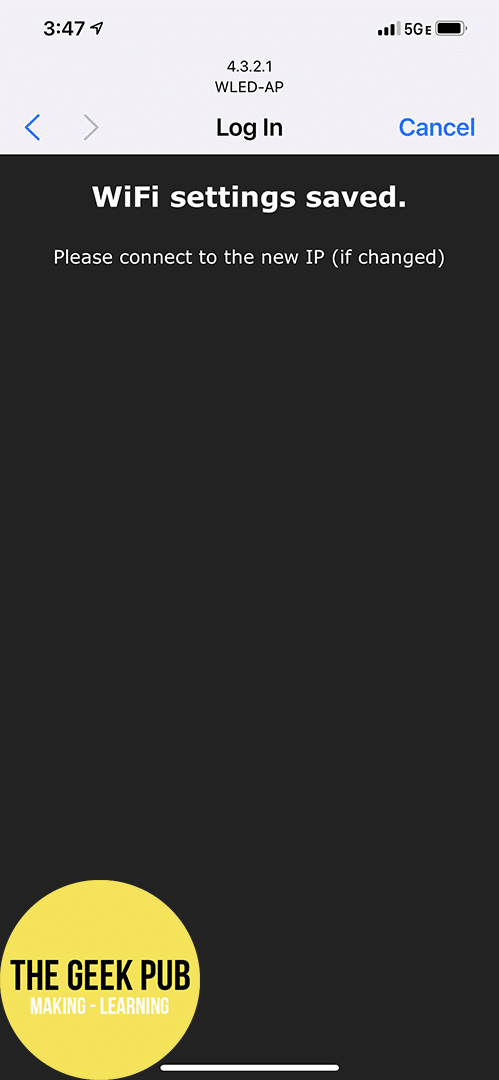
Once you enter your configuration click Save & Connect and your ESP32 will reboot and connect to your Wi-Fi network rather than running its own access point.
Installing the WLED App
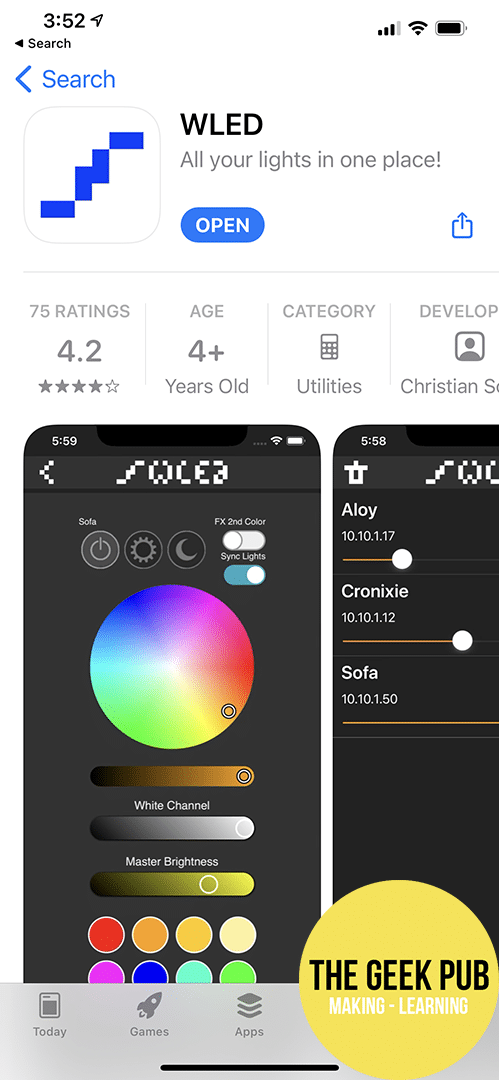
If you haven’t already, install the WLED iOS or Android application onto your smartphone. The links are listed above in the software download section, or you can just search for WLED in the App or Play store. Click the download button. Once the installation is completed, open WLED on your smartphone.
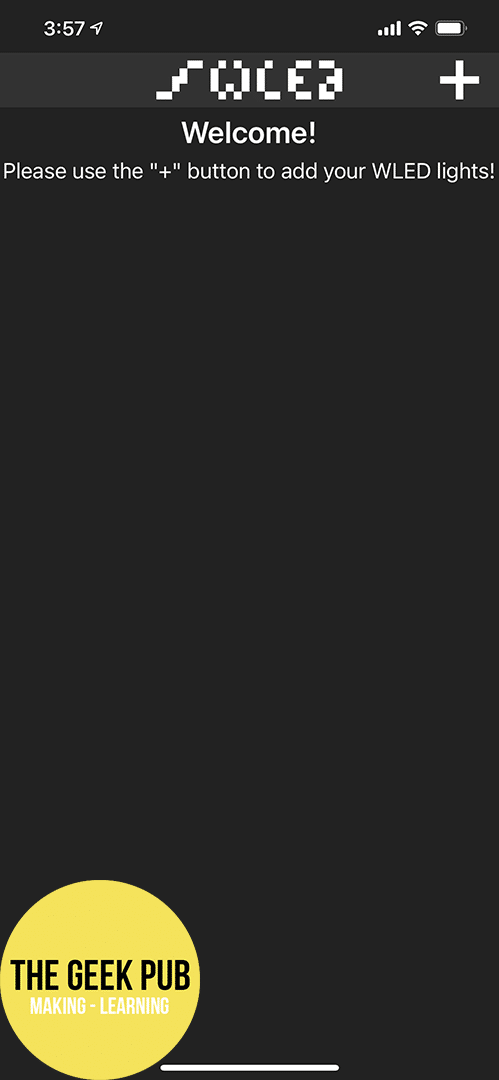
Open WLED on your iOS or Android device. You’ll be presented with an welcome screen. Press the + button to add your controller.
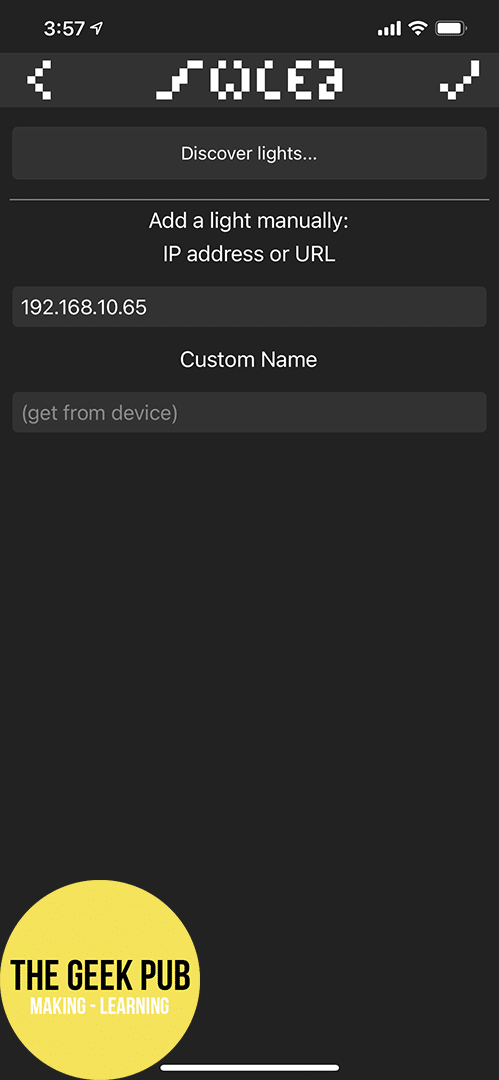
On the add device page, you’ll be prompted to enter the IP address of your ESP32 microcontroller running WLED – or – you can click the Discover Lights button. For some reason, discover lights only works for us about 1 out 20 tries. I am not sure why this is the case. If auto-discovery doesn’t work for you, you can just enter the IP address (usually found on your router or firewall’s status or DHCP lease page).
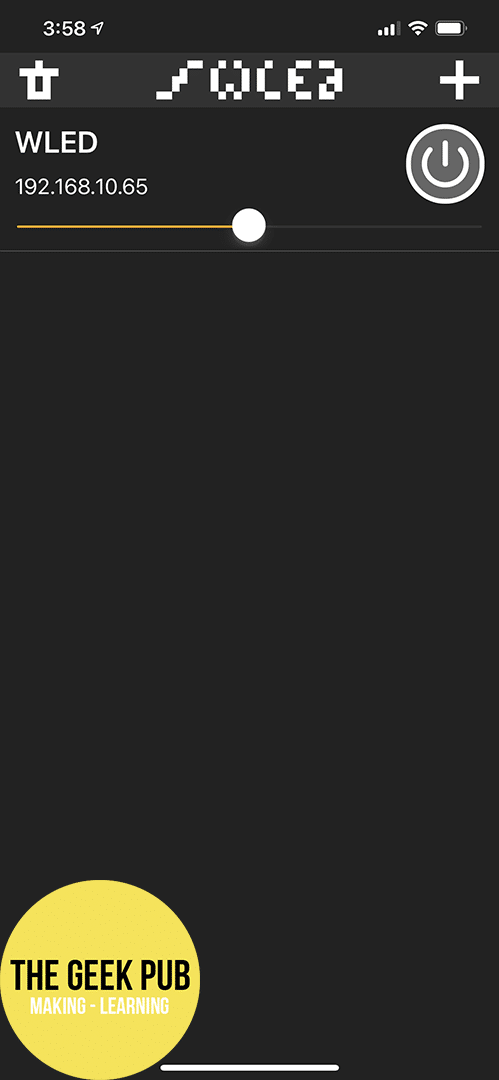
Once your controller is found, you’ll be presented with the device selection screen. This is a really handy screen once you start using WLED more. You might have a controller in your bedroom, one in your kitchen, one on your patio, etc. This give you once place to control them all. Since you will only have one WLED controller go ahead and tap it to open the controller screen.
On this screen, you can configure your LED strips, change their colors, run neat animations and all kinds of other fun things.

But wait! We have a problem. We haven’t connected any WS2811, WS2812b, or WS2813 LED strips to our controller yet! Let’s do that!
Connecting WS28xx LED Strips to WLED
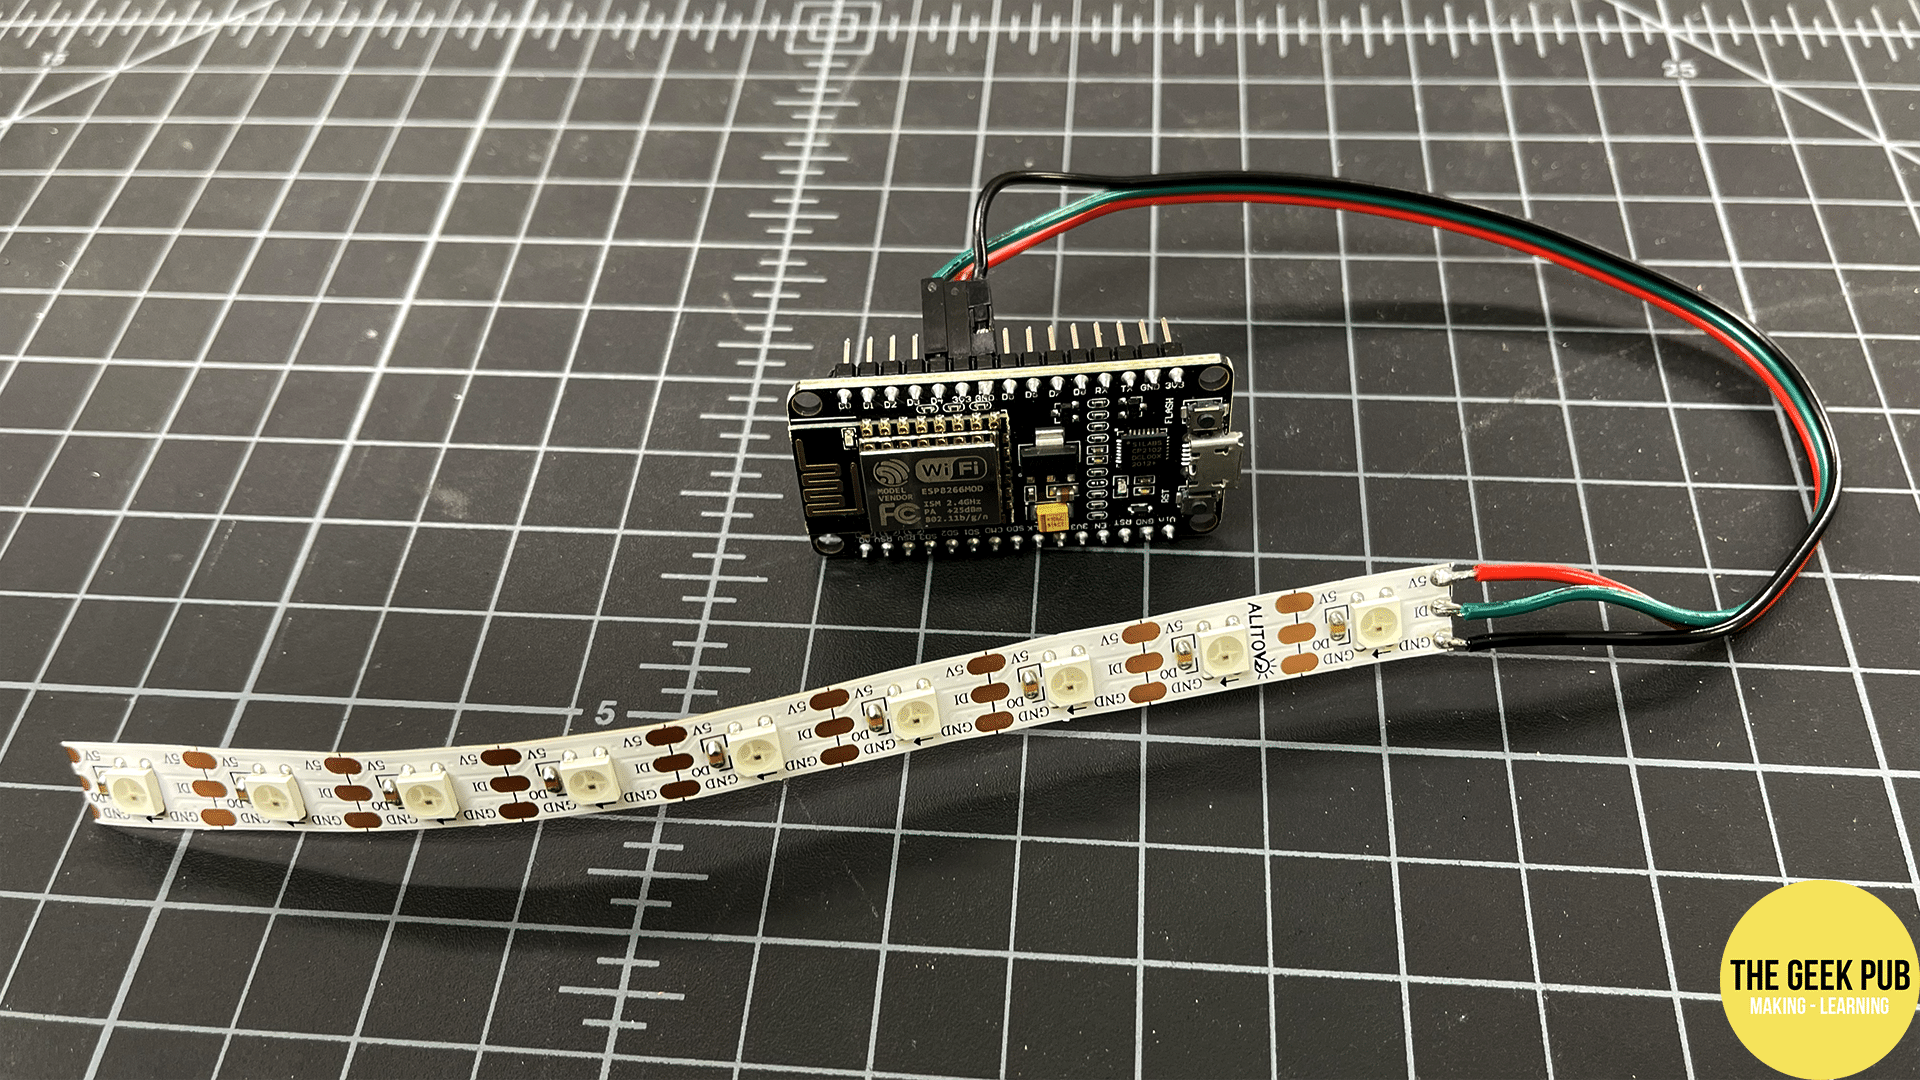
To get meaningful use out of our ESP32 microcontroller running WLED, we need something for it to control For demonstration purposes, I am just going to plug in a short section of WS2812b LEDs from a strip I had laying around.
Disconnect the ESP32 microcontroller from power and make the connection as follows:
- LED Strip Gnd (-) to Gnd on the ESP32
- LED Strip Vin (+) to 3.3v on the ESP32
- LED Strip Din to Pin D4 on the ESP32
Pro Tip: It should be noted that most all ESP32 microcontrollers only have a 3.3v output. This may not be enough for some LED strips. If yours needs 5V or 12V inputs, you may need to use a separate power supply. If you use a separate power supply, be sure to connect the ground (Gnd) to both the ESP32 and the power supply, but only connect the +5V or +12V cable to the LED strip. Only connect the Din to the ESP32 and not to the power supply.
It is possible that a 5V LED strip will work with only 3.3V, albeit its maximum brightness will be reduced.
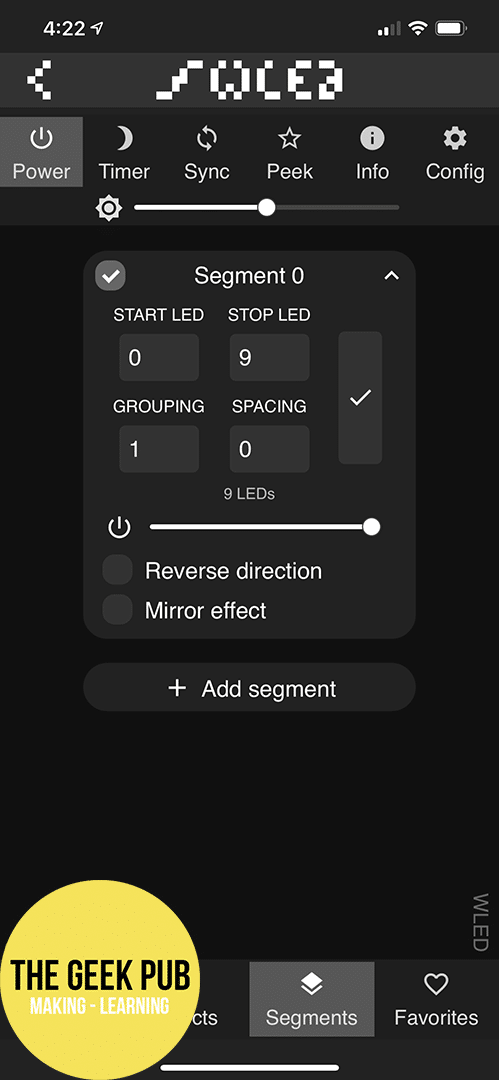
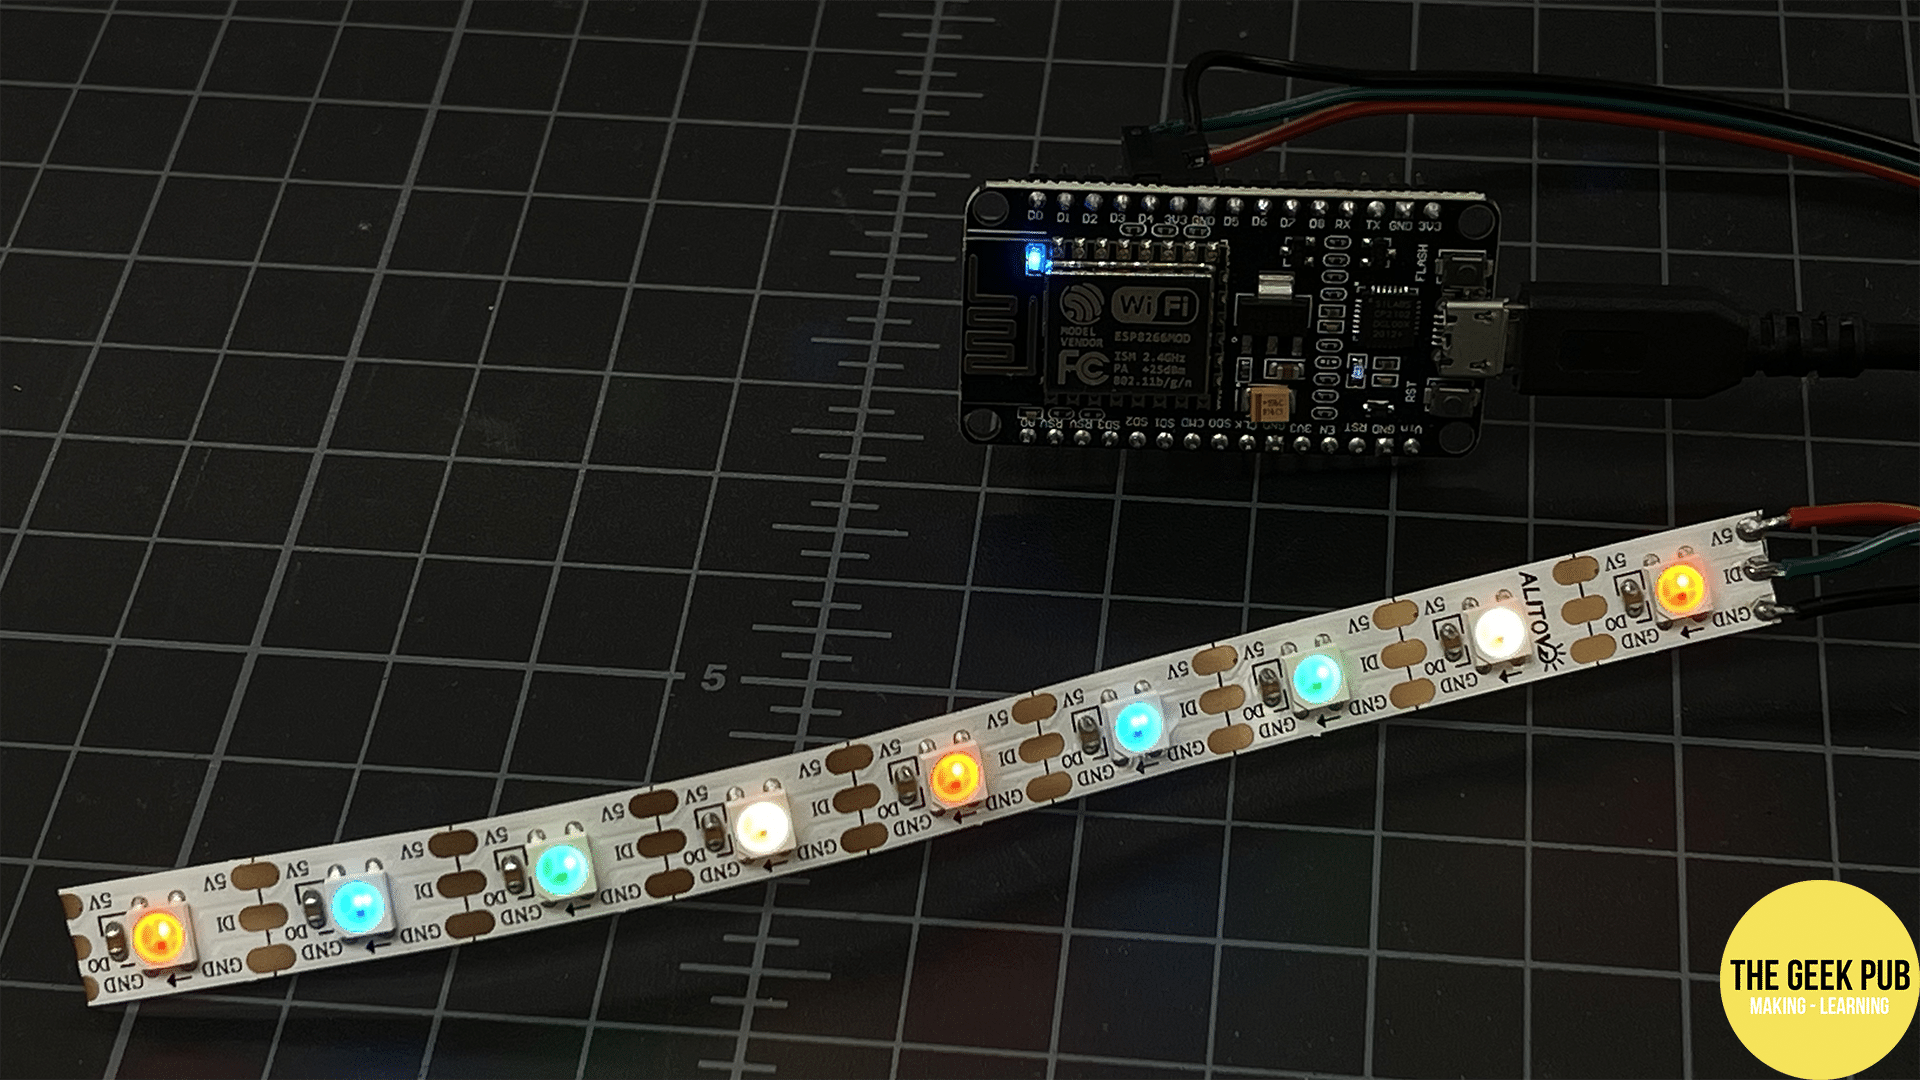
With the LEDs connected, plug the ESP32 back into USB power. Back inside the iOS or Android app, tap the segments tab across the bottom of the screen, and configure your LEDs according to what you have connected. In my case, start LED is 0 and stop LED is 9, since I have a strip of LEDs that are 10 pixels long. Click the check box when done.
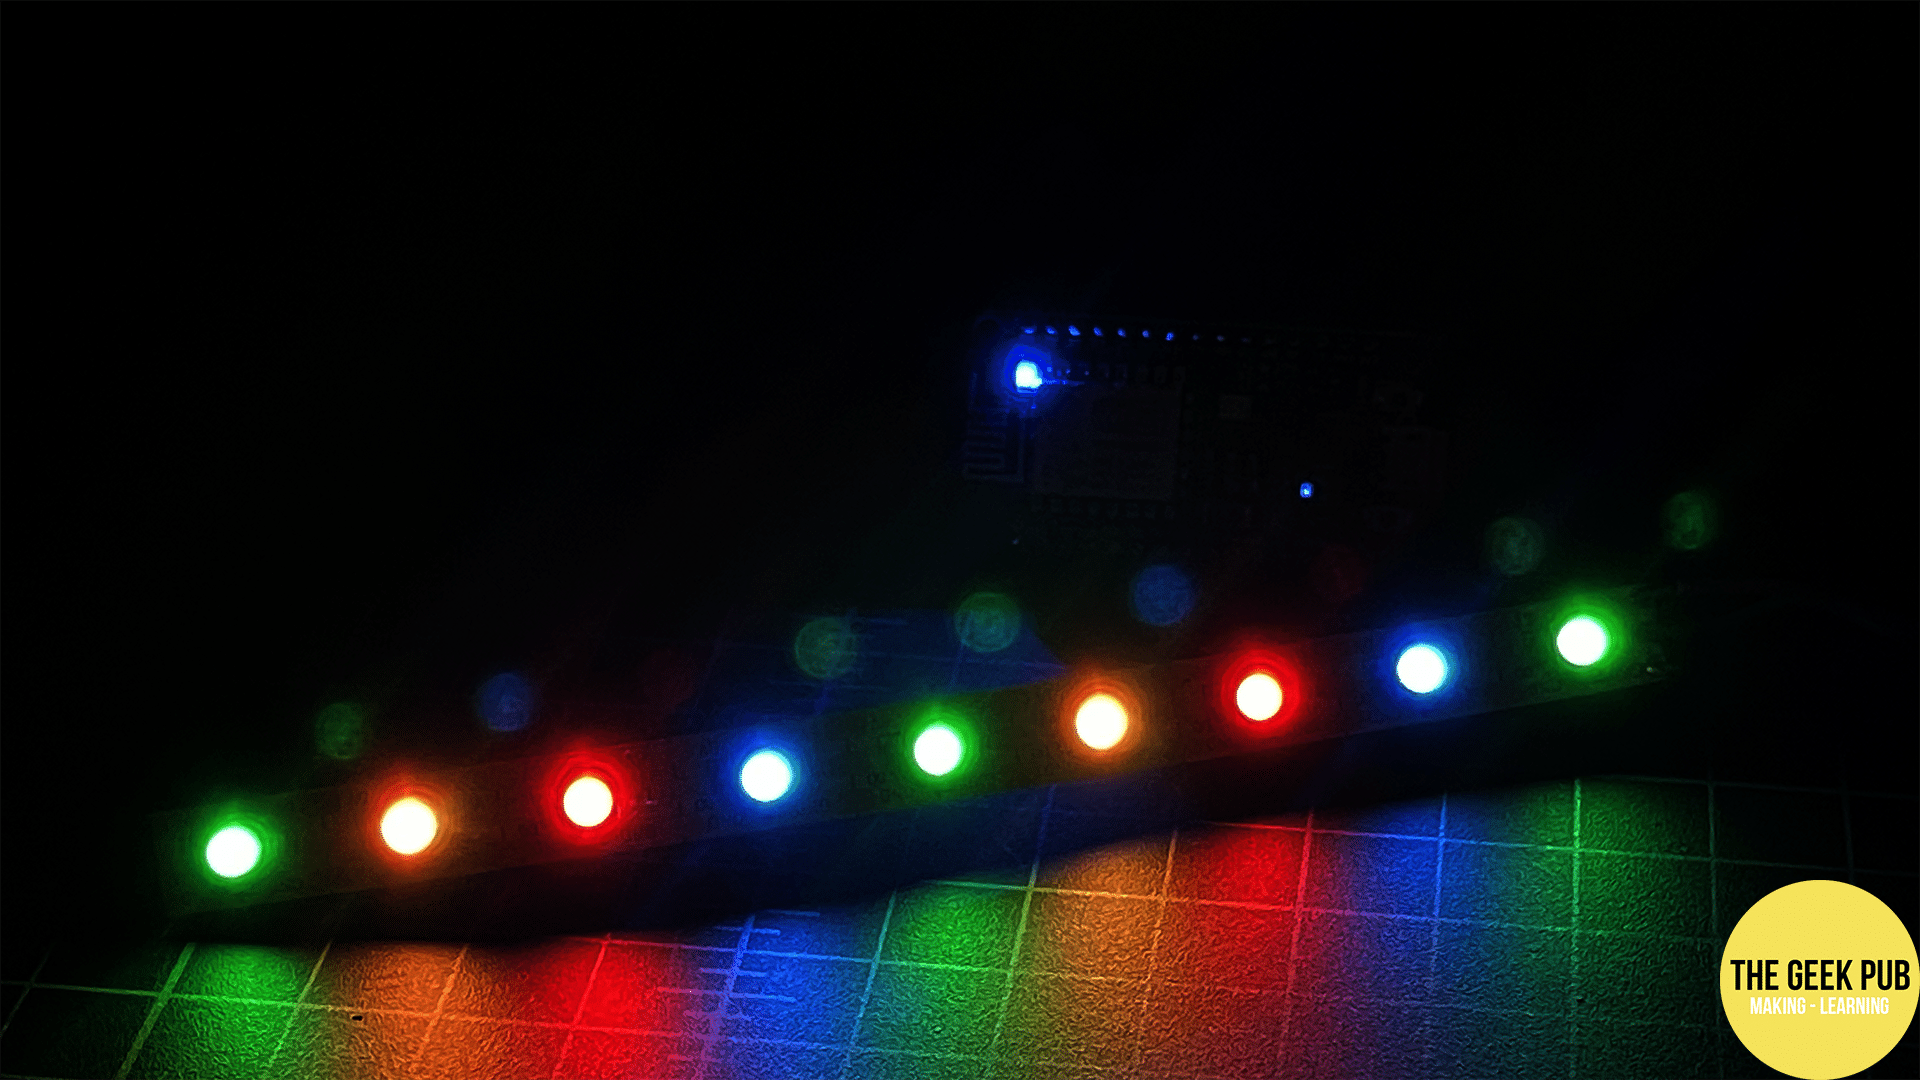
Go back to the colors tab and select a color, or go to the effects tab and select an effect.
In my case, I chose the effect called Colorful, and it was beautiful! That’s all there is to it! You now have a fully function WLED setup!
Additional Ways to Control WLED
In addition to controlling your LEDs via the smartphone app, you can also control WLED from a webpage just by going to its IP address in your web browser. But that’s not all. WLED has a complete API you can use to control LEDs from other applications, scripts, etc. This makes it very powerful. For example, any home automation system that can send an HTTP request can control WLED!
It’s also possible to leave WLED running as its own access point (remember the WLED-AP) and never connect it to your own Wi-Fi network. This is handy for locations that you don’t have access to the Wi-Fi network’s credentials, but still want to use WLED. In these cases you’d just click the second button GO TO THE CONTROLS rather than WI-FI SETTINGS.
We hope you enjoyed this tutorial. Let us know if you have any questions in the comments. We love helping!


You helped me reconfigure my ESP32 so it doesn’t operate as its own access point. Thank you! However, I get knocked offline. I would like to be able to
To do this we must first connect to its private network and reconfigure it. On your iOS or Android device, open your Wi-Fi settings and look for a network called WLED-AP. WLED is operating as its own access point until we configure it. I would like to be able run WLED at its own access point but the WLED-AP to use the GO TO CONTROLS. Any help would be appreciated!