Blog
Arduino Limit Switch Tutorial

In this Arduino limit switch tutorial, we’re going to talk about how to use the limit switch within our Arduino projects. The limit switch is a fantastic tool for use in projects that have motion control and automation.
The limit switch can be used to tell the Arduino that a stop point has been reached. For example, if you build a robot with a leg and that leg has reached the fully extended point and makes contact with a limit switch, this feedback can help us make some decisions in our Arduino code.
If this example leg is fully extended and the limit switch is activated our code can know for certain where the leg is position. We can also use this input to make sure that our motor that is responsible for driving the leg stops applying force.
Parts list for this Project
Here’s a handy parts list for this project to get you started. Some of these may be affiliate links. If you use them they cost you nothing but we get a small commission that helps us keep making great content like this.
| QTY | PART/LINK | ||
|---|---|---|---|
| 1X | [icon name=”microchip” prefix=”fas”] | Arduino Uno | [icon name=”cart-plus” prefix=”fas”] |
| 1X | [icon name=”usb” prefix=”fab”] | USB Type B Cable | [icon name=”cart-plus” prefix=”fas”] |
| 1X | [icon name=”th” prefix=”fas”] | Solderless Breadboard | [icon name=”cart-plus” prefix=”fas”] |
| 1X | [icon name=”grip-lines” prefix=”fas”] | Jumper Wire Kit | [icon name=”cart-plus” prefix=”fas”] |
| 1X | [icon name=”ellipsis-h” prefix=”fas”] | Resistor Kit (10K Ohm) | [icon name=”cart-plus” prefix=”fas”] |
| 1X | [icon name=”lightbulb” prefix=”fas”] | LED Kit | [icon name=”cart-plus” prefix=”fas”] |
| 1X | [icon name=”toggle-on” prefix=”fas”] | Force Sensor | [icon name=”cart-plus” prefix=”fas”] |
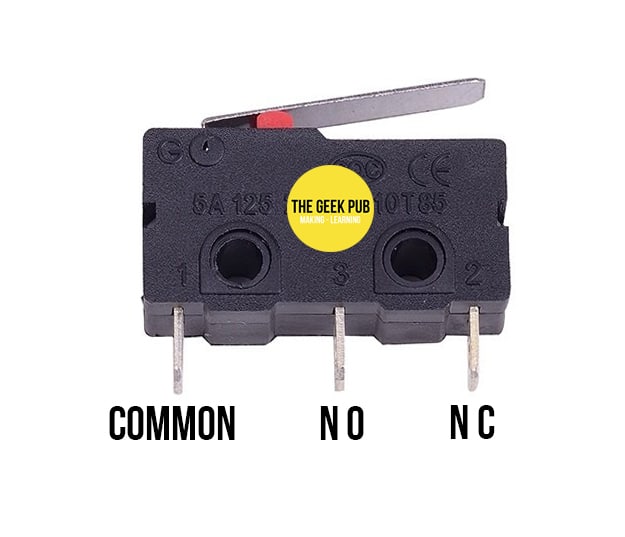
Limit Switch Pinout and Function
The limit switch has three pins. Common, normally open and normally closed contacts.
- Common – As it sounds the common pin between both normally open (NO) and normally closed (NC) pins.
- Normally Open – Normally open means there is no contact between this pin and the common pin until the limit switch is pressed/activated.
- Normally Closed – Normally closed means there is always contact between this pin and the common pin. When the limit switch is pressed/activated the contact is broken.
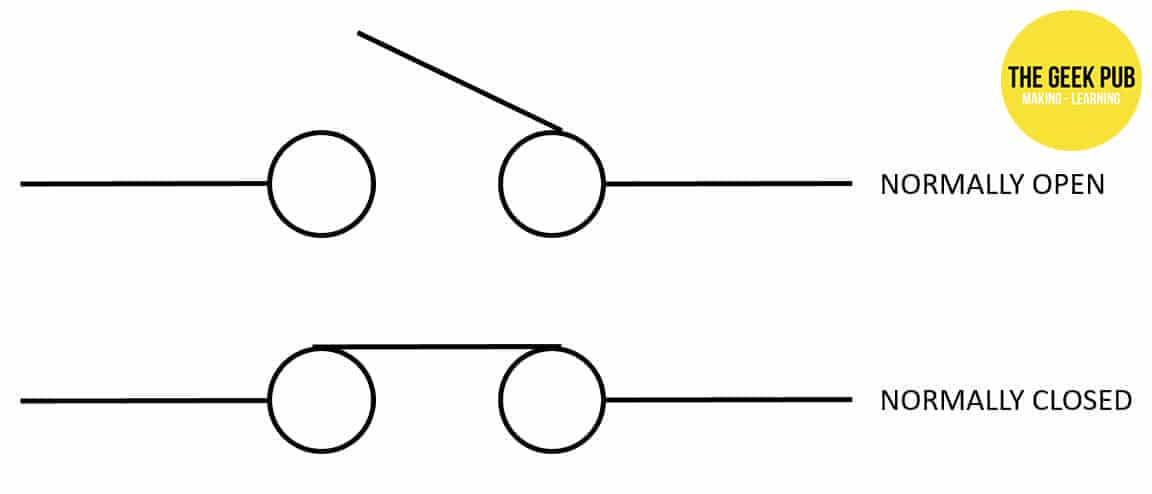
The limit switch is basically a Single Pole Double Throw or SPDT switch. Having a common pin allows us to use it as basically two different switches! In our tutorial we’re going to wire it both ways and provide two separate code examples so you can choose which way to wire the limit switch best works in your projects.
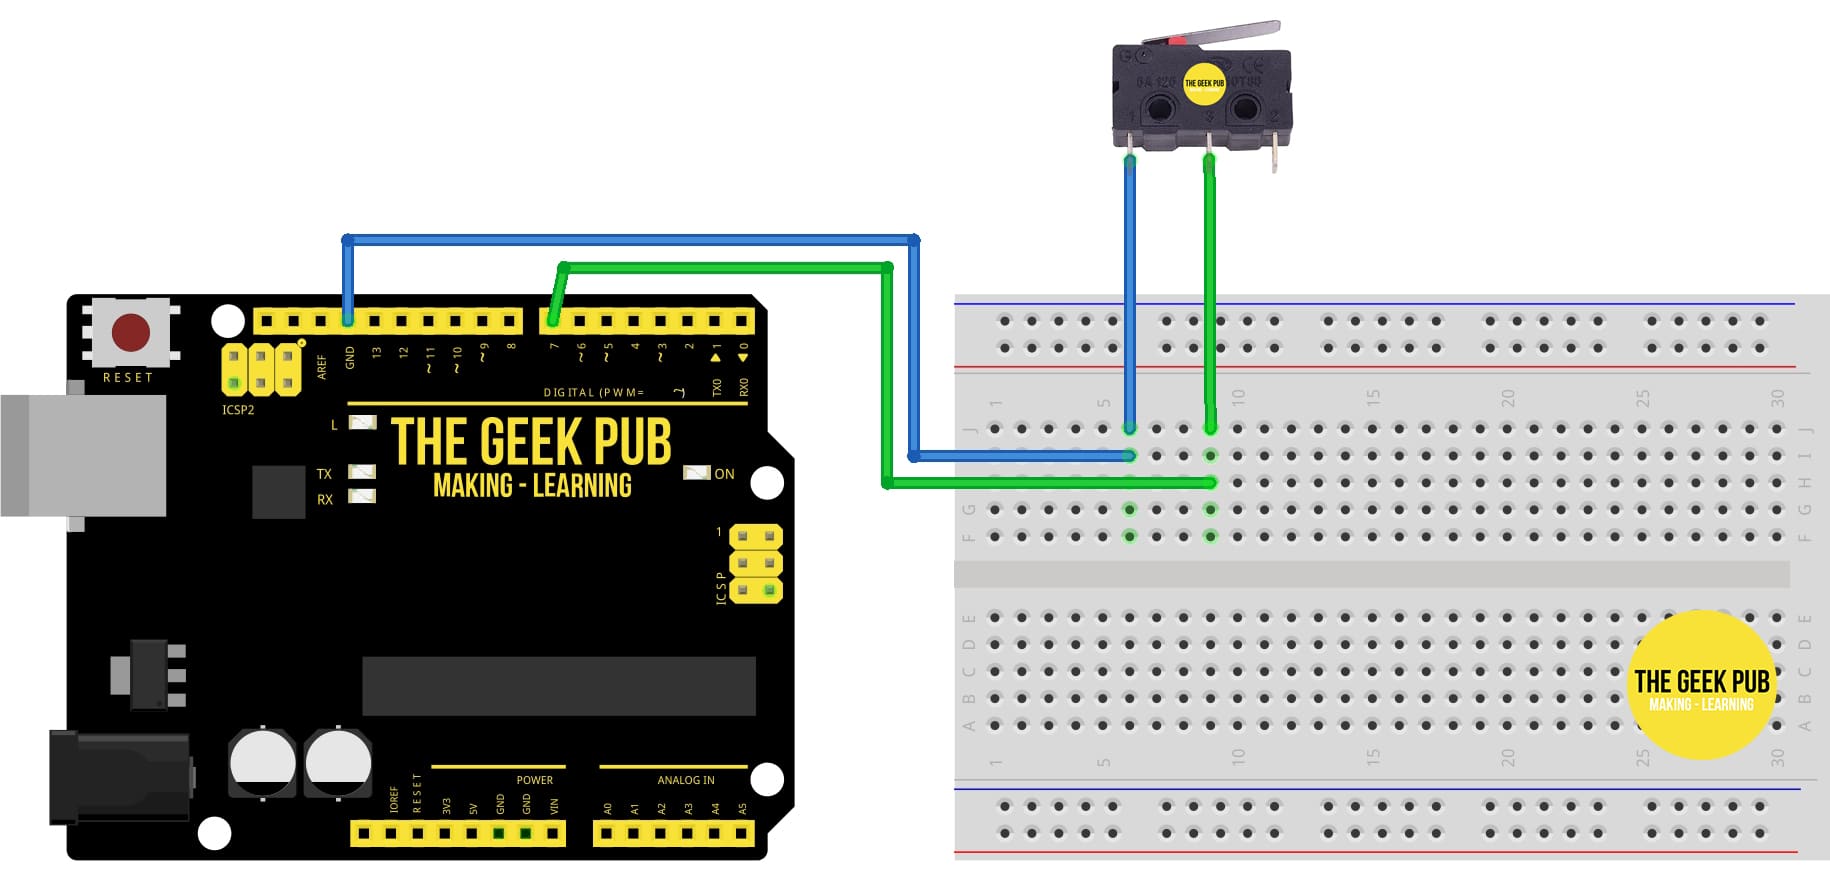
Arduino Limit Switch – Normally Open Wiring Diagram
Follow this diagram if you want to wire for normally open operation. This is the most common configuration.
Arduino Code for Normally Open Limit Switch
/*
    ARDUINO LIMIT SWITCH TUTORIAL: NORMALLY CLOSED
    By: TheGeekPub.com
    More Arduino Tutorials: https://www.thegeekpub.com/arduino-tutorials/
*/

#define LIMIT_SWITCH_PIN 7

void setup() {
  Serial.begin(9600);
  pinMode(LIMIT_SWITCH_PIN, INPUT);
}

void loop() {

  if (digitalRead(LIMIT_SWITCH_PIN) == HIGH)
  {
    Serial.println("Activated!");
  }

  else
  {
    Serial.println("Not activated.");
  }

  delay(100);
}
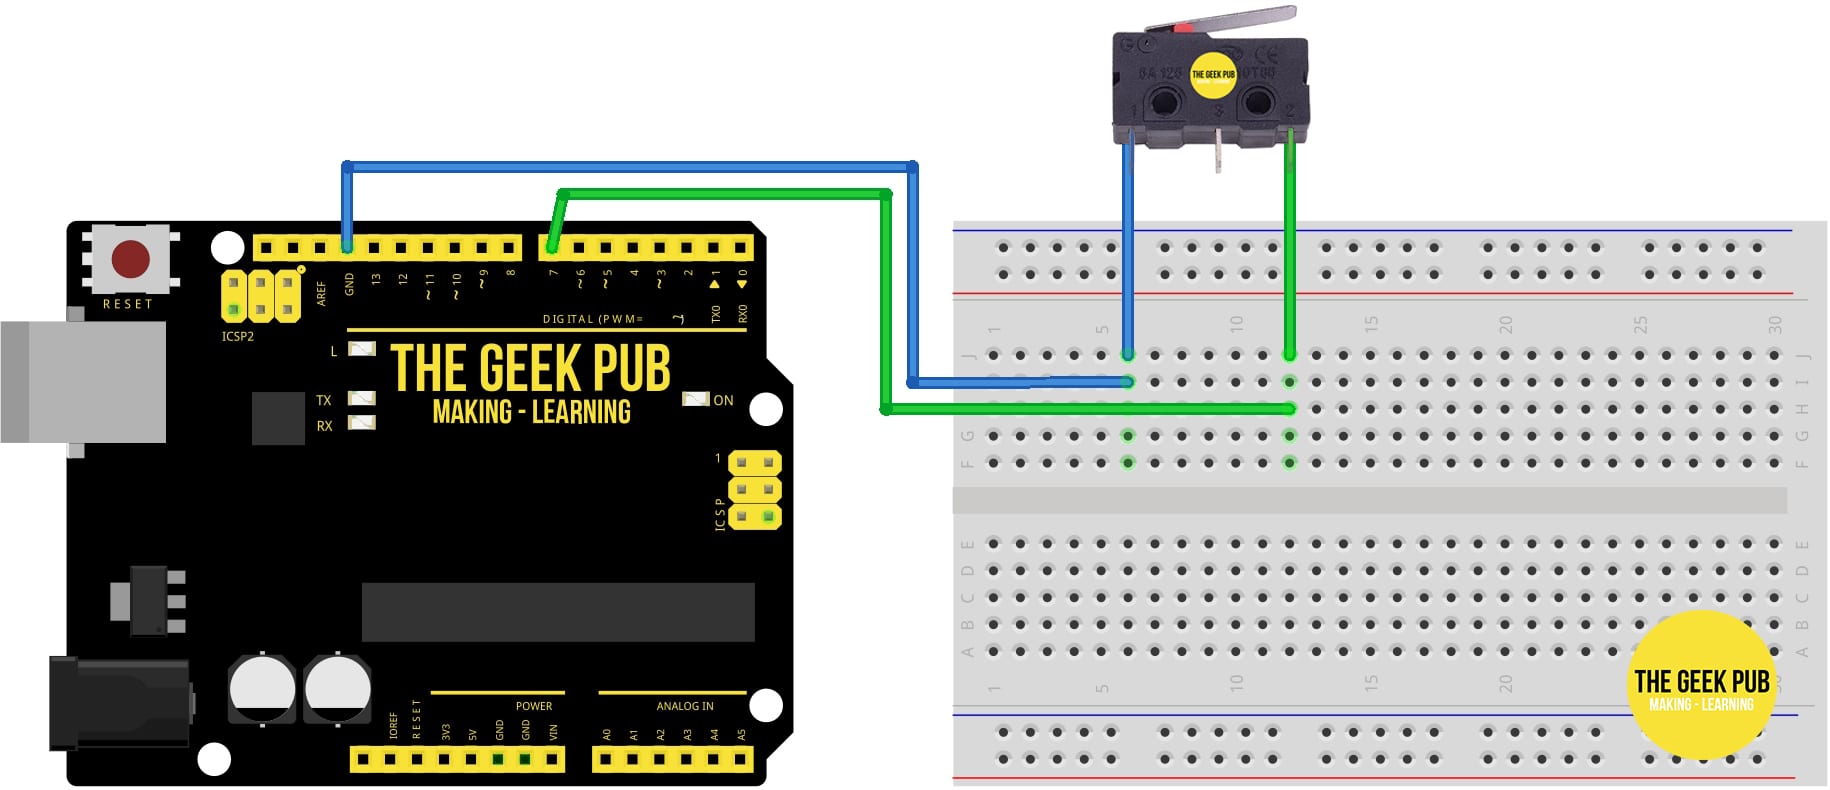
Arduino Limit Switch – Normally Closed Wiring Diagram
Follow this diagram if you want to wire for normally closed operation.
Arduino Code for Normally Closed Limit Switch
/*
    ARDUINO LIMIT SWITCH TUTORIAL: NORMALLY CLOSED
    By: TheGeekPub.com
    More Arduino Tutorials: https://www.thegeekpub.com/arduino-tutorials/
*/

#define LIMIT_SWITCH_PIN 7

void setup() {
  Serial.begin(9600);
  pinMode(LIMIT_SWITCH_PIN, INPUT);
}

void loop() {

  if (digitalRead(LIMIT_SWITCH_PIN) == LOW)
  {
    Serial.println("Activated!");
  }

  else
  {
    Serial.println("Not activated.");
  }

  delay(100);
}
Now you know the basics of the Arduino limit switch!
Next Steps
You can now move on to the next tutorial or go back to the index.


