Blog
Using Xbox One Controllers on a Raspberry Pi
Recommended Components for this Project
If you don’t already have all of the components for this project, we’ve created a handy parts guide for you:
- Raspberry Pi 3 Model B+
- Micro-SD Memory Card
- Raspberry Pi Power Supply
- Raspberry Pi Case
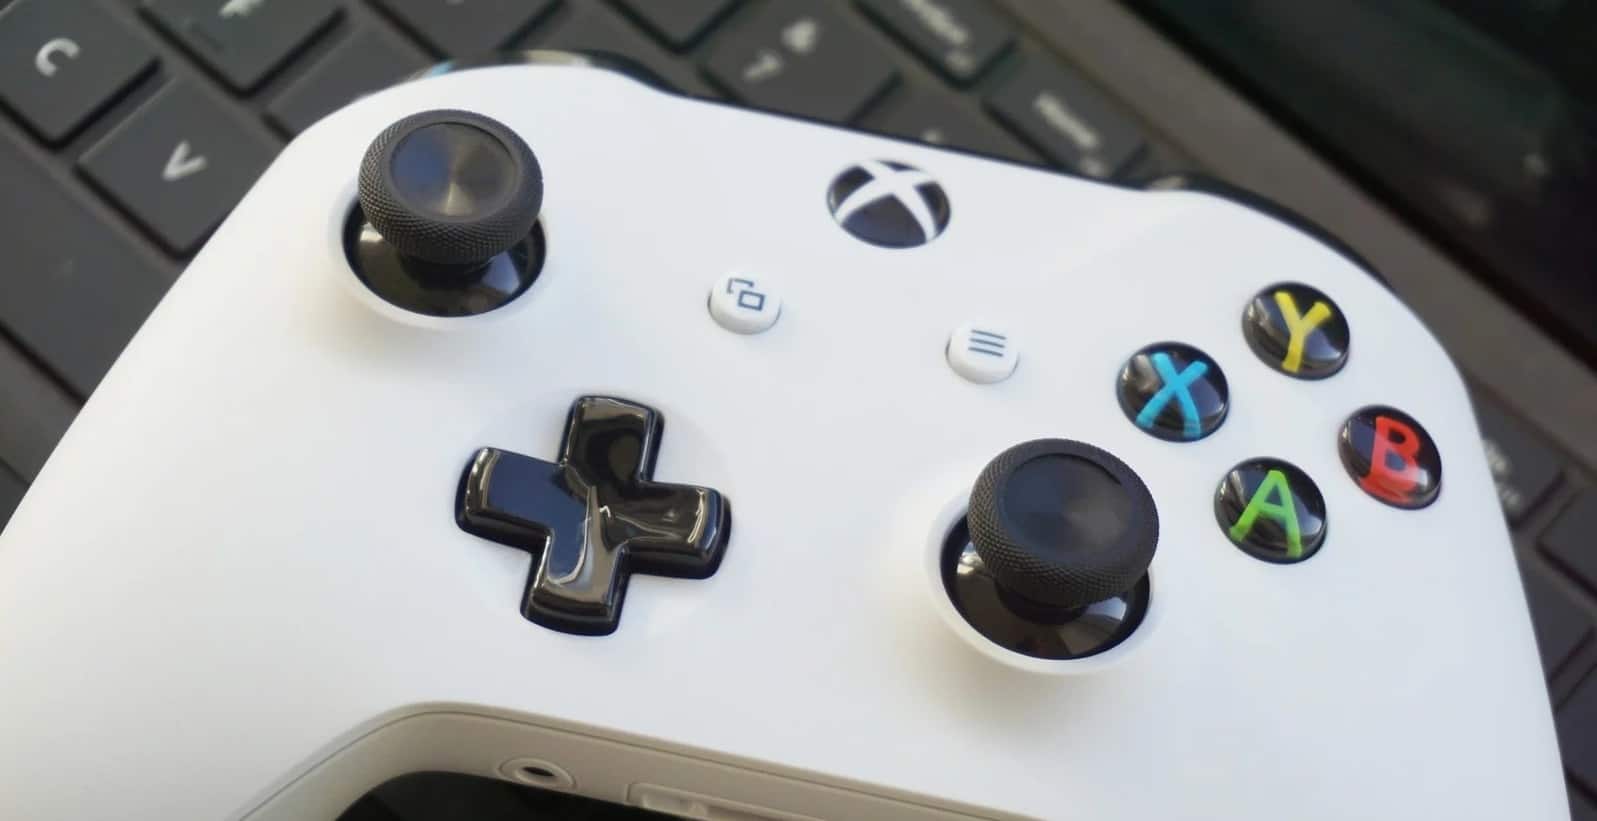
- Xbox One Controller
One item of note. The Xbox One controller in the parts list above supports Bluetooth connectivity. Older Xbox One controllers require this wireless adapter to work, or they must be connected wired via USB. We’ll go into detail and cover connectivity options next!
Xbox One Controller Connectivity Options
Microsoft is the king of making things confusing. They’ve been at it since Windows 1.0. And the Xbox controller connectivity options are certainly confusing to say the least. Let’s cover them and sort out the mess.
Connect the Xbox Controller with the Official USB Wireless Adapter
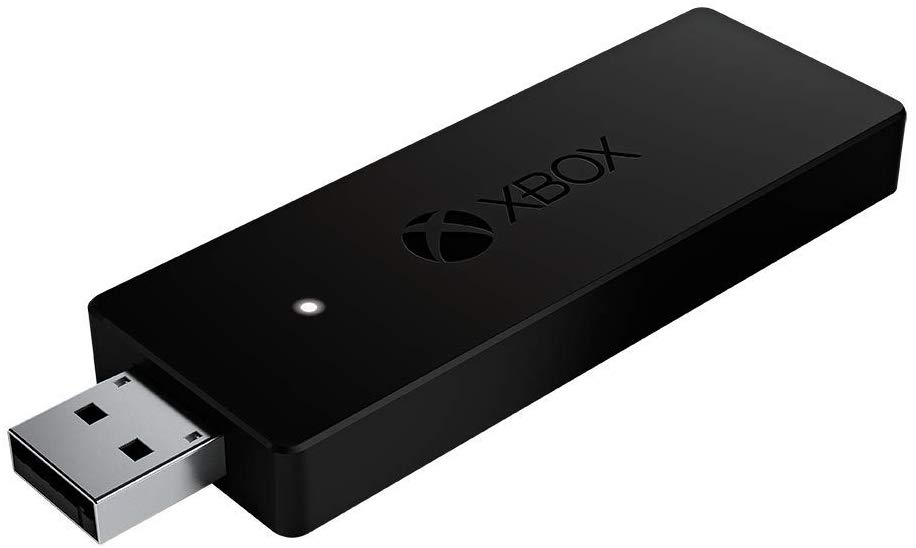 The simplest wireless option for using Xbox One controllers on a
This is the method we recommend. It simple, it works, and its supported. Even though there’s a little extra cost to purchase the adapter if you don’t already have one.
(Note: This is not the same wireless adapter used on the Xbox 360. Yes, Microsoft loves to confuse us.)
Connect the Xbox Controller Using Bluetooth
This is the most difficult option as it requires making some configuration changes on the
Connect the Xbox Controller using USB
This isn’t our favorite option, because it relies on wires, but its hands down the simplest way of using Xbox One Controllers on a
Configuring the Raspberry Pi for Xbox One Controllers
As always, before we begin we highly recommend a clean installation of Raspbian before you begin new projects.
Step 1: Make sure Raspbian is up to date with the latest patches. Almost all issues you’ll run into in the tutorial are solved by updating your software to the latest versions.
[code language=”bash”]
sudo apt-get update
sudo apt-get upgrade
[/code]
Step 2 (Possible Optional): The latest versions of Raspbian already include the Xbox controller diver as part of the Raspbian build. However, some games and applications still specifically look for this driver to be installed separately. Mostly older software that has not been updated to no longer check for the driver. Installing the driver will not cause any harm. If you decide not to install it, you can always add it later if you run into issues with certain software.
[code language=”bash”]
sudo apt-get install xboxdrv
[/code]
That’s all there is to it unless your using Bluetooth. To configure your
Pairing Bluetooth Xbox One Controllers to the Raspberry Pi
We highly recommend installing the xboxdrv from step 2 above when using Bluetooth to connect your Xbox one controllers to the
Xbox One controllers to do not support Enhanced Re-Transmission Mode (ERTM), something enabled by default on the
Run the following command to disable ERTM:
[code language=”bash”]
sudo bash -c echo 1 > /sys/module/bluetooth/parameters/disable_ertm
[/code]
Once that is complete issue a sudo reboot so this change will take effect. We can then begin the pairing process.
Step 1: Open the Bluetooth configuration tool.
[code language=”bash”]
sudo bluetoothctl
[/code]
Step 2: Prepare the Bluetooth radio for pairing.
[code language=”bash”]
agent on
default-agent
[/code]
Step 3: Start the
[code language=”bash”]
scan on
[/code]
Step 4: With the
Step 4: Issue the command connect followed by the device address show on the screen. In our case it would be:
[code language=”bash”]
connect B8:27:EB:A4:AC:11
[/code]
Step 5: If you typed everything correctly, you’ll see a response similar to the following:
[code language=”bash”]
Attempting to connect to B8:27:EB:A4:AC:11
[CHG] Device B8:27:EB:A4:AC:11 Modalias: usb:v054Bp0264a0101
[CHG] Device B8:27:EB:A4:AC:11 UUIDs:
00001124-0000-1000-8000-00805f9b34fb
00001200-0000-1000-8000-00805f9b34fb
[/code]
Step 6: The last step is to now tell your
[code language=”bash”]
trust B8:27:EB:A4:AC:11
[/code]
Step 7: Exit the Bluetooth configuration tool by pressing CTRL-D or typing quit.
That’s all there is to it. Your Bluetooth connected Xbox One controller is ready to go. If you’d like to set that controller up as a mouse, keep reading!
Using the Xbox One Controller as a Mouse on the Raspberry Pi
If you’d like to use your Xbox One controller as a mouse, you only need to execute a simple command. This is a handy feature, especially for those who primarily want to use their
Enter the following command to enable Xbox One controller mouse support:
[code language=”bash”]
sudo xboxdrv –detach-kernel-driver –silent –mouse
[/code]
Once that command has completed your Xbox One controller should be imitating a mouse on your screen. It’s buttons are mapped as follows:
- A – Left click
- B – Right-click
- X – Middle mouse click
- Y – Enter
- Left Joystick – Mouse movement
- Right Joystick – Scroll wheel
- D-Pad – Arrow keys
- Start – Forward
- Back – Back
- LB – Page up
- RB – Page down
Feel free to leave comments below with how you are using your Xbox One controller with the


I had tried to get my xbox one controllers to connect 100 times using other guides. Yours is the only one that works! Thank you! Wish you had a tip jar, I’d buy you a coffee!
Thank you! You’re very welcome. And I do have a tip jar here: https://www.thegeekpub.com/product-category/tip-jar/
Hi there I’m having a problem getting the xboxdrv to recognize my controller I have the controller set up fine with bluetooth but when I try to run sudo xboxdrv –detach-kernel-driver –silent –mouse It tells me no xbox or xbox 360 controller found, anyway to fix this?
Thanks
I’m currently hitting the same thing as Mathew. I would love to control the Raspberry Pi (running Raspbian Stretch) with an Xbox One Bluetooth controller. I’ve gone through the tutorial step by step and get a connection to my controller but xboxdrv returns ‘no xbox or xbox 360 controller found’. Listing current devices with xboxdrv returns no results as well. I would love to troubleshoot this with you guys (though I am a novice at this).
I’m now running the controller with this driver setup: https://github.com/atar-axis/xpadneo (it does not provide mouse functionality)
Thanks for your time and tutorial!
I used my Windows 10 computer to pair my controller with the wireless adapter, but after plugging it into the Pi, the adapter’s light never turns on and the controller is searching indefinitely. Where am I going wrong? I see on Reddit threads that this can’t be done at all, did I miss something?
This is exactly what I’ve read, if this does work I’m definitely buying a pi ( at the moment I’m struggling to get an Arduino uno to perform the task of taking Xbox controller input and outputting a ppm signal for an RC boat but all that is over wires not wireless, despite having bought the dongle specifically for this peruse)
It does work. I am using it in my Full Size R2-D2 Remote Control (Raspberry Pi) as well.
Hey, I used your guide. At first it worked fine, thanks for it. I could connect the controller with the Pi.
Then the controller switched off, long time no use, and as I tried to reconnect them via the bluetooth-sign in the right corner, there was just an error message: “Connection failed. GDBus.error:org.bluez.Error.Failed: Input/Outpur error”
I believe they changed something in the latest bluetooth drivers. This has been widely reported with many devices. I suspect a patch will fix it soon enough.
Hi Mike, thanks for your answer. What a weird problem, some people reported it for months.
@Ed Morris is right, the official Microsoft adaptor doesn’t work. At least not on the Pie 3B, a waste of $20 thanks for nothing.
5
@Will I am using it on my Retropie build. It works just fine.
@Sin P., what did you do to make it work? At this point I have abandoned the XBox One controller and switched to a PS4 controller which works perfectly, but it would satisfy my curiosity to find out what made the USB adapter work in your build.
@Ed Morris I was going to say the same thing about why yours doesn’t work. I just followed this guide. I did have a little trouble at first with it staying connected, but I just redid they guide again and its worked ever since. Been using it for months now.
@Sin P. The guide is for those who have an XBox One S controller (those have Bluetooth and can connect natively to the Pi) and I assume that works fine. My issue is with the USB adapter.
At the beginning of the article, it states that the USB adaptor, “It is simple, it works, and it is supported”. I purchased the adapter and tried everything to get it to work with my older XBox One controller – based on the little that the article gave the USB adapter I assumed it would plug in to the Pi and I could just pair and that would be it. I could not get it to do anything, much less work.
It is moot now, I returned the USB adapter and the Xbox One controller and purchased as PS4 controller, but if my and @Will’s experiences are that the adapter simply doesn’t work, perhaps the article should be modified to reflect that.
Hey mike need ur help please .i have my bartop arcade unit and i fitted a raspberry pi 3b+. Used zero delay encoder for the usb button and joystick. Now i want to also hook up my xbox one s into the same unit so i can flip a couple of switches and swap between systems. The only fault i came up against is that obviously zero delay boards dont work on xbox one, so i looked at the brook universal fighter boards. I emailed their it dept and they said theh have not tried it on a raspberry pi and can not guarantee it will work. Xbox one controllers do not work correctly on raspberry pie either. So my theory would be to solder off or tee off from each button and joystick connections so that there is a zero delay board for raspberry pie and brook board for xbox ie instead of 2 cables for each button there would be 4. I would not power both rapsberry and xbox at the same time. Do you think this may work or have any other ideas ? Cheers lee
Hi,
The Xbox Controller USB Wireless Adapter method does not seem to work and this article does not explain how to make this work although it says it is the easiest way to connect an Xbox controller wirelessly.
Can anyone help me set up this? I have the Xbox one version of both the controller and the wireless adapter.
Thanks,
D. Gagnon
Xbox One USB Wireless Adapter doesn’t work out of the box, at least with RP4.
From what I’ve read it’s because the USB dongle is way too power consuming.
What I’ve found that works is pairing them with a Bluetooth USB Dongle, although you still have to use the commands provided here.
You should update this page reflecting this.
Best regards
How do you connect an Xbox 360 controller on a raspberry Pi 4 model B ive already downloaded the driver i just cant connect thru wifi.
I have a cord but that still doesnt work.
I was able to get my Xbox One Controller connected to my raspberry pi 3 via Bluetooth with this guide, but it randomly clicks buttons every few seconds. The controller works on other devices and works on the RP3 via USB, is there any way to fix this problem?
cannot use as mouse!!!
mouse wont work when i do the command
Nice guide, though I fear there are some parts missing. I’ve encountered an issue whereby the Xbox one controller will continually connect and disconnect from the Bluetooth on my pi 3b. Thoughts?
In regard to|: PAIRING BLUETOOTH XBOX ONE CONTROLLERS TO THE RASPBERRY PI
Your guide got me partially there, but I still had connection issues. The bluetooth service would alternate the connection status from yes to no. After a change to your disable ERTM command and an unpair/repair I was successful.
— Used this command instead (hoping it will display correctly in the HTML once posted)
sudo bash -c ‘echo 1 > /sys/module/bluetooth/parameters/disable_ertm’
— Confirmed it took using:
cat /sys/module/bluetooth/parameters/disable_ertm
— I did not have success until I unpaired then repaired my device. Apparently something is cached from the initial pairing where the ERTM had its original status of N.
Great guide, thank you. Will this work for two controllers for two-player games?
0.5