Blog
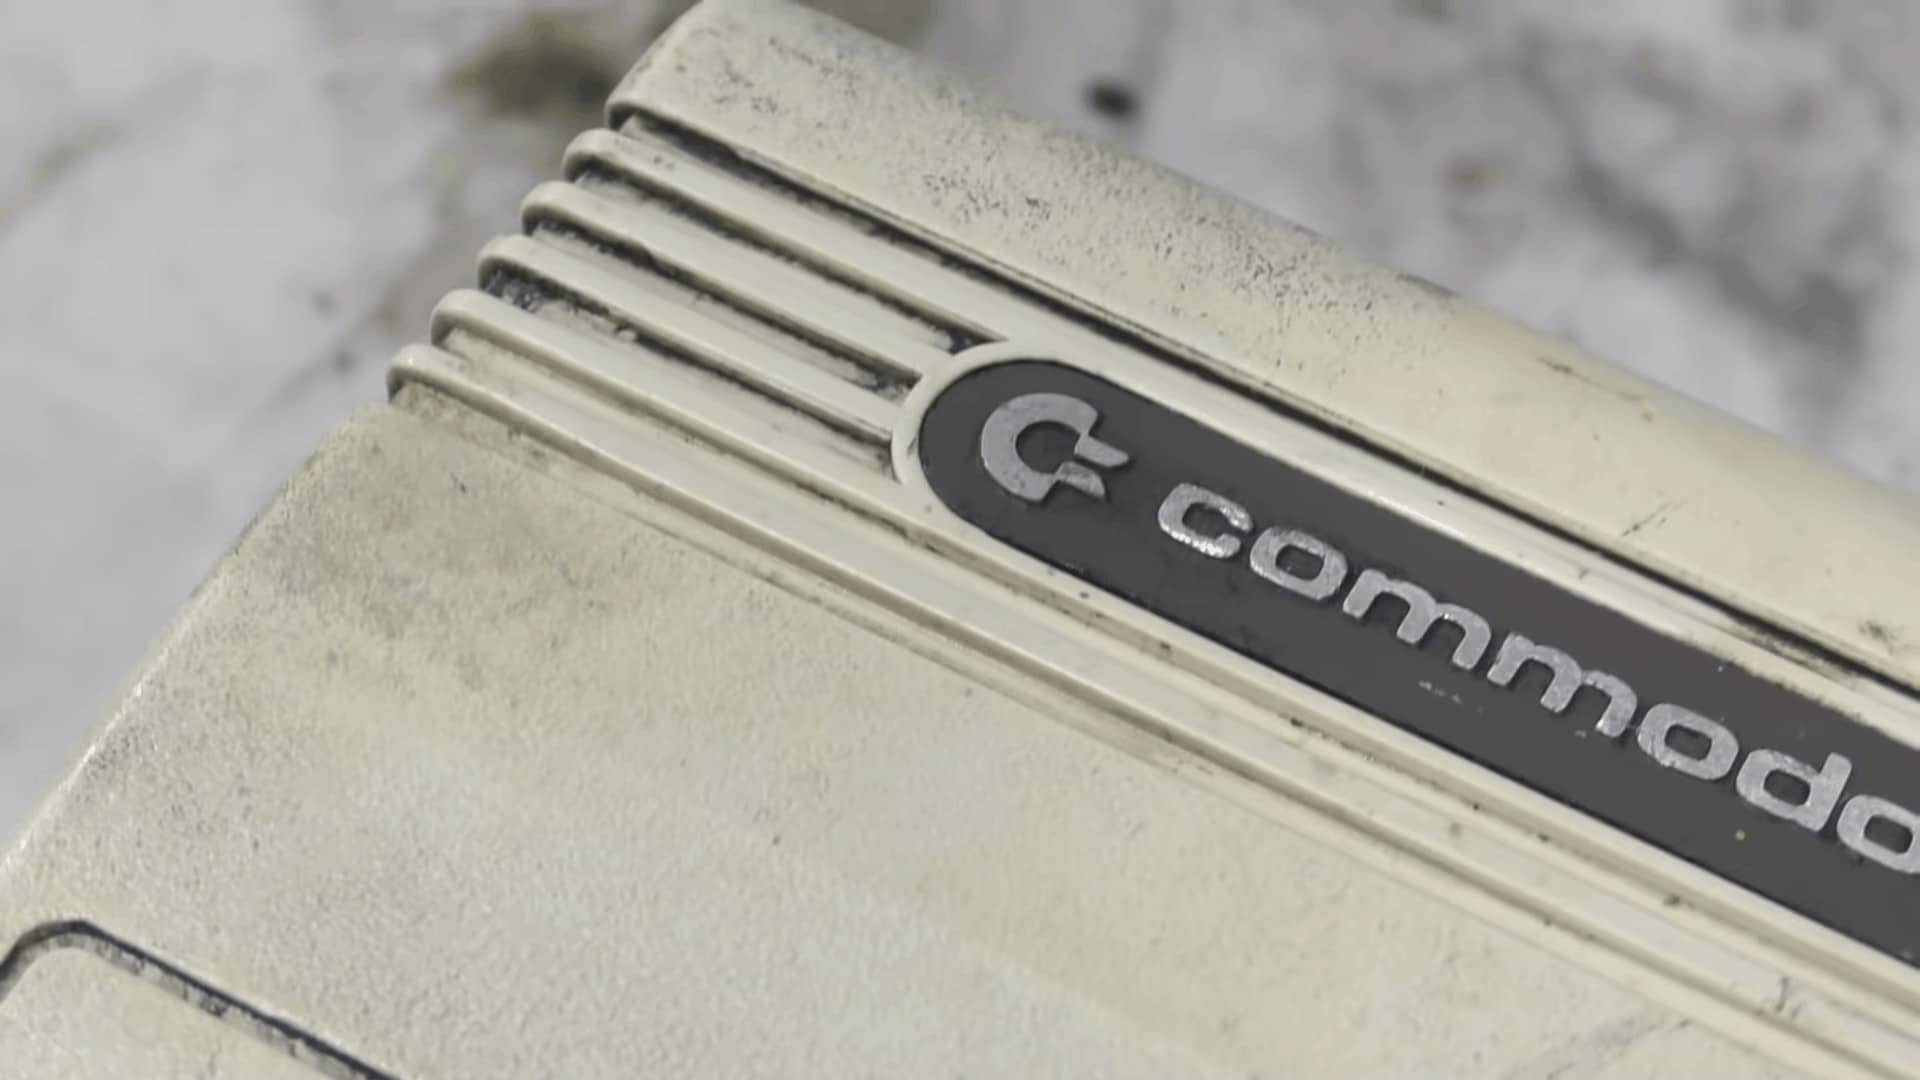
Commodore VIC-20 Restoration – Worst Condition Ever
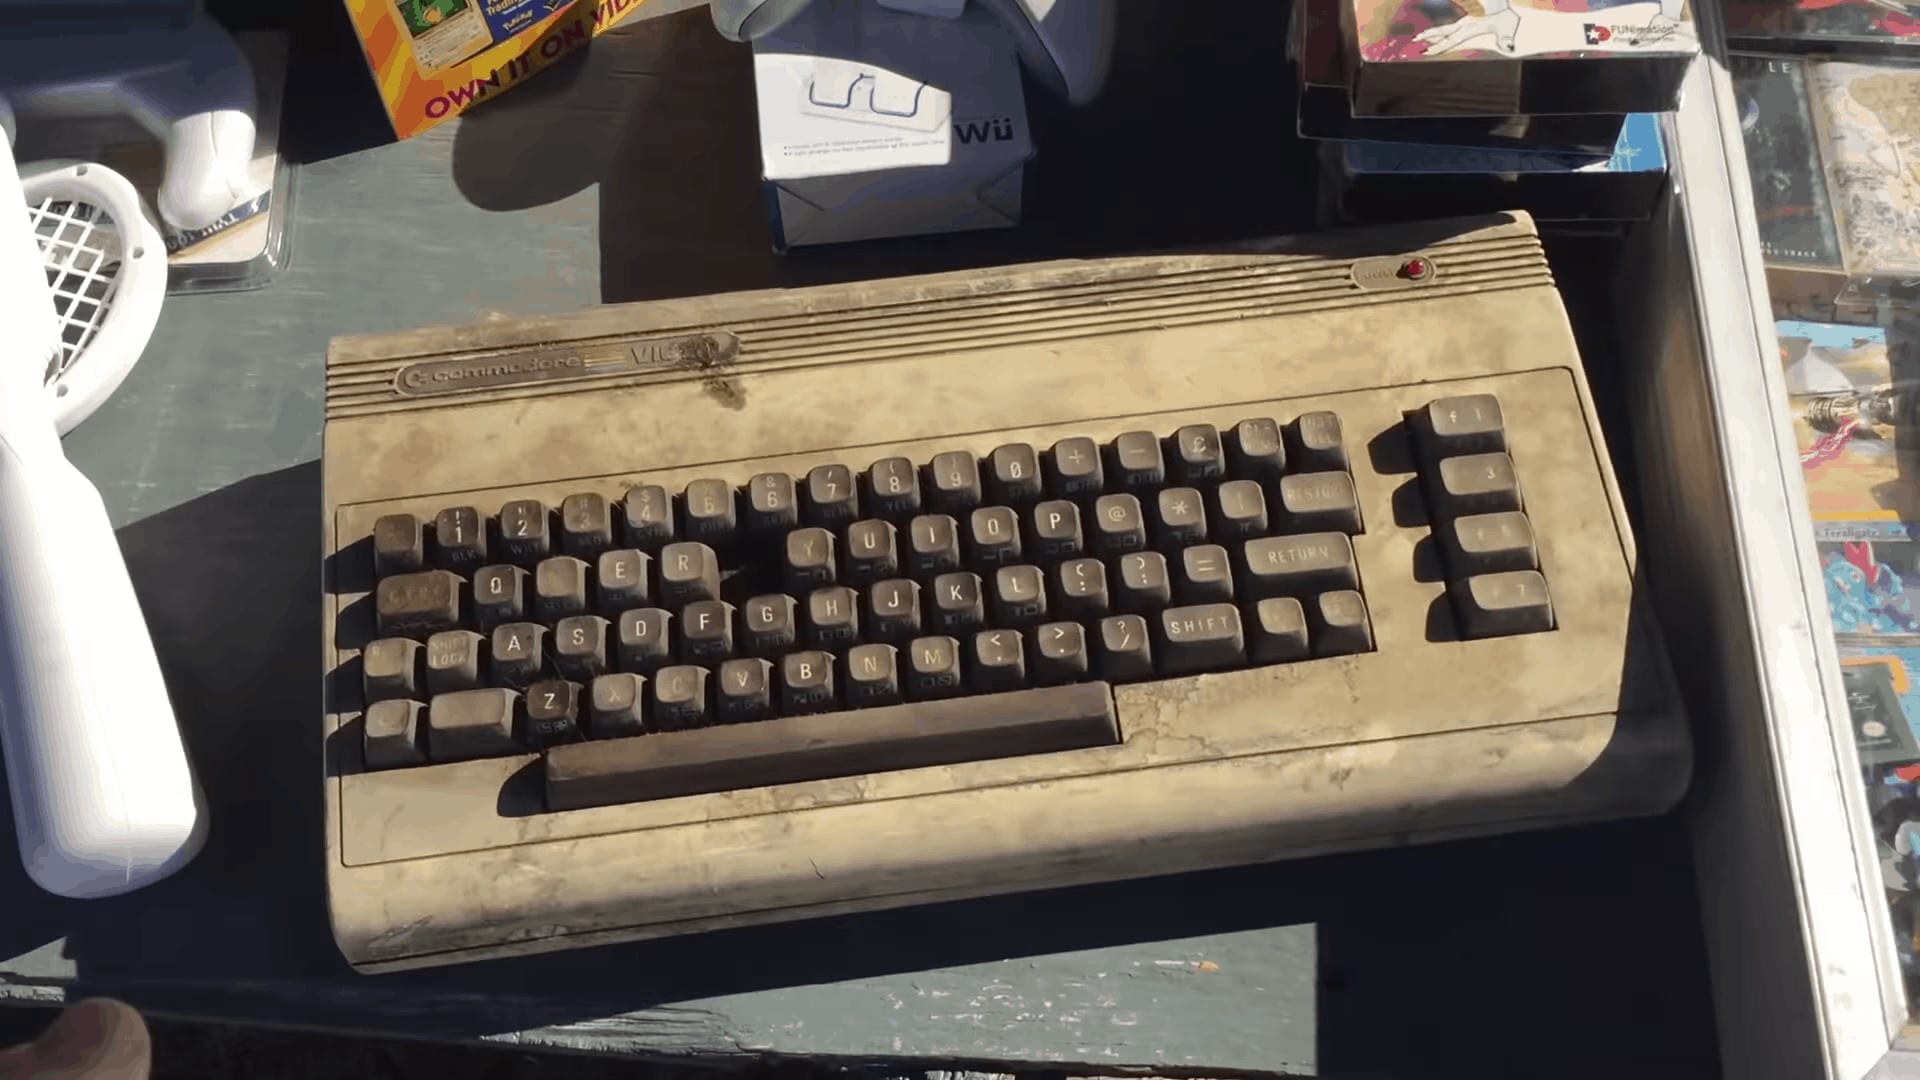
Rob the Obsolete Geek was traveling in Texas to a place called Canton, TX. Canton is well known for their flea market and swap meets. During this visit Rob found something of an oddity. A Commodore VIC-20 that was so utterly disgusting that he was compelled to purchase it, just to see if it was possible for my brother the The 8-Bit Guy to restore it. The seller only wanted $5 US dollars for it, so Rob thought he couldn’t lose! So follow along for this Commodore VIC-20 restoration and you might just be amazed at just how bad it was and how great it became!
Restoring the Commodore VIC-20
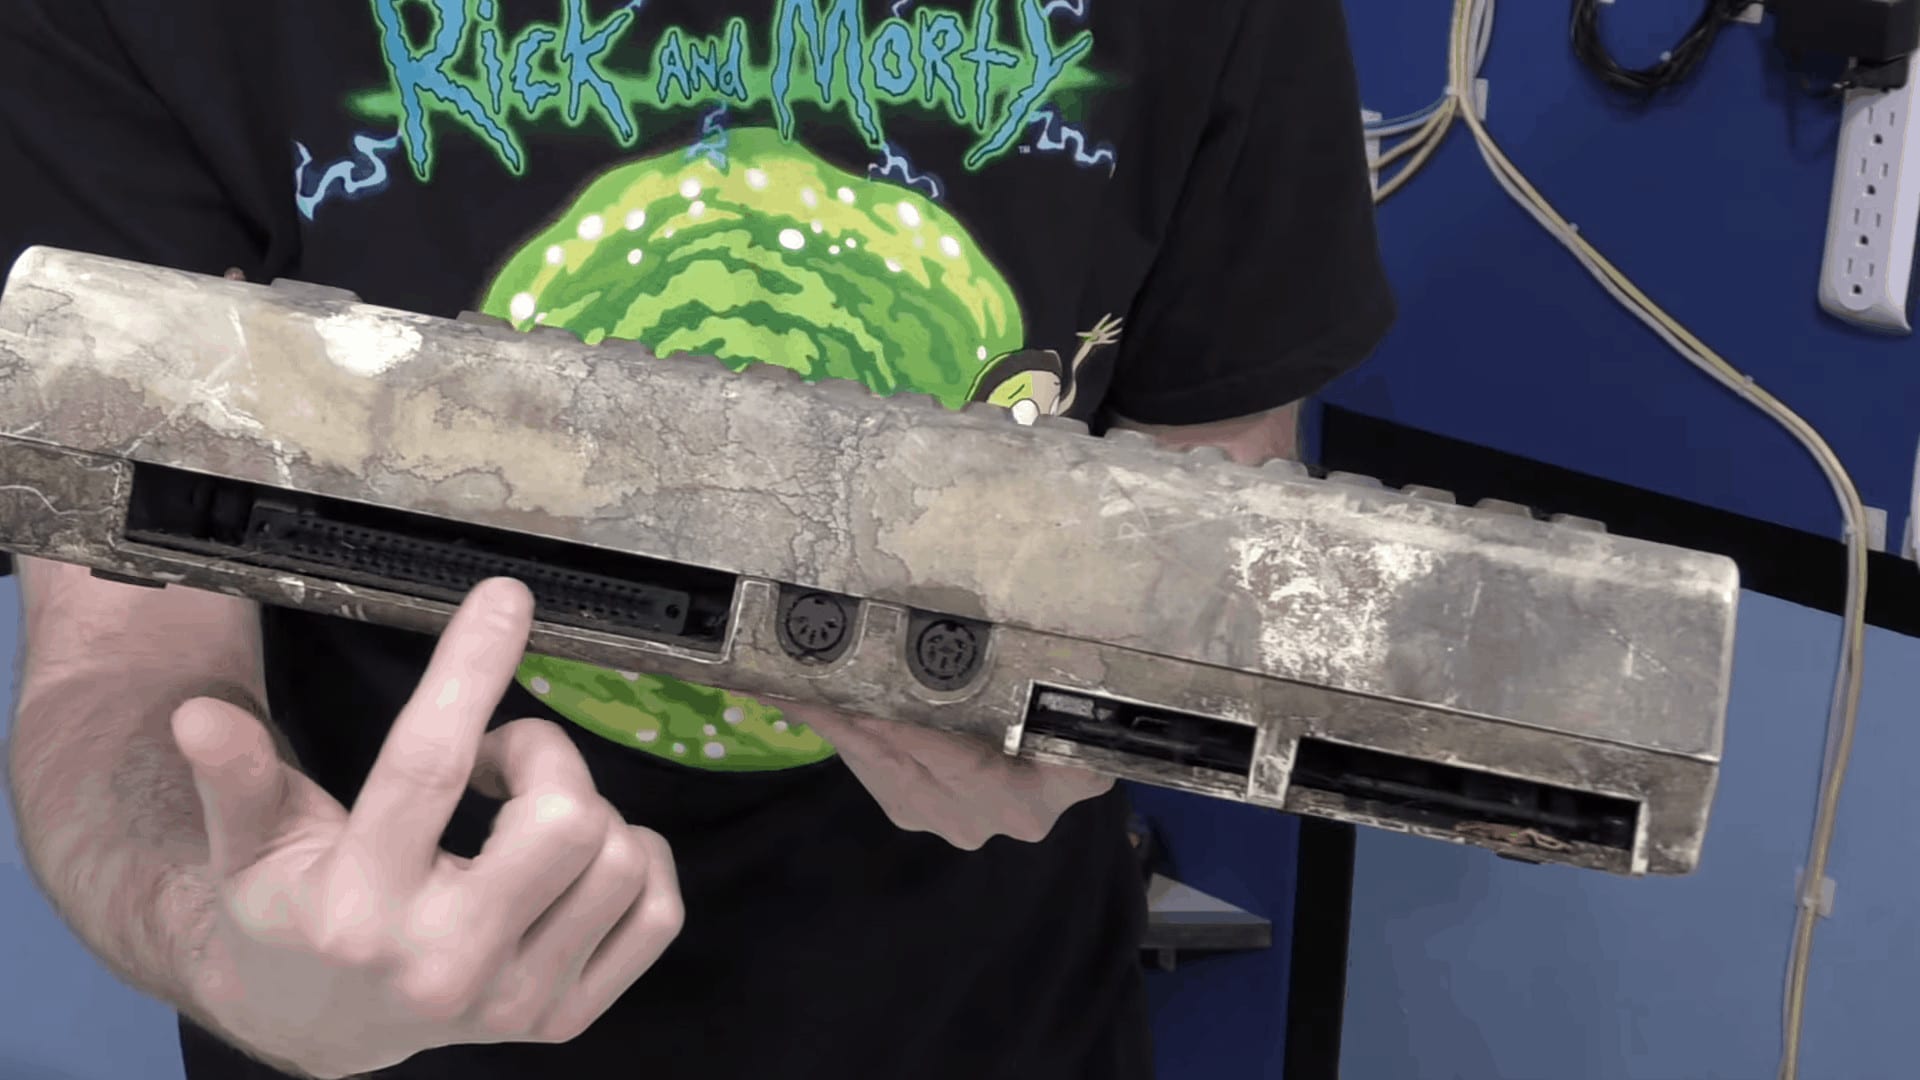
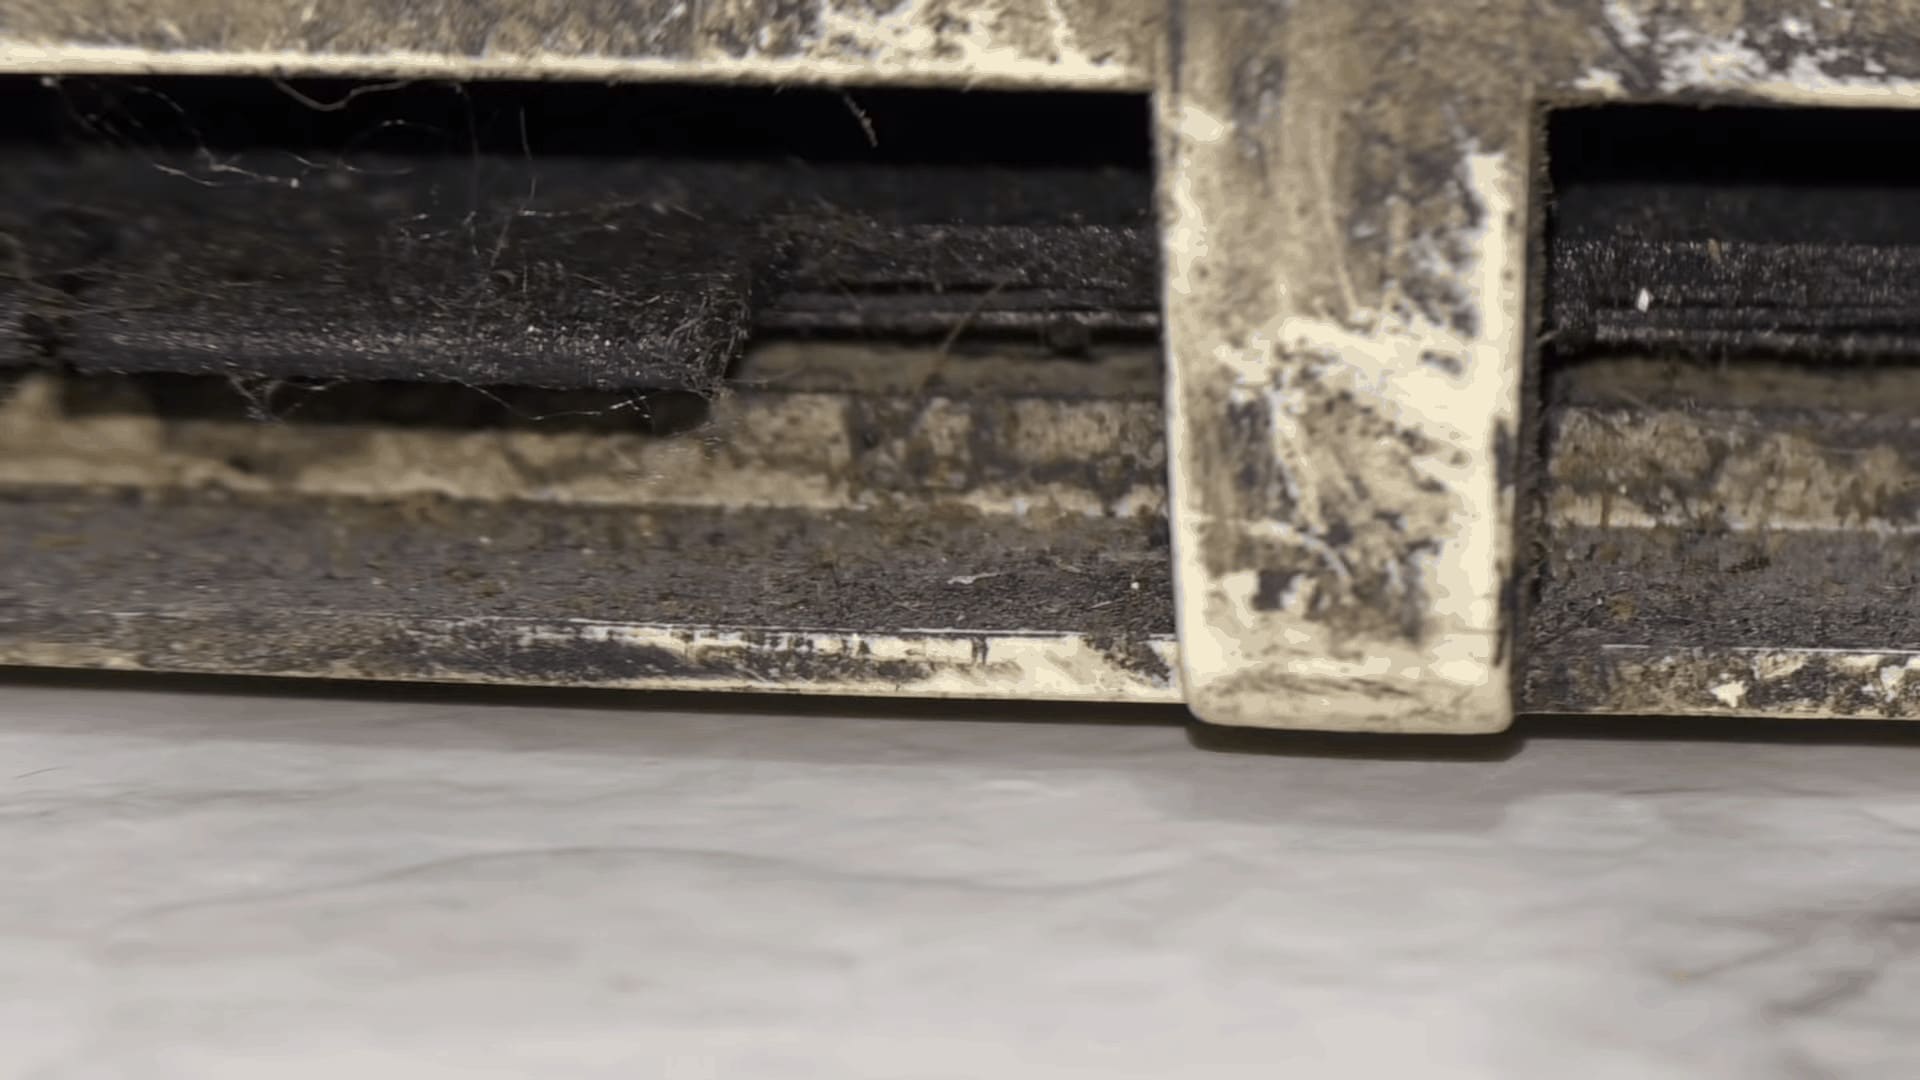
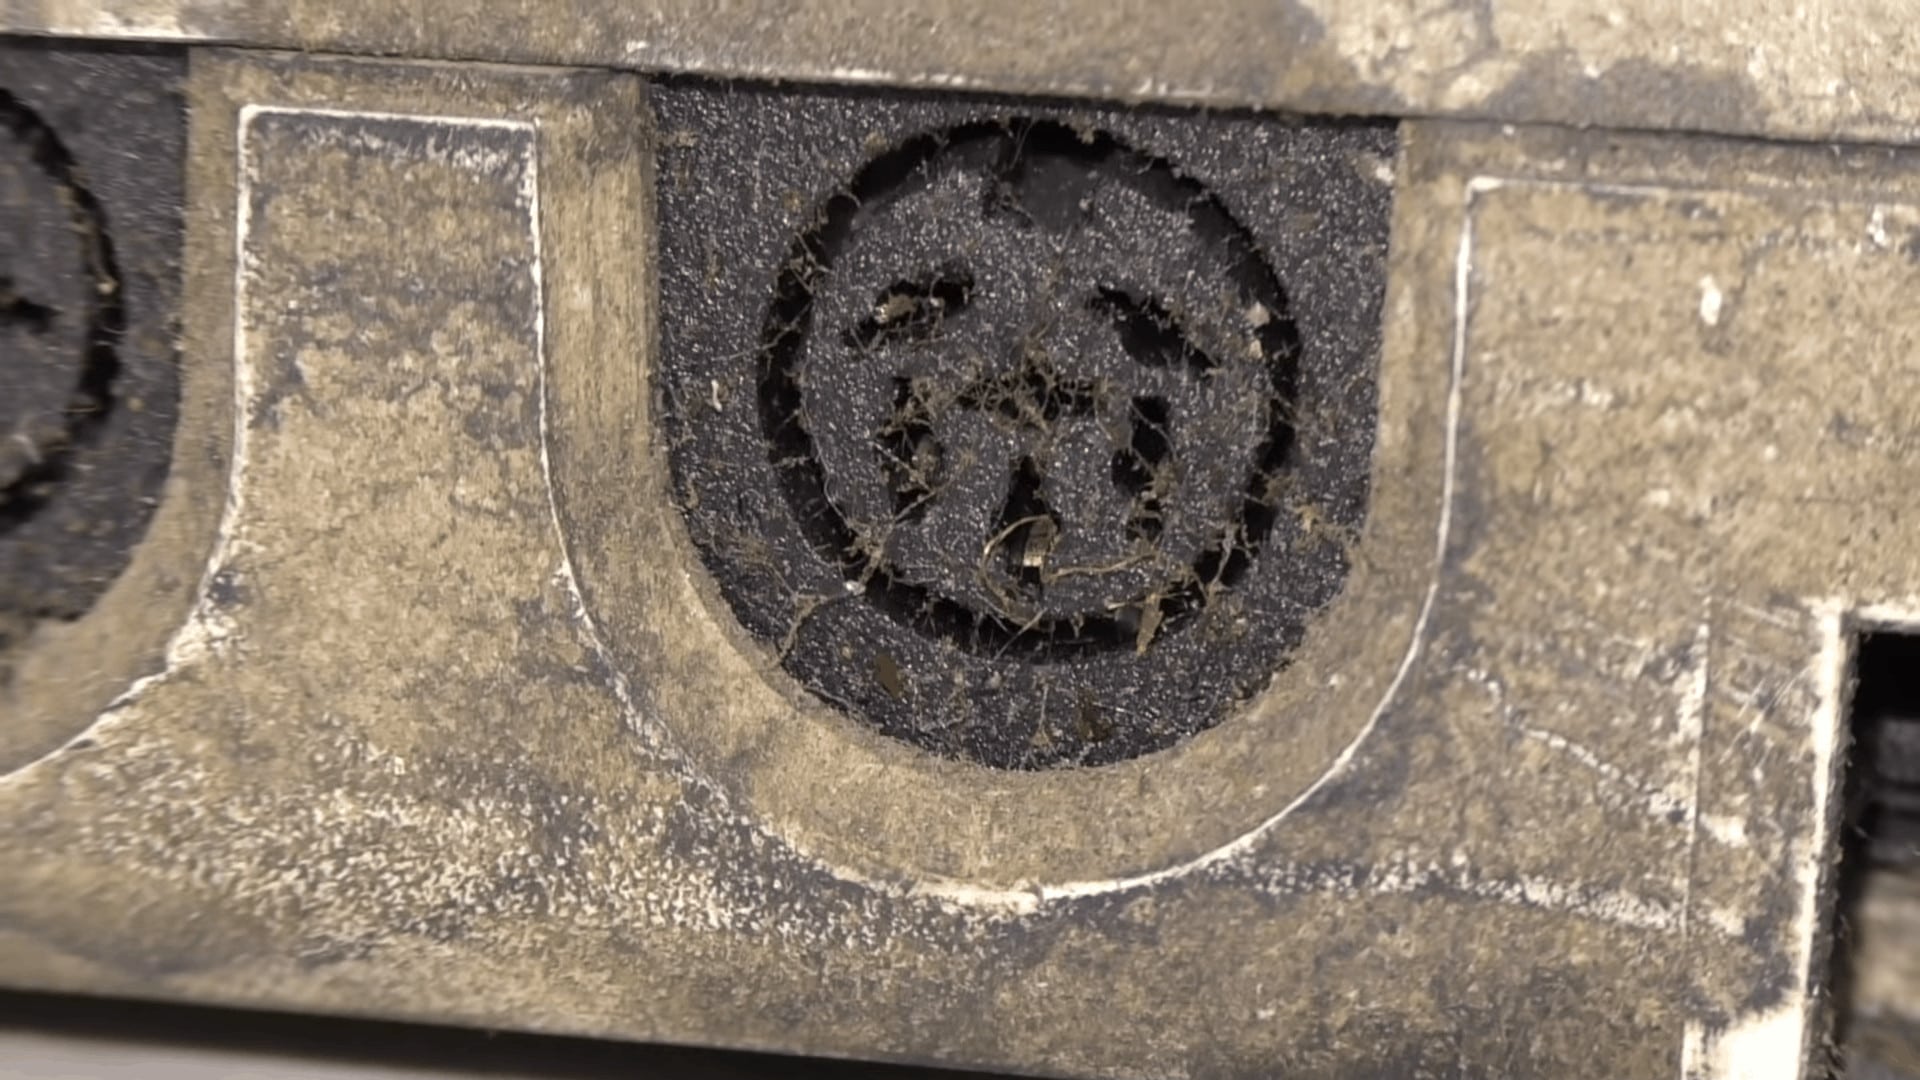
“This is without a doubt the worst VIC-20 I have ever seen!”, David says as he starts off the restoration process. The computer is so disgusting that David literally doesn’t want to touch it. It seems to be covered inside and out in some kind of oil or grease. As you look into the back of the poor abused Commodore you can see that this oily grease has even penetrated into the machine and is covering the motherboard and all of the connectors (cartridge port, user port, serial ports, etc). It’s in bad shape.
When looking over this computer one gets to thinking that it might not even be possible to restore. With this kind of operating condition its very possible that wires and traces on the motherboard are completely eaten through. That assumes the integrated circuits and components are even salvageable! It is possible as David mentions in the videos that depending on what this grease is, it might actually be protecting the circuits, but there’s only one way to find out! Time to open this VIC-20 up!
Opening the Worst Condition Commodore VIC-20 Ever
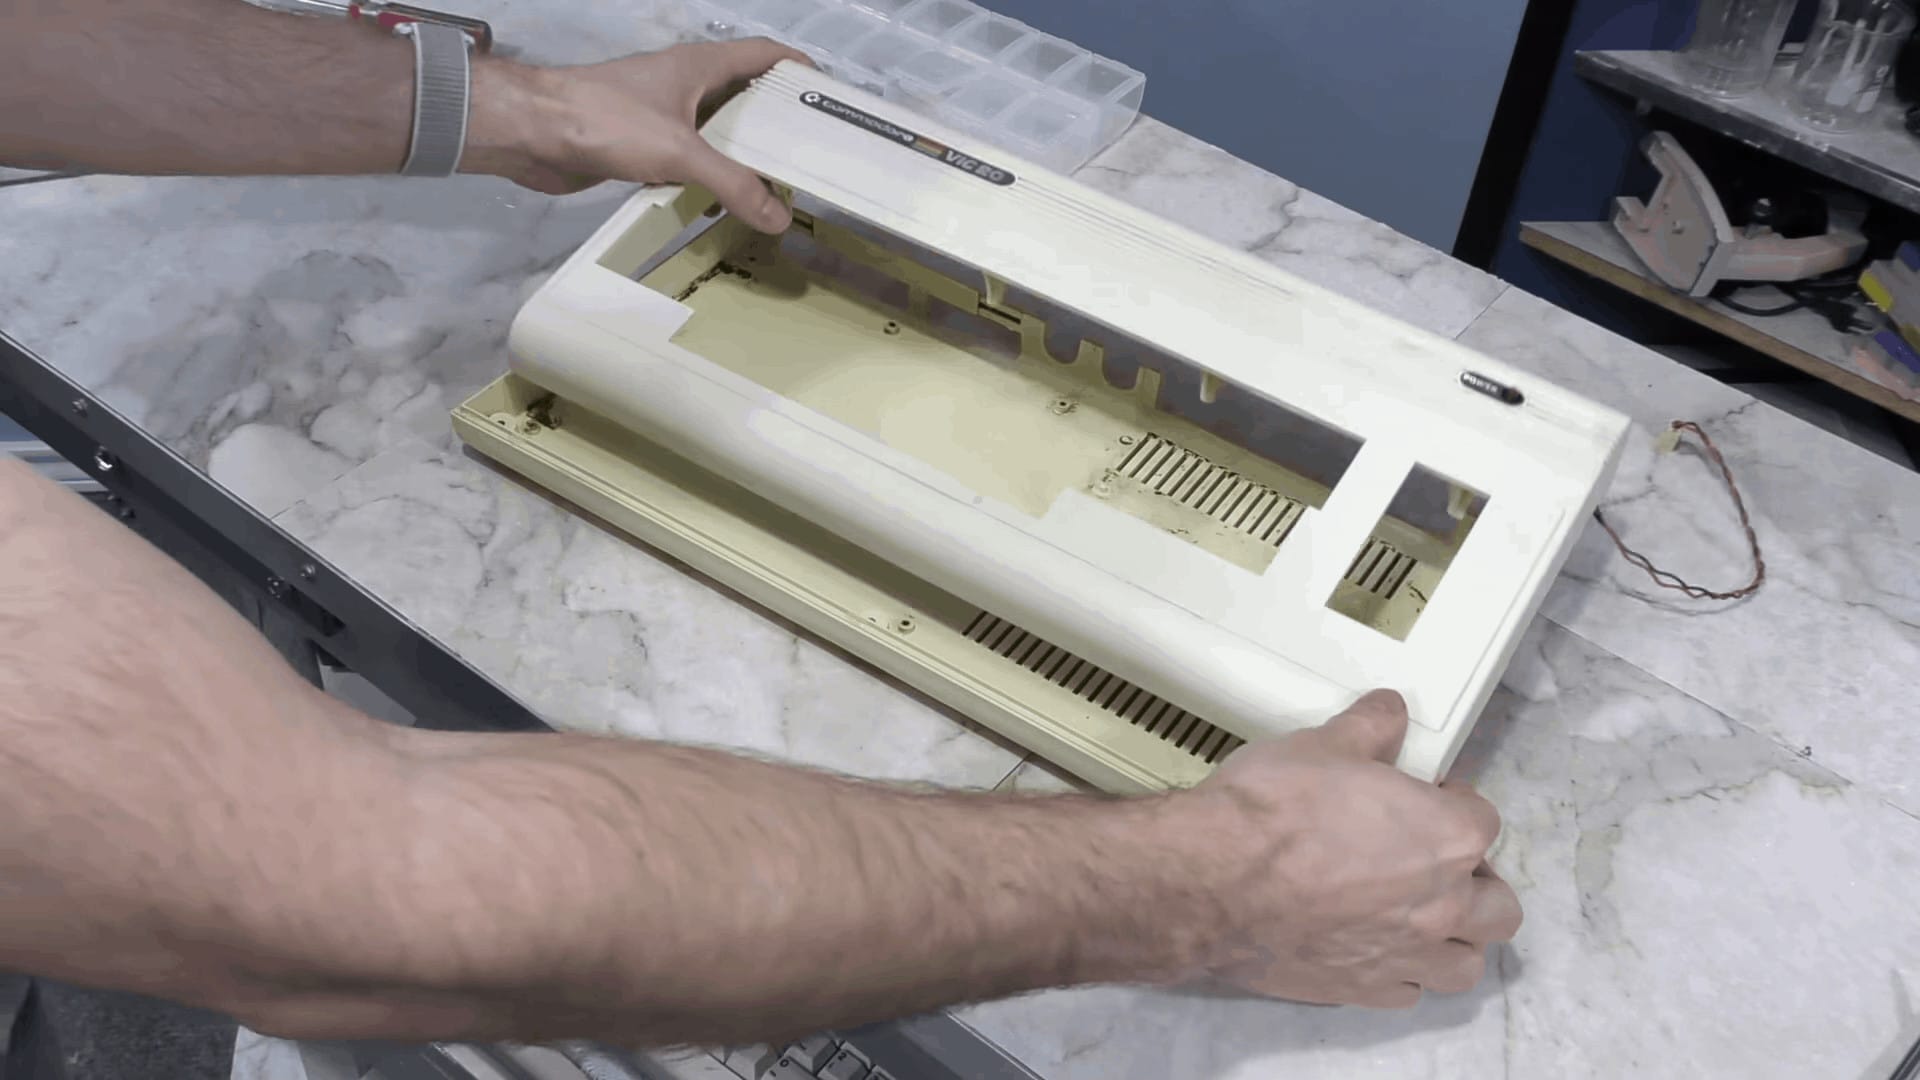
This is the moment of truth! David immediately notices the VIC-20 is missing some feet as he turns it over and removes the screws that secure the case top into place. This Commodore VIC-20 restoration is going to be incredible if it works!
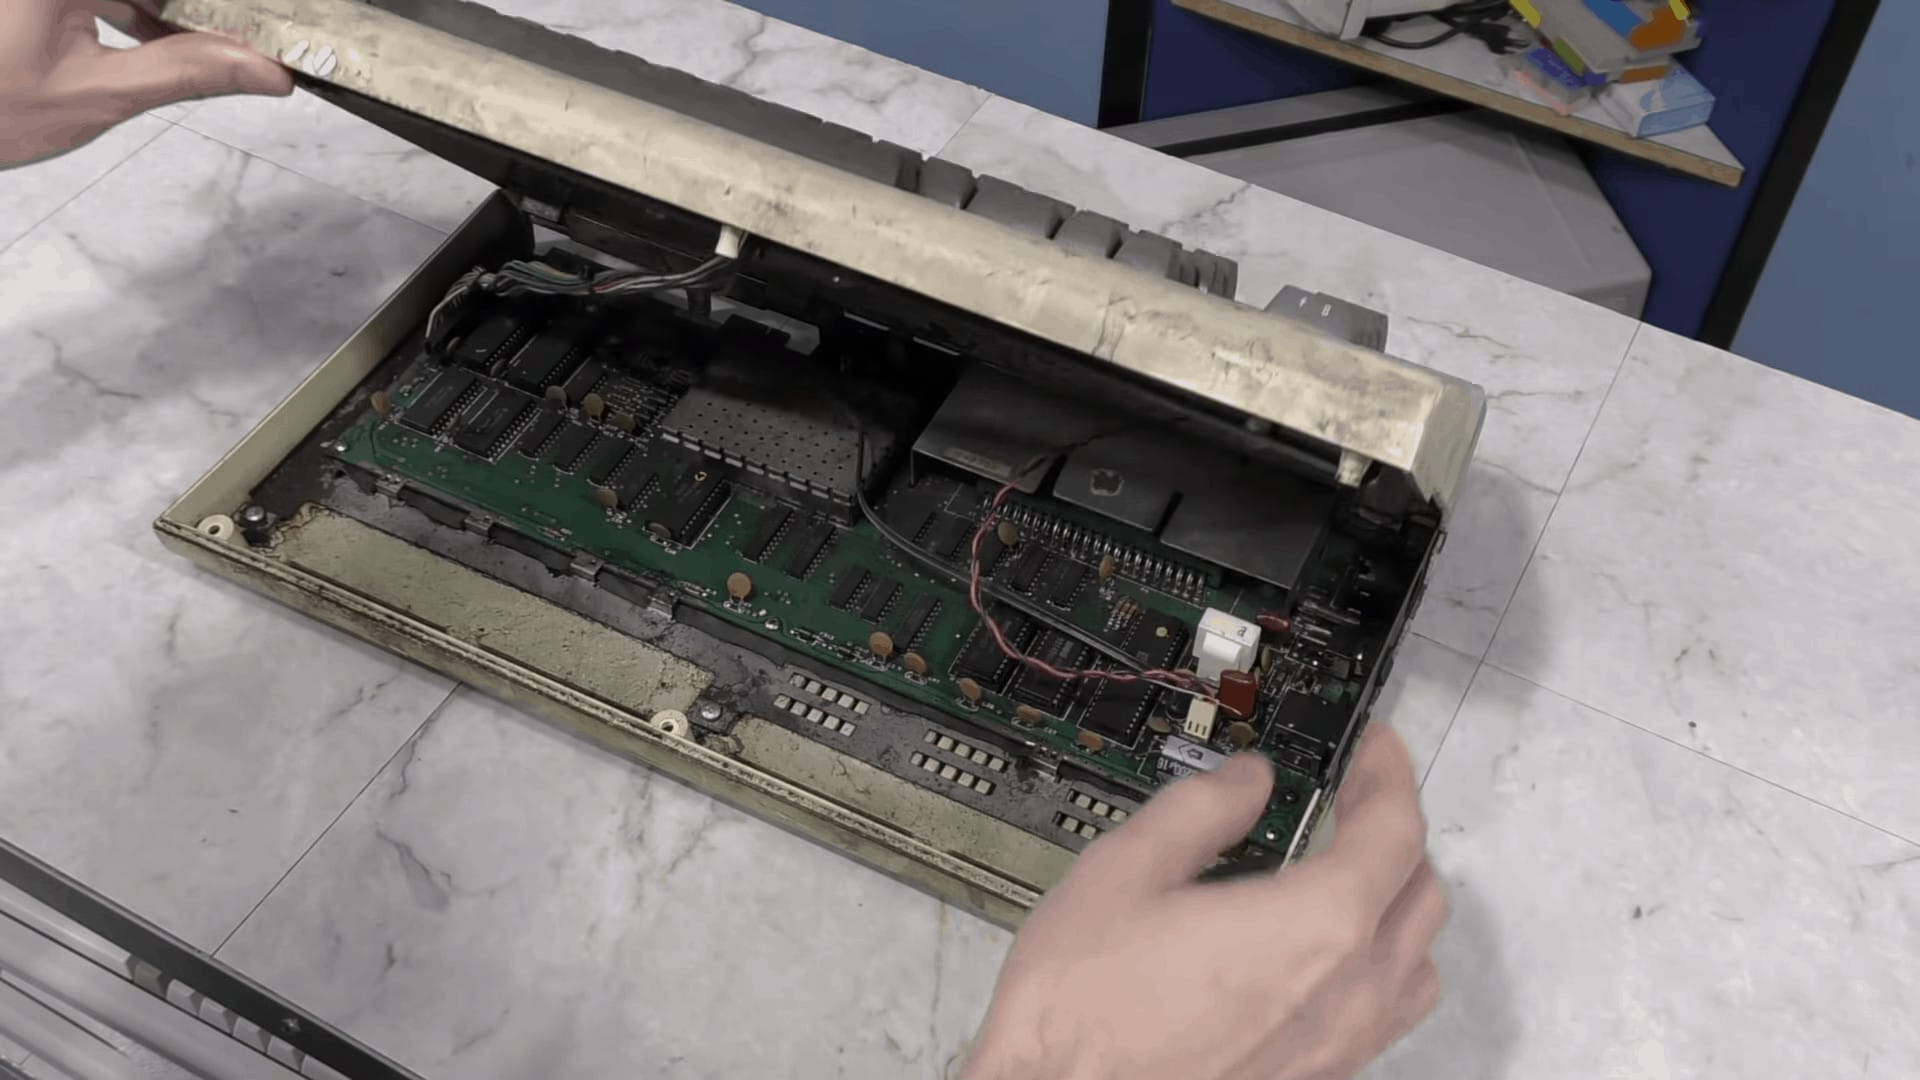
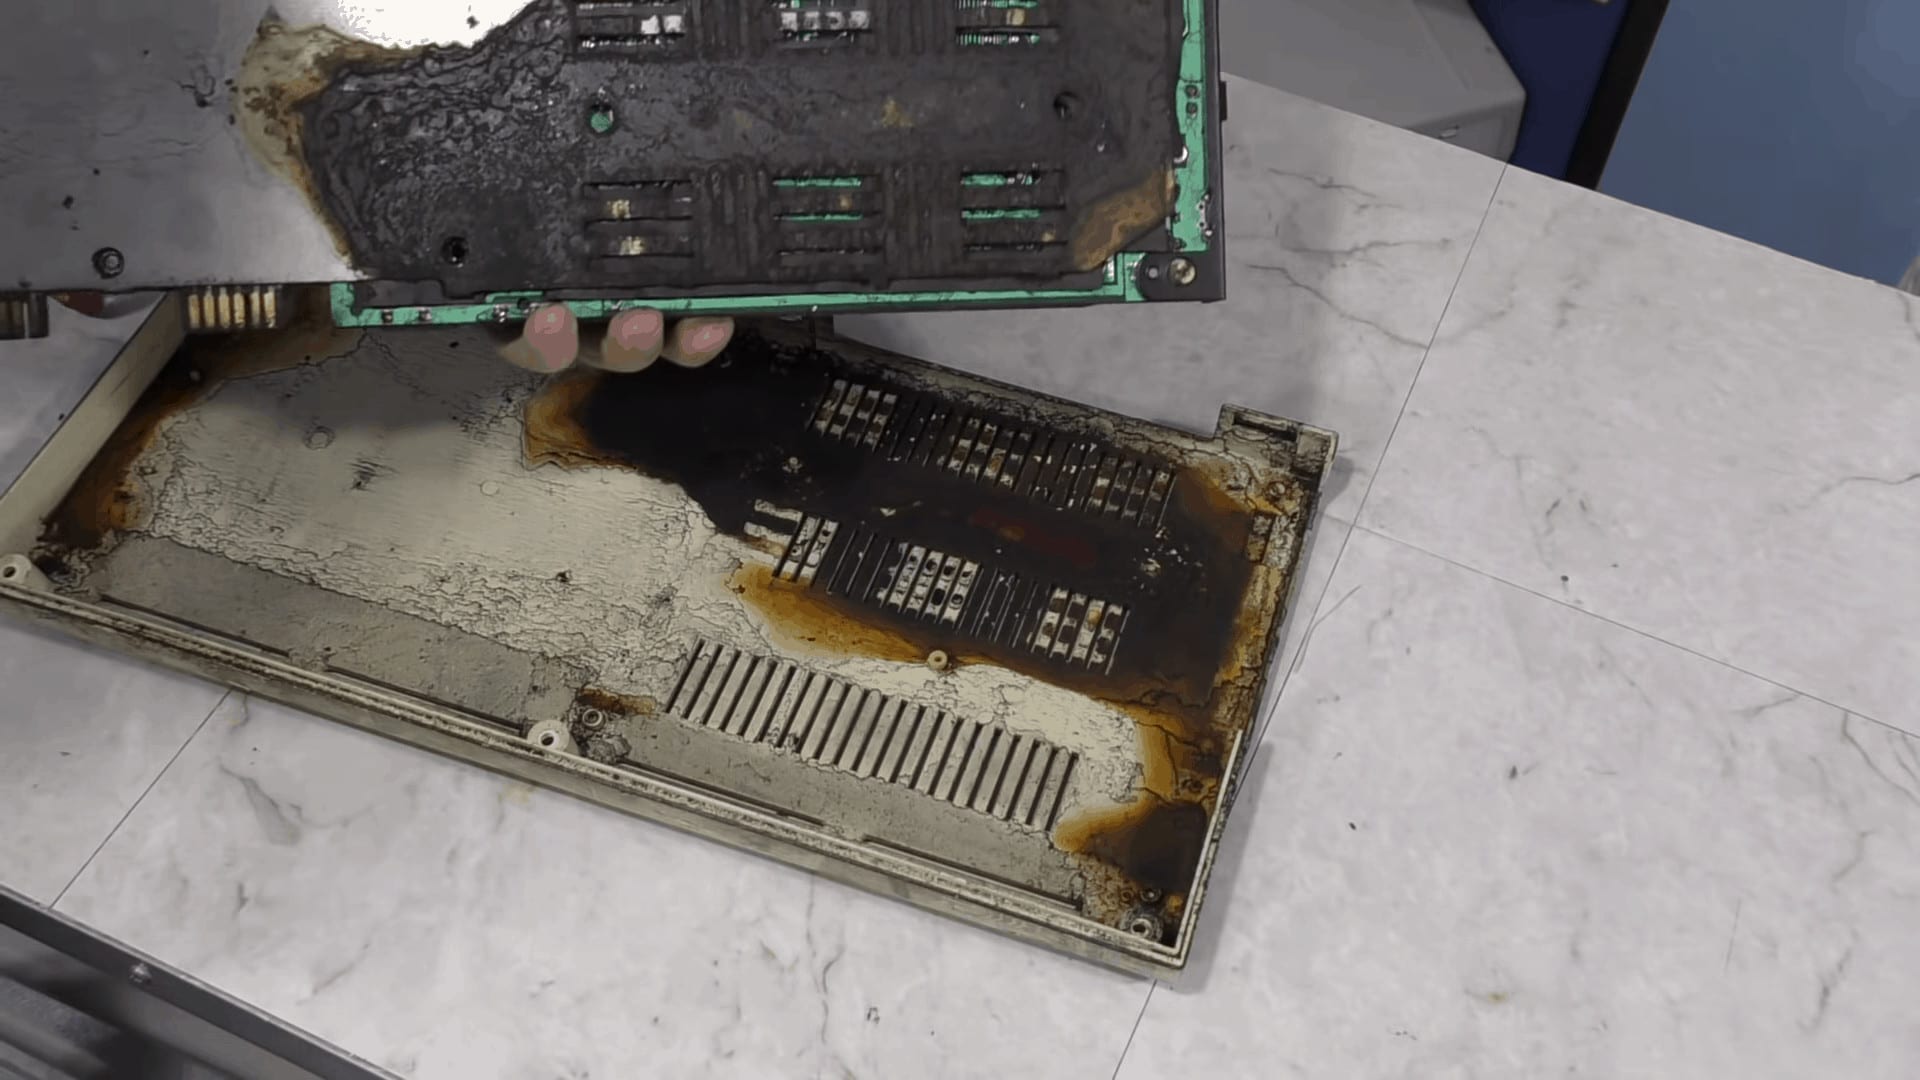
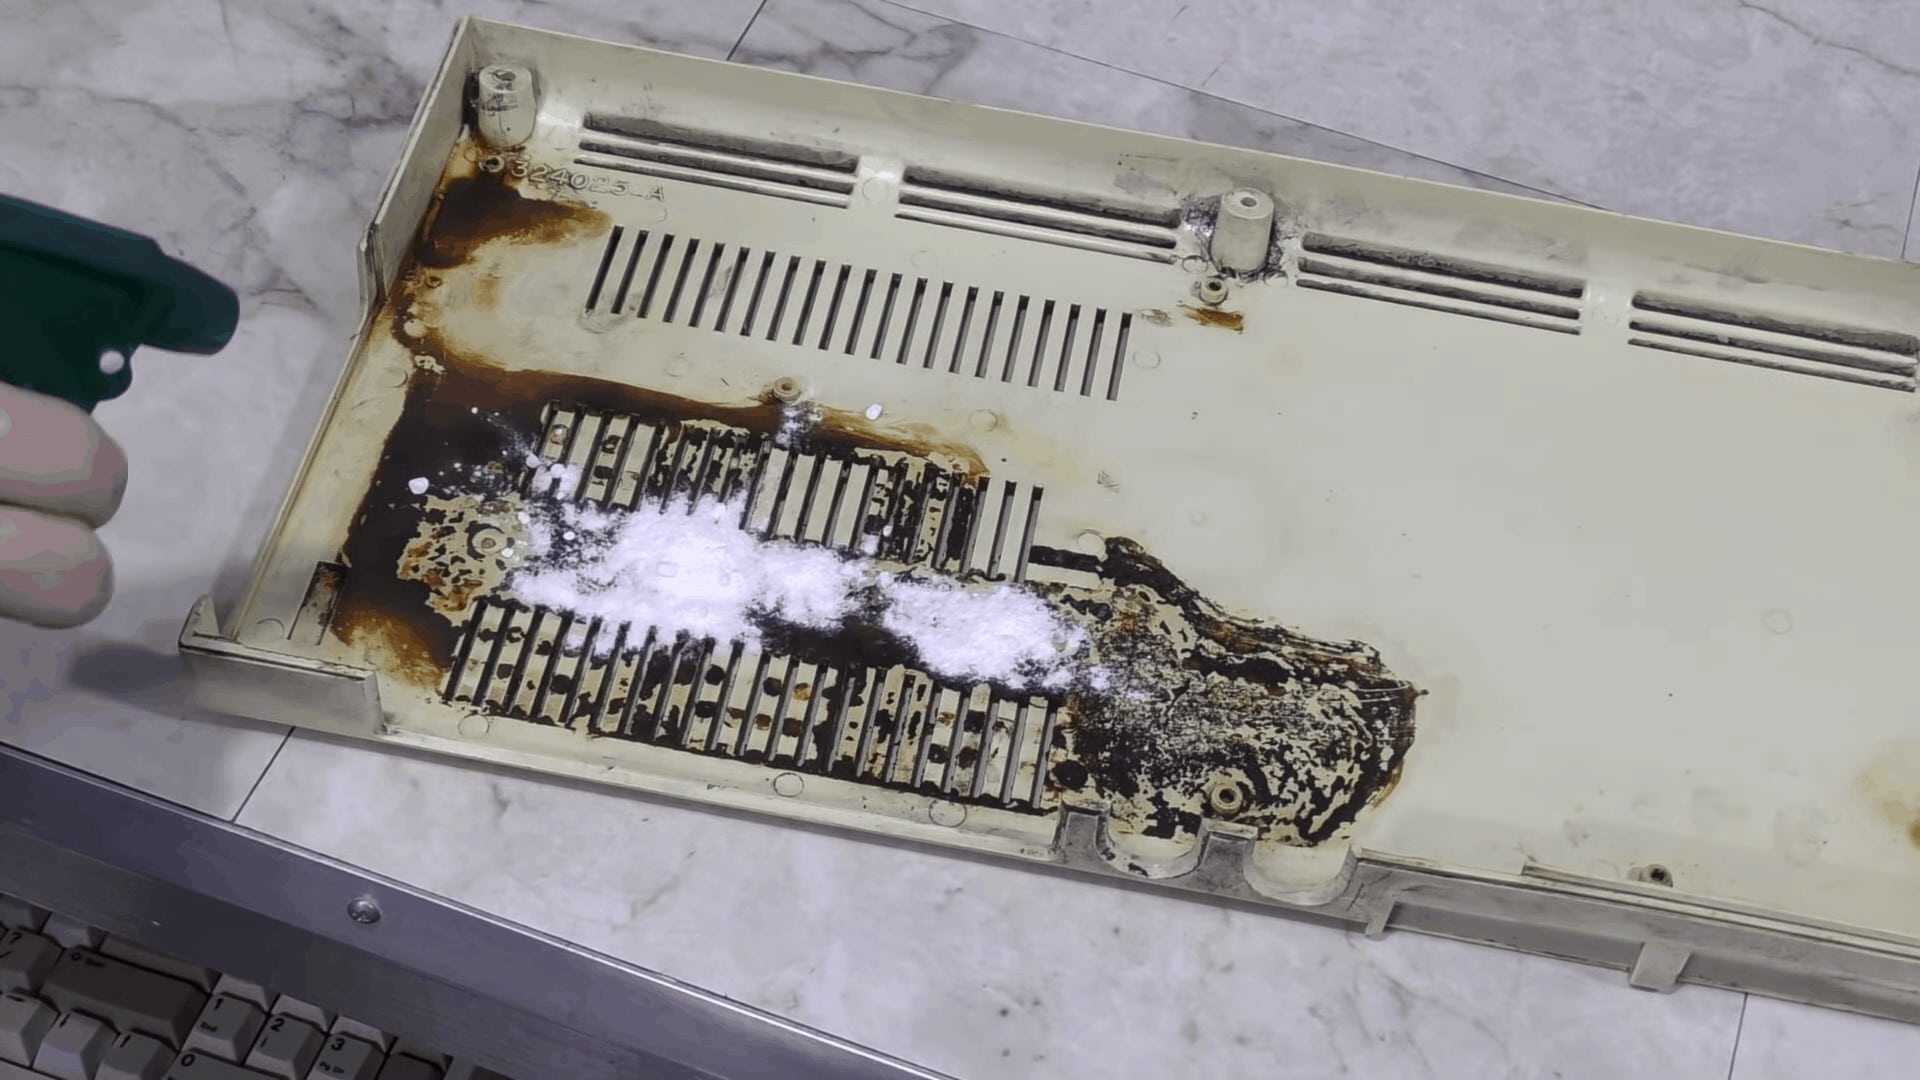
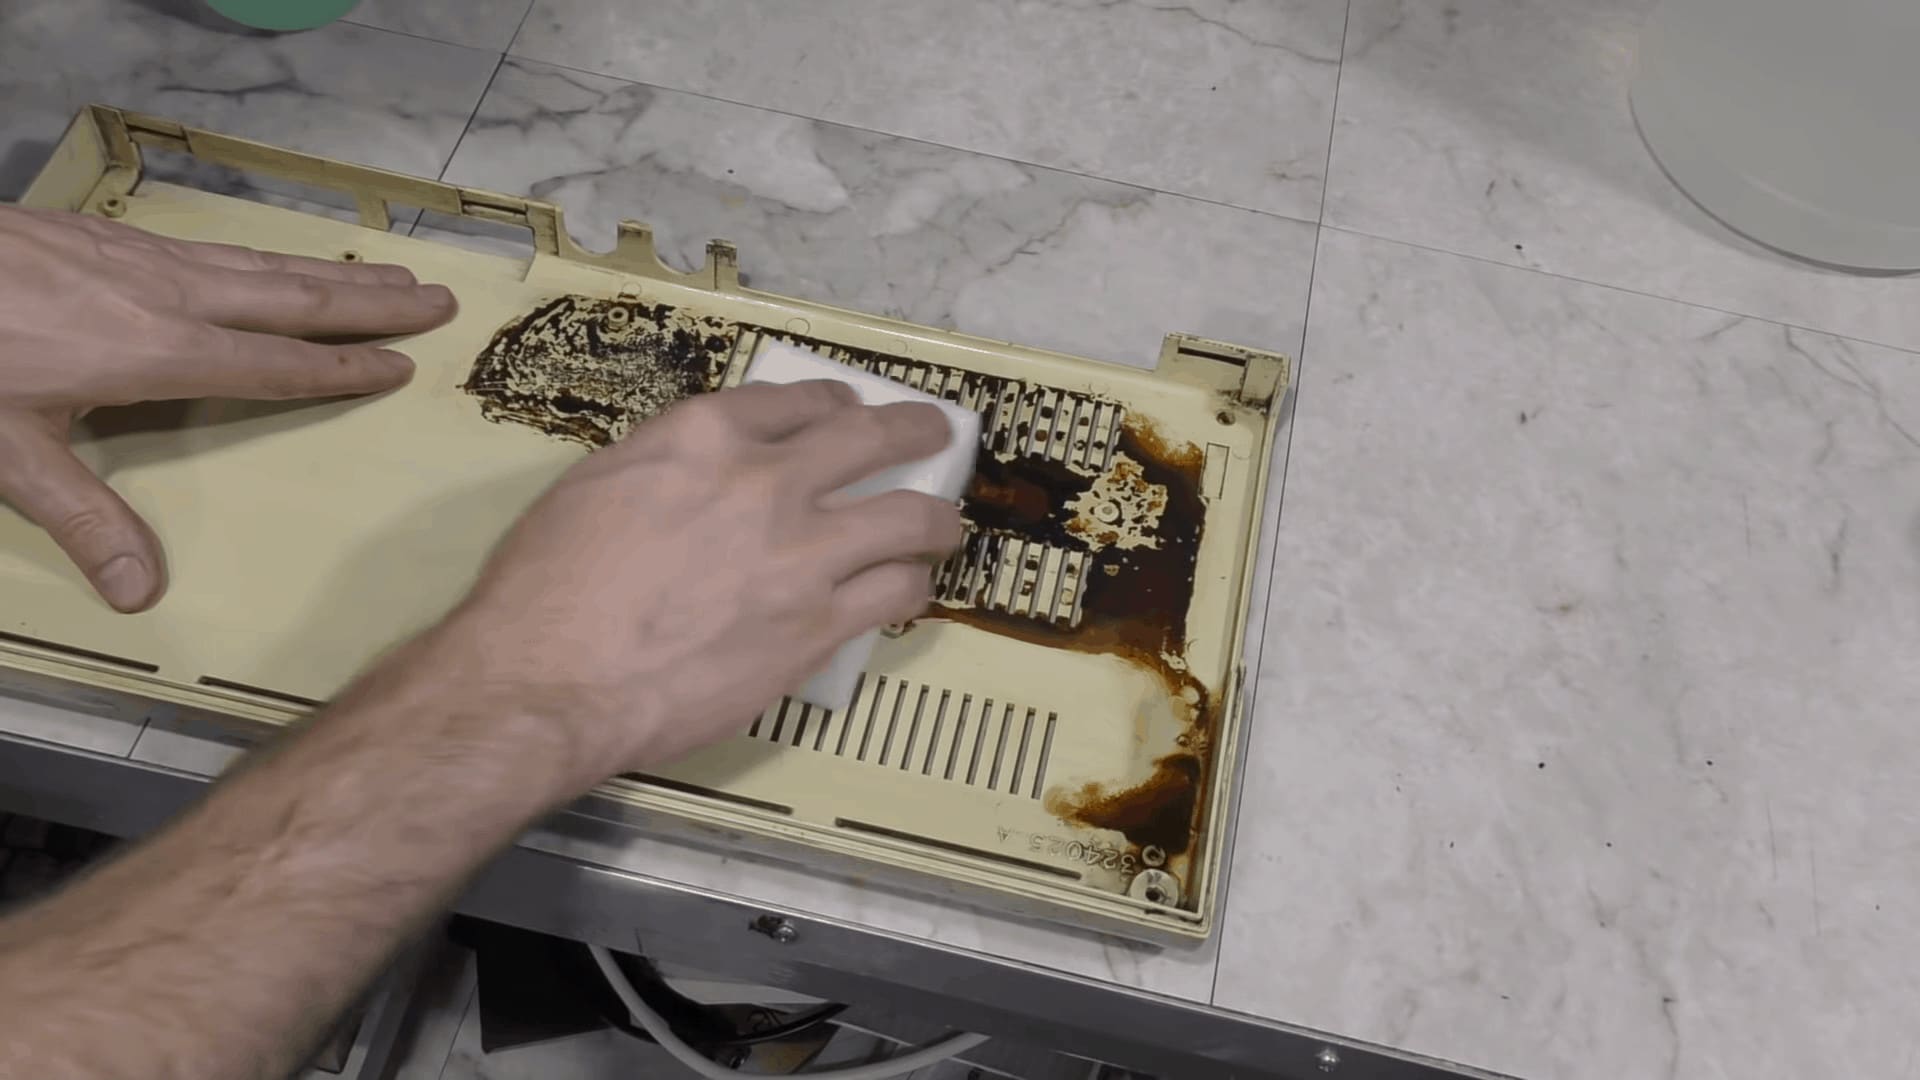
This thing is covered in grime from top to bottom! The motherboard in this VIC-20 is the later version. Later Commodore VIC-20 boards were shorter in depth and didn’t fill the entire case. Unfortunately on opening the case, and removing the main logic board, the corrosion is revealed. The entire RF shield is covered in corrosion. So bad in fact that it has left a remarkable stain on the bottom of the case plastic.
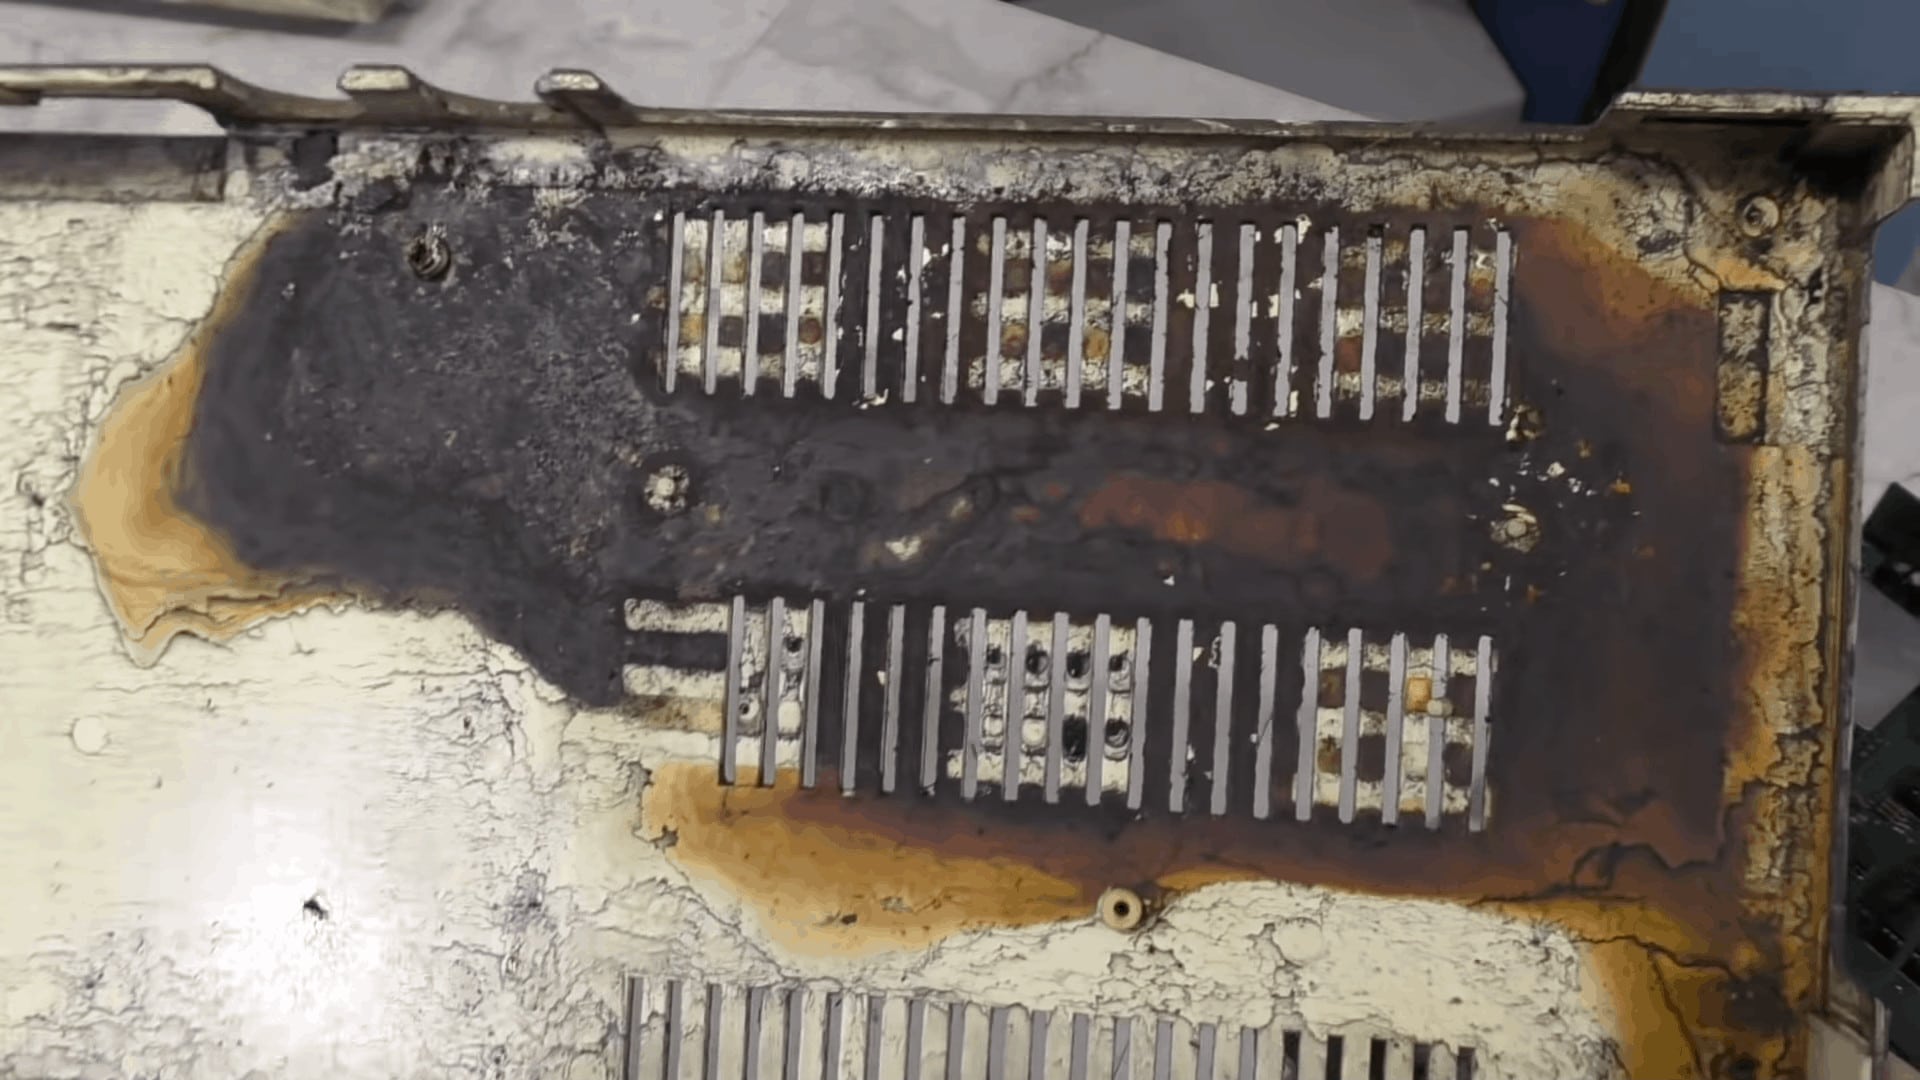
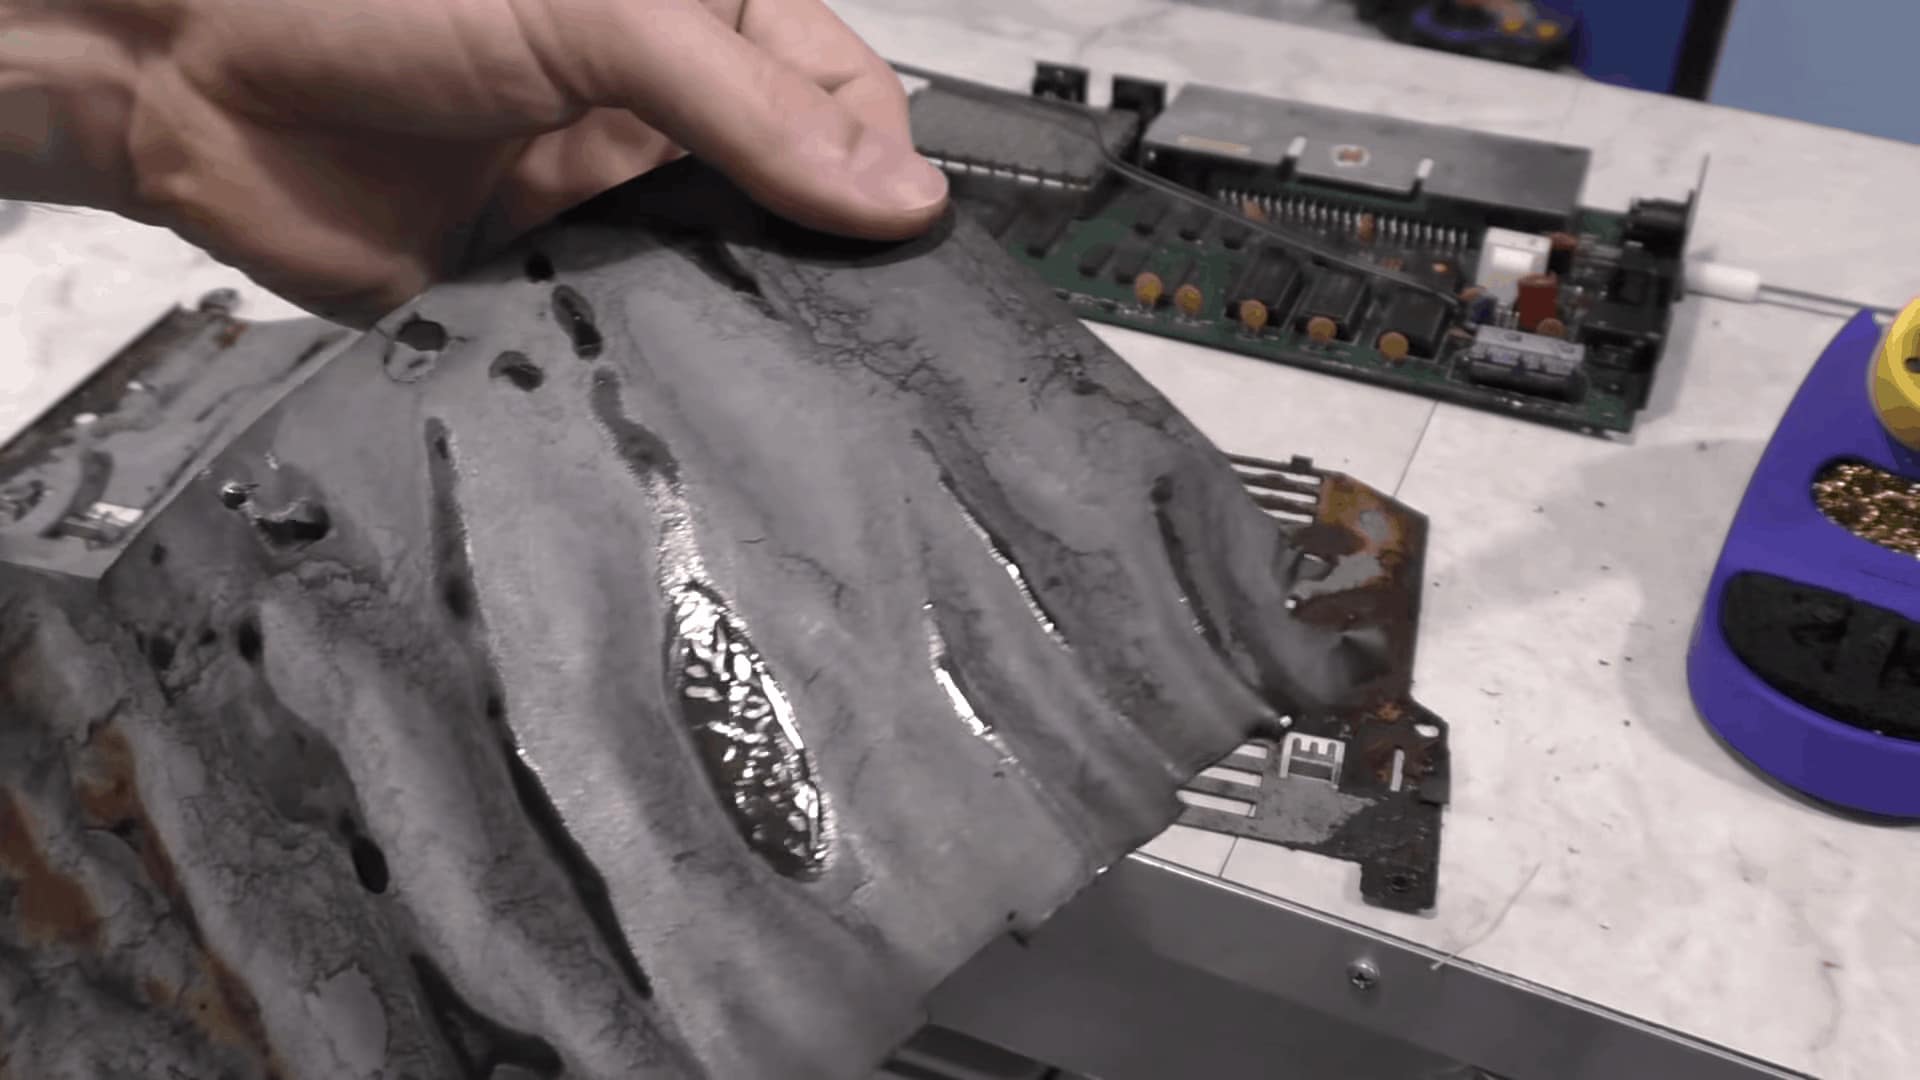
Removing the RF Shield from the Commodore VIC-20
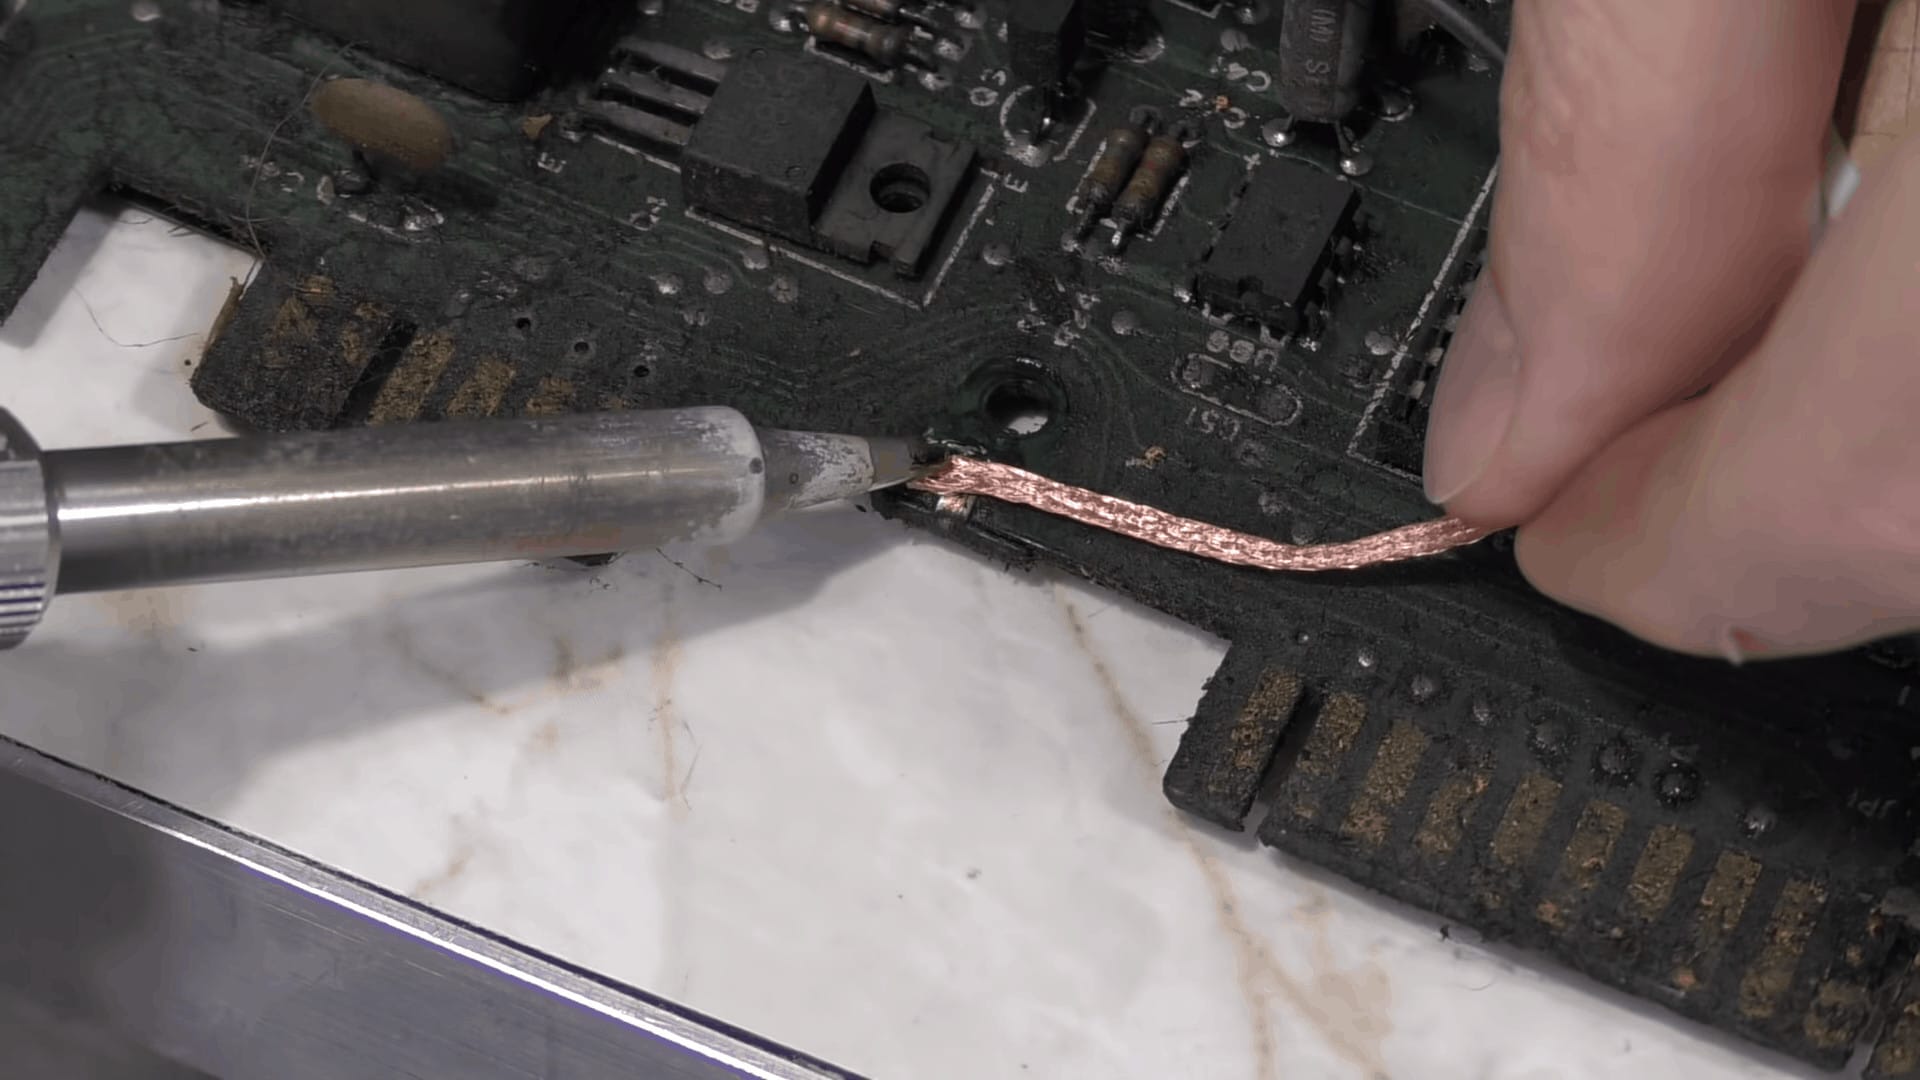
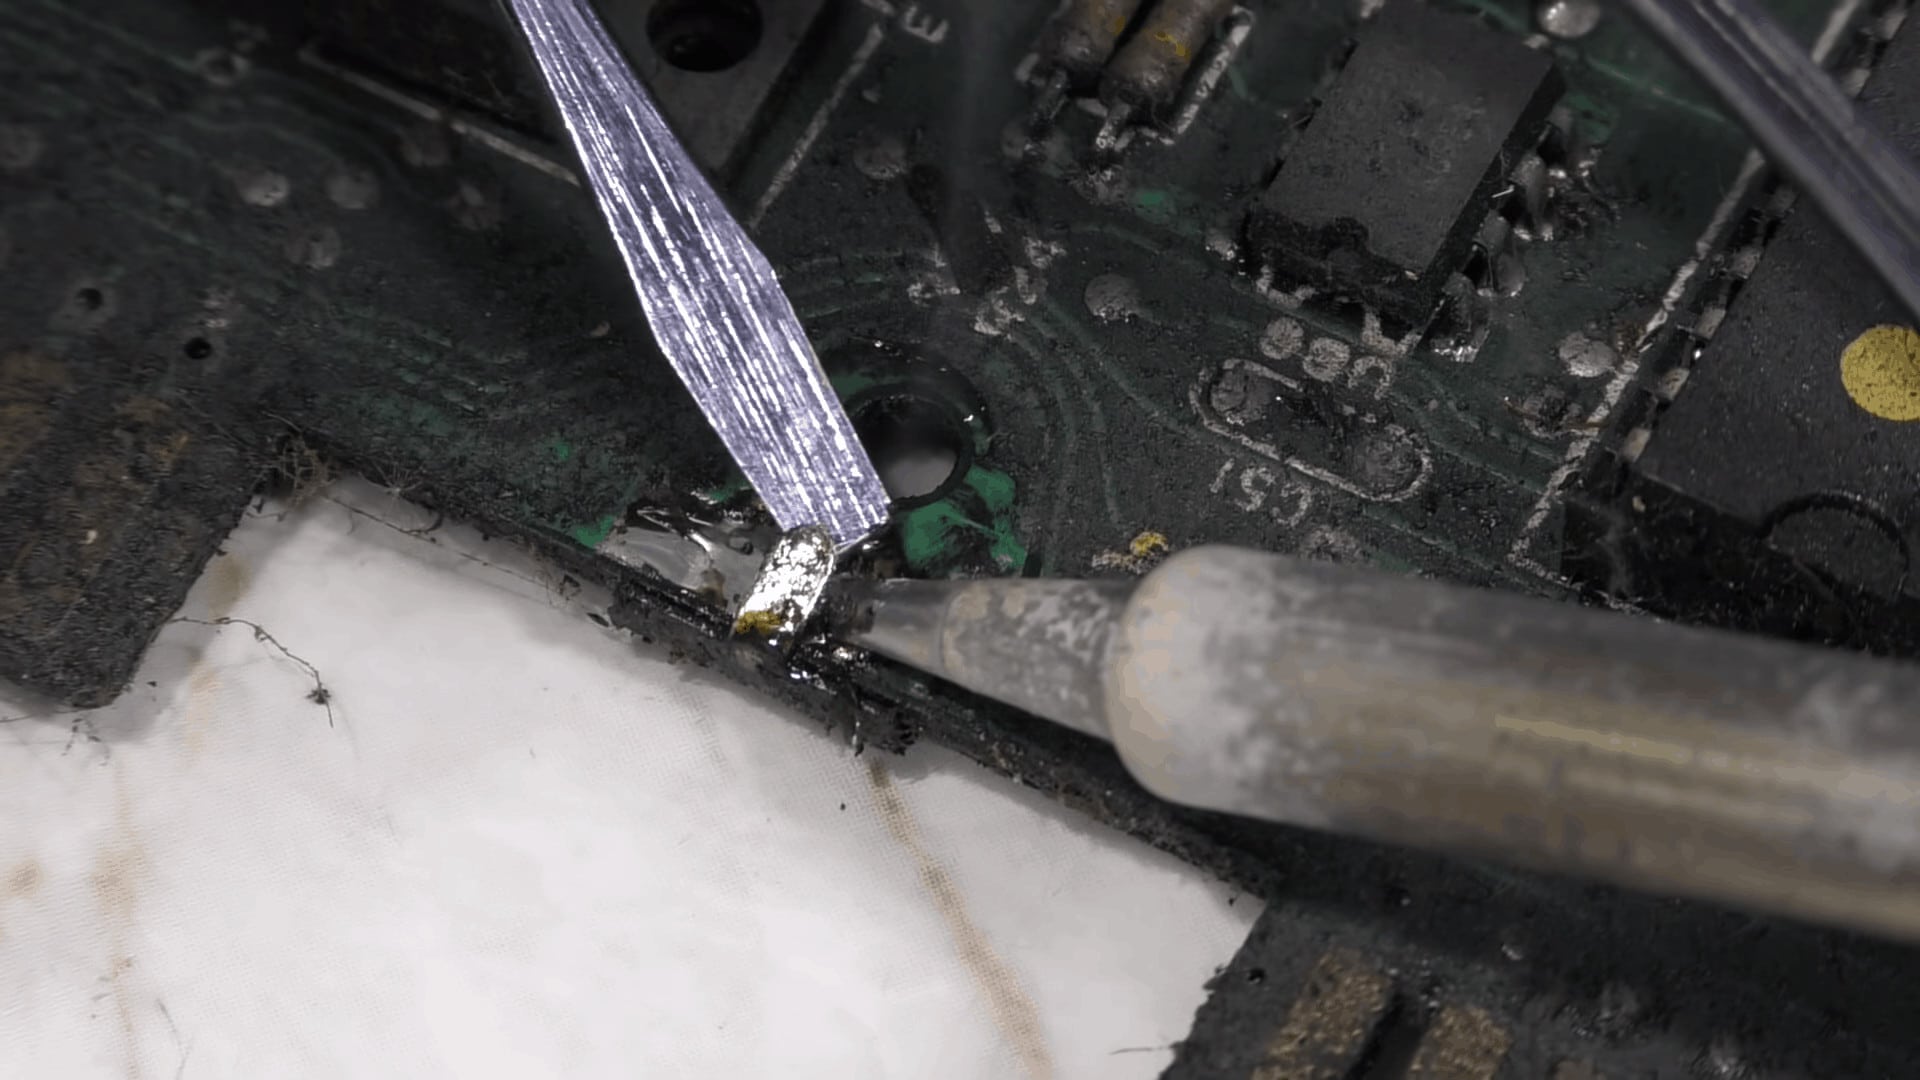
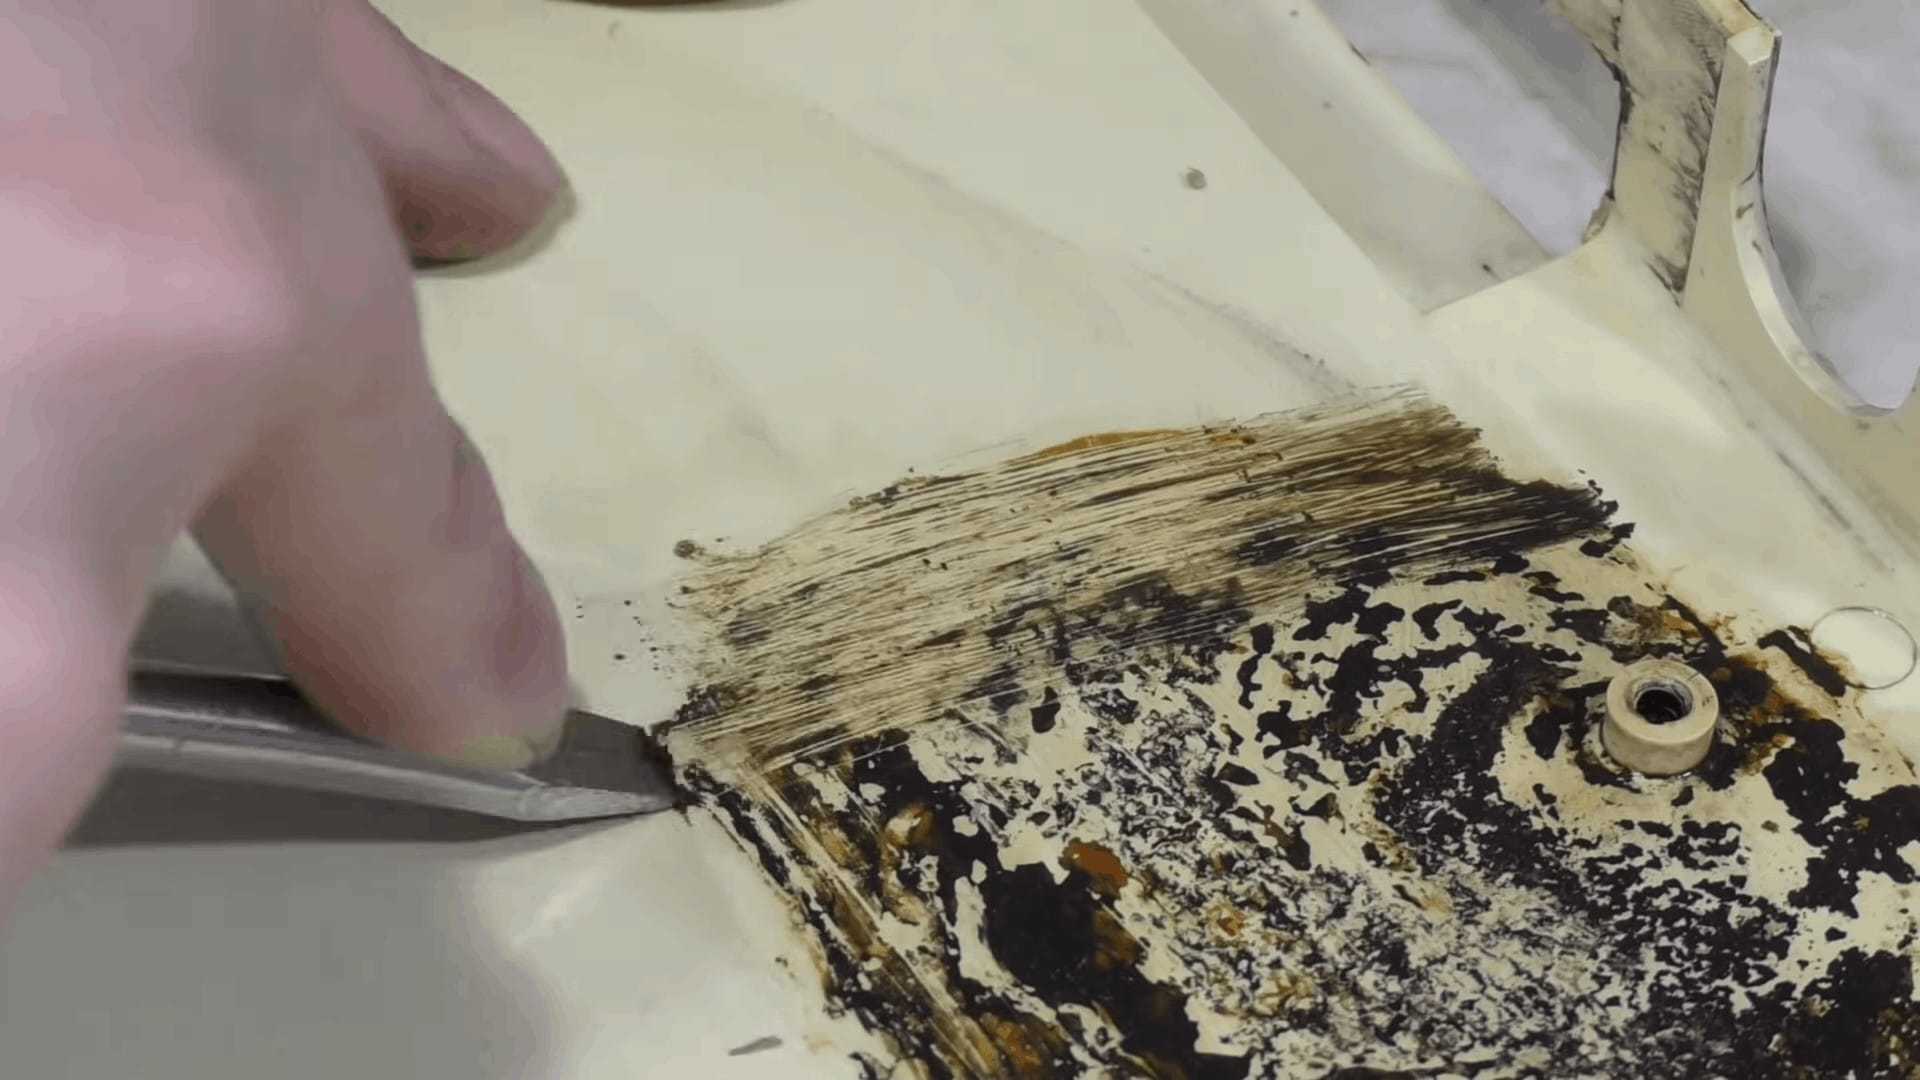
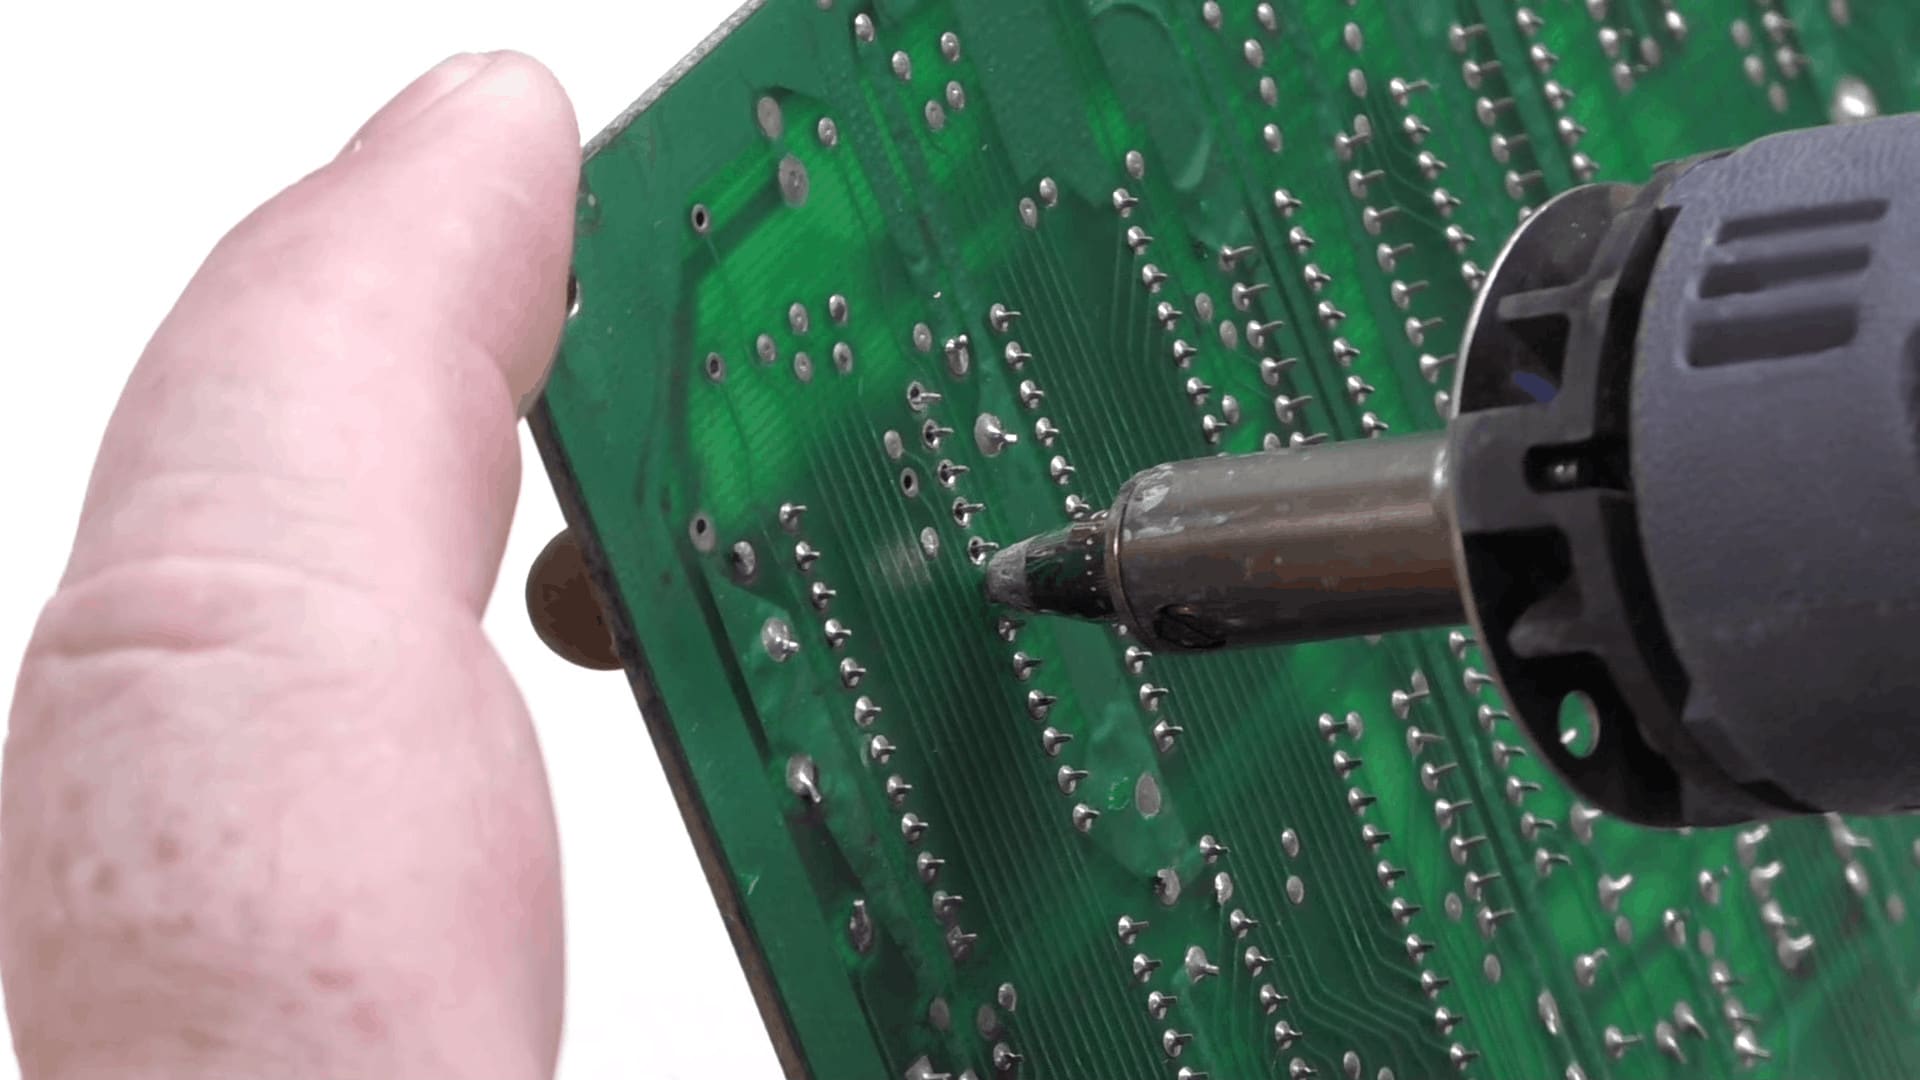
The RF shield must be removed before we go any further. Unfortunately its soldered in place with numerous clips that overlap the main logic board. This Commodore VIC-20 restoration is turning out to be quite the pain! David first tried using soldering brain and as you can see it didn’t work too well. And for his efforts he “enjoyed” the smell of burning oil and grease. Check out his soldering station here! An aroma that filled his room with fun and joy! The good news is that after using a screwdriver as a pry-bar he was able to solderer the ma inboard from the RF shield.
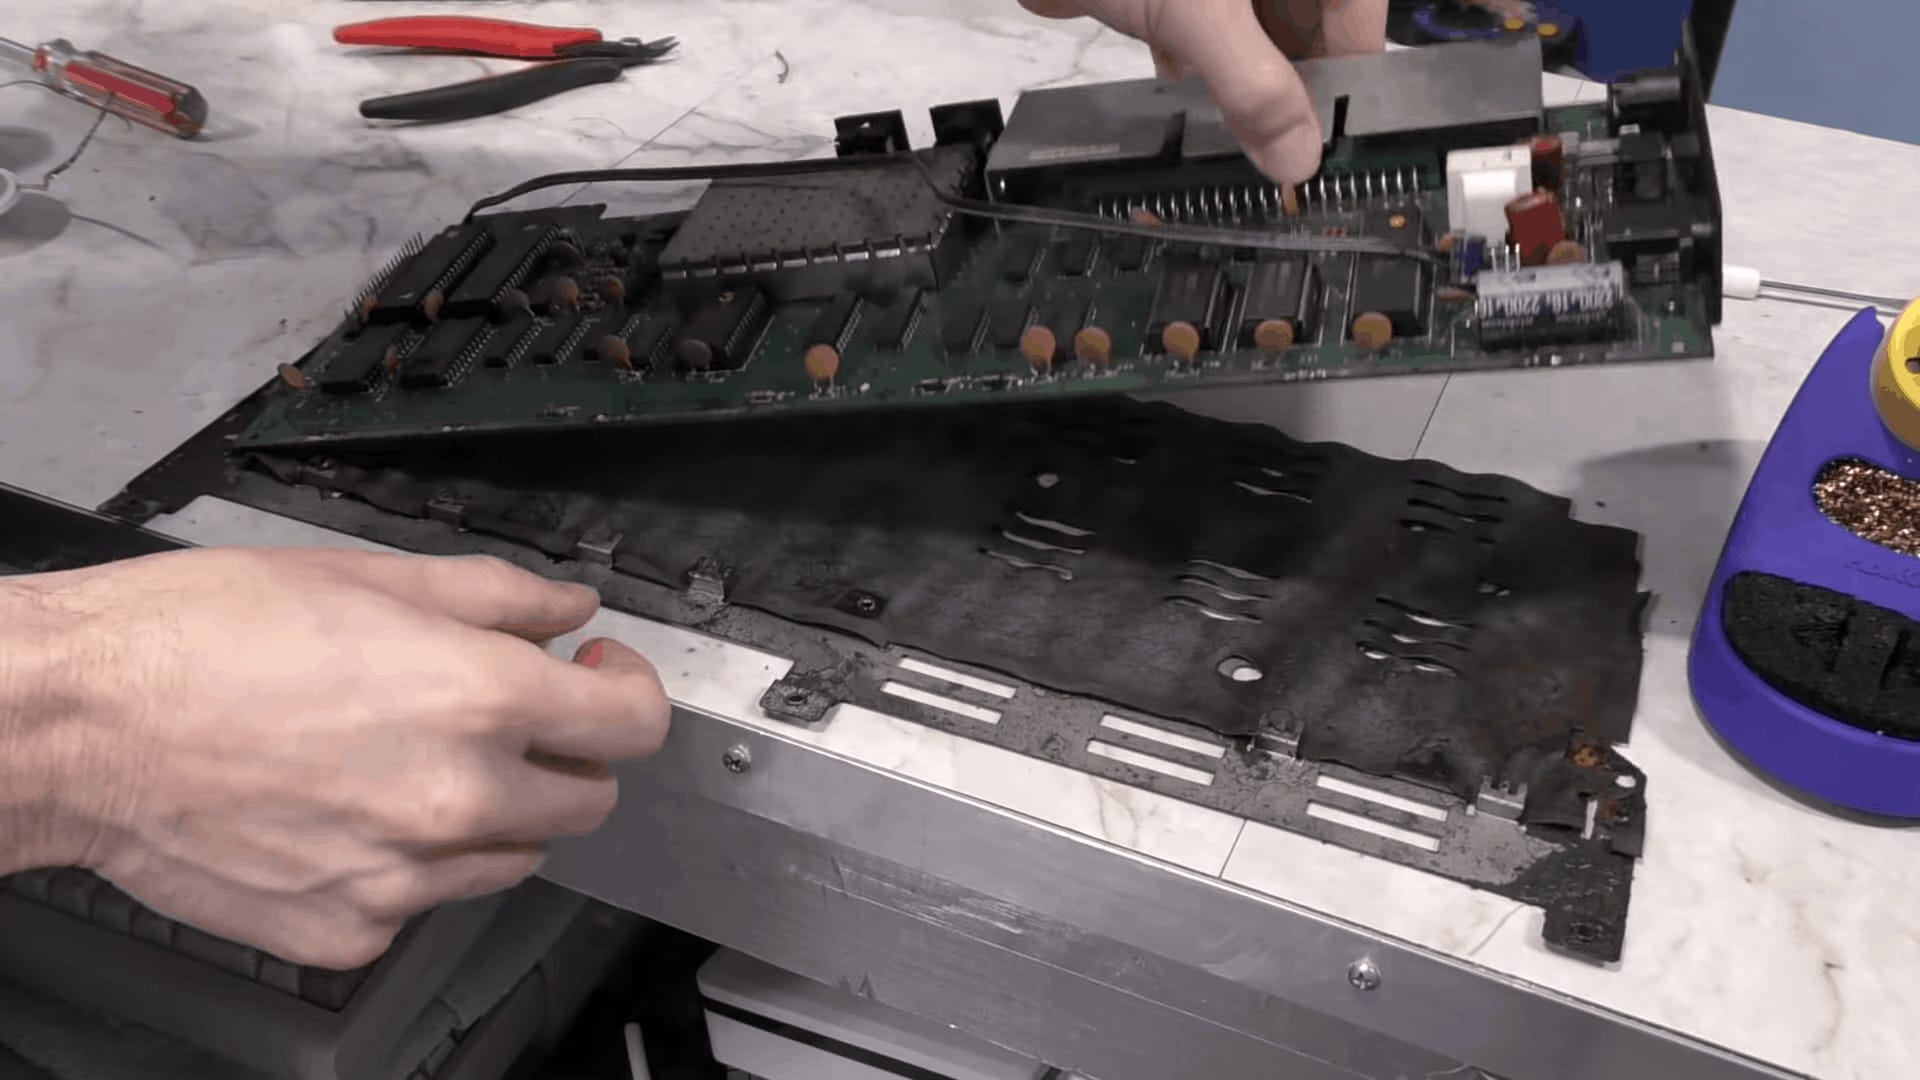
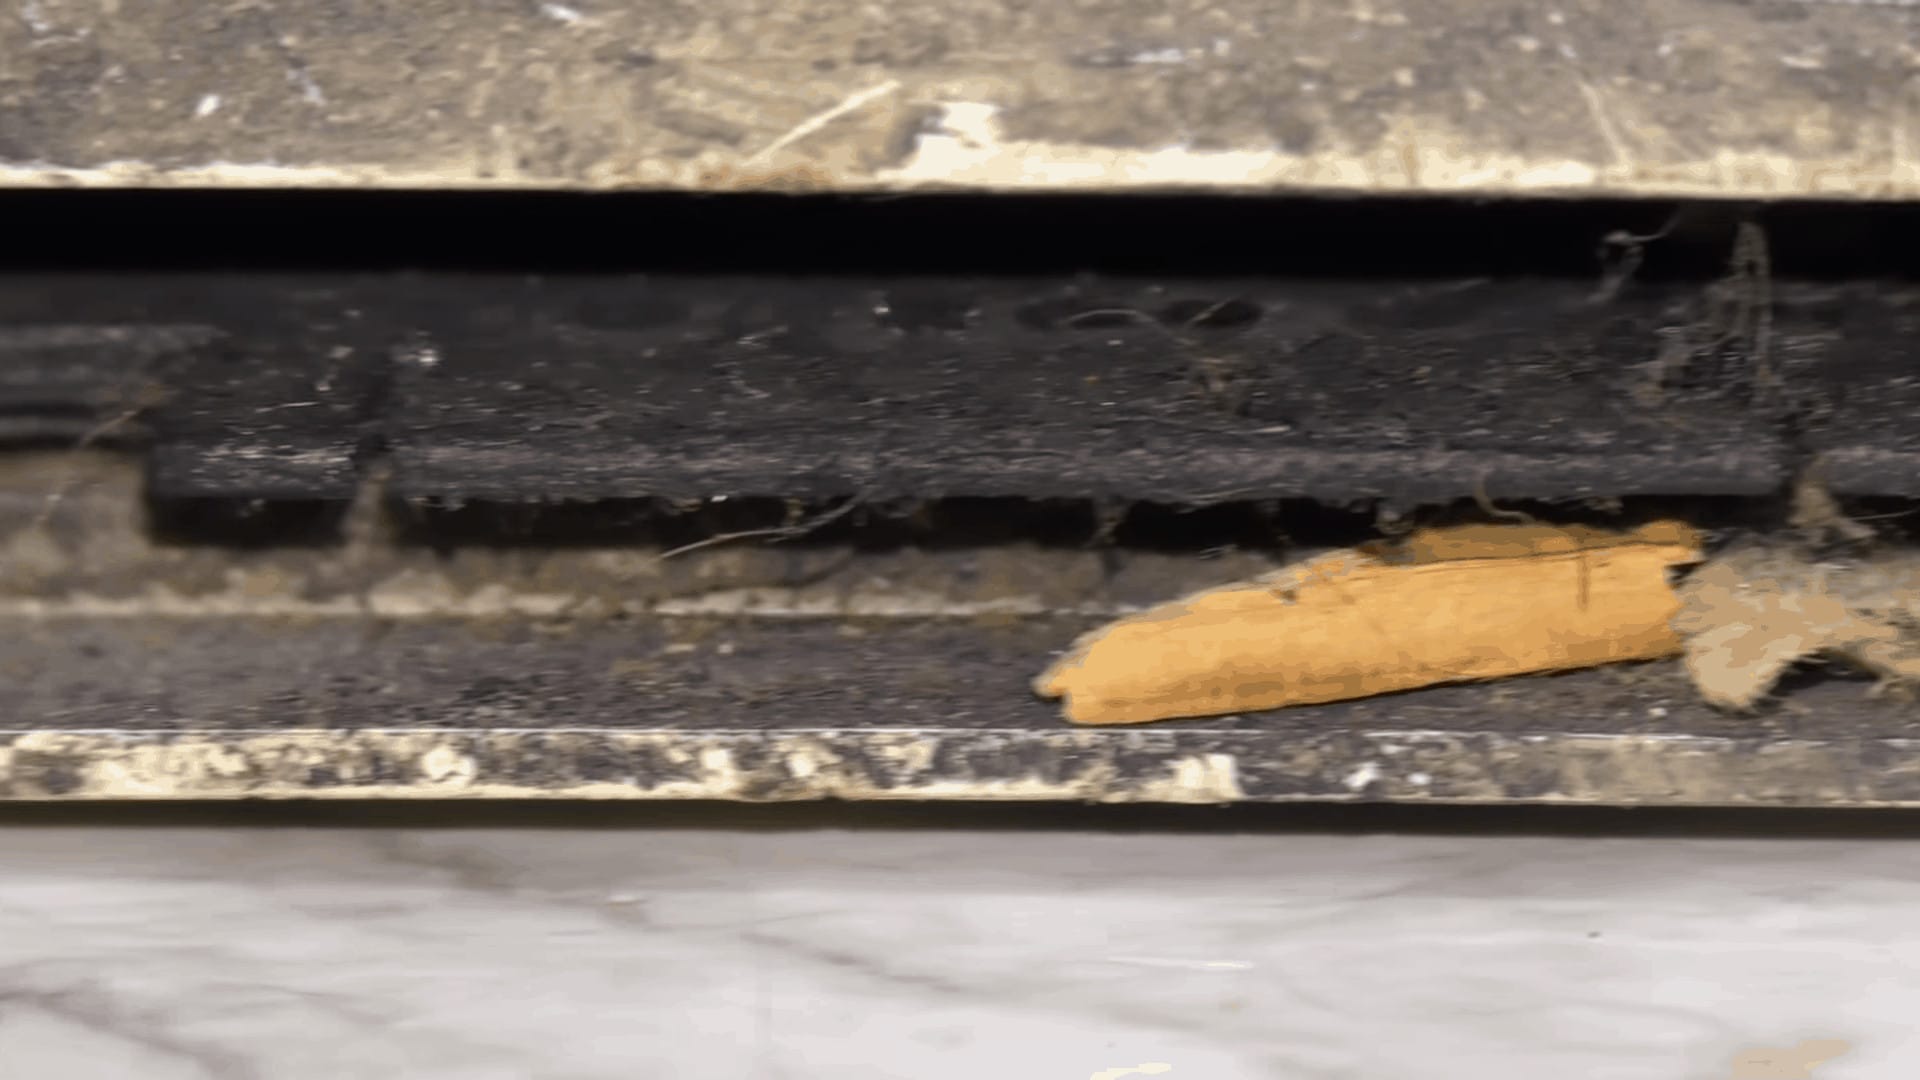
Removing the RF shield revealed the next bit of joy! The oil soaked cardboard insulator! This is so disgusting and is not for the faint of heart! This thing is completely destroyed and will have to be replaced with something else.
Cleaning the Commodore VIC-20
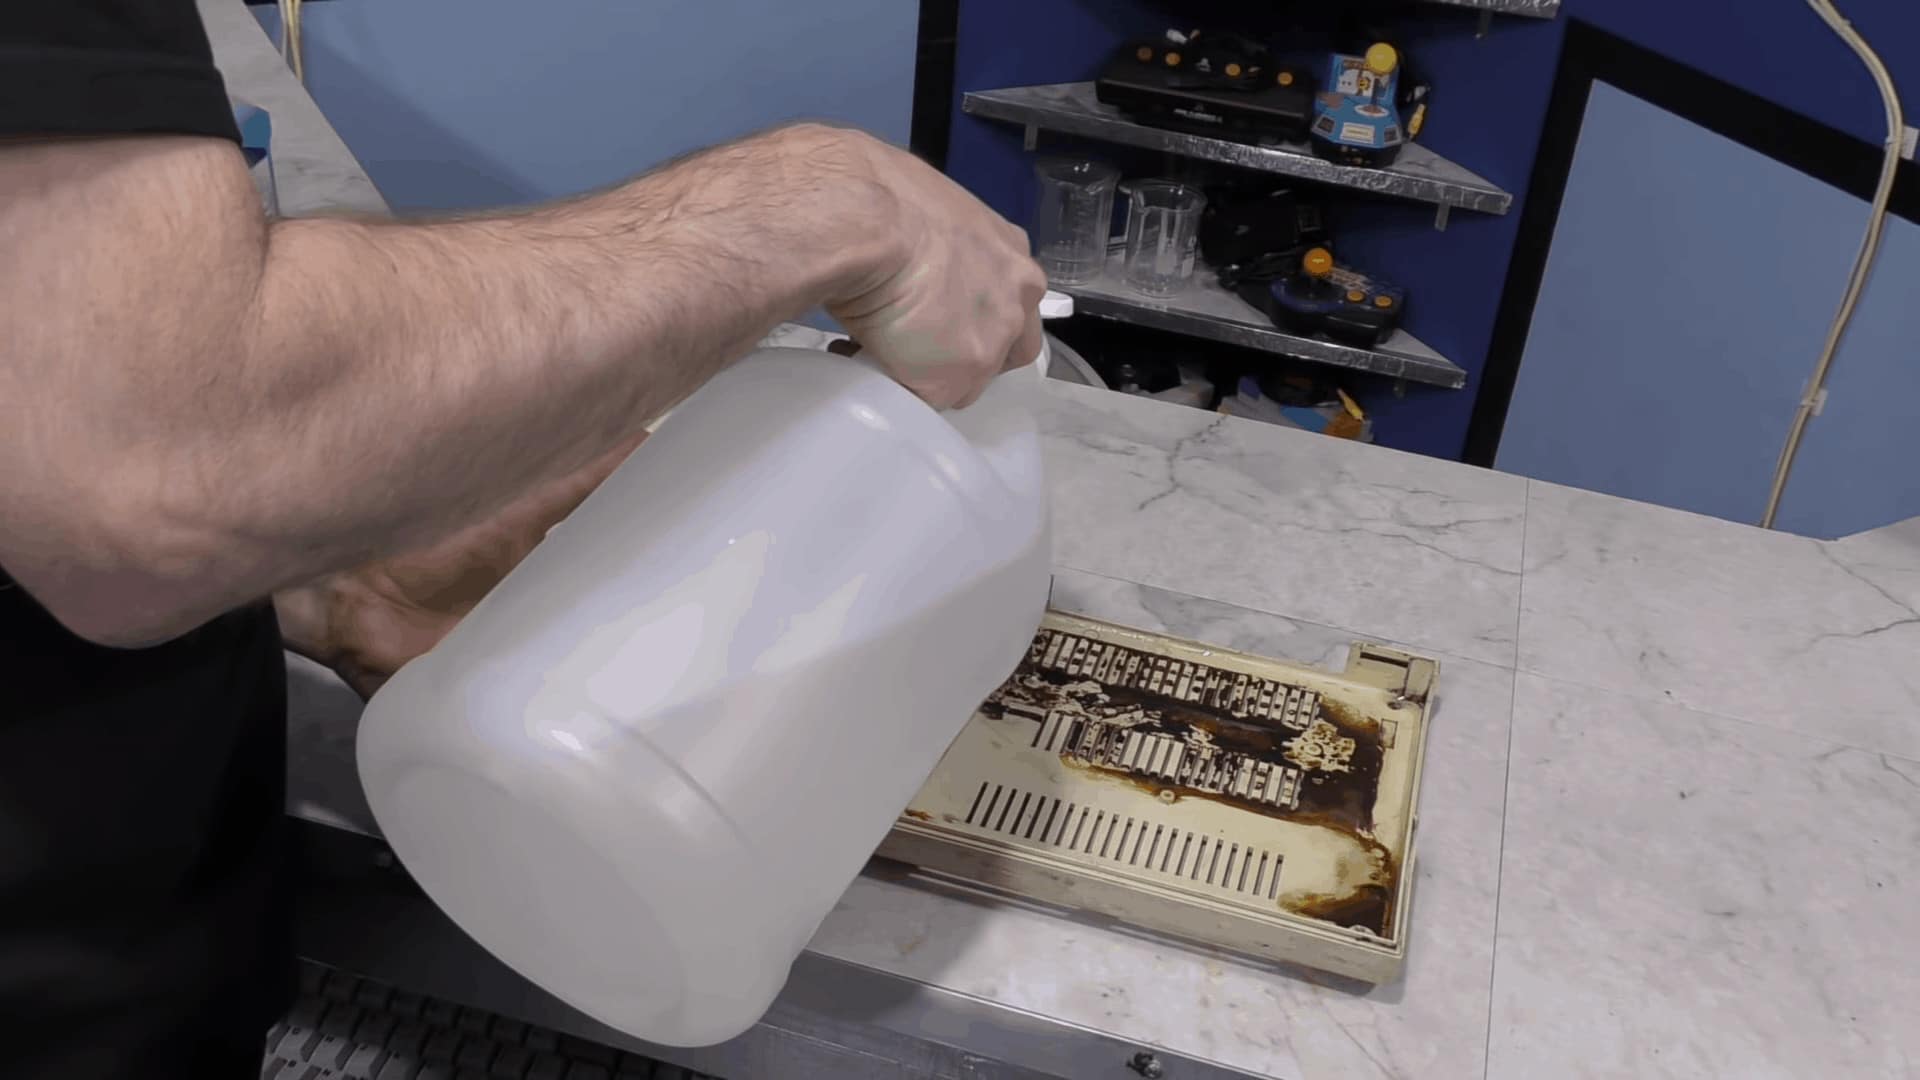
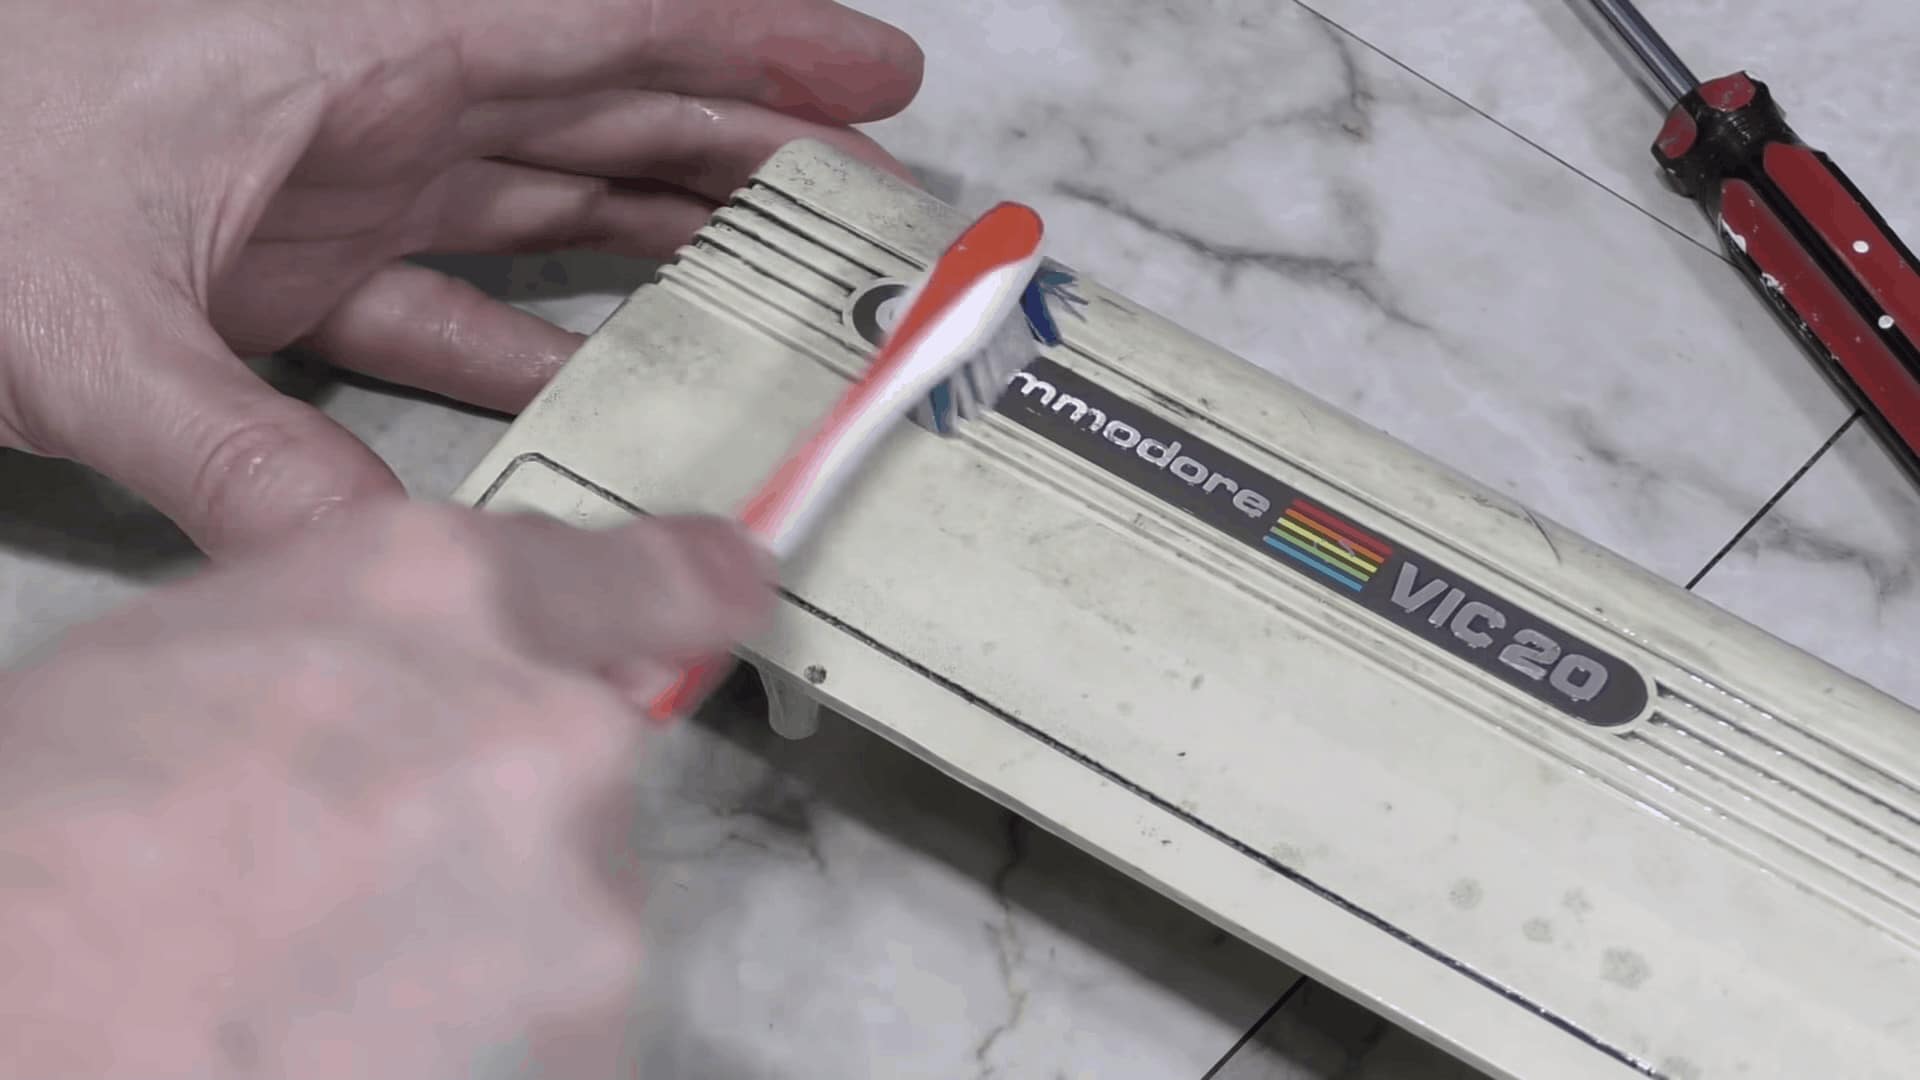
Cleaning the Commodore VIC-20 is the next challenge that David faced! He tried his normal WD-40 technique and it works as expected, removing the oil and grease from the computer for the most part. It looks at least 50% better after this.
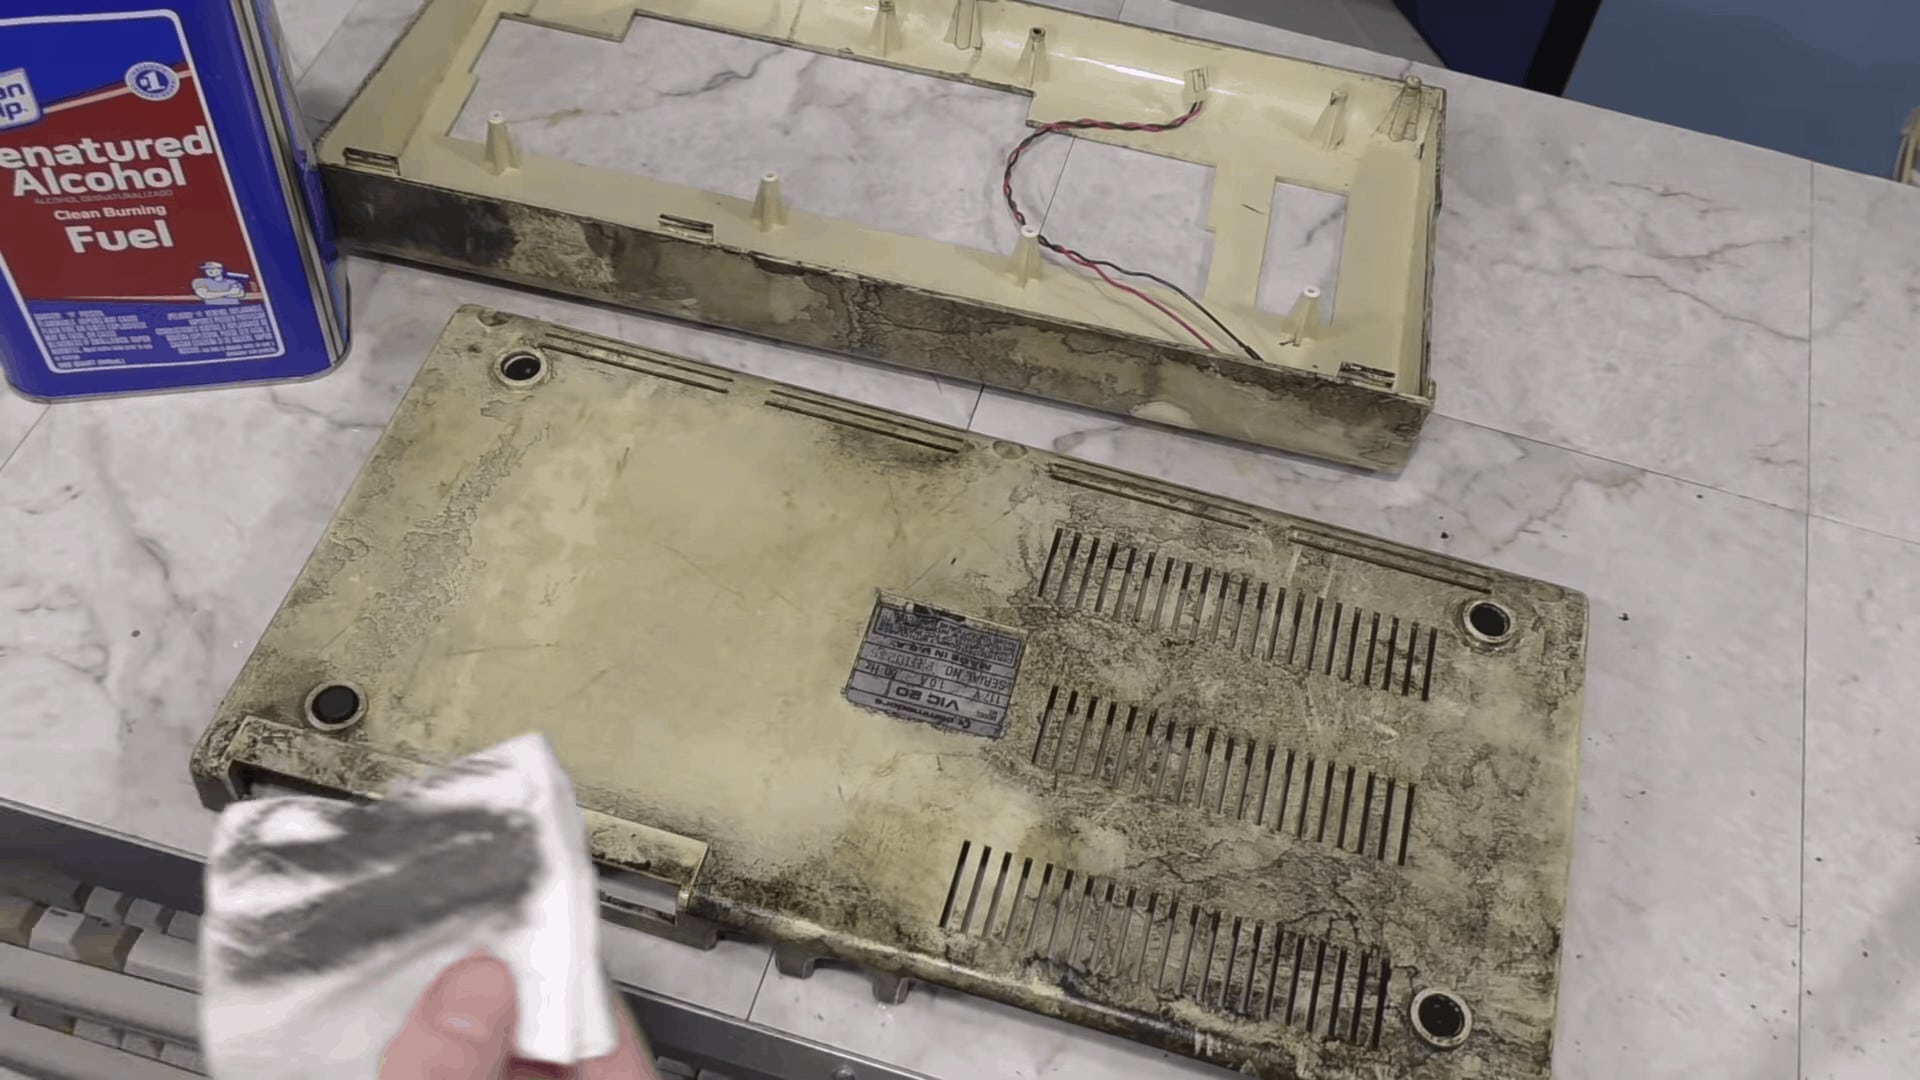
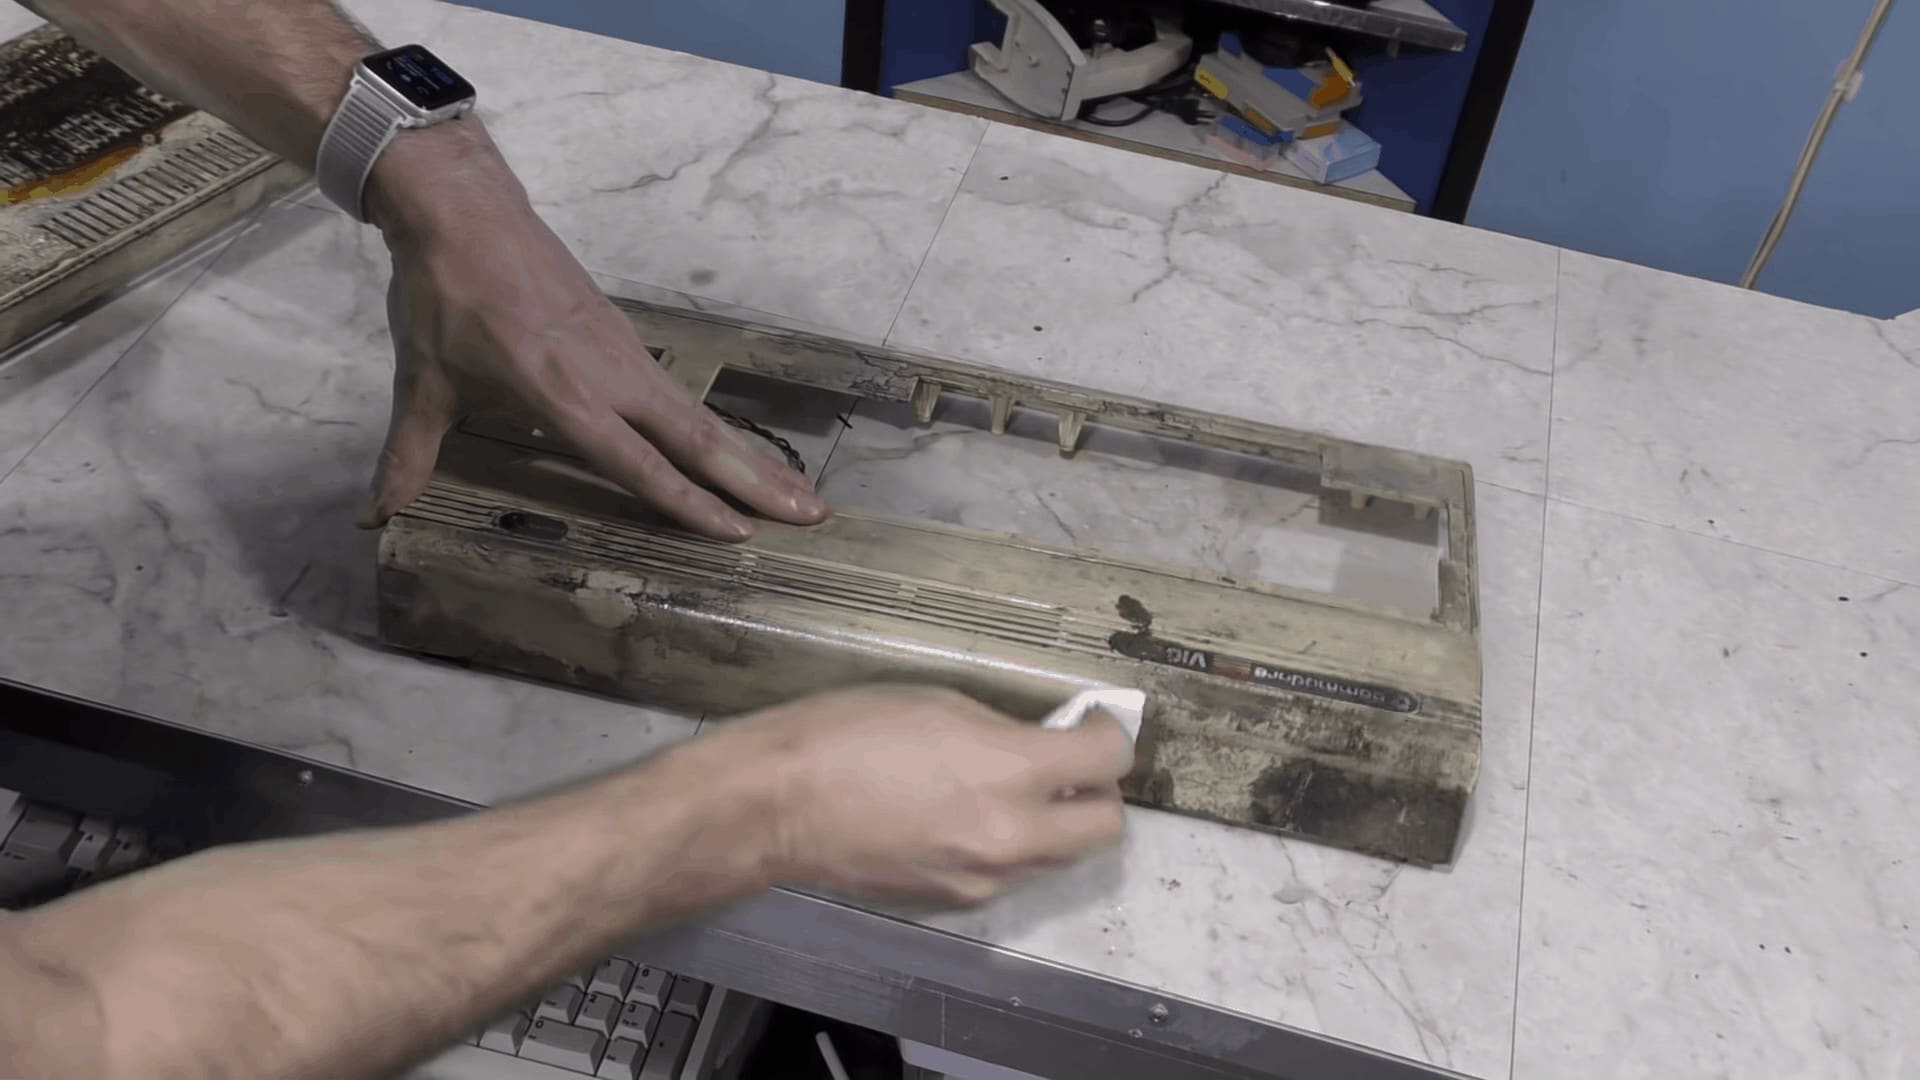
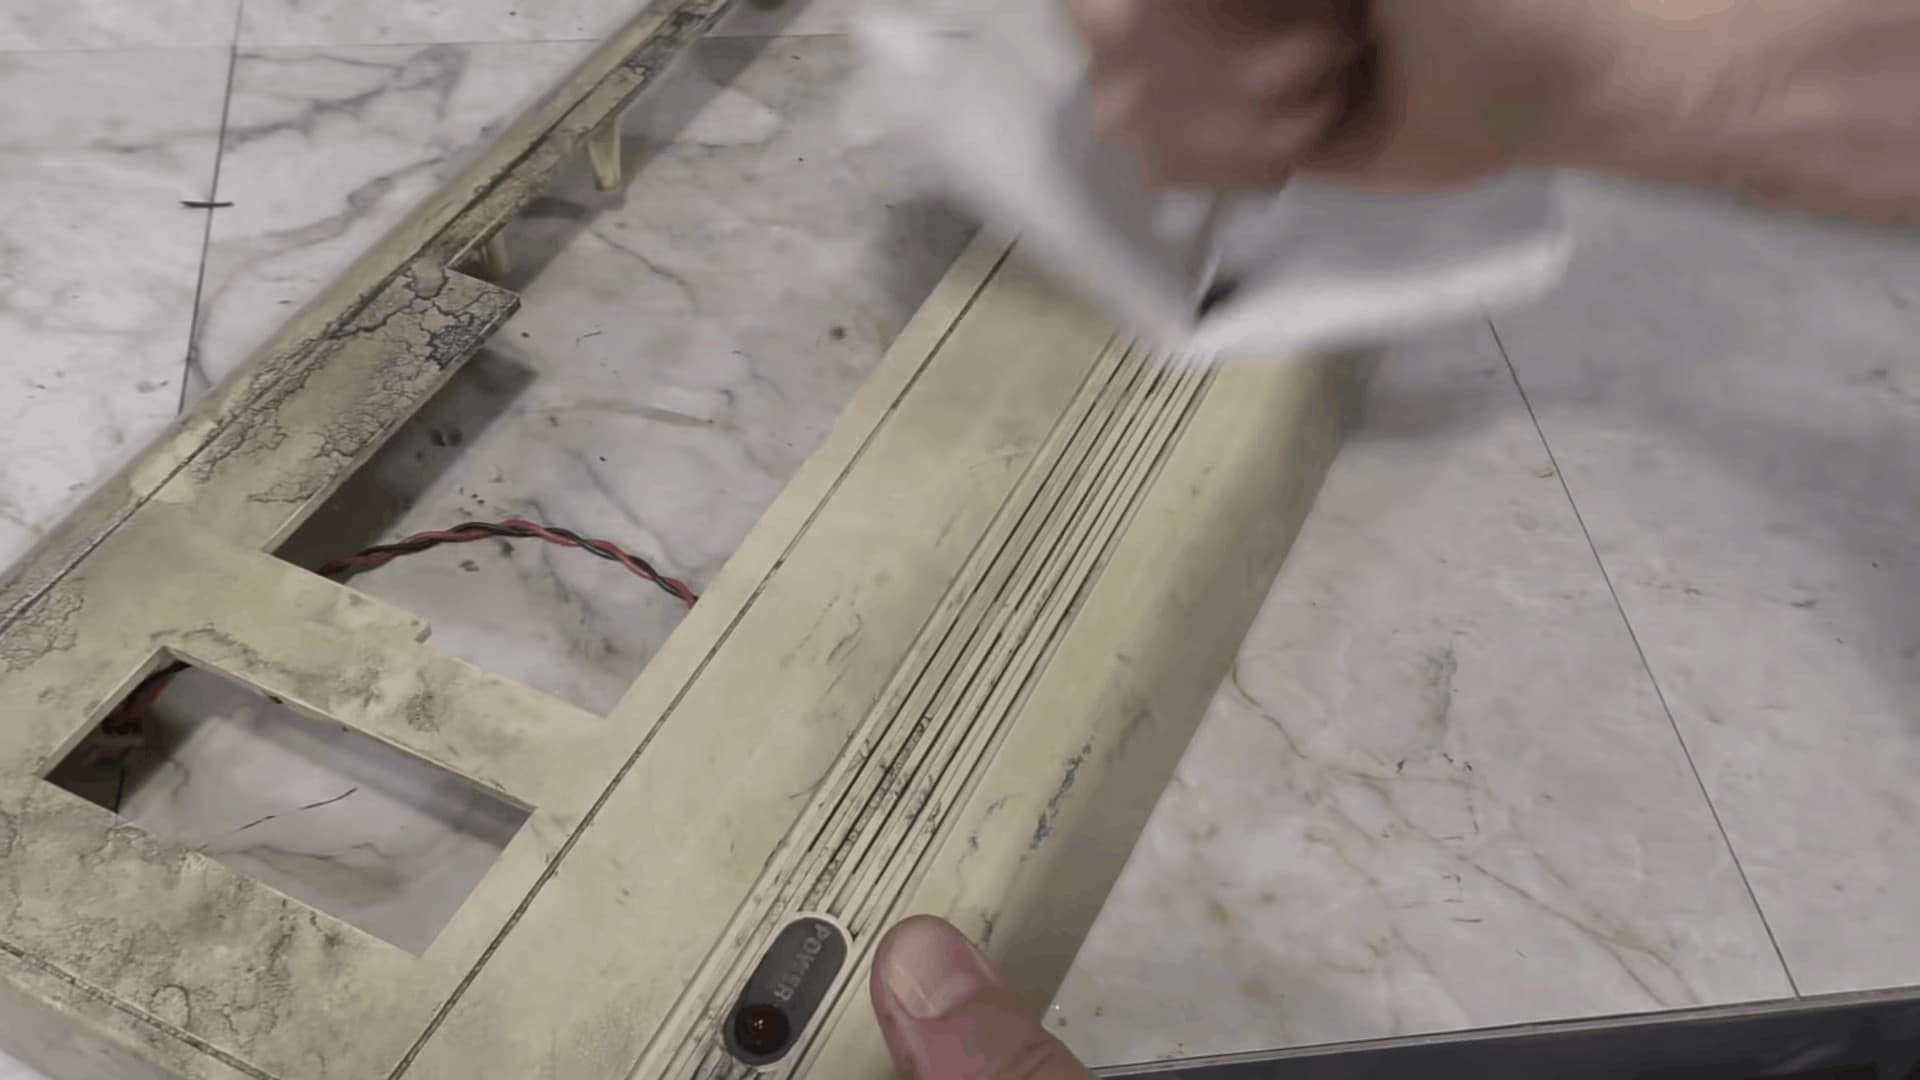
Unfortunately, looking at the case close up reveals there is a lot more work to be done. The case is going to need some additional cleaning.
Anytime the WD-40 doesn’t work, David generally moves on to more powerful methods. Baking soda and vinegar are pulled for extreme measures. Both seemed to do literally nothing. Of course David broke out the Magic Eraser to once again prove it is useless in cases like these. Some people think the Magic Eraser will remove anything. I am not sure how this myth began, but I suspect clever marketing from its company. It does work well for removing certain sticky gunk like sticker residue, but that’s about it.
Retrobrighting the Commodore VIC-20
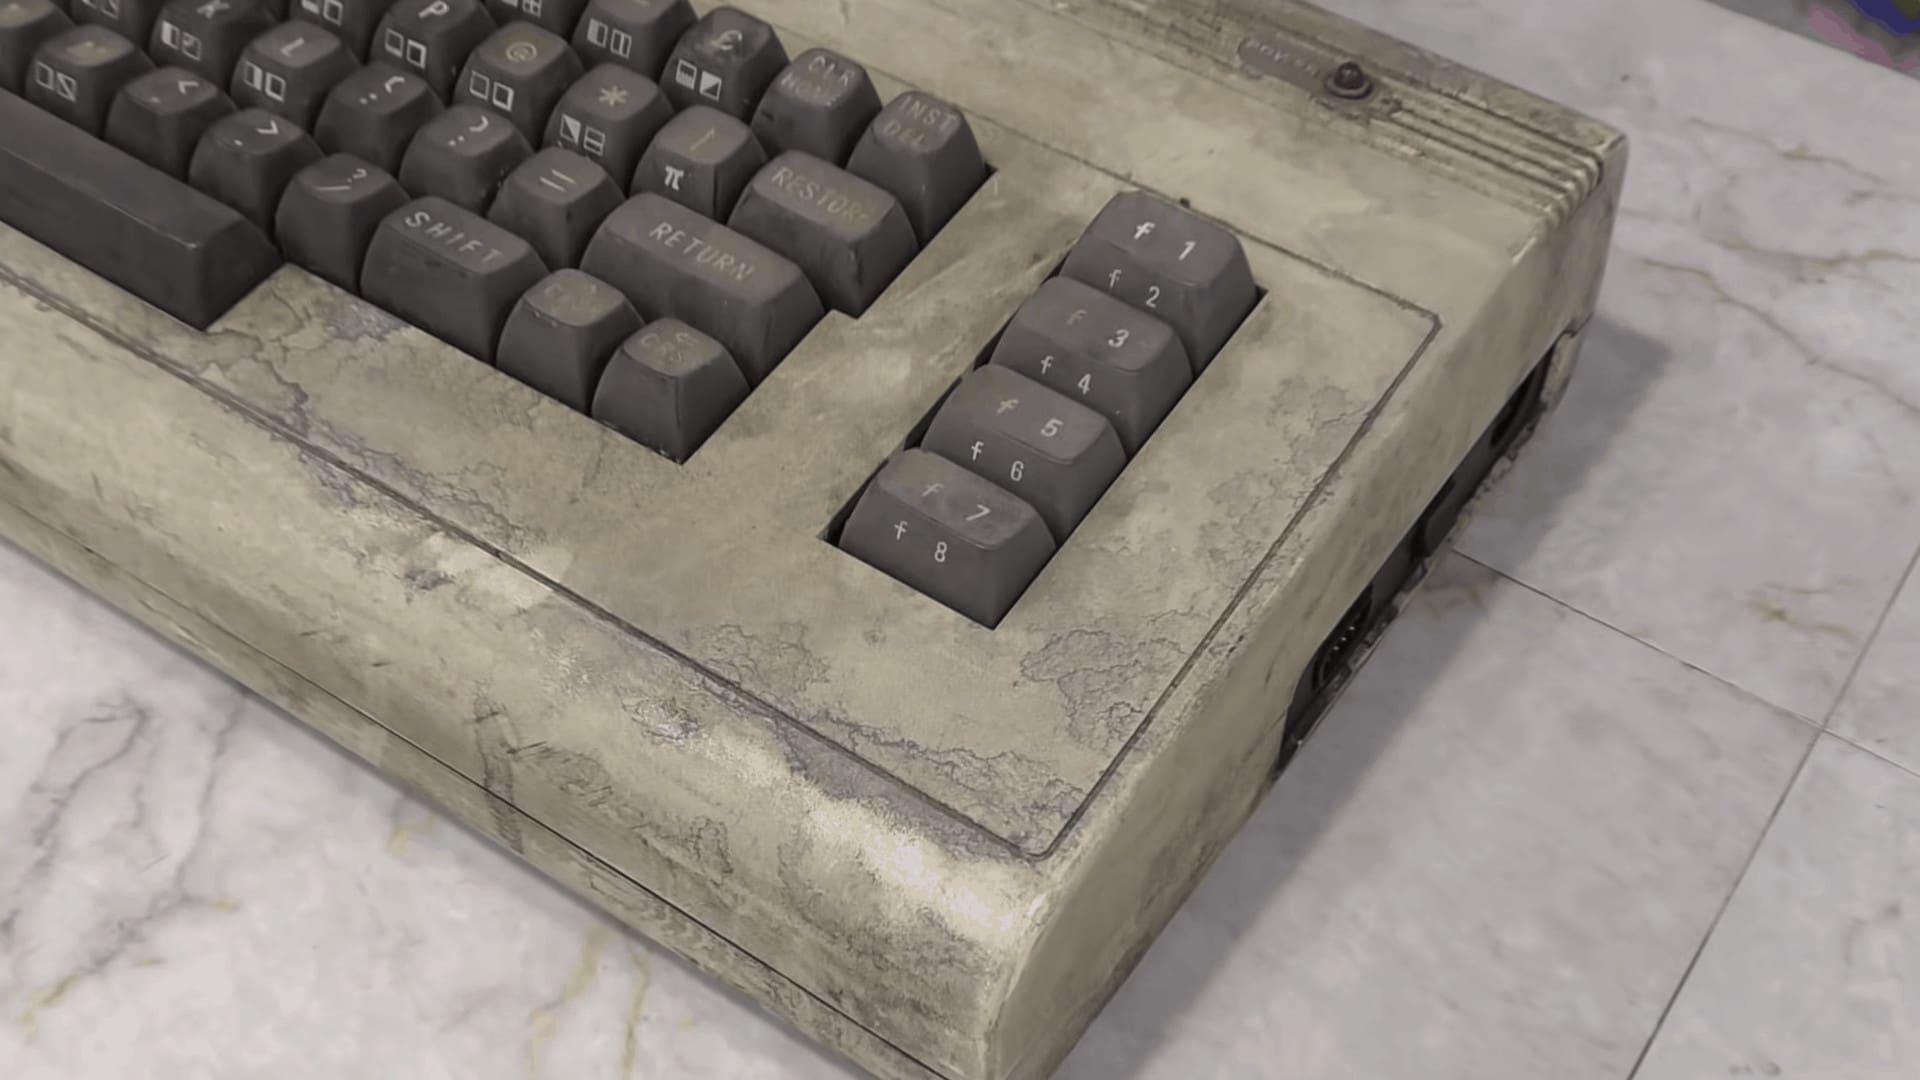
Now that the VIC-20 is cleaned up, it’s time for Retrobright! This Commodore VIC-20 restoration is coming along much better than expected. Computers (and most anything made in the 1980s) yellow over time. This is because of a fire retardant chemical added to the plastics in that era. Retrobrighting is a process that restores the computer (or other plastic) back to its original color by soaking the device in hydrogen-peroxide under UV light.
David’s preferred method is to use a large tub sitting in the sun for a few hours. It works remarkably better than you would expect and has one of the most stunning effects on his restore projects. If you want to learn more about how Retrobright works, check out our article: How Retrobright works.
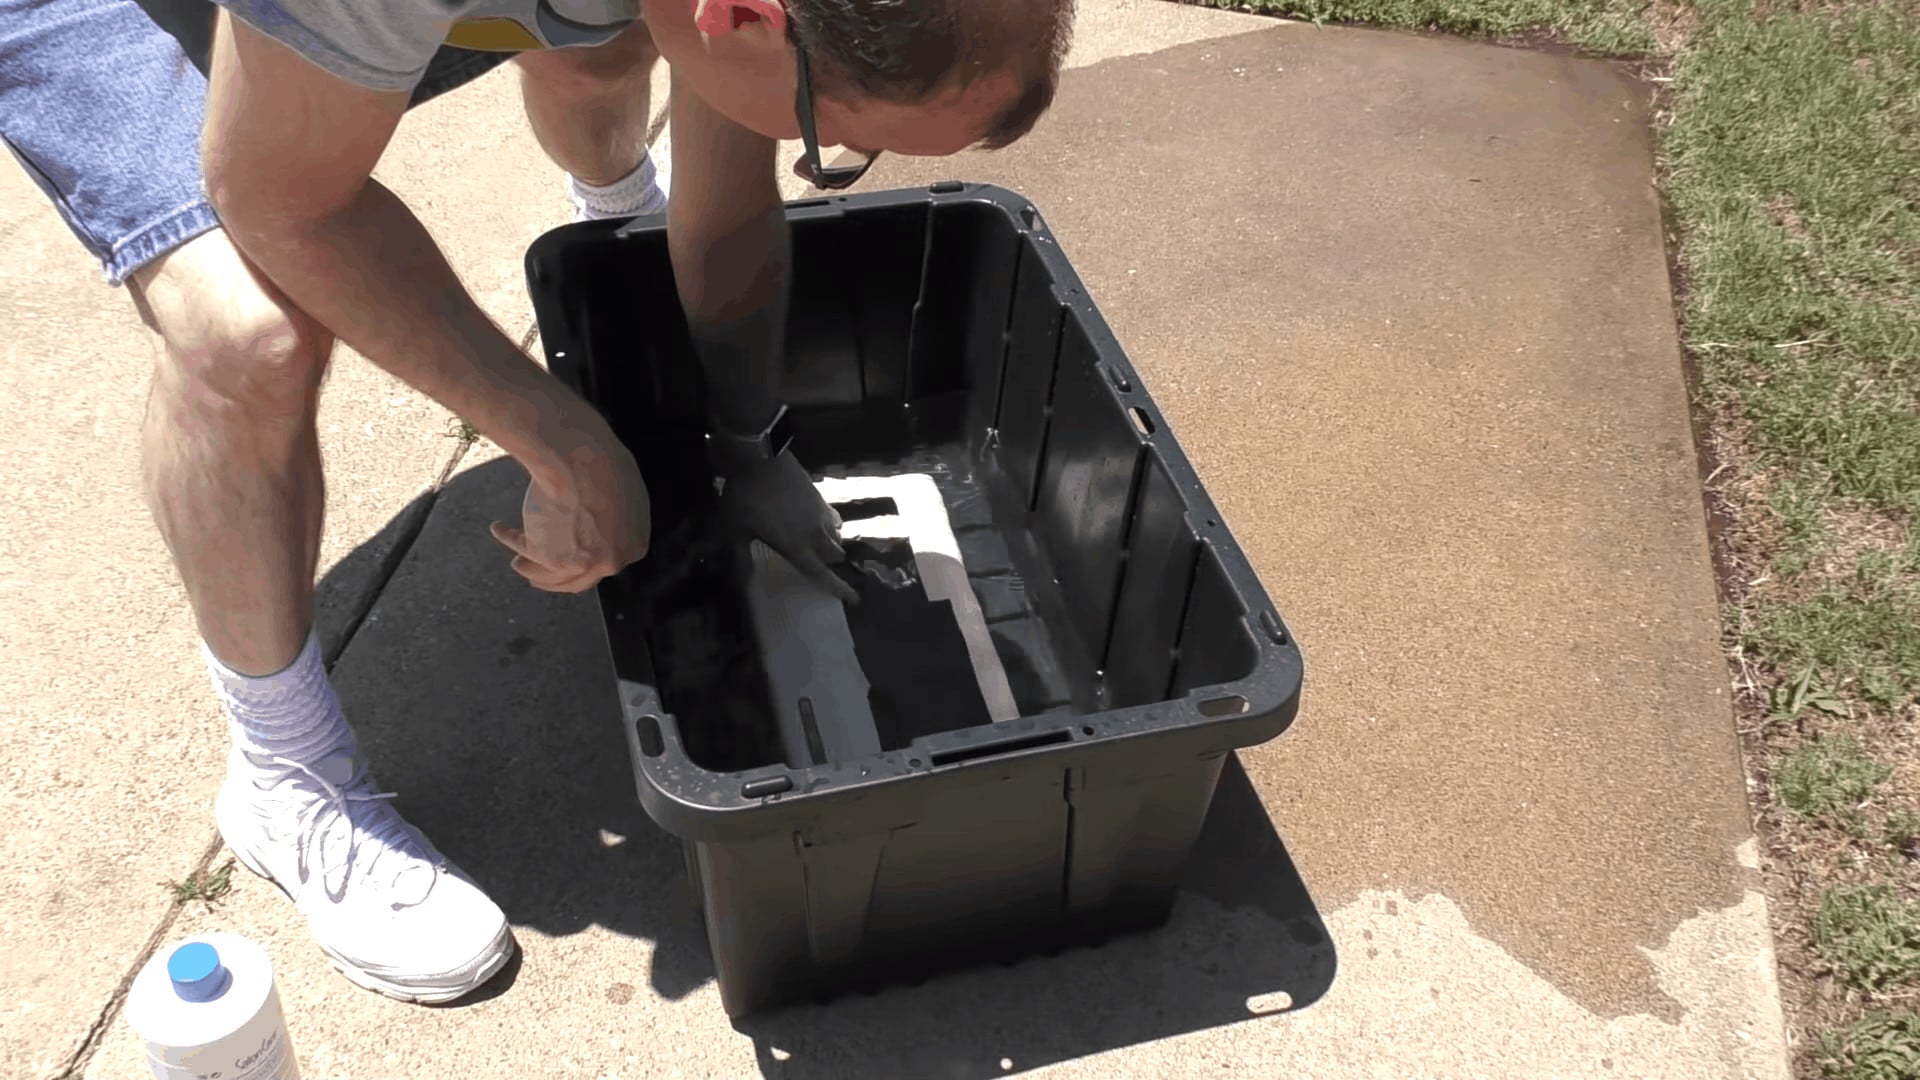
And the effects worked! You can see a remarkable transition between the top and the bottom of the case. The original color is restored. In fact it looks almost new. Pretty amazing work David!
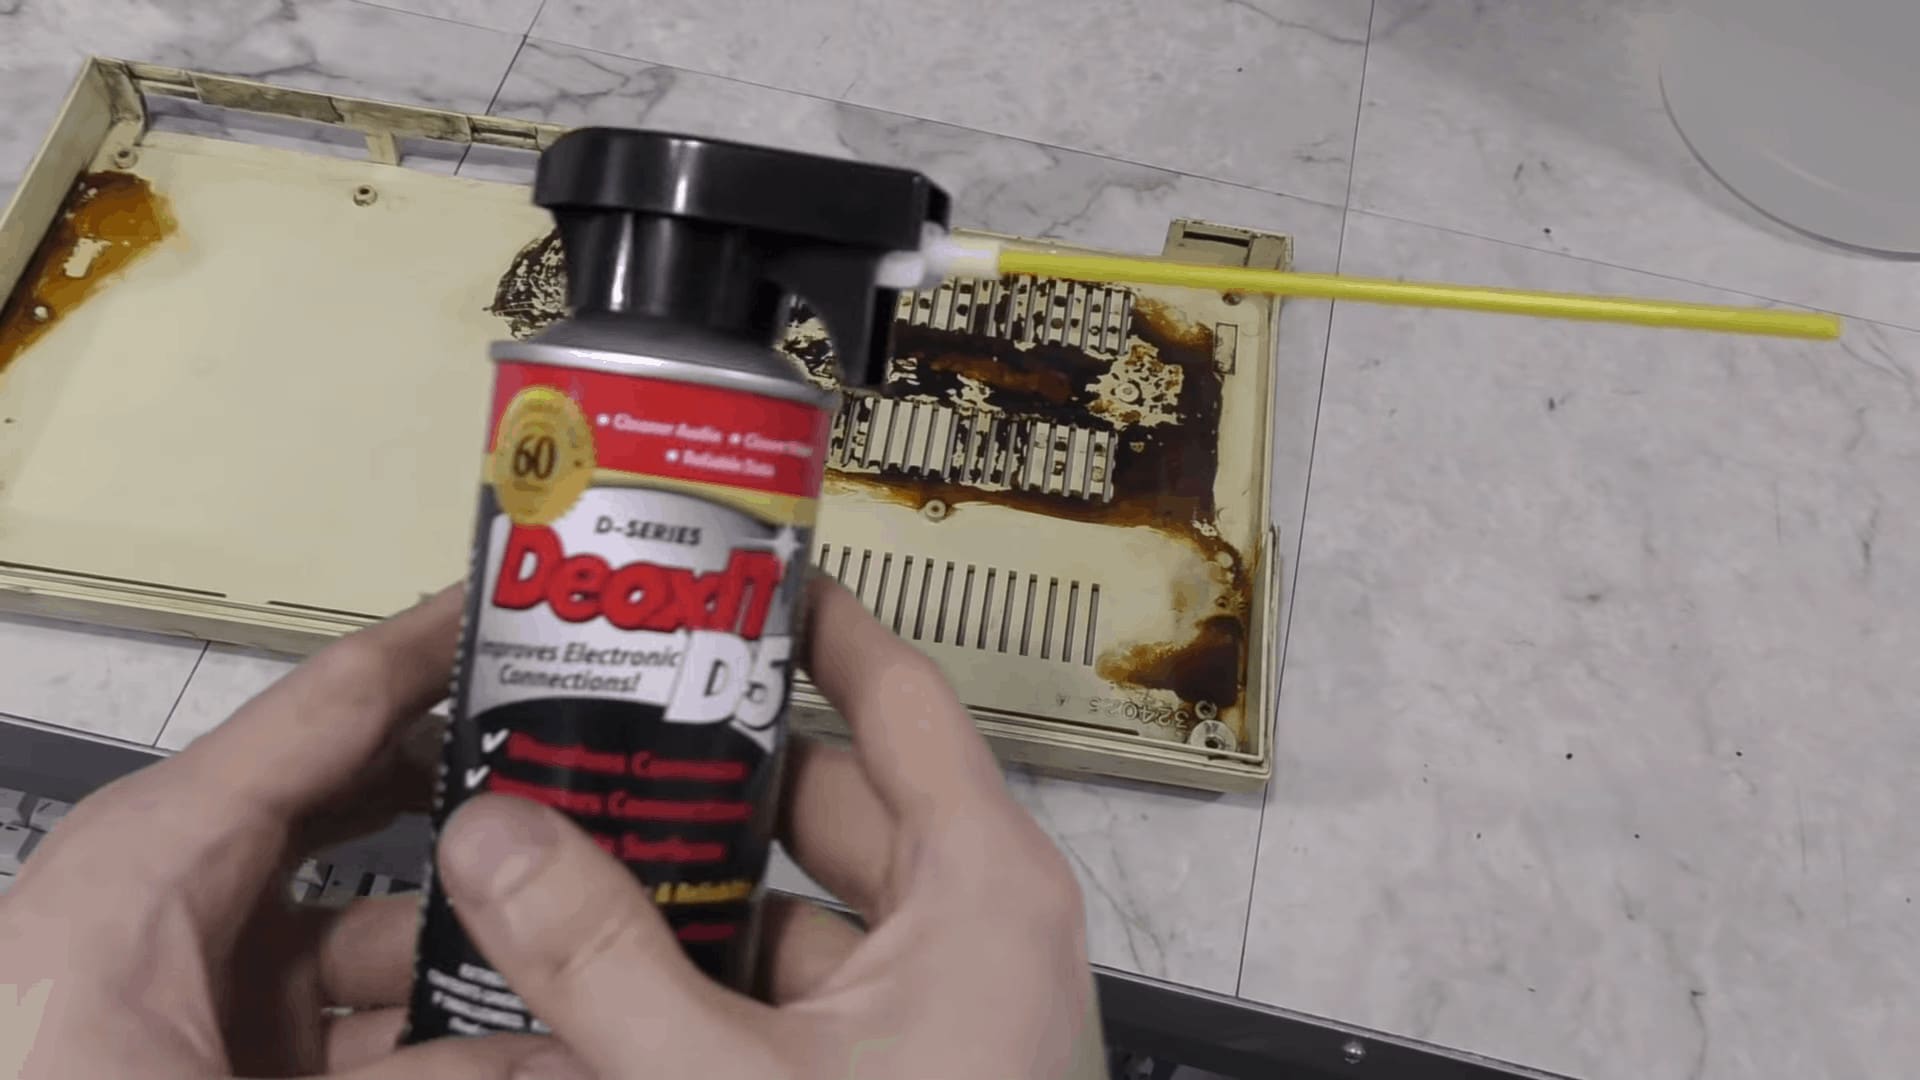
Troubleshooting the Commodore VIC-20 Mainboard
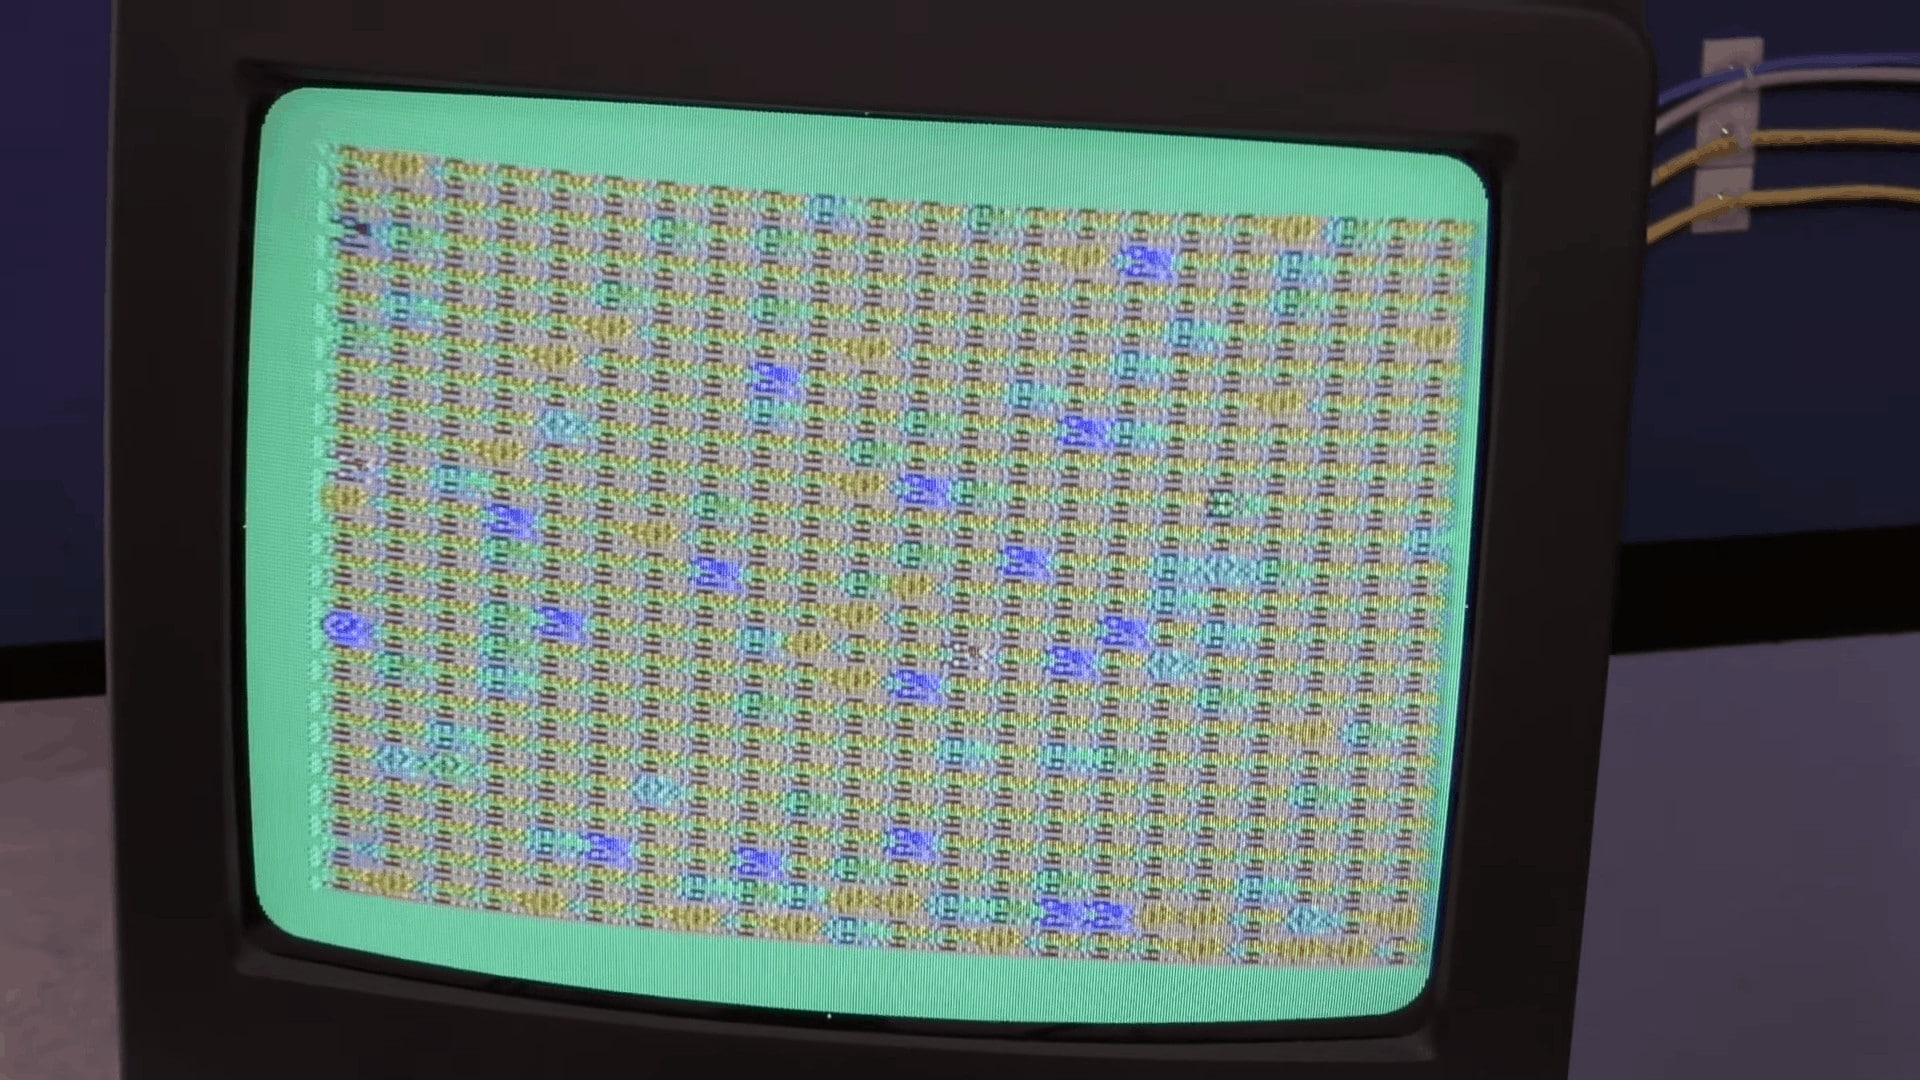
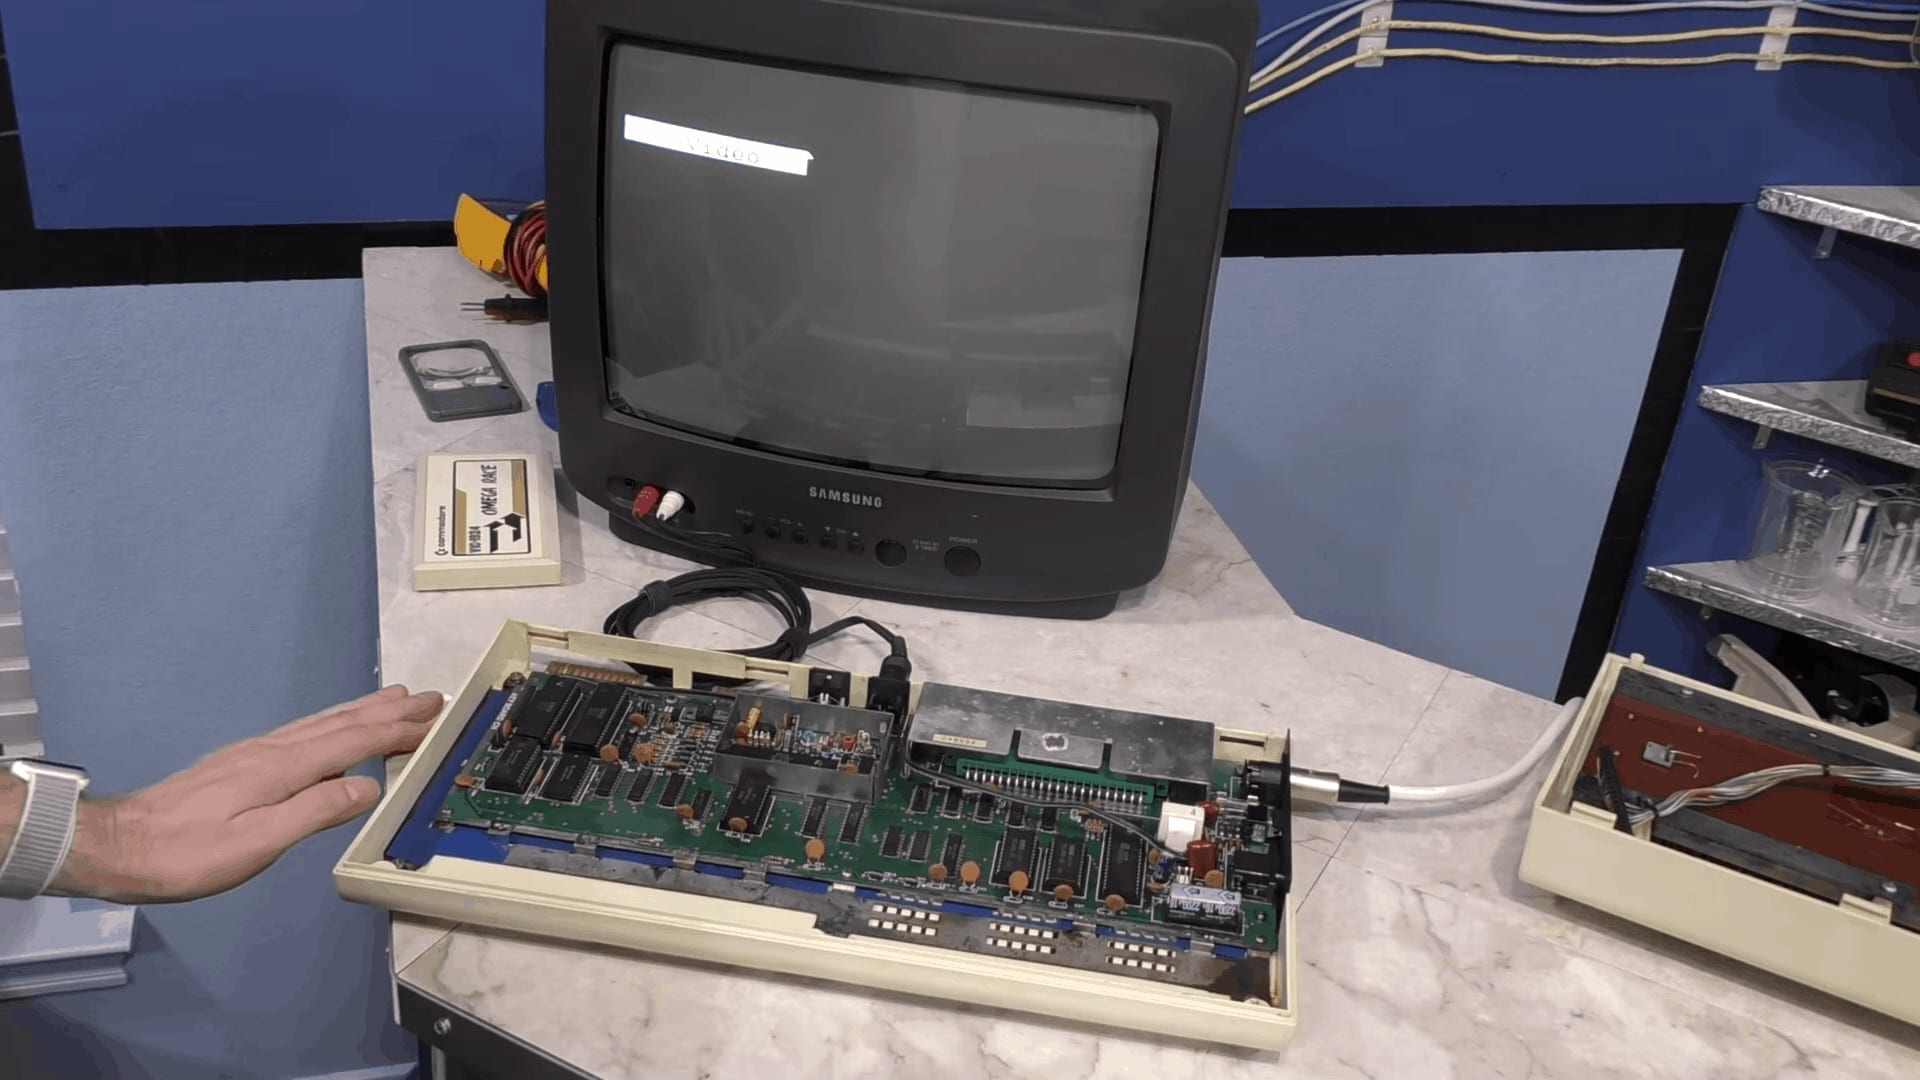
Unfortunately this Commodore VIC-20 restoration ground to a halt after the cosmetic restore. The VIC-20 would power on, but after that it just showed random garbage characters on the screen. This would require some more troubleshooting using some specialized tools.
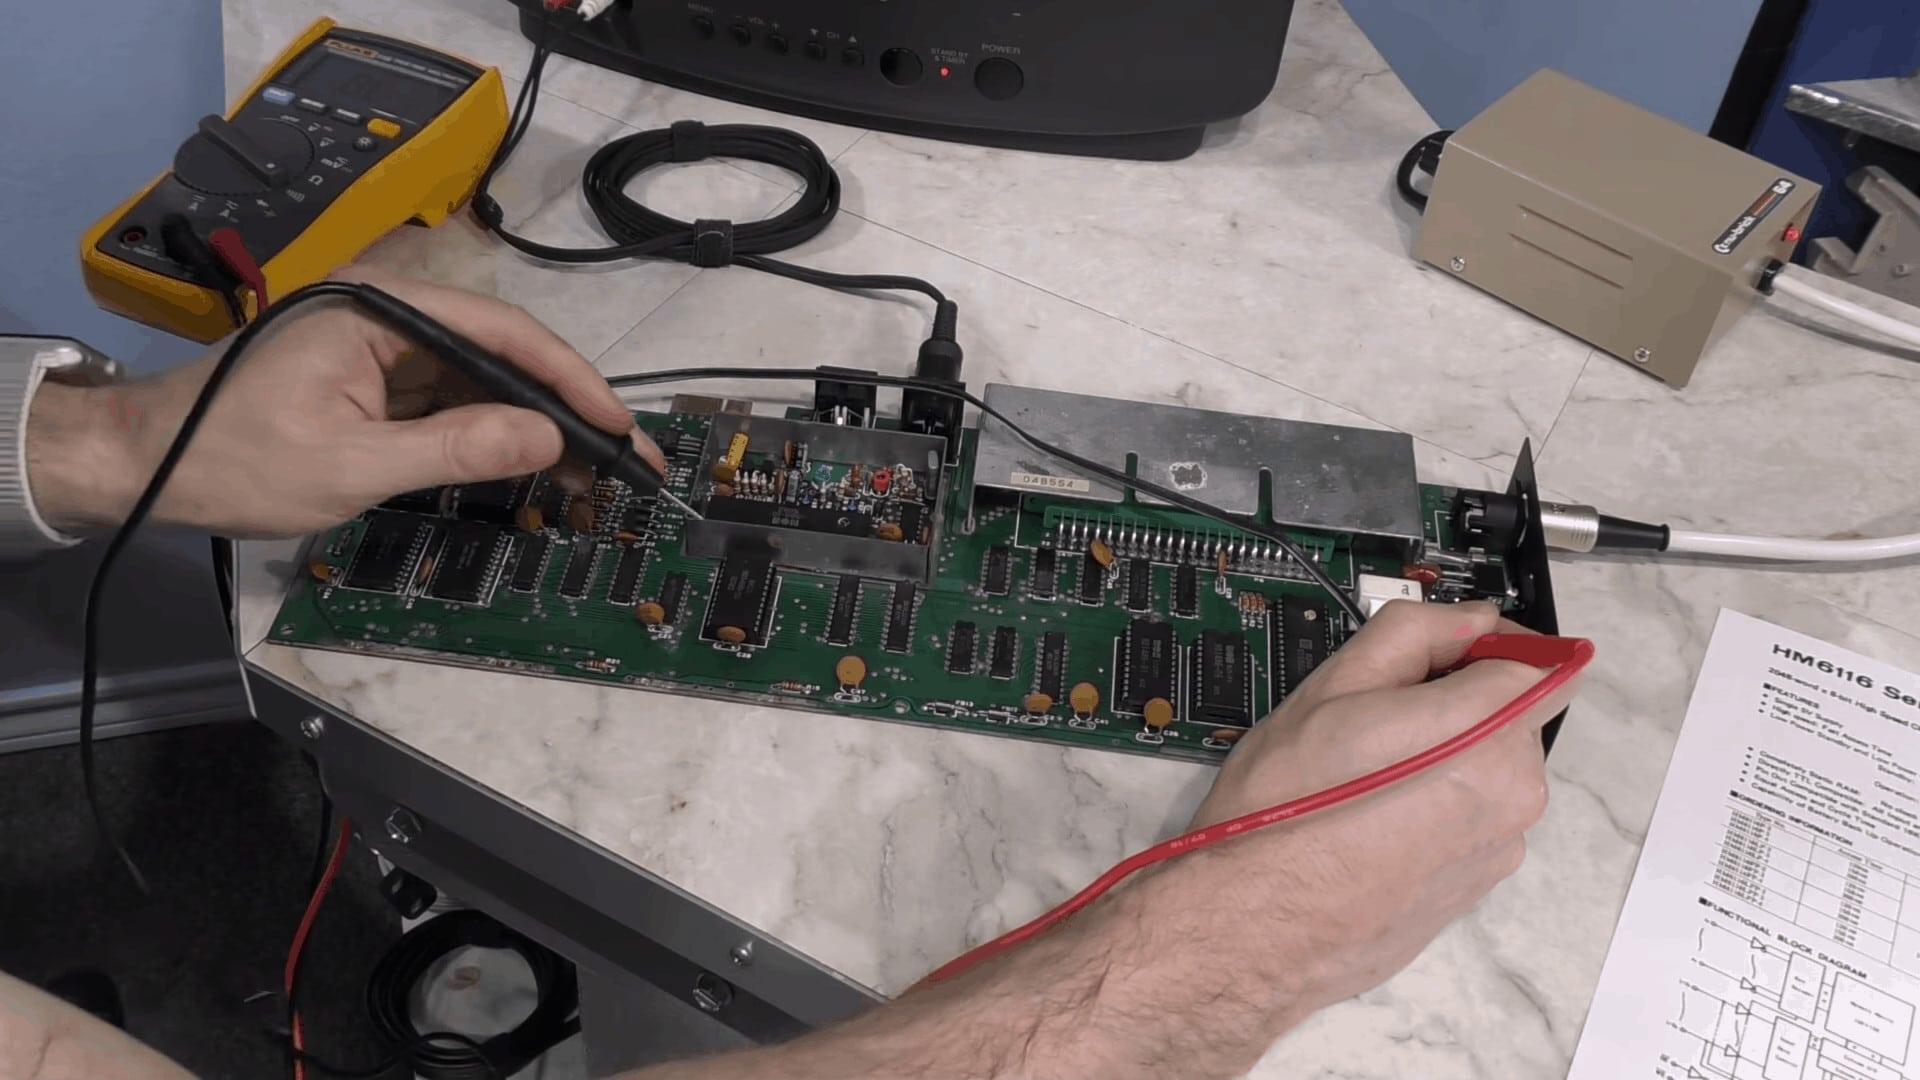
David uses two main tools of the trade to diagnose the VIC-20’s ailments. He uses a standard multi-meter with continuity and resistance meters and a logic probe. The logic probe is probably the most helpful of the two tools, but discount how much troubleshooting can be done with a standard multi-meter!
Multi-meters are great at checking that traces are not broken and looking for things that should be grounded (or not grounded) as well looking for the proper voltage on a circuit. If your meter shows 9v and its only supposed to be 2.3v then you know you have a problem with a voltage regulator or transformer.
The logic probe on the other hand looks for a circuit to be in a certain state. On or off if you will for simplicity. It also looks for activity. This is extremely important because you can look for circuits that are stick “hi” or stuck “lo” indicating a problem or bad integrated circuit.
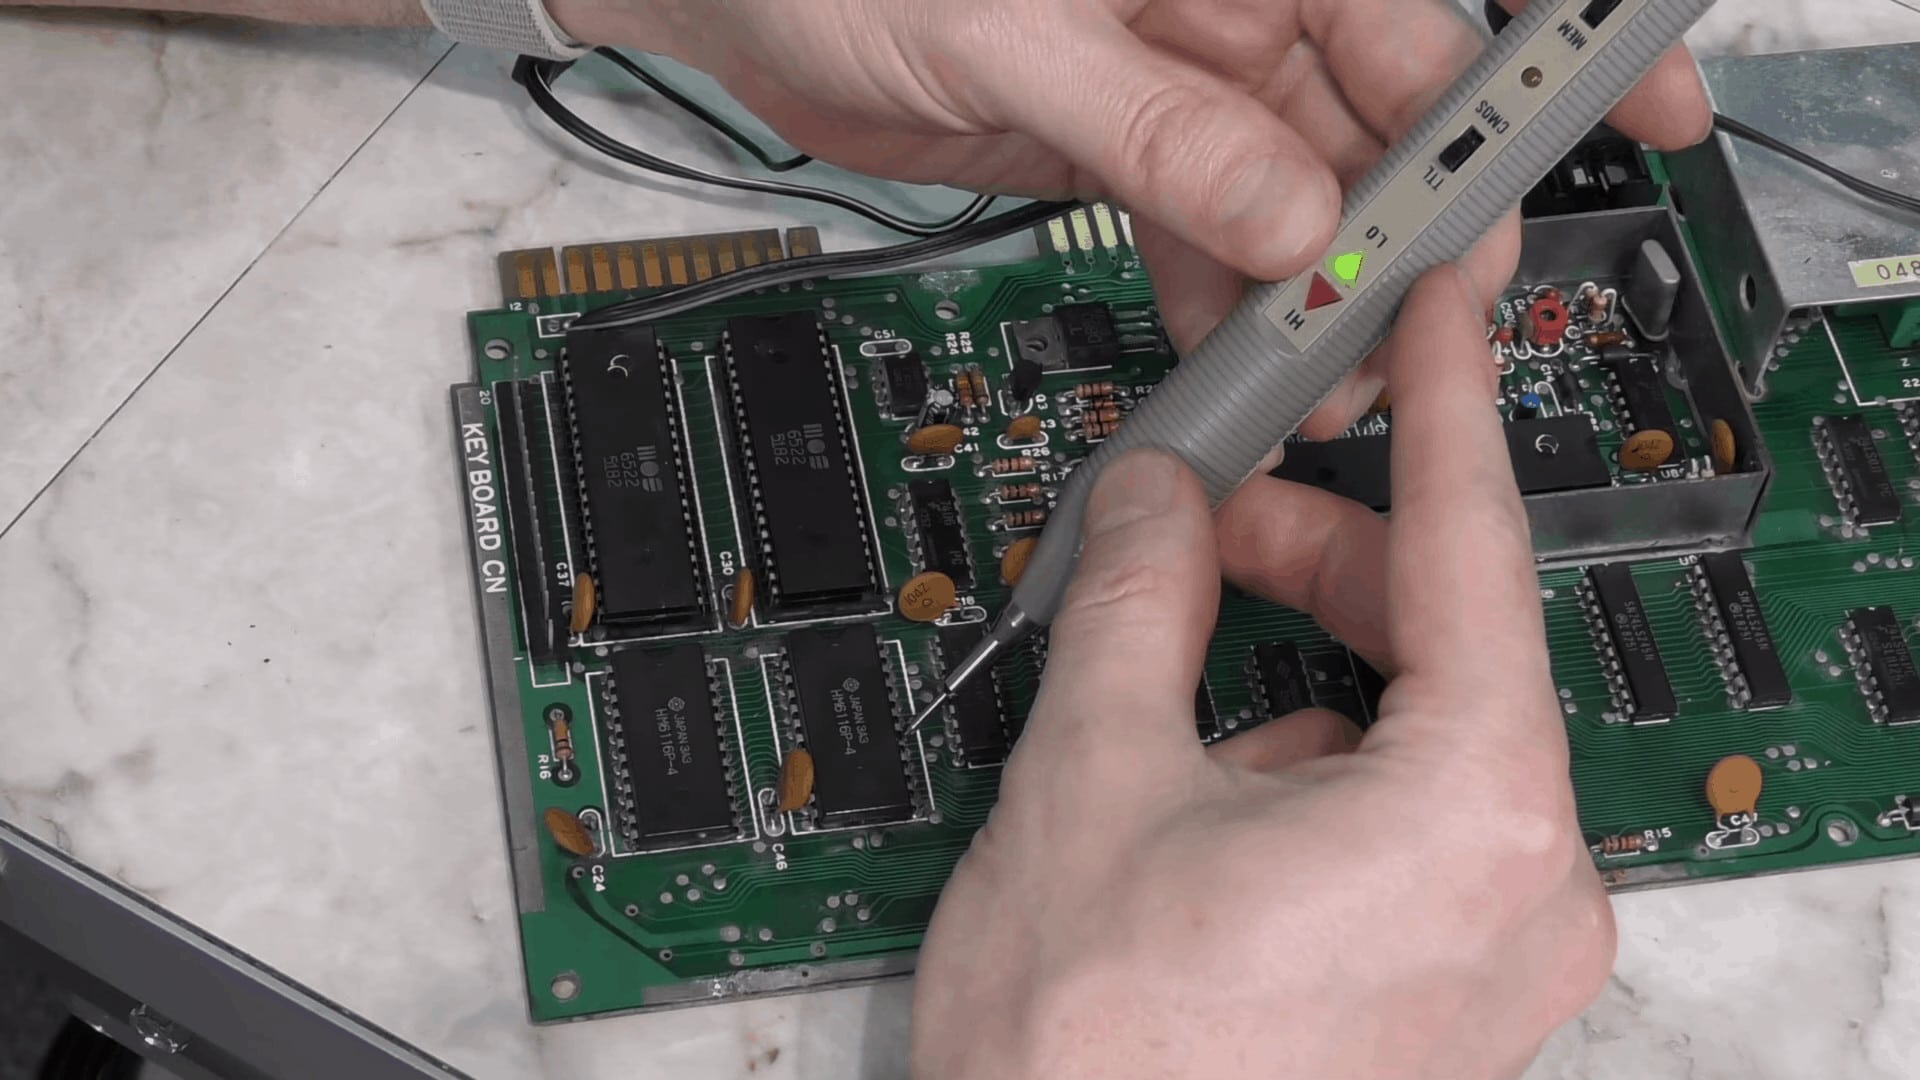
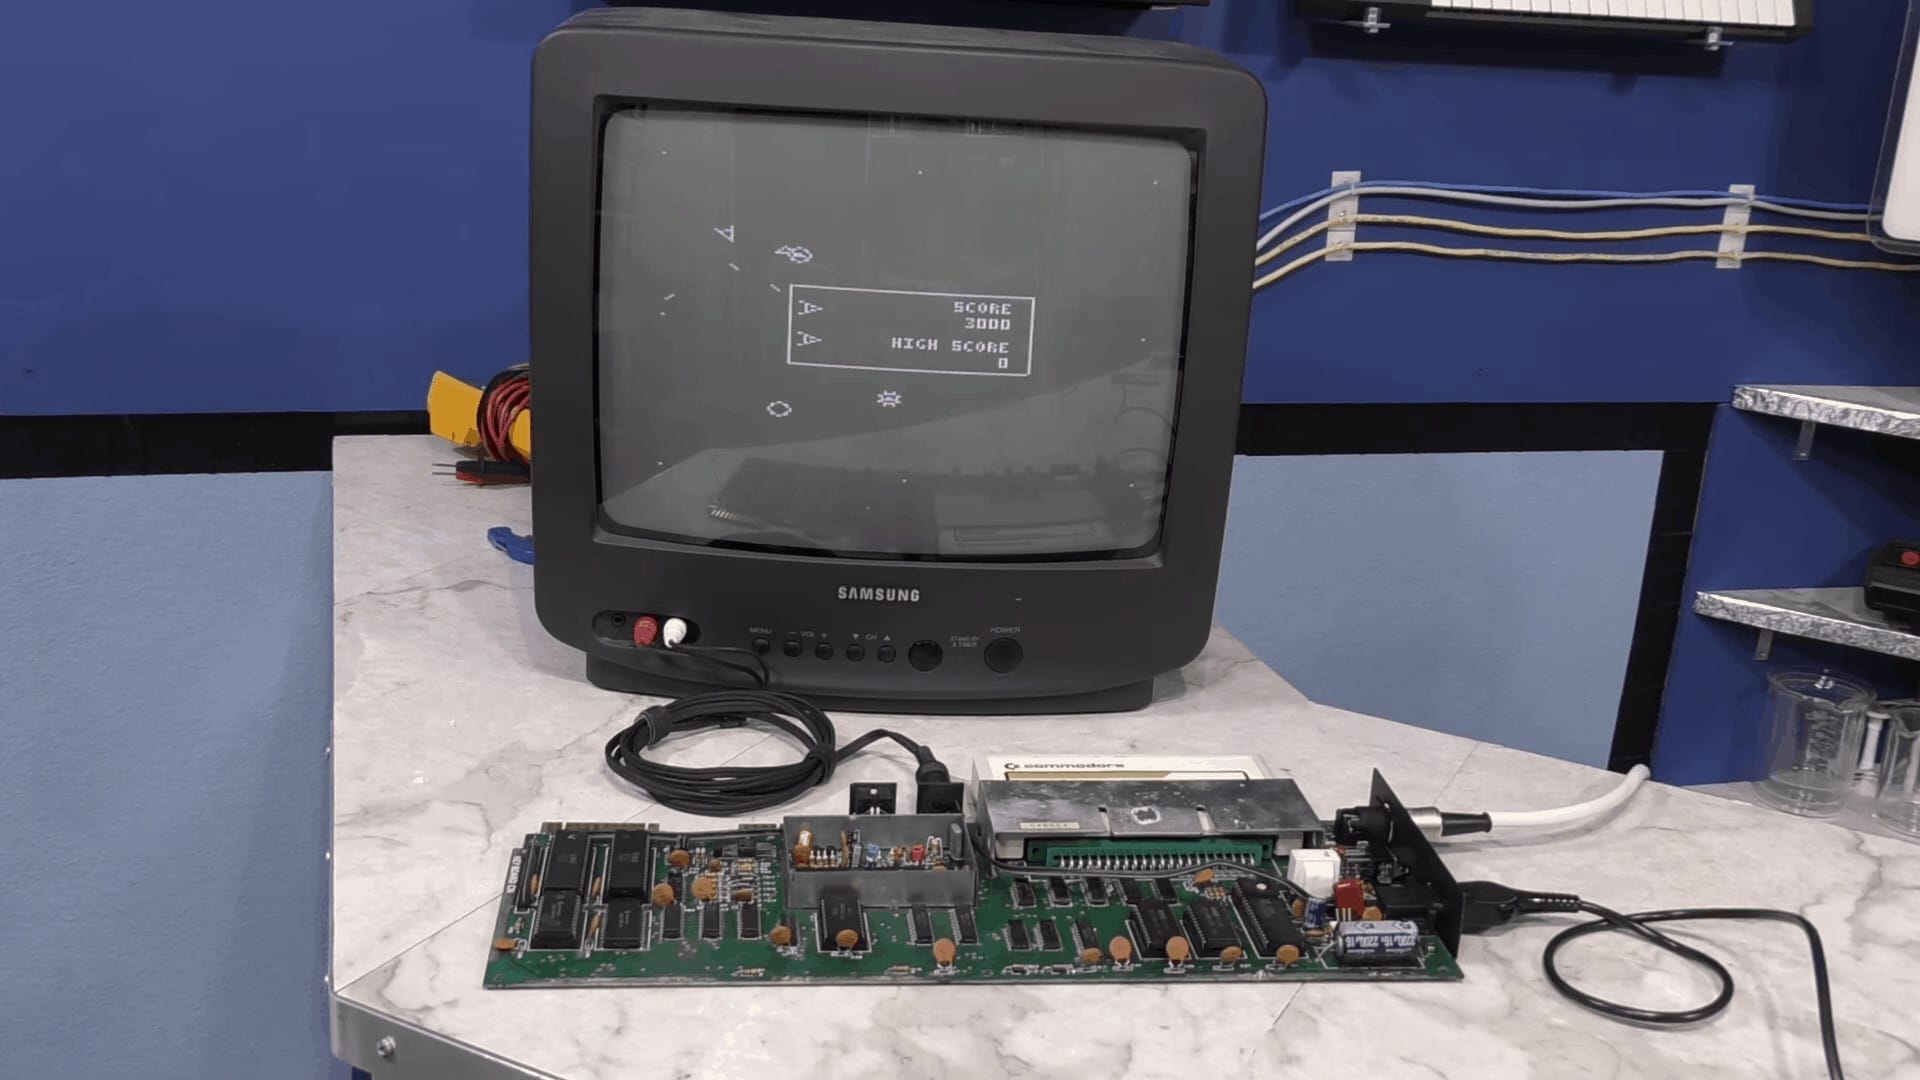
After much troubleshooting, David narrowed it down to a bad RAM chip. Using a de-soldering gun from a friend, David soldered the bad RAM chip, added a new one (using a socket of course for easy repairs in the future) and the machine lives again!
As you can see the Commodore VIC-20 is working just like it used to! Now it’s time for David to put this thing back together!
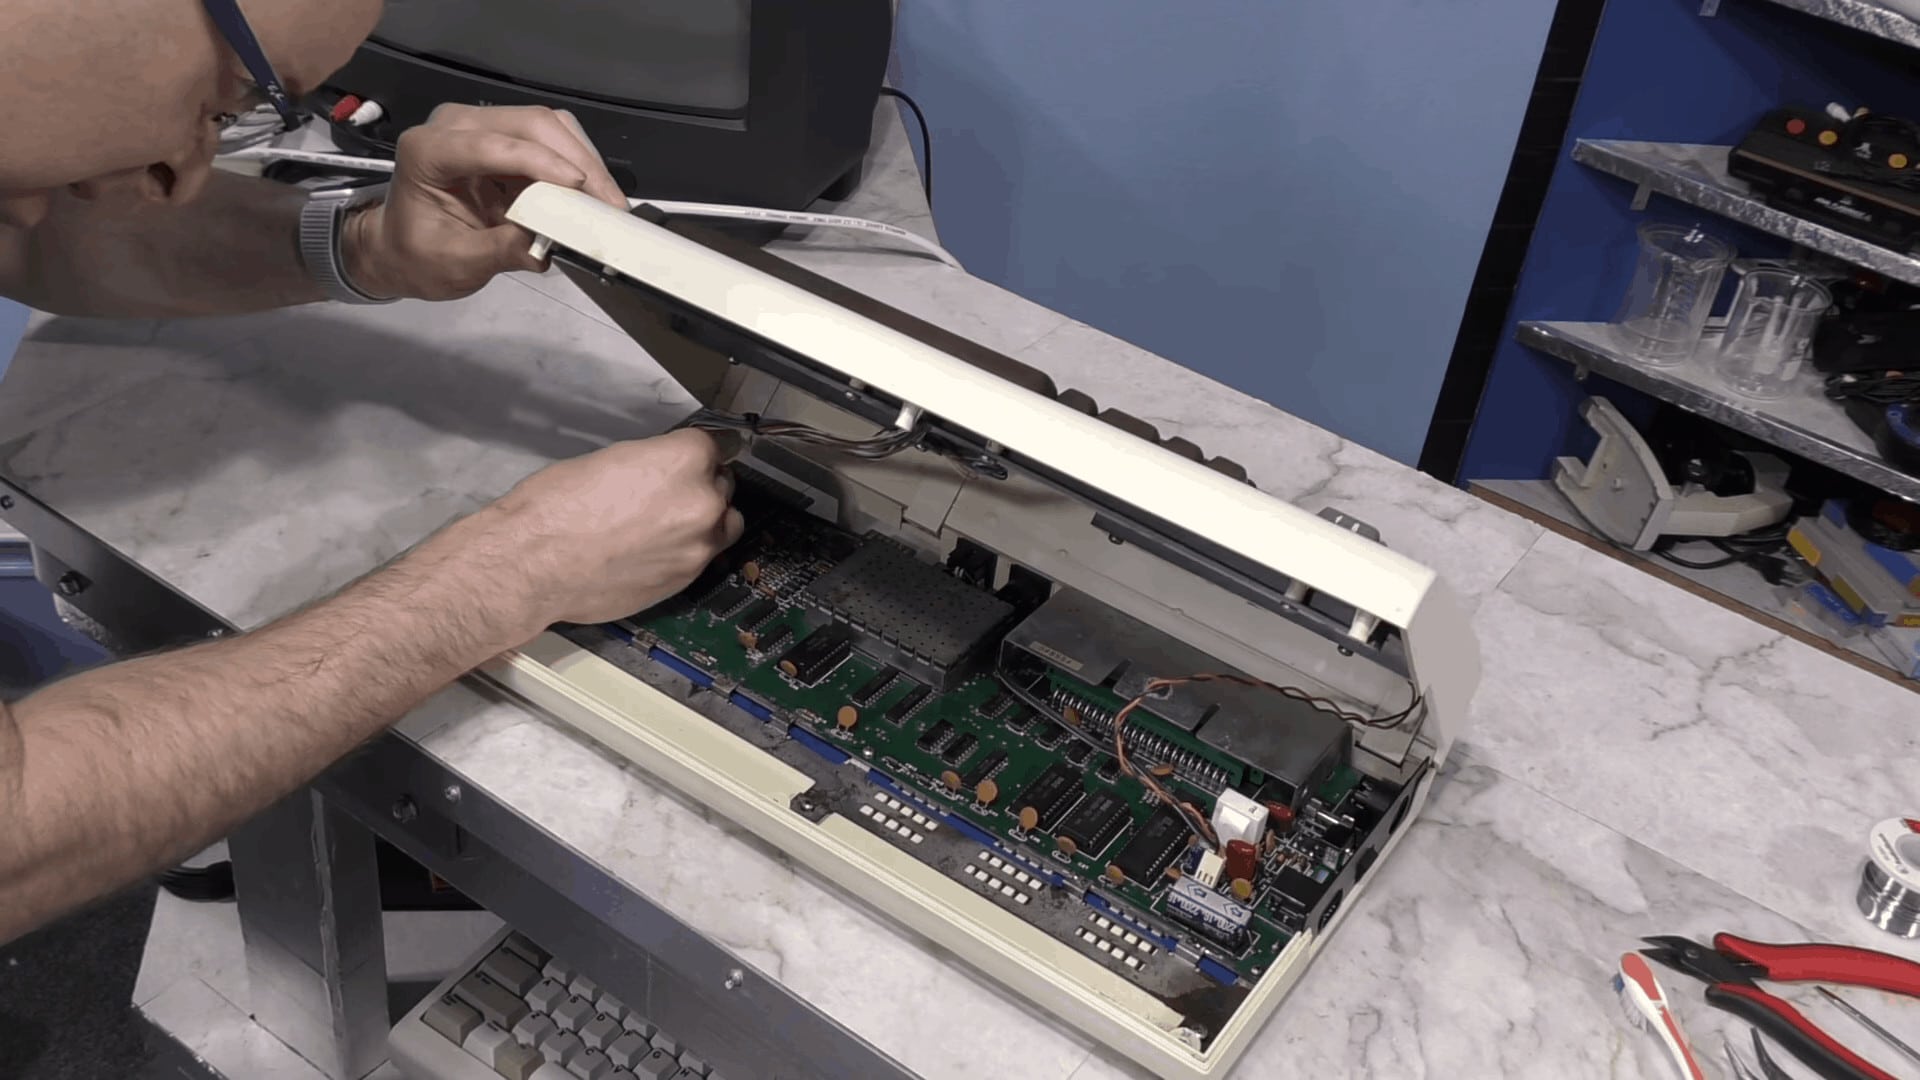
Re-Assembling the Commodore VIC-20
All that was left now was to put this vintage VIC-20 back into it’s case. David added some new rubber feet and re-soldered some of the wiring to make sure it lasts for a long time to come. This old VIC-20 will live to see many more years to come. Most people would have just tossed this thing into the garbage bin and called it a day. The 8-Bit Guy showed us once again that trash can turn back into treasure with some elbow grease and a little creativity.
Get the Tools Use In this Project
If you’re interested in any of the tools in this project, here are some links to them for your convenience:
RELATED: Commodore VIC-20 Clip Repair
Watch The Commodore VIC-20 Restoration Videos
Of course, you have to watch the video series from The 8-Bit Guy to get just how amazing this restoration is. Check out the two part series below!
Commodore VIC-20 Restoration – Part 1:
Commodore VIC-20 Restoration Part 2:


Just a thought. While I’m aware that the VIC-20 that The 8-Bit Guy has probably been doing well for some time now, how about maybe taking the RF shield to a metalworker, and having them make a new one (using the original as a template)? Maybe even have it powder-coated (except where it needs to be soldered) to prevent corrosion and shorting out the board? As mentioned: just a thought.
1.5