Blog
How Retrobright Works!

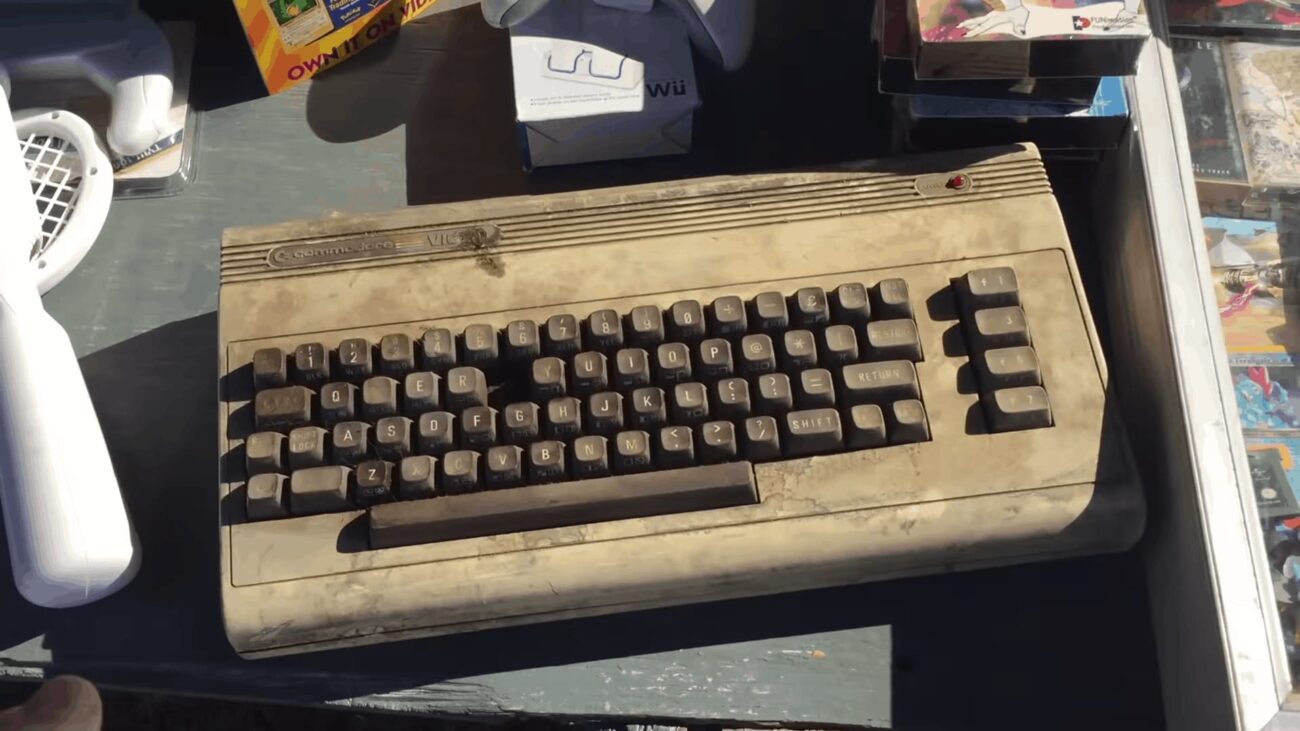
Retrobighting (stylized Retr0bright) is a way of restoring aged plastics from the 1980s to their original color and/or appearance. Plastics from the early days of computing were all made from ABS plastic. ABS was specifically invented for the injection molding process. During this area it was typical for the ABS to be “brominated” with bromine. Bromine is a fire retardant that is included into the ABS recipe and is designed to slow the rate at which the plastic would burn in a house fire. Unfortunately the reaction of bromine with ultra-violet (UV) light results in a chemical makeup that will turn yellow over time. So let’s talk about how retrobright works!
How Retrobrighting Works
Retrobrighting is a chemical process designed to restore the original color of the aging plastic by removing the yellow tint caused by the UV light and bromine interaction. Retrobright is a combination of three basic things (although some people only use two):
- Hydrogen-peroxide
- TAED as a catalyst (Tetraacetylethylenediamine) (purely optional)
- A source of UV light, such as the sun or a UV lamp
Hydrogen-peroxide can be used in numerous different ways with the two most popular methods being submersion in liquid hydrogen-peroxide, or the application of a cream based hydrogen-peroxide.
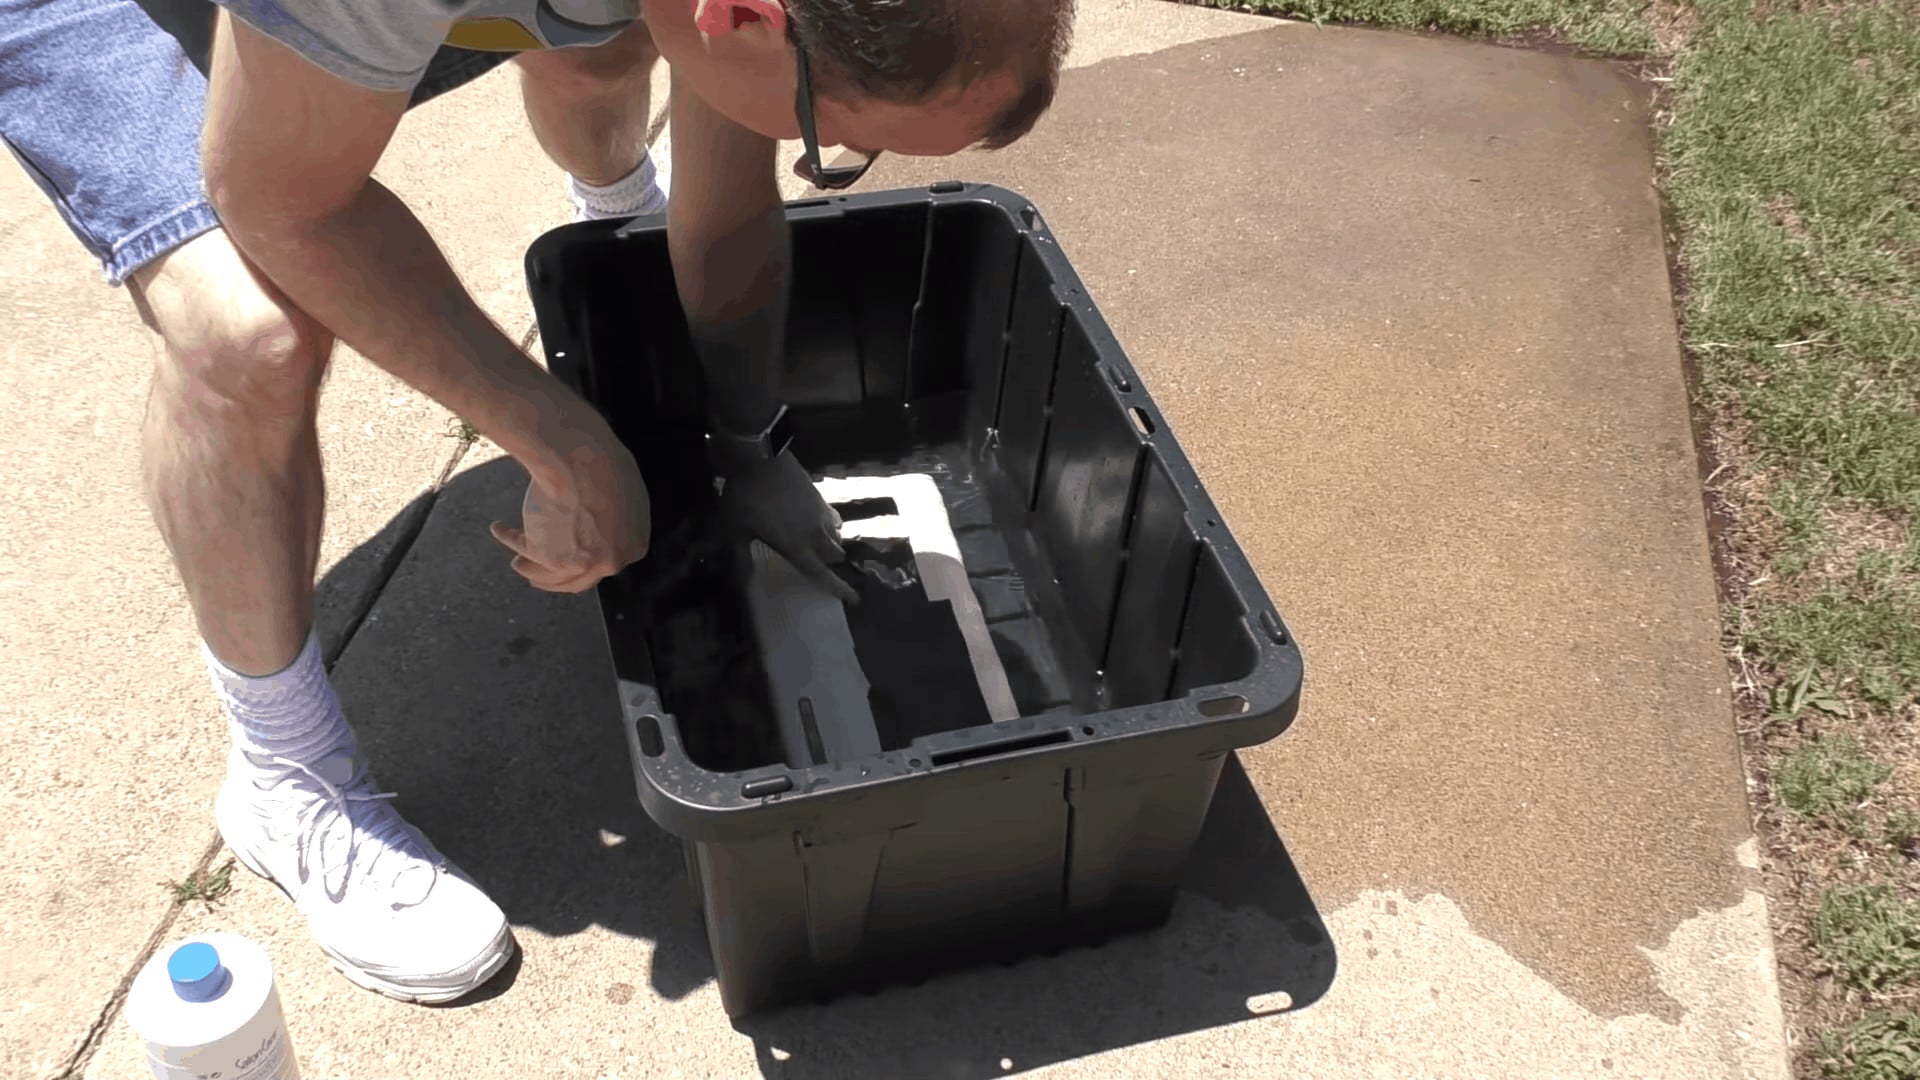
Submersion
As we investigate how retrobright works the first thing to understand is the submersion process. This is probably the safest process as it is more likely to leave an even finish. The process works by submerging the part being retrobrighted into a tub of hydrogen peroxide and leaving it under a UV light until the plastic turns back to its original color.
Cream
Cream is the second most popular method but can be troublesome for beginners. This method involves covering the part being retrobrighted with a hydrogen-peroxide cream (generally a salon cream) and then wrapped in plastic wrap.
Streaking Problems
The main concerns here are that streaks can be left on the part if the cream and wrap are not applied evenly. You can see in this example what happens in this case. The good news is, reapplication may fix this in many cases.
The UV Light Source
The UV light source for retrobrighting can be something as simple as a UV light bulb from a local hardware store, placing the item in direct sunlight, or purchasing a UV light box from Amazon. There are some simple advice and words of caution here:
- Using a UV bulb will take some time. Much longer than sunlight. Depending on how bad the yellowing is and how large the part is, this could take hours to days to complete.
- Placing a tub in the sunlight will quickly retrobright your part. Generally an hour or two. This does come with some risk though. If you leave it in too long the part can become brittle. If you let it get too hot the part may warp. This is a great way to do retrobrighting but without caution could destroy a part you cannot replace.
Additional Retrobrighting Precautions
There are some additional precautions you should be aware of when learning how Retrobright works:
- Retrobrighting will likely destroy any rubbers, PVC materials, or organic materials such as leather or cloth.
- There is some research that says retrobrighting does not last permanently and will need to be repeated every few years;
- and unfortunately the science isn’t 100% yet and it is possible that the process makes the plastic more brittle with every application.
Probably the best thing you can do is to keep your vintage computers in their original boxes and stored away in a cool air conditioned space out of contact with UV light sources when not in use.
was that David on the pictures?
Sure looks like it!
I have seen those episodes.
I live in the Netherlands, so Retrobriting using the sun is not really an option.
What can I do to maximize the effect of using a UV lamp?
you dont need UV light at all. i used hydrogen peroxide 12%, along with heat, and a very bright regular light bulb, and the results were perfect
Lightbulbs emit UV. Just not as much so it takes a lot longer.
I have scrubbed everywhere for this, but it seems so crazy that something that so many people are doing is not understood on a chemical level. It seems everyone just knows that “it works” without having any idea as to the specifics of the why. Are there no chemists in the community who could try to shed light on the mechanisms behind this process? If we knew what was ACTUALLY happening we could come up with ways to make it work better, and maybe fully understand what damage if any the process might cause to the plastic.
4.5
Mike,
I did find some discussion of it.
When exposed to UV light the TBBP-A (BPA with some hydrogen replaced by bromine) degrades allowing bromine to become a free radical. The bromine forms a bond with readily available oxygen and causes the yellow color (BrO2?).
By irradiating the ABS with UV light in the presence of more hydrogen atoms, in the form of hydrogen peroxide, we break the bonds between the oxygen and bromine and allow the bromine to bond with the hydrogen, thus reversing the discoloration
Also check the forums where it was first developed.
http://www.forum64.de http://www.a1k.org http://eab.abime.net
http://www.vintage-computer.com http://www.amibay.com
Can you use a blacklight bulb?
Can i use the 40 volume hydrogen peroxide cream with the water submersing method?
For anybody reading this in the future: I advise against sun exposure for white GBAs and Dreamcasts. Try heat or maybe a UV light.
In my experience, i used the cream and submersion (used the cream too, couldn’t find liquid peroxide) methods exposed to the sun. Initially it worked and i was amazed. I did this in 2018-19, after that i put the 2 in storage so i could move to other repairs/restorations.
A year ago i pulled them out to test a few games and to my surprise, not only they had yellowed again while stored in a closed drawer but they became extremely yellowed, much worse than than they were back in 2018.
I suspect the sunlight might have triggered this as both of them had spent at least a full day under summer sun for treating.
I am trying to set up a UV lamp/heat system to see if i can fix them again, and then how long it will last.
Something interesting i would like to mention is that the GBA has a extra paper serial sticker on it’s back, the Nintendo representative here used to place those. I took care to not let the cream touch it since it would destroy it. After the treatment was done i noticed the gas generated by the process has deyellowed the sticker, which looked pretty much like new. It still looks great after those years.