Blog
Arduino Basics: Hello World!

Now that you’ve acquired your Arduino, have the IDE installed, and have your Arduino plugged into your USB port on your PC or Mac, it’s time to write our first little program “Hello World!”
Opening the IDE and Selecting Your Arduino
To get started, find the IDE icon or search for Arduino on your PC or Mac and open the Arduino IDE. IDE stands simply for Integrated Development Environment, and will be the tool we use to write code, compile it, and then send it to the embedded atmega microcontroller on the Arduino’s board.
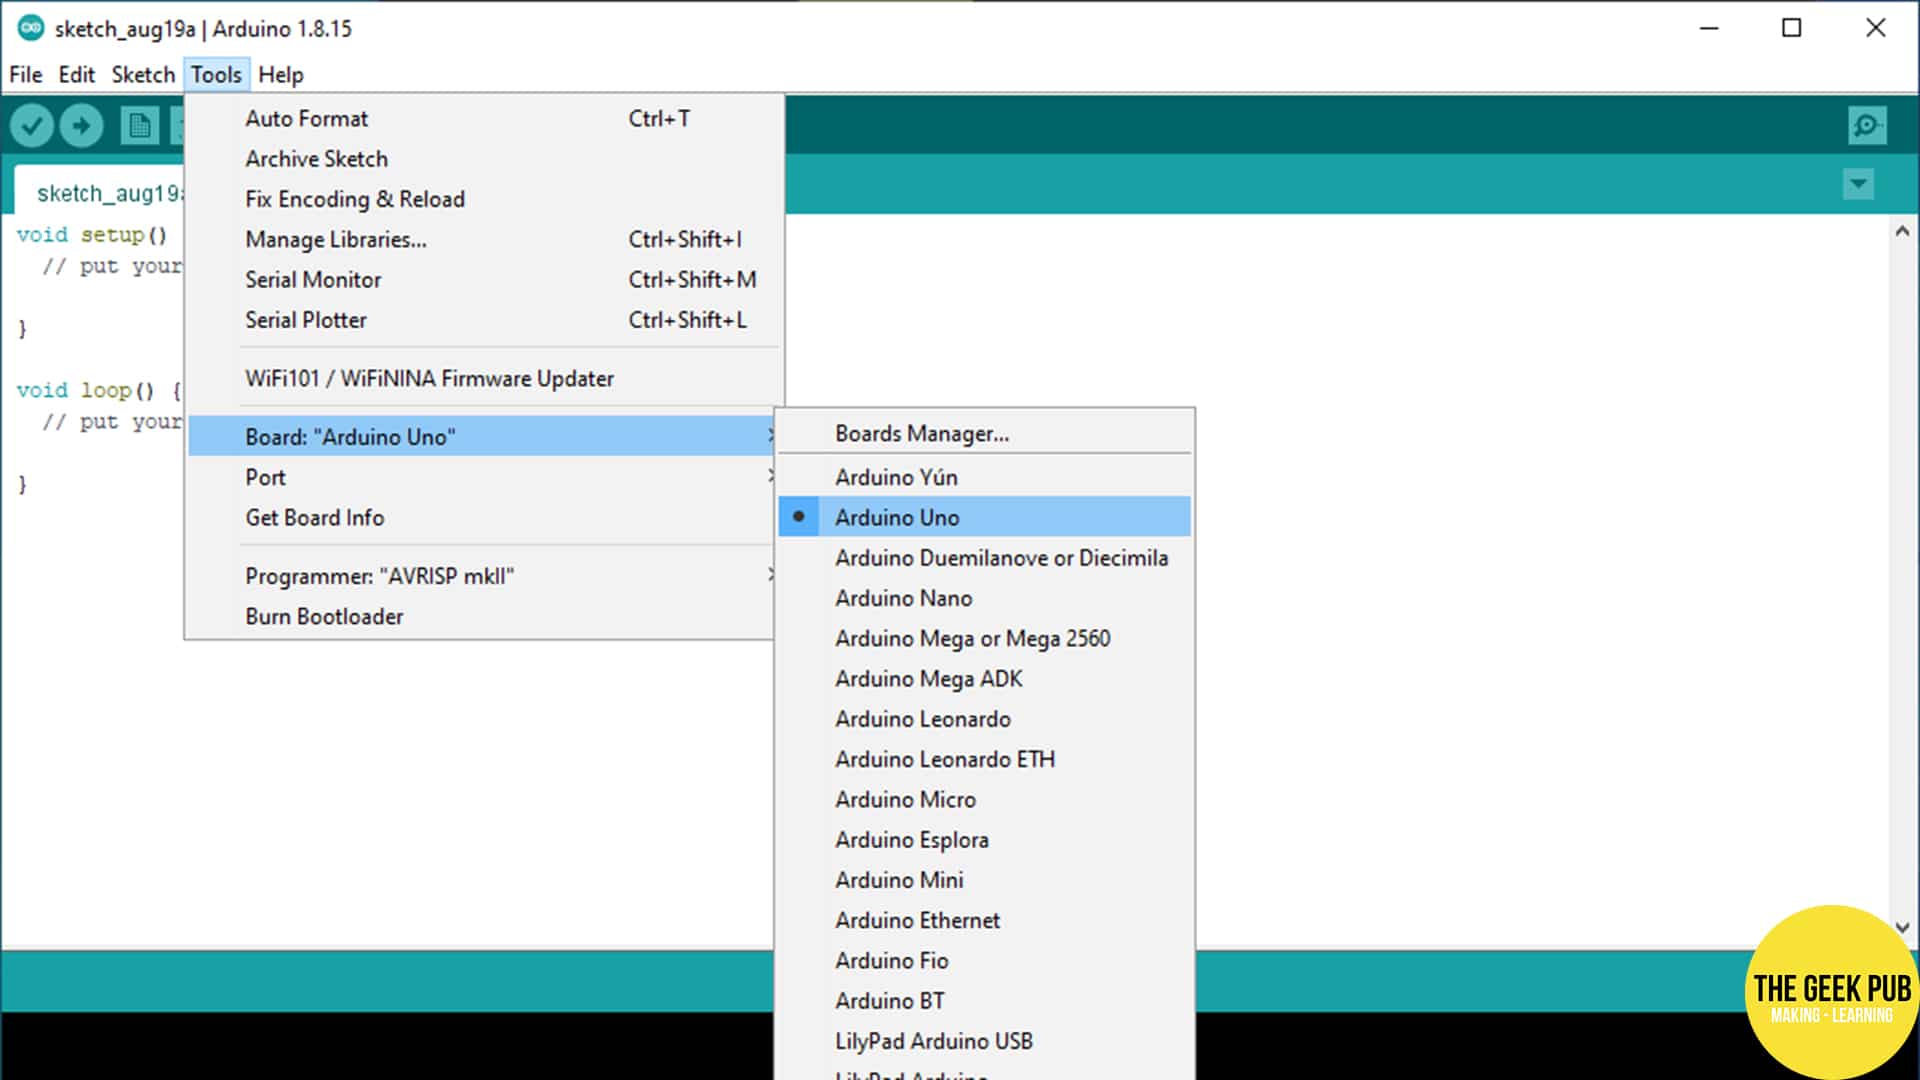
With the IDE open, click on Tools, and then Board. Make sure the correct type of Arduino is selected based on the one you purchased. In our case, we’re using an Arduino Uno. So we selected Arduino Uno in the list.
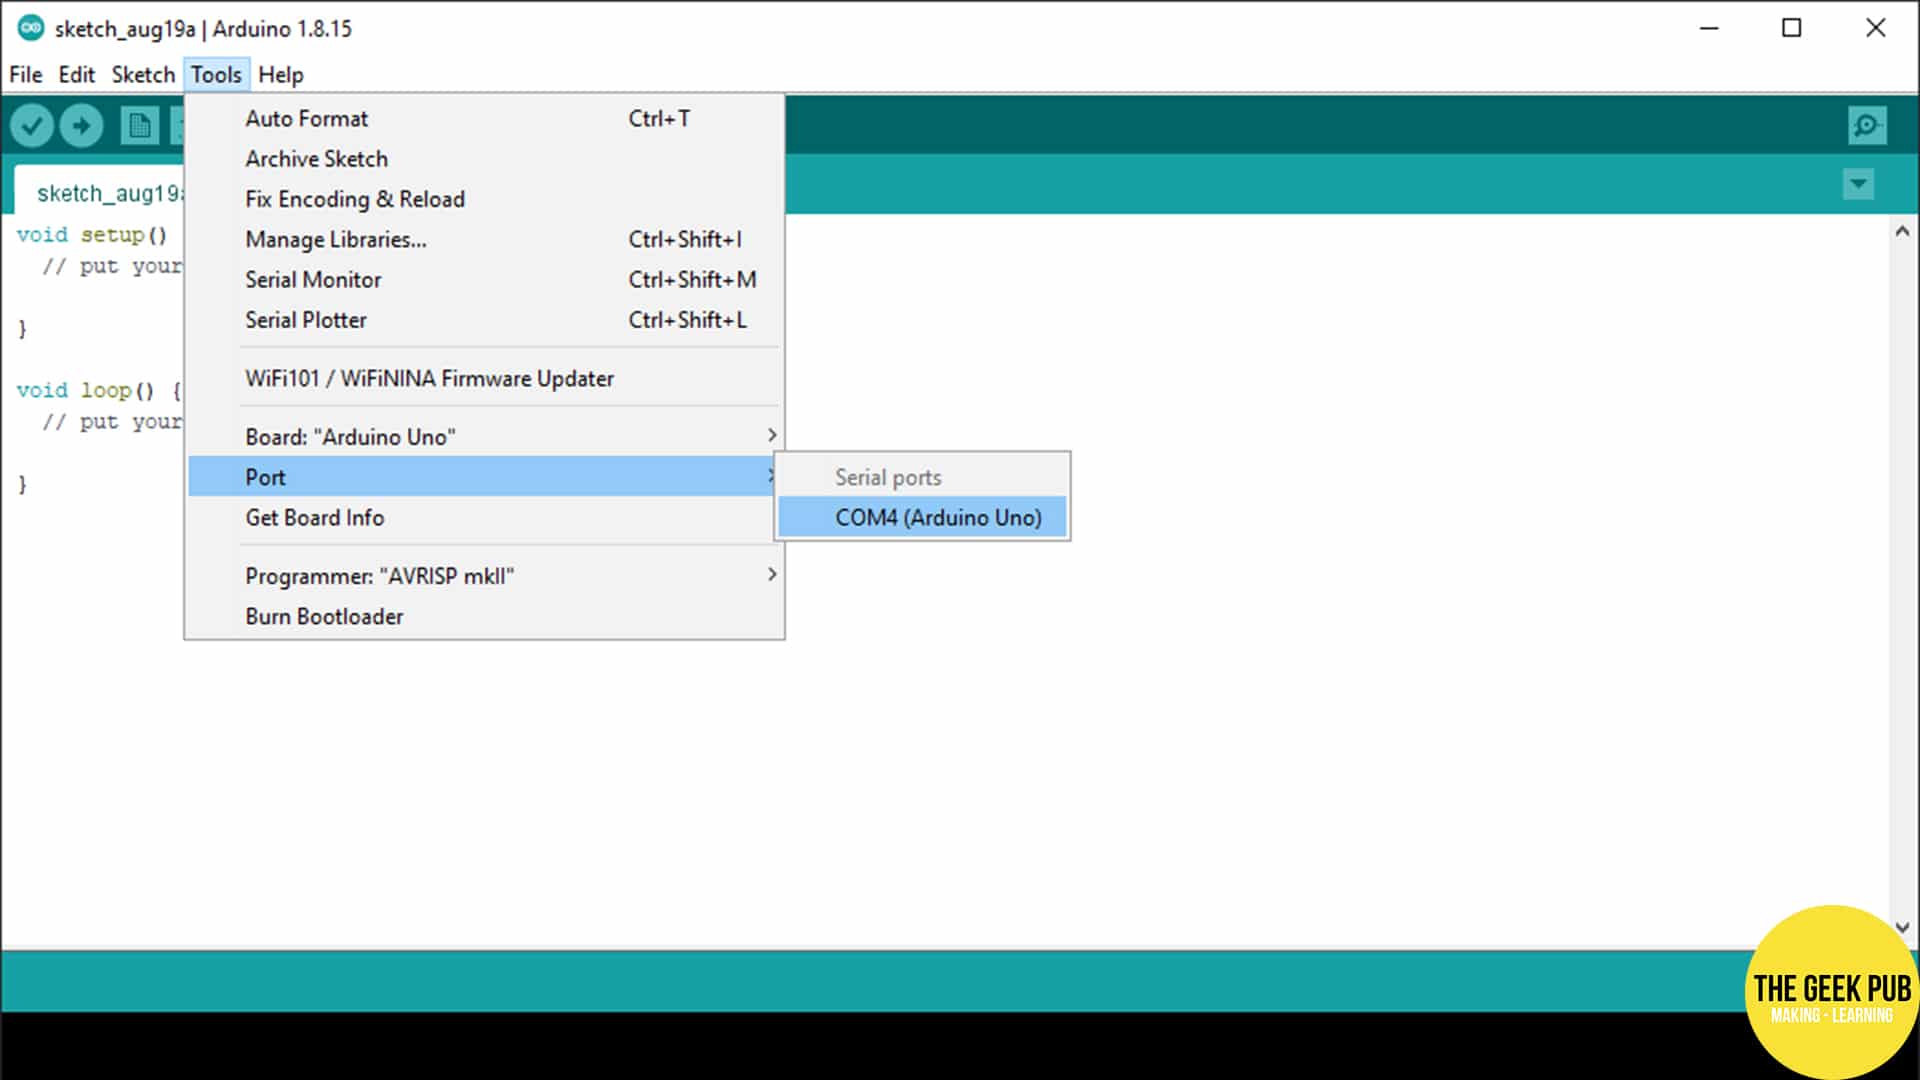
Now that we’ve selected the right board. make sure you have the correct selected the correct port. From the menu click again on Tools, and then on Port.
We will select COM4 (Arduino Uno) in our case. On your computer, the port and board name may be different.
Now that we’re connected to the board, enter the following bit of code into the IDE.
void setup() {
  // put your setup code here, to run once:
  Serial.begin(9600);
  Serial.println("Hello World!");
}

void loop() {
  // put your main code here, to run repeatedly:

}
This Hello World! program is incredibly simple and we’ll get into what it all means in the next tutorial. For context, anything put in the void setup() function only runs a single time. We set the serial port speed (Serial.begin) and then output the serial port “Hello World!” with Serial.println(). The program then ends as the void loop() function is empty. More on that later.
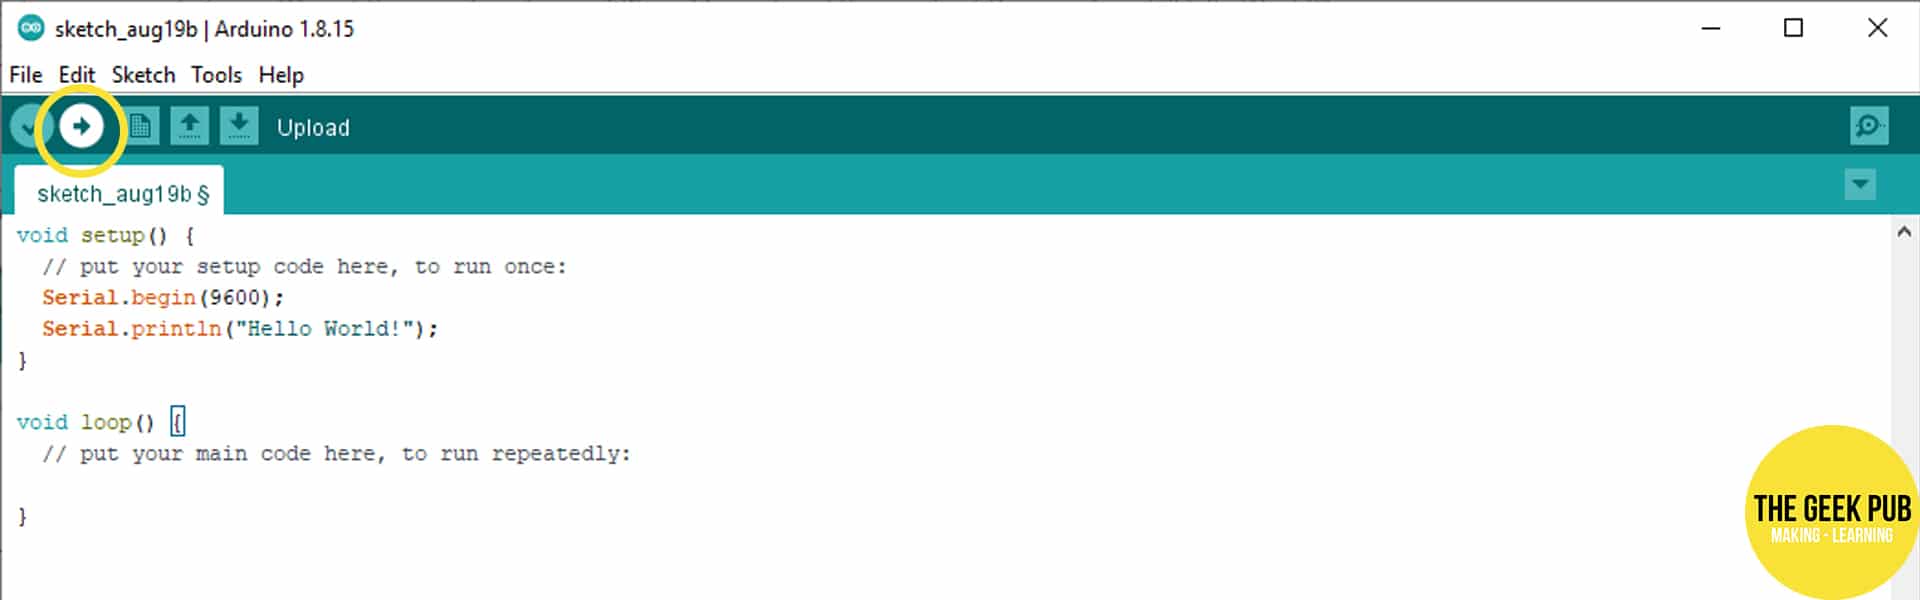
In the IDE, click the Upload Button (it looks like a right point arrow in the toolbar) to send your code to your Arduino!
In the window at the bottom of the IDE, you should see something similar to the following output, indicating that your upload was successful!

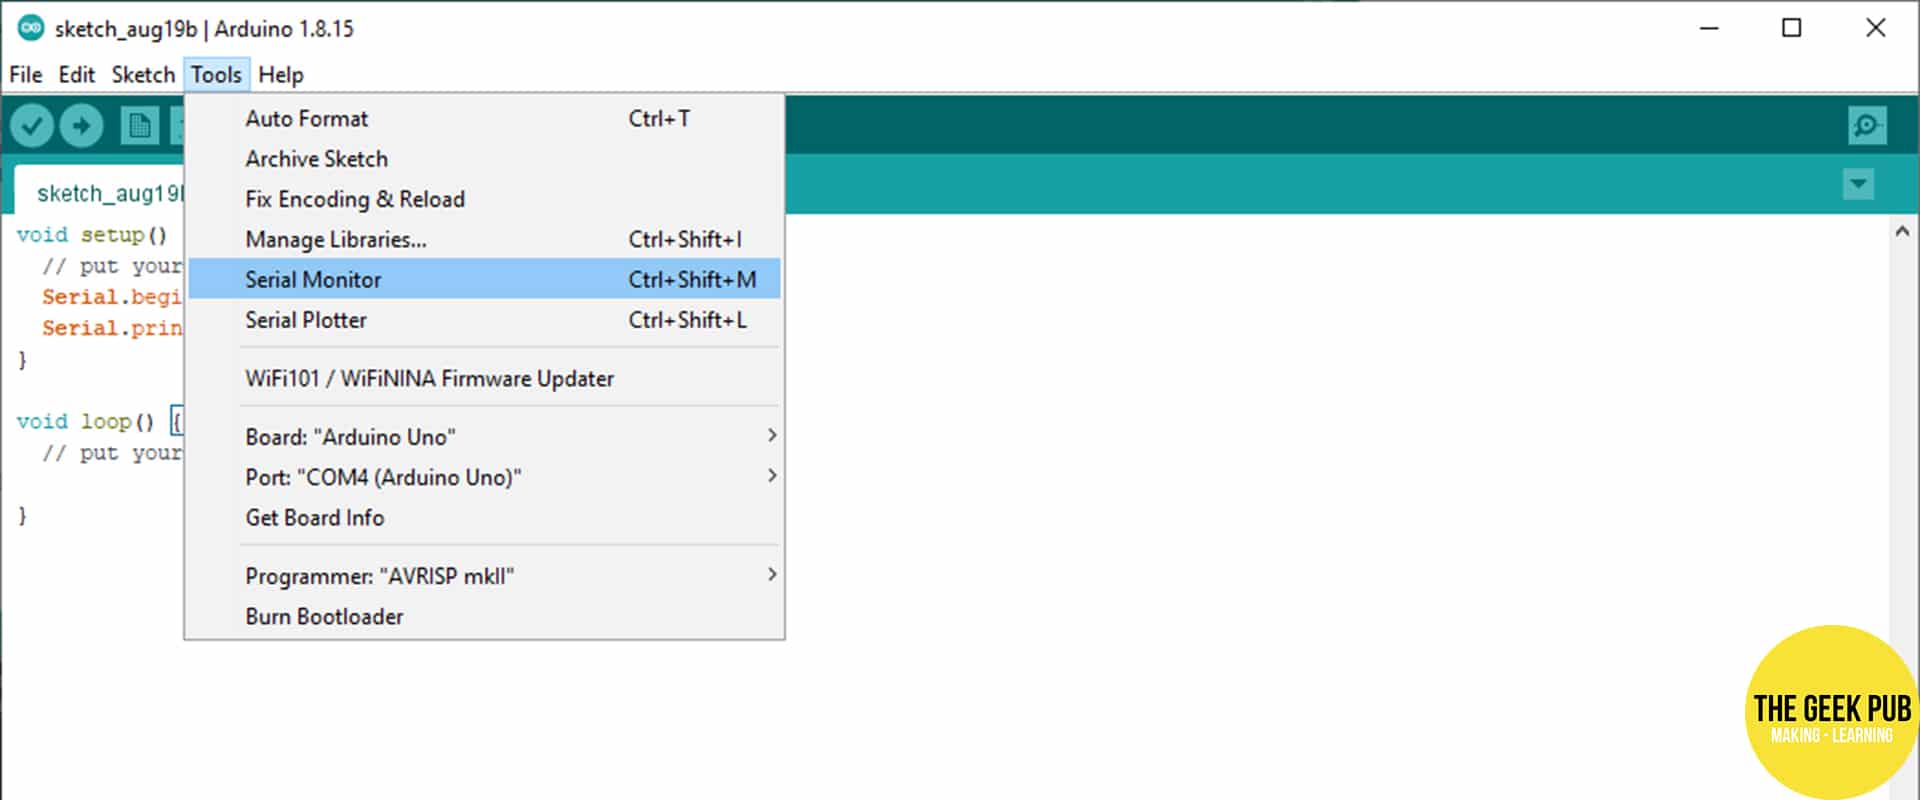
Now you can open the Serial Monitor, which is where the output of Serial.println() is sent and see the results of your Hello World! program. Click Tools and then Serial Monitor.
You should see “Hello World!” in the console window!
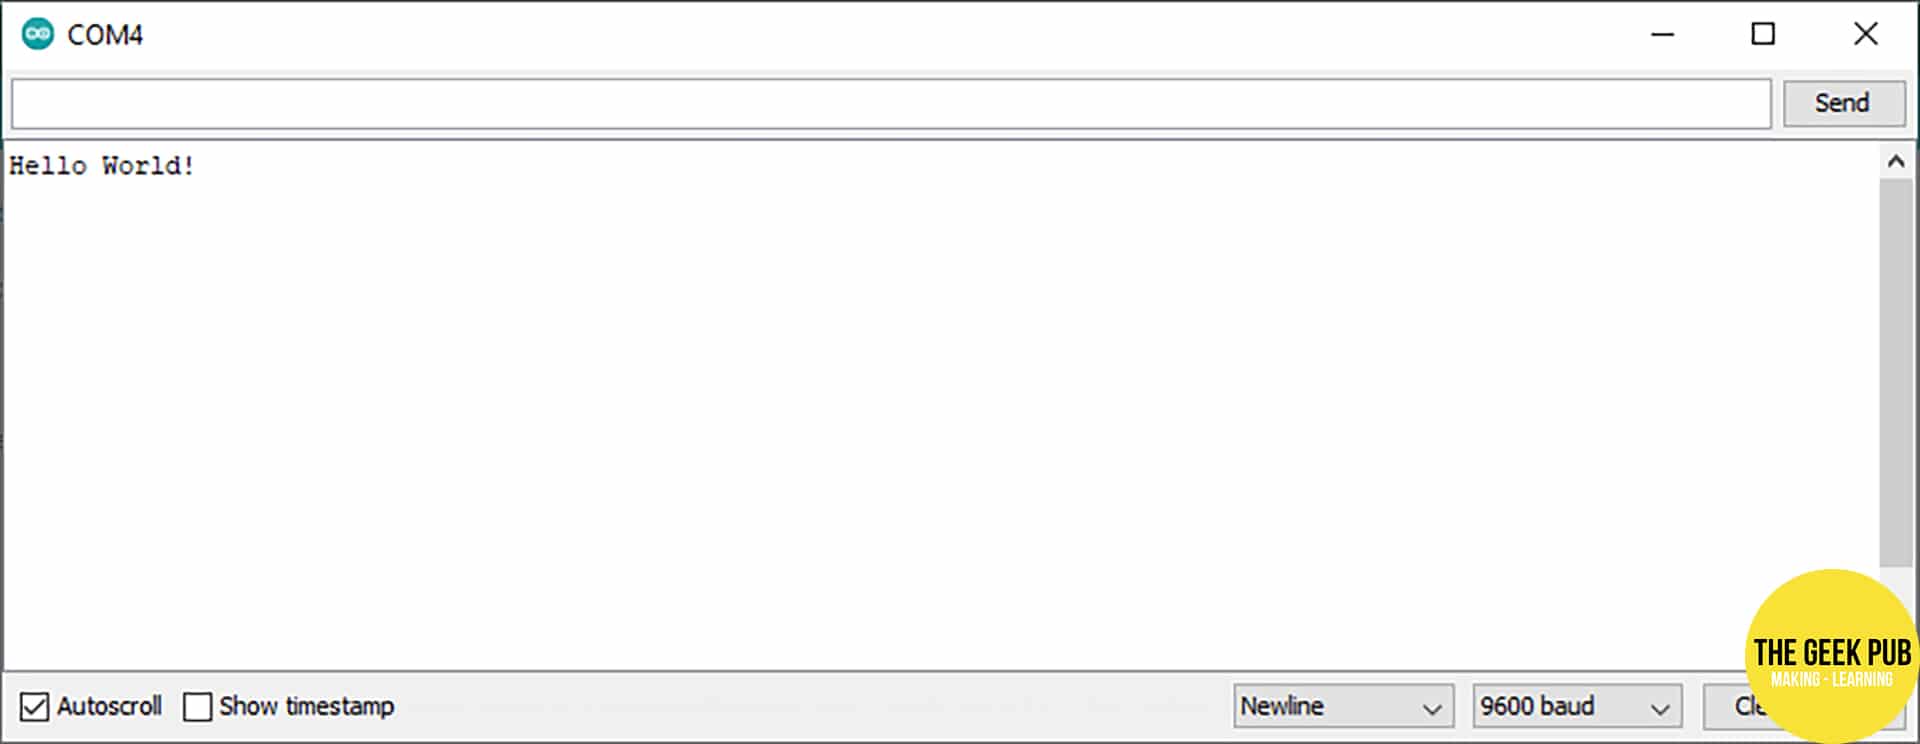
Congratulations! You’ve completed your very first program on the Arduino platform!
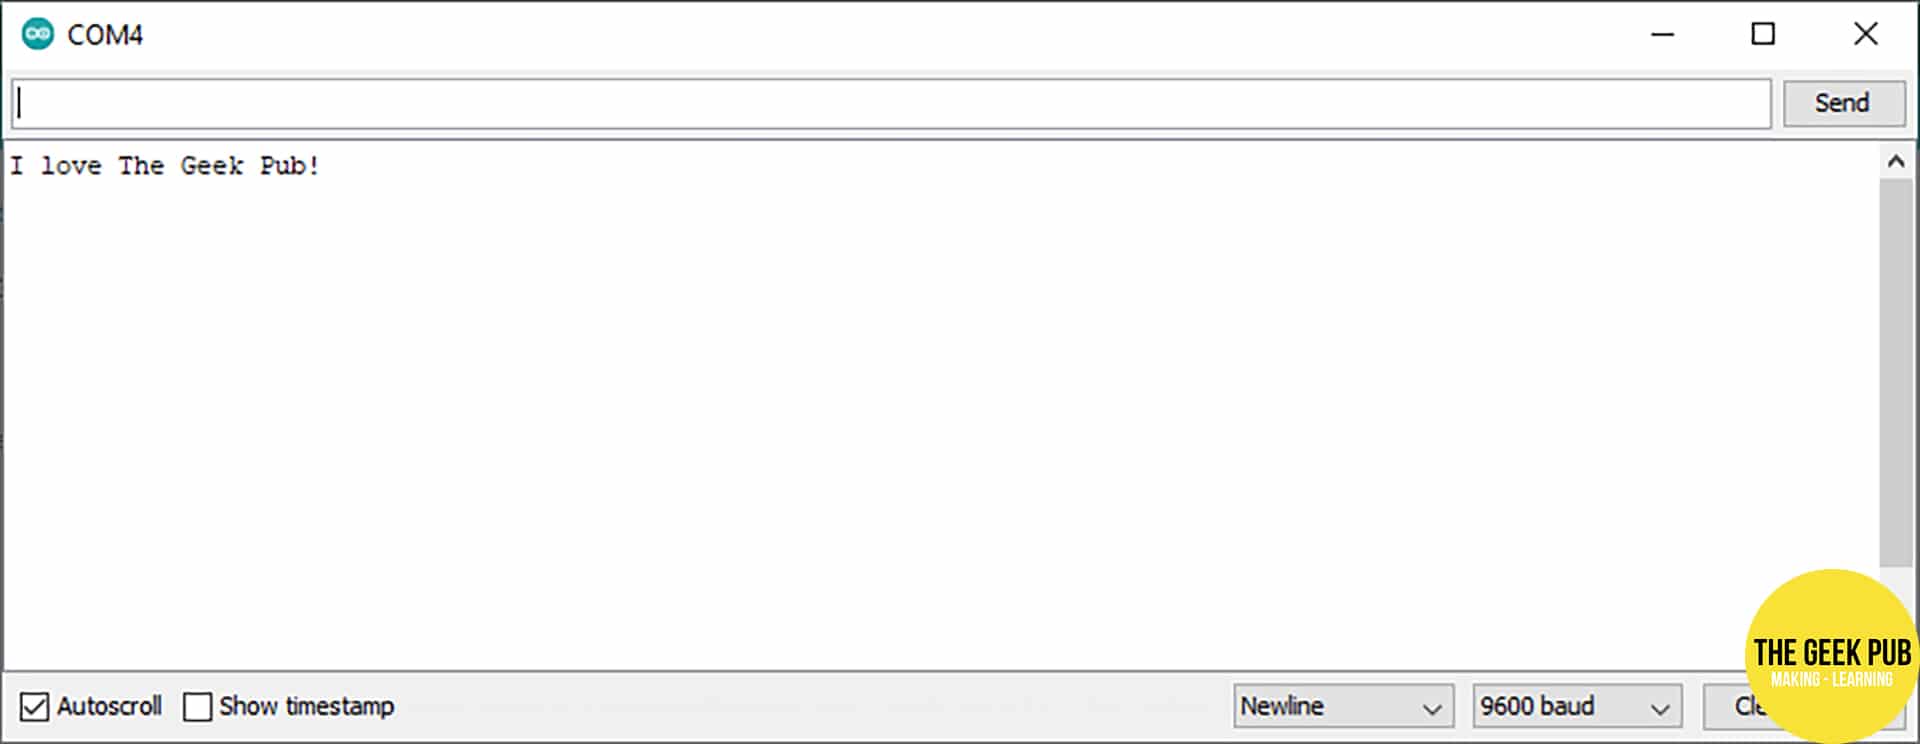
Experimenting with the “Hello World!” Code
Take a minute to change the program around and adjust it’s output. Change “Hello World!” to “I love The Geek Pub!” and see what happens. Don’t worry, you won’t break your Arduino.
Next Steps
It’s time to move on to the next steps! From here you can:
Mike thank you for creating this tutorial, I built a dust collection system an automated it with the arduino about four years ago. All my blast gates close except the one that the tool I am using opens. I did not write code as I did not know enough about coding at the time. I did learn to make many modifications to the code to get the system to work. It was a lot of fun and a challenge.
With your tutorials I will break out another uno and start from scratch and follow along this is a nice refresher for me too! Again Thank you.