Blog
Debouncing a Switch in Hardware or Software
When you flip a switch or press a button two metal contacts come together. It might seem like they make immediate contact and complete a circuit. However, in reality as they make contact they mechanically bounce, making brief contact several times before making a solid connection. In some cases this bounce can also be electrical in nature if arcing occurs due to bad or corroded contacts on the switch. This bounce can cause problems with some circuits, which will result in the hardware incorrectly reading multiple switch presses, when in fact only one occurred. We deal with this by debouncing the circuit!
Debouncing can be accomplished in hardware or in software and there are pros and cons to each method. We’re going to walk through both ways of doing it and talk about the differences.
Switch Bounce Characteristics
We need to first understand switch bounce and its characteristics. And this isn’t as simple of a task as it might at first seem! That’s because different switches have different bounce characteristics. Even two identical switches can bounce differently!
Many also think that bounce is only a problem with momentary switches, but the truth is that bounce affects all types of momentary and maintained switches, including toggles, latching, and rocker switches.
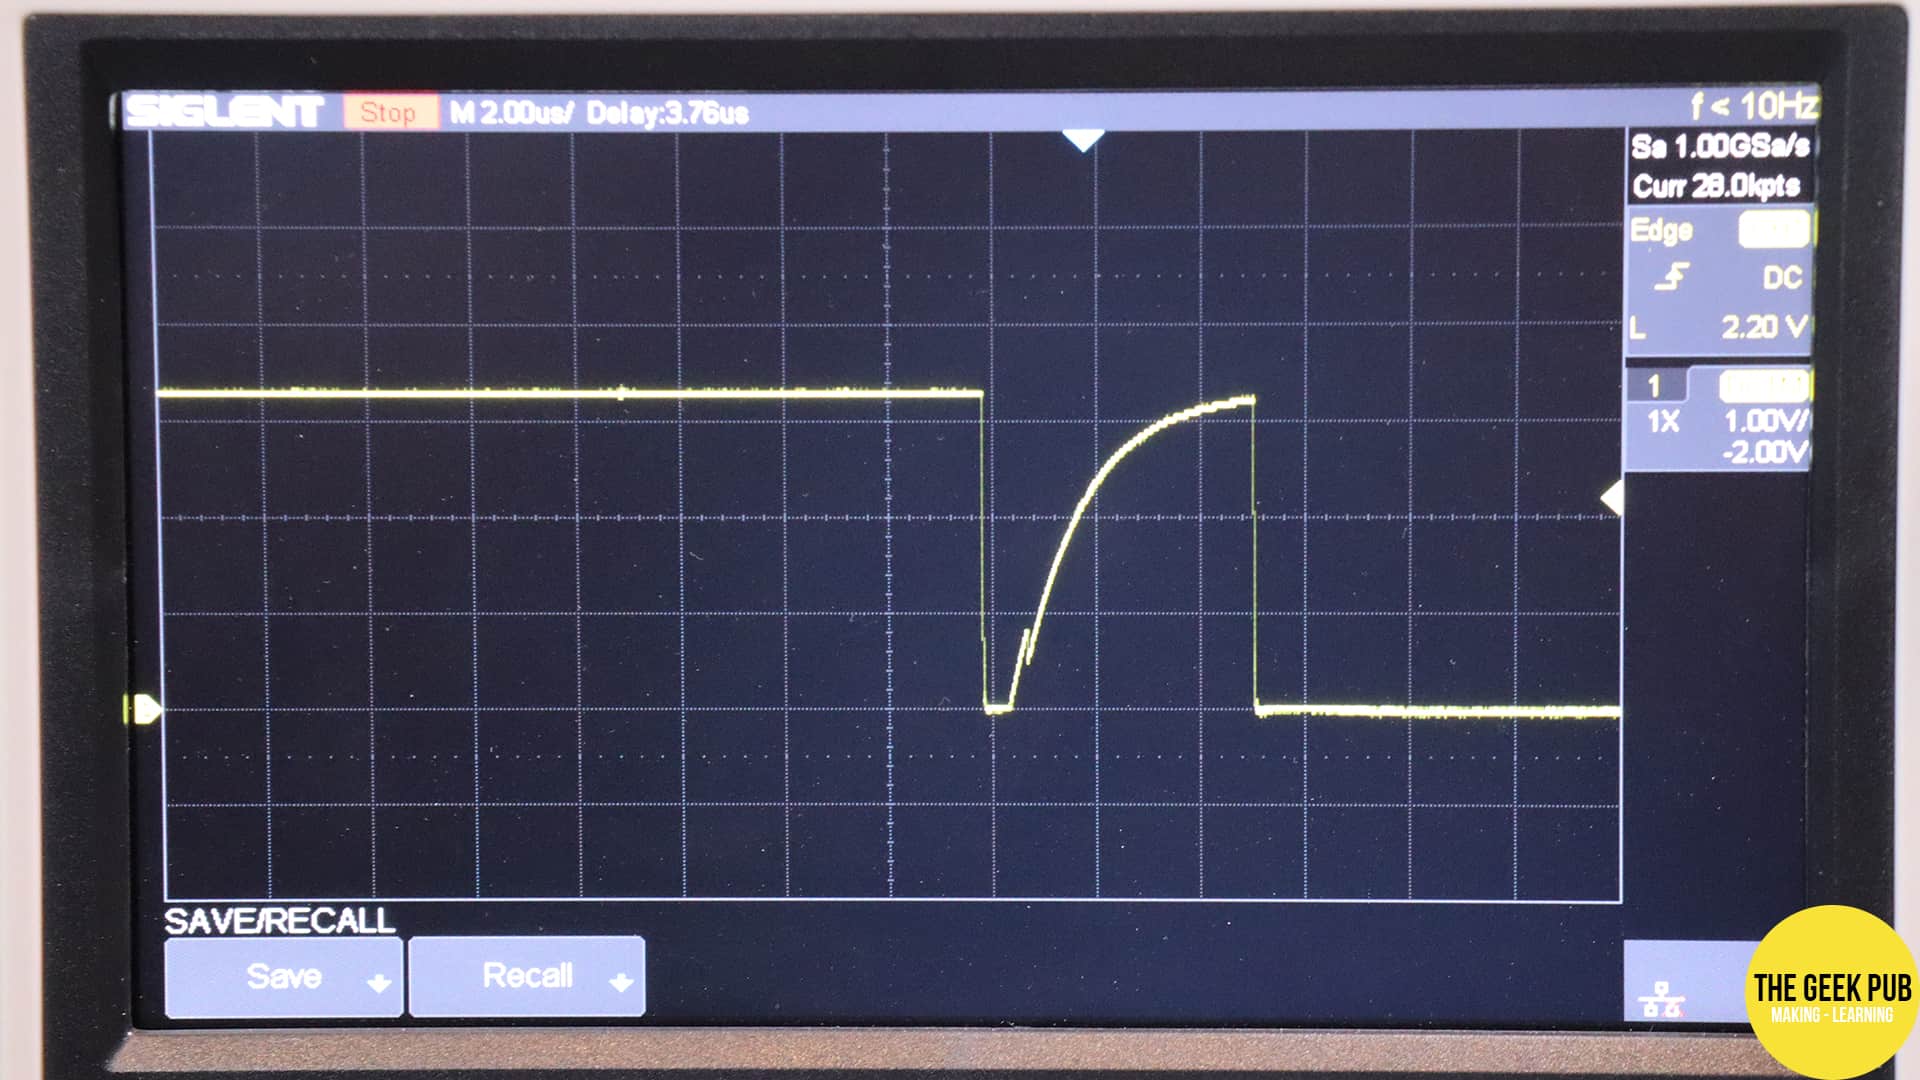
If we pop out the trusty oscilloscope we can actually watch bounce happening on the screen!
In this case, I was using a simple momentary switch from my Arduino Starter Kit. You can see the switch bounced twice before holding steady contact. Many circuits could interpret this as multiple presses, even though you only physically pressed the switch once. Not good!
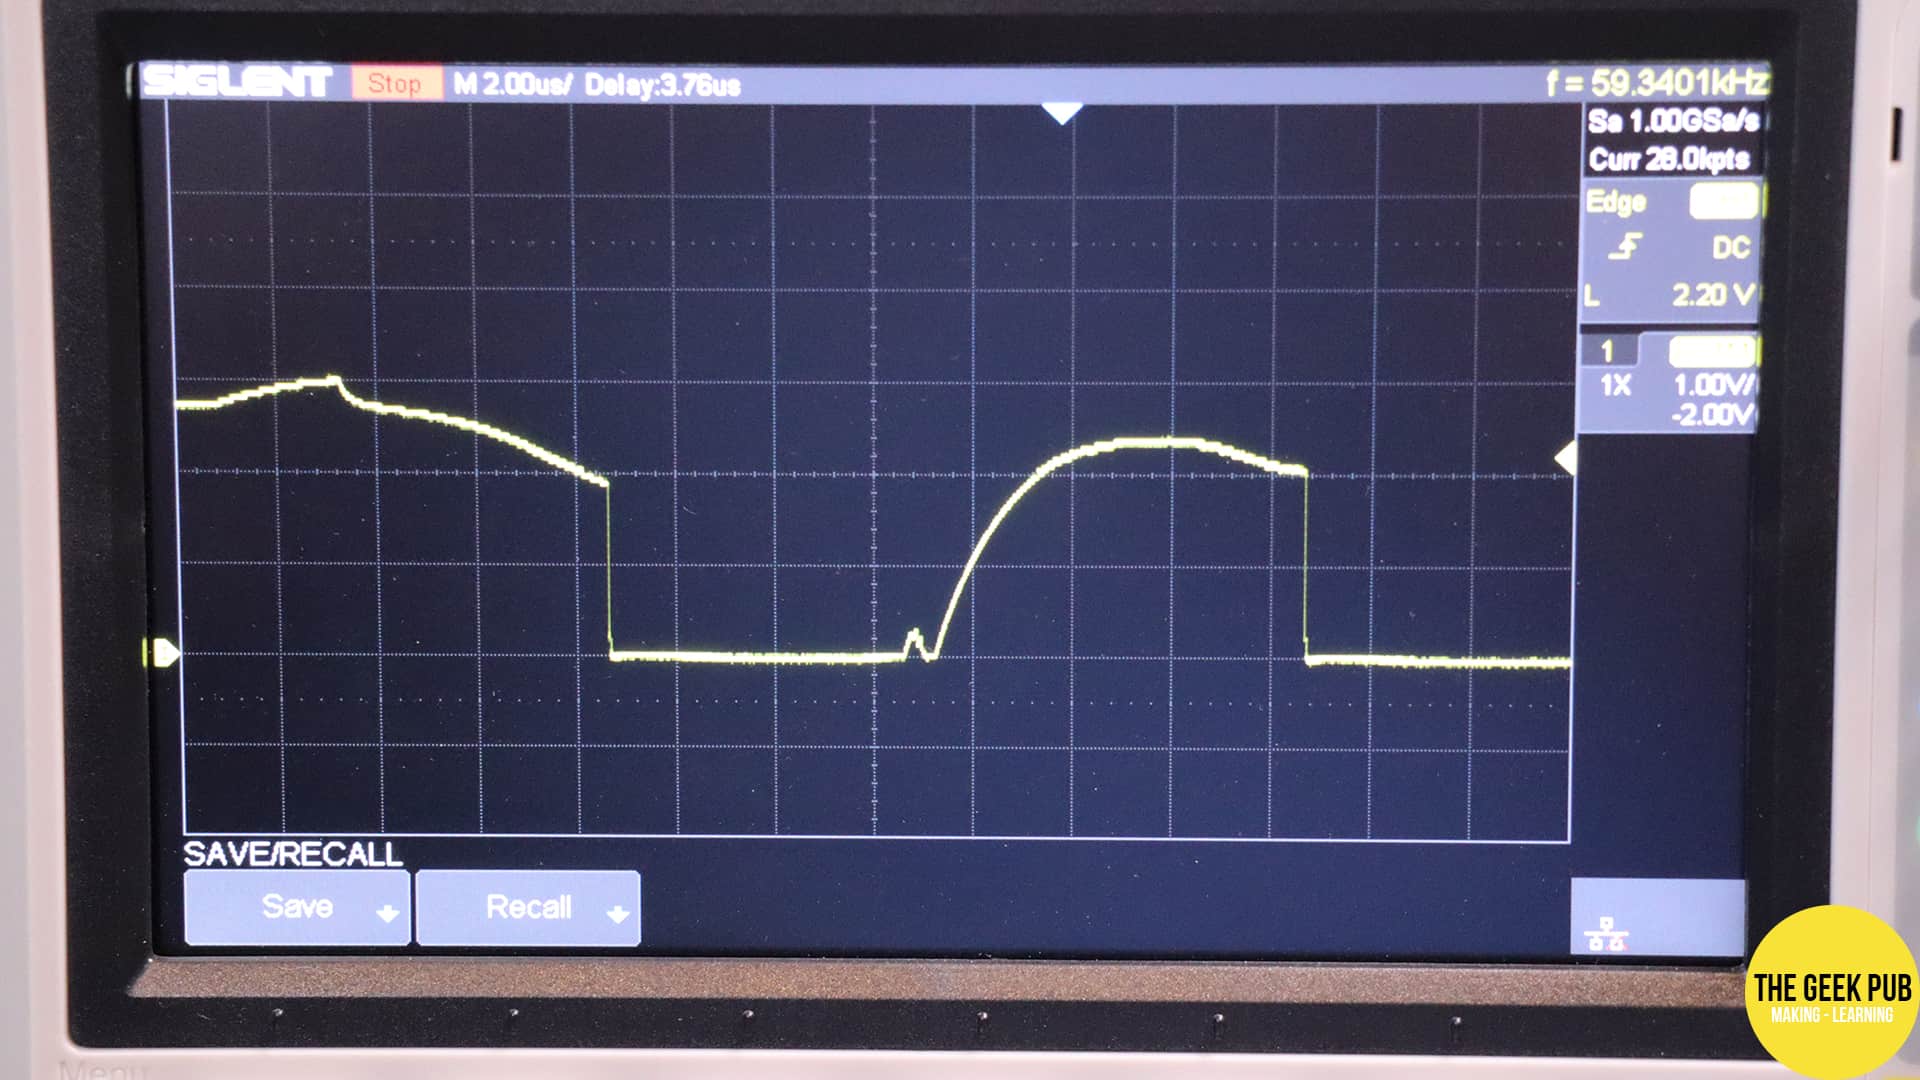
In this second example I used one of the momentary switches I bought for the remove LCD panel buttons on the tabletop arcade build. This switch bounces all over the place before holding steady!
So you can see why debouncing a switch can be so important!
A lot of beginners to electronics usually start searching the web for a problem with their circuits not realizing that switch bounce is even the problem that they are having, because they didn’t even know it could be a problem. Hint: It’s quite common!
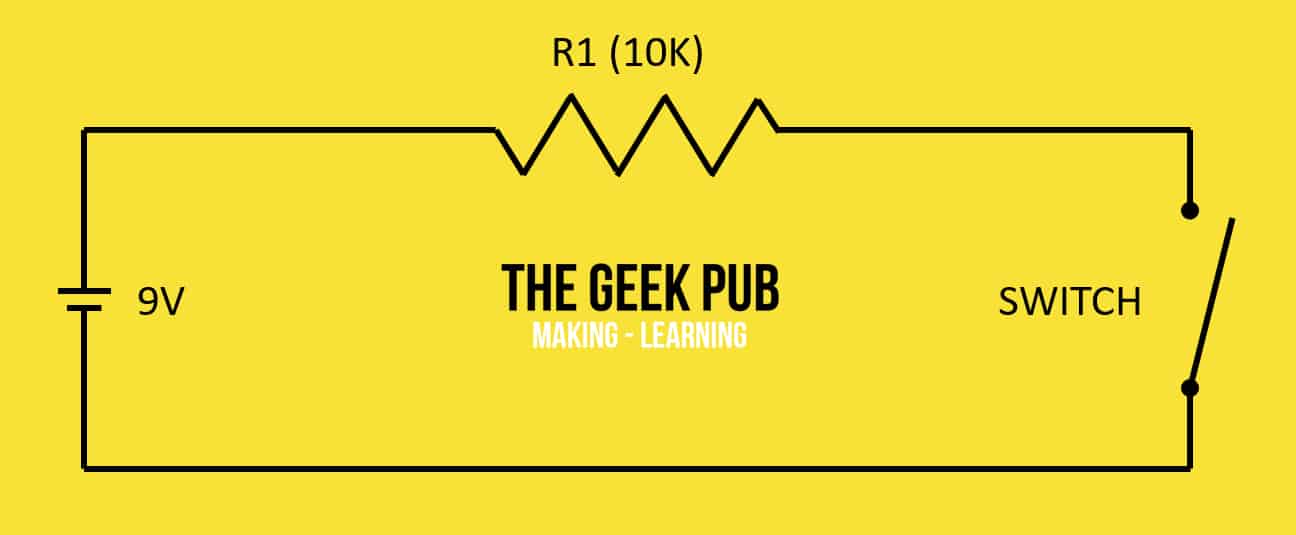
Here’s the circuit schematic for our bouncing switches, with no debouncing hardware in place:
Debouncing in Hardware
The most common way to debounce a switch is to do it in hardware. This involves adding a capacitor to the circuit to even out the bounce into a more gradual curve.
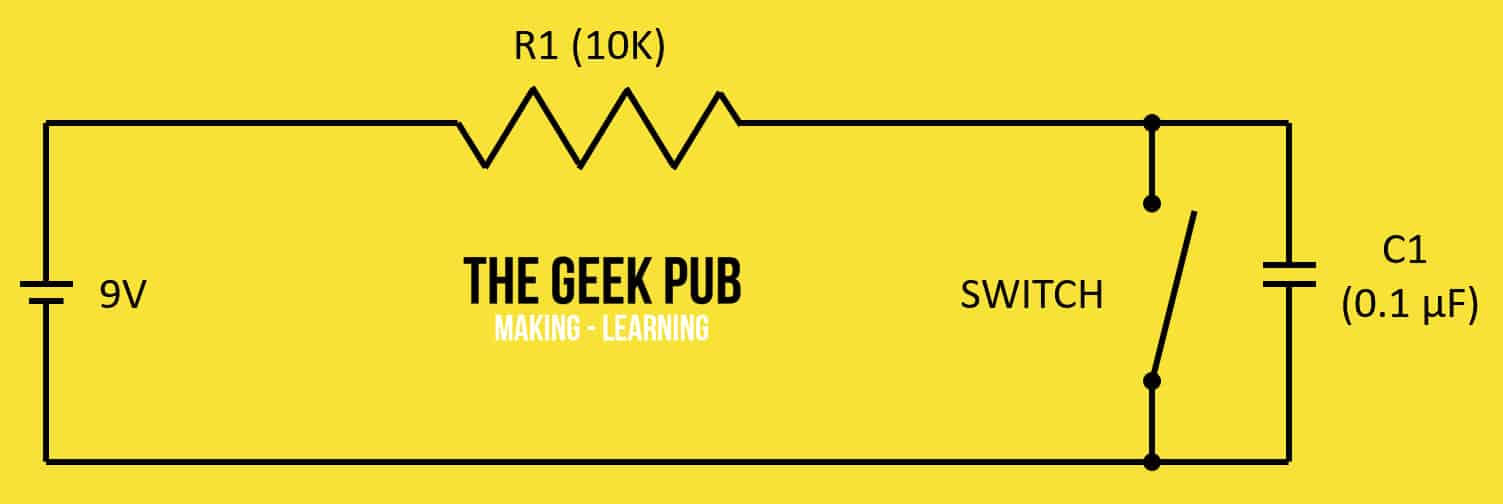
Depending on the circuit, its operating voltage, current, etc. you may need a larger or smaller capacitor, and you might need to experiment a little to find what works best. In our case, we’re just using a 9V battery with a 10K Ohm current limiting resistor. We should be able to easily get by with a .1 µF capacitor. I’ll use a ceramic capacitor since that’s what I have handy in that value, but just about any type will work fine.
Our new schematic with debouncing capacitor added will look like this:
When we try this out on the oscilloscope, things look mighty different!
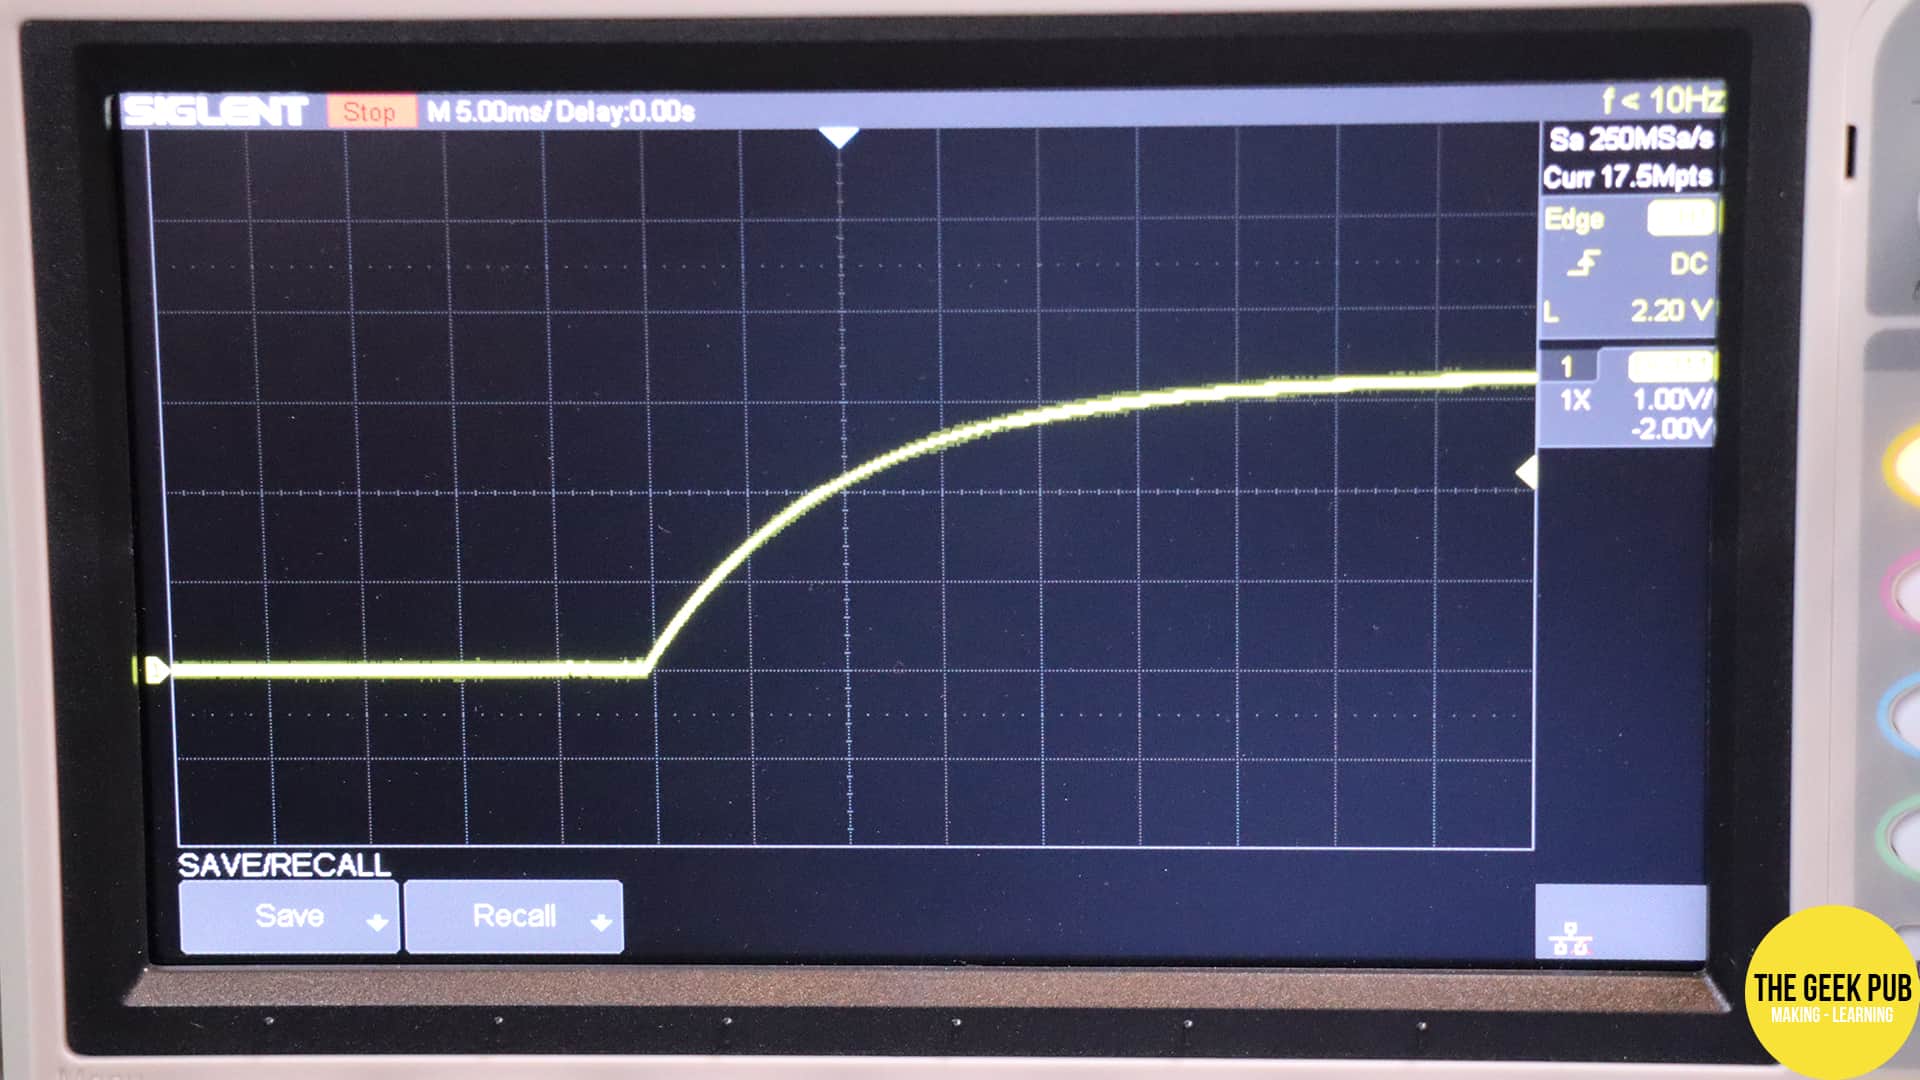
Rather than a bunch of bounces, we can see a rather smooth curve! Exactly what we’d expect! The capacitor stores and charge, and releases it with each bounce smoothing out the connection process (at least from the perspective of any connected devices, ICs, or micro-controllers).
RELATED: How Capacitors Work
Debouncing a switch with hardware comes at a price though. Literally! For our little one off project, its only the cost of a single capacitor. But for a large project producing millions of boards, this would mean millions of capacitors and that cost adds up quickly! Also, a capacitor takes up space, something that is also a concern when making smaller devices.
Debouncing in Software
Another way to debounce a switch is to do it in software. If you’re connecting the switch to an intelligent device such as a micro-controller or single board computer (i.e. Arduino or Raspberry Pi) then you have the option to debounce in software and save the cost of the extra capacitor.
The simplest way to debounce a switch in software is to simply tell the micro-controller to wait 50ms after it detects the first pulse before checking again. This would look something like this:
reading = digitalRead(12);
delay(50);
reading = digitalRead(12);
delay(50);
This works pretty reliably, but its not without its drawbacks. A lot can happen in your project when the Arduino is stuck waiting for 50ms, and you might miss some other input. If there are a lot of button presses, that 50ms could add up making your project slow and laggy. If none of that is important to you, or your project, then just wait 50ms before reading the button a second time.
The better way to debounce in software is a little more complicated and looks like this:
//initialize and declare variables
const int ledPin = 13; //led attached to this pin
const int buttonPin = 2; //push button attached to this pin

int buttonState = LOW; //this variable tracks the button state, low if not pressed, high if pressed
int ledState = -1; //this variable tracks the state of the LED, negative if off, positive if on

long lastDebounceTime = 0; // the last time the output pin was toggled
long debounceDelay = 50; // the debounce time; increase if the output flickers

void setup() {
  //set the mode of the pins...
  pinMode(ledPin, OUTPUT);
  pinMode(buttonPin, INPUT);
}

void loop() {
  //sample the state of the button - is it pressed or not?
  buttonState = digitalRead(buttonPin);

  //filter out any noise by setting a time buffer
  if ((millis() - lastDebounceTime) > debounceDelay) {

  //if the button has been pressed, lets toggle the LED from "off to on" or "on to off"
    if ( (buttonState == HIGH) & (ledState < 0) ) {

  digitalWrite(ledPin, HIGH); //turn LED on
  ledState = -ledState; //now the LED is on, we need to change the state
  lastDebounceTime = millis(); //set the current time
  }
    else if ( (buttonState == HIGH) & (ledState > 0) ) {

    digitalWrite(ledPin, LOW); //turn LED off
    ledState = -ledState; //now the LED is off, we need to change the state
    lastDebounceTime = millis(); //set the current time
    }
  }
}
The basic premise of this code is that we are tracking the state of a button in a variable. We check how long it has been since the button was last pressed. If it was less than 50ms, we ignore the “press” as it would be an erroneous bounce.
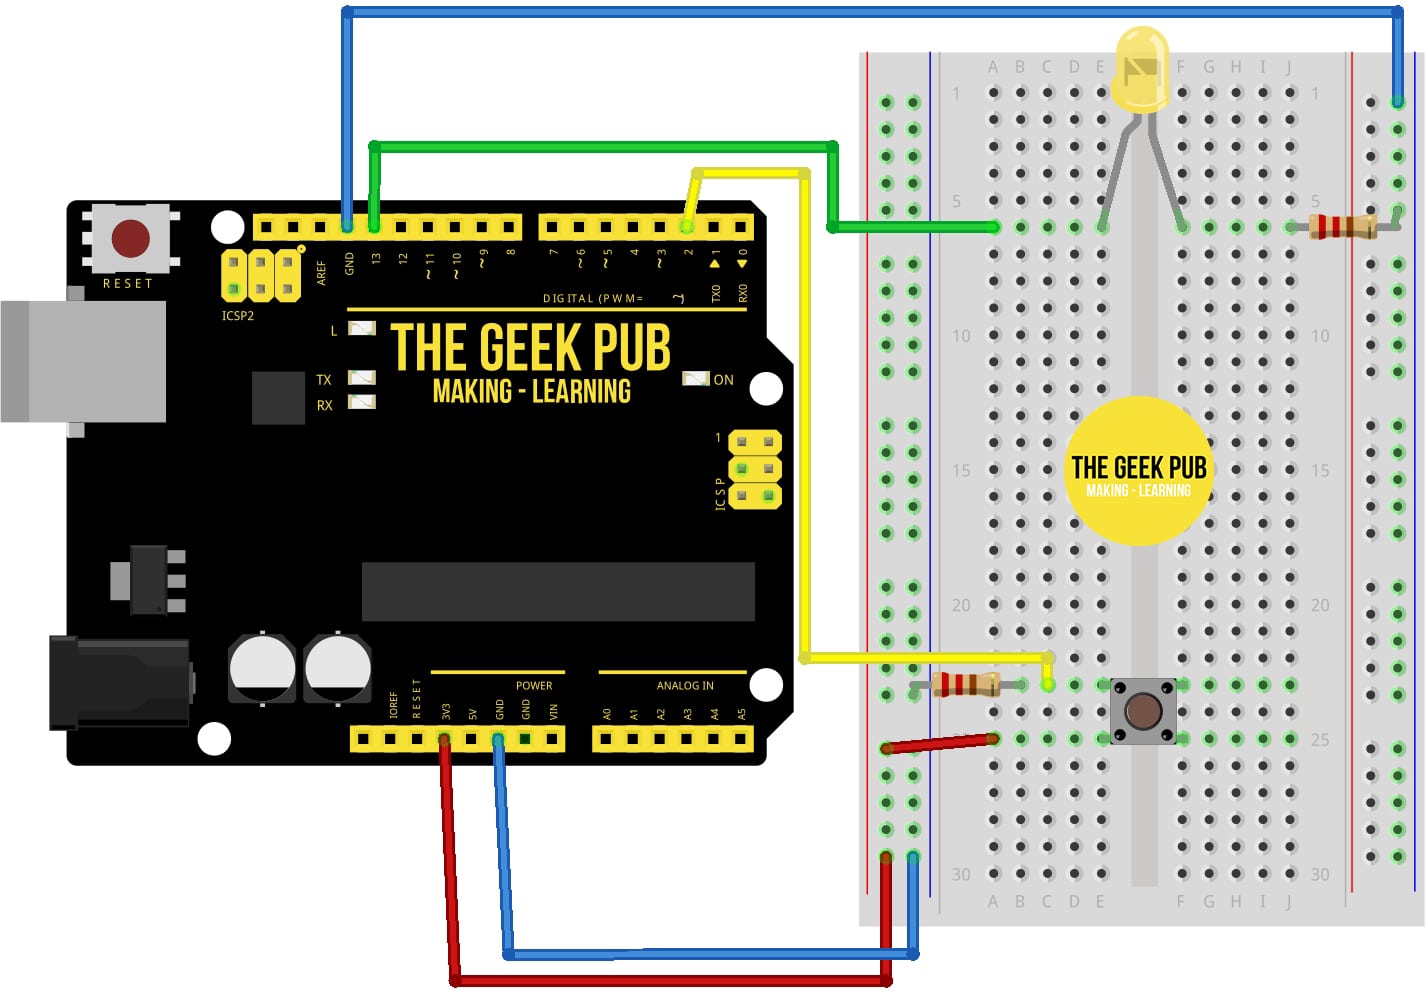
Here’s a Fritzing diagram if you want to build this circuit and try the Arduino software debounce code:
Well that wraps our debouncing tutorial. If you have any questions, leave a comment below and we will try to help you out!
Next Steps
Now let’s move on or go back to the index!
5
I still don’t understand why 50ms wait isn’t good enough?
It might be good enough. But if you are looping your code and part of the routine is to check for a button, and you delay 50ms every time, then that delay could become burdensome. Imagine if every time you fired your gun in Galaga there as 50ms lag as all of the aliens paused and your ship sat there. That would really hurt the game dynamics.
5
Wow. I had no idea this was a thing. I bet I know why some of my older projects have failed to work!
3.5
Setup a timer with 50ms interrupt, check all buttons in the ISR by using a state machine – the proper way.
Or create a task, with 50ms sleep time, check all buttons in the task, if you are using RTOS – the even better way.
Mike – I am having a similar problem with the light switches in my bathroom. 120V AC. I think there is some sparking inside, and my light bulbs burn out real fast. (Light bulbs are either two or three 60W bulbs on each switch.) What would be the equivalent hardware fix? Thanks.