Blog
Create a Raspberry Pi NAS with Samba or OMV
In this tutorial we’re going to cover two great ways to create a
We’re going to cover two ways to create a
RELATED: How to Install Raspbian on the Raspberry Pi
Preparing to Install Samba or OMV
As with all of our tutorials, we highly recommend you update your
[code language=”bash”]
sudo apt update
sudo apt upgrade
[/code]
Once updates finish, we highly recommend you reboot your
Parts list for this project:
OPTION 1: Build a Raspberry Pi NAS with Samba
The first and simplest way to build a
Let’s first create a place to store all of our shares. Execute the following commands:
[code language=”bash”]
sudo mkdir /home/MyShares
sudo mkdir /home/MyShares/Public
sudo chown -R root:users /home/MyShares/public
sudo chmod -R ug=rwx, o=rx /home/MyShares/public
[/code]
These commands create a home folder called MyShares and gives read/write access to users of the
Now we need to add and configure the Samba software for our
[code language=”bash”]
sudo apt install samba samba-common-bin
[/code]
Next we need to edit the Samba configuration file to make everything work. Issue the following command:
[code language=”bash”]
sudo nano /etc/samba/smb.conf
[/code]
Just below the Authentication section add the following line:
[code language=”bash”]
security = user
[/code]
Now let’s tell Samba about the shared folders we created earlier and set some basic permissions around them. At the bottom of the file add the following lines:
[code language=”bash”]
[public]
comment = public storage
path = /home/MyShares/public
valid users = @users
force group = users
create mask = 0660
directory mask = 0771
read only = no
[/code]
Close the file and save it by pressing Control+X and then answering Y to save. This completes our configuration of Samba! We just need to restart the server in order to make it all take effect. Issue the following command to restart Samba:
[code language=”bash”]
sudo /etc/init.d/samba restart
[/code]
All that’s left to do now is to add the “pi” user to Samba. Enter the following command:
[code language=”bash”]
sudo smbpasswd -a pi
[/code]
You will be prompted to enter and verify the password for this user. Once you do that, you’re ready to access your shares!
Connecting to the Raspberry Pi Samba Server
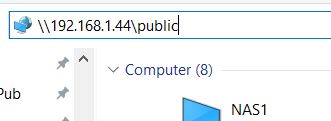
Your Raspbery Pi NAS based on Samba is now up and running. To connect to it you only need to open a file explorer on your computer and browse the network. You’ll see your
If for some reason the Pi isn’t showing up enter \\your_pi_ip_address\public into the my computer. In my case \\192.168.1.44\public.
If you don’t know the IP address of your
You can also map the network drive to make it a permanent drive letter on your computer.
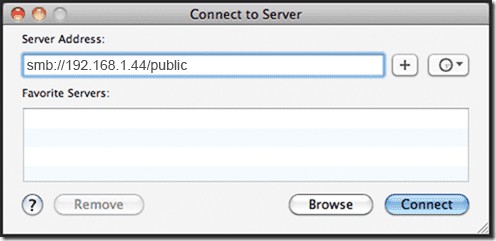
Connecting on a Mac
If you’re using a Mac, you can connect to your Samba share by pressing Command+K and then entering smb://your_pi_ip_address/public into the connection box and clicking connect.
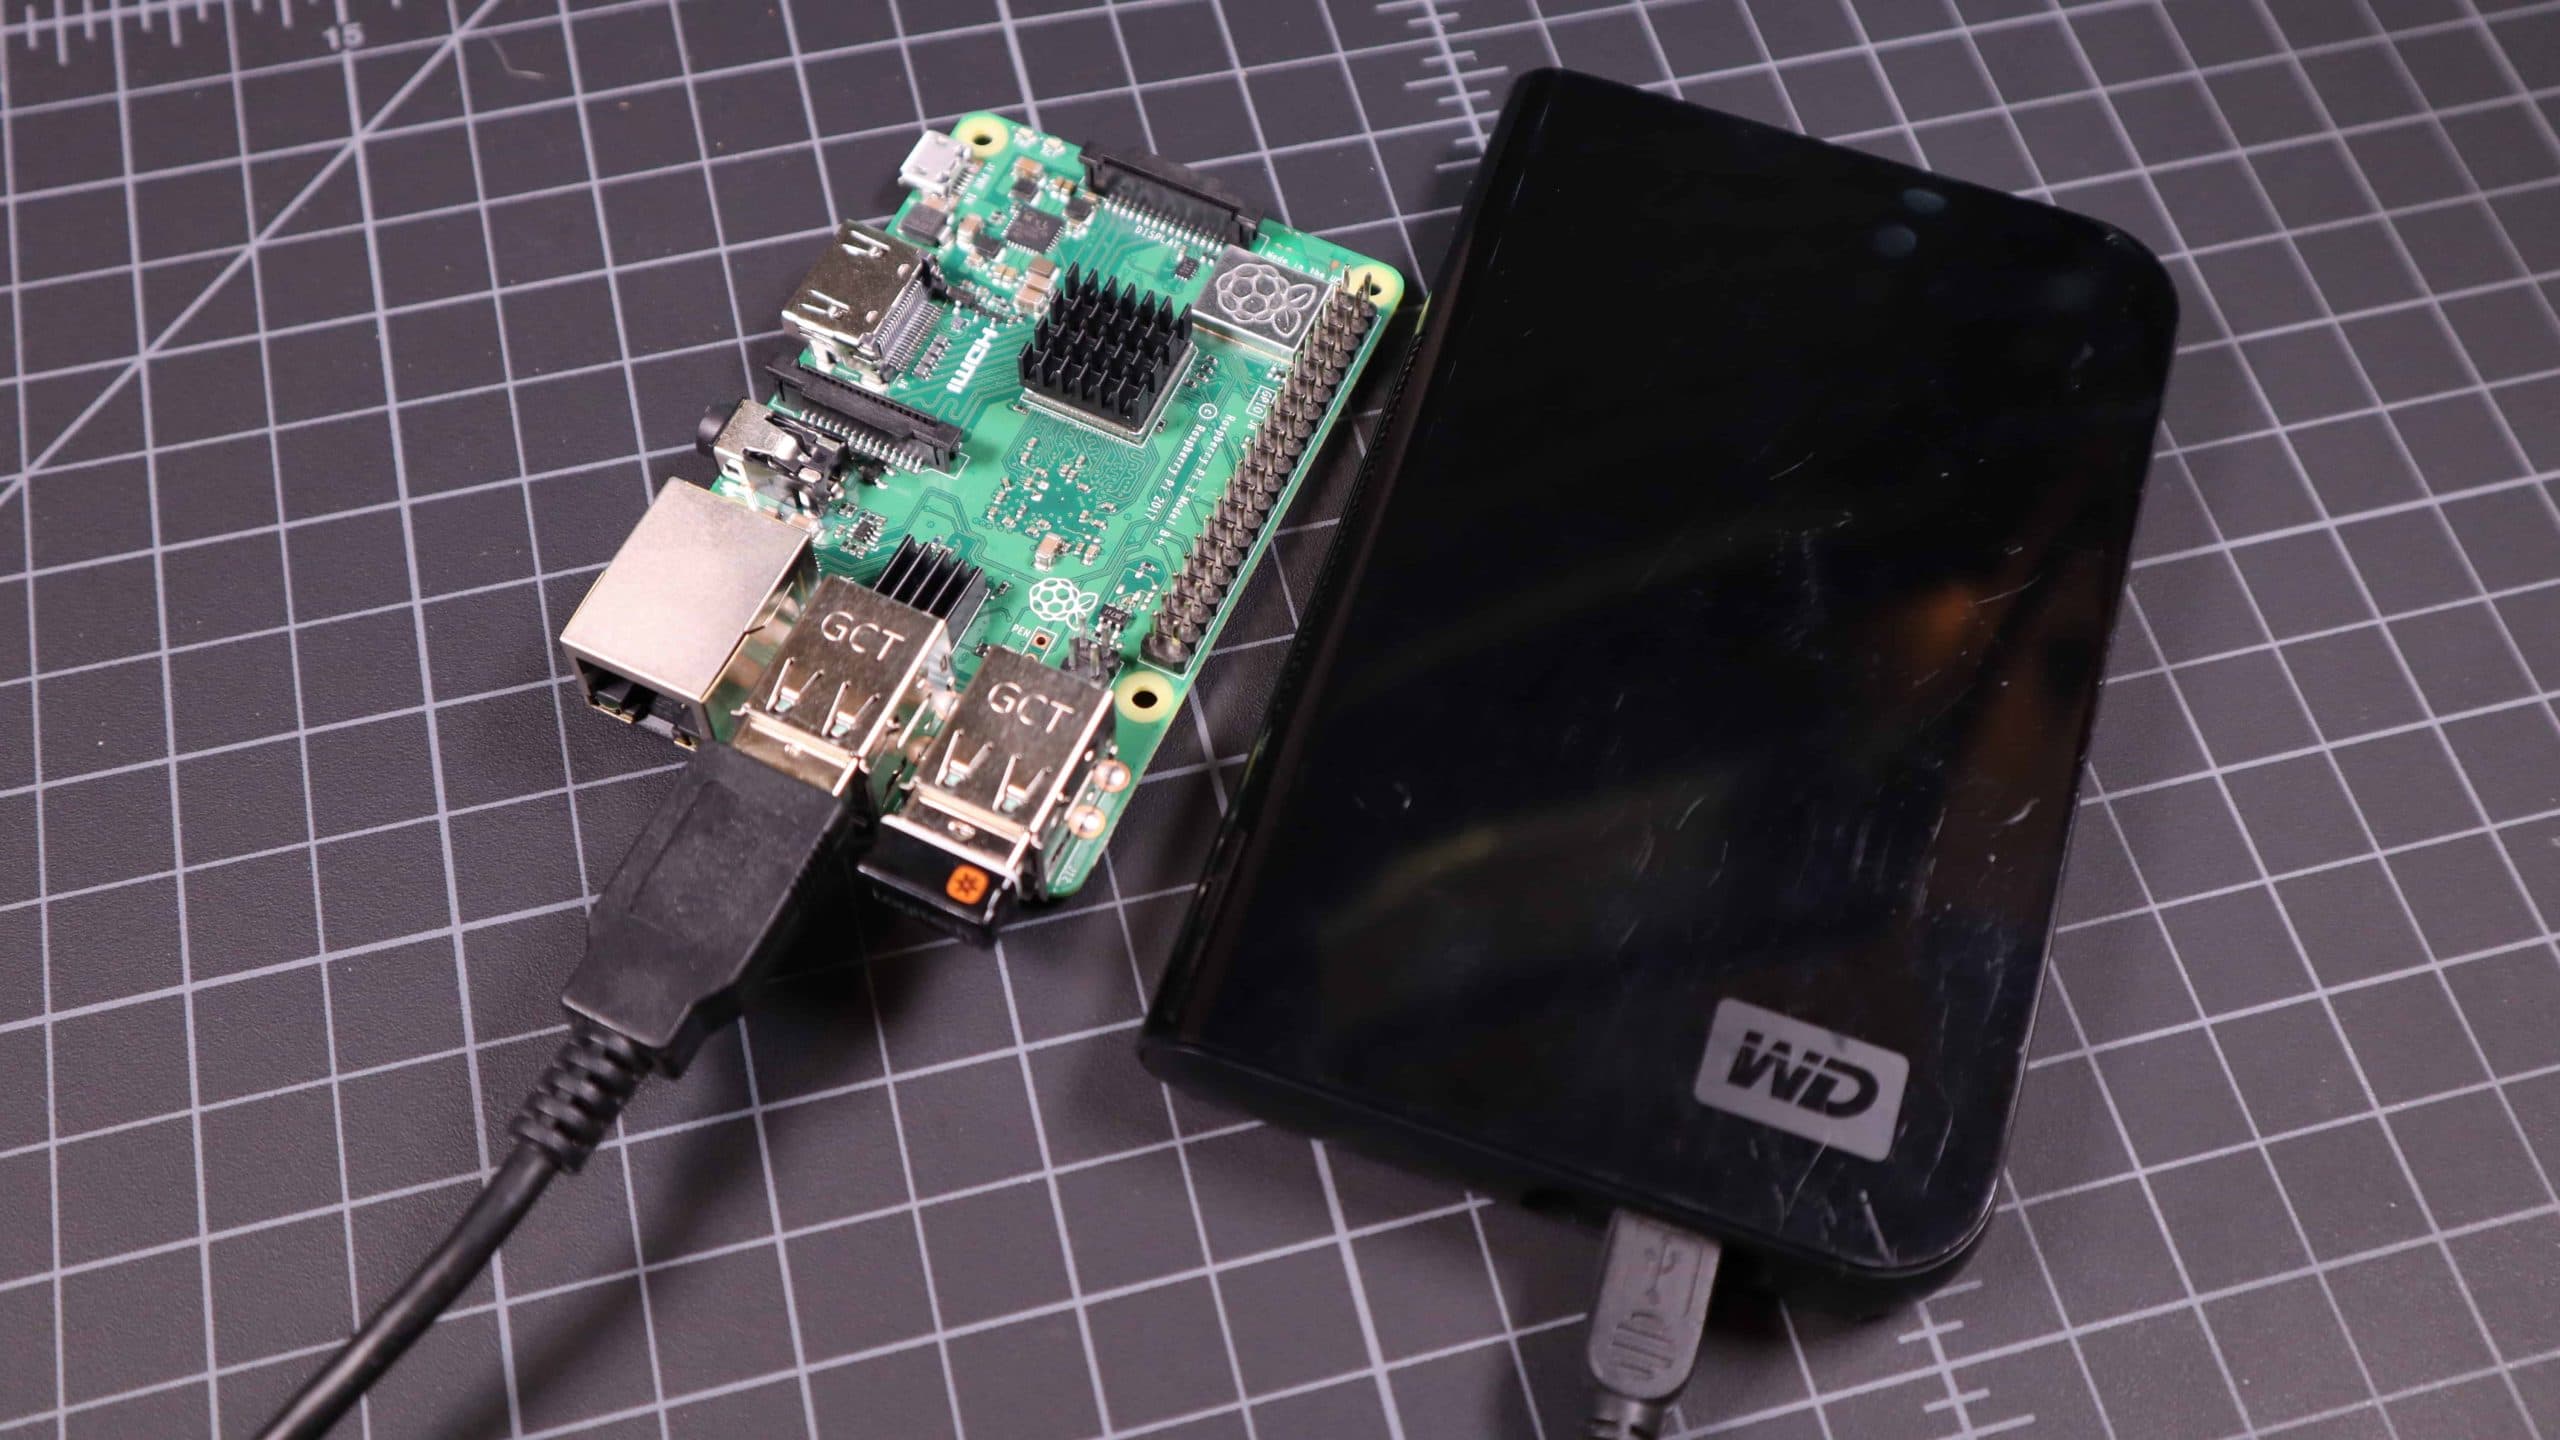
Adding an External Hard Disk to Your Raspberry Pi Samba Server
Of course, the MicroSD card on your
After the hard drive is connected to your
[code language=”bash”]
dmesg
[/code]
This command will list the latest information on the USB bus and should include the name of the recently attached hard disk. In our case the new device is SDA1.
 Now we need to unmount and format the drive with the ext4 file-system. Issue the following commands to do this:
[code language=”bash”]
umount /dev/sda1
sudo mkfs.ext4 /dev/sda1
[/code]
Now let’s create a file folder and give it the right permissions. This new file folder will represent our disk in the Raspbian file-system structure:
[code language=”bash”]
sudo mkdir /home/MyShares/public/MyUSBDrive
sudo chown -R root:users /home/MyShares/public/MyUSBDrive
sudo chmod -R ug=rwx,o=rx /home/MyShares/public/MyUSBDrive
[/code]
I chose MyUSBDrive, but any name you like would work. Now let’s mount the newly formatted USB drive:
[code language=”bash”]
sudo mount /dev/sda1 /home/MyShares/public/MyUSBDrive
[/code]
One last item of housekeeping. You’ll want this drive to automatically mount each time you reboot your
[code language=”bash”]
sudo nano /etc/fstab
[/code]
Add the following bit of configuration to the last line of the file:
[code language=”bash”]
/dev/sda1 /home/MyShares/public/MyUSBDrive auto noatime,nofail 0 0
[/code]
Your
OPTION 2: Build a Raspberry Pi NAS with OMV
Now let’s move on to option 2. Where Samba is a simple way to share files on a network OMV or Open Media Vault is a full blown NAS software for you
Unlike using Samba, where we need to install and configure Raspbian, Open Media Vault comes as a disk image that we’ll burn to our MicroSD card and install. This saves a lot of effort and makes the installation super simple. Word of caution, anything on your SD card will be erased. We recommend buying a second MicroSD card and swapping them out to protect your original card’s data while you experiment with OMV.
Download and Burn Open Media Vault
Head over to sourceforge and download the latest version of the Raspberry Pi OMV files.
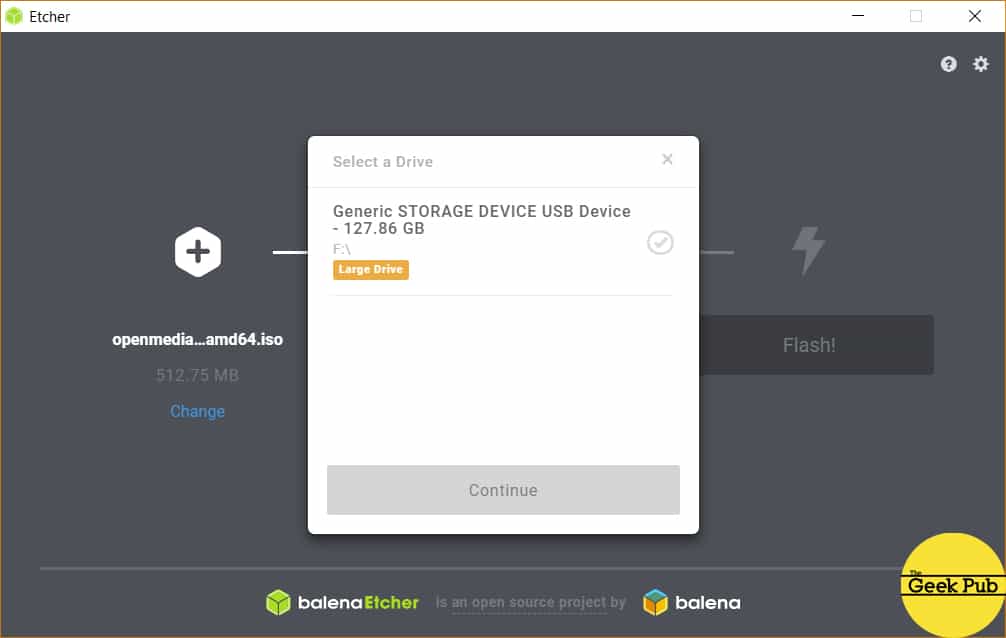
Once you have the file, we’re going to burn it to your SD card using Balena Etcher. Etcher is a super easy drag-n-drop tool for burning image files to an SD Card. You can also use the tried and true Win32 Disk Imager if you’d rather.
Open Etcher, click Select Image. Choose the OMV image you just downloaded and then press the FLASH! button. Balena will burn the image to the SD card over the next few minutes and your OMV image will be ready to boot.
Prepare Your Raspberry Pi for OMV
The next step is to prepare your
- Insert the OMV MicroSD card into your RPi.
- Connect one or more USB hard disks.
- (Recommended) Attach your RPI to your network with an Ethernet cable
- Plug in as your USB power supply to your RPi.
One note of caution. The
Configuring Open Media Vault for Your Raspberry Pi NAS
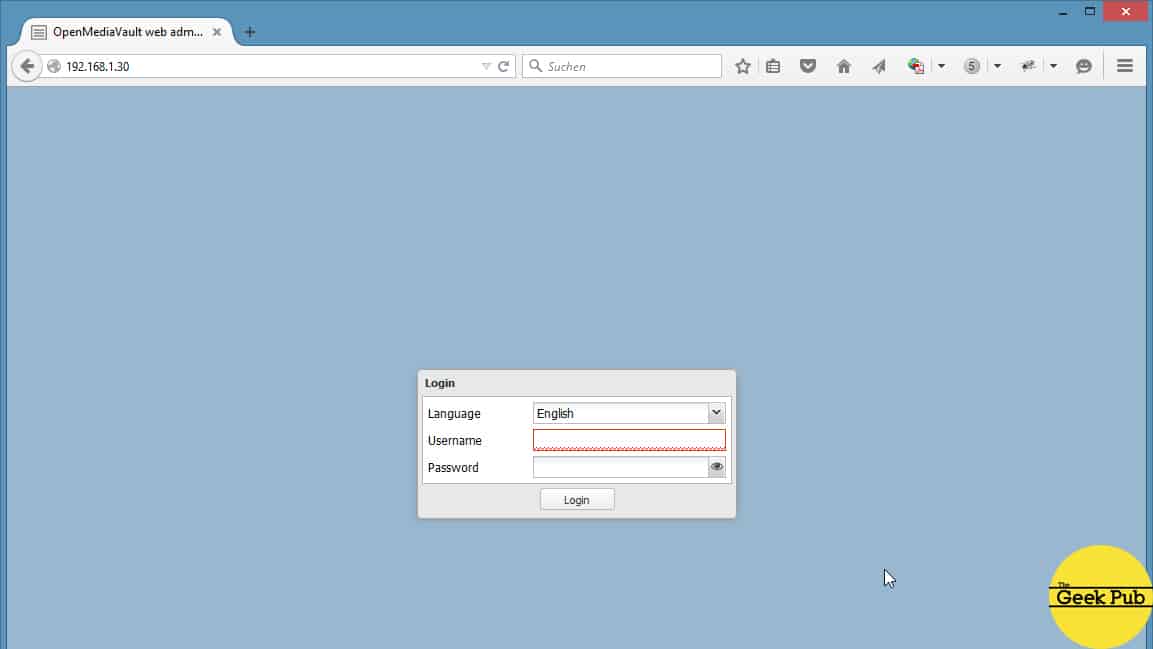
Now we’re ready to get our
You should be greated with the Open Media Vault’s landing page.
The default login credentials for OMV are:
- Username: admin
- Password: openmediavault
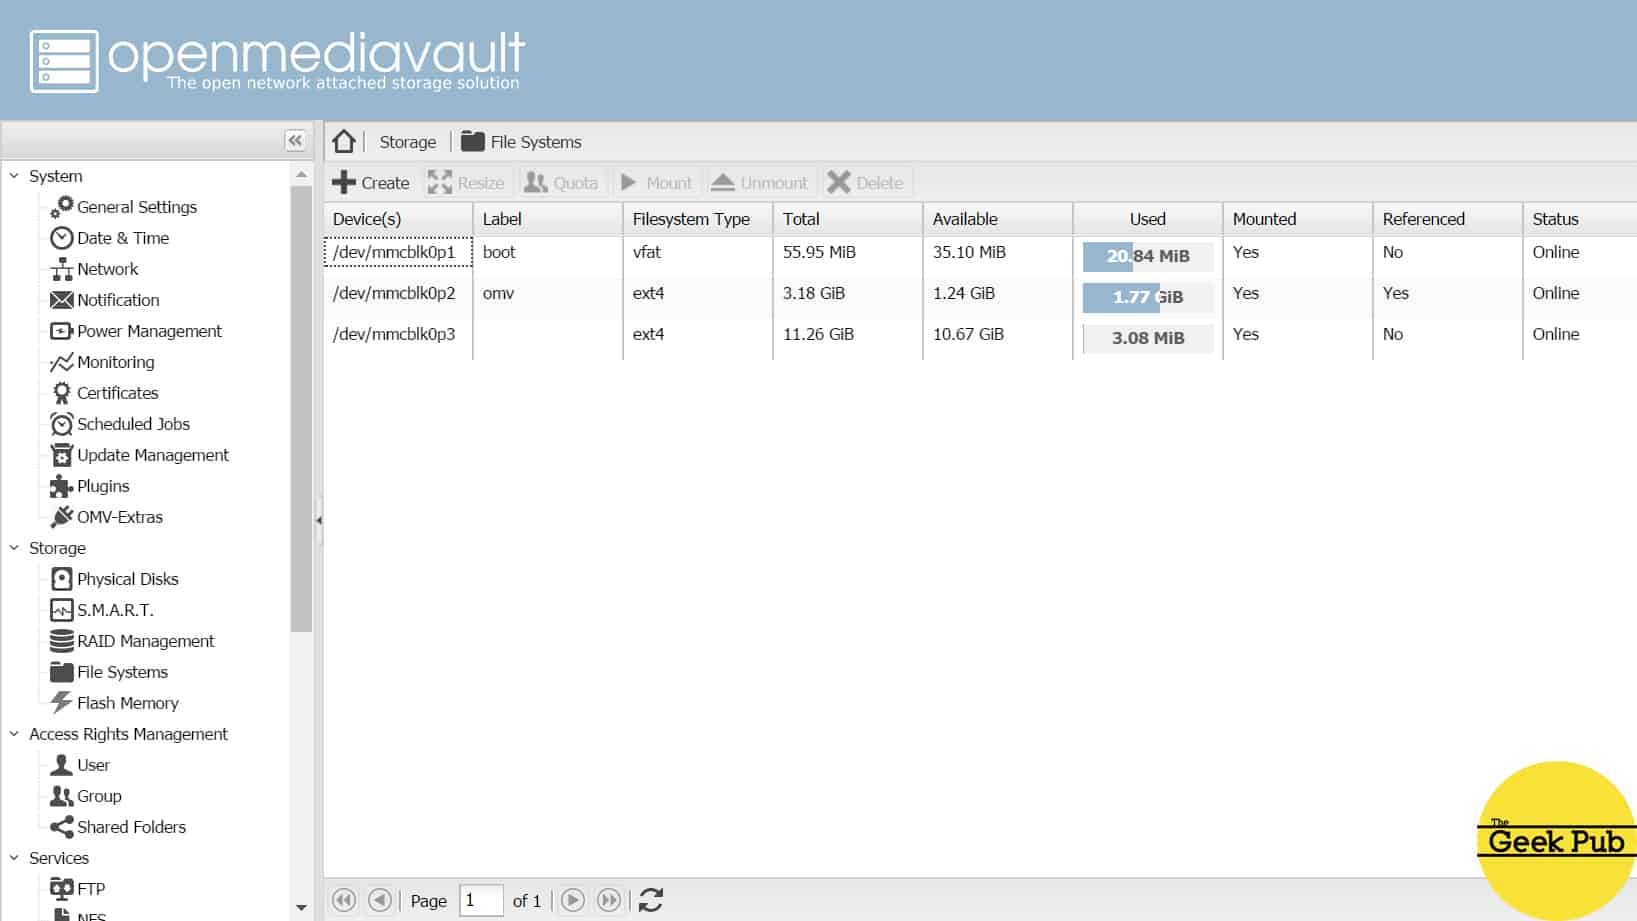
Setting up your Disks and Folders
The last steps for getting your
Next up let’s create some shared folders to use. Again, it couldn’t be simpler. Under the Access Rights Management header, click Shared Folders. Click the add button to create a new folder. In this context window, you can also select which drive it will exist on (if you have more than one drive, any permissions you’d like to assign, etc. Just click save when finished.

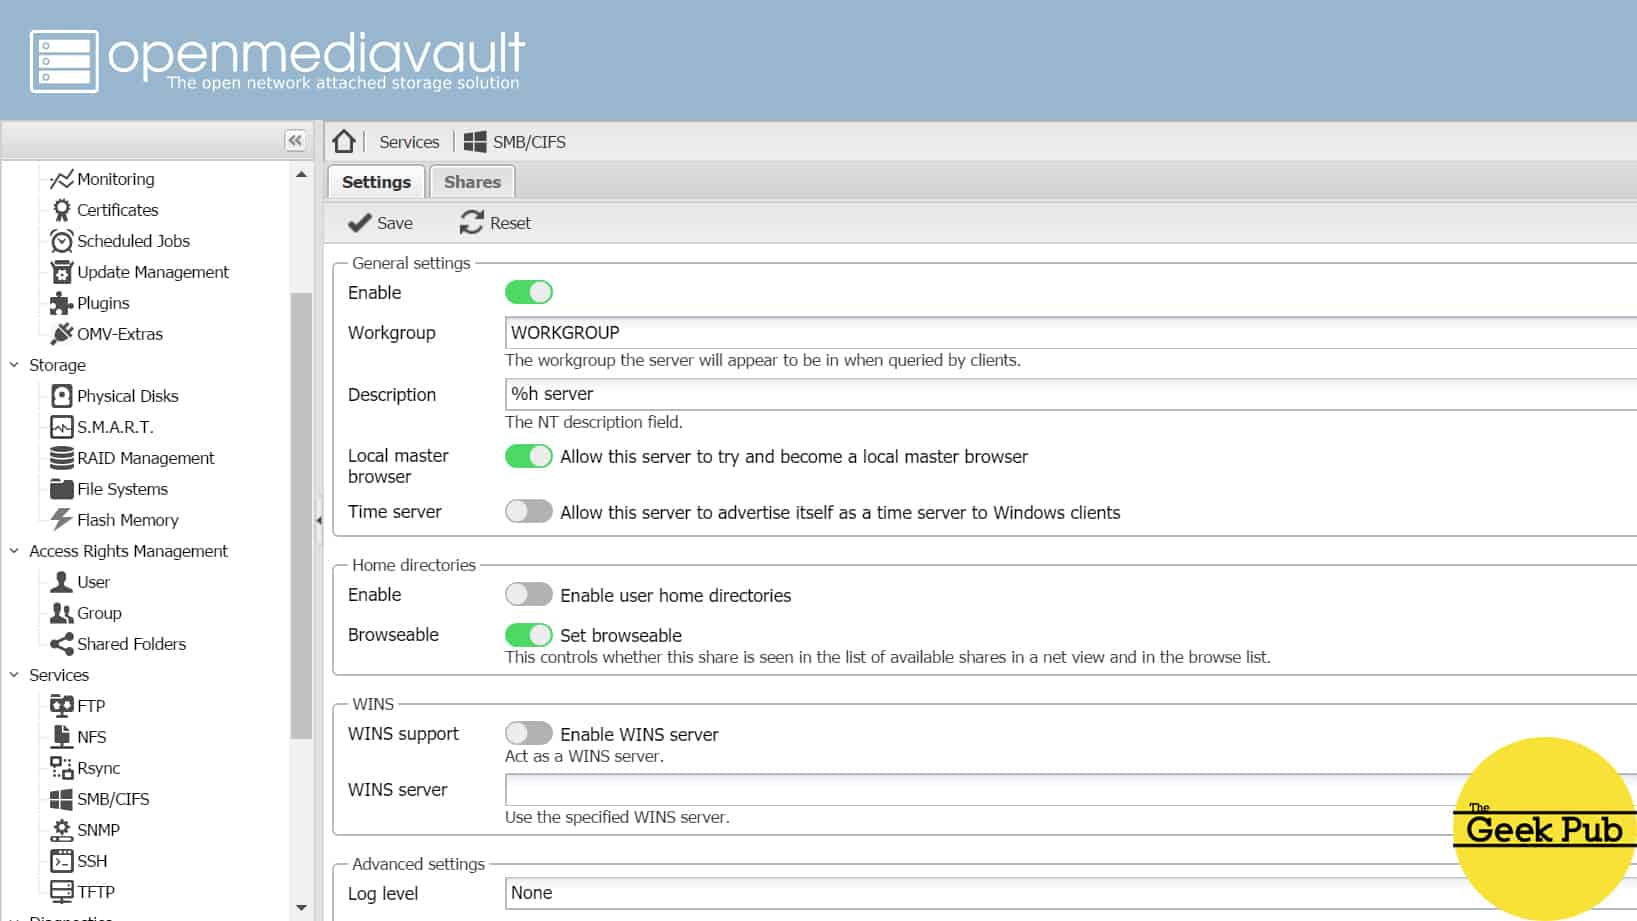
Strangely, OMV does not enable SMB or CIFS out of the box. So these shared folders are not accessible to any devices just yet. In order to bring them to life on the network, we need to enable these sharing services.
Under the Services header on the left side navigation menu select SMB/CIFS. Select the enable radio button and then select save and apply. This will bring SMB/CIFS online and these files shares will now appear on your network.
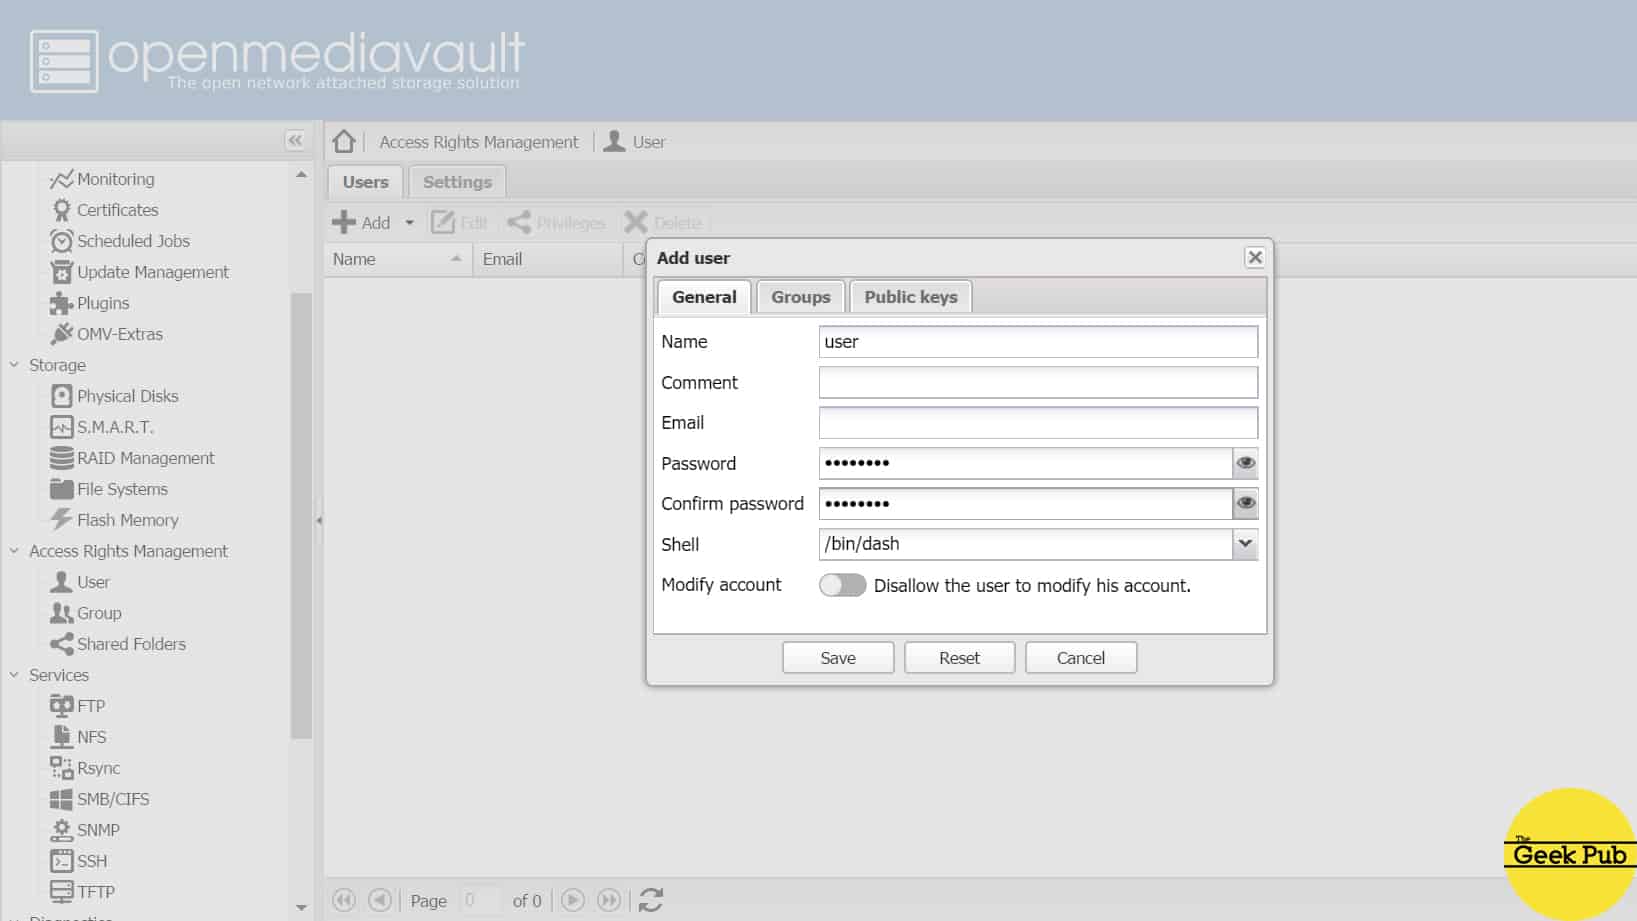
The last step is adding users! On the Access Rights and Management header on the left side navigation menu click User. Click Add and then enter the users information. This can be anything you like, however for simplicity sake you make want to use the same username and password you used to login to your Windows PC or Mac. If you want an extra layer of security, make them something different.
That’s it! You’re finished. Accessing your files is exactly the same as above using the Samba server example. If you need help, scroll back up and read that section. You now have your very own
Now to be honest, we’ve barely scratched the surface of OMV’s capabilities. Like many NAS servers, you can add data protection with RAID, mirror drives, sync data, etc. So start exploring the power of OMV. You’ll be glad you did!


5
I was not aware of this Open Media Vault product. I am super impressed! Thanks for this!
I’m trying to set this up, but the OMV sourceforge link doesn’t refer to anything Pi based. What version should I be using now?
I’m running Buster Lite-> https://www.raspberrypi.org/downloads/raspbian/
0.5
5