Blog
Arduino Water Level Sensor Tutorial
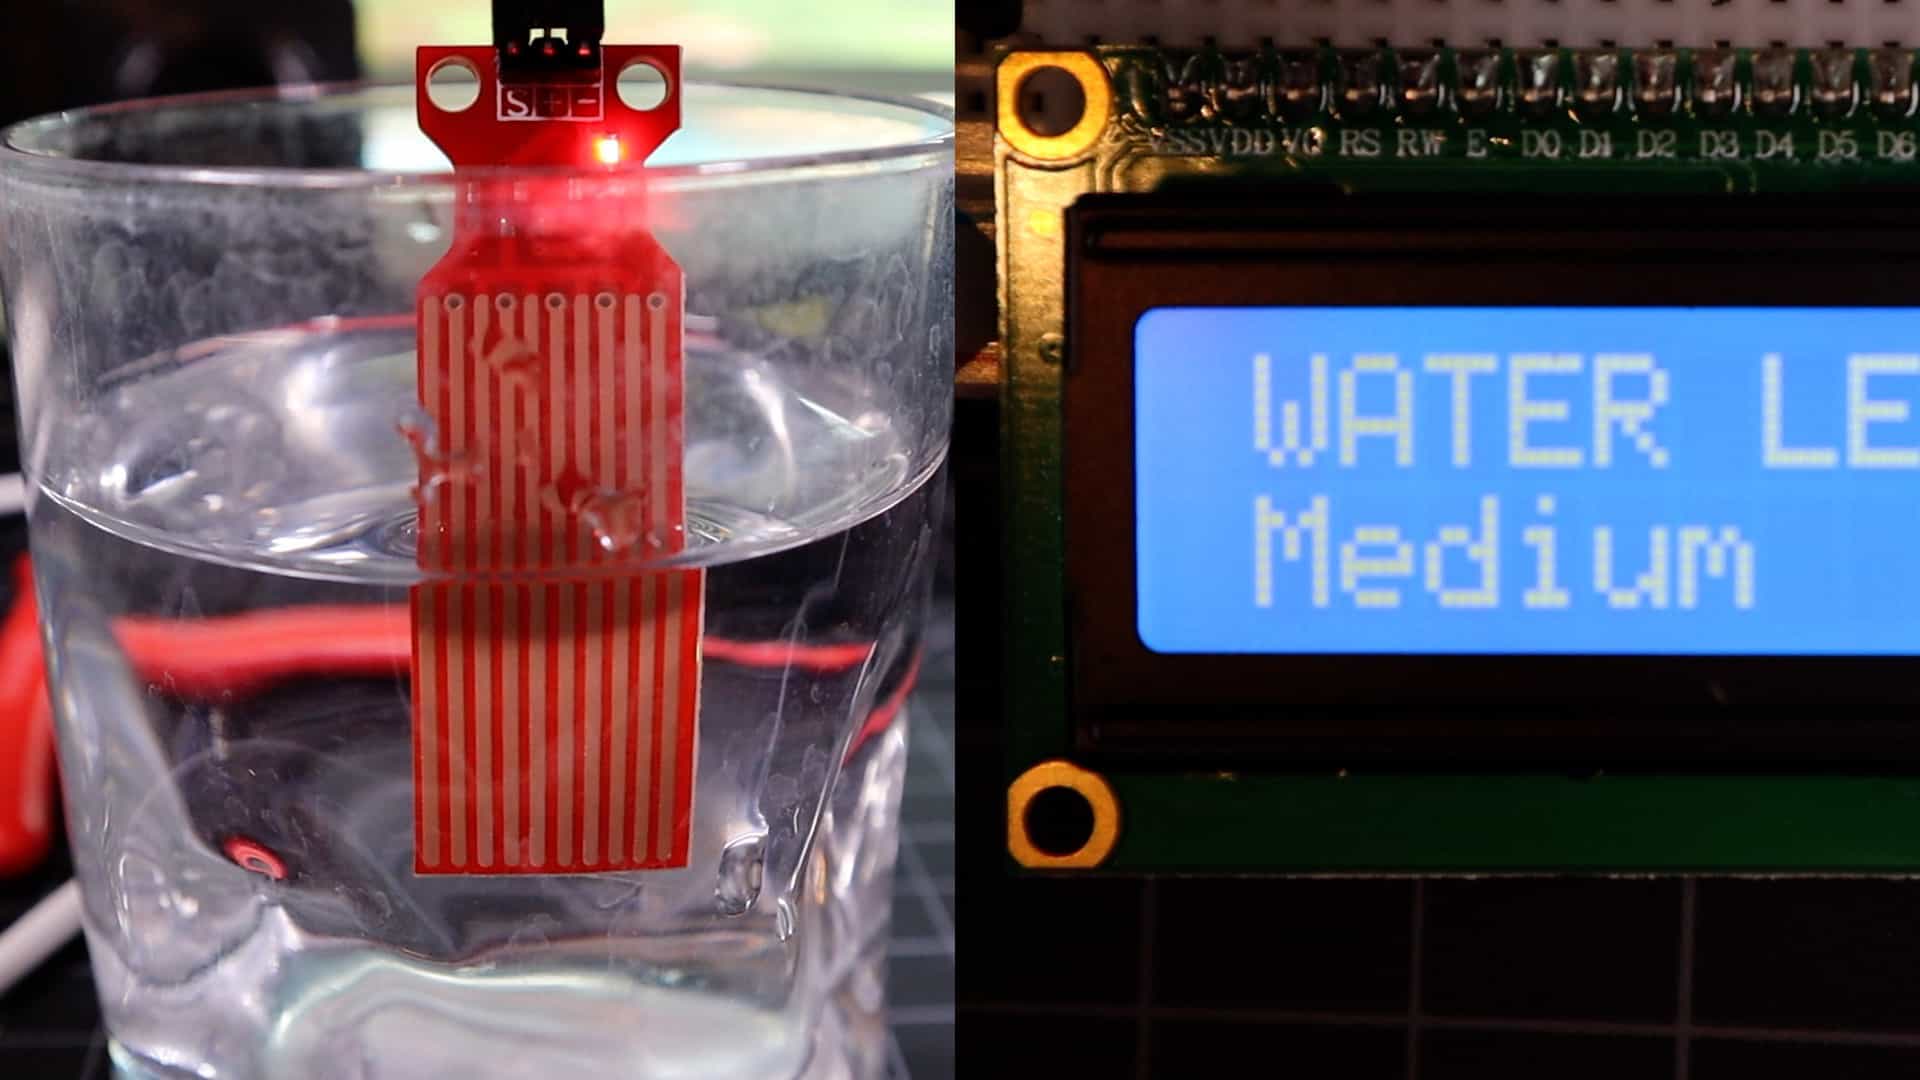
In this article, we’re going to do an Arduino water level sensor tutorial. We’ll go over how to wire the sensor, how it works, and some basic code examples to get you started in your projects. This sensor is also sometimes referred to as a water leak detection sensor.
Watch the Arduino Water Level Sensor Tutorial Video
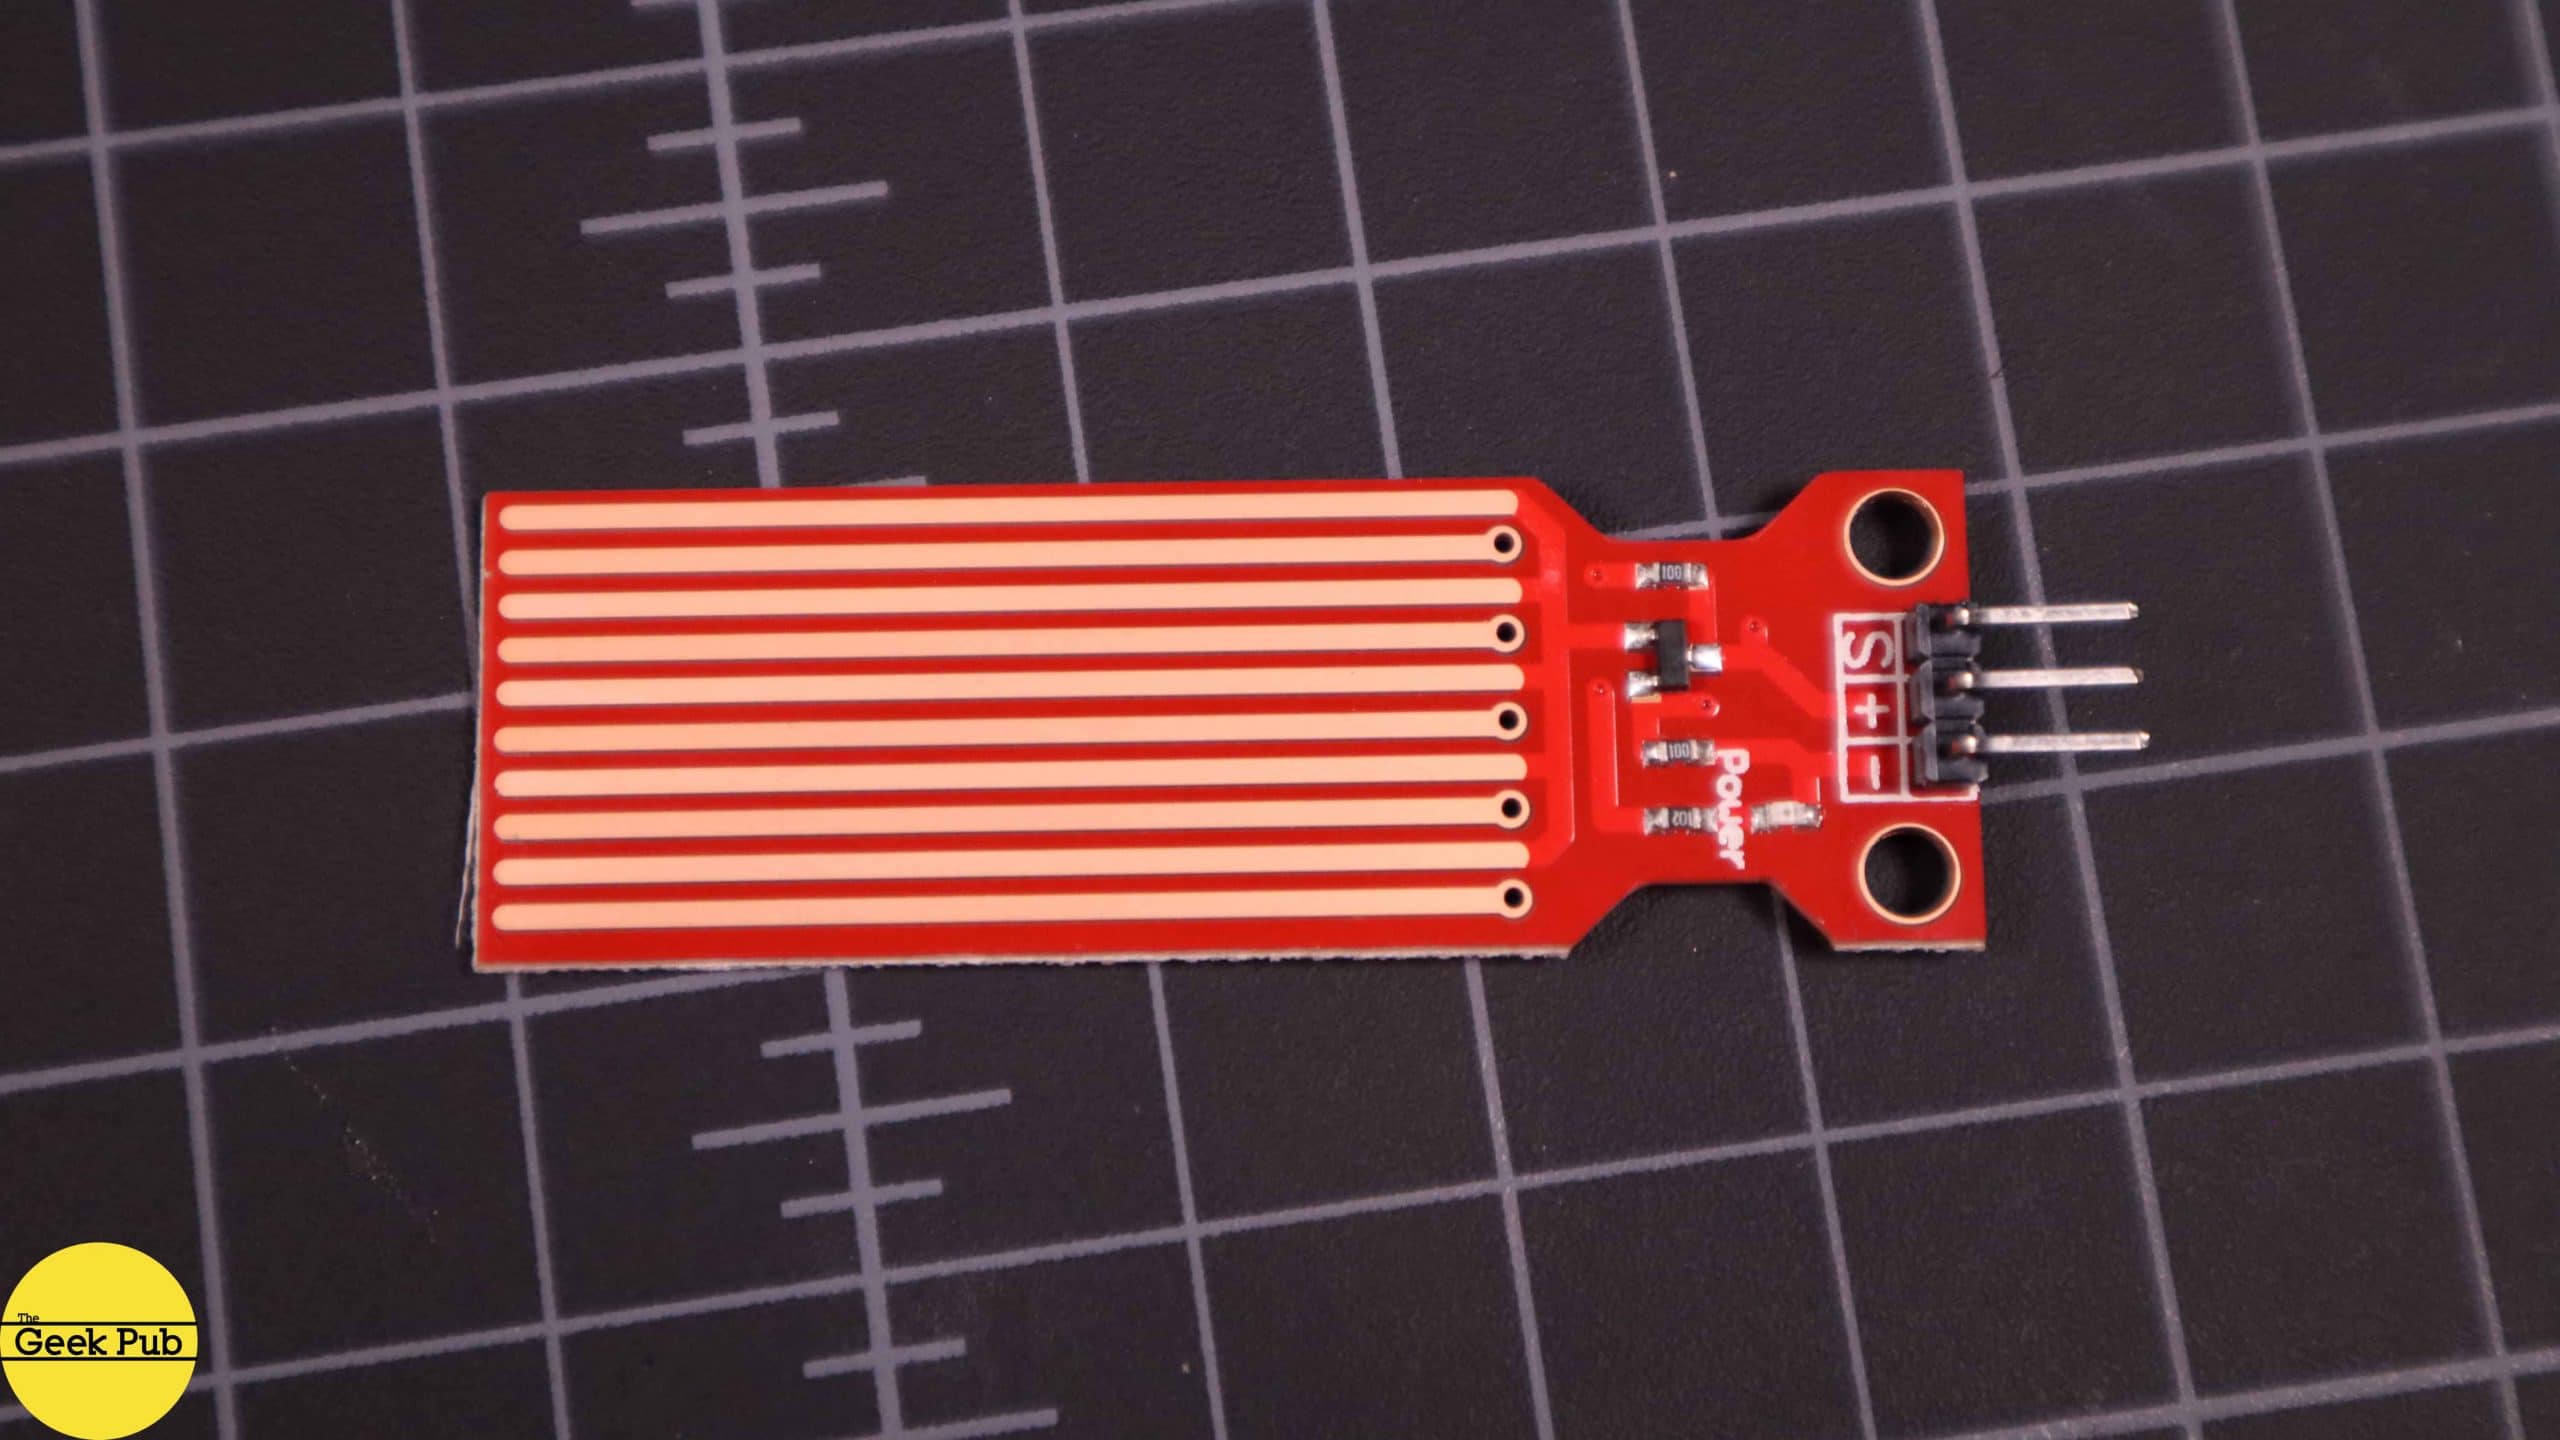
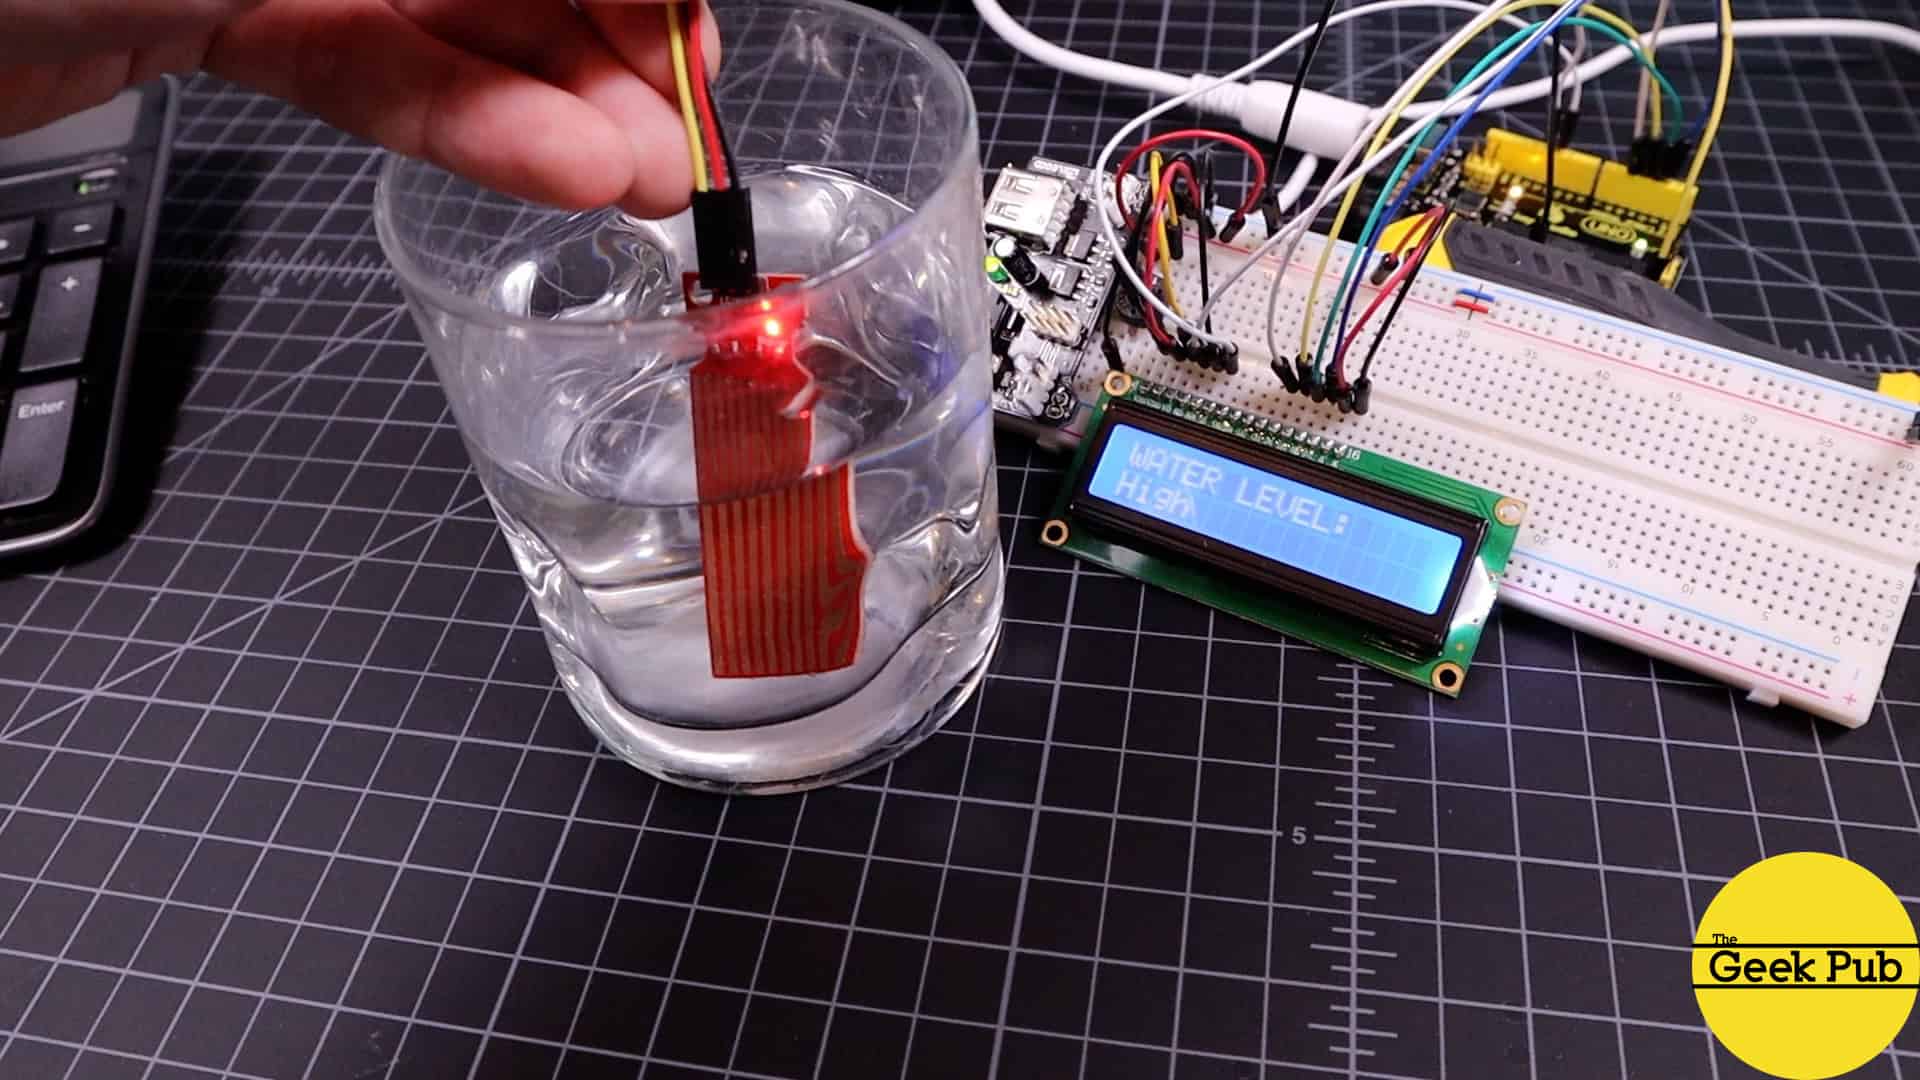
The water level sensor is super easy to use and only has 3 pins to connect. Ground, +5V, and the signal pin. The signal pin is an analog output that will be connected to any of the analog outputs on your Arduino. The analog sensor board has several copper traces on it that are not connected but are bridged by water when submerged.
Pure water is not conductive. It’s actually the minerals and impurities in water that makes it conductive. This is important to understand because your sensor may be more or less sensitive based on your type of water and you may need to change the numbers in the code to get accurate readings. Ultimately, we’re just reading resistance of the impurities in your water. The more of the traces that are bridged the easier current can pass.
Reading the sensor output with an analog input pin on the Arduino will result in an integer between 0 and 500 with typical public water supplies.
Parts List for this Project
Here’s a quick parts list for this project to get you started:
- Arduino Uno or Arduino Mega 2560
- Water Level Sensor (Leak Detection Sensor)
- LCD Character Display (optional)
- 10K Potentiometer (optional)
- Breadboard and Wires
Wiring the Arduino Water Level Sensor
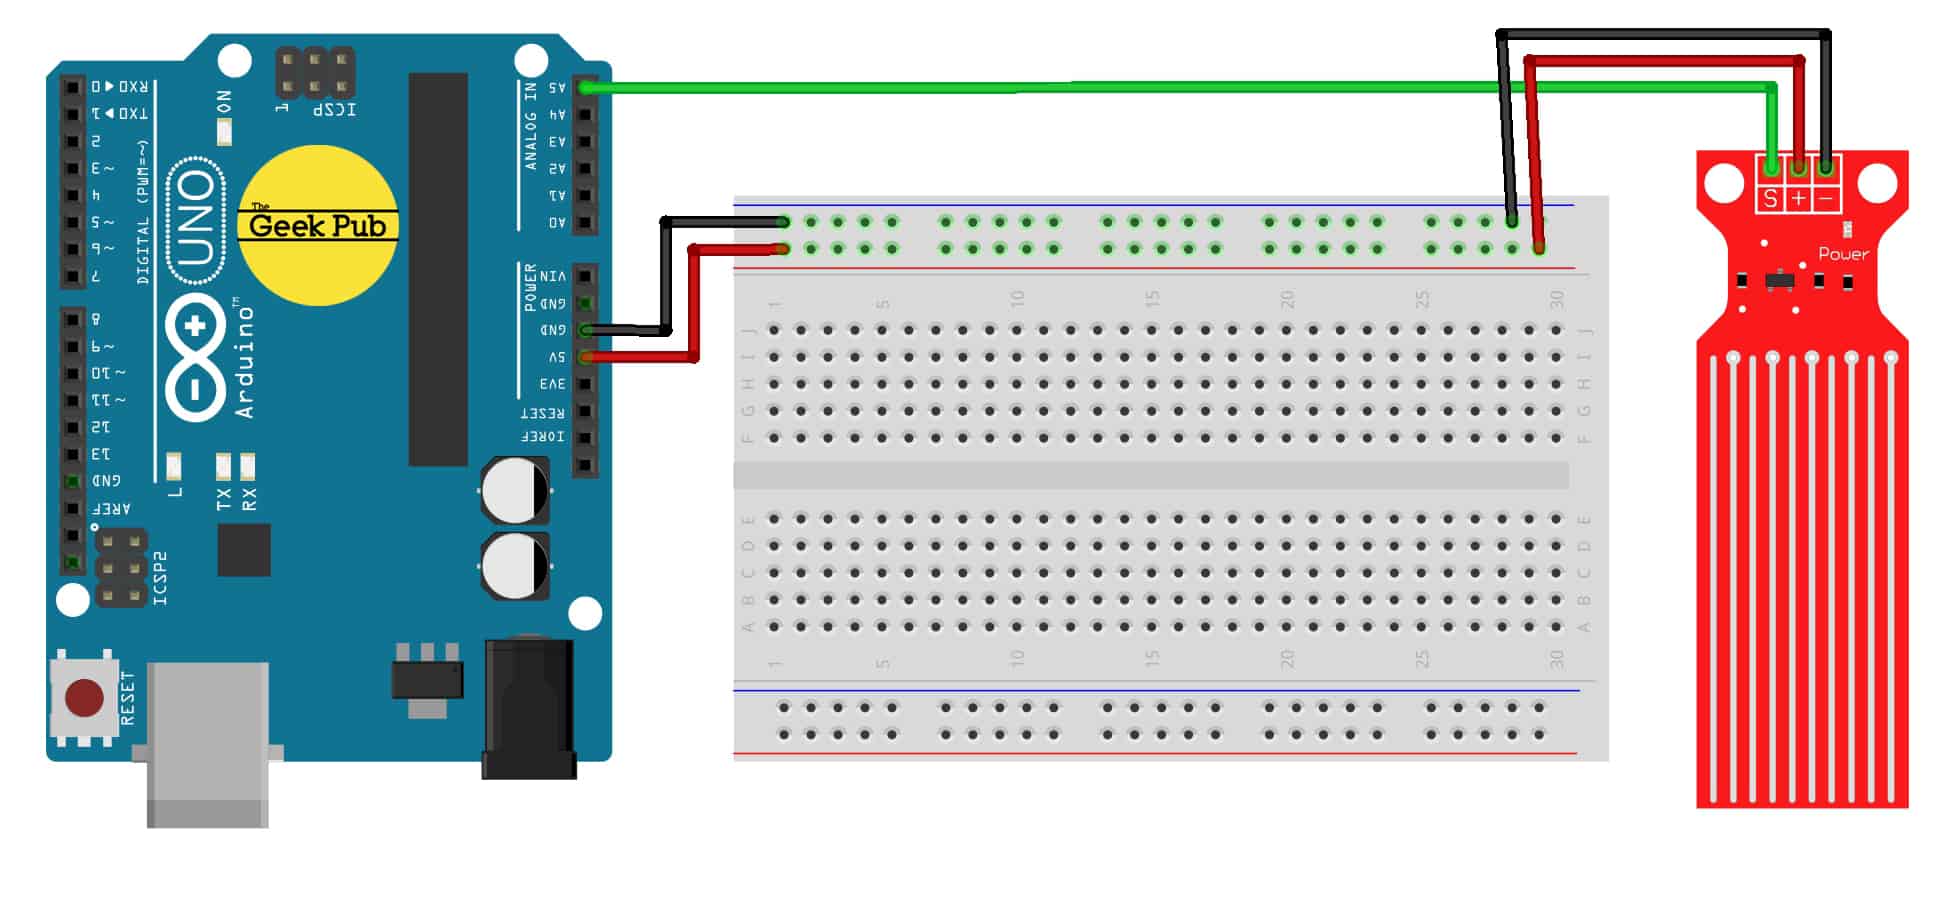
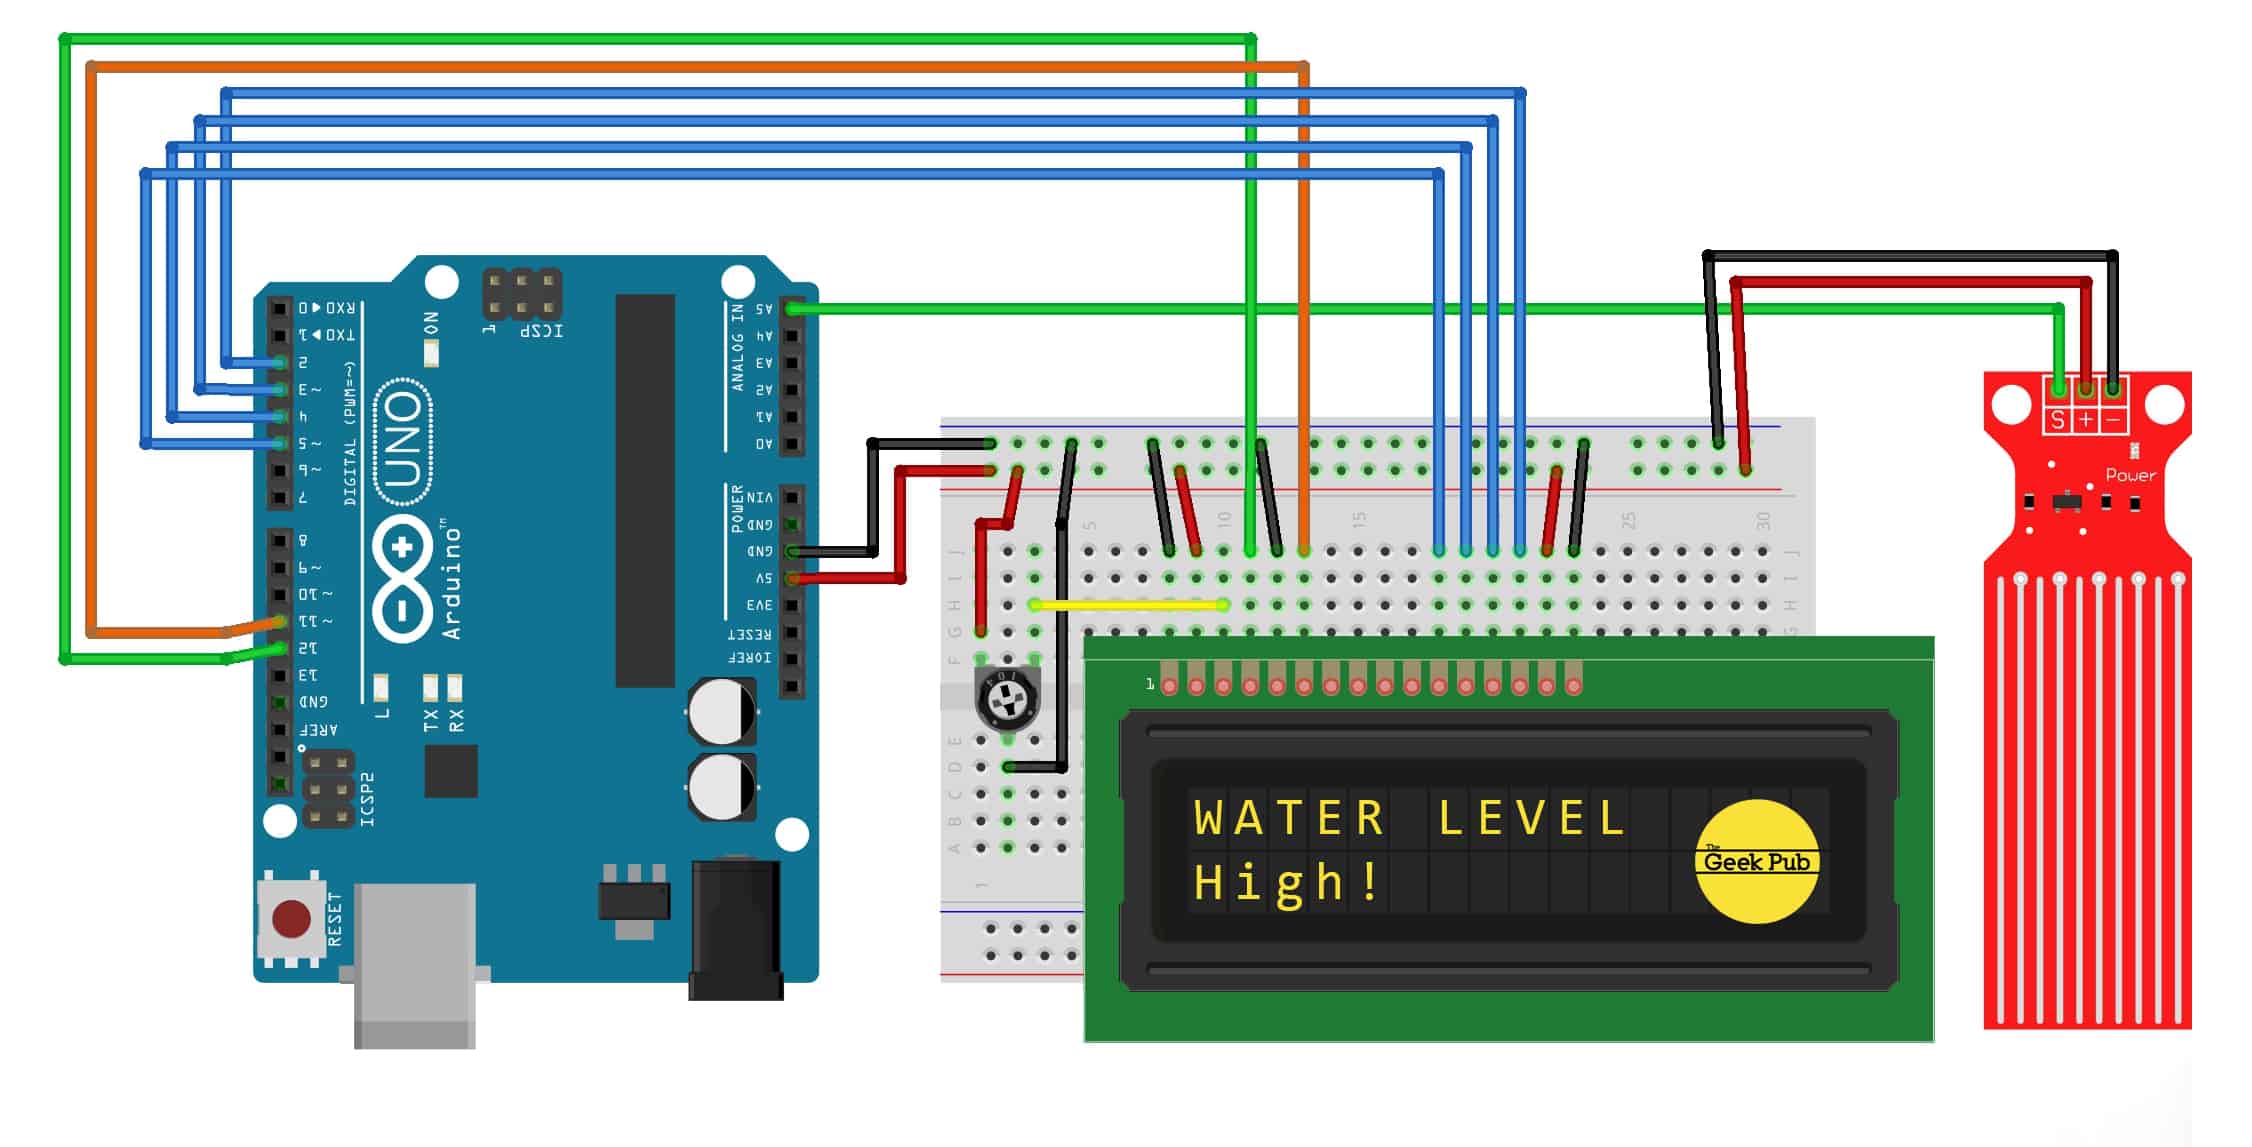
Wiring the water level sensor is incredibly simple. We’ll use the following wiring diagram to wire it up and use it with the serial console, or with your own code. One thing of importance: If you’re using this sensor remotely, it is imperative the Arduino and this sensor share a common ground for it to work. Common ground does NOT work through a transformer or the USB port. Make sure the Arduino GND pin is connected to the sensor’s GND pin somewhere in your project.
- Water Sensor Signal to Arduino A5
- Water Sensor +5V to Arduino 5V
- Water Sensor GND to Arduino GND
 If you’d like to follow our full build and output to the LCD screen, follow the additional LCD wiring instruction on our Arduino LCD wiring tutorial. Here’s the diagram if your already experienced with them.
Arduino Water Level Code Example (Serial Console)
If you don’t have (or don’t want) and LCD character display in your project, then this code will print the output of the water level sensor to your serial console. This is a great piece of intraductory code to help you learn how to use the Arduino water level sensor in your own projects. A few things to note about this code:
- You can run it faster than once a second by changing the delay time. However, your limit will be the serial output routine. To check faster than around 100ms you’ll need to turn off serial output.
- You may need to adjust the numbers here based on the amount of impurities (minerals) in your water. The sensor may be more or less sensitive to certain waters. Remember, pure water is non-conductive, its the minerals that make this work. The numbers I used work well in my area.
[code language=”cpp”]
int resval = 0; // holds the value
int respin = A5; // sensor pin used
void setup() {
// start the serial console
Serial.begin(9600);
}
void loop() {
resval = analogRead(respin); //Read data from analog pin and store it to resval variable
if (resval<=100){ Serial.println("Water Level: Empty"); } else if (resval>100 && resval<=300){ Serial.println("Water Level: Low"); } else if (resval>300 && resval<=330){ Serial.println("Water Level: Medium"); } else if (resval>330){
Serial.println("Water Level: High");
}
delay(1000);
}
[/code]
Arduino Water Level Code Example (LCD Screen)
The LCD version of this code is almost identical, we simply add a routing to print to the LCD and move the cursor back to our home point on each cycle.
[code language=”cpp”]
// include the library code:
#include <LiquidCrystal.h>
//initialise the library with the numbers of the interface pins
LiquidCrystal lcd(12, 11, 5, 4, 3, 2);
int resval = 0; // holds the value
int respin = A5; // sensor pin used
void setup() {
// set up the LCD’s number of columns and rows:
lcd.begin(16, 2);
// Print a message to the LCD.
lcd.print("WATER LEVEL: ");
}
void loop() {
// set the cursor to column 0, line 1
lcd.setCursor(0, 1);
resval = analogRead(respin); //Read data from analog pin and store it to resval variable
if (resval<=100){ lcd.println("Empty "); } else if (resval>100 && resval<=300){ lcd.println("Low "); } else if (resval>300 && resval<=330){ lcd.println("Medium "); } else if (resval>330){
lcd.println("High ");
}
delay(1000);
}
[/code]
The Completed Project
With everything complete your LCD screen (or serial console) should be showing the water level as you lower it into a cup of water or other source of liquid.
Uses for the Water Level Sensor
The water level sensor can be used for many things and is actually more versatile than you might at first think. So here’s things you might try:
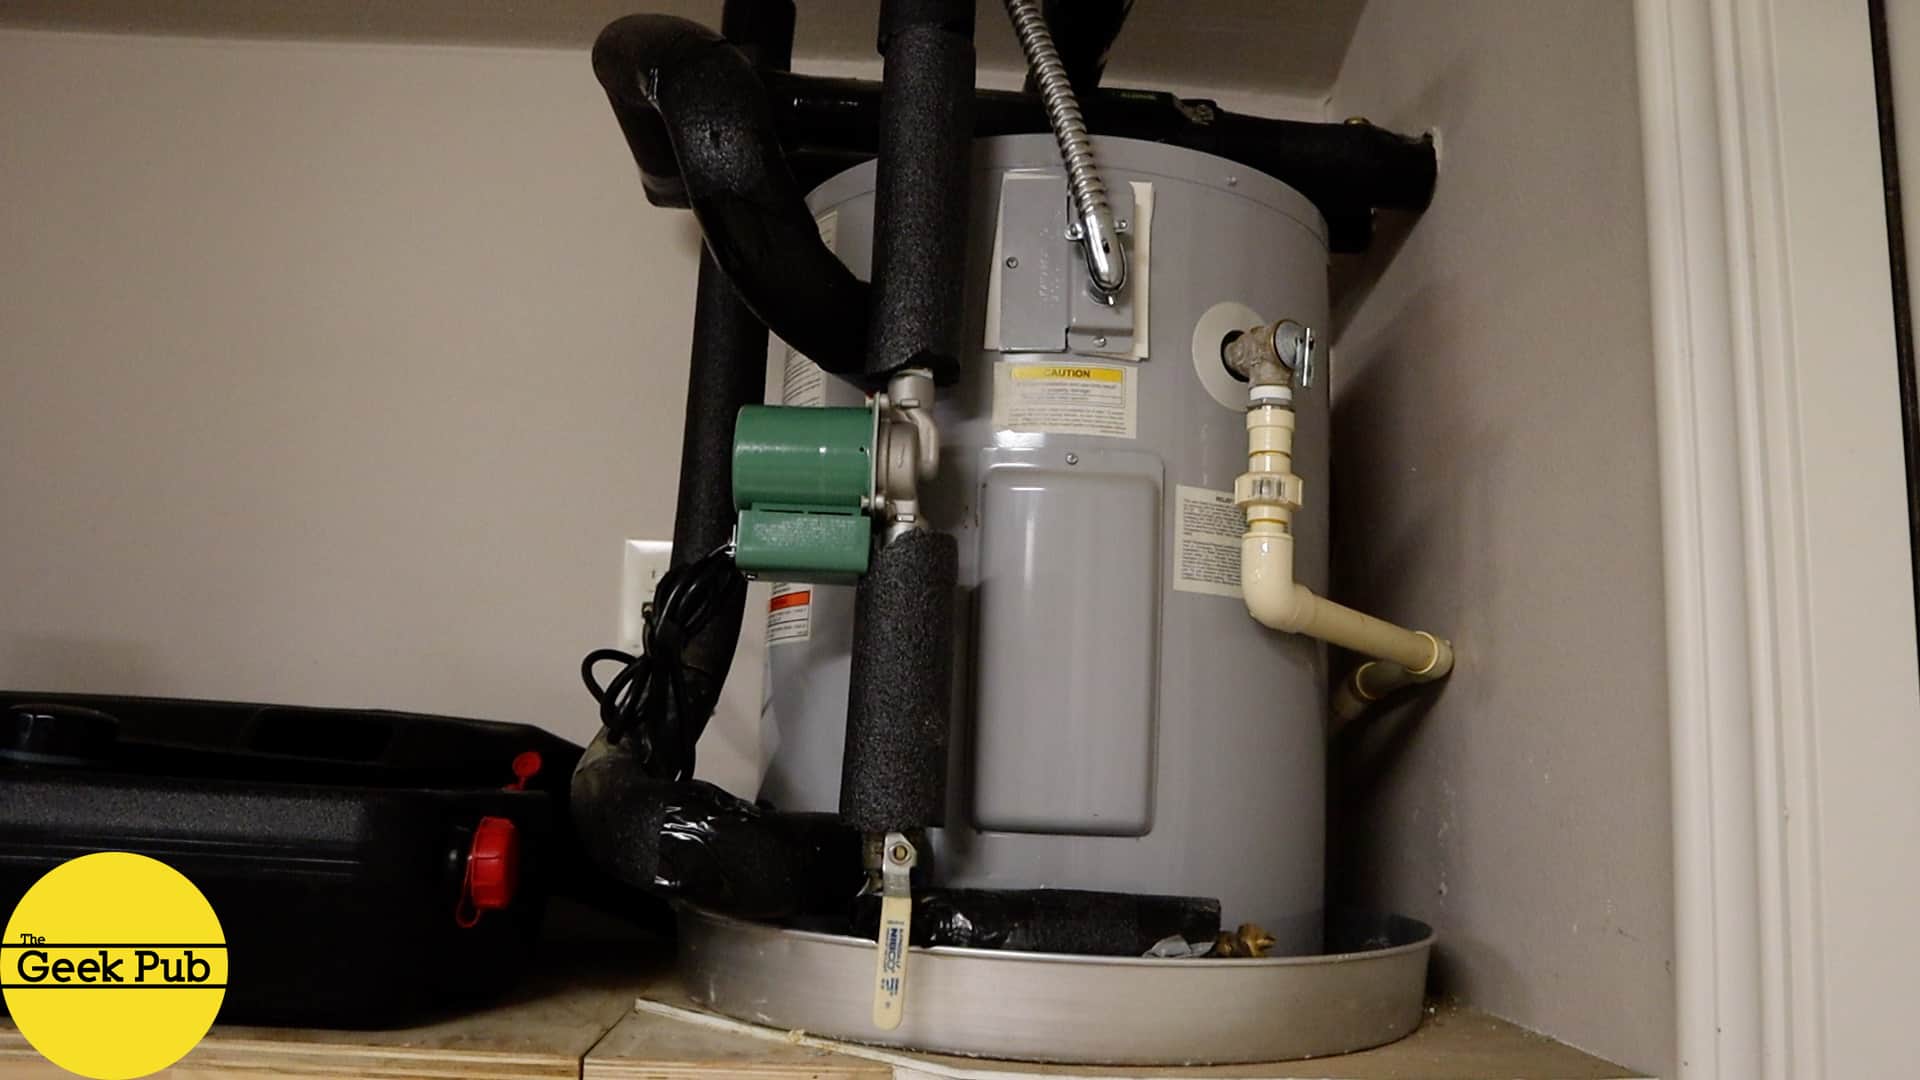
- Water level detection for the pan of a water heater. It’s very common for these heaters to leak when they get older. Placing a sensor in the pan to detect the presence of water where there should be none.
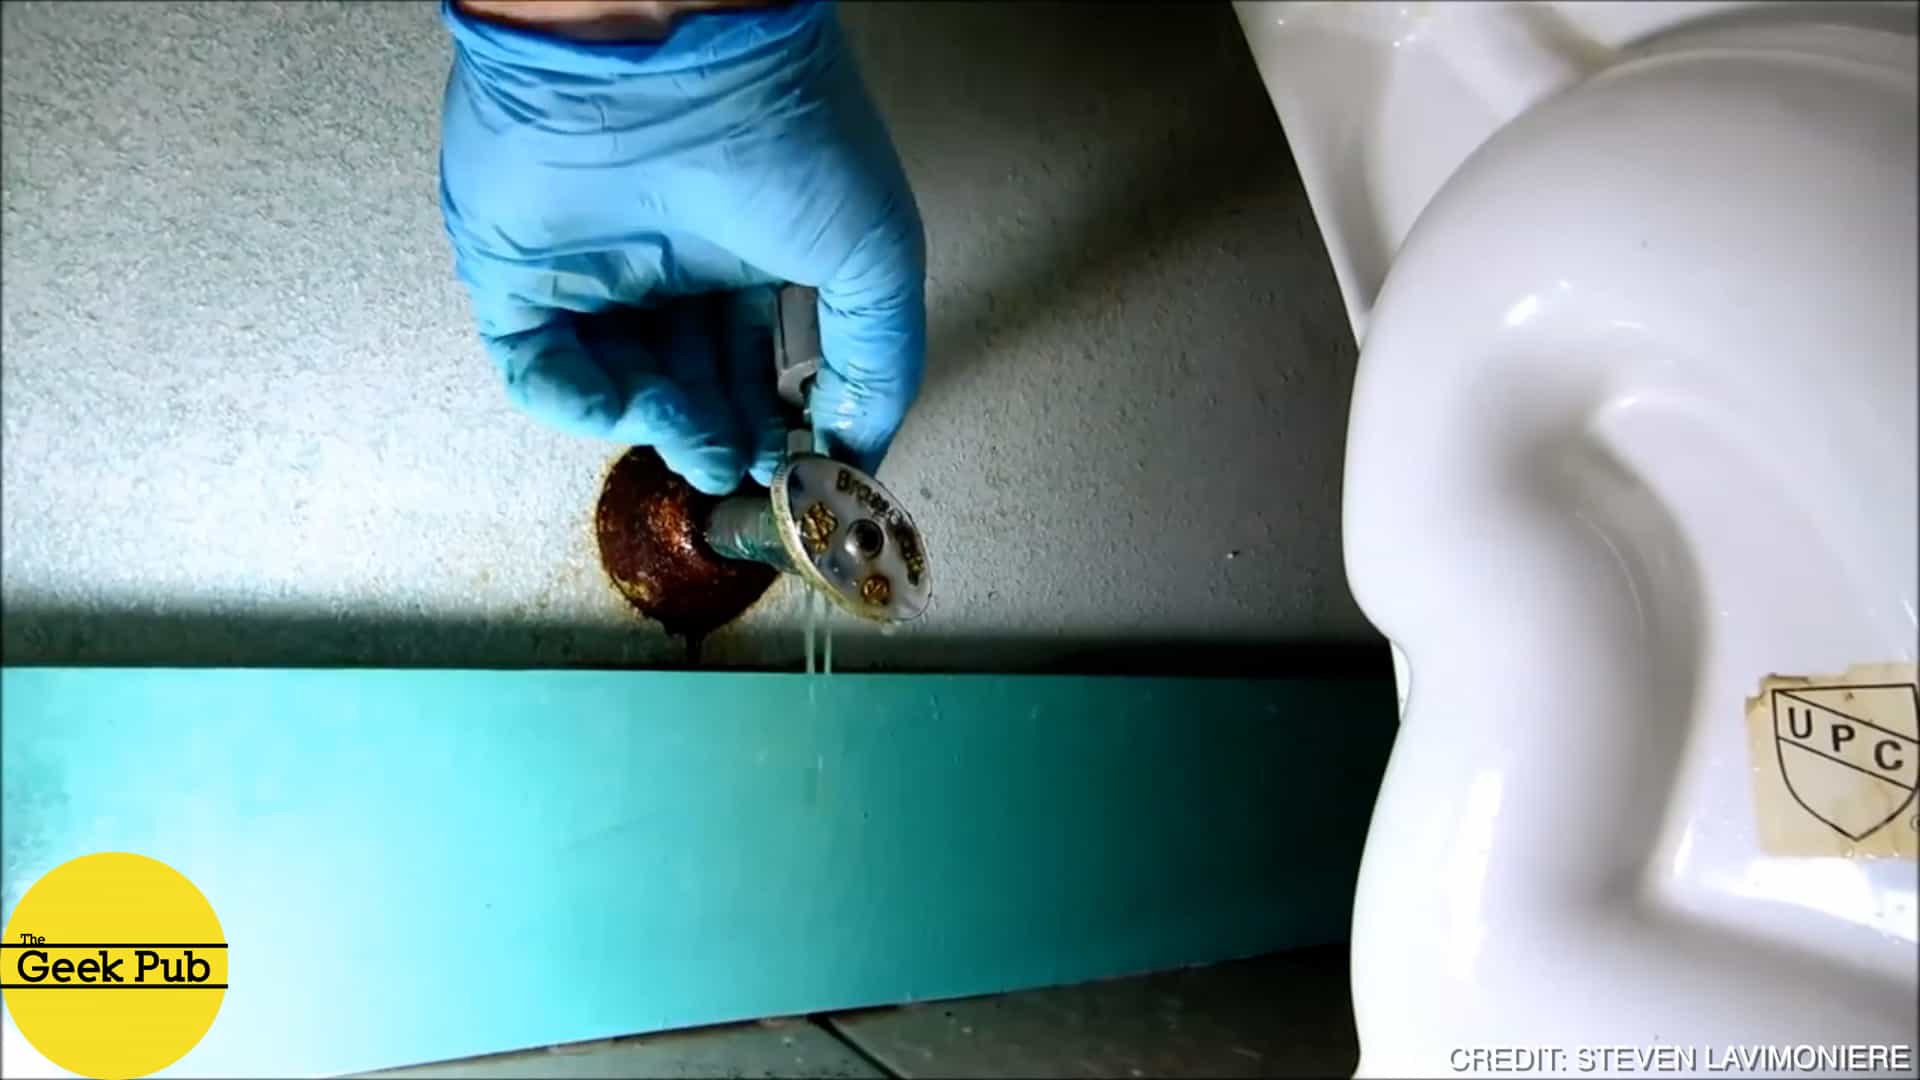
- Same goes for under sink links. Especially in homes that are vacant for much of the year. Use an Ethernet Shield (or WiFi) to add this leak detection device to the internet and have it send an email if water is detected.
- Although not specifically designed for soil moisture readings, it does work relatively well for that purpose. Again, you’ll need to experiment with the numbers but this device could be used to determine if plants need water and to initiate a sprinkler to hydrate them.
We hope you found this project useful! Leave a comment below if you need help and we’ll do our best to answer.


5
Does this sensor have a specific operating temp?
1
4
5
how can we add a piezo speaker in this circuit
Depends. To do what?
In the code given above what is the parameter considered for the selecting the values for different levels.
2
I’m struggling with the code as I’m am new to coding can you include a download?
I’m sorry I forgot copy and paste is a thing I’m not using a Arduino Uno I’m using a elegoo mega2560 will it still work
Yes it does. The analog pin is still down the side on the mega2560 but your + and – are reversed on the breadboard.
4.5
can the same parts be sued to activavte a small water pump to ( for example ) top up an aquarium ?
can I use two sensors instead of one to avoid problems and over filling the aquarium ?
I never used did any ardunio nor programmed somthing do you think its possible to do that , or is there a way to guide me ?
This is fantastic! Anyone ever build this to publish water levels to MQTT?
wheres the code?