Blog
Building a 1U Server (Bad A** 1U Server Build!)
[adinserter name=”TopOfPost”]This build is not about building the biggest, baddest, and most redundant server we can build, rather this one is about building the biggest and baddest server that we cram in to a 1U case that is only 19” wide by 12” deep. Building a 1U Server didn’t come without challenges, but in the end it was worth the struggle and just turned out simply awesome!
This box is home network server running VMWare ESX, meaning it has multiple virtual servers running on it all at once. This server is actually the second server in a pair forming a redundant VMWare ESX cluster. These two servers connect via iSCSI to a Synology RS2416+ to share a VMS storage volume that contains the operating systems and applications. This is awesome because it means if one server fails the other one immediately takes over.
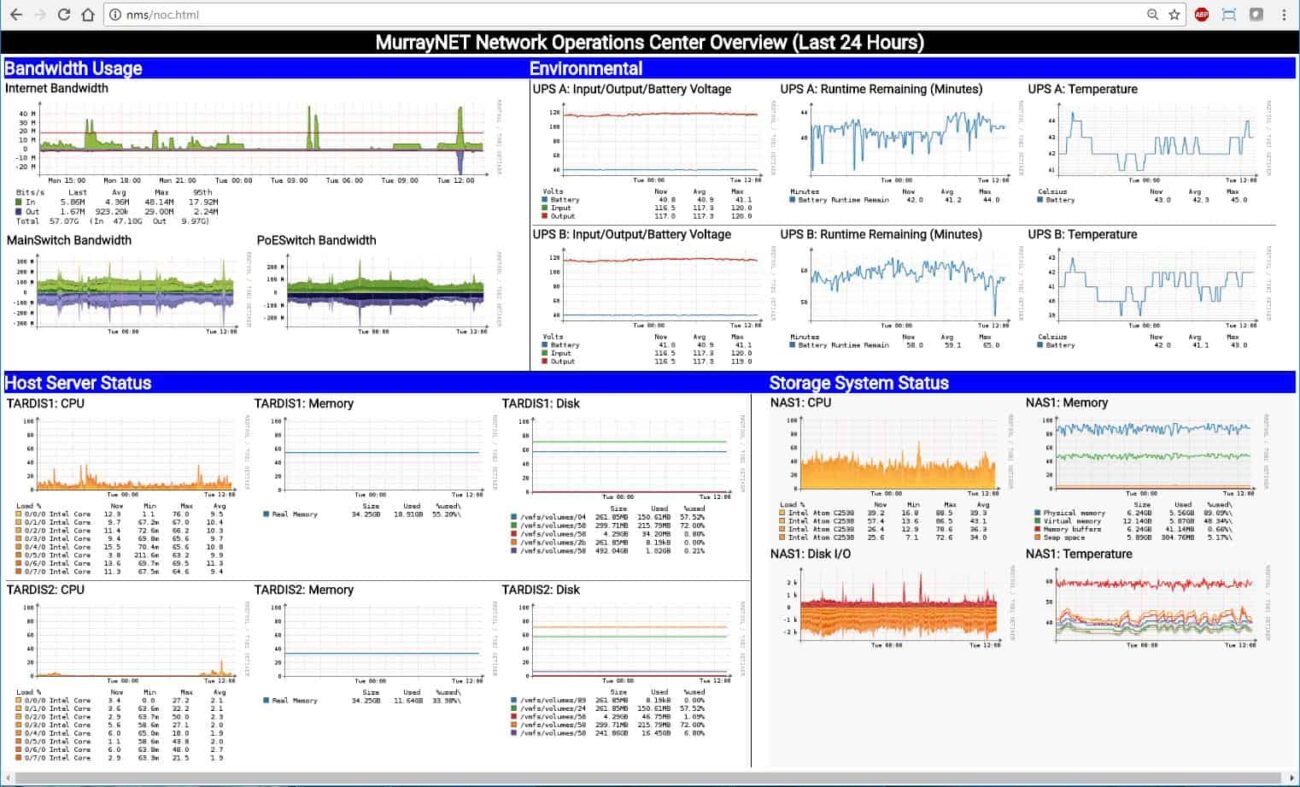
On this server cluster I have several machines running. I have a Windows 10 VM running HomeSeer (Homeseer on ESXi) which is pretty powerful home automation package for controlling lighting and other aspects of the home. I also have an Ubuntu Server VM running Plex, which is an incredibly powerful home media server. Attached to Plex is a 10 terabyte volume for storing movies, TV shows, and music, as well as family home video and photos. In addition I have several lab boxes including Windows 2016 server, Observium for network monitoring, and some other boxes.
Watch the Building a 1U Server Video
1U Server Build: The CPU Choice
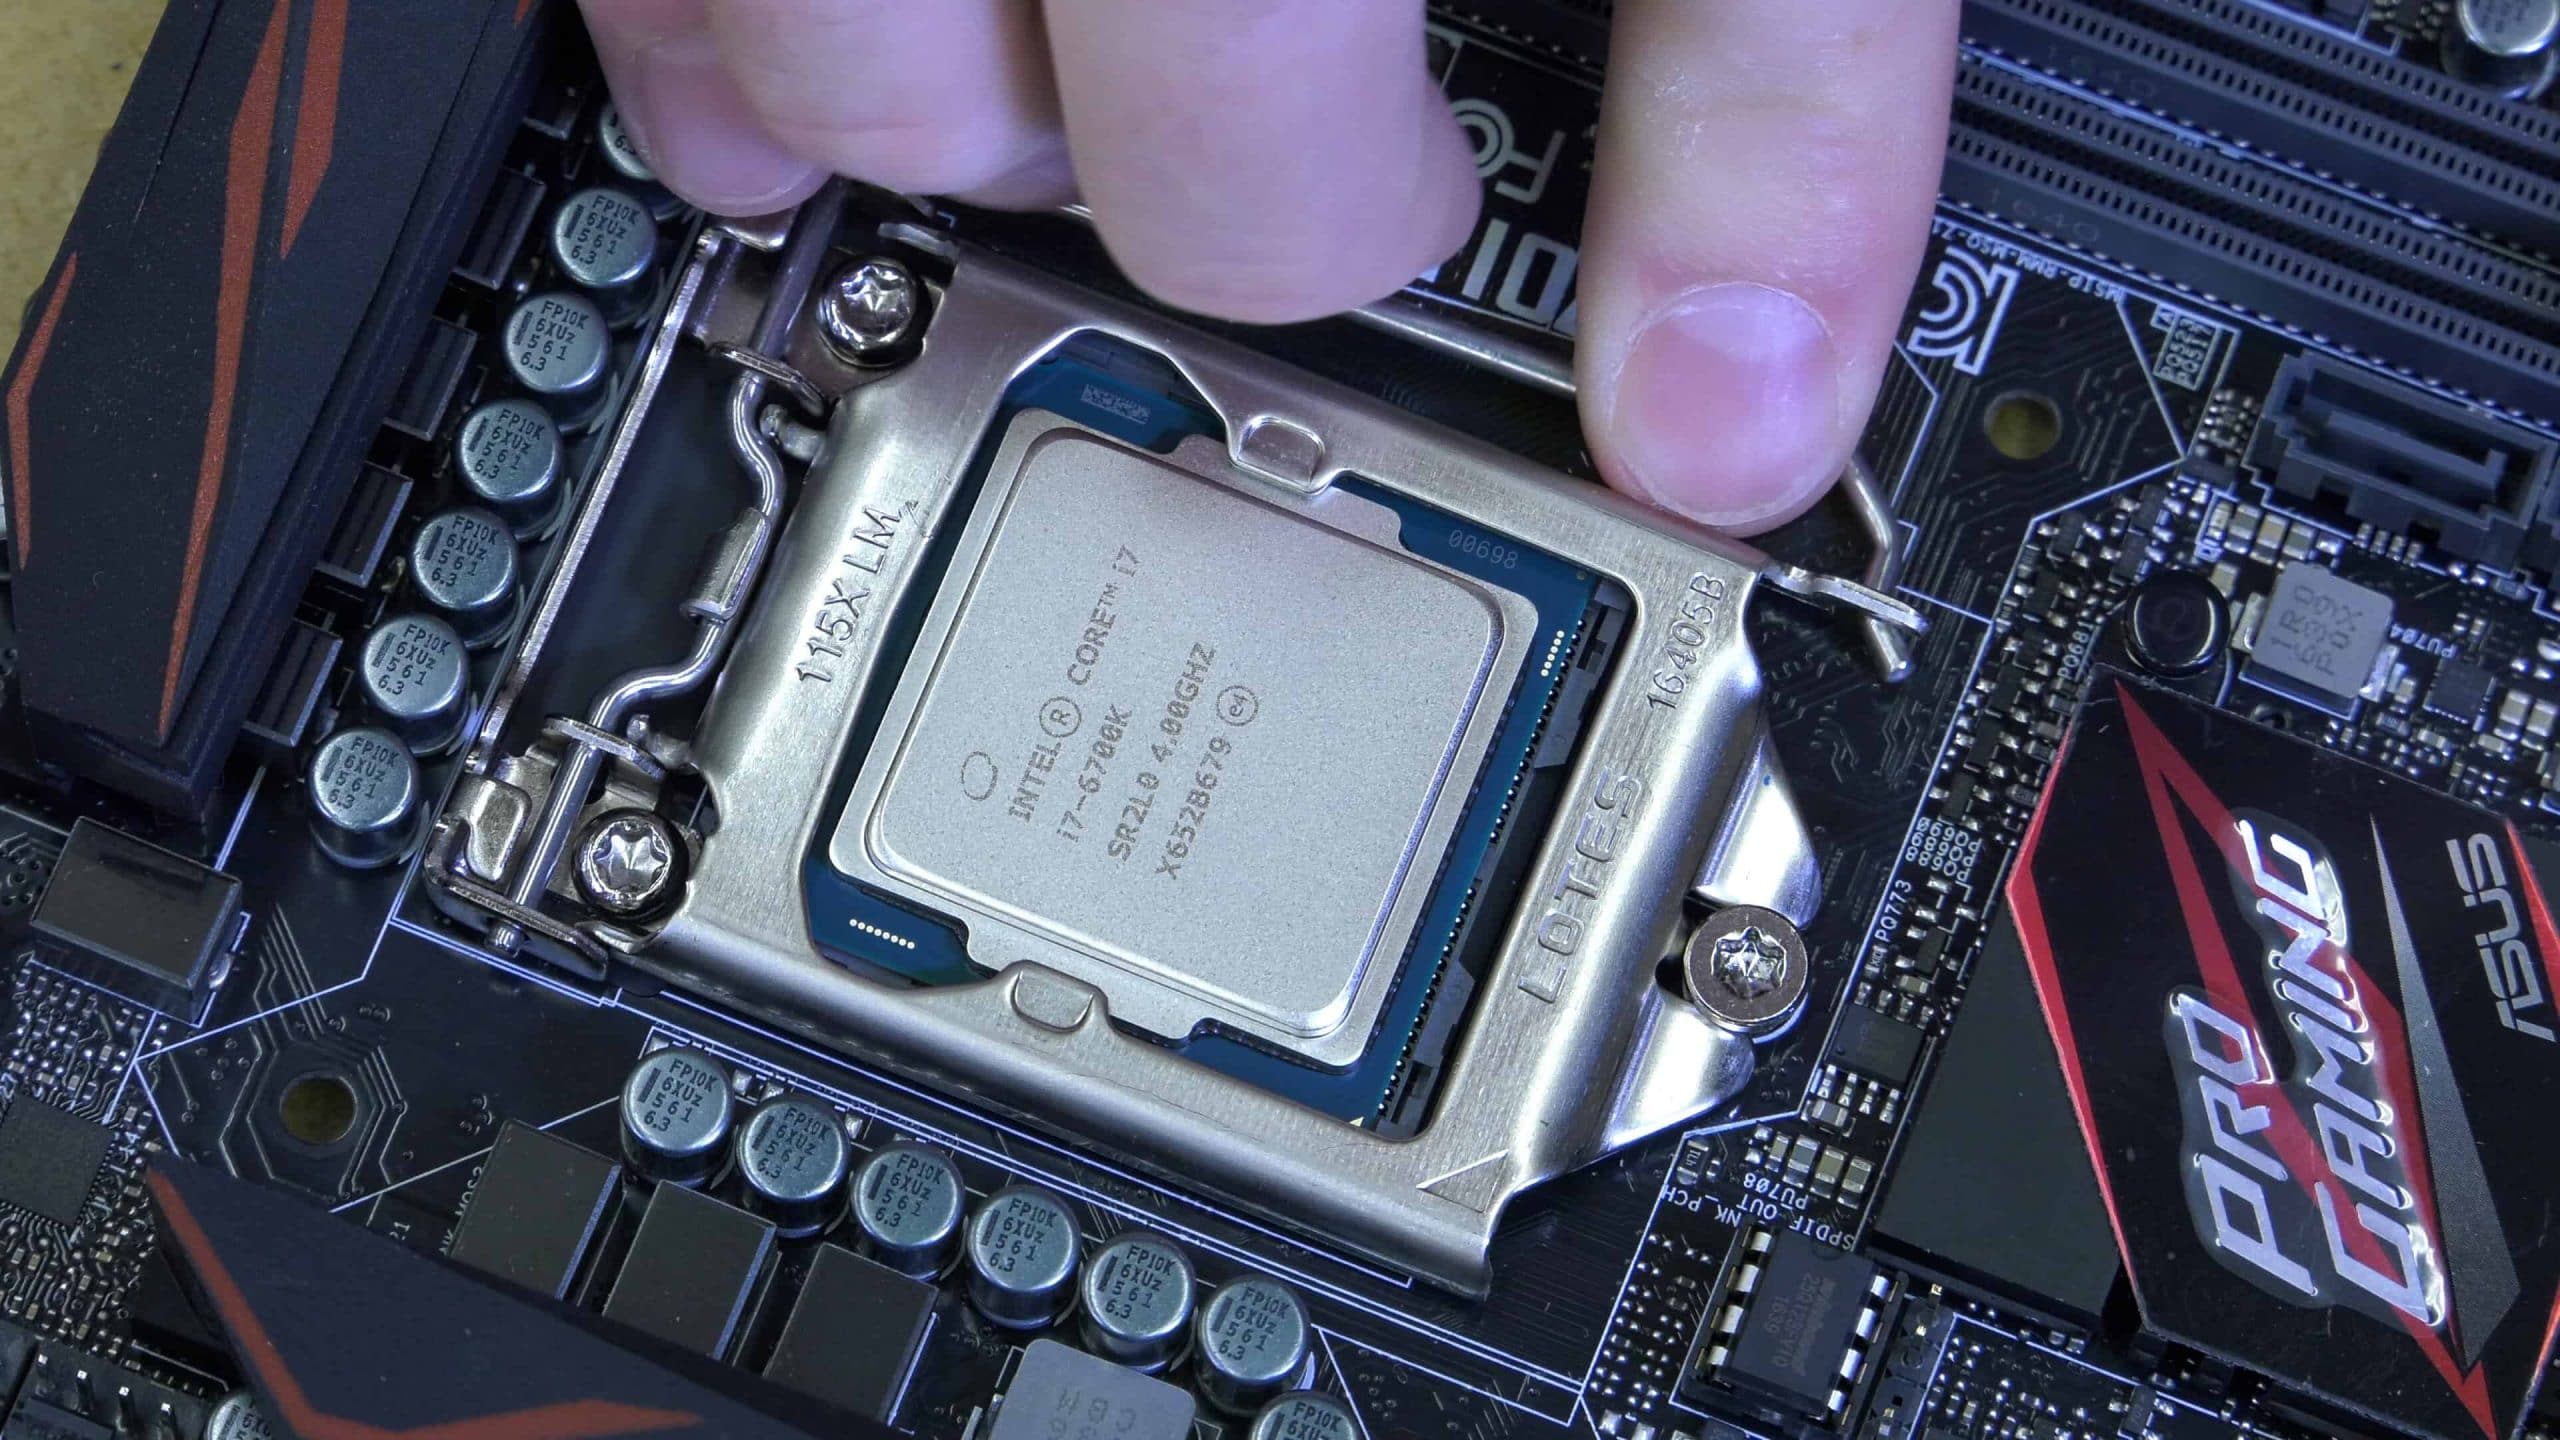
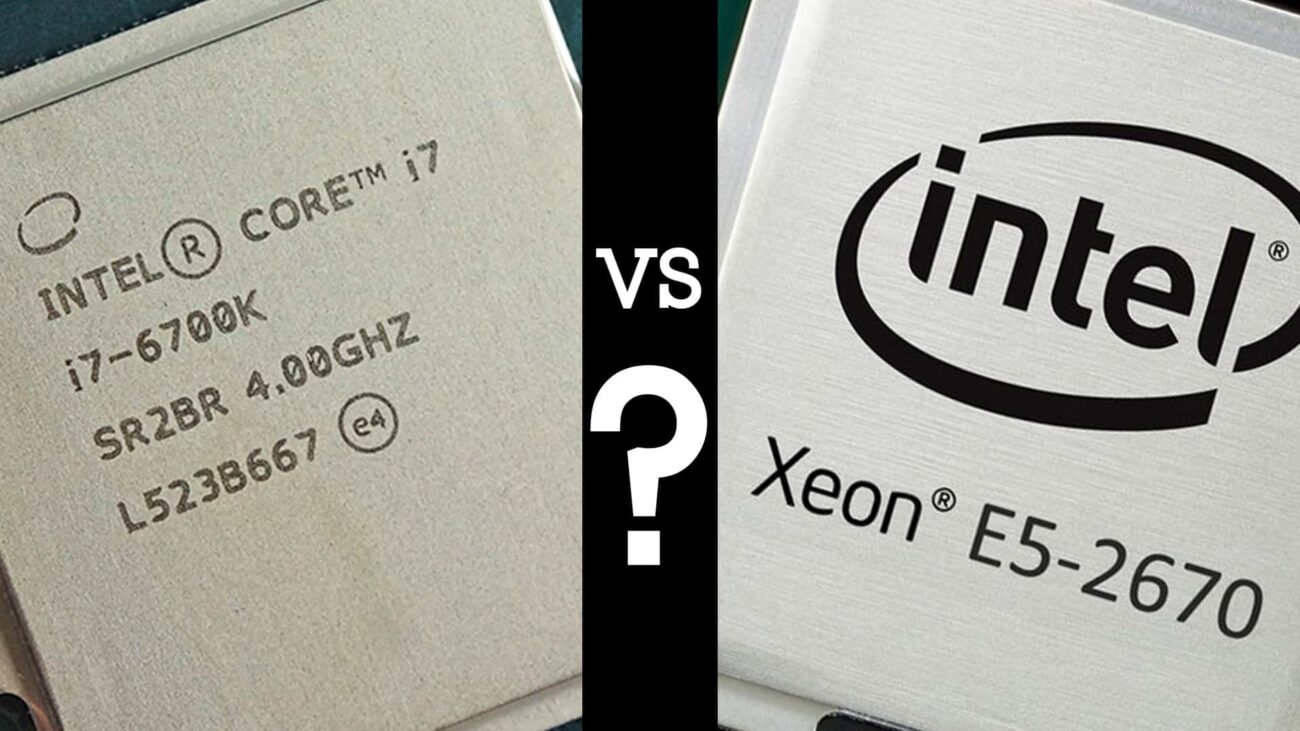
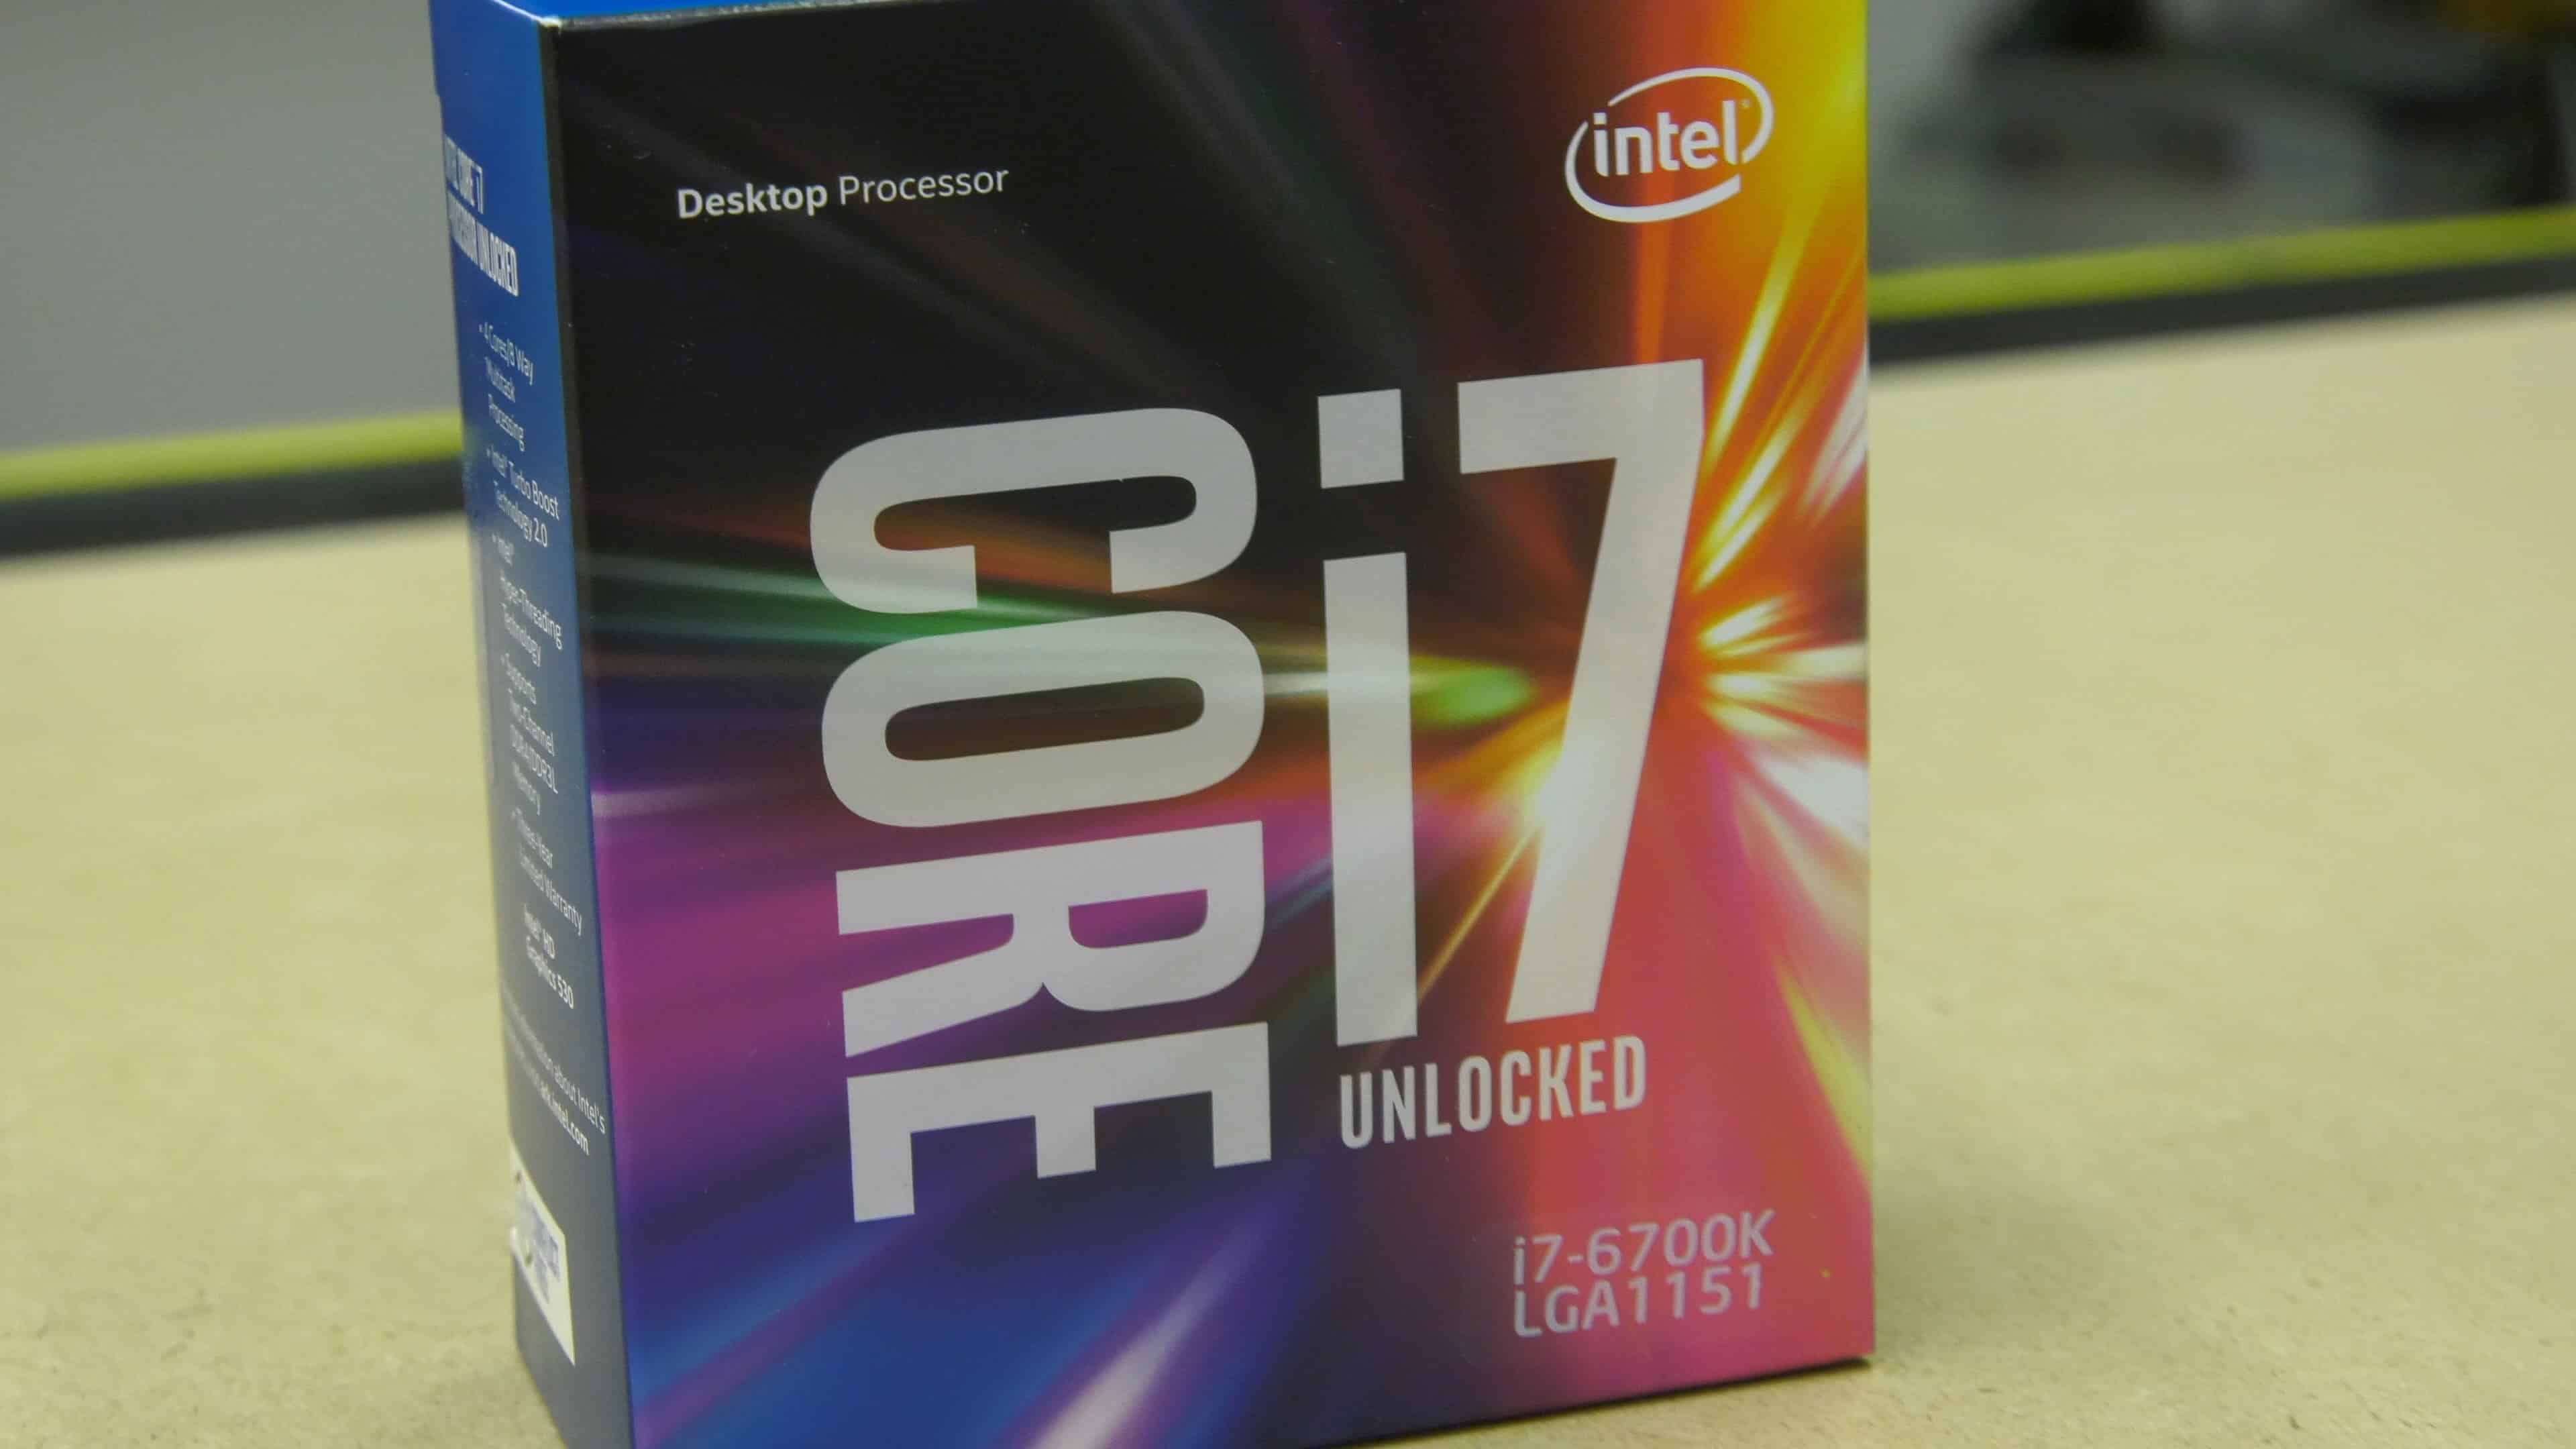 I chose the Intel Core i7 6700K for this server build. It’s a Quad-core 4 GHz processor designed for an LGA1151 socket that can be reliably overclocked to as high a 5 GHz. This is of course a Skylake processor. Some of you are probably wondering why I didn’t choose the new 7700K Kabylake processor and that is absolutely a fair question. I chose the Skylake, because this is the second server in a VMware ESX cluster and I wanted this new machines to be identical to the original. It just makes things with VMWare ESX and VMotion simpler. If you decide to build this box, I would definitely recommend you step up the 7700k, as it costs only a few dollars more.
Now if you don’t need this kind of horsepower when building your 1U server, you could scale this chip back to a Core i5 or Core i3 and same some pretty serious money on your CPU costs.
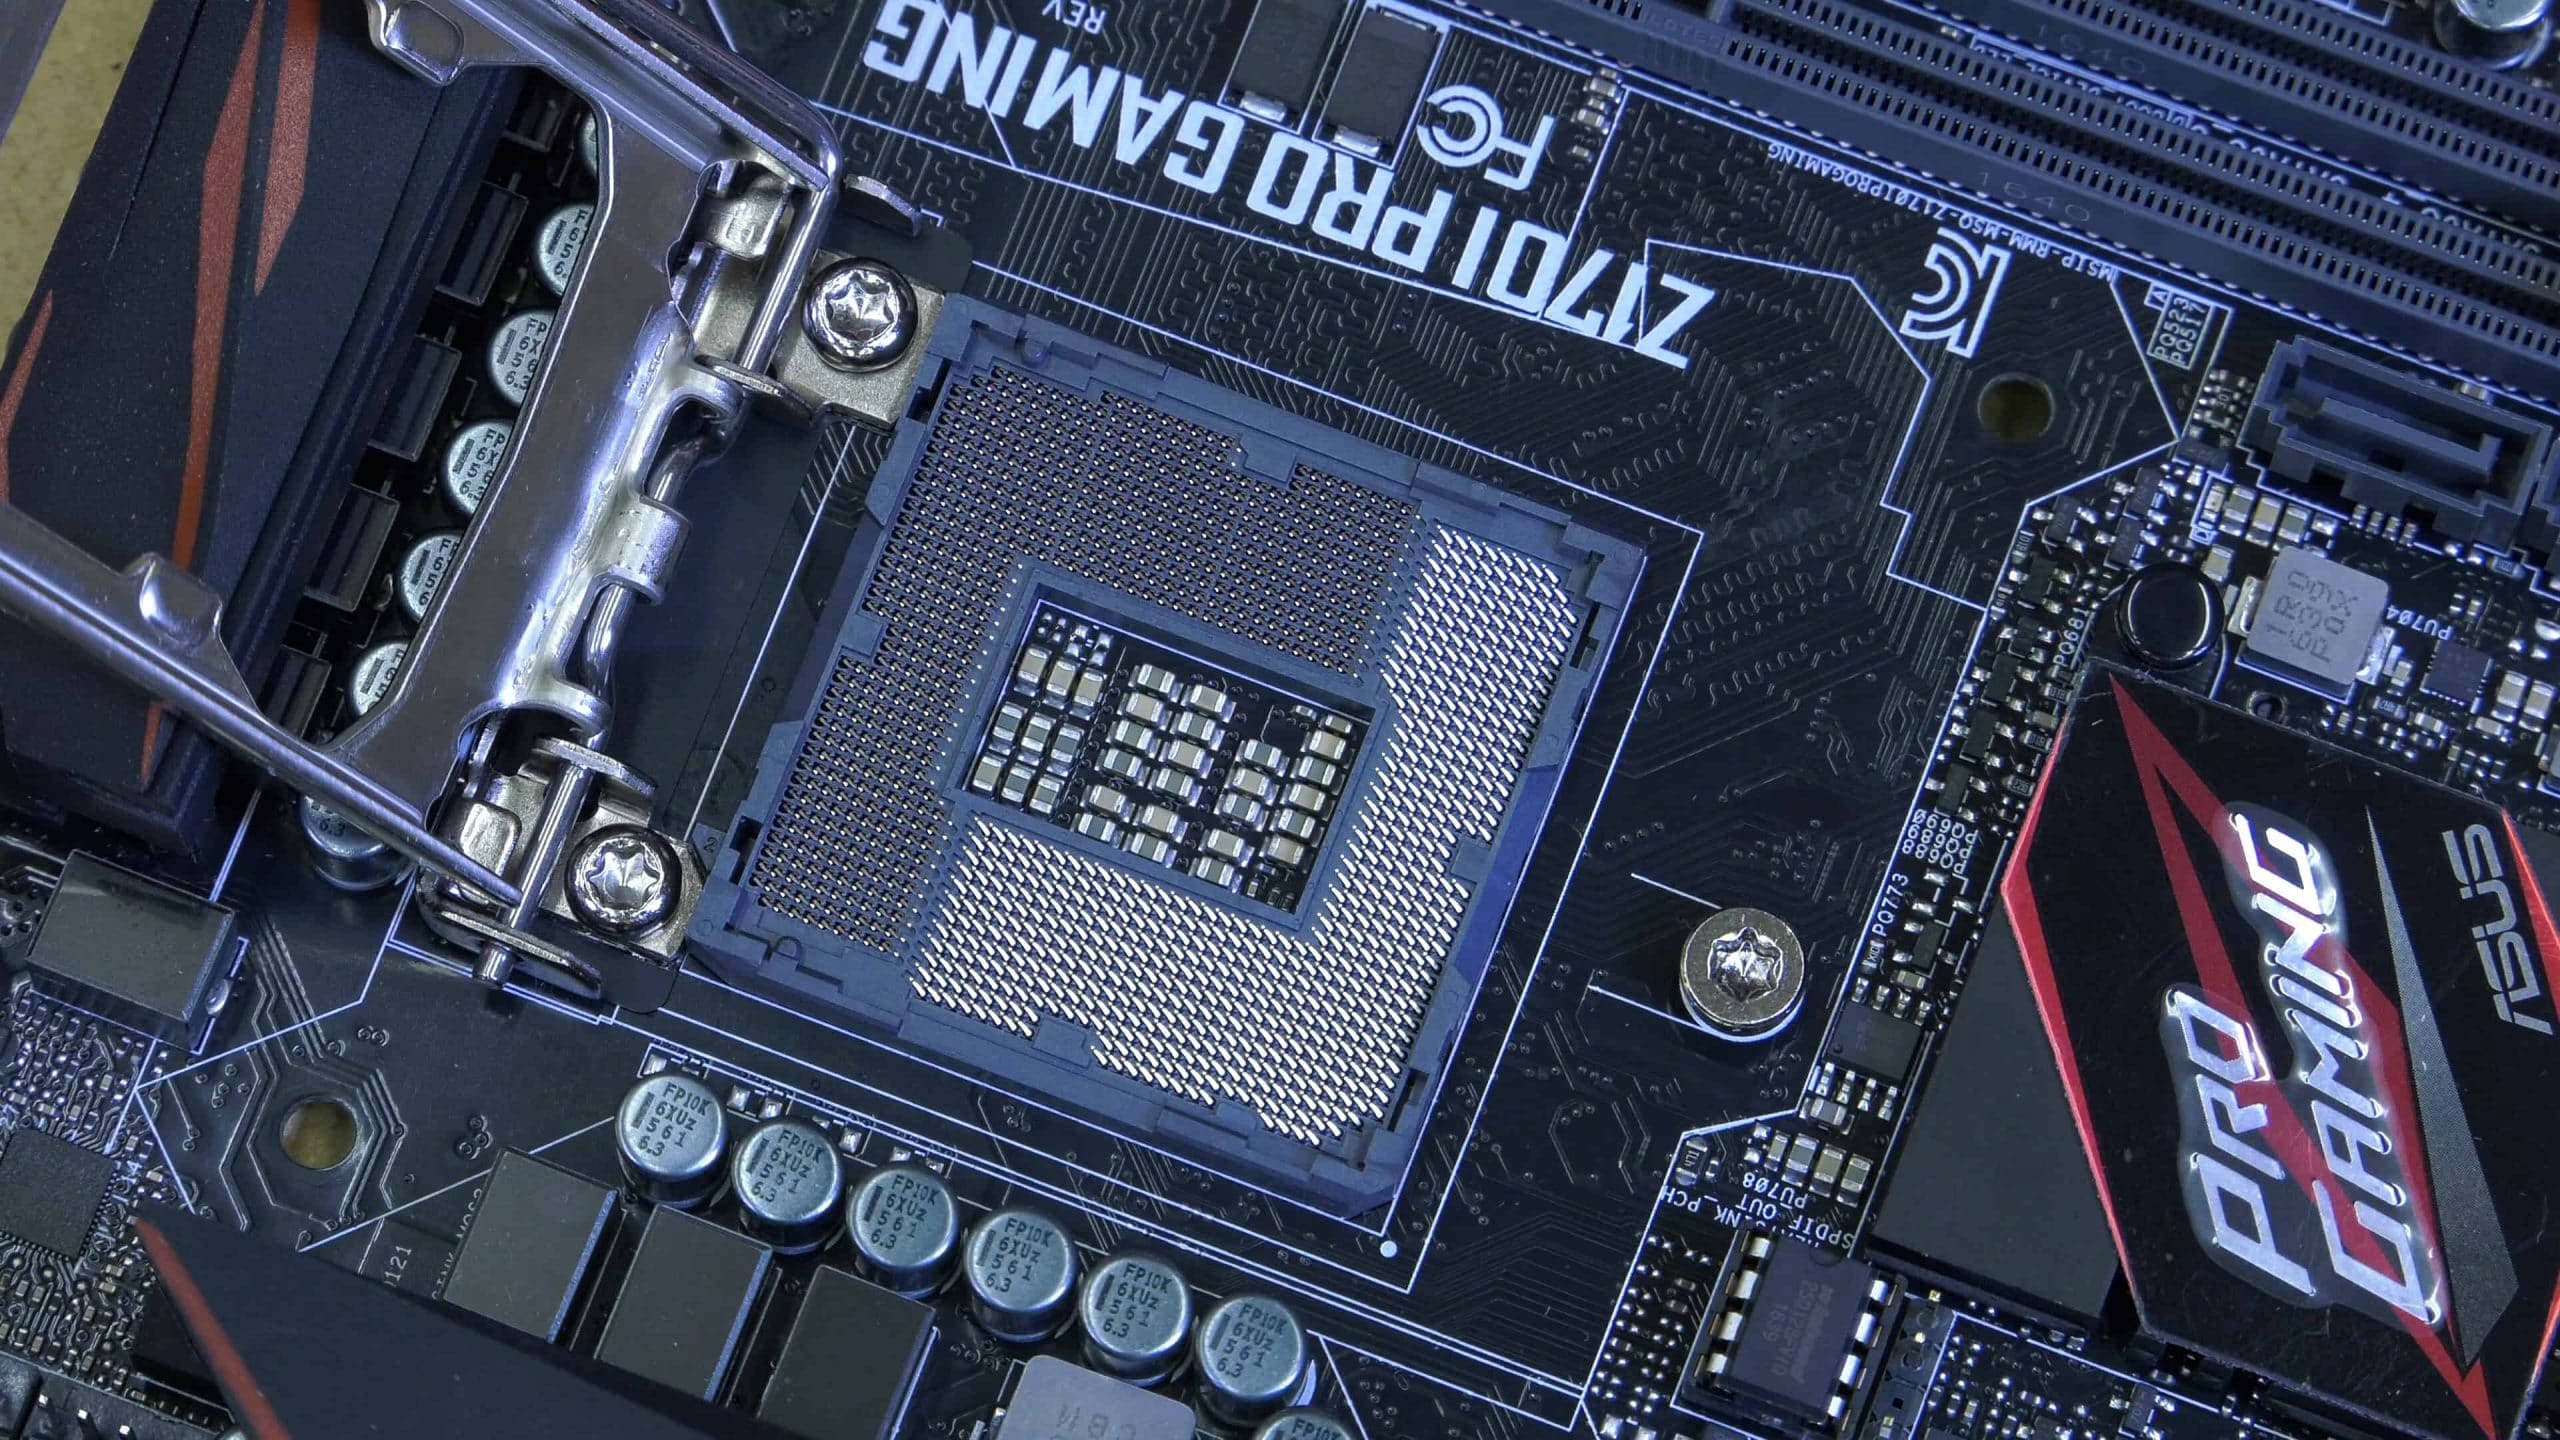
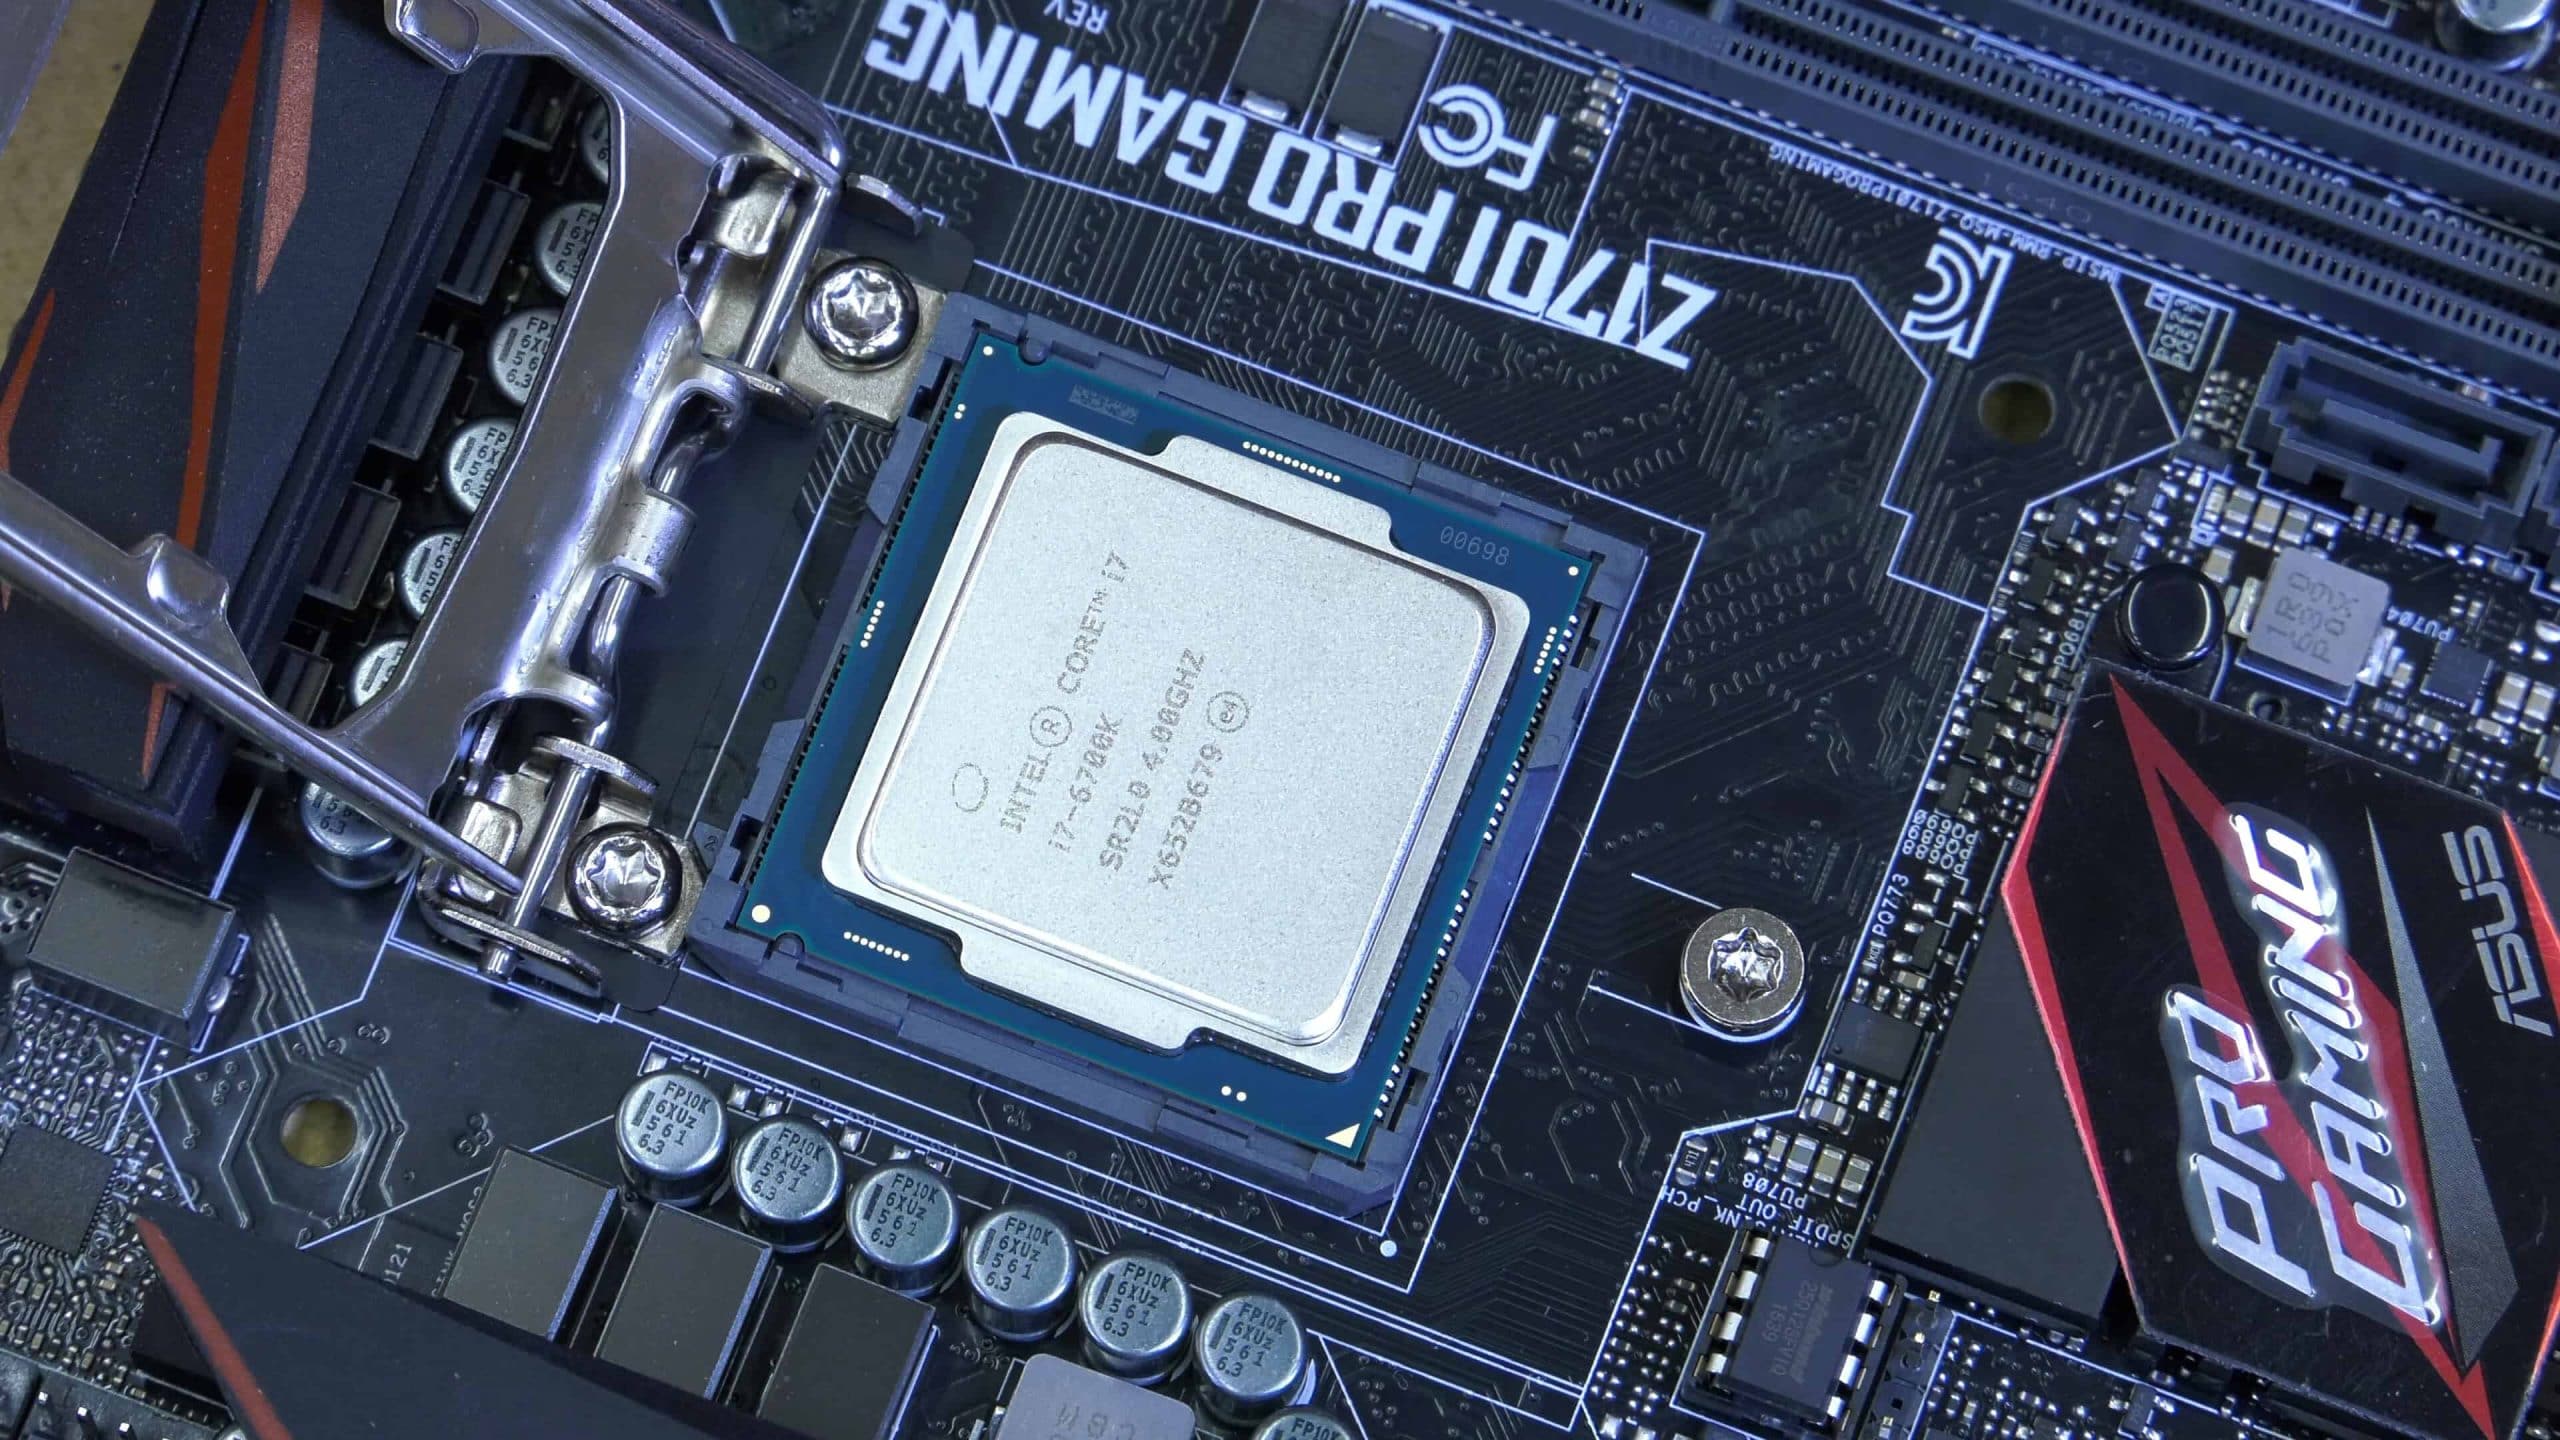
Installing the Core i7 6700K CPU
To install the CPU, simply line up the triangle with the markings on the the socket, set it in place, and close and lock the CPU socket.
1U Server Build: The CPU Cooler
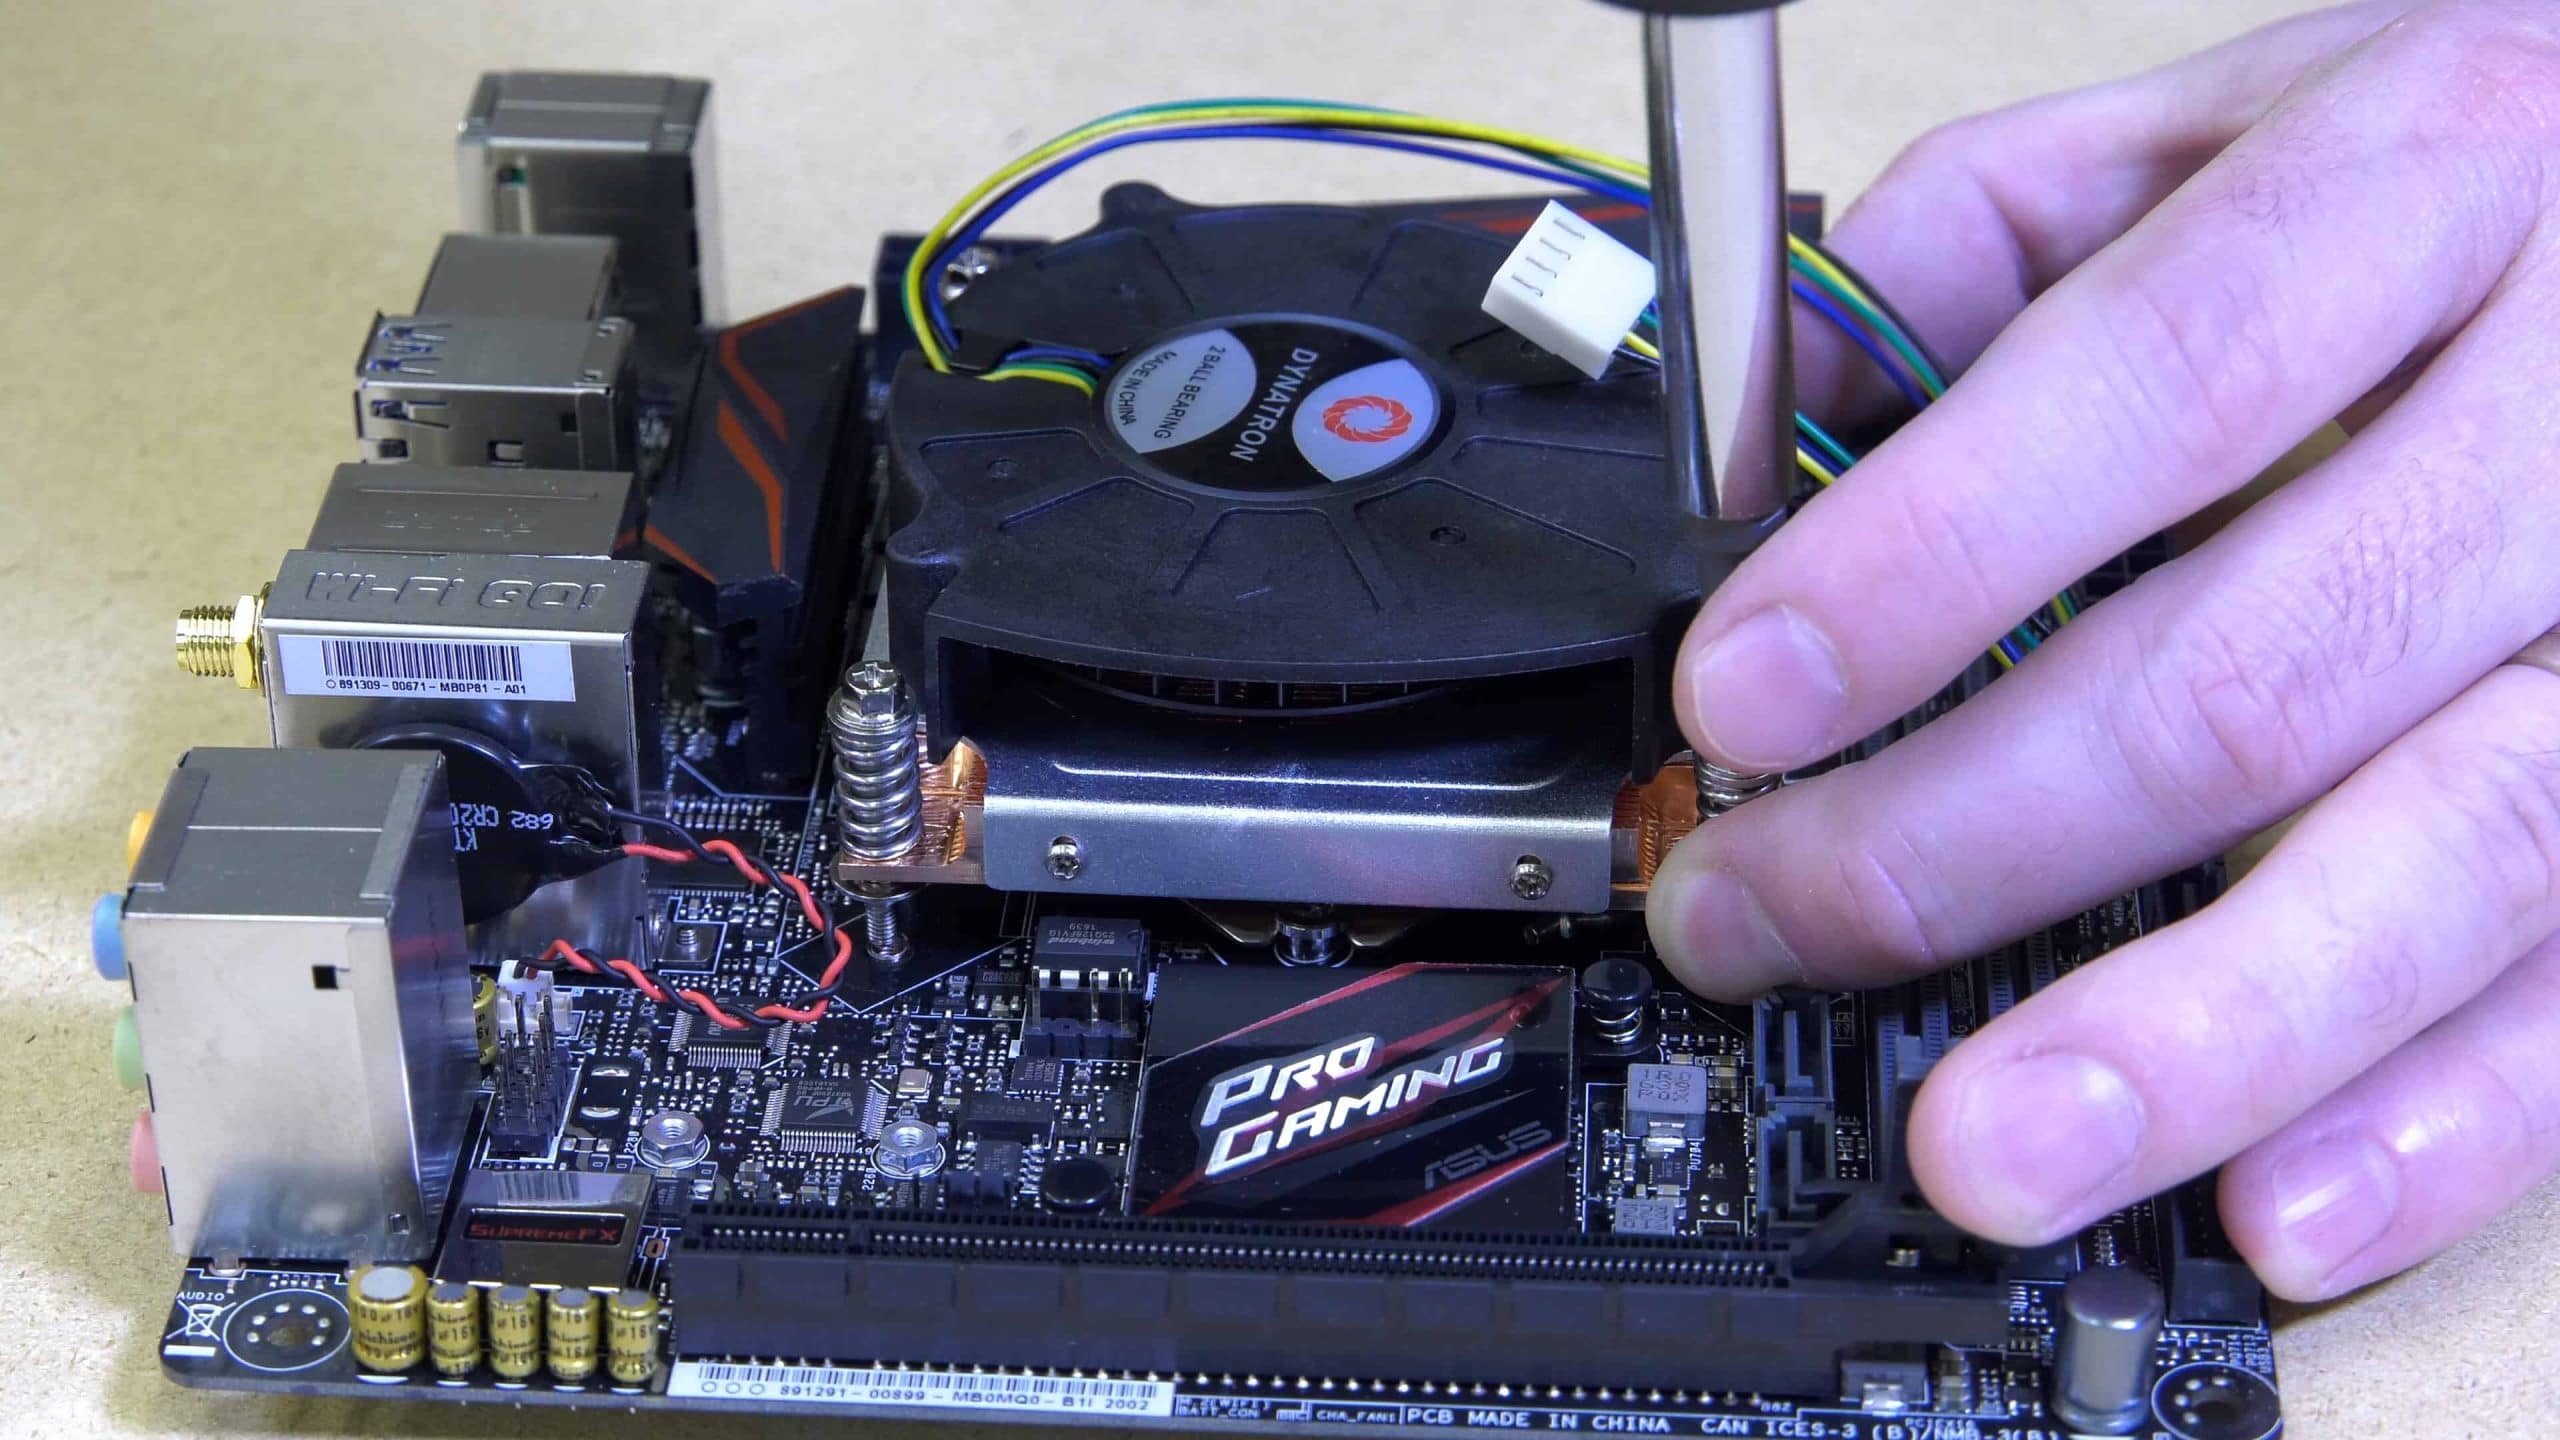
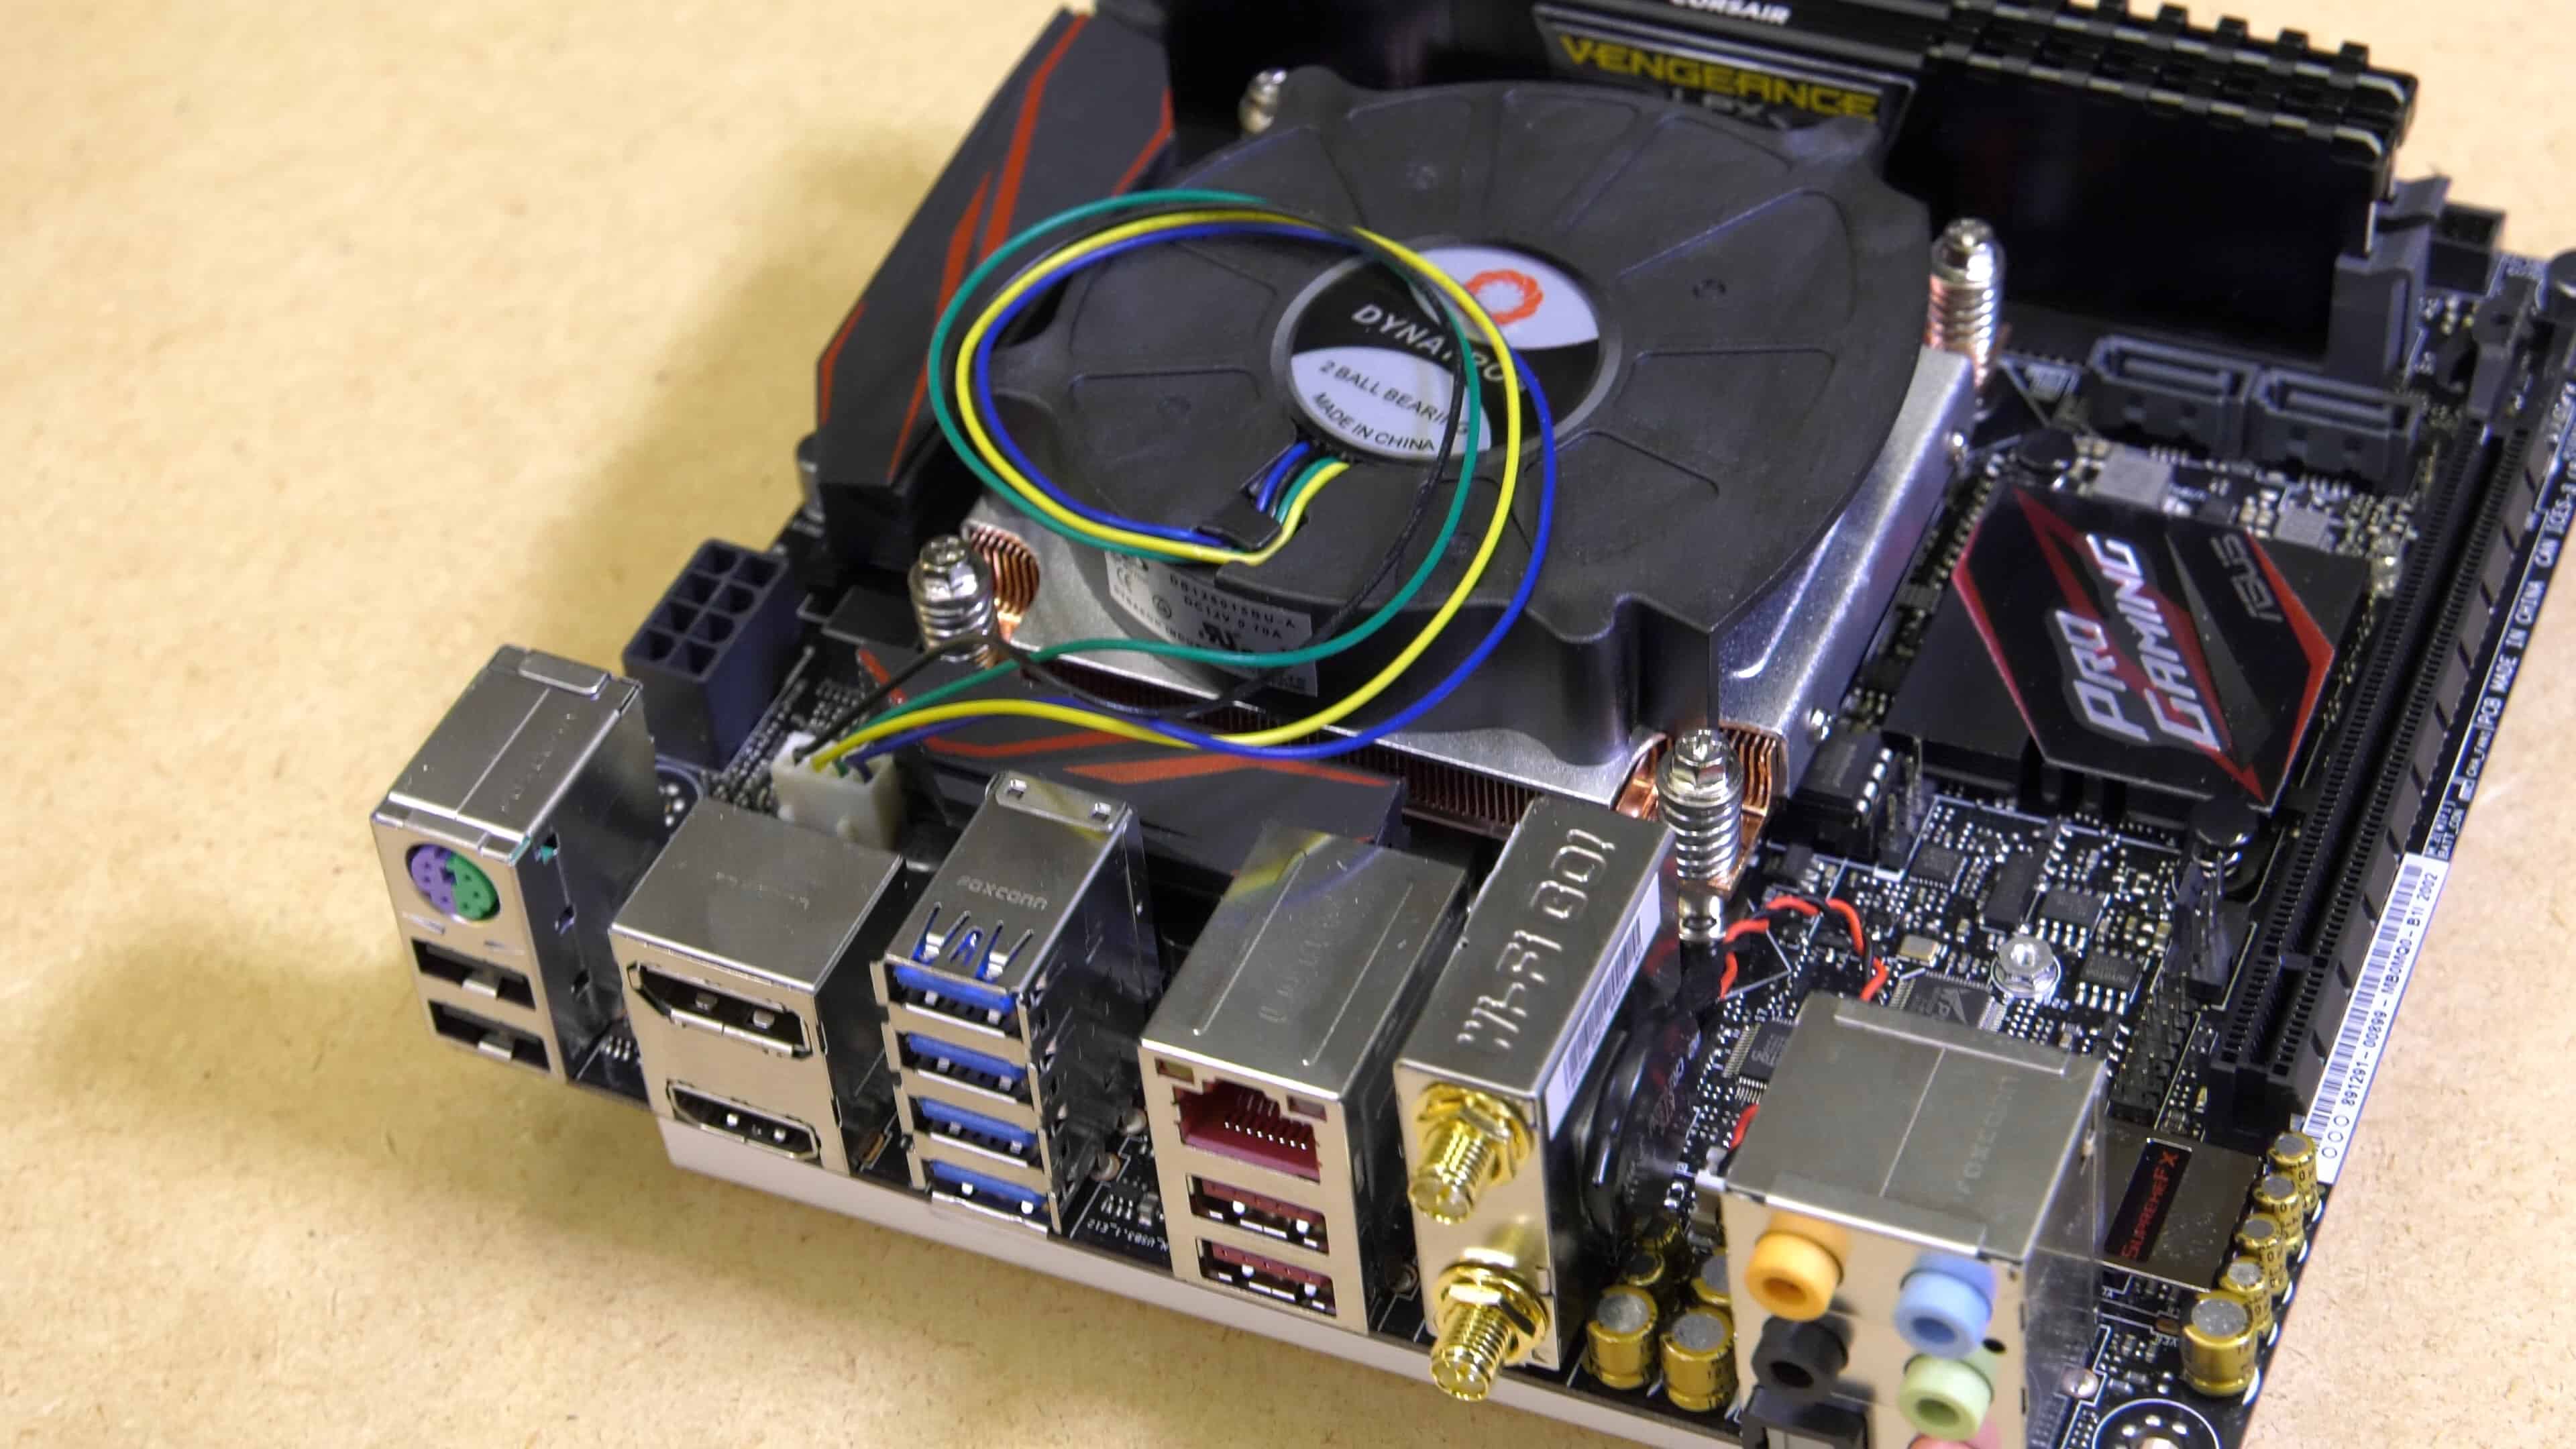
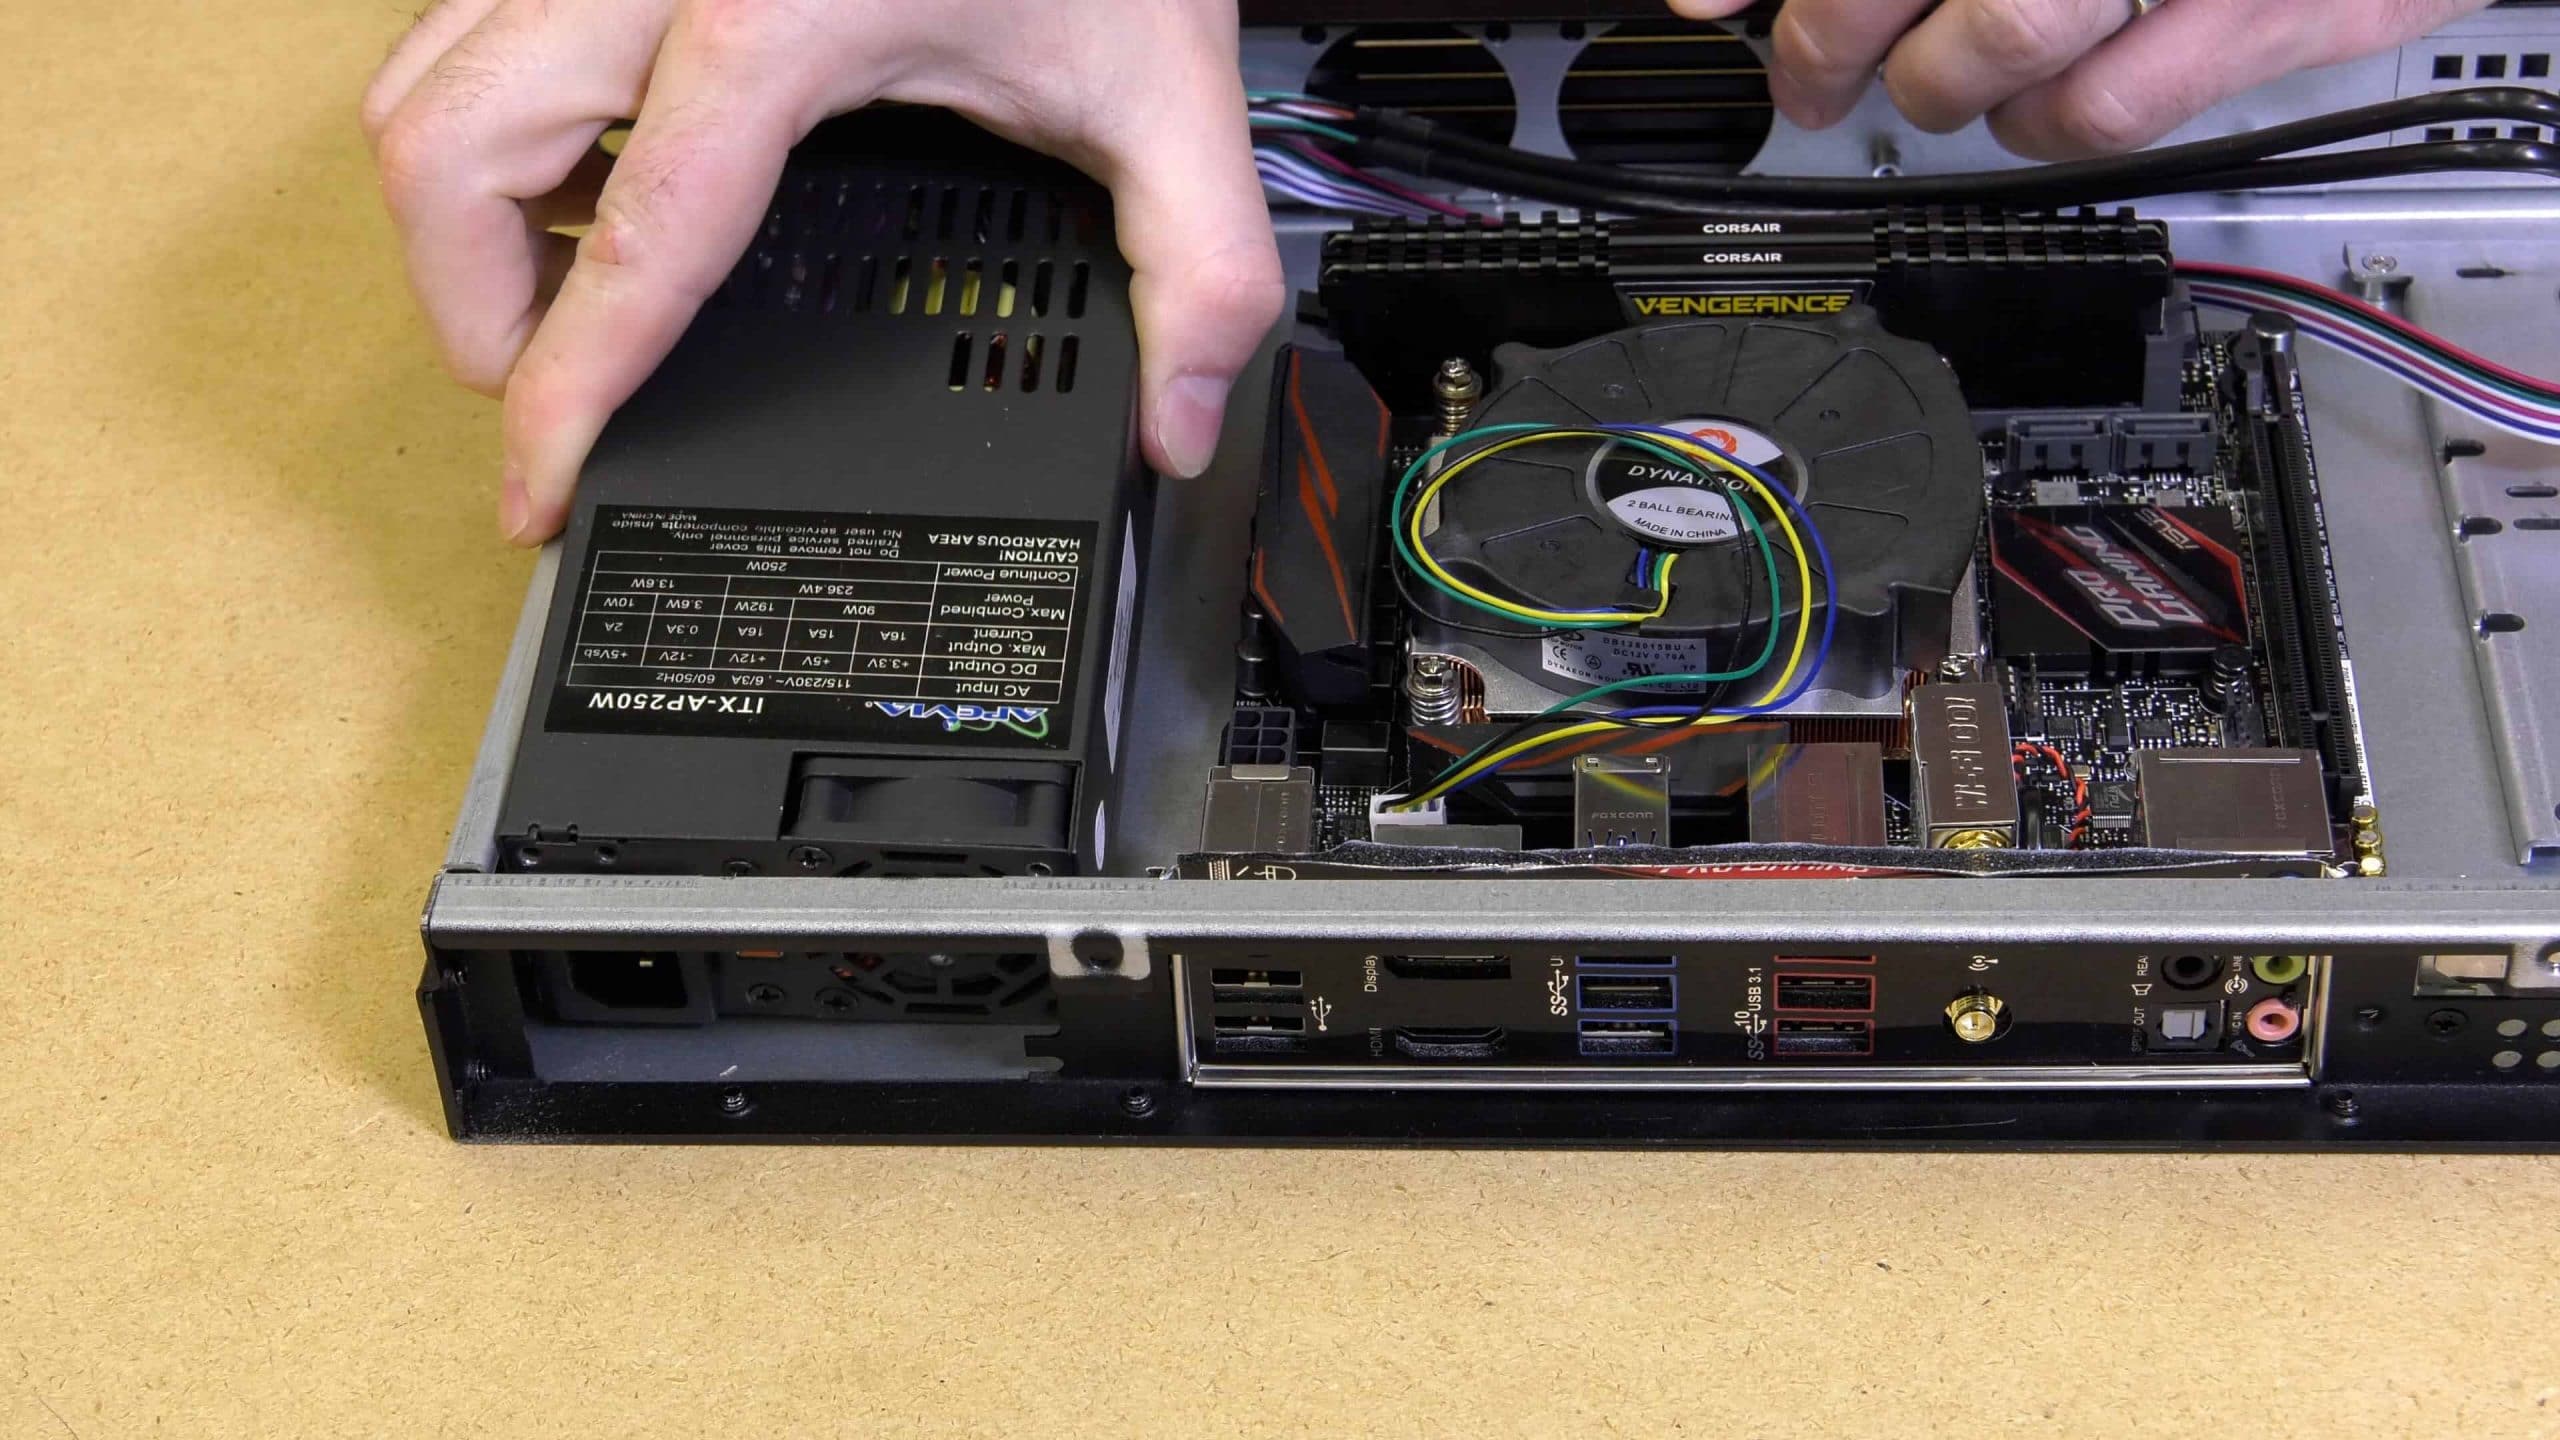
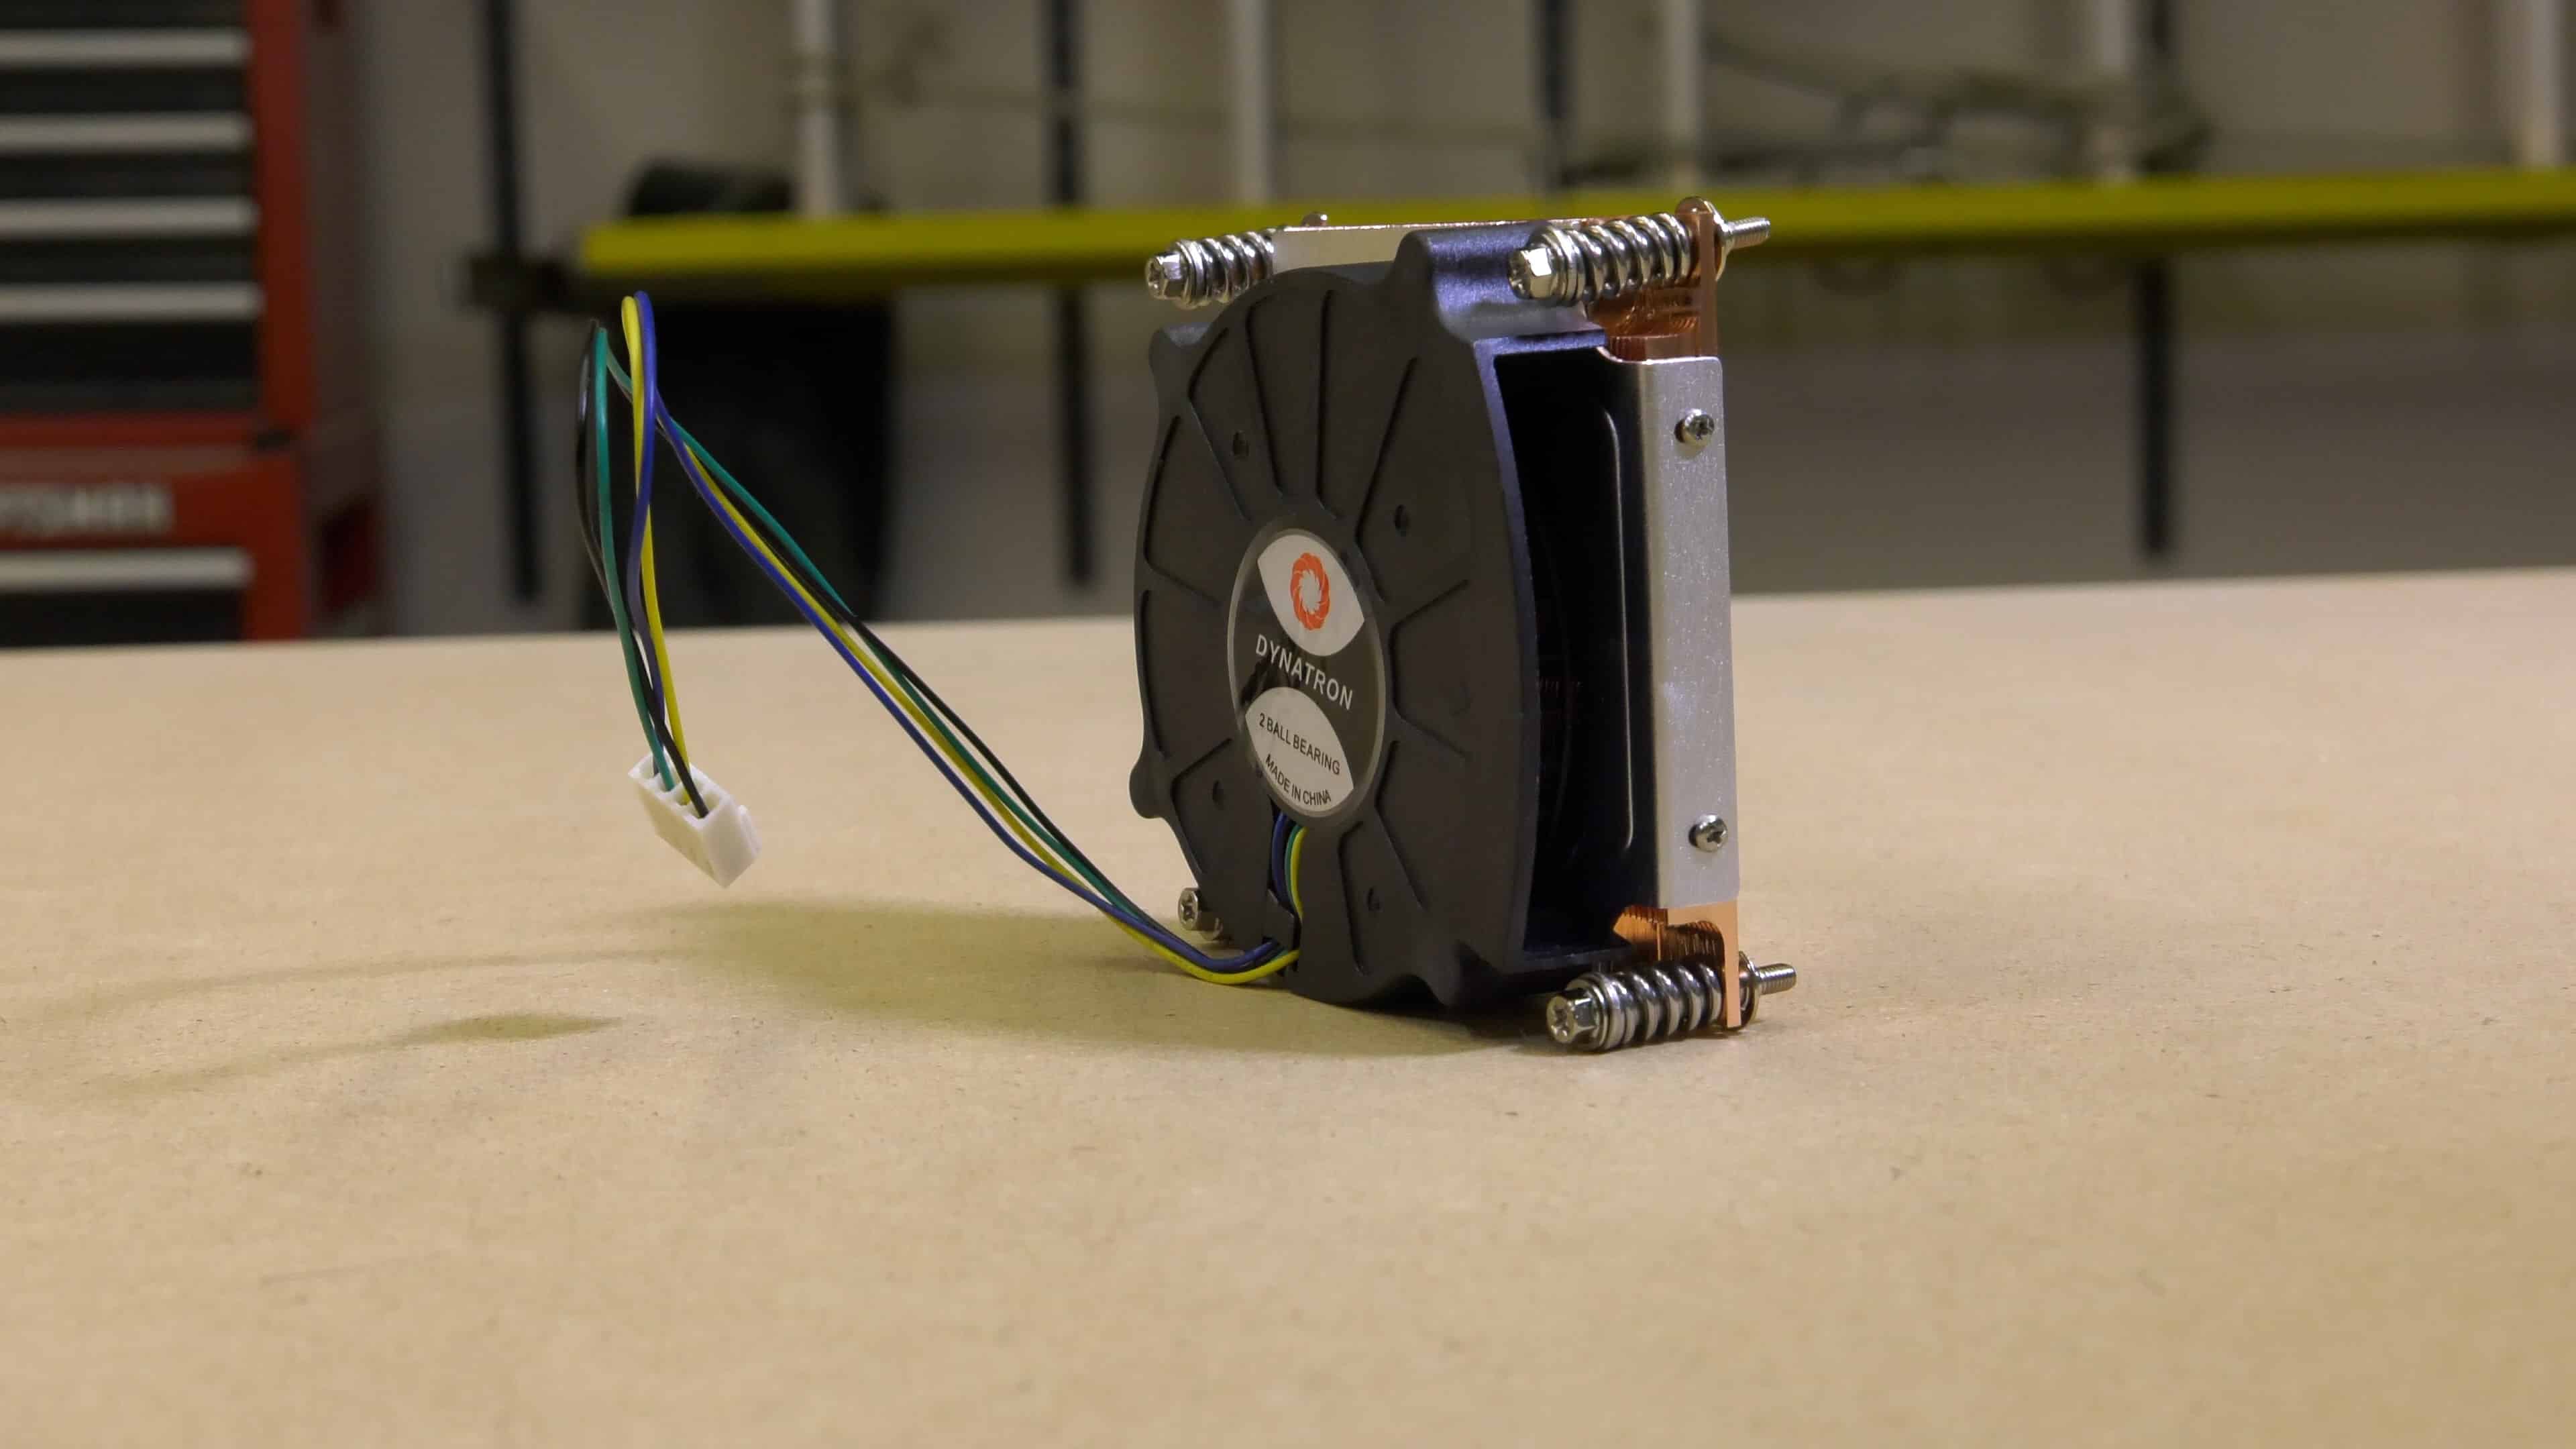 This build has one interesting challenge that you won’t face on most builds. When building a 1U server, the CPU cooler has to be less than 1 inch tall and still be able to adequately cool a 91 watt CPU! This is no easy task, and I went through several different CPU coolers before I found one that could actually handle the job reliably. The cooler I landed on that passed all of my stress tests with flying colors is the K199 Active Blower from Dynatron. This cooler is barely 7/8 of an inche tall and puts out an amazing amount of air. It has a feature that is not only nice to have, but necessary for a 1U server build! The top of the cooler is sealed and the cooler has a side ejection port for exhausting hot air. This is required because when the cover is placed on the case there will be less than 1/8” between the top of the cooler and the bottom of the lid, meaning airflow would be stifled on a normal top ejection cooler.
Installing the Dynatron K199 CPU Cooler
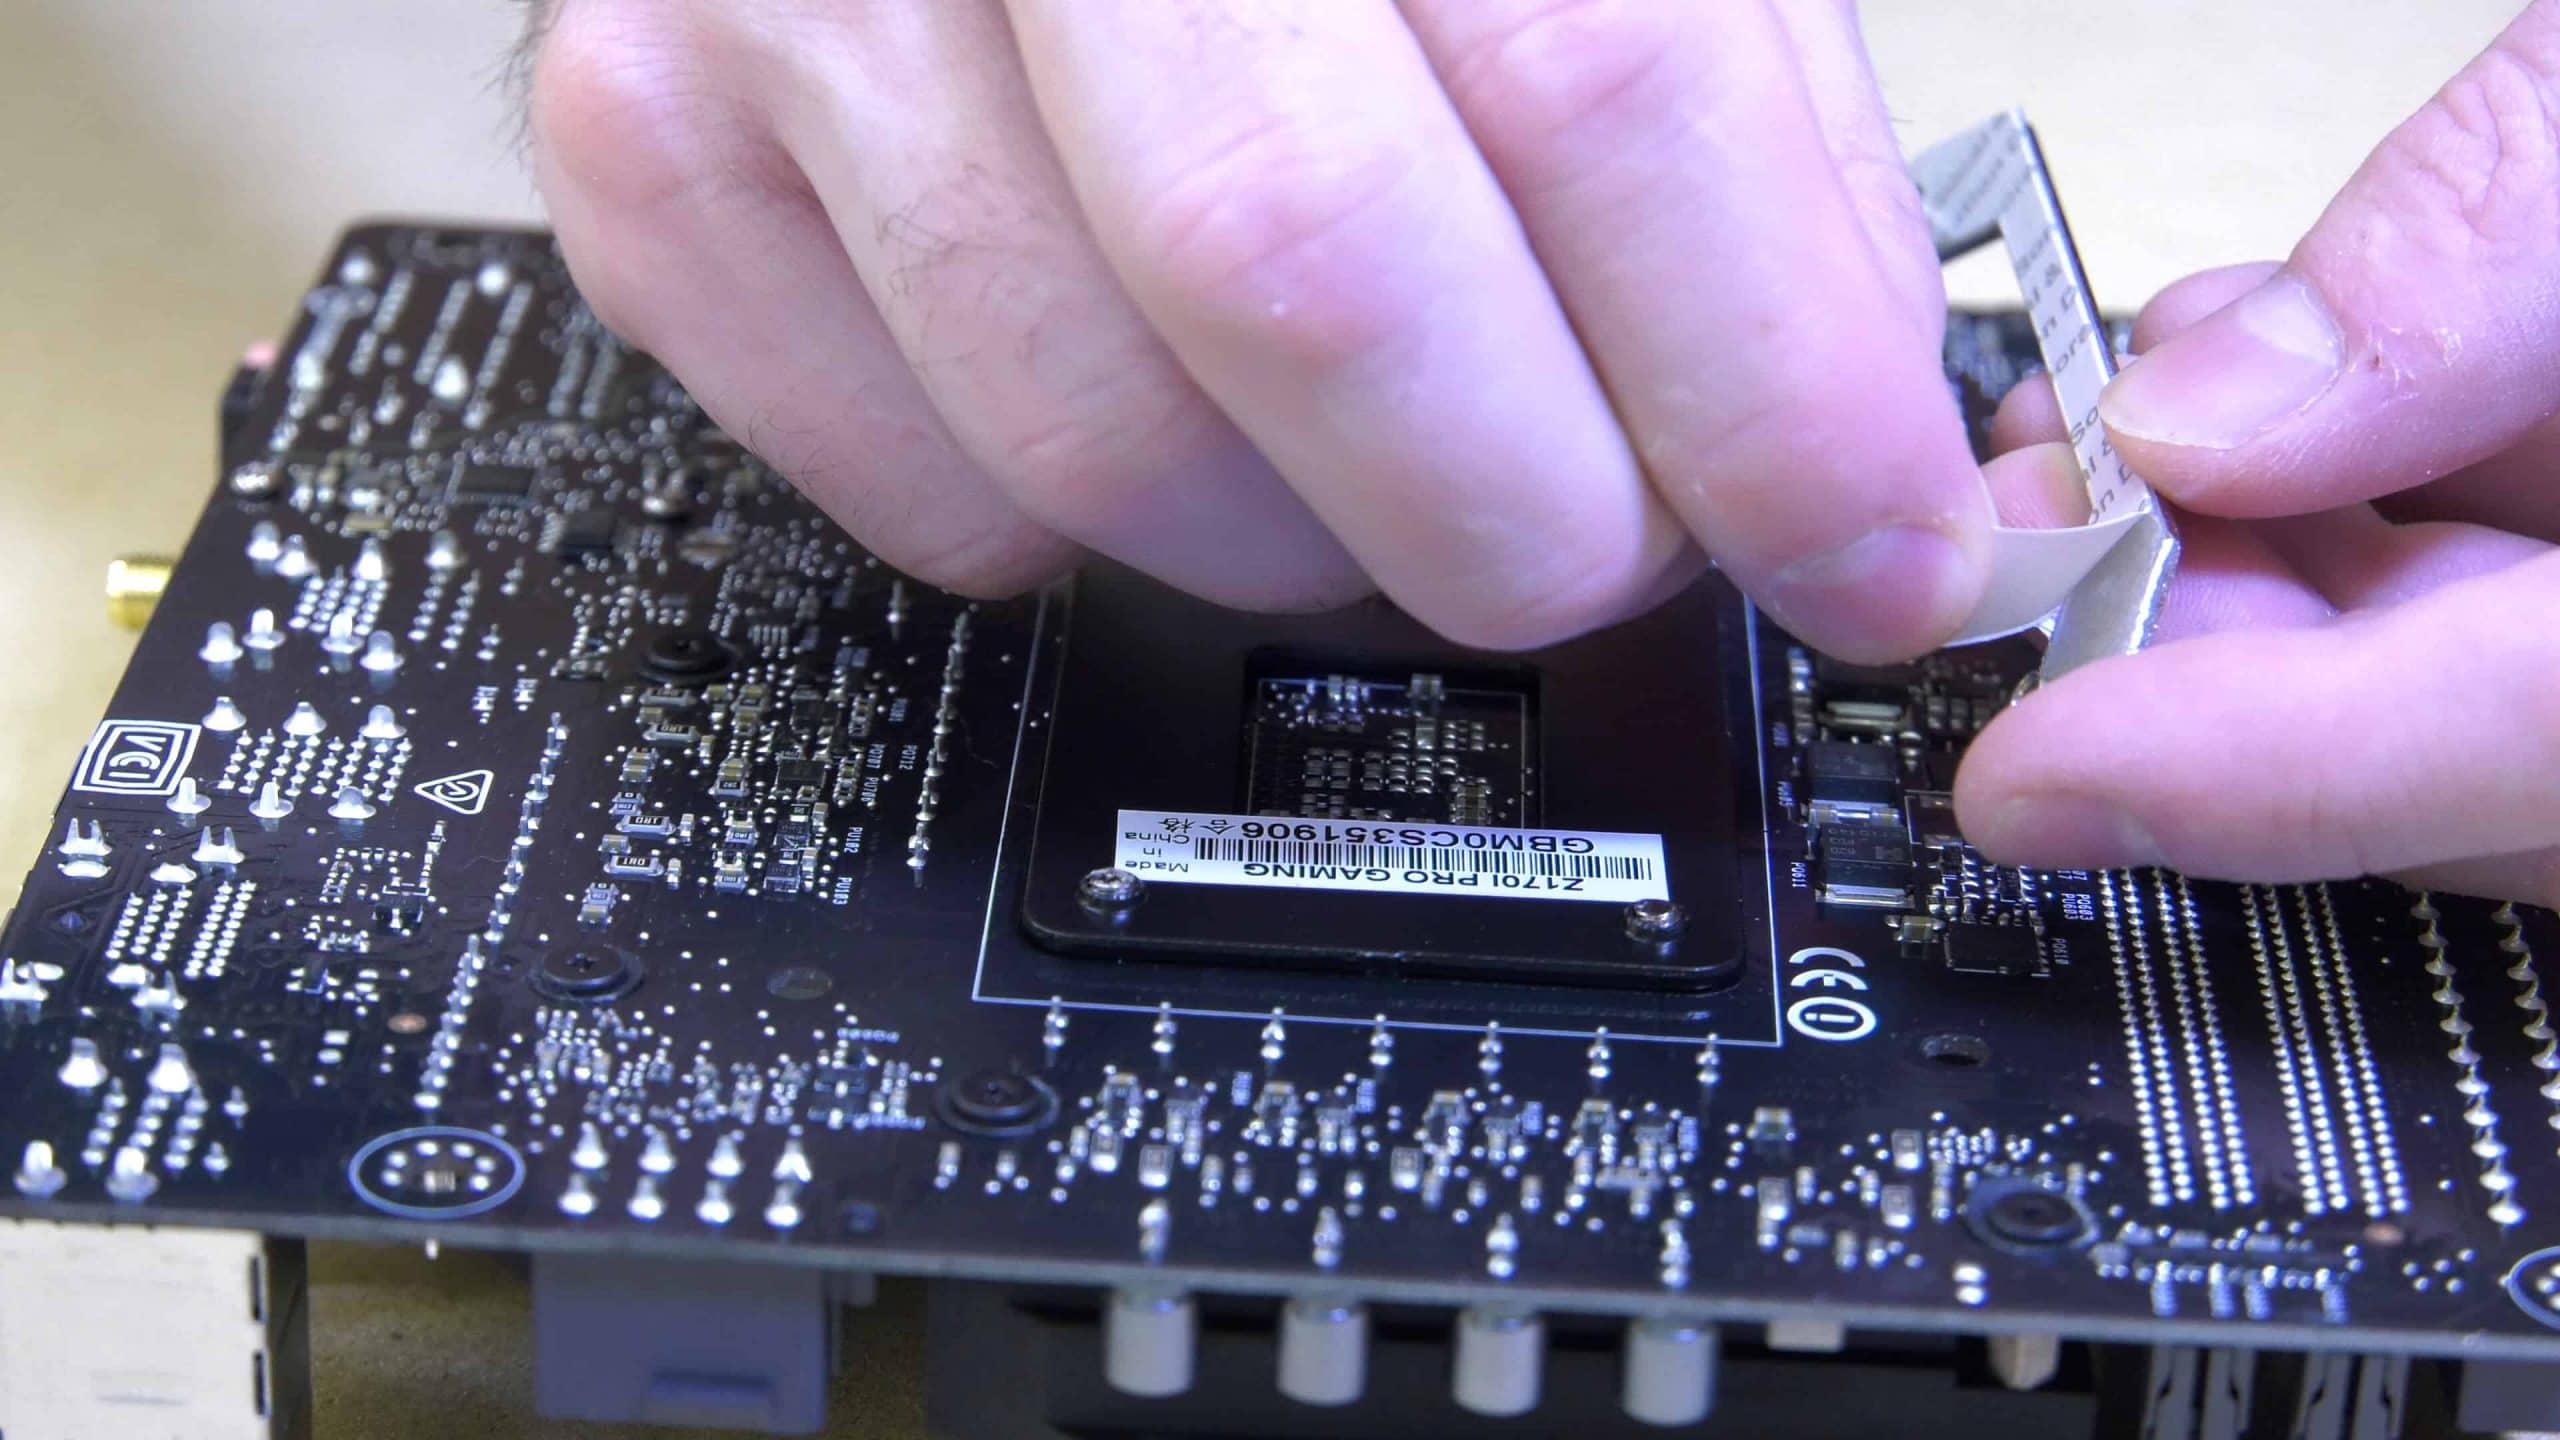
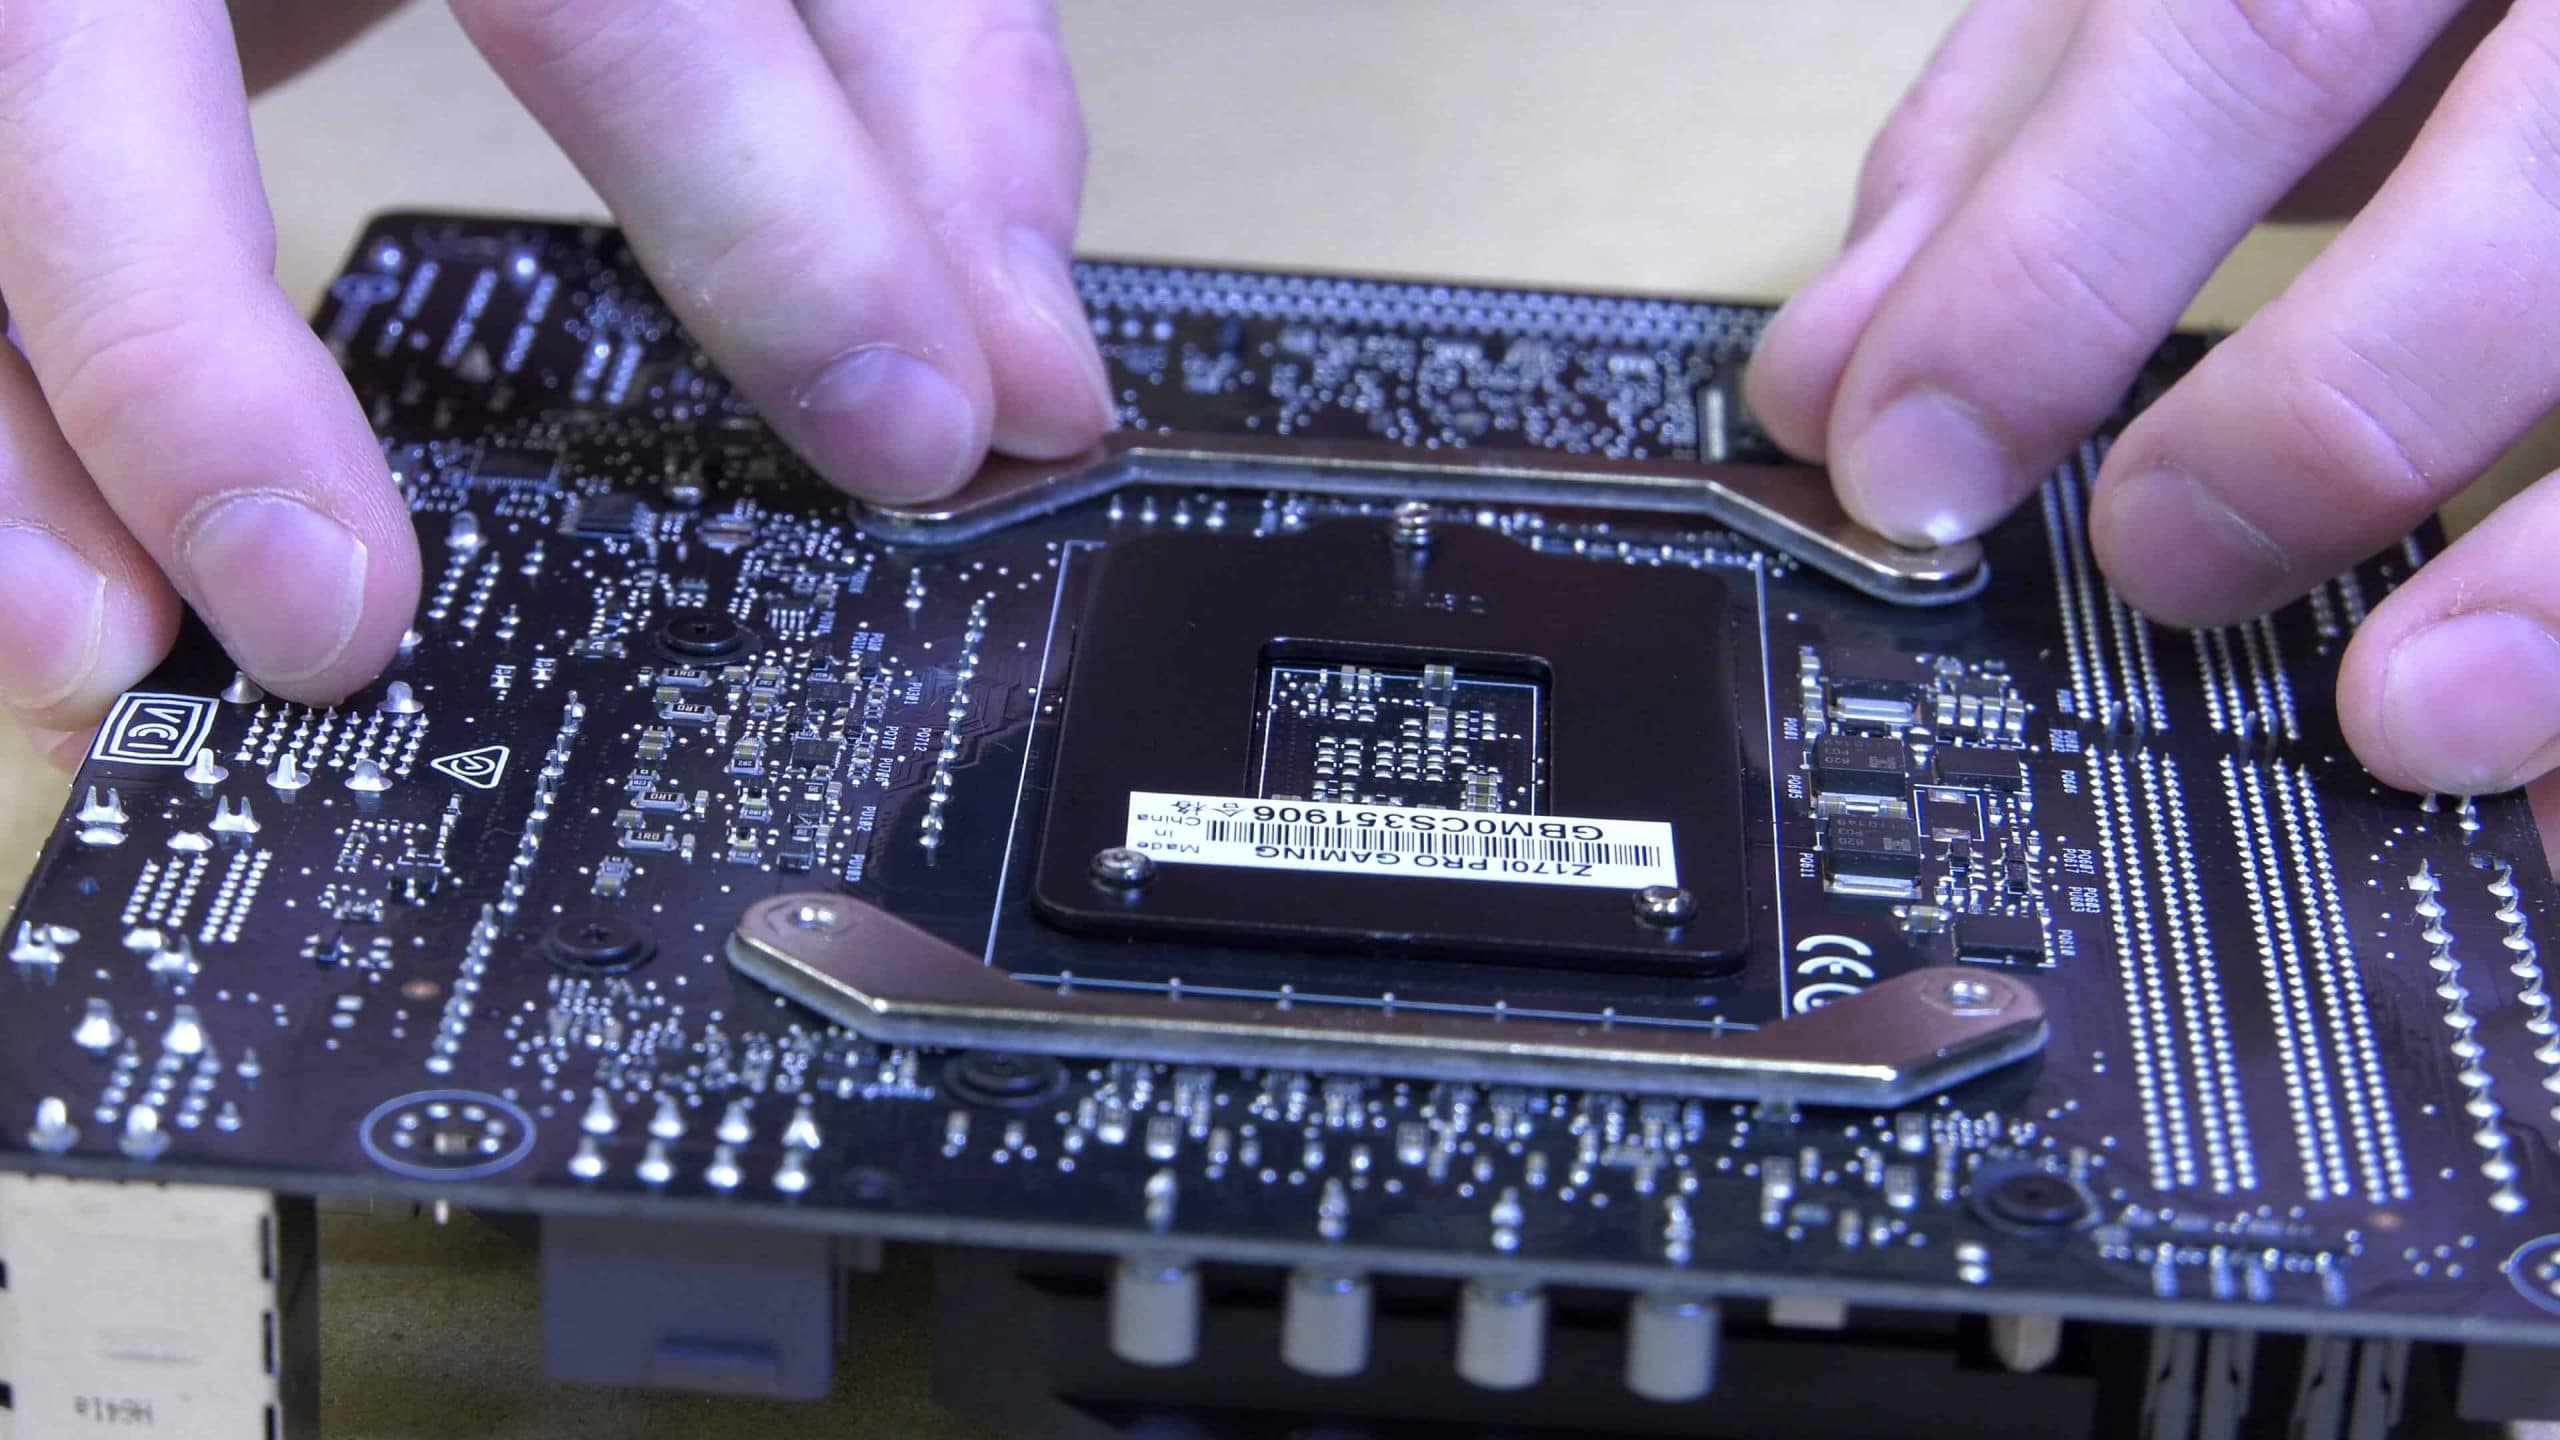
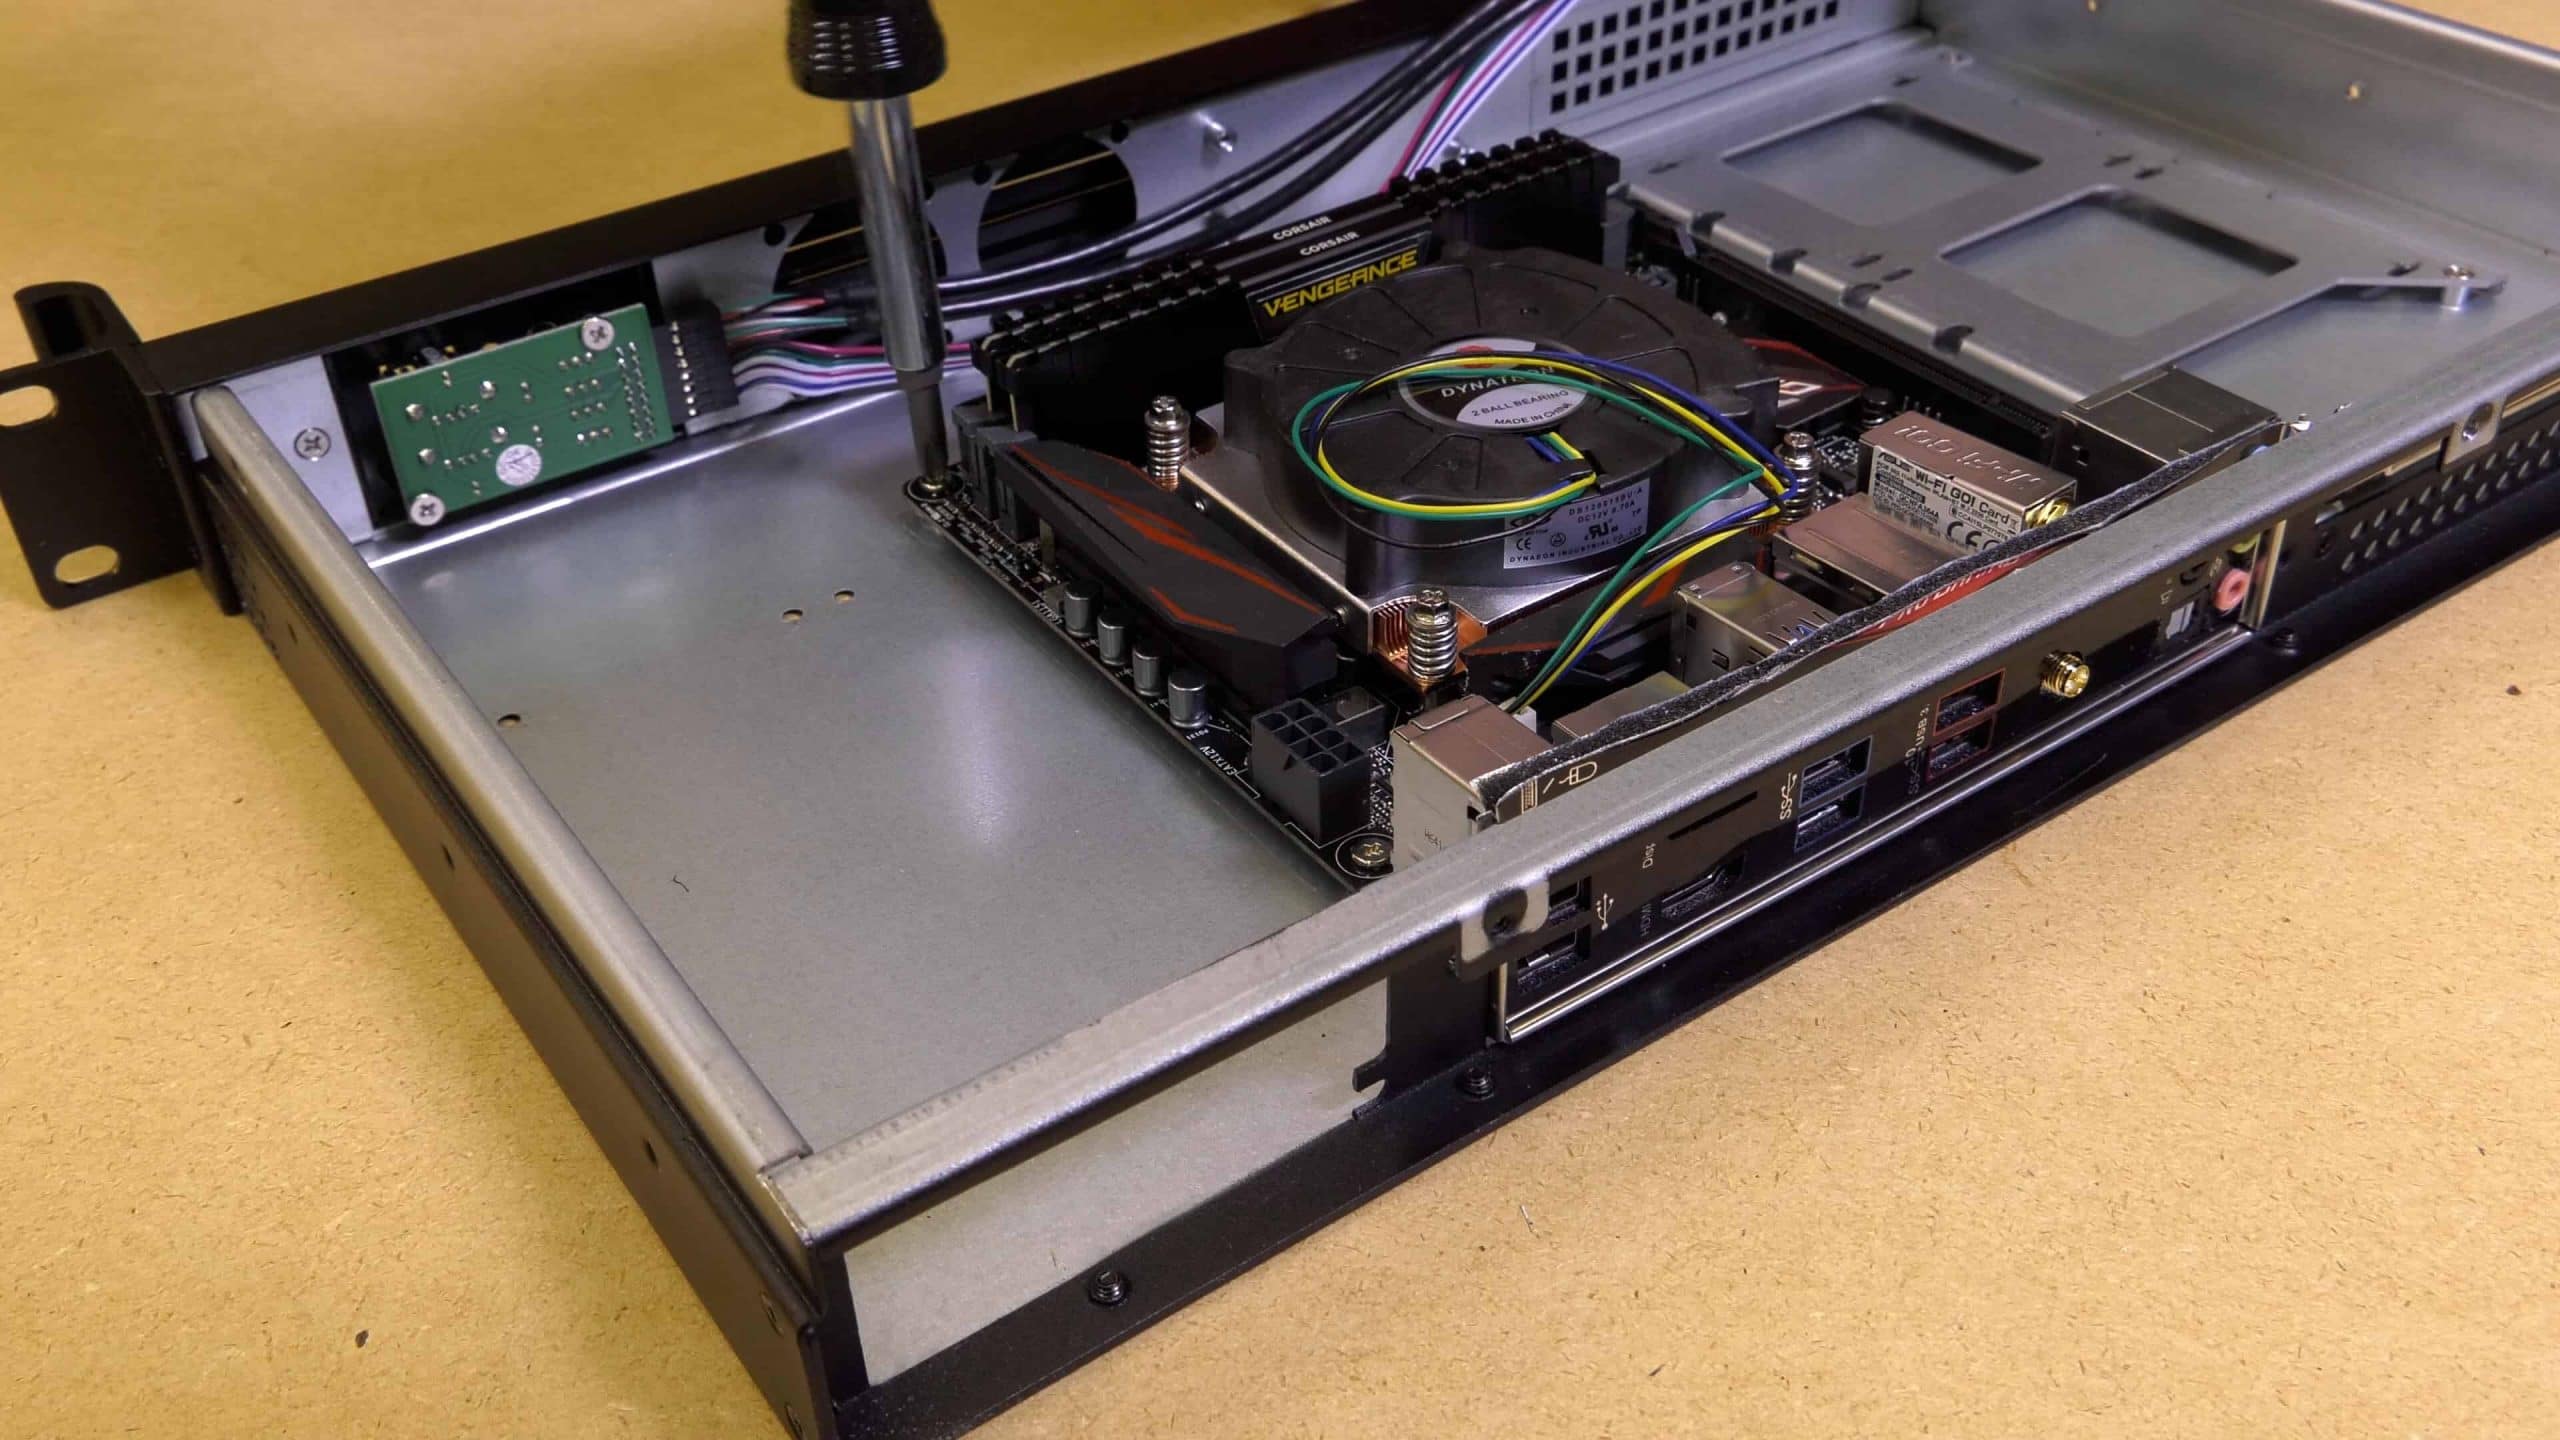
To install the CPU cooler, add the backplate rails to the bottom of the motherboard. They connect with the included double sided tape. Since the backplates are metal and therefore conductive, they also include a plastic insulator between them and the contacts on the motherboard. Flip the mother board and screw down the cooler after placing it on top of the CPU. The K199 comes with thermal paste already applied, but you can replace it with better paste if you desire. Orient the side ejection vent on the cooler towards the left side exhaust vents on the case. This will provide the most efficient airflow pattern, resulting in the most optimal cooling at the lowest RPM.
1U Server Build: The RAM Selection
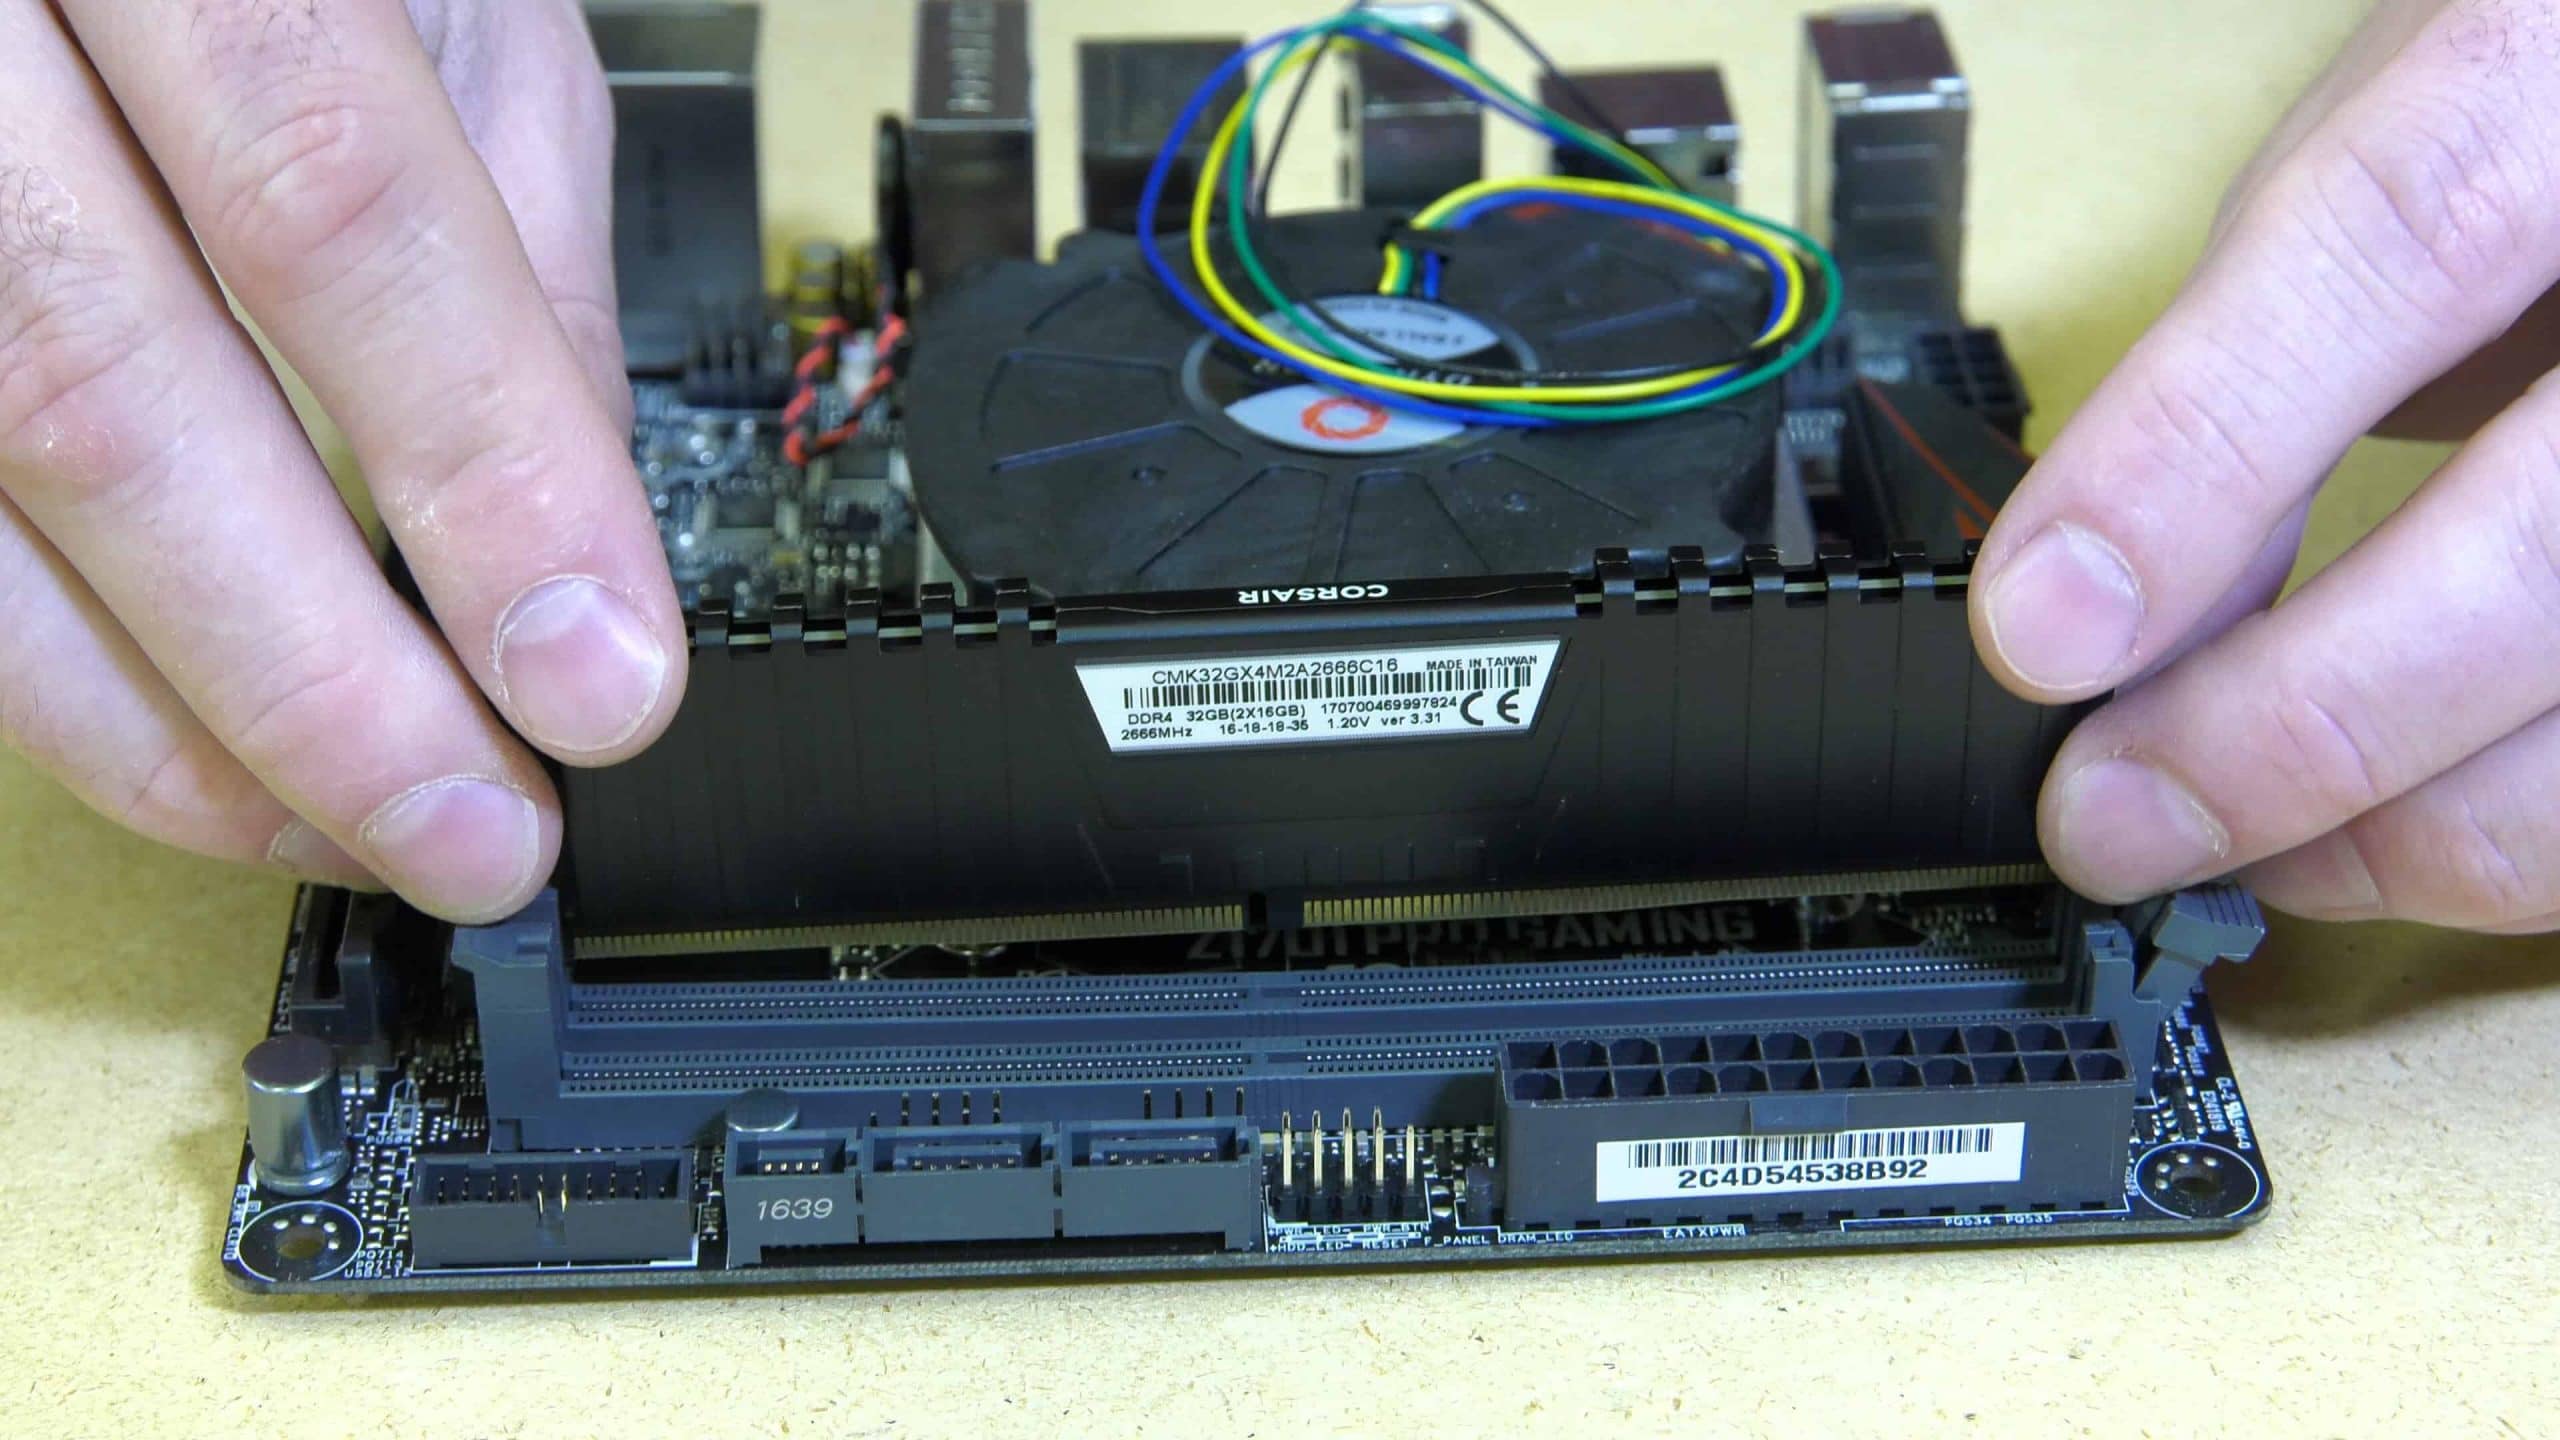
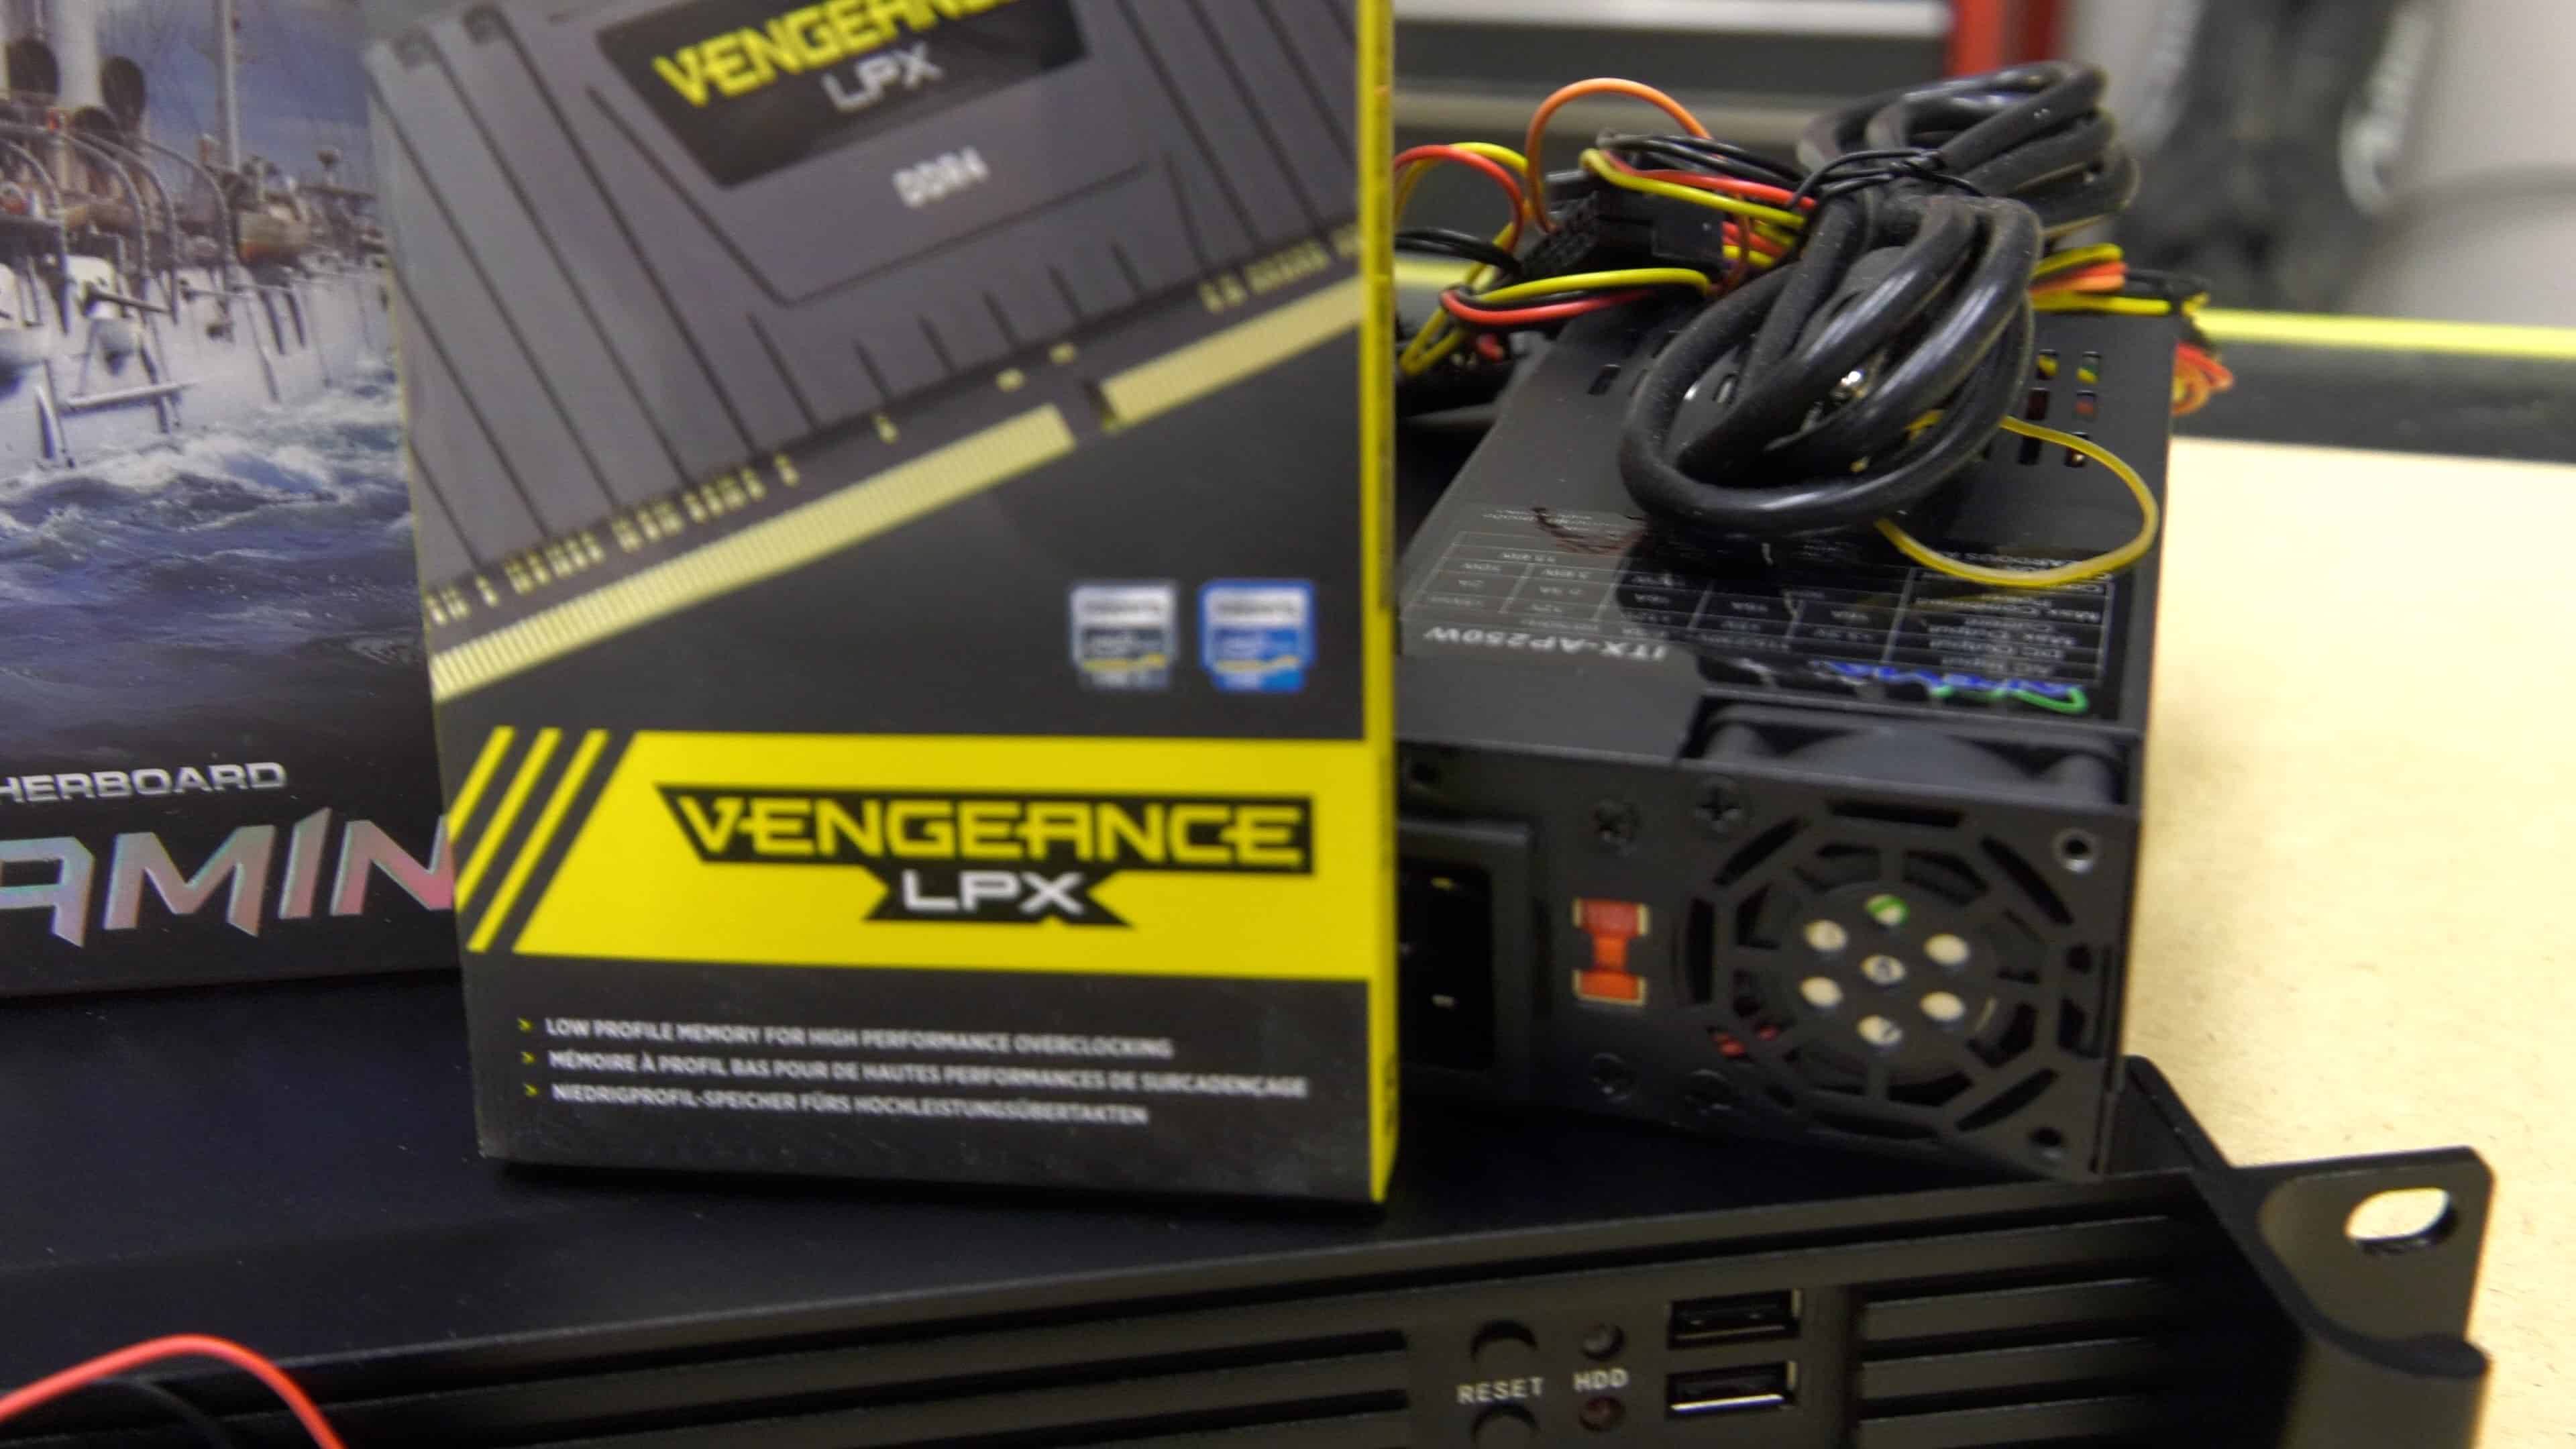 Because this is an ESX server, and it will be running many virtual machines RAM is something that will be important – and lots of it. For this build I chose to use 32 GB of Corsair Vengeance DDR4 at 2666 Mhz. This is the max amount of RAM that this motherboard will support, and also the fastest. Honestly, I would have preferred to have 64 GB of RAM, but I couldn’t find a mini-ITX board that would support more than 32. This is one of the sacrifices necessary when building a 1U server.
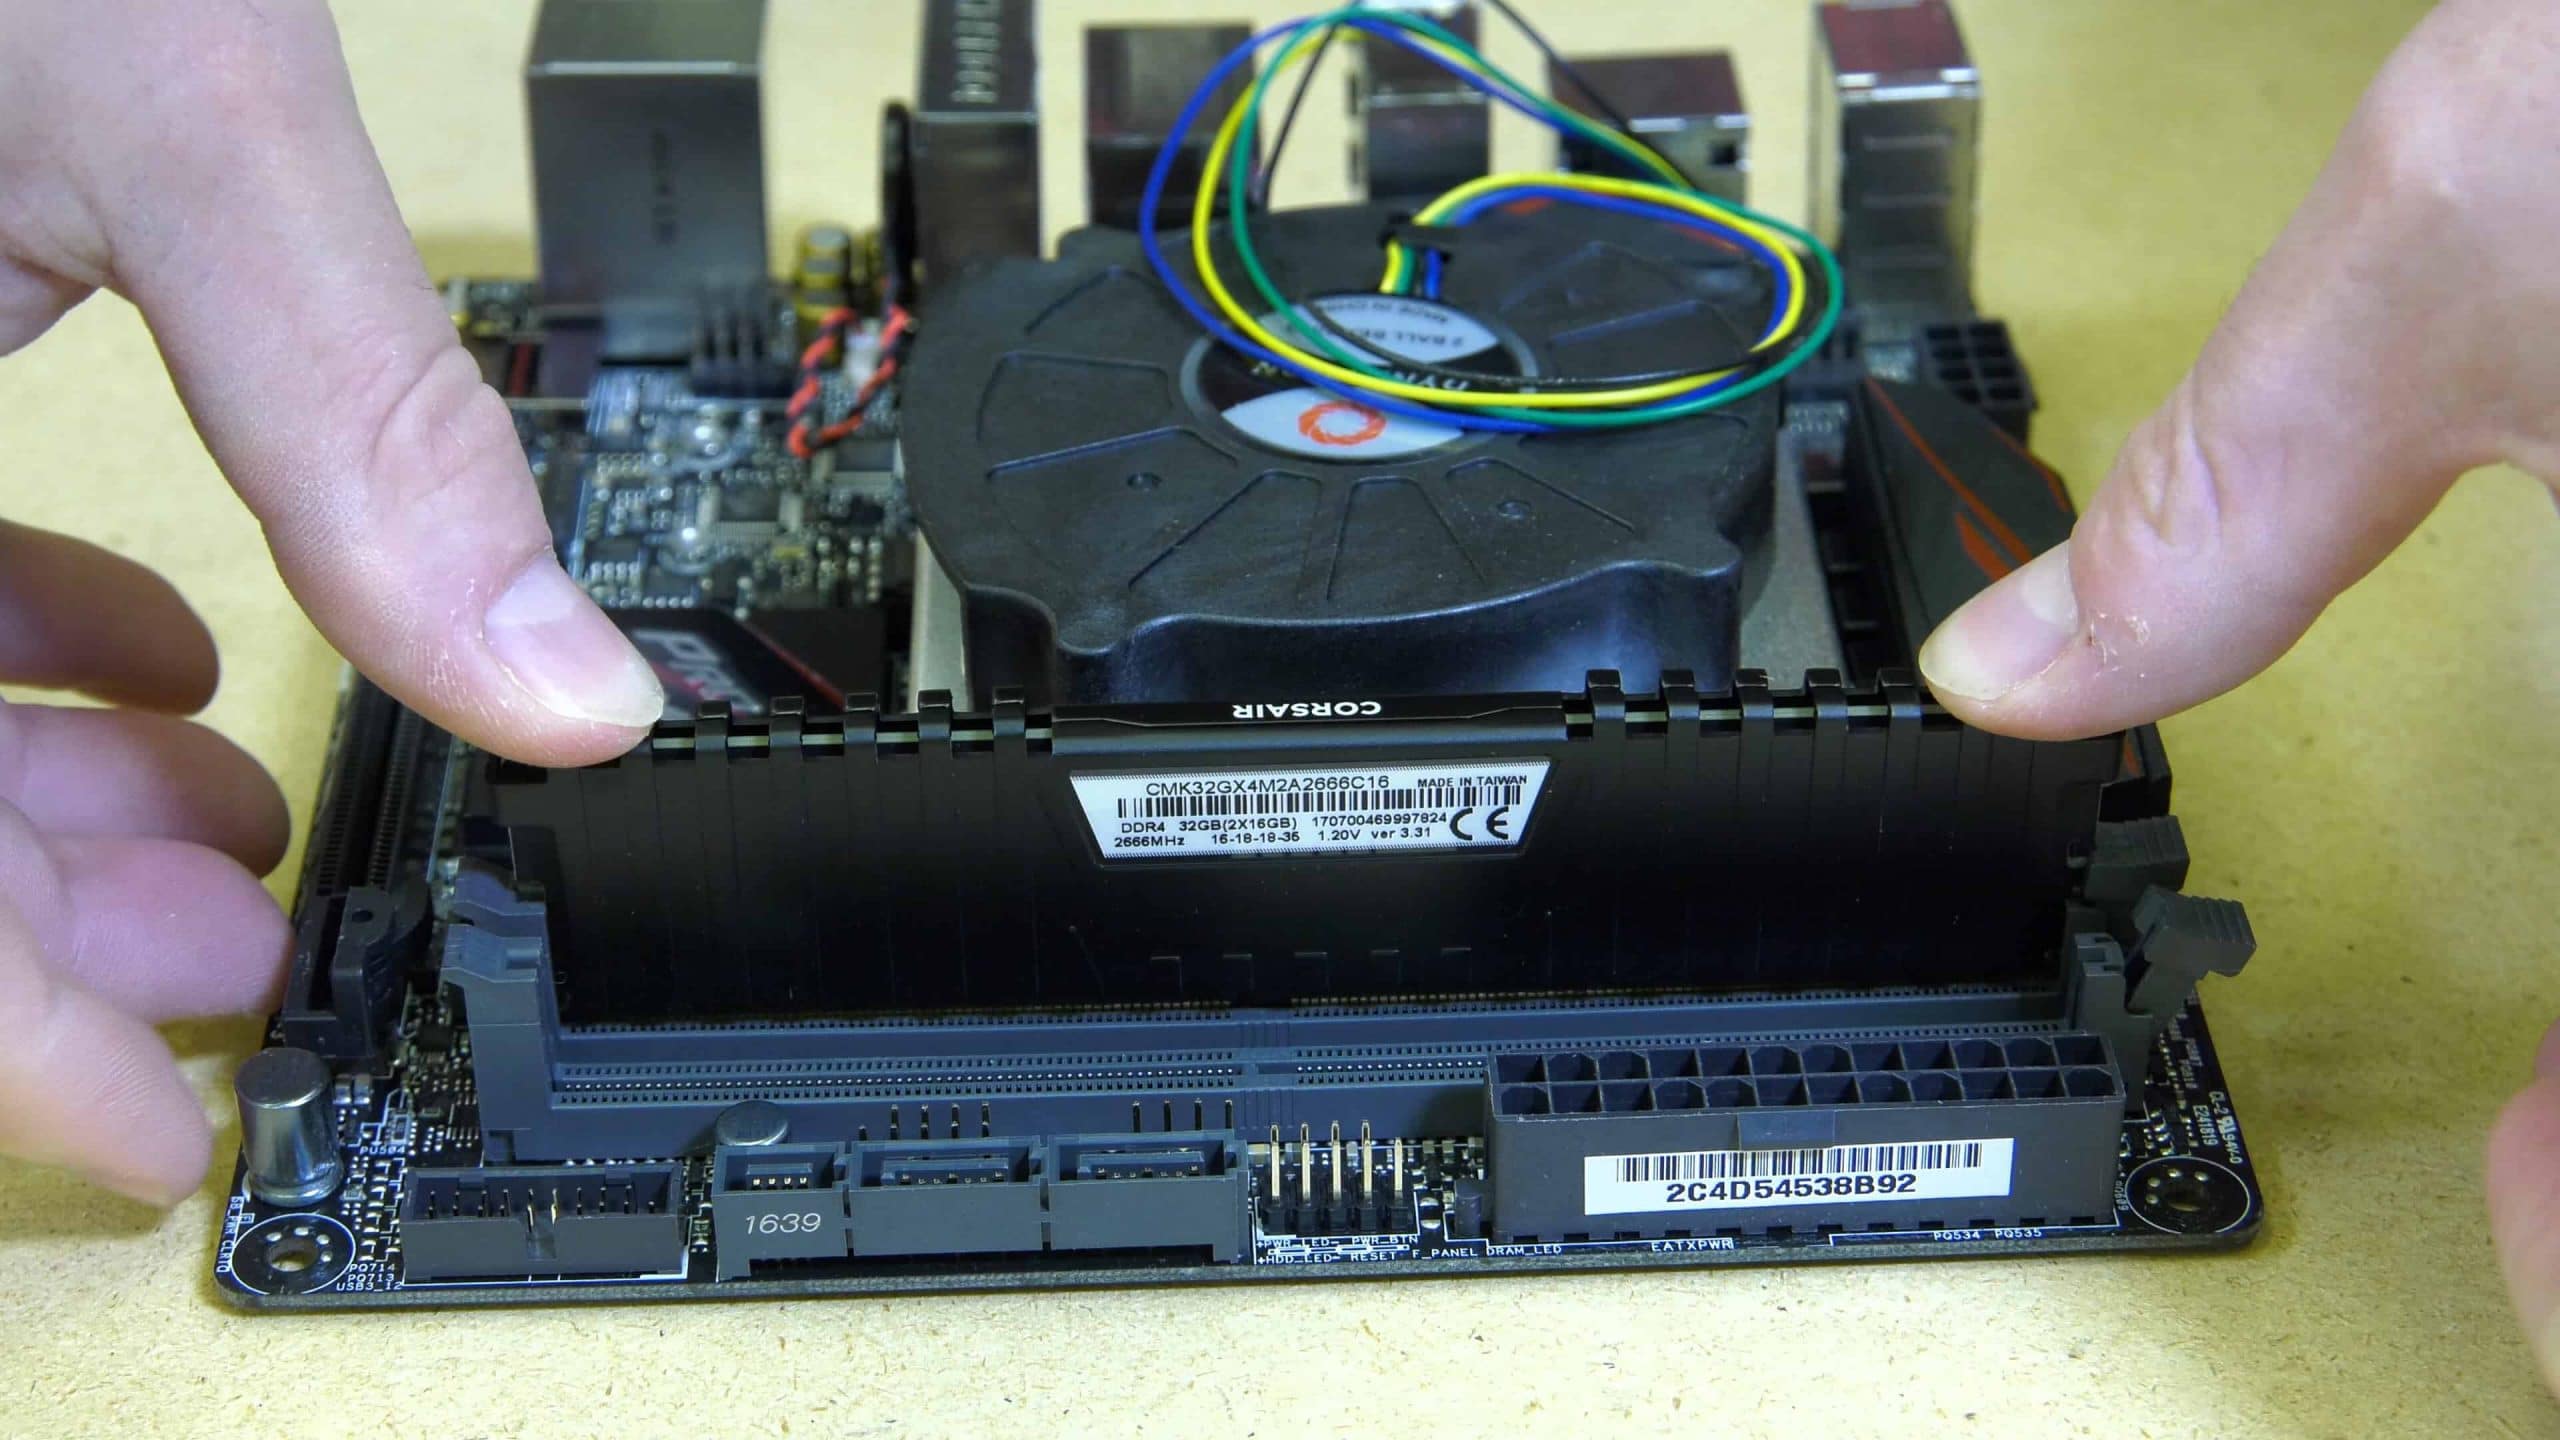
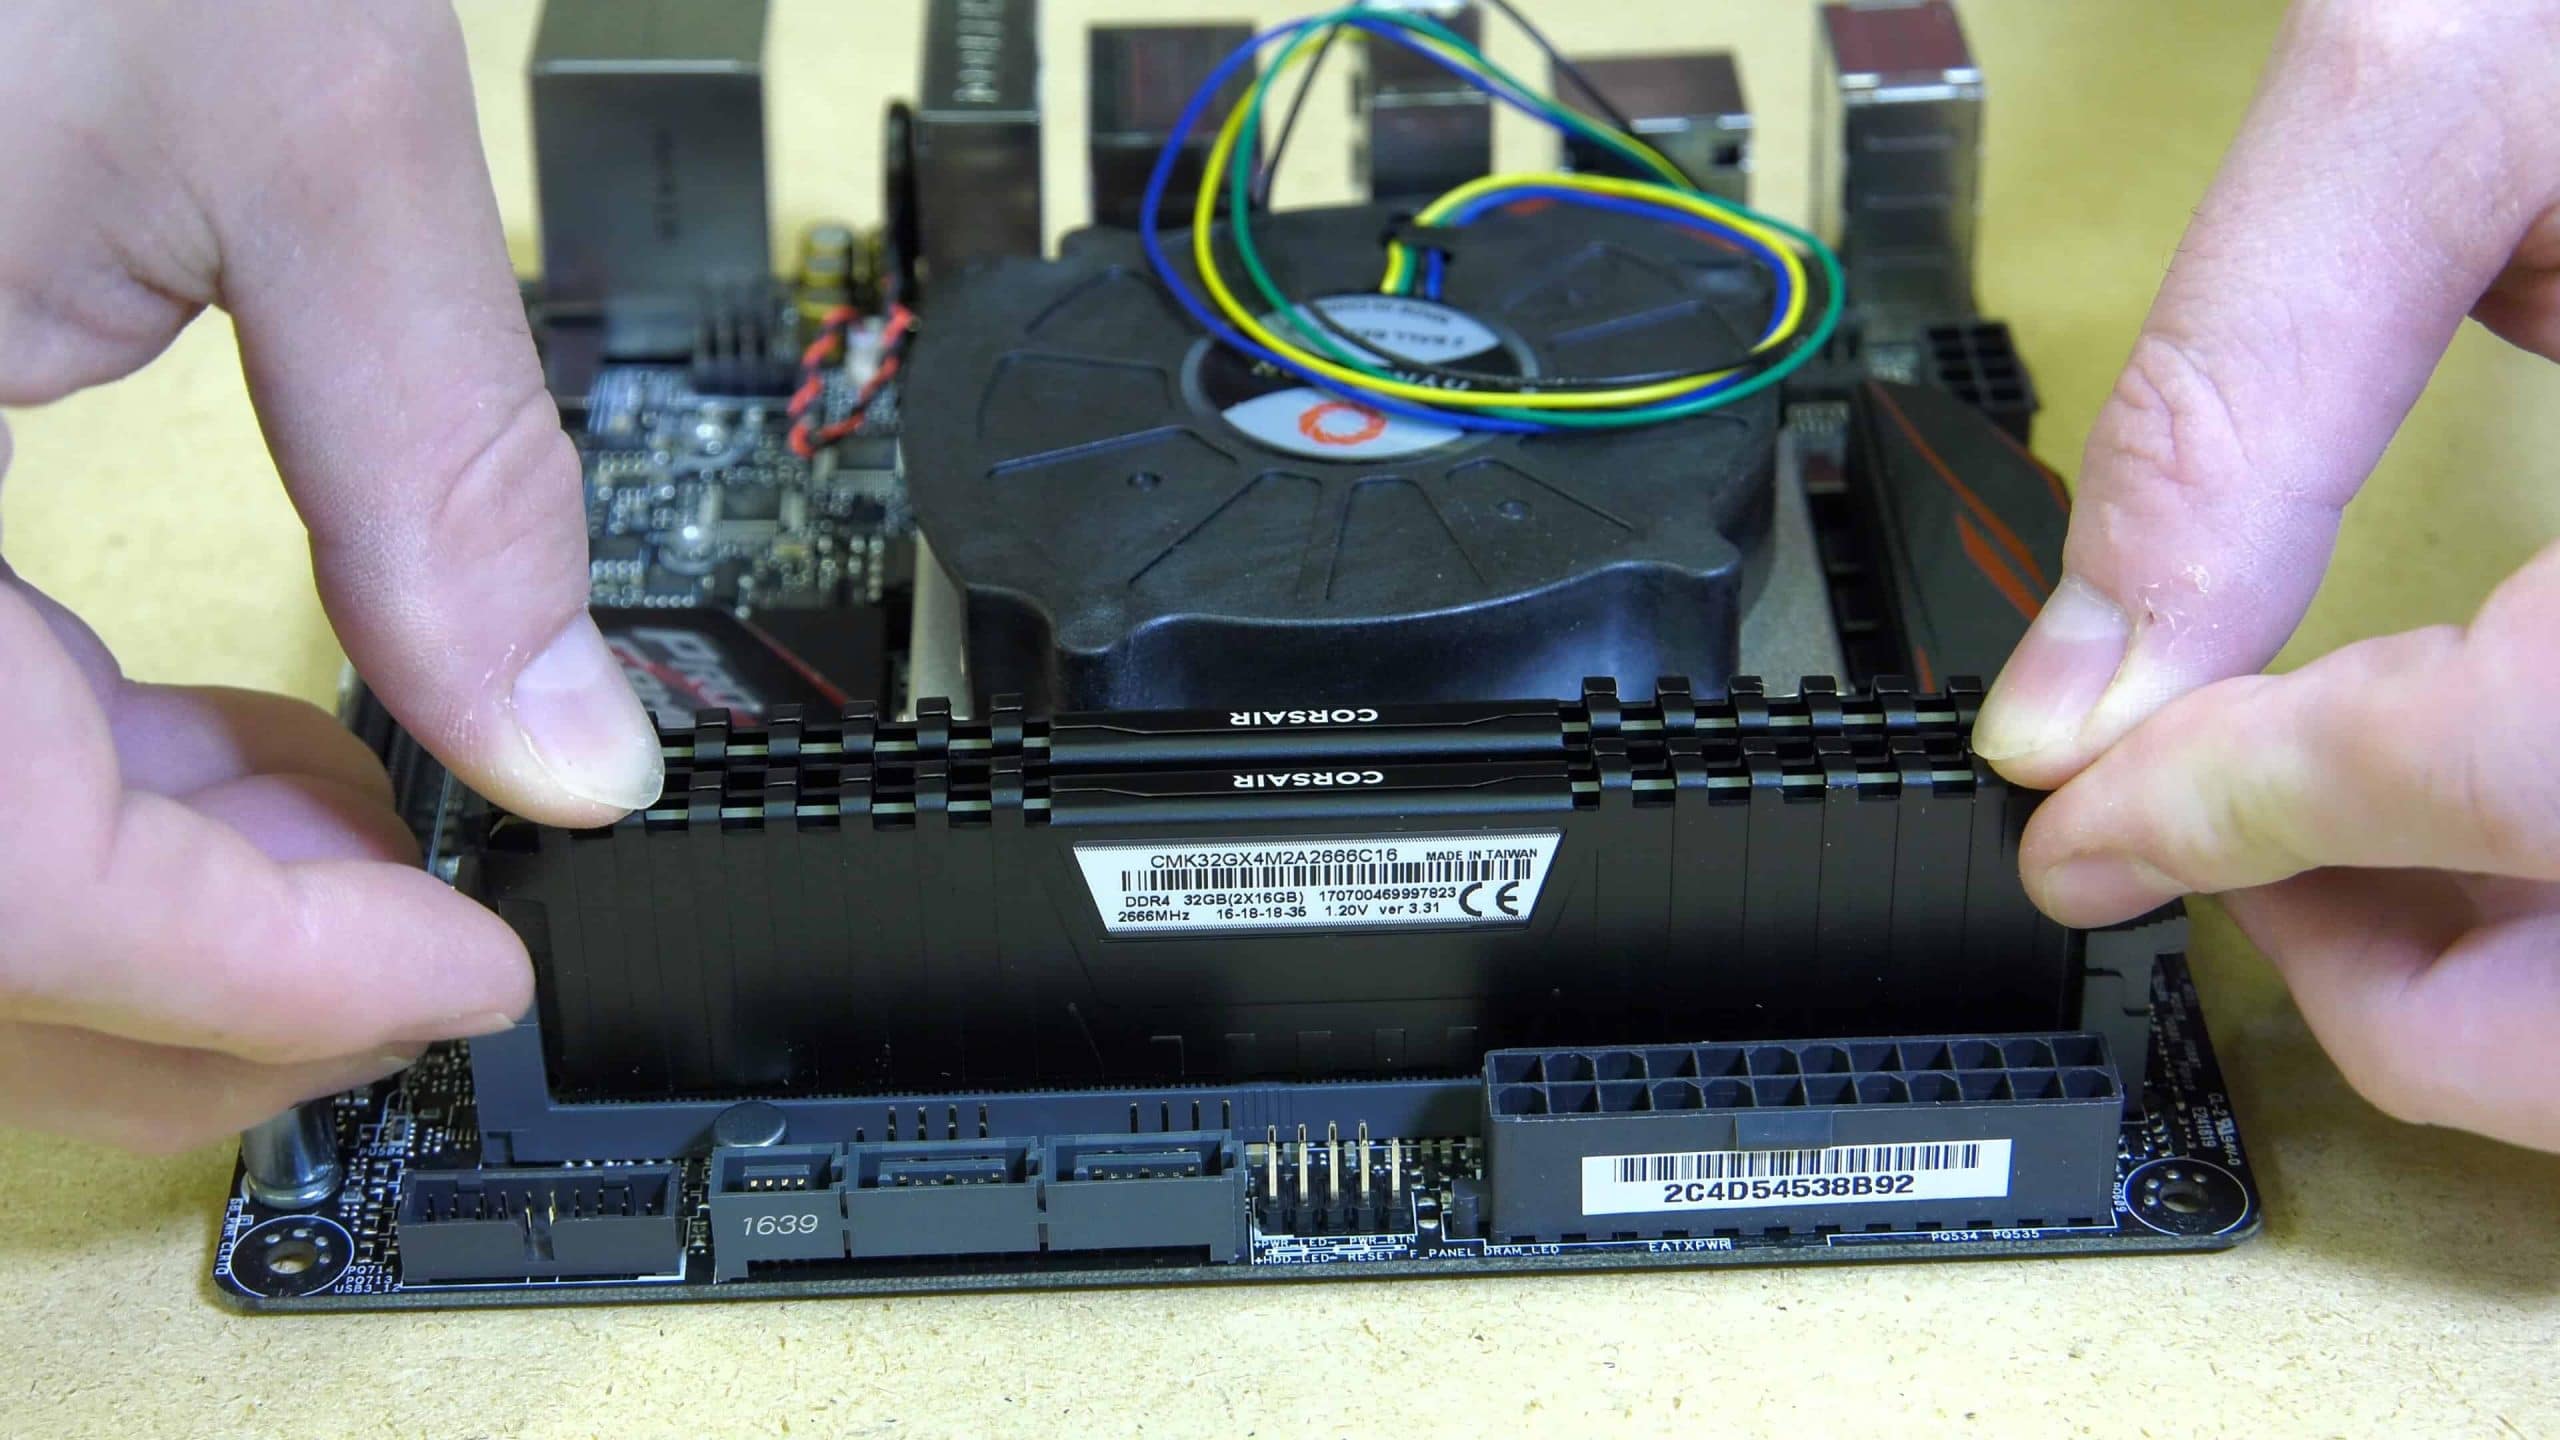
Installing the Corsair Vegeance DDR 4RAM
Installing the RAM is very simple, pull back the tabs on the DIMM slots, align the notch on the bottom of the DIMM with the notch on the slots and simply press them firmly into place at both ends until the levers click back into place on their own.
1U Server Build: The Case Selection
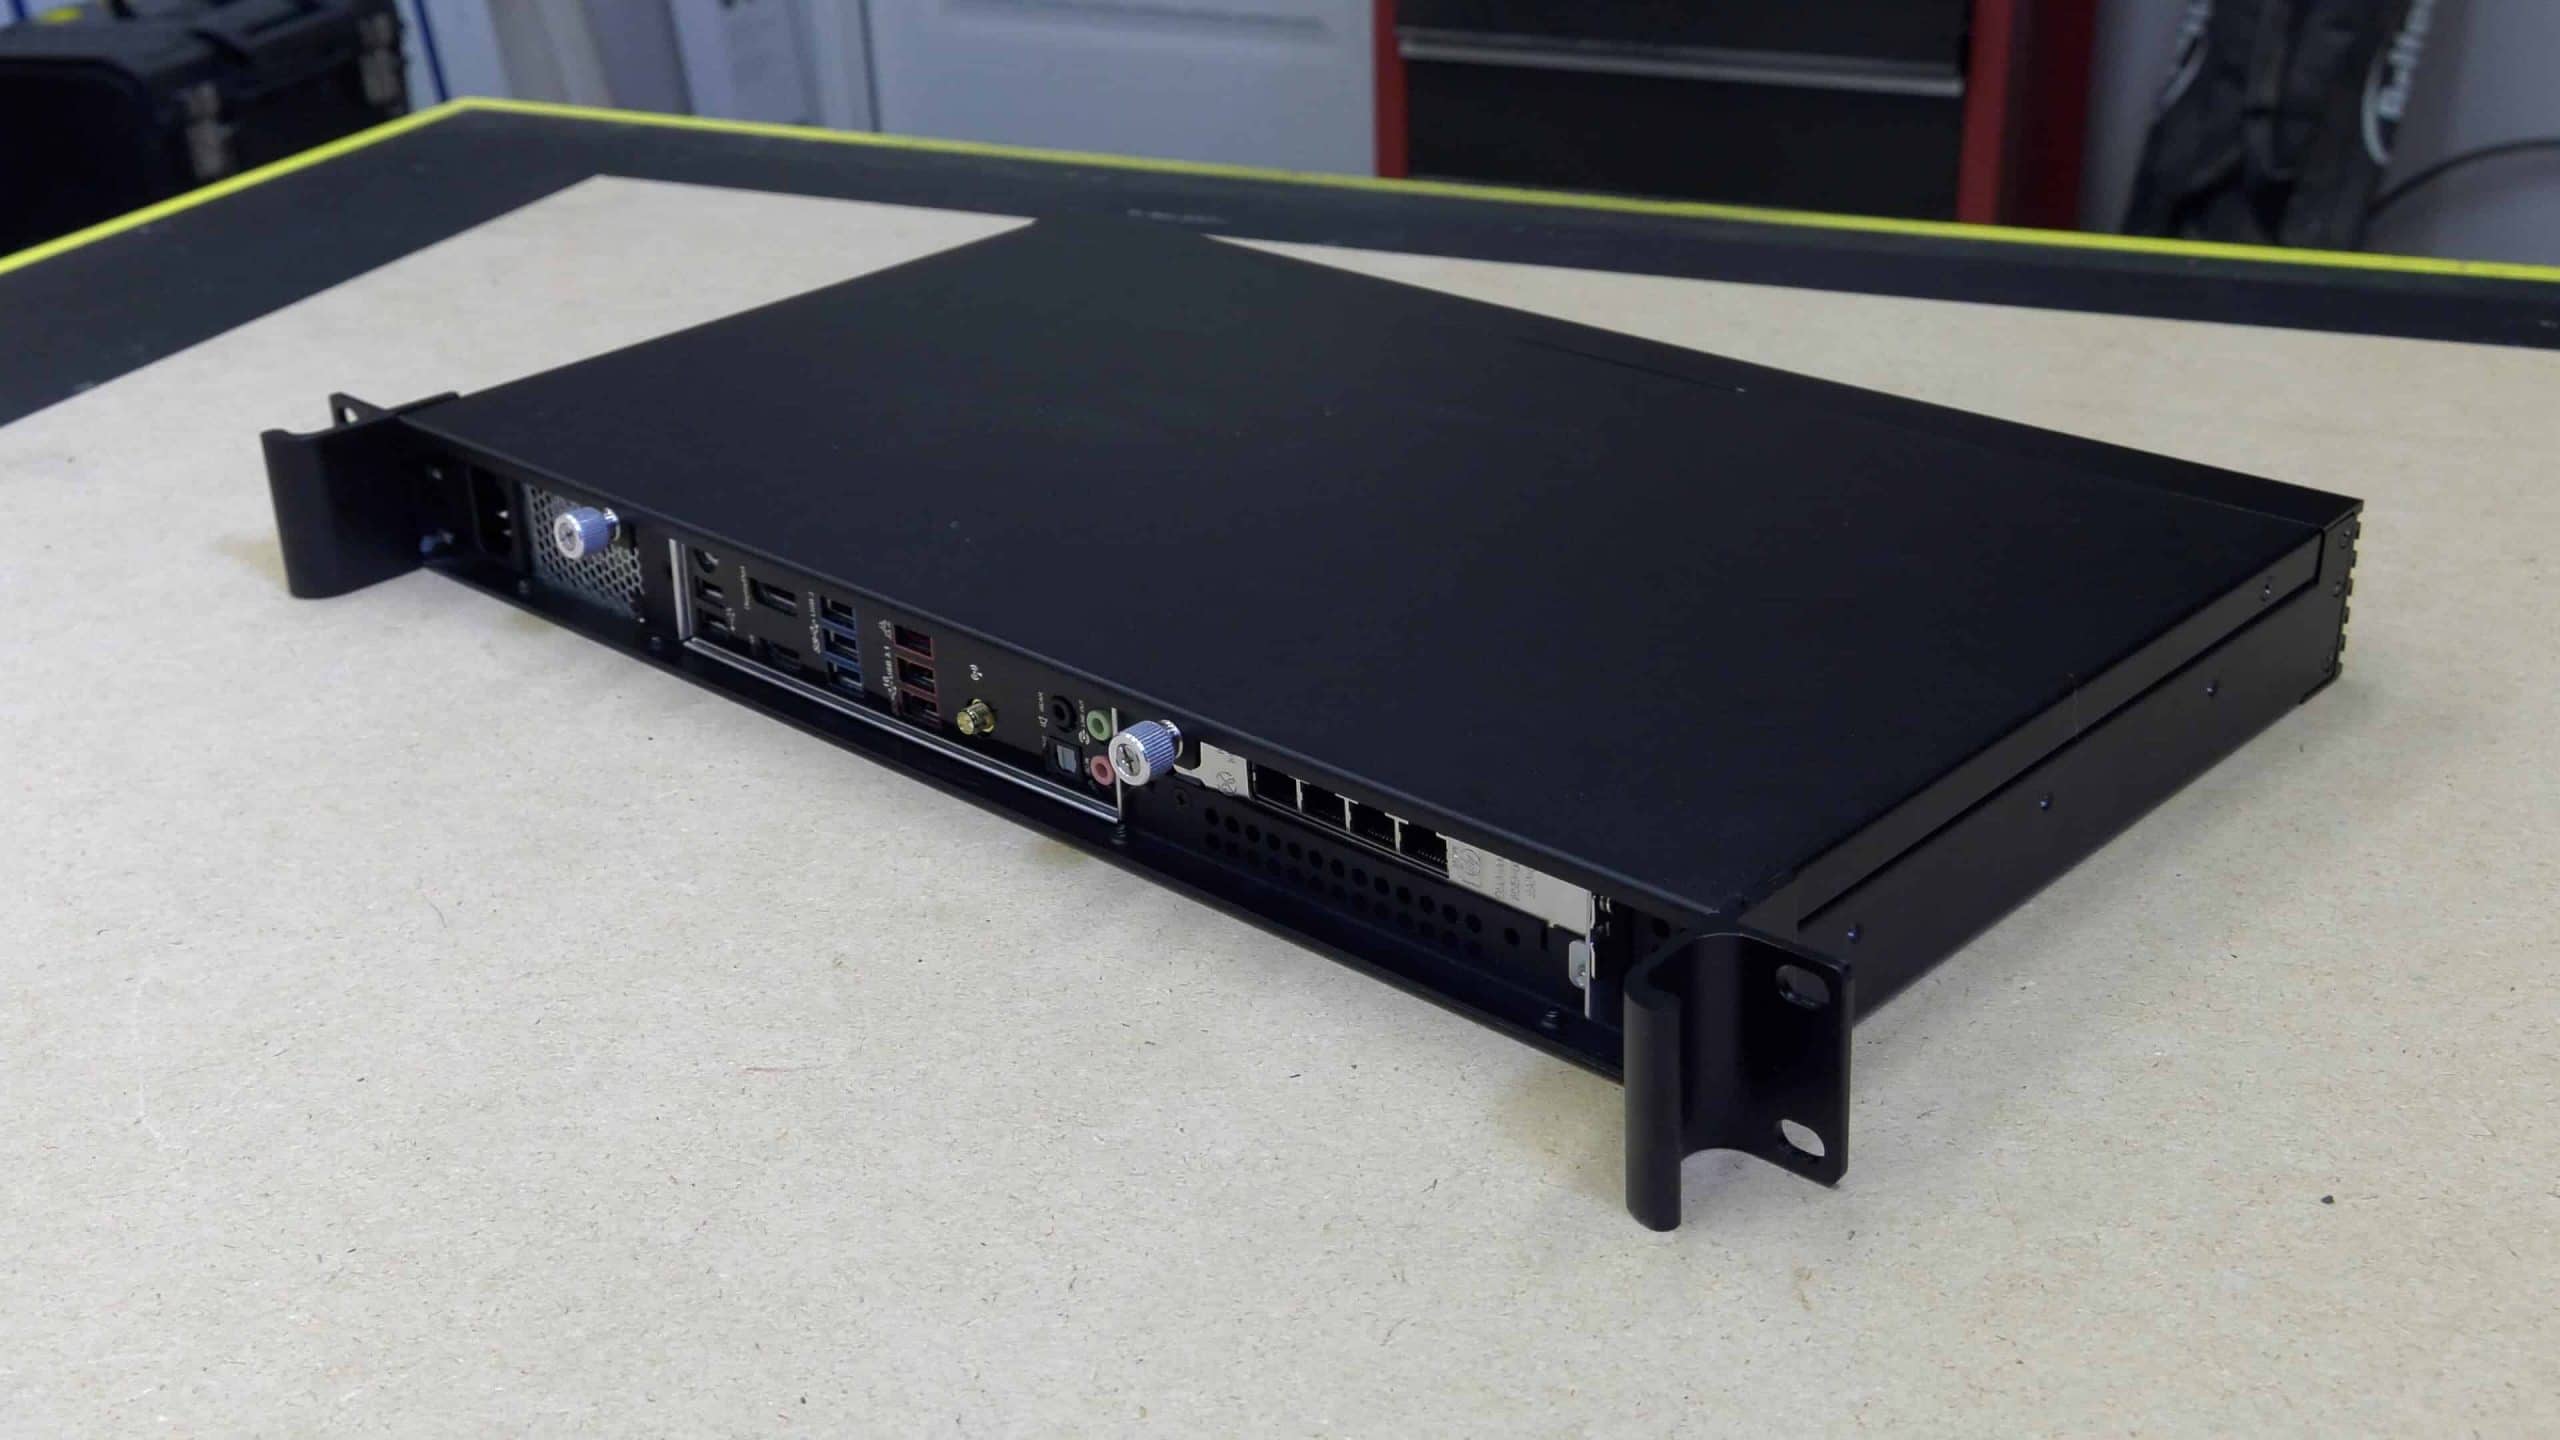
 The case I chose is a 1U 19” rack mount case from iStar USA. This case is completely bare bones and doesn’t include a power supply, or even a fan. One of the nice things about this case is that the rack mounting ears can be placed on either end of the chassis, allowing for the motherboard ports to be at the front or the back of the rack depending on your preference. This is something I consider fairly important when building a 1U server. They come installed on the front of the case, but I swapped them so I could mount the case with the ports towards the front.
This case is not without its shortcomings however, and we will address of few of those shortly.
1U Server Build: The Motherboard Selection
 The motherboard I chose is a mini-ITX ASUS Z170 Pro Gaming motherboard. I chose this board not because of any of the gaming specs, but because it allows overclocking and is 99% compatible with VMware ESX 6.5. I say 99% because this board (like most non-server boards) will not pass IPMI data to ESX, meaning VMWare won’t be able to read the temperature sensors. In my case this is fine, because the motherboard BIOS will handle cooling and fan speeds independently of ESX and I have plenty of other devices that I can read temperature sensors from in my network closet. To be clear, you can get mini-ITX motherboards that support IPMI but I am not aware of any that are supported by ESX that also support a Skylake or Kabylake processor, overclocking, or independent chassis fan controllers.
And by the way, this board supports Aura RGB lighting, which means your server will glow through all of the open vents, if you’re into that sort of thing! Building a 1U server can fun too!
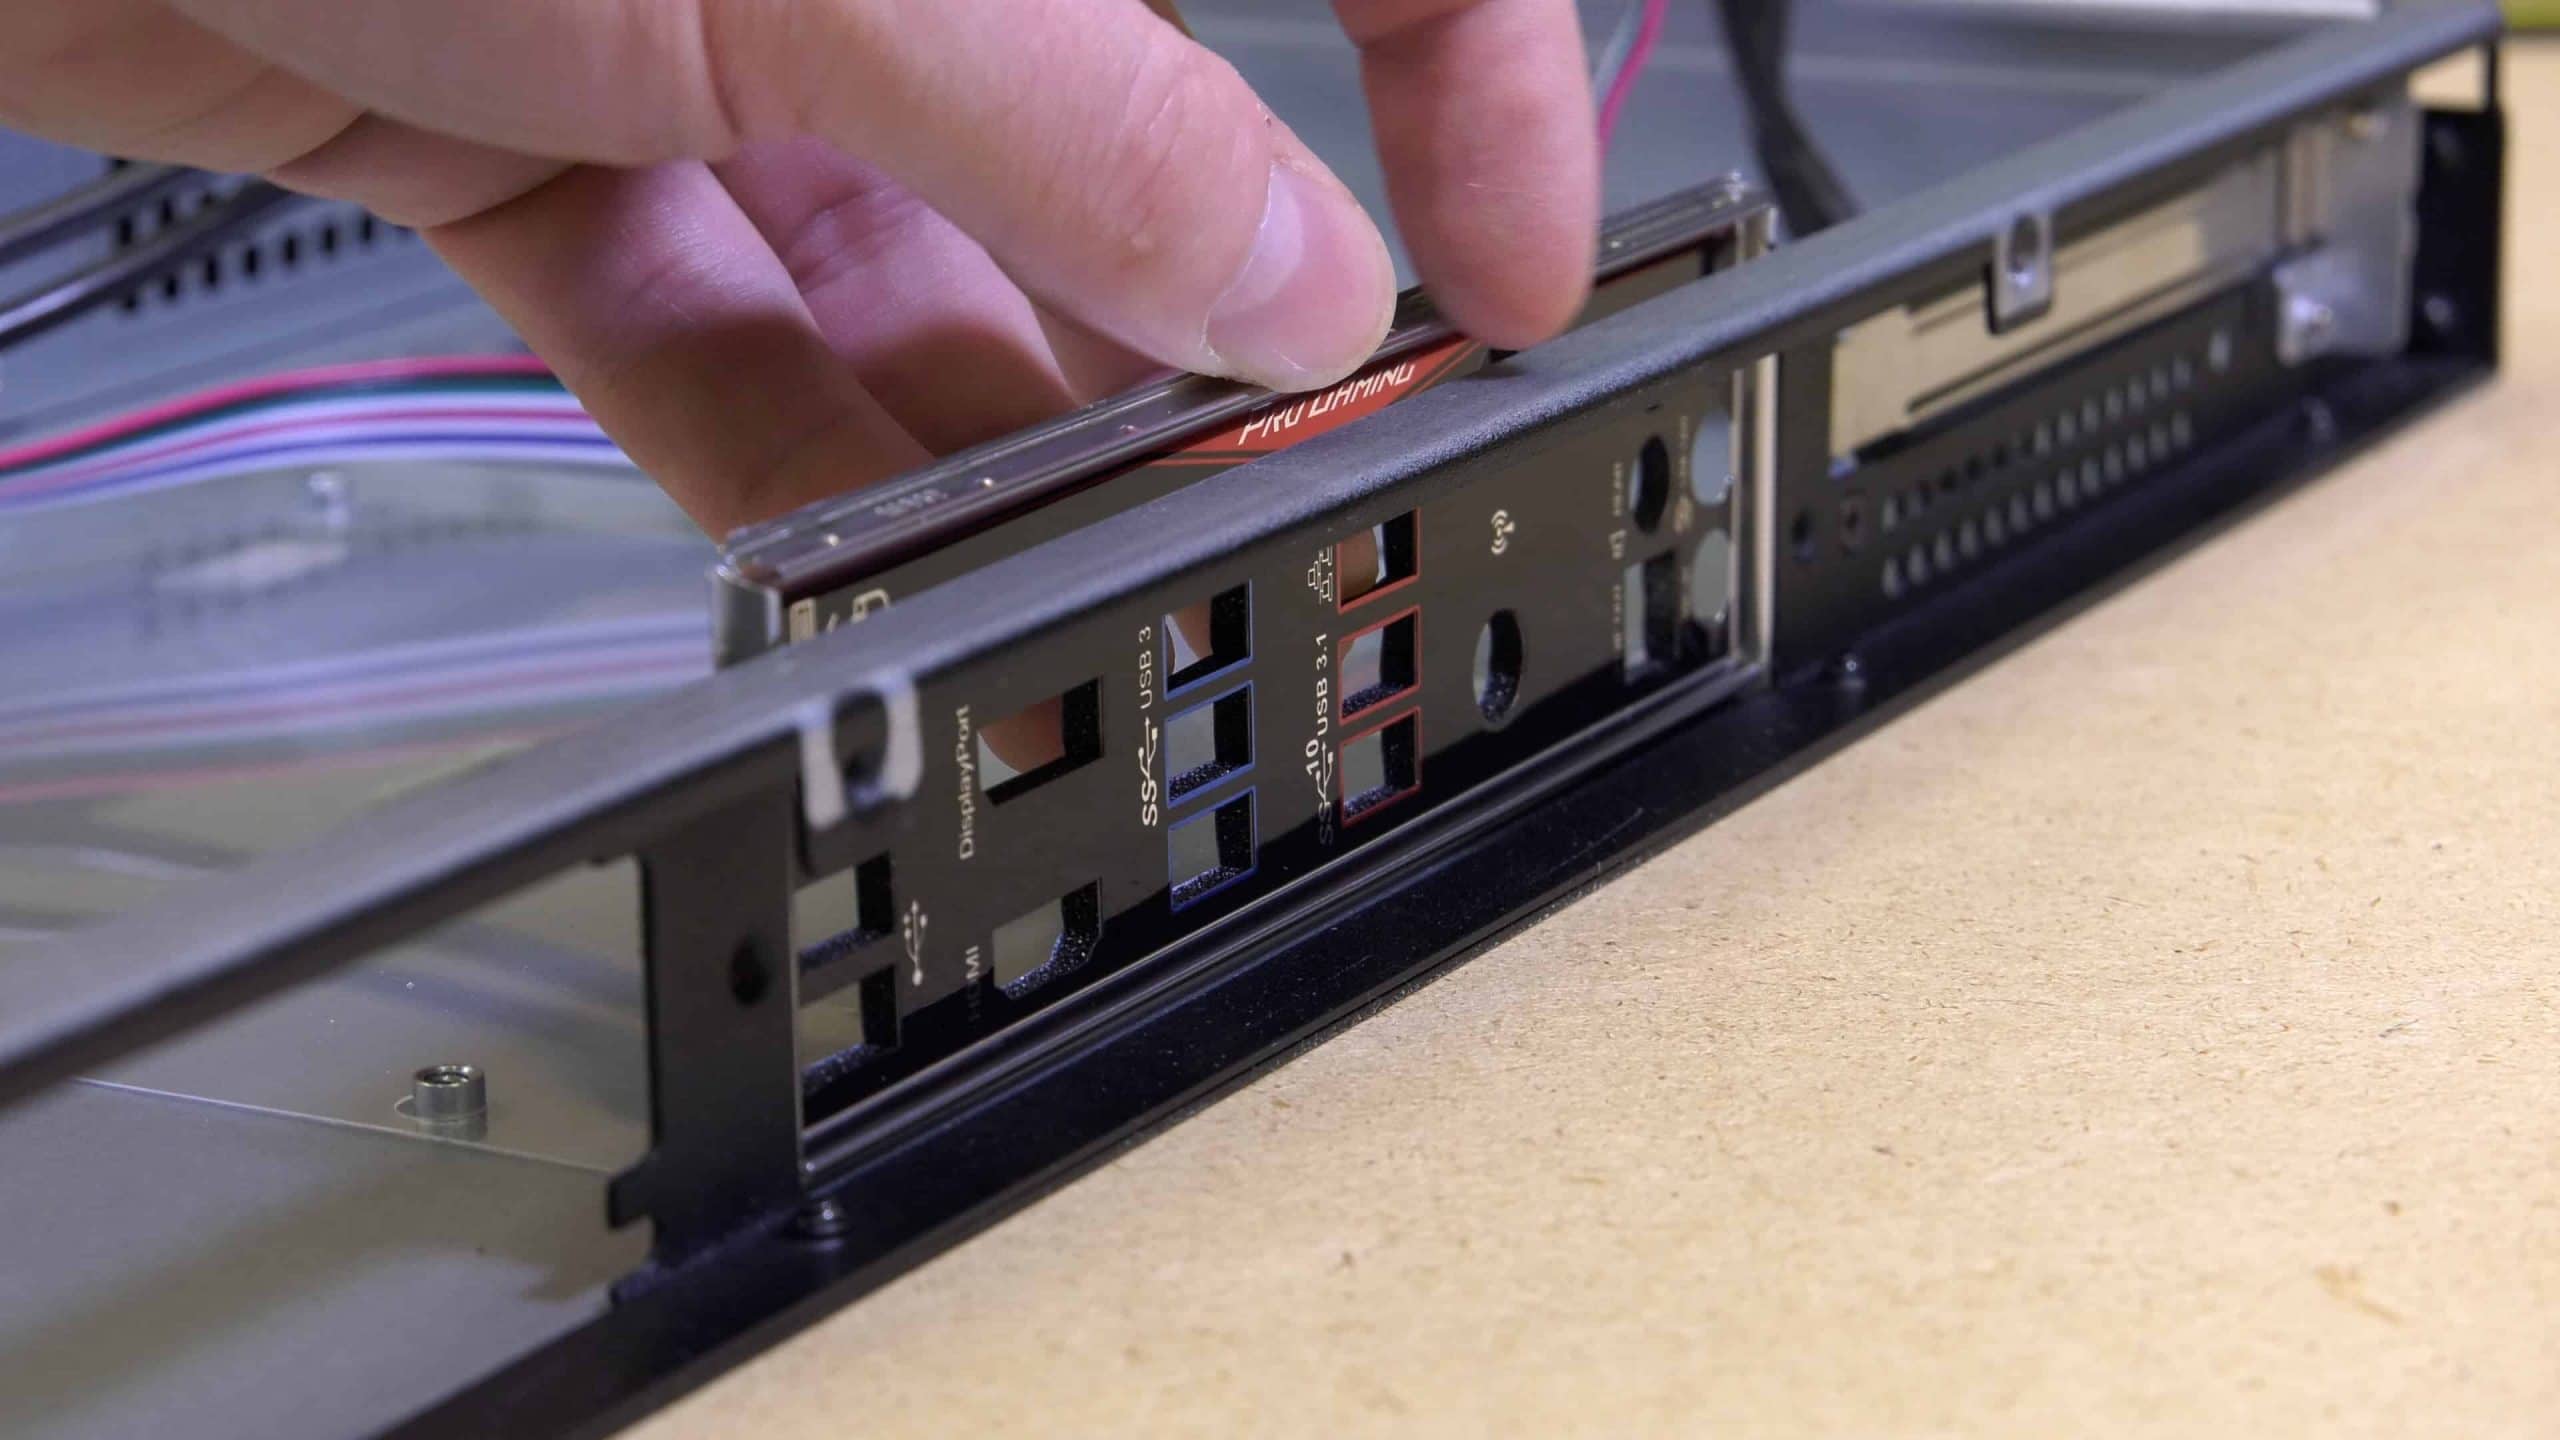
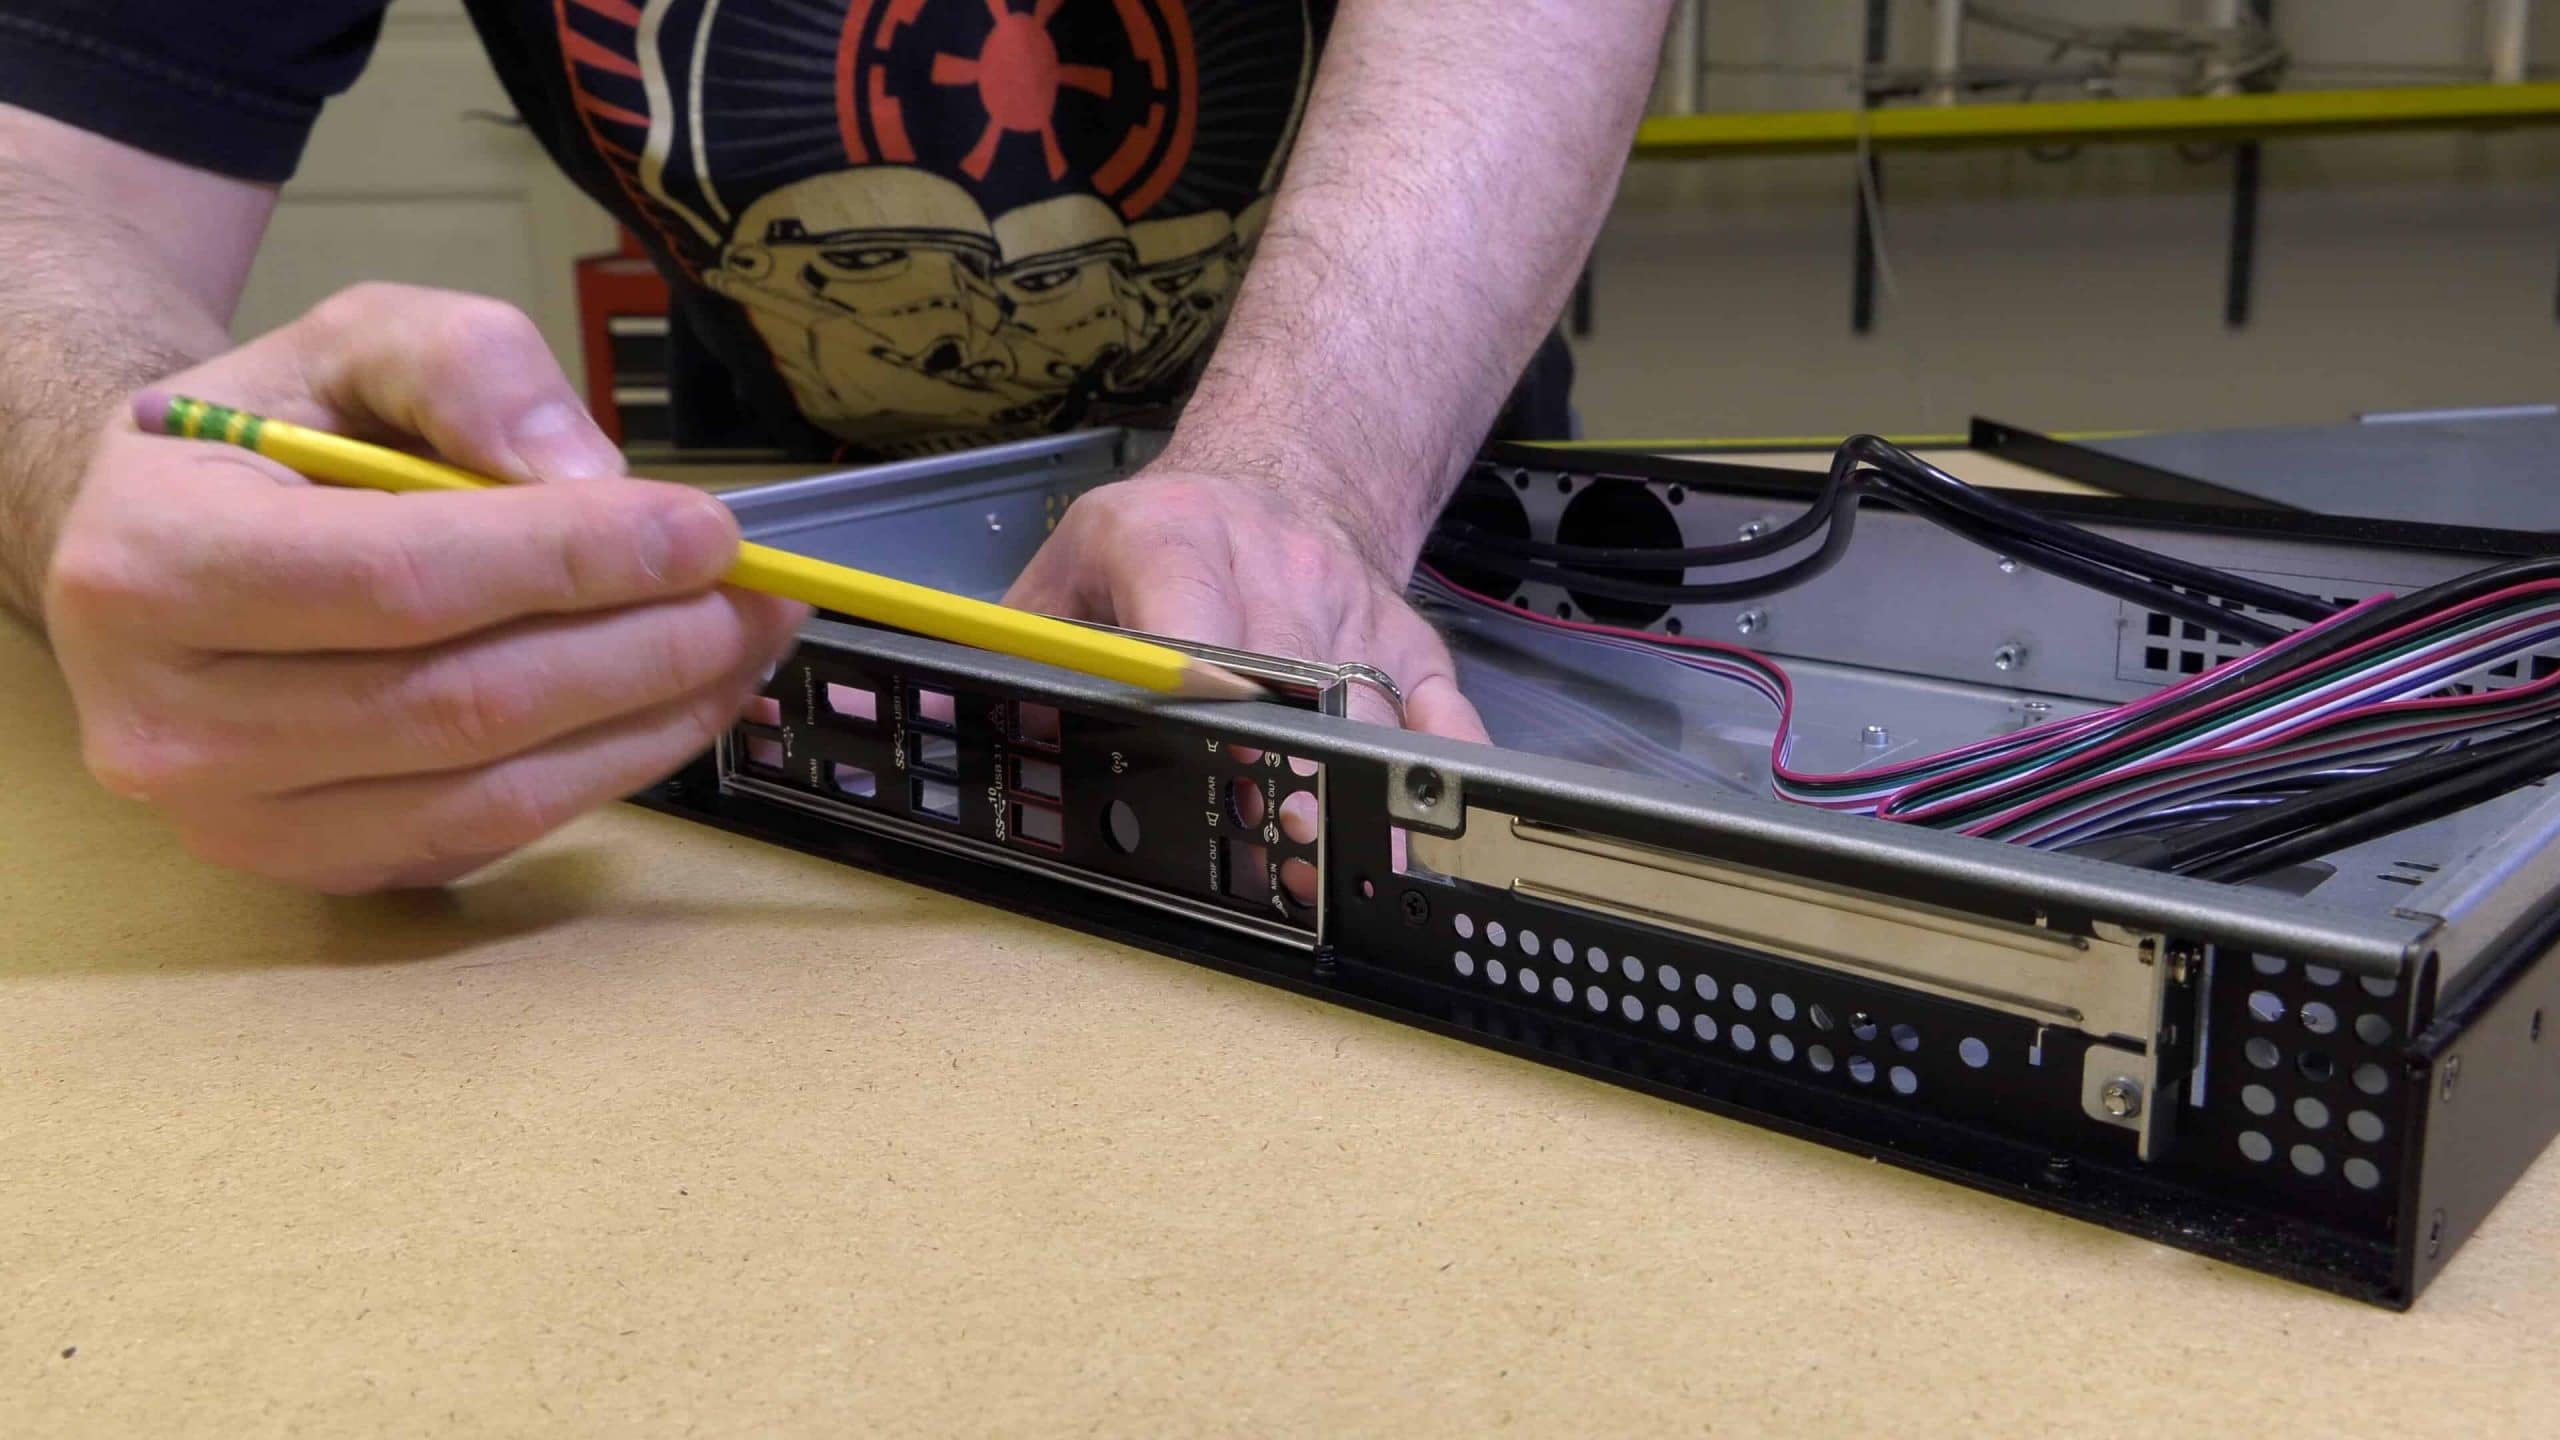
Installing this motherboard into the iStar case represents a few challenges. Lets start with the fact that the IO shield is about 3/8 of an inch too tall. This is a pretty common problem encountered when building a 1U server and the good news its not too hard to solve for.
Installing the ASUS Z170 Pro Gaming Motherboard
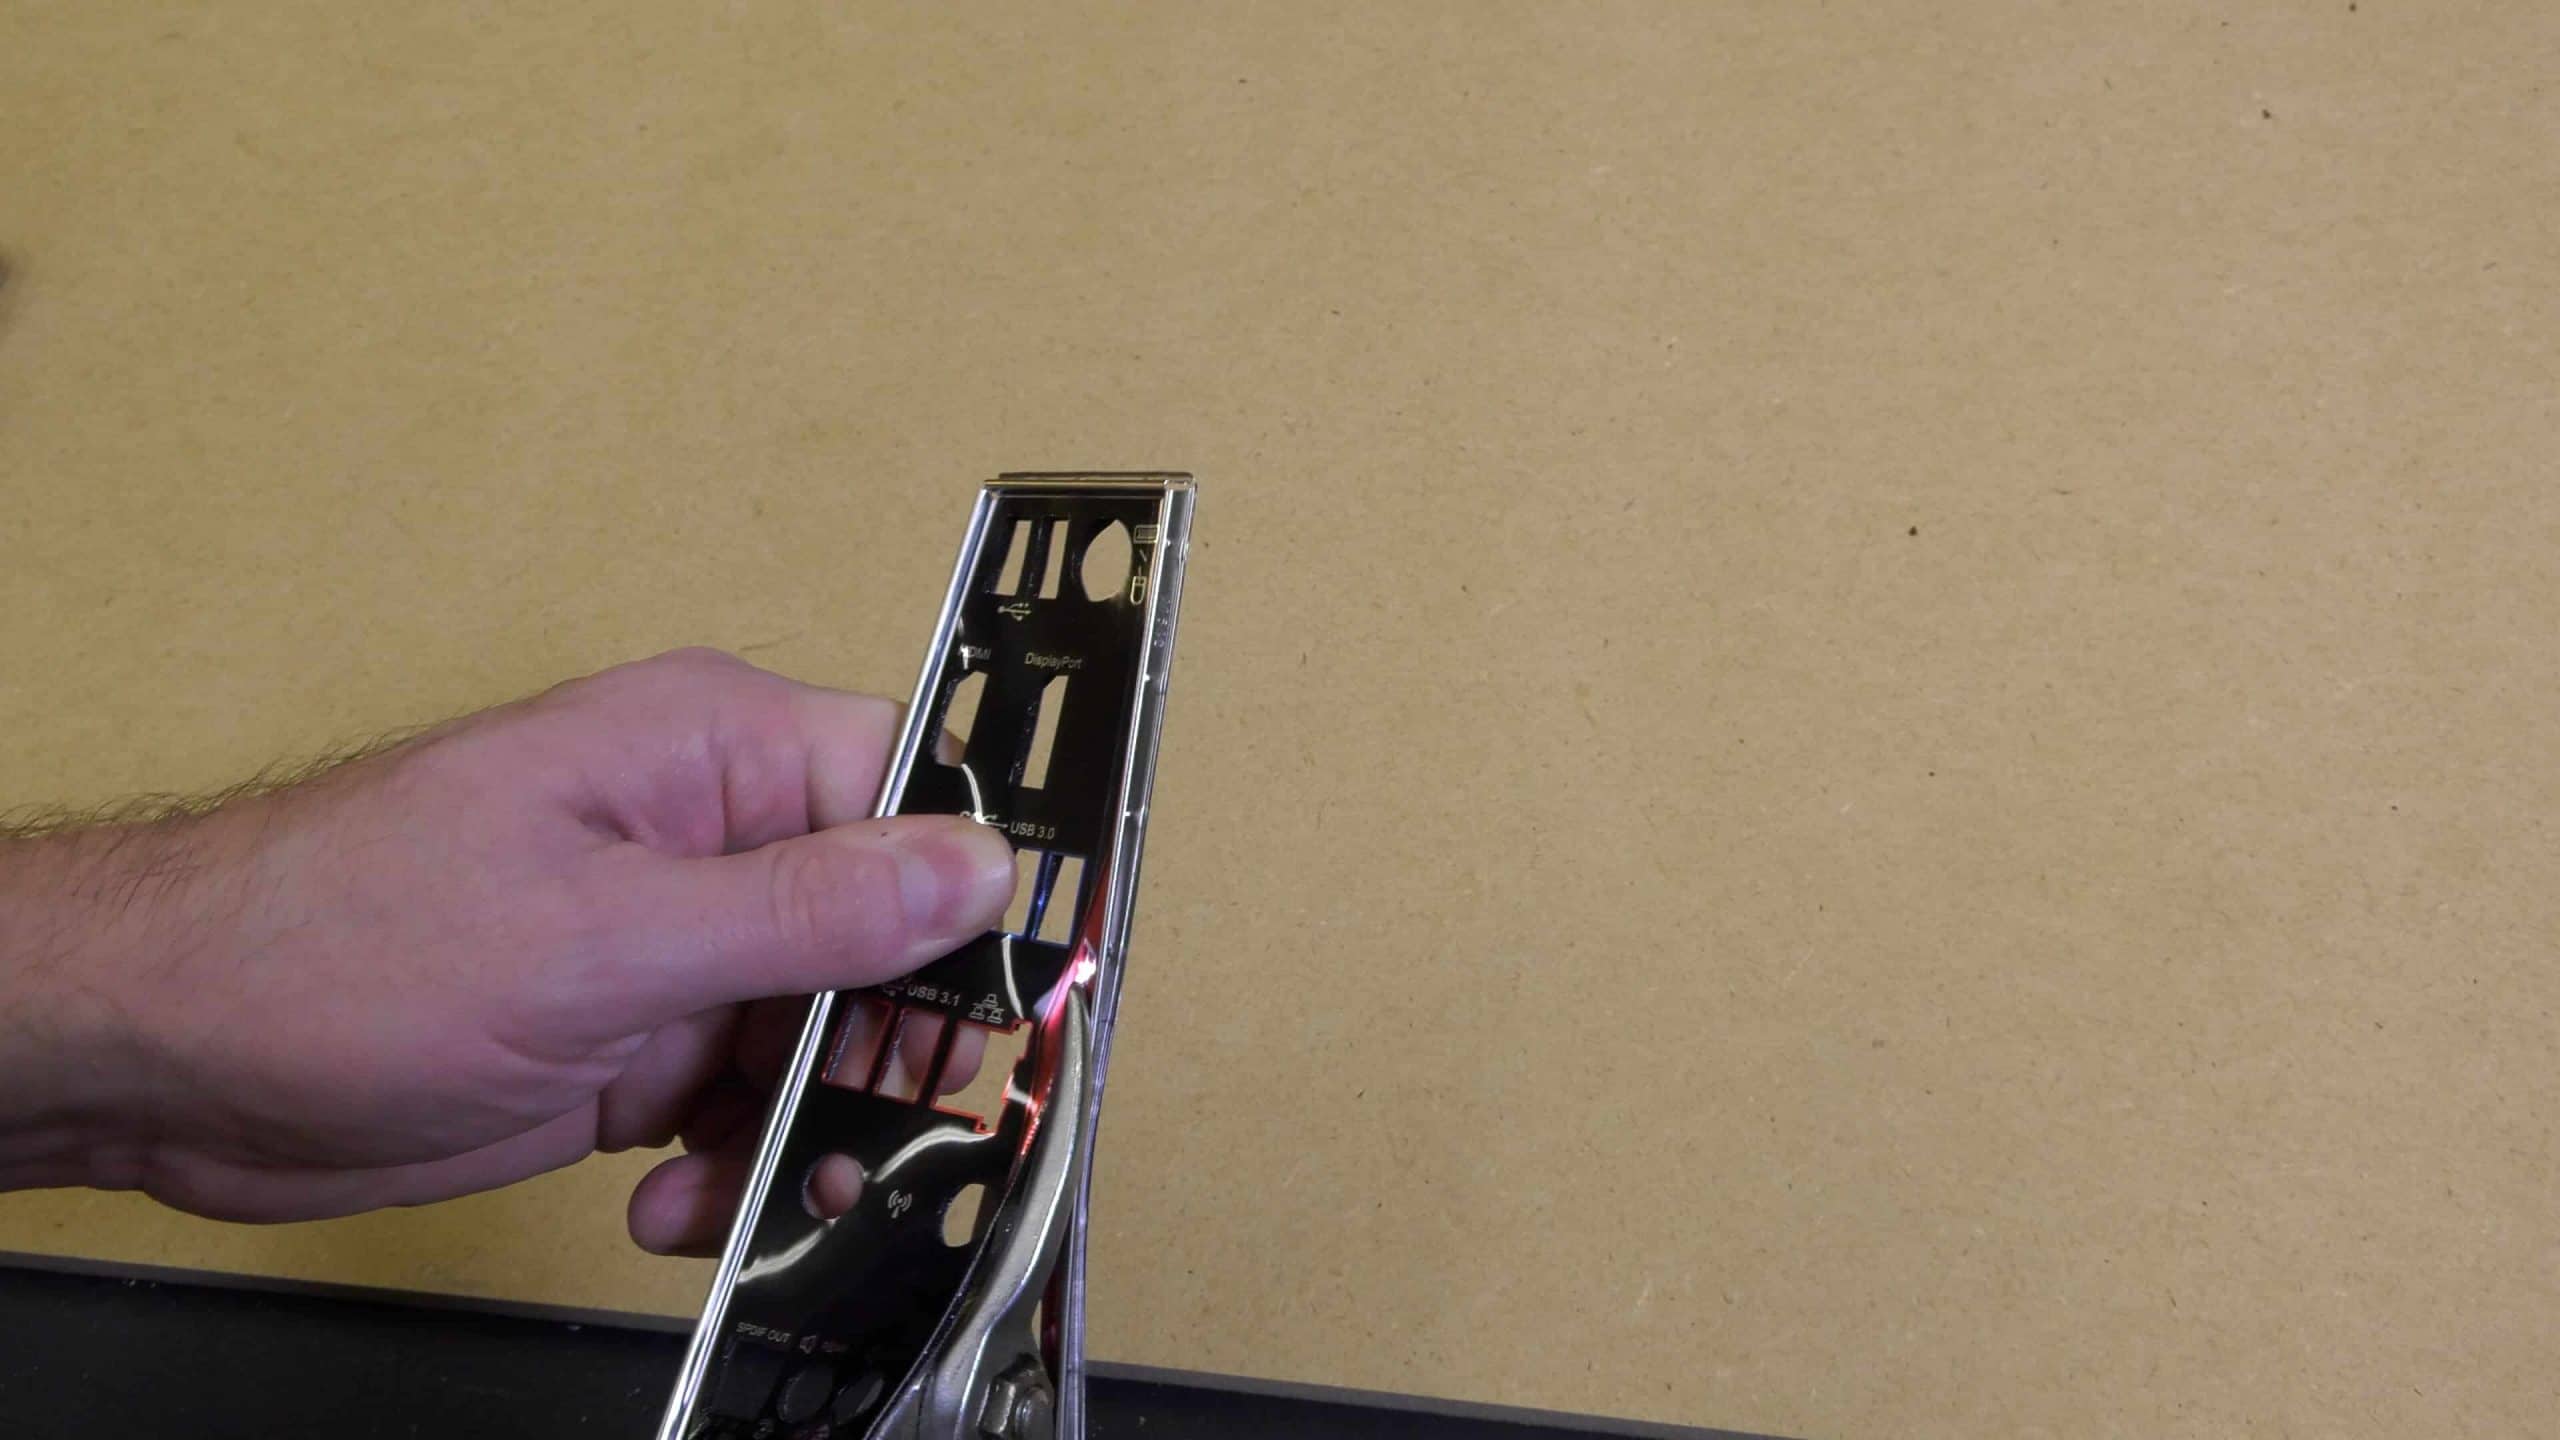
Mark the IO shield with a pencil, and using a pair of aircraft snips, remove the top portion of the shields and then place it into the IO shield slot on the motherboard.
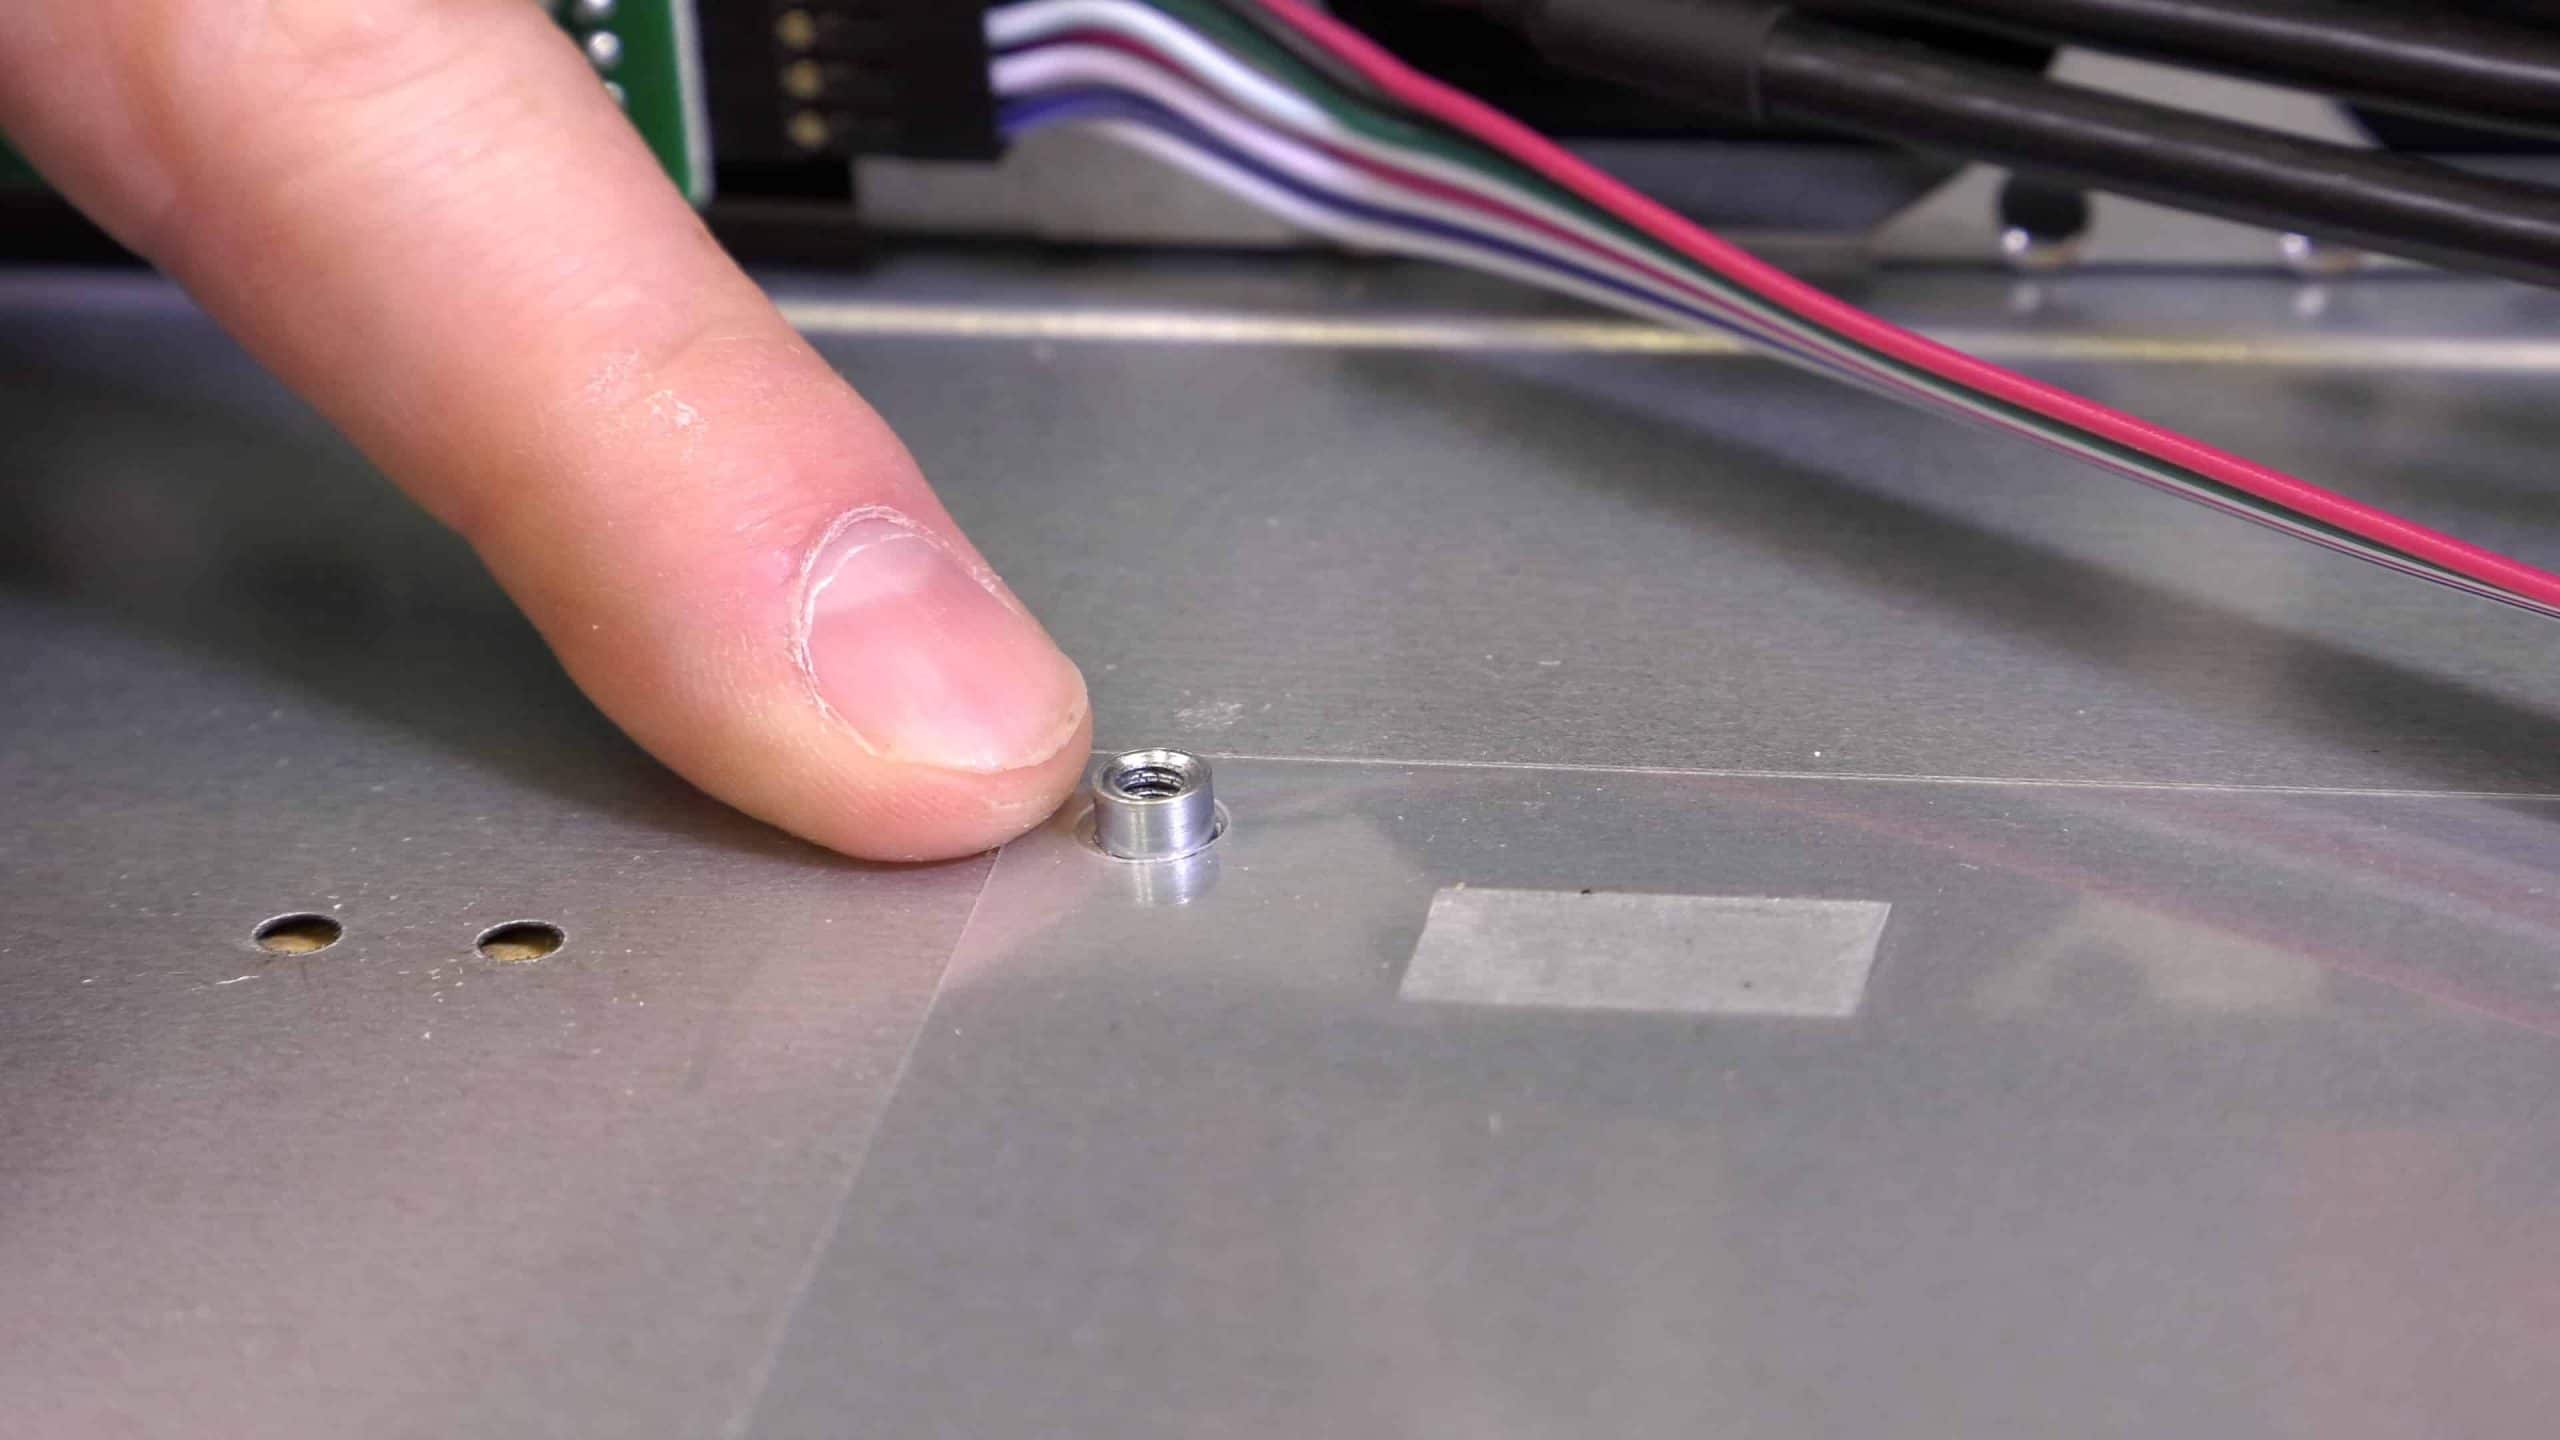
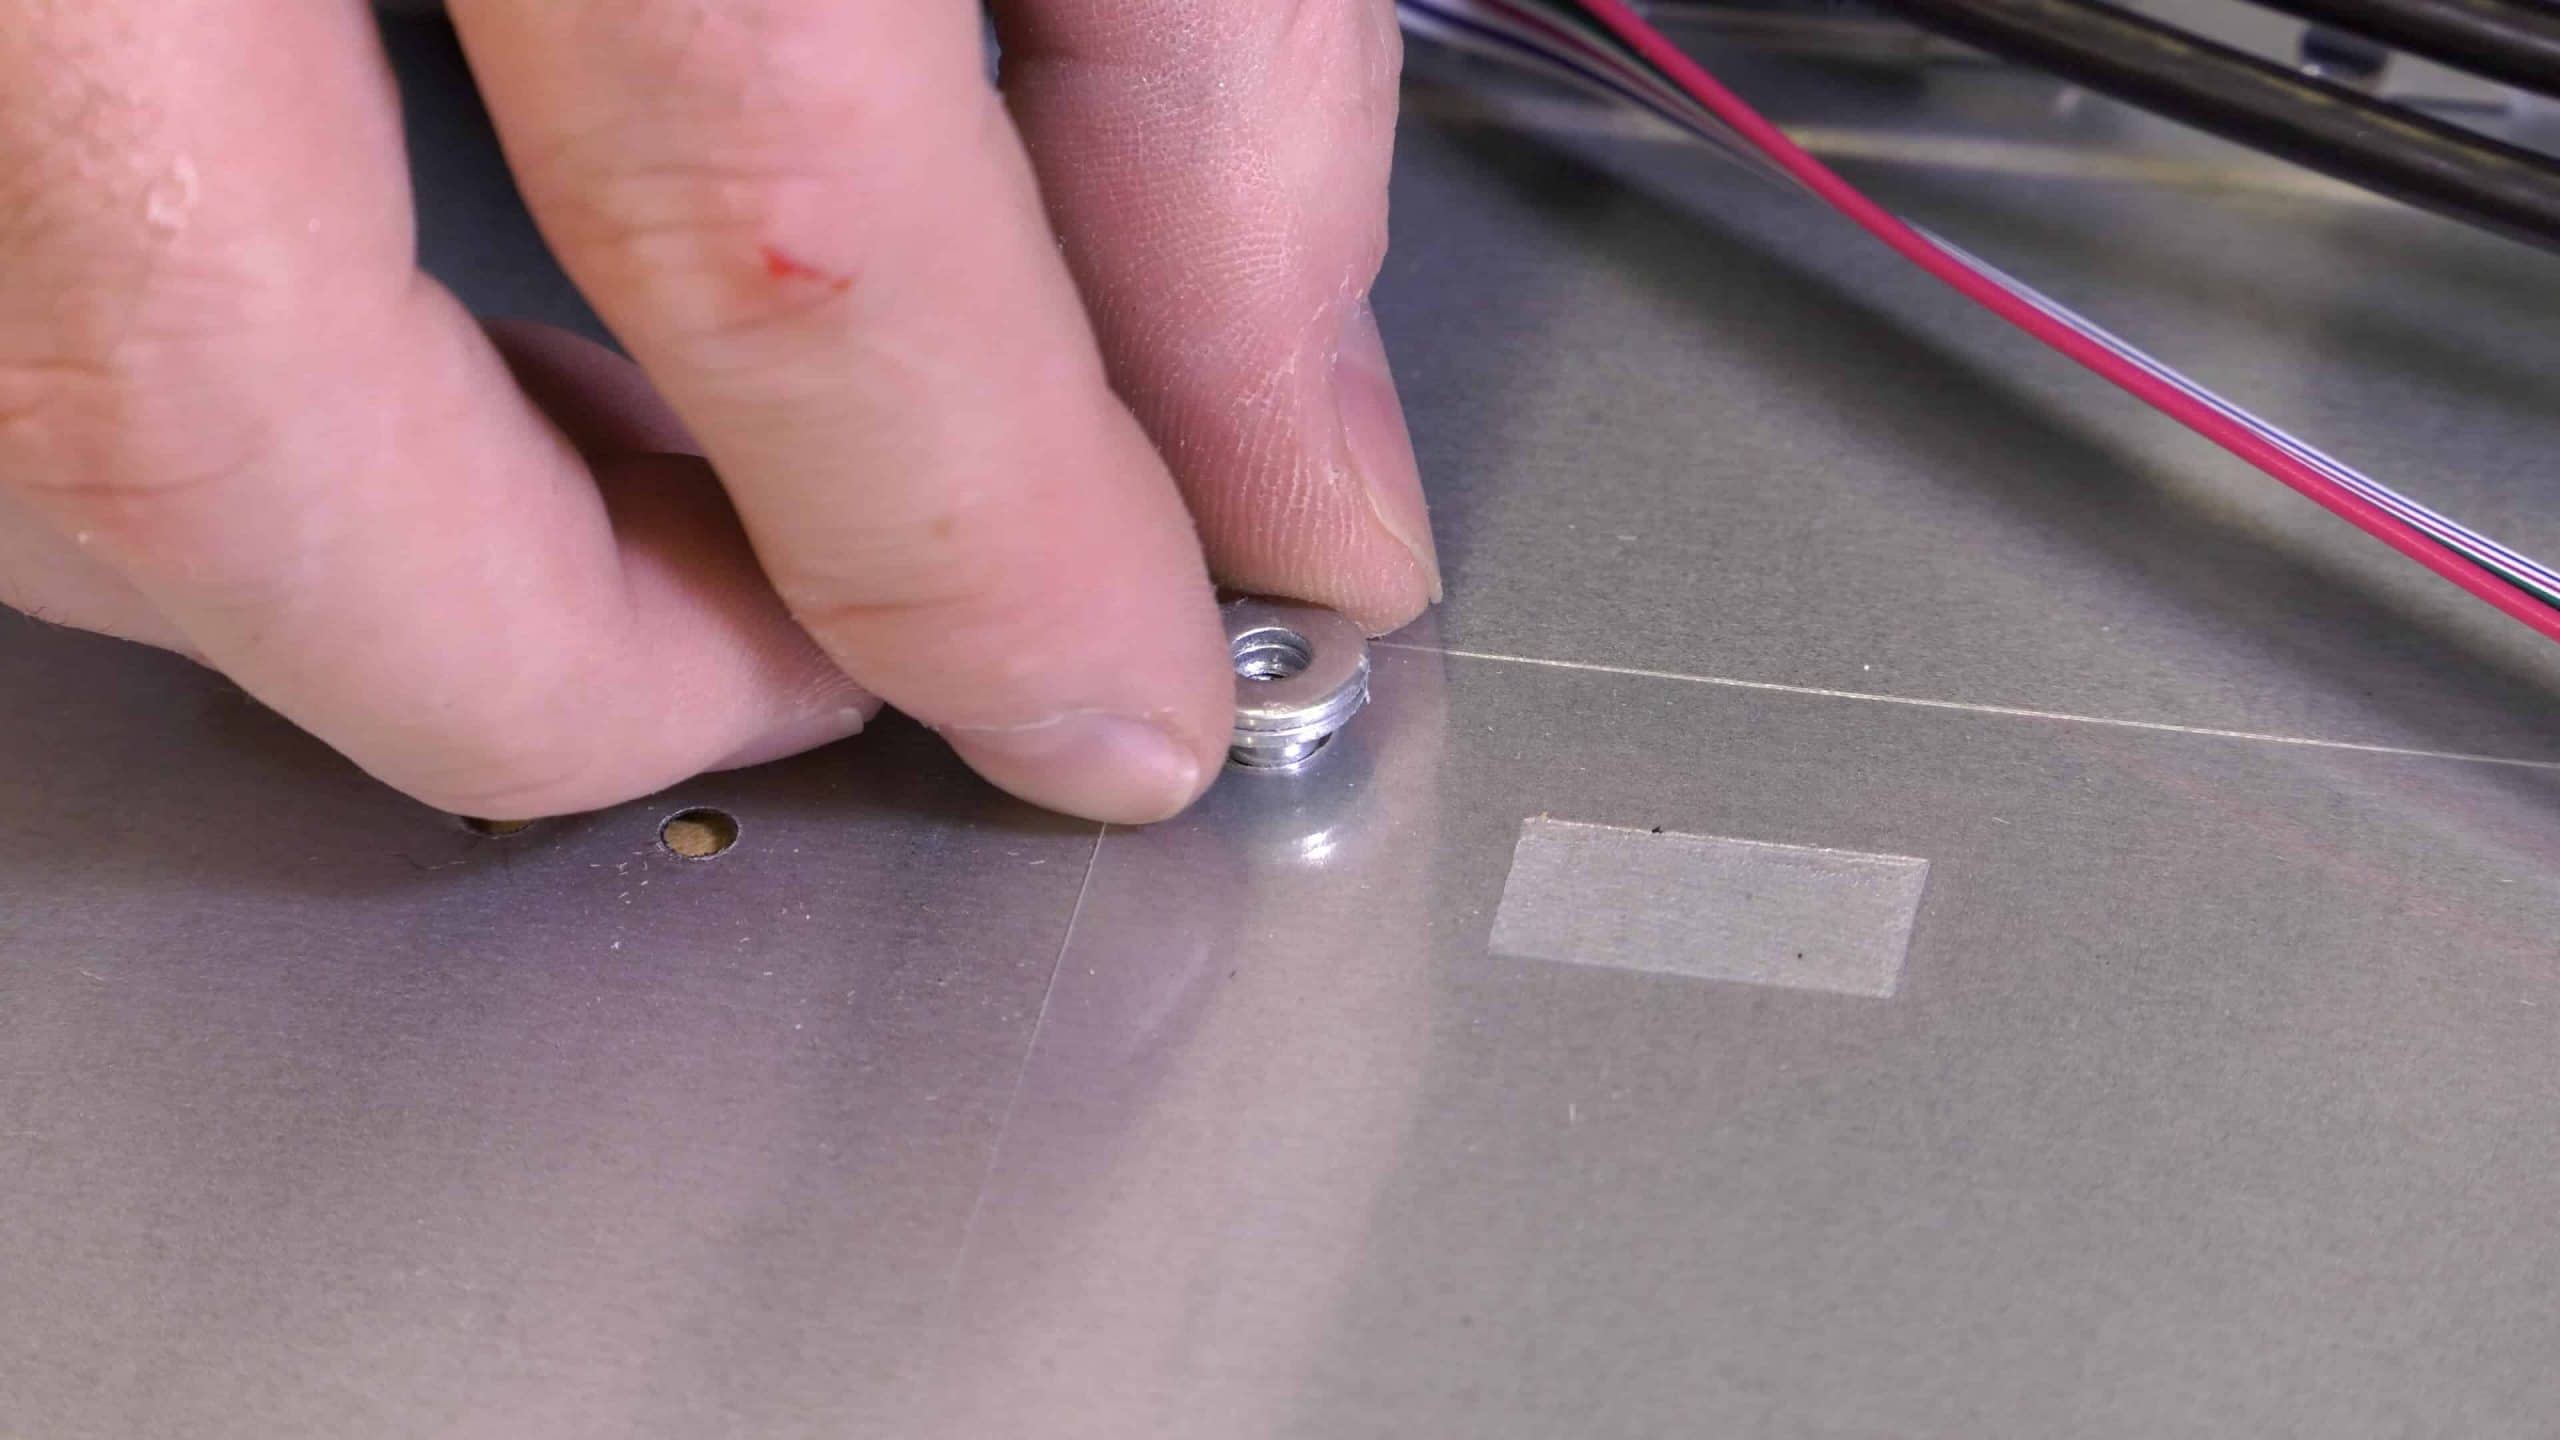
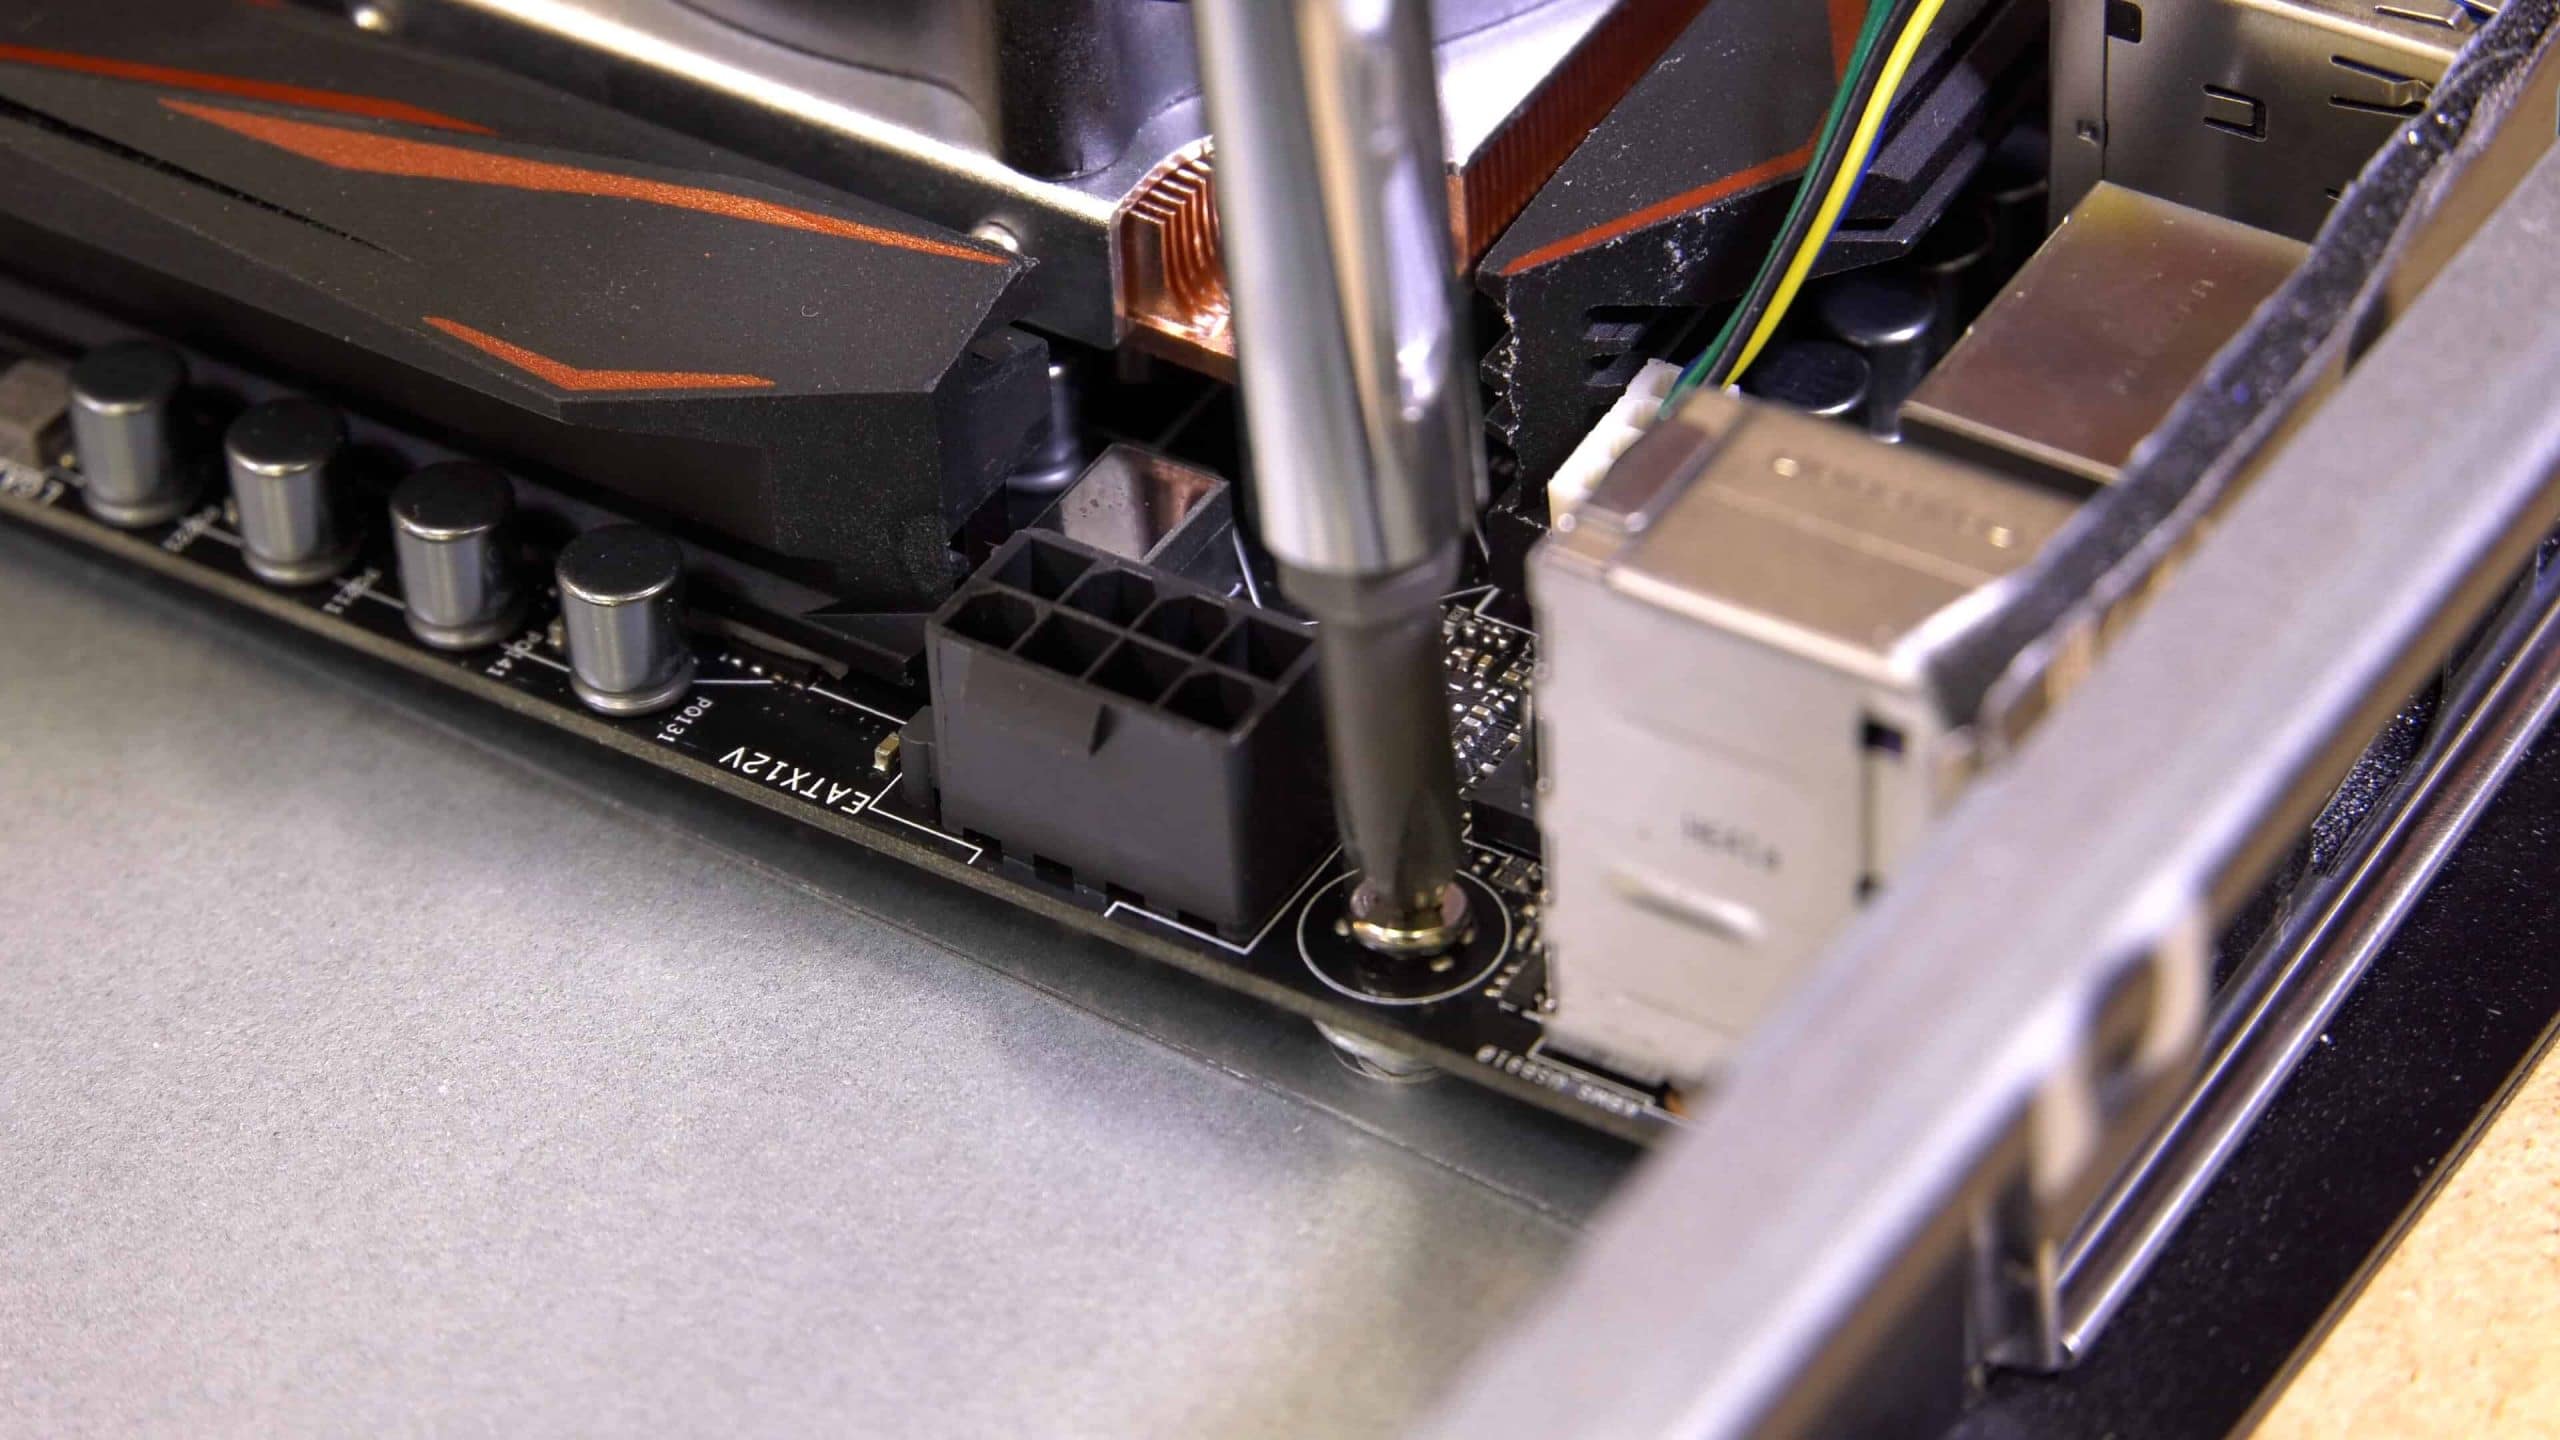
The second challenge you may face with the iStar case is that the motherboard standoffs on the bottom of the case are just not quite tall enough to lift the motherboard to the proper height allowing it to align with the back of the case and keep the CPU backer plates from making contact with the bottom of the case.
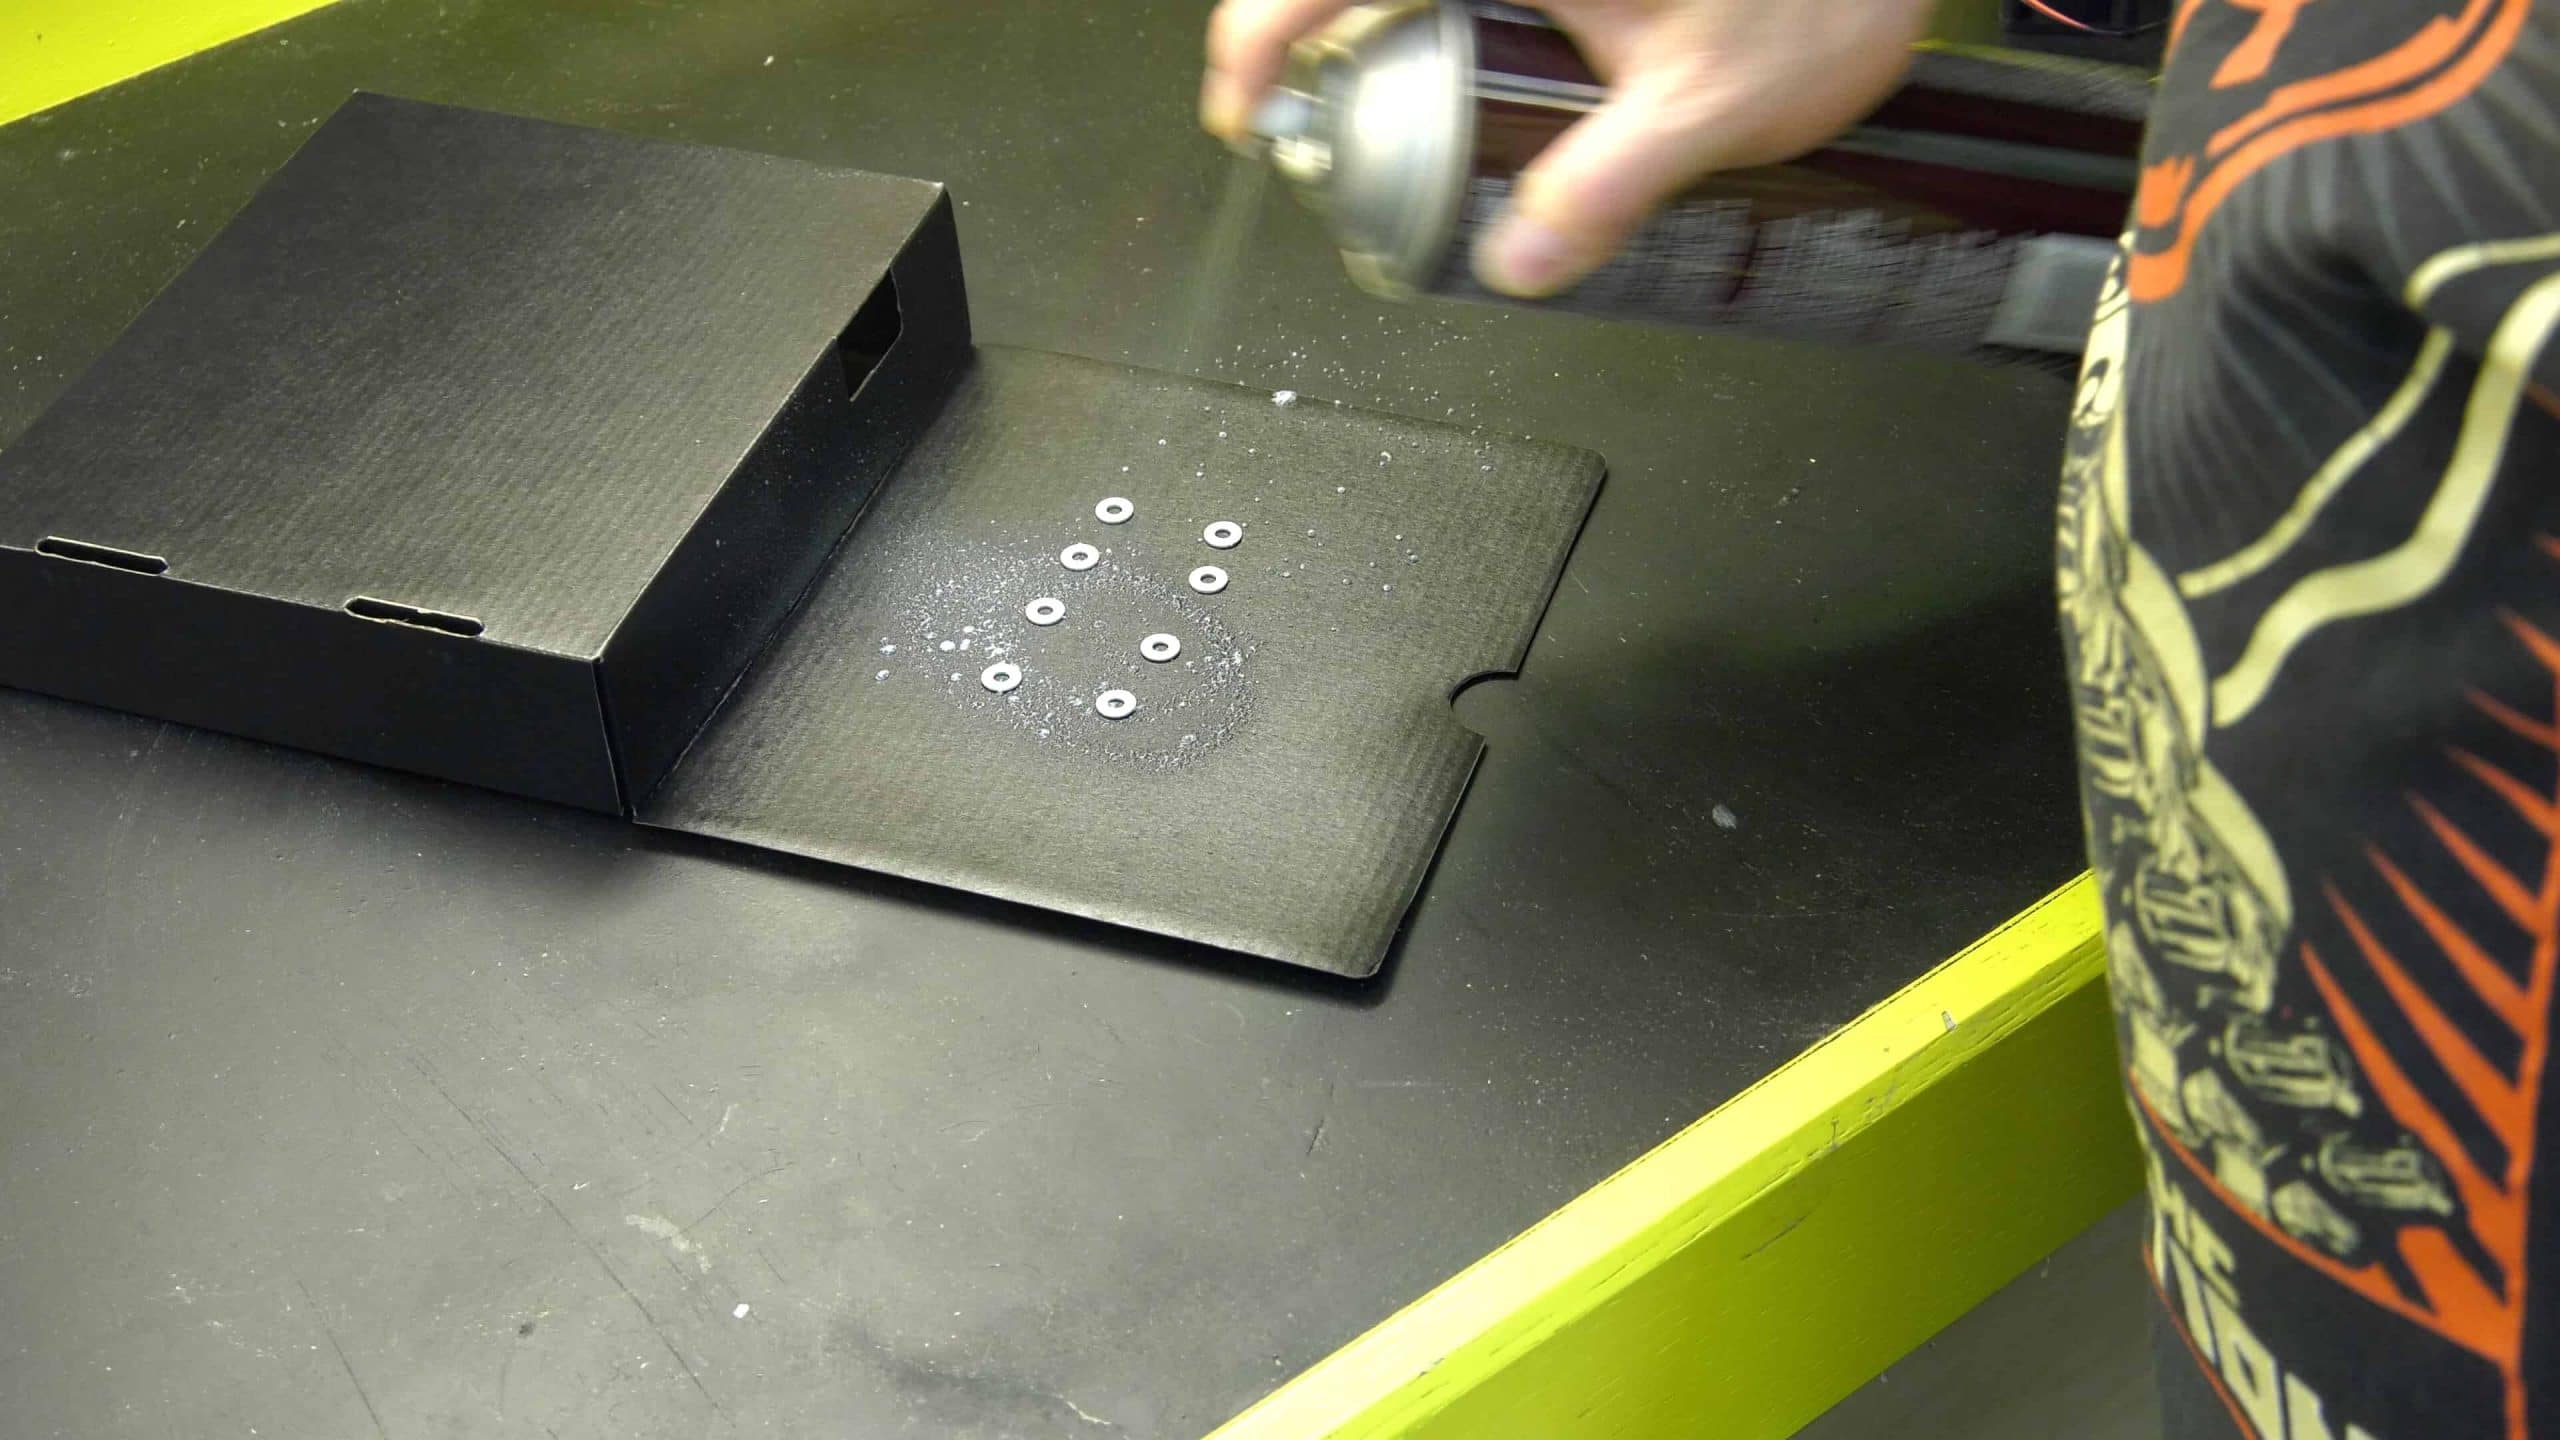
I solved this problem by using some 3M Super 77 spray adhesive to add two small nickel washers between the case and motherboard on all four posts. This added the necessary height to the standoffs and everything fit perfectly in place. Follow this up by installing the four post screws and snugging them up.
1U Server Build: The Power Supply Selection
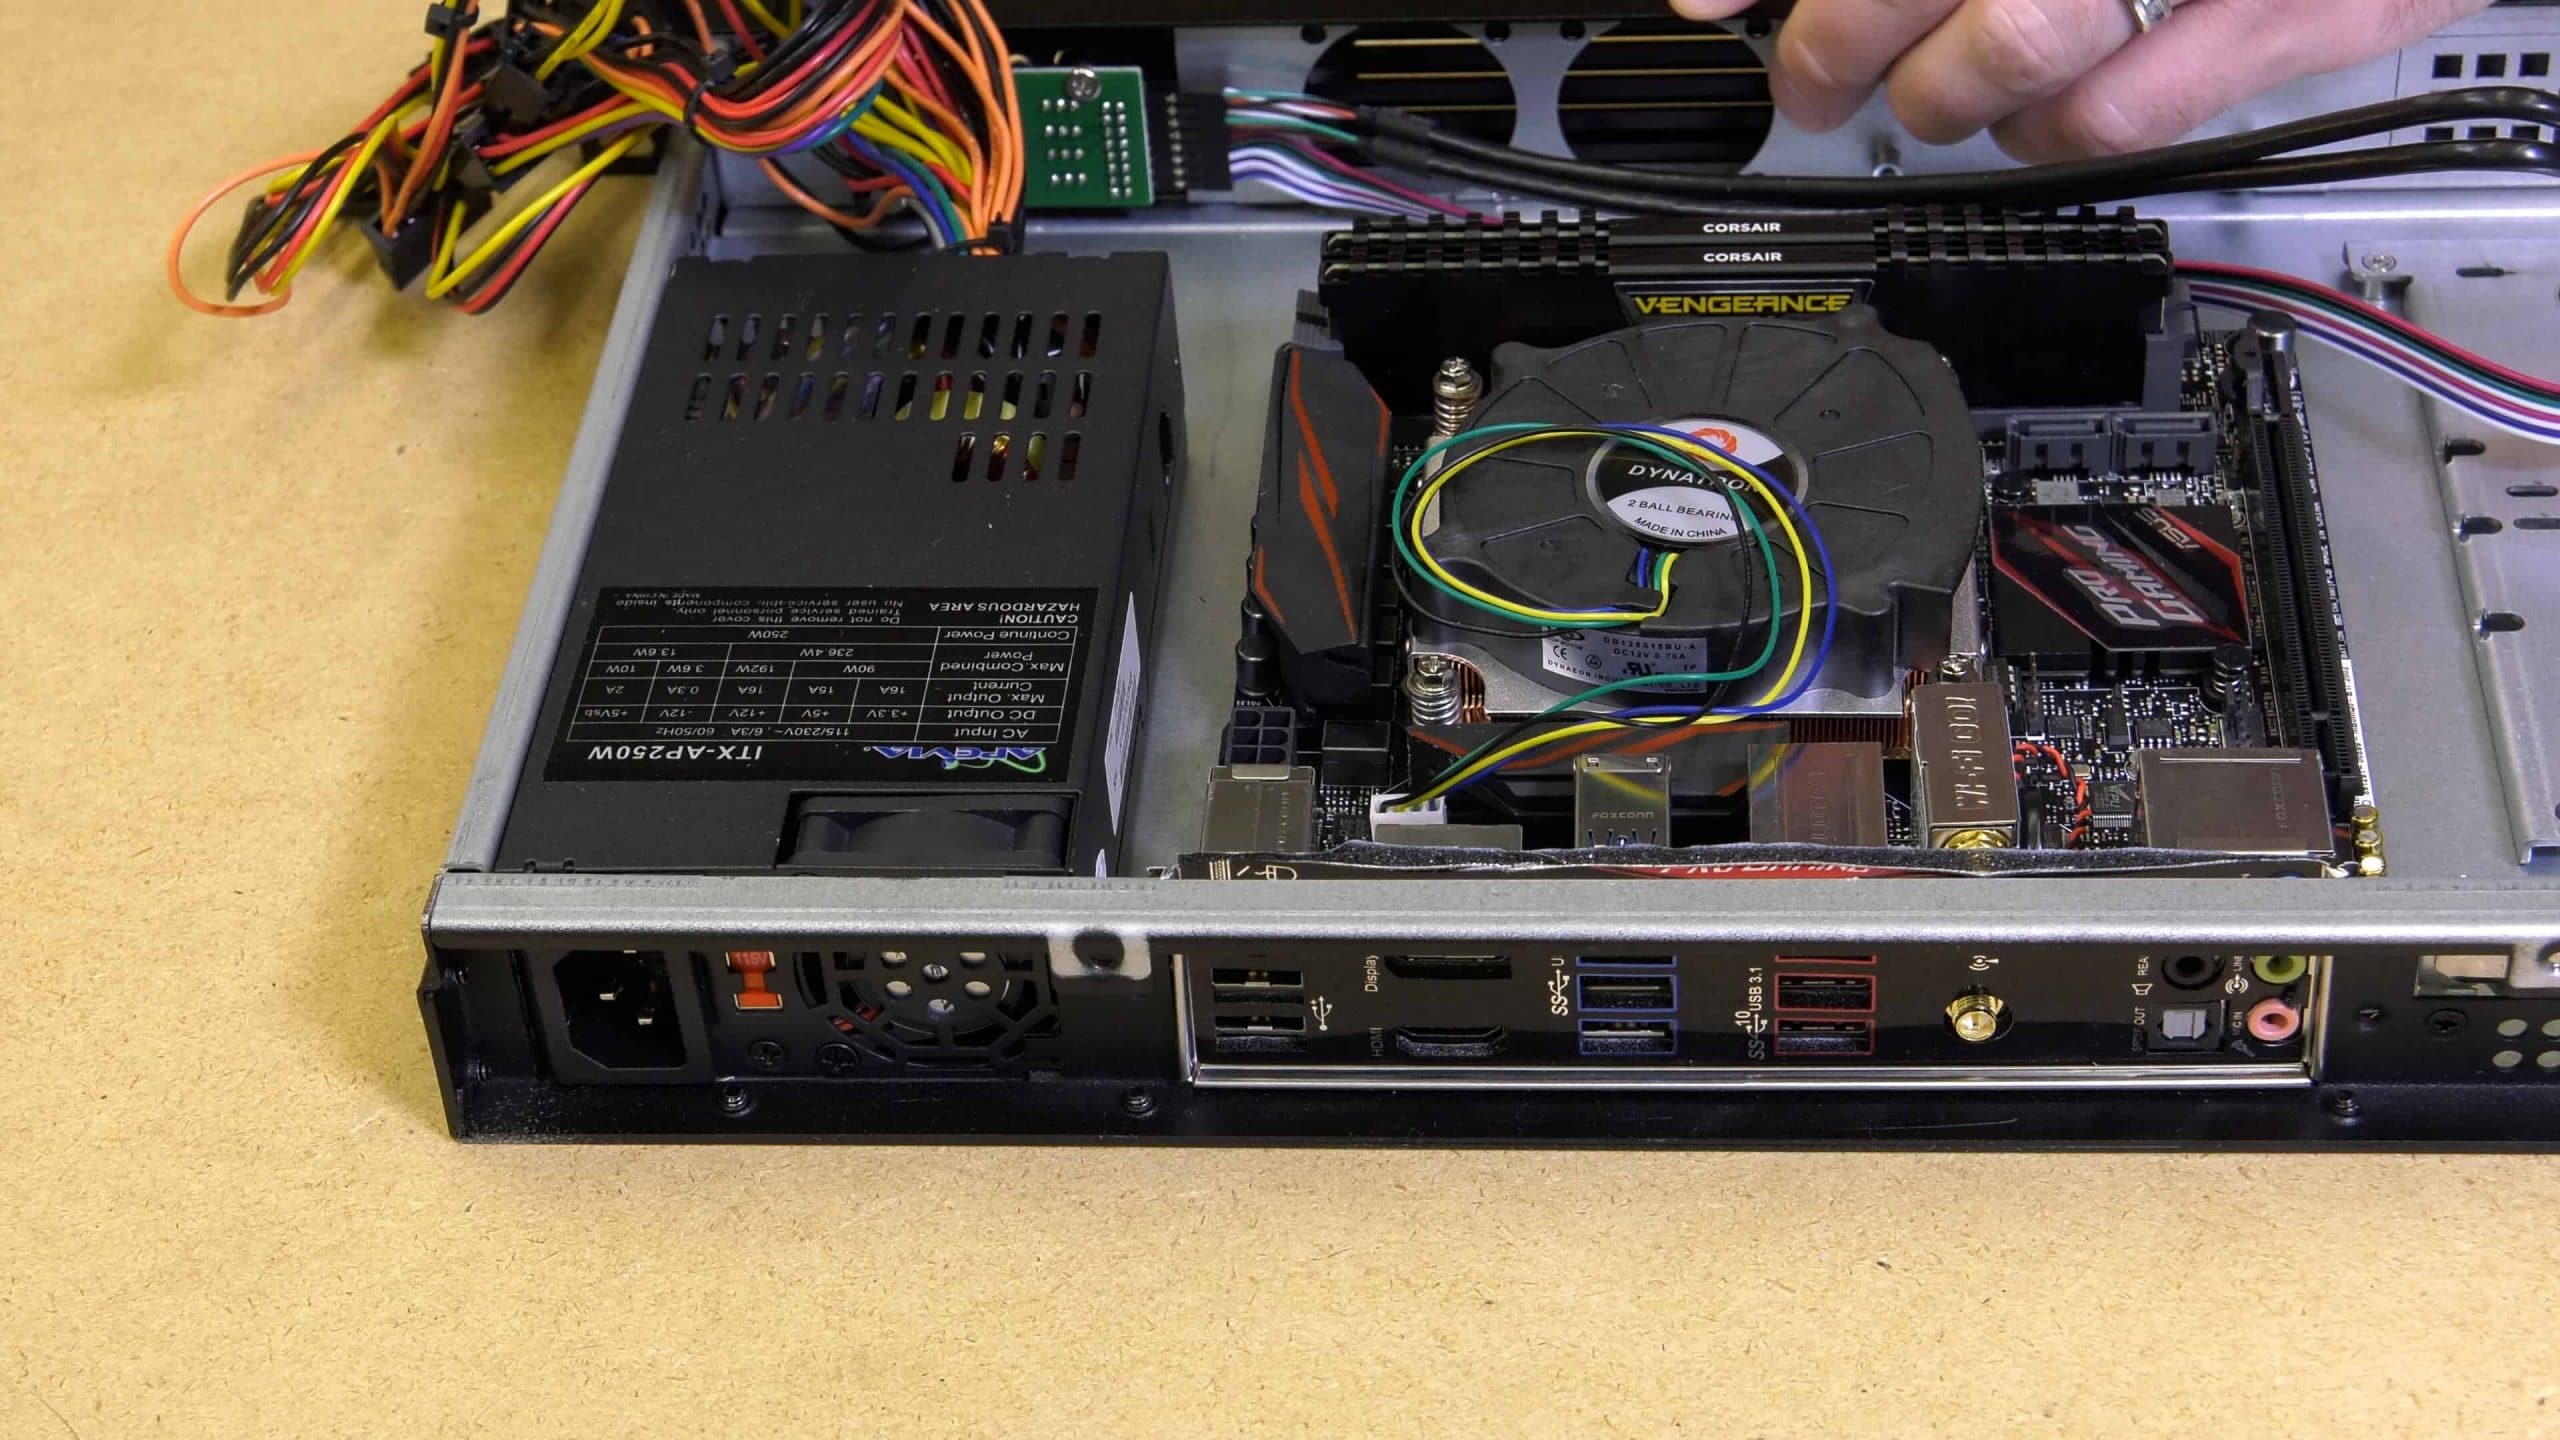
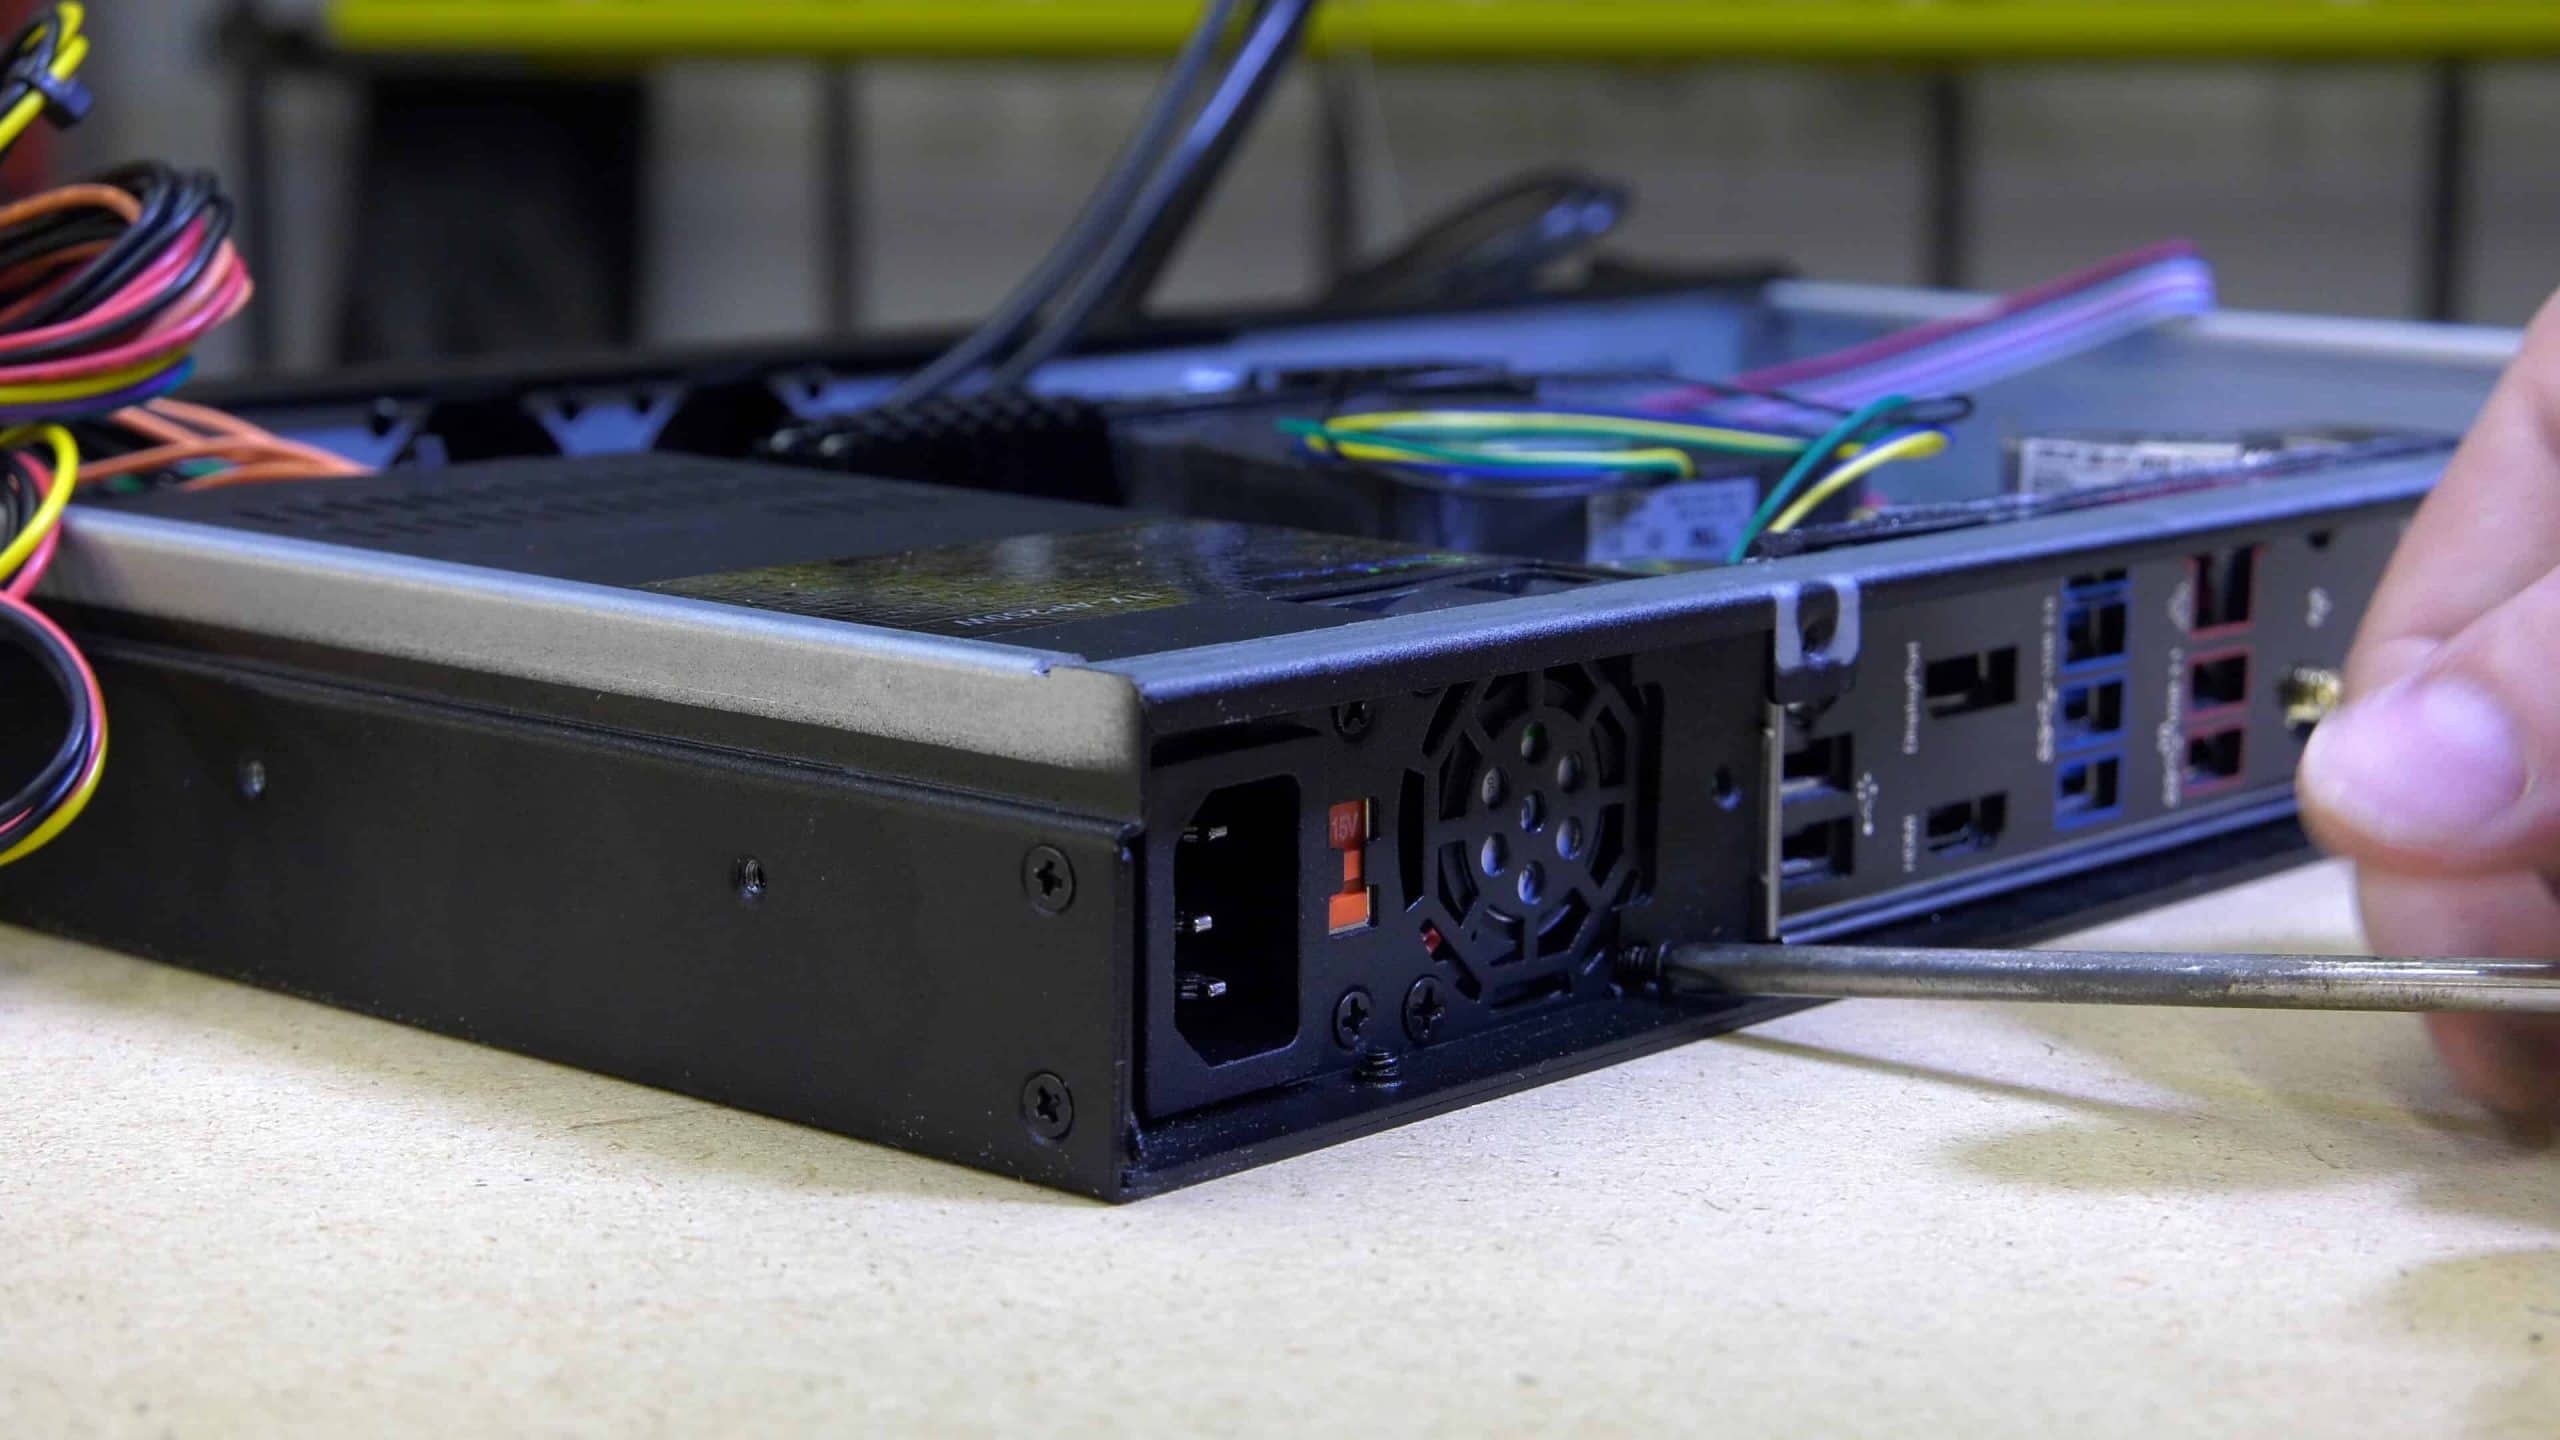
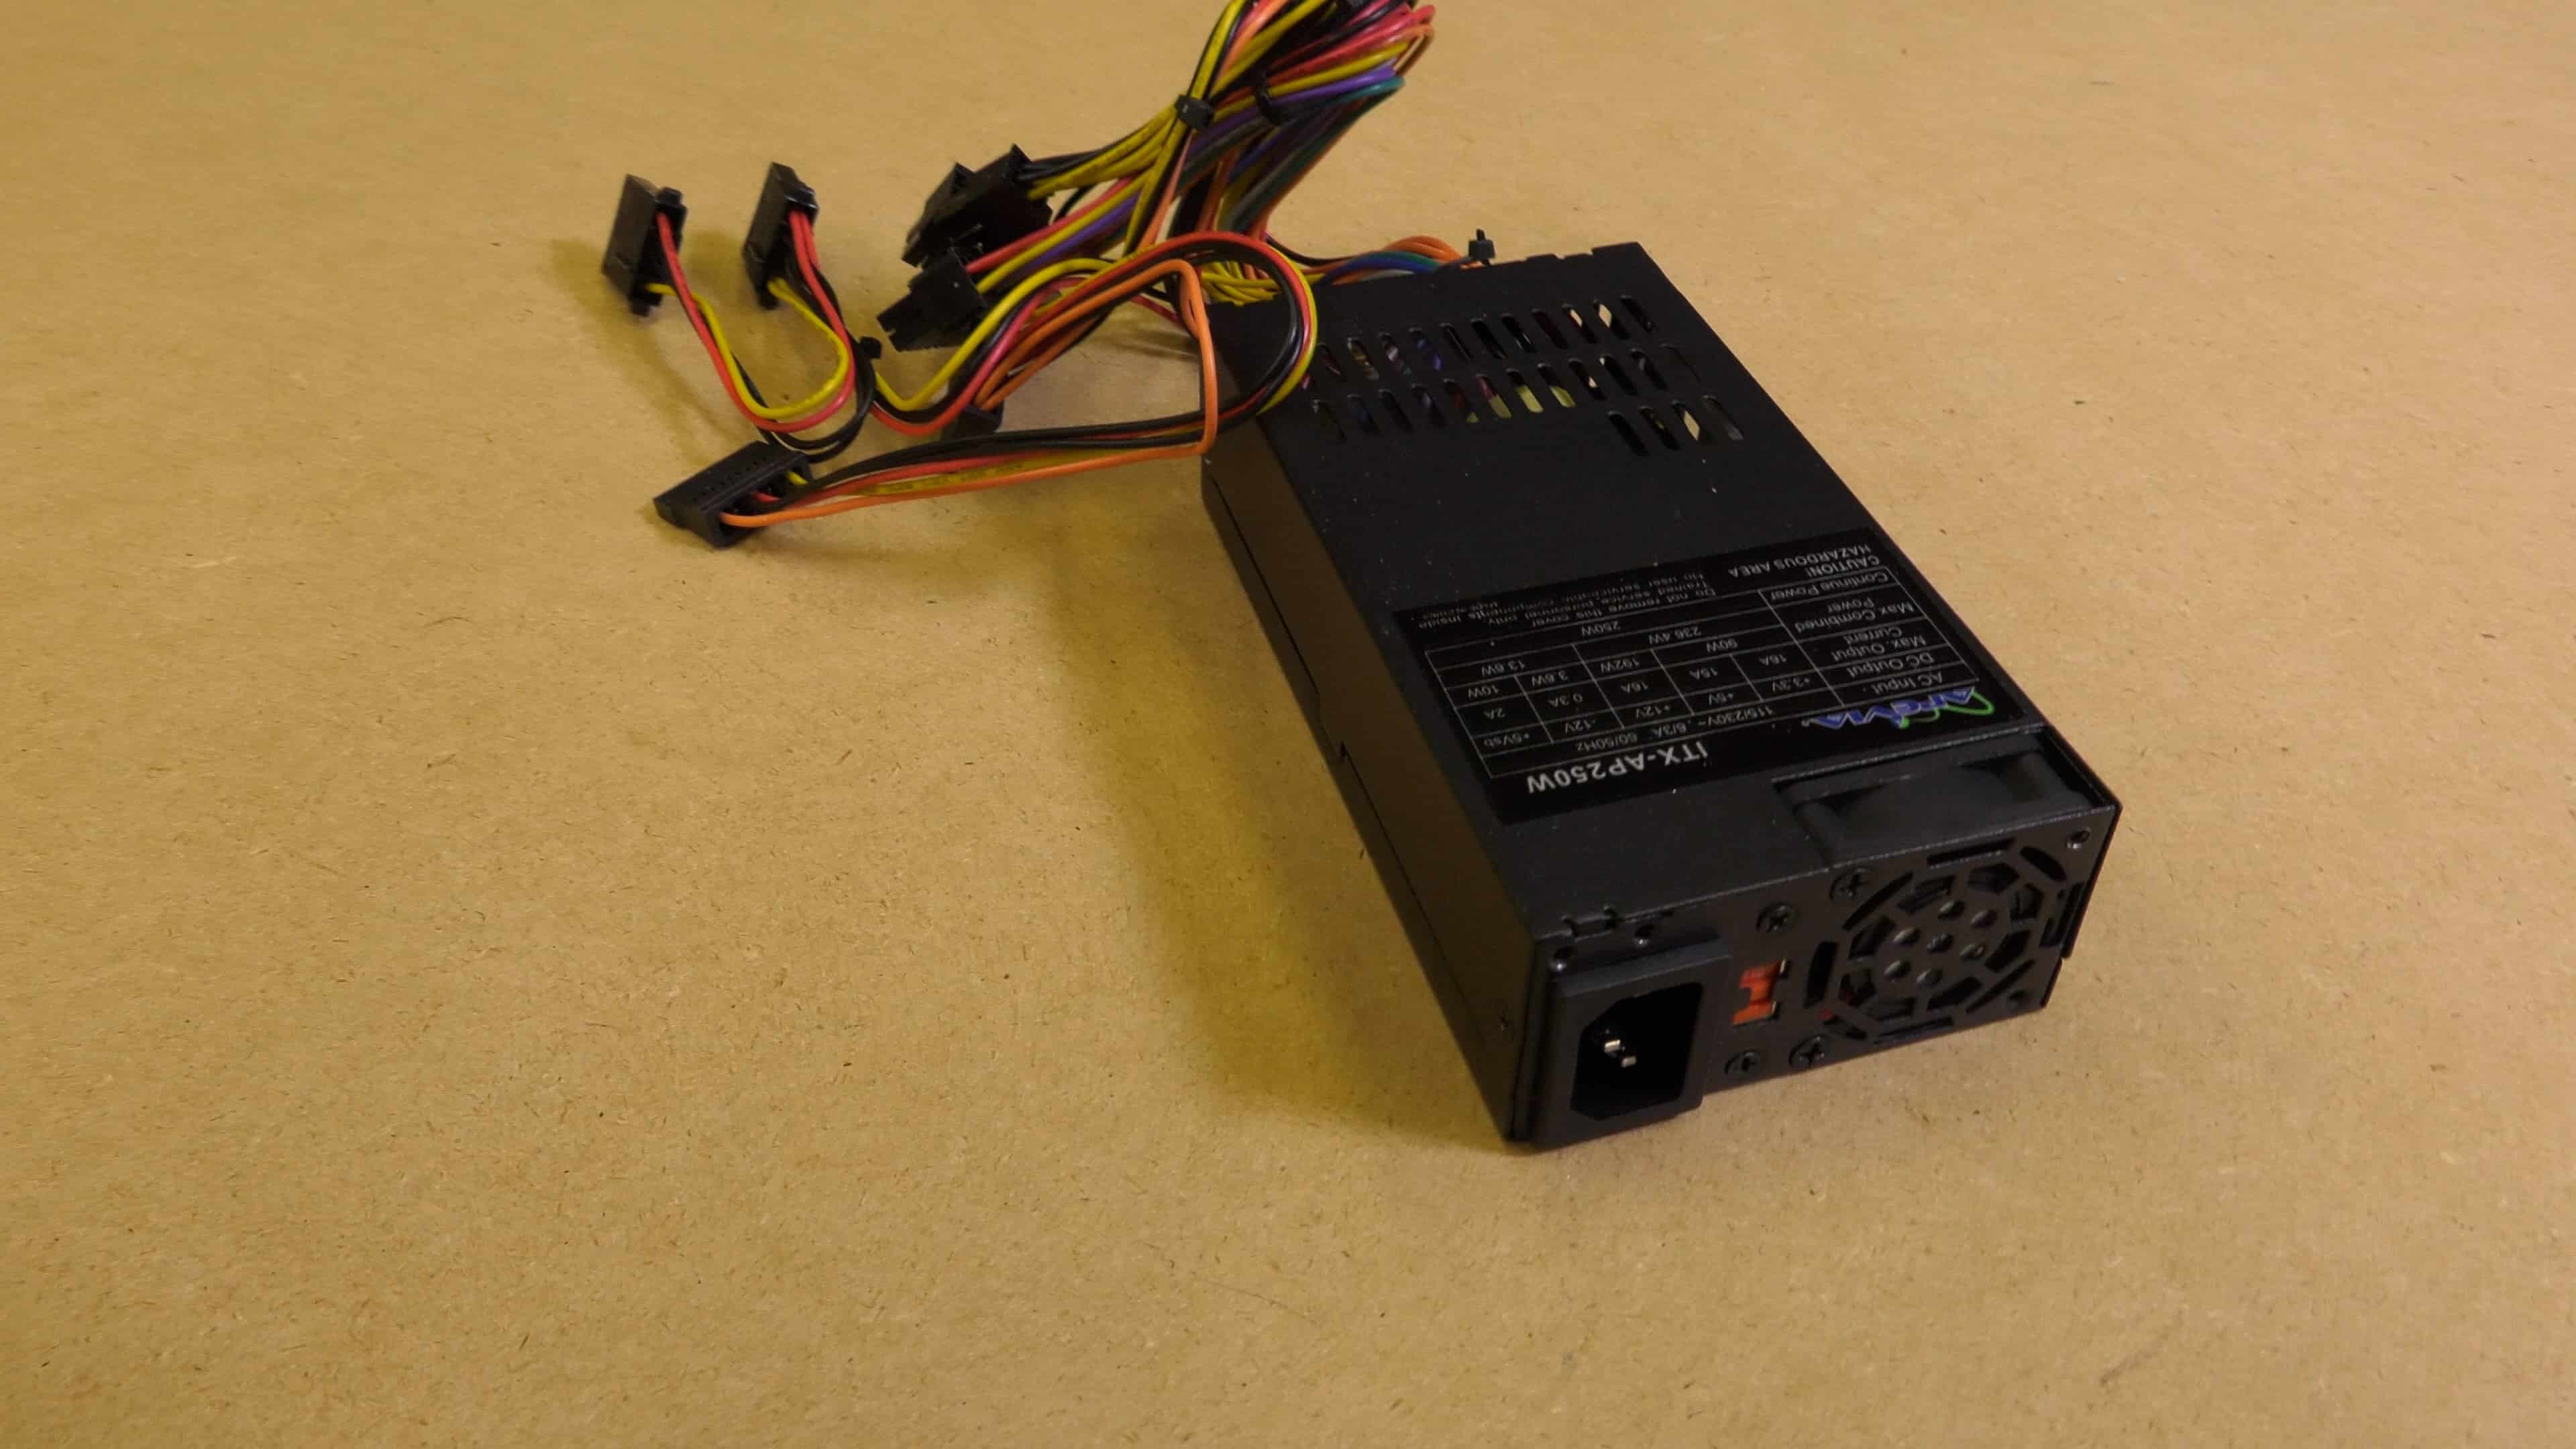 The power supply I chose is a 1U variant from Apevia. It’s a relatively small 250 watt supply but it is more than enough to power our motherboard, CPU, SSD hard drive, and a 4 port network interface card. We don’t have any other power hungry devices such as gaming video cards to deal with. You can get 1U power supplies up to 400 watts should you desire more.
Install the Apevia 250w 1U Power Supply
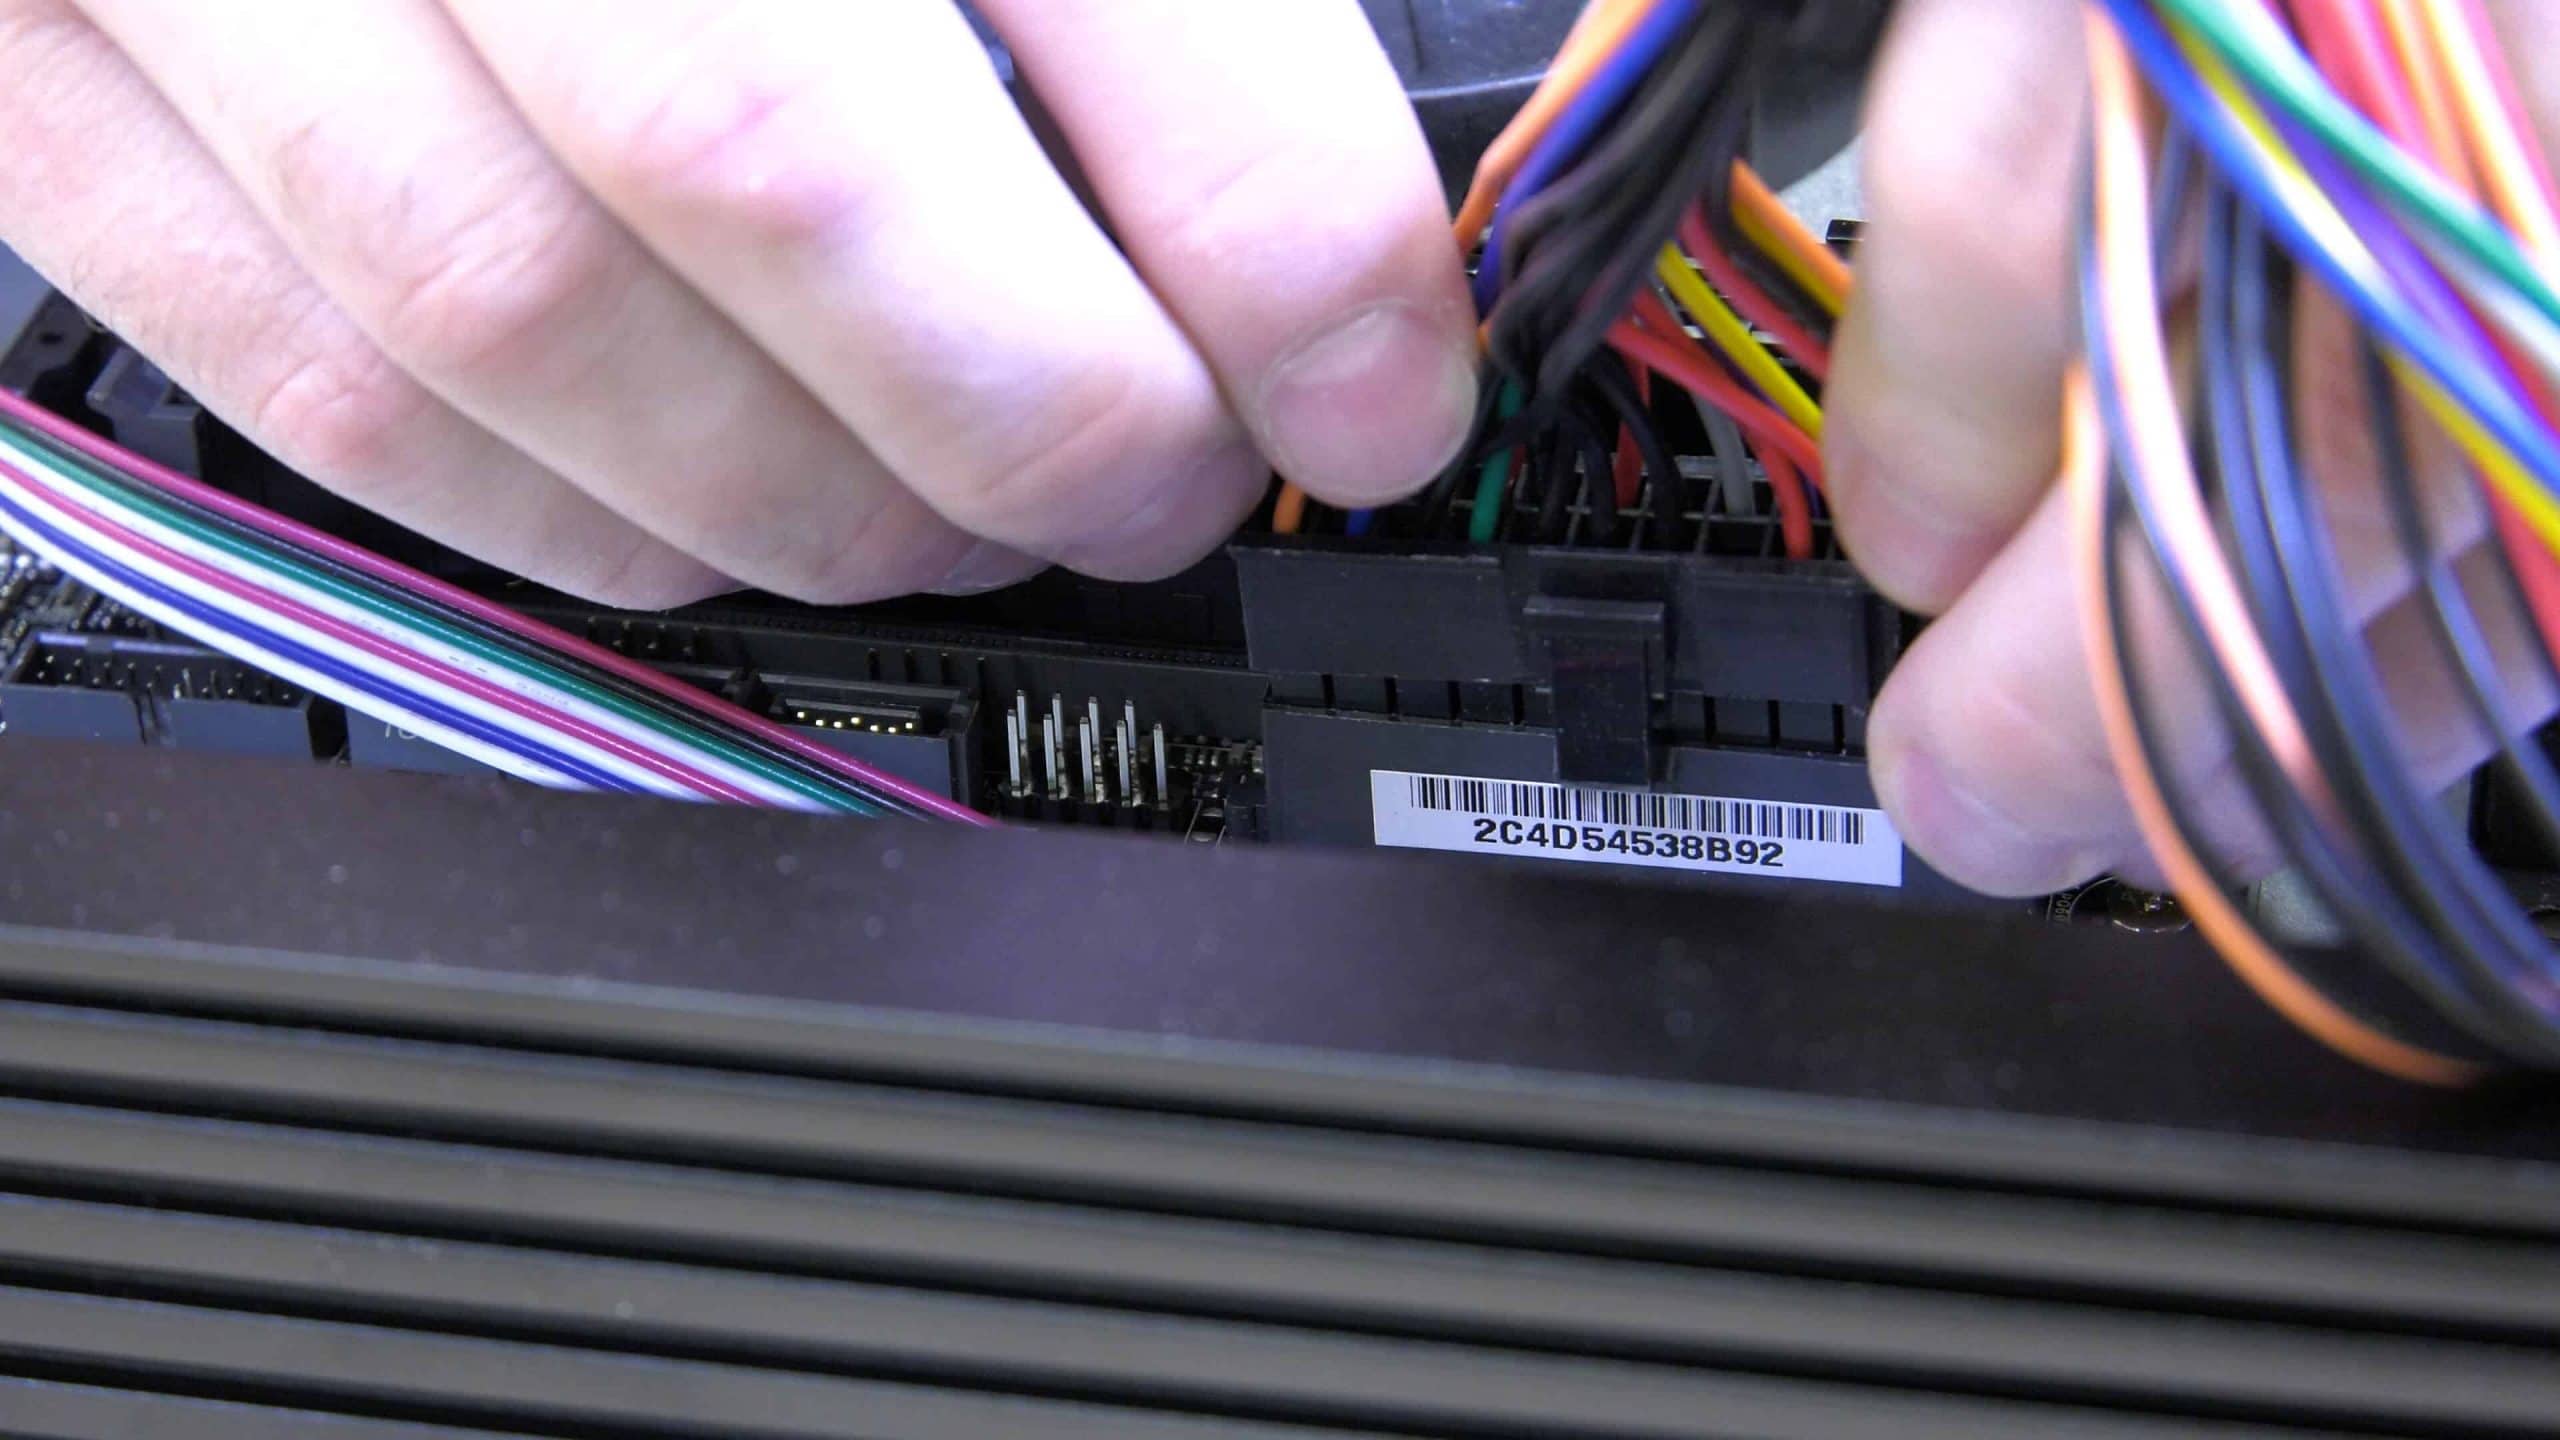
The power supply just slides into place and is attached by four screws on the back of the the chassis. Follow that up by plugging the power supply leads into the the motherboard.
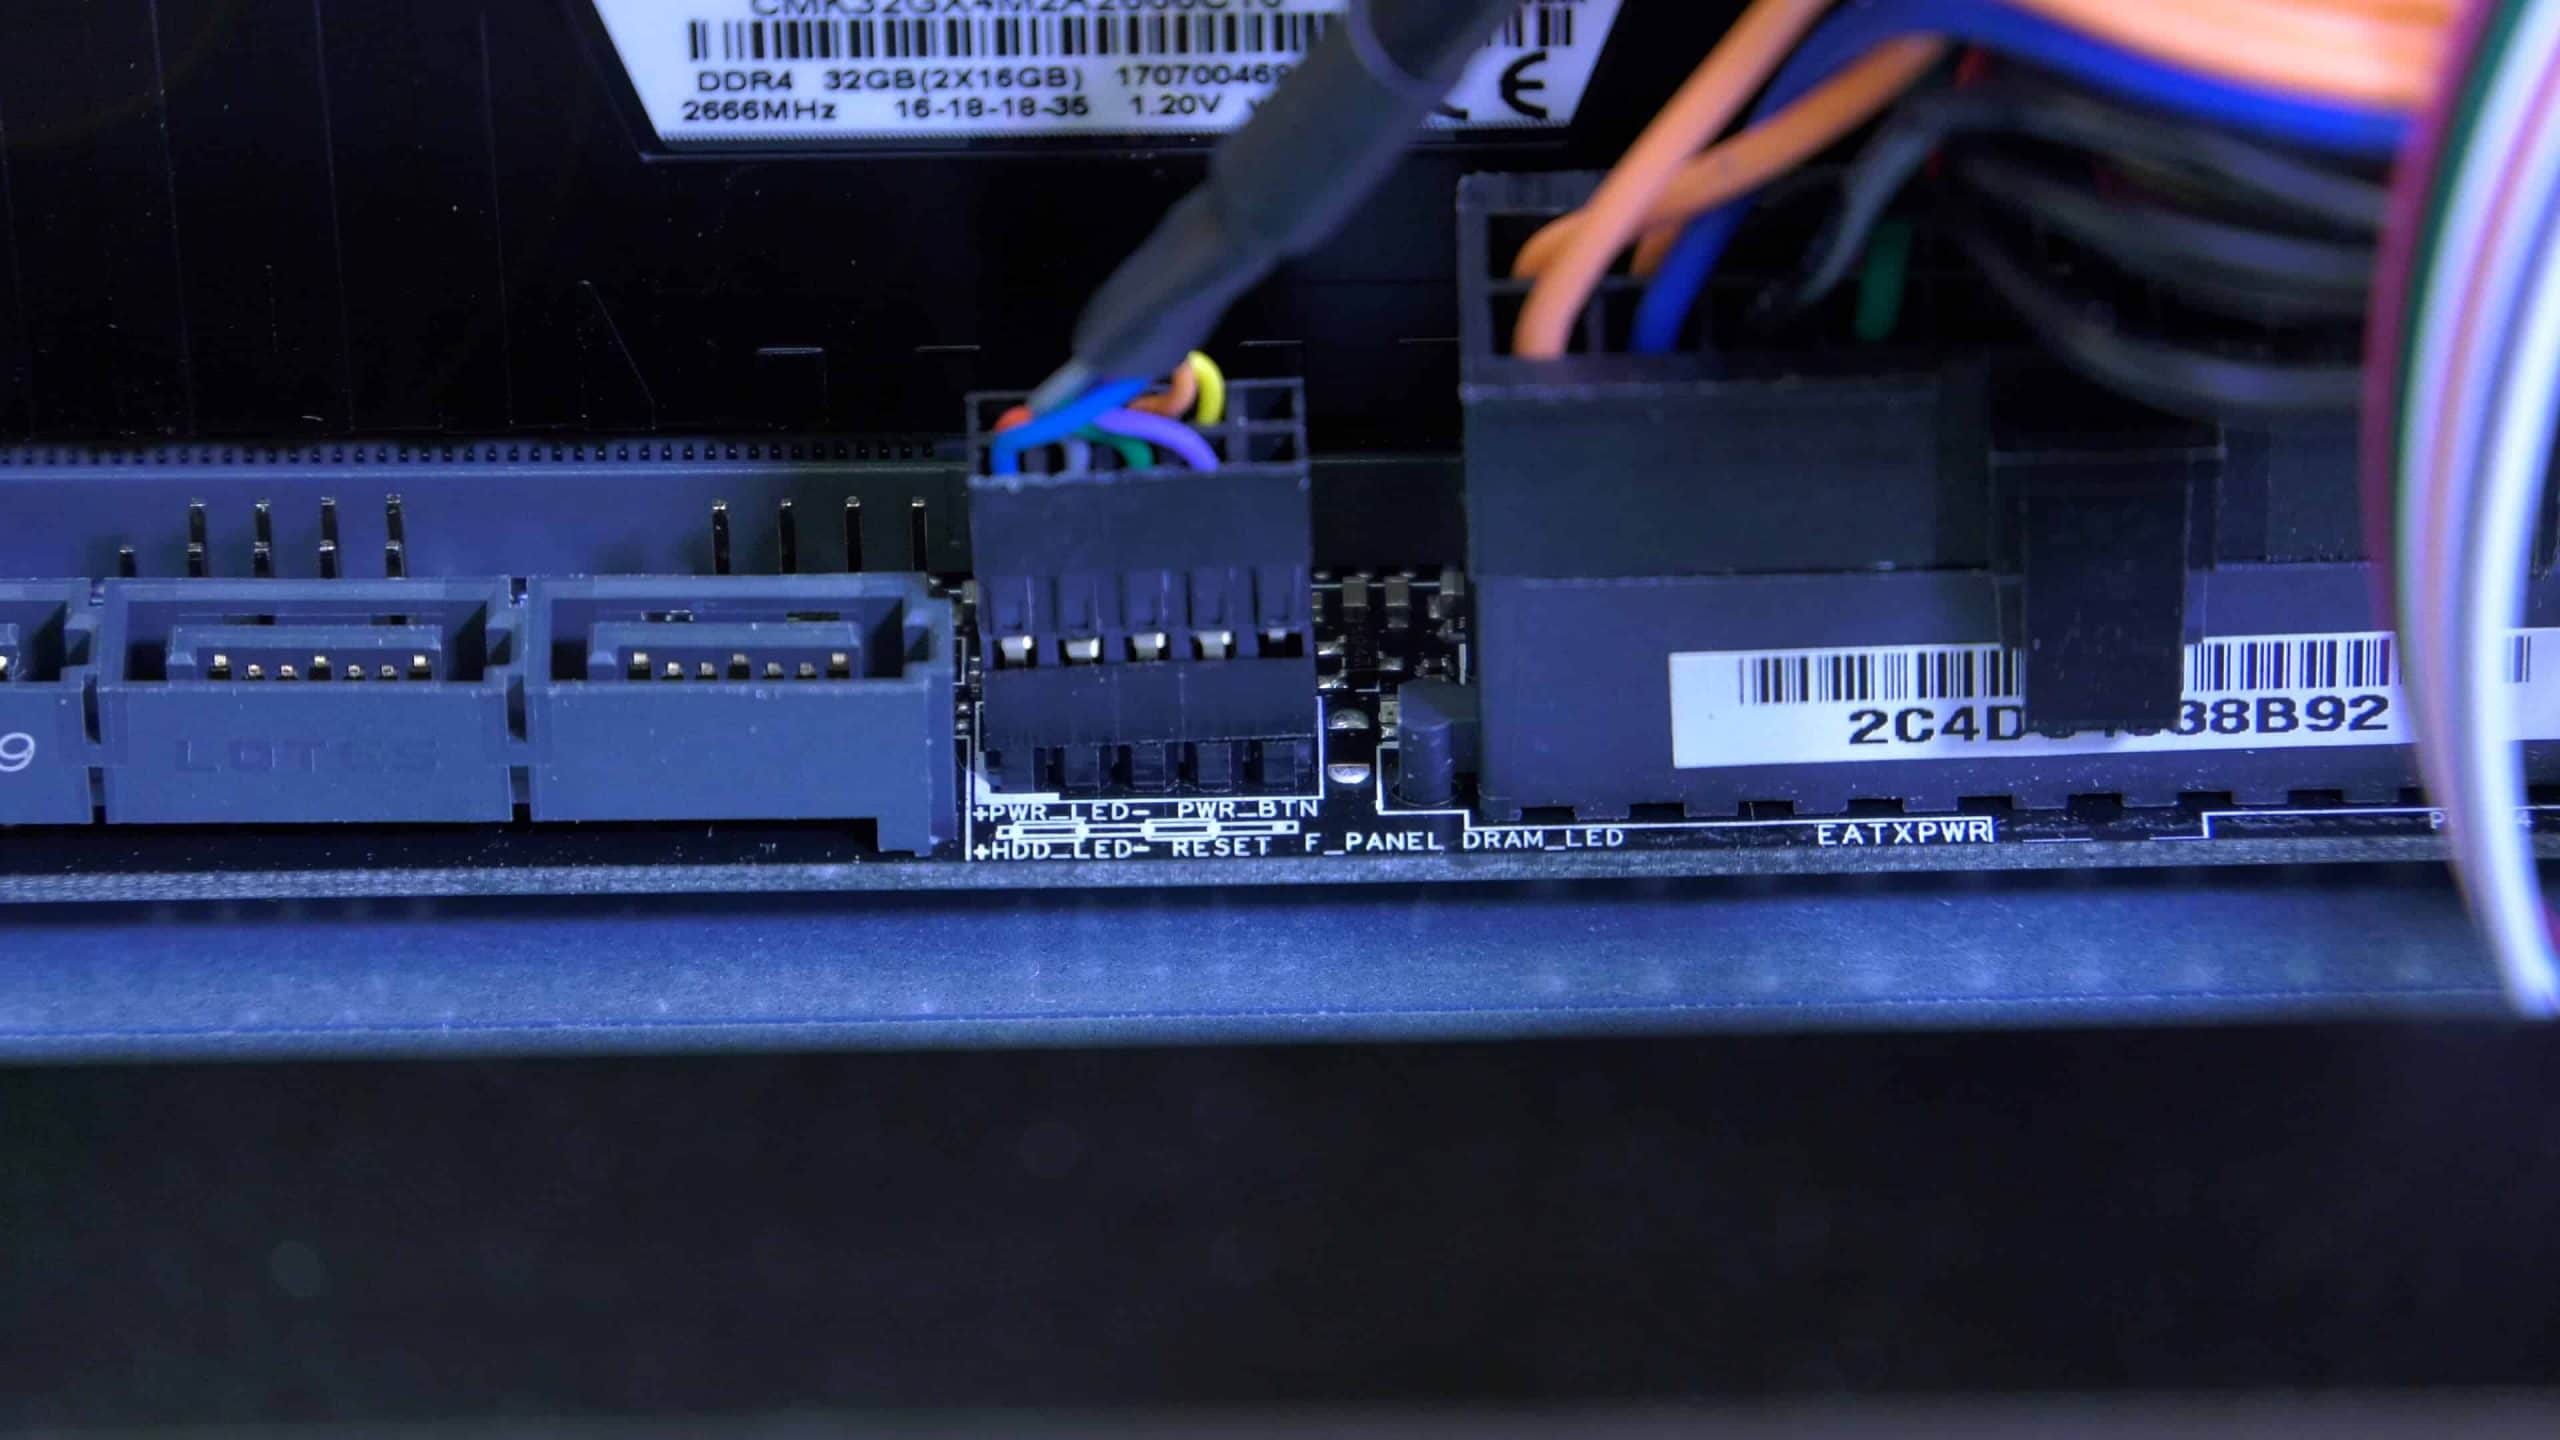
Now is also a great time to plug in each of the connectors from the case for the power and reset buttons along with the power and activity LEDs into the appropriate pins on the motherboard. Also attach the USB block connector for the case front USB ports.
1U Server Build: The Case Fan Selection
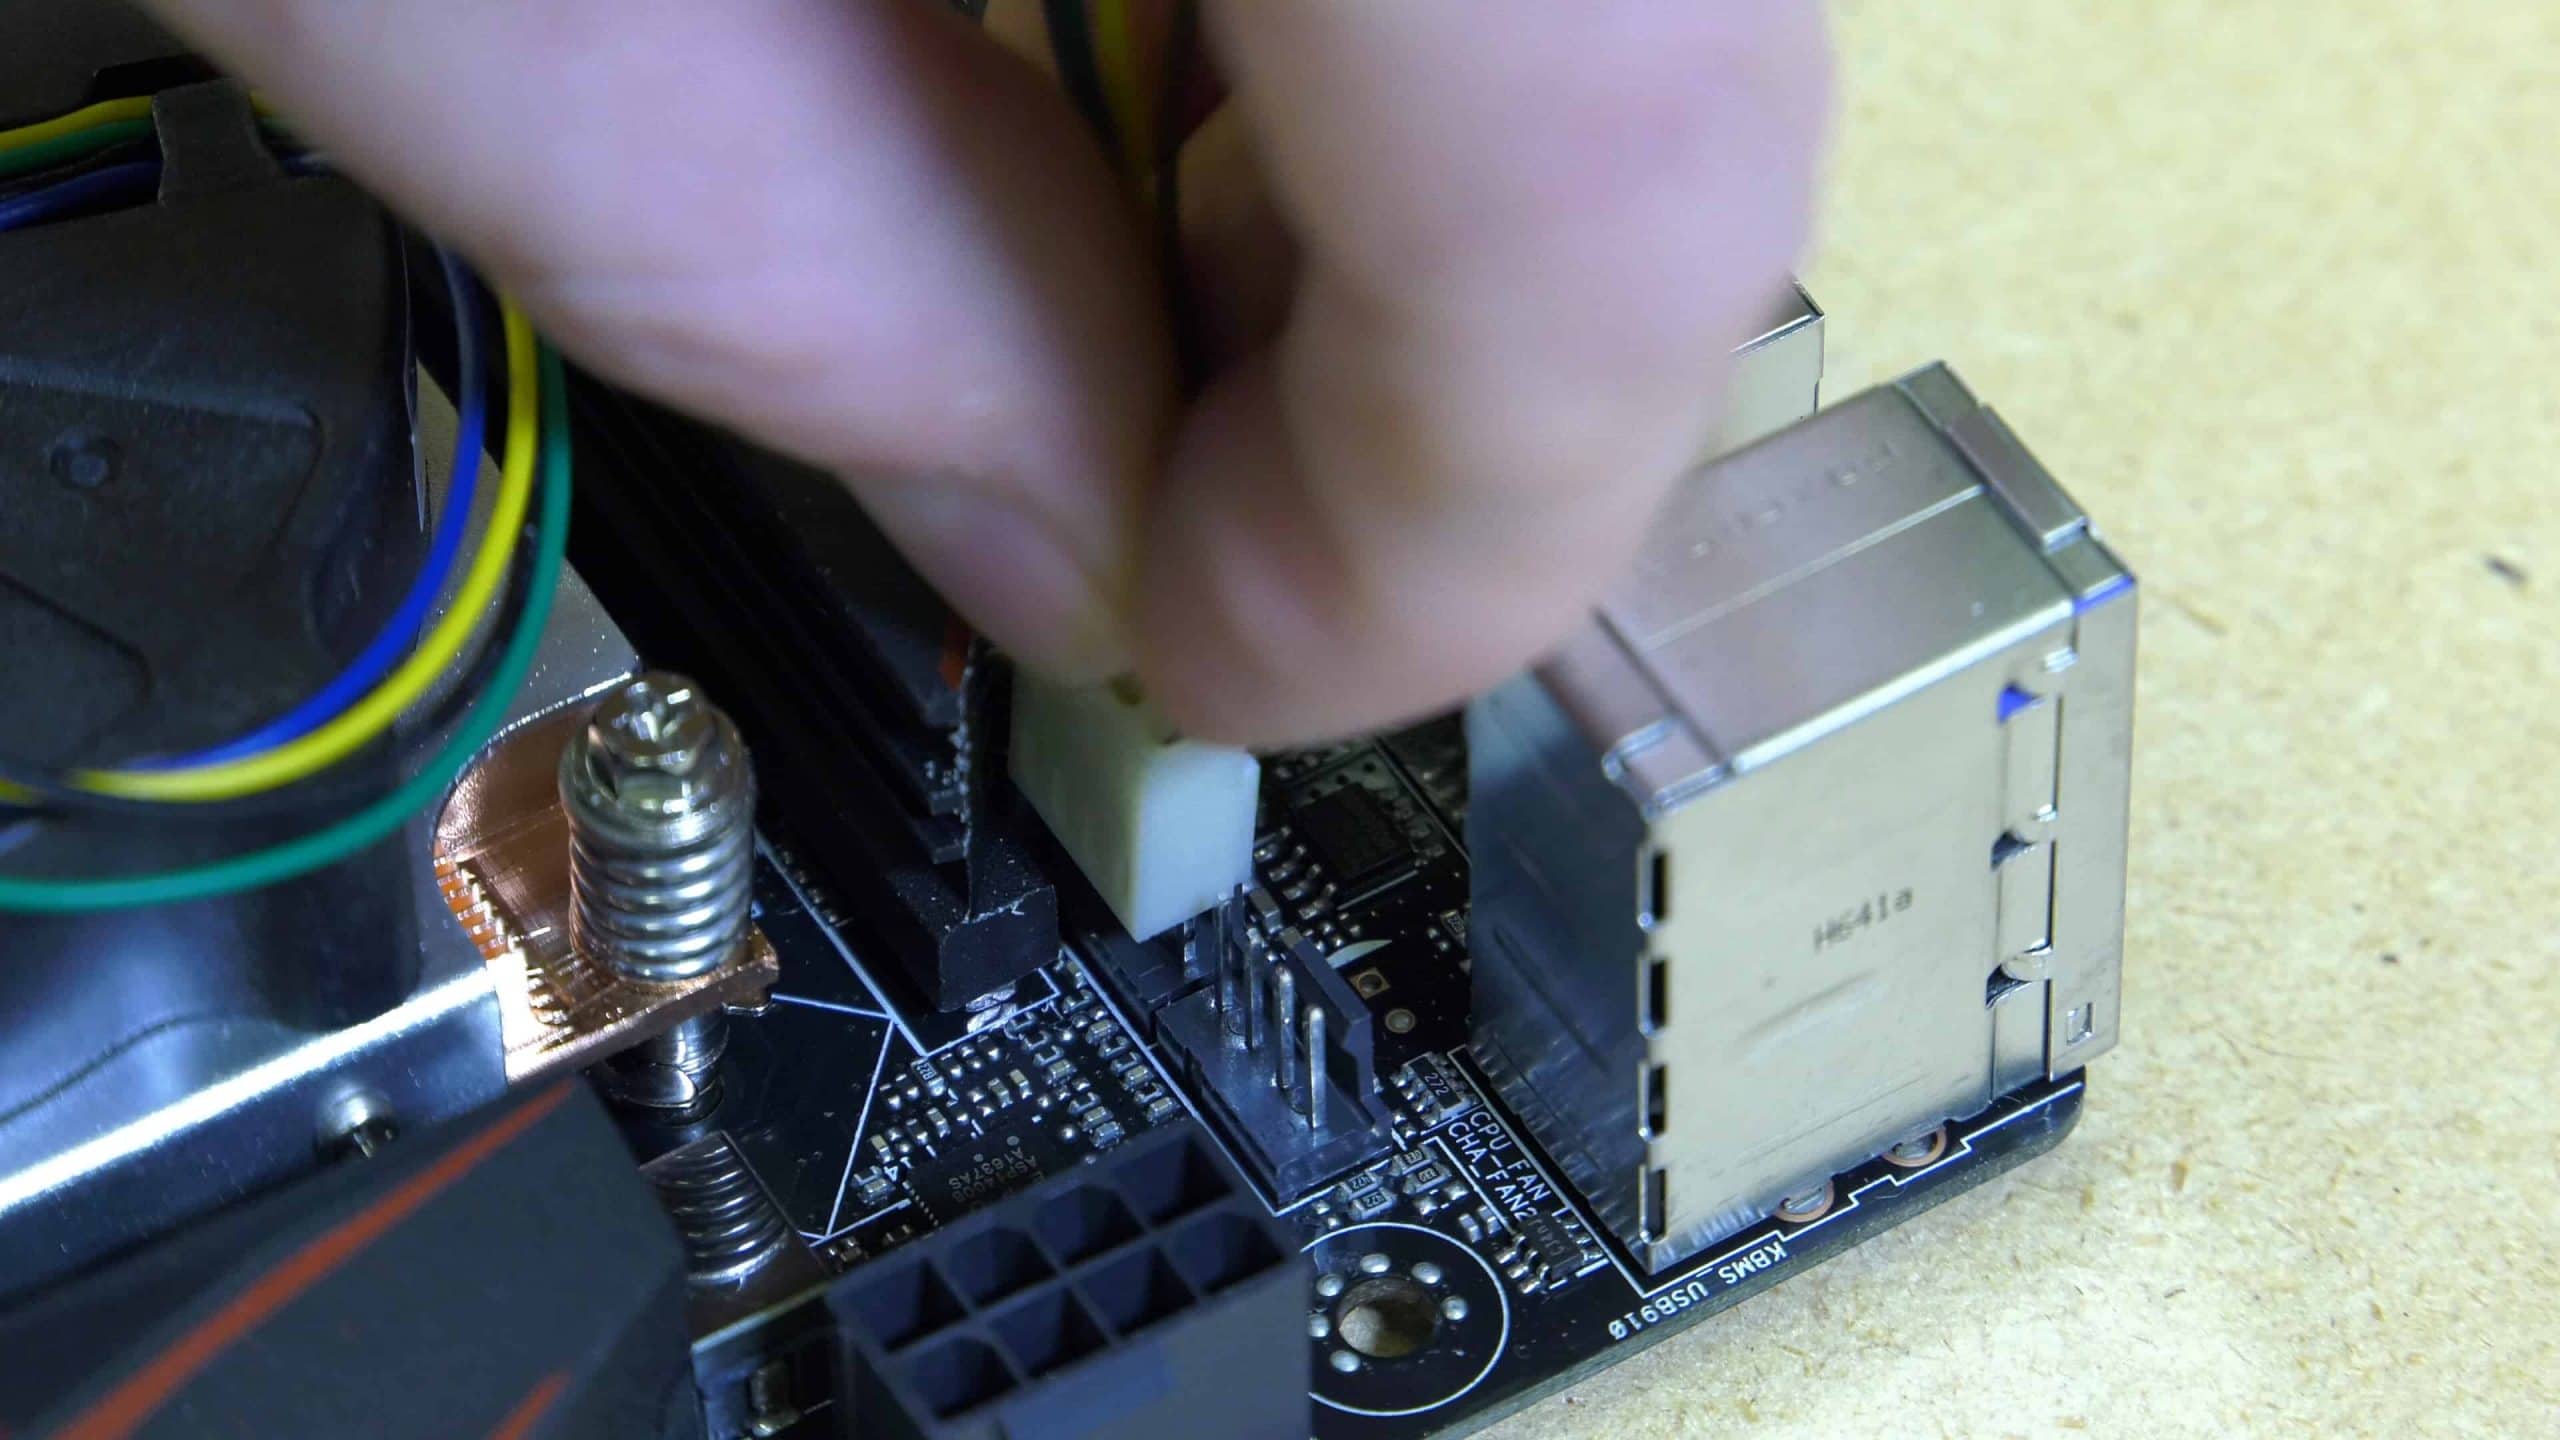
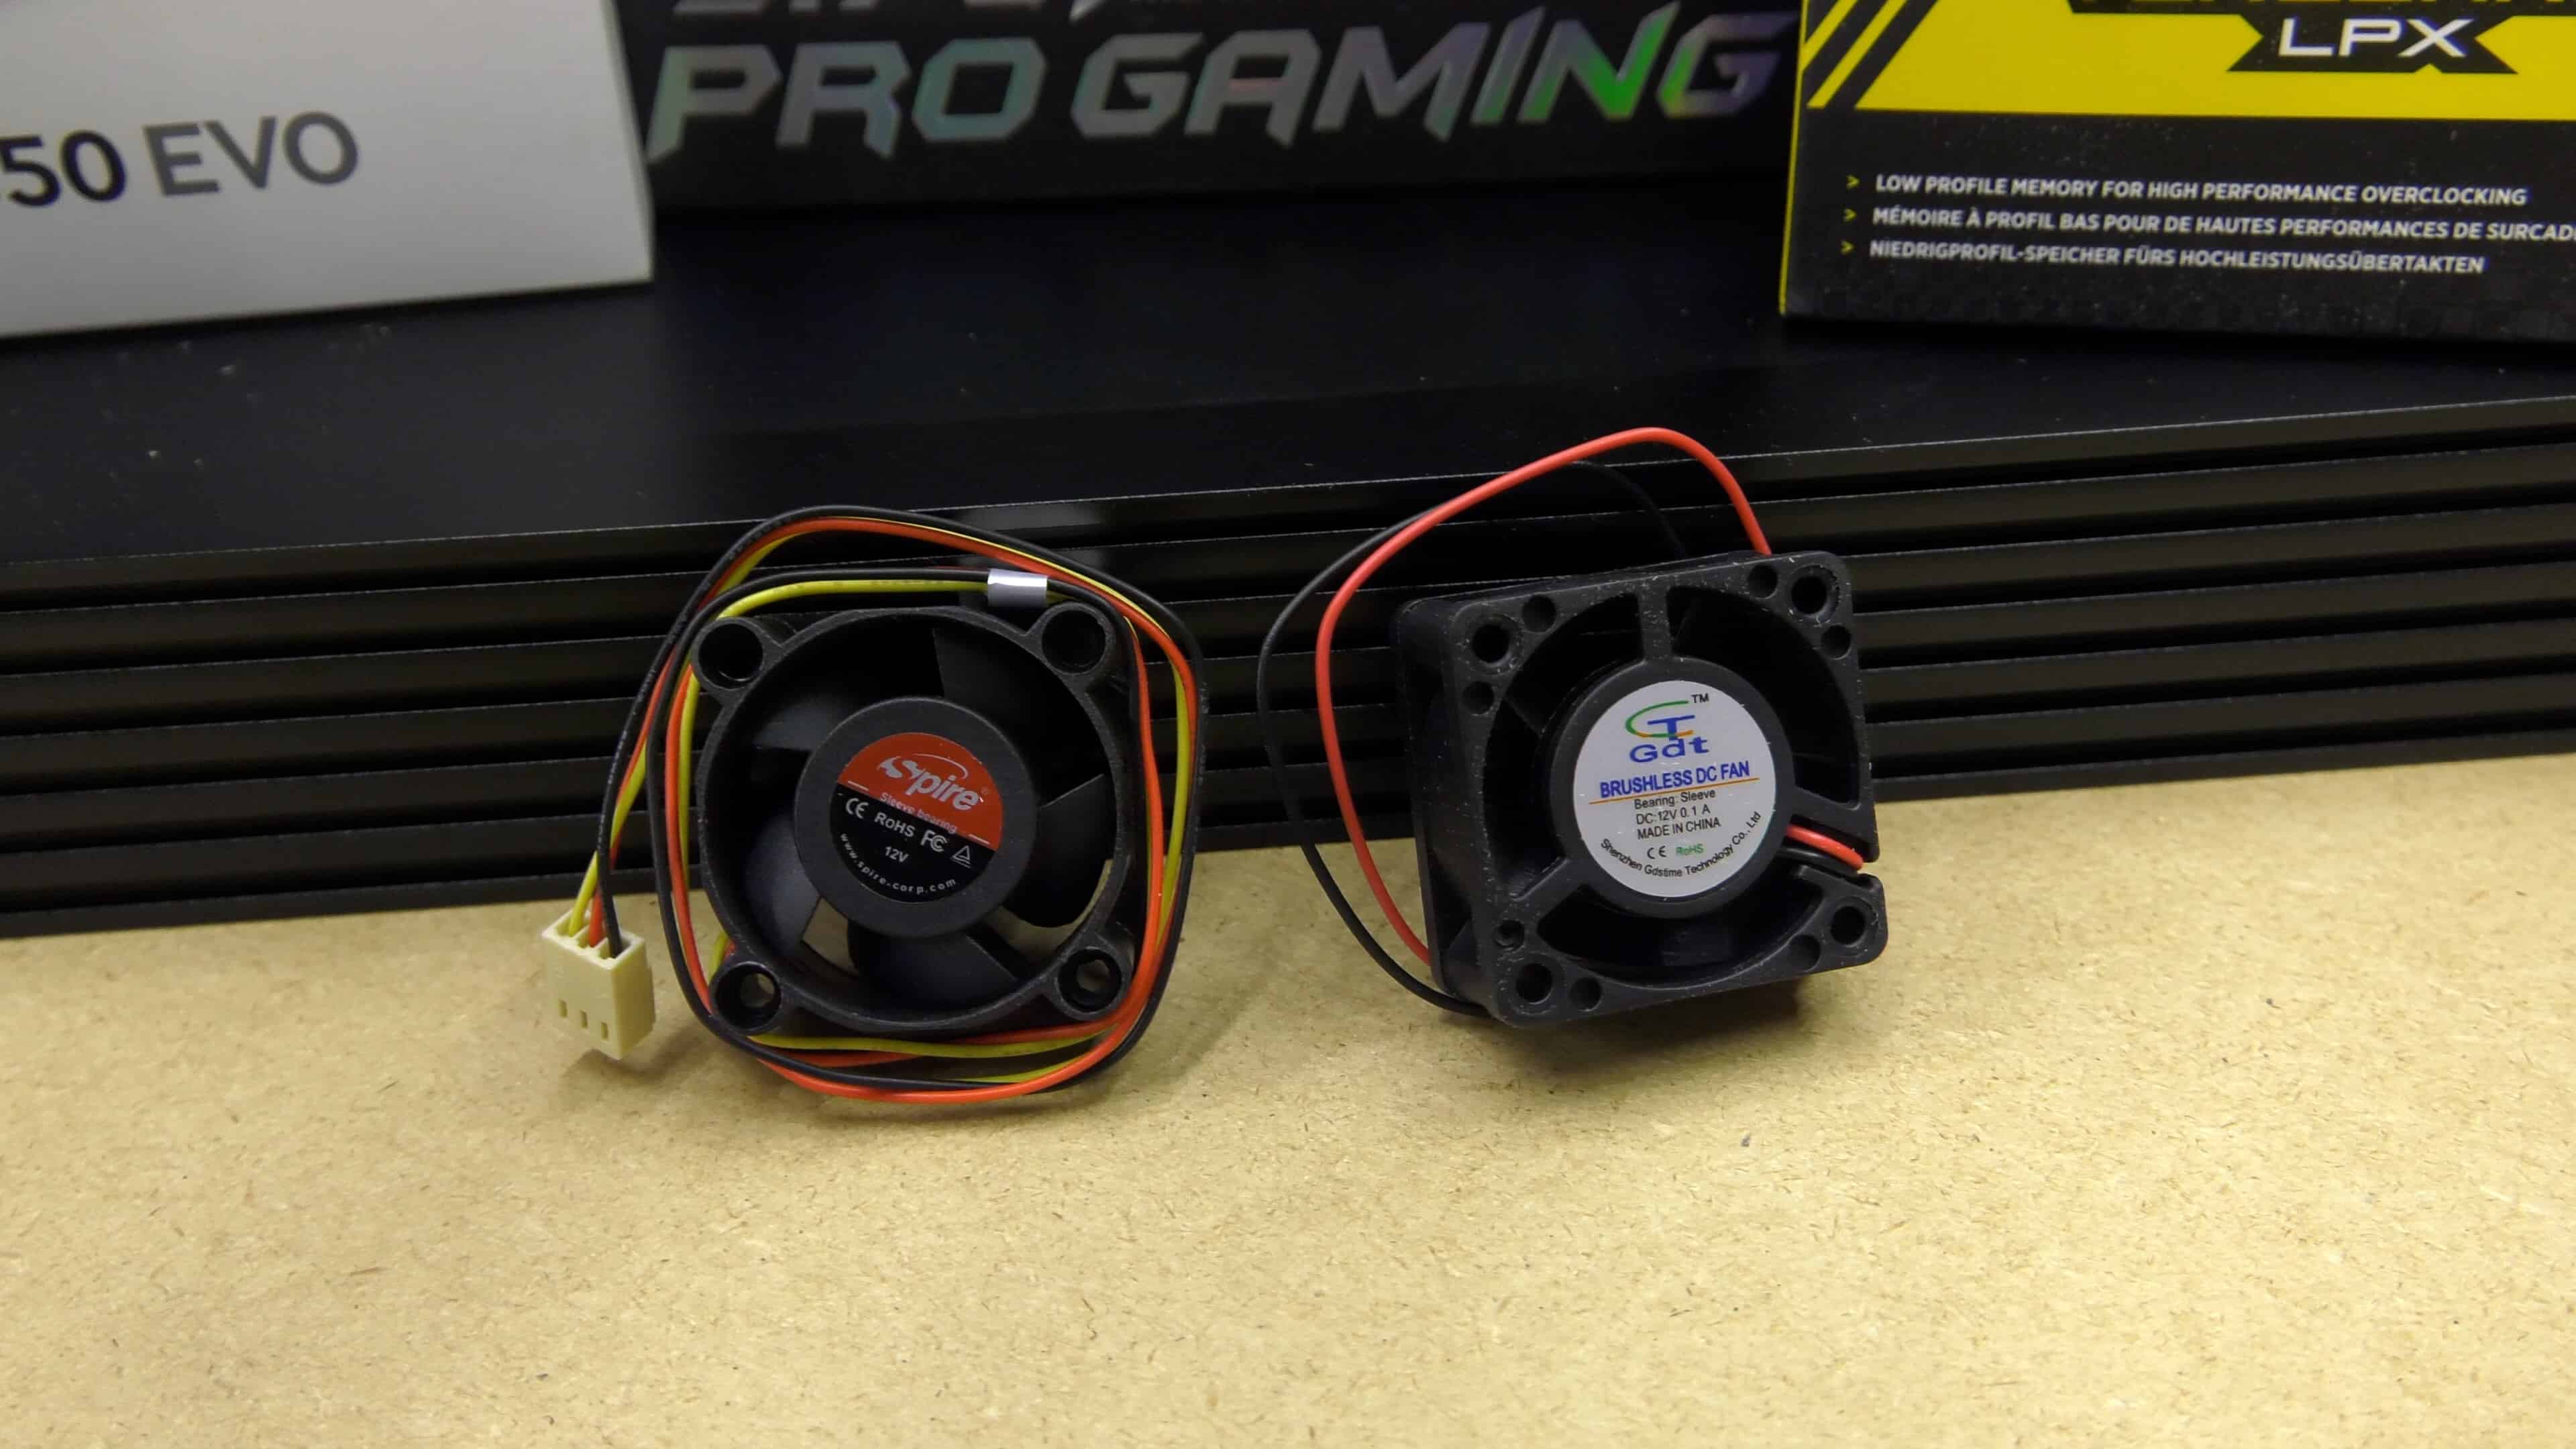 When building a 1U server, cooling is incredibly important. For this build I chose to install two fans in the case. Both are 40×20 millimeter brushless fans. One fan will be connected directly to the power supply and run continuously at full speed. The other fan will connect to the chassis fan connector on the motherboard where its speed will determined by the cooling needs of the system.
Installing the 40×20 MM Case Fans
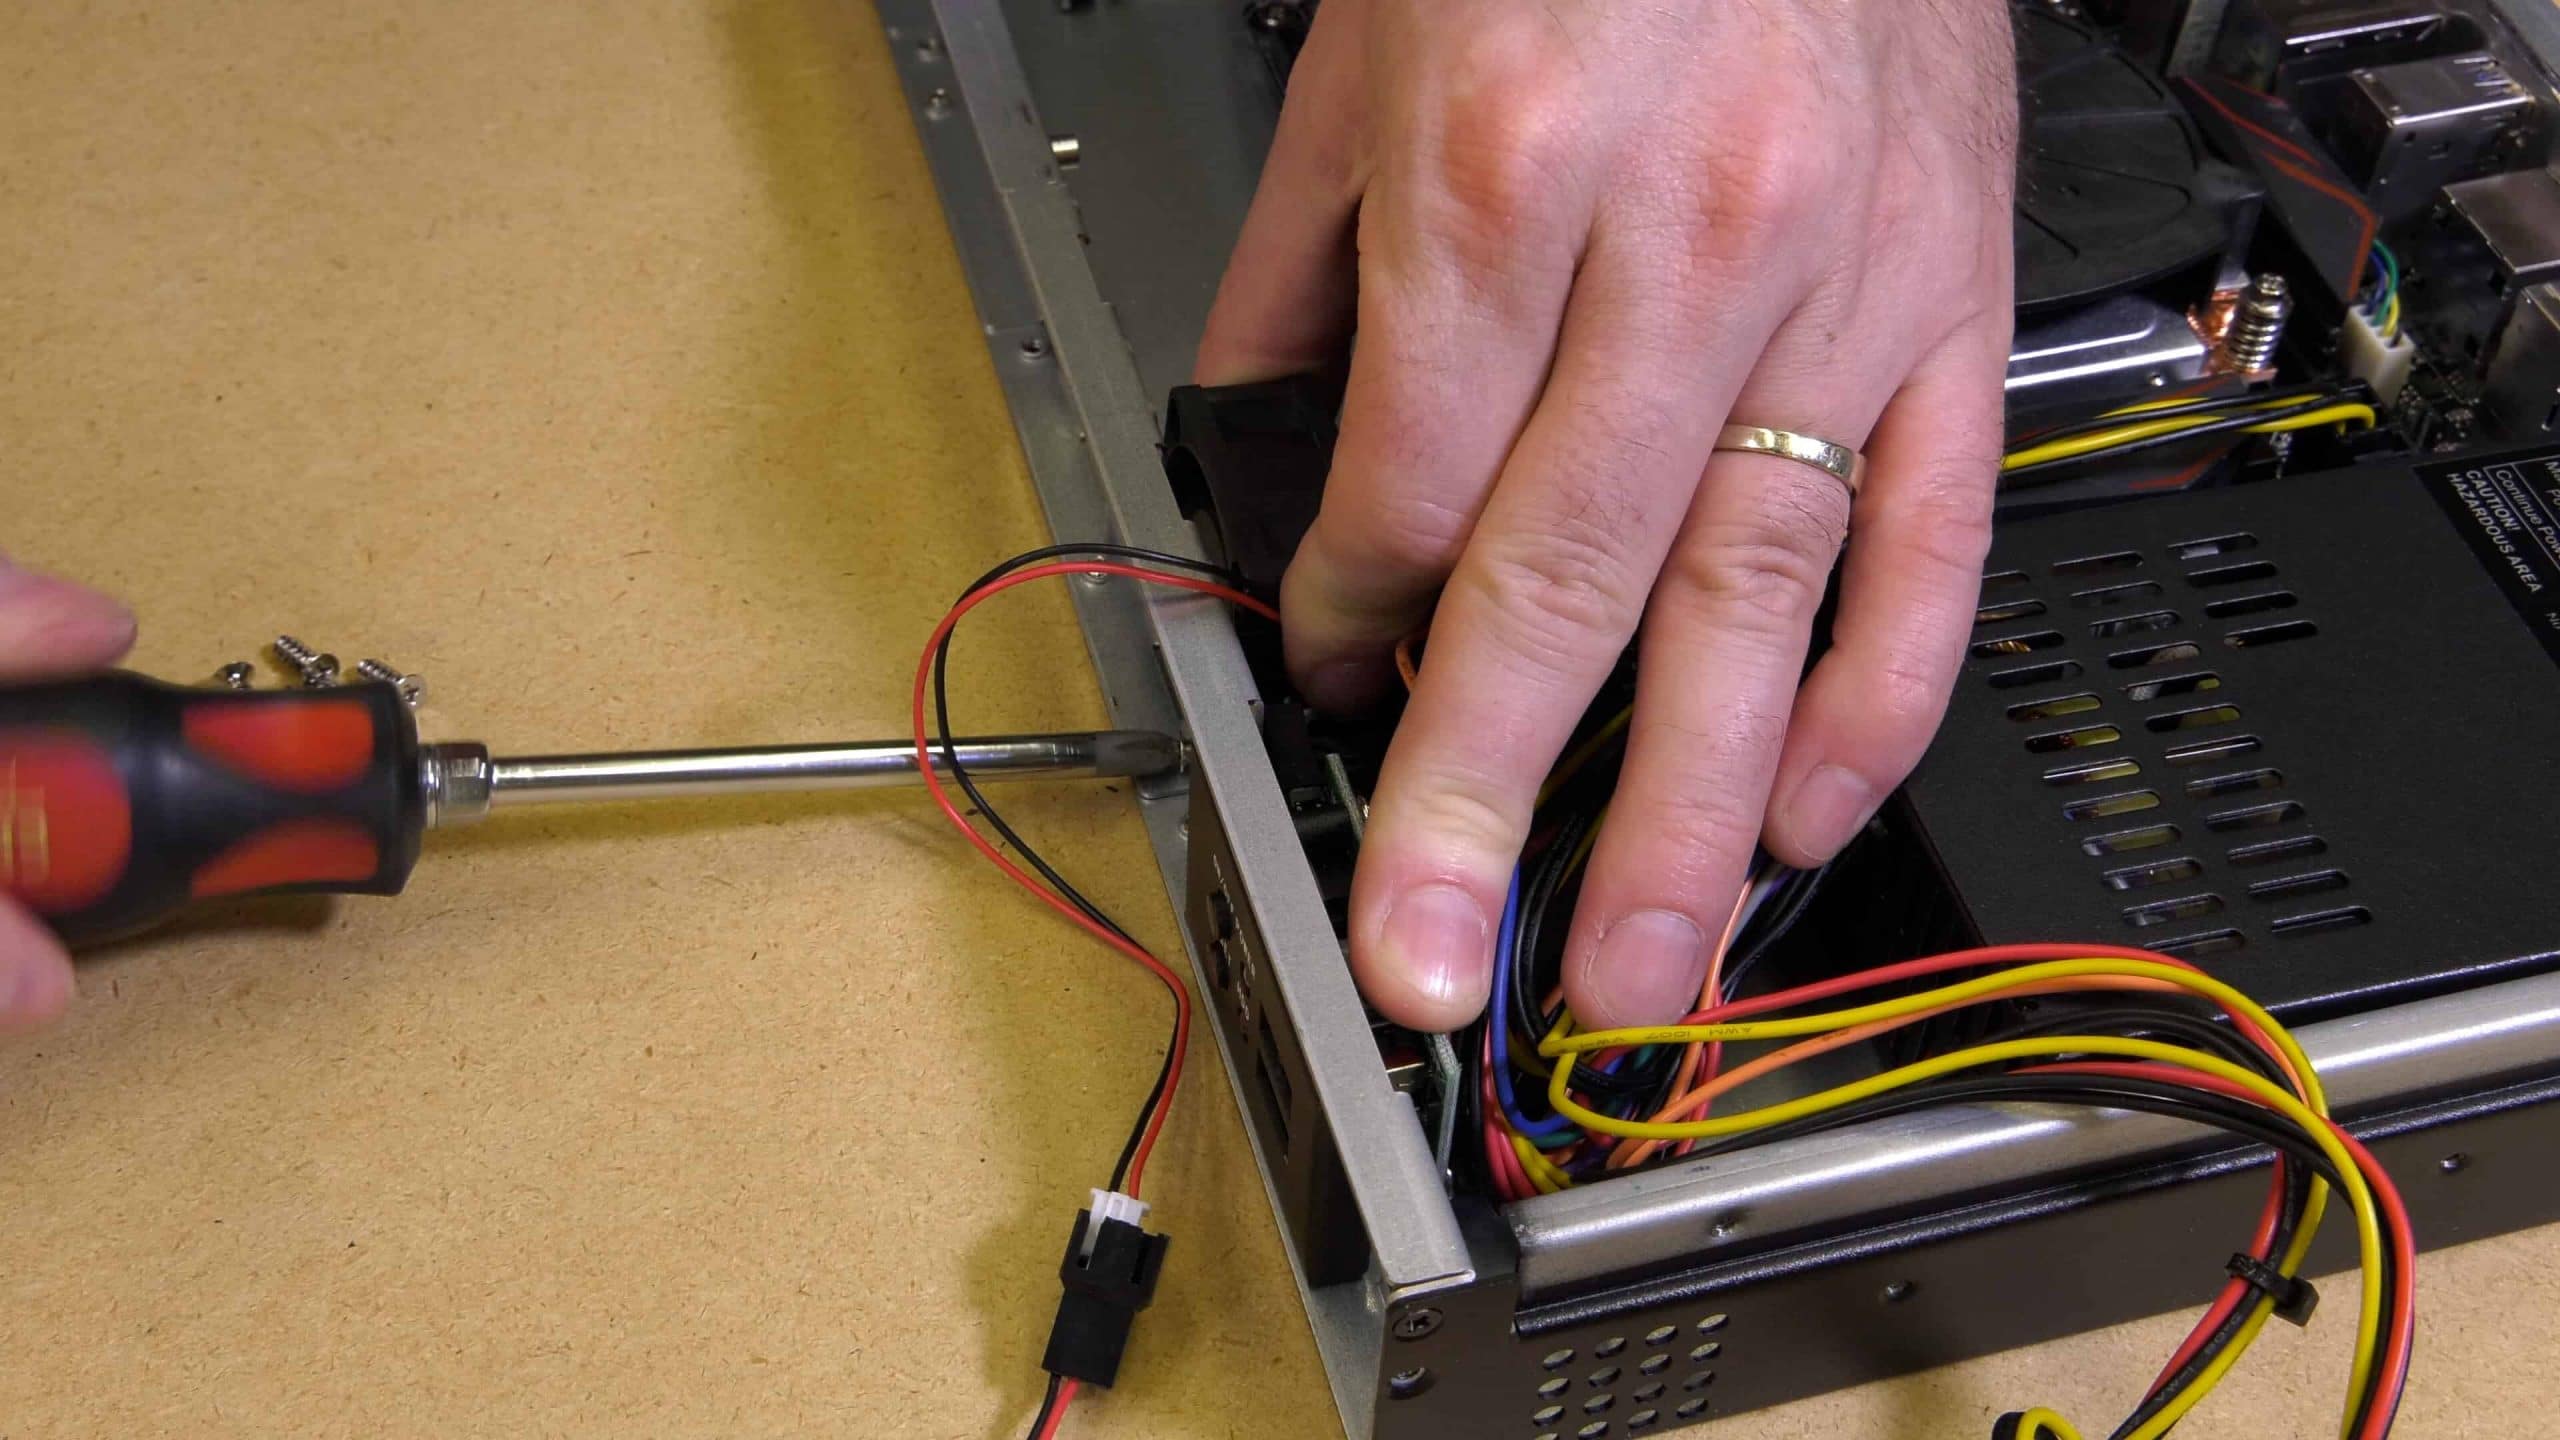
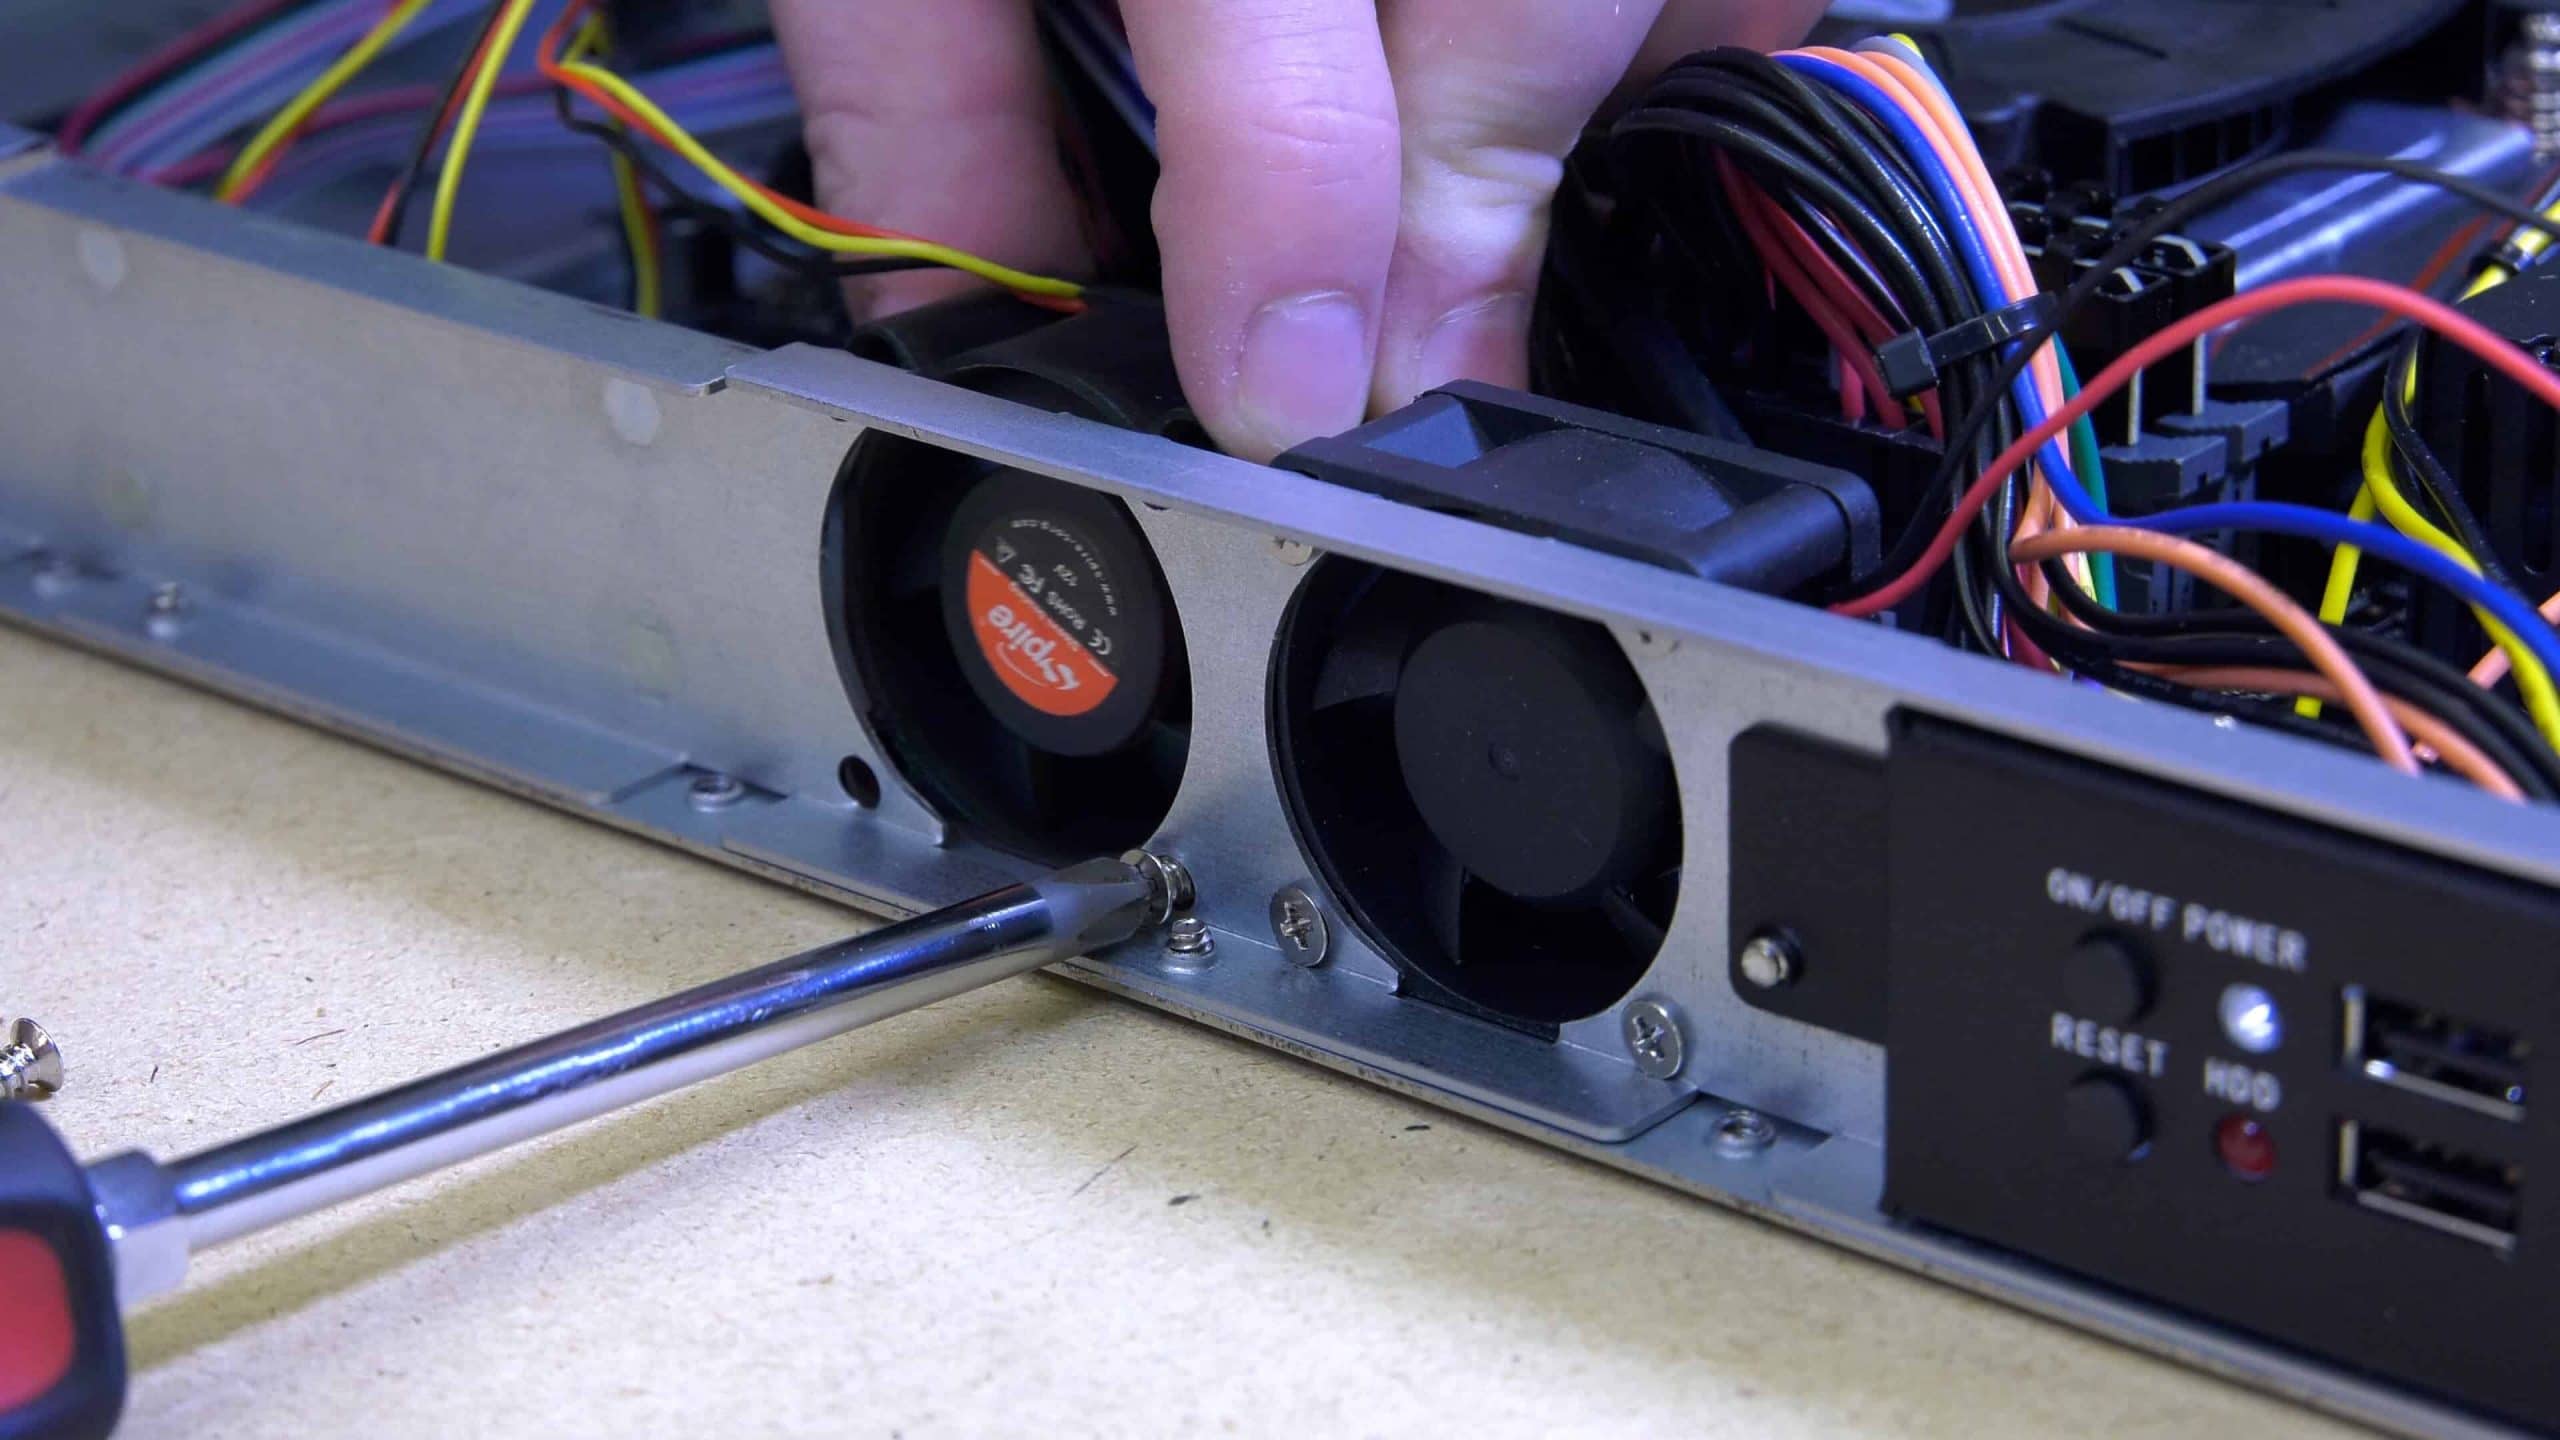
The fans are installed by screwing them into the front of the case with the eight provided screws. You can position the fans to either exhaust air from the cause or intake air. Be sure to orient them in the correct direction based on how and where you are mounting your server in your rack. I will be mounting my fans in the intake position.

1U Server Build: The Hard Drive Selection
 The iStar 1U server case supports the mounting of two drives, however, my internal storage will only be used for holding the operating system and some installation images for my virtual machine installs. This is because all of my virtual machines will be booting and operating from a shared VMS volume on a Synology Rack Station 2416+ over iSCSI. I honestly, could have skipped the hard disk completely and just booted my servers from a USB stick, but I wanted to provide for future functionally should I ever use these for any other purpose or decide not use network attached storage. And having a local mount-point for install ISOs is pretty slick.
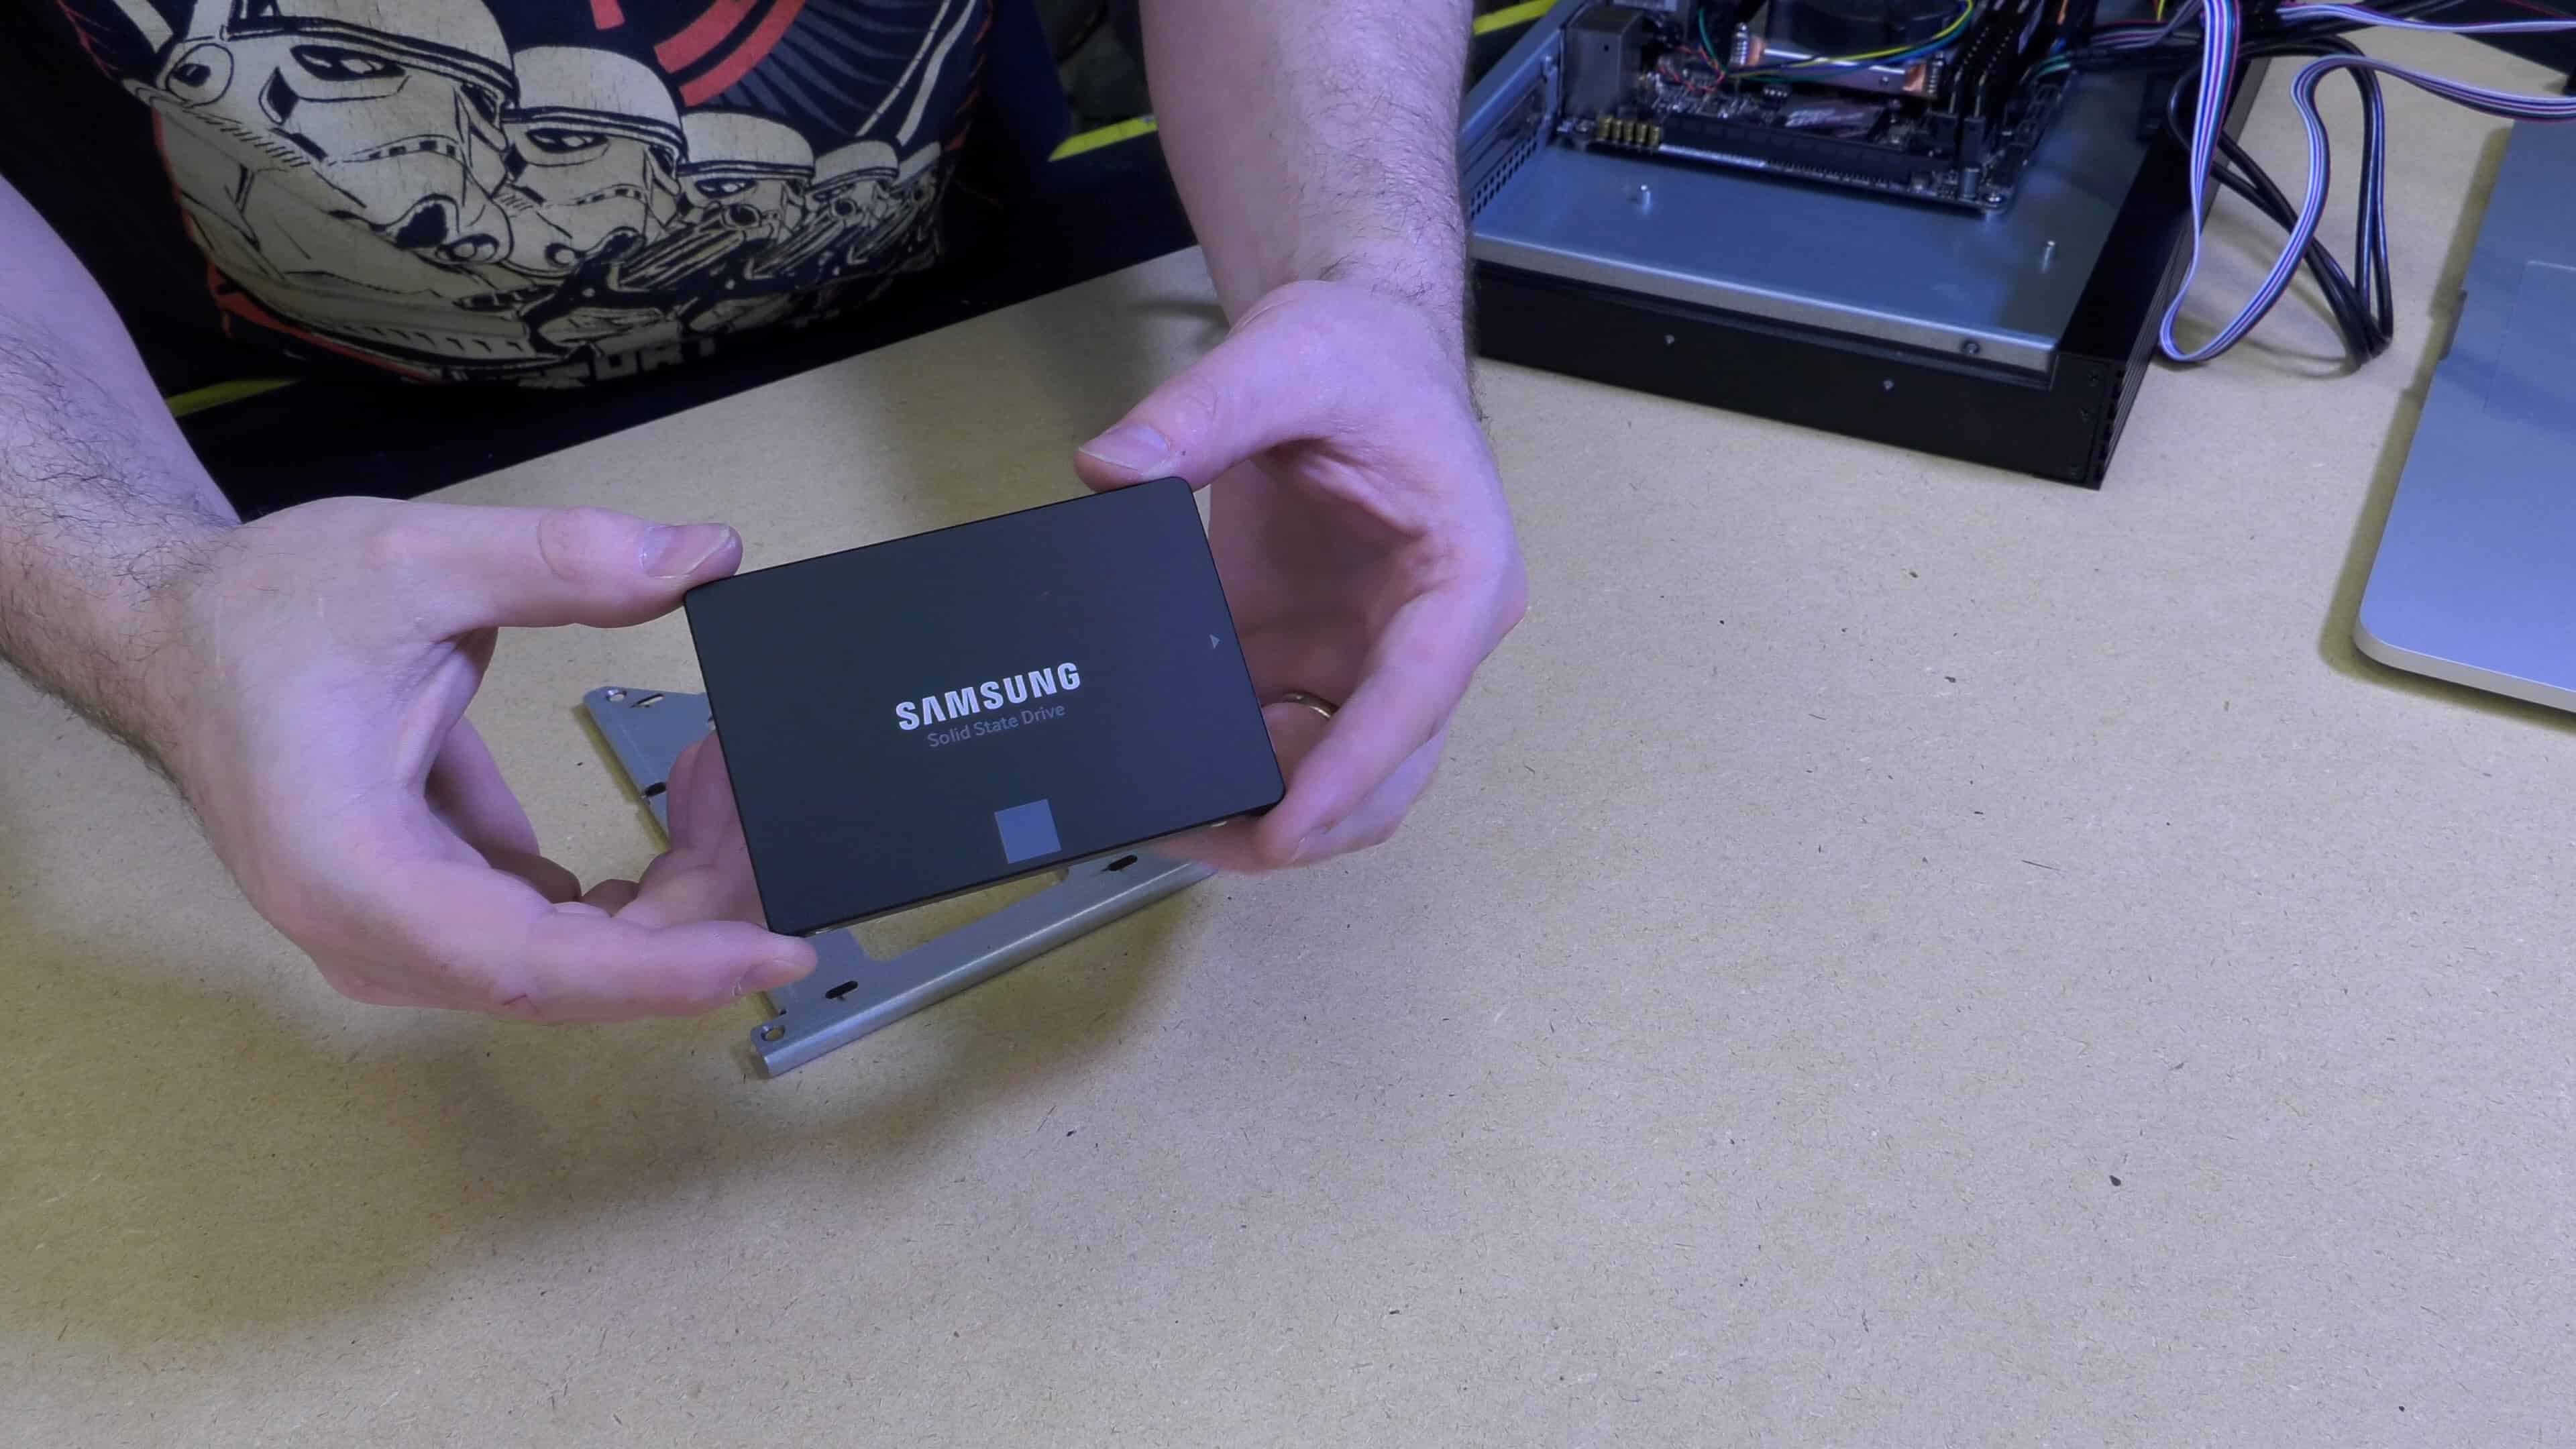
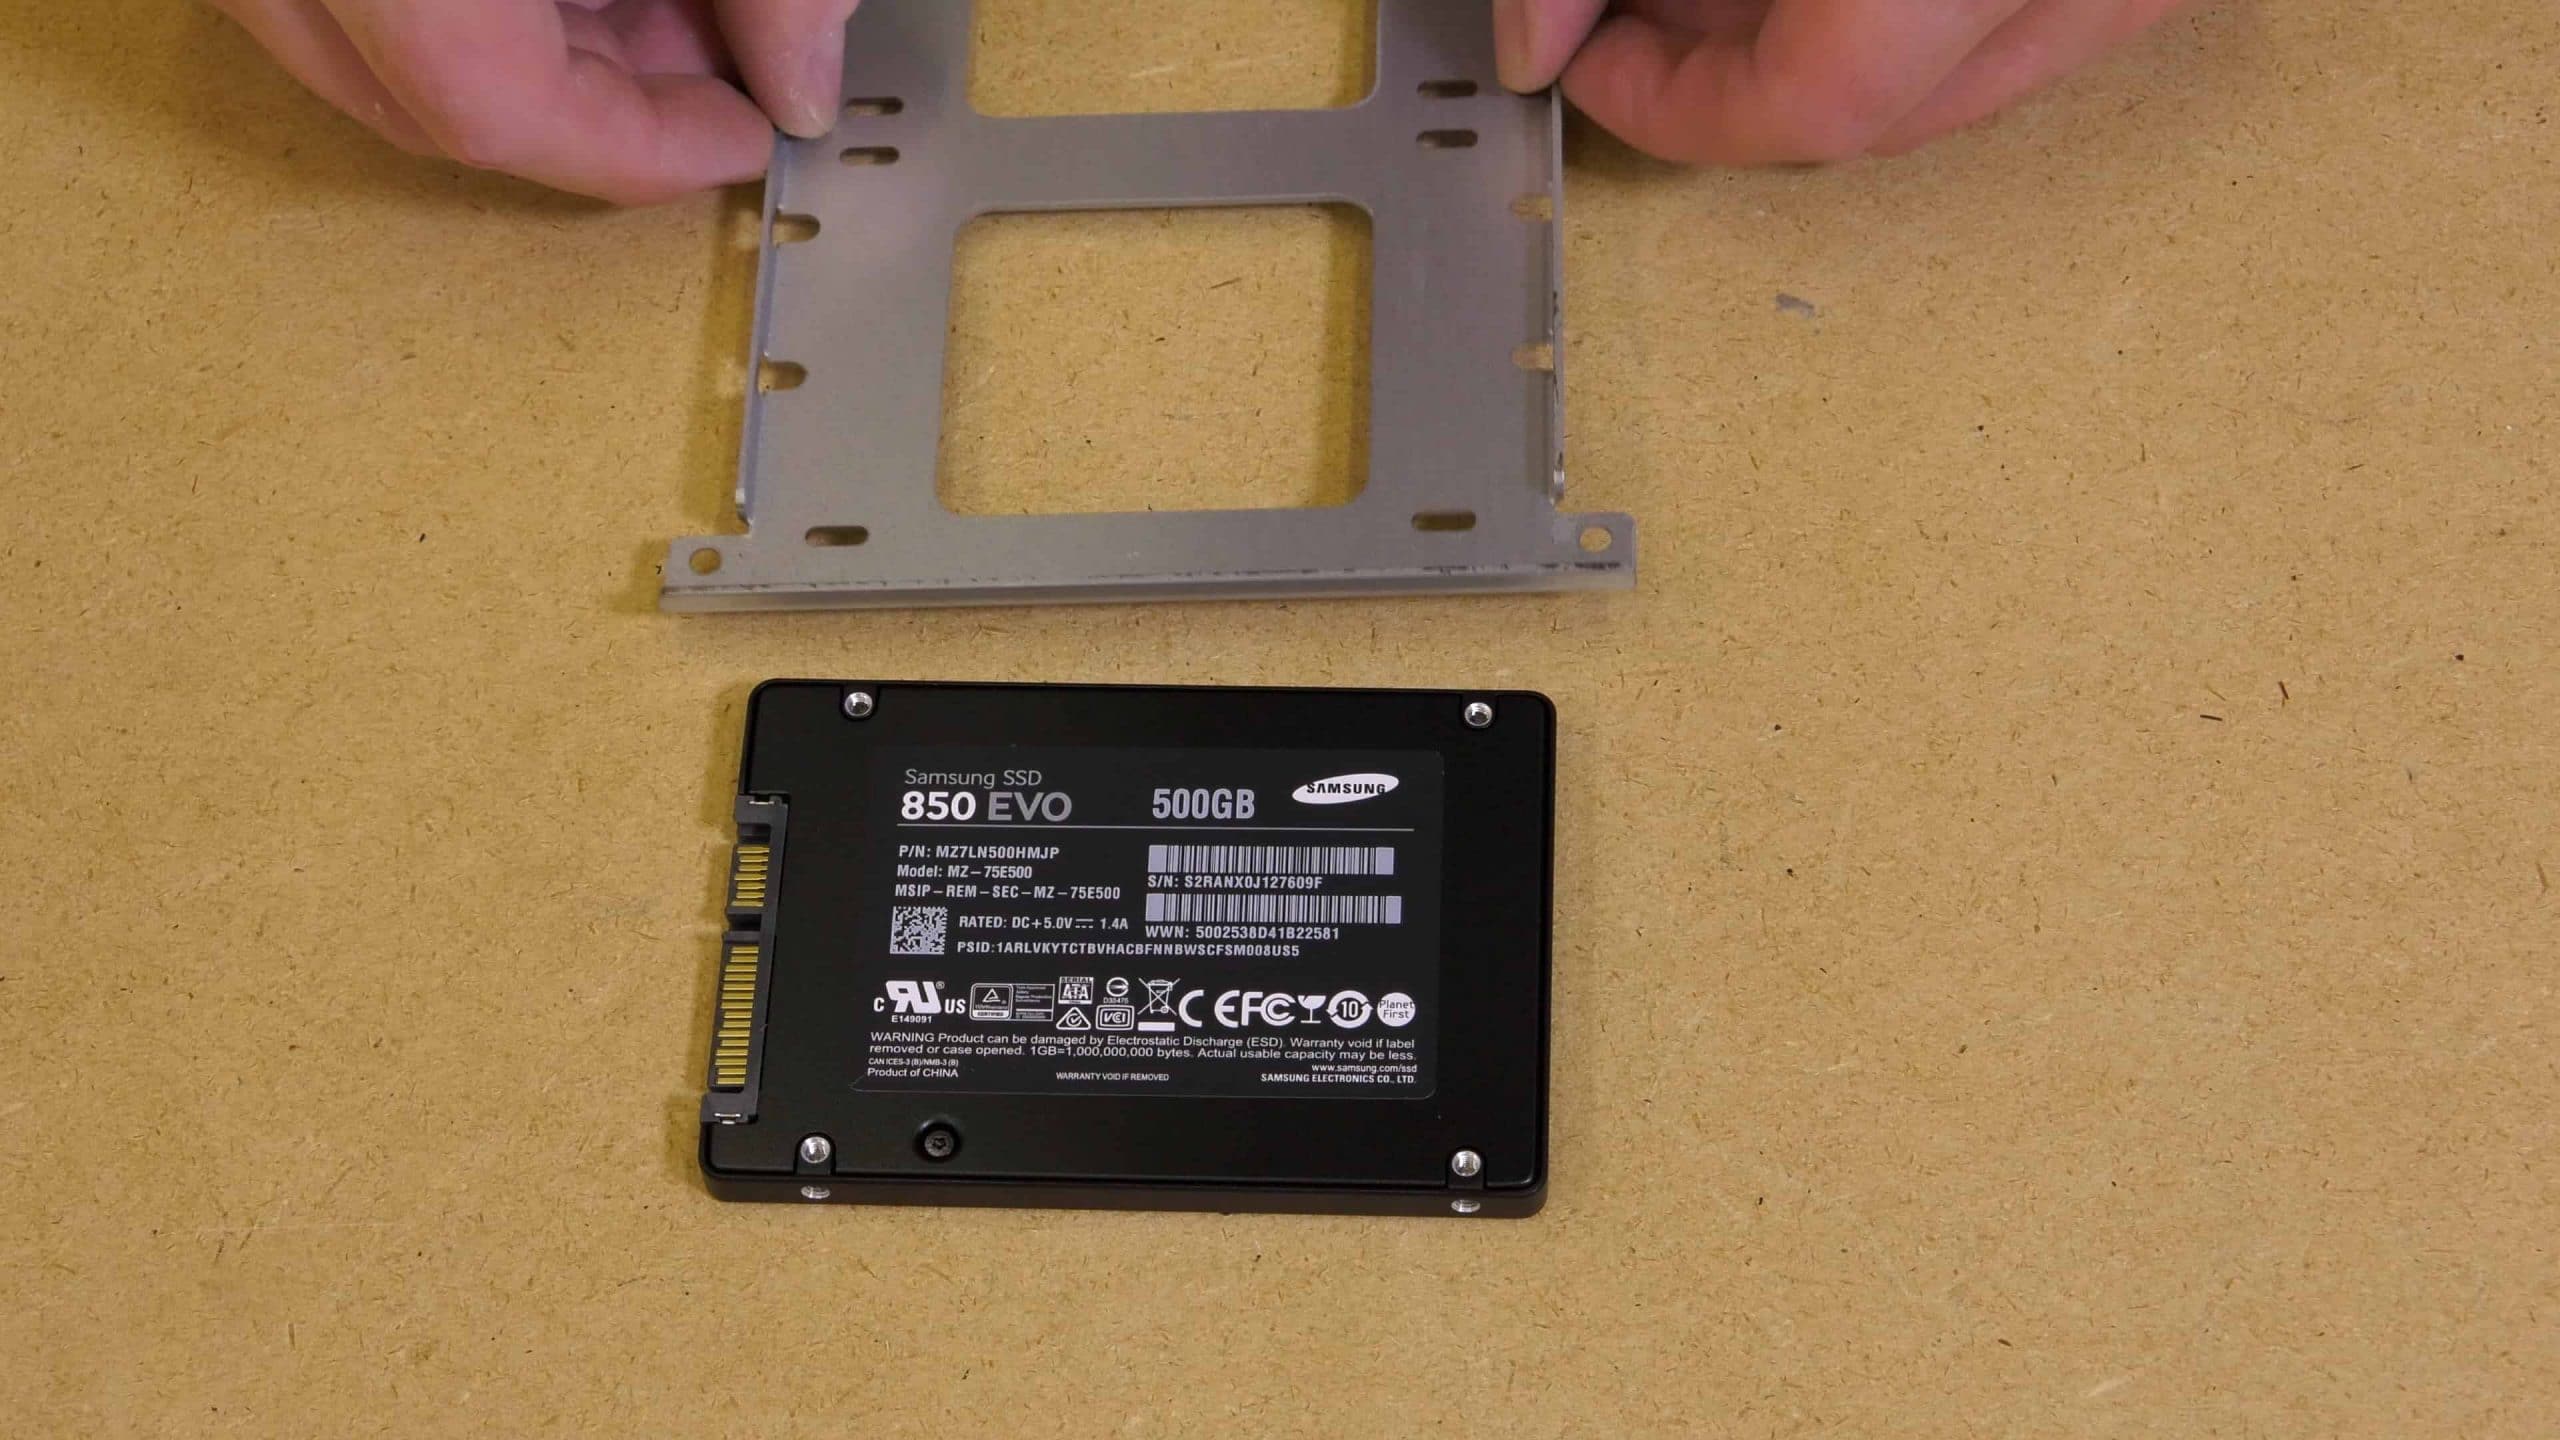
The drive I chose is a Samsung EVO 850 SSD in the 500 gigabyte variant. Again, complete overkill for me but likely perfect for most of you who won’t have network storage. The iStar 1U case does allow for two drives, meaning you could mirror two drives for better performance and redundancy using a RAID 0 or RAID 1 configuration. When building a 1U server, smaller form factor drives are most definitely better. I should point out that the iStar case does not have mounts for 3.5″ spinning disks.
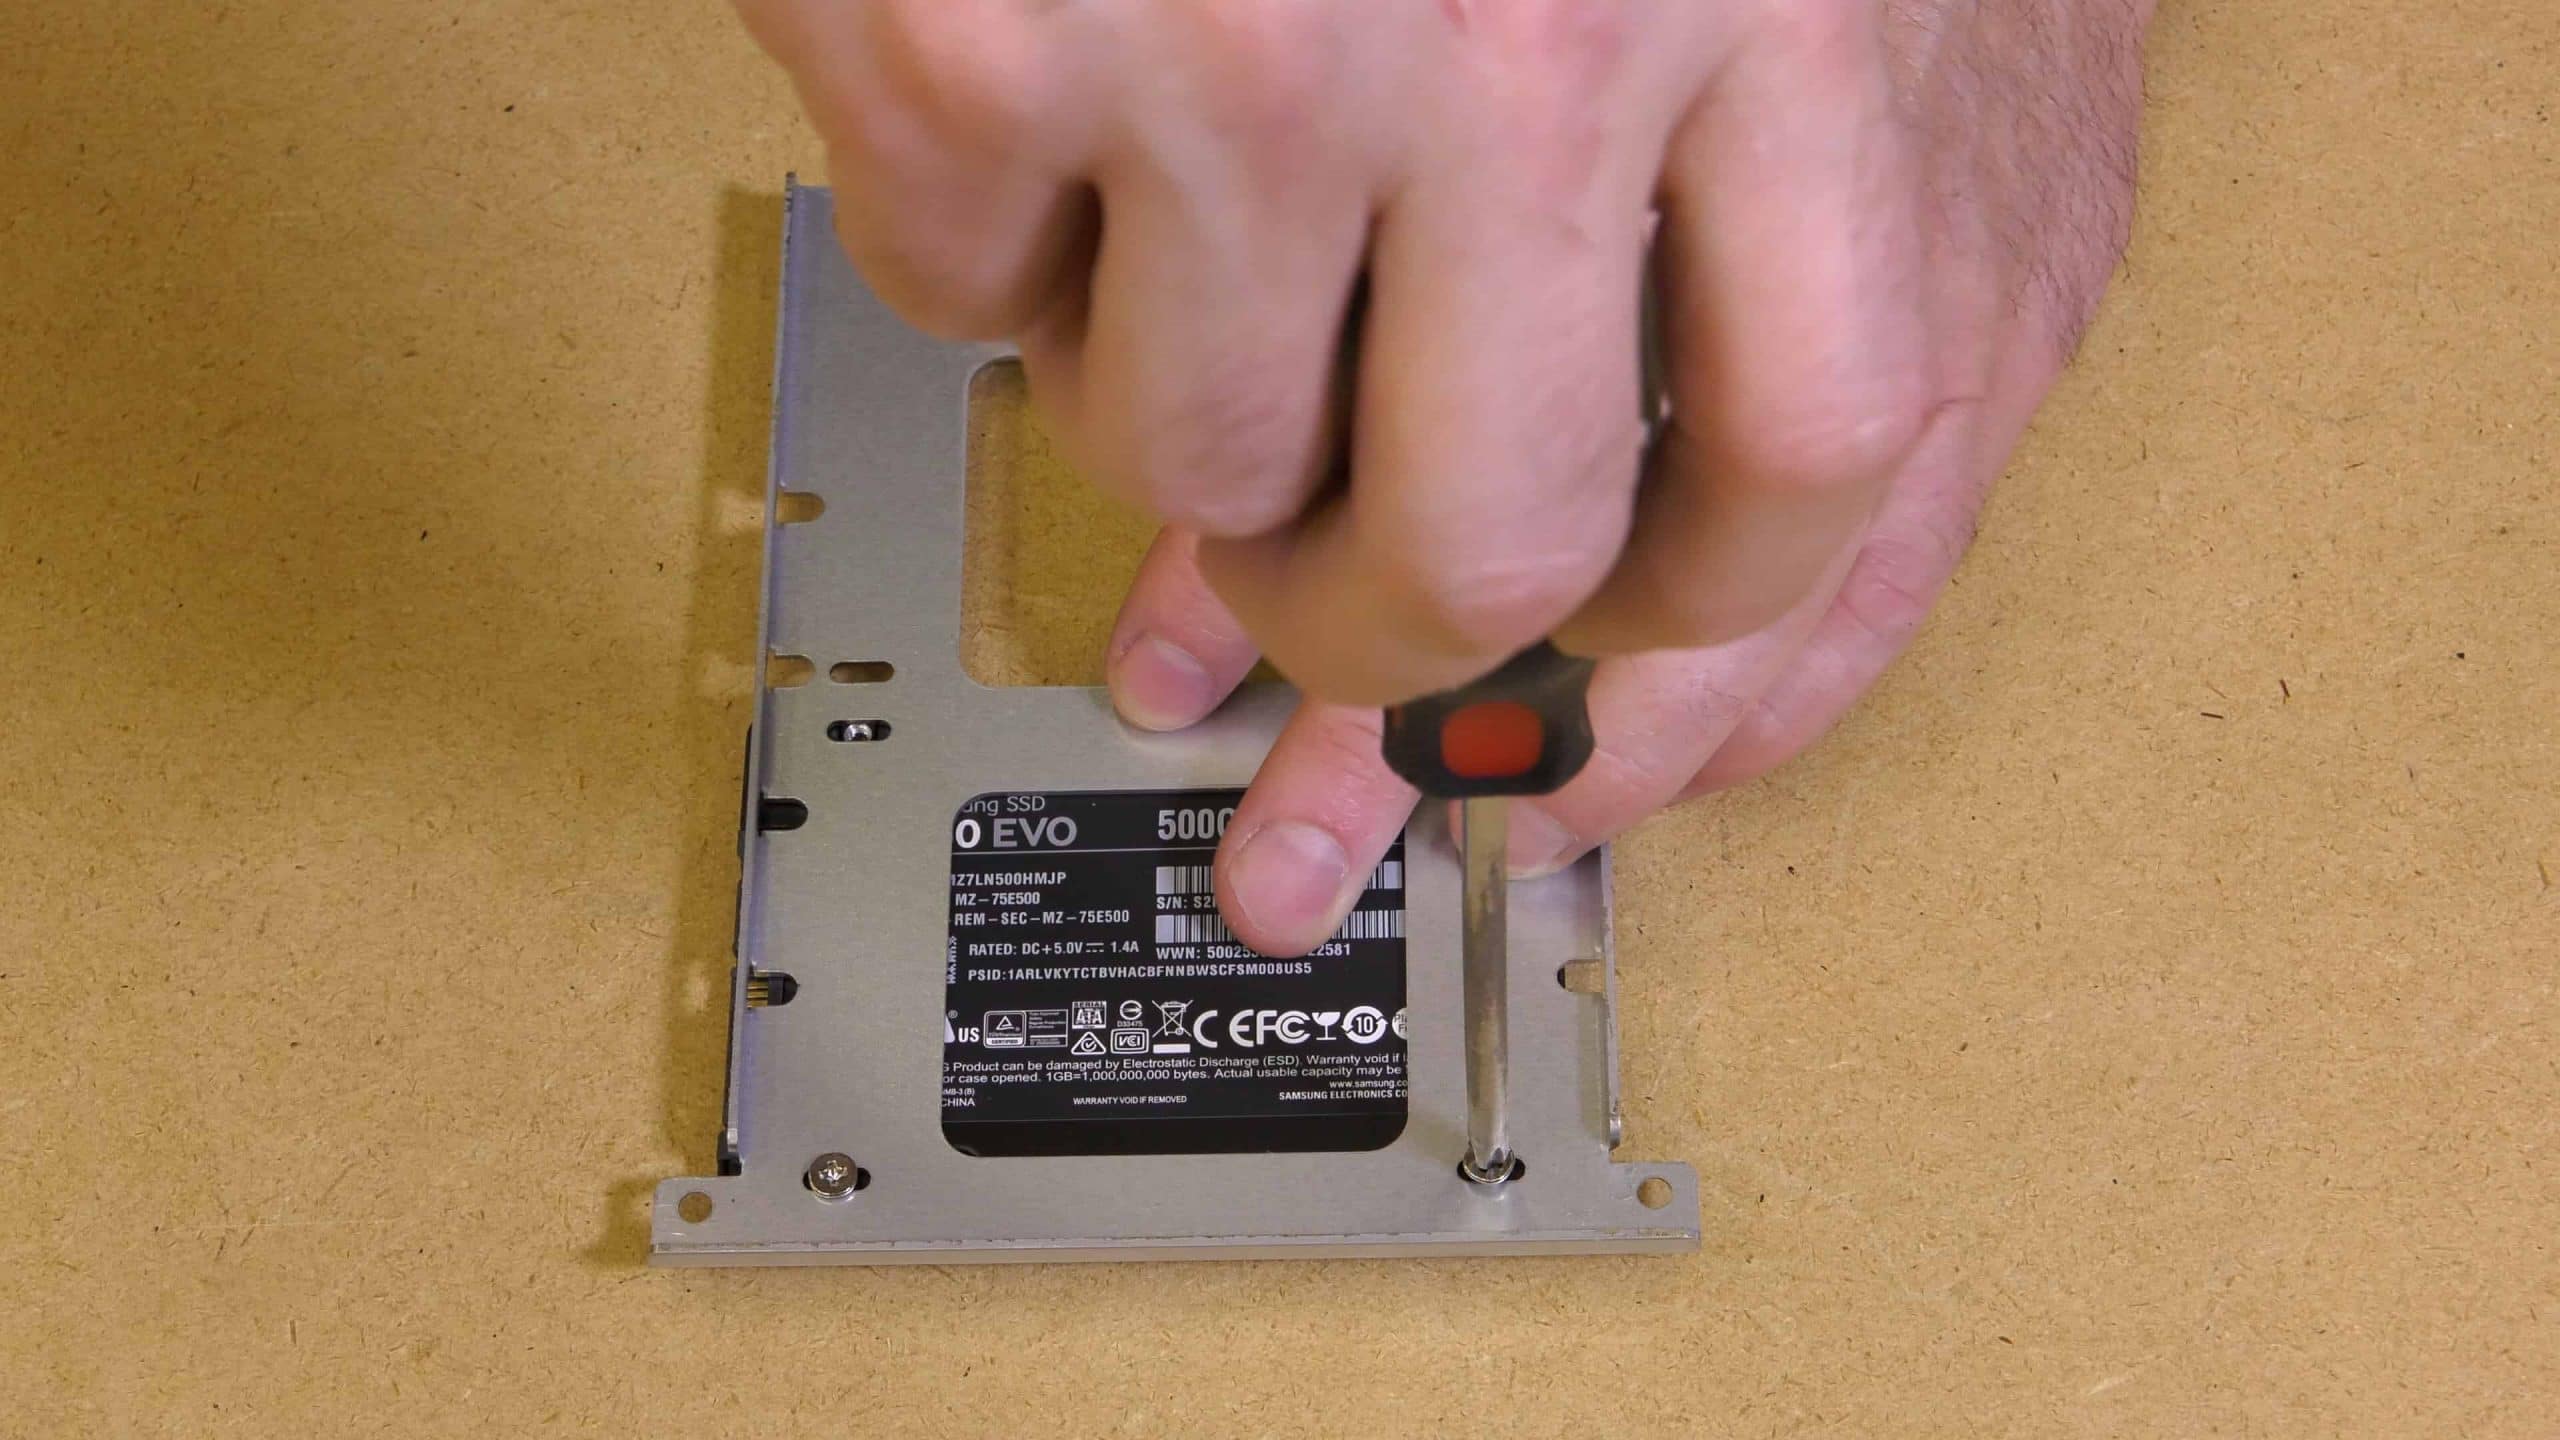
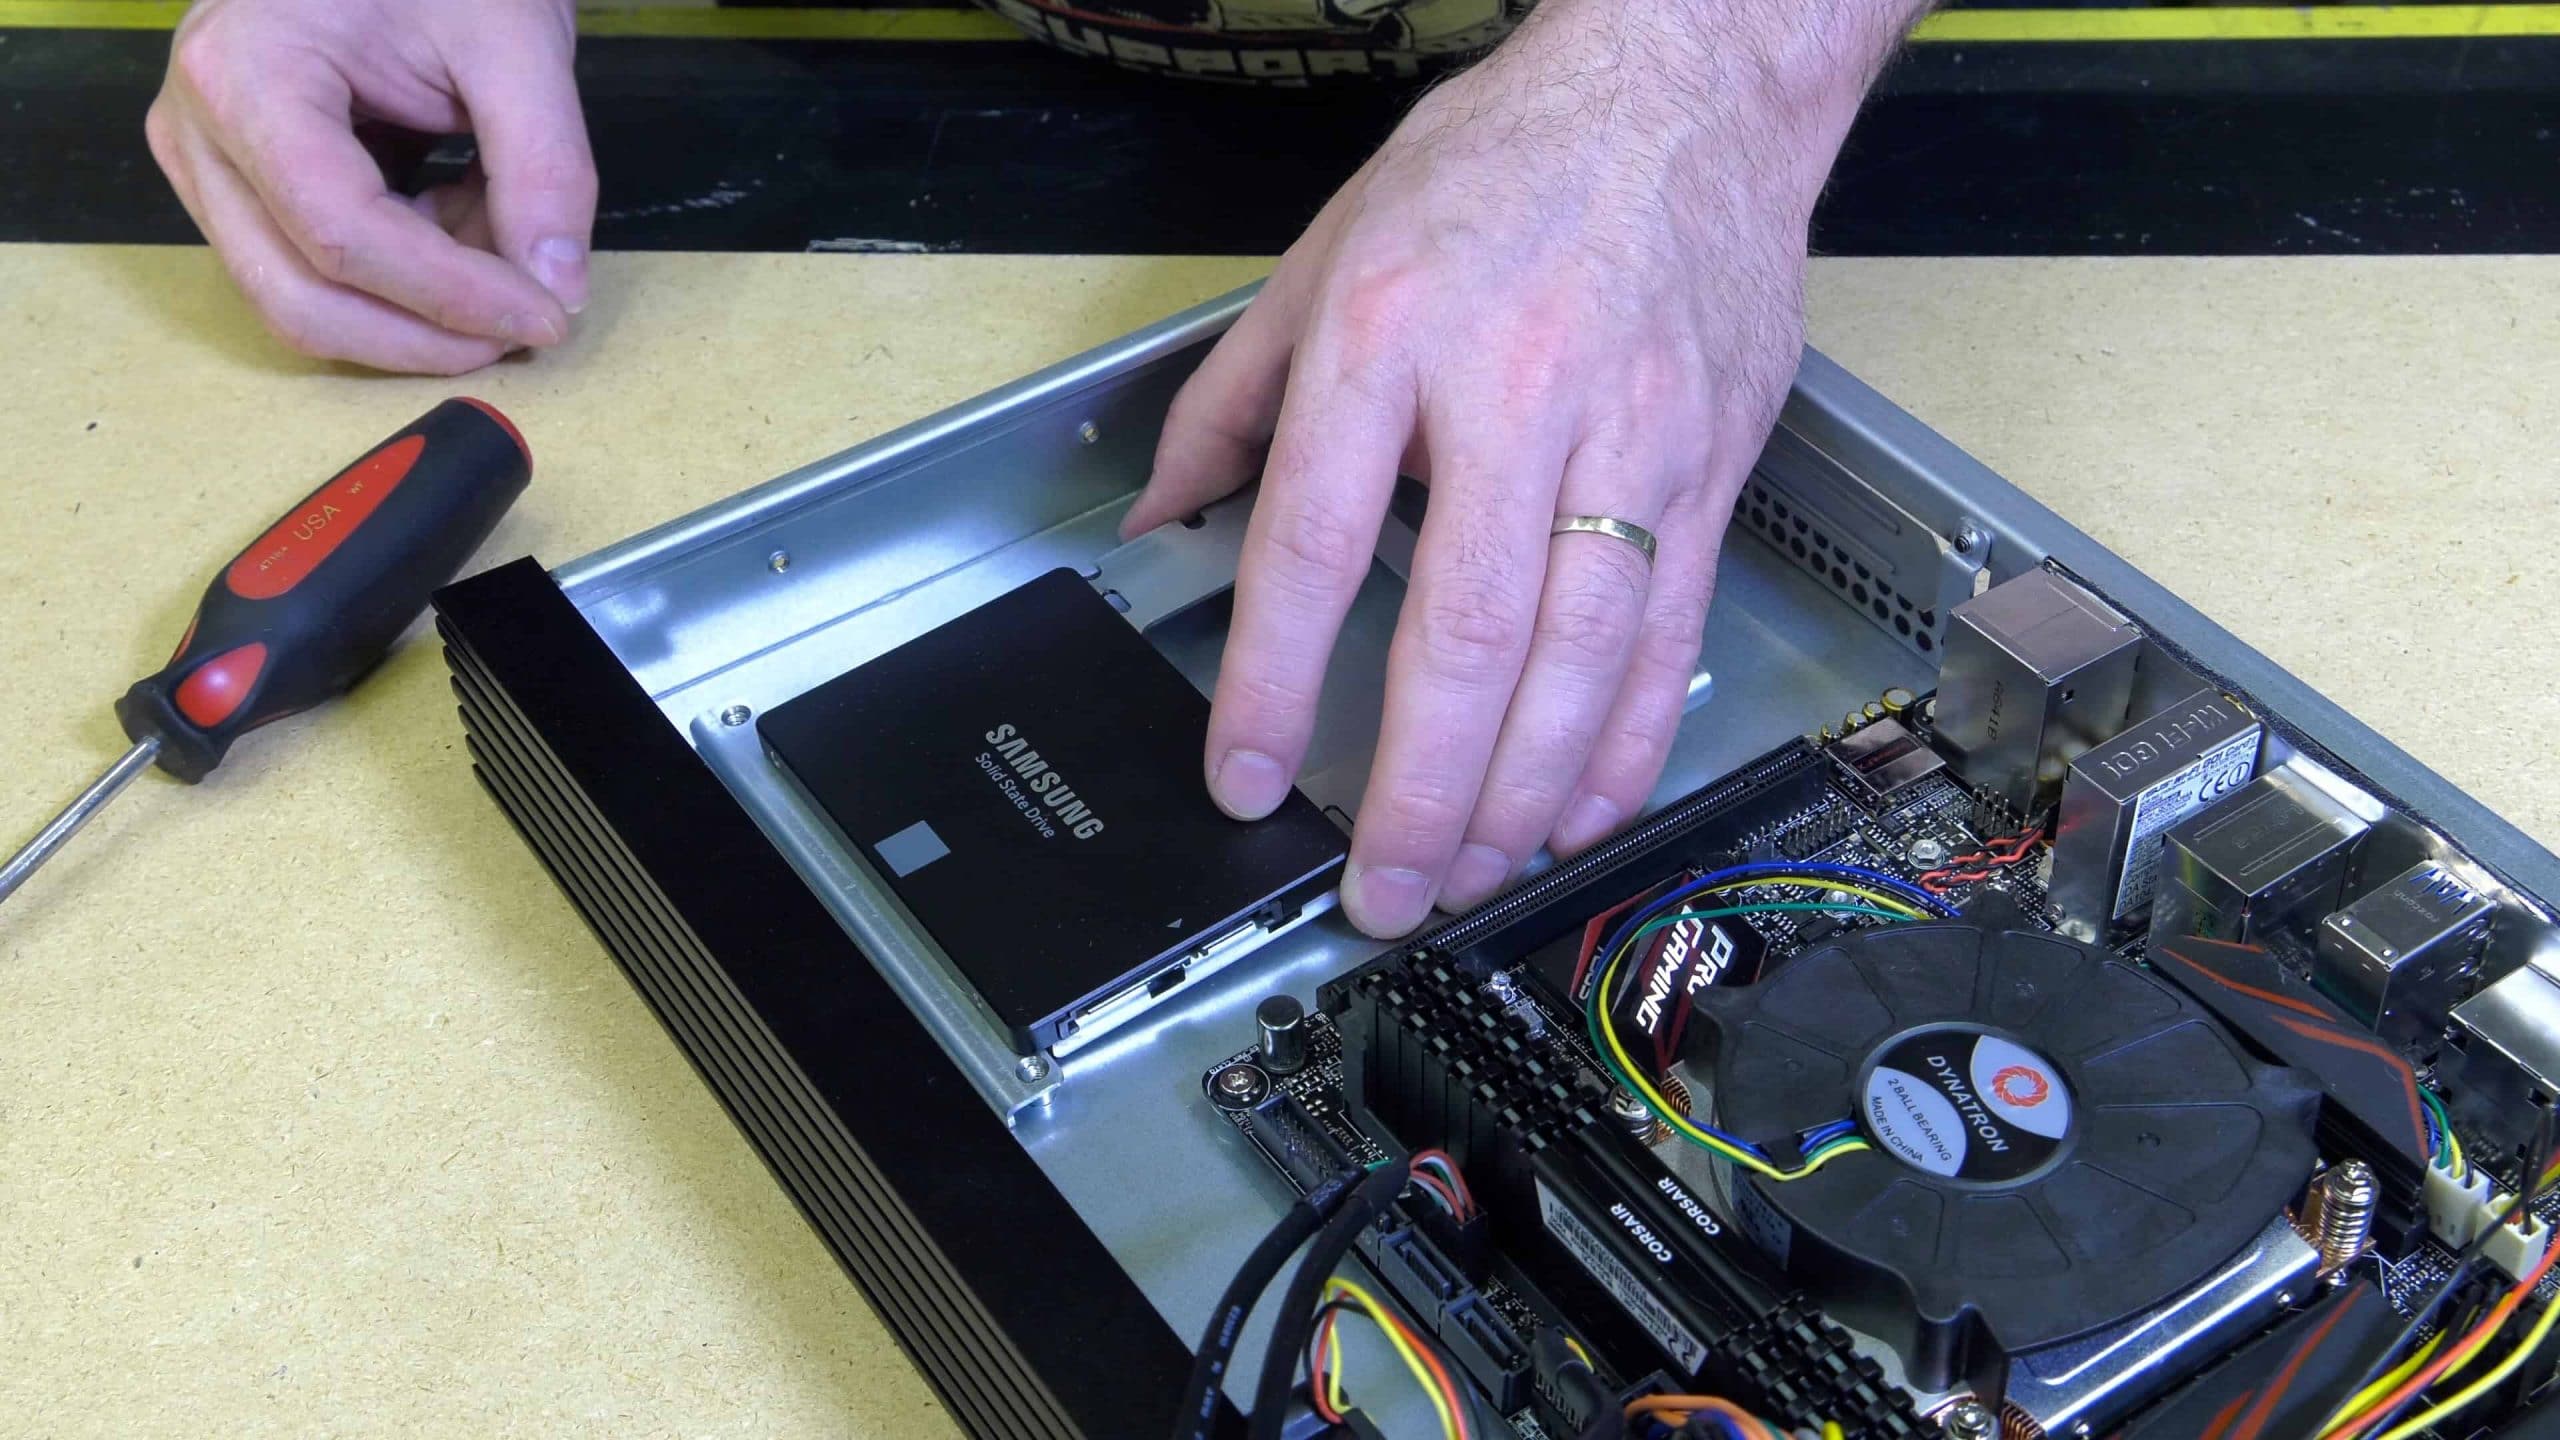
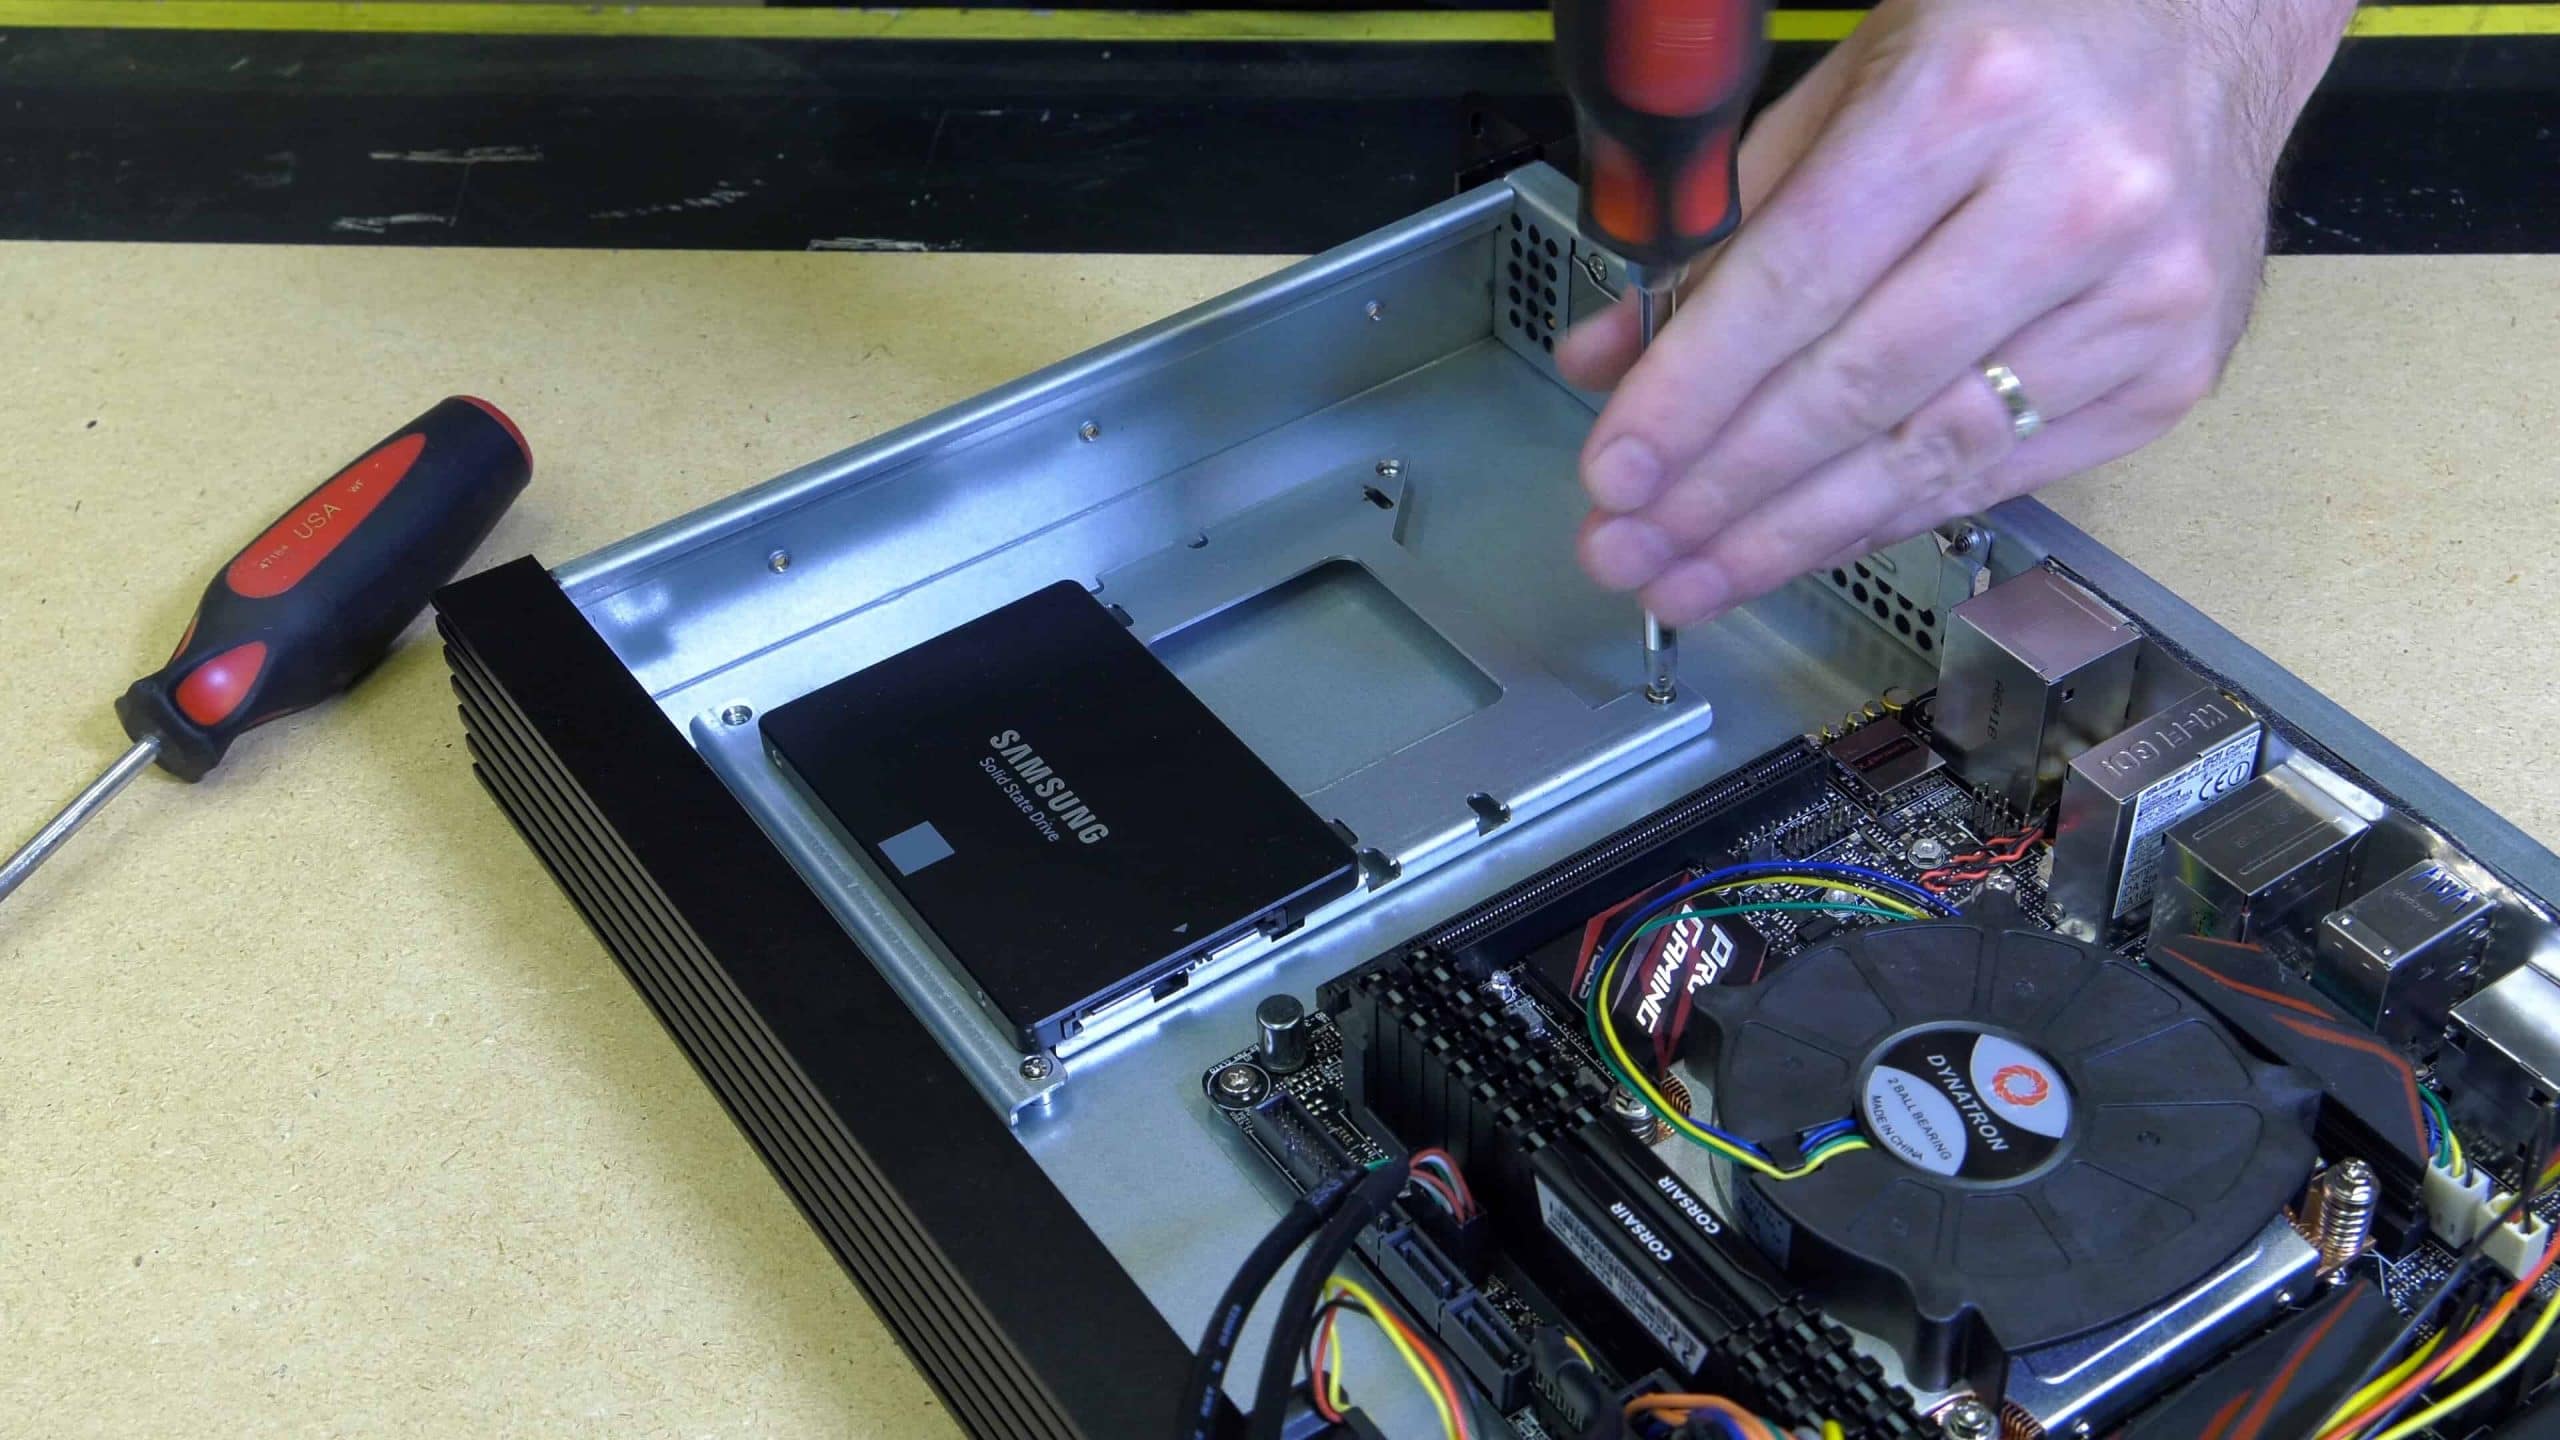
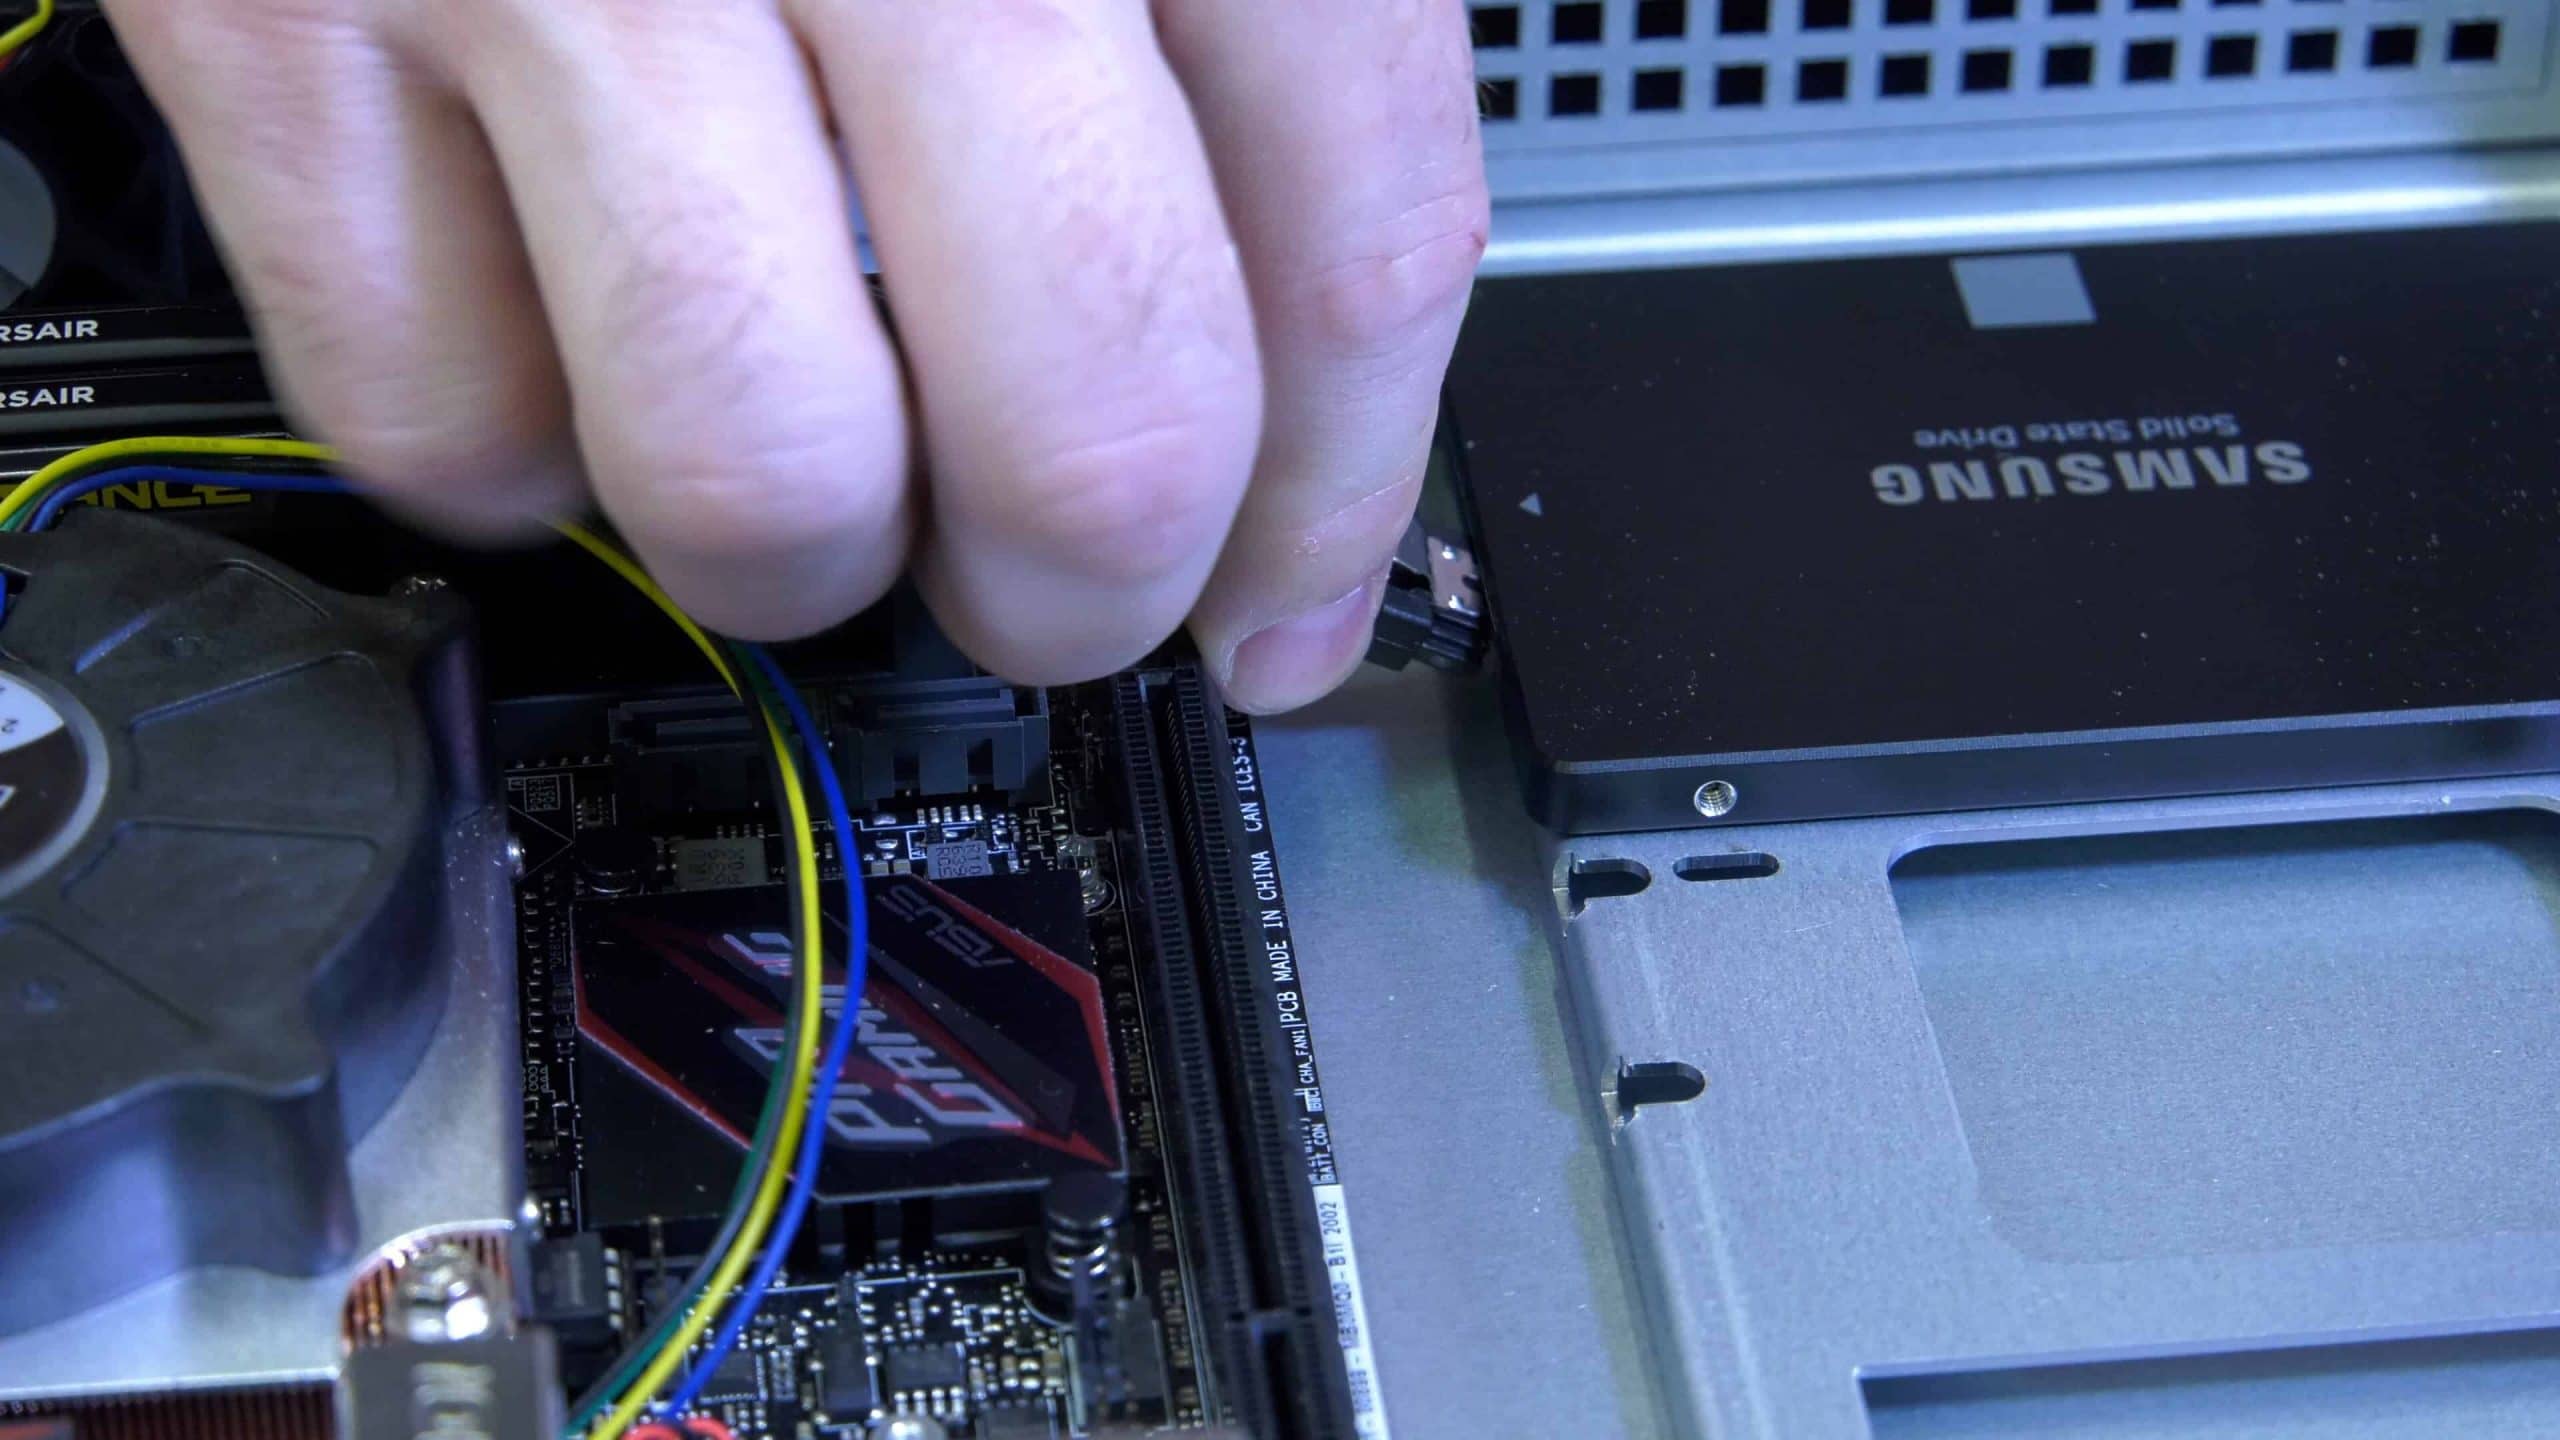
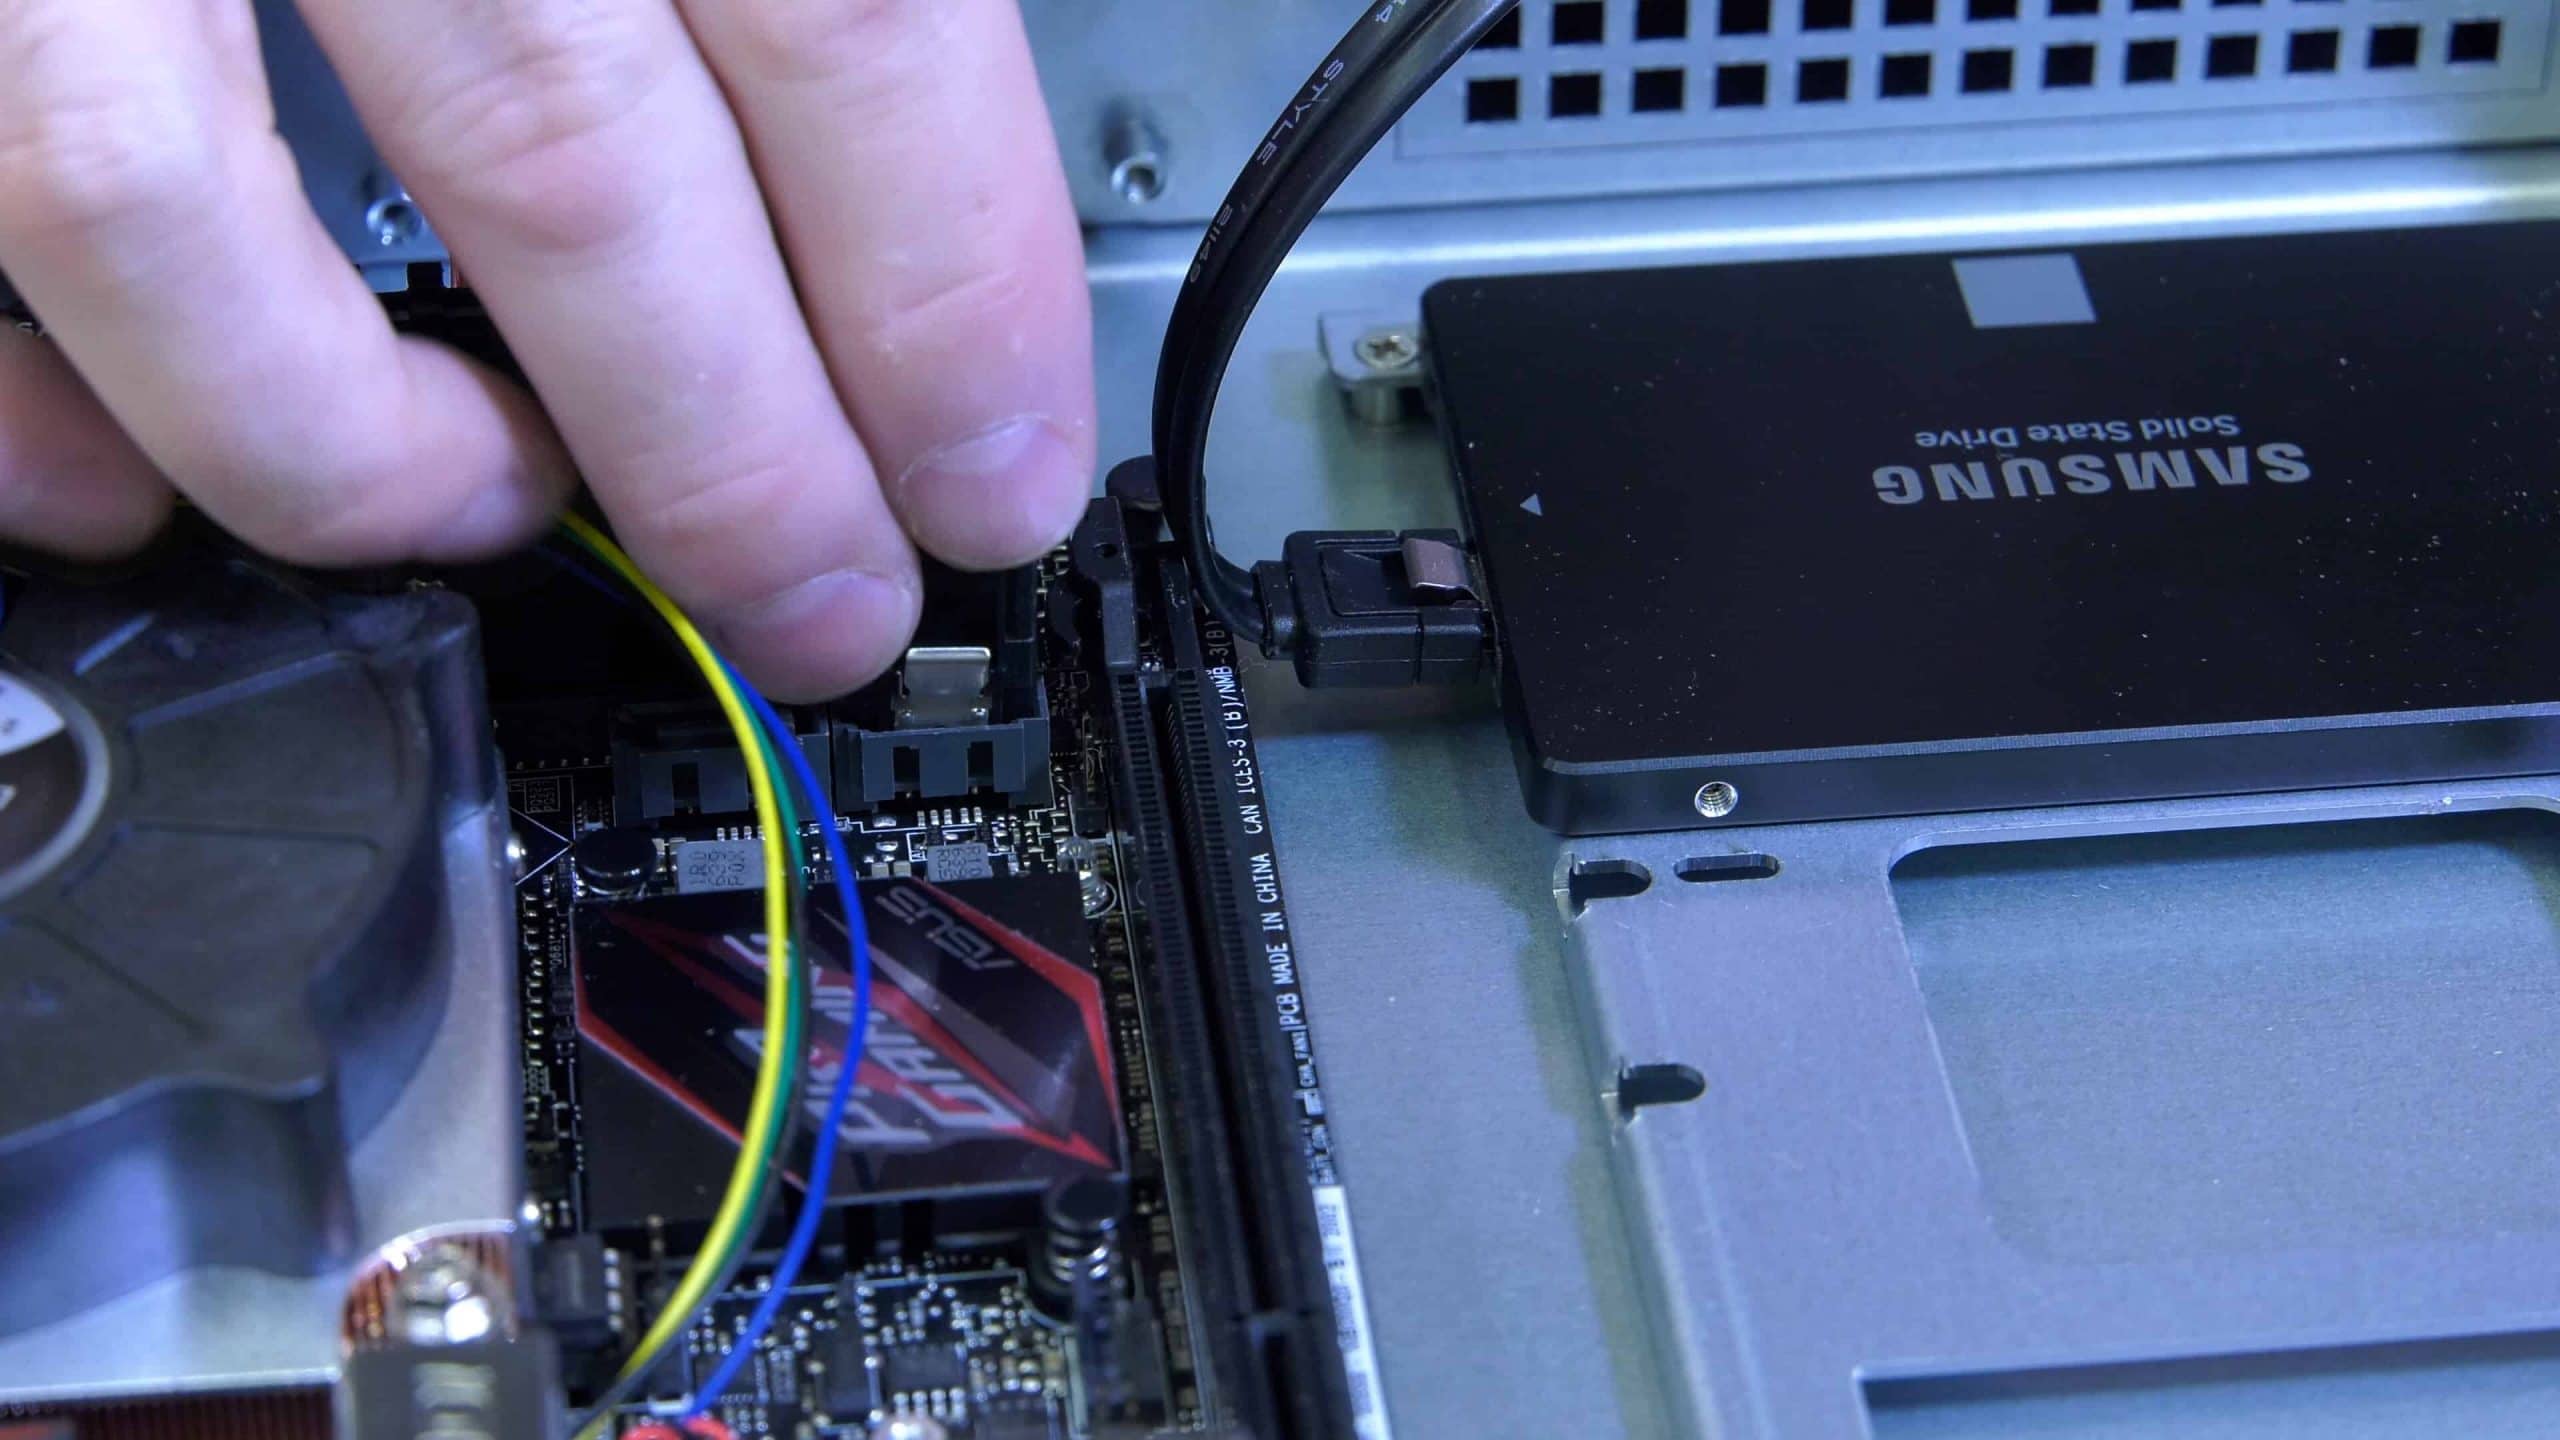
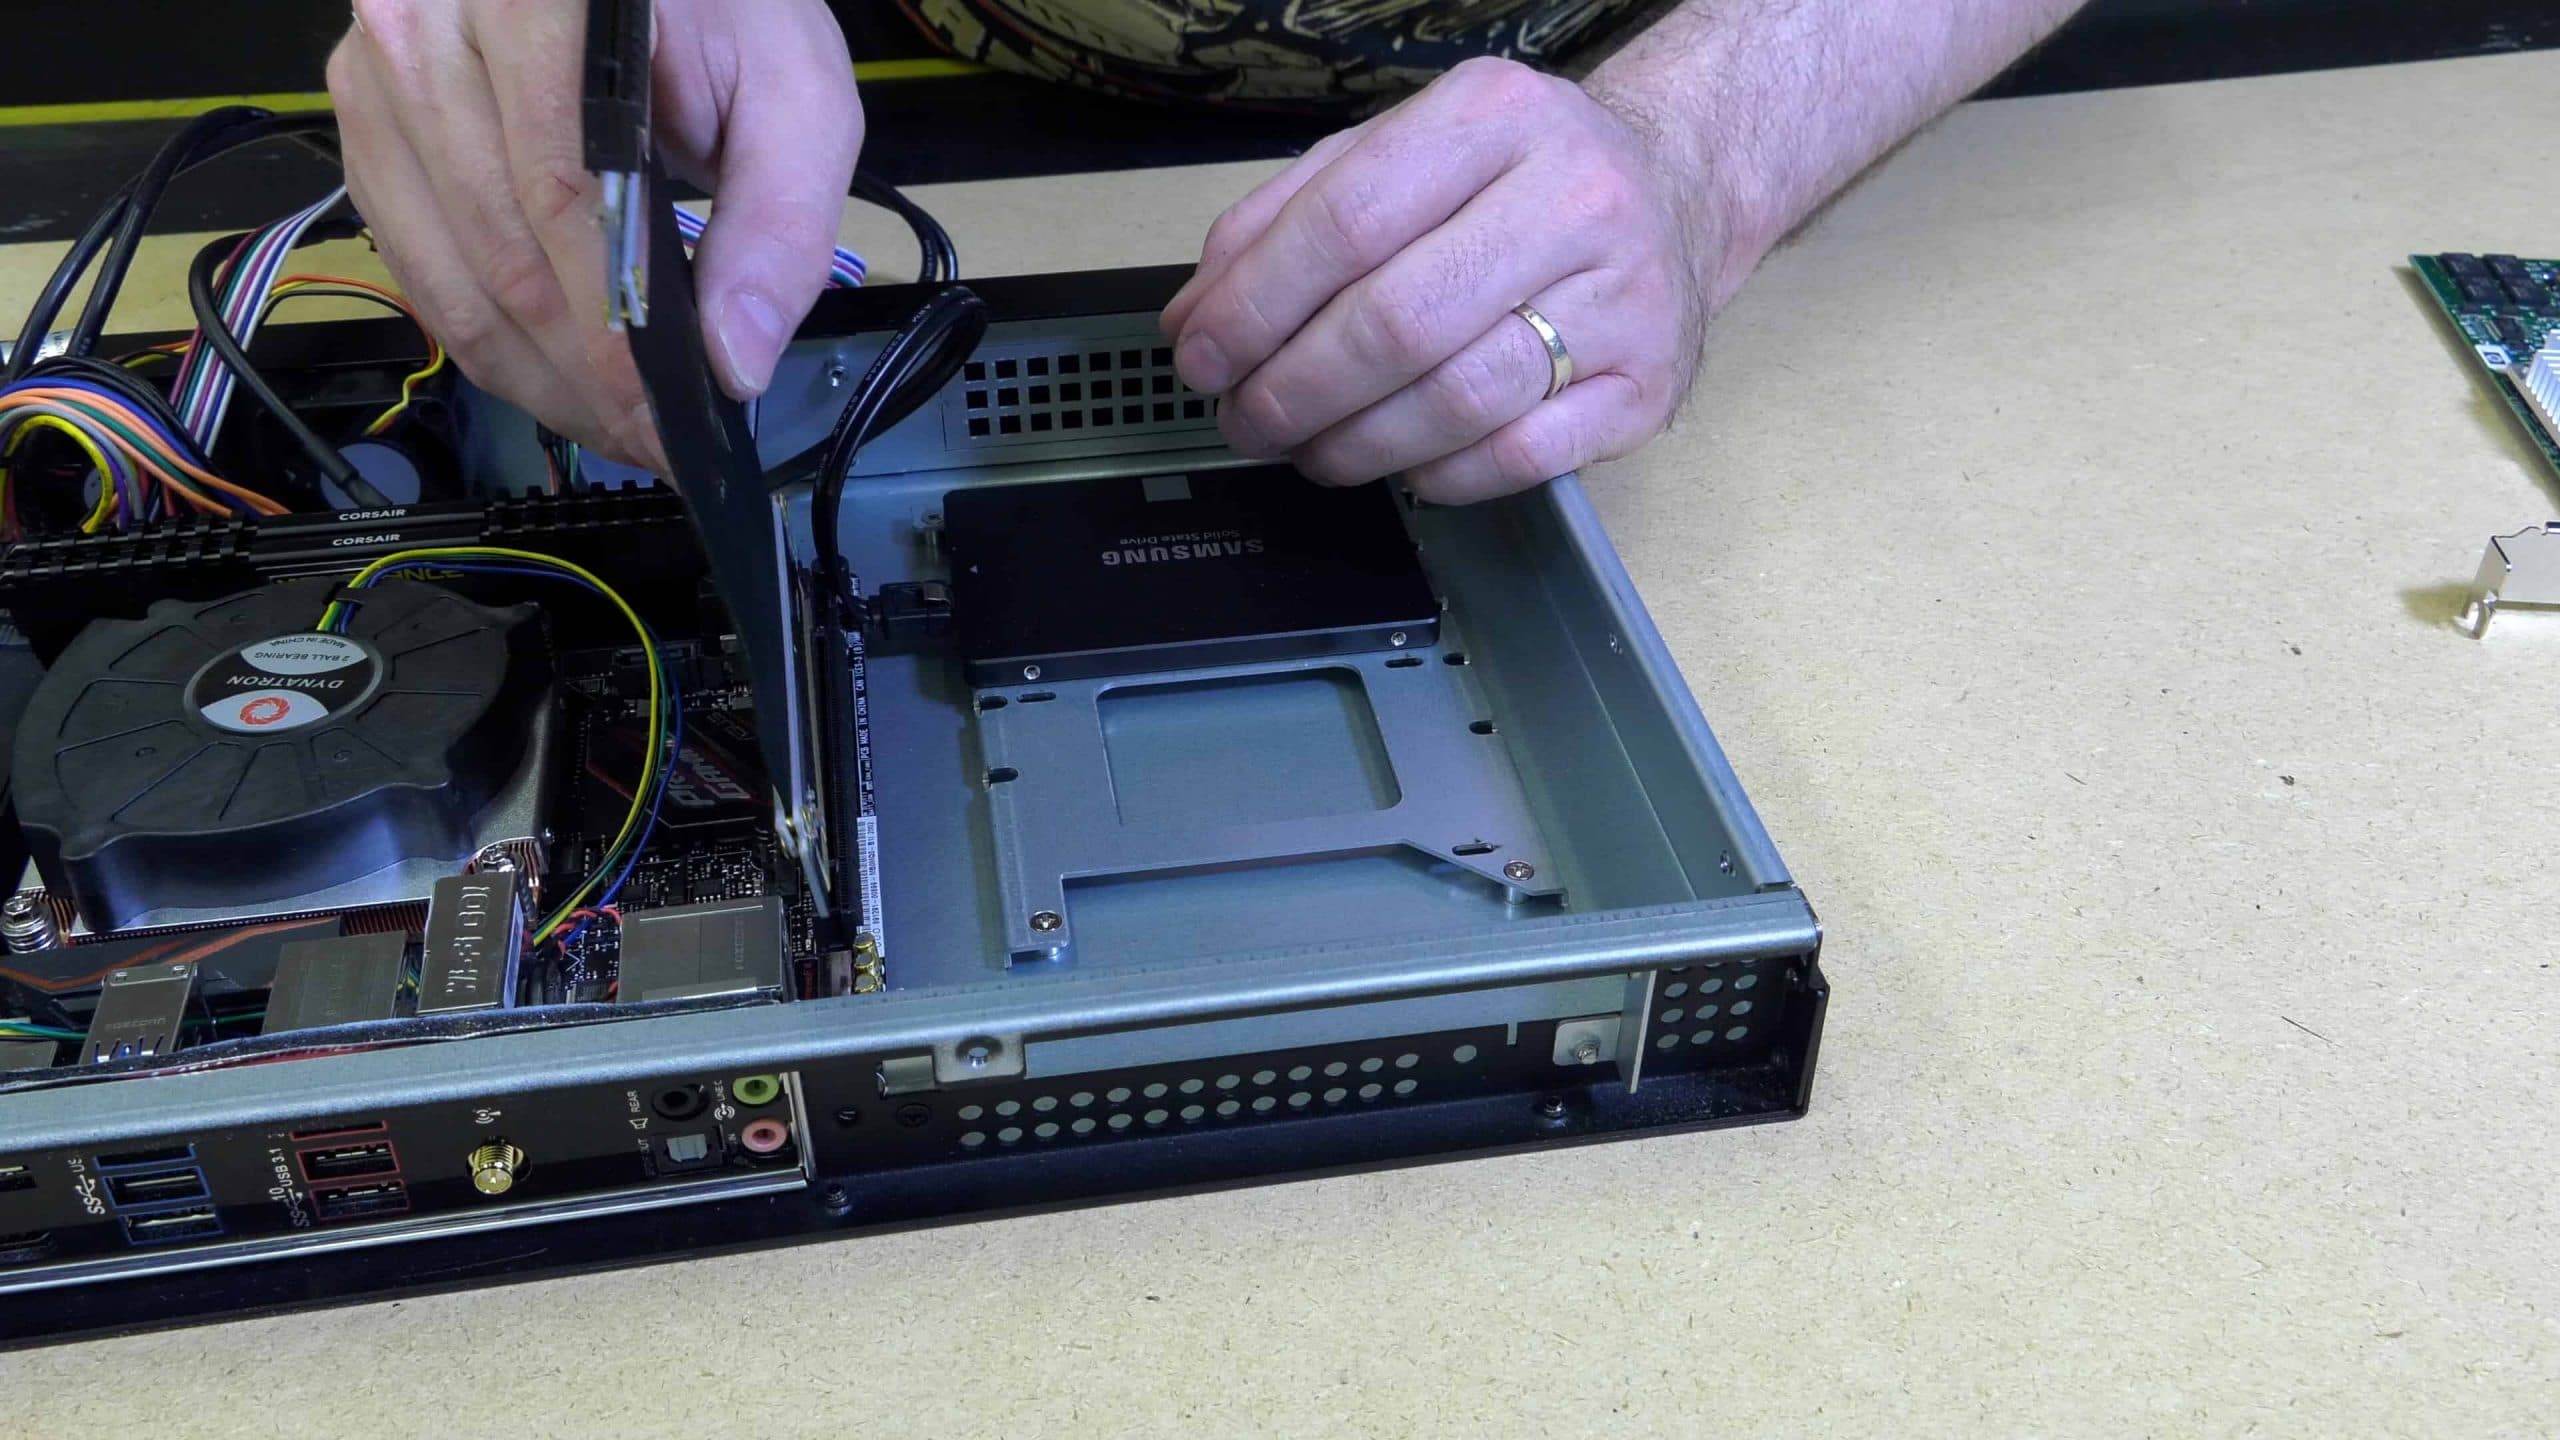
Installing the Samsung EVO 850 SSD
To install the drive, simply screw it to the backer plate with the four provided 2.5” drive mounting screws, and then attach the backer plate to the bottom of the case. Attached the SATA power connector from the power supply. Attach the SATA connector to the hard drive and then to the SATA 1 port on the motherboard.


1U Server Build: The Network Card Selection
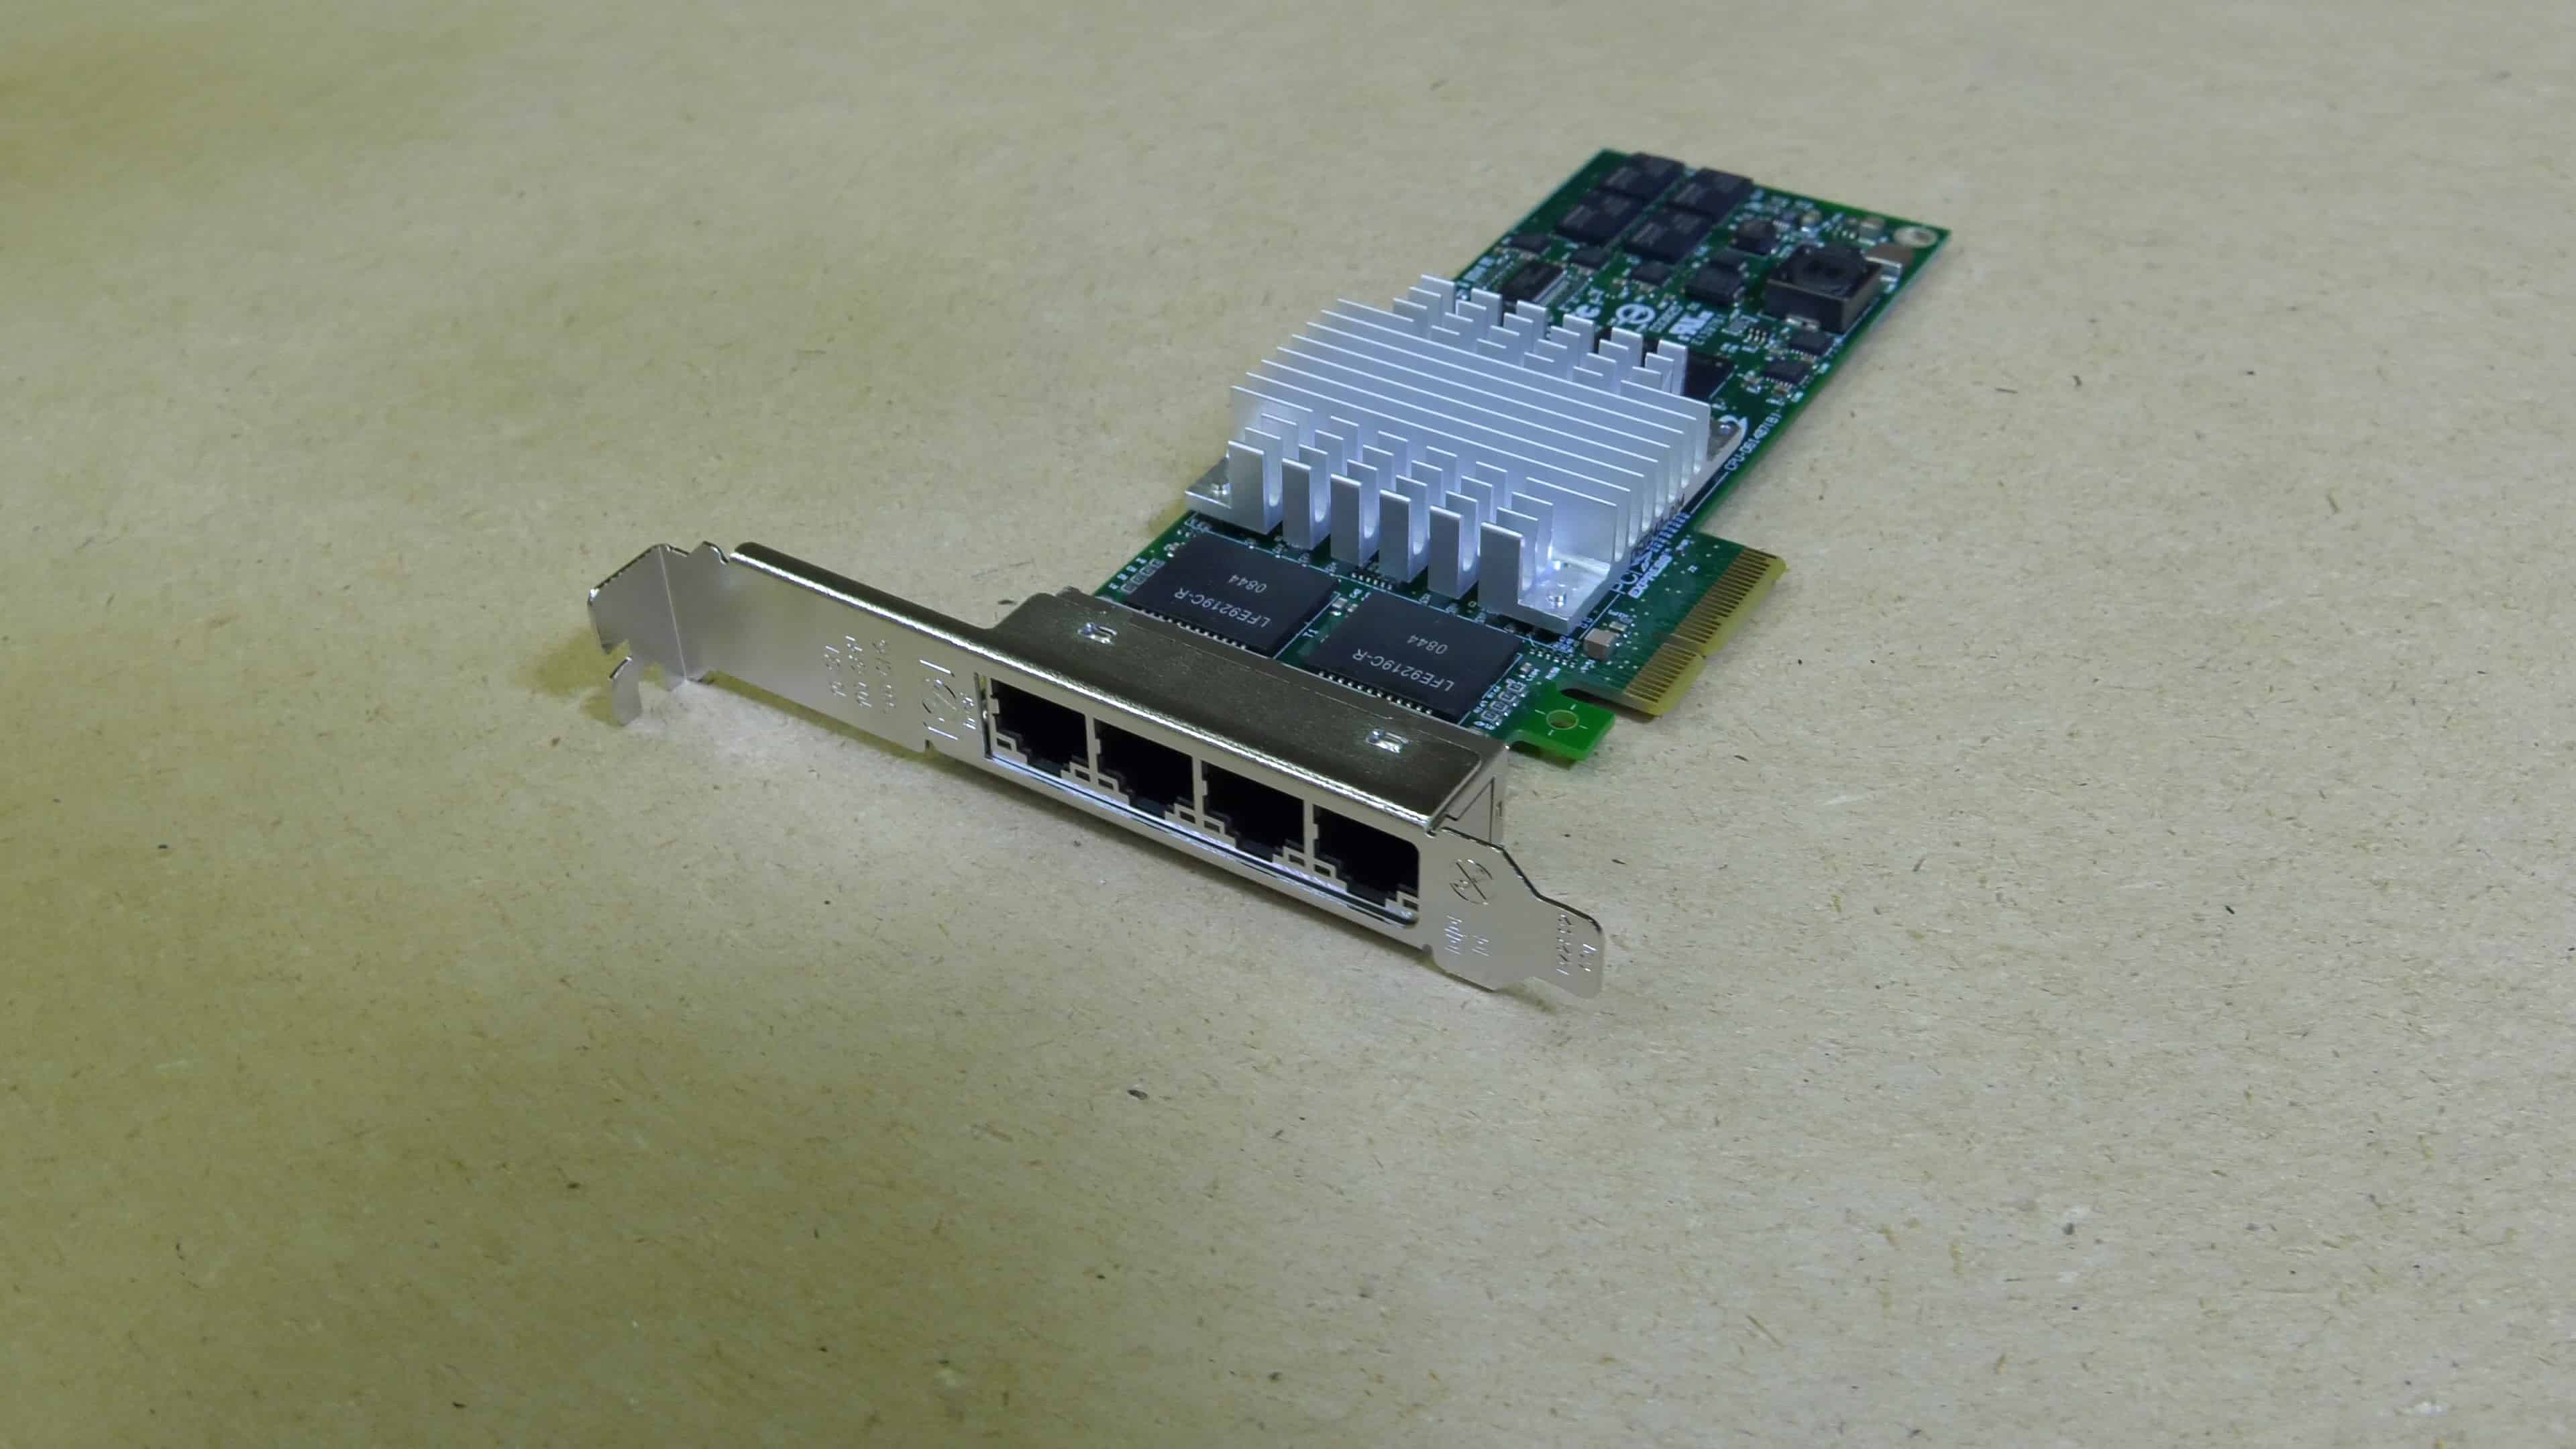 Since this server is going to not only get its storage from iSCSI, but also be responsible for streaming movies and media throughout the house, robust network connectivity on this box is of vital importance. For that reason I selected an Intel Pro 1000 VT Quad port card. This card is 100% compatible with VMWare ESX and performs exceptionally well for the price.
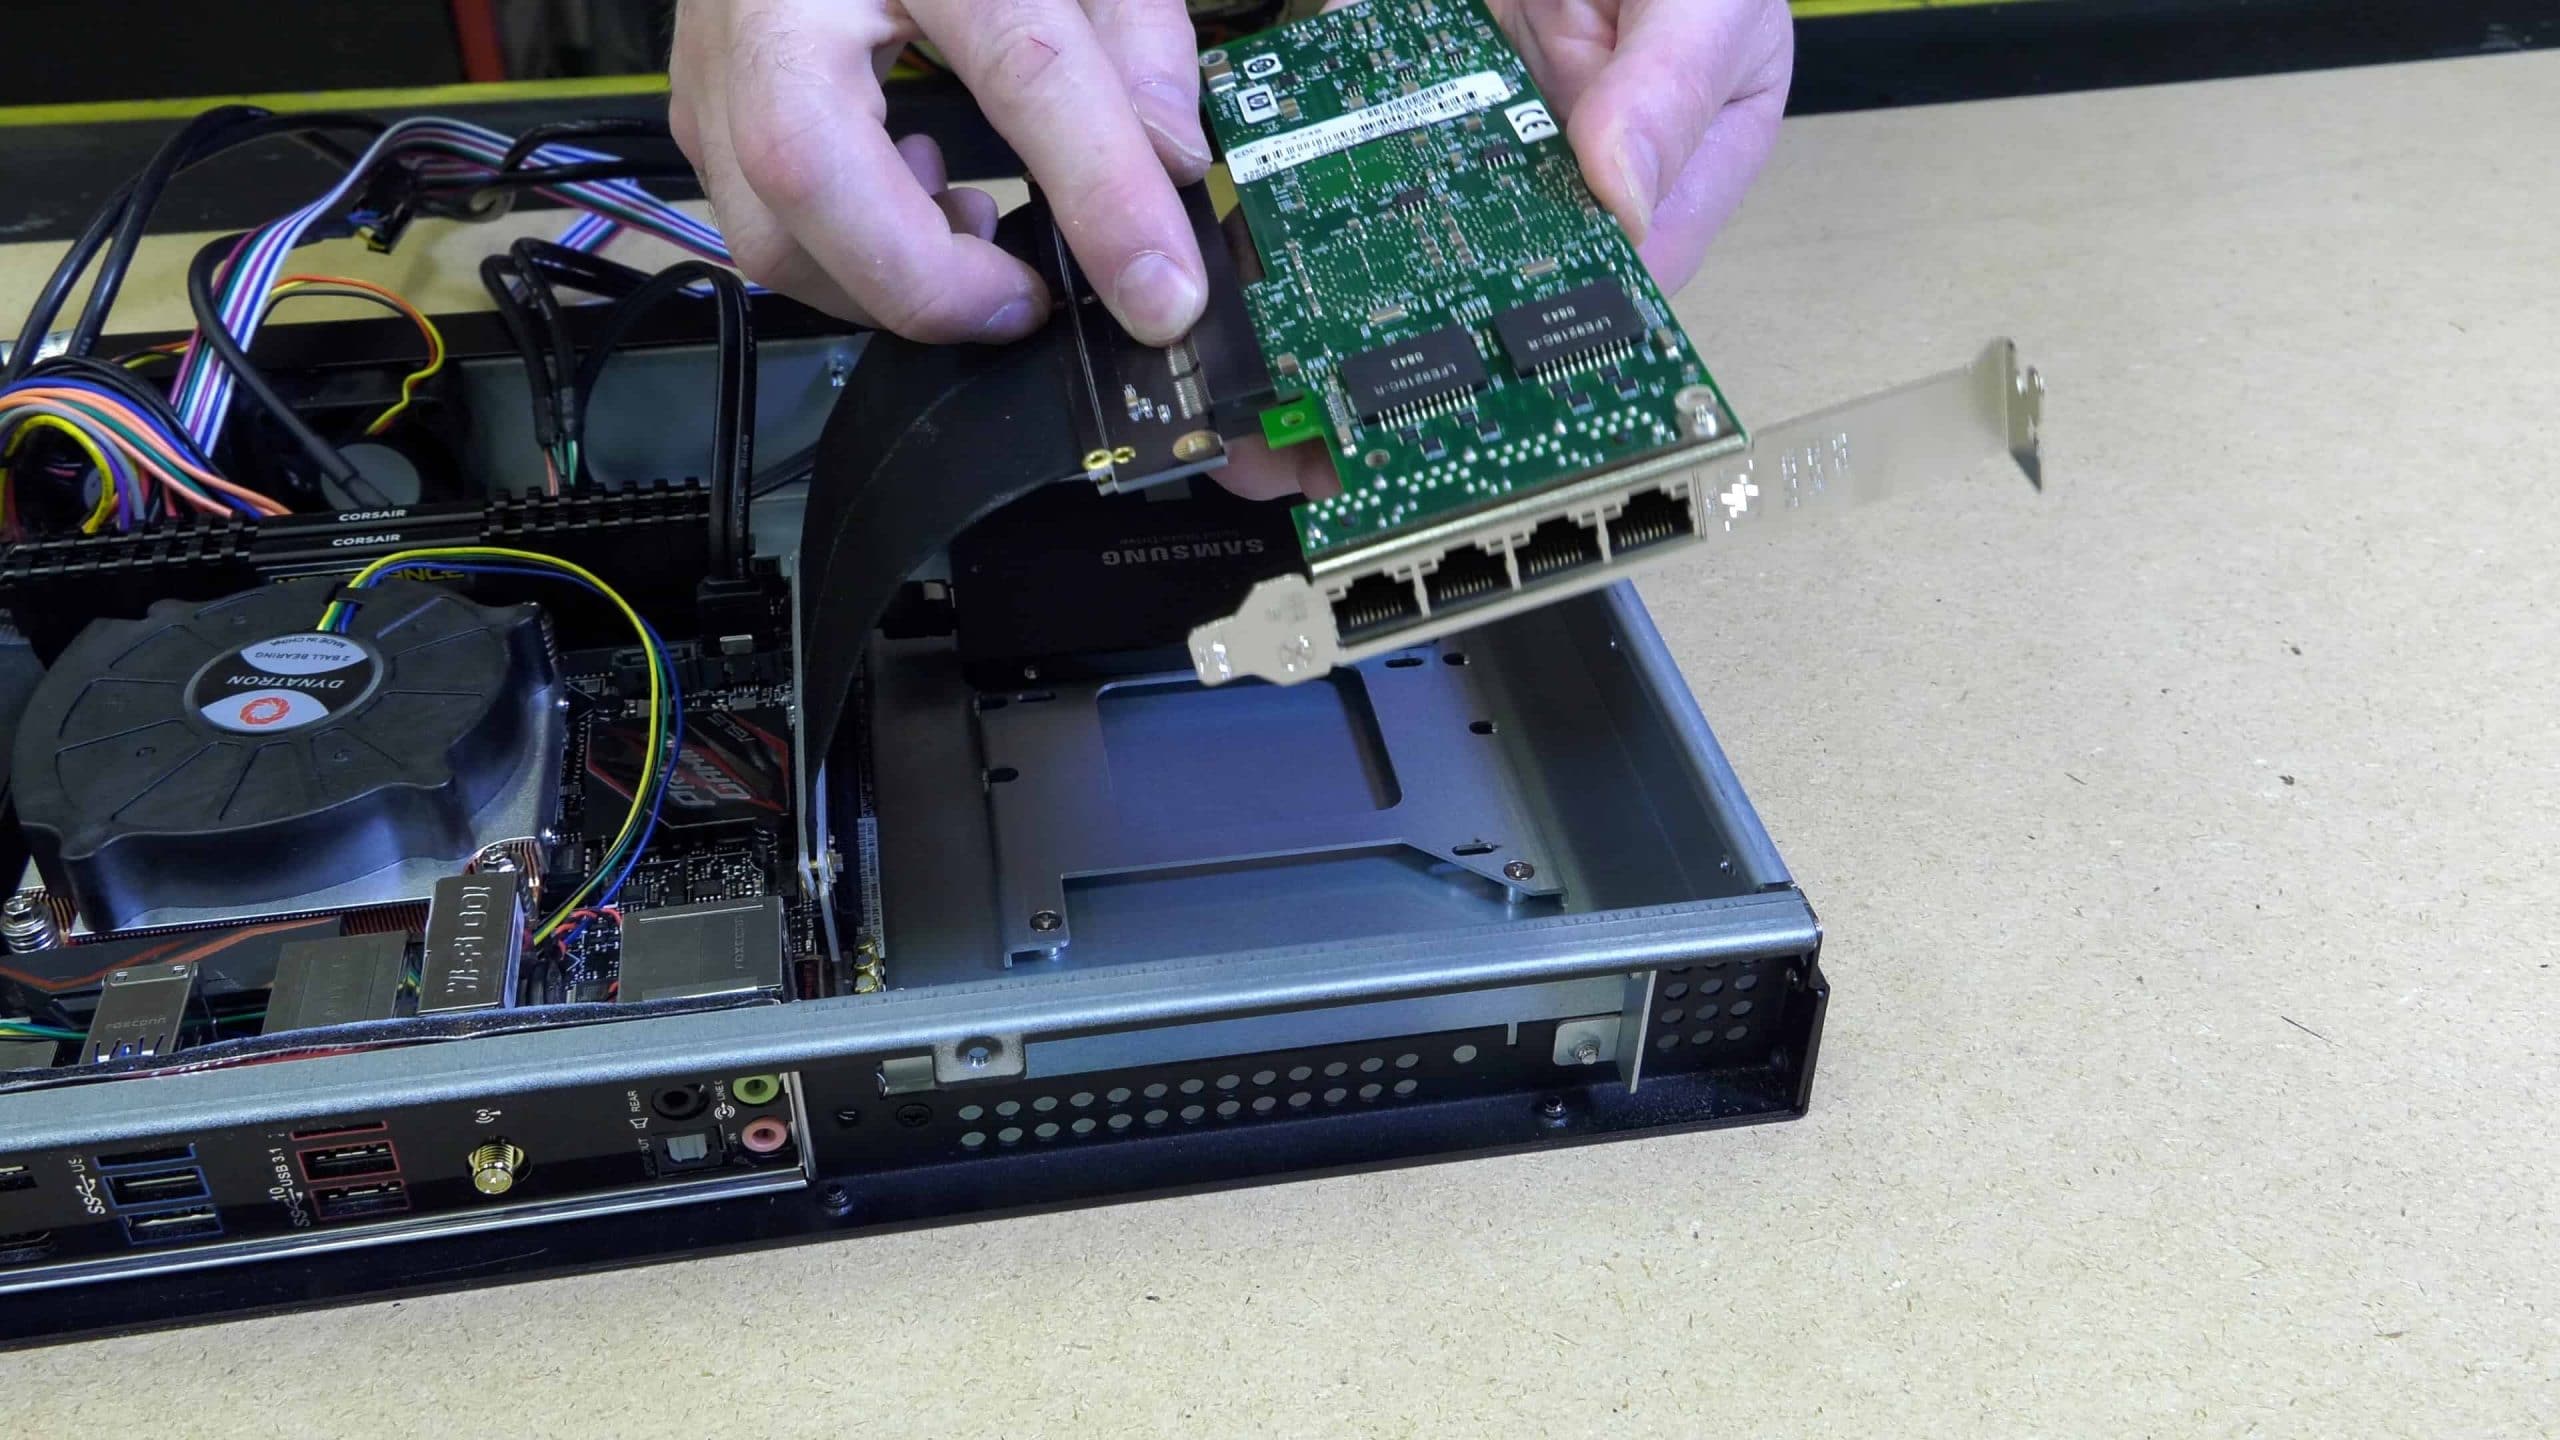
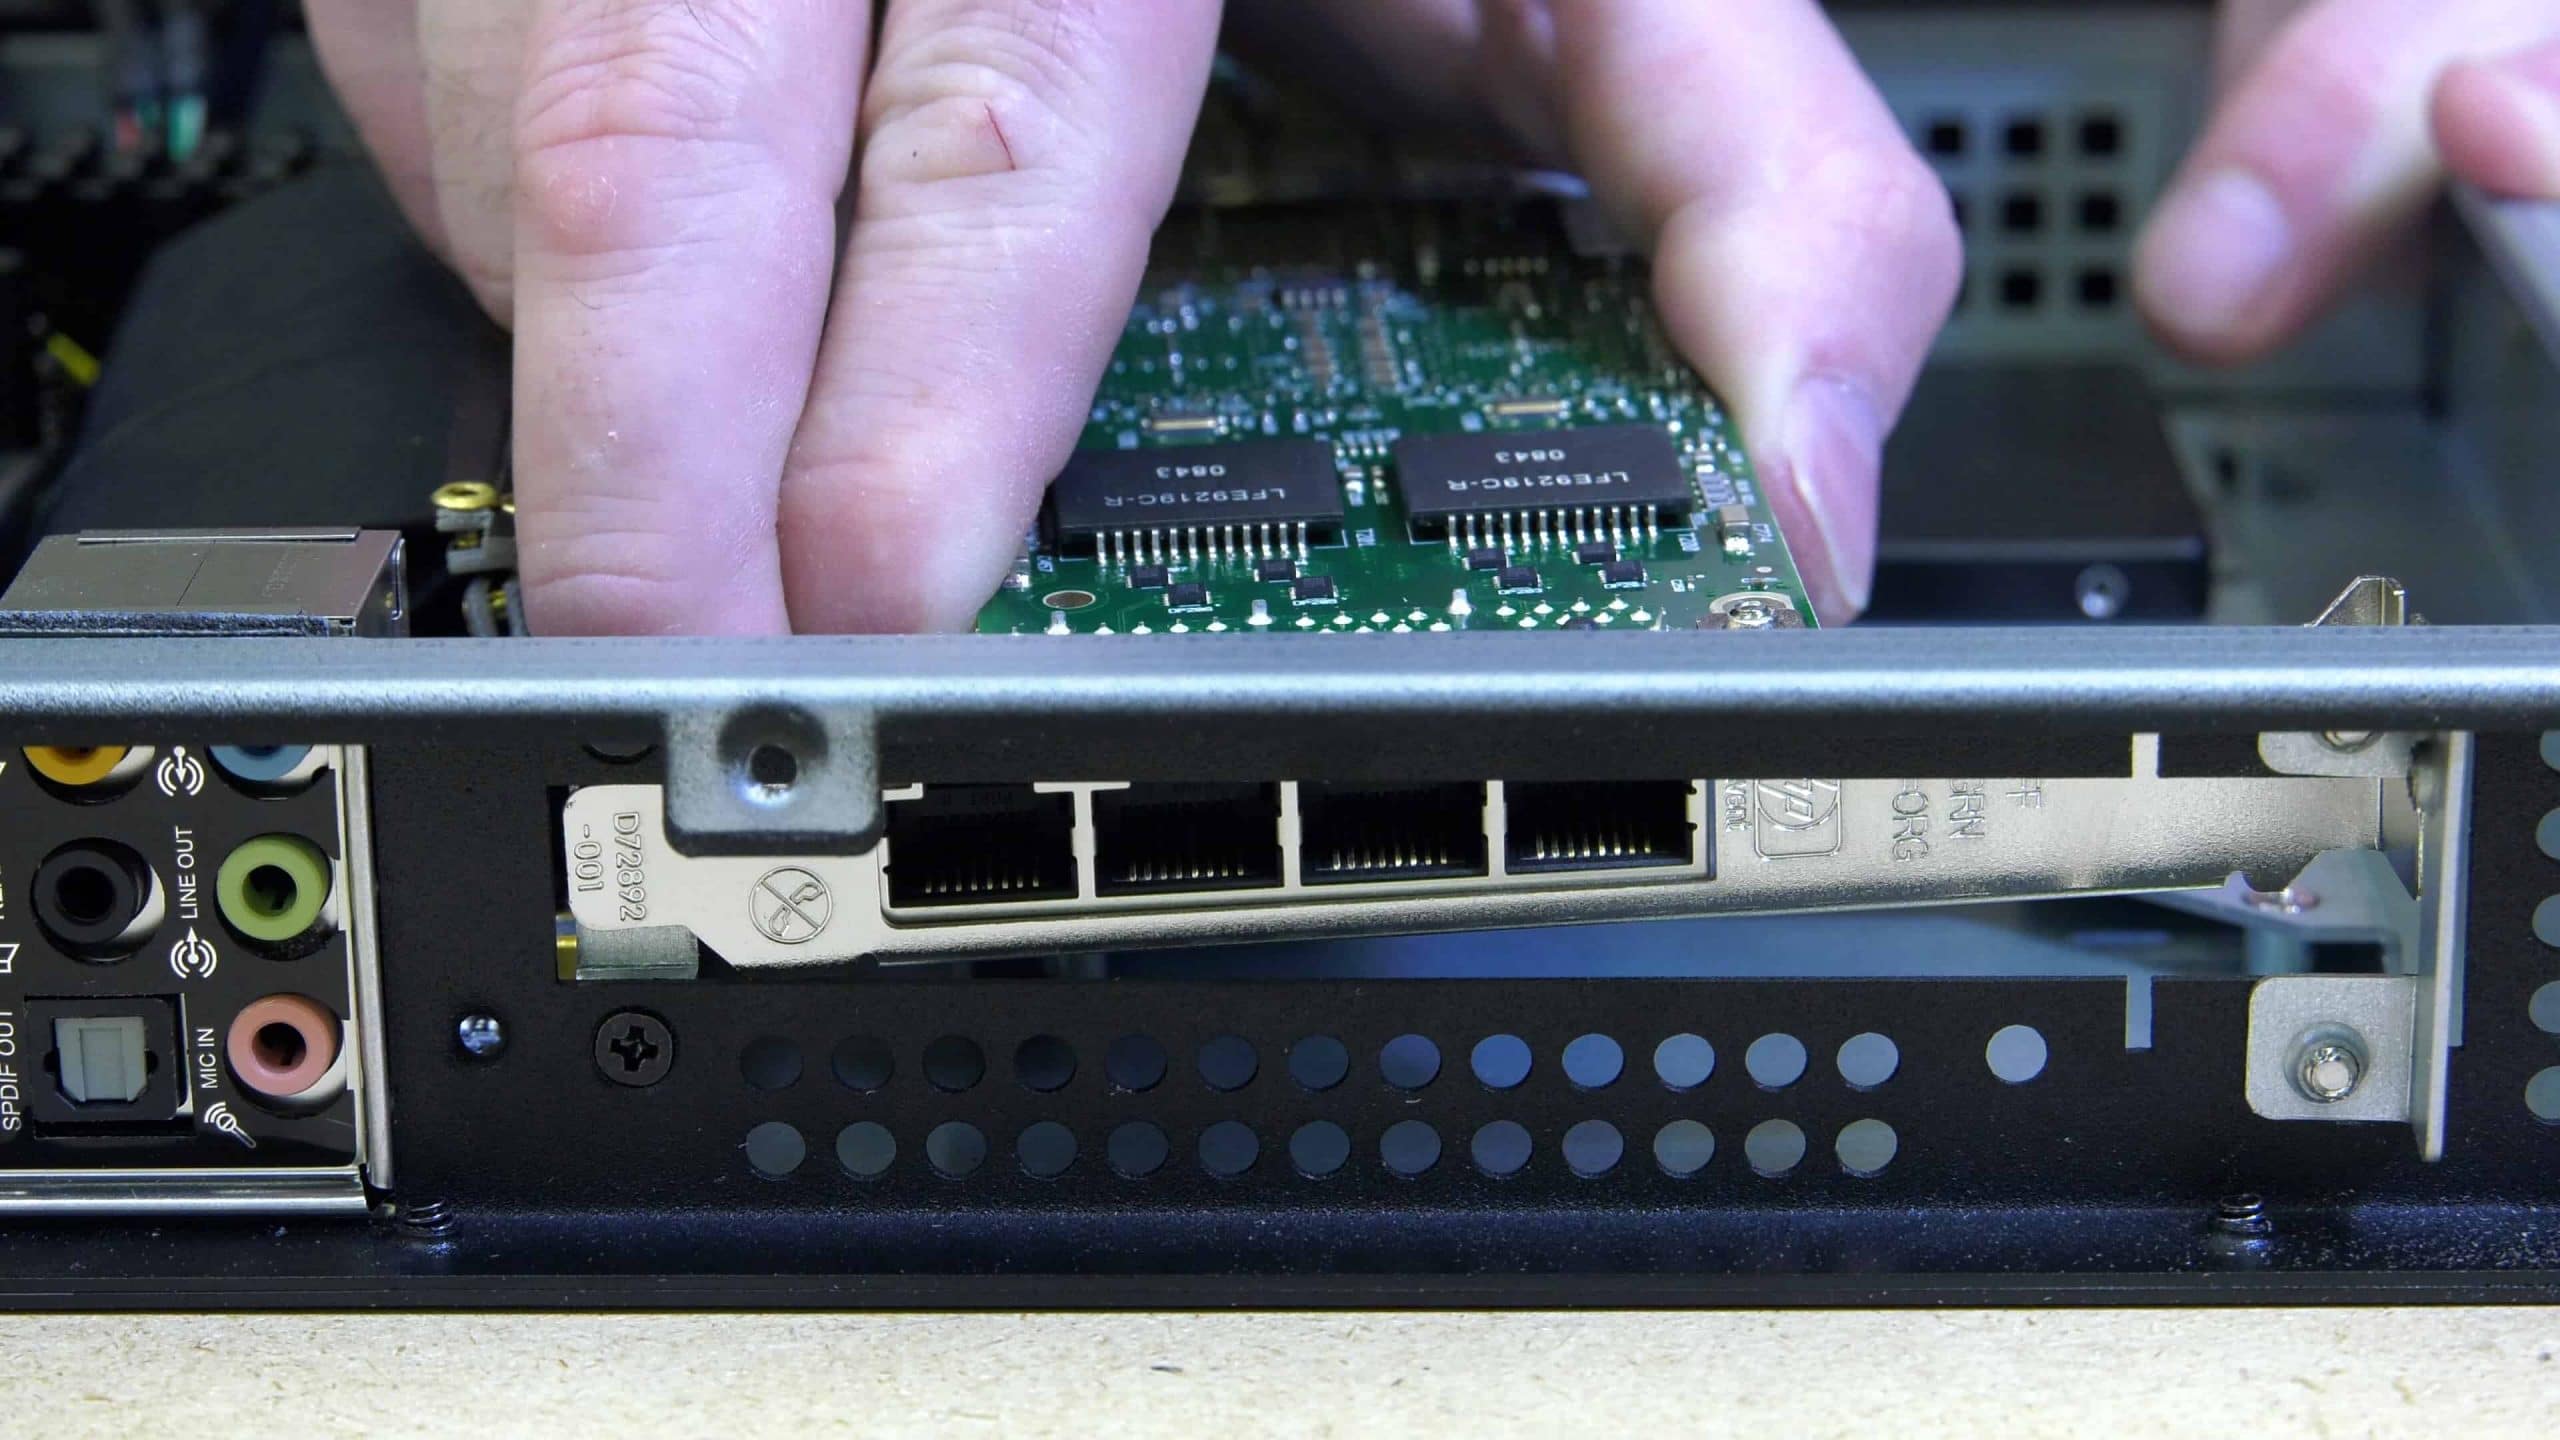
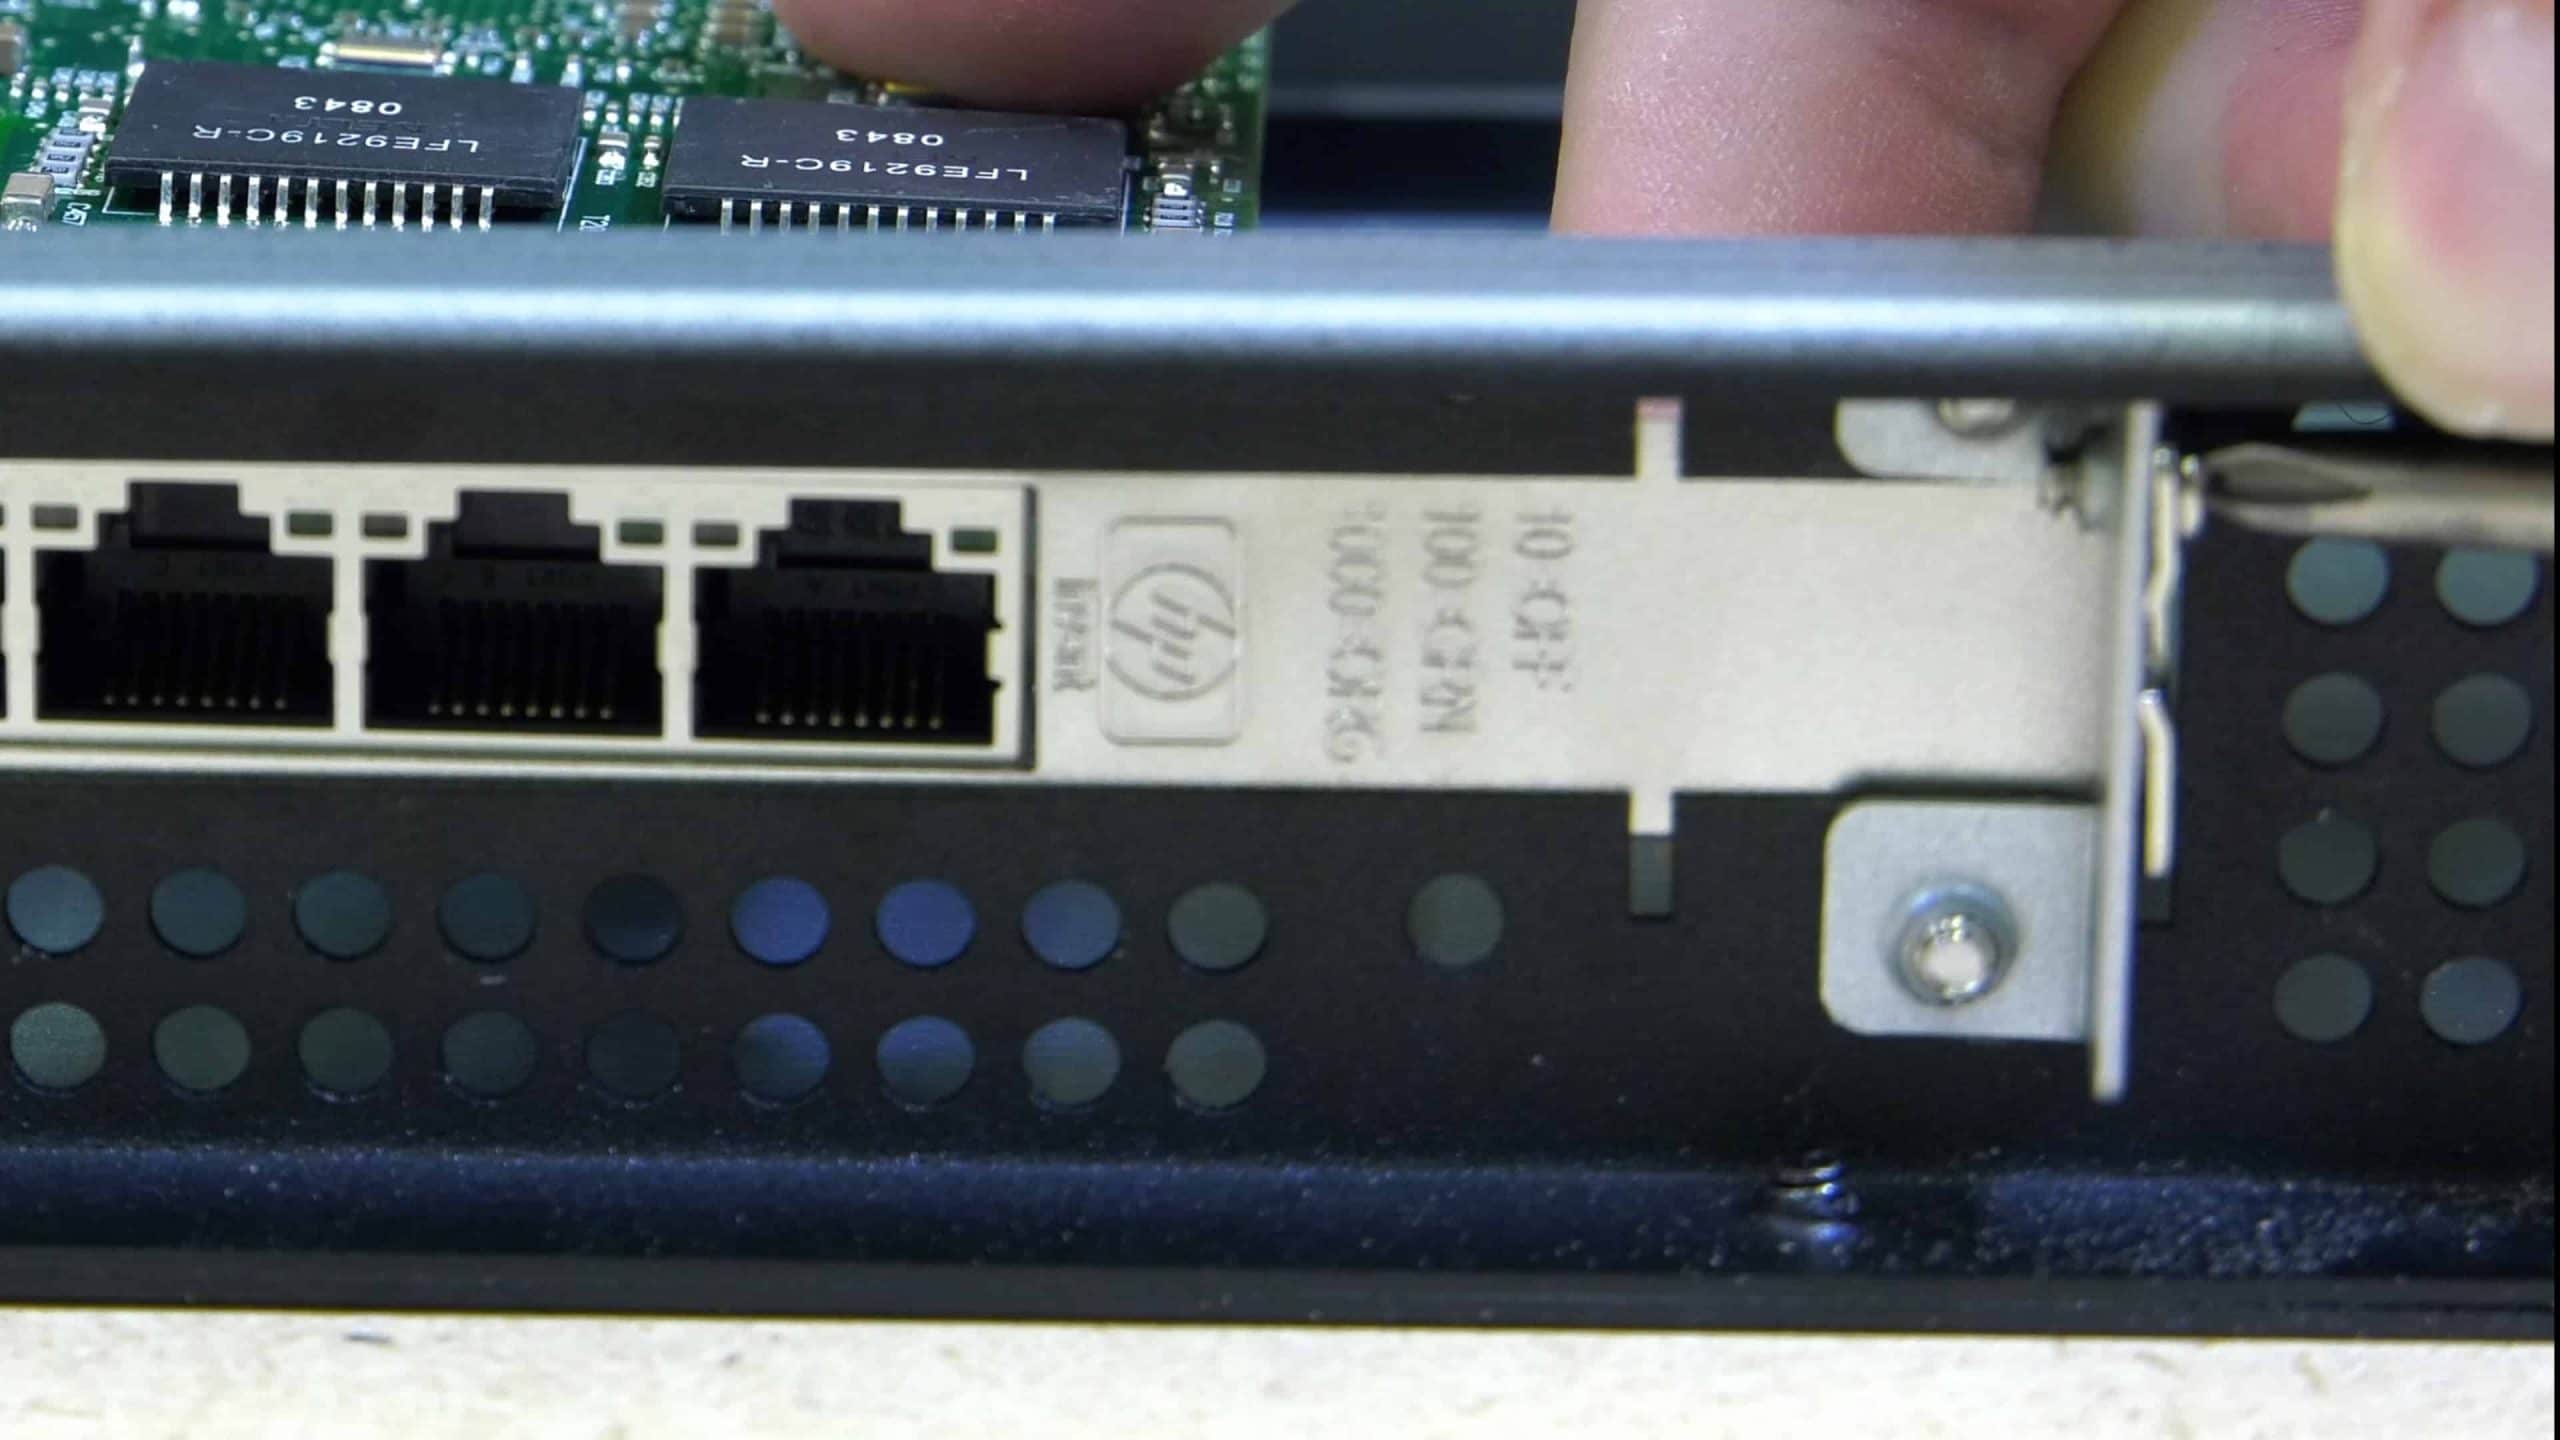
Installing the Intel Pro 1000 VT Quad Port NIC
Another challenge of building a 1U server: Since this card mounts sideways at a 90 degree angle from the motherboard a PCIe riser cable will be required to mount it. First, plug the riser cable into the motherboard and then plug the card into the other end. Orient the cable so that it will not interfere with other components and then screw the card into the case card slot with the provided screws.
1U Server Build: Installing the Server into the Rack
I installed the server in the 1U rack slot above my existing server. It just slides into place and is secured by four rack screws. That’s really all there is to it. I connected it to my gigabit network switches. loaded VMware ESX and I now have two servers in a VMware cluster.
Parts Used in this Build
- 2 pin Case Fan (always on, full speed)
- 3 pin Case Fan (speed controlled by motherboard)
- Apevia ITX-AP250W 250 Watt 1U Power Supply
- ASUS Z170 Pro Gaming Motherboard
- CoolerTech Y-Splitter Fan Cable
- Corsair Vengeance DDR4 32 GB RAM Kit
- Dynatron K199 Active CPU Blower 1U Cooler
- Intel Core i7 6700K 4Ghz CPU (Core i5 here) (Core i3 here)
- Intel Pro 1000 VT Quad Port NIC
- iStar 1U 19″ Rackmount Case
- PCIe Riser Cable
- Samsung EVO 850 500 GB SSD (250 GB here)
The Results
Building a 1U server was a blast, and I honestly couldn’t be more happy with how this pair of servers turned out. Anytime I build a box I always stress test it before putting it into daily use. In this case, I used Prime95 to calculate prime numbers for 24 hours straight, all while keeping the CPU at 100% utilization. The CPU never thermal throttled meaning everything is working as designed and we don’t have any cooling deficiencies in this build. The CPU cooler and case fans did run at 100% during the entire time which can be quite noisy, so if you plan to run your Bad Ass 1U server at or near maximum load, placing it in a closet away from the main part of your house might be a good idea. That being said, under normal loads the server is extremely quite and barely noticeable do to the fans running at near idle speeds.
Good luck building a 1U server and comment below with how your build went!

SO FREAKING AWESOME! I never even considered that you could build a 1U server that’s only 12 inches deep. I always just assumed one would need to be the standard 3 footer. Great build as always!
Yeah! I don’t have much depth in my rack, so a short 1U server is the only way to go.
Your work is awesome sir! Love this build!
It would be awesome if you could show us how to set this up (VMWare ESX, iSCSI, NAS). Good work sir.
What exactly would you like to see? Any specific areas that interest you?
I think he asks for the same as I will now. Can you provide some sort of Tutorial on how to set up ESXi (or a cluster) connect it via iSCSI to a NAS and configure it with some servers(Plex on ubuntu, WIN10, …)
Thanks for your great work,
Chris
Great work dude just what I have been looking for to replace my old ESXI box.
I’m in Australia and have been having trouble finding the right power supply, what you think of this as its the closest I could find.
I should have mine up and running in a few weeks with a bit of luck.
Thanks
Hi Mate,
Thanks for the info on this and the home network. Given me some inspiration for my new build after moving house, was using a HP microserver which was poor.
If you did it again and more room would you use a 2U case?
Thanks,
Adz
Actually, I mentioned in my home tour that I moved them to 2U cases so I could add some additional PCI cards.
Could you update the parts list as the power supply is no longer available and the mother board seems to be in short supply. My biggest concern is not finding the compatible parts to work with esxi. Thanks for the video.
Hi Mike, great work!! I want to build one too.
Btw, a quick question ◦Apevia ITX-AP250W 250 Watt 1U Power Supply is no longer available. Is the AP300W workable?
I’m using the Apevia 300W power supply. According to the Apevia web site the dimensions of the 300W are just slightly different from the 250W (150 x 81.5 x 40.5 vs 150 x 82 x 40). I found the screw holes on the power supply to be slightly out of alignment with the mounting tabs on the chassis. I needed to use a Dremel on the chassis to remove about 0.5-1.0 mm of material in order to get the screws to line up properly. Build is still in progress (waiting not-so-patiently for motherboard to arrive).
I just wanted to say thanks for this article. I probably wouldn’t have attempted a 1U build were it not for your very well-written guide. I wanted a 1U server for my home automation and media serving platform, but I couldn’t find anything commercially available with the desired performance, form factor, and price point. Like you, my rack doesn’t have the depth to handle a full size 1U server.
As you saw above, I ended up using the Apevia 300W power supply, which required a very minor chassis mod. I also selected a different motherboard and CPU as I wanted to keep costs down and didn’t need the server to be as bad a** as your build. I chose the Gigabyte GA-Z270N-WIFI, Core i5 7600K, and 16 GB which saved me almost $350 and was easily OC to 4.2 GHz. I could’ve gone higher, but I don’t need the performance at the moment.
Next up might be another one to run Zoneminder.
With the network card you used, what are each of the ethernet ports connecting to? Do they all plug into a router?
Sorry but of a dumb question!
They plug into a 24 port switch.
Hi Mike,
I love this build and am looking to do something very similar. Right now in the UK I can get the 7700K cheaper than 6700K so that is the obvious choice but I’m extremely nervous about motherboard choice due to compatibility with ESXi.
My original thought was to just buy the same one that you used but it is incompatible with the 770K without a bios update (which would require a SkyLake processor to do and therefore not an option for me). I cannot find any information about this online and the HCL for ESXi doesn’t list any Z270 or B250 boards. What should I be looking for? Could you please point me in the right direction or recommend one?
Many Thanks!!
I can confirm the board works with the 7700K. You can boot the board with a 7700K into the BIOS, you just can’t boot the OS. Also, you bet at this point unless you buy old stock that the board will come already on the latest BIOS.
Thank you for the advice and for the super fast response! I’ll take your advice and go with the tried and tested.
Hi Mike what are he temps like? I have thinking of building a 2U with an i7 6700k as I have it spare and using a Noctua NH-L9x65 cooler and was worried about tdp.
Thanks
How man vm’s can you run on one of the systems? I was looking at building one of these or a version of one of 2 of them in the cluster.
That’s impossible to answer. How big is each VM? How much RAM? What is the VM going to do? Windows? Linux? You could probably run 100 or more Ubuntu boxes with 256MB RAM that don’t do much. If you wanted to run a media encoding server and share with 100 people you might not even get one per box.
im interested to know how the Longevity has been.. ive long built my own servers and even placed them in production without ill results… I realize this article is 2 years old now.. there are a lot of expensive servers out in the marketplace.. ive put together some great builds running KVM as my hypervisor of choice.. (namely because its real easy to convert VMs from AWS to KVM or Vice Versa .. rather than trying to convert them to VMware… although the idea i can manage my VMware hosts / guests via VPN from my V<ware fusion on the MAC is a plus for ESX. ive not had a lot of dealing perosnbally with using Synology as iSCSi. though ive had good luck for the most part using fake RAID in level 10 .. (as long as you disable the weekly complete bit for biot verifications).. cool stuff here
They’re still running in production today.
Hi Mike, are you able to reply a quick update on what parts would be practable if you were to build one today on the same budget ? Which CPU would you pick and which motherboard would you pick?
Hi Mike , I really like this appliance, I would like to build one but with i7 and 16Gb ram for pfsense, two 80gb ssd discs, I can buy the pieces in amazon, but I don’t have much time, if I ask you to build one, how much would it cost for you work
Hi Mike, I built this server to your specs last year, but i’m now looking at upgrading the network card to 10GB. Do you have a product recommendation?
1
Nice build. Sadly enough there aren’t any cases higher than 1U in that segment. I’m currently looking for one at 3U or 4U 19″ 12 inch deep. Has anyone ever seen one of those?
I stumbled across this while looking for information on the Xeon vs i7/i9 debate. That one was for what to do as my next main rig. I just built a Xeon-based graphics computer from a Dell T5610 and my current “Daily driver” is a Dell Dimension XPS 9100 that I have maxed out the specs on. The only thing more I can do is ditch the quad core i7 for a 6-core Xeon. But… if my 16-core, 64GB T5610 continues to perform as it has in just the 24 hours it has been online… I may just duplicate that build. Anyway… back to this post which represents my MDF relocation project. It is going from my garage with a LOT of space to a more climate-friendly space inside the house. Problem… the cabinet is only 24 inches deep. I was in need of a shallow 1u server and searched hours for one only not to find it. Why this sight never came up, I have no idea. Anyway, I ended up going with a Dell Optiplex 7070 micro… for now. My complaint is that it only has one NIC and there is no easy way to add a second. This project looks as if it could be my answer. Thank you. Will likely stand things up with the Opti until I can do this build. I’m sure I will find some use for a 32GB 8-core i7 Optiplex,