Blog
Make a Party Serving Tray: Hand Tools vs. CNC
[adinserter name=”TopOfPost”]I get a lot of comments in my YouTube and blog that I can make anything because I use a CNC machine. Everything from “CNC is cheating” or “CNC isn’t real woodworking” to “making that by hand too hard for you?” or “those who can hand tool, those who can’t CNC.” Seriously. I’ve gotten it all. And the truth is, I really don’t use the CNC that much. Generally I only use it when there is an intricate pattern that is difficult to cut by hand, or when I think it will somehow speed up the project I am working on. Honestly, I rarely use the CNC. It’s in my videos a lot because people seem to like seeing what it can do.
This has caused a lot of controversy. So today we’re going to do a challenge. We’re going to find out what’s better. The CNC or the old fashioned way. No I don’t mean I’m not going to use power tools. Just none that are computer controlled.
[button link=”https://www.thegeekpub.com/product/party-serving-tray-plans/” type=”big”] Download the Serving Tray Plans Here[/button]
Hand Tools vs. the CNC (X-Carve)
That’s right, I’m going to make this project twice! Once with regular handheld power tools and once on the X-Carve. We’ll see which one is faster, which one does the better job, and which method is the overall winner.
Making a Wooden Party Serving Tray
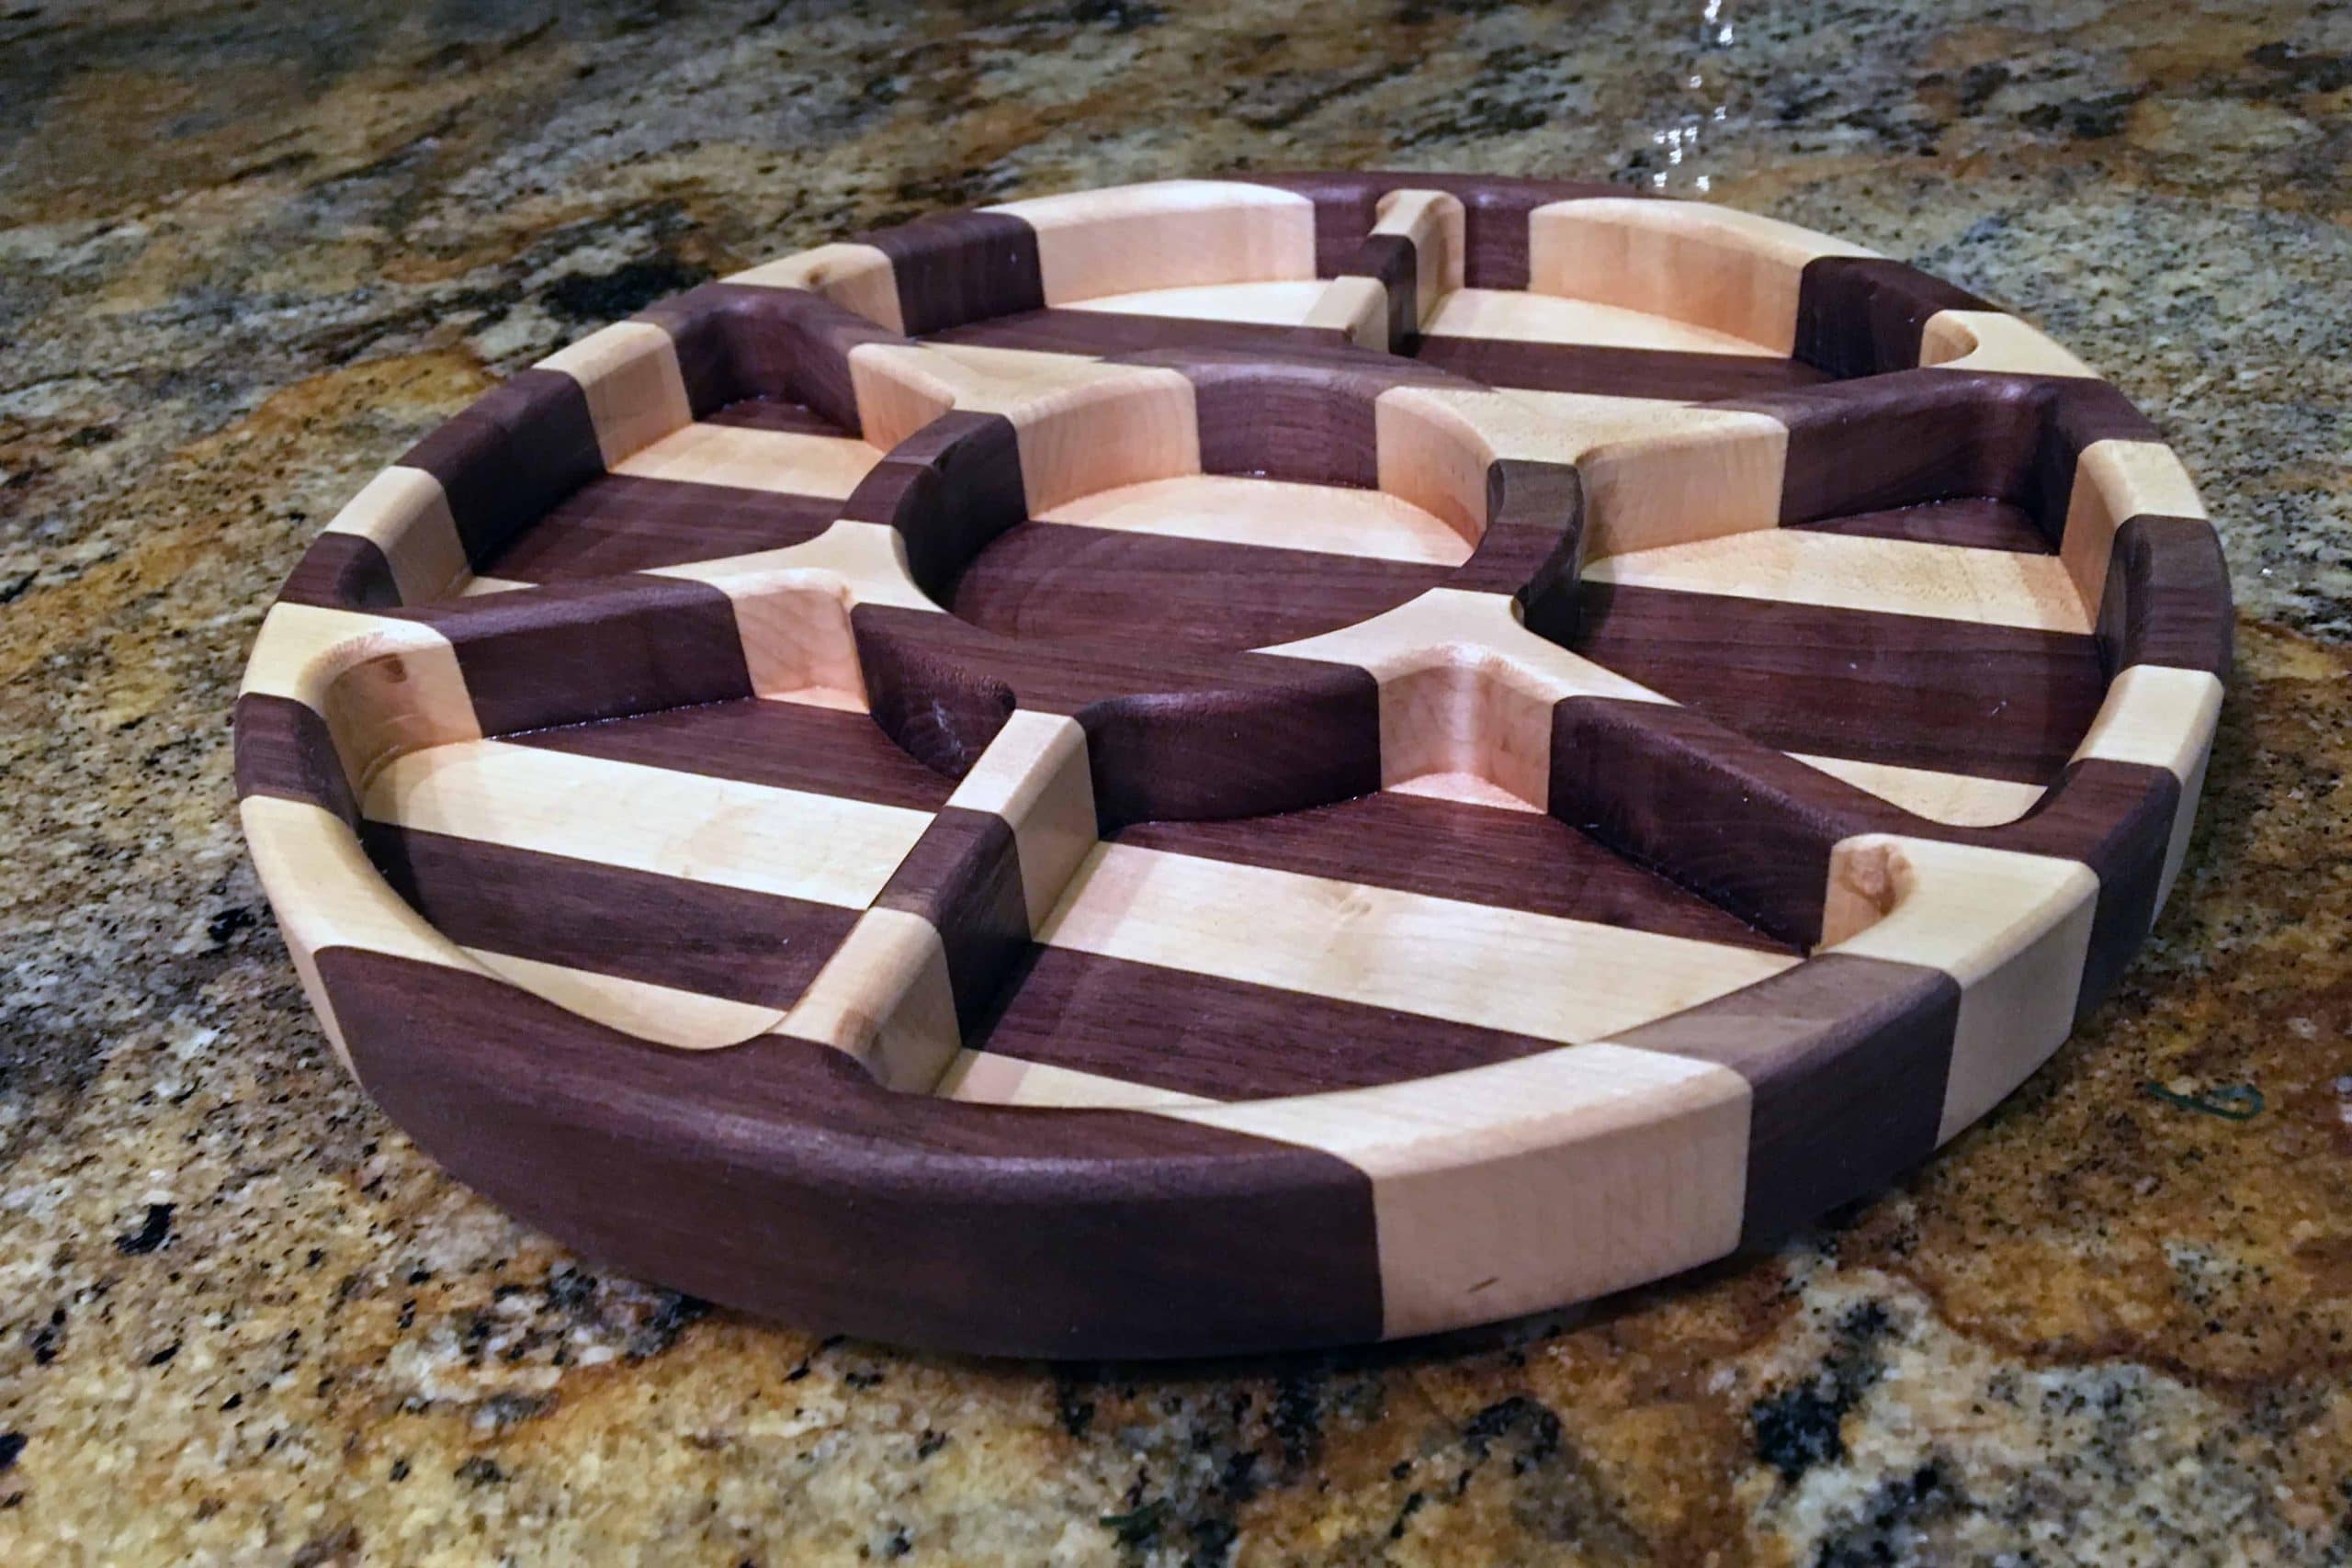
I’m going to make a party serving tray. The design I chose is a hexagonal tray with a center circular dish. This kind of tray has been around since the 1950’s or maybe earlier. I chose this design for two reasons. First, because I find this type of serving tray most useful. Second, it seems like something that in theory would be harder to make giving the CNC an advantage.
Step 1: Making the Serving Tray Blanks
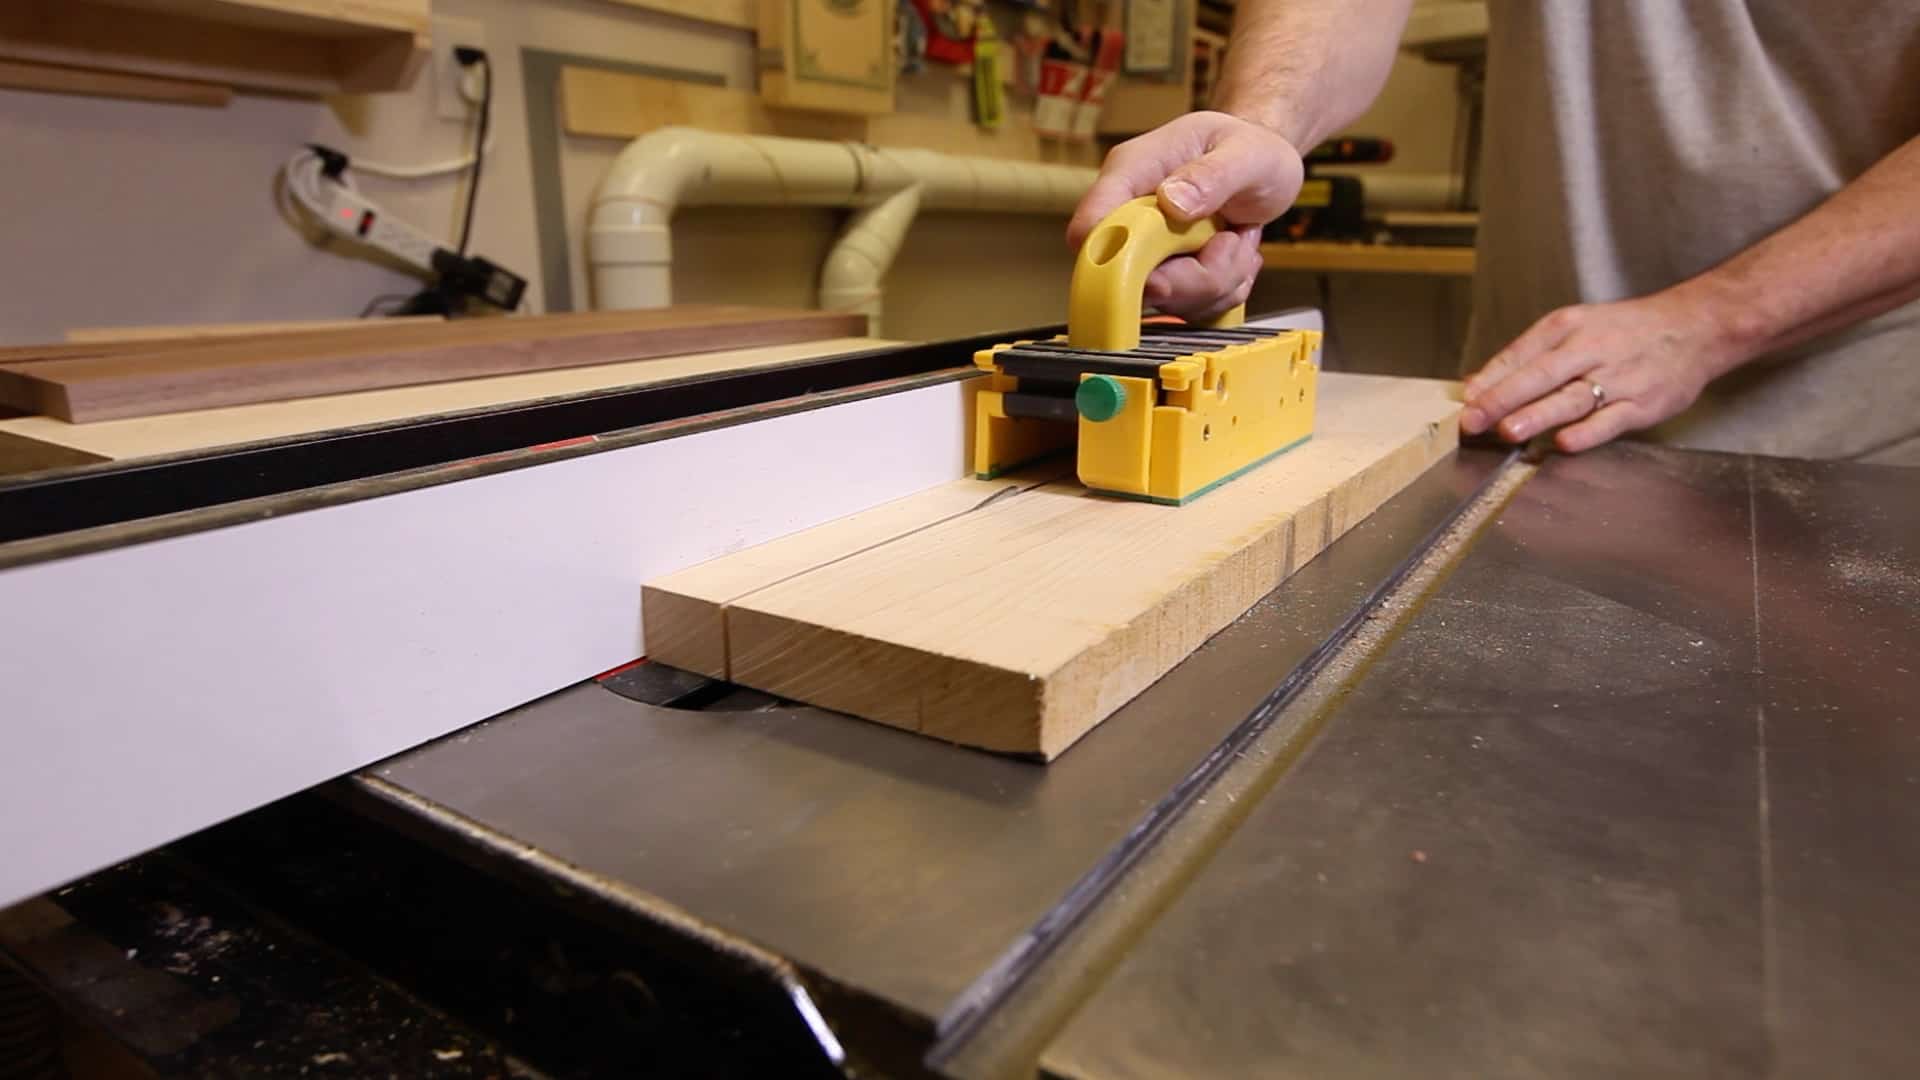
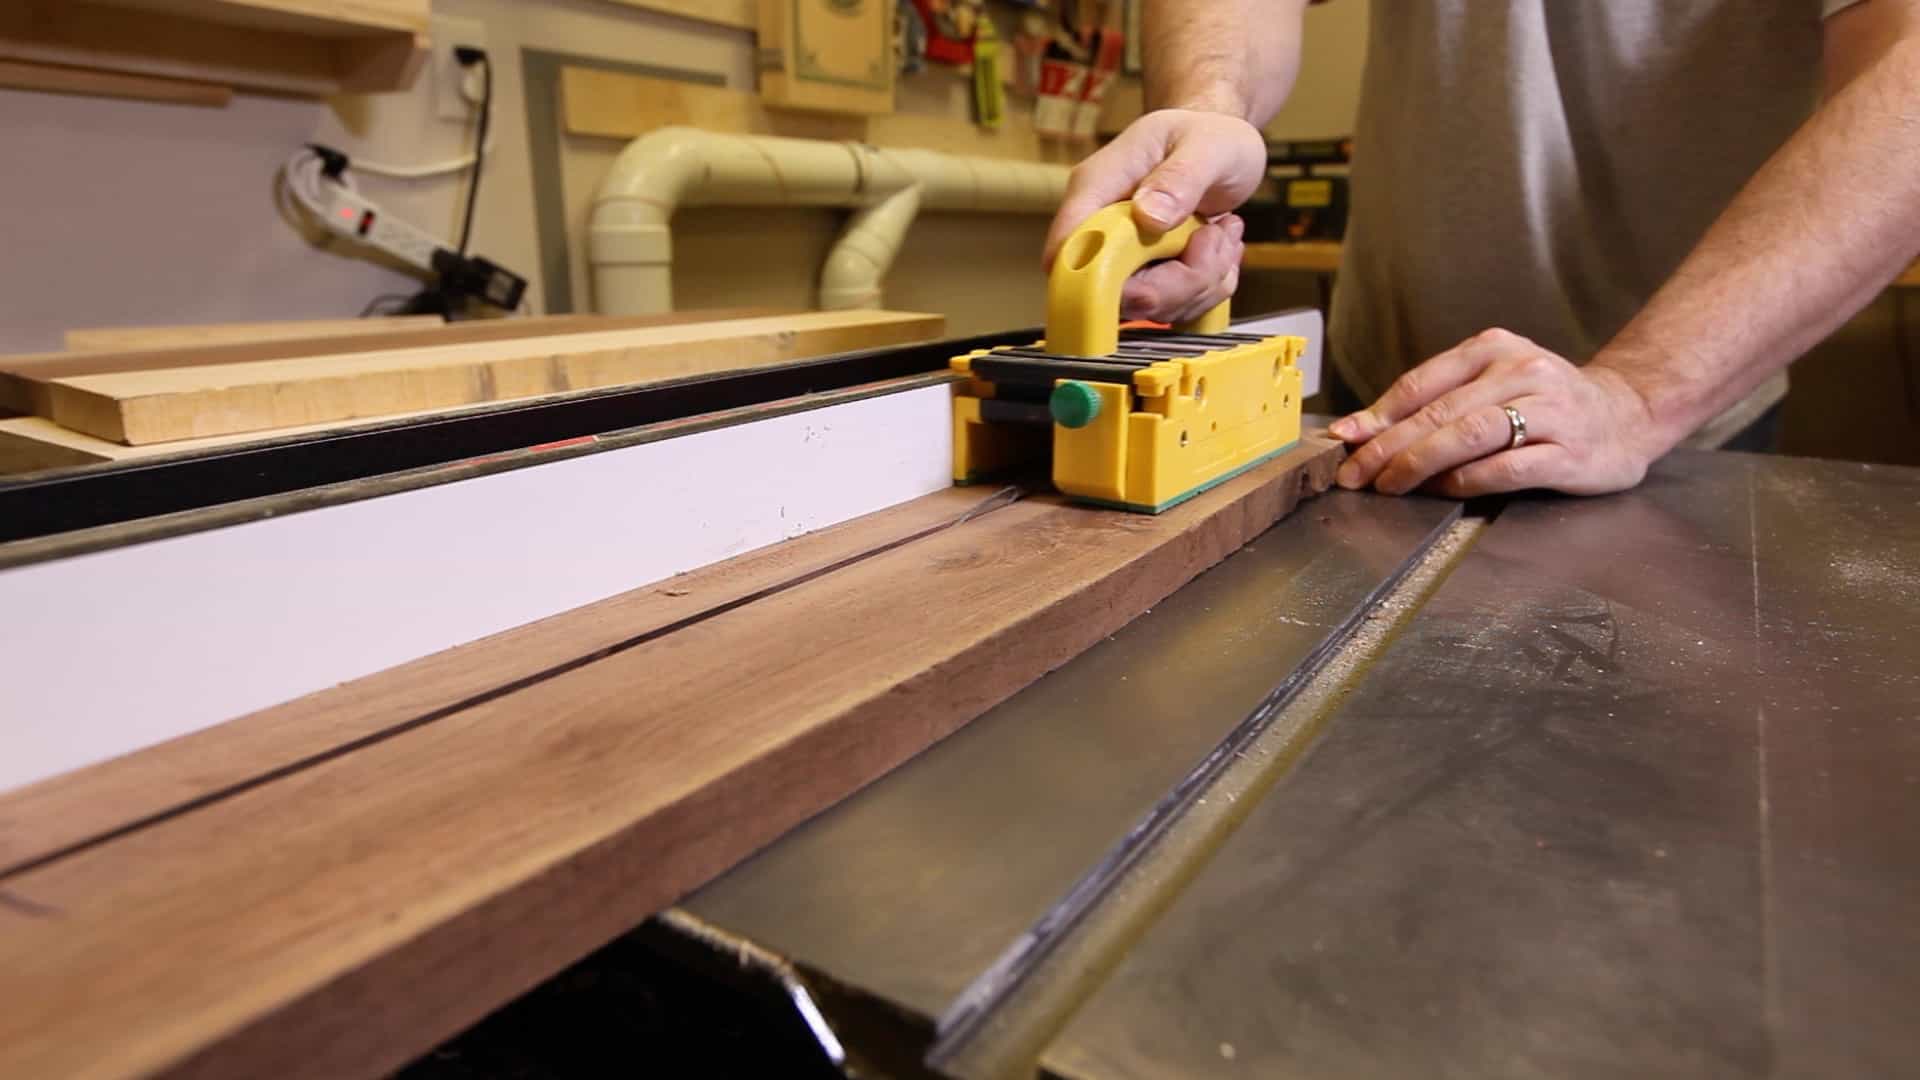
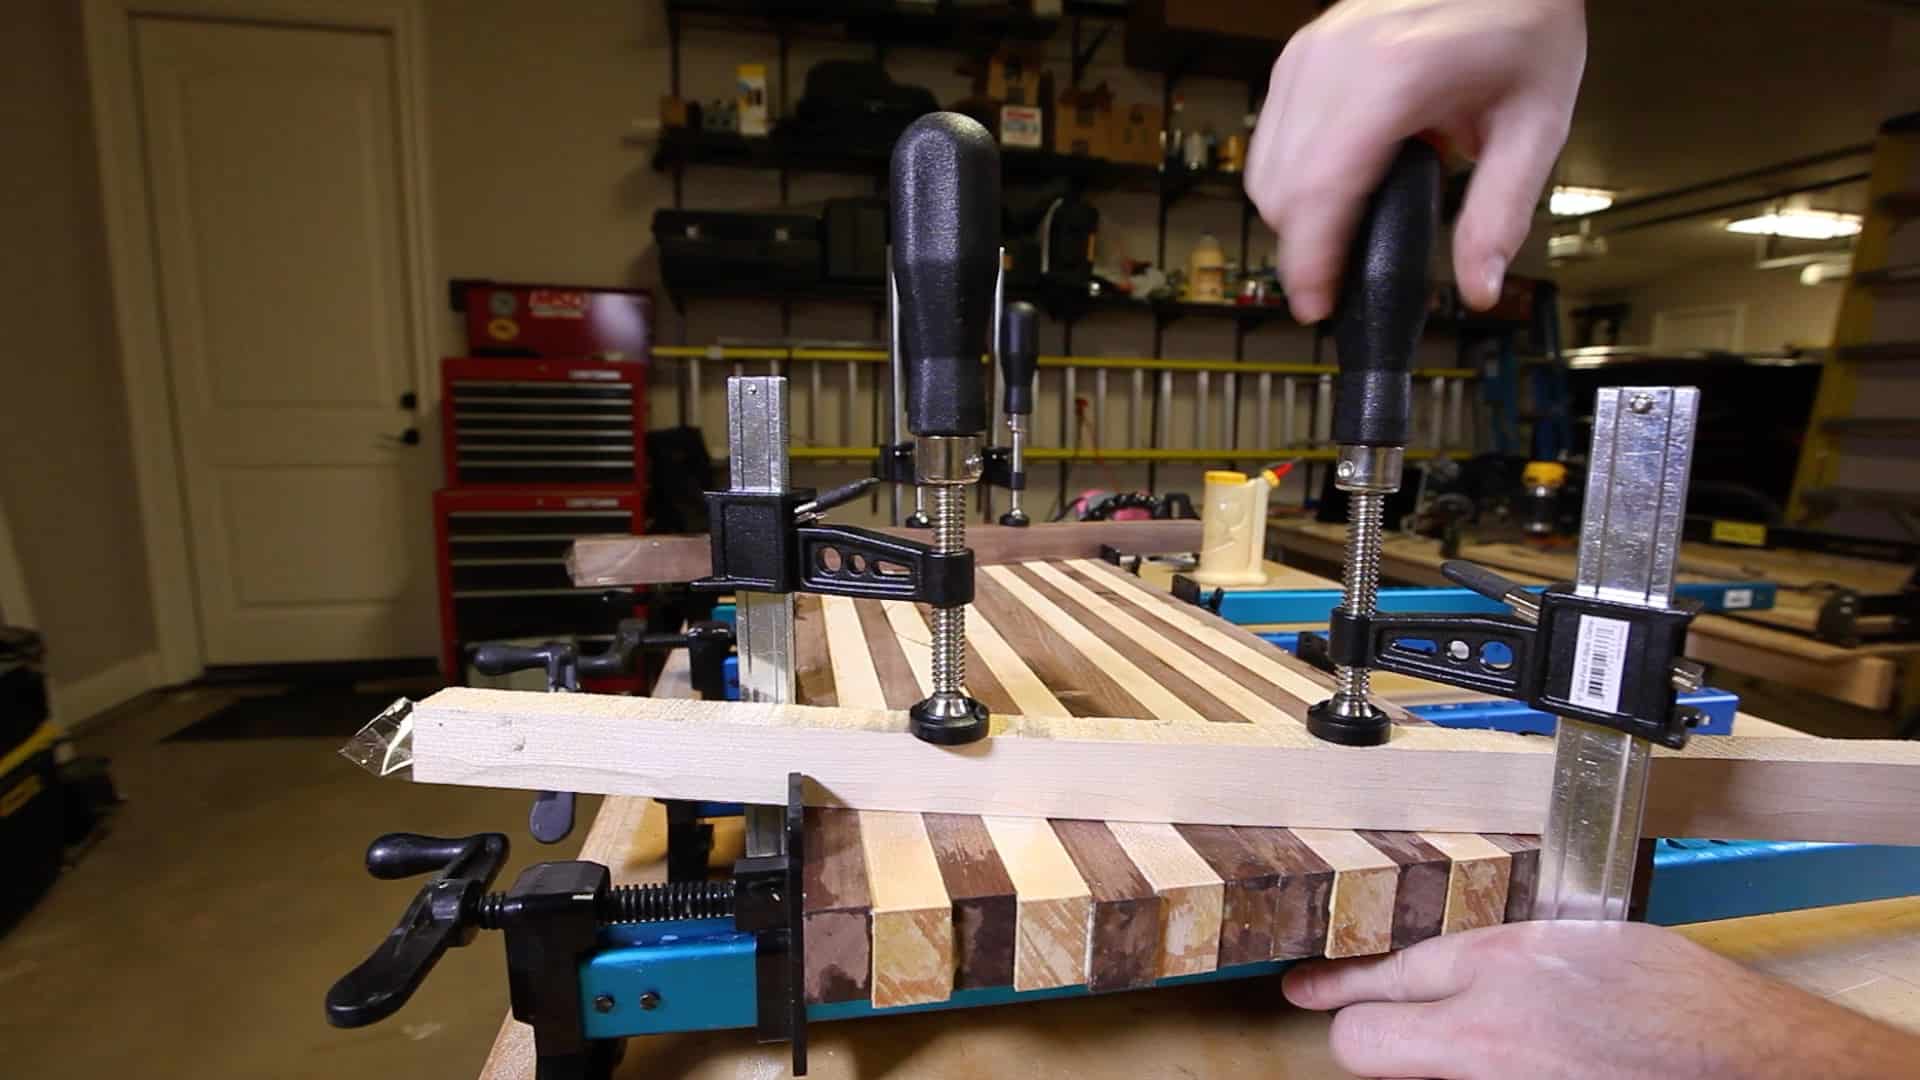
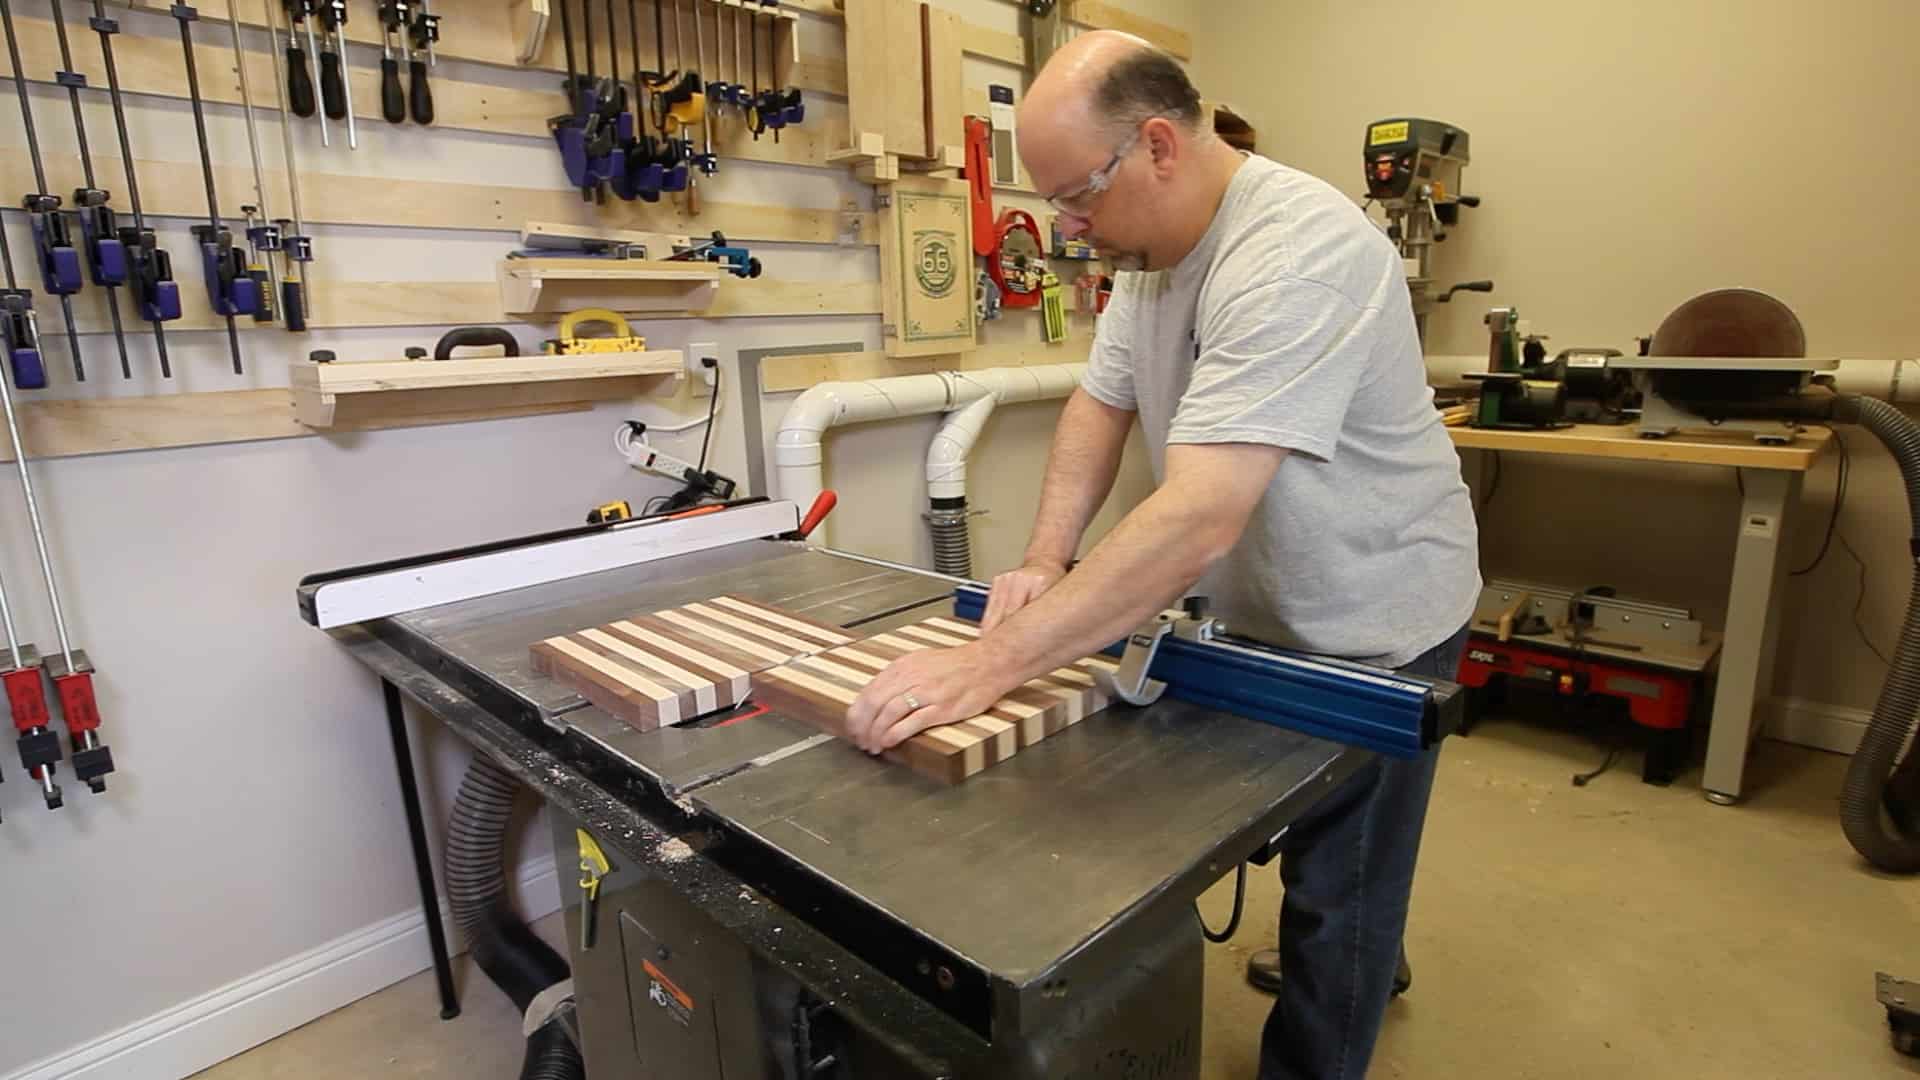
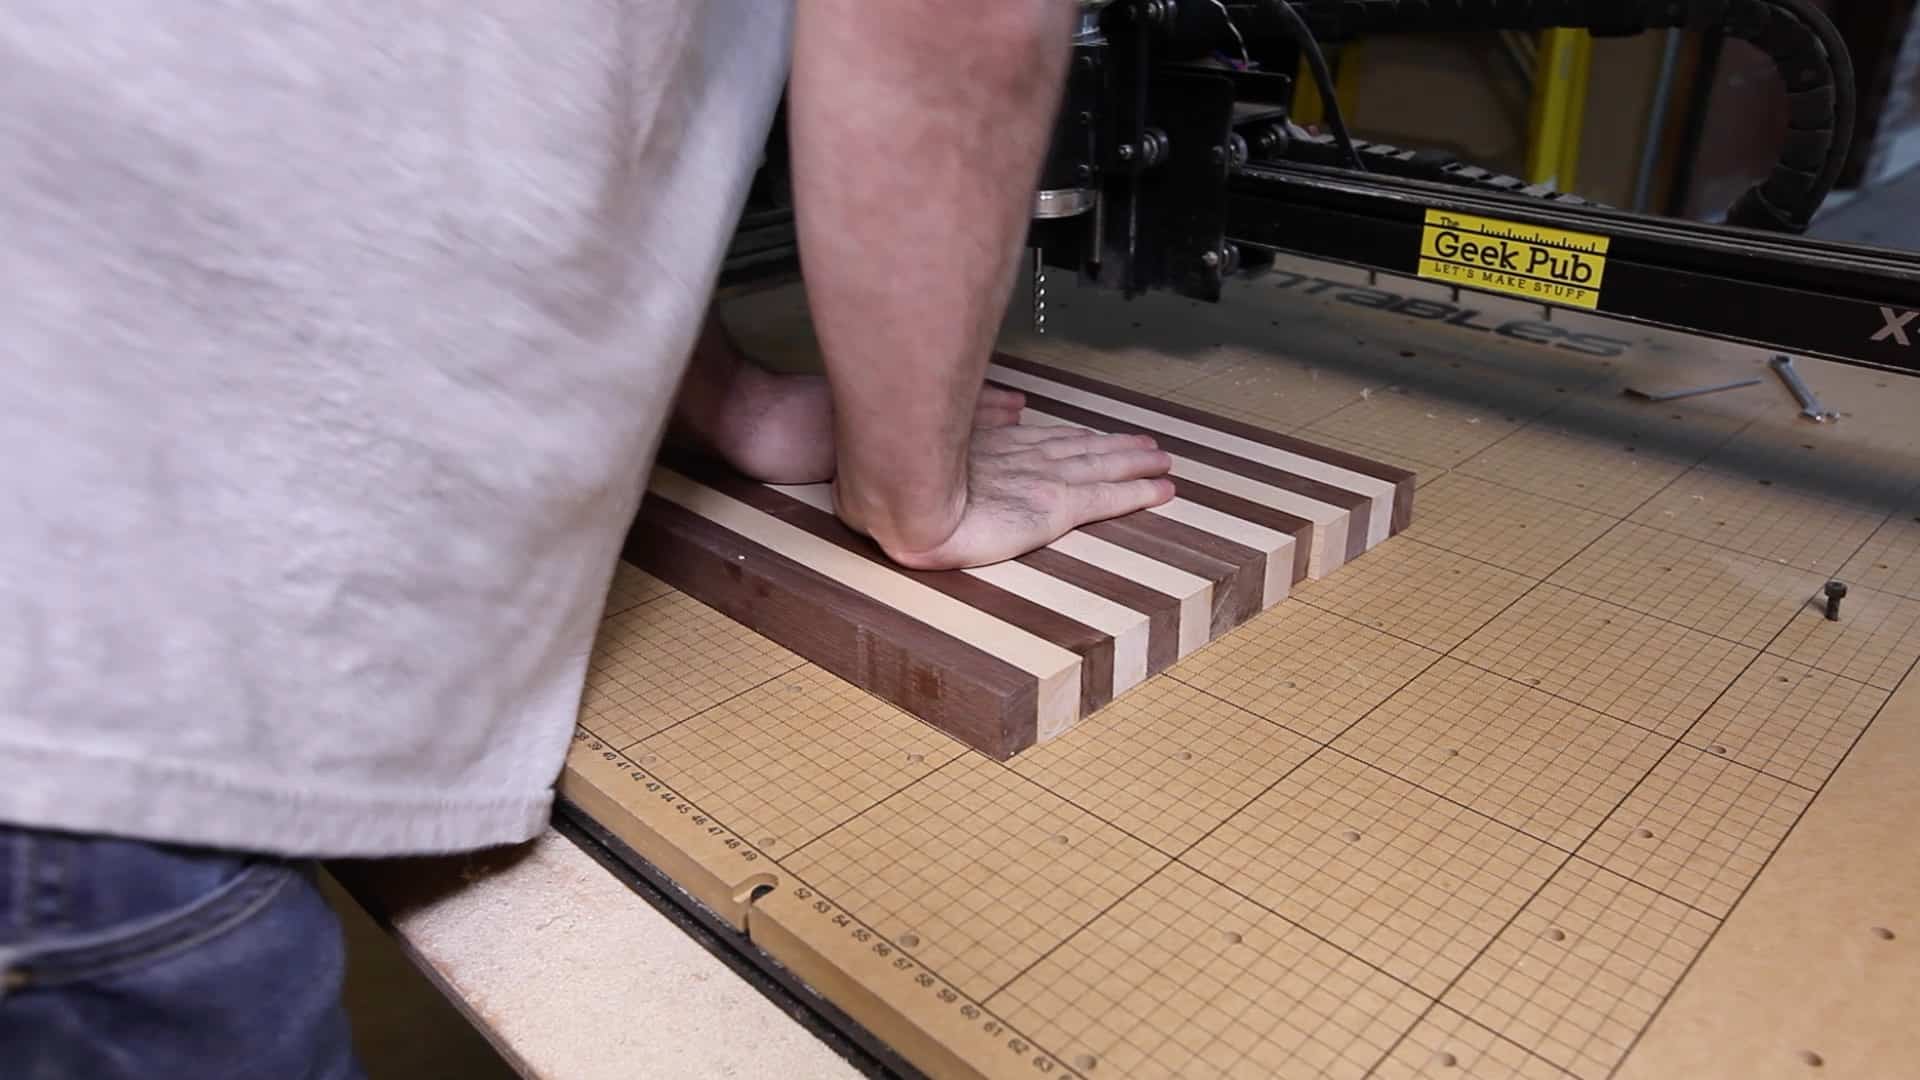
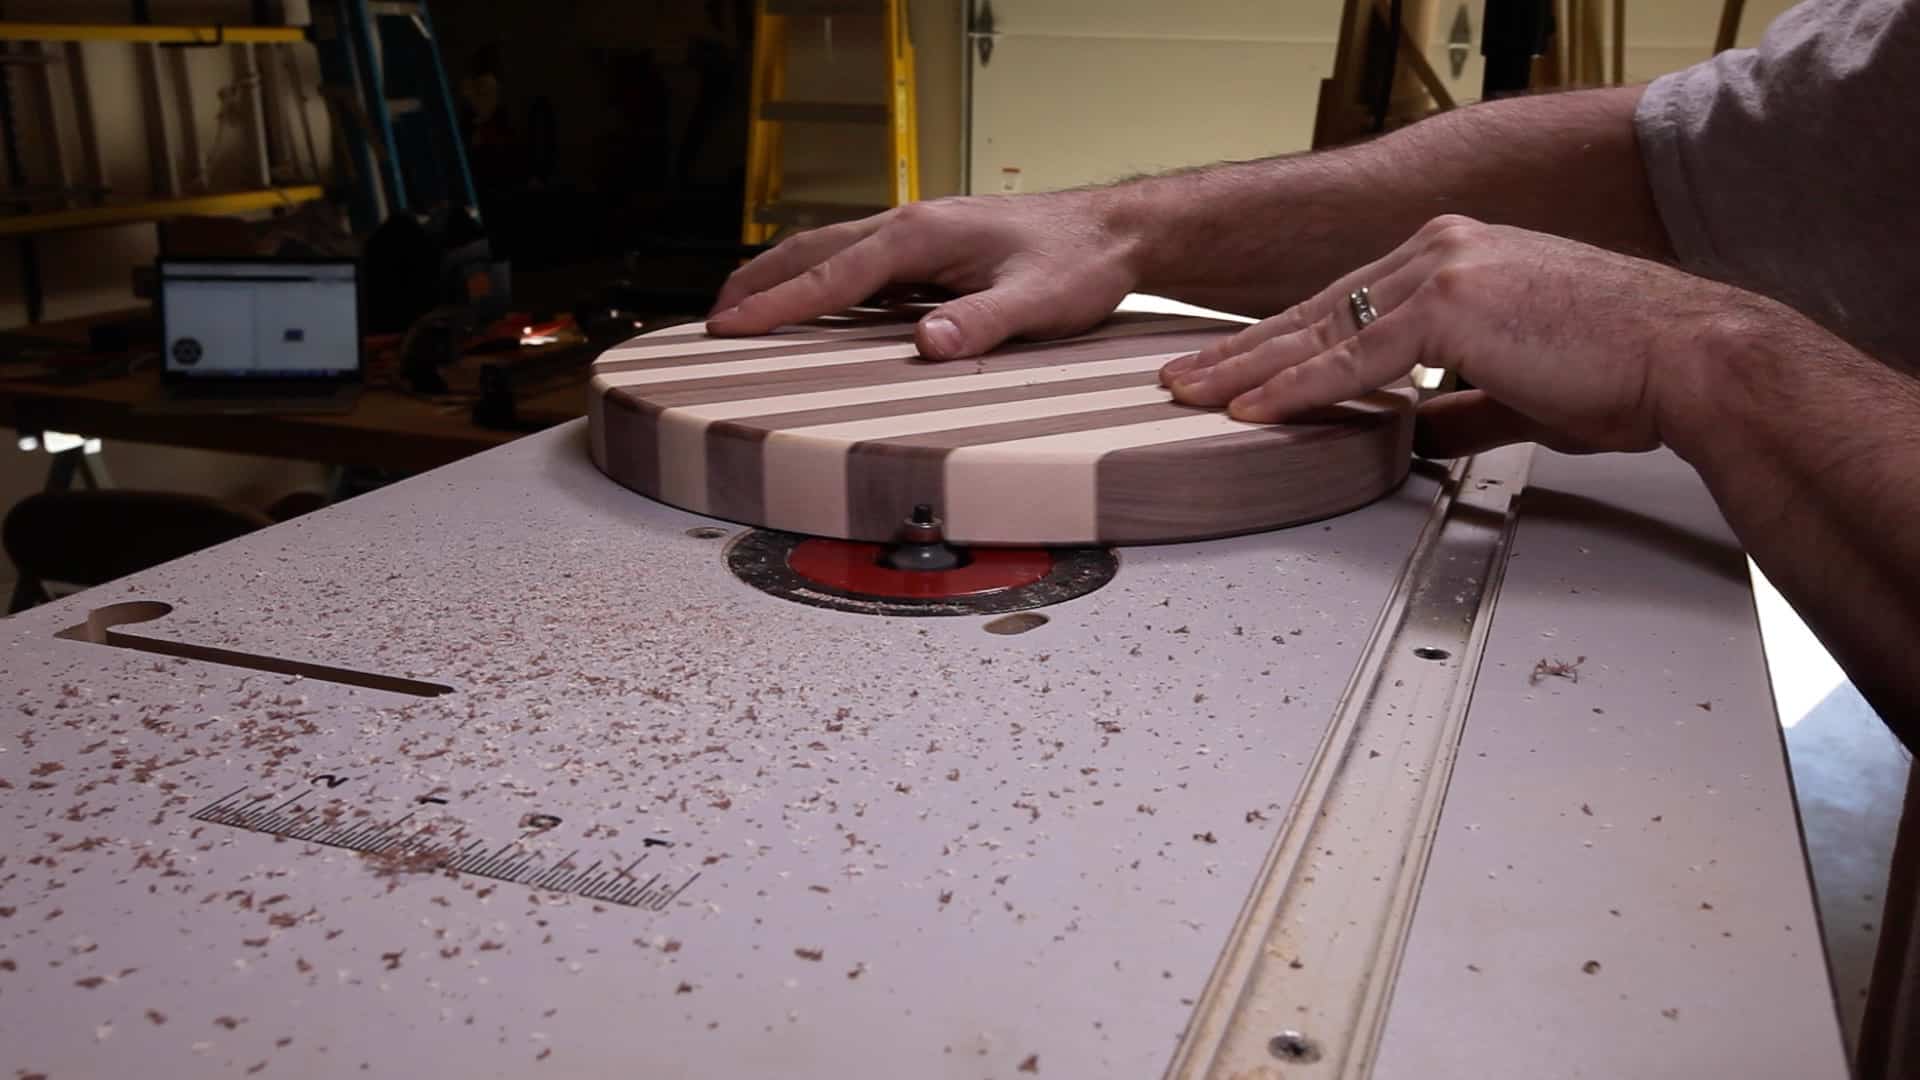
I decided to make my serving trays out of hard Maple and Walnut. I’ve always been a fan of that contrasting design. I started by cutting down some stock I had on the table saw to 3/4 inch wide, by 1 1/2 inch tall, by 25 inches long. I made enough to make a blank that was 25 inches long, by 13 inches wide. This would allow me to cut it in half to make to perfect copies. Once for my hand tools and one for the X-Carve. I glued them up, clamped them, and let them set overnight to dry.
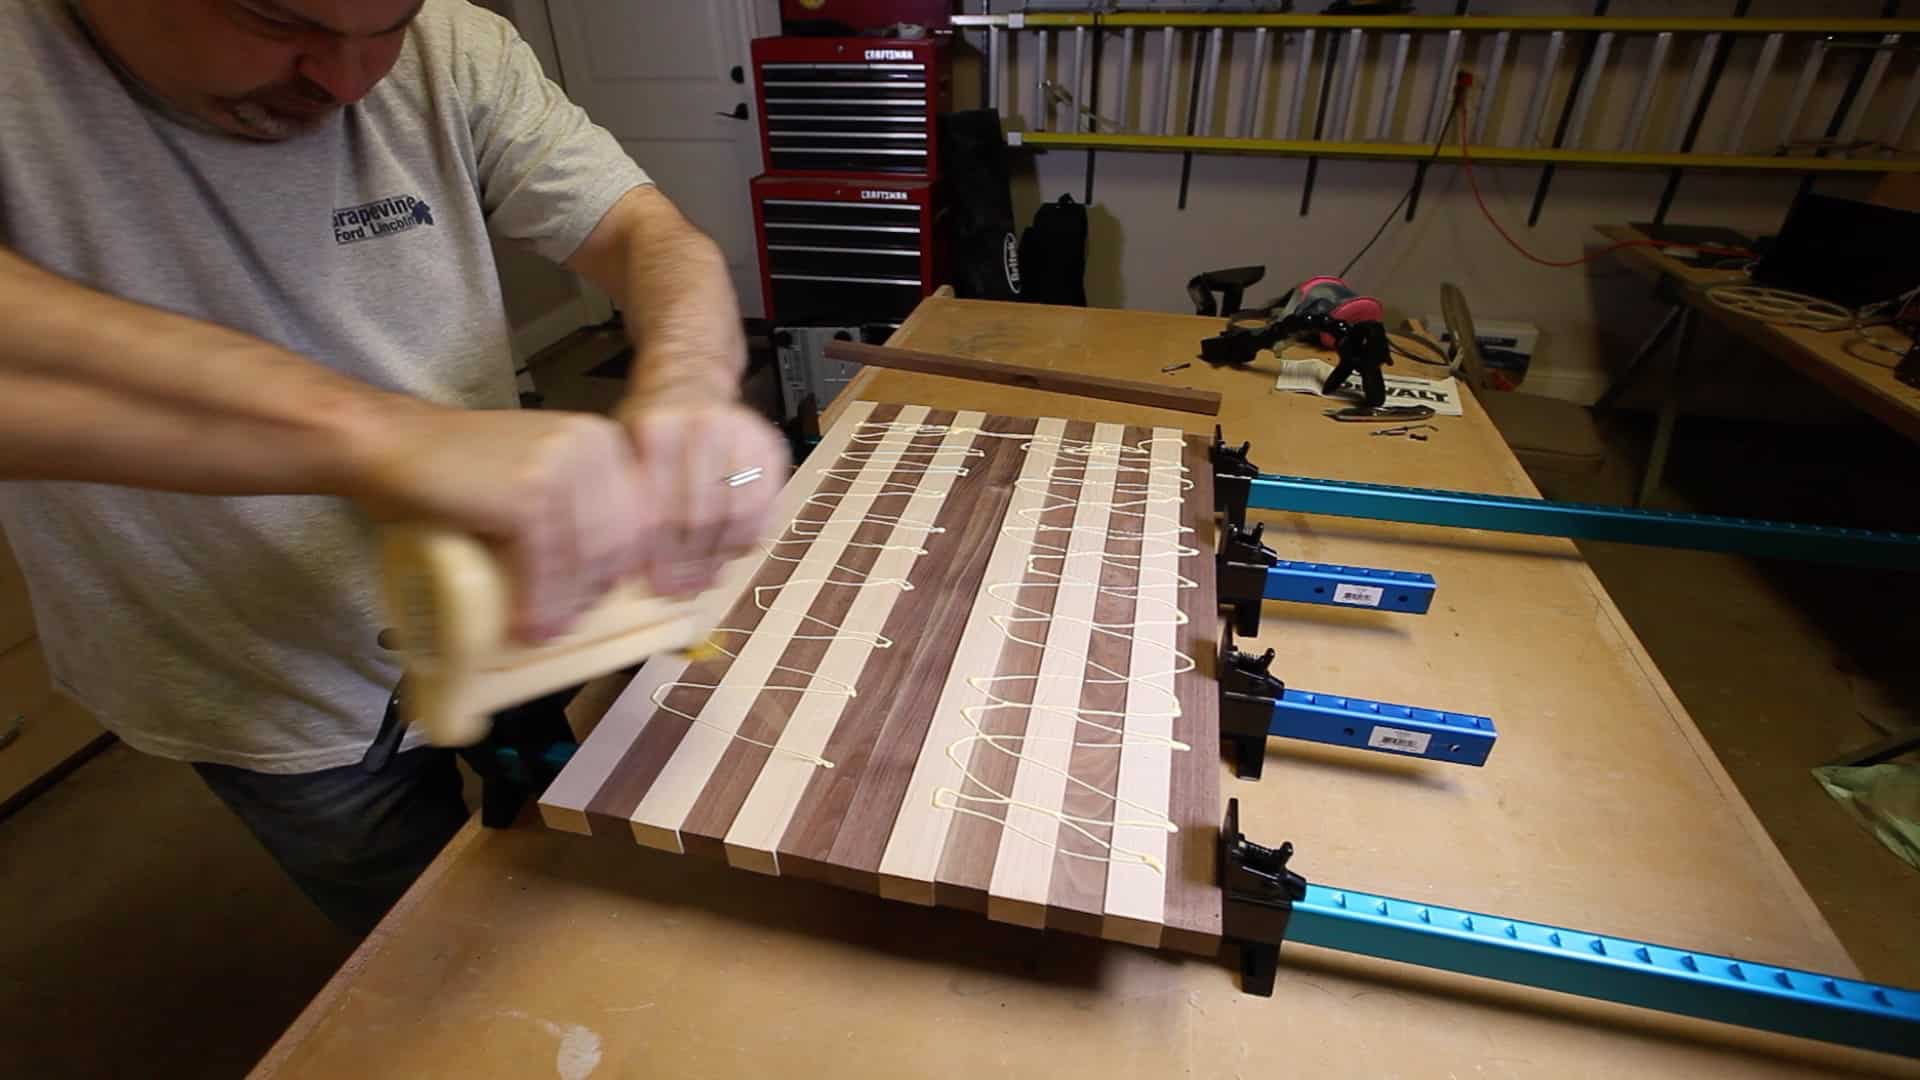
Step 2: Preparing the Serving Tray Blanks
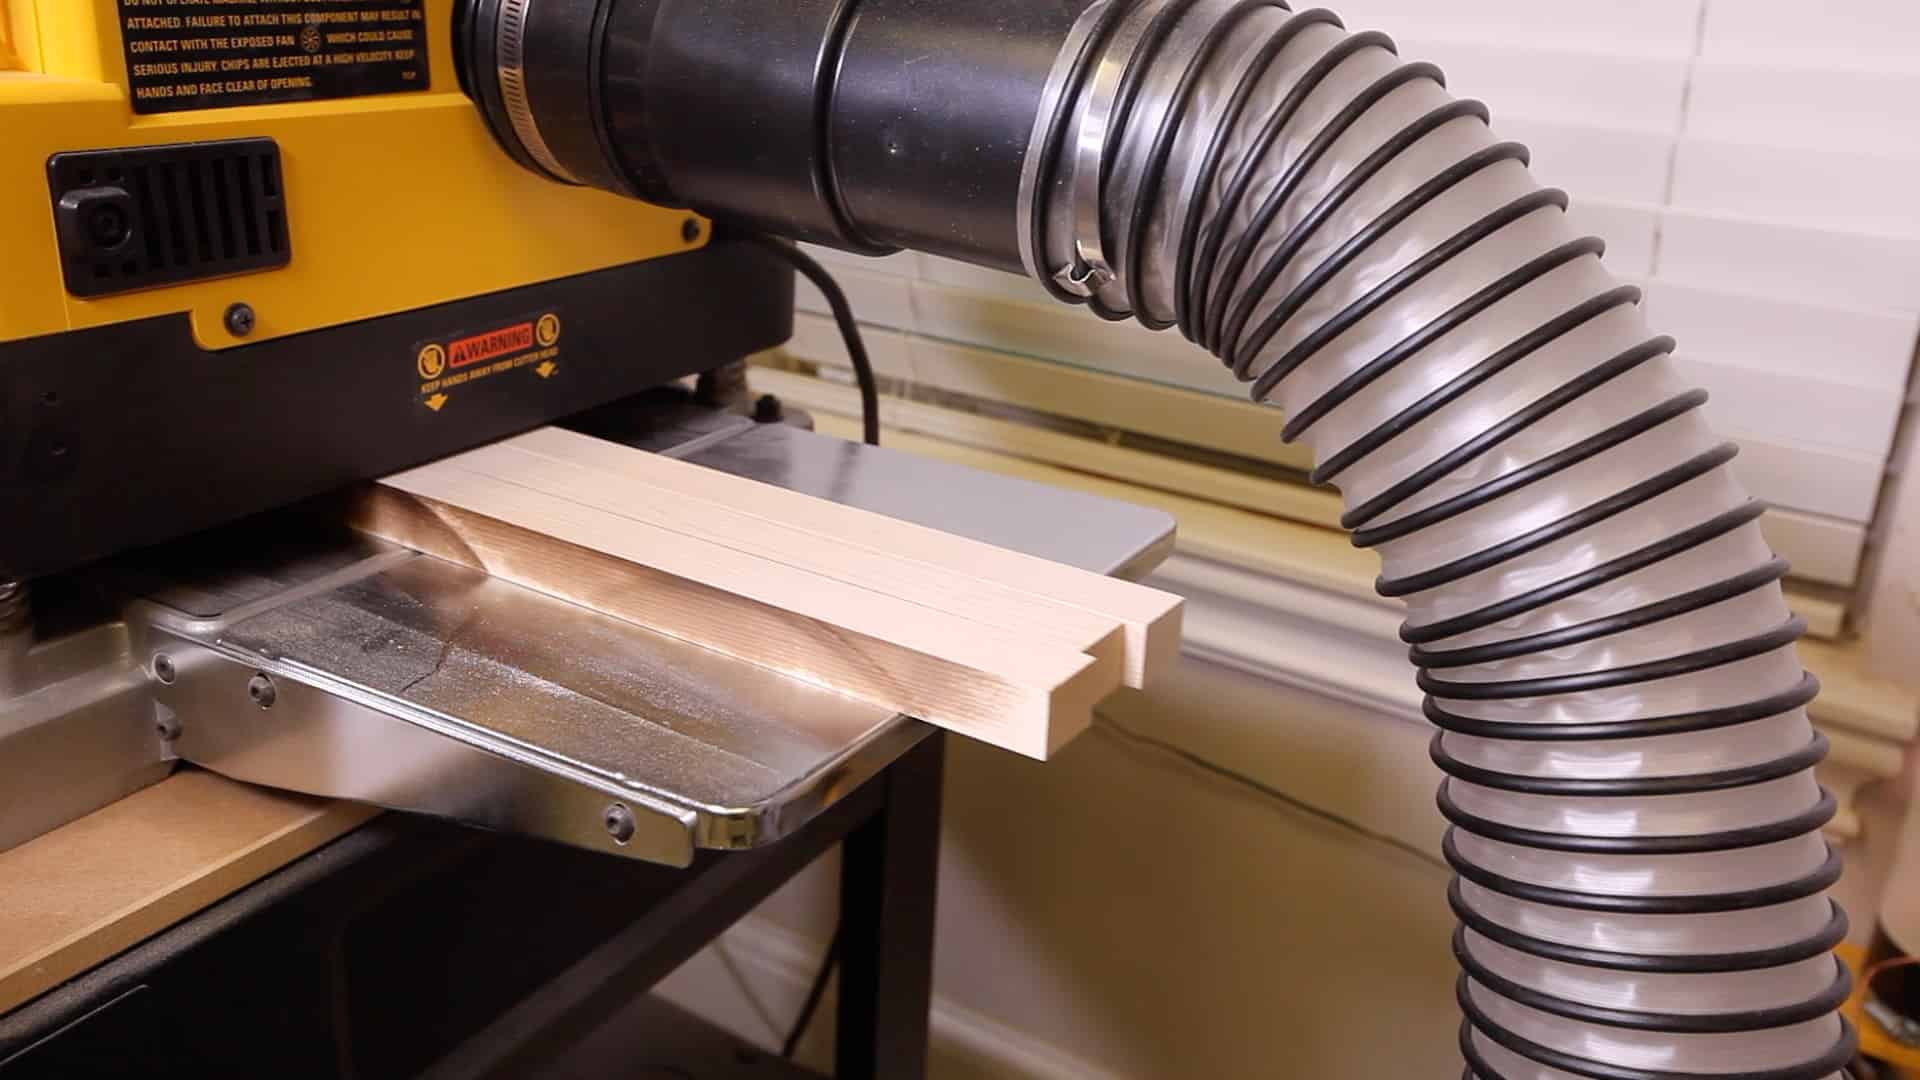
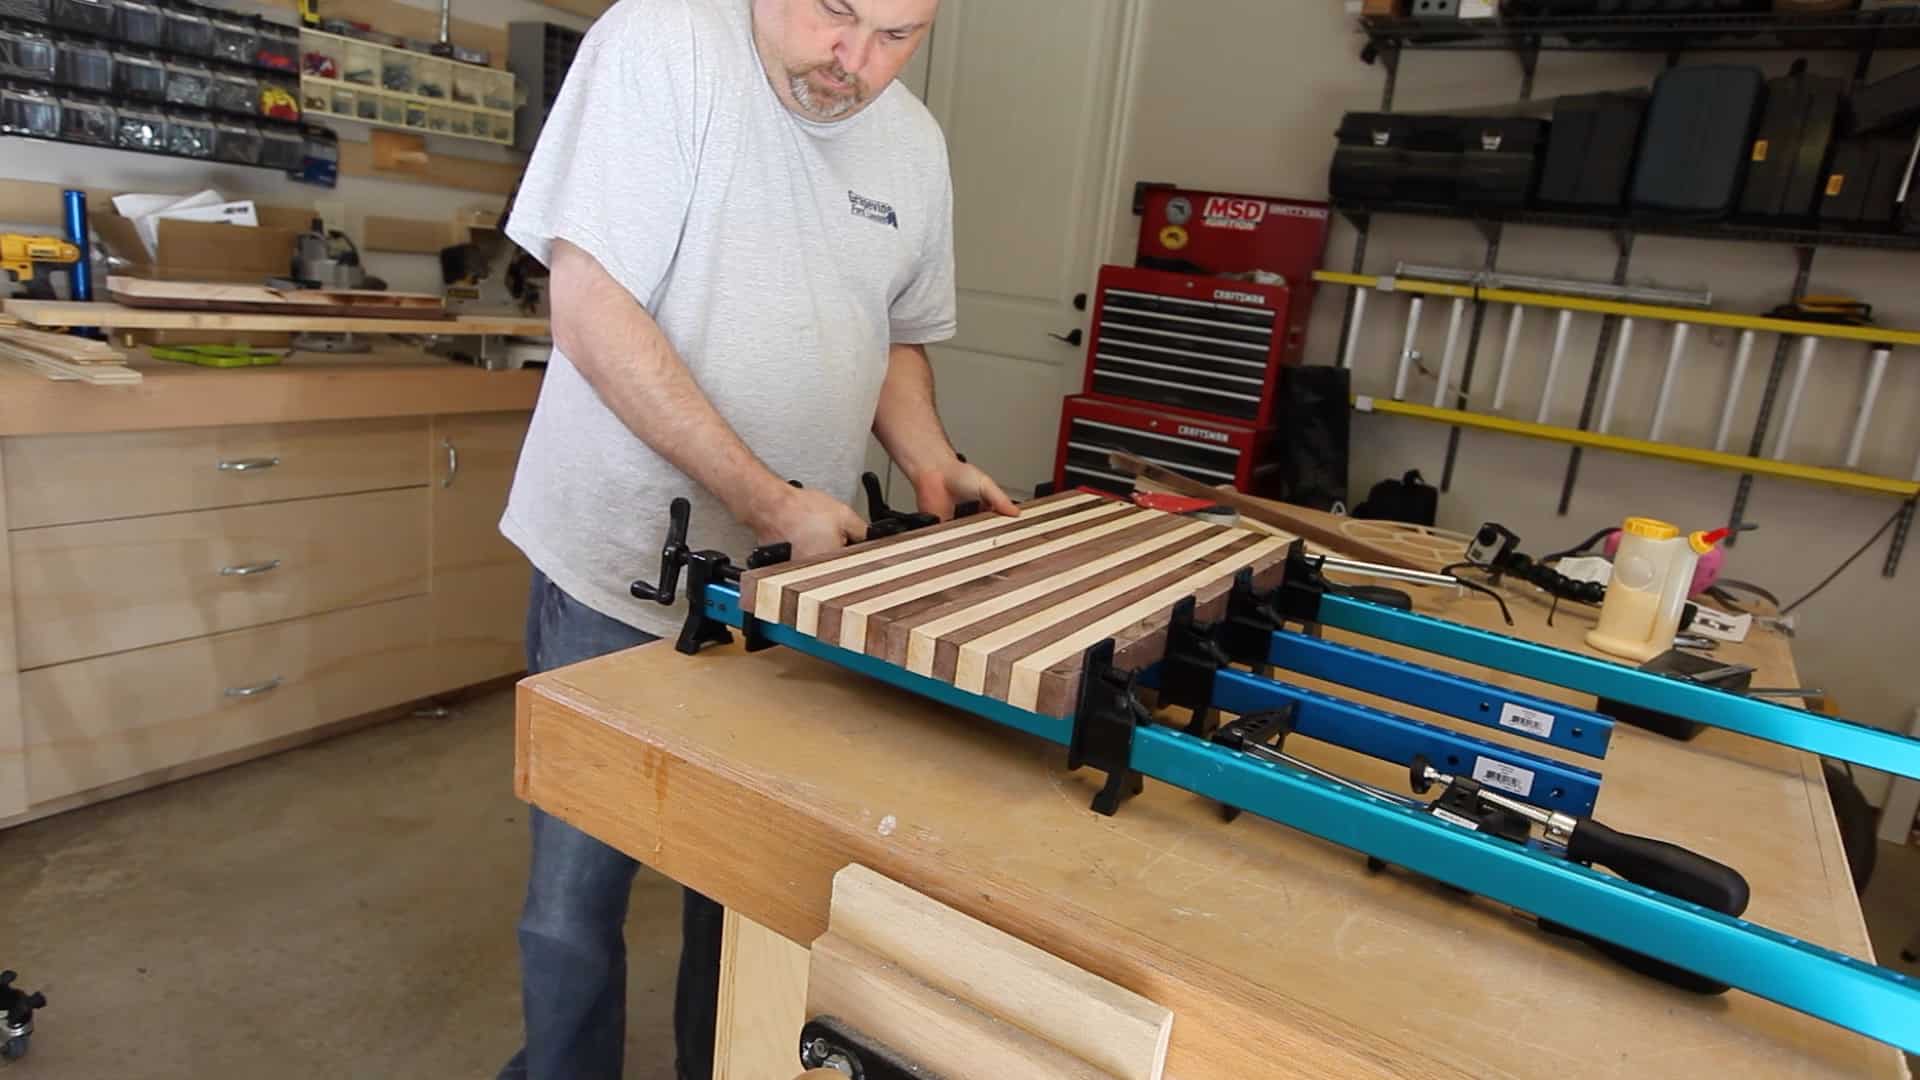
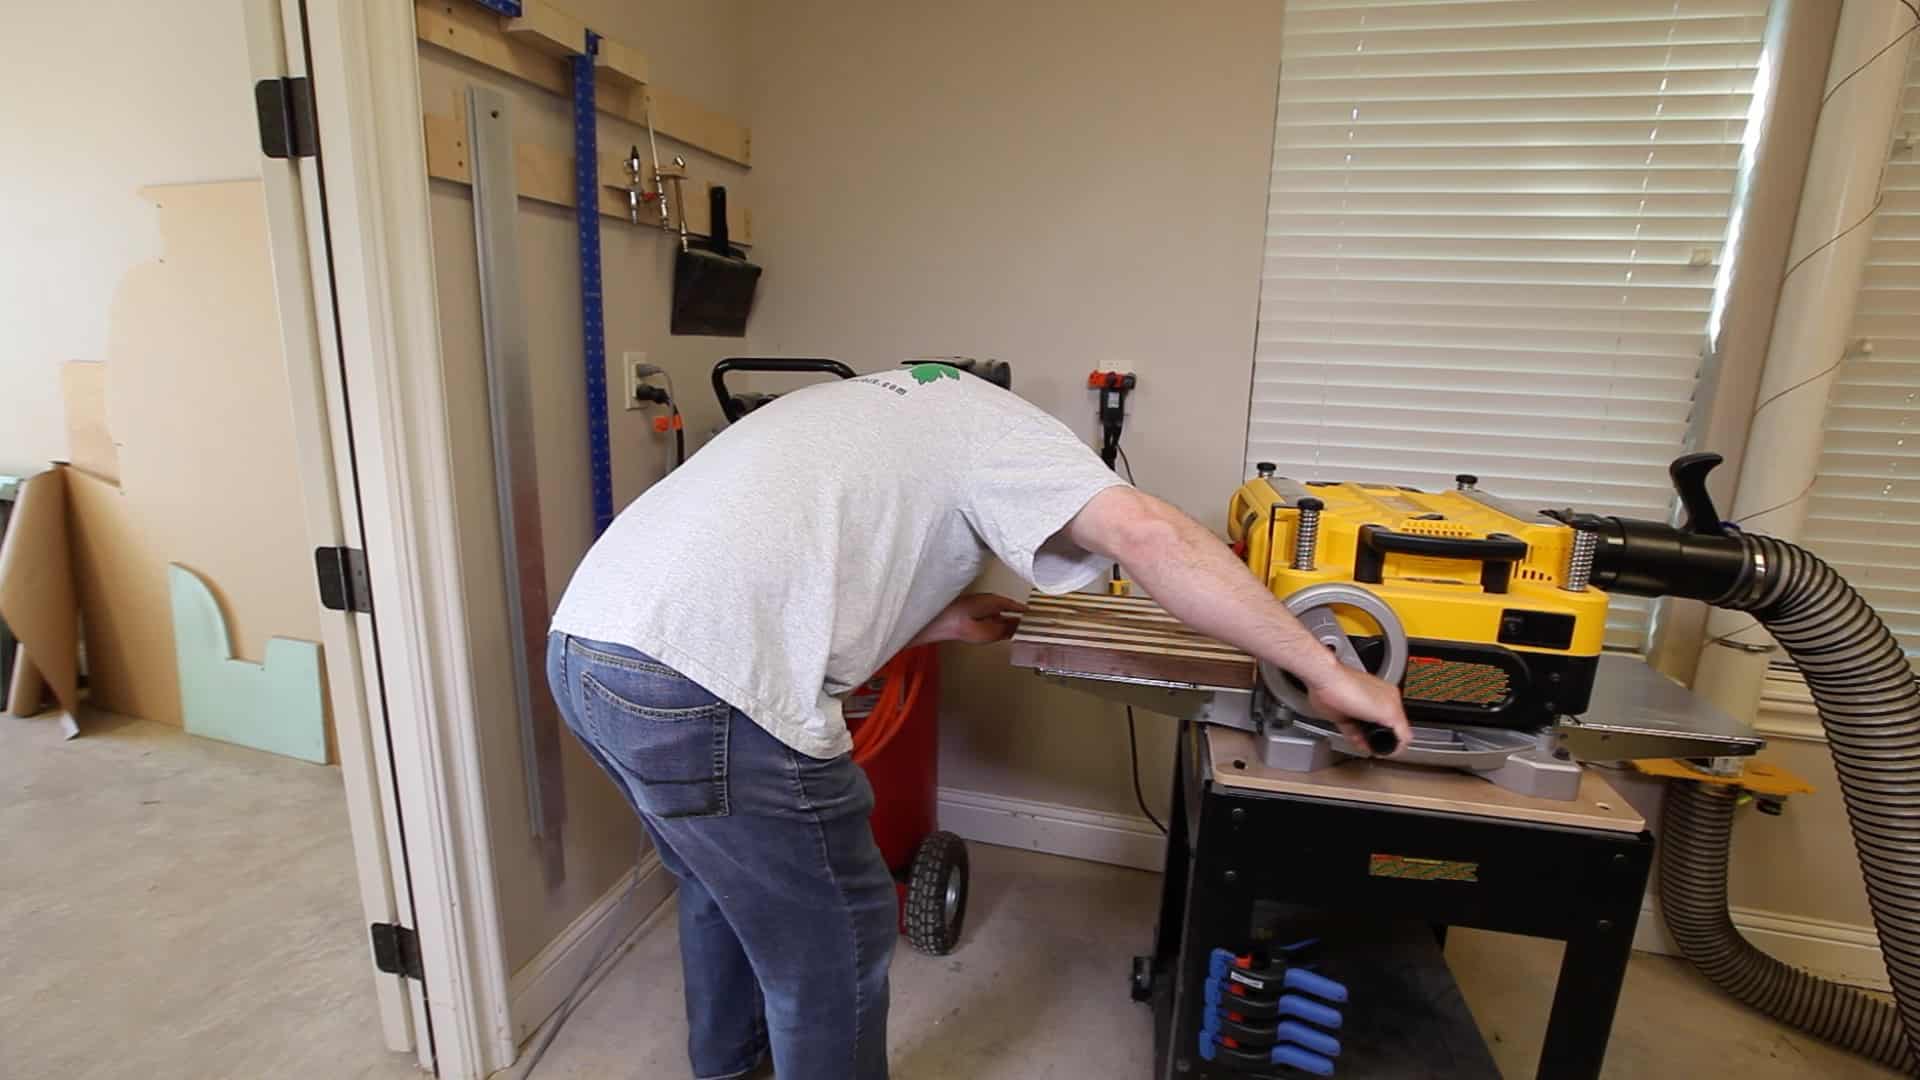
Once the glue had dried I removed the blank from the clamps. I ran the blanks through planer to clean up both sides. Gave it a quick rough sanding, and then cut it into two perfect squares on the table saw (13″ X 13″).
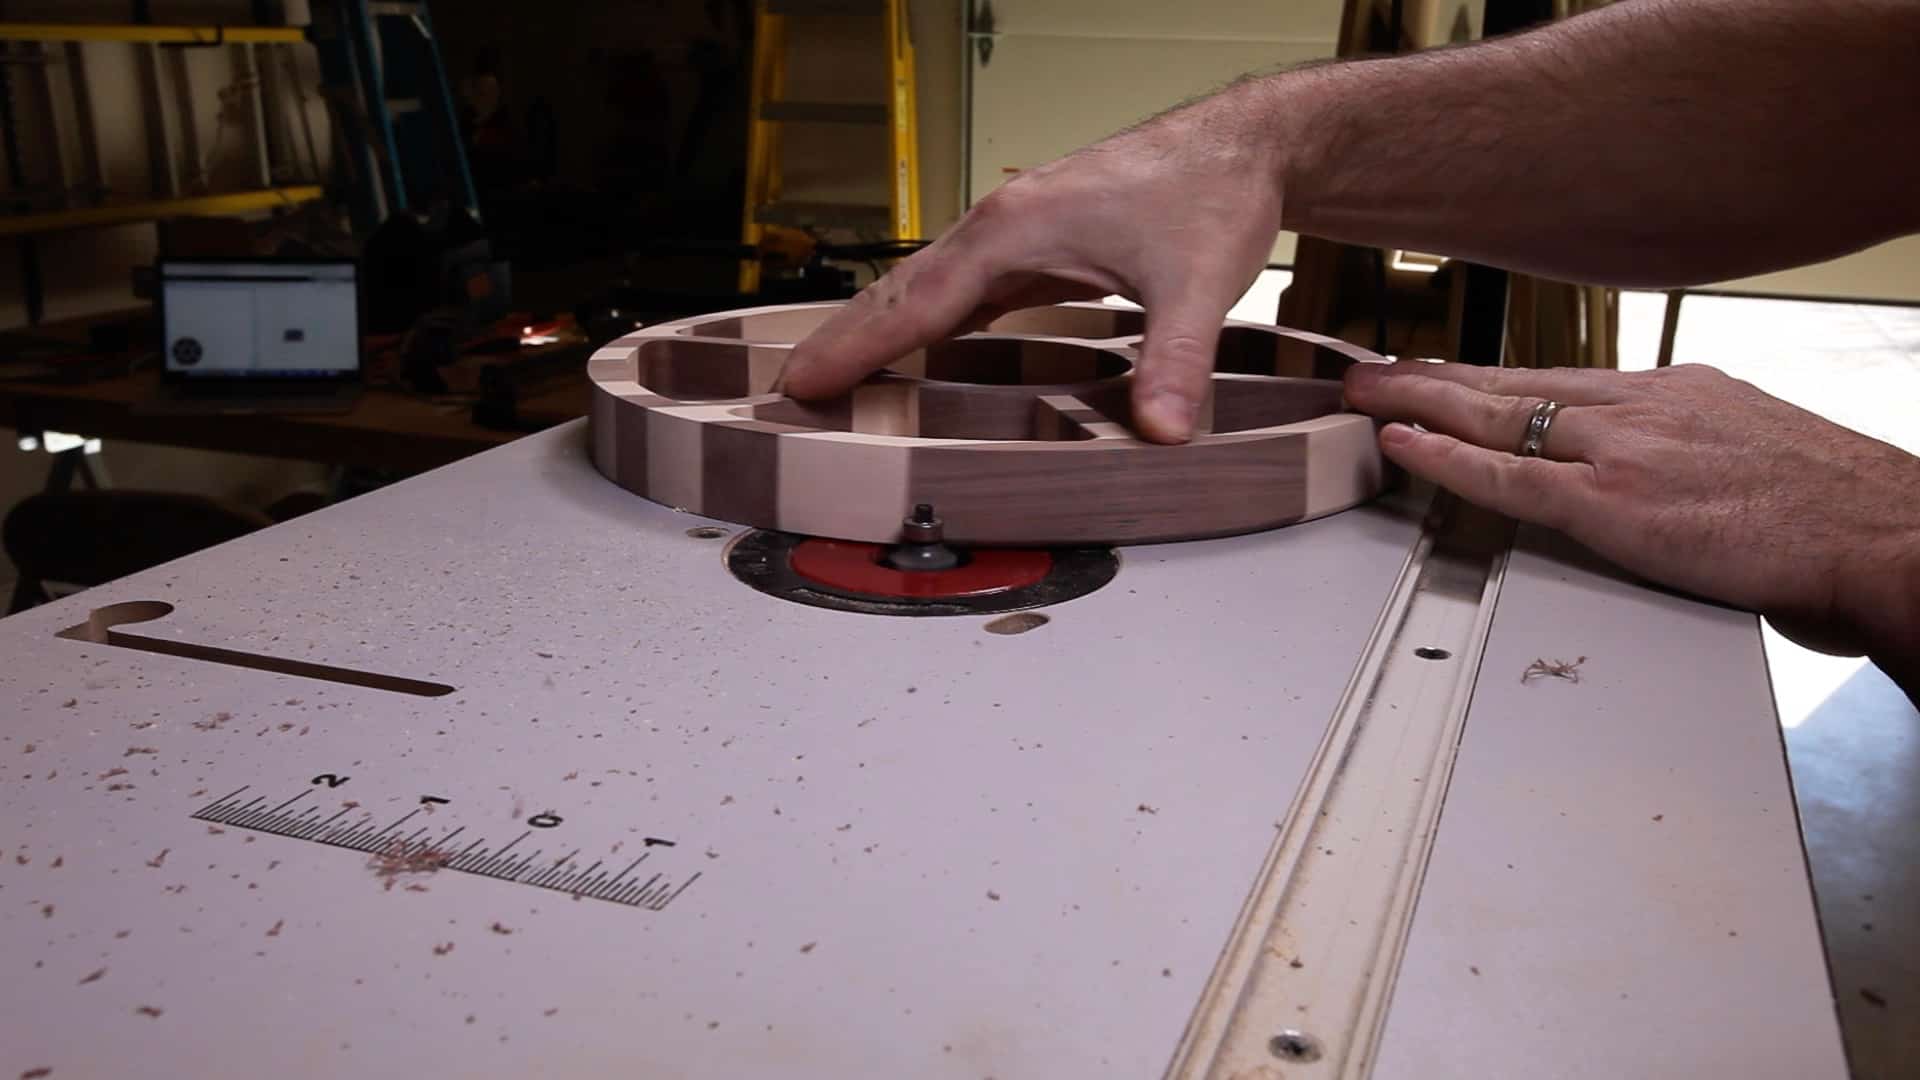
Step 3A: Hogging out the Serving Tray Dishes – Hand Tools
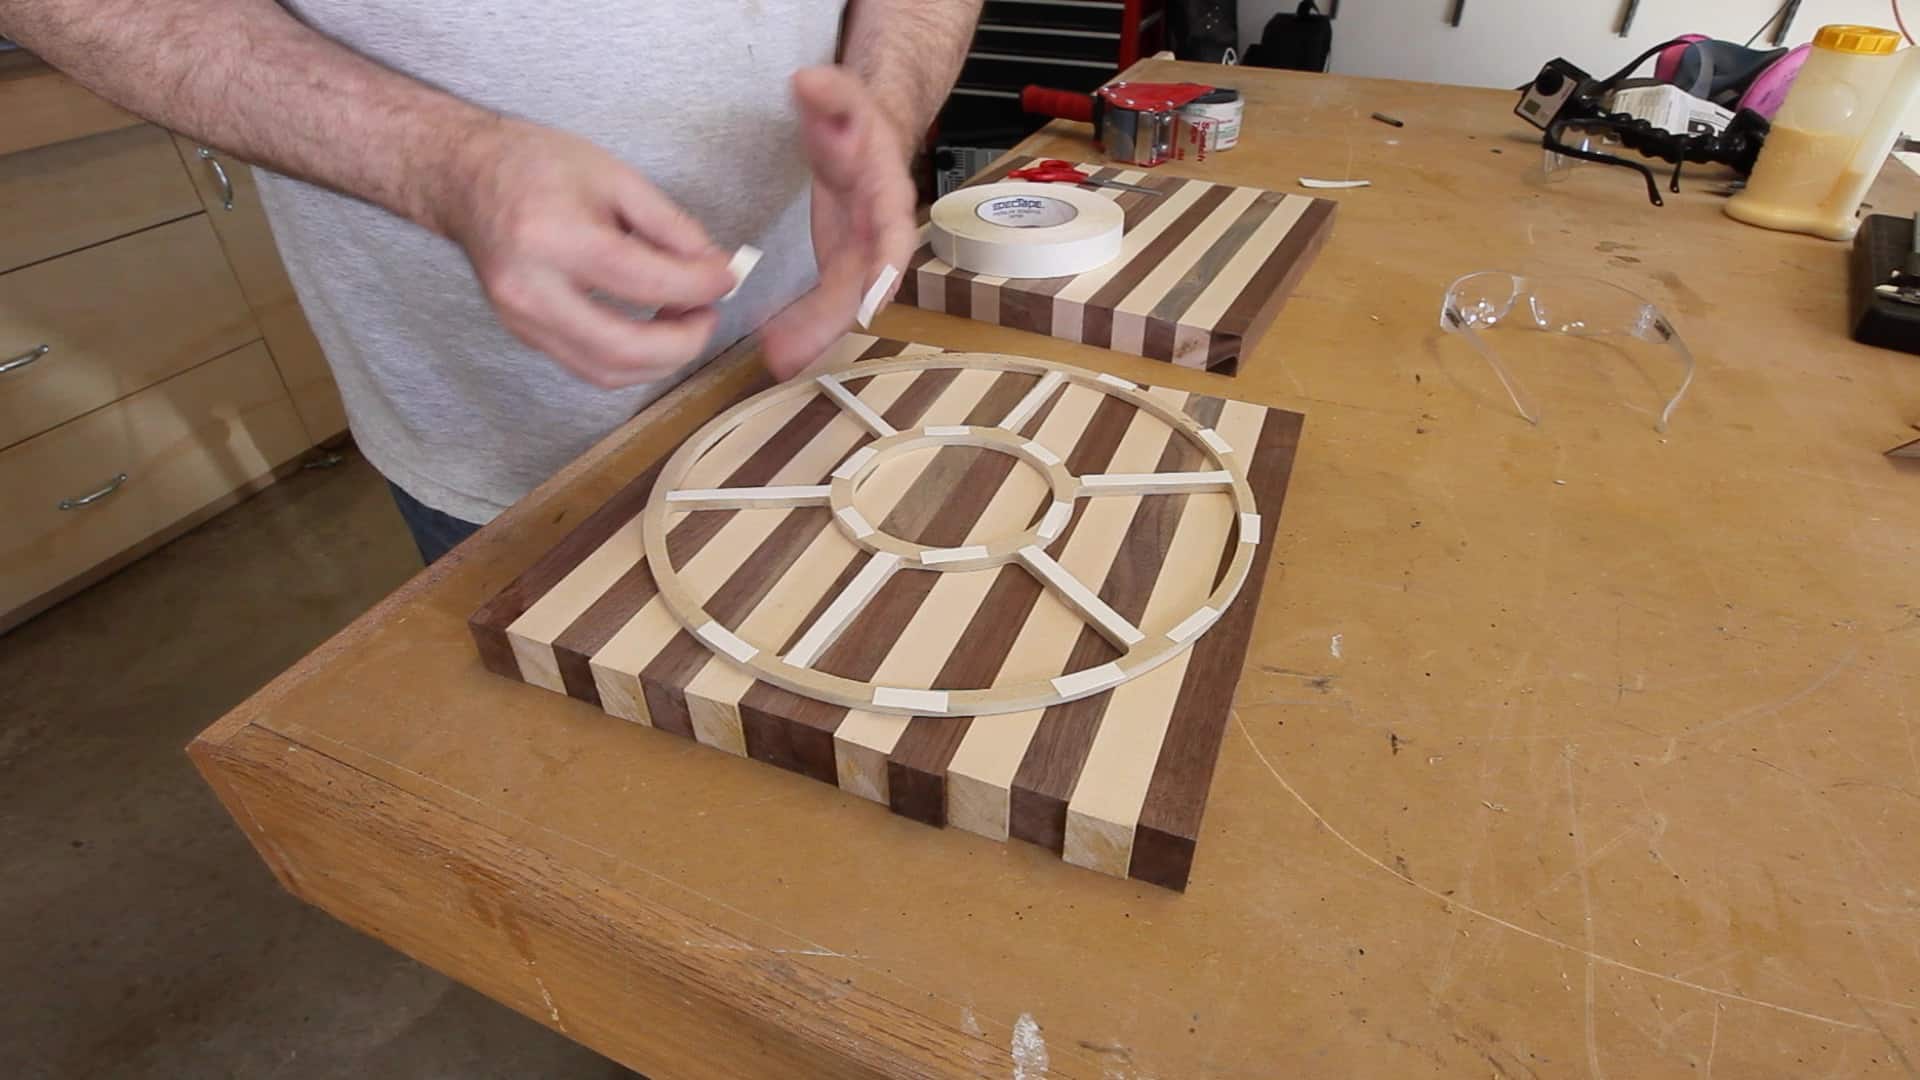
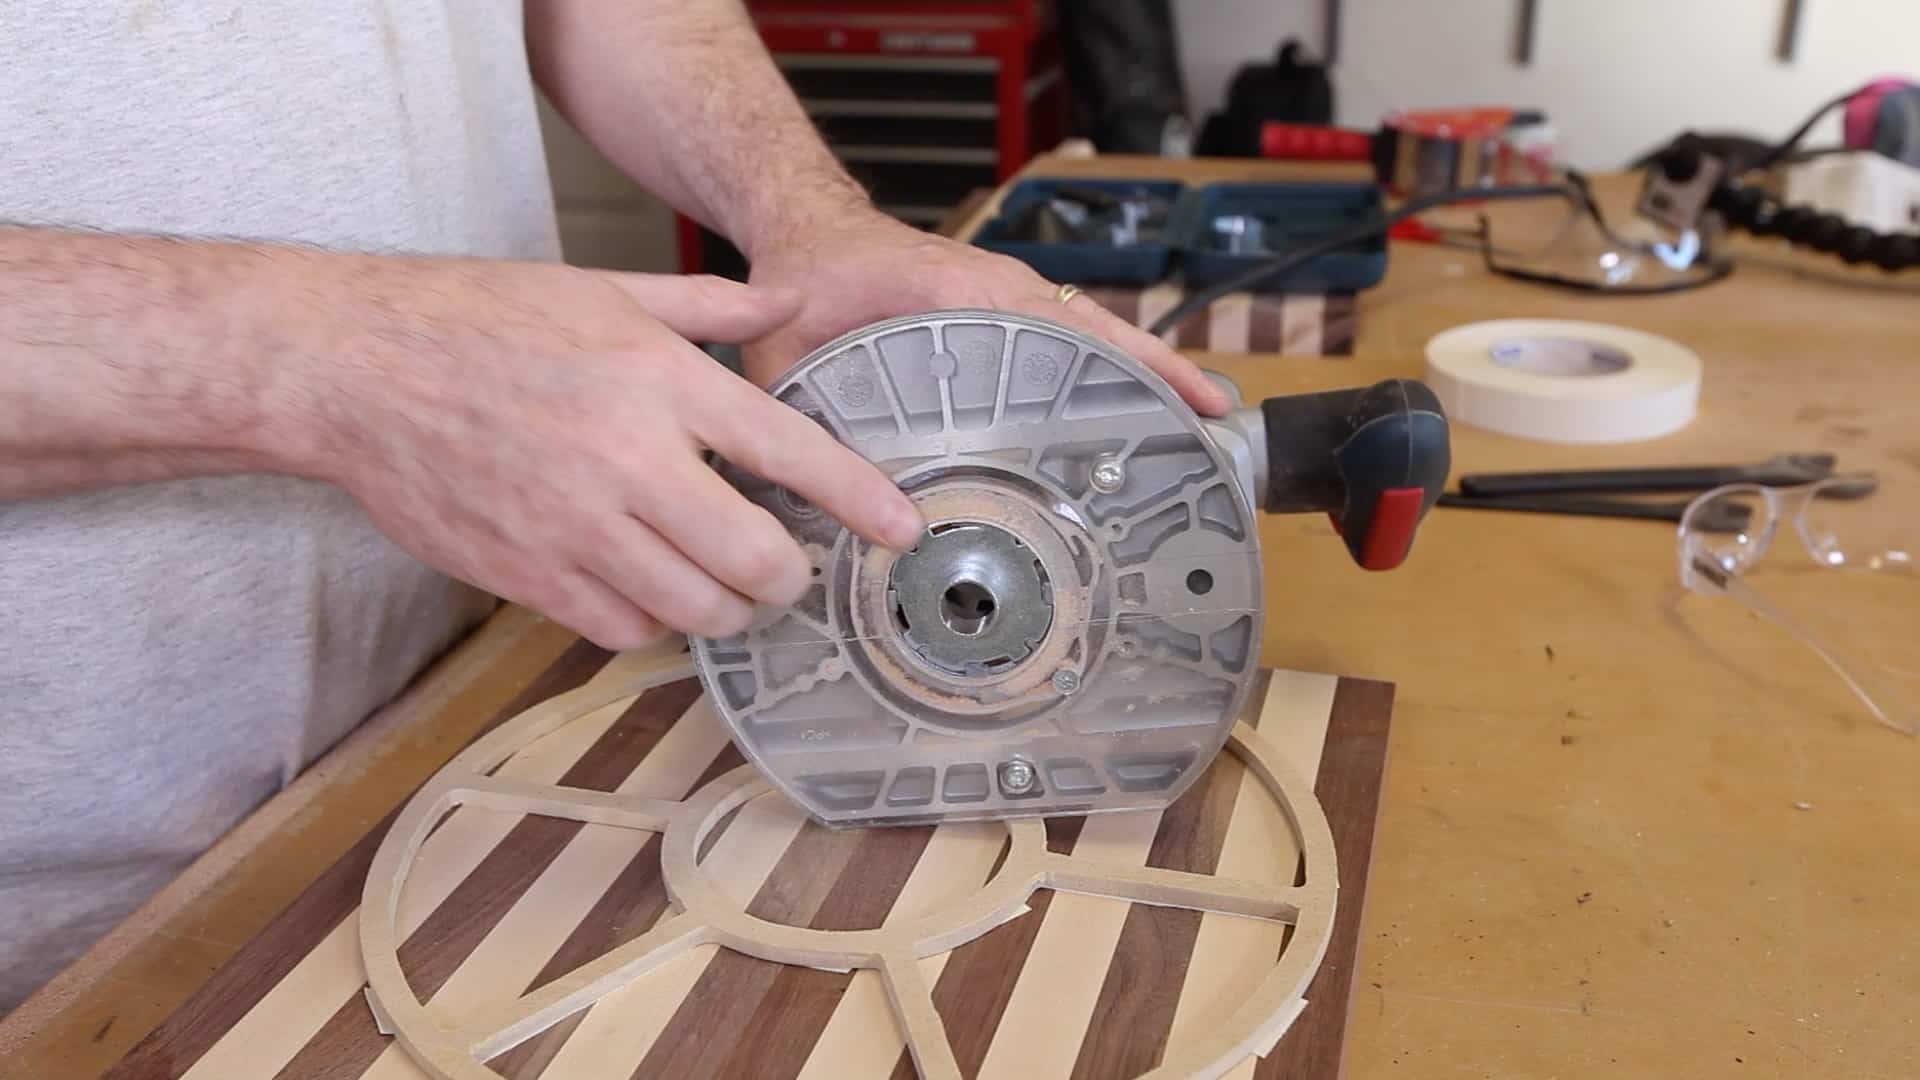
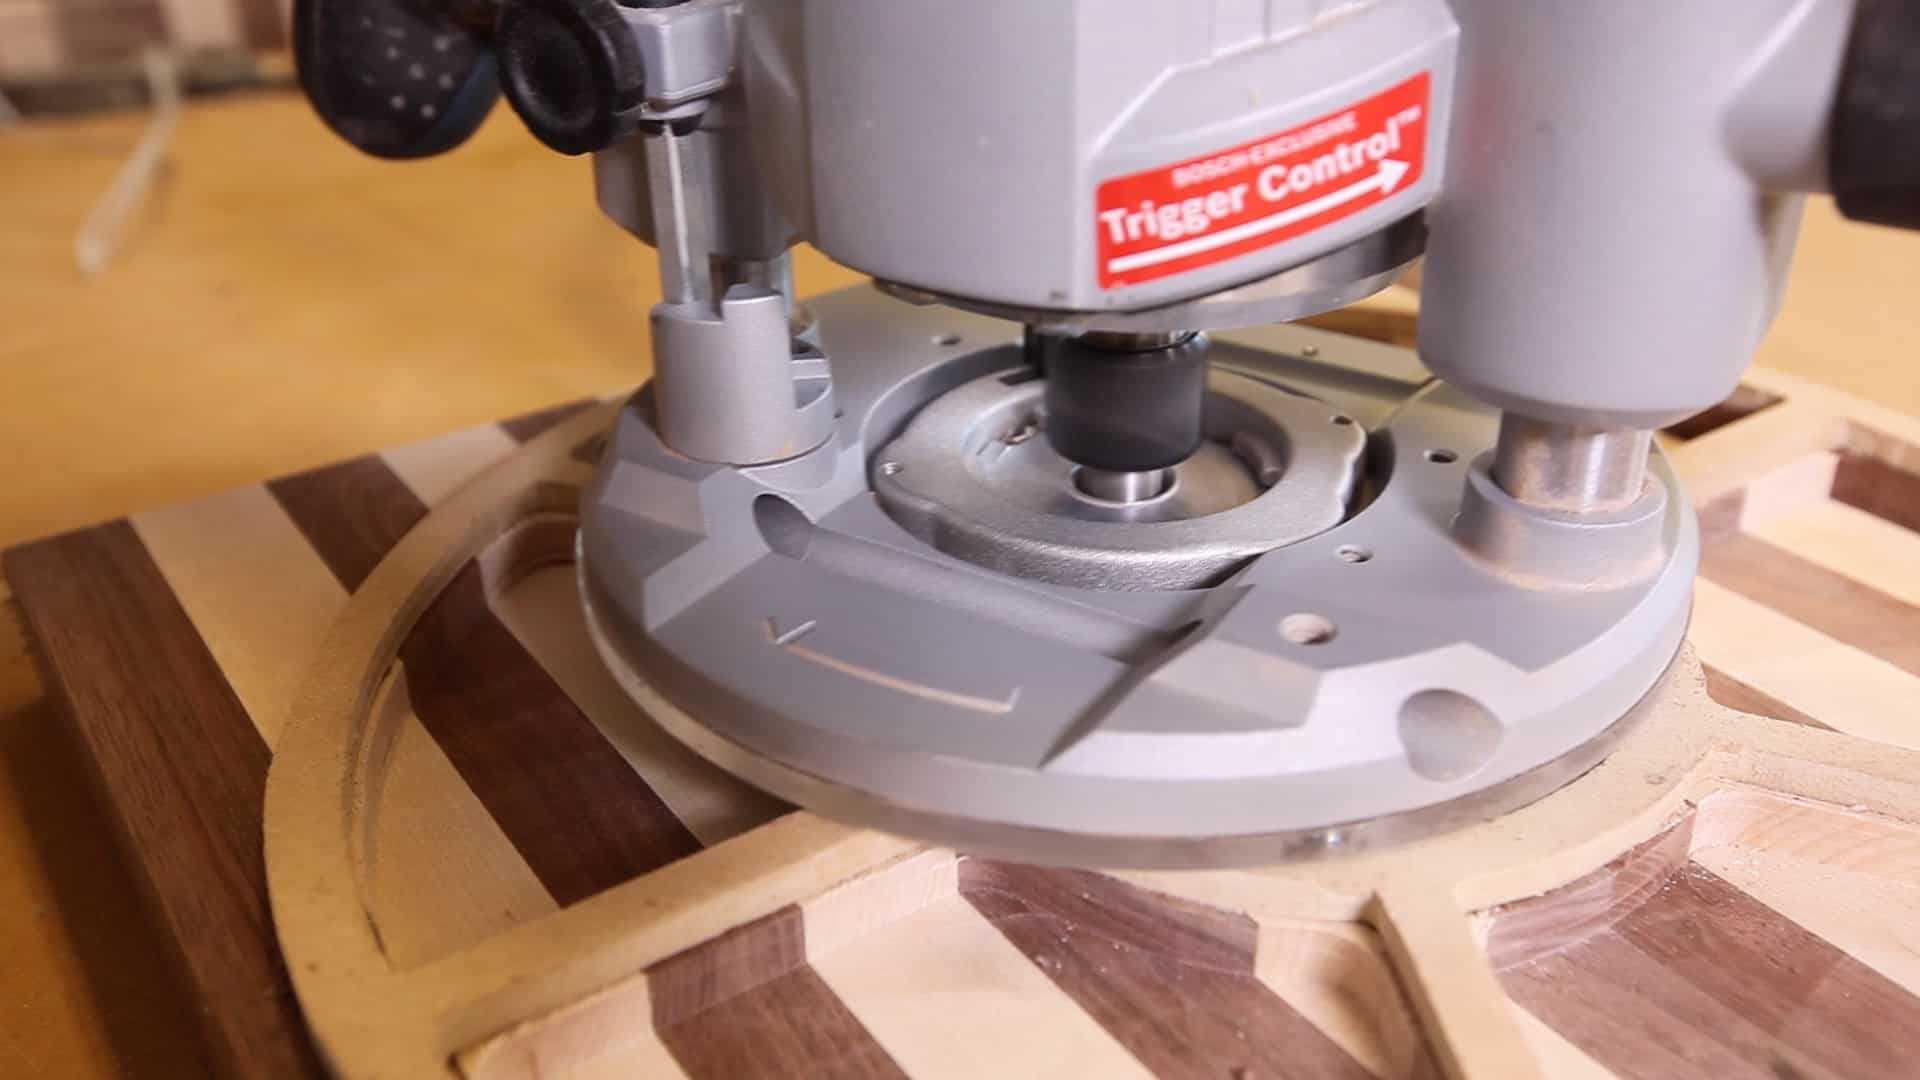
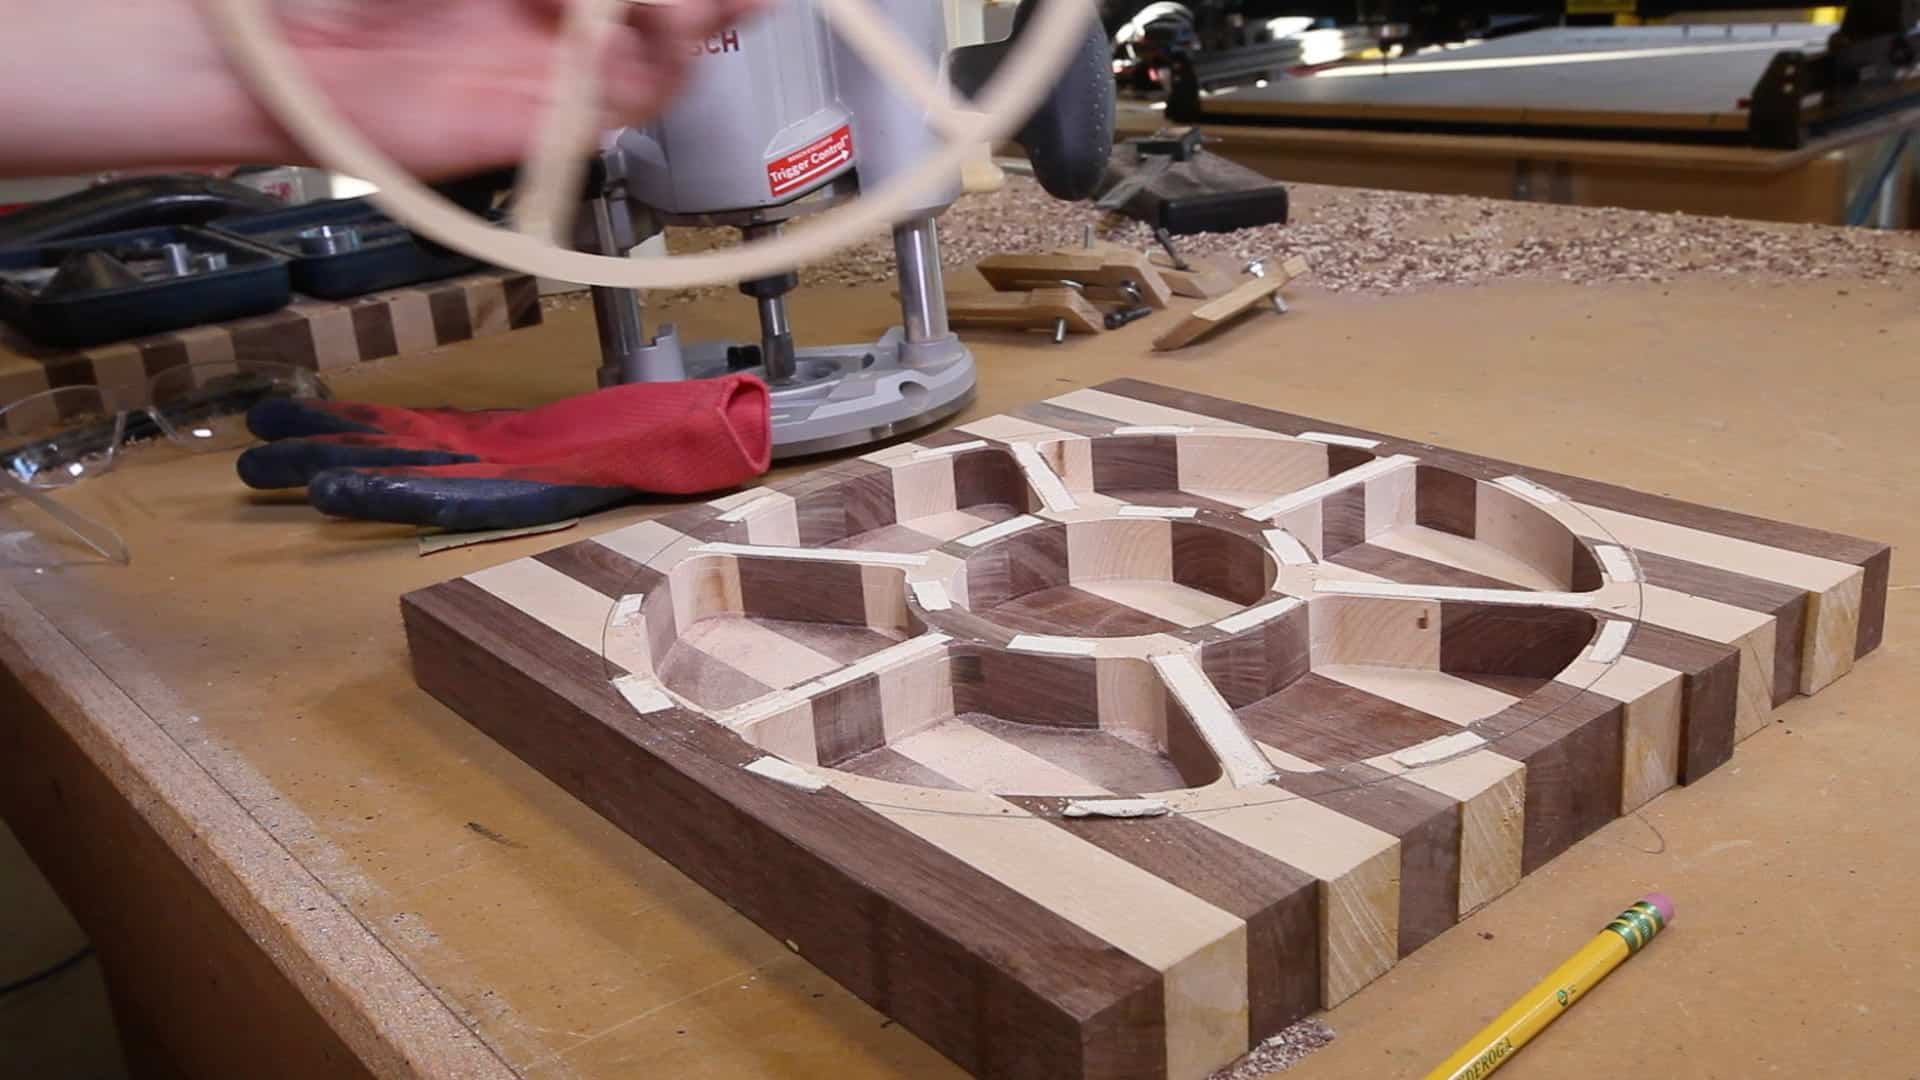
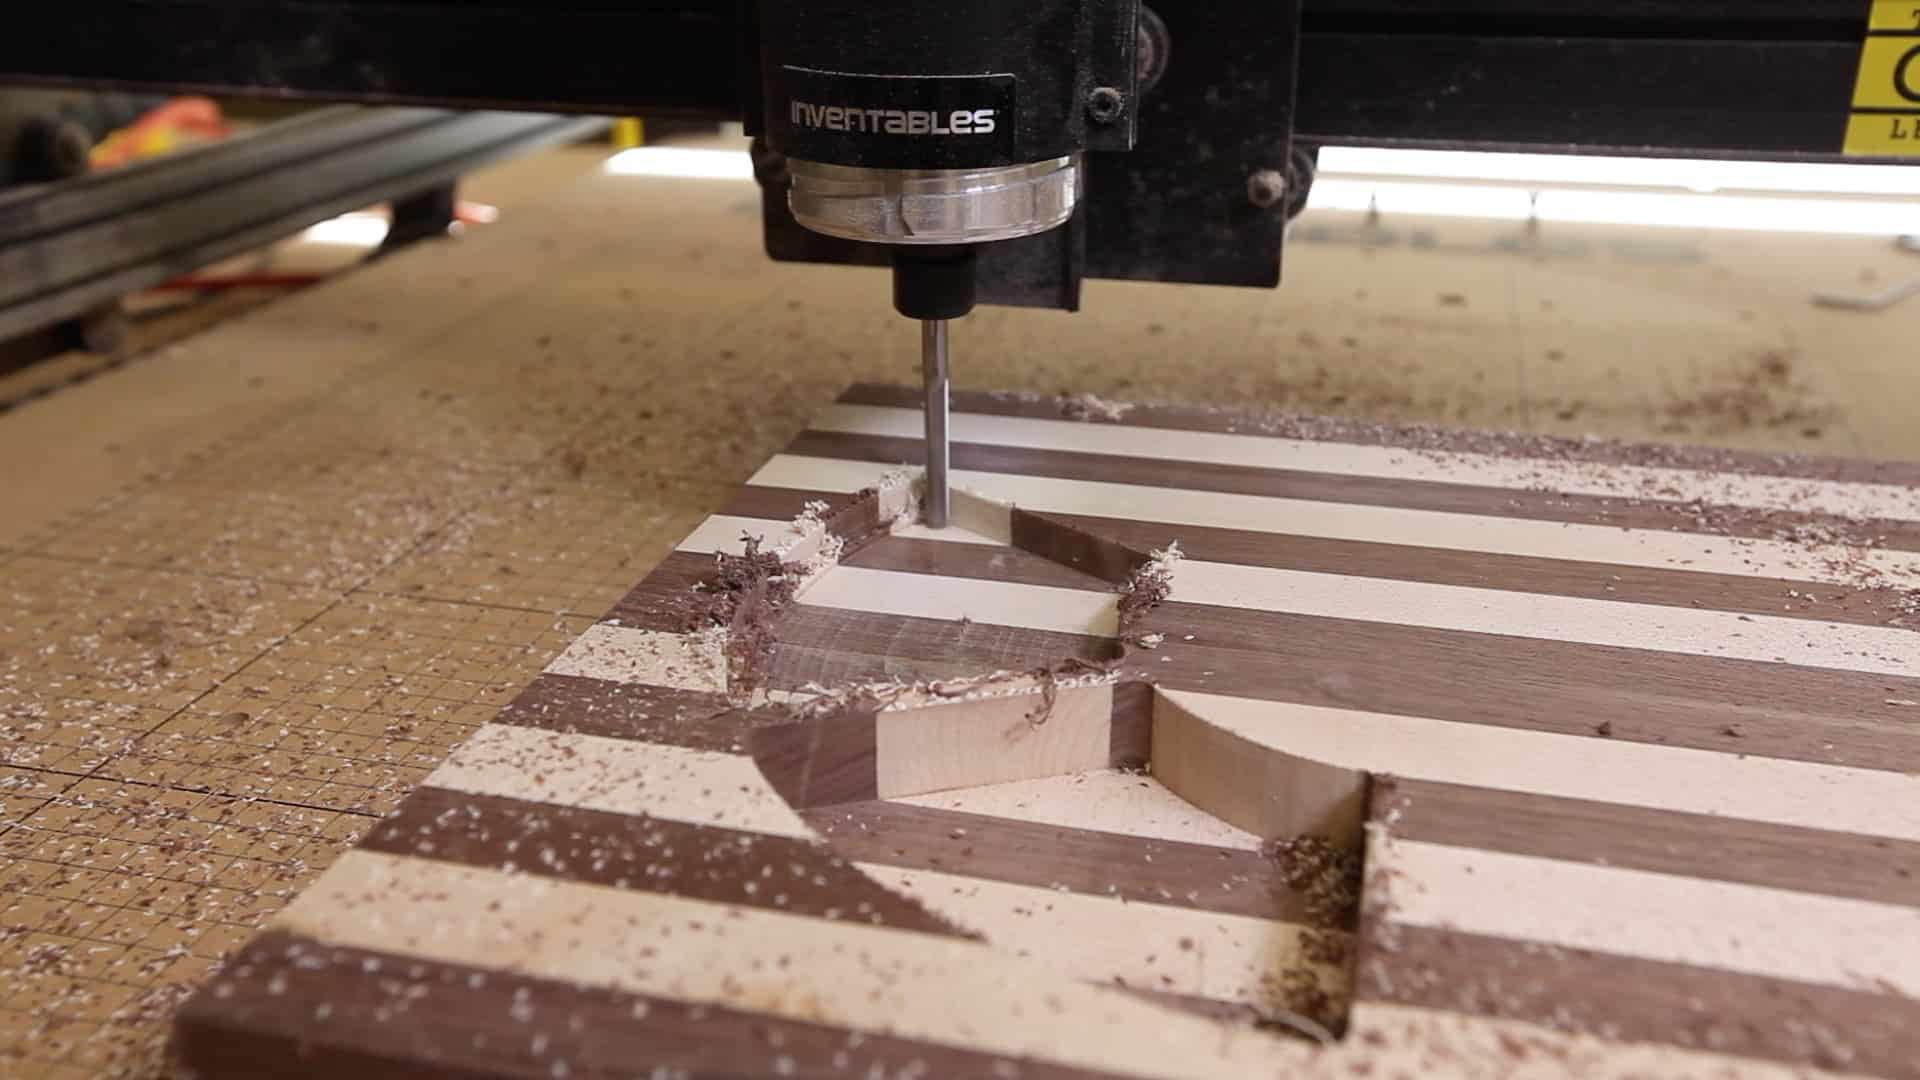
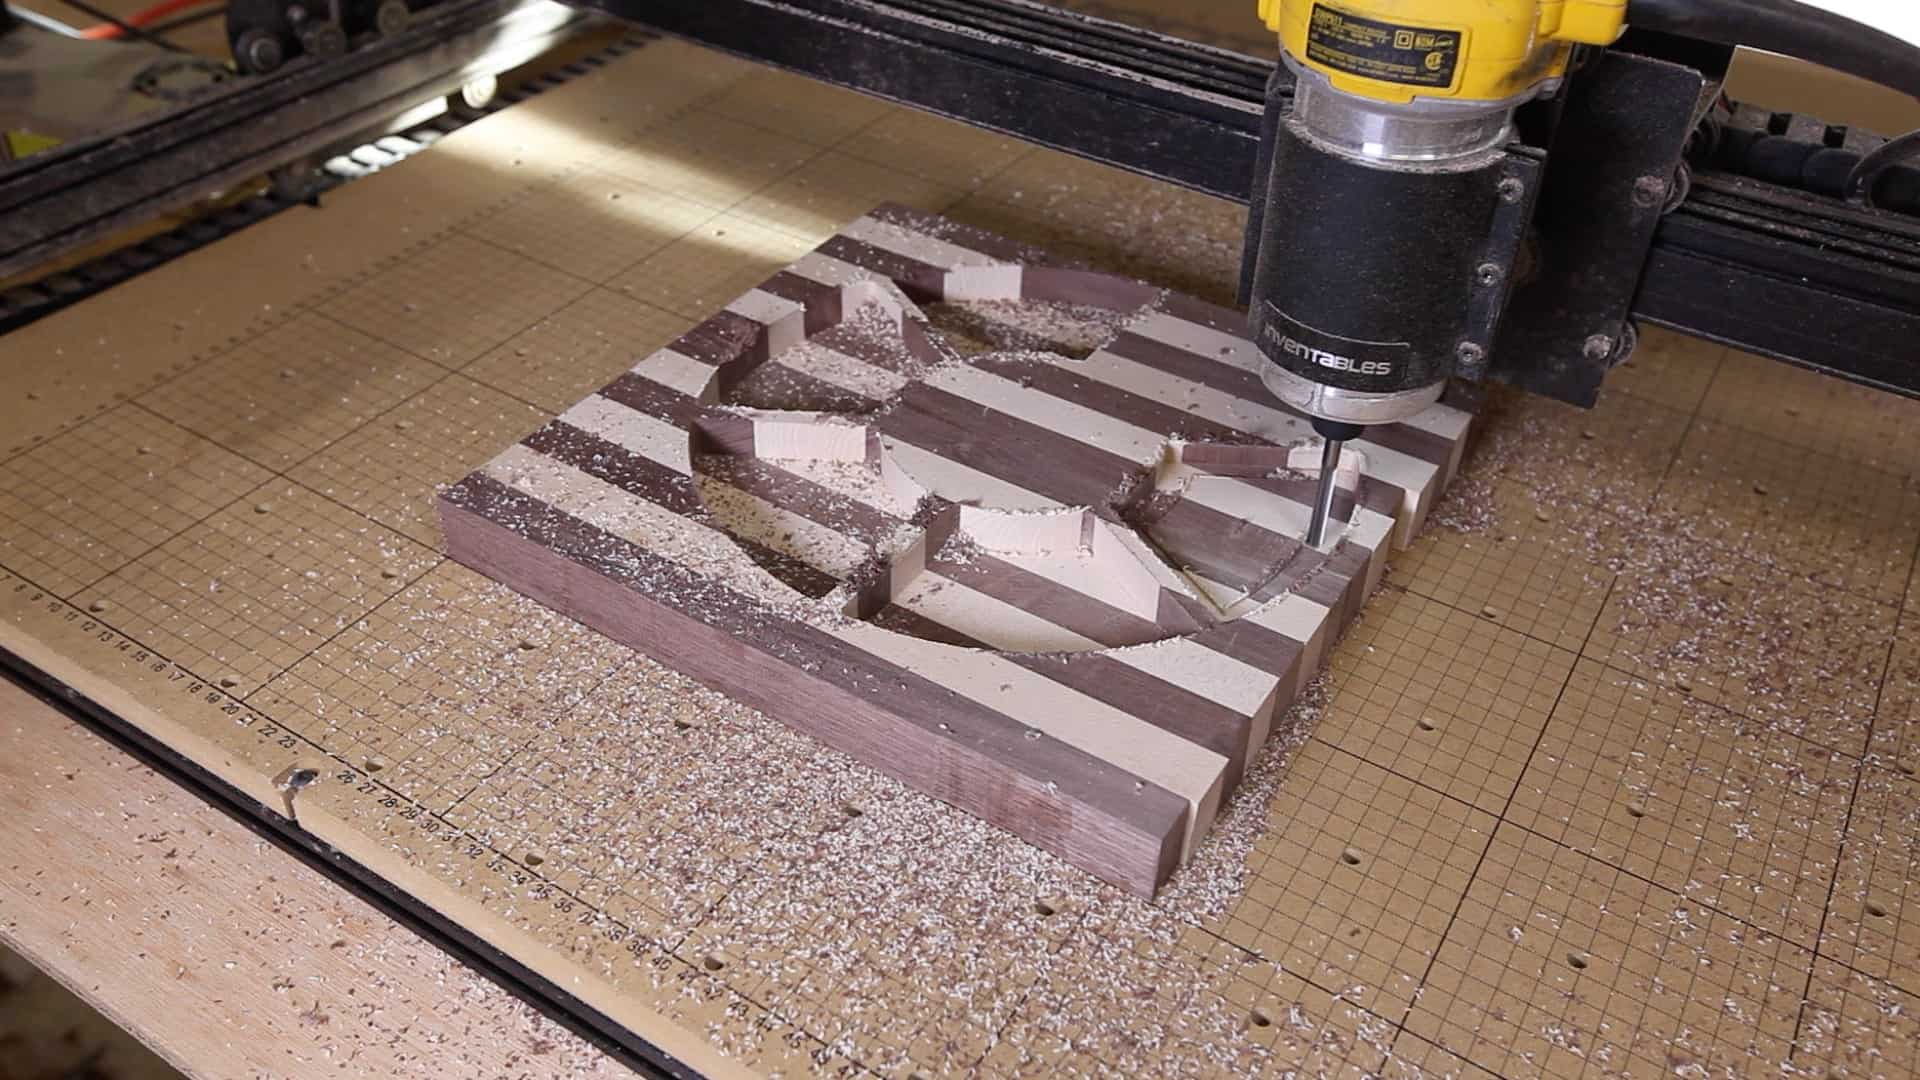
Here’s where their paths take their separate ways. I took the Sketchup files and made a template. I printed it out and then used my scroll saw to make a 1/4″ MDF template. I used fabric tape to connect the template to the blank. Using a guide bearing on my router and 1/2″ slotting bit I hogged out all of the material in each of the dish sections.

Step 4A: Cutting out the Dish – Hand Tools
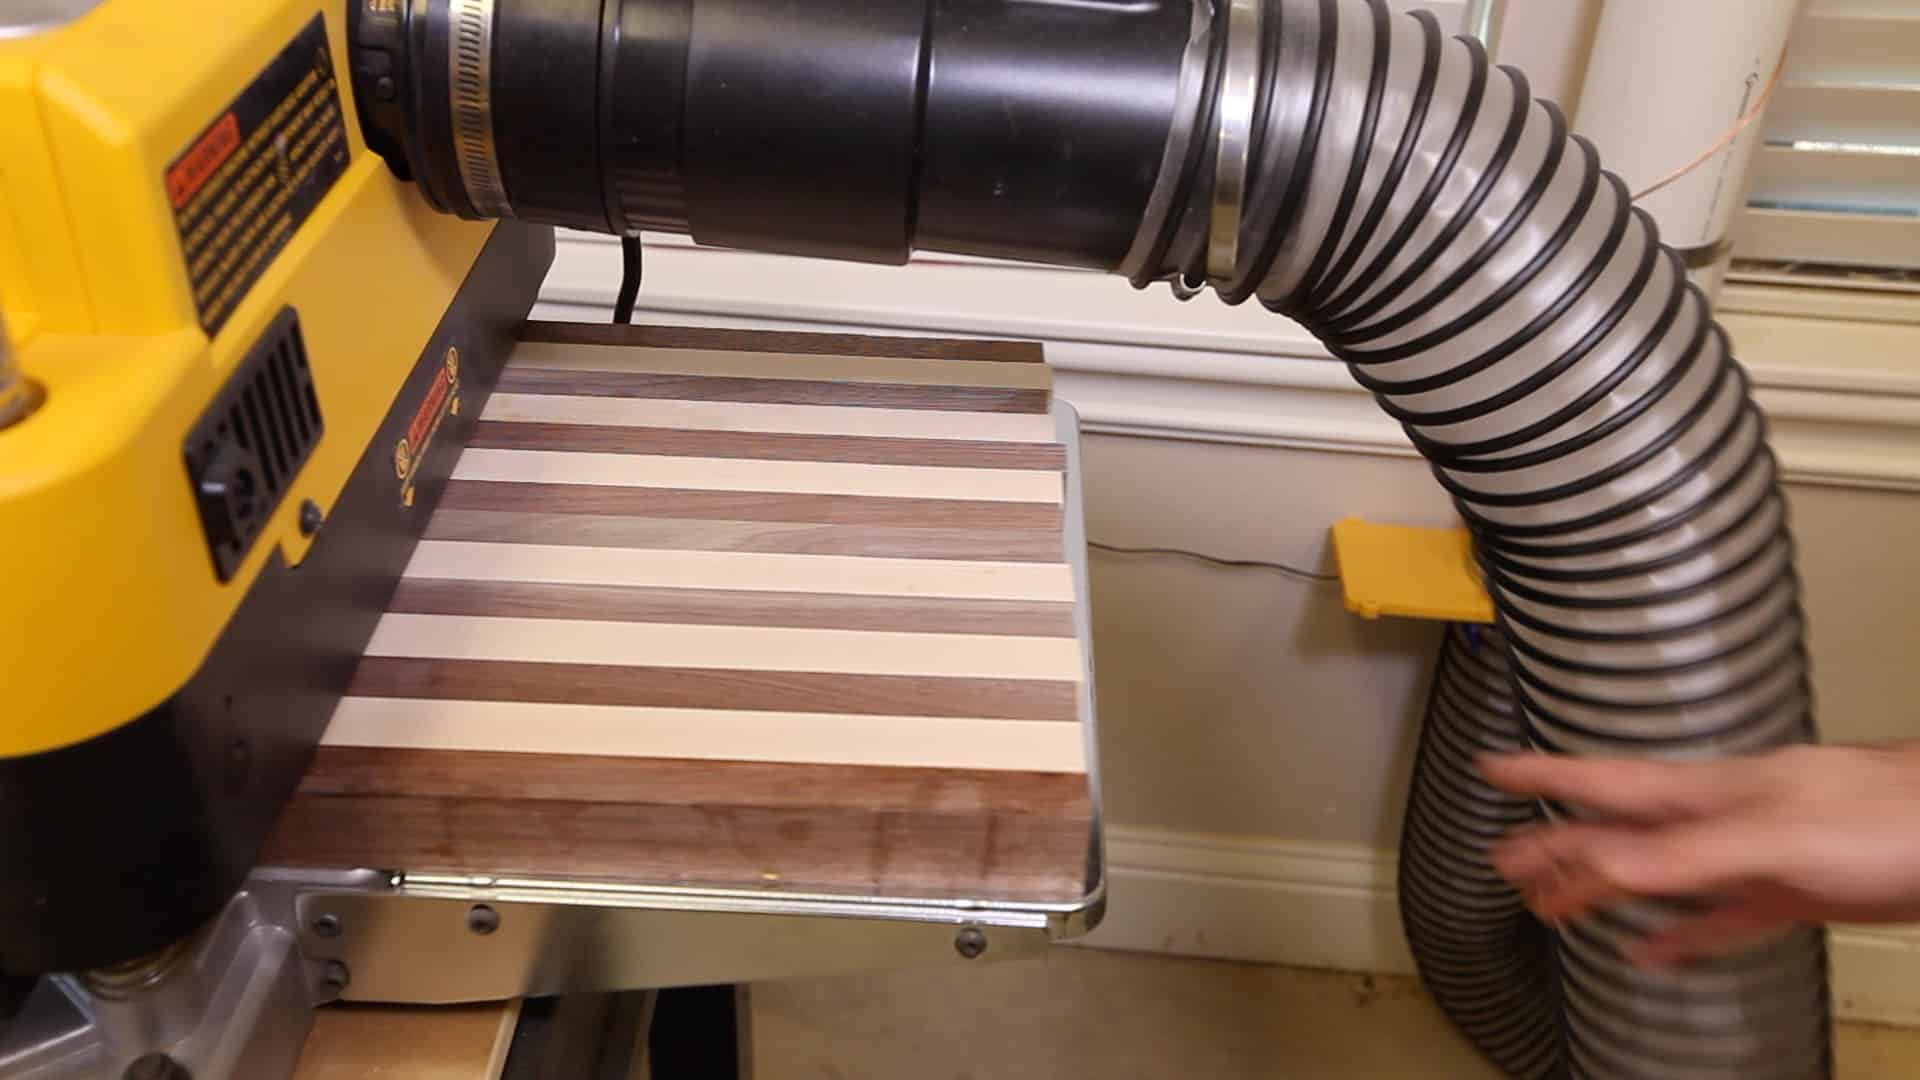
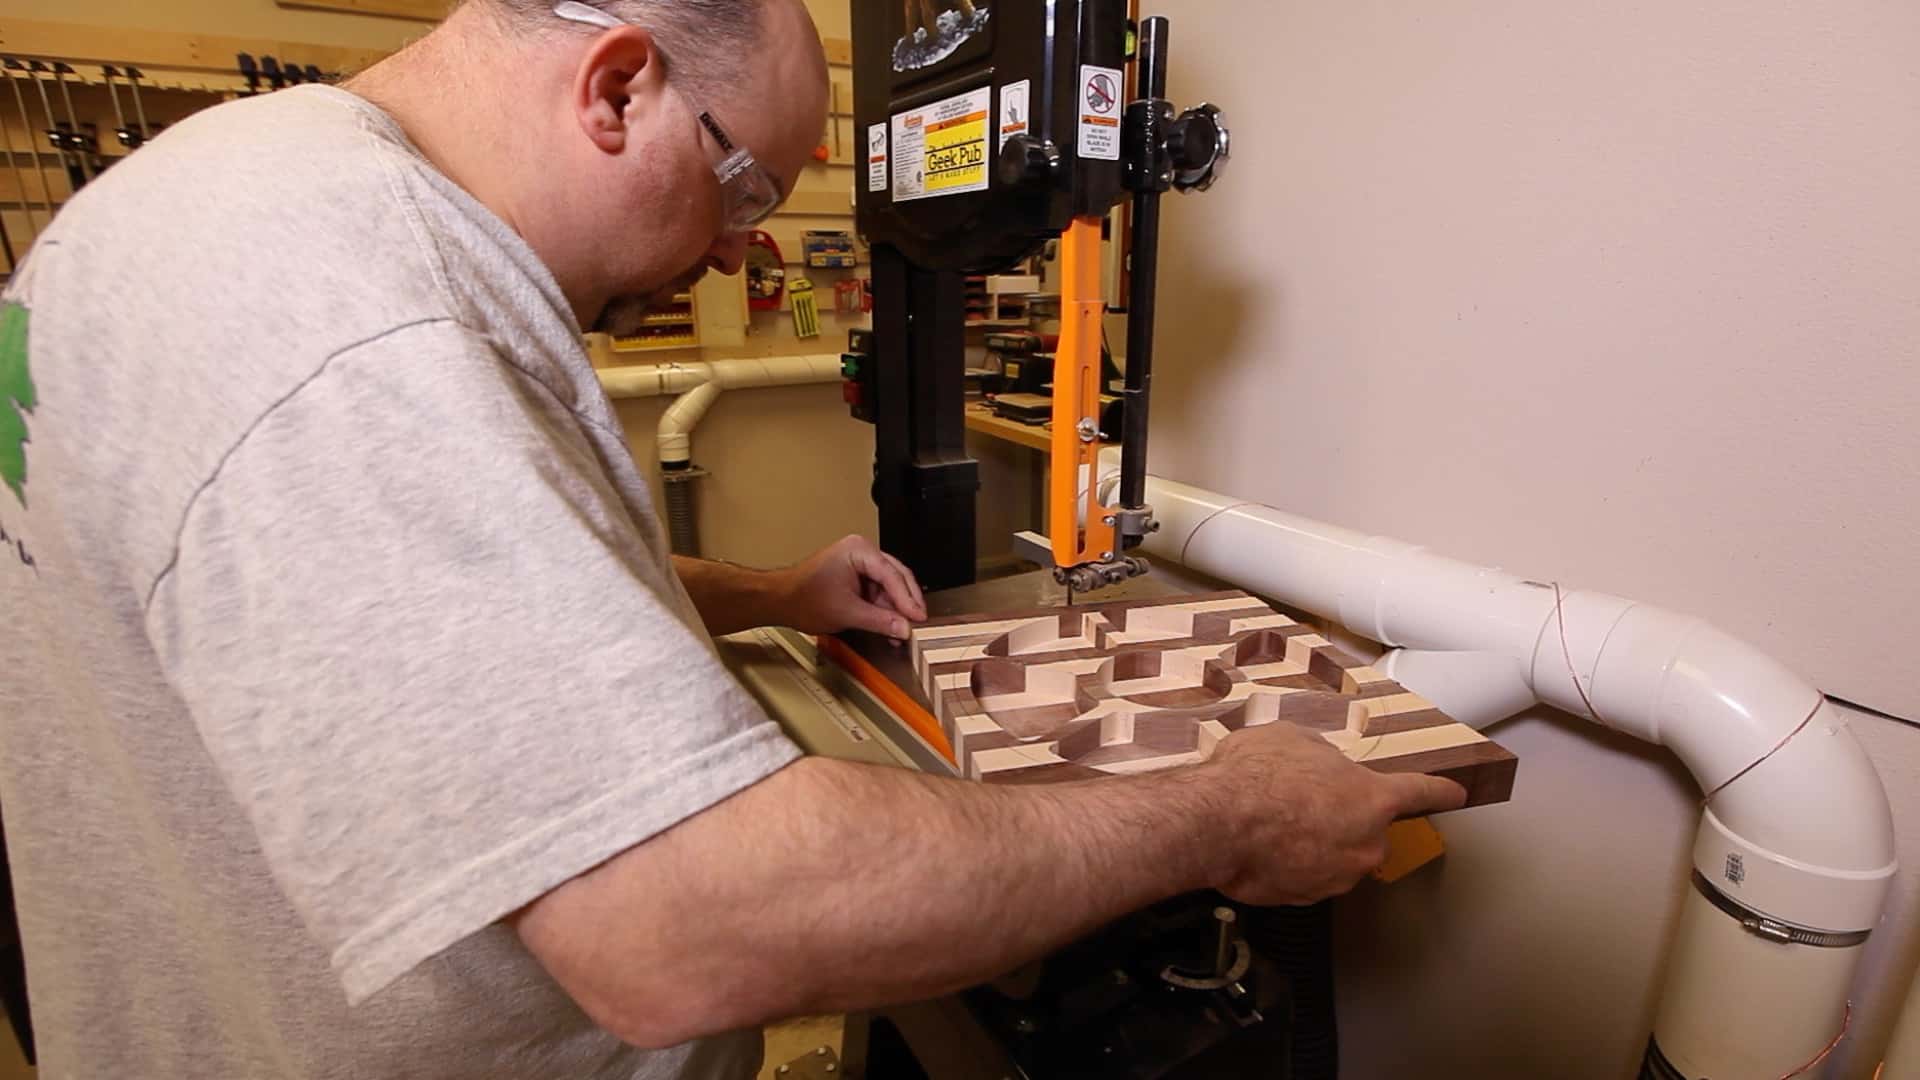
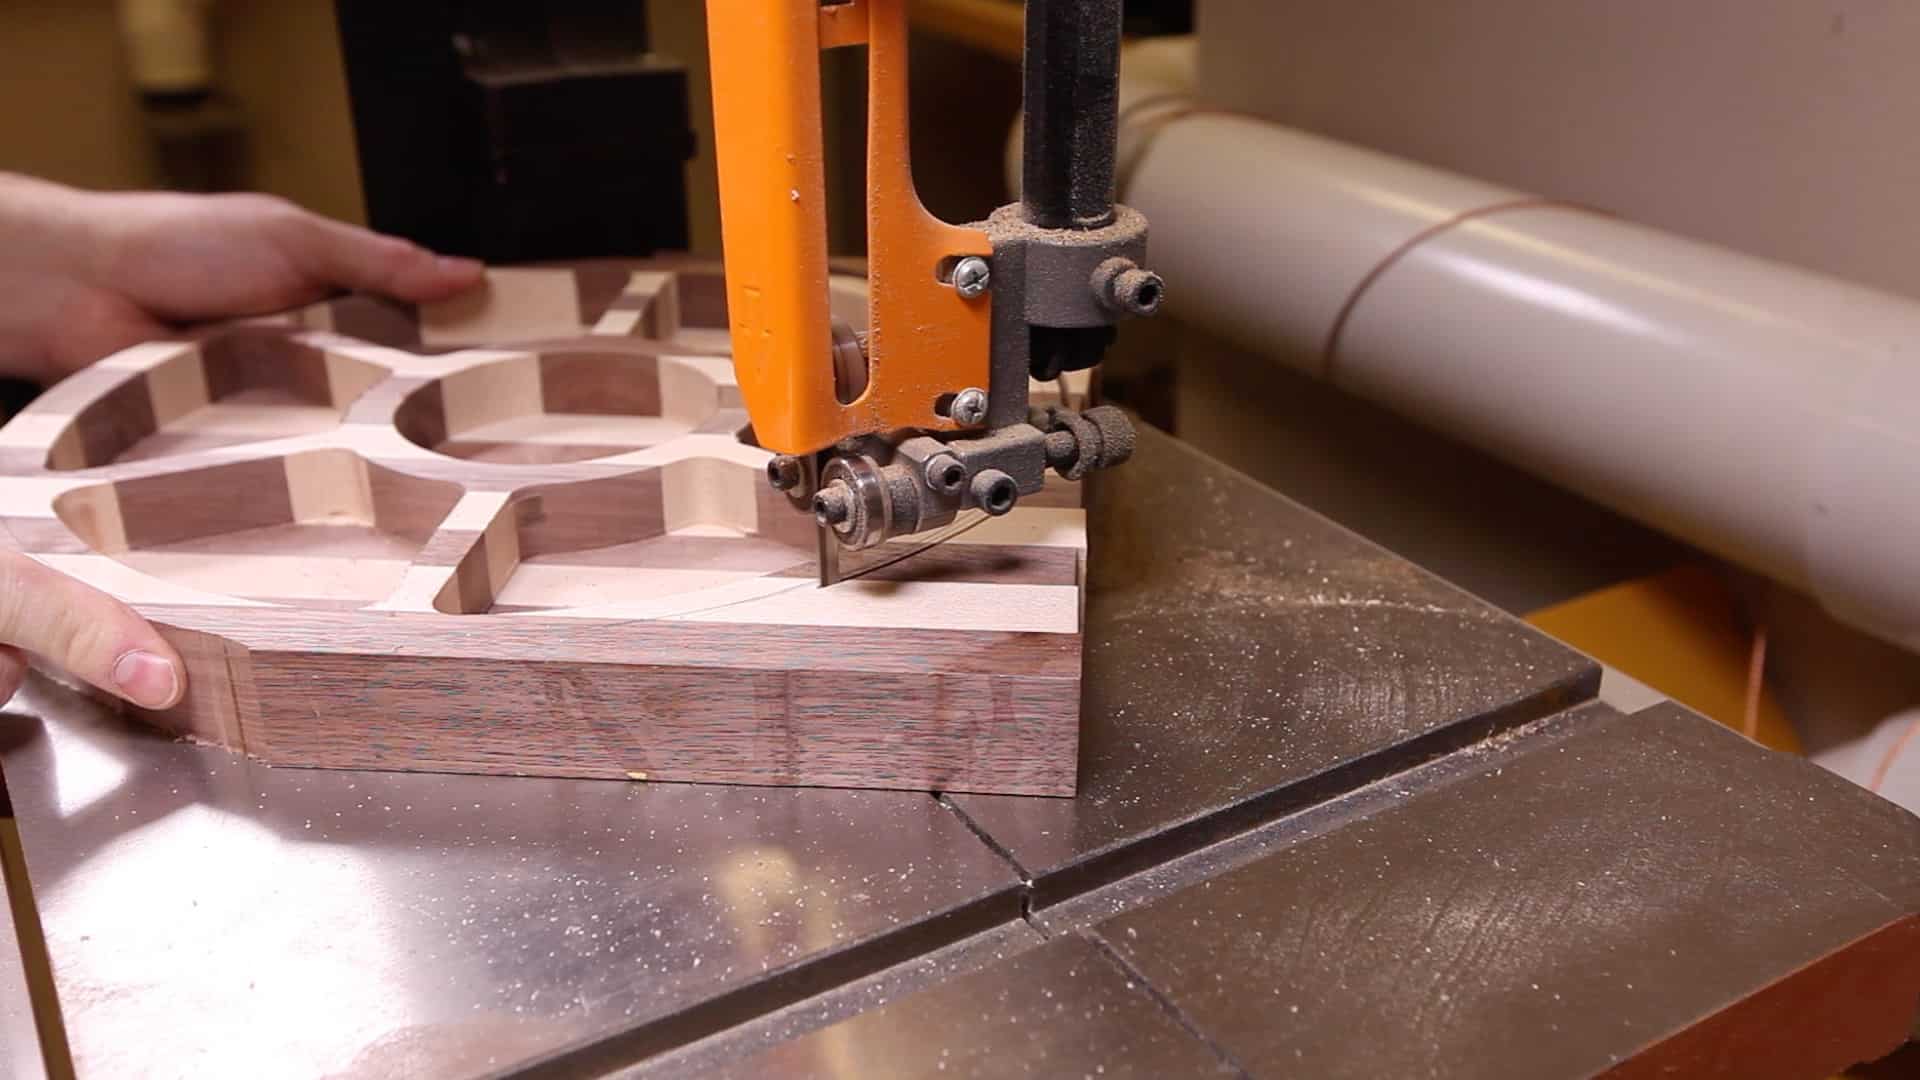
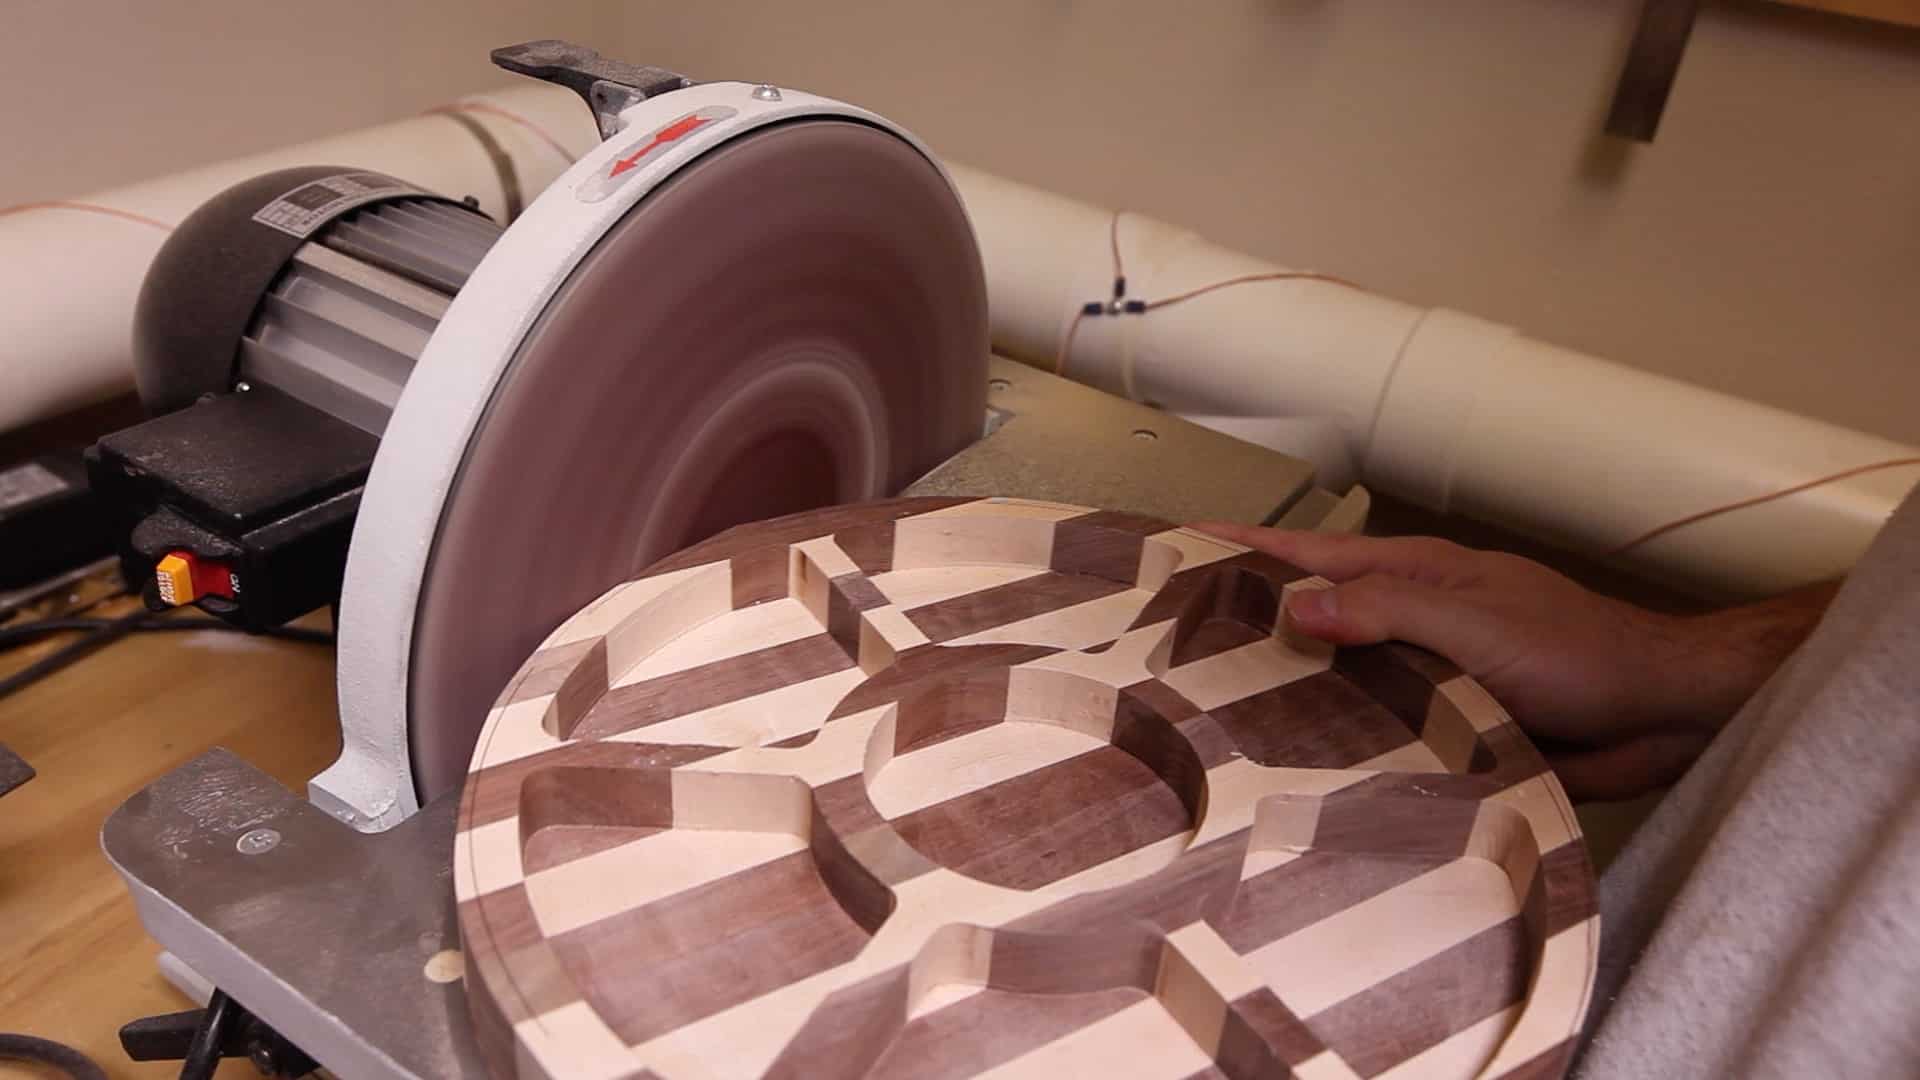
Using the band saw, I cut out the tray along the template lines and then used the 12″ disc sander to clean up the bandsaw marks.
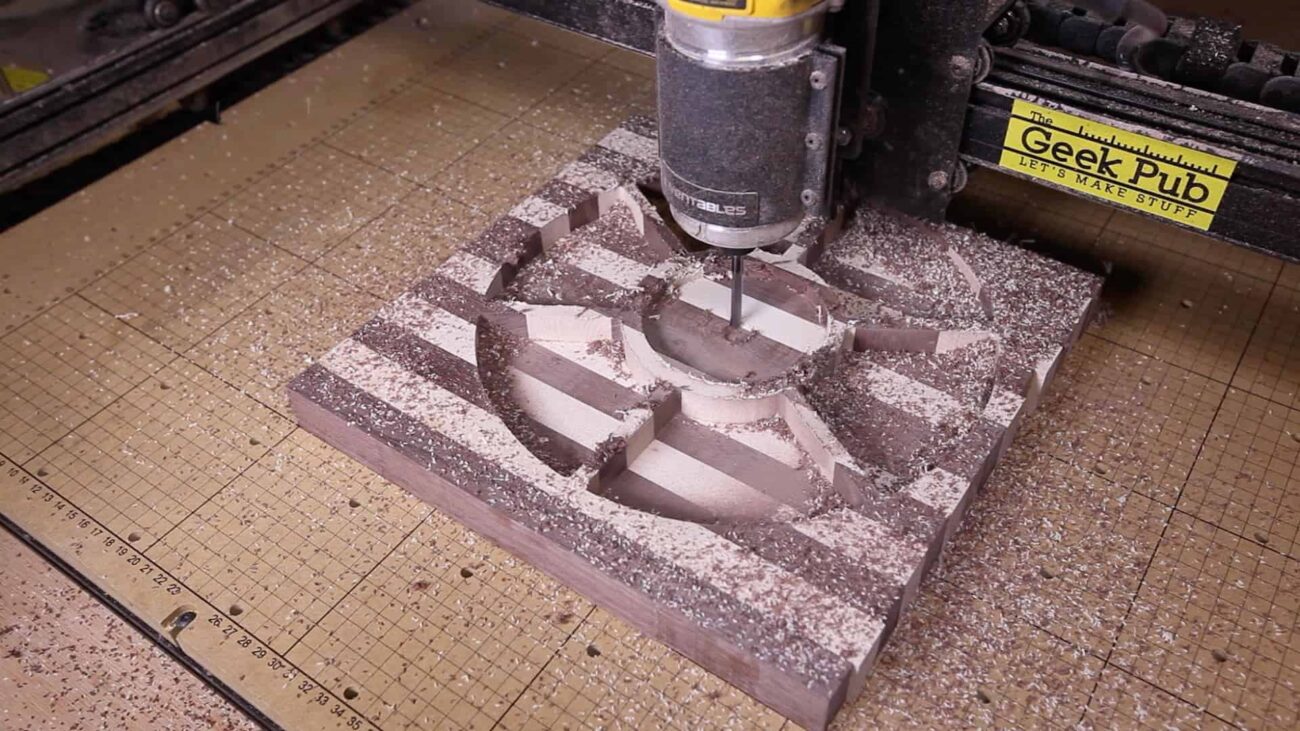
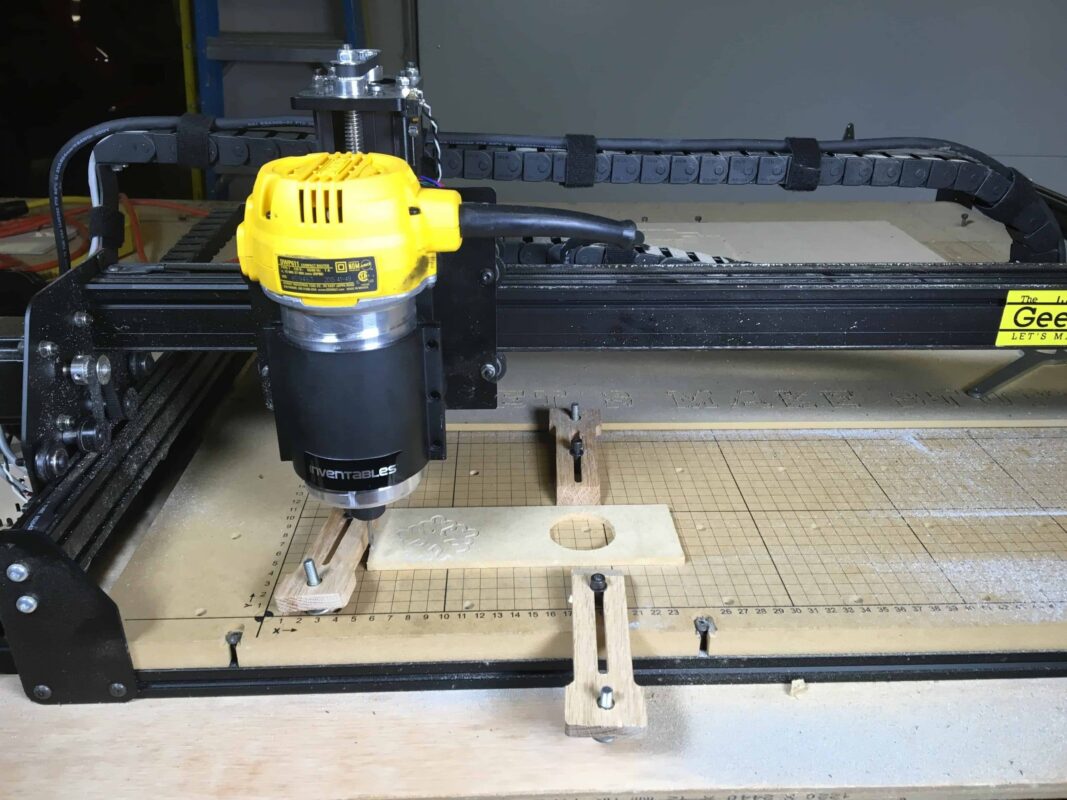
Step 3B and 4B: Making the Serving Tray – CNC
With the CNC version its pretty simple. I just attached the blank to the bed of the X-Carve, loaded SVG template, and then clicked the carve button. All you need to do is sit back and wait…. and wait… and wait… more on that later.

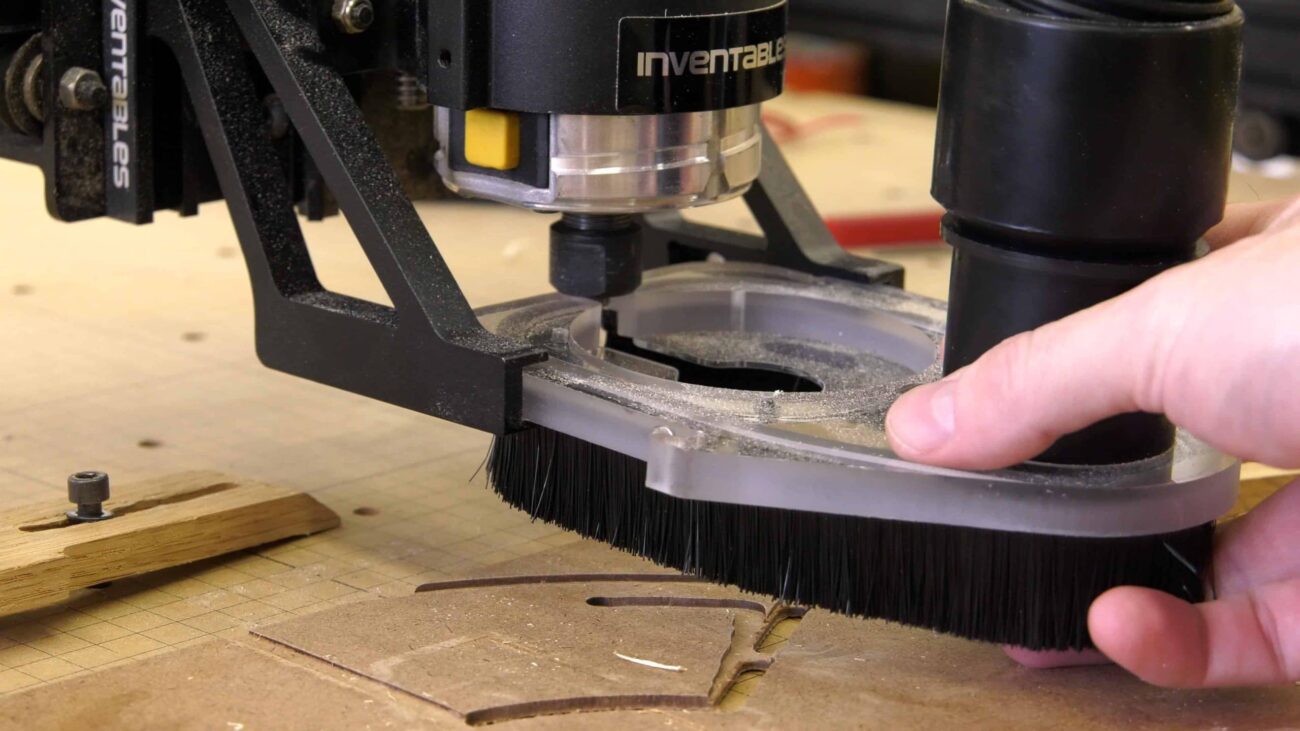
Step 5: Add Decorative Edging to the Tray
At step 5, things converge back together. I used the router table to add a decorative round over (1/8″) on all edges of the party serving tray.
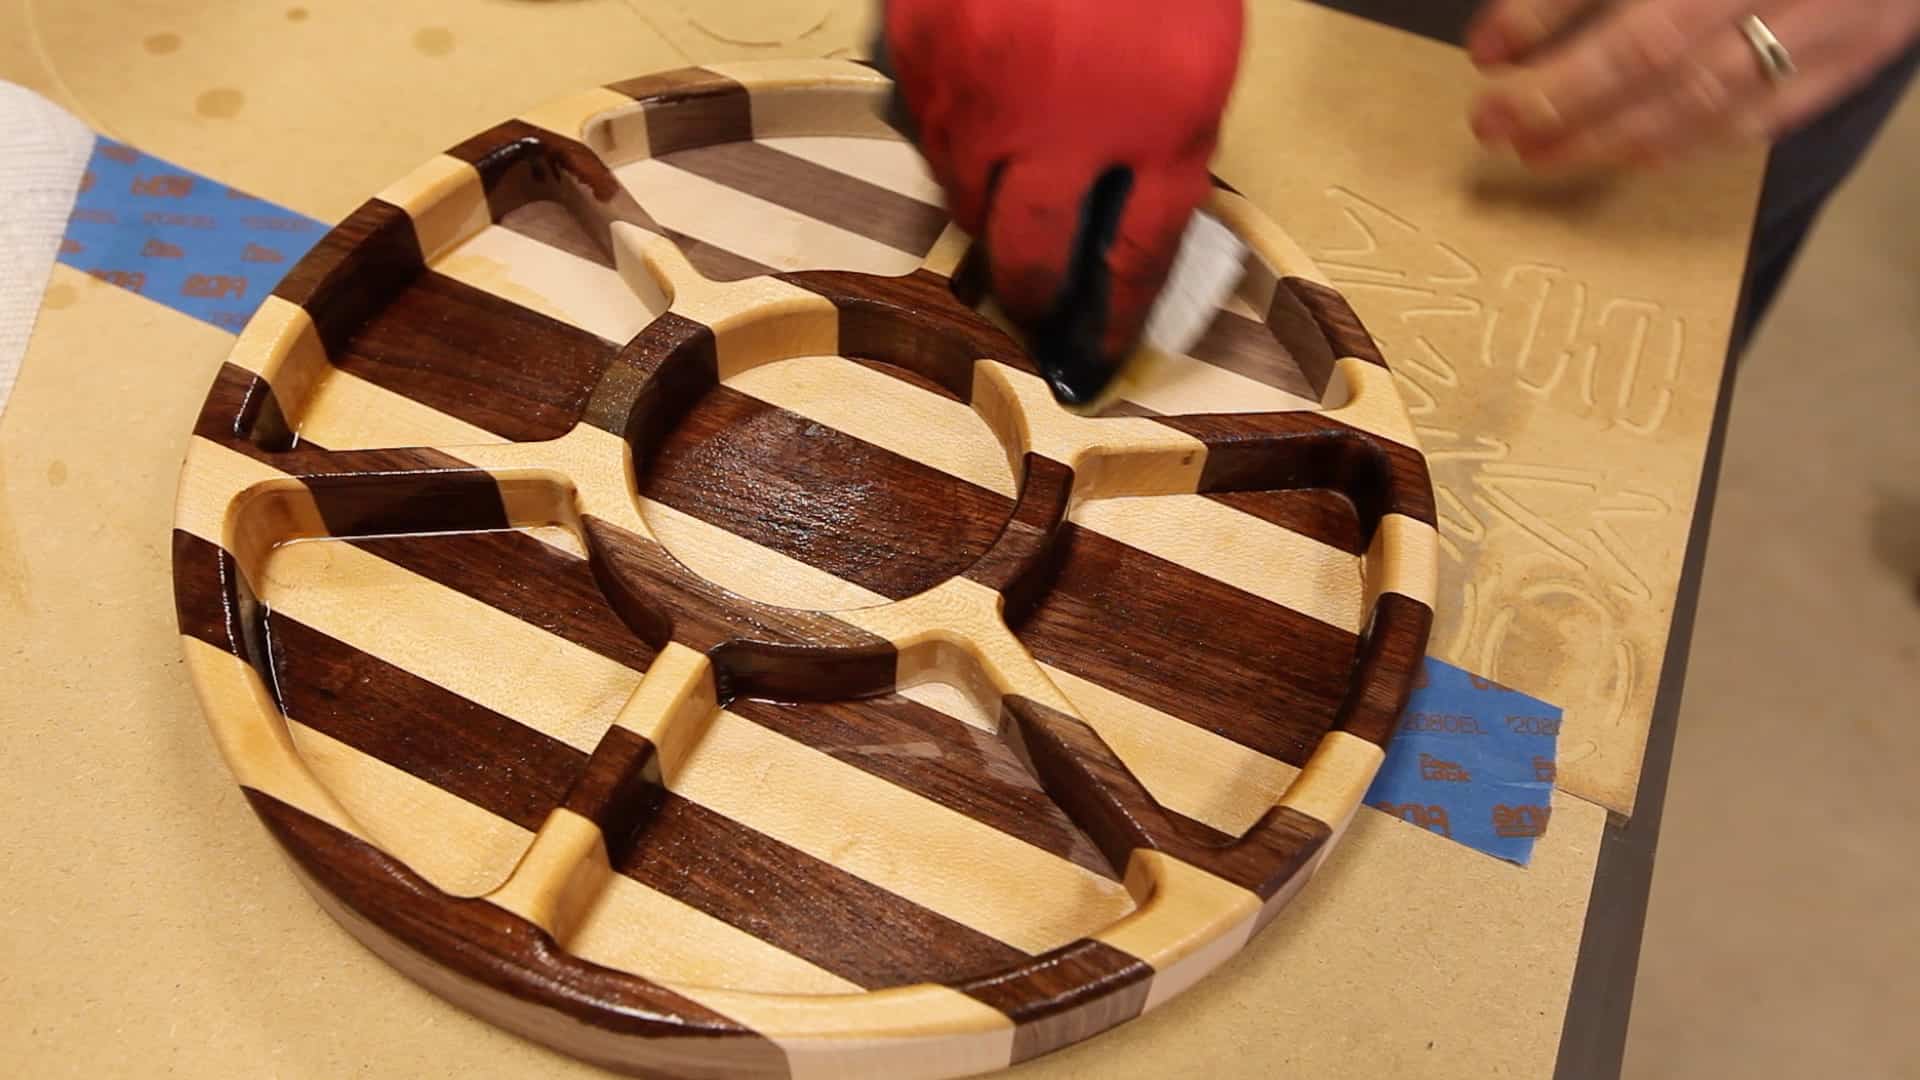
Step 6: Finishing the Party Serving Tray (Food Safe)
The final step is to finish the serving tray with a food safe finish. My favorite food safe finish is General Finish’s Salad Bowl Finish. It really makes the grain on Maple and Walnut pop! It’s incredibly easy to apply. Just wipe it on with a cotton rag or a paper towel.

The Finished Party Serving Trays: The Winner
Wait. What happened you say? Why is the CNC version not finished? Keep reading.
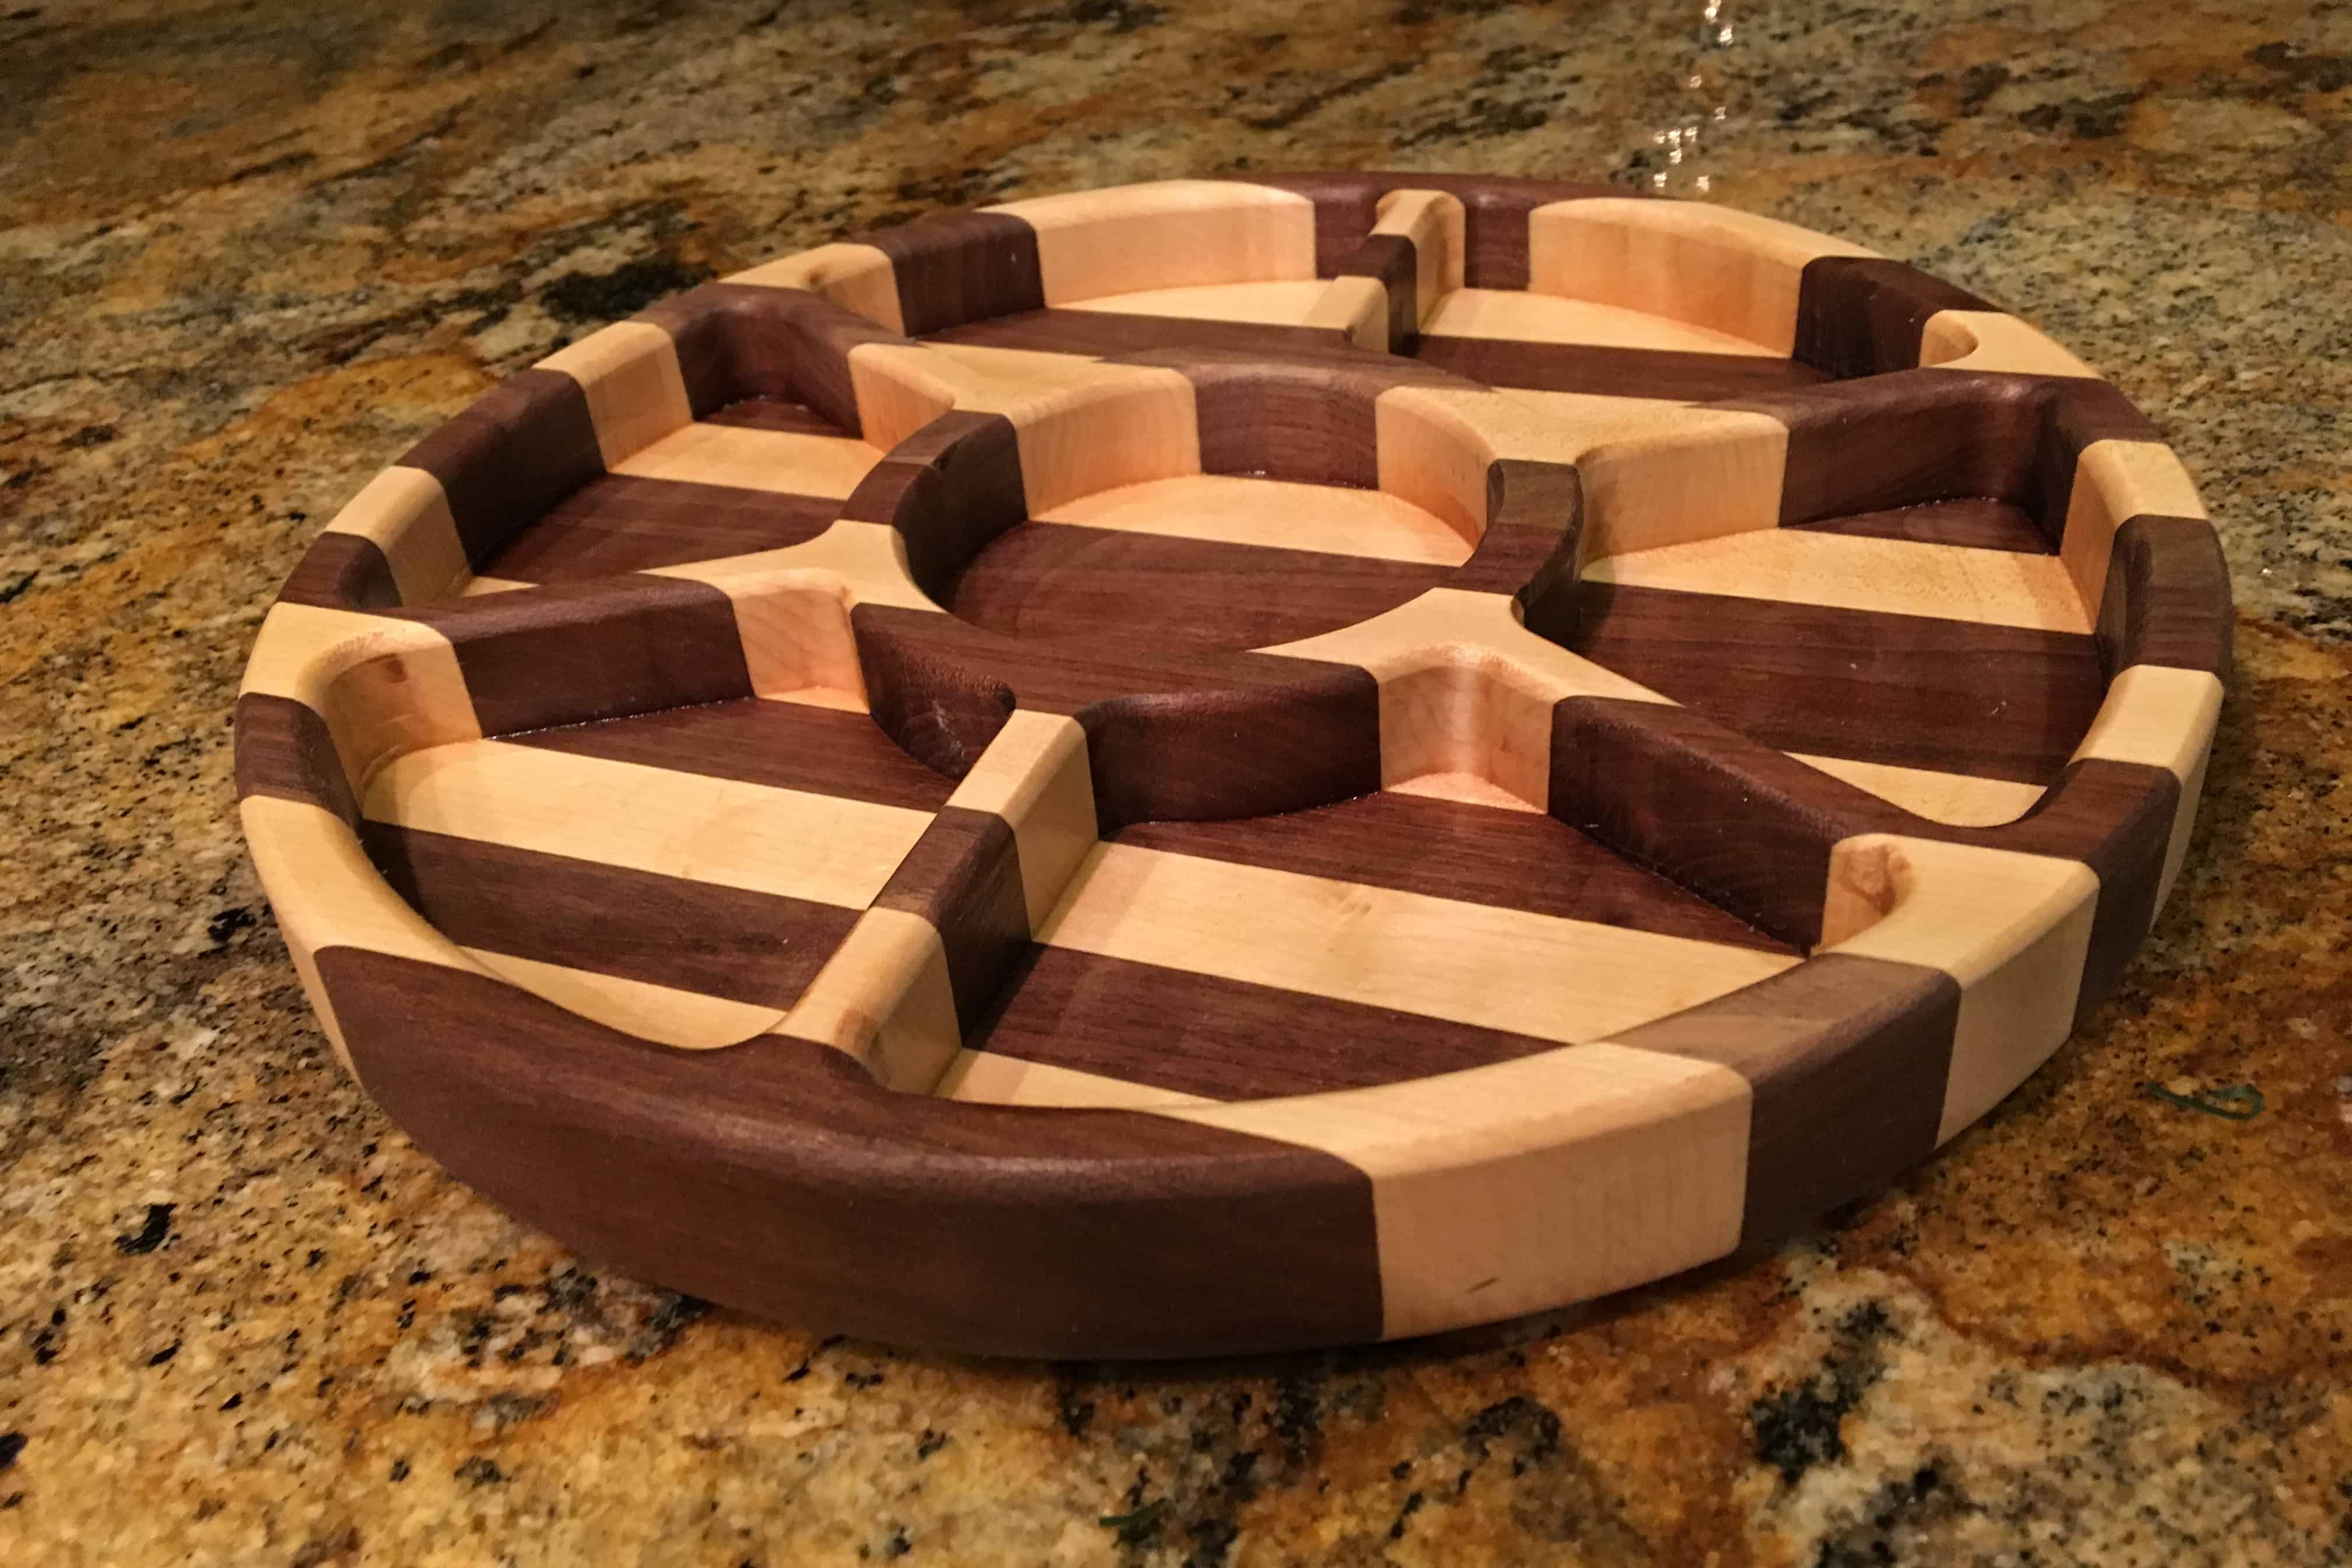
The Completed Wooden Party Serving Tray
Time Invested: Hand Tools vs. CNC
First, let’s talk about the time invested in this project using the different methods. I made the first tray, including the bandsaw template in less than two hours start to finish. Pretty slick. I should have spend a little more time sanding it, but I just got tired of it. So let’s say all in it should have taken me about two and a half hours. Pretty slick.
For the CNC version, I spent about 30 minutes drawing the template in Adobe Illustrator. Another 30 minutes testing various bits, feed rates, and depth of cut on samples before I started. Then it took the X-Carve SIX AND HALF HOURS just to carve the dishes out. I didn’t let it finish cutting the tray itself out which would have easily added another hour. So let’s just call it seven and half hours. And I still have to sand it, route it, and finish it. Add another 30 or so minutes.
Results and Finish Quality
I have to say, my hand made version has smoother edges and would require less sanding. I say would… because the X-Carve failed numerous times during this test.
First, the X-Carve homing position was a giant fail, and it started the carve in the wrong place, offsetting the entire bowl and not leaving enough room to finish it.
Second, the belt slipped after 7 hours of carving, making the center circle off about 1/8 of an inch.
Third, the DeWalt over heated and the bit fell out of the collet. Drilling a hole through the blank, the bed of the X-Carve, and finally ruining the project beyond any possibility of recovery.
So you decide? I think I’ll stick with hand tools.
[button link=”https://www.thegeekpub.com/product/party-serving-tray-plans/” type=”big”] Download the Serving Tray Plans Here[/button]
Video Transcript
Hey guys! Well this video is going to be a little bit different! Every time that I use the X-Carve I get told multiple times in the comments that “You can make anything if you have a $2000 CNC machine.” So in this video I am going to make a party serving tray. And I am going to make it twice. I am going to make it once by hand with hand tools, using the bandsaw and the router, and then I am going to make the second one on the X-Carve. So I have made two versions of the plans. One is in Sketchup and that will be the one we use for the hand made one. Not that we can really call it hand when we’re using power tools, but you get the idea. The second one I have made in Adobe Illustrator and this will go in the X-Carve as an SVG file and we’ll import that into Easel. Using the Sketchup version I made a template out of MDF and this is what we will use to route all of the edges and make all of the cups in the tray when we use the router to make it. And we’re going to start by making a couple of blanks and we’re going to make those just like we’re making long grain cutting boards. So I’ll make a big long one. I’ll run it through the planer a couple of times and get it smooth and then I’ll cut in half and we’ll have our two blanks. So let’s get started.
OK. So we could stop here and we’d have some really cool long grain Maple and Walnut cutting boards. Just a little bit of finish and a little sanding and they would be beautiful. But we’re not going to stop there because we are going to turn these into serving trays. And to do that, again we’re going to make one on the X-Carve and one with hand tools. So I am going to use this template and I am going to use fabric tape to connect it and then I am going to use the fabric tape on the bottom to hold it to the workbench so that I can hog it out with the router and a guide bearing. So for the CNC version I’ll do the same thing. I’ll put the fabric tape on the bottom of it to hold it down the bed of the X-Carve while it does the work.
OK. So I have the router setup with a guide bushing installed and that bushing will ride along the edges of this template. So I’ve got the depth wheel setup so that I can turn it, and every time that I turn it I will cut an eighth-inch deeper. So I can turn it plunge, turn it plunge, and that will allow me to slowly hog out all of this material rather than trying to do it all at once.
Alright well this project did not turn out at all like I expected. I originally went into it thinking one thing and the exact opposite actually happened. So let’s first talk about the one that I made by hand. So this is it here. I finished it with General Finishes Salad Bowl finish which is a food safe finish. I’ll probably add a couple more coats to it over the next couple of days and hit with some steel wool and really make it look nice. I have roughly two hours invested in the making of this and that includes making the template that I cut out on the scroll saw from a paper template. So I am actually kind of surprised at how well this turned out. It’s very smooth and it really turned out nice.
So what about the one that I made on the X-Carve? Well, I never finished it. And here it is. And so let’s talk about what happened. So number one, apparently the homing sequence did not work. So the homing sequence started right here but as you can tell the entire bowl is shifted up about a half of an inch which means it ran out of room on this end. Now I thought; I figured that out about half-way through the carve because it was making these one at a time. So I decided hey I am going to go ahead and let it finish because I can go ahead and just glue on another piece of maple and then put it back on and cut out the outside.
Well, so then… so I don’t know 75 to 85 percent of the way through the cut the belt slipped. and when that happened it was cutting the circle in the center and that shifted the entire circle off by about 1/8 of an inch. And so I said “Well, I’m going to go ahead and let it finish that too because I am going to run this experiment all the way to completion!” Well… as it was cutting out some of the last cuts the DeWalt overheated. It overheated and started smoking. The bit actually came loose and fell out of the collet and it drilled a hole all the way through my blank and through the bed of the X-Carve. And so anyway. That is complete junk. And not only is it complete junk I want to say one other thing. and that is “It took the X-Carve seven and a half hours to carve this!” And that is after I originally estimated it at thirteen hours and I went in and I doubled the feed rate thinking that with the DeWalt and the better bit that I had purchased that it could go faster. Apparently. BIG FAIL. Two hours beautiful. Seven and half hours junk. You decide. Can I make anything because I have a CNC machine? See ya in the next video!


i think the title might confuse some. most people wouldnt classify belt sanders and bandsaws as hand tools. aside from that, was very helpful for me