Blog
Setup a Raspberry Pi Chromecast Alternative
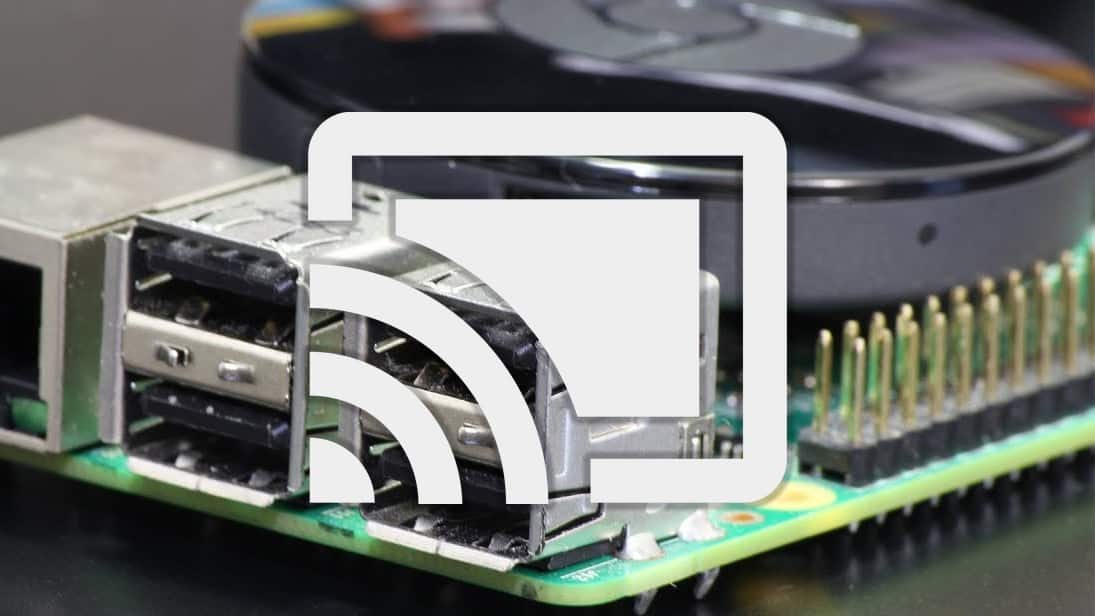
A lot of us use a Google Chromecast to stream (or “cast”) movies, TV shows, home videos, and pictures to our televisions and theater room screens. It’s a great alternative to Apple’s proprietary Airplay service. However, many people have become hesitant to use some of the technology from these big tech conglomerates because of privacy issues and vendor lock in. There is an open source tool called Raspicast that lets you setup a
Chromecast is a super simple technology from a user perspective. A Chromecast is small dongle plugged into an open HDMI port on a TV, projector, or monitor. Using a PC, Mac, or mobile device you can “cast” your screen or application to the display with a couple button taps. This is incredibly handy or getting content on your device to the big screen. Perfect for movies or even business presentations.
The Raspberry Pi Chromecast Alternative
In this tutorial we’re going to cover the
Parts list for this Project:
In order to get this working we’re going to install a few pieces of software on the
Raspicast uses the OMXPlayer which is already installed on the
However, to show pictures, we’ll need to install one more piece of software and a couple of supporting libraries. So let’s get started with that.
Make sure Raspbian is Up-To-Date
One of the most common problems we see with people following our tutorials is that they skip the step for updating Raspbian to the latest version. We keep our tutorials updated on a regular basis. So keeping your
RELATED: How to Install Raspbian for the First Time
To update your
[code language=”bash”]
sudo apt update sudo apt upgrade
[/code]
Once you’ve completed this reboot your
Installing Supported Libraries and OpenMax
First, we need to install OpenMax. To do that we just need to clone it from its Git repository. This is super simple. Just enter the following command:
[code language=”bash”]
git clone https://github.com/HaarigerHarald/omxiv
[/code]
Once that completes, install two image libraries, libjpeg8-dev and libpng12-dev. These libraries are required to compile the OpenMax image viewer we just downloaded. They provide support for both JPG and PNG files.
To install these we’ll use the apt installer:
[code language=”bash”]
sudo apt-get install libjpeg8-dev libpng12-dev
[/code]
Now that we have the code and the libraries we can compile the OpenMax image viewer by issuing these commands:
[code language=”bash”]
cd omxiv
make ilclient
make
sudo make install
[/code]
Your
Note: Some will say these reboots are not necessary, and strictly they are not. However, each Pi is different and has different software installed and configured for different purposes. We don’t have a way to know your Pi’s specific configuration, so these reboots are simply a precautionary measure. If you feel comfortable everything is good on your Pi, you can skip them.
Preparing for Raspicast
To get ready for our
Enable SSH from the Command Line
My preferred method of enabling SSH is from the command line. Enter the following command:
[code language=”bash”] touch /boot/ssh [/code]
This creates a blank file in the /boot partition that will tell the Raspbian to enable SSH on the next bootup. Now reboot your
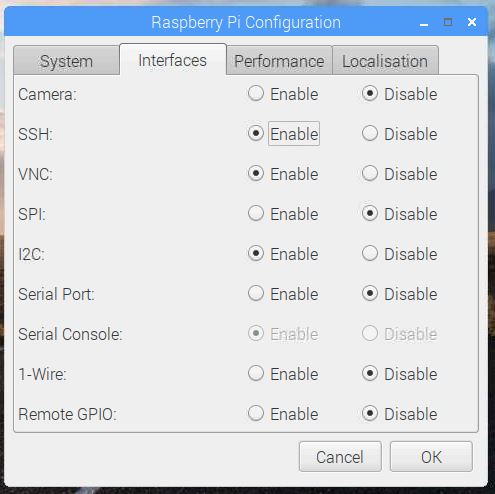
Enable SSH from the GUI
The second best way to enable SSH is on the preferences pane in the Raspbian GUI. On the GUI desktop click the
Installing Raspicast on Android
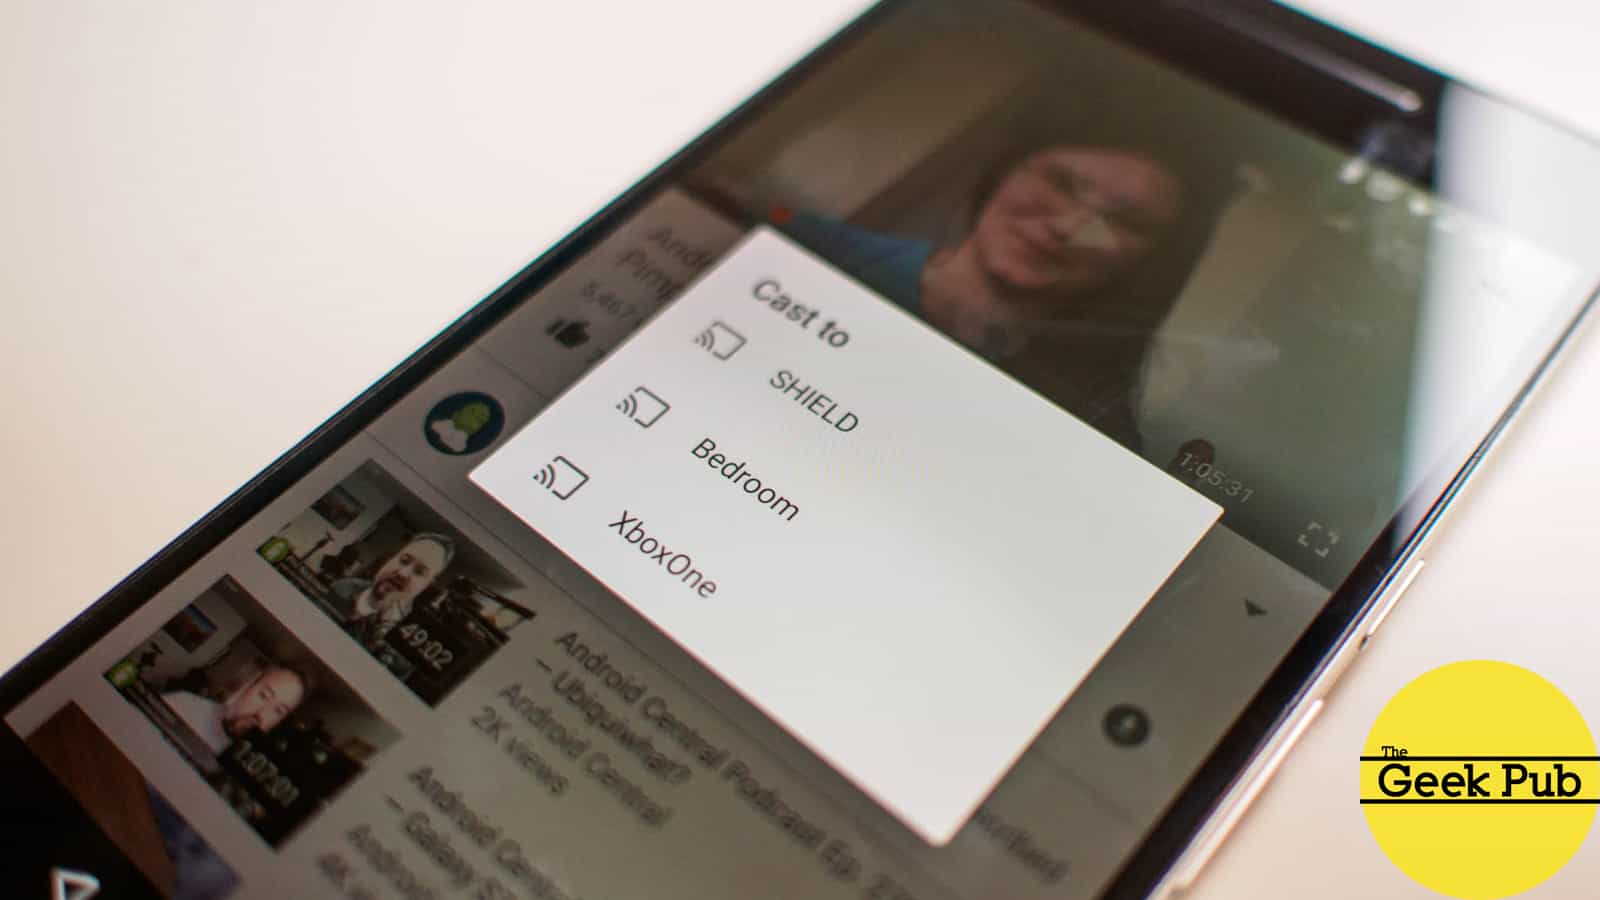
The last step is to install Raspicast on your Android device. Open the Google Play store and search for Raspicast. This application contains the functionality for casting media from your Android device to the
Once Raspicast is installed, it will ask you for a few pieces of information. Enter the IP address of your
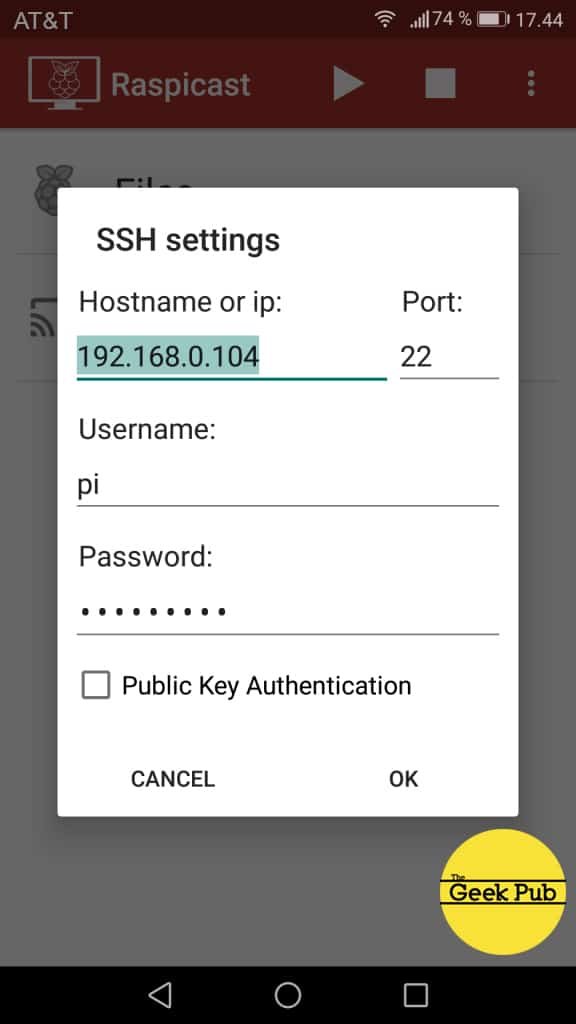 Now that you’ve got Raspicast installed, you can open your media and press the cast button to send it to your
Some applications have already included support for Raspicast. One such app is YouTube. Open a video in the YouTube application and select the share/cast button. From the list choose Raspicast and you’re on your way. More apps will likely add support for Raspicast over time.
[adinserter block=”5″]


5
This. this allows me to finally dump apple. I am moving everything to this.
0.5
Thanks. This works very well however some YouTube videos work and some don’t. Is there a fix for that? Local videos on my phone works really well and any YouTube videos that do work run at a good rate and quality.
Hi.When I run the command “sudo make install” the message “Bus error install omxiv.bin /usr/bin/omxiv ” is displayed. Is there any solution?
4
OMXplayer is not installed on Raspios – buster- light. I had to install it manually later when I found it missing. All I have on the screen is a green screen with a command prompt. And the Raspicast player doesn’t seem to work either. I see a choice of cast or Files, and cast wants a web location.
1. What else is missing as well as OMXPlayer?
2. What is perhaps missing on my tablet. ?
Hah – Got it working. Uninstalled Raspicast from my tablet, rebooted, Installed again and realised that the tab for files showed files on the R-Pi, then started youtube and shared to Raspicast second alternative after ‘queue’, to actually play. And it worked.