Blog
Using Arduino Temperature Sensors DHT11 and DHT22
Having your Arduino aware of temperature and humidity adds some really neat real world use cases for your Arduino projects, so in this tutorial we will focus on using Arduino temperature sensors in our projects! Specifically we will focus on the Adafruit DHT11 and DHT22 temerature and humidity sensors.
Since we will be building off a previous project, we highly recommend you read our tutorial on using LCD displays with an Arduino first. We will be using the LCD display to show the current temperature. We will include code examples to display the temperature to the serial console in case you don’t have an LCD handy.
Arduino Temperature Sensor Parts List
If you’re just getting started or just want a simple list of parts, we’ve provided a simple shopping list for you:
- Arduino Uno
- 16×2 LCD character display
- Project breadboard
- Breadboard wires
- 10K Potentiometer
- DHT11 temperature sensor
- DHT22 temperature sensor
Note you only need to order the DHT11 or the DHT22, not both. The DHT22 can detect a much wider range of temperatures (well below freezing) at the cost of being more expensive and larger in size. The DHT11 is what most people start with.
Using Arduino Temperature Sensors
Using the DHT11 temperature sensors are super easy. Let’s first go over the wiring. Remember, this is an add on to our LCD display project, so we’re only going to show the additional connections on this DHT11 wiring diagram.
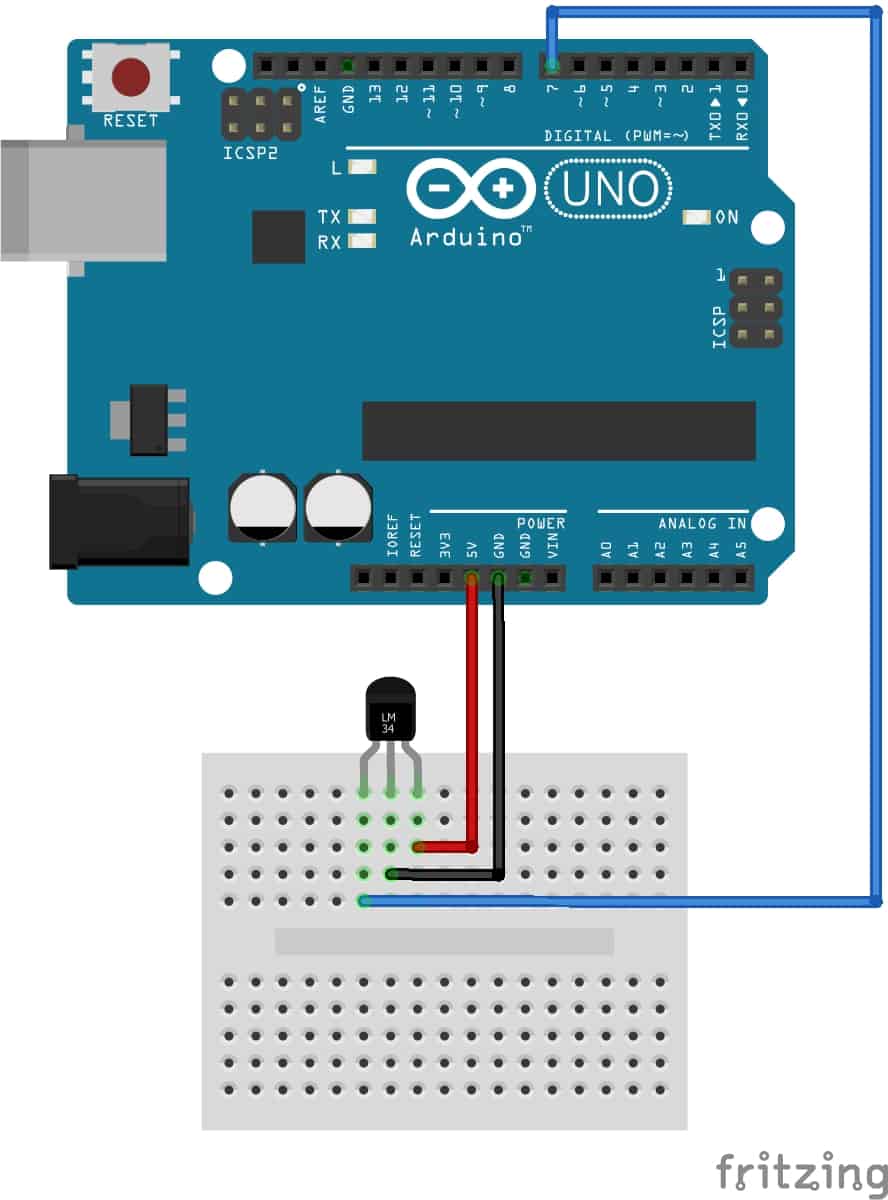 Note: If your DHT11 has four pins, it is not already soldered to a board with a limiting resistor. You’ll need to add a resistor between the +5v pin and the signal pin. The DHT11/DHT22 listed above in our parts list do not need an extra resistor.
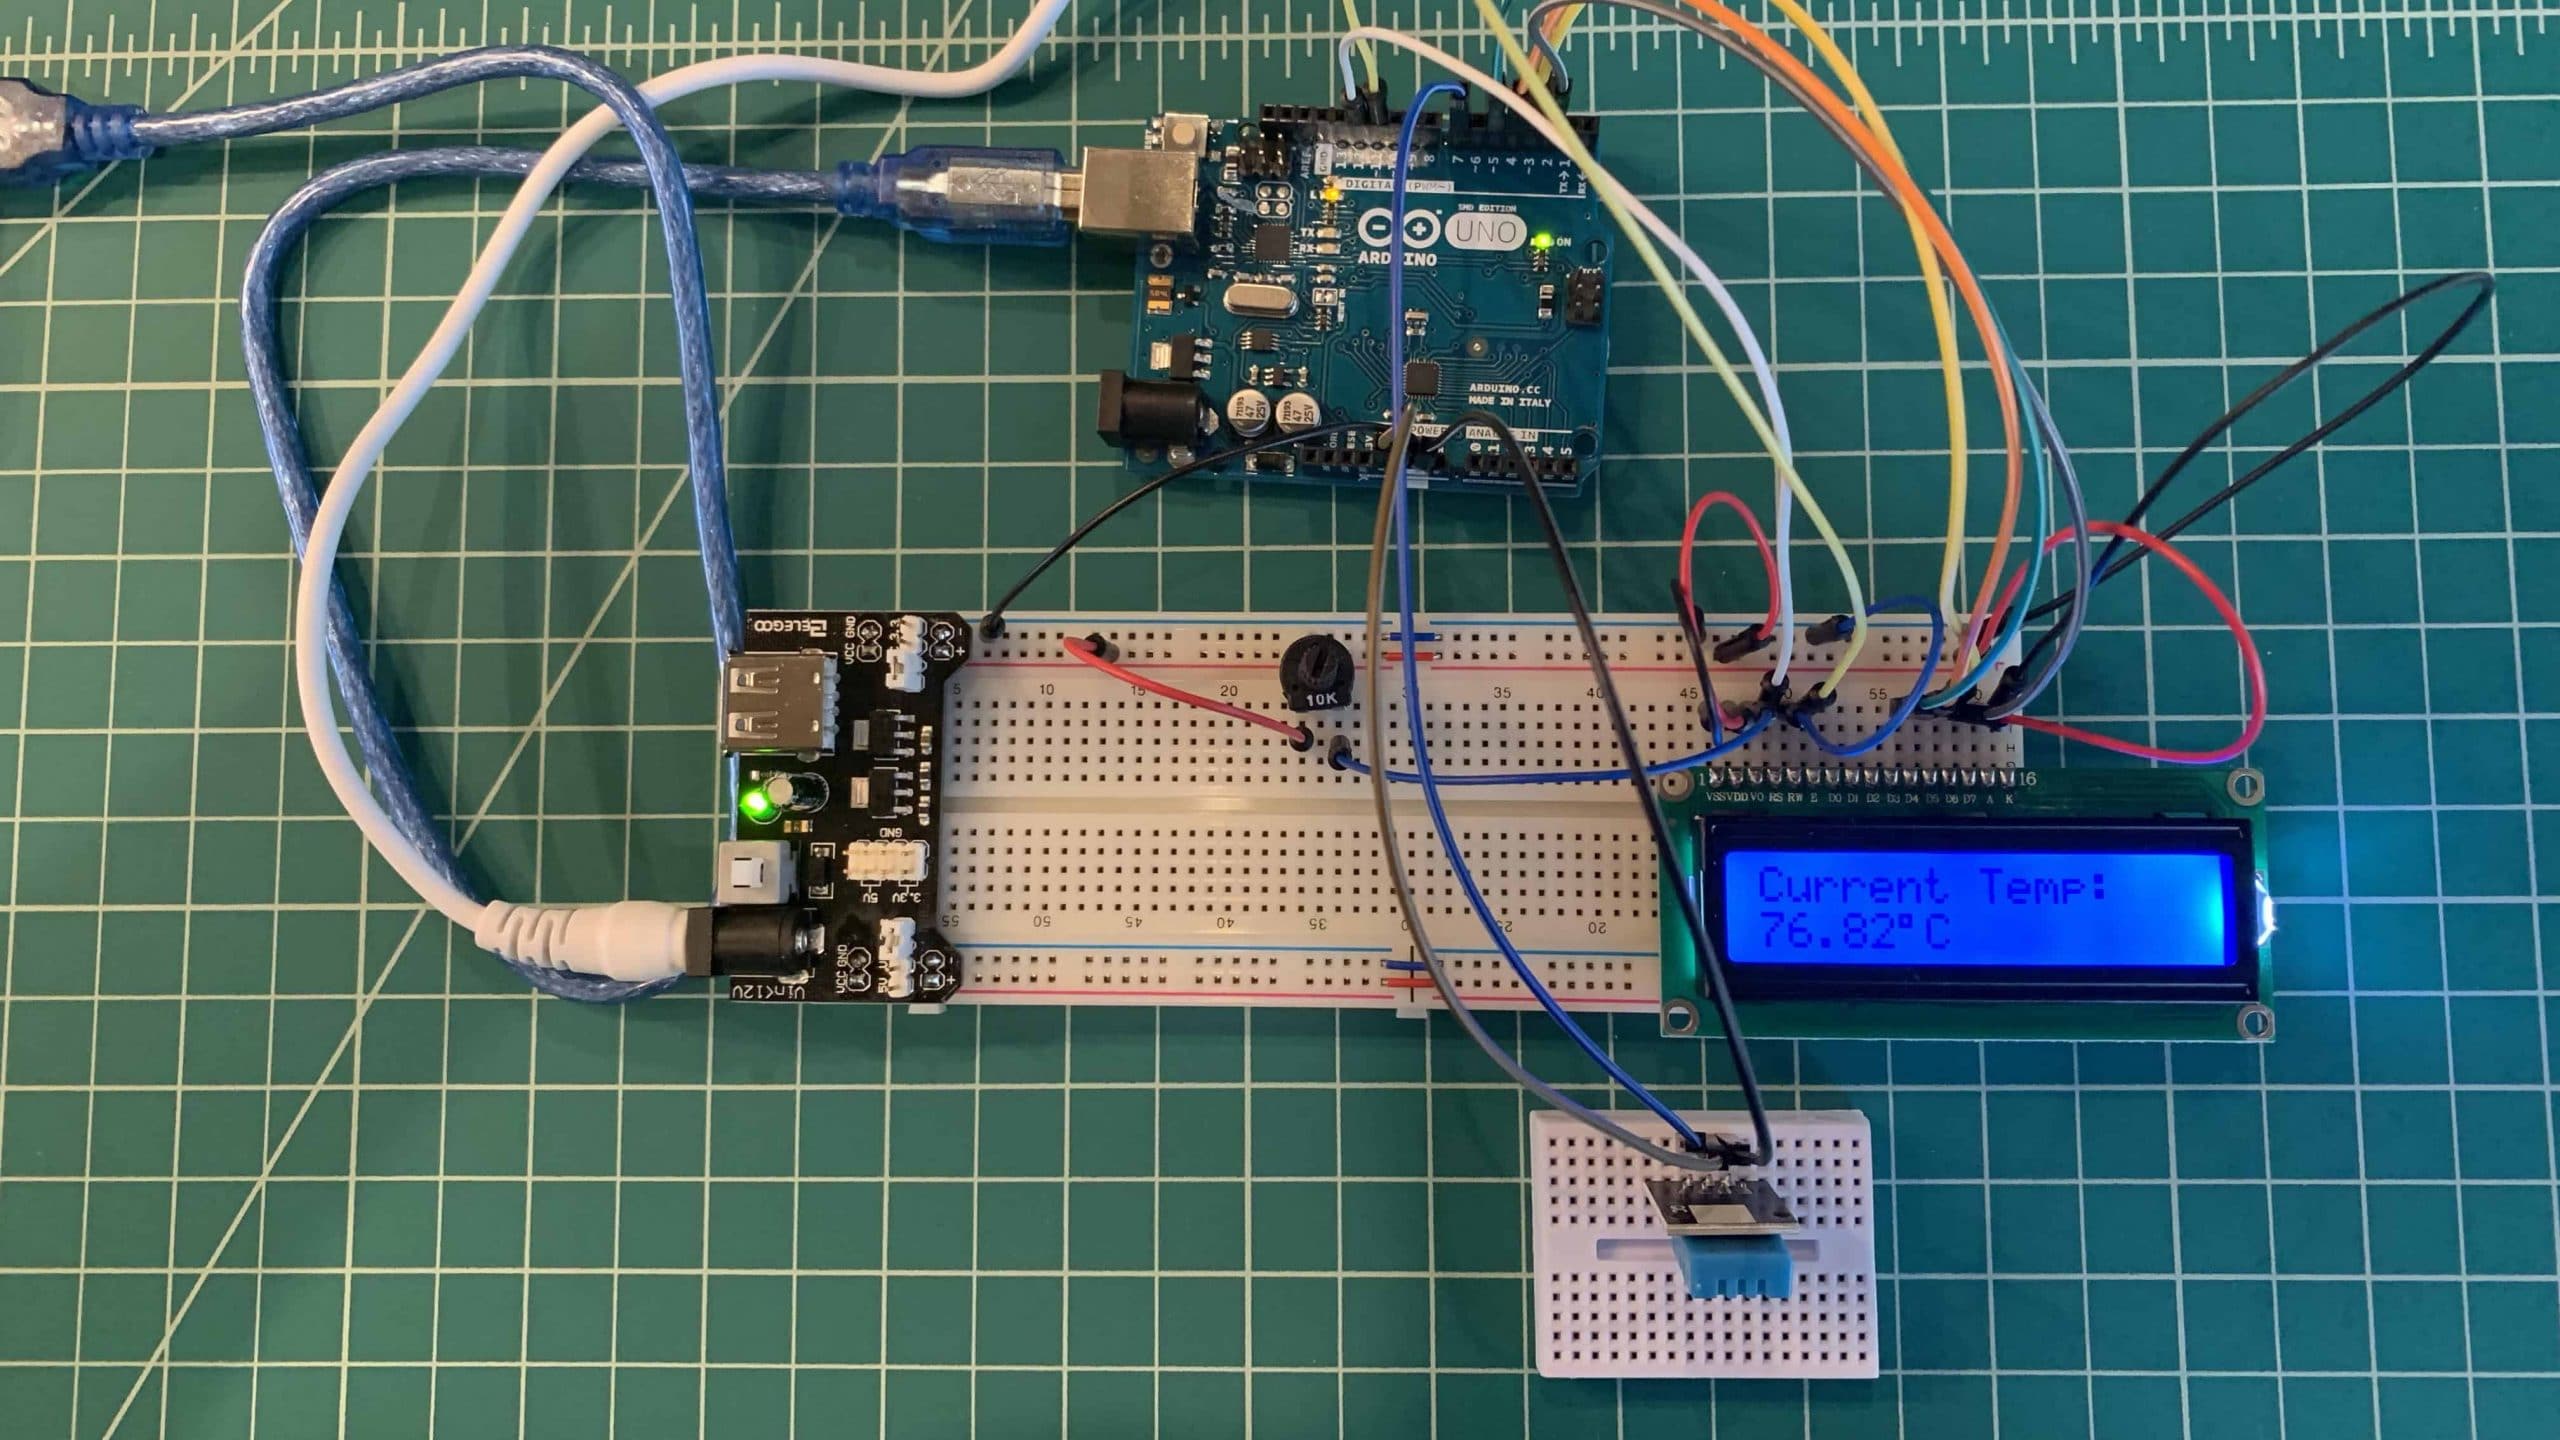
Your completed temperature sensor should now look something similar to this:
Arduino Sketch Changes for the Temperature Sensor
Using arduino temperature sensors with our LCD is super simple. We just need to add a few lines of code and install some libraries we likely don’t have installed yet.
Installing the DHT11/DHT22 Arduino Libraries
First things first. We need to install two libraries into the Arduino IDE: 1) The Adafruit DHT Sensor Library, and 2) the Adafruit Unified Sensor Library. You must install both, as the DHT library calls functions from the unified library.


The Adafruit Unified Sensor library is the very last library in the list if you filter by “sensors”.
Adding the DHT11 Code to our Sketch
Now it is finally time to modify our code so that we can display the temperature on our LCD screen. Here’s the code in its entirety:
[code language=”cpp”]
// include the libraries
#include "LiquidCrystal.h"
#include "DHT.h"
#define DHTPIN 7 // we’re using pin 7
#define DHTTYPE DHT11 // change to DHT22 if you’re using the DHT22
//initialise the library with the numbers of the interface pins
LiquidCrystal lcd(12, 11, 5, 4, 3, 2);
// define our DHT object using the pin and type from above
DHT dht(DHTPIN, DHTTYPE);
void setup() {
// set up the LCD’s number of columns and rows:
lcd.begin(16, 2);
// Print a message to the LCD.
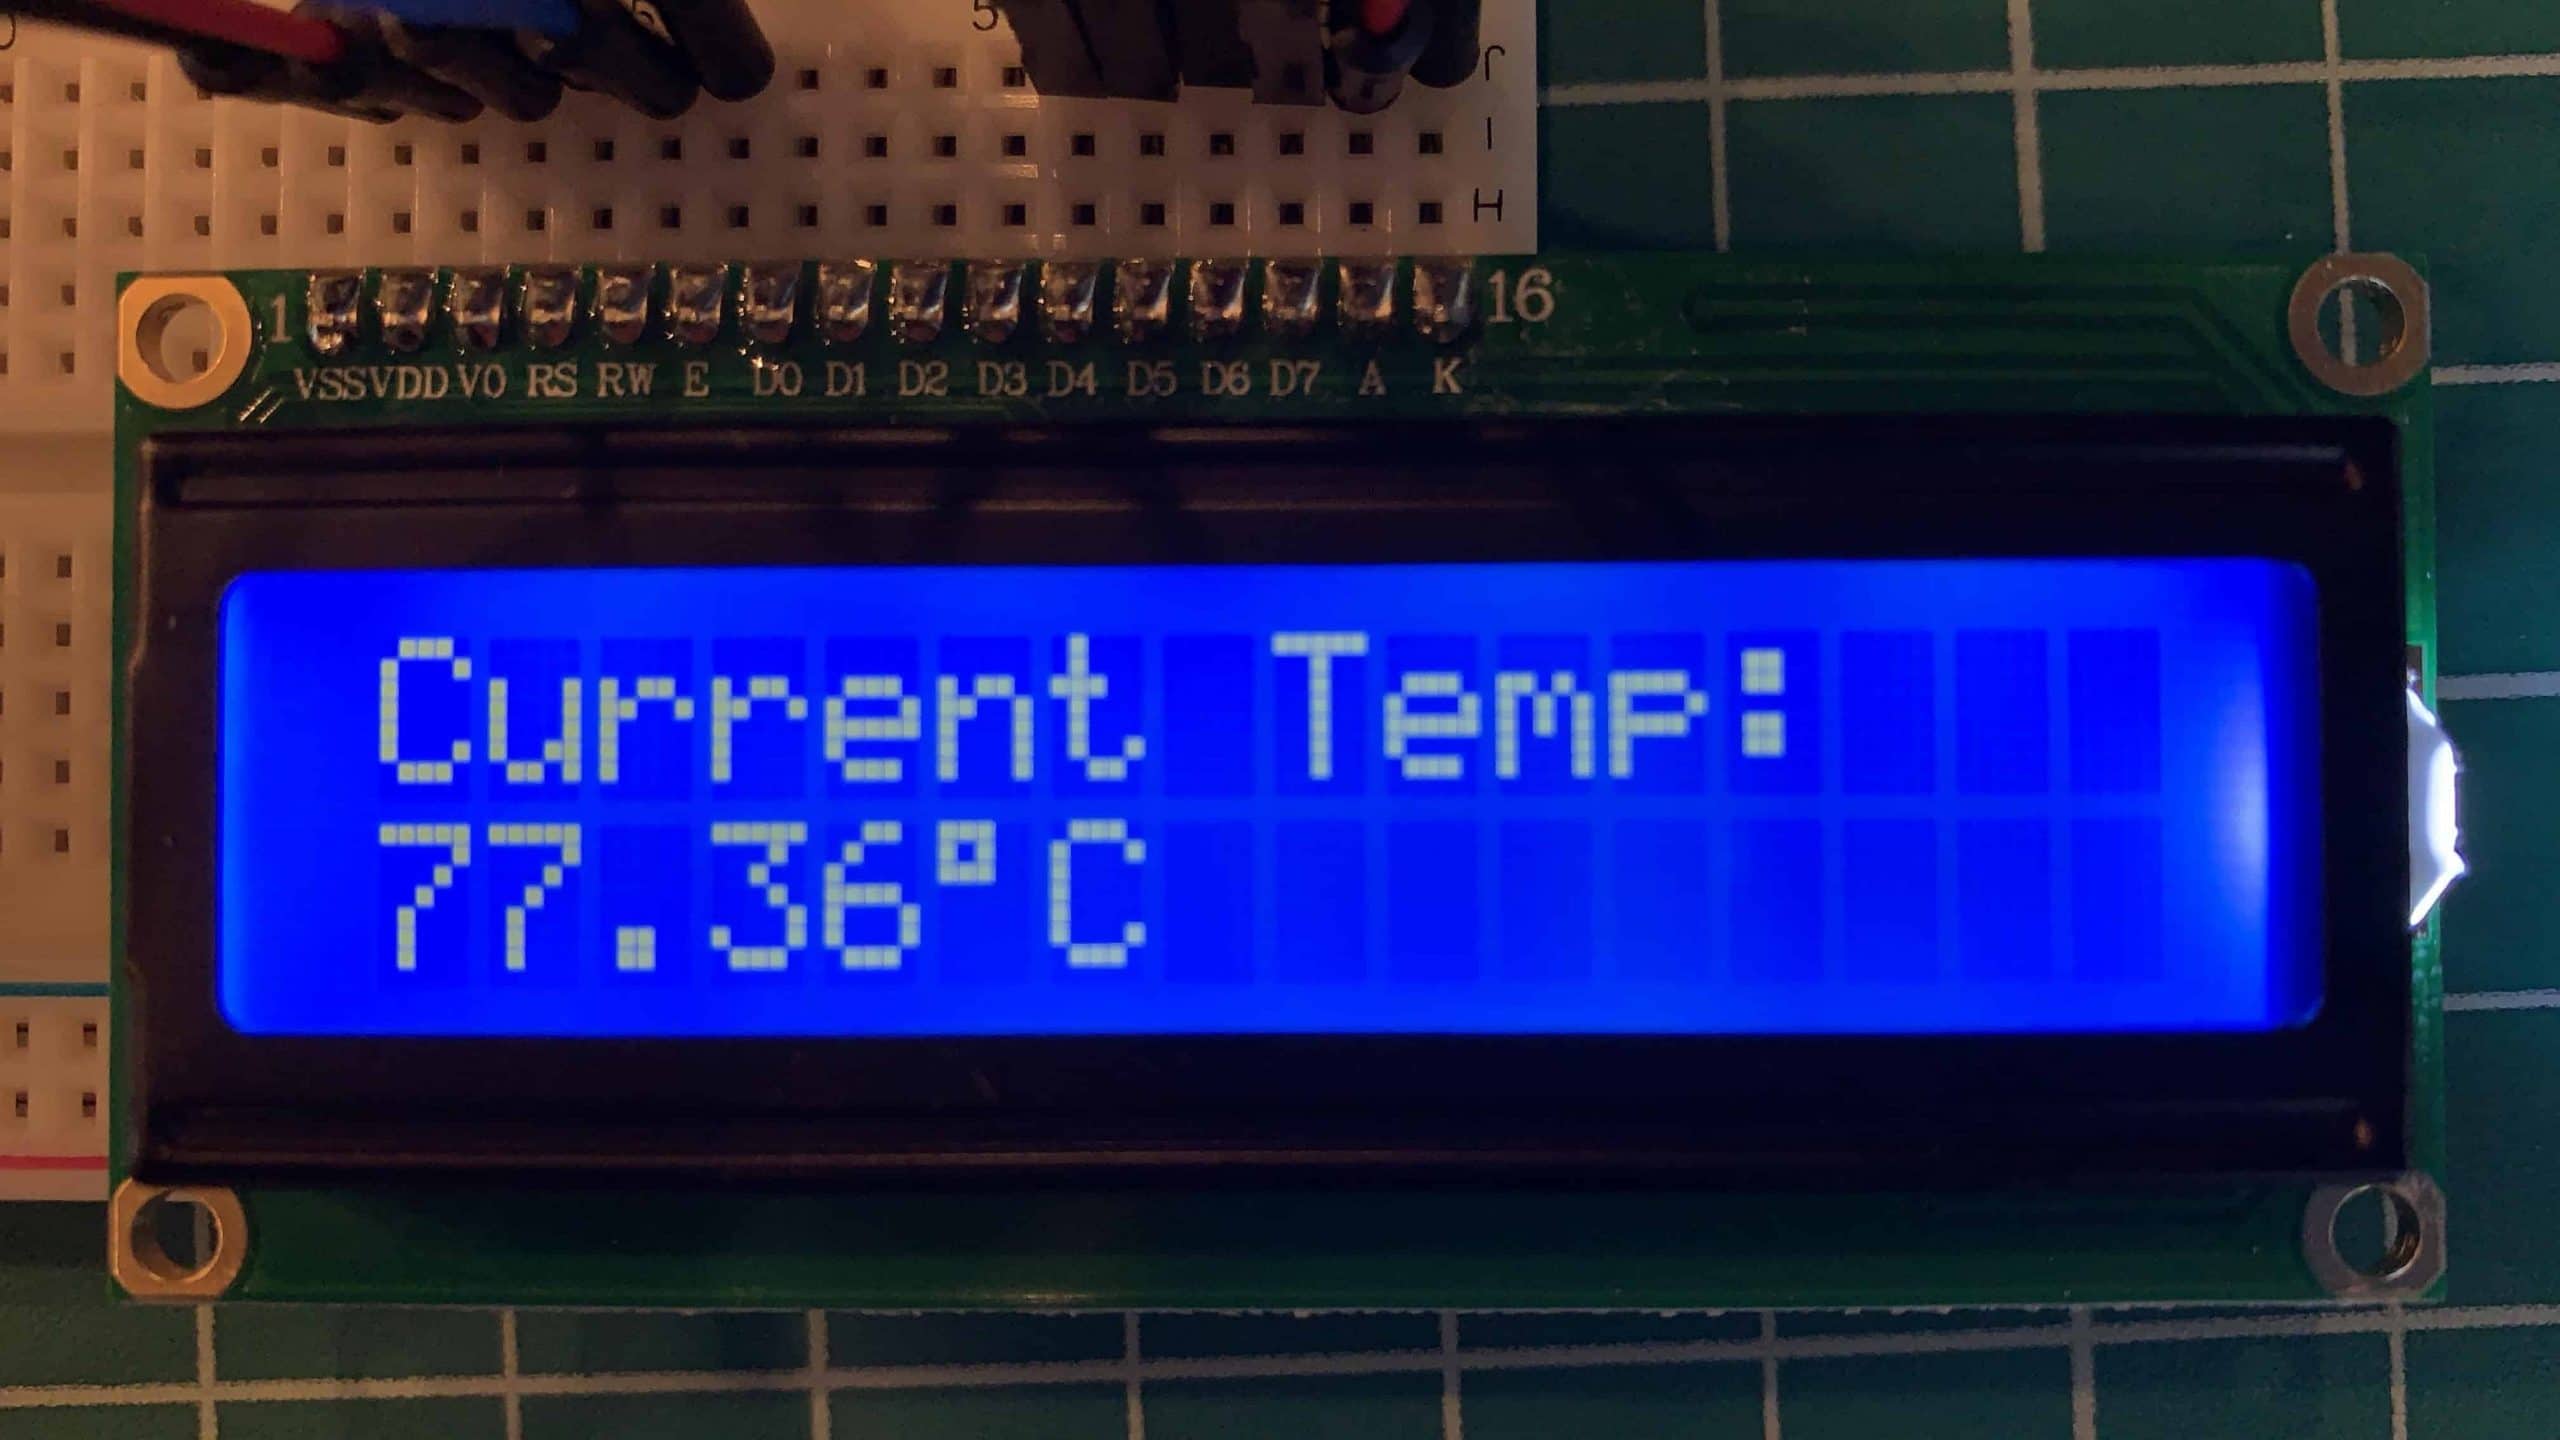
lcd.print("Current Temp:");
}
void loop() {
// set the cursor to column 0, line 1
lcd.setCursor(0, 1);
// create a float and read the temperature sensor
float myTemperature = dht.readTemperature(true);
// print the temperature on the screen in Celsius
lcd.print(myTemperature);
lcd.print((char)223); // degree symbol
lcd.print("C");
delay(500); // wait half a second before updating again.
}
[/code]
We’ve added the DHT code, changed “The Geek Pub!” to ” Current Temp:”, and instead of counting the number of seconds running, we’re using the look to display the temperature. It’s super easy.
If you wired everything correctly, your screen should look like this””
Understanding the DHT11 / DH22 Code
If you’re using Arduino temperature sensors in your projects, it is important to understand the basics of the code. Let’s walk through what we added. The first thing we must do is include the DHT library.
RELATED: Converting Celsius to Fahrenheit on the Arduino
[code language=”cpp”]
#include "DHT.h"
[/code]
The next bit is to define our pins and DHT type (11 or 22).
[code language=”cpp”]
#define DHTPIN 7 // we’re using pin 7
#define DHTTYPE DHT11 // change to DHT22 if you’re using the DHT22
[/code]
Then finally we need to create the DHT object. In my case I just called it “dht”. I’m boring sometimes.
[code language=”cpp”]
DHT dht(DHTPIN, DHTTYPE);
[/code]
To read the temperature or humidity from the DHT11/22 you need only call a simple function. The temperature or humidity will be stored in the variables myTemperature and myHumidty.
[code language=”cpp”]
float myTemperature = dht.readTemperature(true);
float myHumidity= dht.readHumidity(true);
[/code]
If you don’t have an LCD Character Display
If you don’t have and LCD screen you can always just write the output of these variables to the serial console as follows:
[code language=”cpp”]
Serial.begin(9600); // initiate the serial port
Serial.println("Current Temp: ");
Serial.println(myTemperature);
Serial.println((char)223); // degree symbol
Serial.println("C");
[/code]
Be sure to leave a comment below with the results of your temperature sensor project!


Is it possible to change the temperature from C to F in the code. All my thermometers here in Texas say F.
Thanks.
I have an article on converting Celsius to Fahrenheit on the Arduino.
Thanks. It seems that everything Arduino is metric.
5
Ictexas ; here is sample;
// Read temperature as Celsius (the default)
float t = dht.readTemperature();
// Read temperature as Fahrenheit (isFahrenheit = true)
float f = dht.readTemperature(true);
4.5