Blog
Sense HAT Clock for the Raspberry Pi
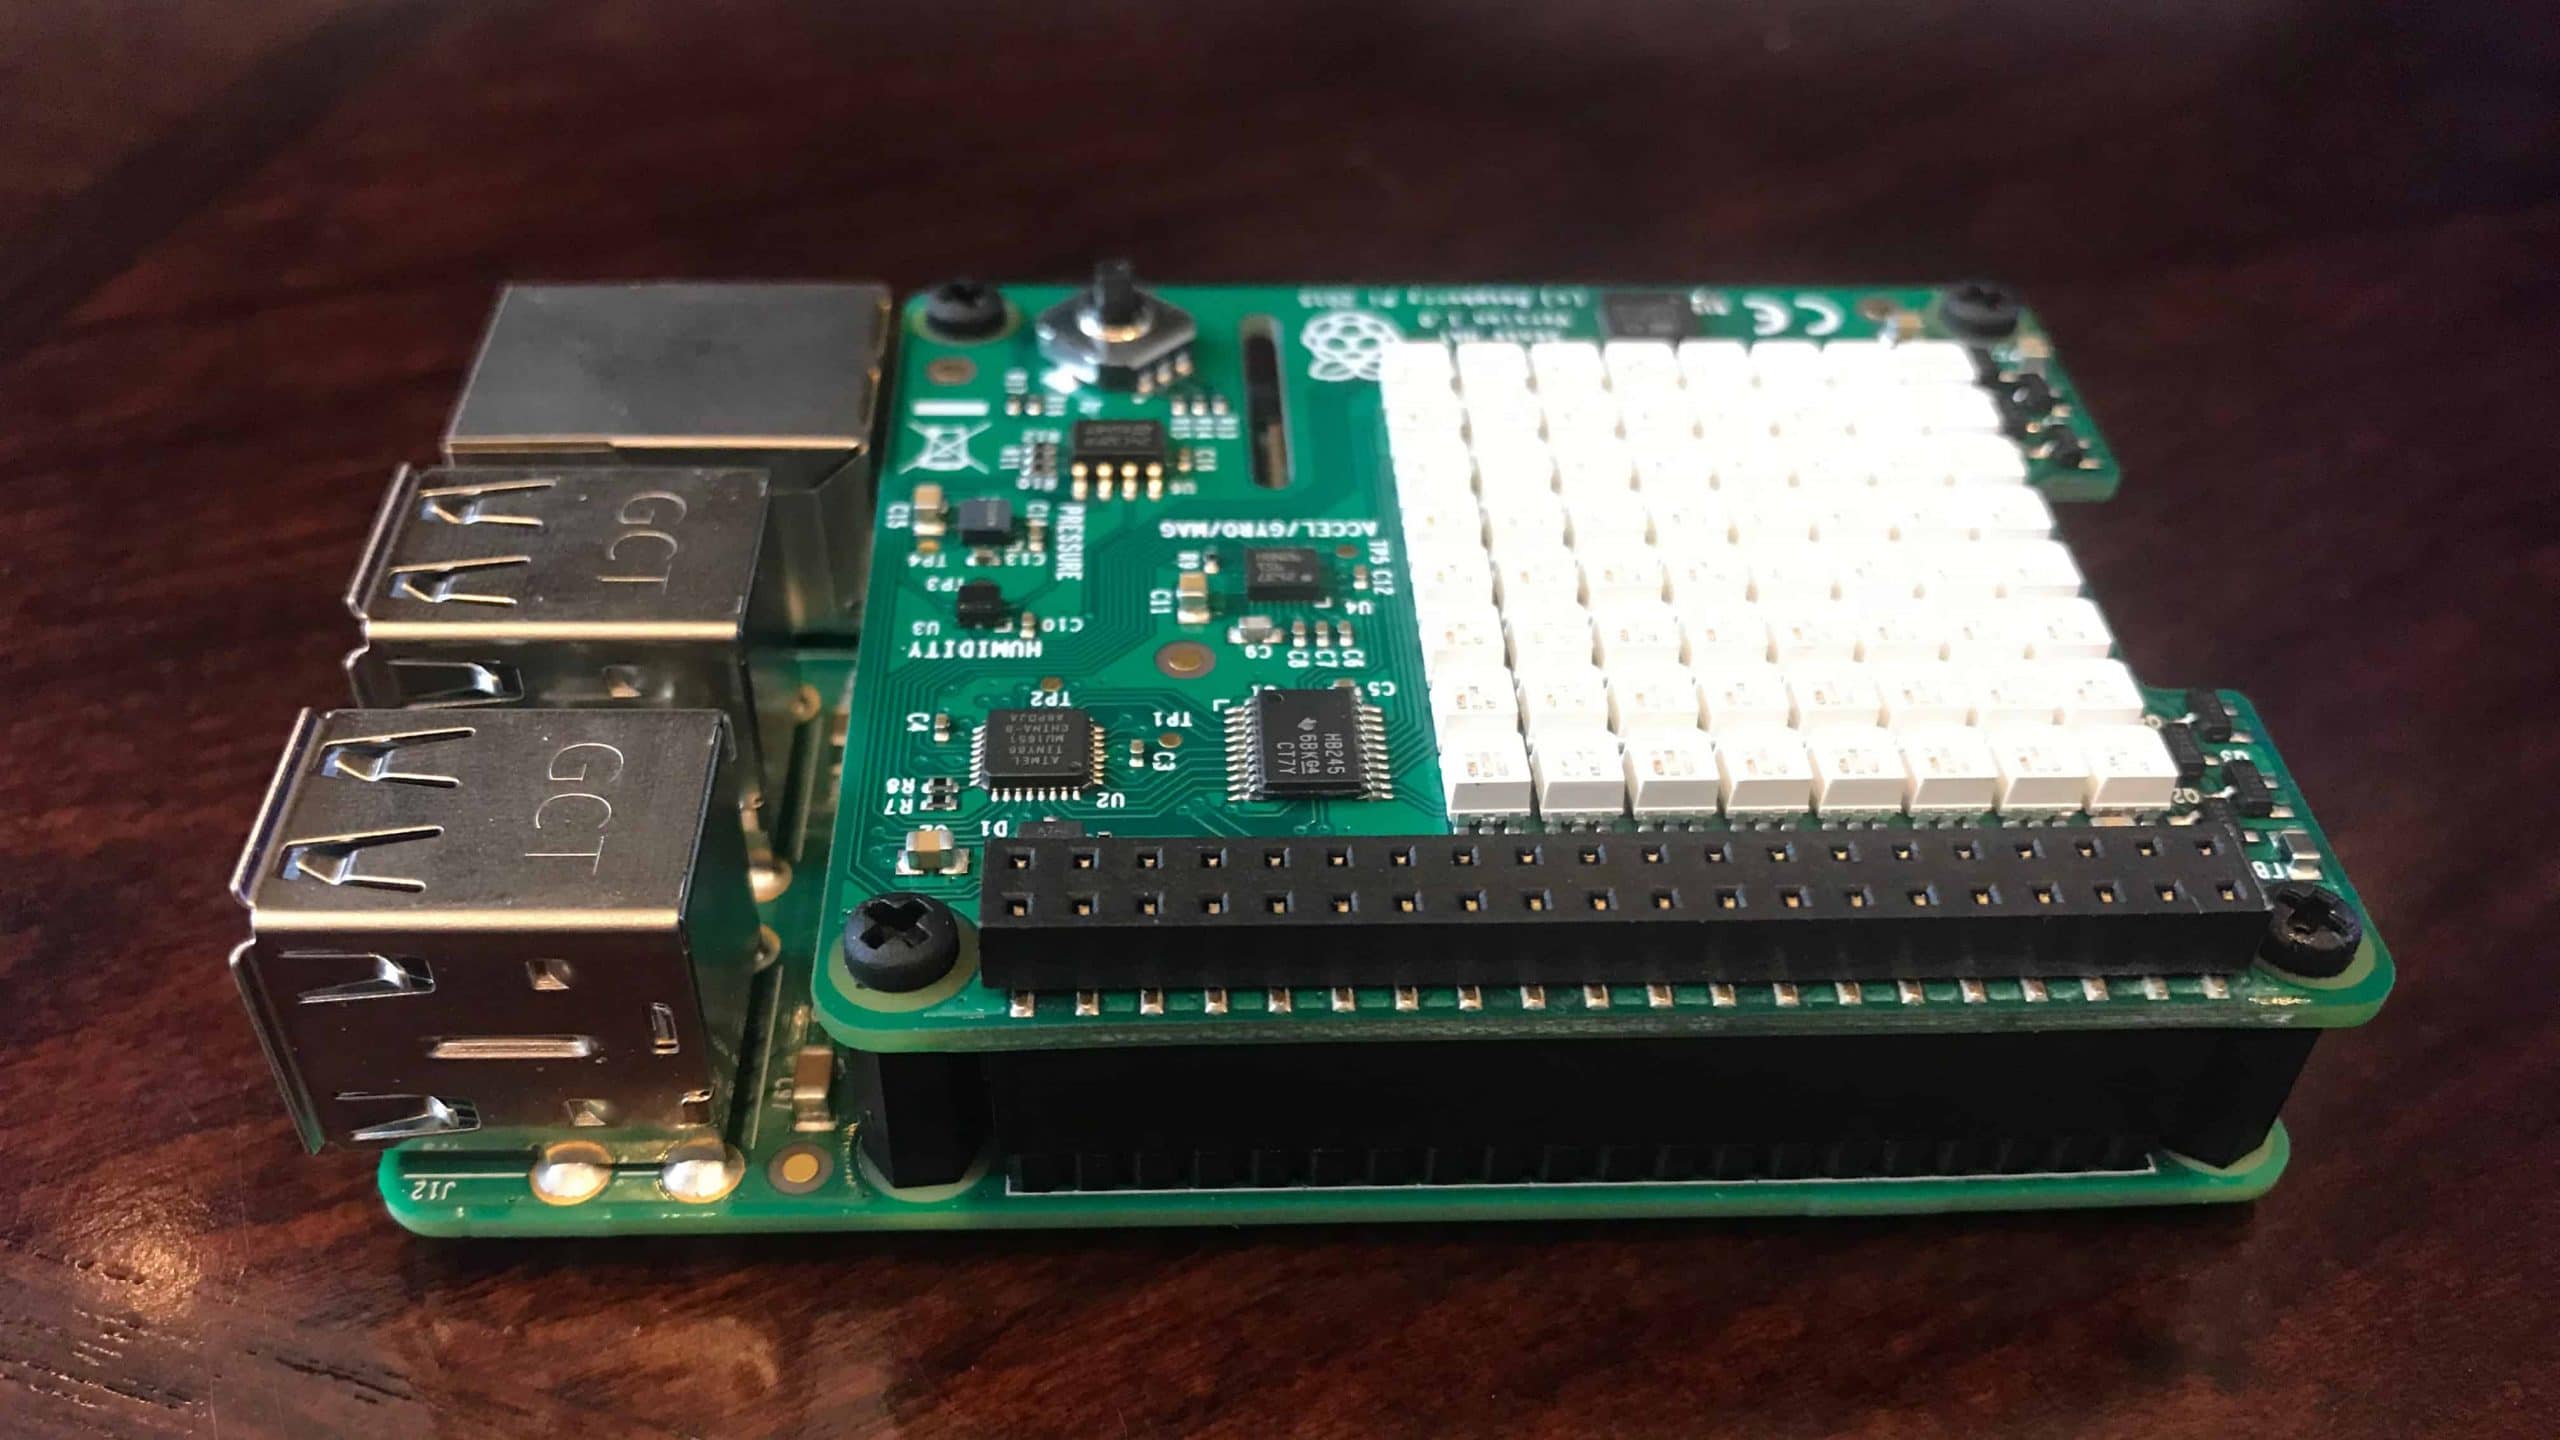
I recently purchased a Sense HAT for the
The Sense HAT was developed for the Astro Pi project in which the
Creating a Raspberry Pi Sense HAT Clock
This project, like so many other
Install the Sense HAT
If you’ve not already installed your Raspberry Pi Sense HAT you should do that first. Make sure your Pi is shutdown and disconnected from power before installing the HAT. The HAT simply slides over the GPIO header and screws down to the Pi using the included four nuts and eight machine screws.
Update Raspbian
One mistake that happens so often is that tinkerers (like me) don’t start with all the latest updates installed. Take just a second and make sure Raspbian is up to date!
[code]
sudo apt-get update
sudo apt-get upgrade
[/code]
Install the Sense HAT Library
The Sense HAT library is already installed on the latest versions of Raspbian, but take just a second to make sure.
[code]
sudo apt-get install sense-hat
[/code]
Create Your Python Program File
You’ll need a blank file for your code. Let’s start by creating a file called gpclock.py. The easiest way to do that is to use the touch command.
[code]
touch gpclock.py
[/code]
Edit GPCLOCK.PY and Paste The Code
Open the file for editing using nano,
[code]
nano gpclock.ph
[/code]
and paste the following code inside.
[code]
from sense_hat import SenseHat
import time
sense = SenseHat()
sense.set_rotation(180)
sense.low_light = True
number = [
0,1,1,1, # Zero
0,1,0,1,
0,1,0,1,
0,1,1,1,
0,0,1,0, # One
0,1,1,0,
0,0,1,0,
0,1,1,1,
0,1,1,1, # Two
0,0,1,1,
0,1,1,0,
0,1,1,1,
0,1,1,1, # Three
0,0,1,1,
0,0,1,1,
0,1,1,1,
0,1,0,1, # Four
0,1,1,1,
0,0,0,1,
0,0,0,1,
0,1,1,1, # Five
0,1,1,0,
0,0,1,1,
0,1,1,1,
0,1,0,0, # Six
0,1,1,1,
0,1,0,1,
0,1,1,1,
0,1,1,1, # Seven
0,0,0,1,
0,0,1,0,
0,1,0,0,
0,1,1,1, # Eight
0,1,1,1,
0,1,1,1,
0,1,1,1,
0,1,1,1, # Nine
0,1,0,1,
0,1,1,1,
0,0,0,1
]
hour_color = [0,0,255] # Blue
minute_color = [248,226,55] # GeekPub Yellow
empty = [0,0,0] # Black
clock_image = [
0,0,0,0,0,0,0,0,
0,0,0,0,0,0,0,0,
0,0,0,0,0,0,0,0,
0,0,0,0,0,0,0,0,
0,0,0,0,0,0,0,0,
0,0,0,0,0,0,0,0,
0,0,0,0,0,0,0,0,
0,0,0,0,0,0,0,0
]
while True:
hour = time.localtime().tm_hour
minute = time.localtime().tm_min
# Map digits to the clock_image array
pixel_offset = 0
index = 0
for index_loop in range(0, 4):
for counter_loop in range(0, 4):
if (hour >= 10):
clock_image[index] = number[int(hour/10)*16+pixel_offset]
clock_image[index+4] = number[int(hour%10)*16+pixel_offset]
clock_image[index+32] = number[int(minute/10)*16+pixel_offset]
clock_image[index+36] = number[int(minute%10)*16+pixel_offset]
pixel_offset = pixel_offset + 1
index = index + 1
index = index + 4
# Color the hours and minutes
for index in range(0, 64):
if (clock_image[index]):
if index < 32:
clock_image[index] = hour_color
else:
clock_image[index] = minute_color
else:
clock_image[index] = empty
# Display the time
sense.low_light = True # Optional
sense.set_pixels(clock_image)
time.sleep(1)
[/code]
Finally close and save the file by pressing CTRL+O to save the file and CTRL+X to exit nano.
Execute the Sense HAT Clock Python Program
To start your clock is as simple as entering the following command.
[code]
python gpclock.py
[/code]
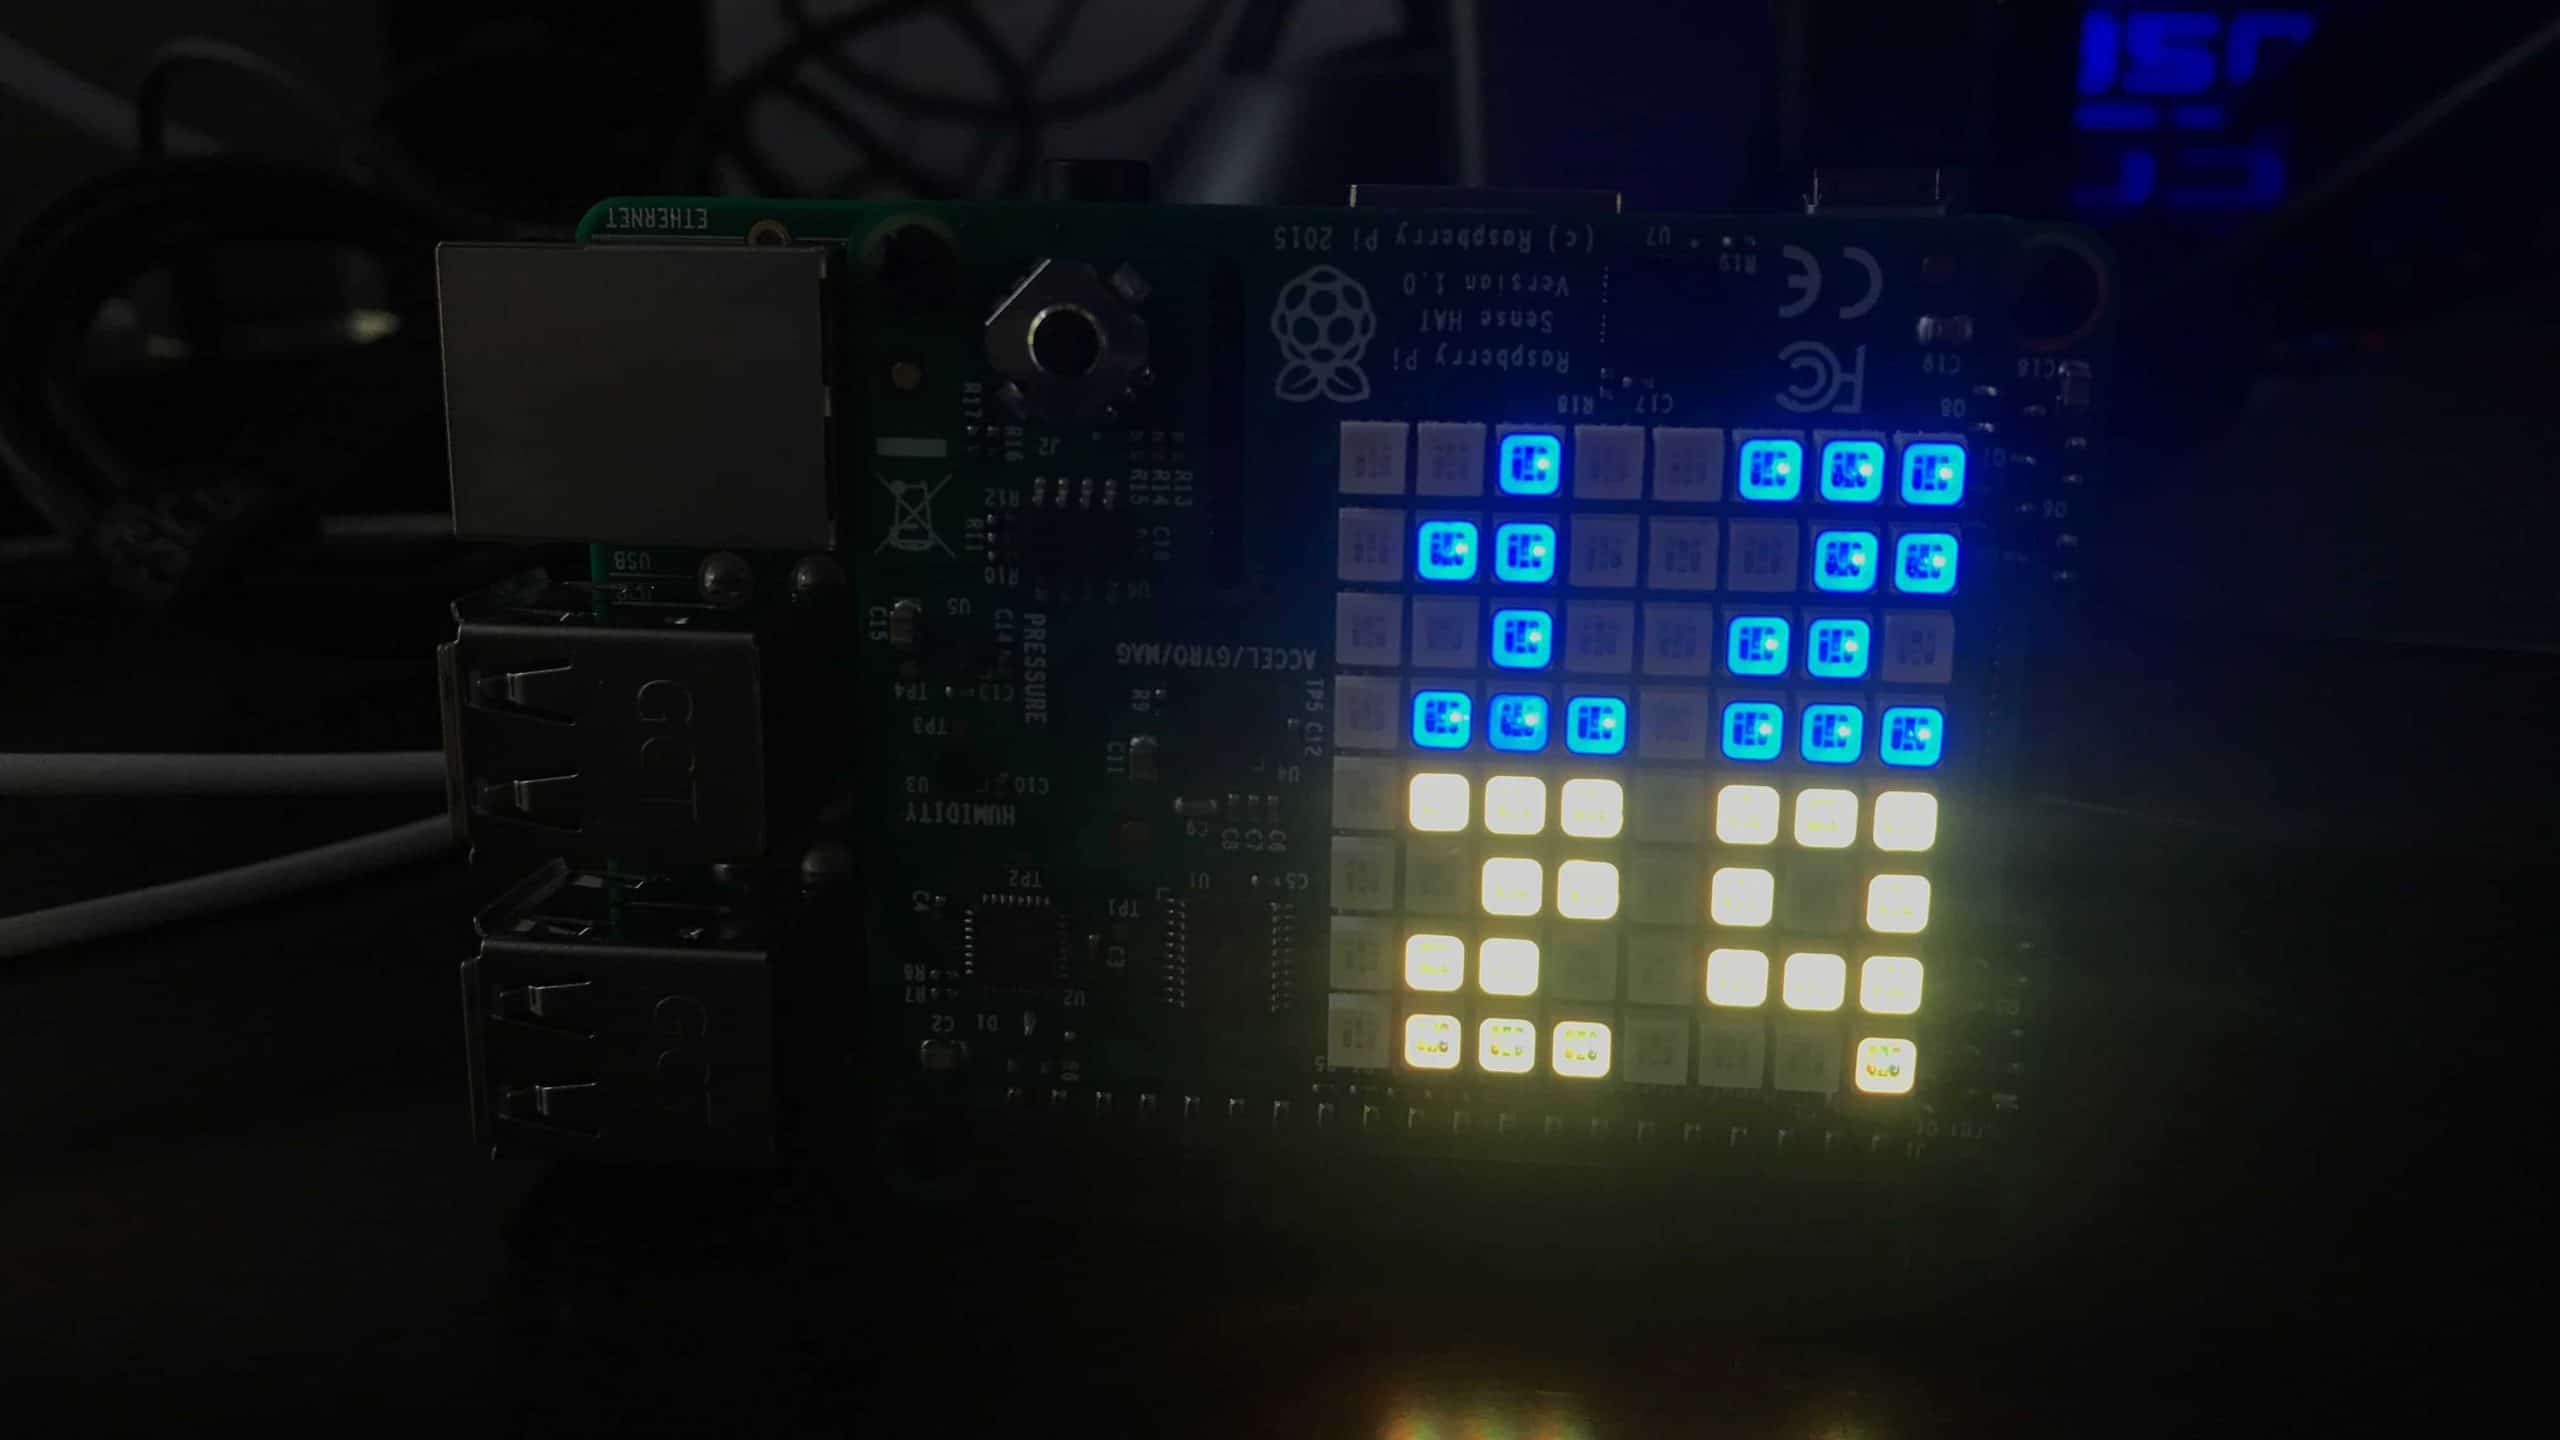
After you press enter the Sense HAT clock should show on the screen and start ticking away the hours and minutes like any sensible clock would do. It’s so simple, it just makes me warm inside to think about it.
The clock will execute until you stop it. You can do this by pressing CTRL+C at any time and the clock program will cease (the screen will not clear on the Sense HAT display).
This code is based on code written by Steve Amor.
Parts List for this Project
A list of parts for this project:
Some Things You Can Change
If you want to mess around with your Sense HAT clock, I recommend looking over the code and tinkering with it. It’s a great way to learn about Python and a great way to relax while experimenting at the same time.
Change the Pi Clock’s Colors
The colors are controlled by the following section of code.
[code]
hour_color = [0,0,255] # Blue
minute_color = [248,226,55] # GeekPub Yellow
empty = [0,0,0] # Black
[/code]
These are simply RGB values and you can made them anything you want. RGB values come in strings of three. The first number represents Red, the second number represents Green, and the third number represents Blue. These colors are mixed together in different intensities to create the desired color. Values range from 0 to 255.
Some RGB examples:
- 255,0,0 would be bright red
- 100,100,100 would be a medium shade of grey
- 248,226,55 represents the color of my logo; Geek Pub yellow
Change the Pi Clock’s Font
The font of the numbers on the Sense HAT clock are created using this code.
[code]
number = [
0,1,1,1, # Zero
0,1,0,1,
0,1,0,1,
0,1,1,1,
0,0,1,0, # One
0,1,1,0,
0,0,1,0,
0,1,1,1,
0,1,1,1, # Two
0,0,1,1,
0,1,1,0,
0,1,1,1,
0,1,1,1, # Three
0,0,1,1,
0,0,1,1,
0,1,1,1,
0,1,0,1, # Four
0,1,1,1,
0,0,0,1,
0,0,0,1,
0,1,1,1, # Five
0,1,1,0,
0,0,1,1,
0,1,1,1,
0,1,0,0, # Six
0,1,1,1,
0,1,0,1,
0,1,1,1,
0,1,1,1, # Seven
0,0,0,1,
0,0,1,0,
0,1,0,0,
0,1,1,1, # Eight
0,1,1,1,
0,1,1,1,
0,1,1,1,
0,1,1,1, # Nine
0,1,0,1,
0,1,1,1,
0,0,0,1
]
[/code]
In this array, zeros are off and ones are on. Moving those numbers around will change the design of your numbers. In fact, if you look very closely at the array you’ll actually see the shape of the numbers formed by the 1’s.


Thanks for sharing.
Tried the code but my sensehat stays blank.
No errors though, any ideas?