Blog
How to make an Air Powered Water Balloon Cannon
How to make a Water Balloon Cannon
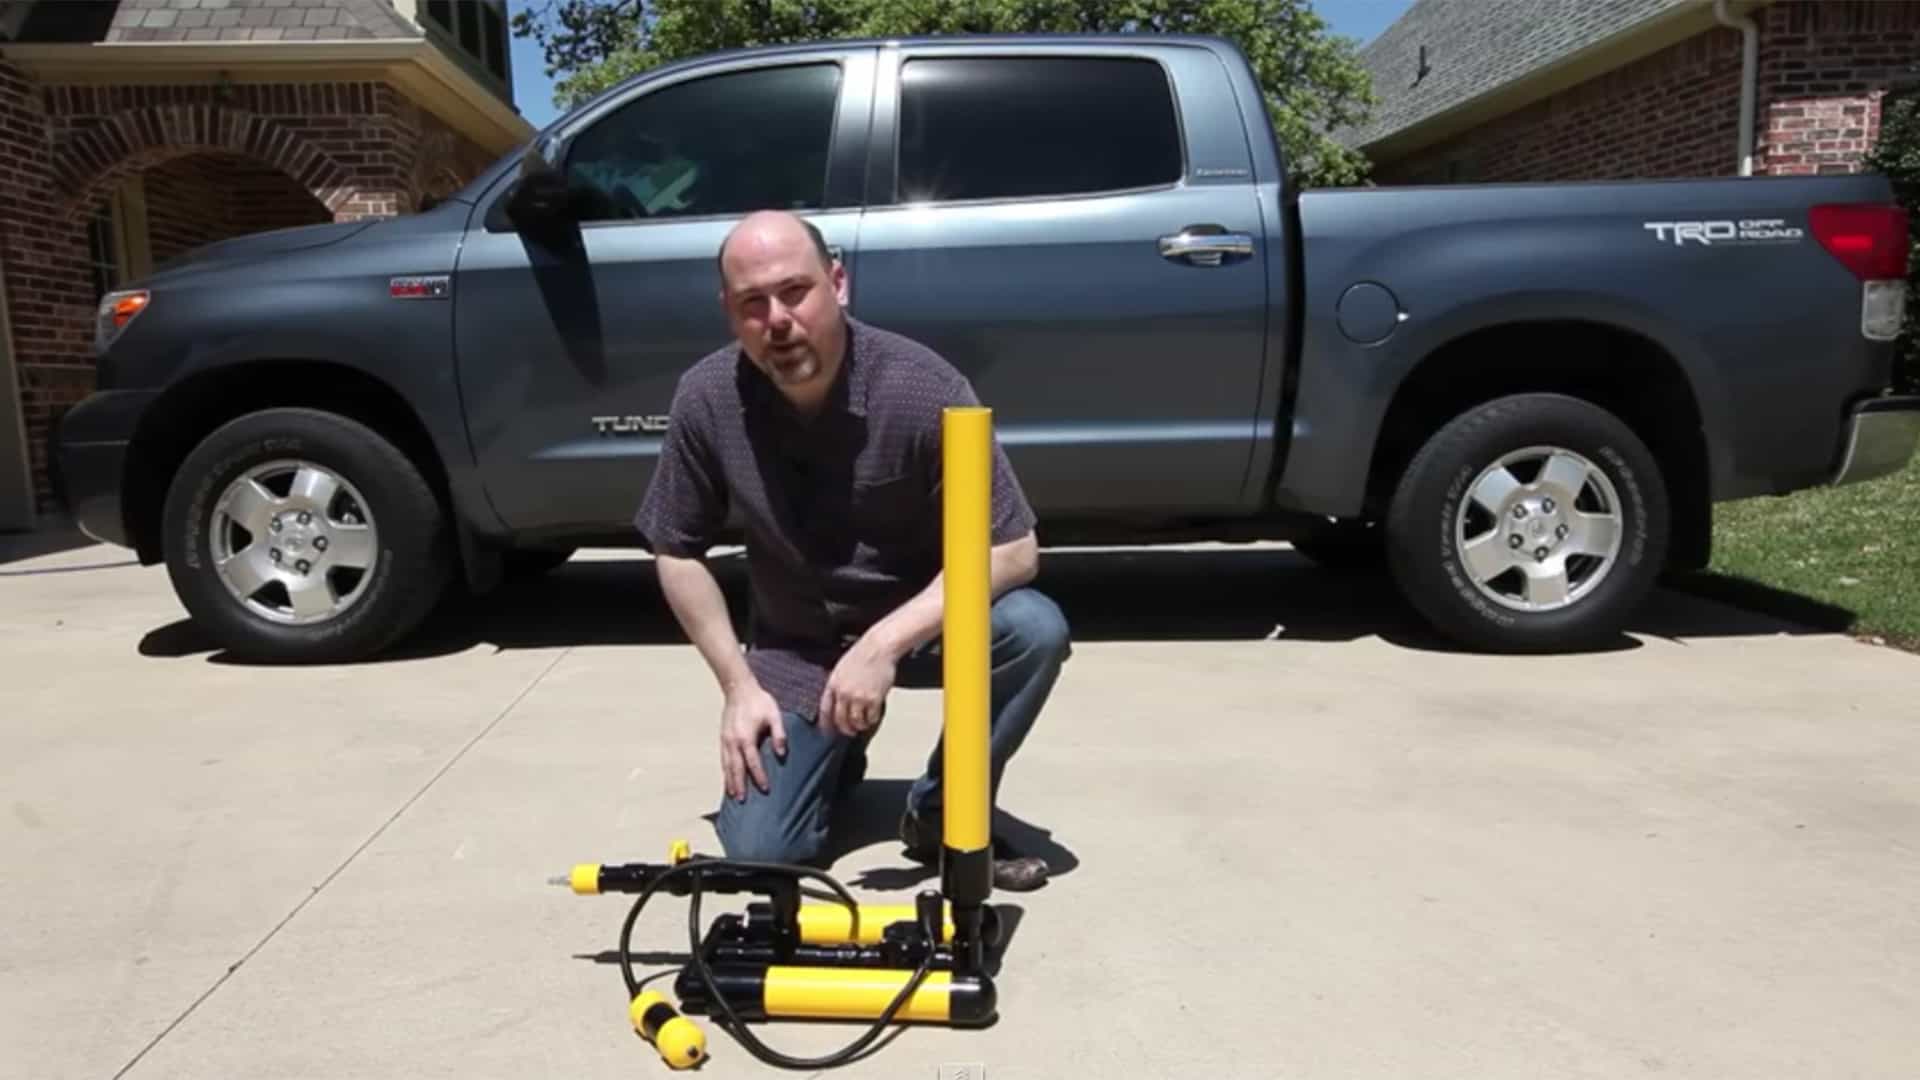
[adinserter name=”TopOfPost”]When I was a kid I always loved throwing water balloons on a hot sunny day. My brother and I would go out of our way to trick each other and figure out ways to make our water balloons bigger and bigger. I remember hiding outside and throwing water balloons at the door as soon as my brother would open it. It wasn’t a pretty day when my mother opened the door and threw a water balloon right passed her into the heart of the living room! I think I was grounded for a week after that little incident. The great thing about water balloons is they cool you off in the hot summer months and allow you to play outdoors without getting too hot. It wasn’t till I was in my teens that I got the idea to make a water balloon slingshot, basically two stakes in the ground and a rubber belt. Word to the wise: A water balloon traveling at speed can hurt like hell. I’ve had a few leave big whelps!
Well, now I am an adult (and a mad scientist to boot)! I decided there has to be a way to make these water balloons travel faster and further. The solution? A compressed-air powered water balloon cannon made from PVC pipe that you can build at home in about 3 hours with parts found at your local home improvement center! Or as my brother calls it, the Water Balloon Bazooka!
Now don’t be fooled. This thing can be dangerous! Don’t shoot someone directly with this, and never at the face! Serious injury could occur. That being said when used in a safe manner, these cannons can be some of the funnest summer time toys to have around the yard!
[button link=”https://www.thegeekpub.com/product/water-balloon-cannon-plans/” type=”big”] Download the Water Balloon Cannon Plans Here[/button]
Building the Water Balloon Cannon
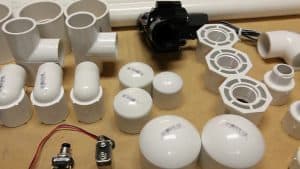
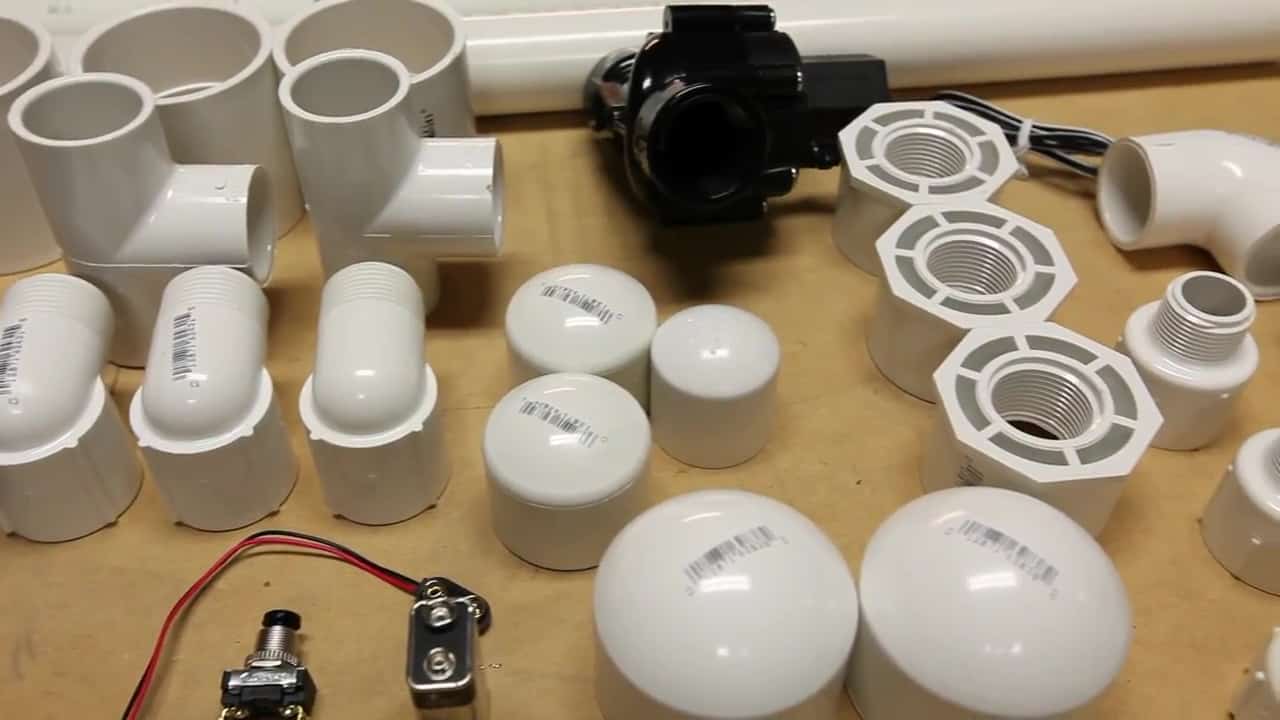
 There’s quite a few components you’ll need to purchase to get started with this project. A complete parts list can be found at the bottom of this page. As previously mentioned, everything you need to complete this project can be found at your local home improvement center. Make sure that you purchase components with a Schedule 40 rating. Schedule 20 components will not with stand the pressure we’re going to put them under and will likely burst with high probability of injury to yourself or a bystander. I also recommend that you limit the pressure of your air compressor to 134 PSI if it is capable of going higher (most are between 120psi to 130 psi). Safety should always be top of mind when building compressed air projects!
Cutting and Assembling PVC Pipe
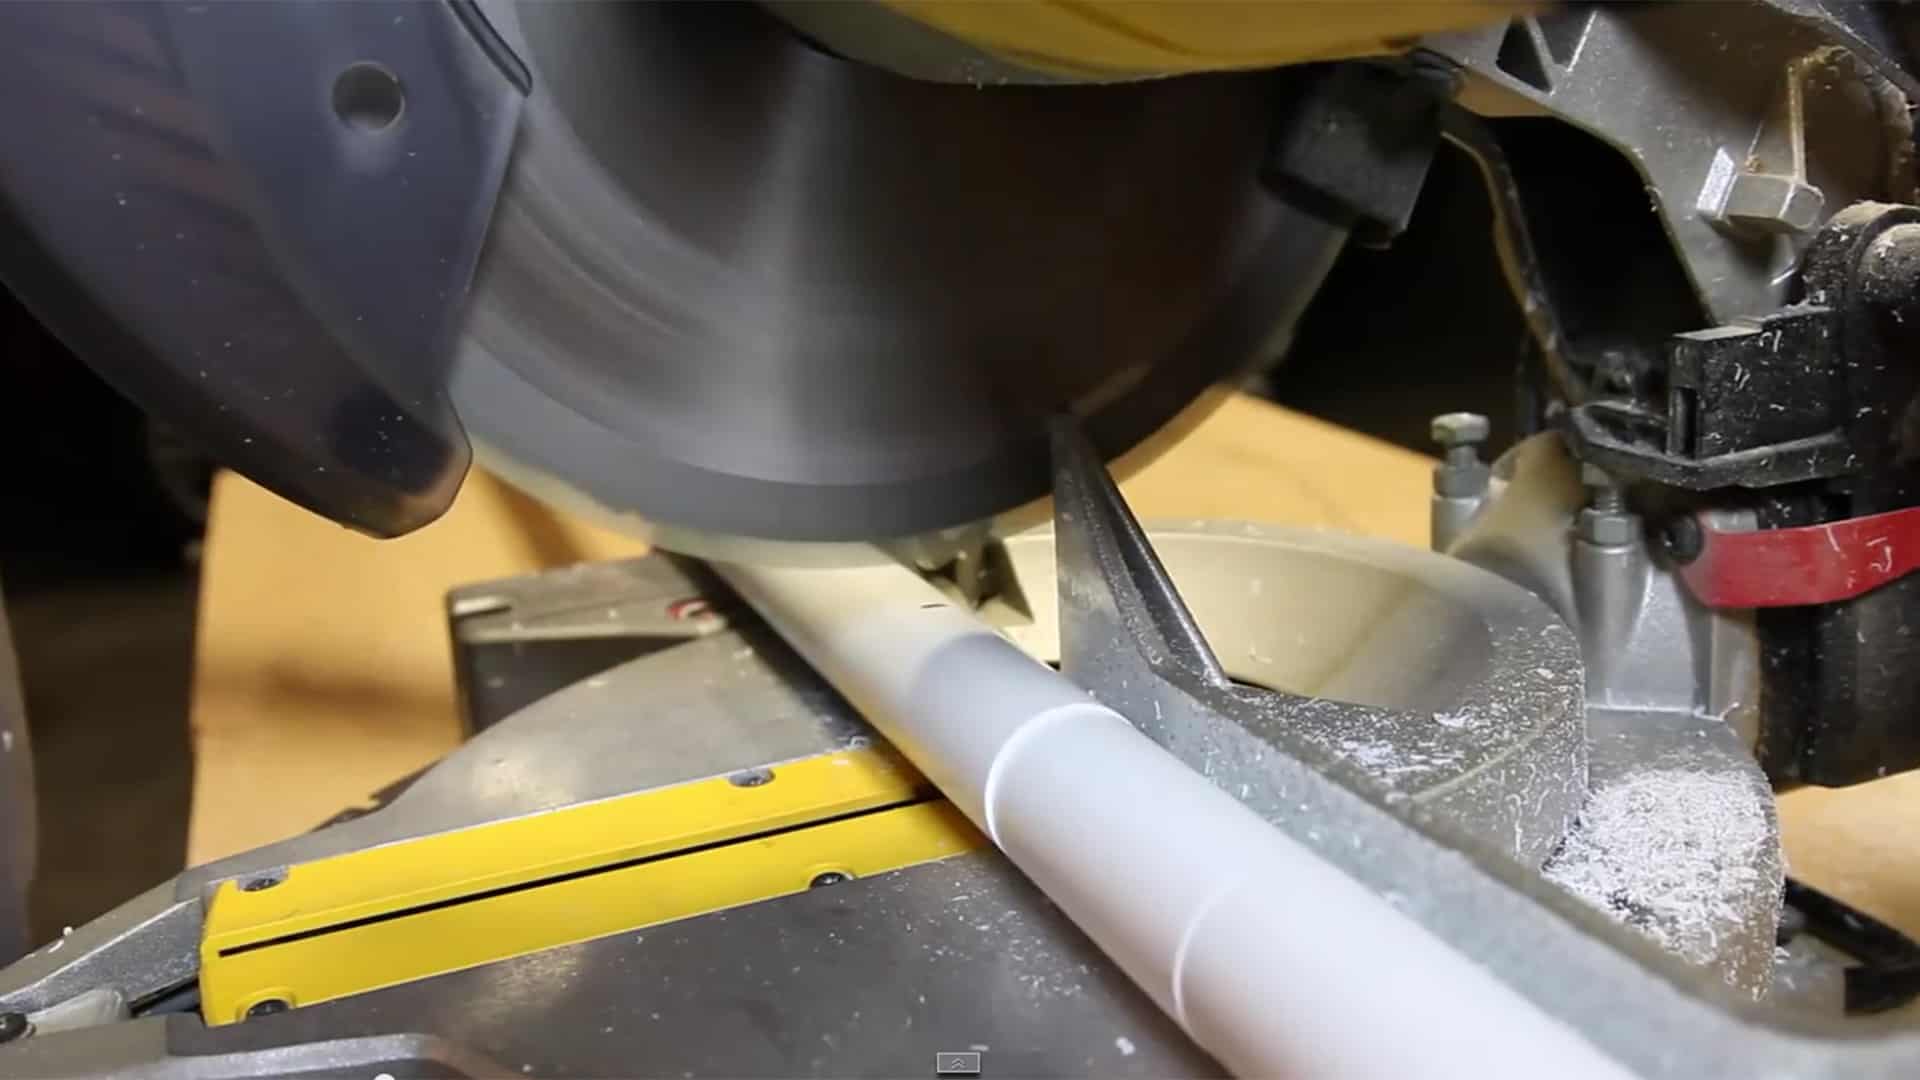 When cutting PVC pipe there are numerous options. You can use specialized PVC pipe cutters which cost hundreds of dollars, or you can use whatever tools you have a round the shop. Many people prefer to use a regular old hand-held hack saw (hand saw). I’ve seen people use sawzalls, and even table saws to cut this stuff. I personally like to use my 10″ compound miter saw. It cuts the pipe and leaves an incredibly smooth finish on it. I highly recommend using a 40 tooth or higher blade when cutting PVC, and to go slow. PVC is somewhat brittle and prone to fracturing if you cut it too fast (or when using a low tooth count blade designed for ripping operations).
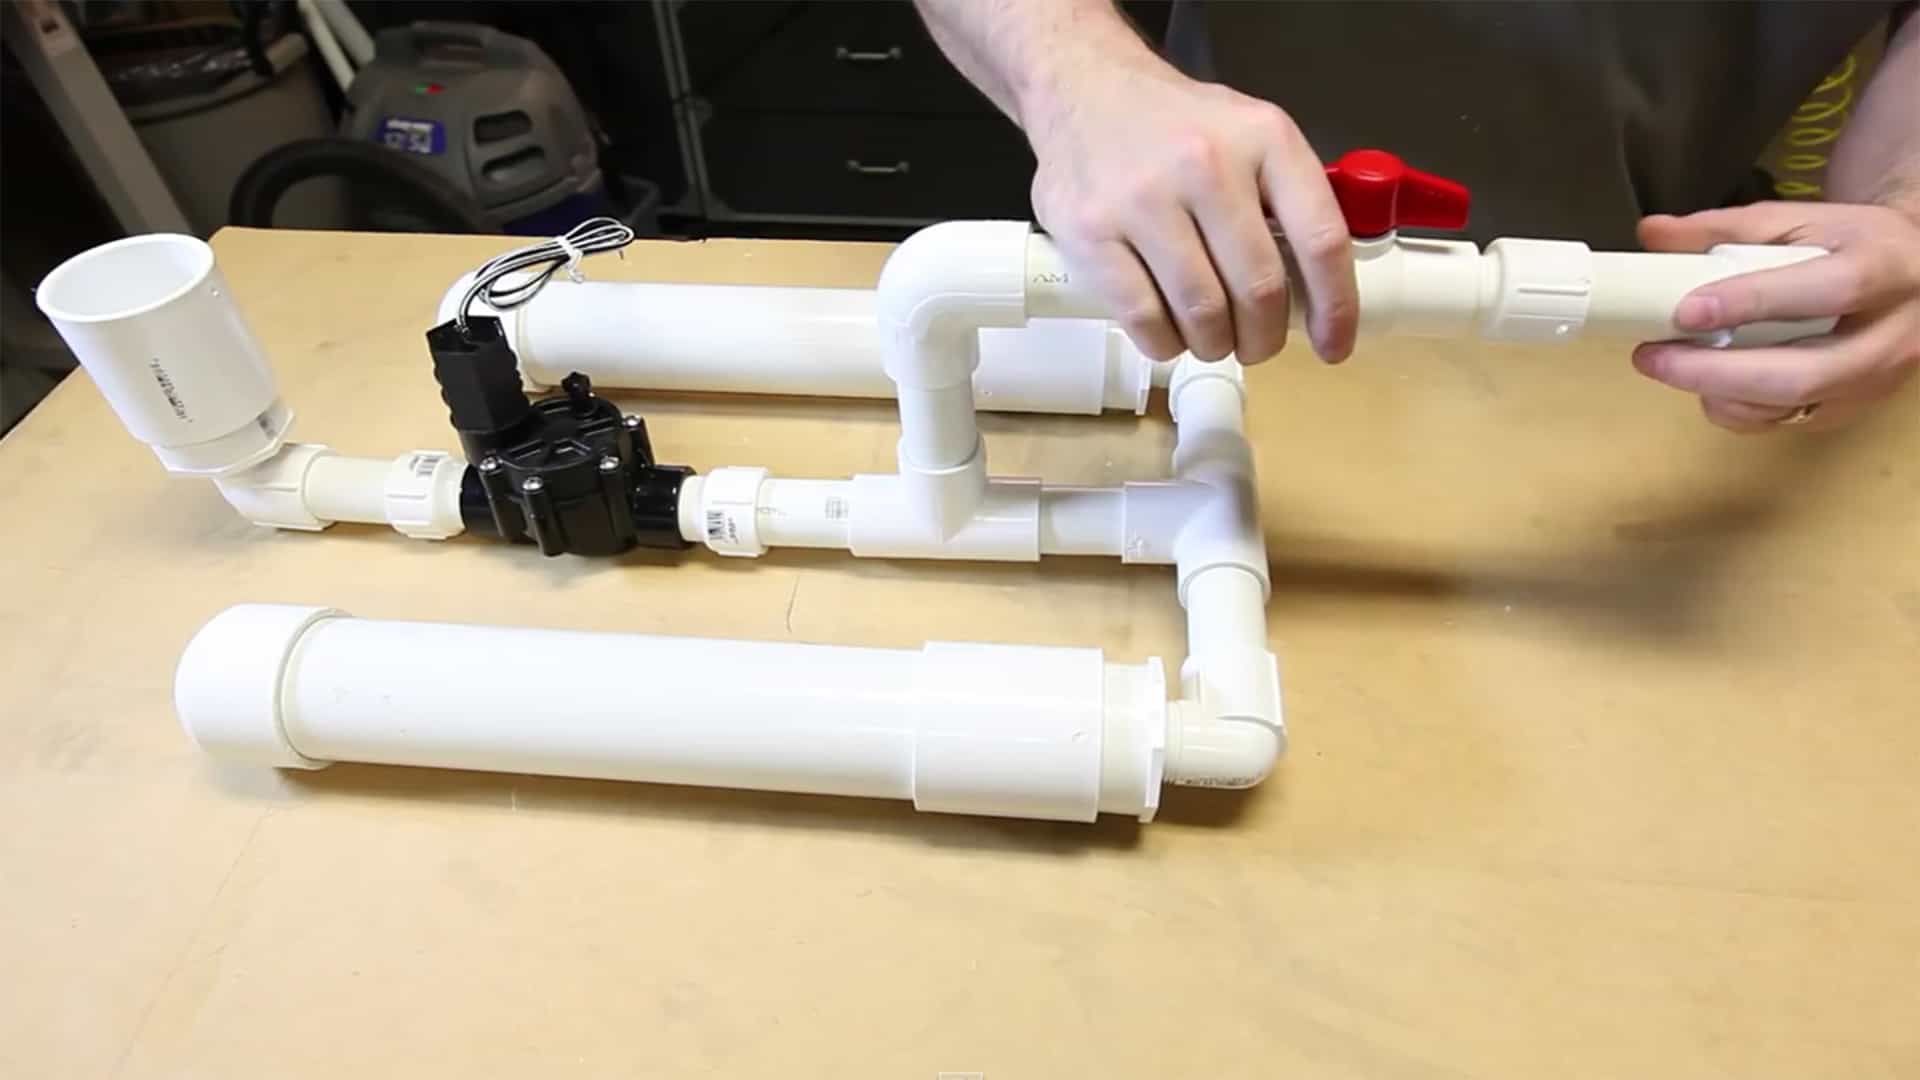 The next step after cutting all of the pipe is to dry fit it. You’ll want to put the entire cannon together, making sure that all of the pieces are the right length and that all of the parts line up and connect together correctly.
The last thing you want to have happen is to glue it half way up, only to find out that you cut something wrong and it too late to correct it. You’ll wind up starting all over from scratch!
Choose some color of your choosing and paint the cannon!
Making the Water Balloon Cannon Step by Step
These step by step instructions are not meant to be a replacement for the plan files above, however I’ve had a lot of requests for some free plans. This is an attempt to help those out who for whatever reason cannot afford the $6.99 plans above. Although if you can’t afford the plans, I’m not sure how you can afford the parts. Wink. Wink.
 Step 1: Acquire all of the PVC and Electrical Components
You should be able to acquire all of the PVC and electrical components for your water balloon cannon at any home improvement center, including the wiring and the buttons. The balloons can be obtained from the local party store or dollar store. Keep in mind that some of the cheaper balloons will need to be wrapped twice so that they don’t burst on launch.
 Step 2: Mark the PVC sections to length
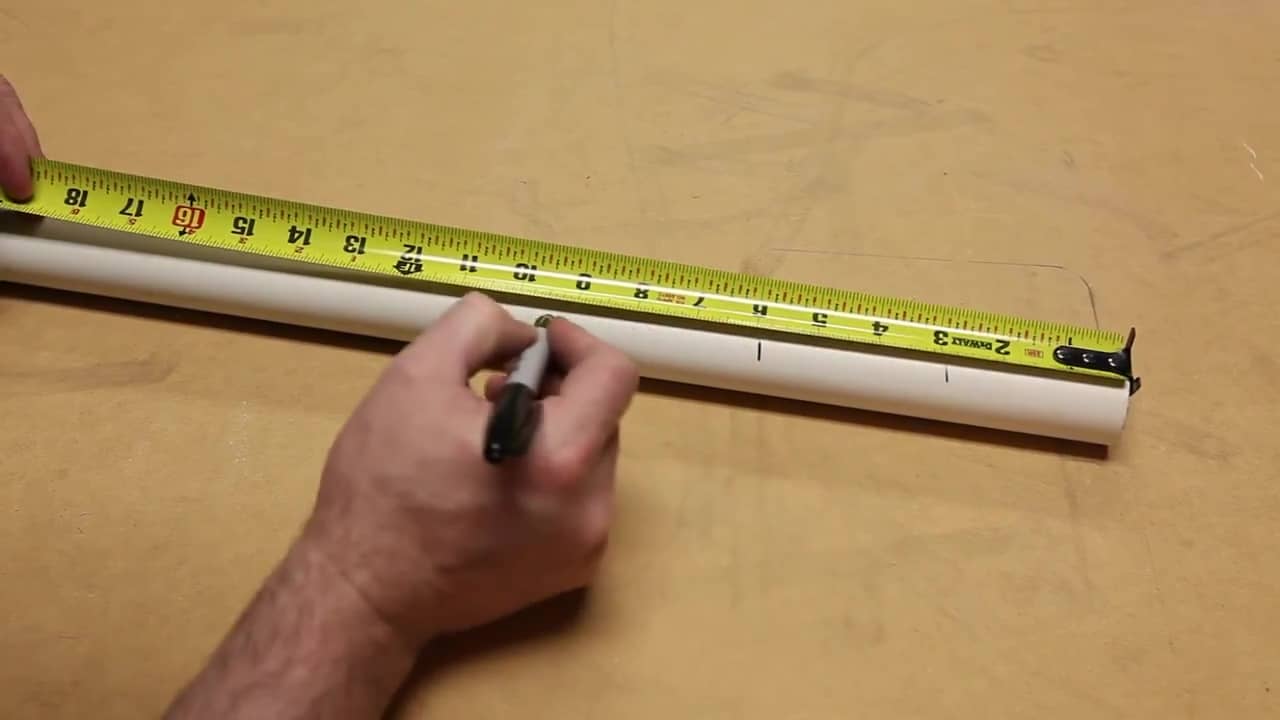
Use a measuring tape and marker to mark all of the sections you’ll need to cut out on the PVC pipes.
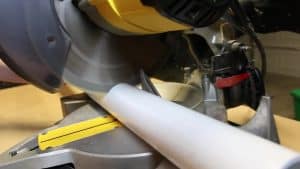 Step 3: Cut the PVC to size
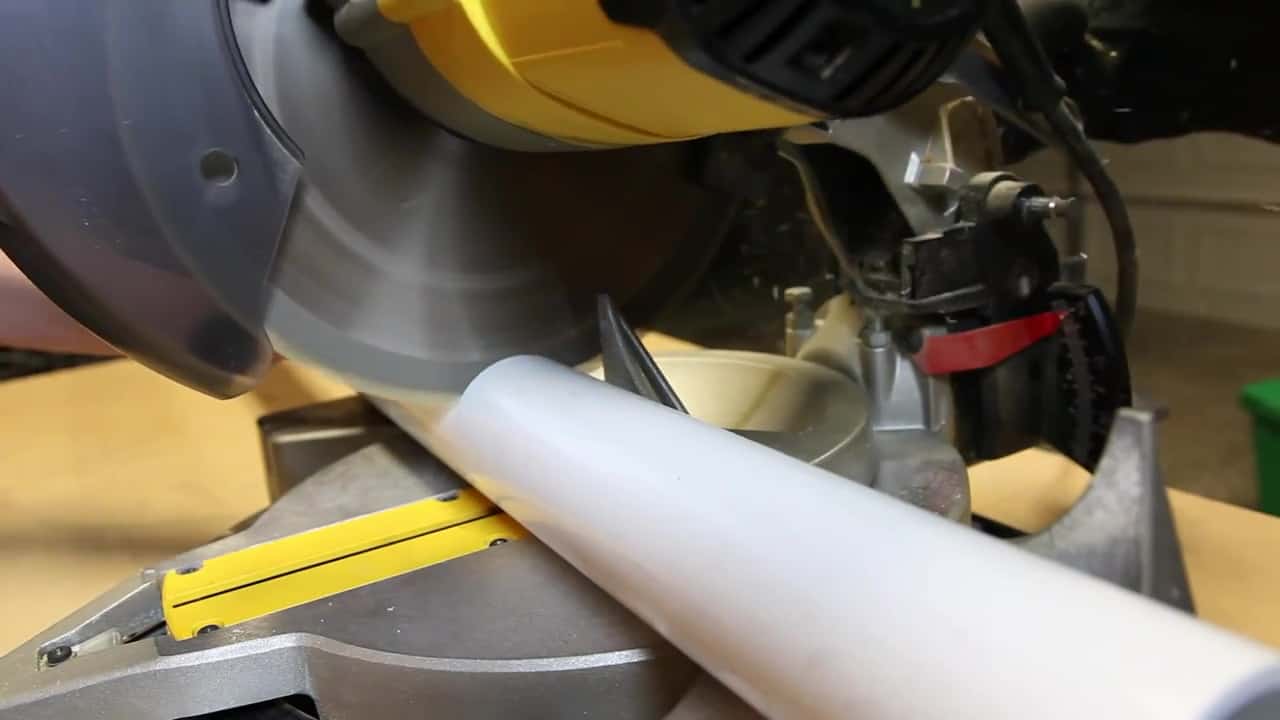
I cut the PVC down to size using my compound miter saw. This is she simplest way to do it, and by far the fastest. But it doesn’t come without risk. Make sure to use a crosscut blade, not a ripping blade or you may shatter the PVC. It helps to cut slower, not faster. You can also cut it with a handsaw, or hacksaw, or a pipe cutter if you have one.
 Step 4: Dry fit all of the components

Before you prime and glue, dry fit all of the components. This way if you made any errors in cutting or sizing your cannon, you can make corrections without major damage or repairs to your cannon after the glue drys. This is just a dry fit, not a test, so do not try to connect compressed air to the water balloon mortar!
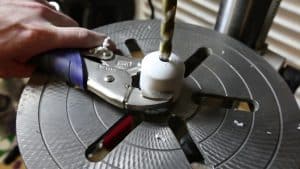 Step 5: Drill the end cap
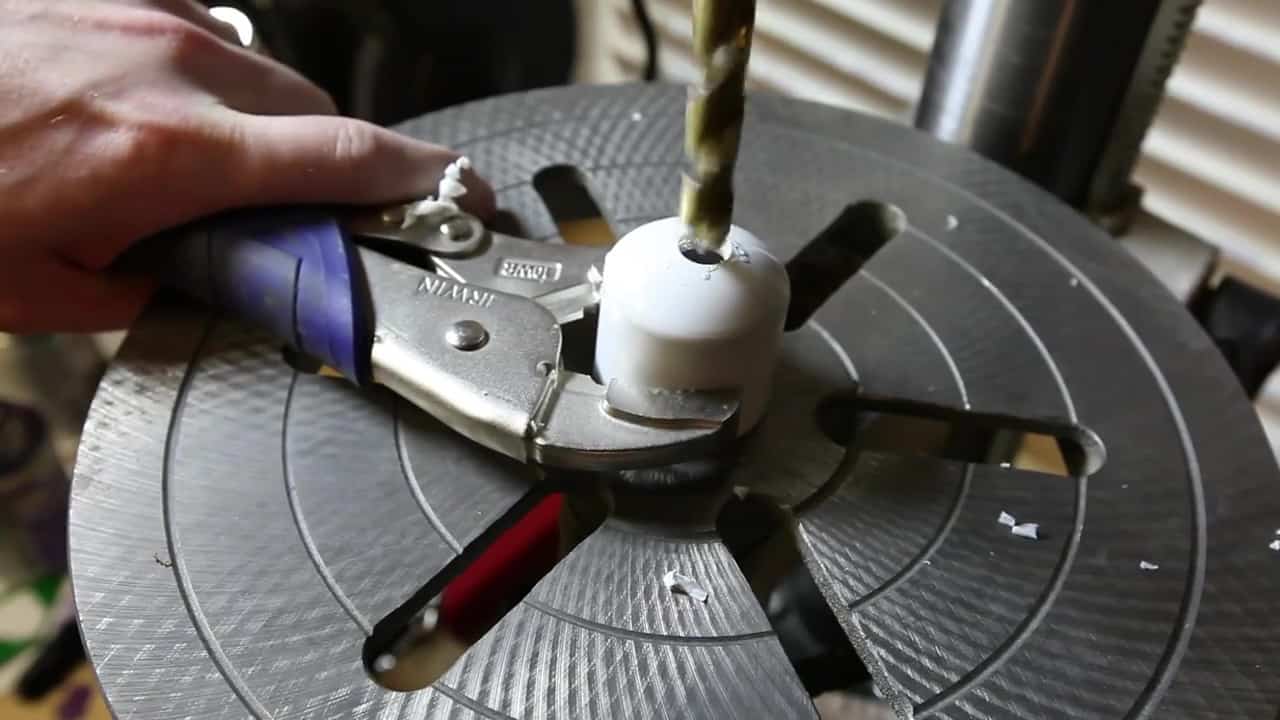
Drill a hole in the end-cap on the back side of the ball valve. This hole should be about 1/16″ to 1/32″ smaller than the threads on the PVC fitting.
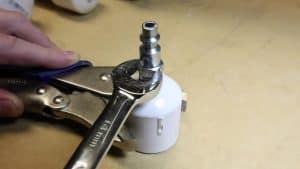 Step 6: Thread in the air compressor fitting
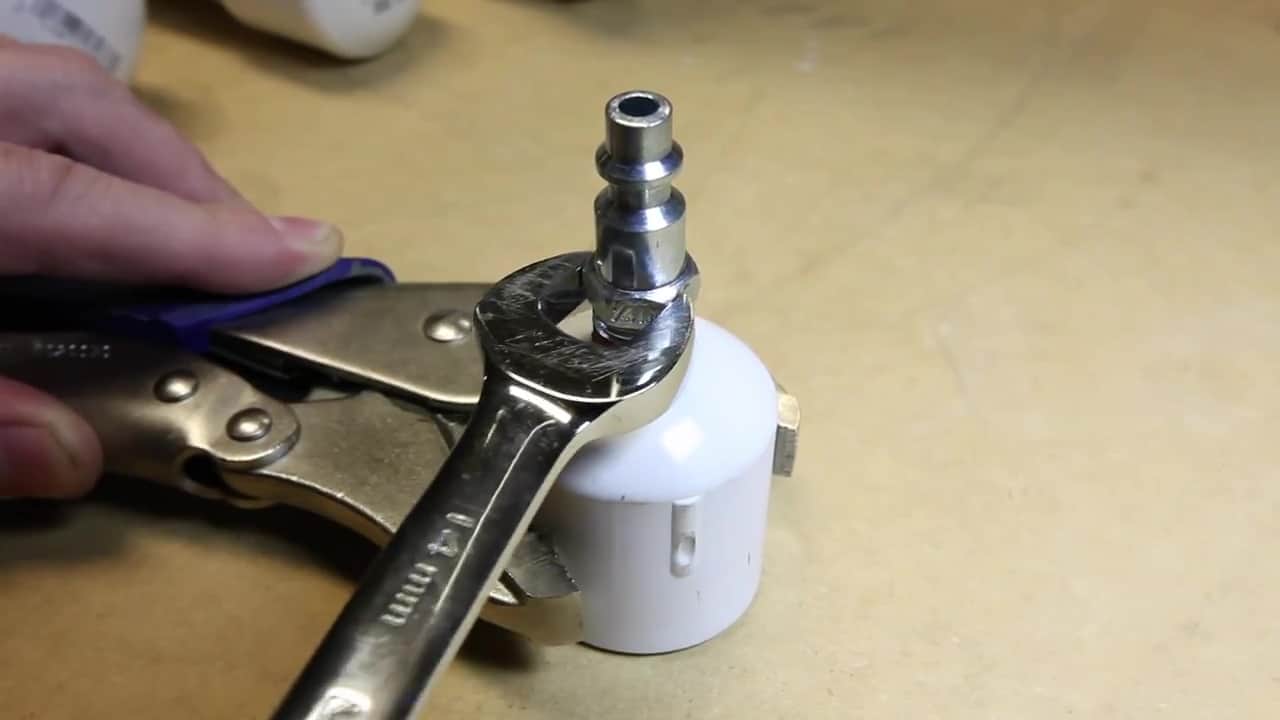
If the fitting is not already covered with thread sealant, wrap it with pipe tape and then thread it into the hole you drilled in step 5. The threads will cut into the PVC and make a perfect seal.
 Step 7: Prime the PVC

Use PVC primer to prime all of the PVC pipe where it will be jointed. It is important to prime both the fittings and the pipe. Many people skip the primer. Do not do this. It could lead to failed joints down the road. You want your cannon to be safe!
 Step 8: Glue the PVC

Add glue to one component at a time and press them together. Do NOT add glue to more than one component at a time, as it will dry before you can get to it and ruin the parts. PVC glue dries fast.
 Step 9: Press the parts together
Some of the larger pipe will be very difficult to press together once the glue is applied. A vise makes it easier. It is OK to sit them on the ground and stand on them if you need to.
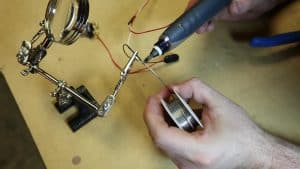 Step 10: Wire the firing trigger
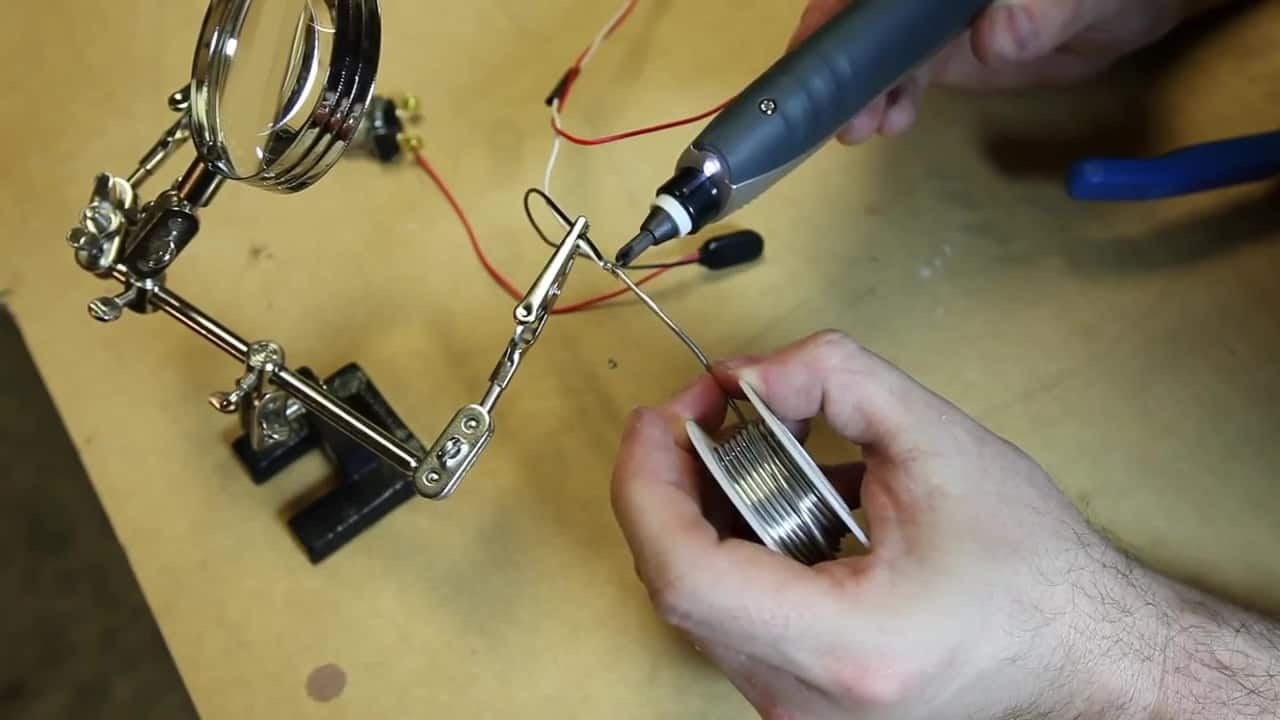
I used solder and heat-shrink tubing to connect my wires together. If you don’t feel comfortable with this method, you can just twist them together and wrap them with electrical tape.
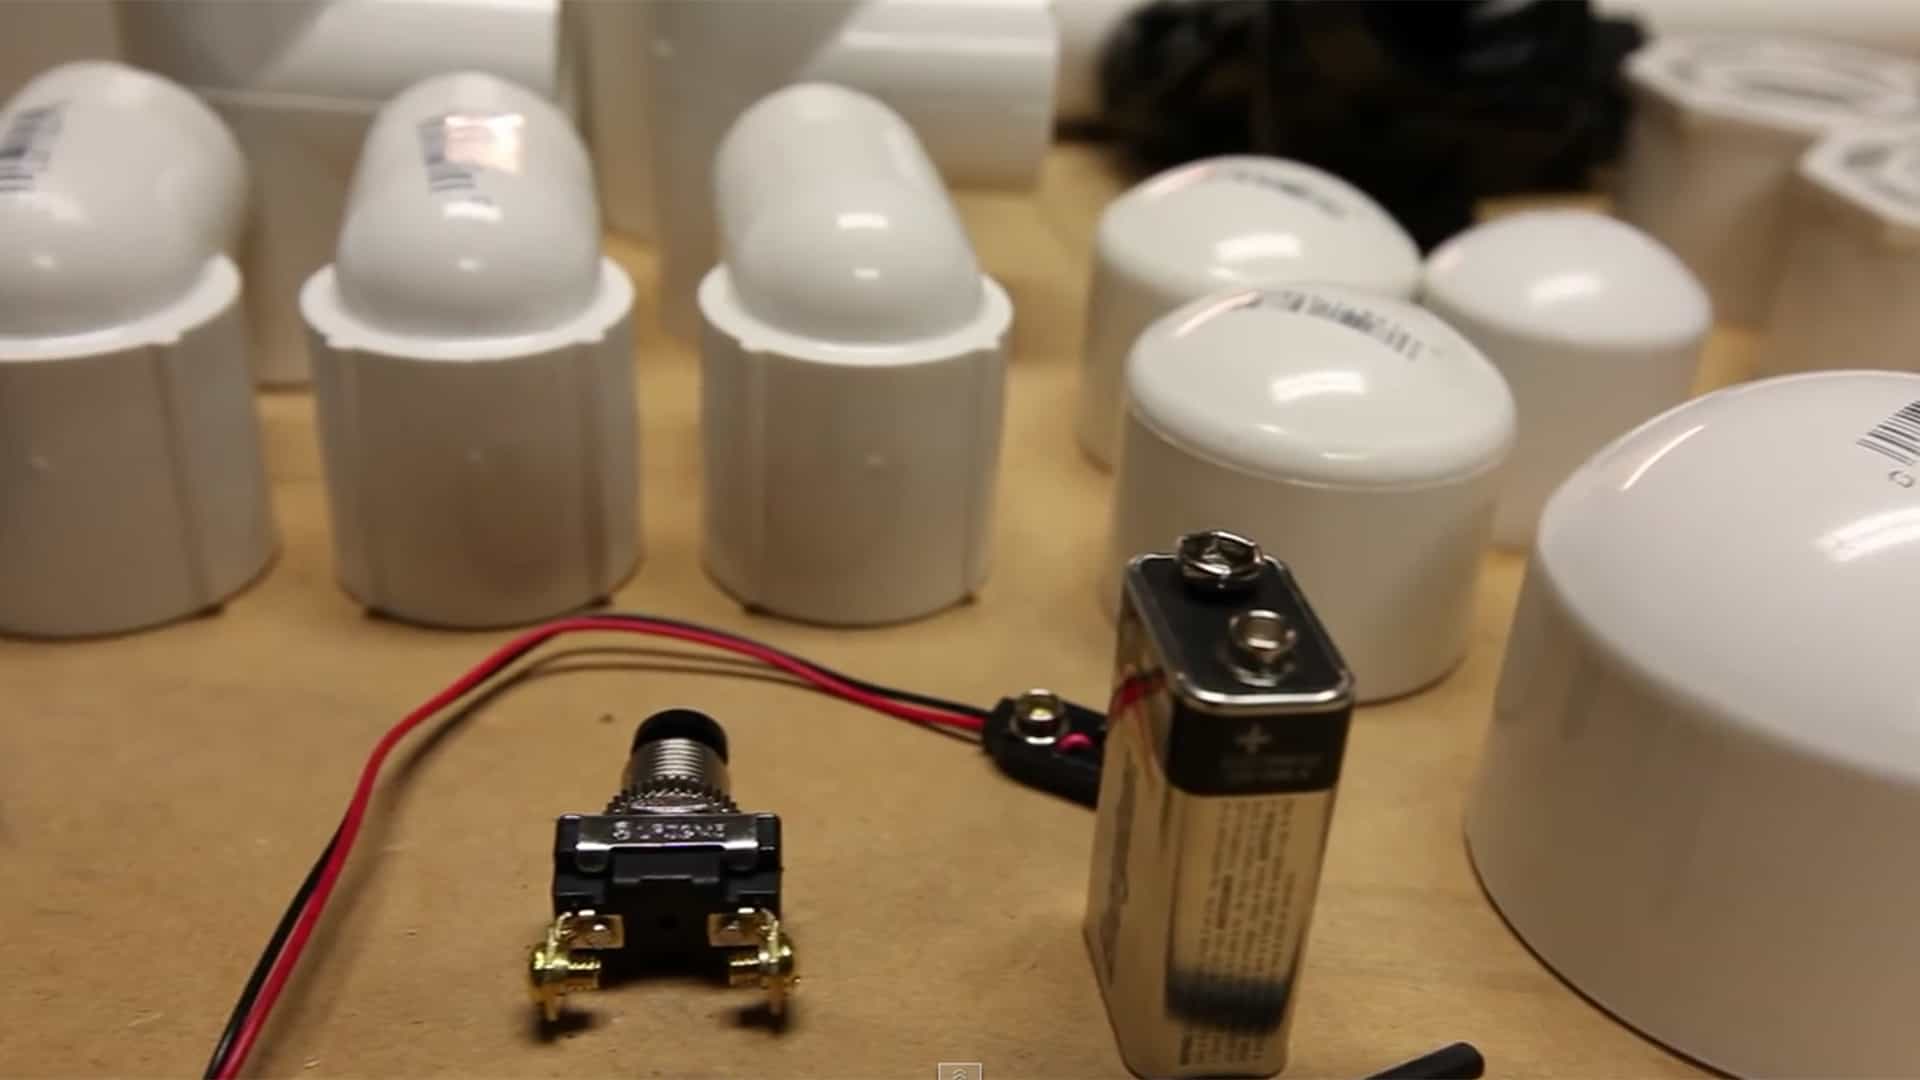
 Step 11: Make the detonator
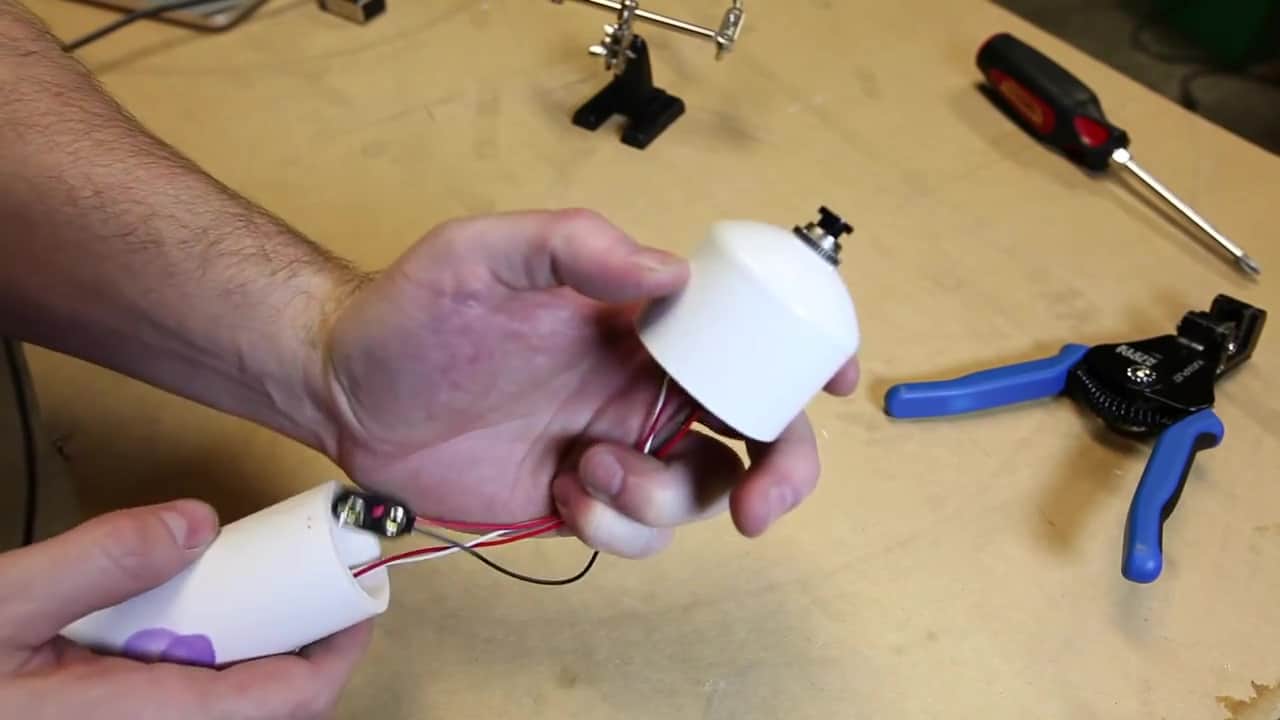
Using the two 1 1/4″ PVC caps and short section of pipe make the detonator by drilling holes in the ends of the PVC caps. Insert the button into one cap and the wire to the sprinkler valve through the other. Do not glue these caps. You’ll need to open the detonator to change the batteries.
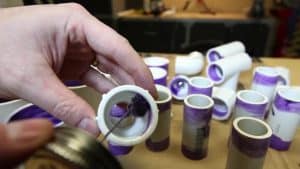
 Step 12: Paint the first color

Unscrew all of the threaded PVC sections and paint the entire cannon with whatever you want to be your primary color. If you only want one color, you can skip the next few steps.
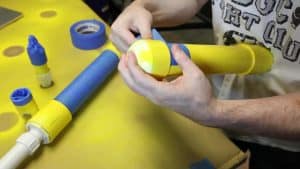 Step 13: Tape off the first color

Tape off the pipe sections anywhere you want to keep the first color. Generally the caps are left uncovered.
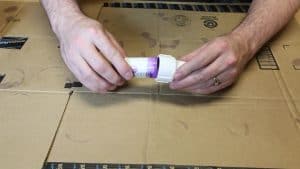
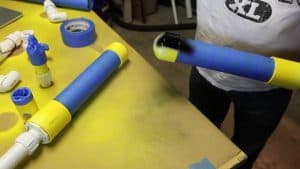 Step 14: Paint the second color
With the tape covering the pipes, paint all of the caps.
 Step 15: Remove the tape

After the second color dries to touch remove the tape to expose your awesome two color water balloon cannon!
 Step 16: Reassemble the water balloon mortar

Once the cannon is completely dry (generally 24 hours for the paint and clue to completely cure), put it all back together, replacing any pipe thread tape that was damaged or got coated in paint.
 Step 17: Lubricate the Water Balloon Cannon barrel
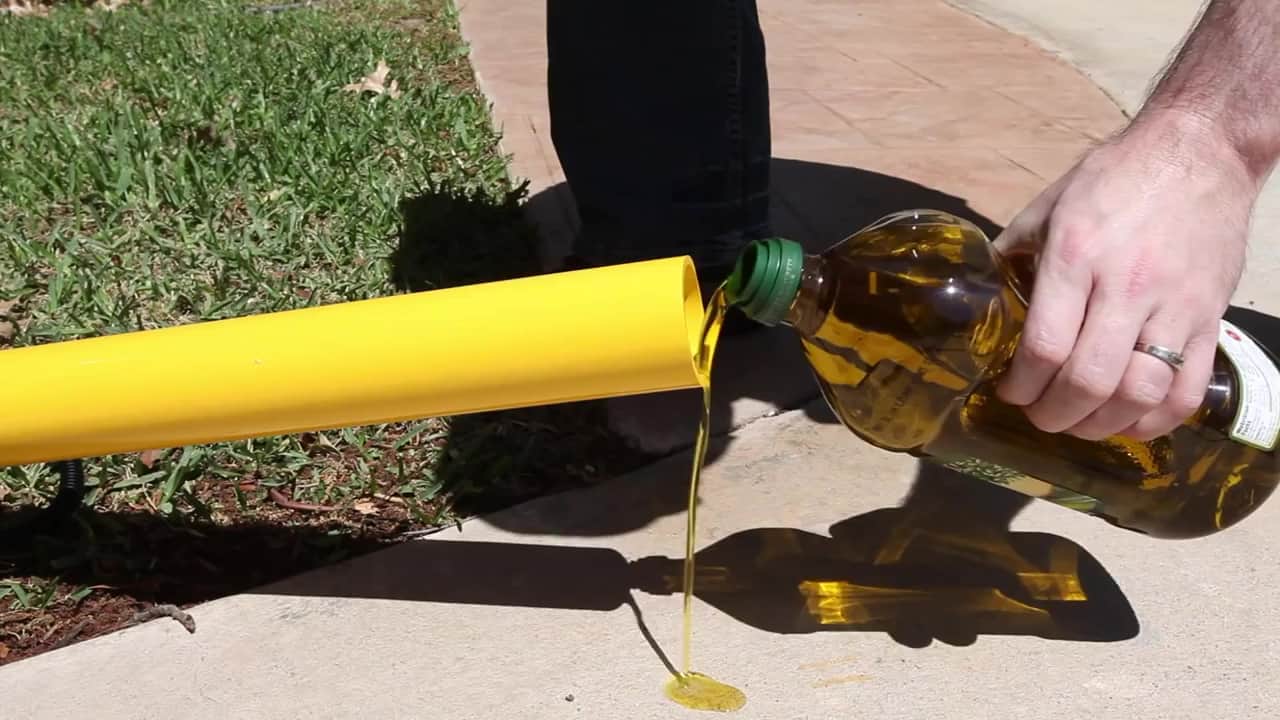
Balloons are generally made of latex, and will not freely travel down the water balloon cannon’s barrel. To solve this coat the inside of the cannon’s barrel with vegetable oil. Do not use WD-40 or other petroleum product as it will cause the balloon walls to burst.
 Step 8: Fire the Water Balloon Cannon
Now that your ready, insert the water balloon into the cannon and fire it! You’ll want to fill the water balloons until they are just ever so slightly smaller than the barrel. If you have problems with them busting you’ll need to lower the pressure or wrap more balloons to make them thicker. Depends on how far you want them to go. Of course, you can also shoot other items like foam balls or tennis balls from the cannon. Be safe and wear eye protection!
[button link=”https://www.thegeekpub.com/product/water-balloon-cannon-plans/” type=”big”] Download the Water Balloon Cannon Plans Here[/button]
Video Transcript
Before starting this project, we’ll need to travel to the local hardware store and acquire the parts. You can find the parts list for this projects at the bottom of the page.
To get started we’ll need to cut two 12″ pieces of 2″ PVC pipe and six 3″ pieces of 1″ PVC pipe. I used my compound miter saw to cut the PVC. When cutting PVC with a power saw, be sure to use a segmented blade. Using a standard blade could result in dangerous kickbacks. And of course, regardless of the method you choose, always wear good eye protection. After we get the PVC pipe cut its time to test fit all of the components. Let’s start by assembling the pressure tanks. The pressure tanks are connected by a 1″ PVC tee. Another tee is added to split incoming air from outgoing air and will be connected to our firing mechanism which is a simple water sprinkler valve.
On top of the tee we’ll add a 3/4″ ball valve. This will allow us to charge the tanks and close the system for portable firing. Now, we need to take one of the 1″ caps and drill a 1/4″ hole in it for an air compressor quick release. This is how we will pressurize the cannon. It’s attached directly behind the ball valve. Then just add the 24″ firing barrel and assemble the detonator!
Once we’re happy with the fit, it’s time to glue it all together. Be sure to use the proper PVC primer on all of the joints before we start gluing, as it will help prevent leaks. Now its time to apply the PVC cement. I like to push the parts together tightly and then twist them 1/4 of a turn. Some of the bigger fittings can be very difficult to fit together, and can require a lot of force, so don’t let the glue dry too long before mating them. Be sure to get the alignment right on the elbows because you won’t be able to adjust them later.
Now, lets strip the wire back about 1/4 of an inch and connect the momentary switch to the 9v battery snaps and doorbell wire. I prefer to solder the joints and use heat shrink to cover them.
Next we mount the momentary switch through the hole we drilled earlier in the 1 1/4 inch PVC cap and slide the wire through 5″ length of the pipe. I thought the wiring needed some cleanup so covered it with this back tubing for a super clean look!
With everything assembled, its time to attach the air compressor and give it a test fire. I just placed a paint cap over the end and pressed the detonator. It worked!
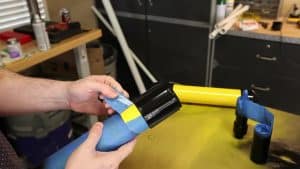
I want my Water Balloon Cannon to look awesome so I decided to paint it yellow and black. First I painted the yellow and then taped it off carefully. Be sure to wait 24 hours for the paint to cure completely before applying the masking tape. Once that’s done were ready to paint the black components and then gently remove the masking tape.
Finally, we’ll apply pipe thread tape to all of the threaded joints before final assembly. And that’s it! It’s ready to fire! Before the first firing, we need to lubricate the barrel with some vegetable oil.
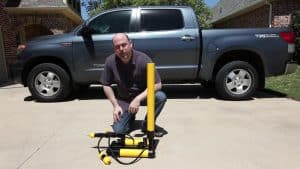
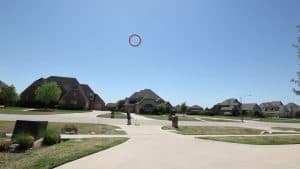
And the first shots a success! But my second shot missed… I put a back piece of foam down the barrel and fired it at 120 PSI to give you an idea of just how powerful it is. Easily traveling hundreds of feet into the air.
Well, that’s it for this project! If you enjoyed this video, please help me out by liking it and subscribing to my channel on YouTube. And of course, thanks for watching!
Parts List
Qty Item
1 2″ SCH 40 Pipe
1 1″ SCH 40 Pipe
2 2″ Caps
2 2″ Couplers
3 2″ to 1″ threaded reducers
3 1″ threaded to 1″ adapter
1 1″ elbow to threaded 1″ elbow
2 1″ Tee
1 1″ threaded sprinkler valve
1 1″ 90 degree elbo
1 1″ ball valve
1 Air compressor quick adapter.
1 2″ Coupler
2 1″ caps
1 Momentary switch
1 25 ft doorbell wire
1 plastic wire wrap
1 Yellow High Gloss
1 Black High Gloss
1 Pipe Primer
1 Pipe Glue


Well I am 13 and I made a the water ballon cannon and I Was wondering if you can make a rocket ad on?
Sure! Just put the barrel from the cardboard rocket rifle on it!
Hi, First great video and I’m excited to make this and try it out this weekend. But I did have a few questions. In your video you mention 3/4″ Ball Value but in the parts list you have 1″ Ball Value. Which is correct? Also it looks like I would need 7 3″ cuts. Is that also correct?
There is nothing listed in the parts section for the 1 1/4 inch PVC Cap? Do I need that?
Again thank you for posting this information.
I’ve made this cannon several times, and I made it a few different ways, so the anomalies. Either a 3/4″ or 1″ ball valve will work. The 3/4″ is cheaper. The two 1-1/4″ caps are used on the detonator. You’ll need them.
Thank you for the fast response…
Hi, first i want to say that’s my English isn’t very good 😉
I would like to make that cannon but i have no idee where I can buy all that parts.
I hope you can help me, and i live in belguim so if you want to search 🙂
I also have a good idee for you that you can try.
Take a look at this webside
http://www.myaircannons.com
I really hope that you can help me to find those parts.
Hi! I like this video! Can you use a common kitchen lighter to solder to wires?
Can you use a volt inflator to power it too?
Hey I want to make one but I don’t know what kind of sprinkiker valve because I went to the home depot.com and thy had different ones so please let me know
Rate this comment
Hi does anyone know where he buys his pvc from thanks
I buy it from Home Depot.
I’m a master carpenter for a high school theatre department, and I want to use a system like this for our up coming show. It looks like an awesome easy system, but I have a few questions for you:
What type of sprinkler system valve did you use attached to the momentary switch that operates the release?
Where might I find that part in Seattle?
What pressure was the system set to?
Thanks for any answers you might provide.
Every single part for this was purchased at Home Depot.
hey, i working on your project this weekend but i have some doubts.in india i got brass plated sprinkler valve but i dont know how to atach it and you said to use air compressor quick release but in parts list it is written air compressor quick adater
and what to attach the air compresor with what pipe
Hi I am thinking about making one and I want to know how much the materials cost please respond
About $20 to $30 bucks.
I am having trouble with the sprinkler valve. It clicks but doesn’t open what am I doing wrong
Either not enough pressure in your tank, or you have it on backwards.
I want to make it do i need to use a sobering gun for the wires.
No. You can twist them and use wire nuts.
OK thank and I can’t find the sprinkler valve and the 2″ to 1″ threaded reducers. Do you know where i can get it.
OK thank and I can’t find the sprinkler valve and the 2″ to 1″ threaded reducers. Do you know where i can get them
Thanks for this tutorial. Pretty awesome. Im trying to build one and I went to Home Depot. The electronic vavles they have there are 24AC. But you are using a 12V DC Battery. Should this work anyway? Also, all the tutorials I see online people modify this valve to use a pnematic release. why? to avoid the electric wiring? I prefer the electronic way. How much are these valves rated for? I plan on filling mine to 80psi? Sorry for all the qeustions.
Thanks for your comment. The Sprinkler valve I used was a 24v valve. 9V seems to power it just fine, but worst case scenario you could always put two 9V batteries in series if your sprinkler is finicky. Converting the sprinklers to pneumatic control is simply to remove electronics from the design. I much prefer my way. 😉 The valves are rated at 90 to 100 PSI depending on brand. I’ve pushed mine all the way to 125 PSI without them popping, but you’ll have to decide on your own how much risk you’re willing to take.
I built the thing but its making a weird trumpet noise. What should I do. And when I let go of the switch it fires so when I press the switch it stops it from firing the balloon.
You either have the sprinkler valve in reverse position, or the solenoid is in bypass mode (try turning it clockwise or counter-clockwise), there should be an arrow on it.
Which brand/model of sprinkler valve do you use?
Looking for one that can really hold the pressure, and I’m not having any luck finding the specs they are rated to.
How much did it cost you to make the whole thing?
About how much does this project cost?
Can you pump it with a bike pump? Mine goes up to 160psi.
Can you pump it with a bike pump? Mine goes up to 160psi.
Sure!
Can you tell me the make and size and part number of the plastic cups you used?
Thanks