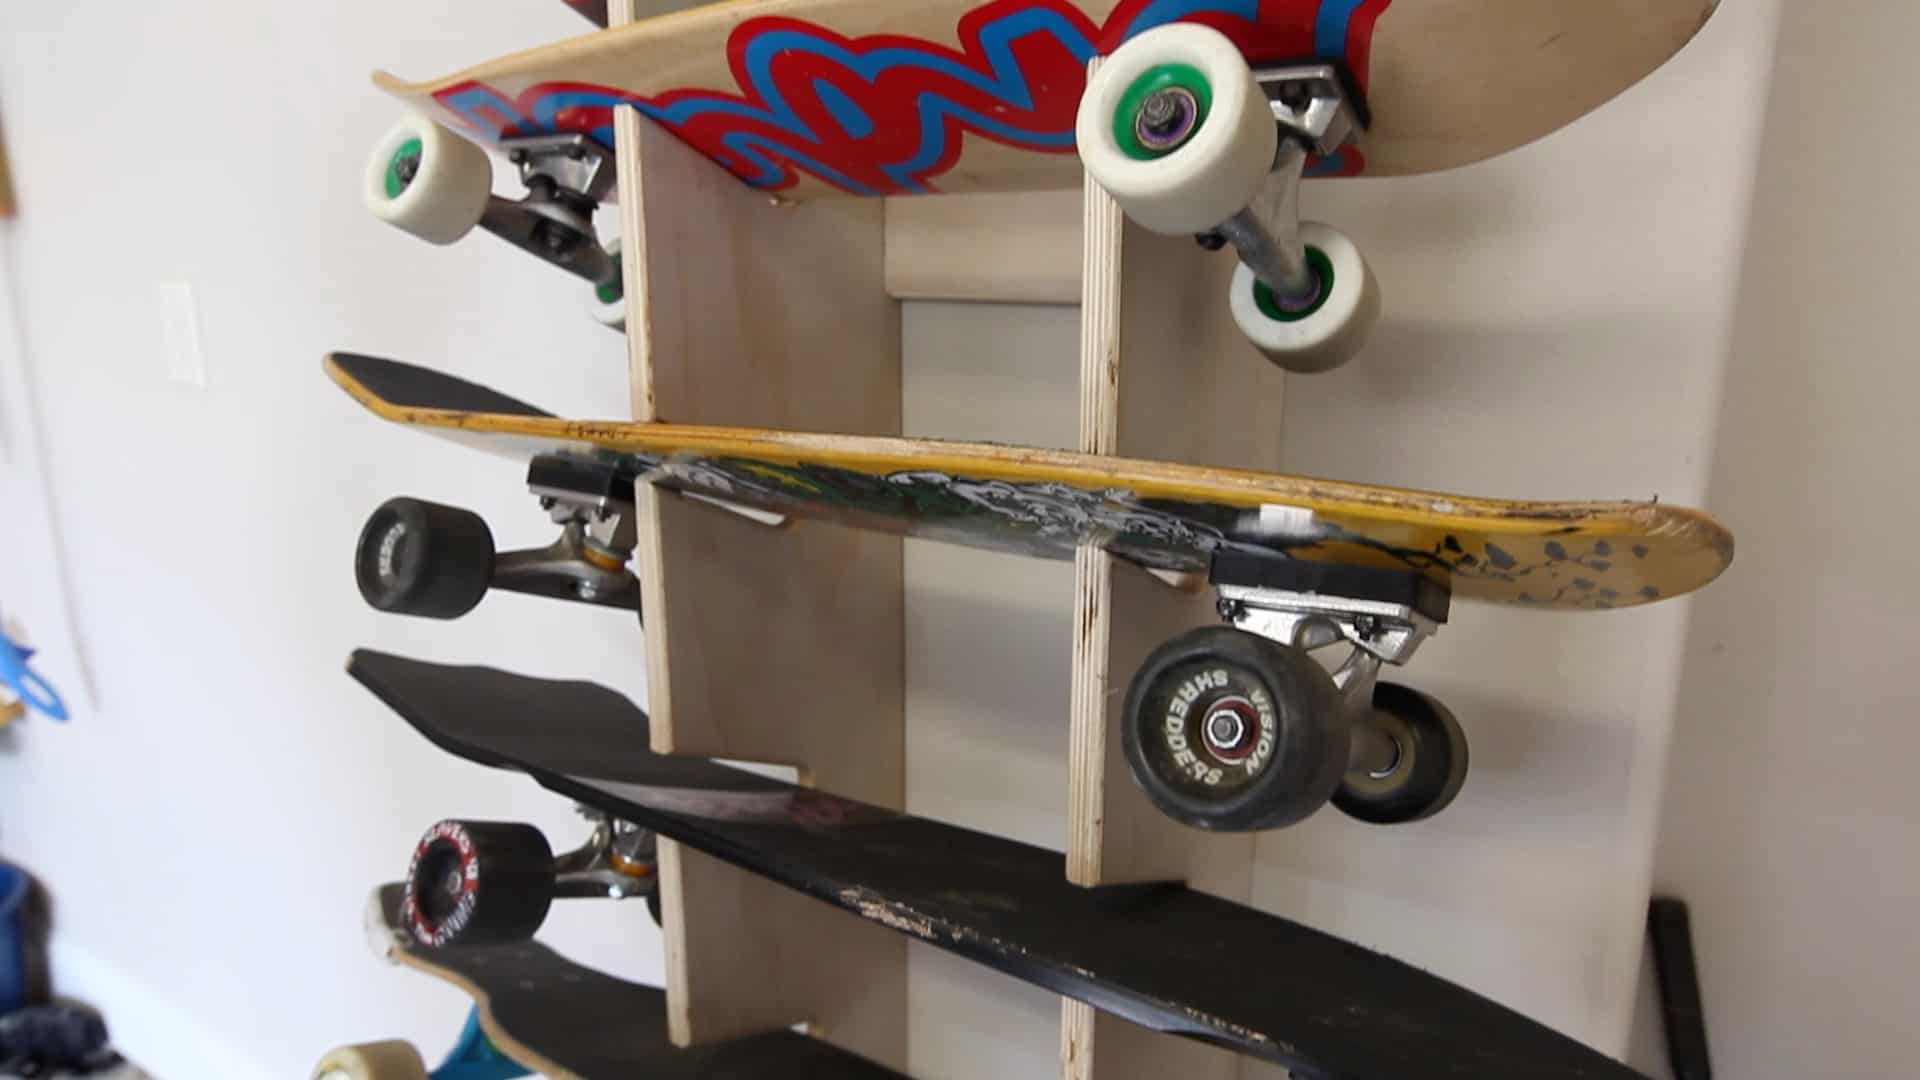
Your skateboard storage rack (or skateboard display rack if you prefer) can be designed to hold just a couple of boards, or 10 or more! There’s really no limit, so use your imagination and make your skateboard rack fit your style!
Don’t be afraid to experiment with different ideas!
[button link=”http://www.thegeekpub.com/product/skateboard-rack-plans/” type=”big”] Download the Skateboard Rack Plans Here[/button]
 The first thing you’ll need to do is decide what to make your skateboard rack out of. You can use plywood, MDF, or dimensional lumber. MDF won’t hold up as well, but lots of skaters like to use it because they can shape it easily, and put a super high quality gloss finish it (usually followed by a ton a skate stickers!).
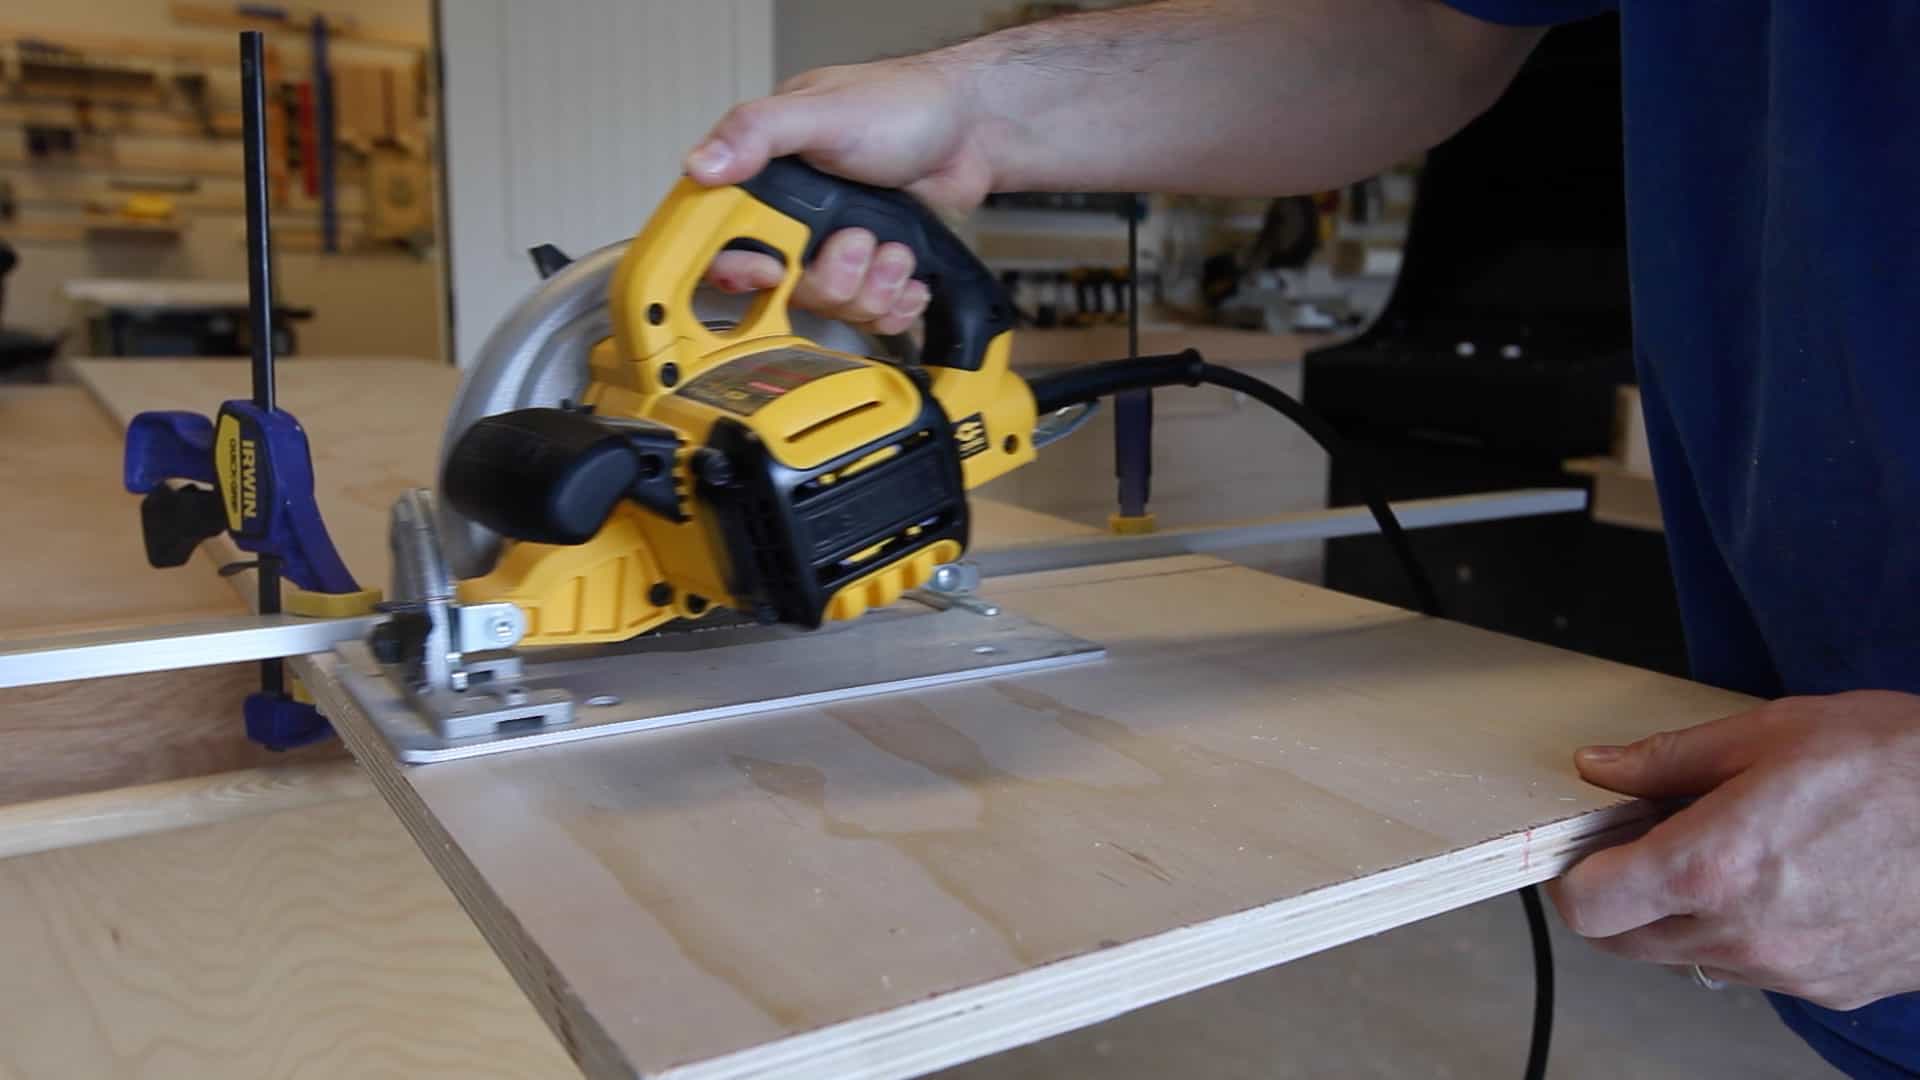
For Connor’s skateboard rack, we decided to go with plywood, because Connor thought he might stain and clear coat it at some point in the future, but he still wanted it to look some what grungy with the exposed plywood edges. Connor’s skateboard rack is going to be 82″ tall by 9″ deep. So I started by cutting down some scrap cabinet grade plywood int two 82″ x 9″ strips.
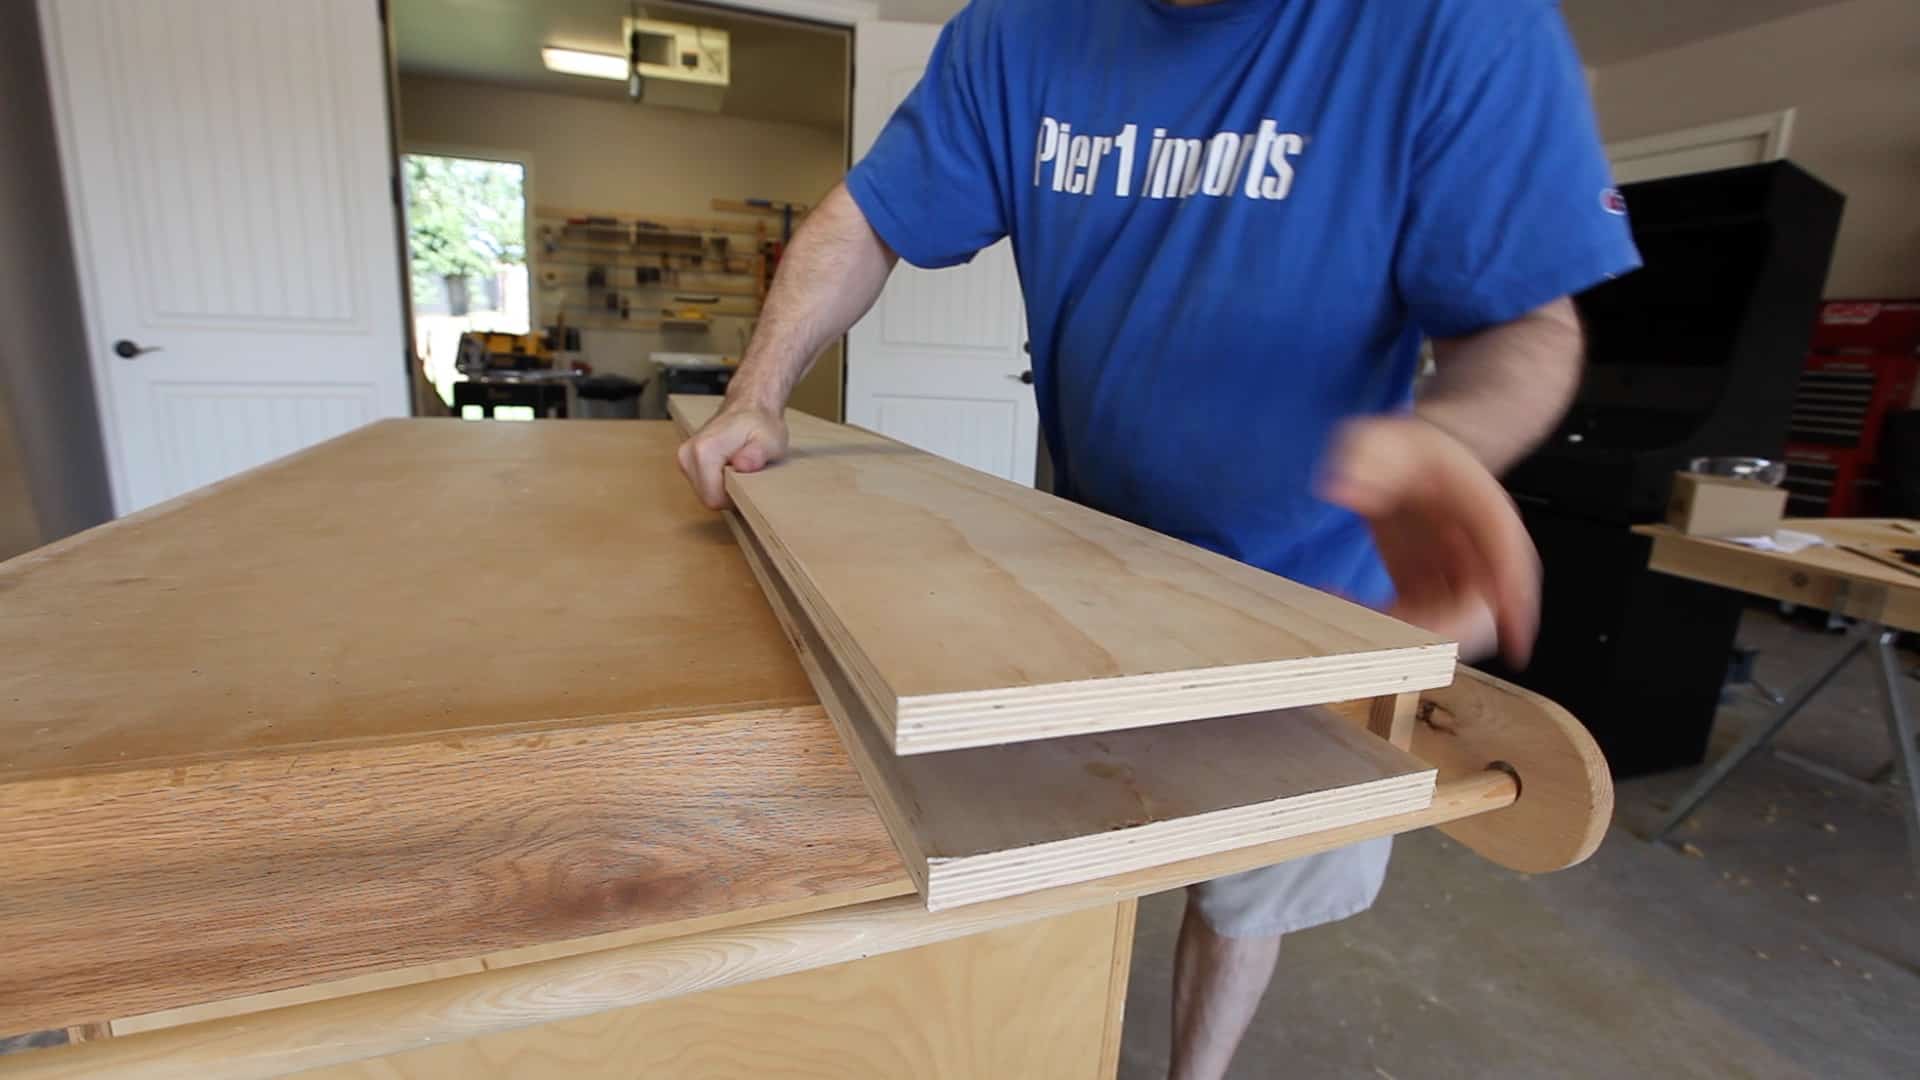 I always like to save time anywhere I can. In this case we’re going to have ten skateboards on this rack. That means marking and measuring for ten centers, ten angles, ten center holes, and ten slots. Then I have drill ten holes and cut ten slots. I’d really like to do that only once, rather than do twenty!
To cut our work in half, I used some double sided fabric tape. You can get this stuff at just about any woodworking supply shop, hobby store, or Amazon. Use this to sandwich the two sides together so we can measure, mark, drill, and cut them just once, and get two perfectly matching sides!
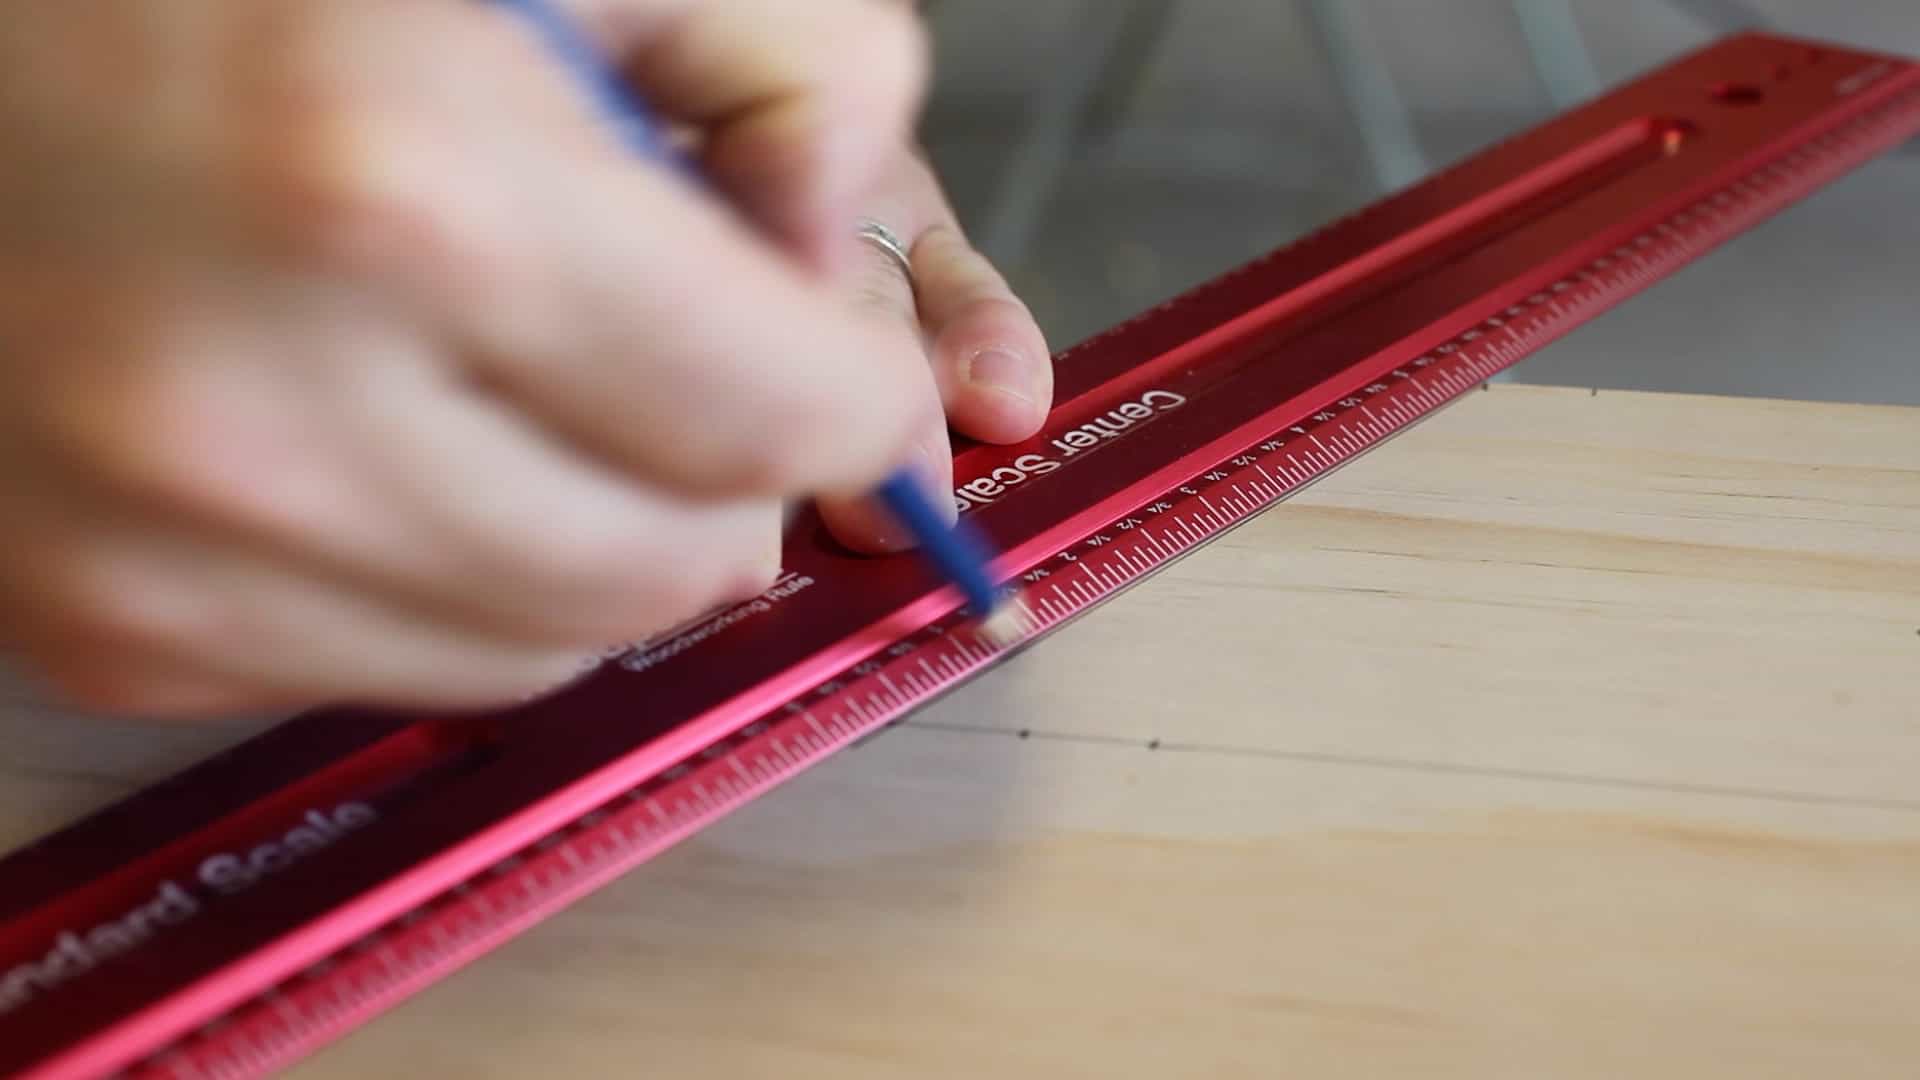 The slots all need to be angled. To make those angles I marked all of the centers of the board at every 7 3/4″ inches. You can also mark every 6 1/2″, with a 1 1/4″ spacer (for the board slot) if you prefer. Then do the exact same thing on the front face, only offset everything by exactly two inches. In other words your first tick mark on the face will be at 4 1/4″, while your first tick mark in the center will be at 6 1/2″. This will give you the angled slots we’re looking for.
All that you have to do then is connect the dots of all of those tick mars to draw your slots. Depending on how many slots you’re going to make, this can take a little time.
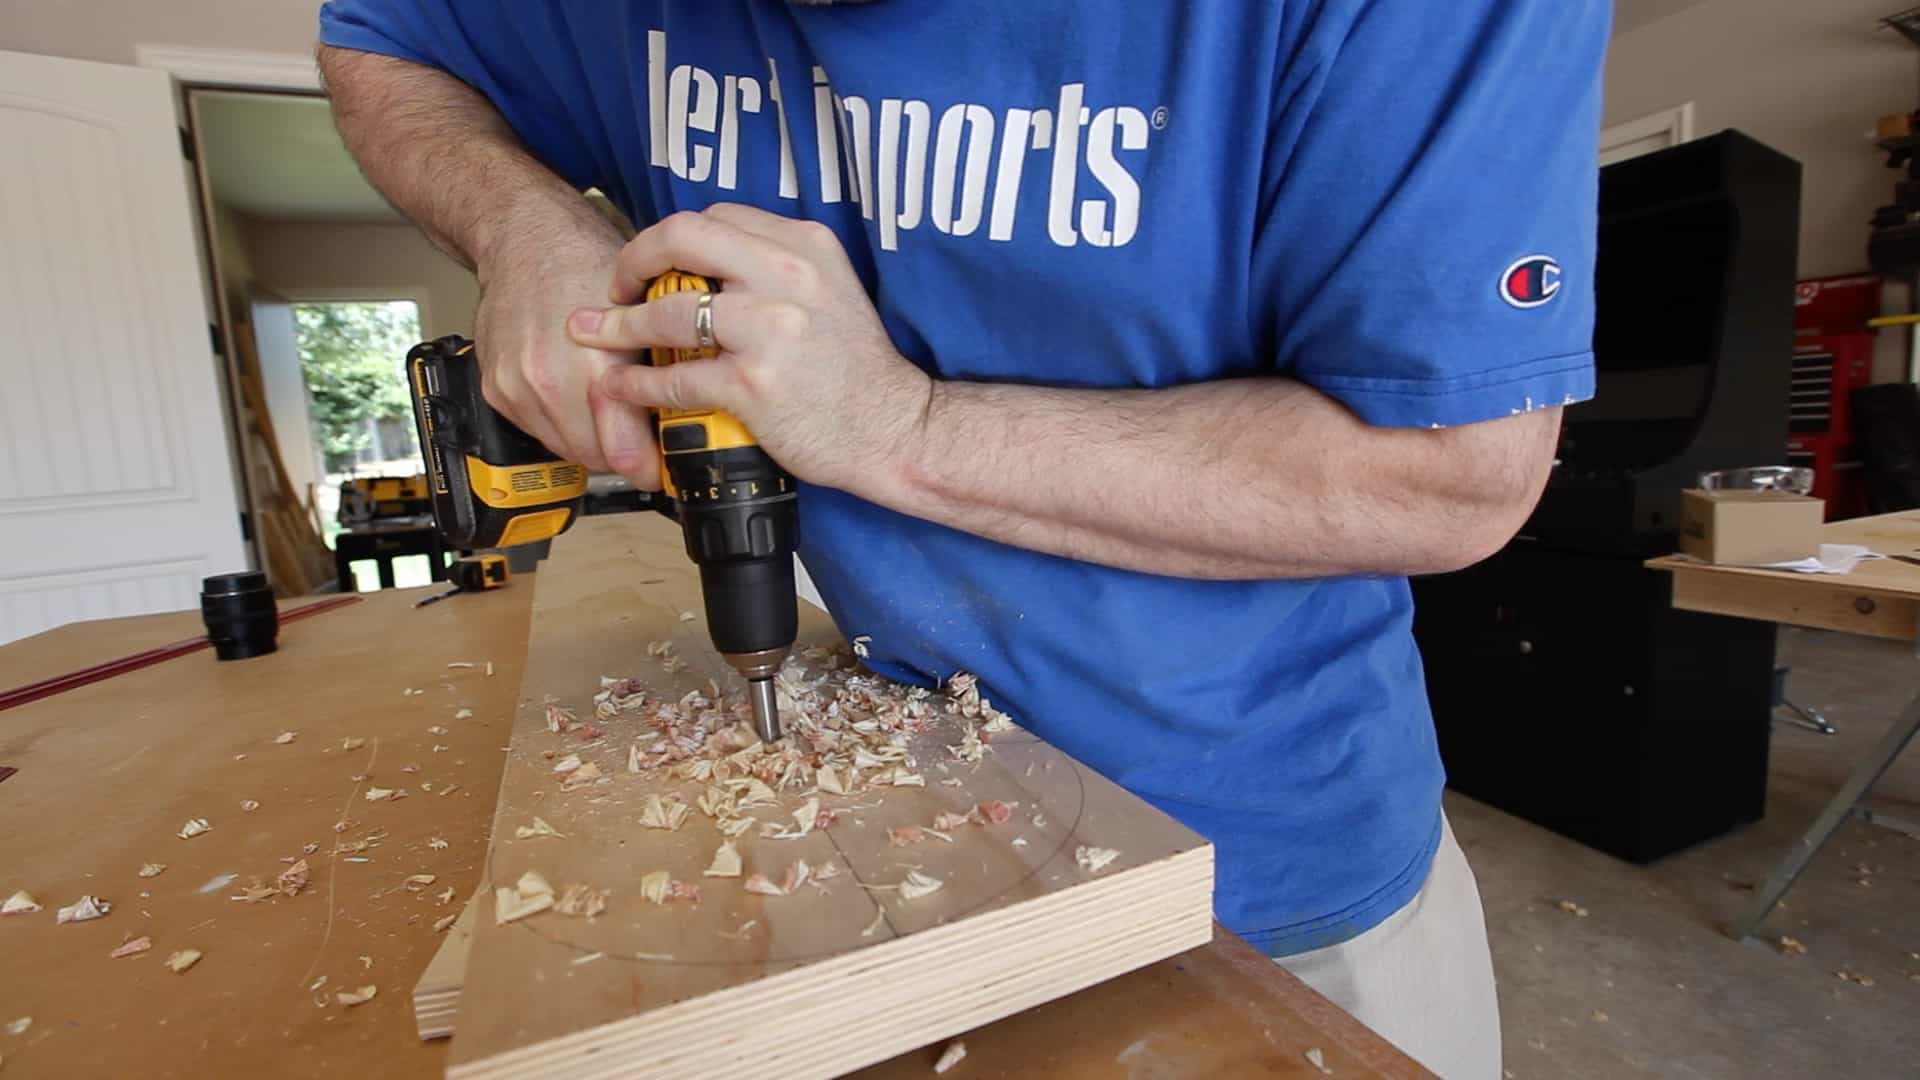 You could make your slots square at the back. Lots of storage racks are. But I wanted Connors rack to be a little cooler than that. So I used a Forstner bit to drill a 1 1/8″ hole at the center point of every slot down the entire center of the rack, both sides.
This hole will make the back of the slots round, rather than square. If you don’t have a 1 1/8″ bit you could round these over with the jig saw, but it is much, much harder and will require a lot of sanding and/or filing with a file to get it smooth. The Forstner bit just makes it quick and makes it look great without too much trouble.
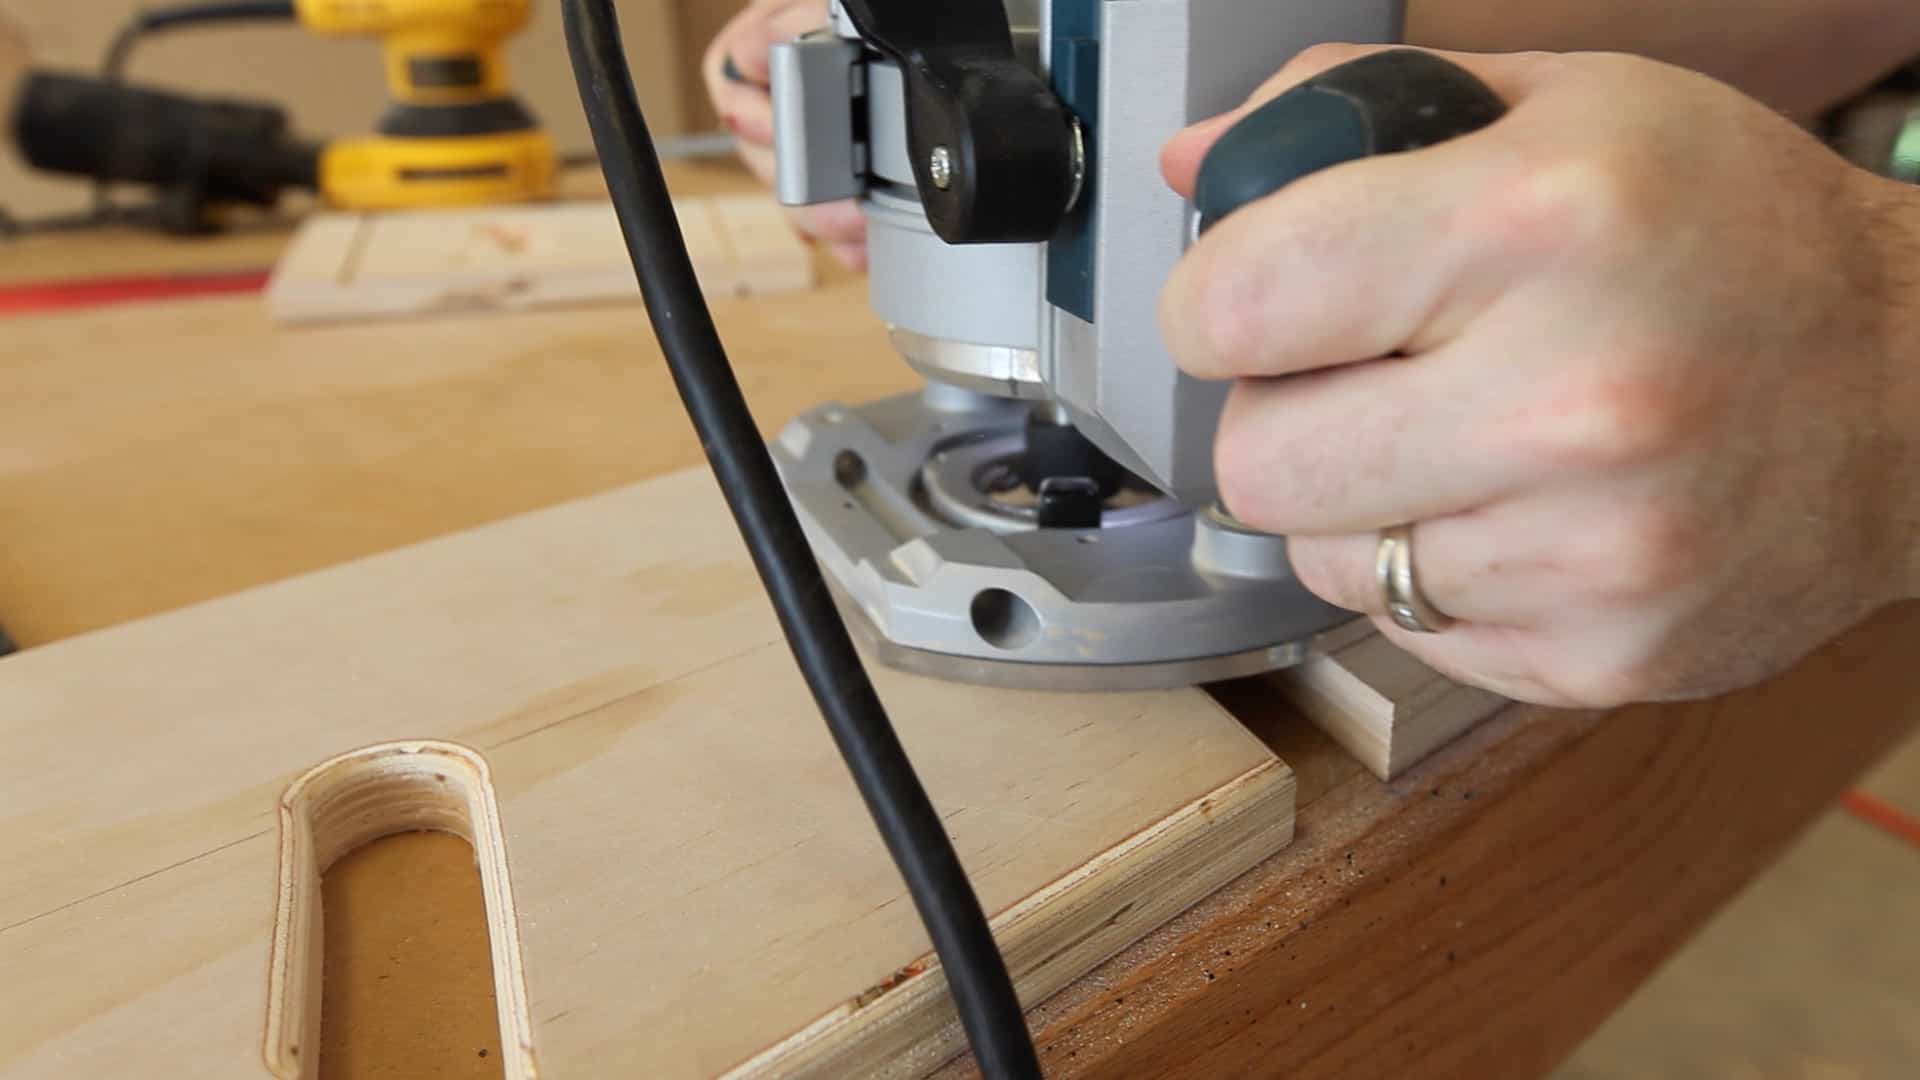 I wanted this skateboard rack to be a little more functional, and also a little more decorative than just some plywood with slots cut it. In order to achieve that goal, I used a 1/4″ round-over bit to round over all of the edges of the front face and each of the slots.
These round-overs will also make it much easier to slide the skateboards in and out of the rack slots. Since I am using 3/4″ plywood, I used a 1/4″ round-over bit. I recommend using a round-over bit no larger than 1/4 to 1/3 of the width of the material you are using.
 I cut four 10″ by 6″ stretcher for the back and then screwed them into place.
I also cut a 5/8″ x 7 5/8″ slot at the bottom of the skateboard rack to leave room to clear my trim moulding/base boards. You’ll need to measure your trim/base and cut yours to the appropriate size.
To hold the skateboard rack in place, I just used a couple of 3″ wood-screws and screwed the stretchers into the wall studs. I used a countersink bit so that the screws would sit flush.
Well thats all there is to making a super cook skateboard rack! Go ahead and grab the plans and make yours today!
[button link=”http://www.thegeekpub.com/product/skateboard-rack-plans/” type=”big”] Download the Skateboard Rack Plans Here[/button]
Hey Guys! It’s Mike from The Geek Pub, and on this episode I’m going to show you how to make this awesome skateboard rack!
To make the sides of the rack I’m going to cut this piece of plywood down into two 9 inch sections, eighty-two inches long.
To make this go a little faster I’m going to use this double-sided tape, and that will allow me to cut both pieces at the same time.
The top of the skateboard rack is rounded-over and I’m just going to that with a compass.
This skateboard rack is designed to hold ten skateboards, but you can make yours hold any amount that you would like. I have the skateboards set six and half inches apart from each other so I’m just going to make a tick mark every six and a half and then every ever one and a quarter inches.
Once you’ve got all of the tick marks in place its just as simple as connecting the dots.
OK. I’m going to use a Forstner bit to drill all of the centers of all of the slots and this will leave the backs of the slots with a nice rounded effect.
OK. So I am just going to use the jig-saw to cut out all of the slots and curve over the top.
Using a quarter-inch round-over bit, I’m just going to round over all of the slots and the front of the face.
On the table saw I’m just going to cut out four ten inch by six inch stretchers for the back support.
I’m just going to mark and pre-drill where the stretchers go.
And finally I’ll just screw everything together with wood screws.
Well hey guys, that’s all it takes to make a super cool skateboard rack. Connor will probably come back and paint it at some point in the future, but right now he’s too excited so he’s putting his skateboards on.
Well hey, if you want to follow along with me while I create my projects, I post pictures every day on Facebook and Instagram, so head over to Facebook.com/TheGeekPub or Instagram.com/TheGeekPub and hit that Like button! And don’t forget to subscribe here to my channel on YouTube!

One Response
Hey! I used your video to make a skate rack for my garage. It worked great! I’ve been talking for two year about building a rack for my boards. So glad I came across this video. Thank you. 😉