Making a potato battery is a great learning exercise that everyone getting into electronics should investigate! A potato battery is one of the first science experiments most school children do. It’s a great way to explain how batteries work and how the fundamentals of batteries and electrolytes work with electrodes in the creation of electricity.
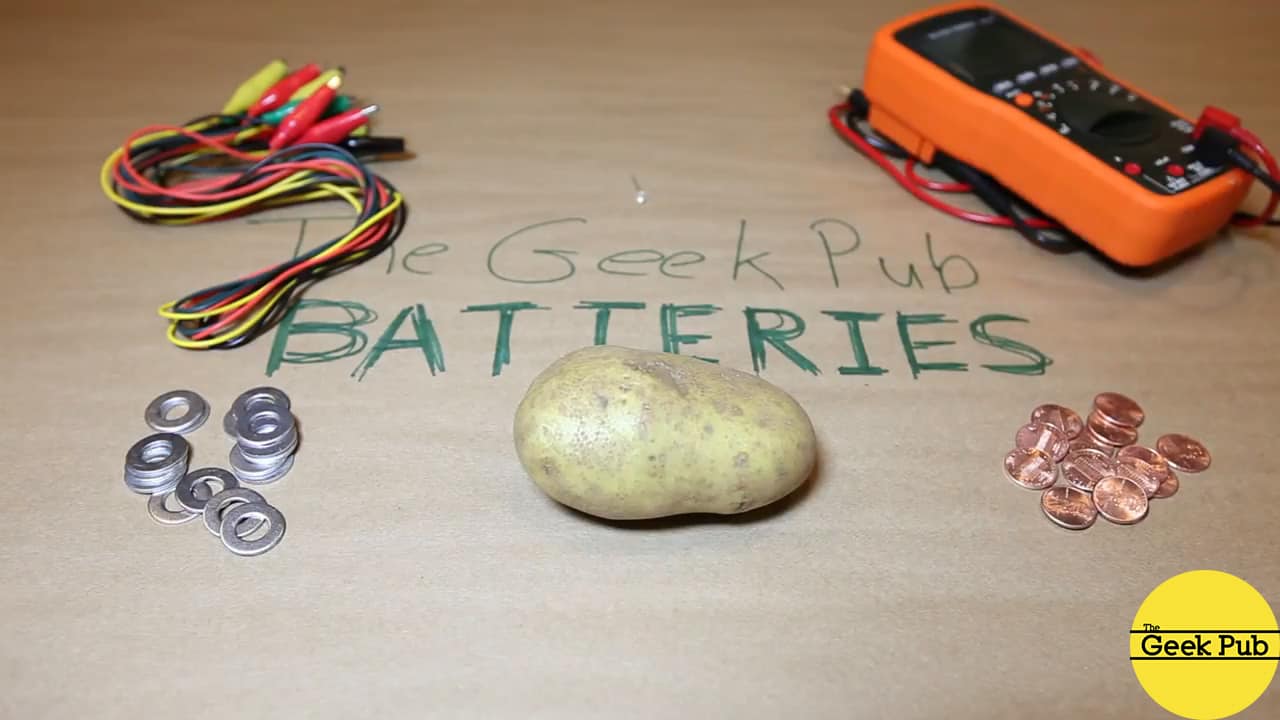
To make a potato battery, we’re going to need just a few things that you probably already have laying around the the house. But just in case you don’t, here’s a quick parts list:
The basic components of a potato battery are a potato, some copper pennies, zinc washers, some test leads, and an LED or other device to power. A multimeter is also a great tool to have, but is certainly optional.
RELATED: Buying your First Multimeter
If you don’t have any pennies or washers, a strip of copper wire can replace the pennies, and some galvanized nails could replace the washers. In fact, just about any metals made of (or coated) with copper and zinc will work. You just need one of each.
The first step is to cut our potato in half and then lay the potato cut side down onto a flat surface. Follow this up by making some slits in the top of the battery for our electrodes. Just make a couple of pokes with a knife in the top of each potato about an inch apart from each other.


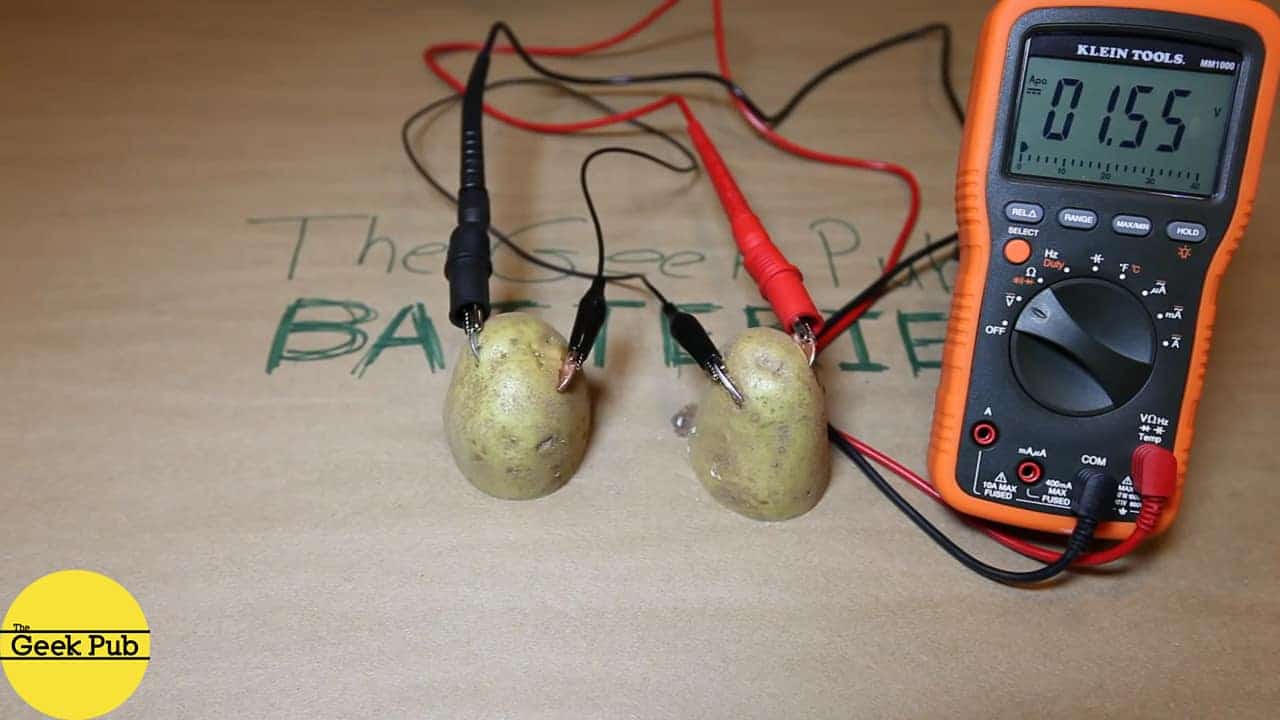
Insert one penny as a cathode and one washer as an anode into the top slits of each potato half, leaving only about an 1/10th of an inch exposed. Just enough to clip our test leads to (or touch the probes of your multimeter to). The acid in the potatoes acts as an electrolyte between our two electrodes, so we want as much of the metal’s surface touching the potato as possible.


Take one of your test leads and connect the zinc anode of one potato to the copper cathode of the other potato. If you have a multimeter, now is a good time to attach it. Mine gave me a reading of 1.5 volts. That’s amazing!
However, our LED requires a minimum of 2 volts to operate, so you know what that means?! Add more potatoes! And this time it lights right up, giving us a nice blue glow!


What would you say if I told you that the potato is completely unnecessary part of the potato battery, and provides none of the actual electricity? That’s right! The potato just provides an acid, or electrolyte, between the two metals, or electrodes! Check out our penny battery project to learn how to make this same project, minus the potato!
If you’re looking to learn more about electricity in general, we also have a tutorial on How Voltage Works, and How Current Works!
3 Responses
4.5
5
Those Russians figured out how to make vodka out of them there potatoes. Let’s see you top that! Great potato battery though!