Blog
SD2IEC Manual (How to use the SD2IEC on the C64)
[adinserter name=”TopOfPost”]I recently purchased an SD2IEC from from The Future was 8-bit. While the device is awesome, I felt the documentation was less than stellar. And that led me to put together this resource to help others who are first experimenting running SD Cards on the Commodore series of computers. I consider it the unofficial SD2IEC manual and I hope it helps others on their awesome 8-Bit retro-computing journey!
For those of you who might not be familiar with the SD2IEC, a little background. The venerable 198o’s Commodore line of computers, which includes the C64, C64C, C128, C16, Plus/4, VIC-20 and the portable SX-64 used a propriety disk connection known as IEC (also known as IEEE-488). This is not the parallel version used on the Commodore PETs, but rather a stripped down serial version that was designed specifically for the consumer lines. The Commodore VIC-20 was the first computer to support this new serial IEC in both hardware and software form.
The IEC serial bus is used for many different types of peripherals, the most common two being printers and disk drives. The tape drive was also on this serial bus, albeit on a different physical connector. The SD2IEC is a device which emulates the IEC protocol and translates the data being read from and written to an SD card. This allows Commodore computers to read and write to SD cards rather than than 5.25″ floppy disks. A 2GB SD card for example can store hundreds of Commodore “D64” disk images and takes up almost no room compared to the Commodore 1541 disk drive and a stack of floppy disks. Additionally an SD card is far more reliable and less prone to damage as compared to floppies. If you add the Fastload Reloaded cartridge to the mix the SD2IEC performance will be five to six times faster than using floppies. Let’s move on to getting started in this unofficial SD2IEC manual!
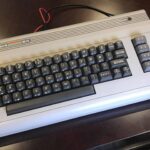
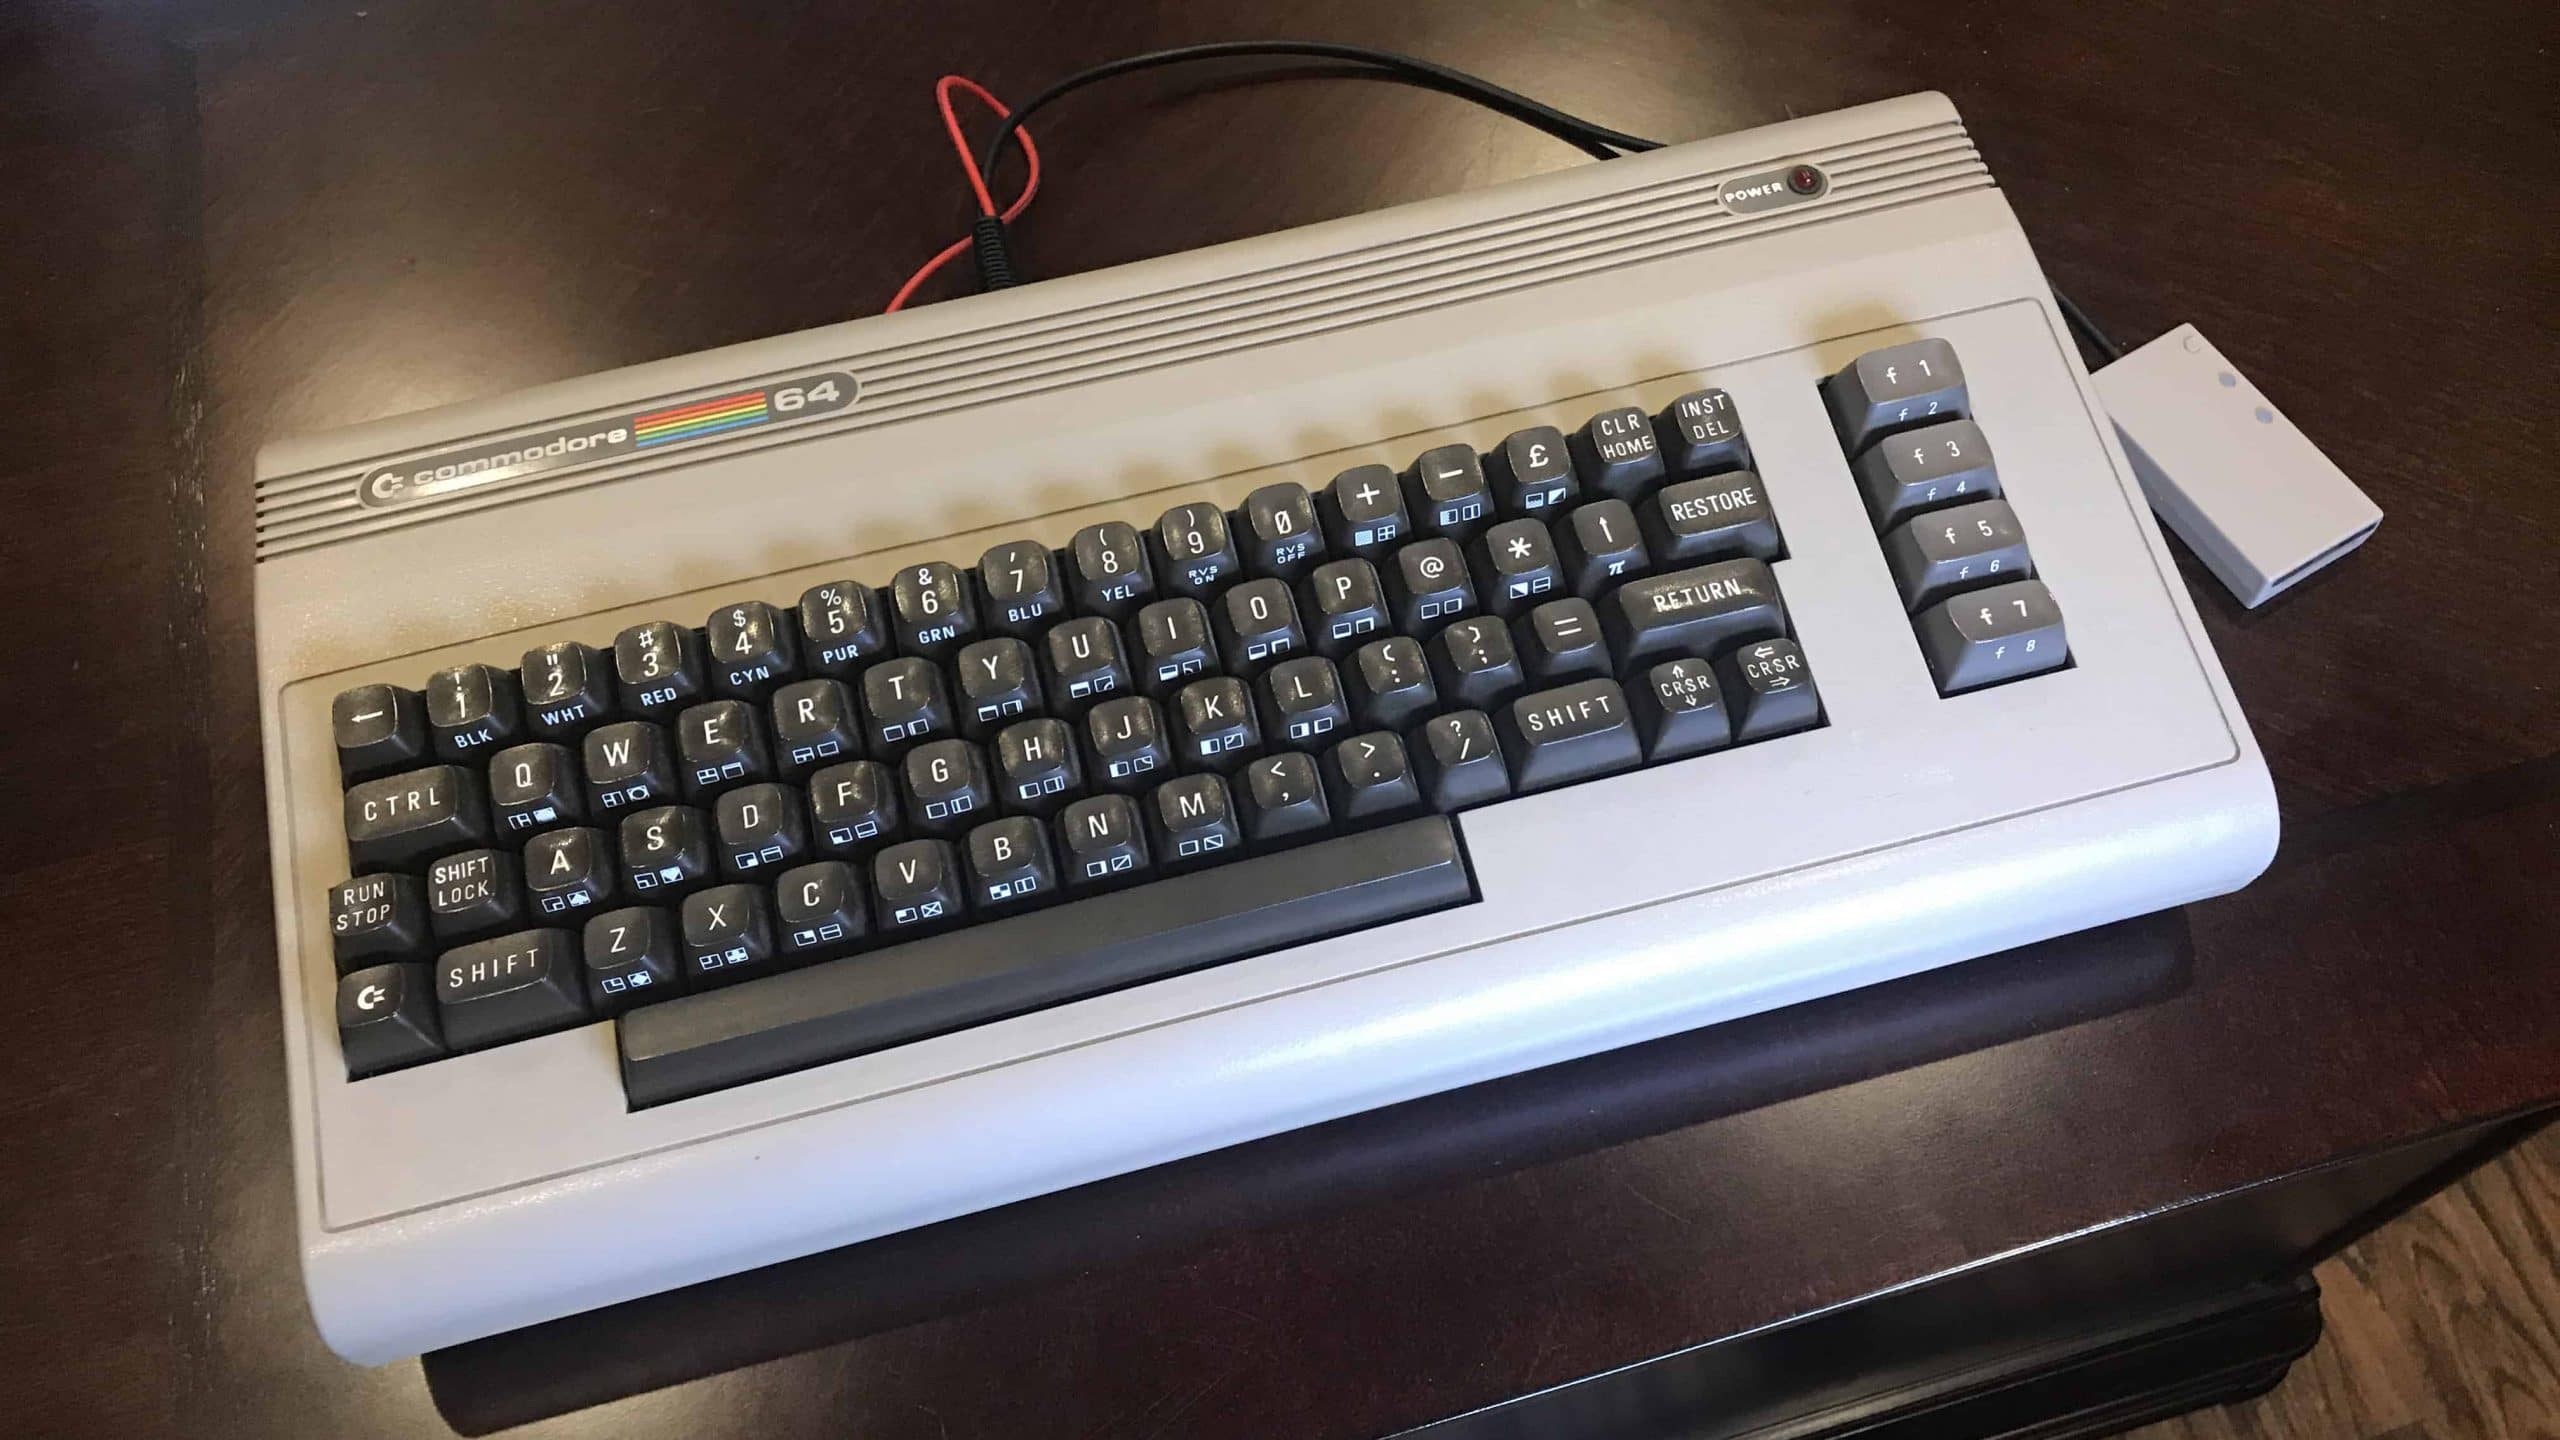
SD2IEC Compared to a 1541 Disk Drive
Getting Started with the SD2IEC (Unofficial SD2IEC Manual)
When you receive your SD2IEC you’ll notice it only comes with a single sheet of paper with some very basic instructions, rather than a full SD2IEC manual as you might expect of a product such as this. At least a nice PDF you can download right? Well you’ll get no such luck with this product. And that’s really unfortunate for less technical users who just want to play the games they played as kids on their C64. Just a few steps and you’ll be up and running!
Prepare the SD Card
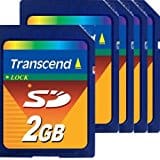 One word of caution as I found out quickly, you need to use a smaller card. I tried several 32, 64, and 128 GB cards that were laying in my drawer and none of them were compatible. The SD2IEC would not read them. I wound up purchasing a Transcend five pack of these 2GB cards from Amazon on they worked perfect first try. So if you’re having problems that’s the first place to look, especially if everything else seems like it is right. A sure sign is that you’ll be unable to even list the main directory of the card once you boot the C64.
Formatting the SD Card for the SD2IEC
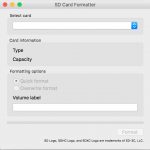
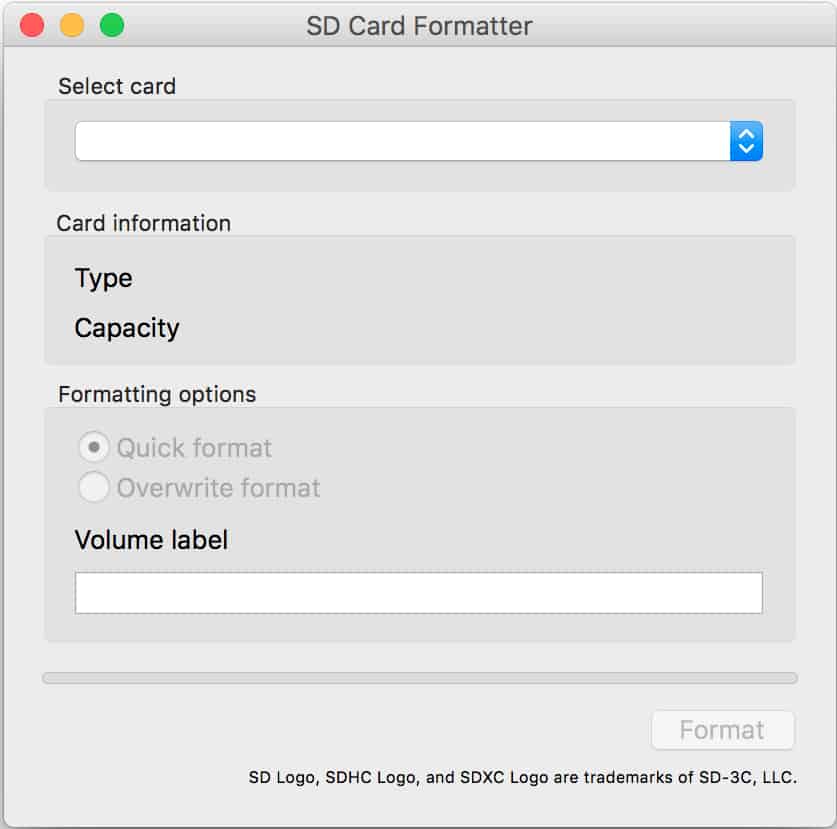
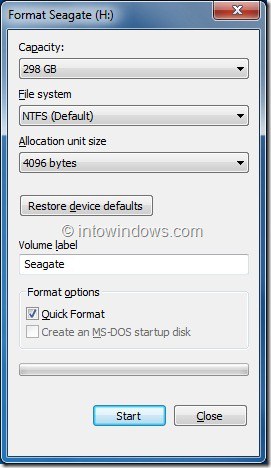
The first thing you’ll want to do is get and format an SD card. If you do this on a Mac, download the Official SD Card Formatter, rather than the Apple Disk Utility as it only supports Apple File System or exFAT. Neither are compatible with the SD2IEC. You need to format the card with FAT16 or FAT32 (FAT32 being the preferred format). If you’re using Windows just select FAT32 from the File System drop down and you’re good to go. Another recommendation is not to use an SD card which has been previously used for some other operating system such as a
-
- Mac SD Card Formatter
-

- Windows Format SD Card
Preparing the Newly Formatted SD2IEC SD Card.
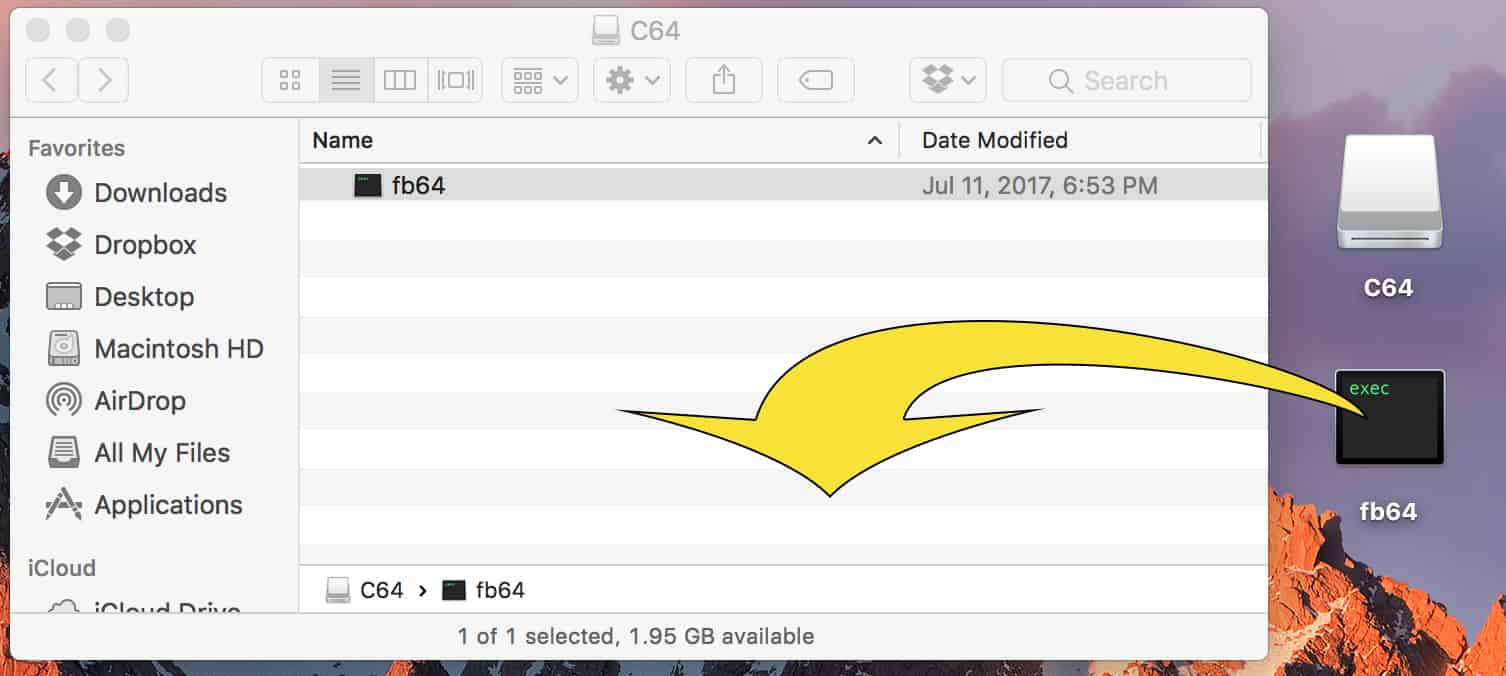
Once the card is formatted its now ready to be prepared for use. Head on over and download the CBM File Browser.
The CBM File Browser is a set of Commodore programs designed for specific machines that will allow the Commodore computer to browse the disk images called “D64 files” that you place on the SD2IEC’s SD card. Although these programs are not strictly needed, they do make the task much simpler.
Select the CBM Browser for your specific Commodore computer and copy it into the root folder of the SD card. If you’re using a Commodore 64, copy the FB64 file. If you’re using a Commodore VIC-20, copy over the FB20 file, and so on. On some versions of Windows it has been reported that the Explorer will add an extension to the file. If this happens you will need to rename the file and remove everything including the period. In other words the file on the SD card should just be named FB64, rather than FB64.EXE or FB64.TXT.
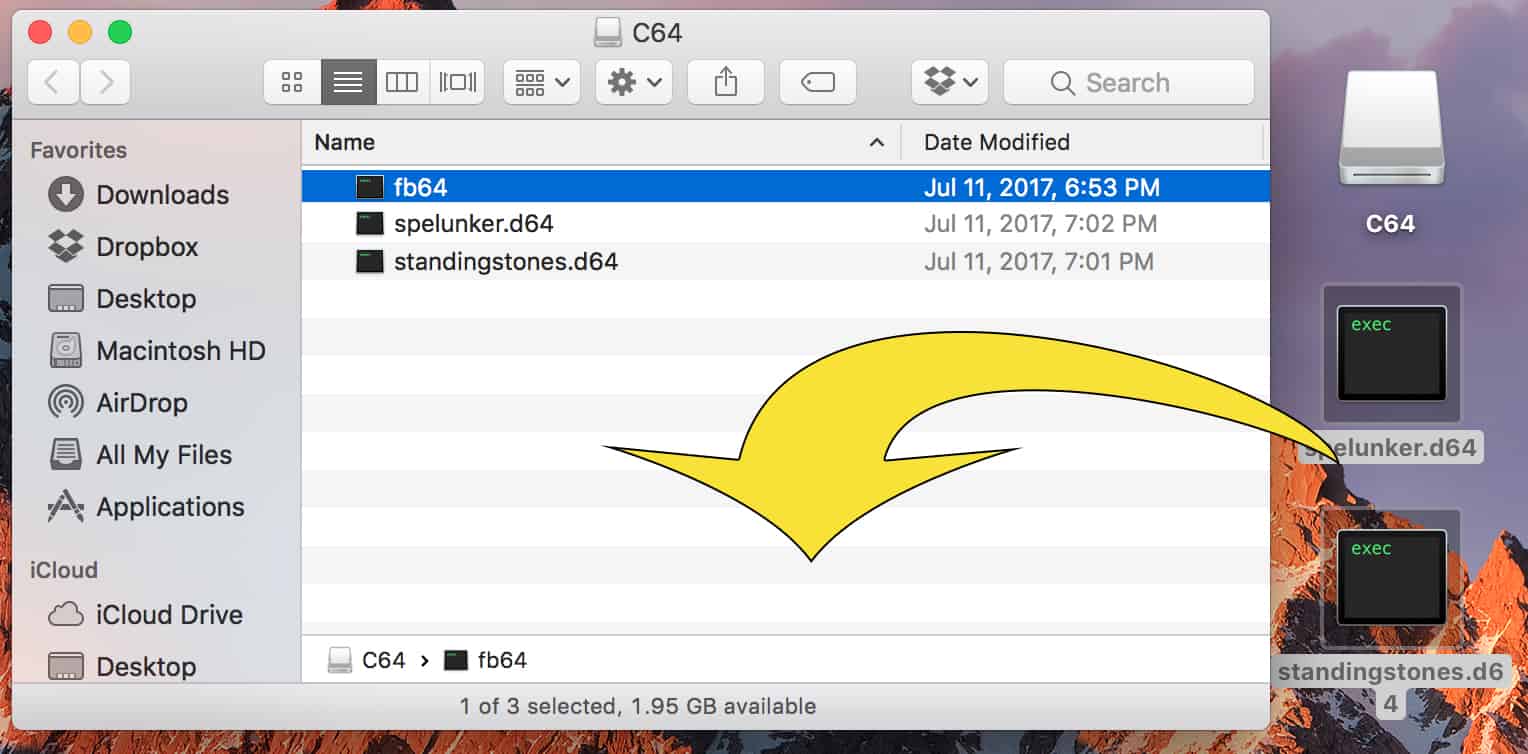
Copy D64 Files over to the SD Card
The next step in our unofficial SD2IEC manual is to copy over your D64 Commodore Disk Images to the SD card. It is recommended that you create directories and drop the files into them. This is especially true if you have a multi-disk game. Games like the Ultima series of role-playing games come on several disks and will be much easier to play if they are in their own directory. You can swap disk images with the buttons on top or an AUTOSWAP.LST file, but more on that later. Strictly speaking though, directories are optional and you can place all D64 images right in the root of the SD card along with the FB64 program.
With the SD2IEC card still in your Mac or PC, copy over any D64 disk images that you want on the card. You can find many ready to download D64 images just by doing a quick Google search. We don’t condone piracy, so don’t download files that have not been released in the public domain or that you don’t already own a copy of.
Connecting the SD2IEC for the First Time
As we move forward in our unofficial SD2IEC Manual, we’re ready to put our SD card and SD2IEC to use! Make sure your Commodore 64 (or whichever Commodore you’re using) is setup on your desk and will load to the basic screen. Once your there turn off the computer and unplug the power connector from it.
Connecting the SD2IEC
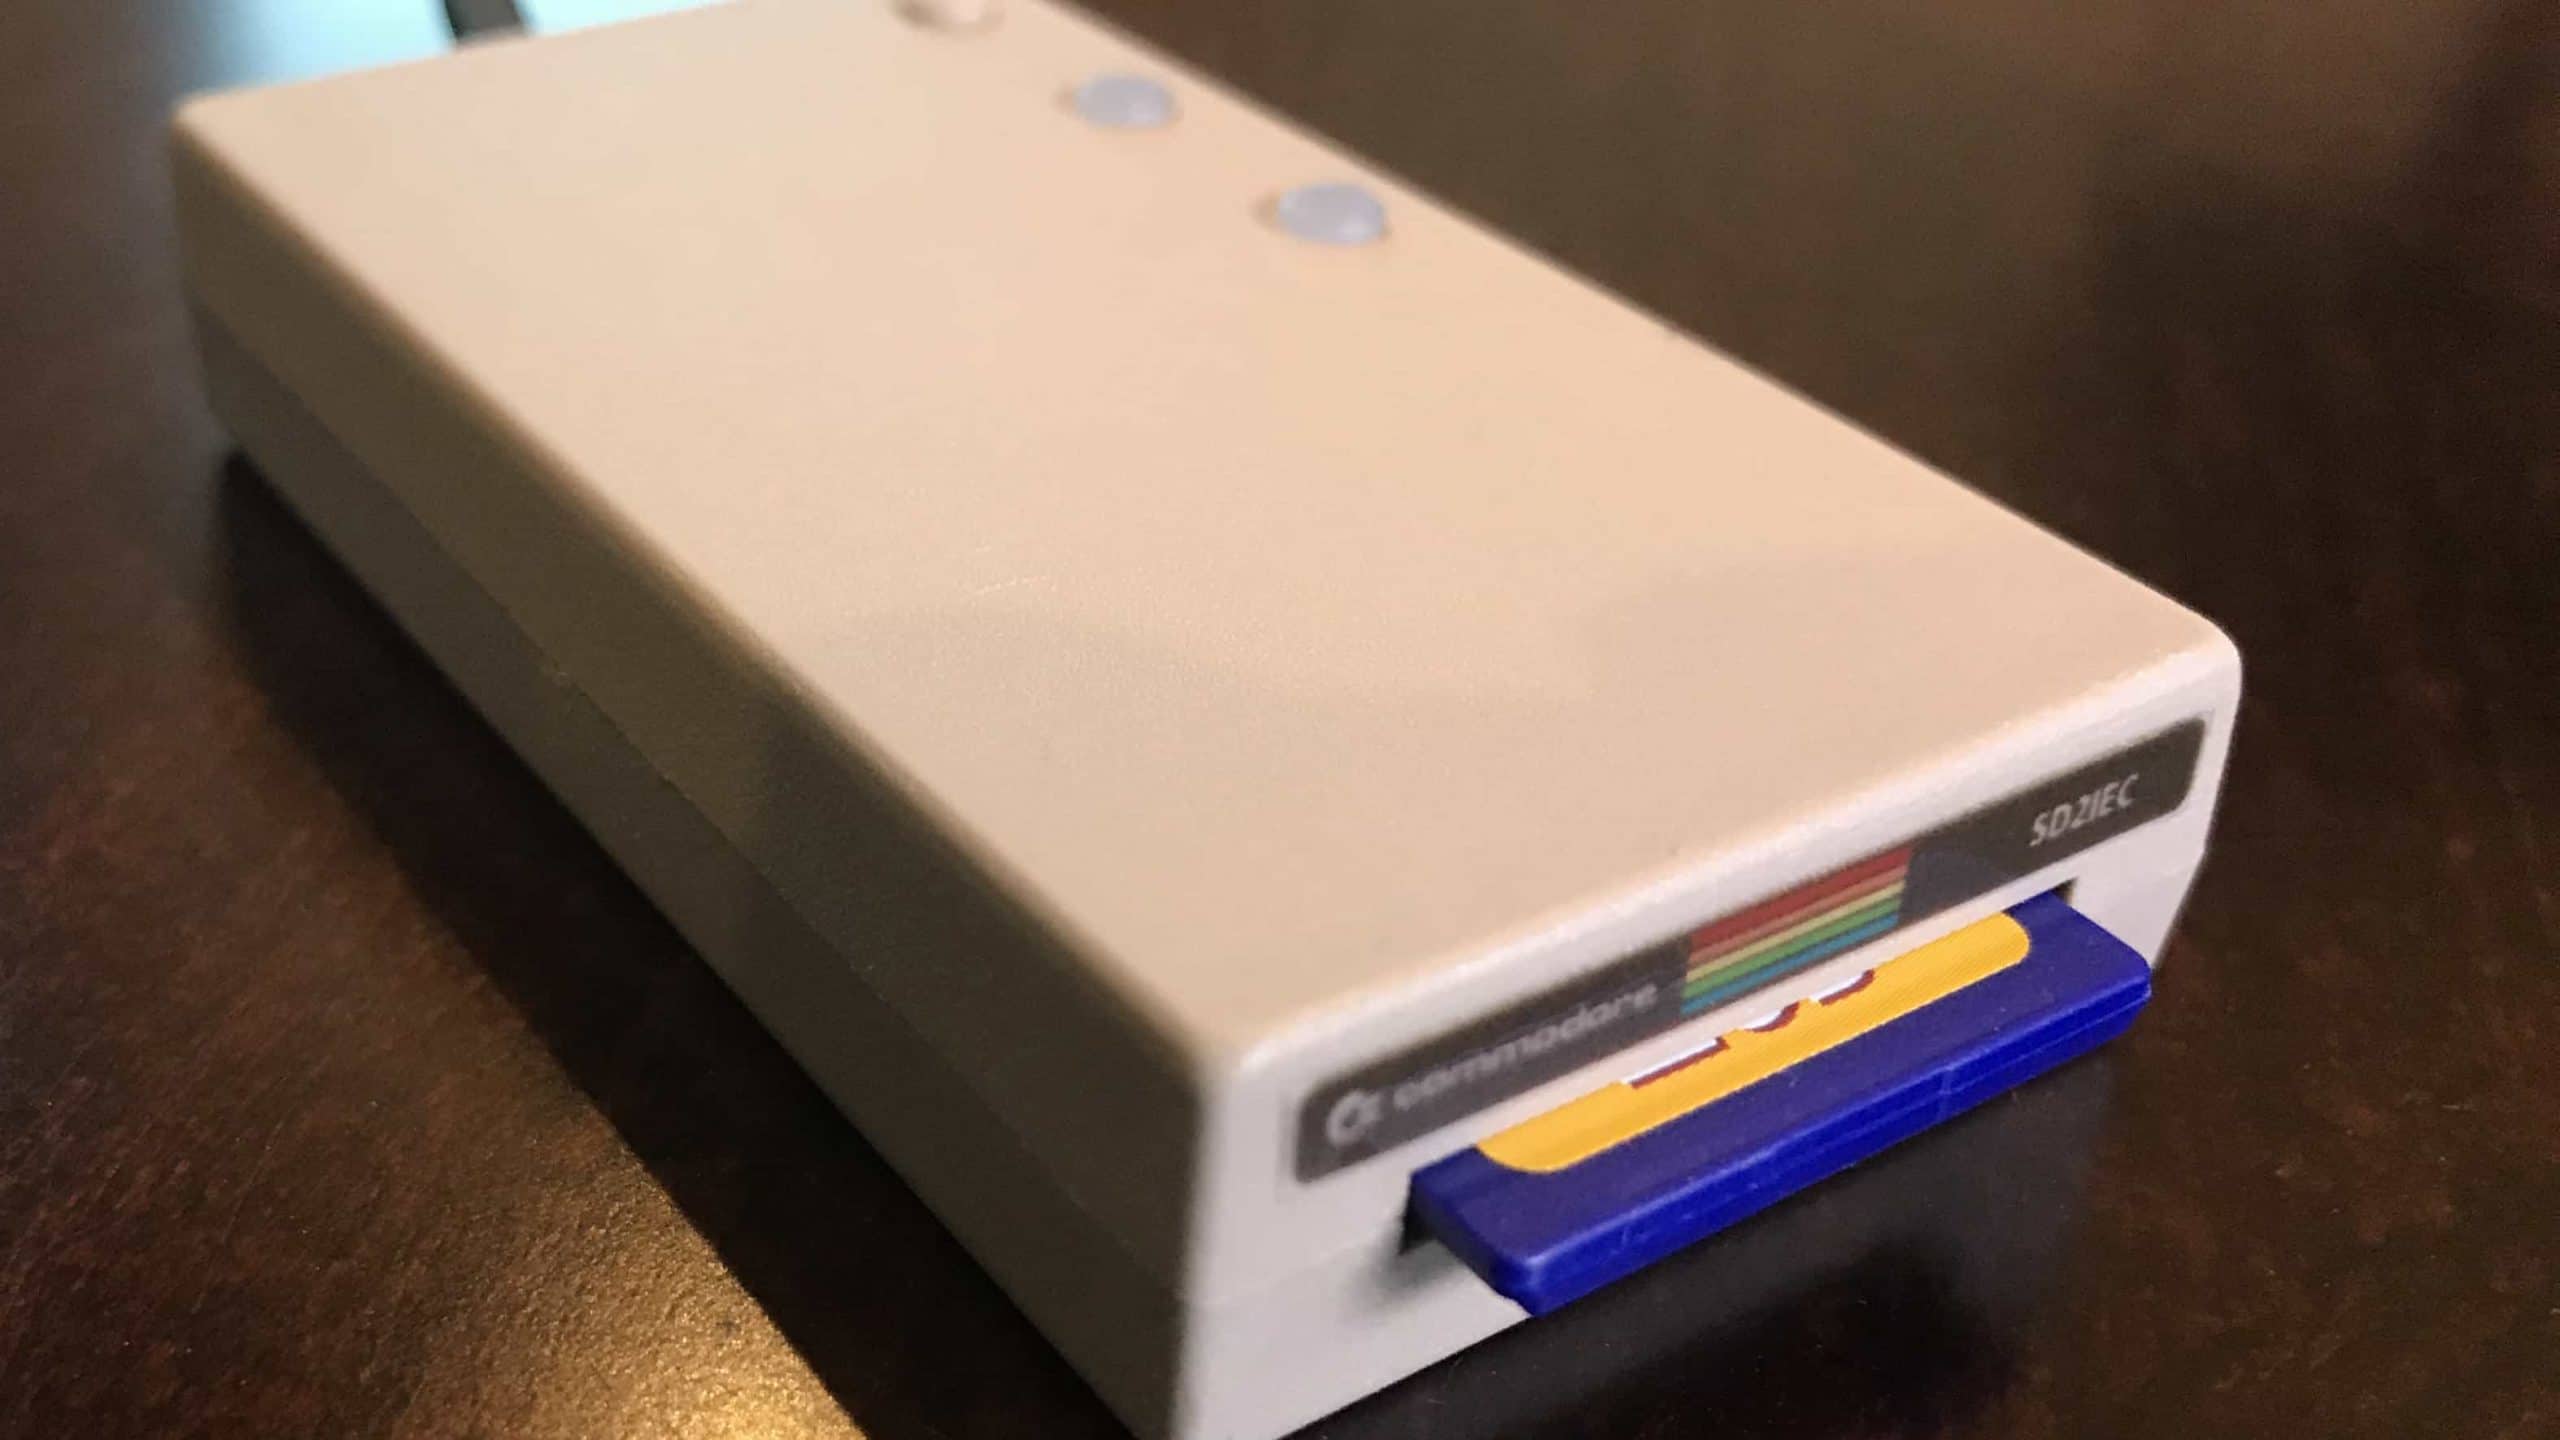
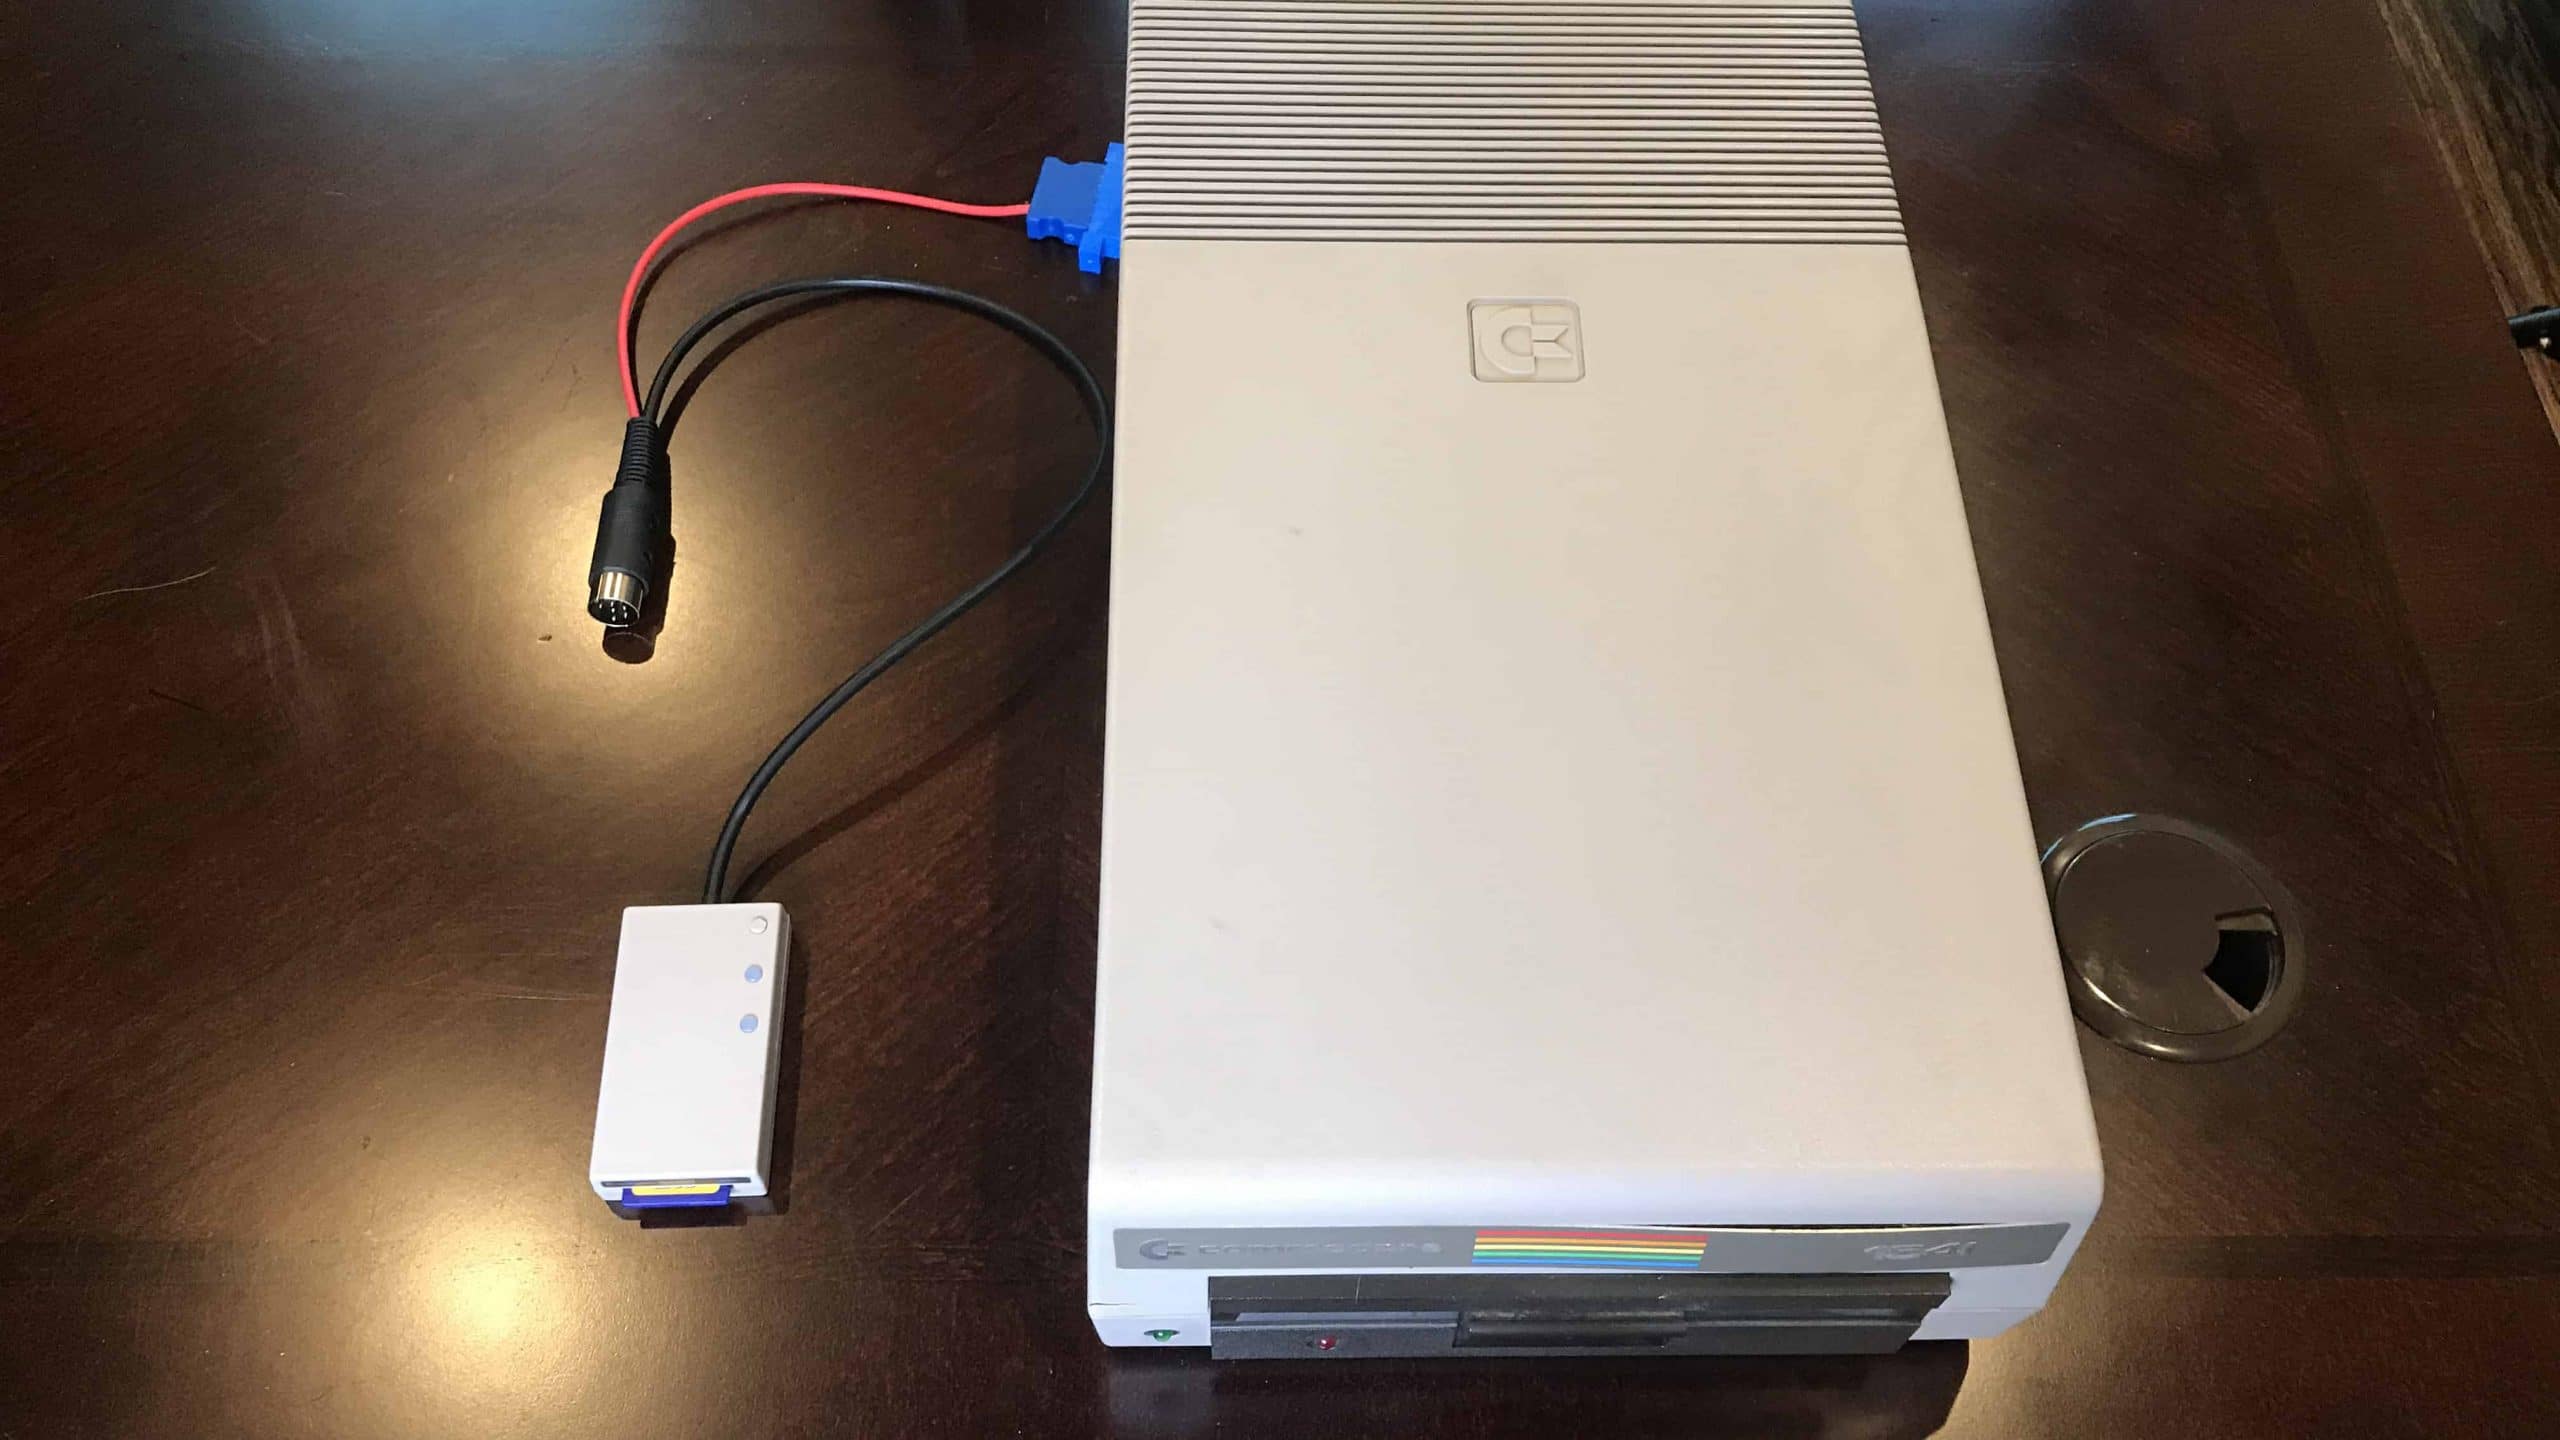
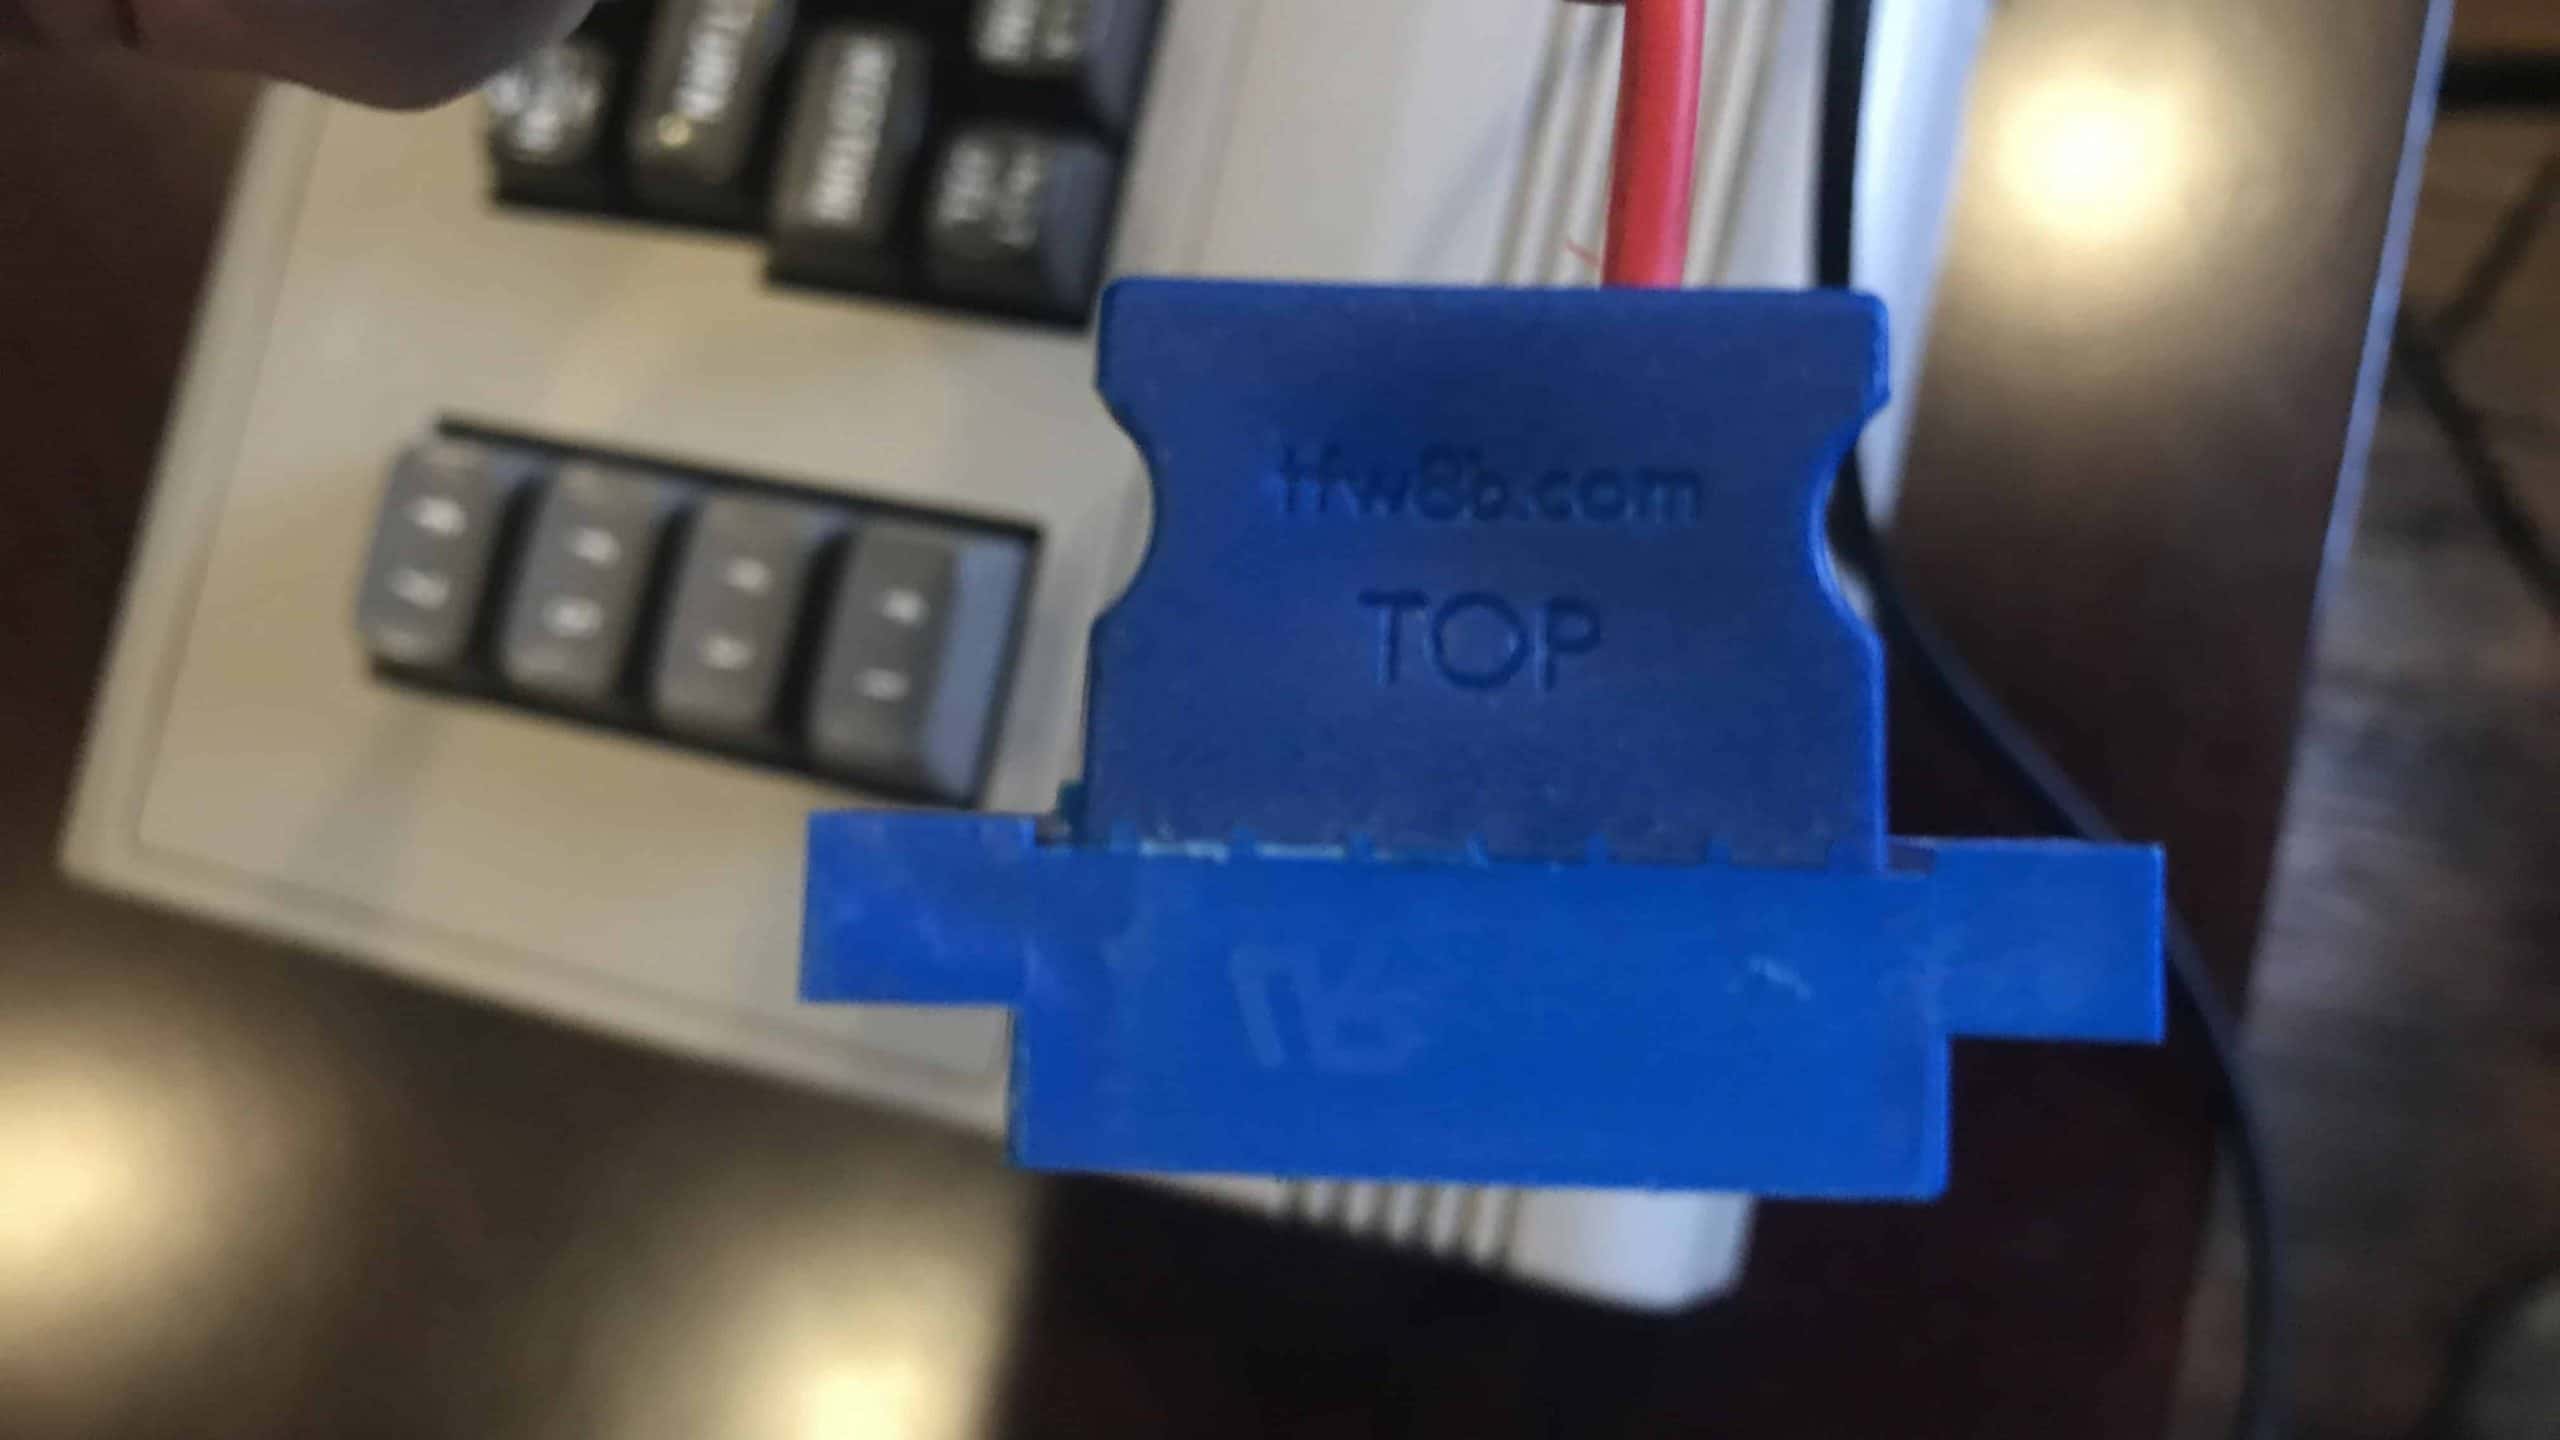
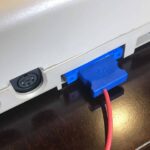
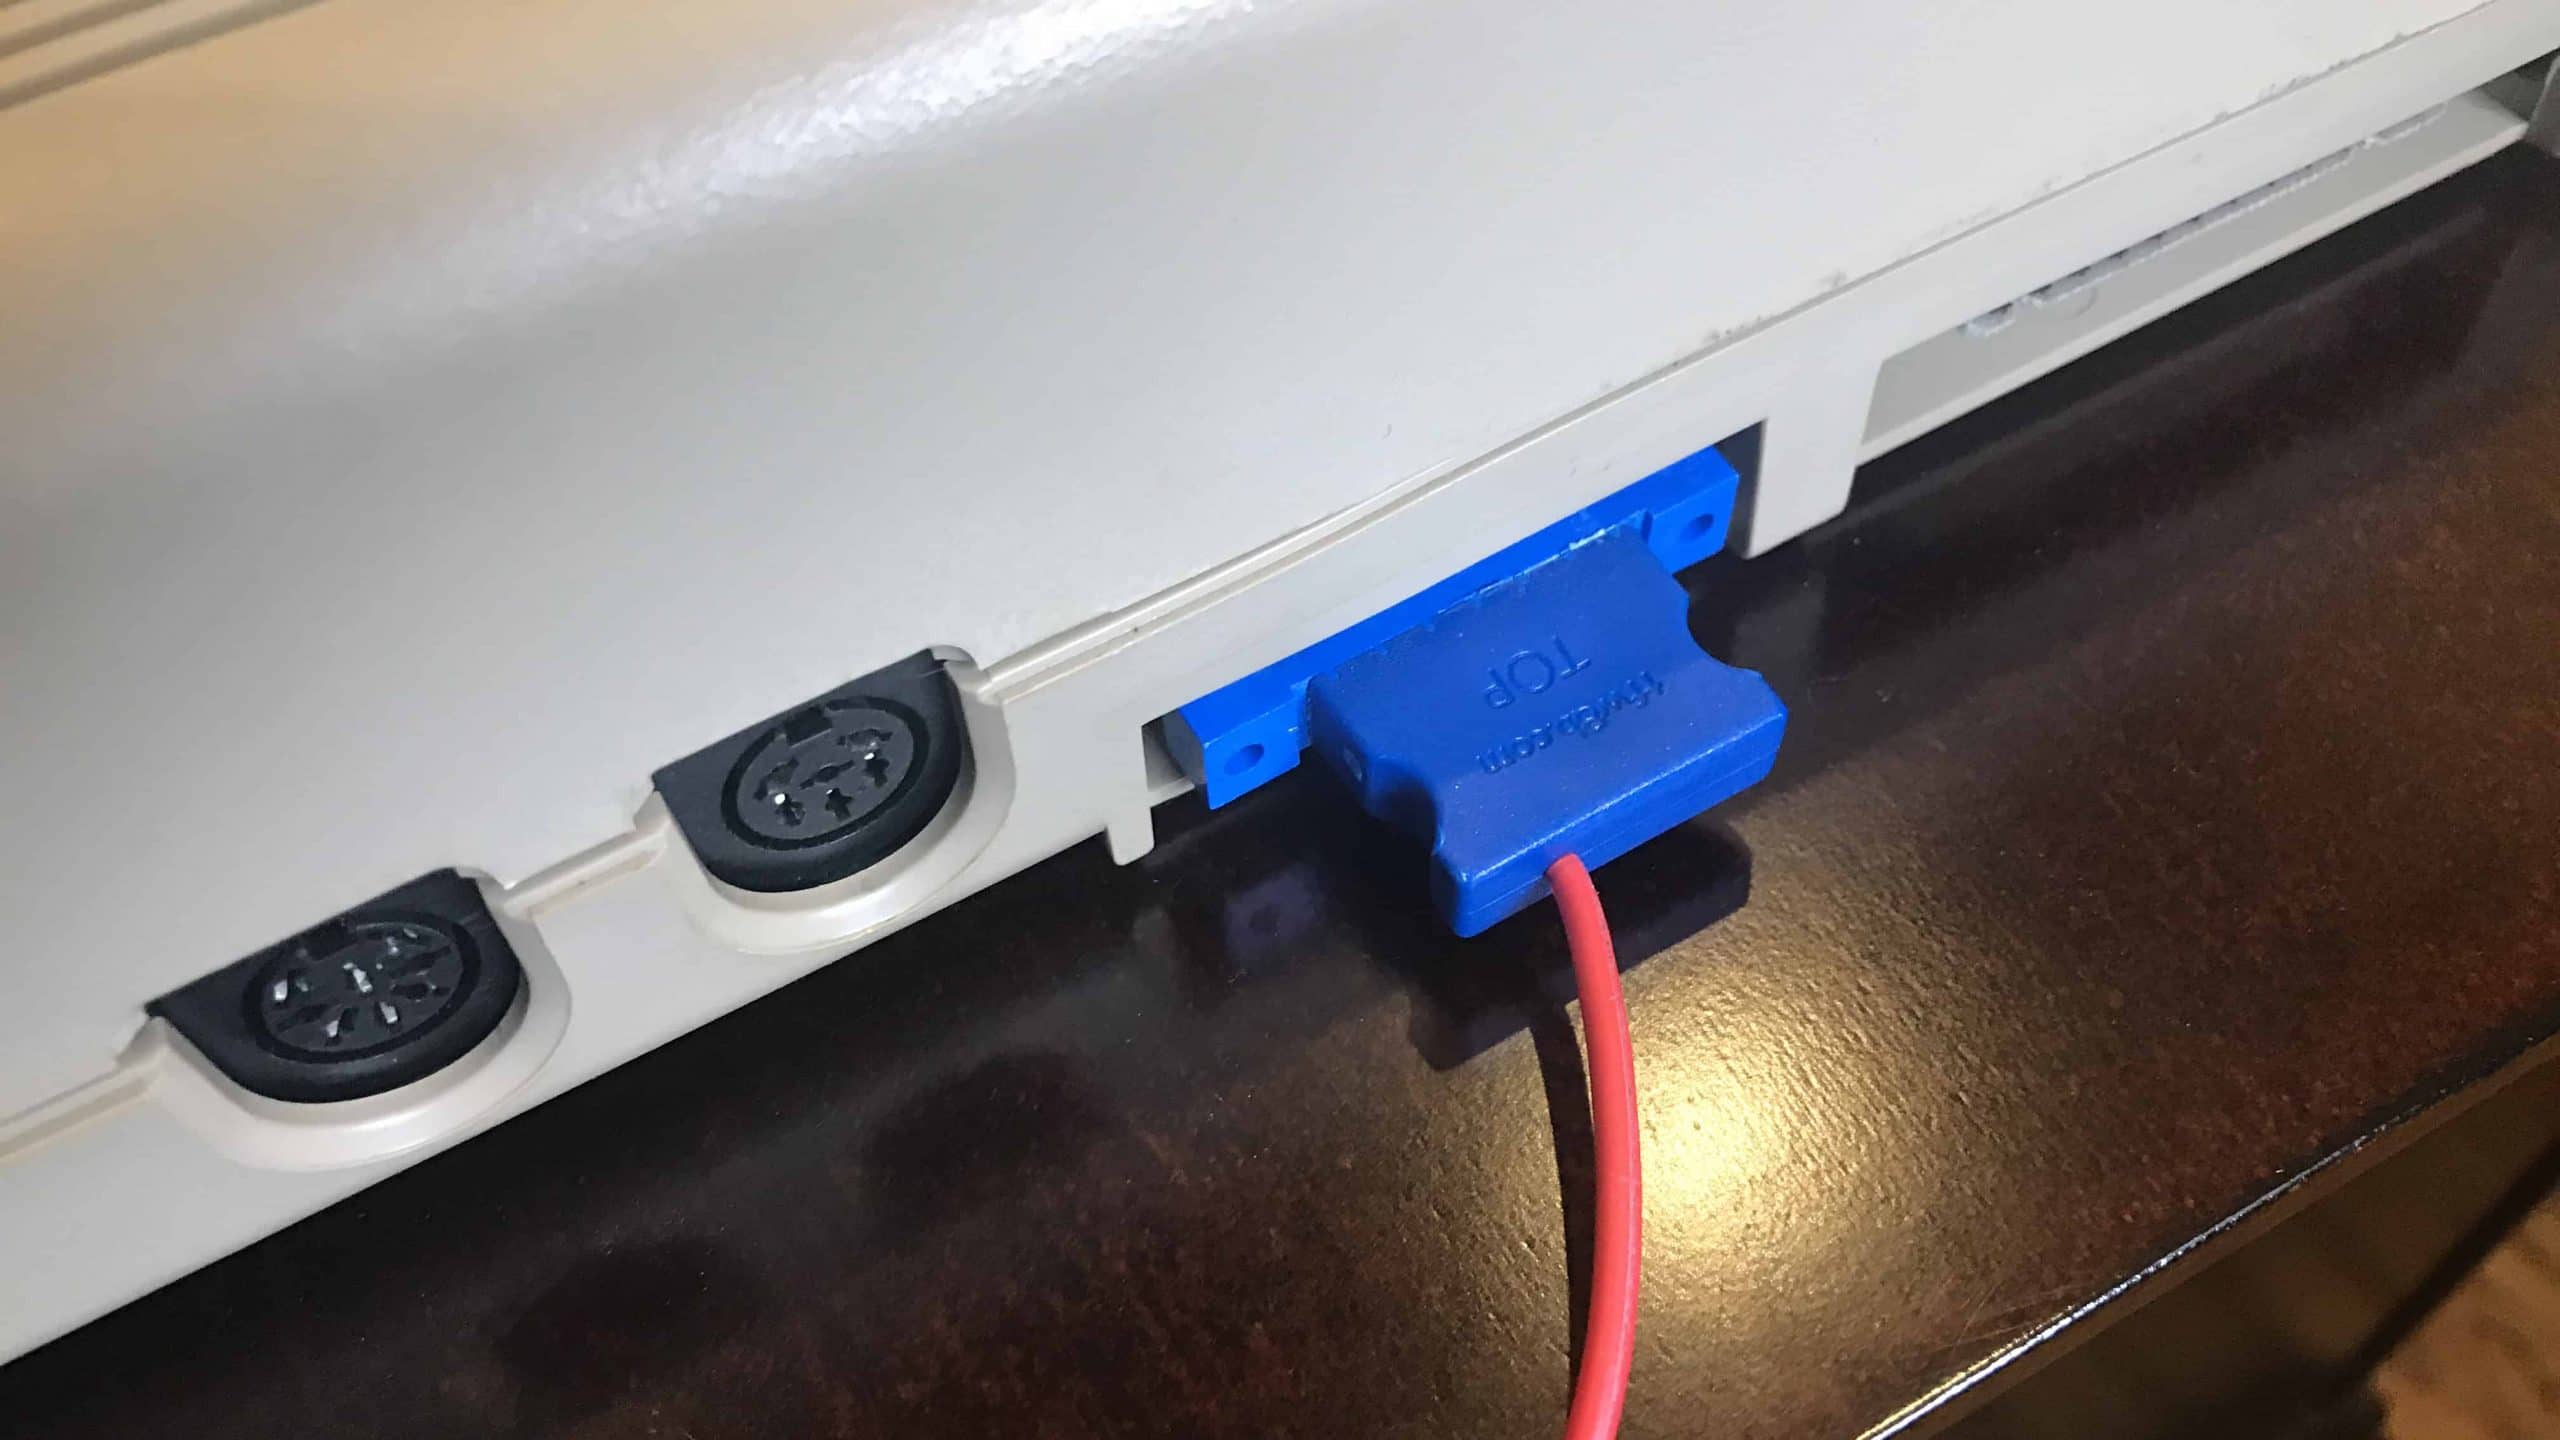
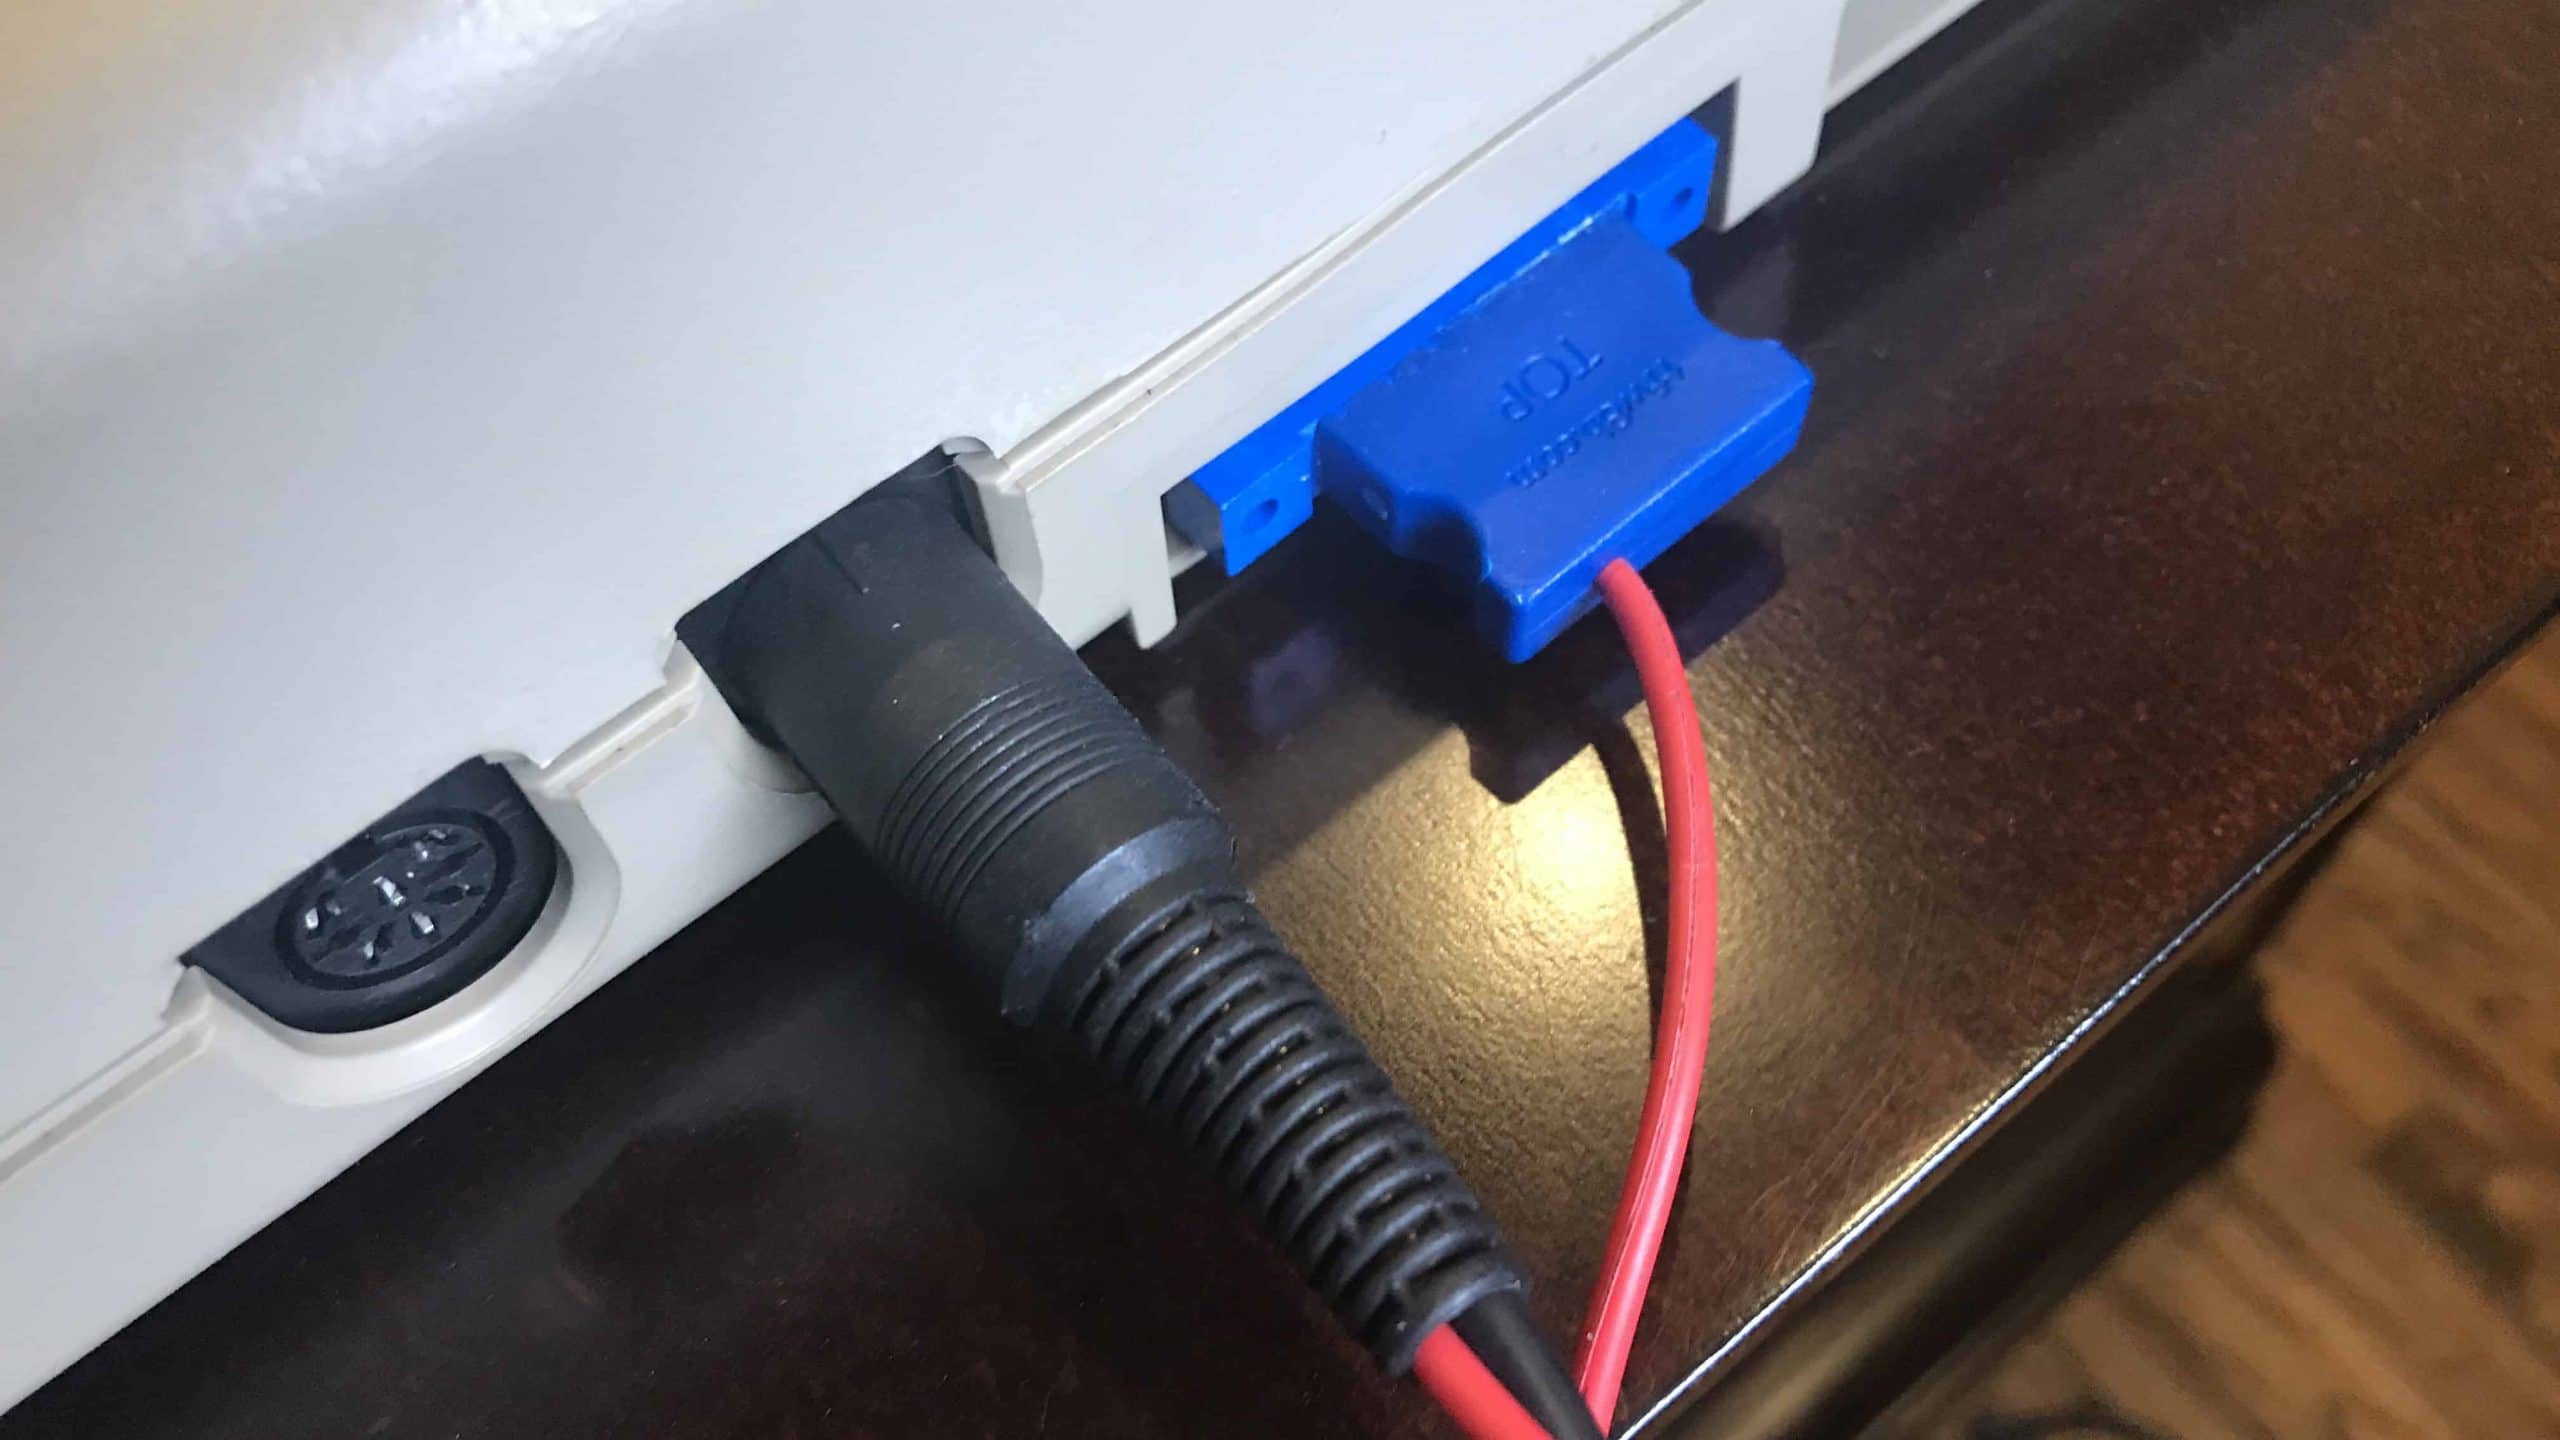
There are two types of SD2IEC’s. One is powered from the user port, while the other is powered from the tape port. I personally chose the tape port version since it leaves the user port available for peripherals and I can’t imagine I will ever use the tape port. Regardless, the connector is labeled with a top and bottom side. Make sure top is up and plug it into the corresponding port on your Commodore computer. Plug the 6-pin IEC connector into the IEC port on the back of the Commodore.
-

- SD2IEC Power (Tape) Top
-
- SD2IEC Power Connected
-

- SD2IEC IEC Connected
-
- SD2IEC Ready to go!
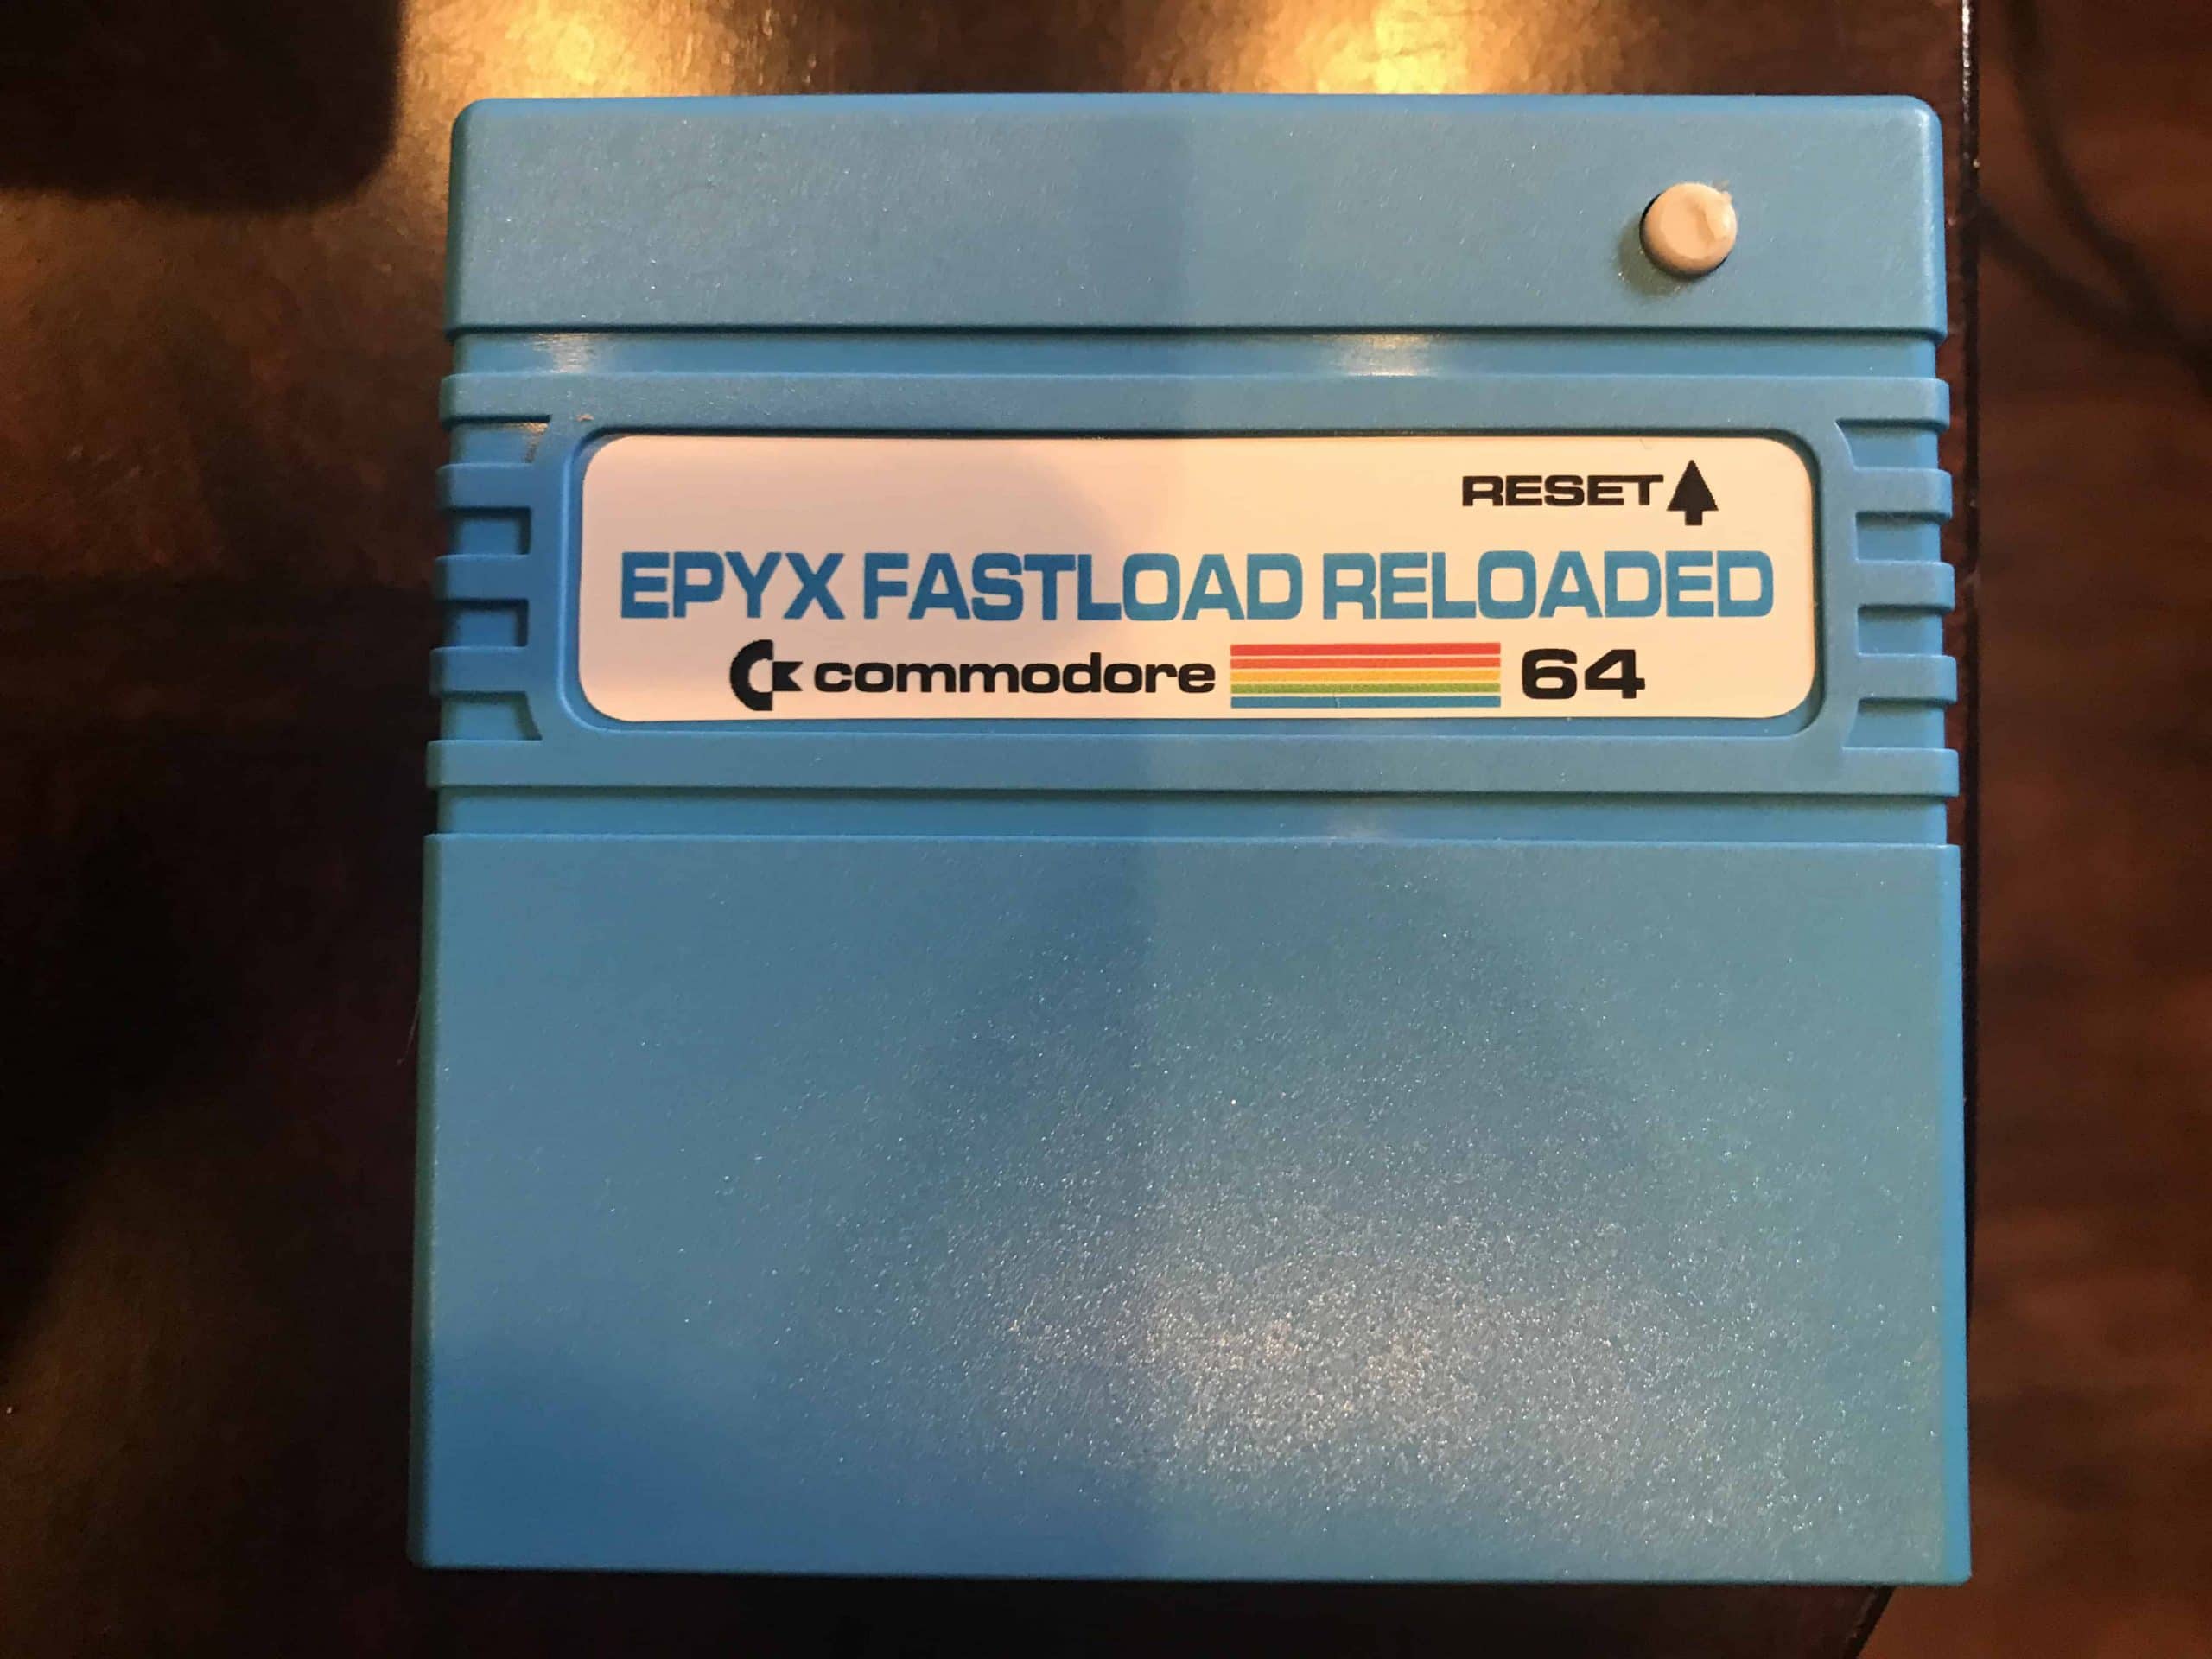
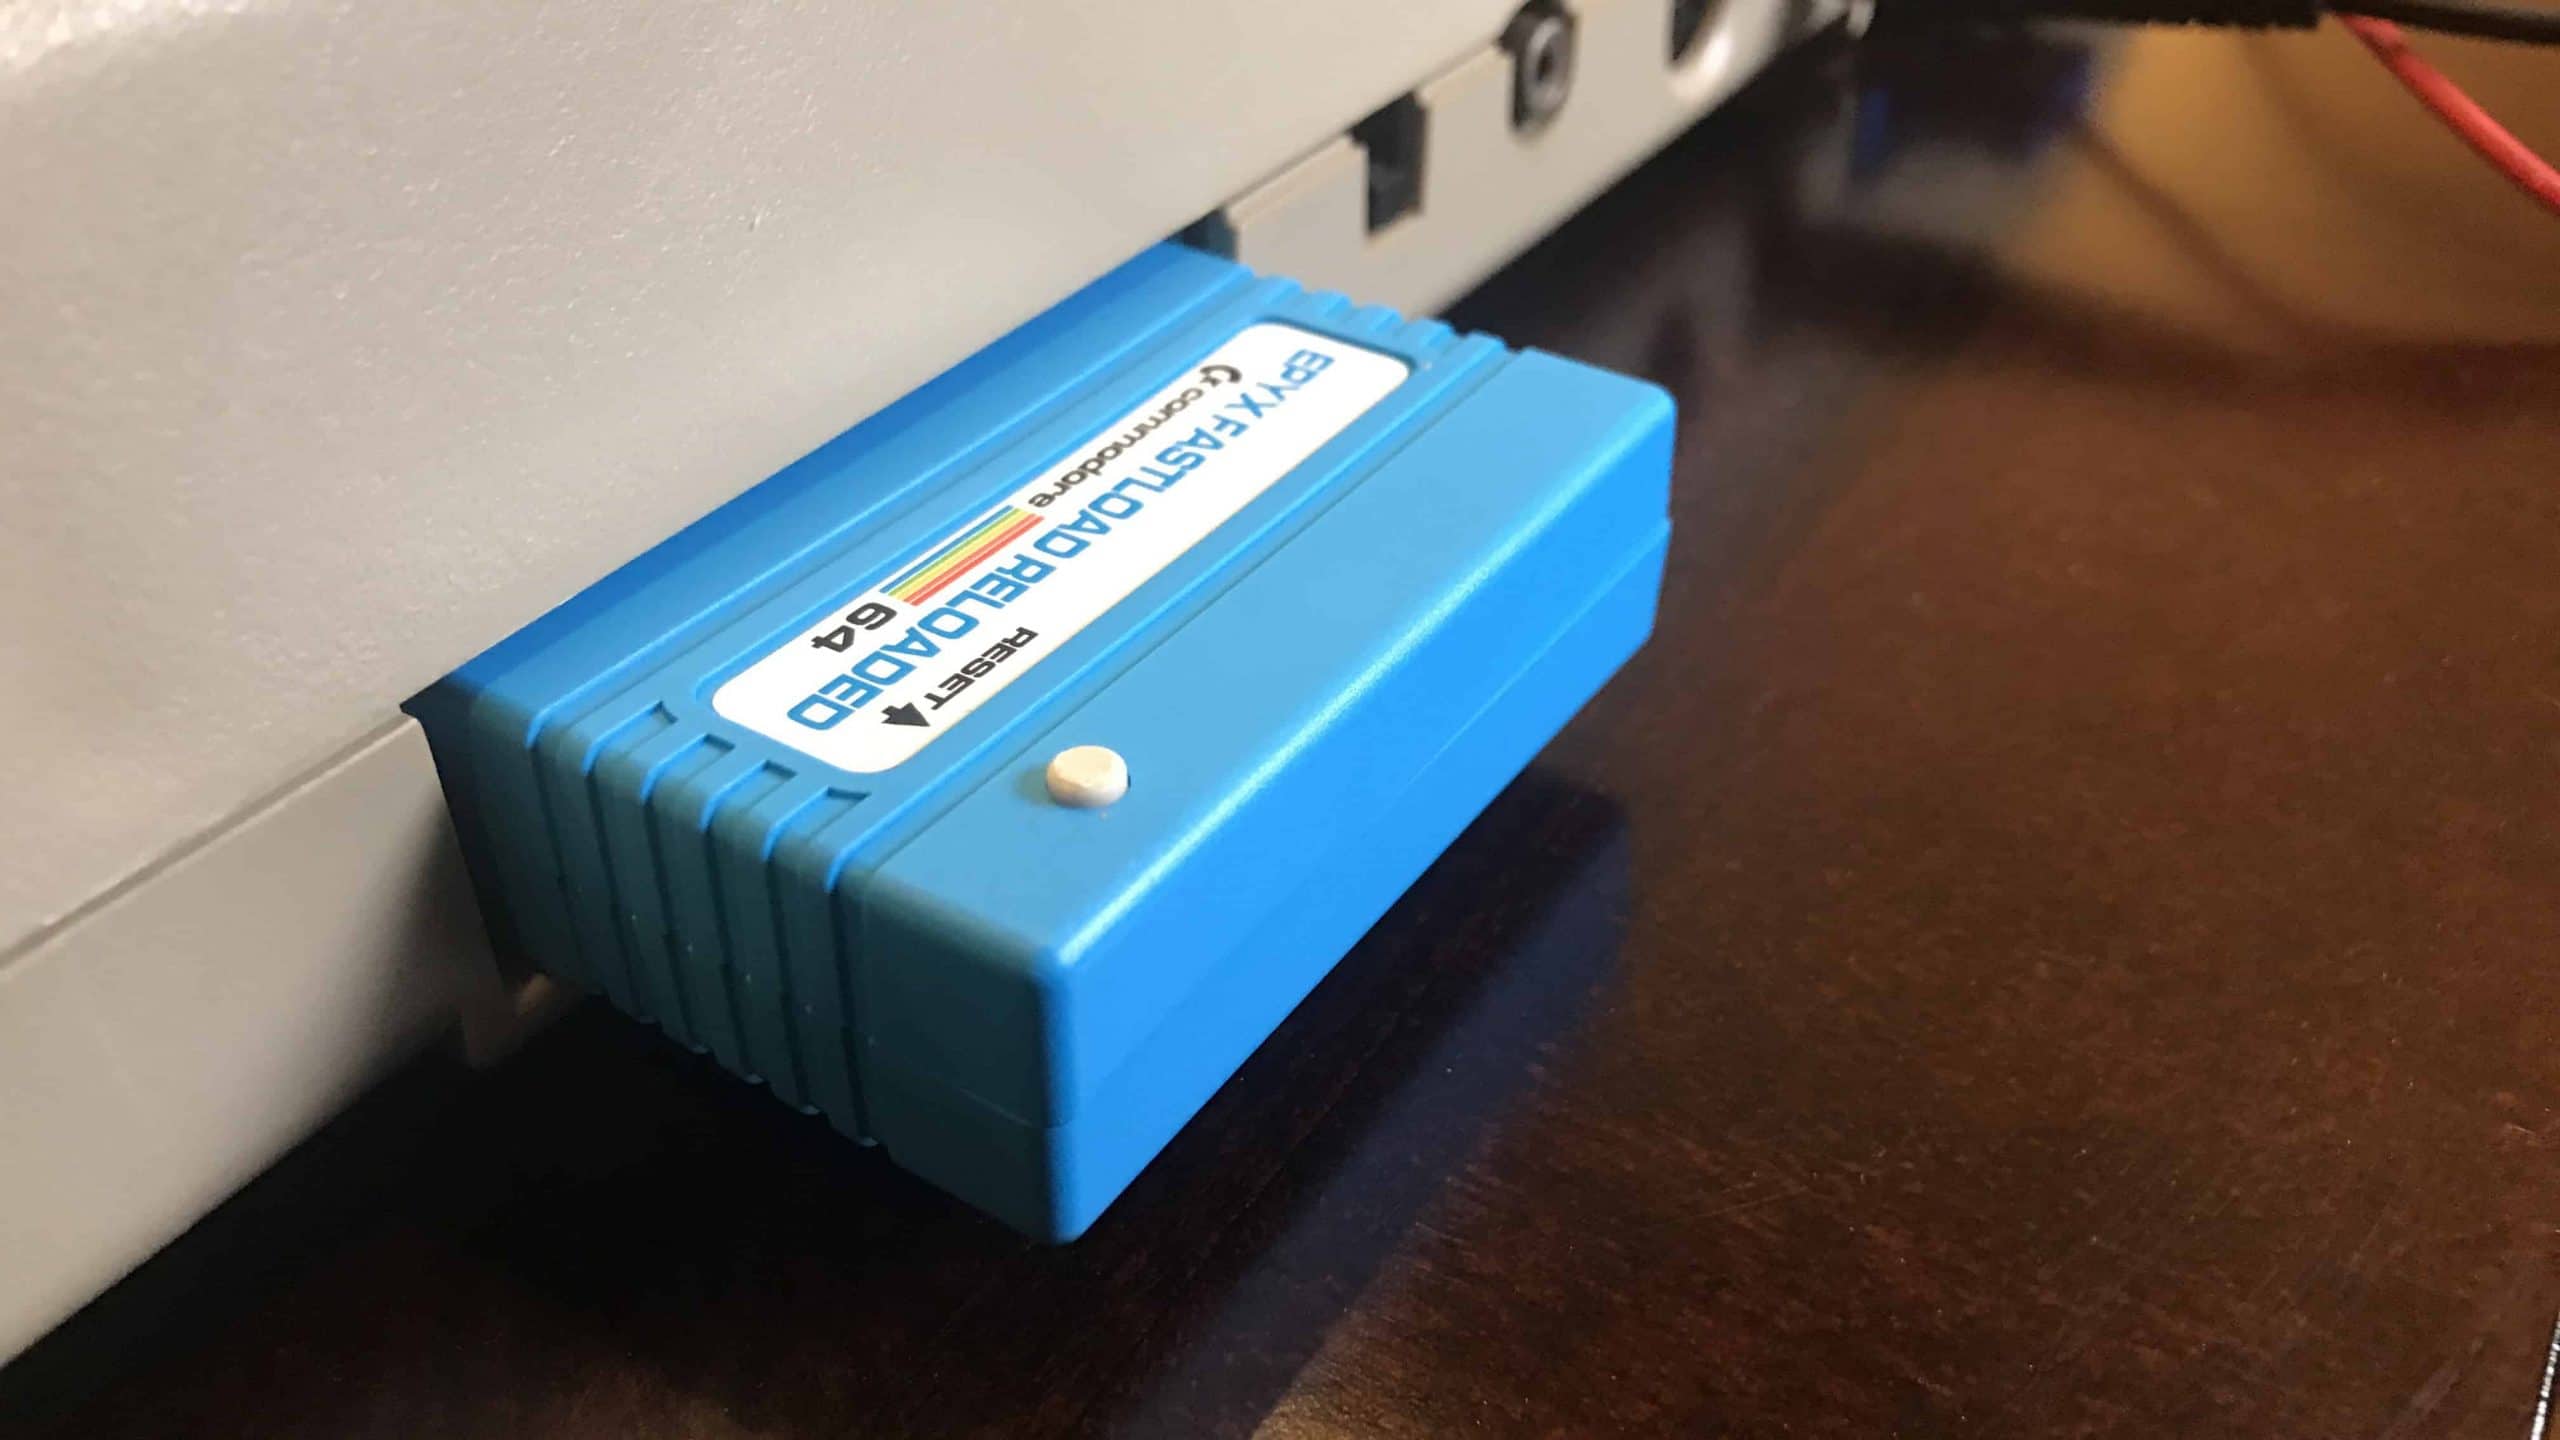
Install the Fastload Reloaded Cartridge (Optional)
If you also bought a Fastload Reloaded cartridge, now is the time to install it. It simply plugs into the cartridge port of the Commodore 64. While this is completely optional it will dramatically increase the speed of loaded software from the SD2IEC (or even a real 1541 disk drive). It is important to note that the SD2IEC will not work with original Epyx Fastload from the 1980s.
-

- EPYX Fastload Reloaded
-

- EPYX Fastload Reloaded Installed
Turn on the Computer
All that’s left before we get started is to plug the power back into your Commodore and turn on the power switch.
Note: I highly recommend if this is your first time using the SD2IEC that you have any other peripherals disconnected. Do not install modems, daisy chain disk drives, printers, or other devices with the SD2IEC installed until you know everything is working correctly.
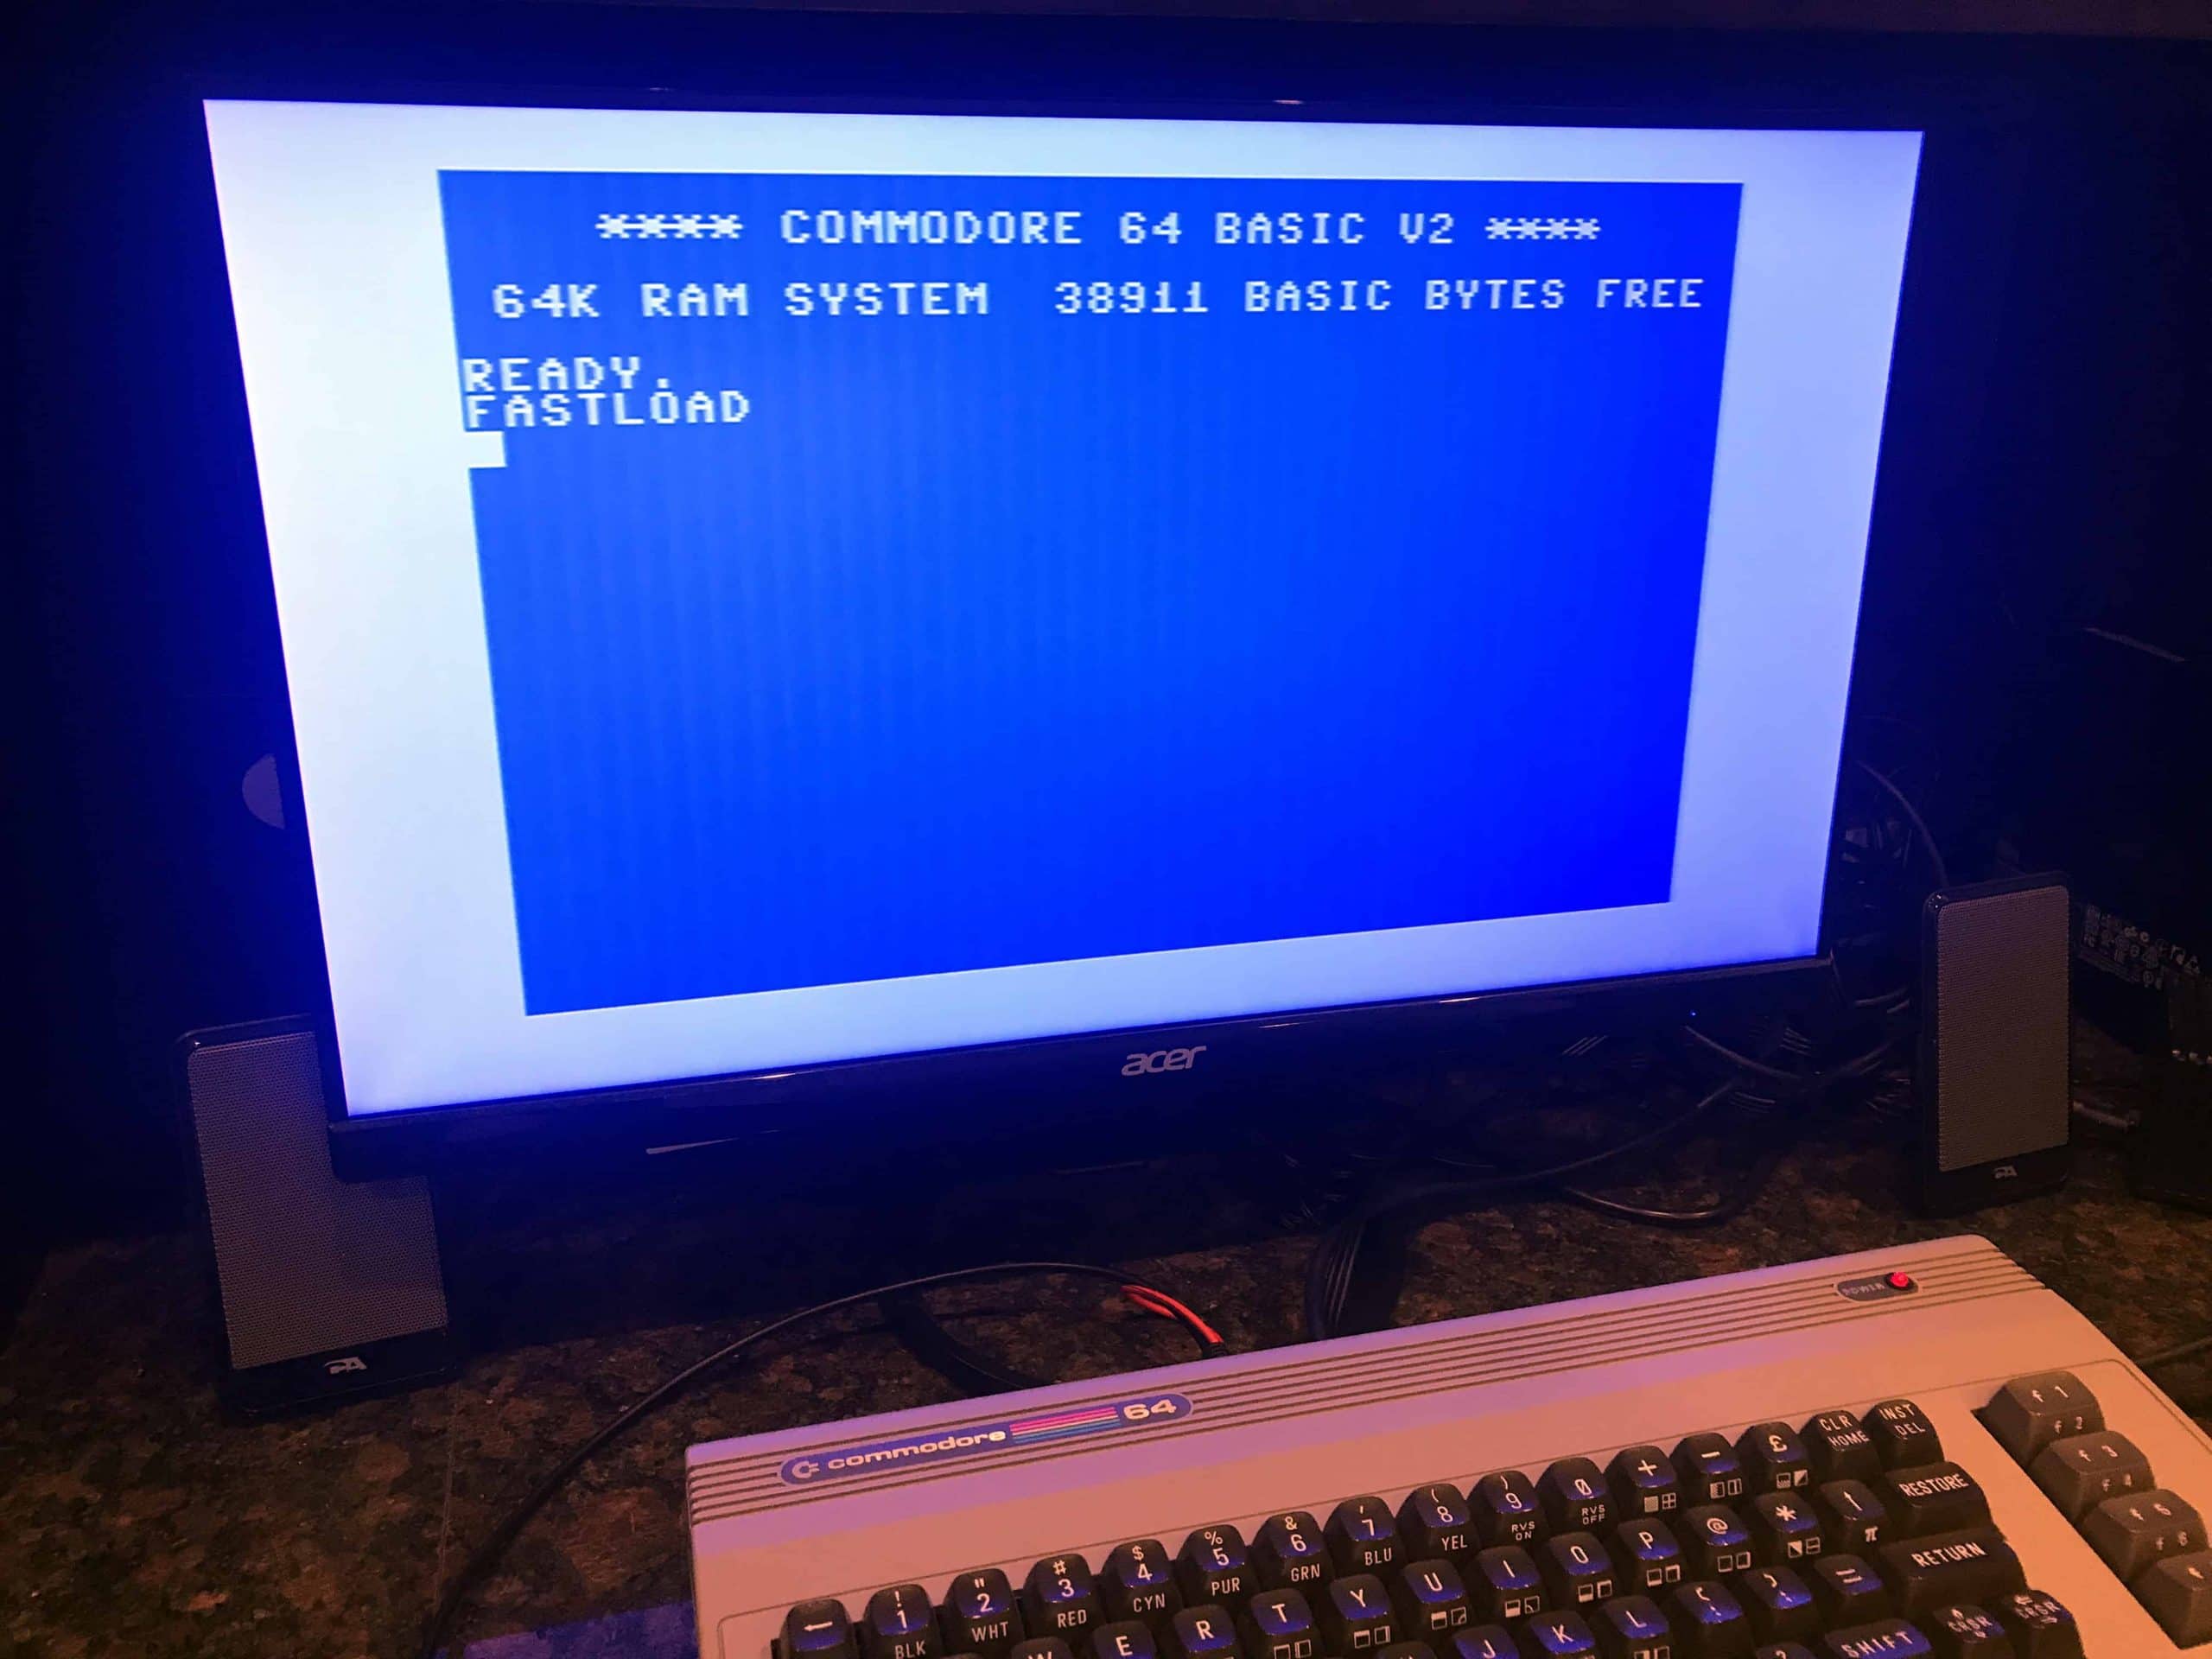
If all goes well, the C64 will show the welcome to BASIC message and the ready prompt (including the FASTLOAD logo if you have the Fastload Reloaded installed).
Connecting the SD2IEC for the First Time
Now in our unofficial SD2IEC Manual lets learn some basics of reading and writing disks on the SD card.
Listing the root directory of the SD2IEC without a Fastload Reloaded
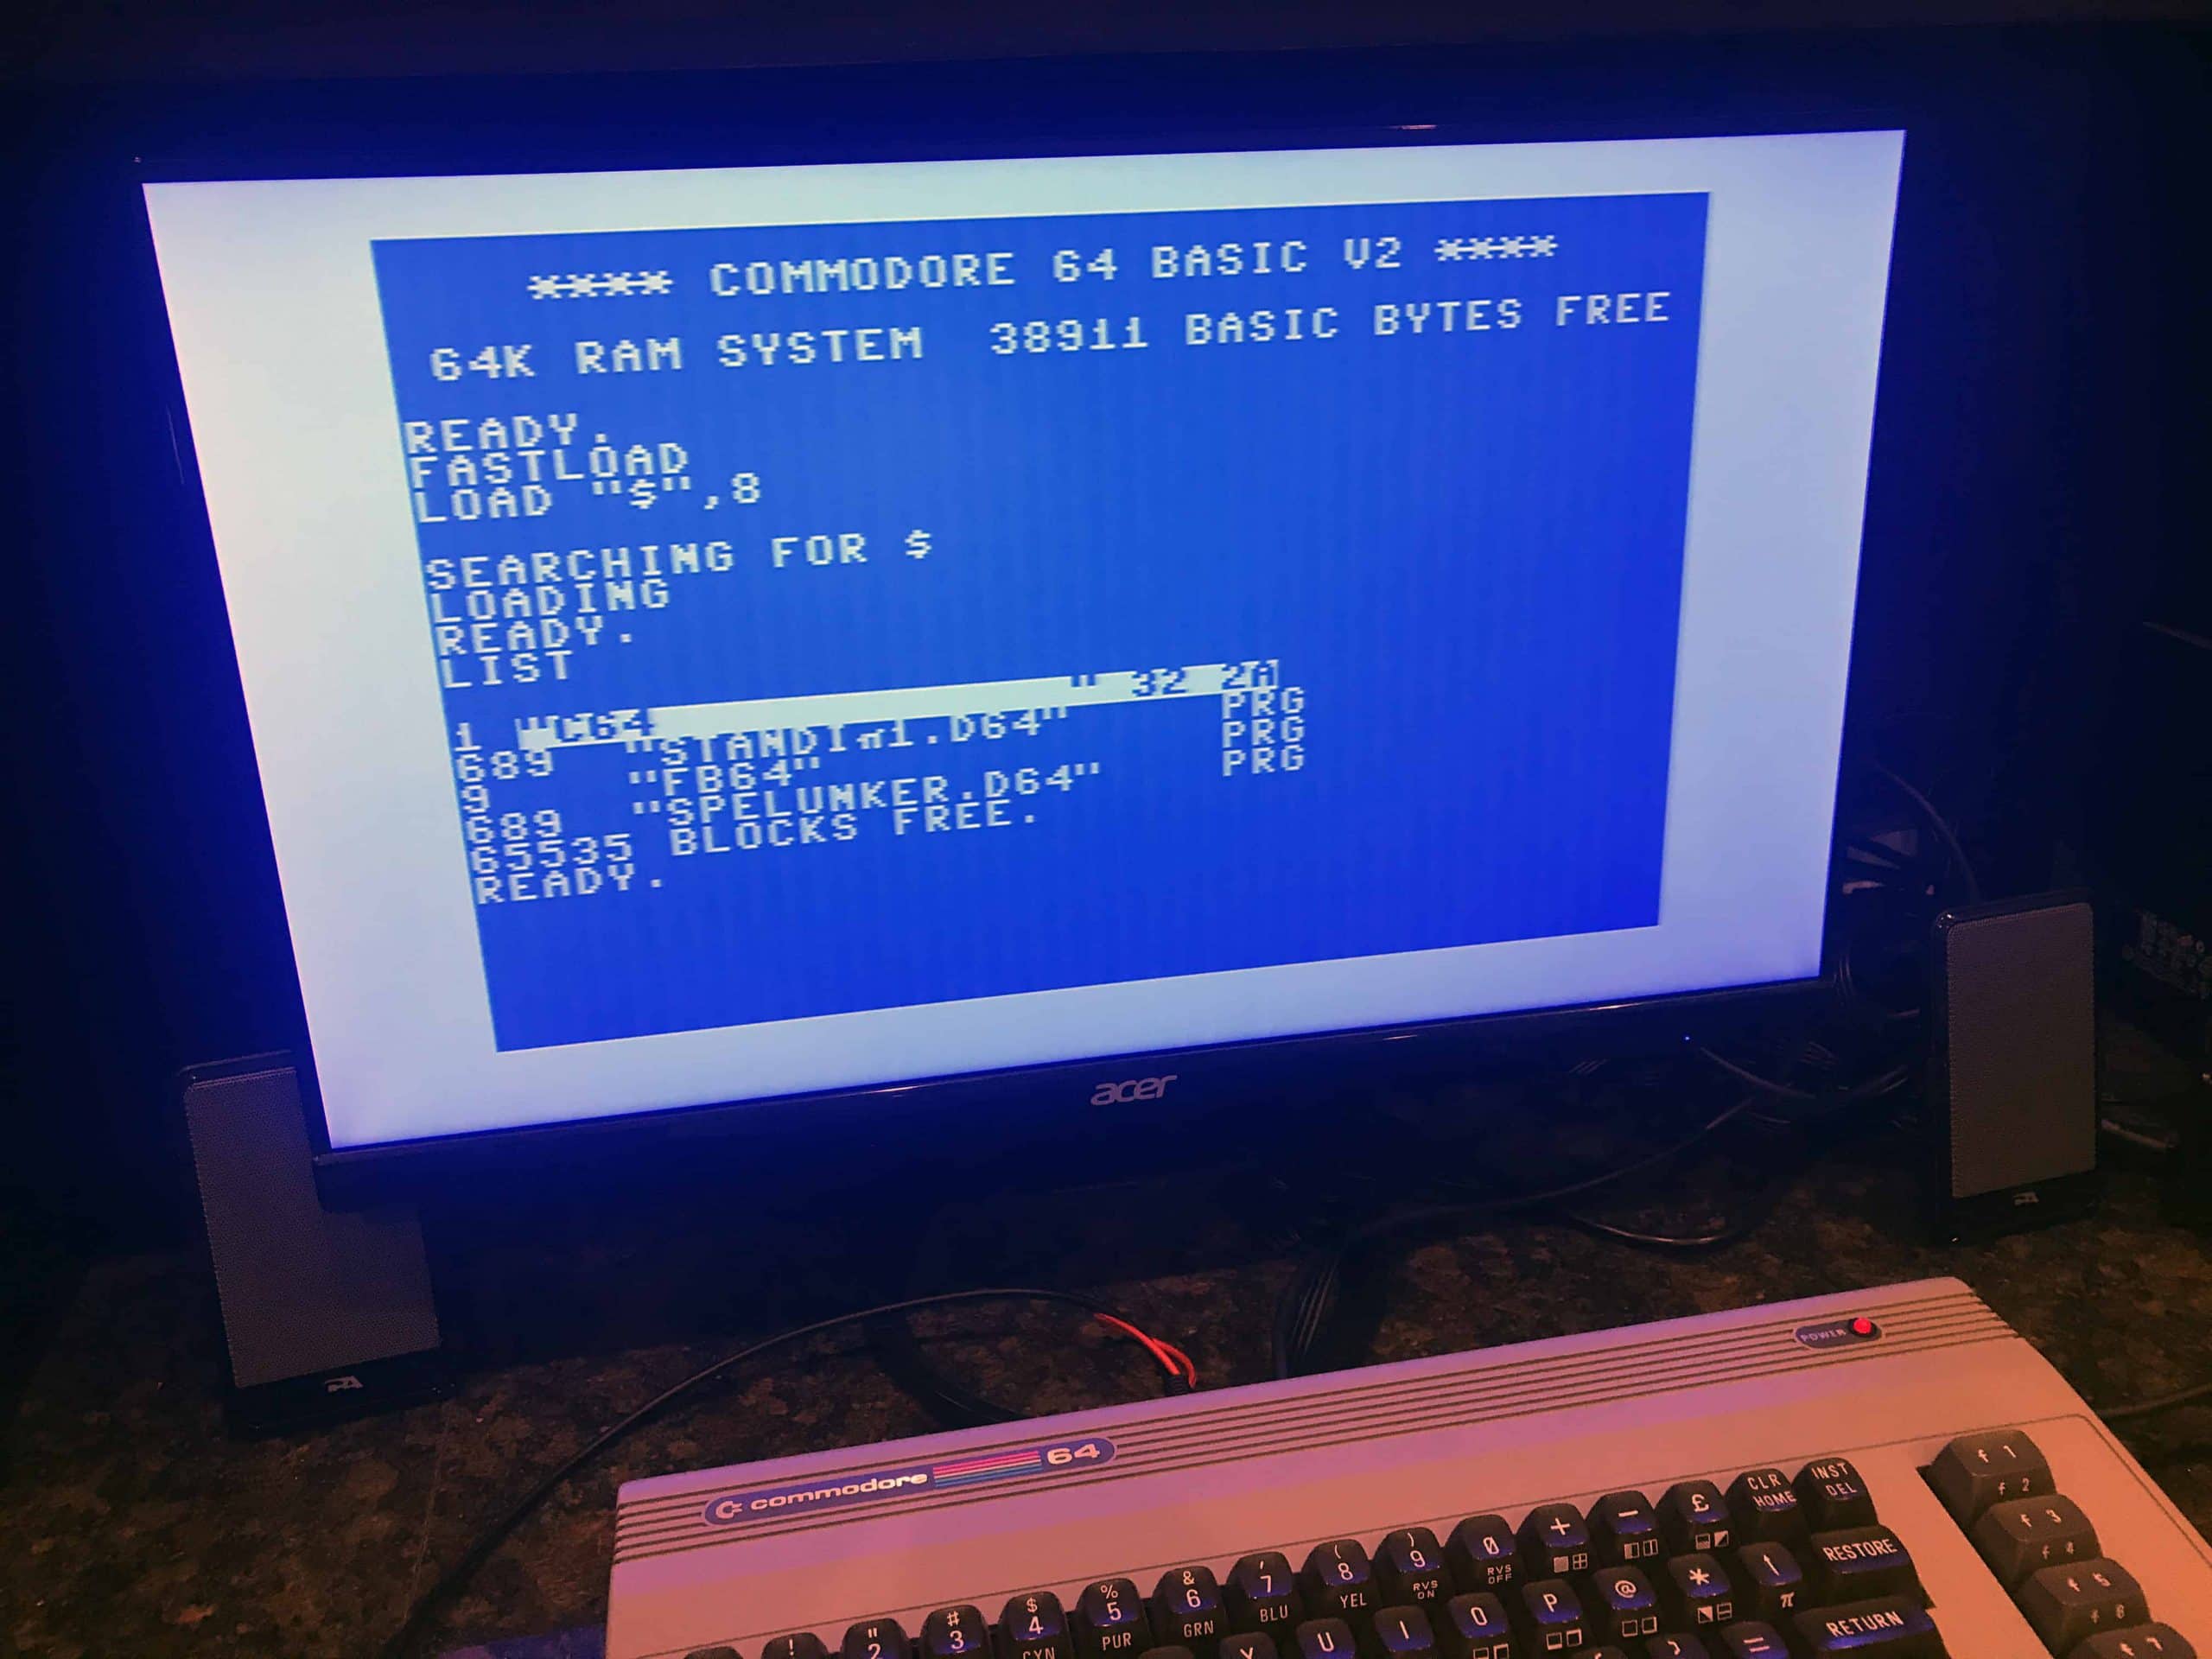
If you’re not using a Fastload Reloaded you’ll need to type the following Commodore BASIC commands to list the directory of the SD2IEC.
LOAD "$", 8
LIST
Listing the root directory of the SD2IEC with a Fastload Reloaded
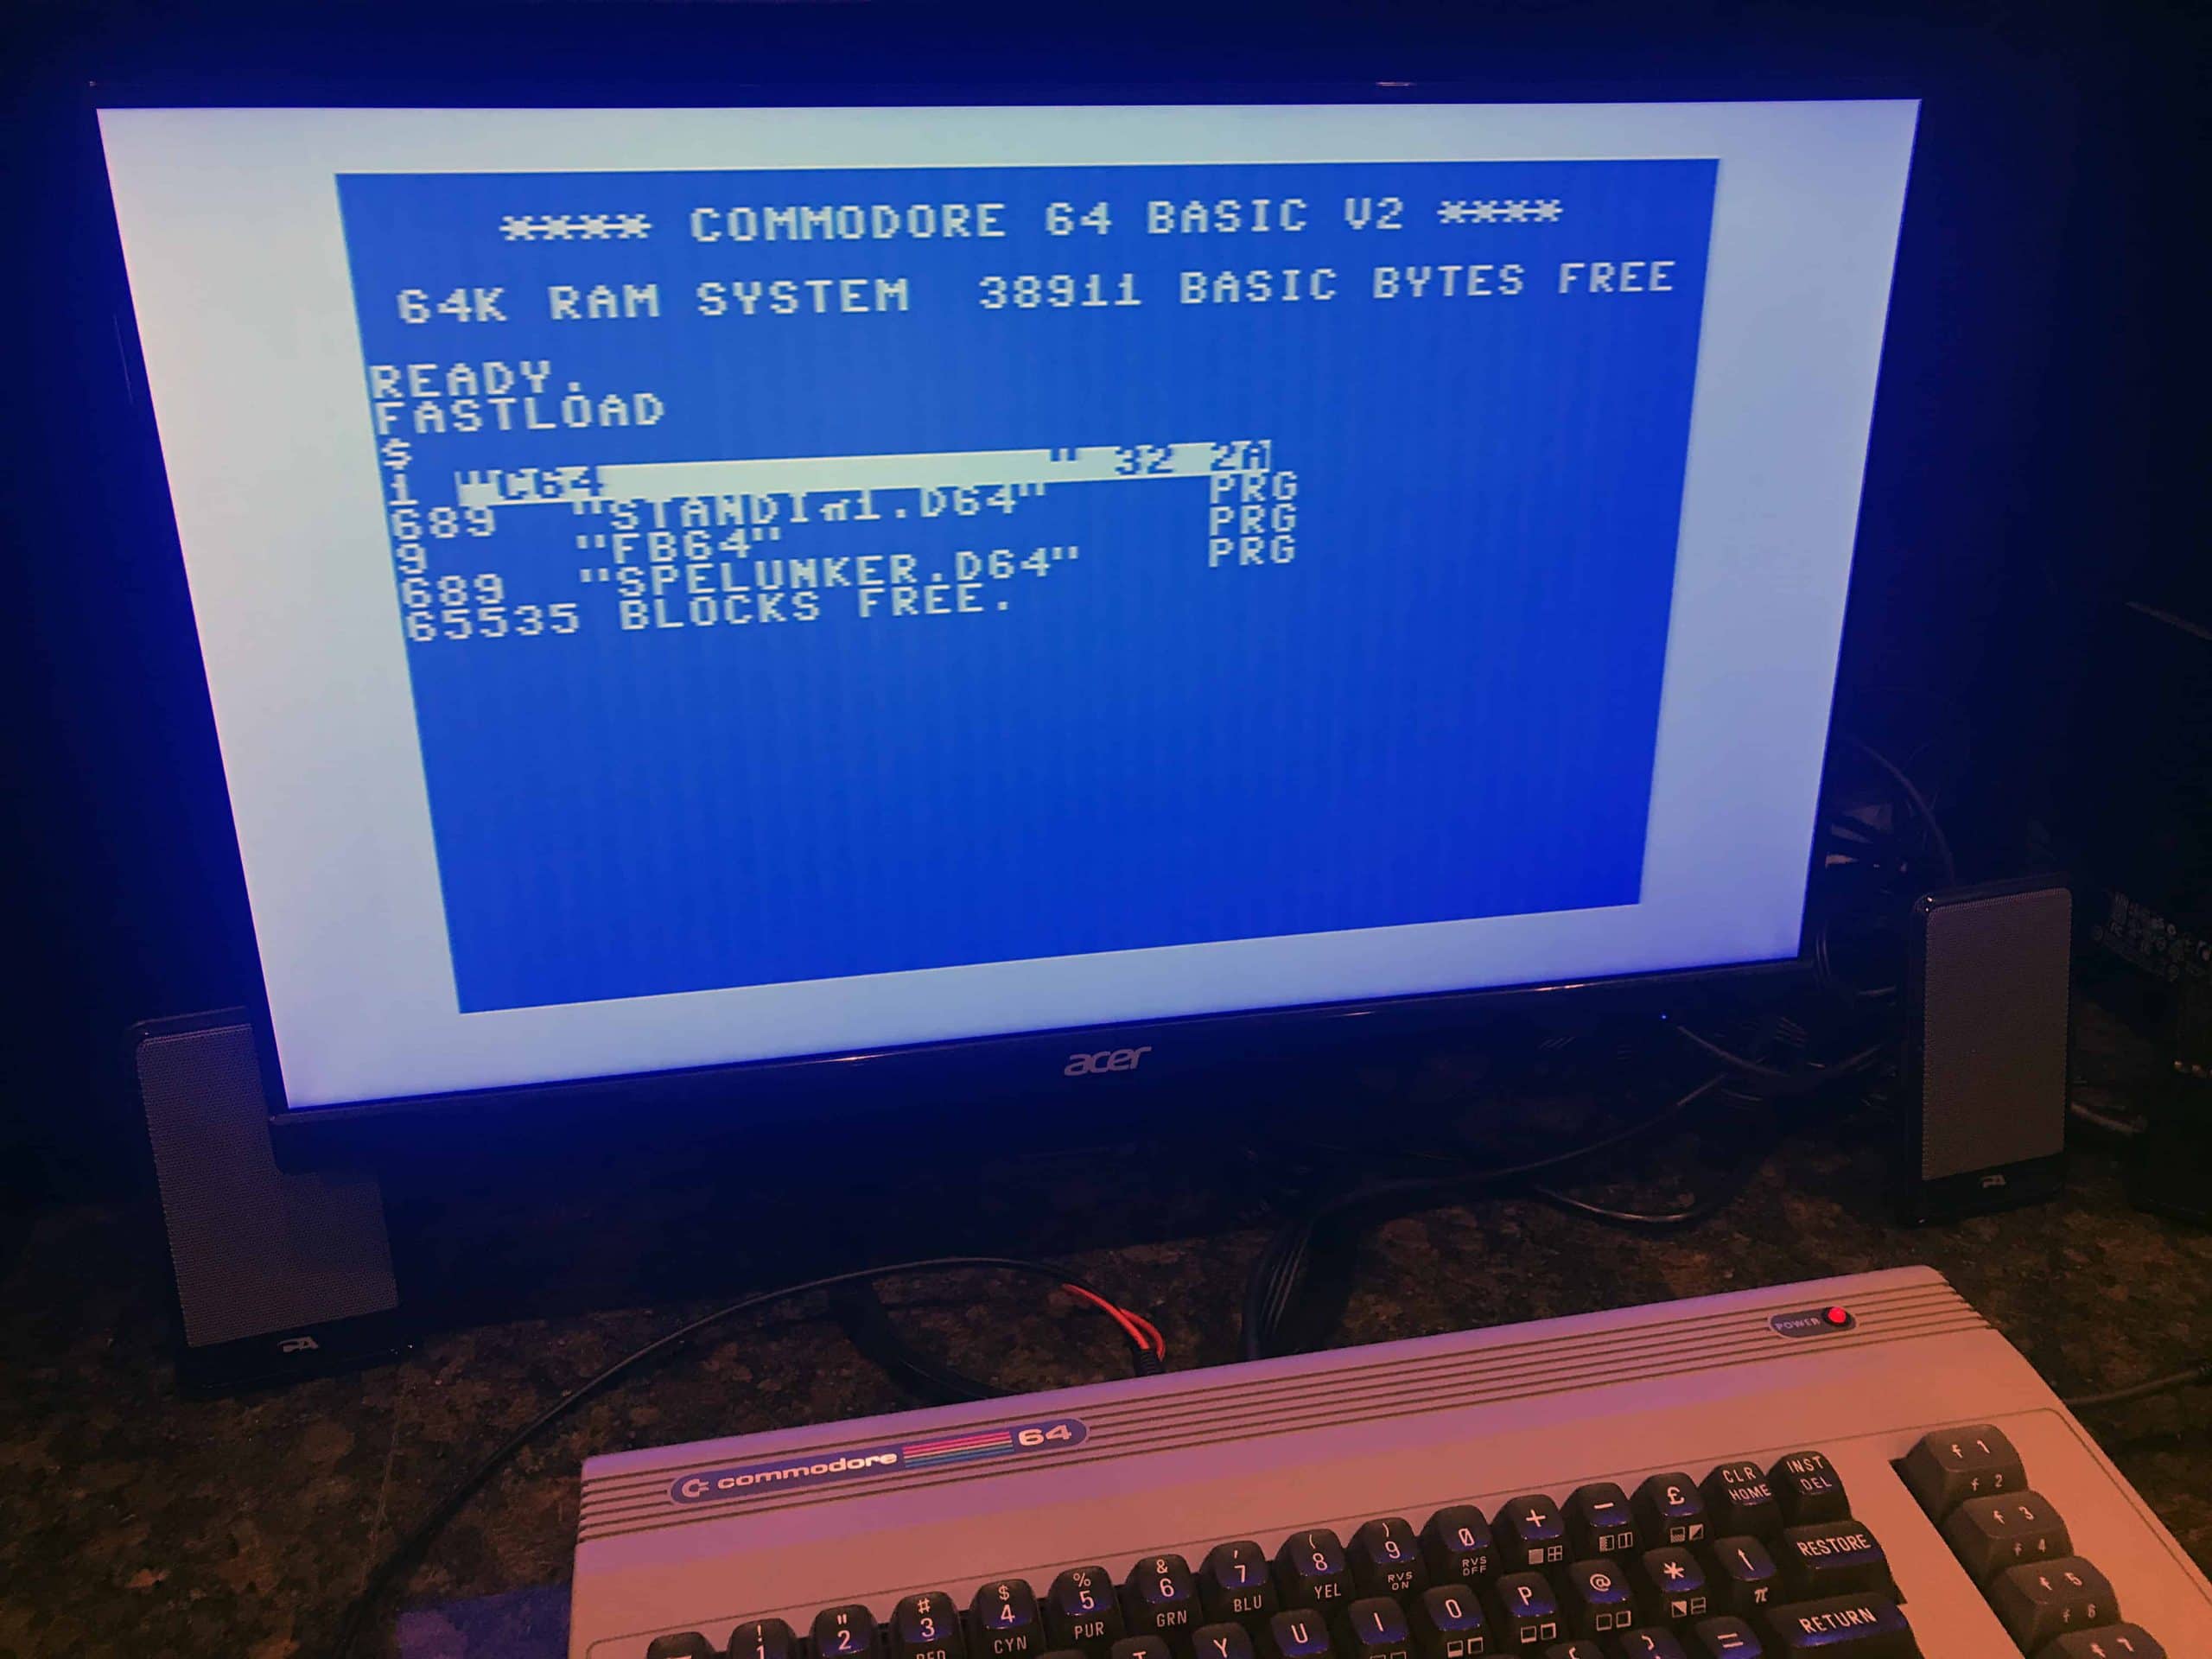
If you’re using the Fastload Reloaded, the command is much simpler. Simply type a $ (dollar sign) and press return.
Using the CBM File Browser – Select the Disk Image to Mount
To use the CBM File Browser to mount an image and load a game is fairly simple. Simply type the following commands:
LOAD "FB64",8,1
RUN
Use the cursor keys to browse the menu to select the disk image you want to mount and then simply select the program in that disk image that you wish to load and press return.
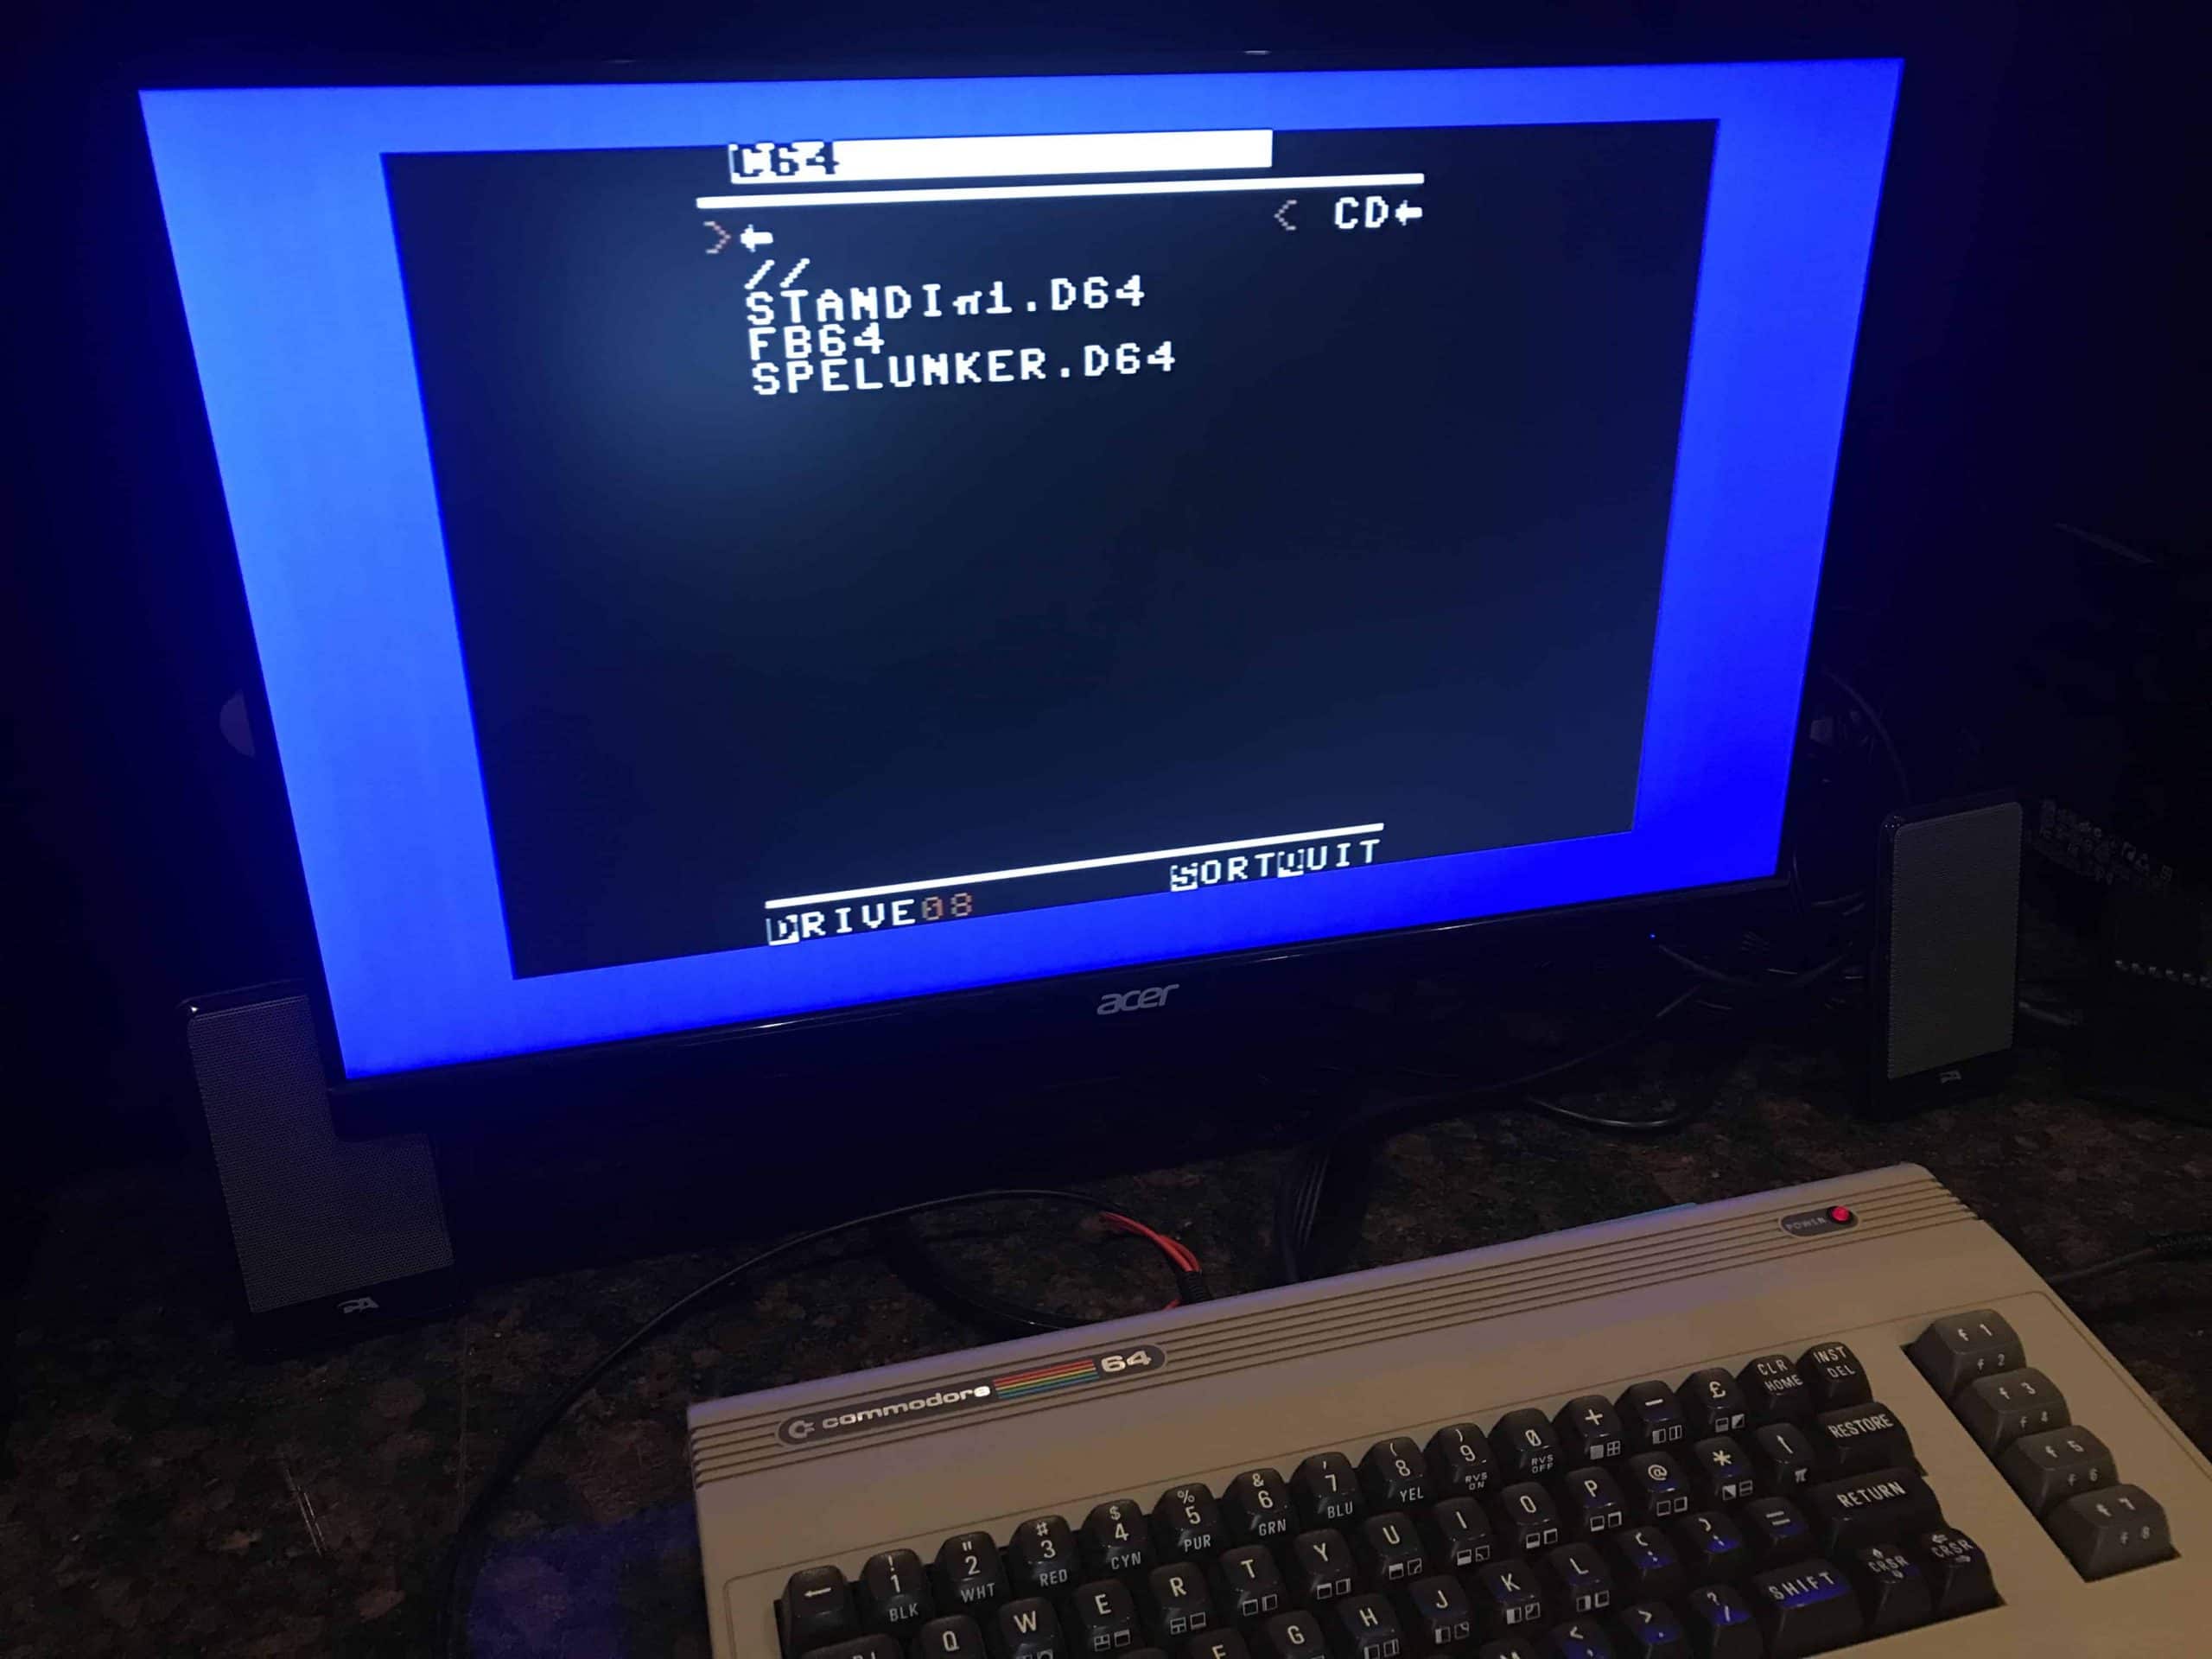
Using the CBM File Browser – Select the File to Load From Disk
The next screen will show you the contents of the disk image you just selected to mount. Select the file you want to open and press return.

Using the CBM File Browser – Play your Game!
Once you press return, the CBM File Browser will mount the disk and launch the file you selected. In a matter of just a few seconds you should see your game on the screen and ready to play! In my case I am playing Spelunker, one of my all time favorite C64 games (even if it was ridiculously hard to win).

Some Advanced SD2IEC Features
There are some additional SD2IEC features that the average user may not be interested in, but could help if your a more advanced user.
Playing games with Multiple Disks (or disk images)
Inevitably you’re going to run into a game or application that contains multiple disks. This can be troublesome since once you exit the CBM Disk Browser you no longer can see the contents of the SD card. Nope. Commodore’s still can’t multitask or open separate windows, even today!
The good news is that the creators of the SD2IEC thought of this very problem. You’ll need to create a file called AUTOSWAP.LST in the same directory with your game’s D64 disk images. You can create this file in any text editor such as Notepad on Windows or TextEdit on the Mac. This file should simple contain a list of D64 images in the correct order. Example:
GameDisk1.D64
GameDisk2.D64
CharacterSave.D64
Once you’ve done this, open the FB64 program again and open the directory that contains your disk image. Now instead of selecting a disk image, press Q to exit the program. Press the DiskSwap button on the SD2IEC (the DiskSwap button is the one closest to the IEC cable). This will select the first disk. Enter the C64 load commands (or follow whatever instructions your game came with) as shown here:
LOAD "*",8,1
RUN
This will load the game. When the game asks you to insert disk 2, press the DiskSwap button the SD2IEC and it will mount the next disk in the AUTOSWAP.LST file. When you reach the last disk, the SD2IEC will simply start the list over and select the first disk again.
Changing the SD2IEC Device Address
By default the SD2IEC will be Disk ID 8. This is the default Commodore 64 Disk ID. If you want to daisy chain the SD2IEC behind an existing Disk 8 you will want to program the SD2IEC to act as Drive ID 9. Enter this command to that:
OPEN1,8,15,"U0>"+CHR$(9):CLOSE1
If you want to save this to the SD2IEC’s memory so that it stays Drive ID 9, enter the additional command:
OPEN1,9,15,"XW":close1
This can of course be changed back at any time by swapping 8 & 9 in the above commands.
And that’s it! Now you’re an SD2IEC guru!


Great article. Just one thing I’d mention. I have the same SD2IEC as you have pictured and it works with the original Epyx fastload cartridge from the 80s without any problem! I know a few running this way with no issues 🙂
Brilliant article for a novice, thank you, especially the information on setting up the reader for a VIC-20.
You should include an article with JaffyDOS, jiffydos with enhancements for sd2iec
Lot of thanks !
any help using it to copy disk ot all the files from 141-II to SD with Dracopy v1.0d ? How to use blank.D64 for having all the files on it ? Thanks if you can help me !
Great! Thanks
I nave just got my sd2iec (different model, without cables); i need to understand the function of the two pushbuttons, i suppose one for reset and one for changing image
Did you managed to make your one working, i think i have the same like you (all on one board power from tape port and with DIN port to connect drive)
It is a very well written and informative article. I wish it would expand the discussion on firmware and how to upgrade it.
Fabulous informations. These help alot. Since I have 2 1541 hooked to my 64, I switched to 10 instead of 9.
Thanks a lot! After 2 years not being able to load anything else than .prg files, I finally can use .d64 files thanks to you =). Fuck the official “documentation”.
Anyone care to update the creator of CBM FileBrowser v1.6 that the distributed fb128 prg is misaligned as far as local absolute addresses, jmps and jsr’s are all 2 bytes low in destination… I doubt that it would run correctly. I wonder where that 2 byte offset came from. Don’t mind me, just venting a bit. -=[grin]=-
multiple disk feature just simply doesn’t work. tried and tried but not well written at all. I don’t think you described it good at all! pressing the q button before the program is loaded does noting but exit out. then pressing the diskswap button does nothing.
I use it all the time and it works just as I described.
4.5
Even easier is with the Epyx Fastload added, you can just press Commodere Key and RunStop to take you into File Browser (if it is in root of SD card)
5
Great article Mike, very helpful, many thanks for posting it.
Keep up the great content Mike! Very timely article for me as I just received my sd2iec with FastLoad cart Saturday. You and your brother (and others in the community) have inspired me to get back to the 80s computing and make things (I built my own joystick for my C64 out of arcade parts and a cigar box). It’s even better now than it was when I was a teenager. I also followed your tutorial when I built my raspberry Pi a few months ago and it turned out great! Next thing is gonna be a bar top arcade or the new style you just built.
Thanks Wayne! I appreciate it!
Great directions on how to use the device, but I do have question. Will this device work in the opposite direction going from the C64 and drive to the sd card? I’ve got disks I’d like to backup before they become unreadable. Thanks.
Well done Mike, makes life -with the sd2iec- a lot easier. Question: bought one with preformatted and installed software md. File structure is fine, but as soon as I add d64 files the names of these files are corrupted when displaying them on a c64 with monitor/tv. They seem to work fine, but I don’t now how it works with multiple disk games -yet- hence the corrupted file names (they keep changing with every startup).
4
Awesome !! This help me out a lot. Thanks for taking the time to do this !!
Mike
3
3.5
Ever since I installed my SD2IEC I have been looking for commands needed to:
Make a folder on the SD2IEC (in msdos it is simply MD foldername)
Change(move) into a folder on the SD2IEC (in msdos it is simply CD foldername)
Does the new folder need to be formatted?????
If I want to copy the content of a 1541 diskette into a folder what is the command to do that????
Is there a list of the commands I’m asking about available?
All of my attempts to make these things happen have been unsuccessful……
Thank you,
Joe
Some tips for easier handling. When you, for example, have a Final-Cartridge-3, then you can combine not only it’s fastloader with the SD2IEC, you also have the function-keys on F1 to F8, which can make the life alot easier here. You can rename the filebrowser, lets say for example the CBM-browser, to the name “00.prg” and copy it in every folder and subfolder on your SD2IEC SD-card. Then you let a filesorter program run over the whole card, including all subfolders and after that, when you open a folder with the CBM-browser, you can see, that the program “00.prg” will be the very first file in all folders. Now this first file can be loaded with a simple press on the F5 key on the keyboard, because there the Final-Cartridge-3 has the commando
load”*”,8,1
which always loads the first file on a disk or in a folder. This now means, you can turn on your C64, press one time on F5 and the browser loads. When fully loaded, which will be in two or three seconds, then you press F3 to Run the filebrowser, because on F3 the FC3-modul has the “Run” command. Now the browser starts and the modul-fastloader is already activated. You choose a game and play it. When you have played enough, you make a Reset on the Reset-button of the FC3-modul and then you simply press F5 again and the browser is there again. With F3 you start it.
And if you were inside of a d64 image before and the reset don’t bring you back to the root-directory or the subfolder-directory, where you have copied the file “00.prg” (the browser) inside, then you simply press one time F8, there the FC3-modul has it’s simplified DOS-commands and after you have pressed F8 in the BASIC screen, you type only
CD←
and then you are back in the directory above, where this d64 image is located, in which we were before. Now we are in the subfolder and again a “00.prg” file is inside (because we have copied this file in every subfolder first) and a simple press on F5 loads the filebrowser again.
That’s what i call a perfect handling. The user don’t need to type anything to load the browser or to load the files. And also no need to turn off the computer, because we have the Reset-button on the FC3. This very good way of using, is the reason, why i really love the combination of SD2IEC and FC3-modul so much.
Thanks for this great article, still accurate after 5 years 🙂
I have an issue with my sd2iec that when I turn of my c64, it stops working. It doesn’t recognize it anymore and load”$”,1 or $ using fastload doesn’t do anything. Resetting doesn’t work and I haven’t found simple steps to get it to work again. Sometimes turning the computer on and off works, sometimes I need to unplug the sd2iec.
Does that sound like a familiar issue?
I didnt use my SDIEC for like 3 years and originally I just had it working but didnt really play any games. Before turning the C64 on, I figure I need some refresh and I ended up reading your manual. Great work, higly appreciated. Thank you, Mike
Does anyone have recent information on exactly what micro SDHC cards work in a SD2IEC deck? Brand, size, class, etc? There has to be a method to compatibility. Just bought a SD2IEC deck and tried a brand new SanDisk 32Gb and an old PNY 4Gb. All I get is FILE NOT FOUND error. Others have used up to 32Gb cards with this deck but I haven’t found out yet which ones work and why. Pictures of working cards would help. Thank you for any help you can offer.
Recently purchased an SD2IEC drive. Other people have used up to 32Gb microSDHC cards successfully with this device. I am trying a SanDisk 32Gb card and a PNY 4Gb card. The c128/c64 sees the drive but cannot read anything from the card.
The Sandisk is brand new, the PNY is used. I formatted both cards FAT32 with Tuxera SD Card Formatter for Mac 5.0.2
I’ve tried naming the card and no name.
LOAD “$”, 8
Searching for $
Any file I put in the root with no directories at all only returns a FILE NOT FOUND error.
Tried “fb” “fb64” “fb128” = cbm filebrowser v1.6
Also tried “(various programs)” without the file browser and attempting to load direct.
Please could anyone take screen shots of the exact card they’re using successfully with their SD2IEC so I can figure out what works and what doesn’t? There has to be a method to this rather than buying dozens of cards and trial and error. Thank you!