Blog
Planing Boards that are Wider than your Planer
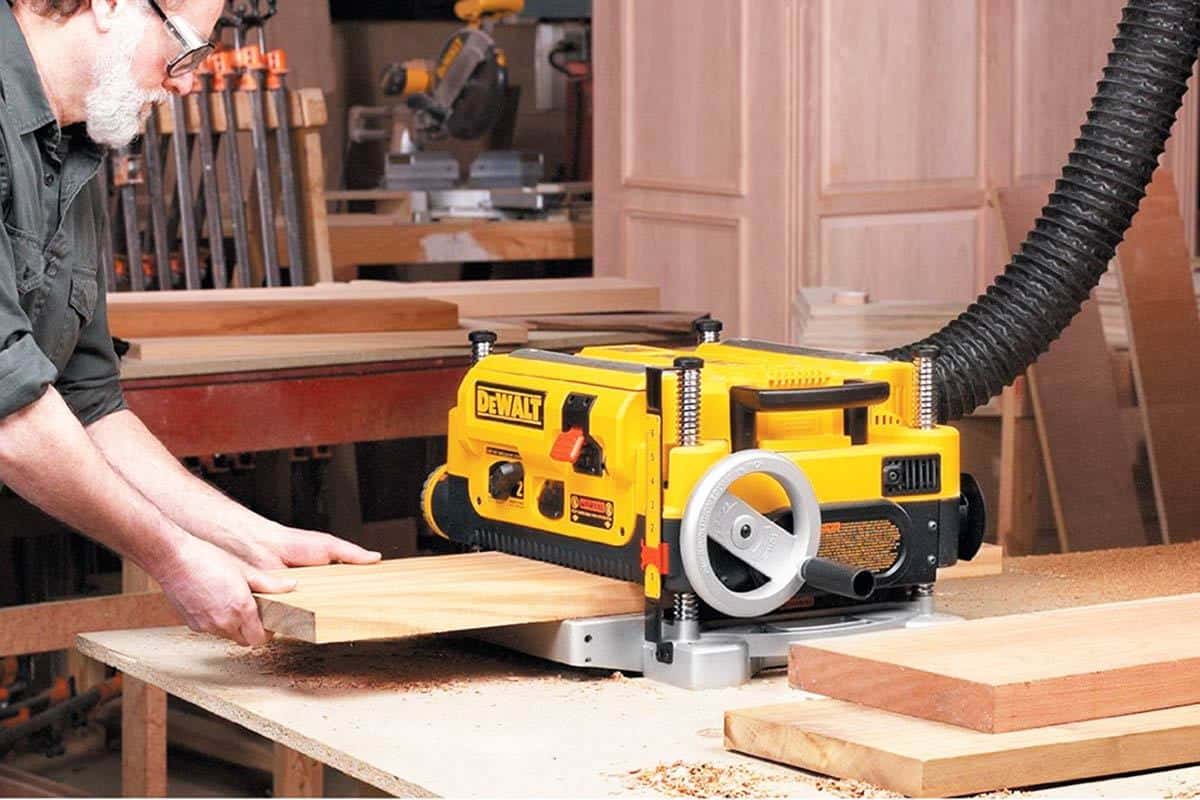
The planer is one of the most used tools in a woodworking shop. It’s almost indispensable really. Unfortunately they can also be very expensive tools, and the bigger ones are generally out of most people’s budgets. Most shops I visit have a 12 inch to 14 inch planer. These planers (like the DeWalt 735X, get it here) are great tools without a lot of compromises, except for their small size. Which leads us to a very common problem, some boards are just too large to fit through them. This leaves you scratching your head looking for a way of planing boards that are wider than your planer, or worse contemplating spending money on a larger planer.
Planing Boards that are Wider than Your Planer
The good news is, there is a way of planing boards that are wider than your planer, and the methods are not all that complicated!
Option 1: Sectioning the Boards
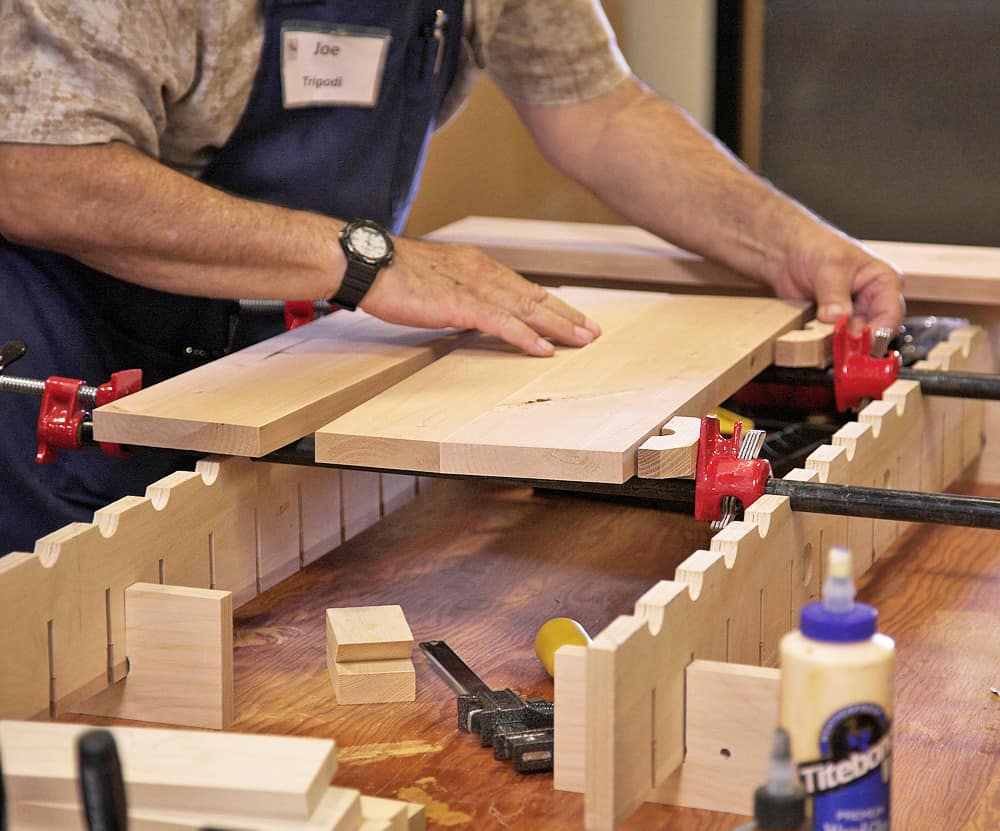 This option might or might not be obvious. Let’s say you’re building a kitchen table or coffee table that is wider than your 13 inch planer. Obviously there’s a big problem here! If you glue up the entire table as you normally would, it is not going to fit through your planer. The simplest option is to glue the table top up in sections less than 13 inches. For a table that is 48 inches wide, you’d wind up with four 12 inch sections. Surface each of those sections individually on the planer, and then do a final glue up.
You’ll want to make sure that each of these sections is as flush as possible. I would highly recommend using cauls across the tops of the boards to make sure they stay flush during the drying process. Some also recommend using biscuits to help the alignment process. The better aligned the last four sections are, the less time you’ll spend with a hand plane or a sander afterwards and the better your finished results are going to be.
Option 2: Hiding Your Joints
 The next idea for planing boards that are wider than your planer is not obvious, because the last thing you generally want to do is rip a board down when you don’t need to. All you do is wind up adding unattractive joints to it. But if the board simply won’t fit through your planer then you sometimes aren’t left with any choice but to rip it, plane it, and join it back into one piece afterwards. In these cases, there are some steps you can take to make this approach less obvious and hide those joints.
Avoiding the No-Rip Zone
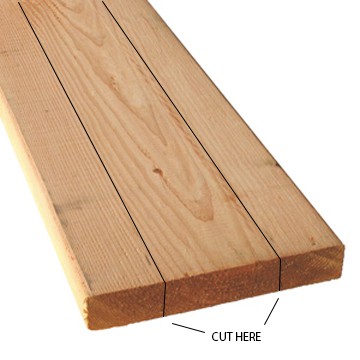
If you have a 14 inch board, it might seem like the best option is to rip it down the center, resulting in two 7 inch boards that will fit through your planer. The problem here is that your rip is going to be very obvious. The blade of your table saw is going to remove 1/8 inch of material down the center of the board, which is going to result in a misaligned grain pattern after they are glued back together!
There is a way to make this much less obvious. Make two rips down the edges of the board, where the grain is straight. When you glue these boards back together there won’t be any (or very minimal) places where the grain crosses the kerf line left by the cut.
Planing boards that are wider than your planer don’t have to be an exercise in futility, and they don’t have to result in a trip to a local maker center that has a larger planer (for a fee, of course). You can generally work with what you have with a little forethought and planning.
5
0.5