Blog
Quick and Dirty Furniture Repair
[adinserter name=”TopOfPost”]My mother in-law loves antique furniture. Much of this furniture is furniture that her father built, or purchased. She’s got chairs, tables, beds and an assortment of other antique items. She also holds the heirlooms near and dear to her heart. She can’t part with them. She feels an attachment to these items, because they are a connection to loved ones who are no longer with her. For those who understand this it will come to you as no surprise when she recently came to me asking if I could fix one of these pieces. Yes. She wanted me to do a furniture repair.
I was initially worried. Working on something that is incredibly precious to someone is always risk. If you mess it up there is no recovery. These pieces are almost always one of a kind and irreplaceable. I also had no idea what was wrong with it, other than knowing it was some portion of a bed frame.
Quick Antique Furniture Repair
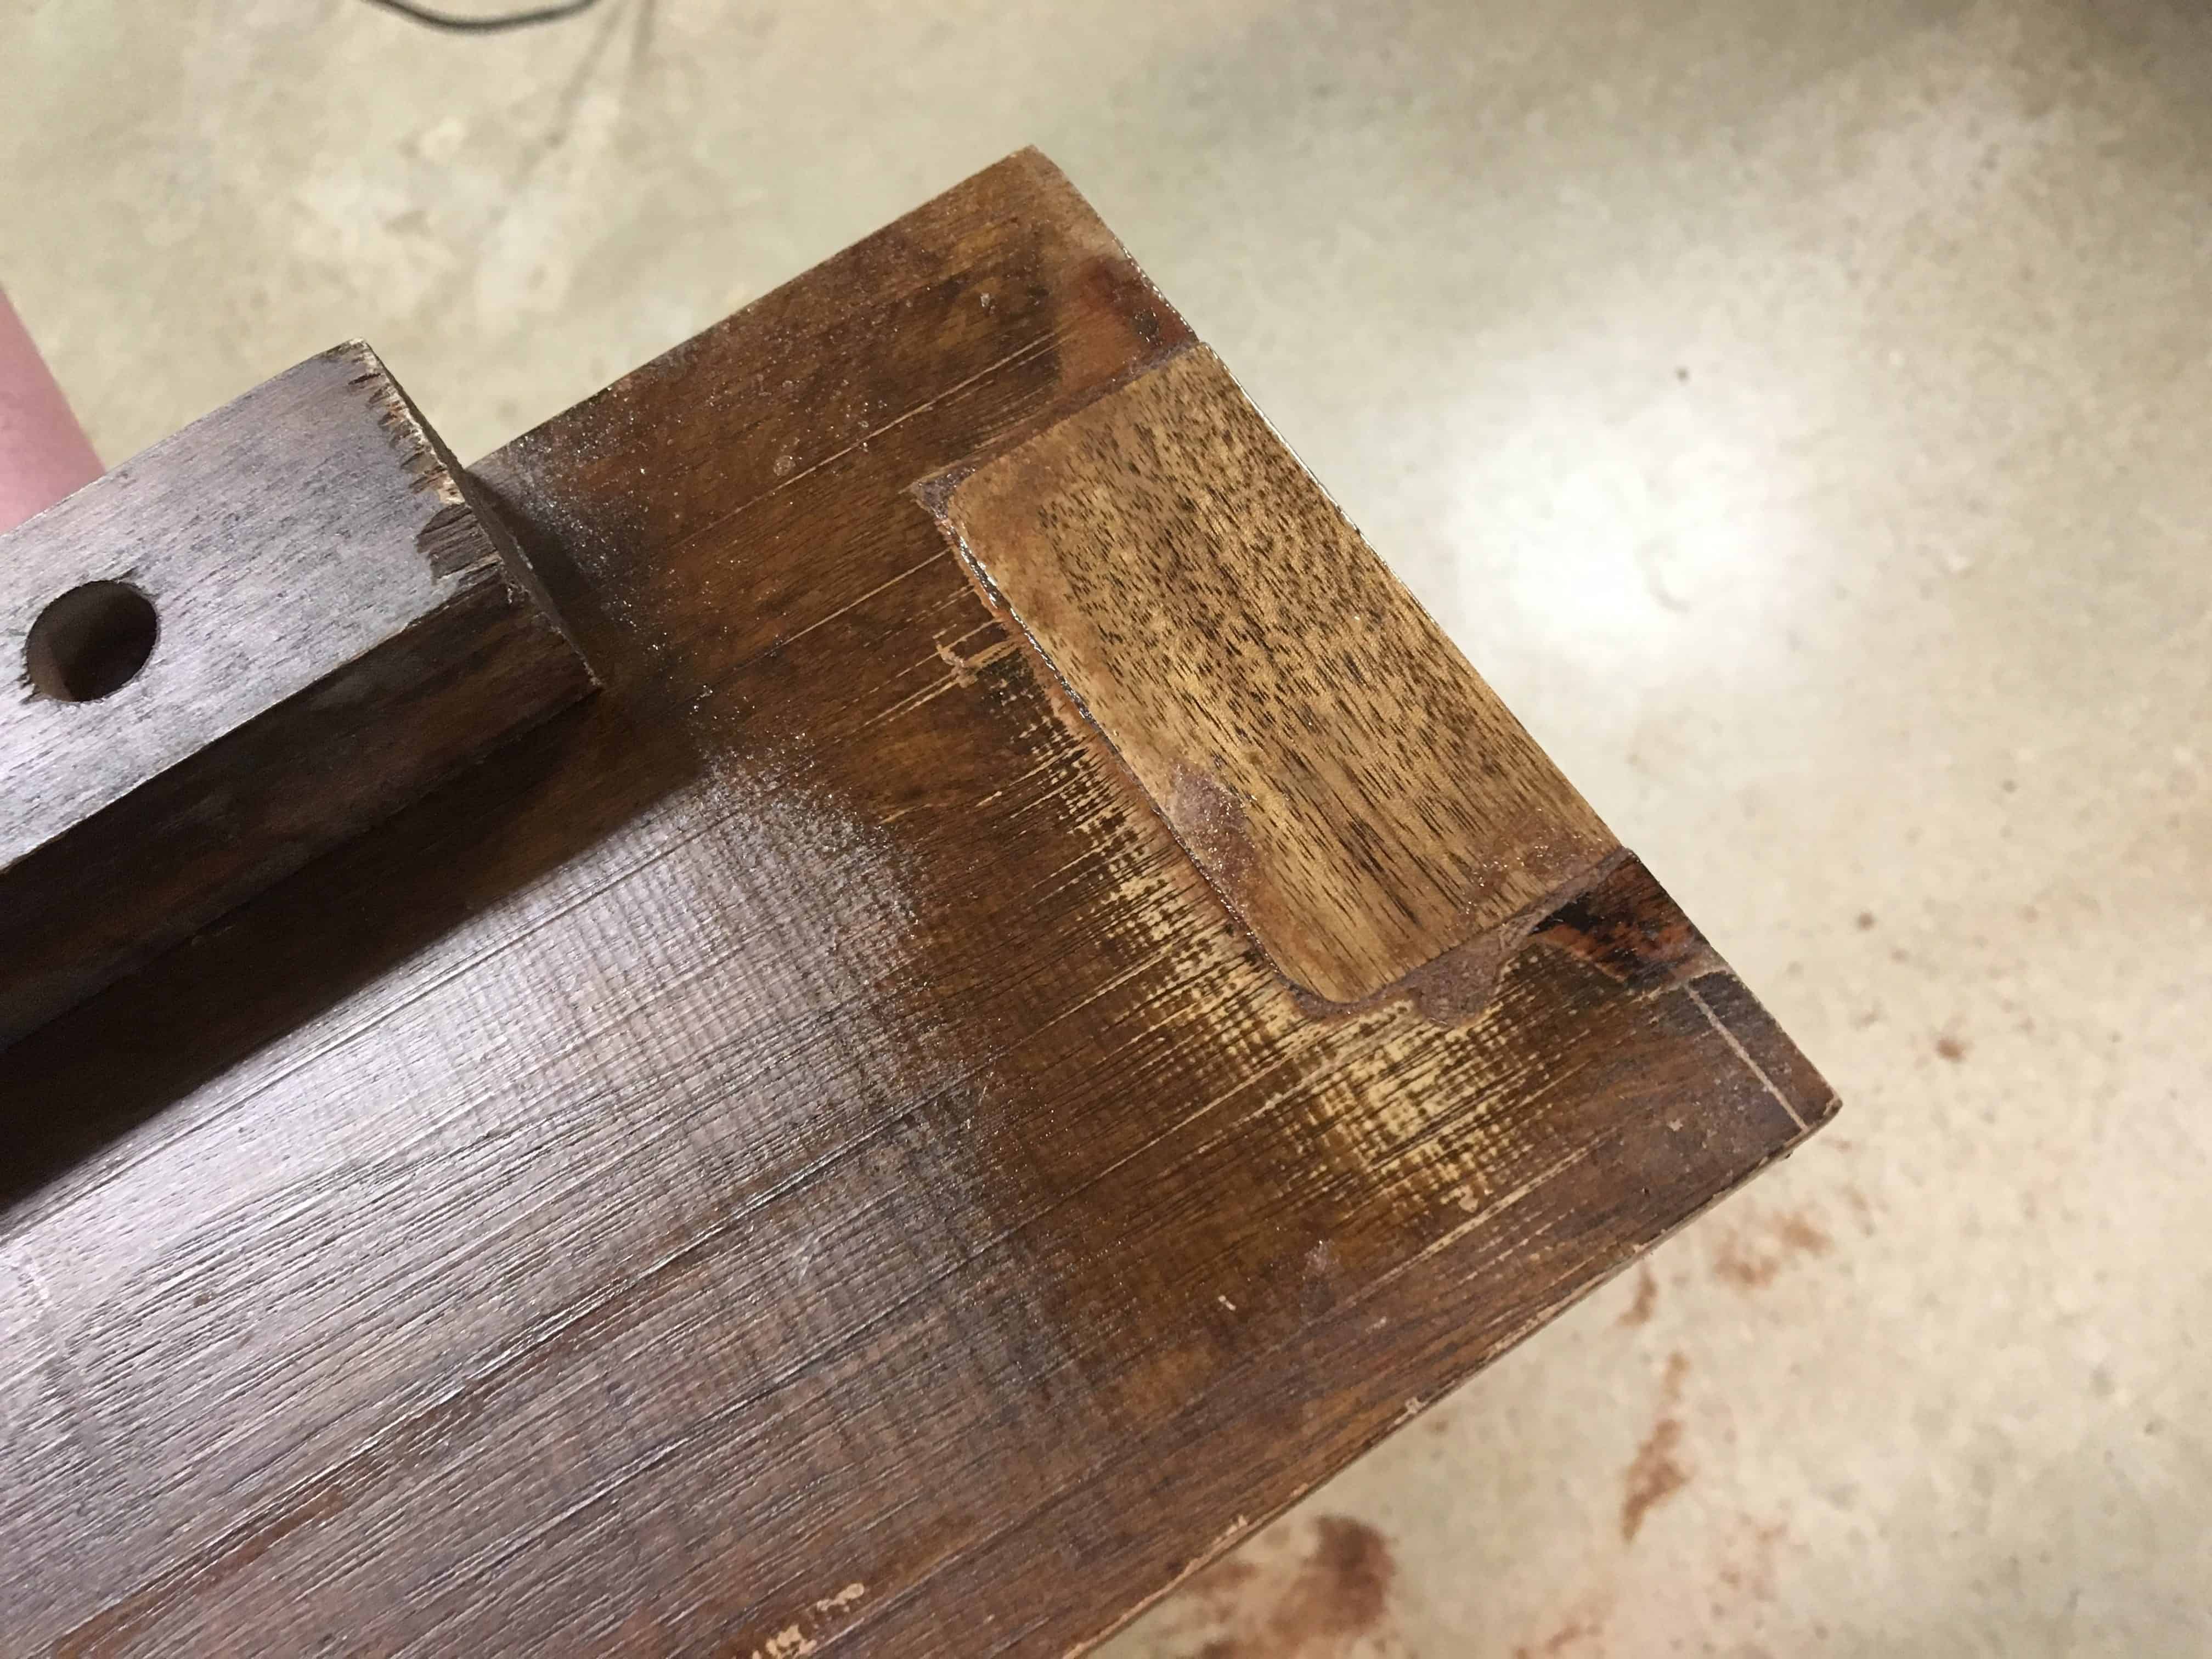
I was quite happy to find out that the broken piece was actually a bed rail that connected the headboard and footboards together. A section of the wood had cracked free, and the hardware had popped off. It was obviously a combination of weak wood, improper screws, and probably a little bit of abuse over the years. The awesome news was that it was on the inside of the bed frame where no one would ever see the repair. This meant I could just fix it, and not worry about how the repair looks. The first thing I did was to hollow out the chipped out area of wood with my router and an 1/4″ end-mill.
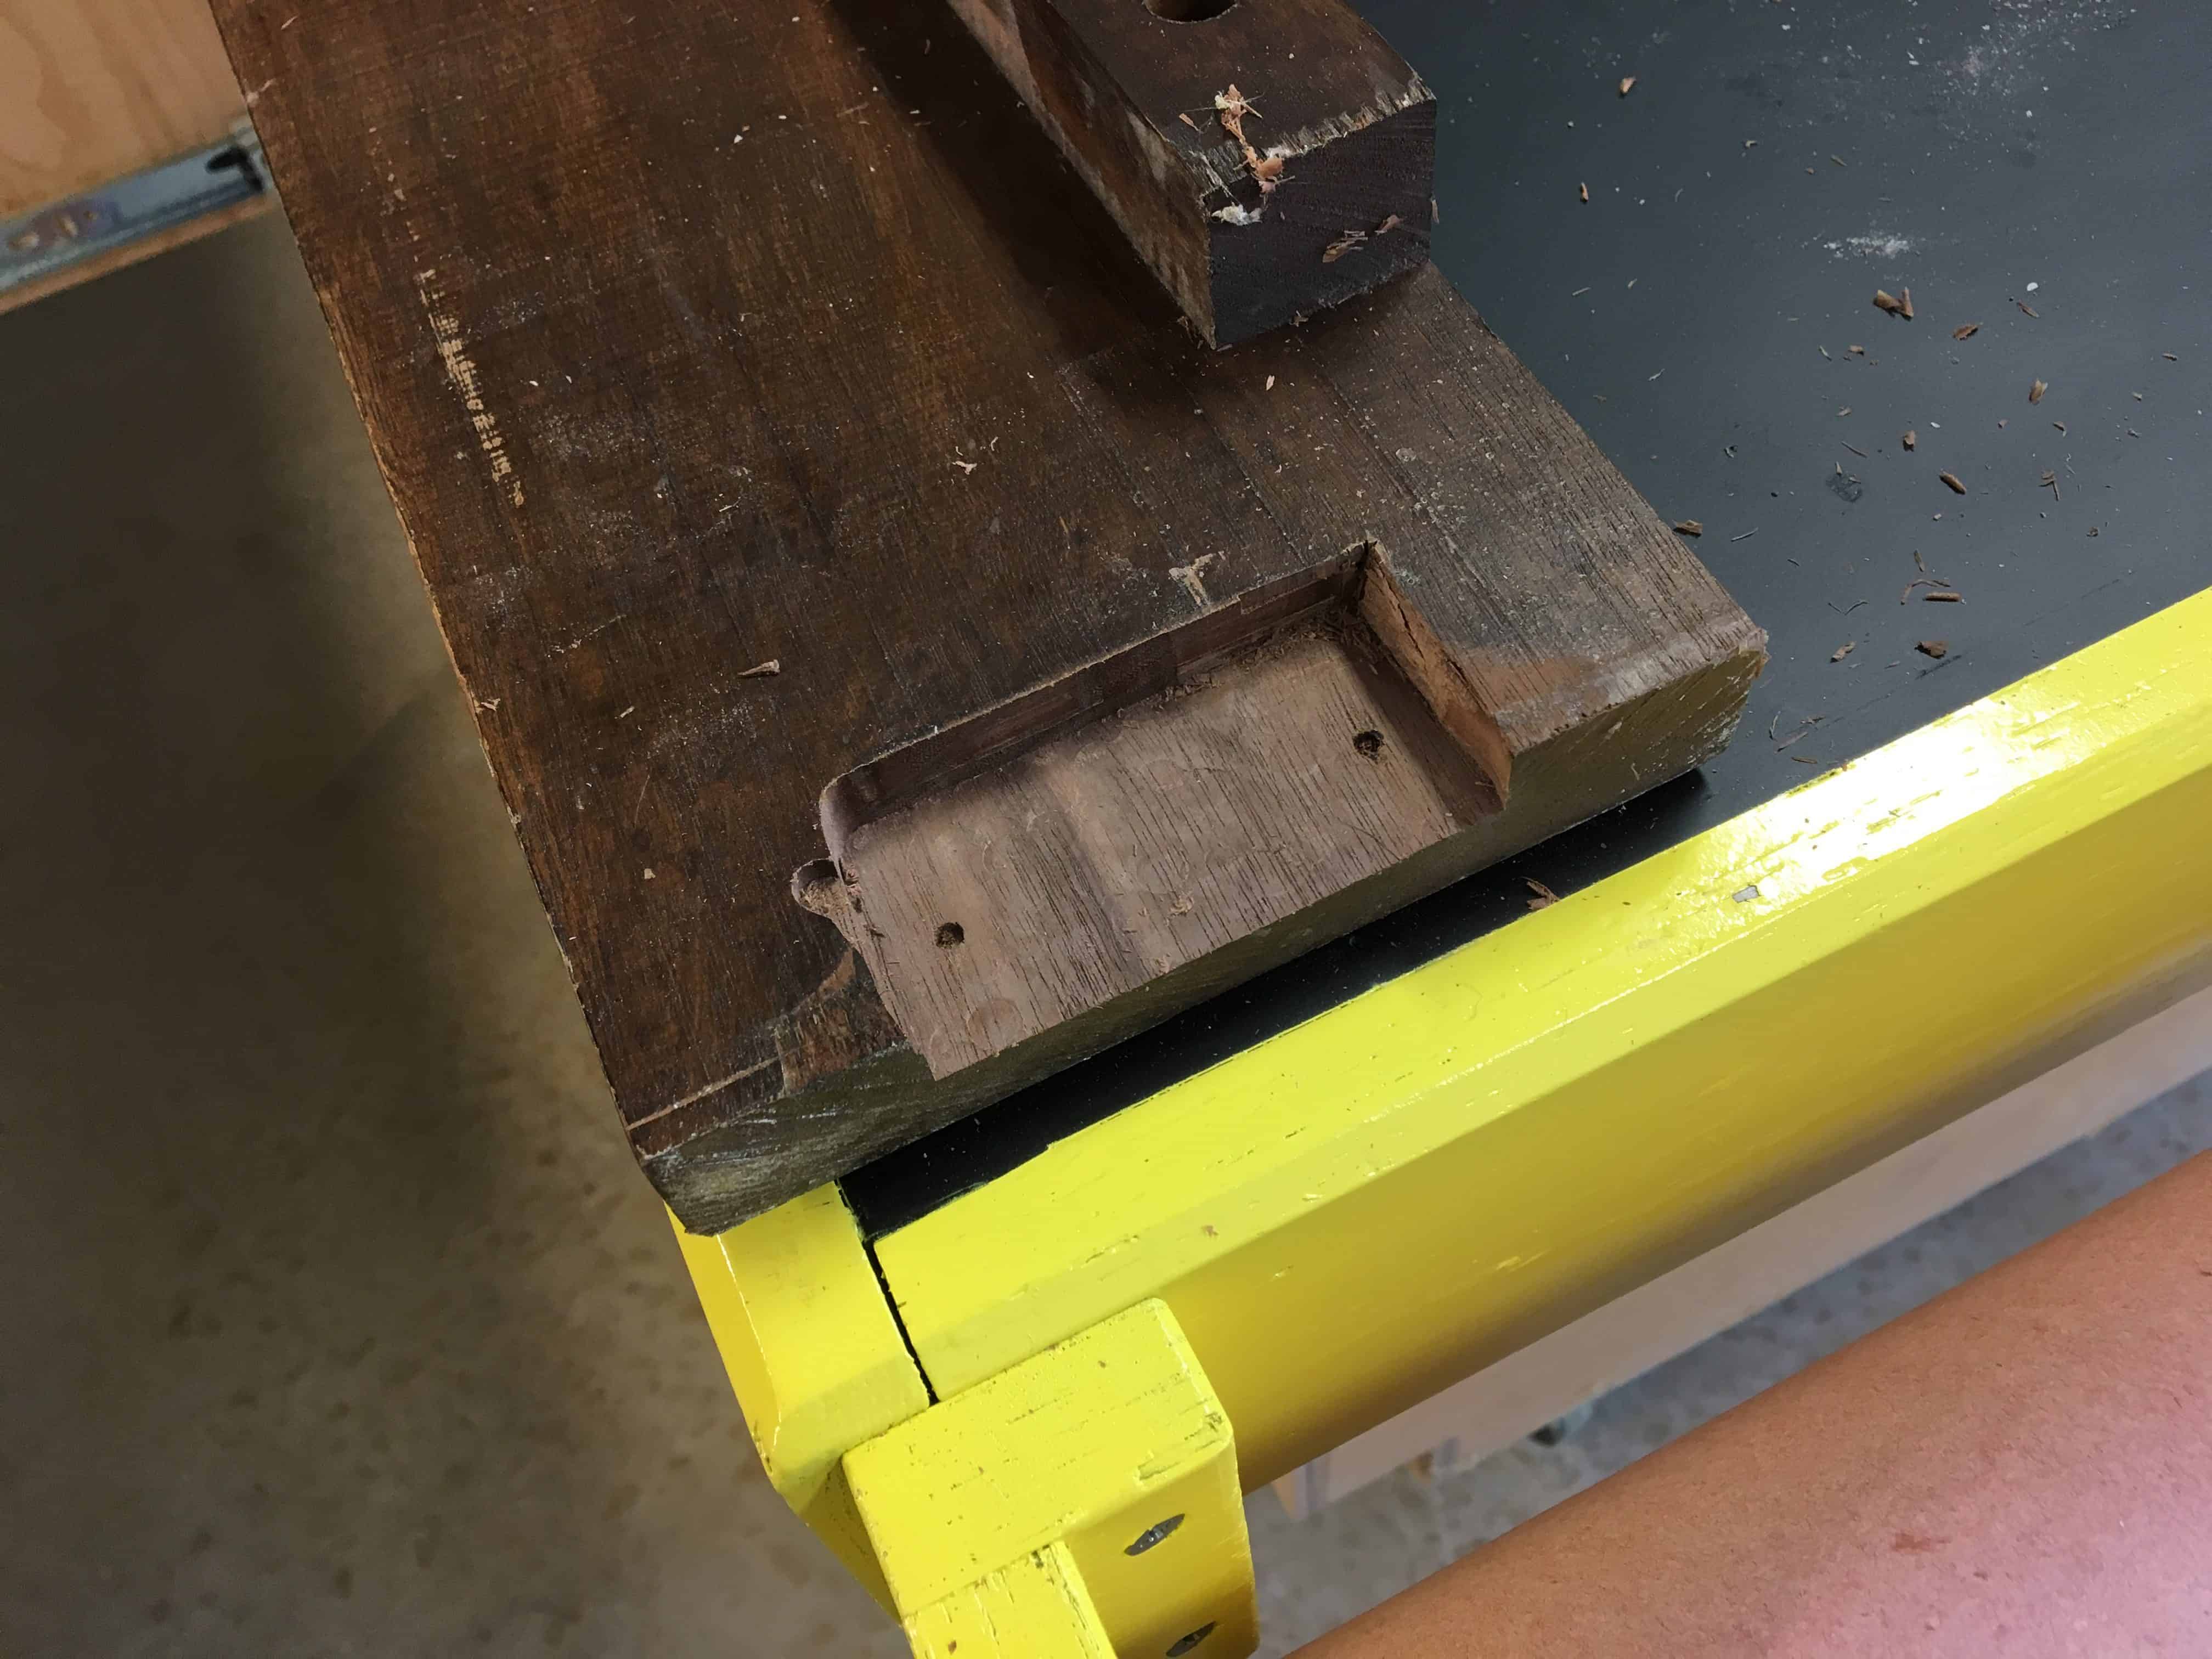
Step 1: Hollow out the broken area with a router.
The next step of this furniture repair was to cut out a section of wood to fill this hole. I cut it as close to the hole as I could get it and with a little sanding it was a decent fit. I didn’t pay any attention to the wood grain, type or direction of the wood… knowing that this would never be seen. There was a screw hole and a a few gaps still left. I filled those with wood glue and walnut shavings from the band saw.
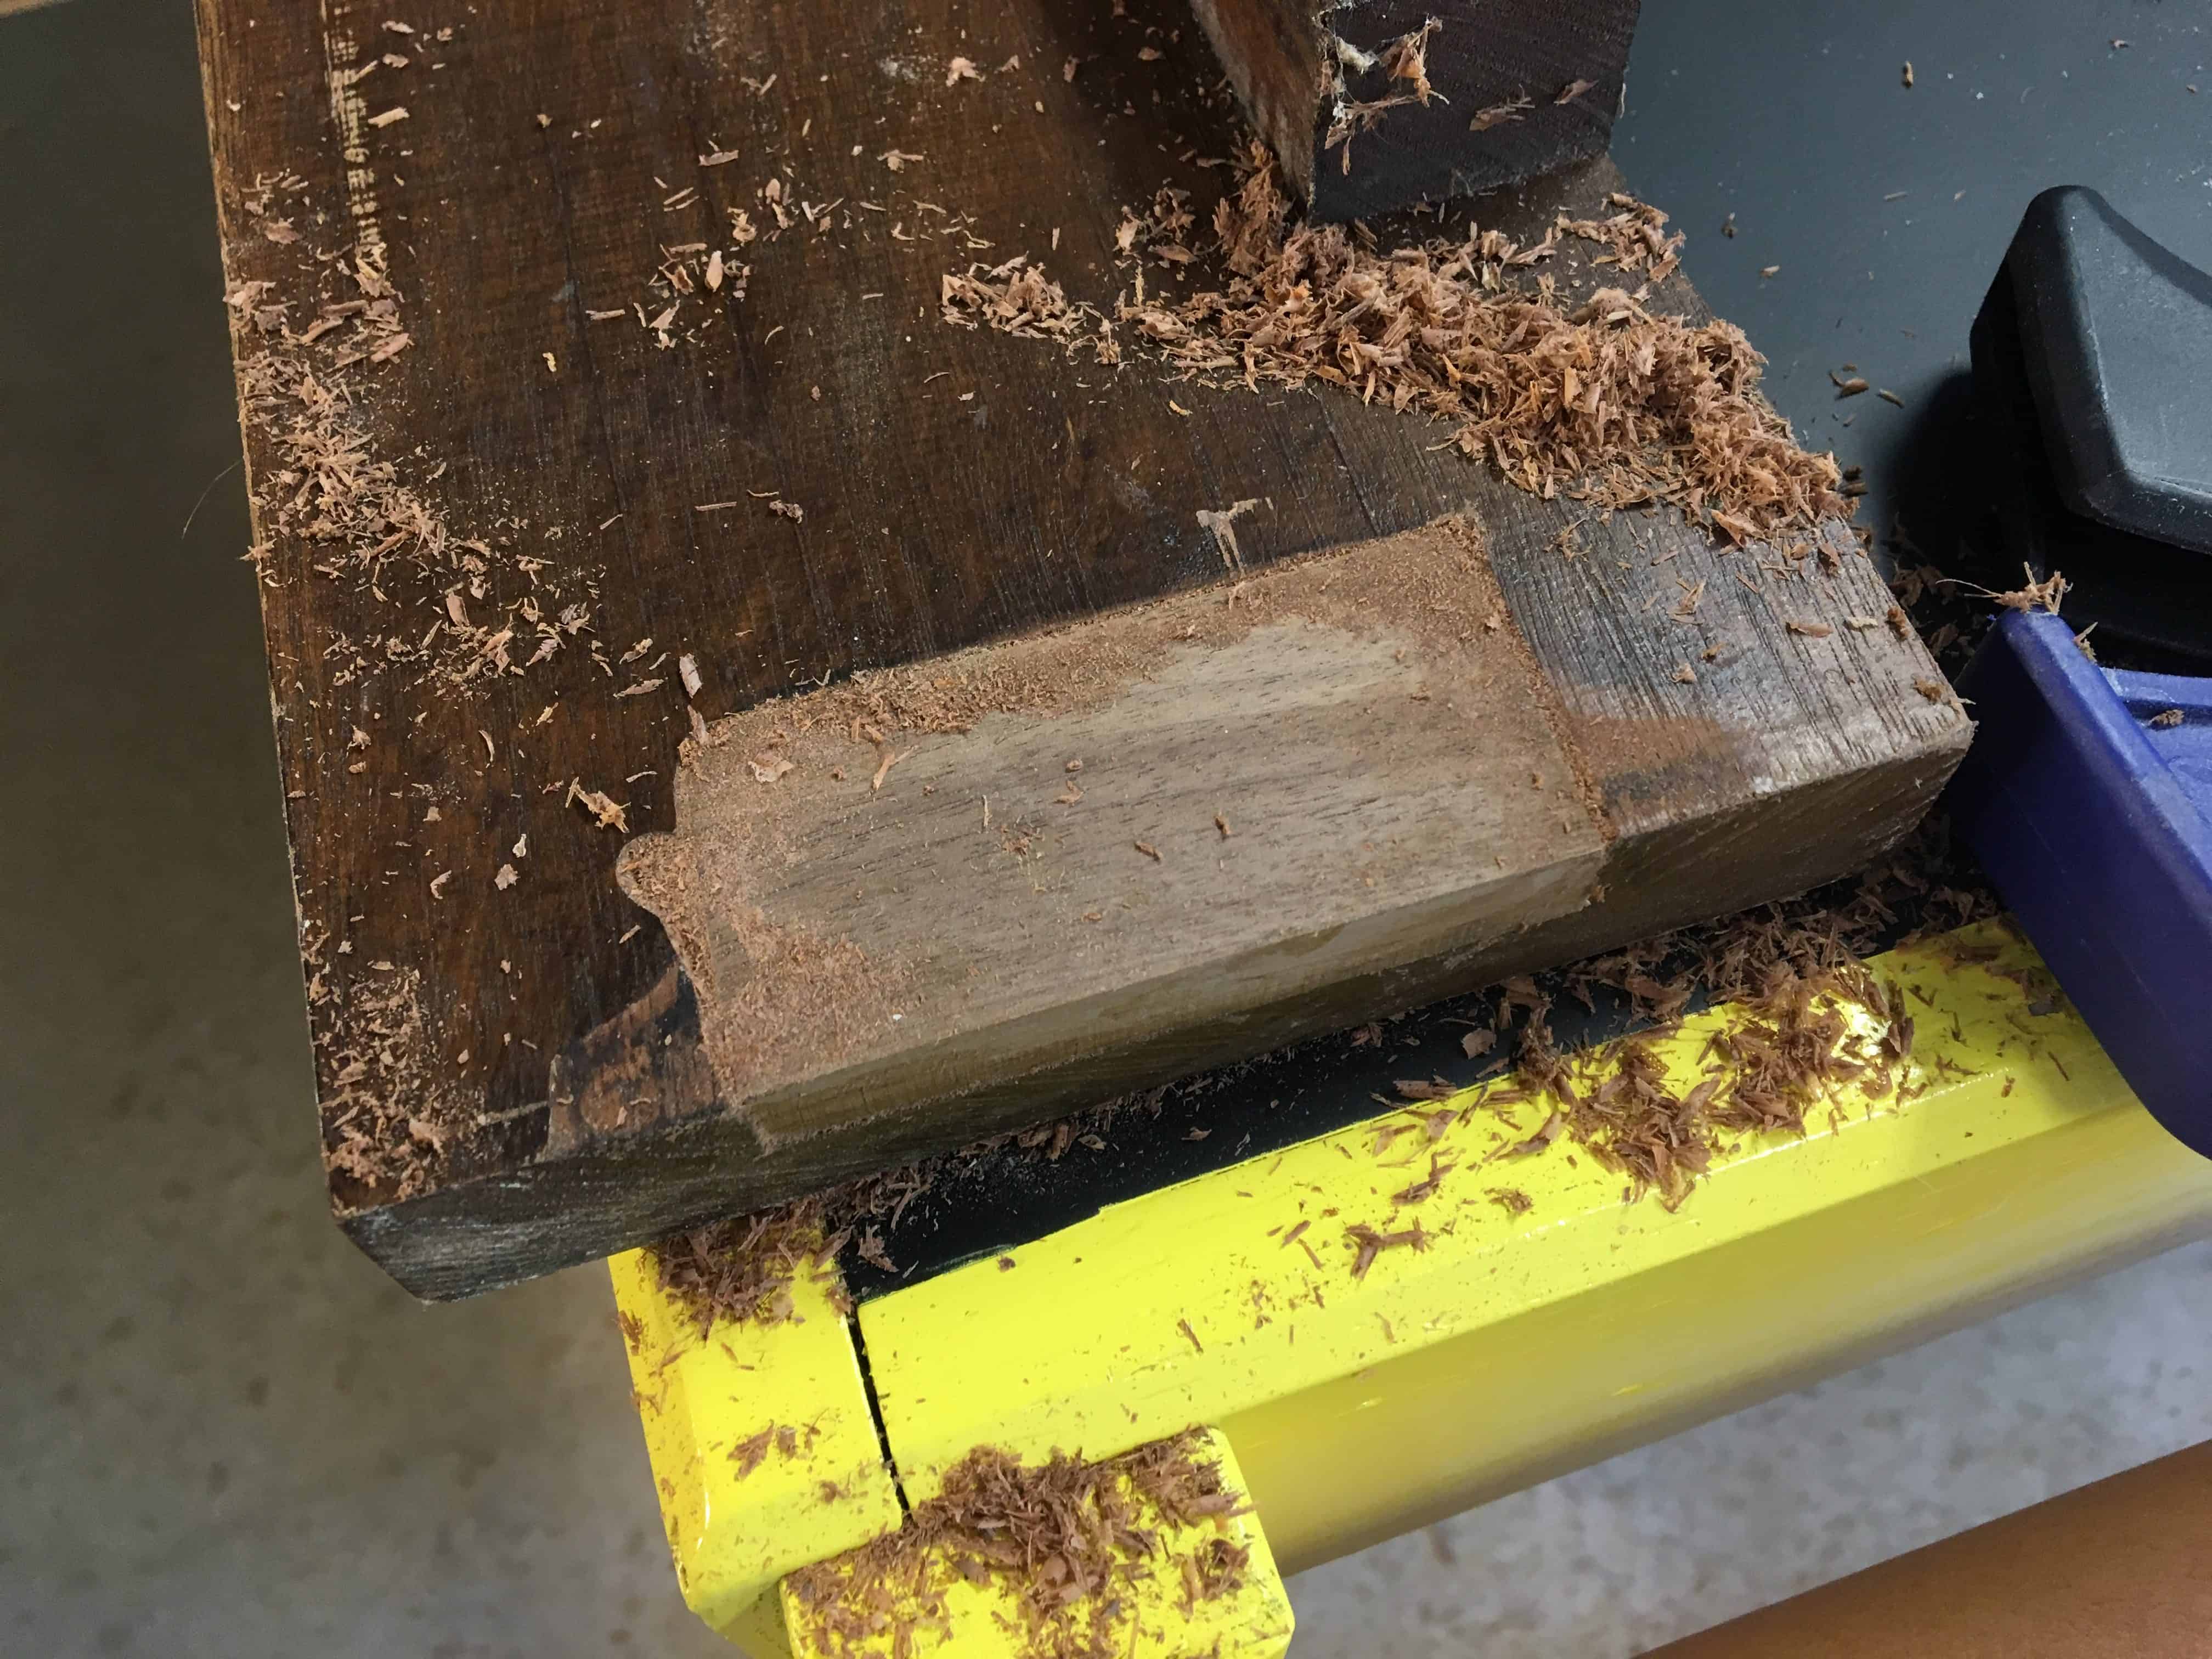
Step 2: I cut a small block of scrap walnut to go into the hollowed out area.
All that was left to do was clamp it and let the glue dry for a few hours.
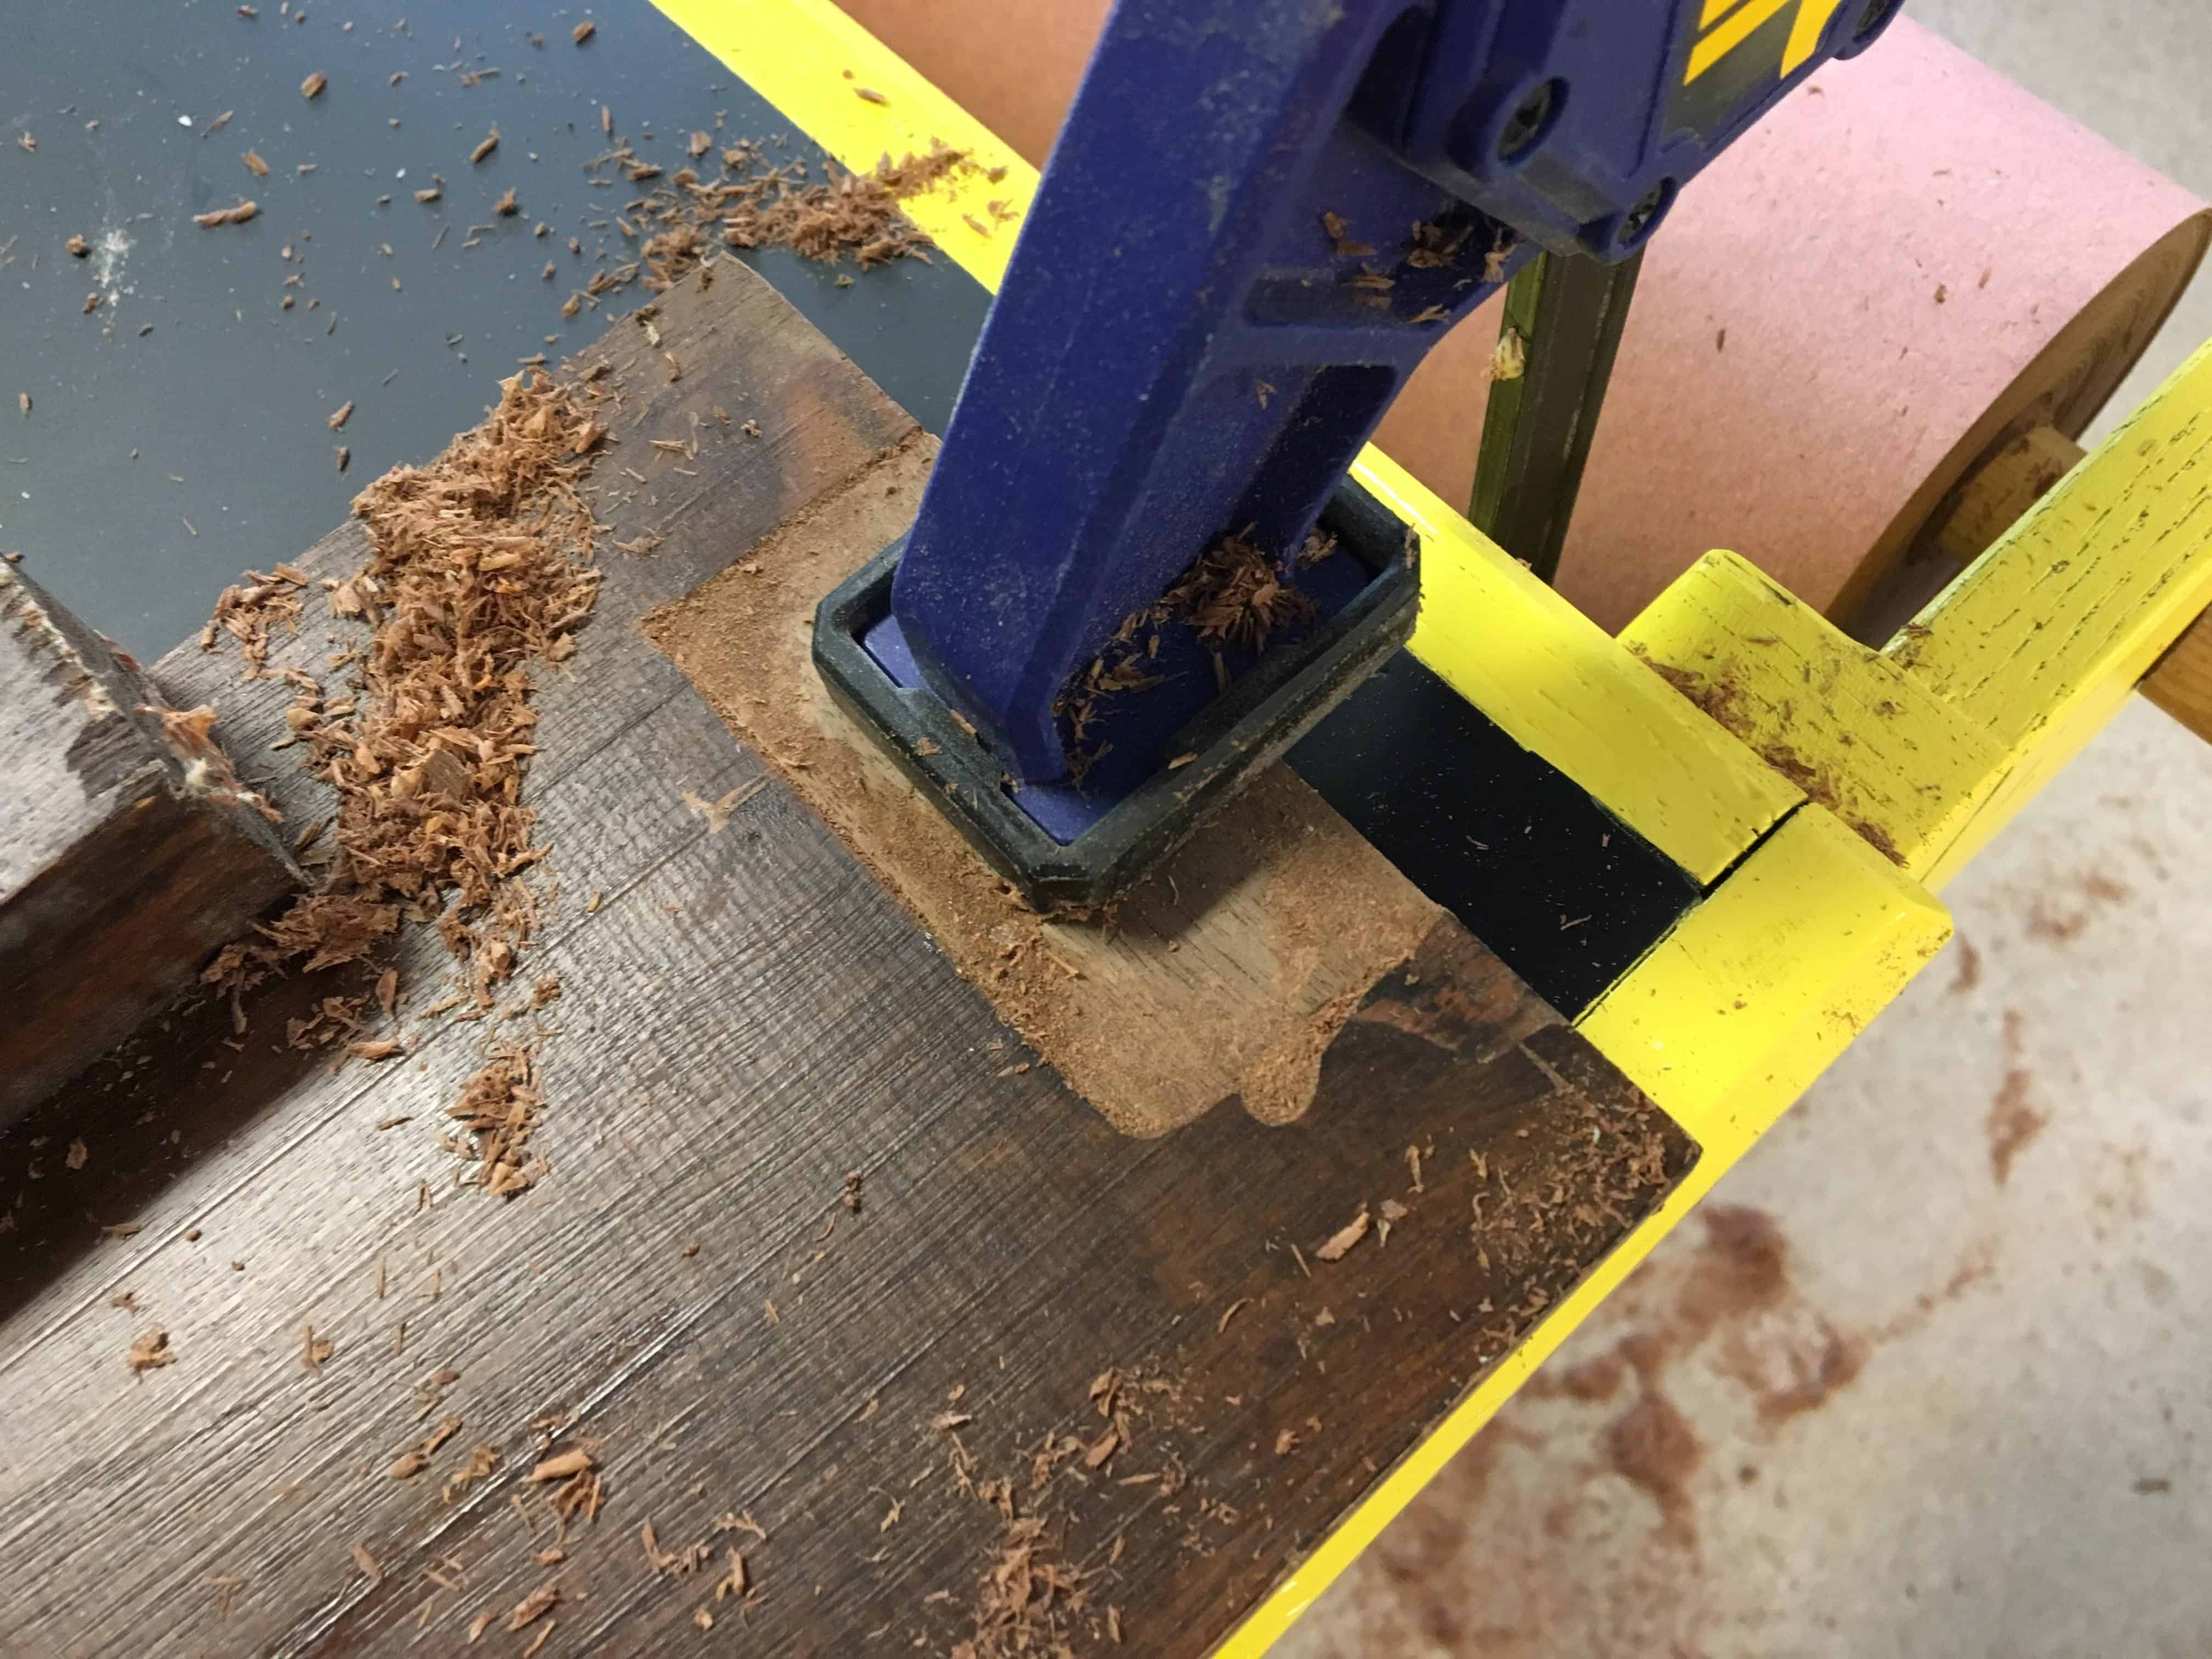
Step 3: I clamped it up and let the glue dry overnight.
The next day, after the glue had dried I shot a couple of coats of spray lacquer over the repaired section. This wasn’t necessary, but I felt better about it.
Step 4: Add spray lacquer to the repair.
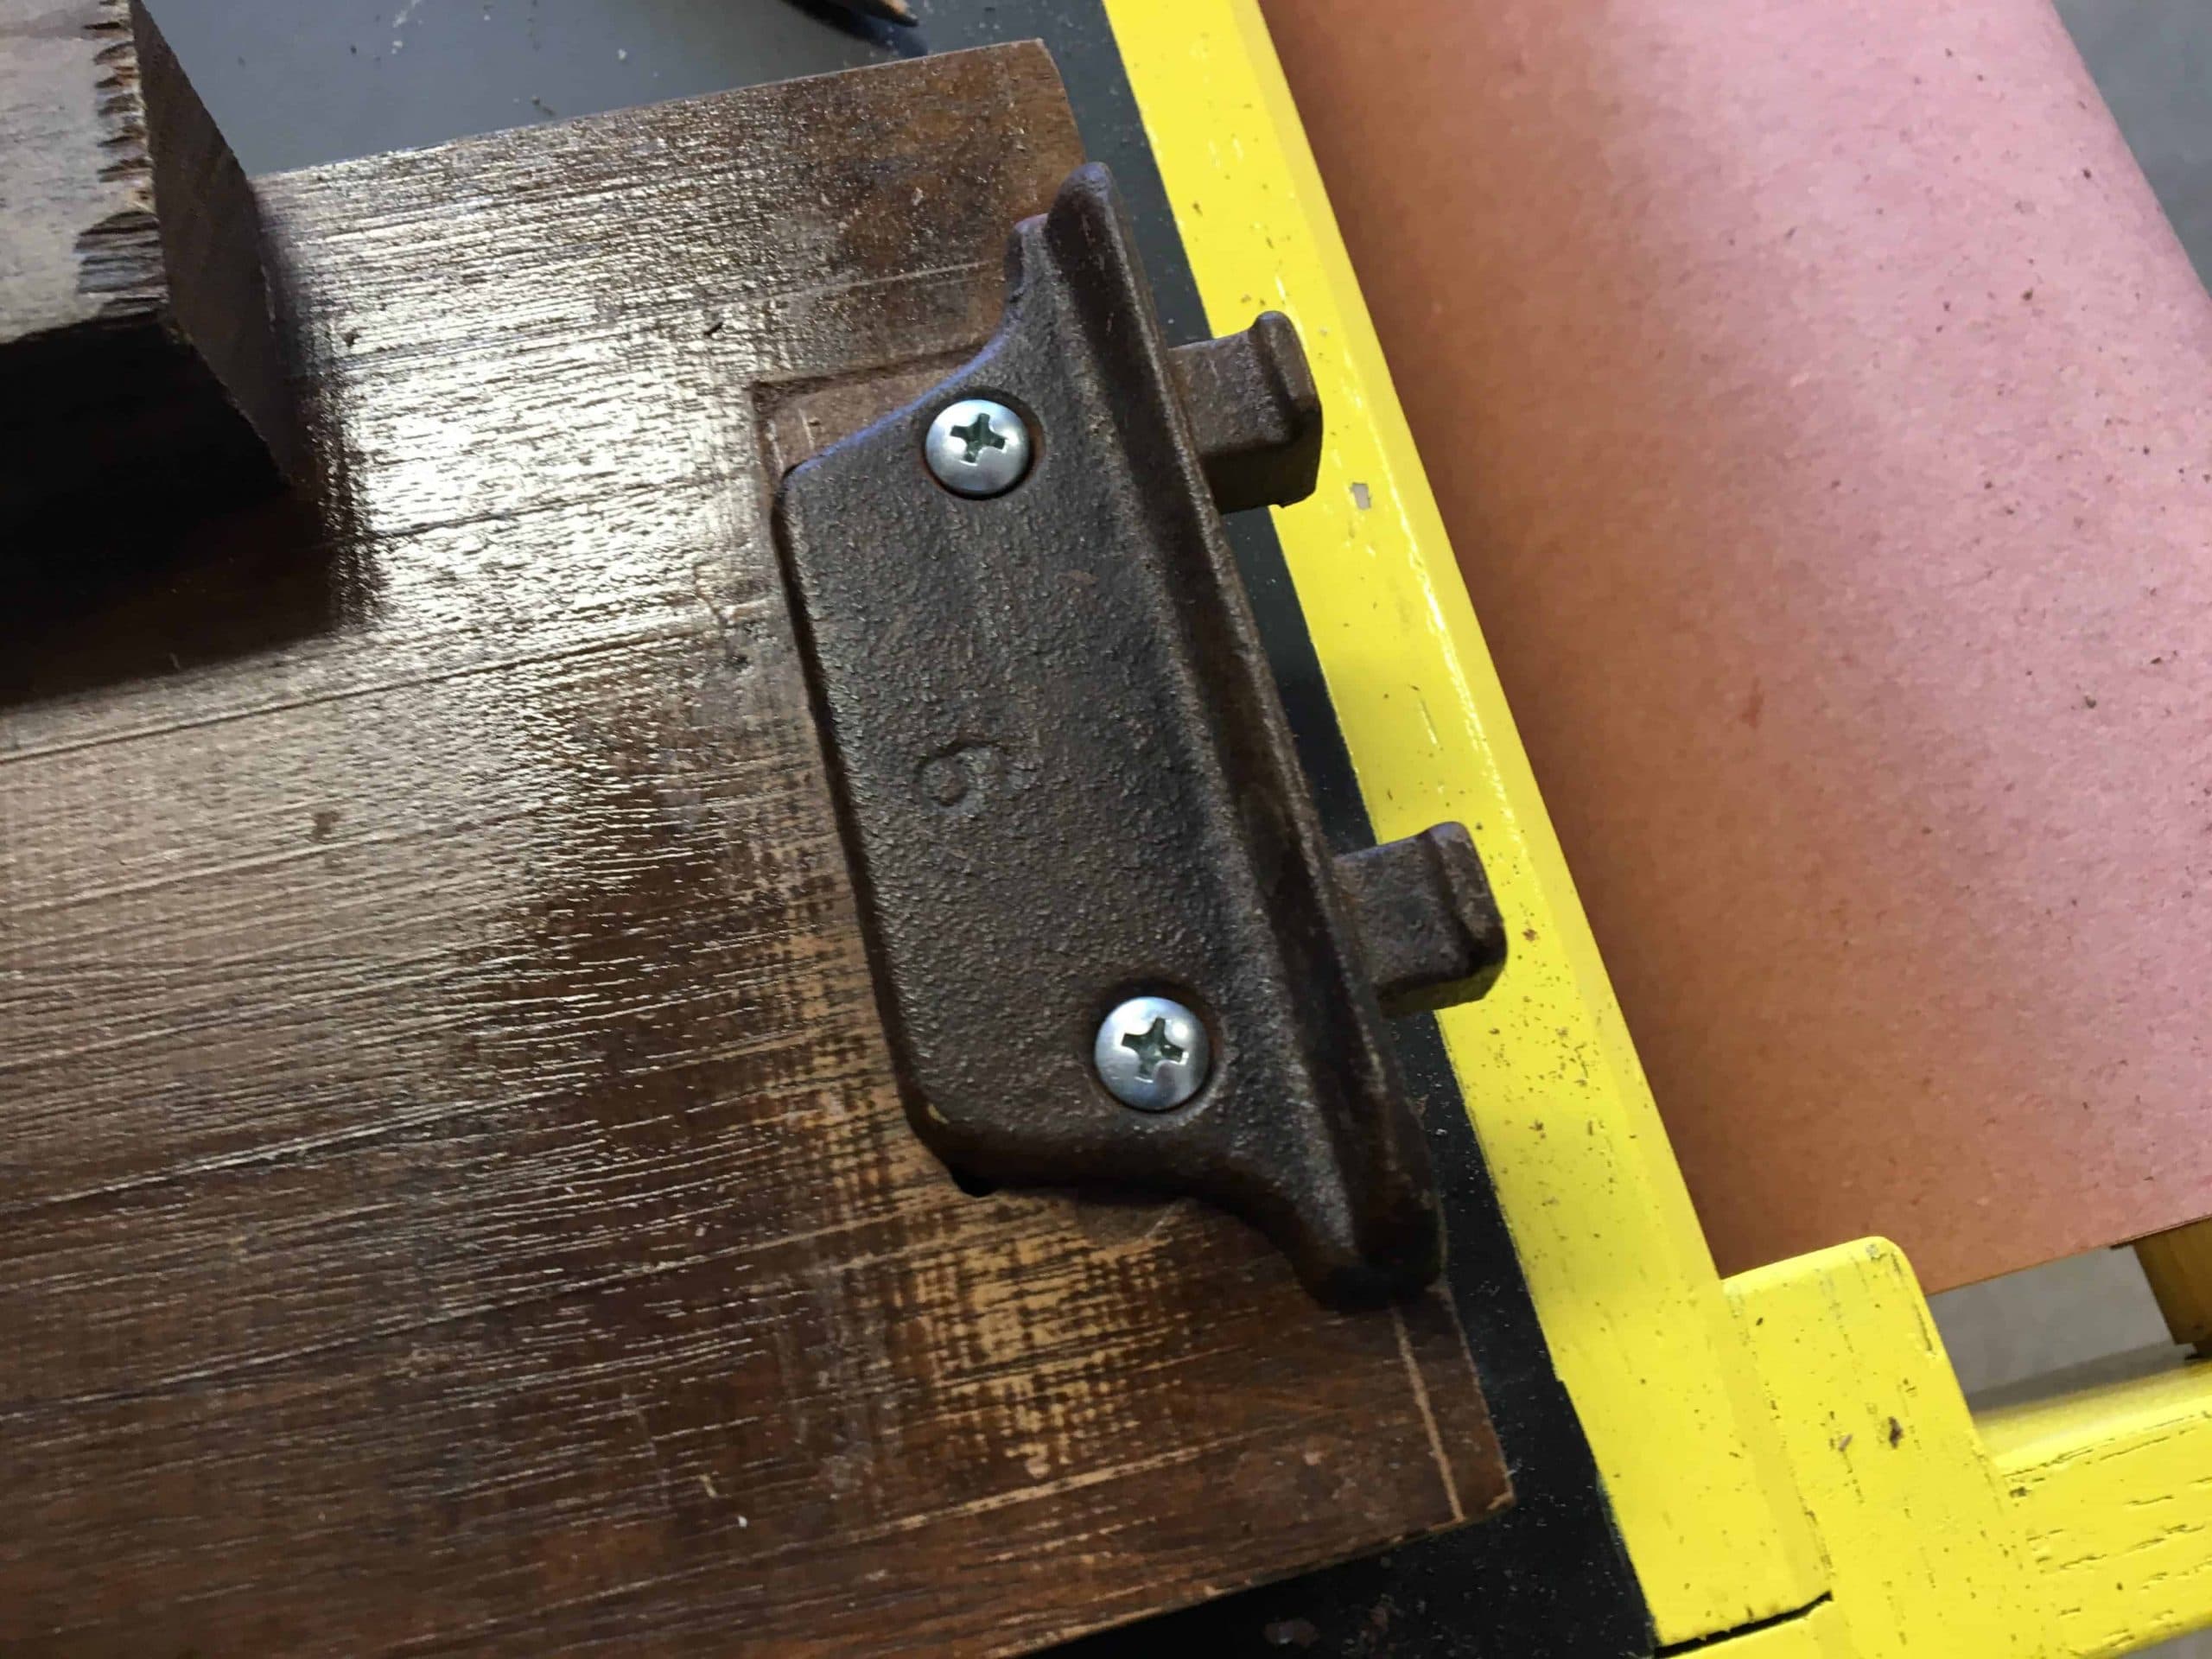
The hardware that was originally on the bed was quite weird, but I still needed to reuse it. It had a slot on the bottom side of it designed fit into the wood. Honestly this is probably what it broke in the first place, because this slot obviously weakens the structure of the frame. But to keep it original I went ahead and slotted the wood using a Dremel and a straight edge.
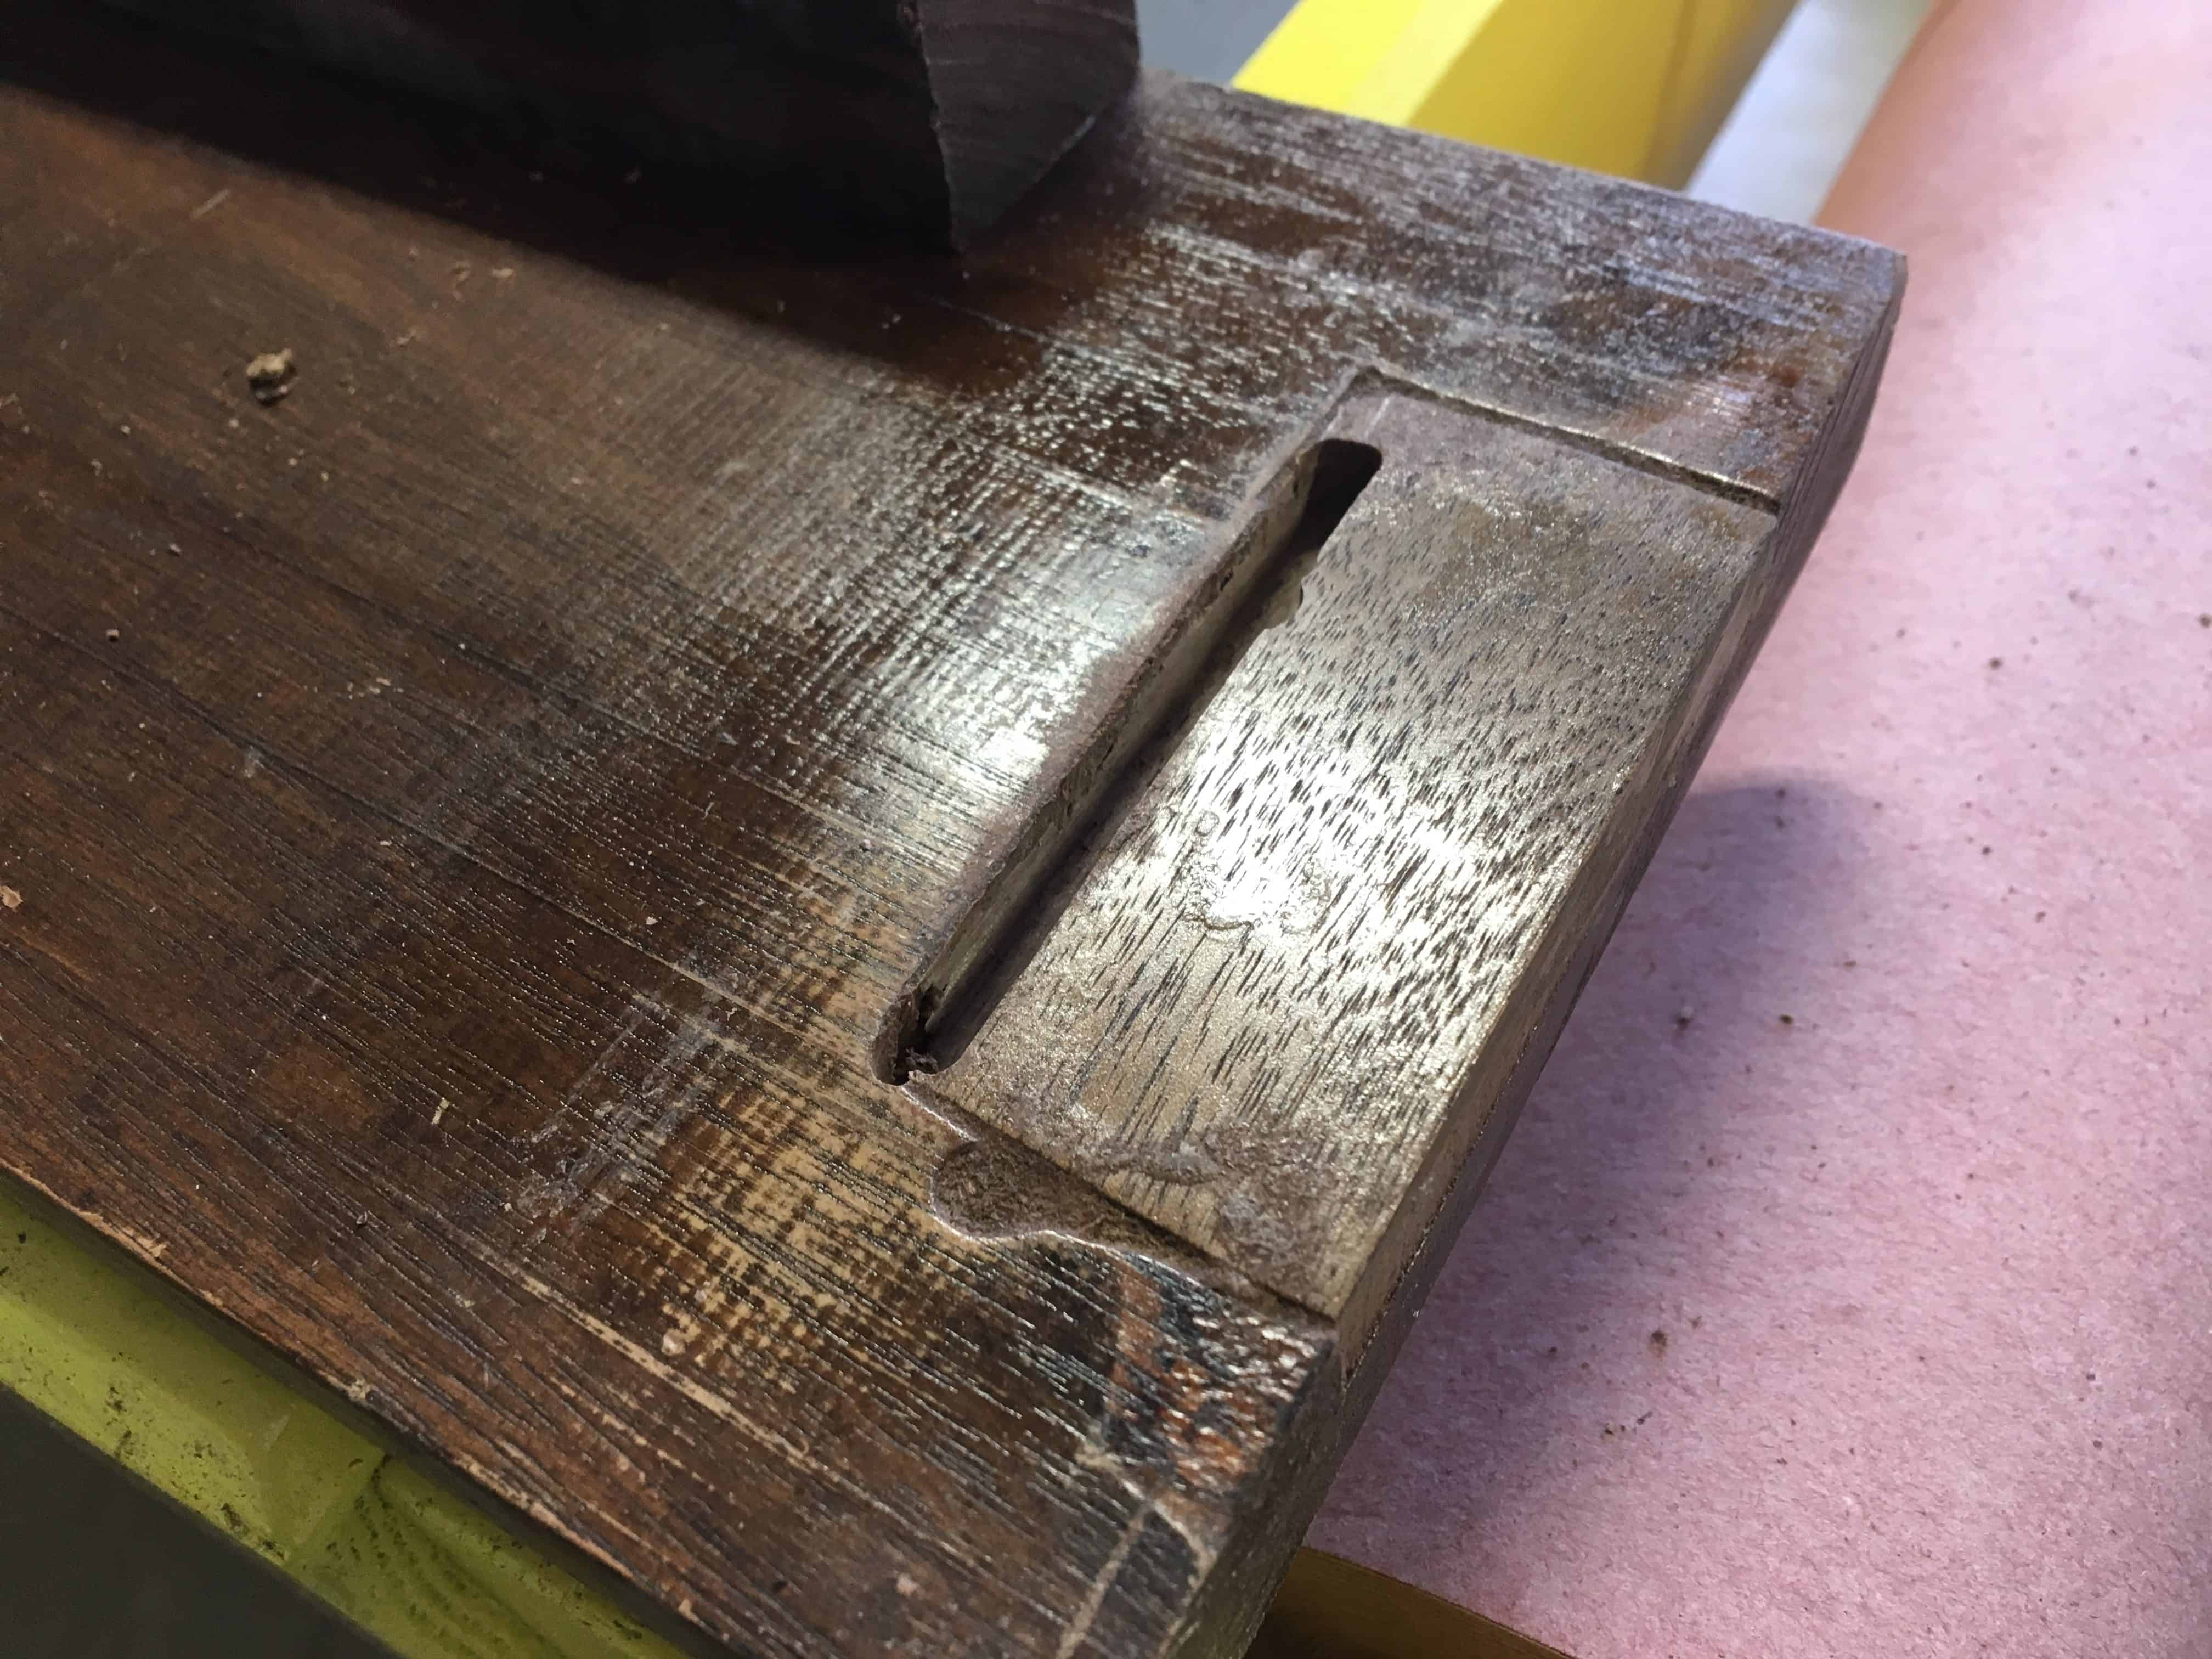
Step 5: Add a slot for the hardware
Then finally I drilled two holes for the hardware.
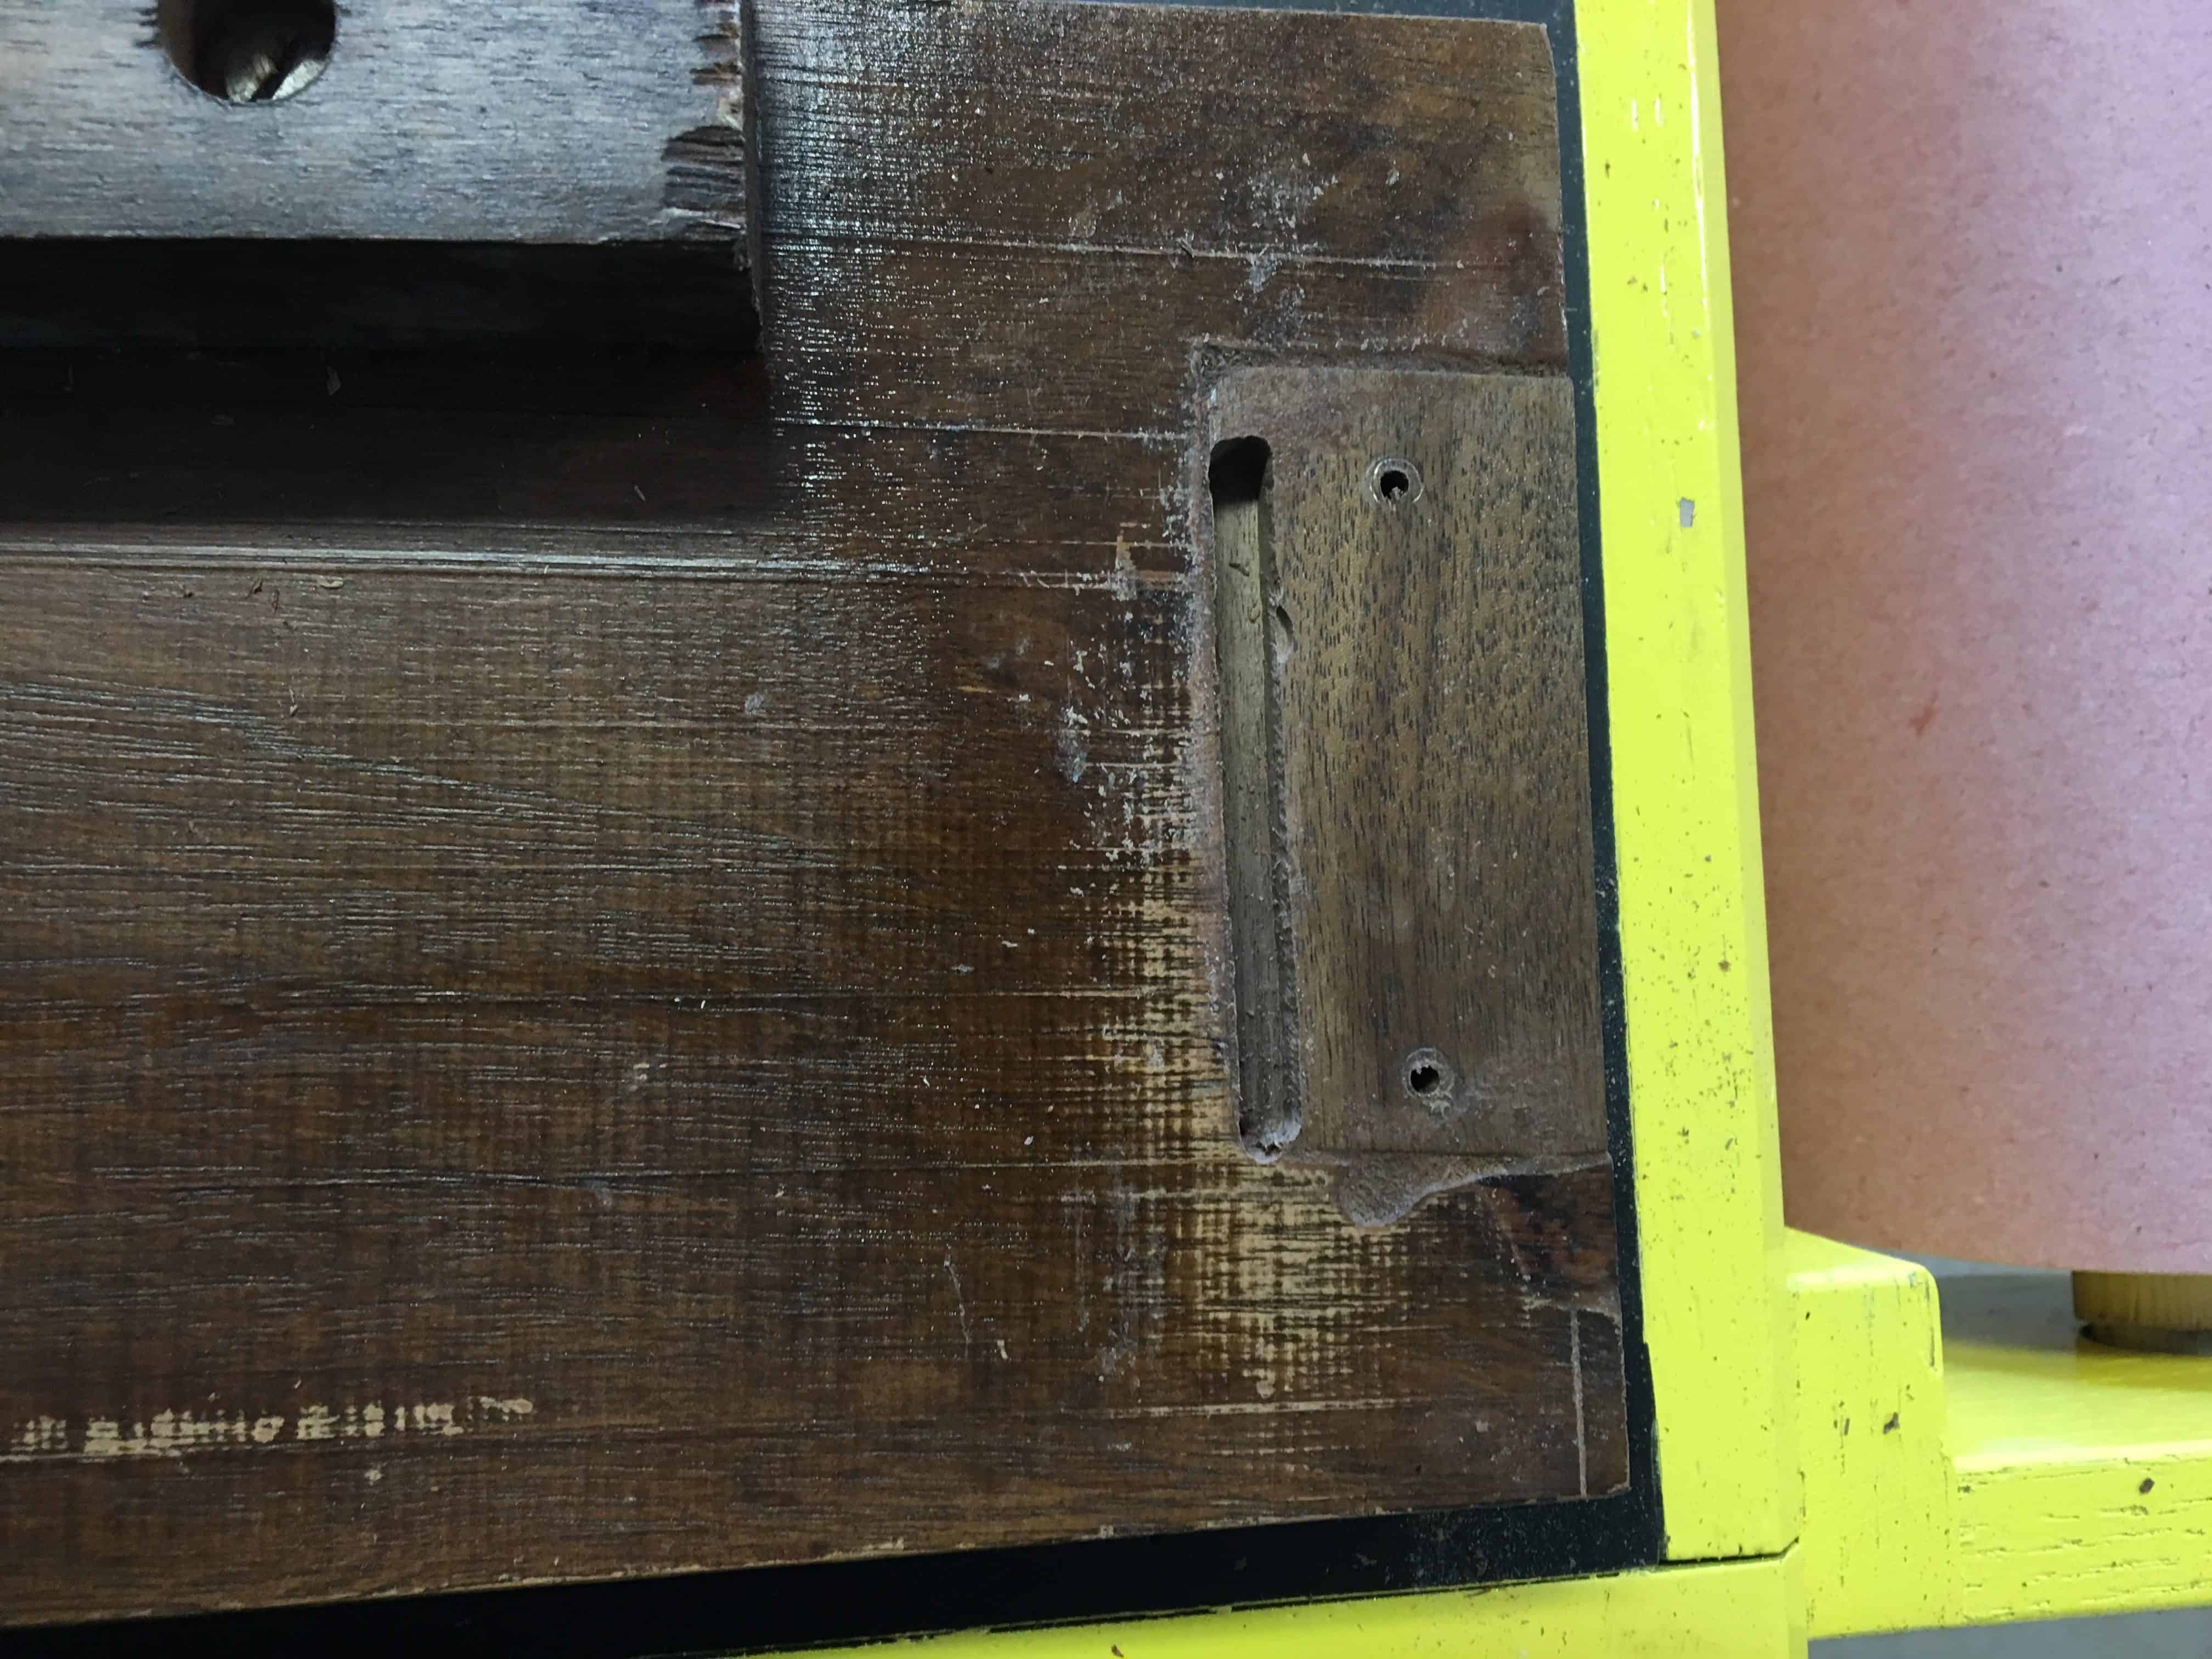
Step 6: Drill the holes for the hardware
Finally, I installed the hardware. Good as new!


4.5
0.5