Blog
How to Reset an Arduino Using Code
One question I get asked regularly is just how to reset an Arduino using code. This sounds like something you should never need to do. But resetting an Arduino programmatically is most likely something you will eventually encounter in your Arduino journey!
There are two basic types of resets for the Arduino (or just about any type of microcontroller).
- Hardware Reset – Physically connecting some pins or pressing a button to reboot the Arduino.
- Software Reset – Executing a code snippet that causes the Arduino to restart.
Arduino Hardware Reset
Before we learn how to reset an Arduino using code, let’s talk about the hardware reset. It’s actually possible to use the hardware rest from code too!
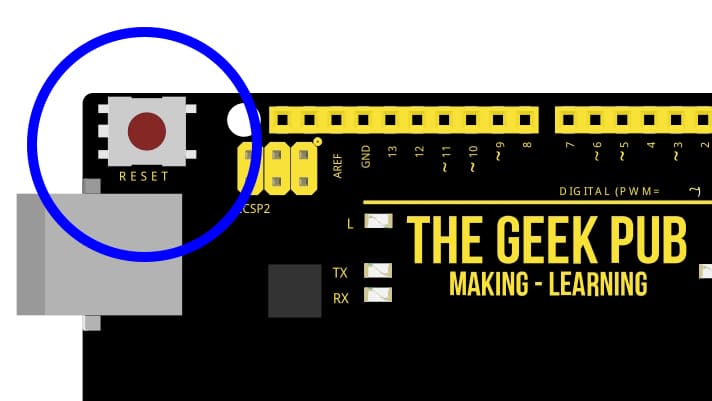
On the Arduino you will find a button. Pressing this button is a hardware reset. Almost all of us have done this at some point in time. Either our code hangs or something just isn’t behaving properly. Press the reset button!
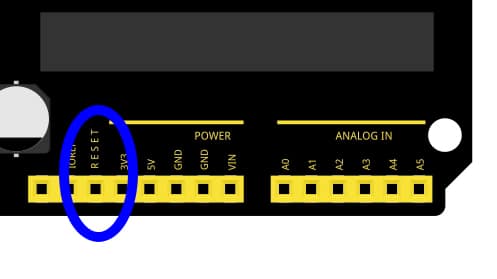
However, you might not have noticed, but one of the Arduino input pins is also labeled reset! By grounding this pin out you will reboot the Arduino! This pin was originally intended to allow Arduino Shields to have their own reset button. Especially if they covered the on-board reset button and made it hard (or even impossible) to press while the shield is installed.
Although we’ll get to the true software reset here in a minute, resetting an Arduino programmatically can be done using this pin! All we need to do is bring the pin low in code using one of the Arduino’s digital pins.
I have also found this pin extremely helpful when I have a Raspberry Pi or a master Arduino running other Arduino via I2C or SPI. If the RPi or the master Arduino lose connection, they can simply ground the reset pin to restart the slave device to attempt a recovery.
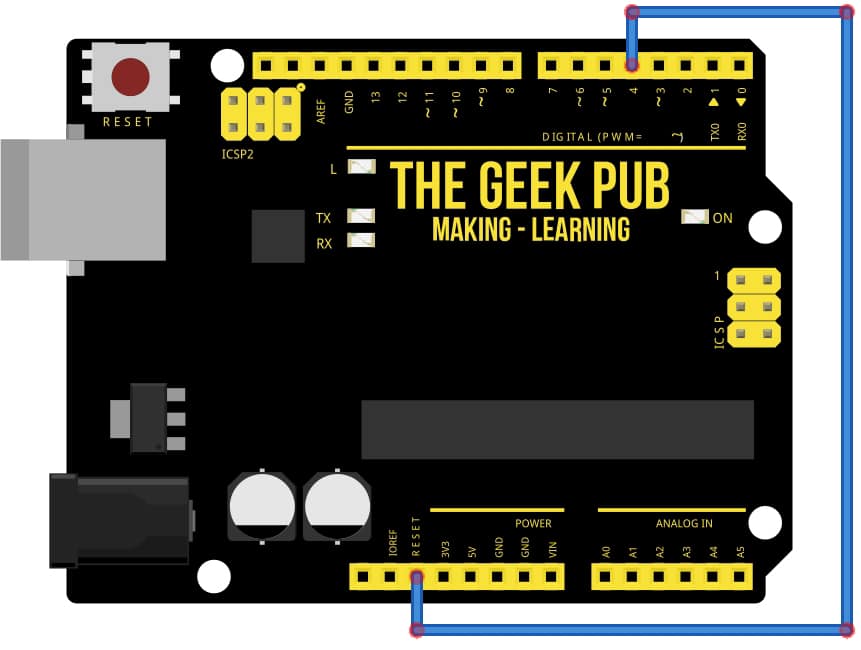
Wiring Diagram to Software Reset the Arduino using Code
As mentioned, how to reset an Arduino using code AND hardware is possible with the following super simple wiring. Simply connect any digital pin to the reset pin. In our caser, we will use digital pin 4.
Hardware Reset the Arduino using Code
Now we can hardware reset the Arduino using code!
NOTE: If anything goes wrong, just remove the wire between pin 4 and the reset pin. This will stop the Arduino from being in a reset loop.
/*
 *  HOW TO RESET AN ARDUUINO USING CODE: HARDWARE RESET
 *  By: TheGeekPub.com
 *  More Arduino Tutorials: https://www.thegeekpub.com/arduino-tutorials/
 */

int ResetPin = 4;

void setup() {
  digitalWrite(ResetPin, HIGH); // Set digital pin to 5V
  pinMode(ResetPin, OUTPUT); // Set the digital pin to an OUTPUT pin
  Serial.begin(9600);
}
void loop()
{
  // A little fun countdown!  3..2..1
  Serial.println("3..");
  delay(1000);
  Serial.println("2..");
  delay(1000);
  Serial.println("1..");
  delay(1000);
  Serial.println("We are now resetting Arduino programmatically");
  Serial.println();
  delay(1000);
  digitalWrite(ResetPin, LOW); // This command grouunds the reset pin and reboots the Arduino
  Serial.println("If it worked, the Arduino will never output this line!");
}
If this code is working properly, the Arduino will never reach or execute the following line of code.
Serial.println("If it worked, the Arduino will never output this line!");
On your serial console, the output should appear like the following:
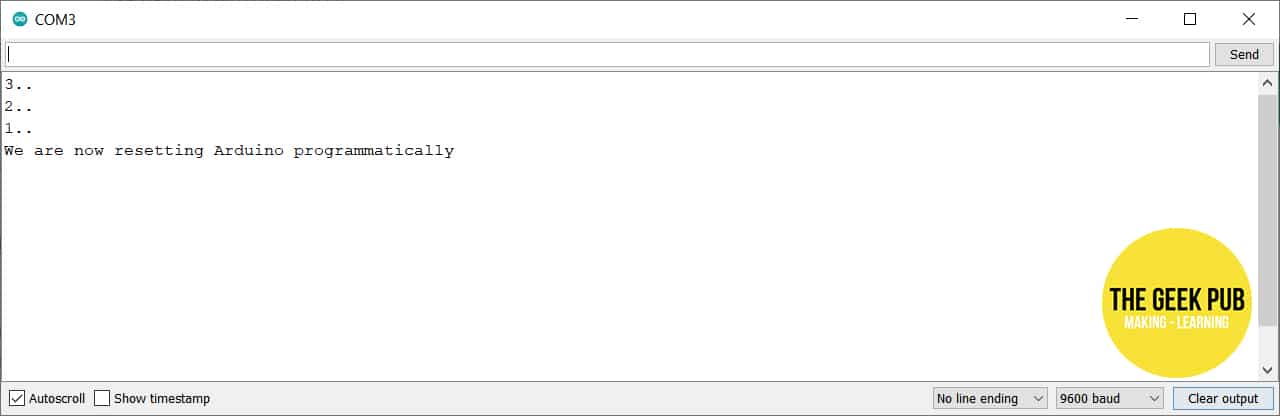
If you are seeing “If it worked, the Arduino will never output this line!” this line on the screen something is wrong. Check your wiring and code and re-upload it if there is a mistake. If you’re getting errors uploading code, remove the wire connecting pin 4 to the reset line. This will stop the Arduino from being stuck in a reset loop.
Arduino Software Reset
Now let’s learn how to reset the Arduino using code. No really: Using only code. A software reset!
Software Reset the Arduino using Code
This code simply calls the software reset function rather than grounding the reset pin. Keep in mind that if the software crashes on your Arduino, the software reset will never execute. Understand the limitations of a software reset!
/*
 *  HOW TO RESET AN ARDUUINO USING CODE: SOFTWARE RESET
 *  By: TheGeekPub.com
 *  More Arduino Tutorials: https://www.thegeekpub.com/arduino-tutorials/
 */

void(* resetFunc) (void) = 0; // create a standard reset function

void setup() {
  Serial.begin(9600);
}
void loop()
{
  // A little fun countdown!  3..2..1
  Serial.println("3..");
  delay(1000);
  Serial.println("2..");
  delay(1000);
  Serial.println("1..");
  delay(1000);
  Serial.println("We are now resetting Arduino programmatically");
  Serial.println();
  delay(1000);
  resetFunc();  // reset the Arduino via software function
  Serial.println("If it worked, the Arduino will never output this line!");
}
The output again should like identical to the hardware reset code above.
Next Steps
You can now move on to the next tutorial or head back the index!