Blog
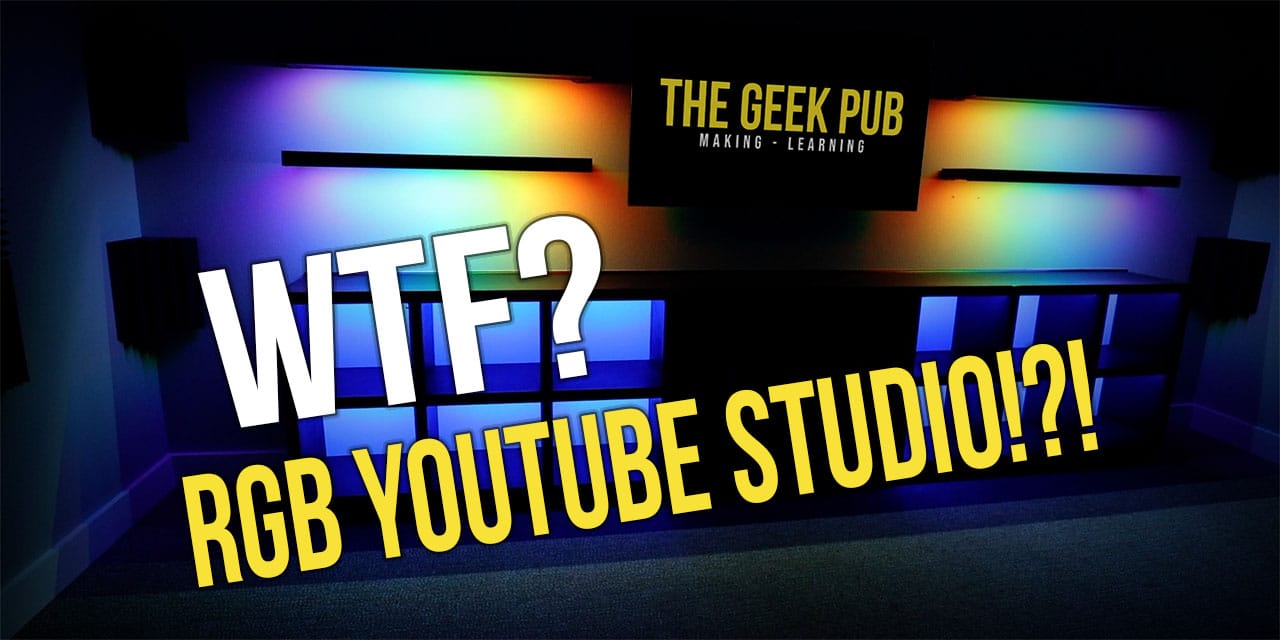
Building a YouTube Studio Set
I’ve always wanted a dedicated studio room and set for the talking portions of my videos. For years I have resorted to setting my camera up in the hot garage, in my kitchen, or even just in front of my computer in my home office. Well no more! Today, The Geek Pub is building a YouTube Studio Set, dedicated for the purpose. This set will also be the home of our new podcast called GeekBits.
Watch the YouTube Studio Build Video
Building the YouTube Studio: Goals
As this is something I’ve been thinking about for some time, and planning off and on for a year or more, I had several goals for building my new YouTube set by the time I got around to being able to do it.
Goal 1: The set had to be very functional. I’ve seen lots of YouTube studios on other channels that are “gaudy” and elaborate, but at the end of the day they’re just not very useful. If I have to spend 30 minutes getting it ready every time I want to use it, no thanks.
Goal 2: The studio needed to have a TV or large monitor I could place in view of the camera. In many cases it will just show The Geek Pub logos. In other cases I can use this monitor to show artwork, extra details, or even zoomed in closeups of what I am discussing.
Goal 3: It has to be transformable. You read that right. The set needs to be able to transform into different sets. Should I ever decide to do different channels I’d like to be able to easily make the set look significantly different by changing the props, décor, and lighting to match a different topic. Additionally the set will be used for The Geek Bits Podcast and therefore should be able to support both close up shots and wide angle shots when three or more people are in the scene.
Goal 4: It needs to be affordable. That’s even more important with today’s ridiculous lumber prices. I can’t afford to spend thousands of dollars on this. In fact, I wound up cost reducing the set after my first YouTube set design came out to be well over $1000 in just lumber.
Building a YouTube Set can be a loft goal. And indeed for some, building the set from scratch may not be an option. But I hope you can learn from ideas what works and what doesn’t, and if nothing else help you buy the right furniture from Ikea or others.
Items Used in the Project
I’m always asked to provide links to all of the tools, parts, and materials I use in a project. Here’s a hand set of links to everything. A few of these are affiliate links, which means if you buy the item I get a small commission. It costs you nothing, but it really helps me out.
Tools:
- Bostitch Brad Nailer
- DeWalt Cordless Jigsaw
- DeWalt XR Impact Driver
- DeWalt Laser Level
- Sawstop Cabinet Saw
- Rockler Corner Clamps
Parts and Materials:
- Samsung 50 Smart TV
- 12×12 Acoustic Foam Panel
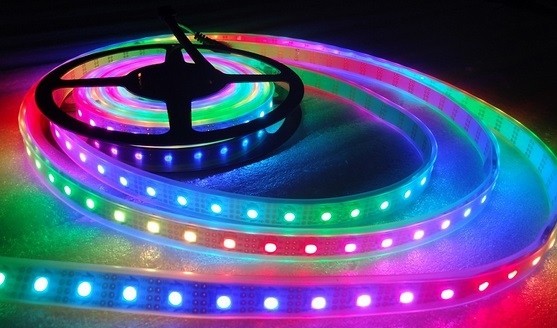
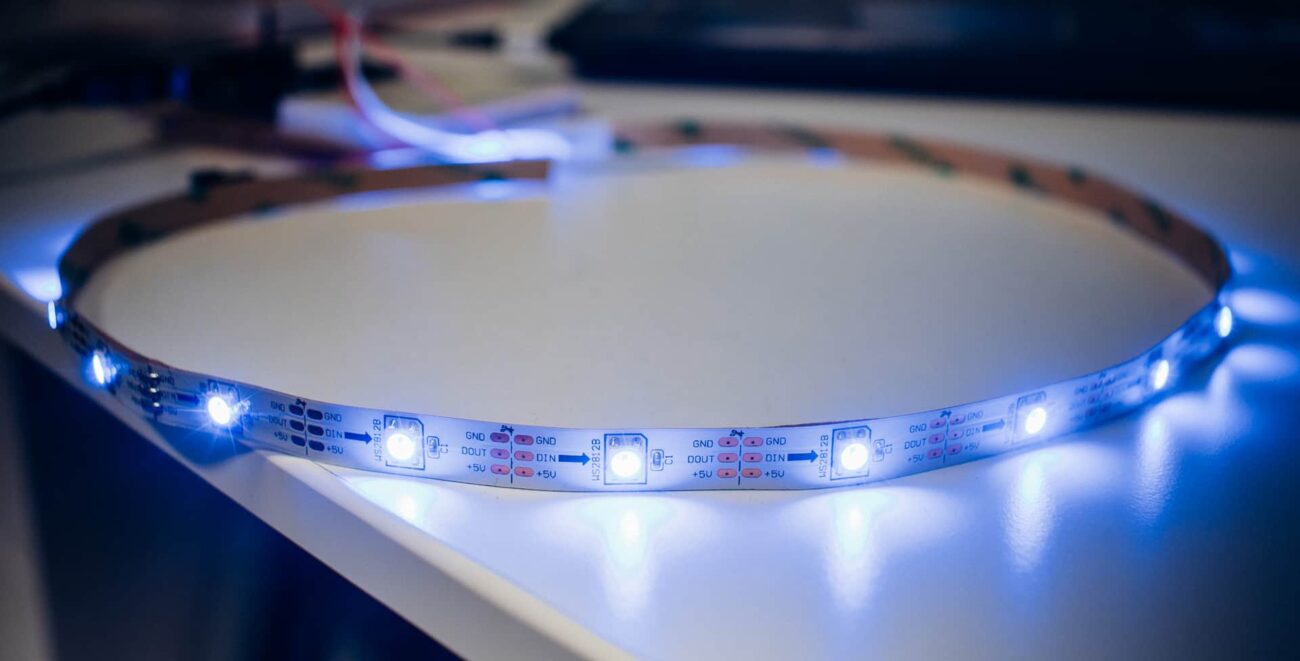
- WS2813 RGB Led Lighting Strips
- WS2813 Wi-Fi LED Controller
- WS2113 12V Power Supply
- Staples Office Chair
- 3M Super 77 spray adhesive
- Dap Spackling
- Sherwin Williams paint: Light French Gray
- Sherwin Williams paint: Tricorn Black
YouTube Set Designs Ideas (and Cost Reduction)
My first attempt at building a YouTube Studio design was pretty ambitious. Not from a standpoint that it would be hard to build, but from the standpoint it was going to cost more. In fact, a lot more than I had anticipated. We’re in August of 2021 and lumber prices are through the roof. A sheet of plywood that would normally cost $25, currently costs ~$100. So a set that requires $500 in lumber, now costs $2000.
In addition to the high cost, others who I shared the design with thought I should scale back the TVs from two, to one; and make it smaller. Relying more on props and decorations behind me for effect. I agreed and redesigned the set to something much less elaborate. However, I found a way to give it some punch! More on that later.
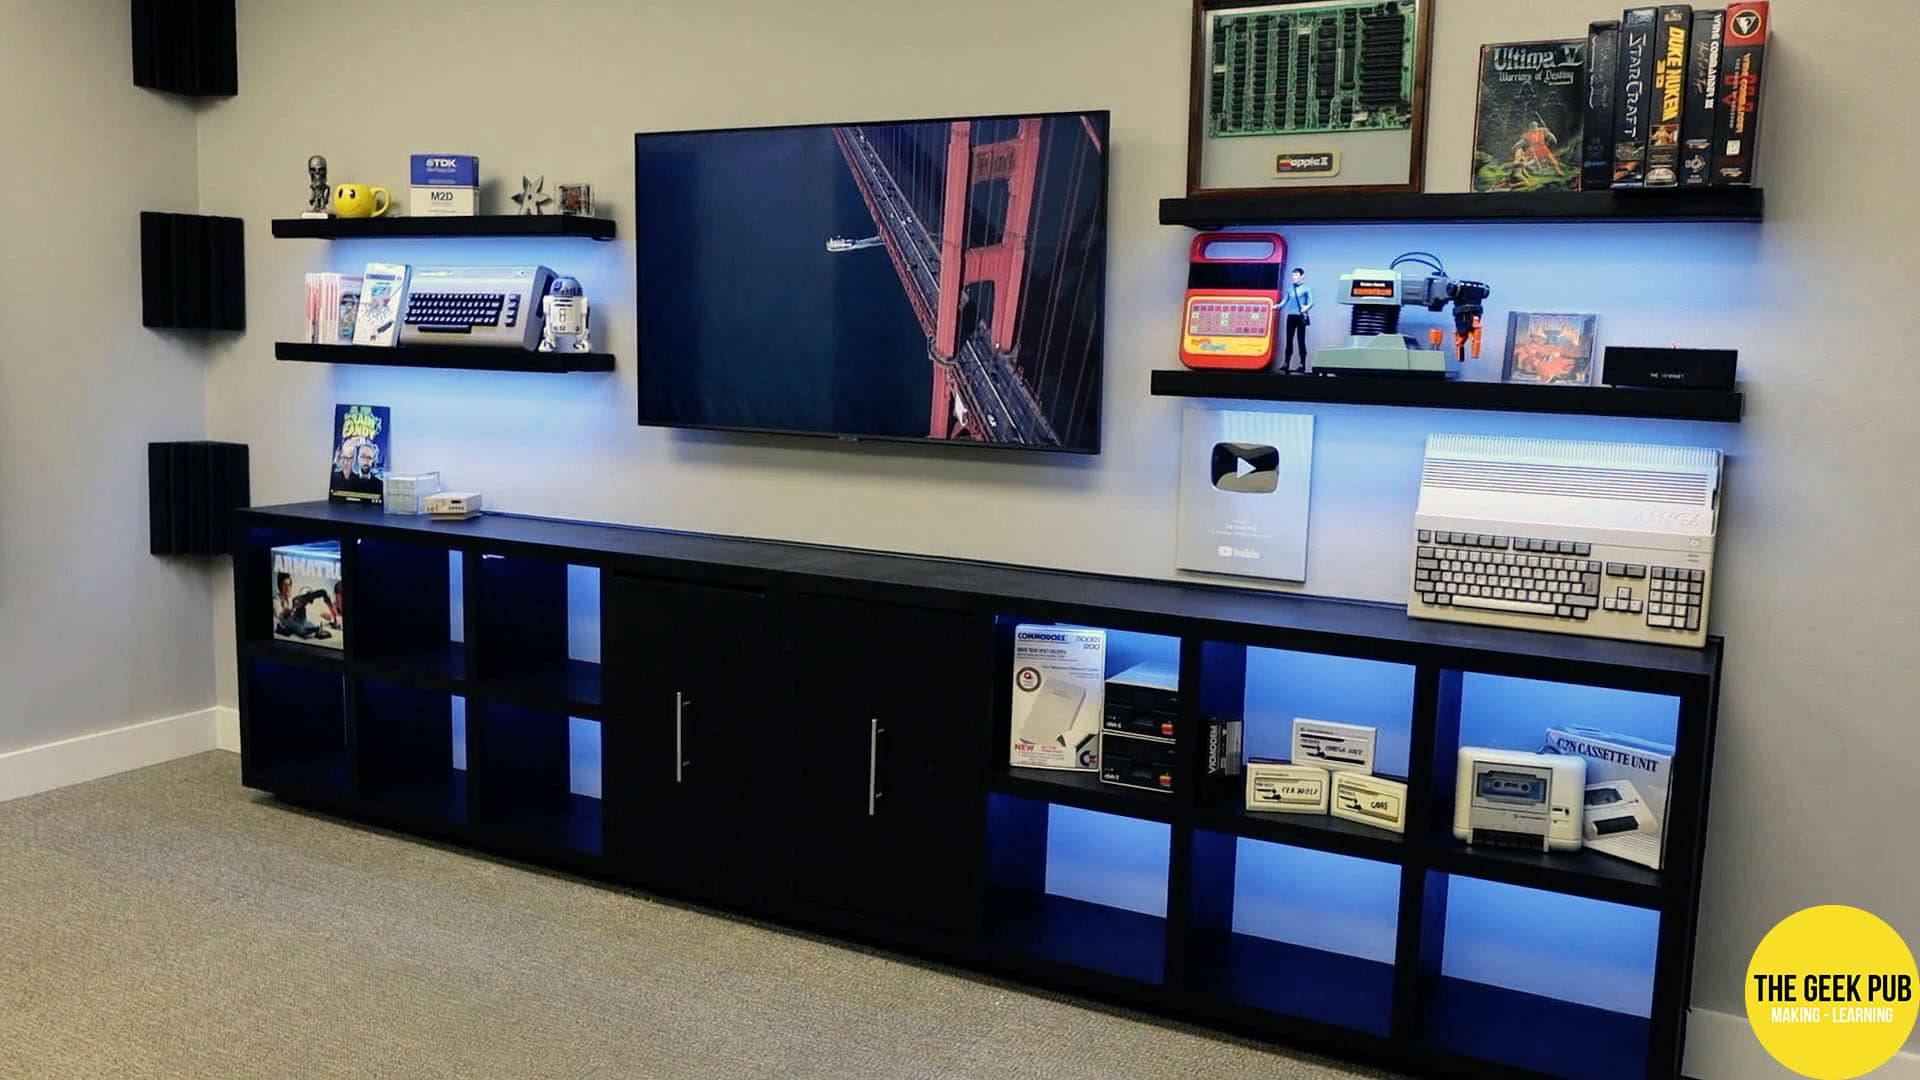
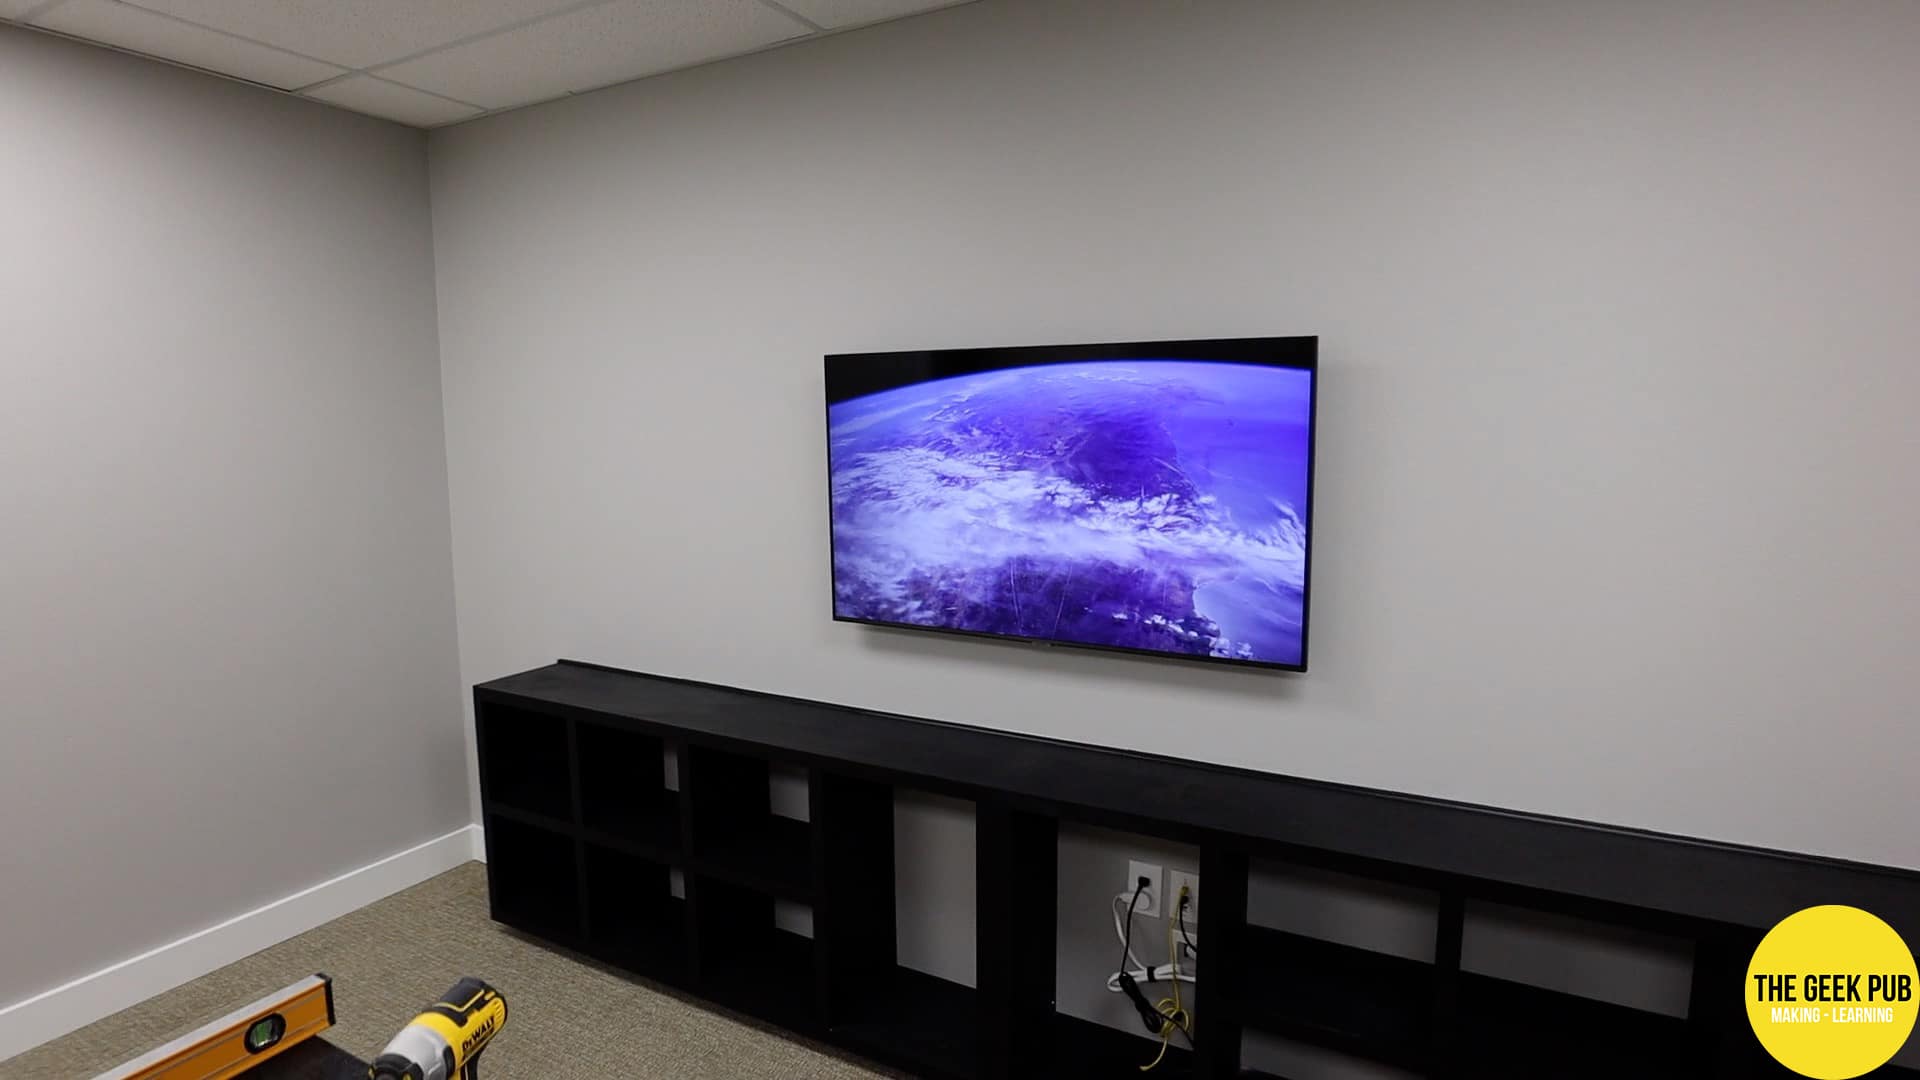
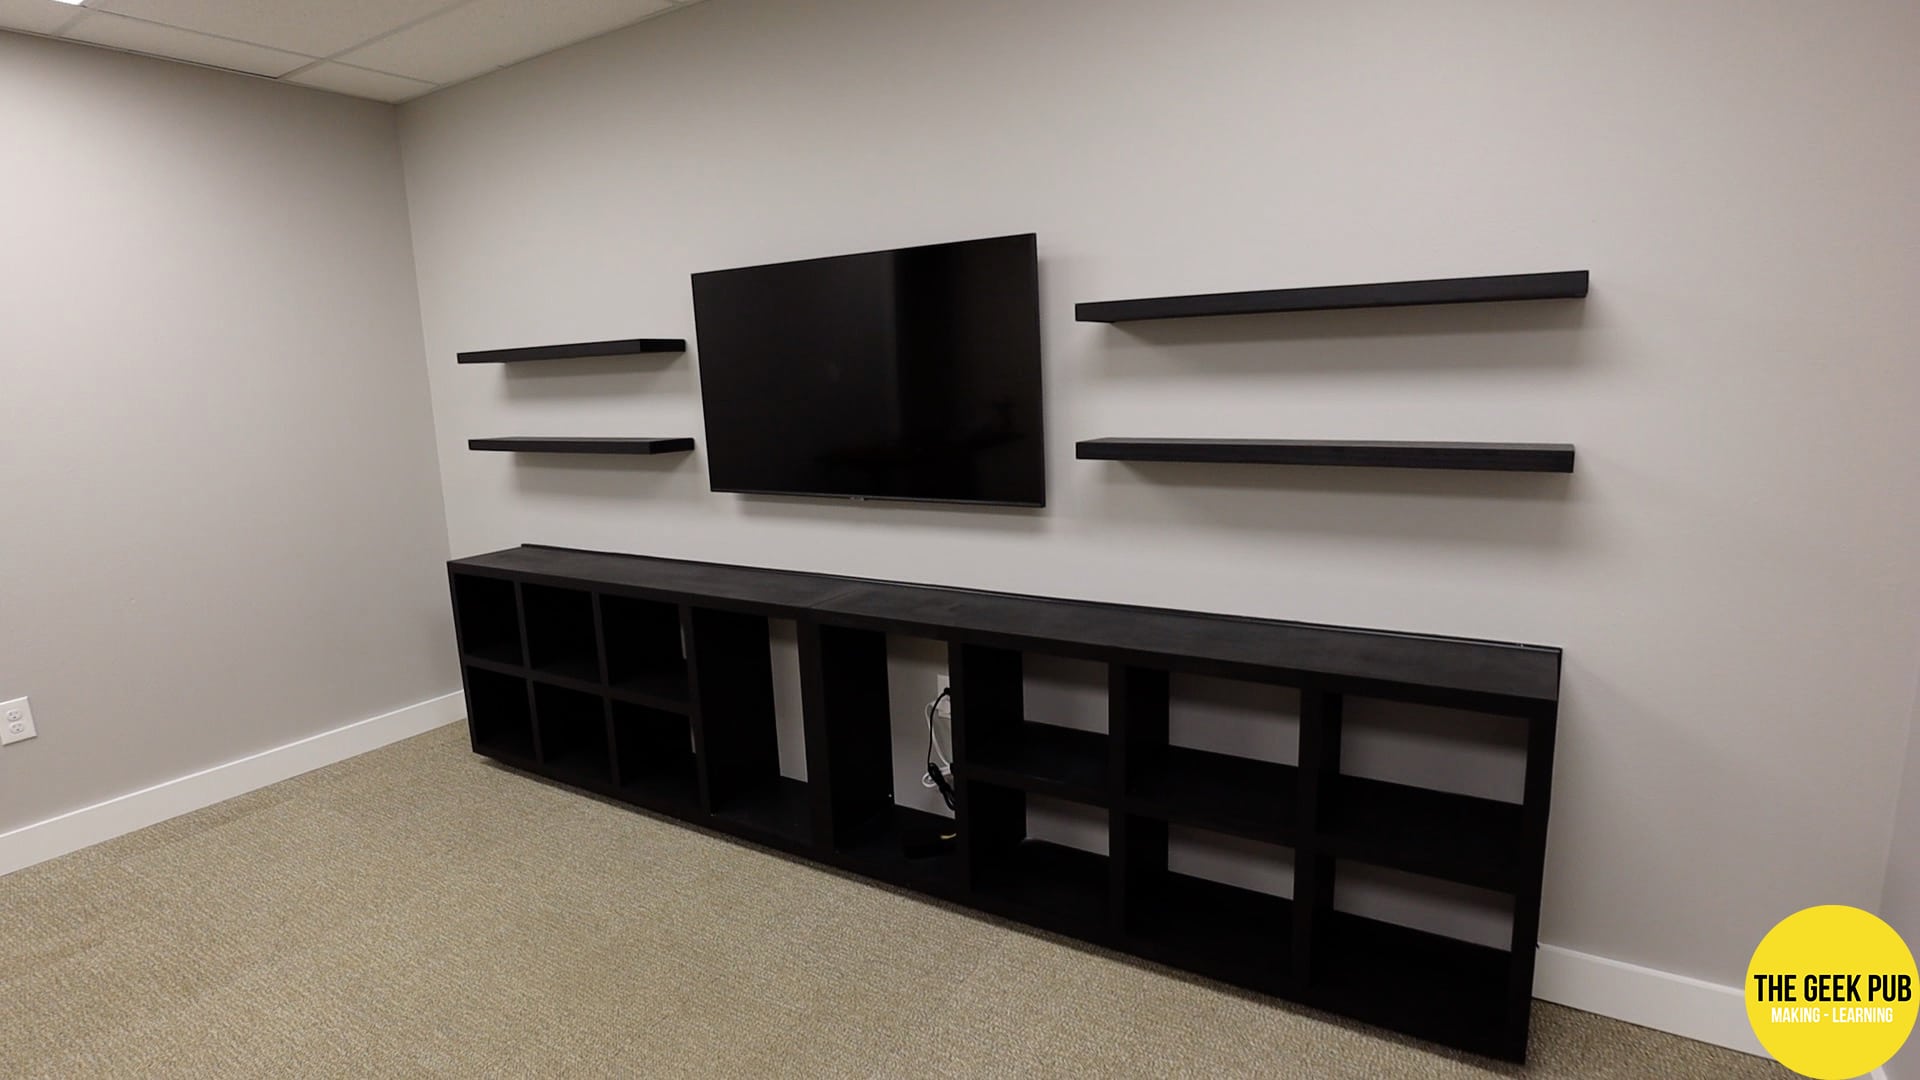
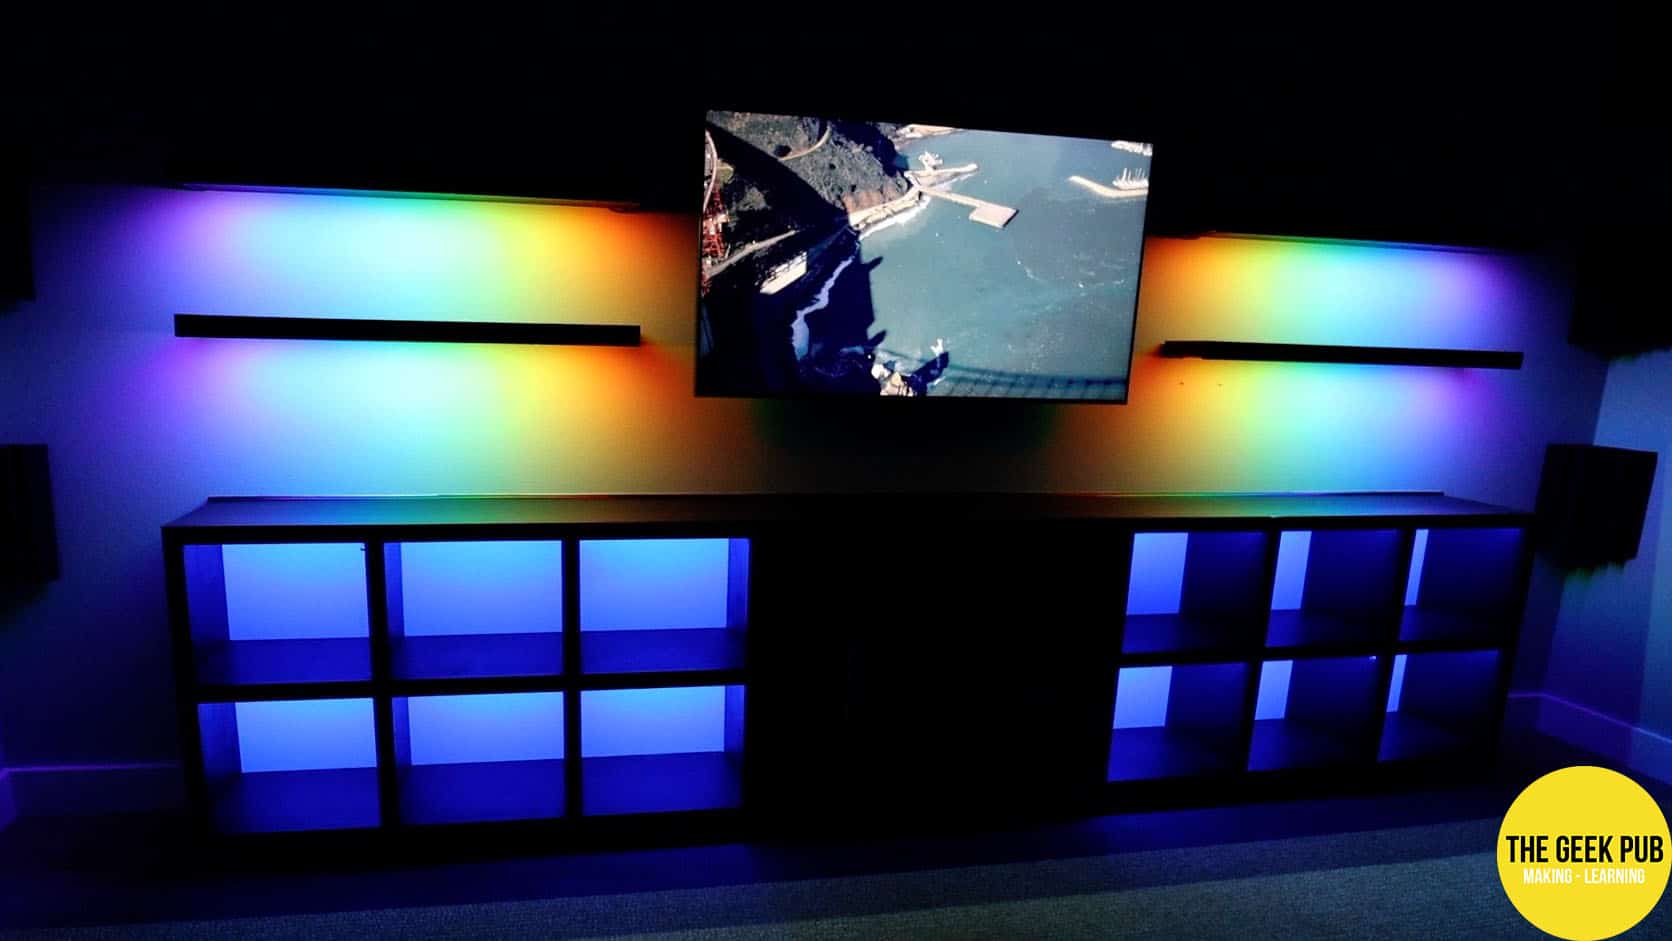
 The set design I ended up with is really pretty cool. It’s a single 50″ TV (127 CM) centered on the wall, flanked by floating shelves on each side, and a credenza below with 14×14 boxes for decoration to sit within.
Painting and Prepping the YouTube Studio Room
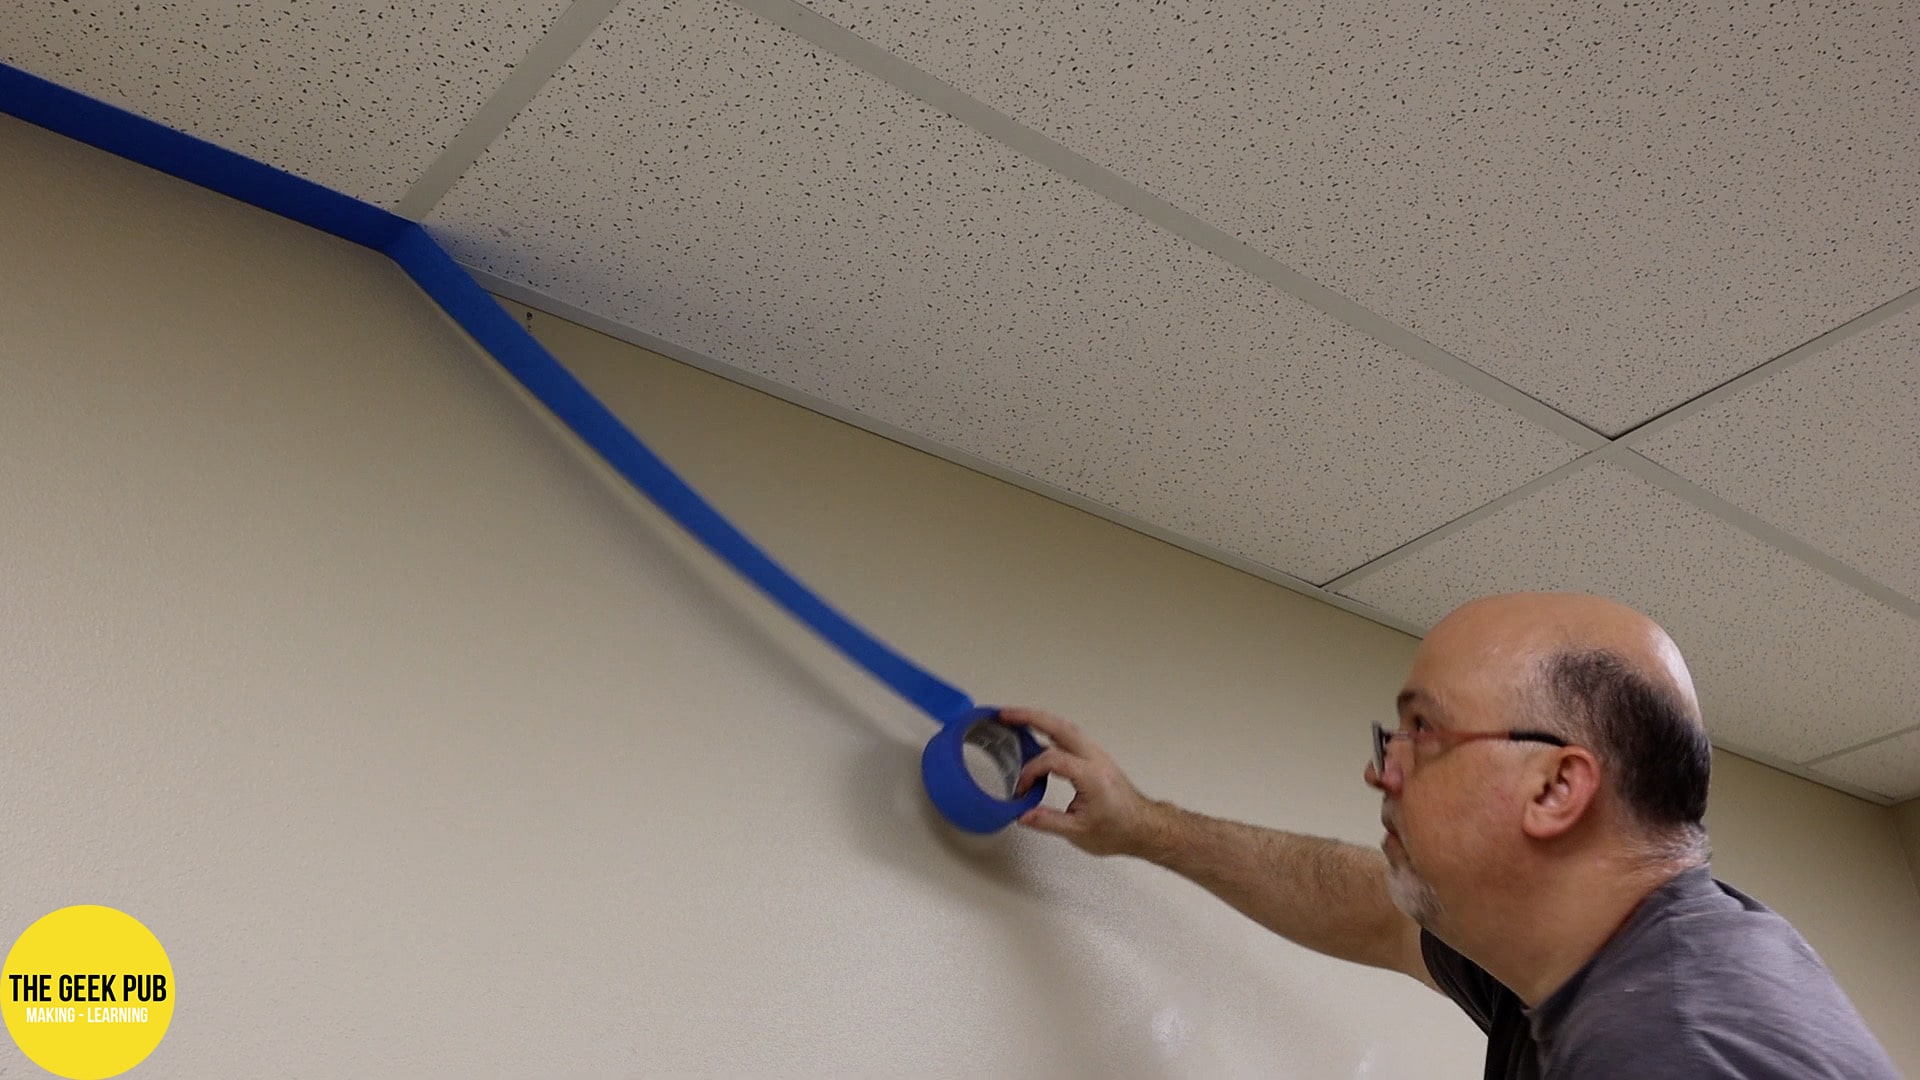
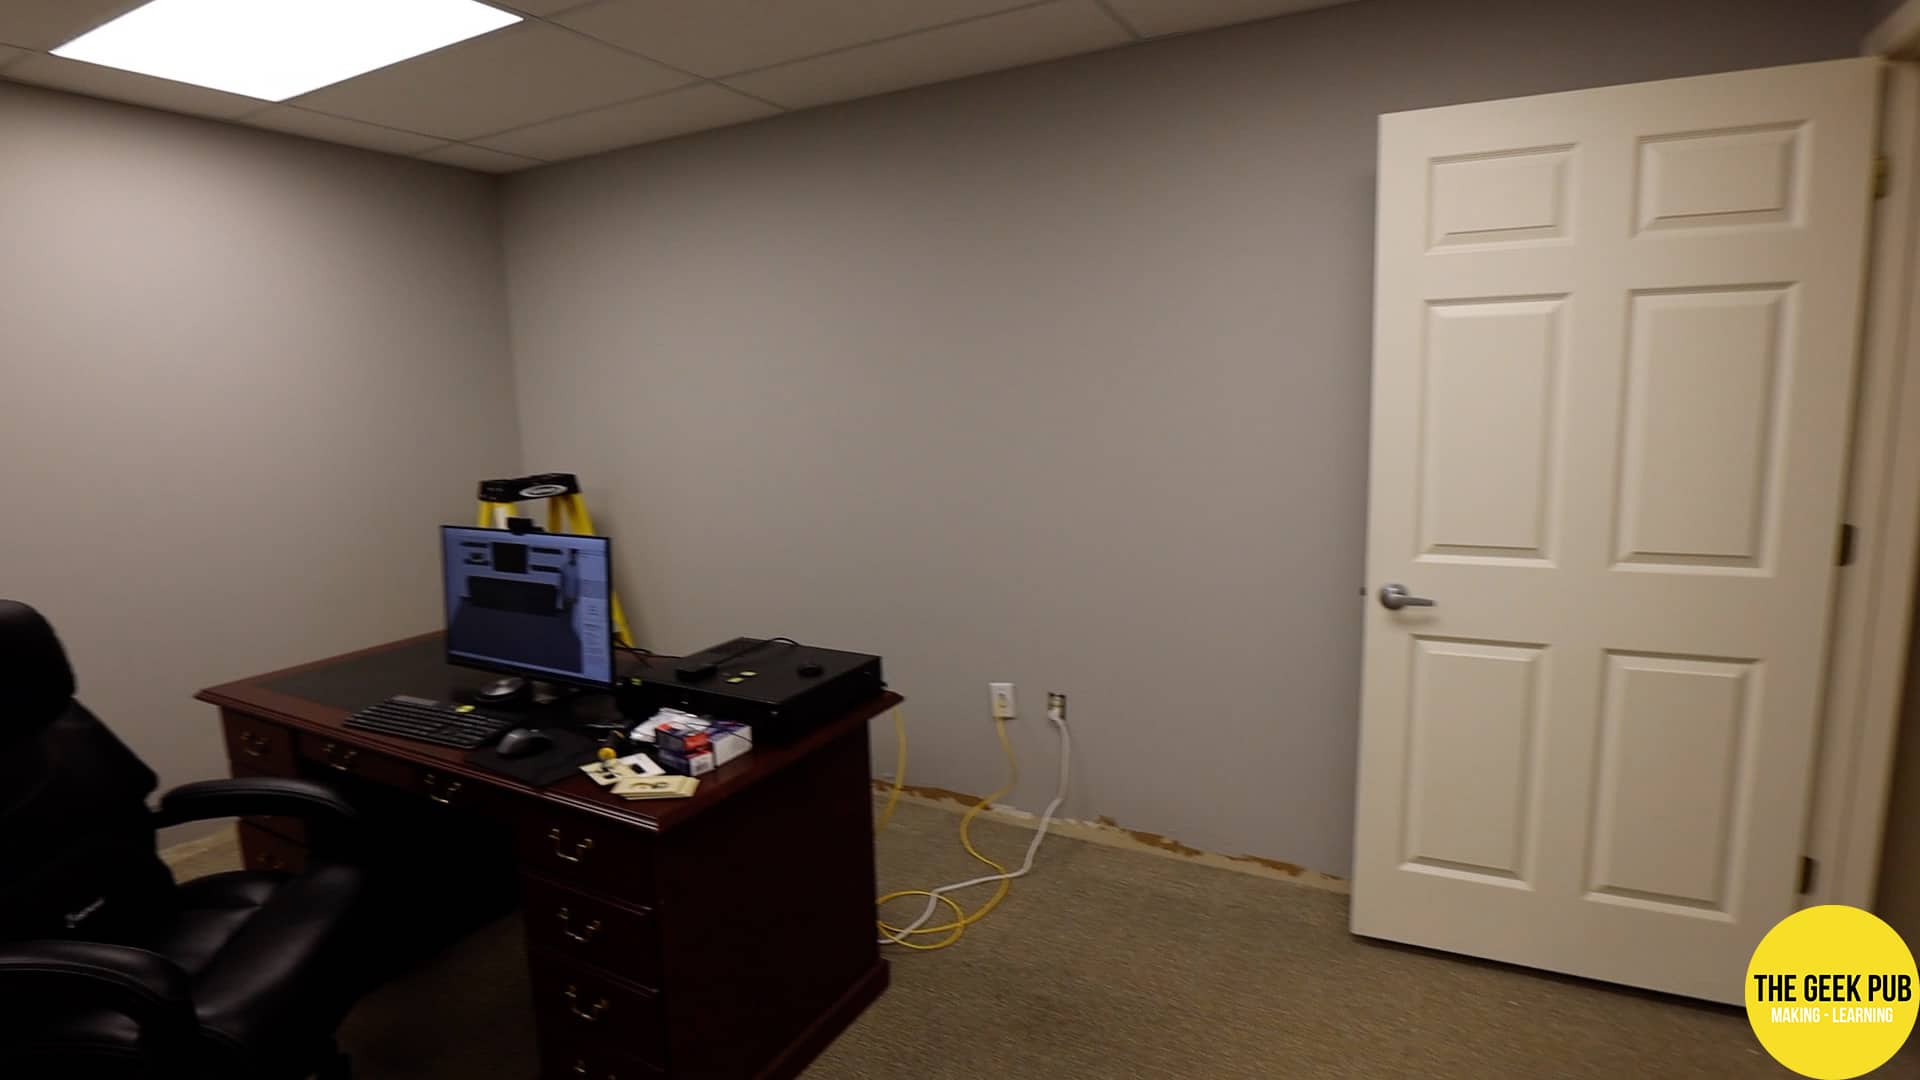
Before I could get busy with construction of the set, I needed to get the room ready. If you’ve watched our video on Buying the New Studio Building, then you know they left us the building in kind of a mess. Lots of trash to be hauled away. They didn’t patch or paint any off the walls where they removed artwork and just left it for us to deal with.
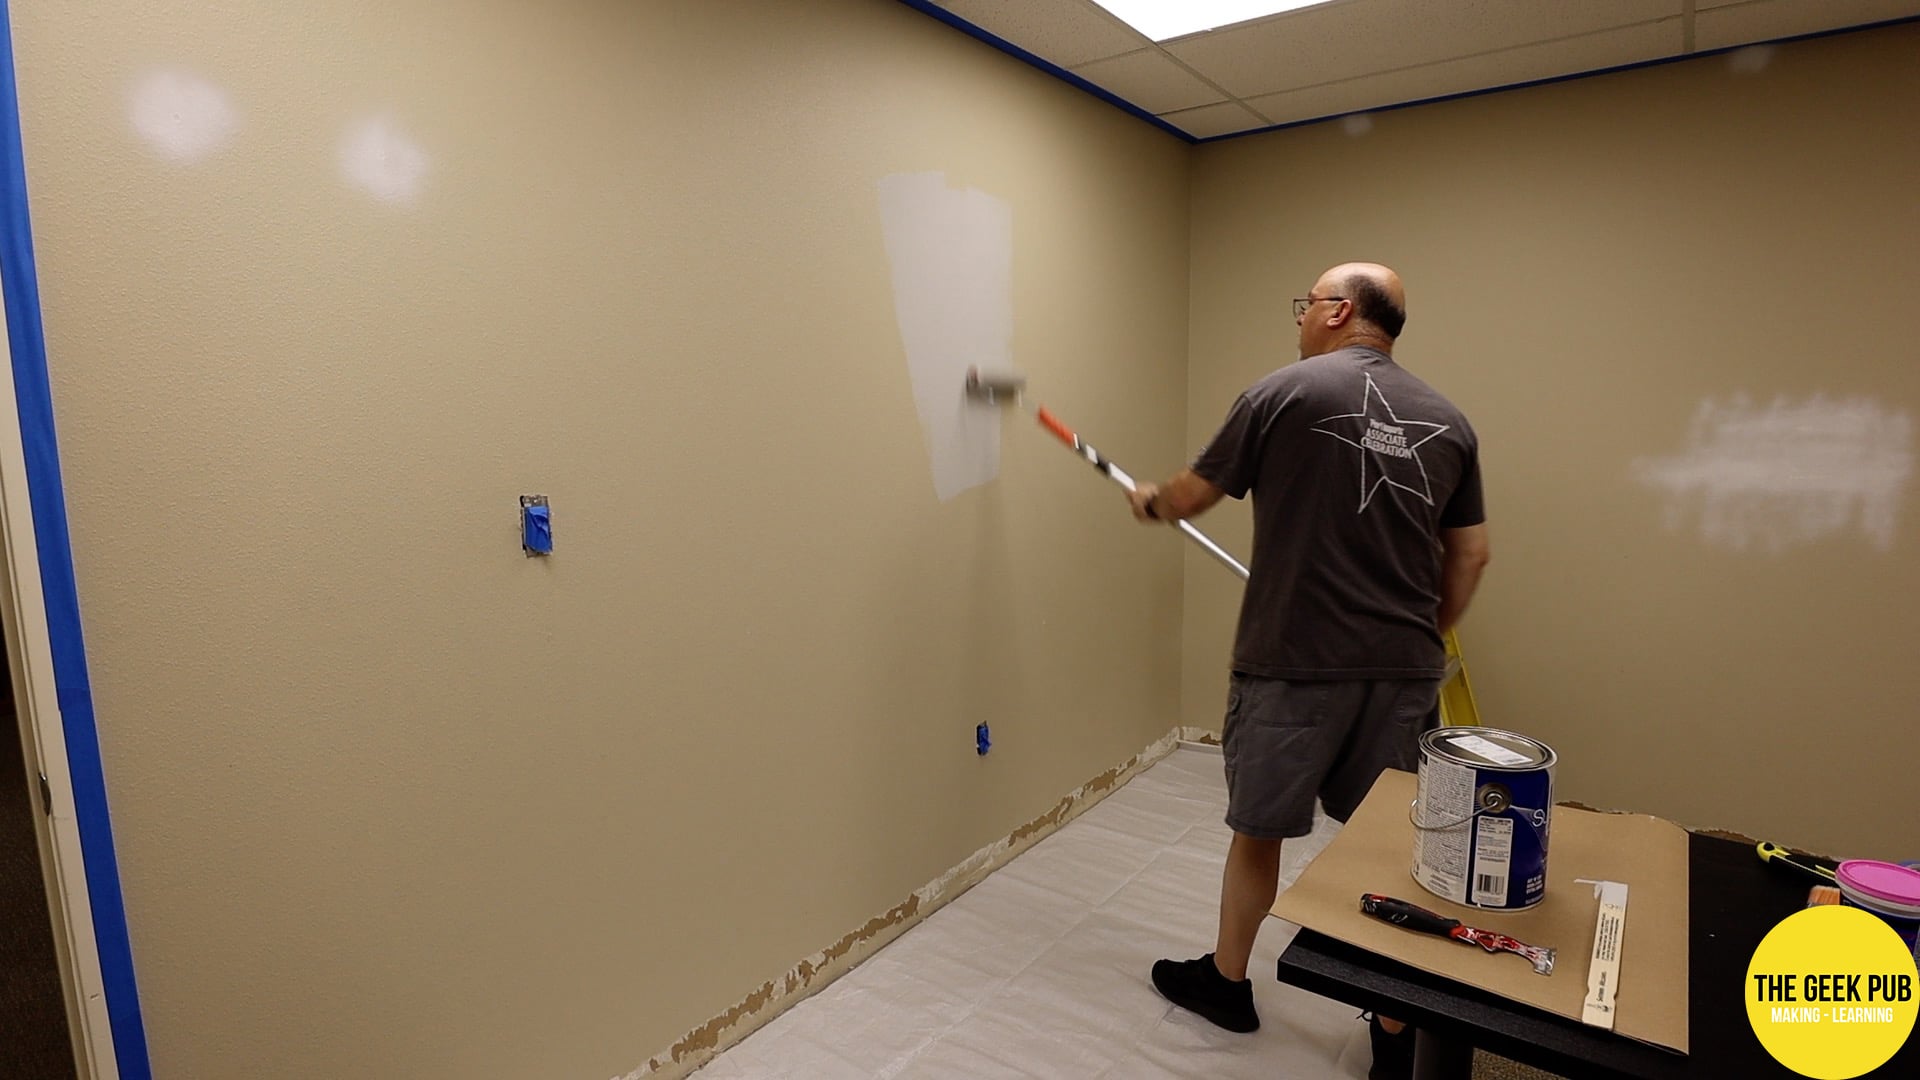
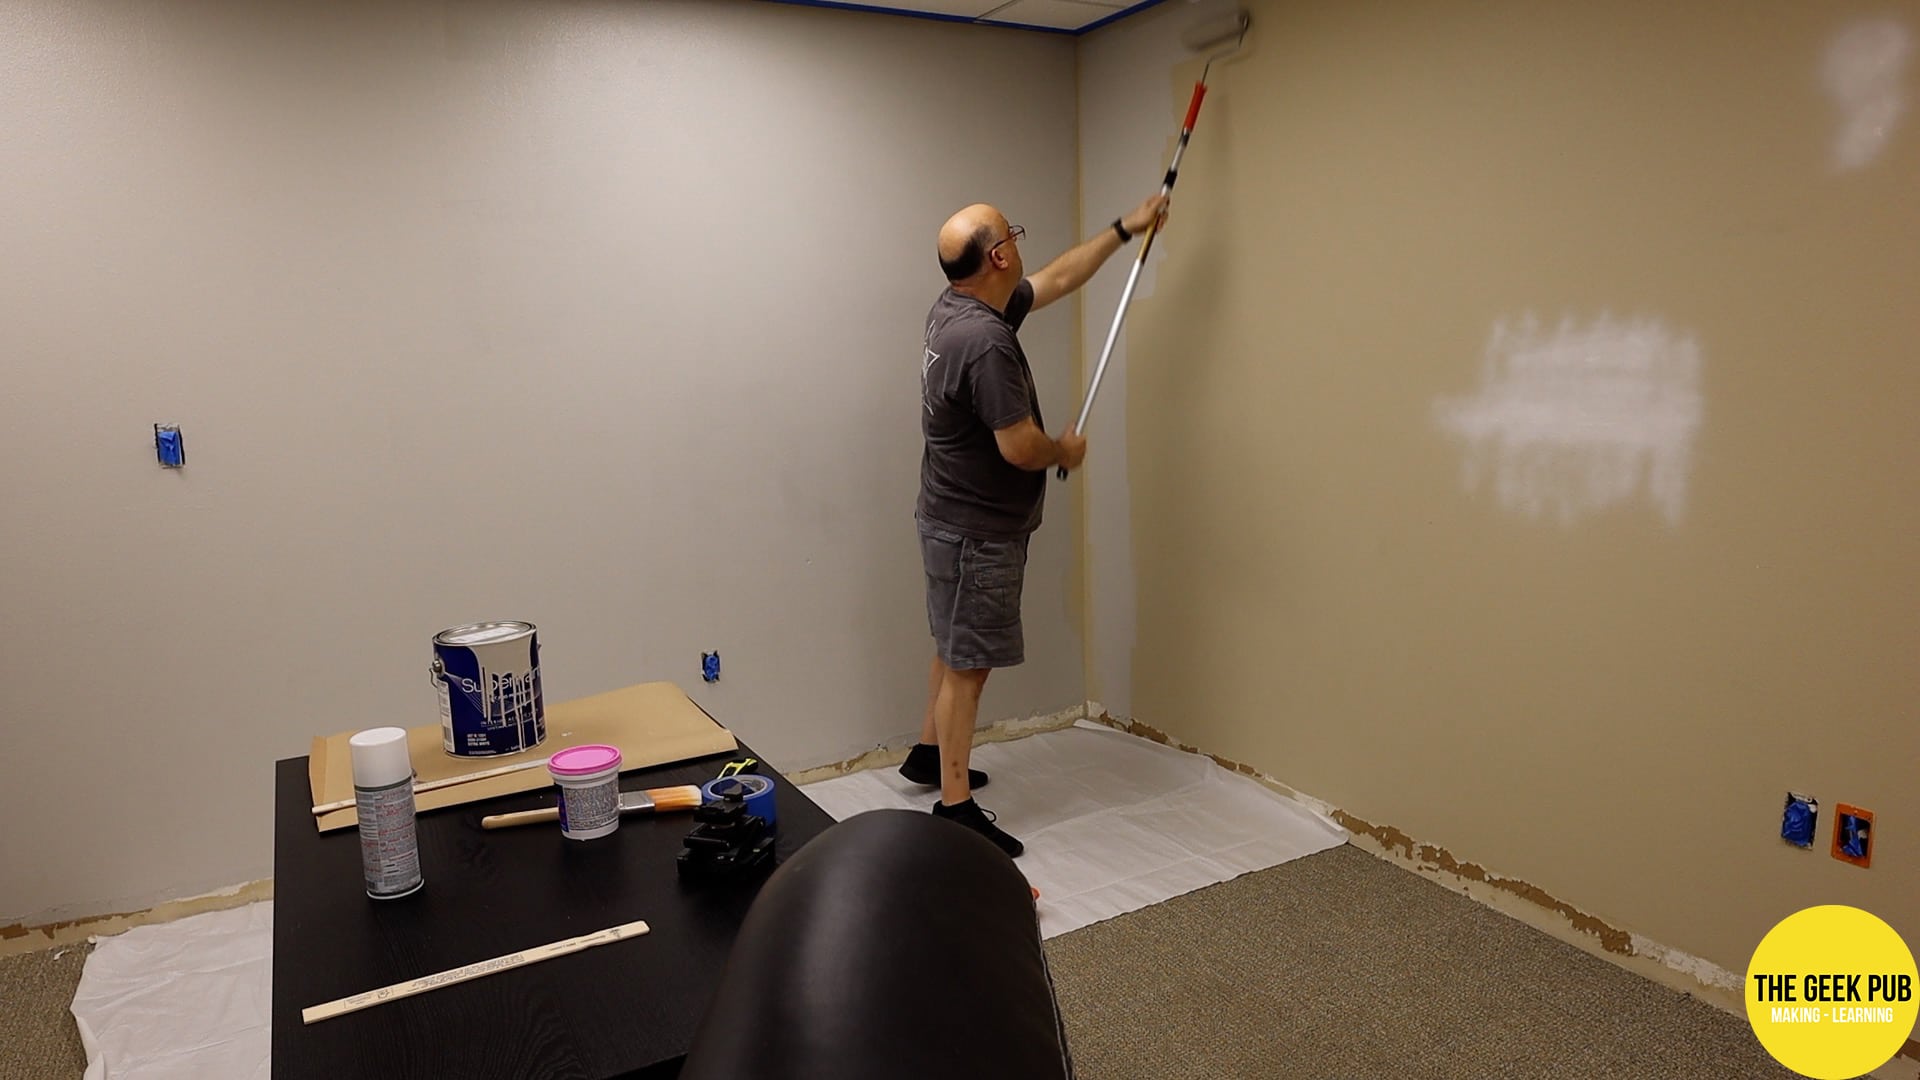
The walls in the studio room were painted a beigey-brown color. And it cast a yellowish tint on everything in the room. Something I definitely did not want in my videos!
So with that I went to work patching and painting and priming all of the holes in the walls, along with scratches and scuffs.
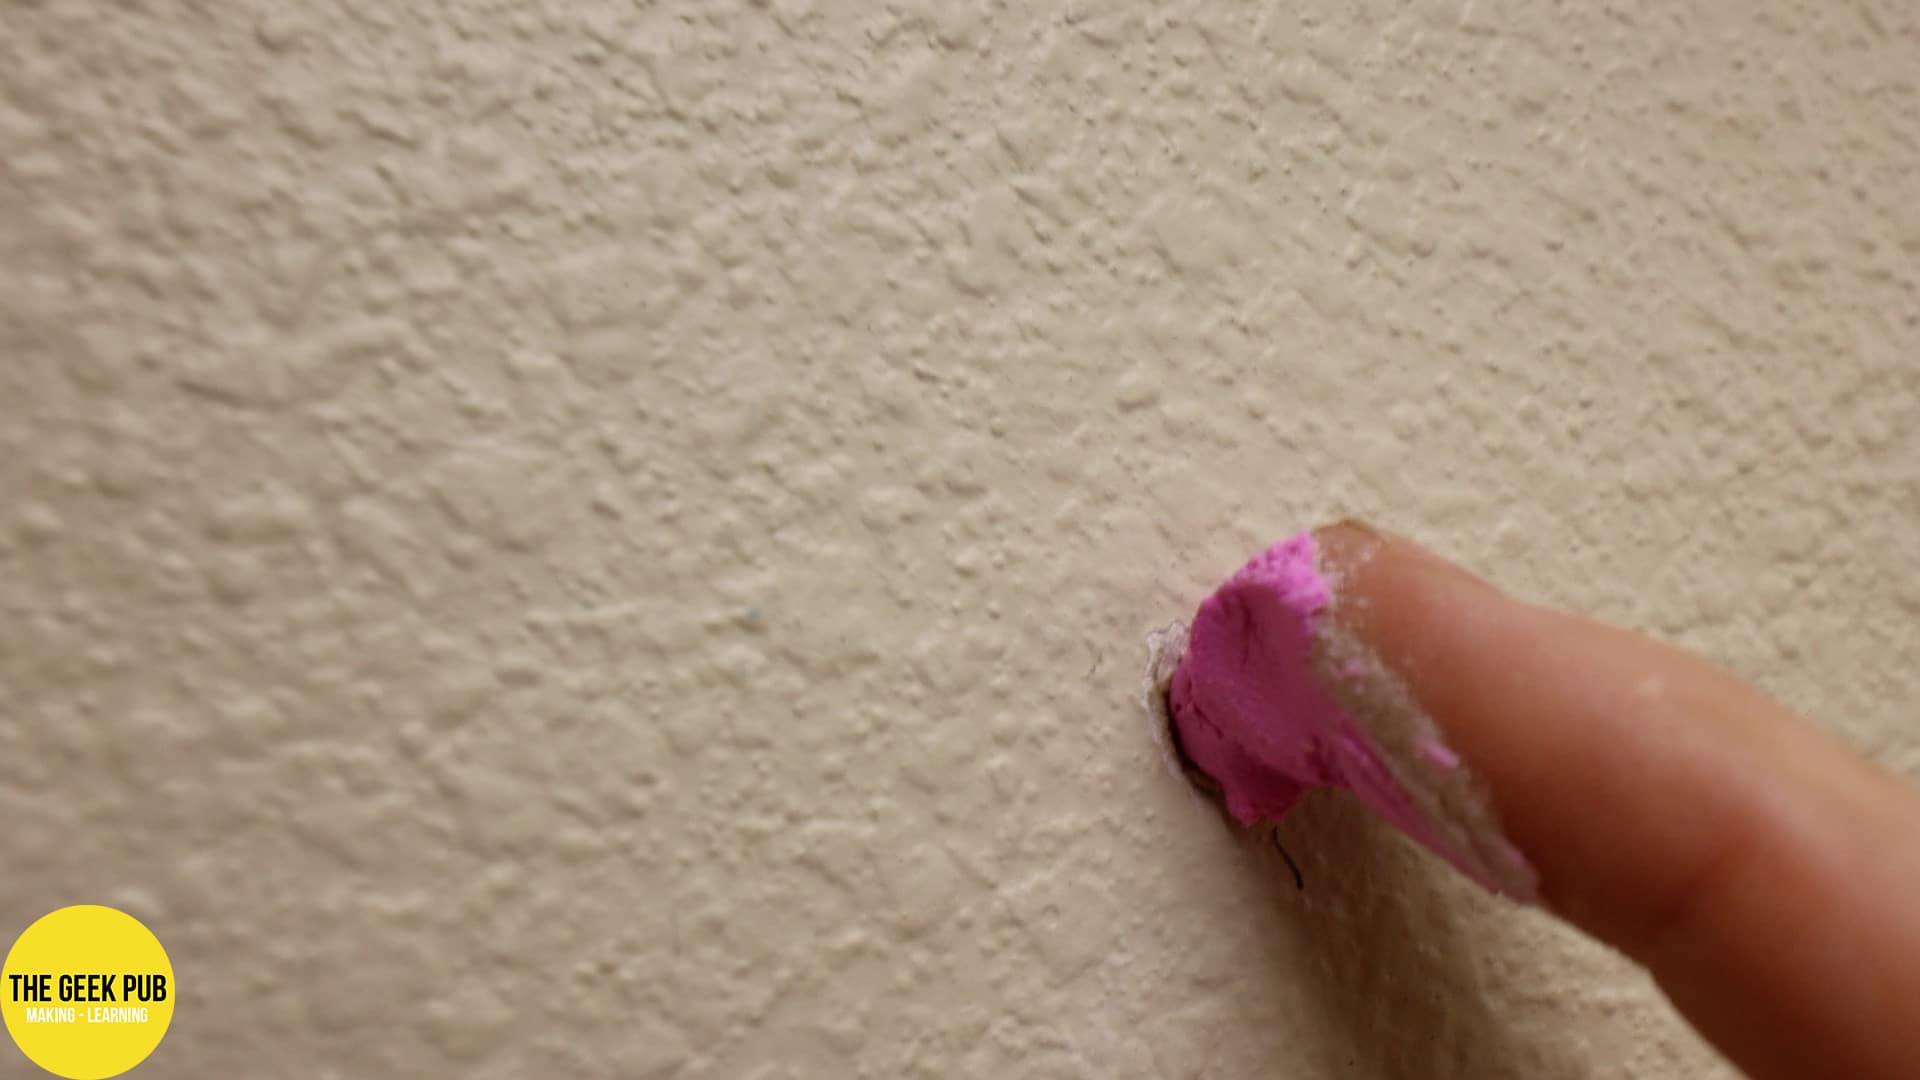
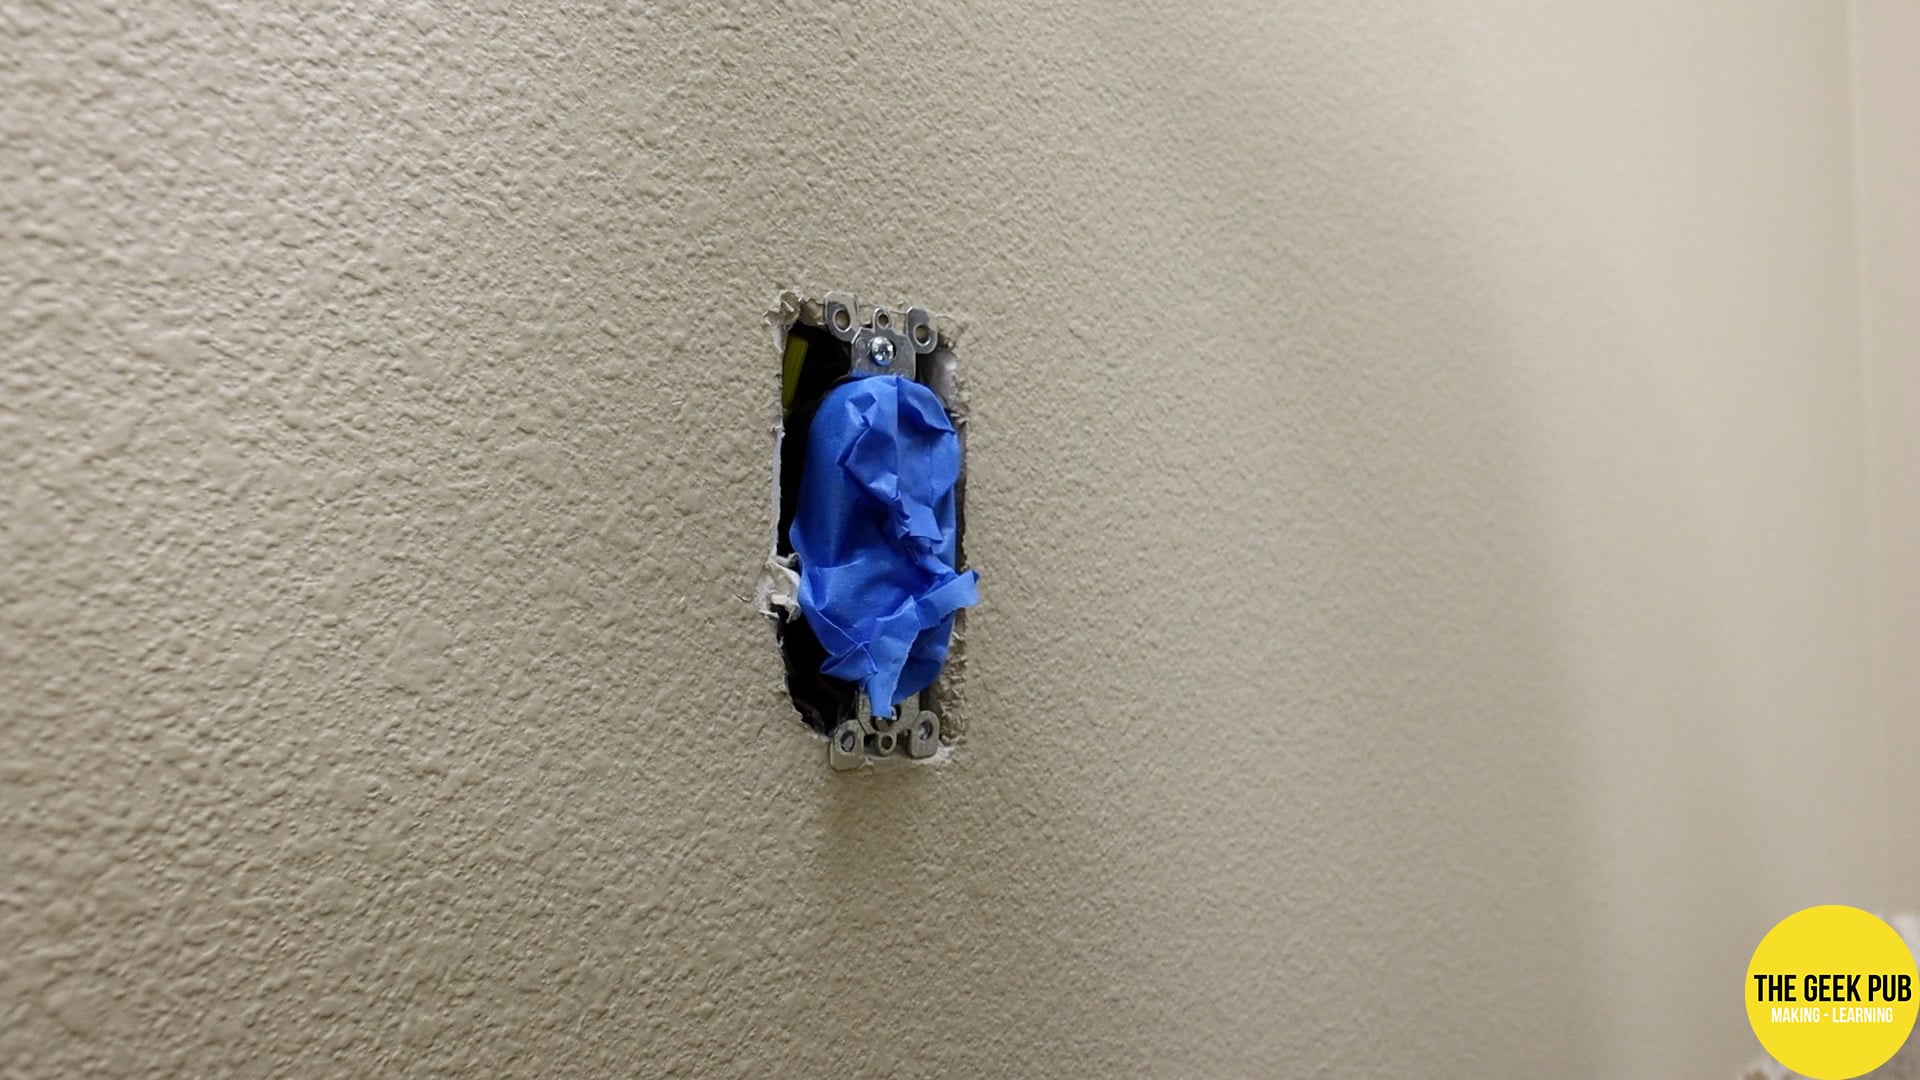
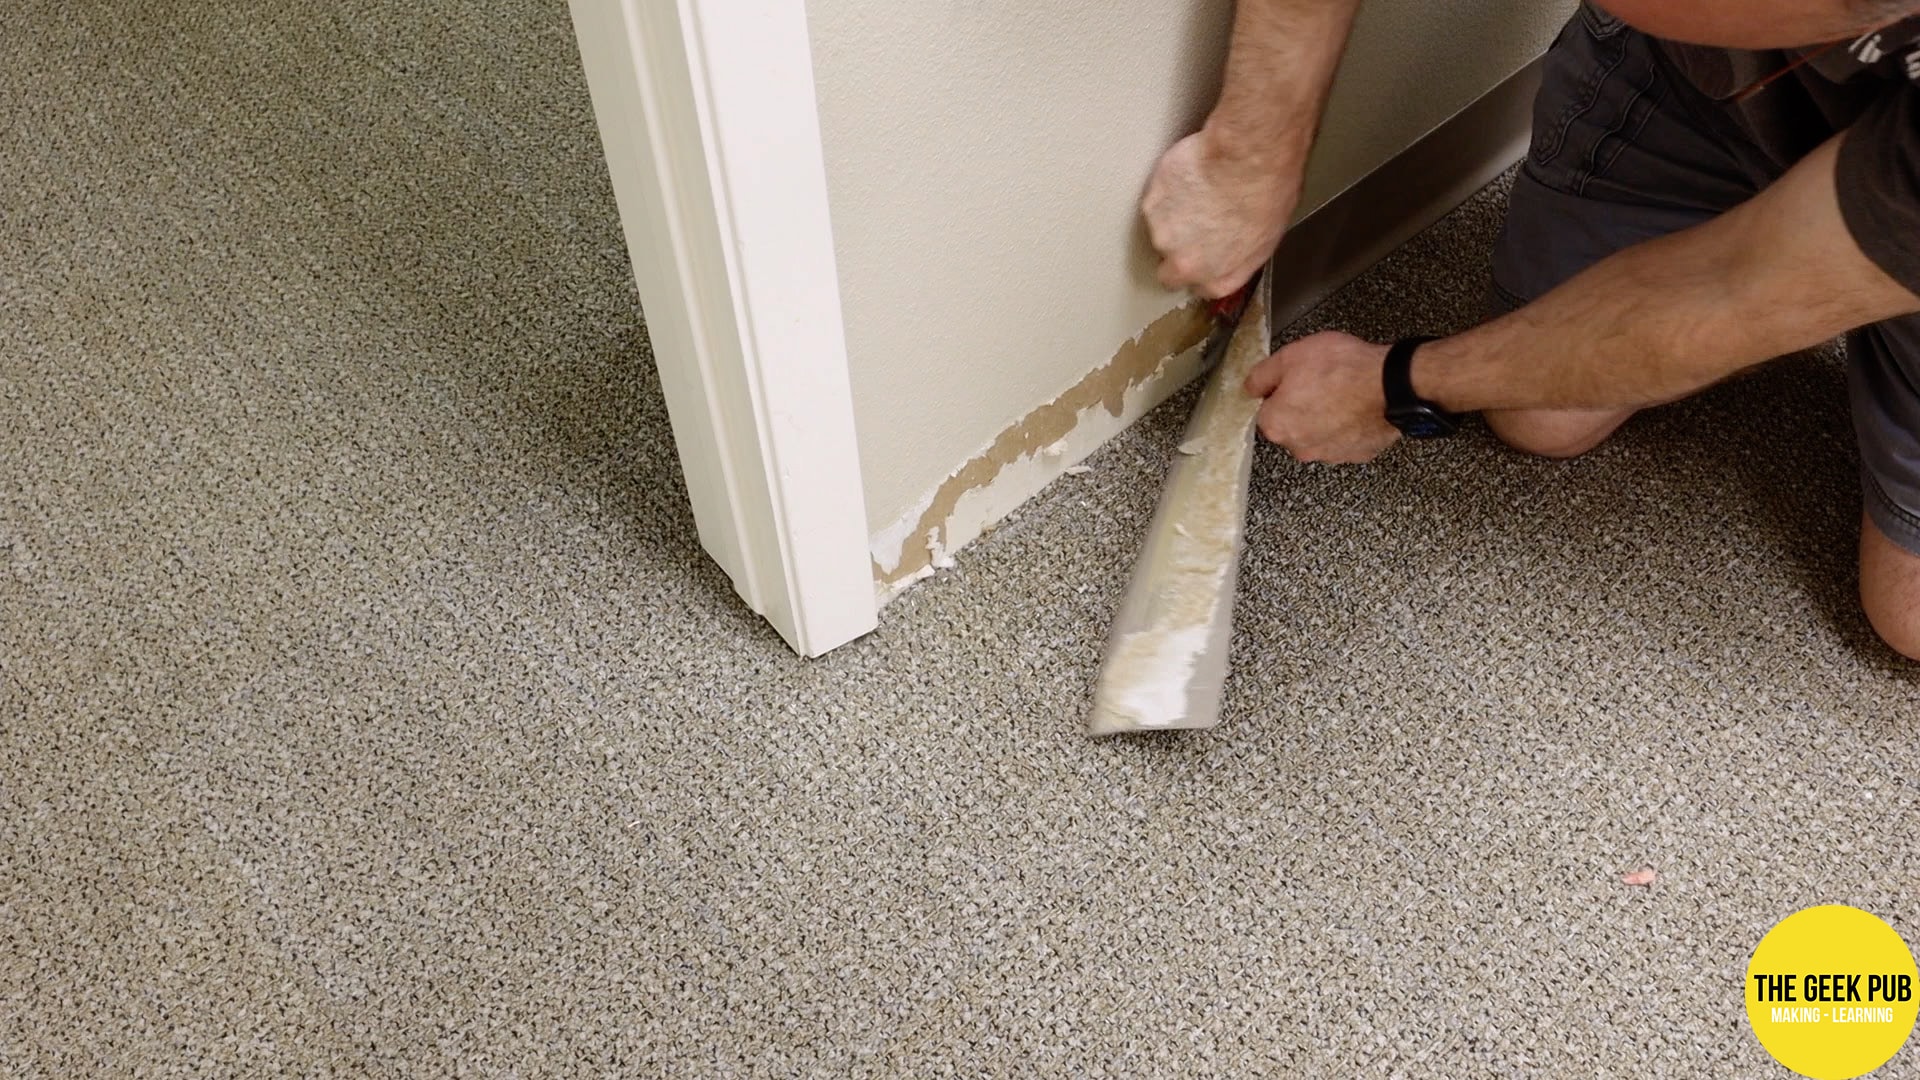
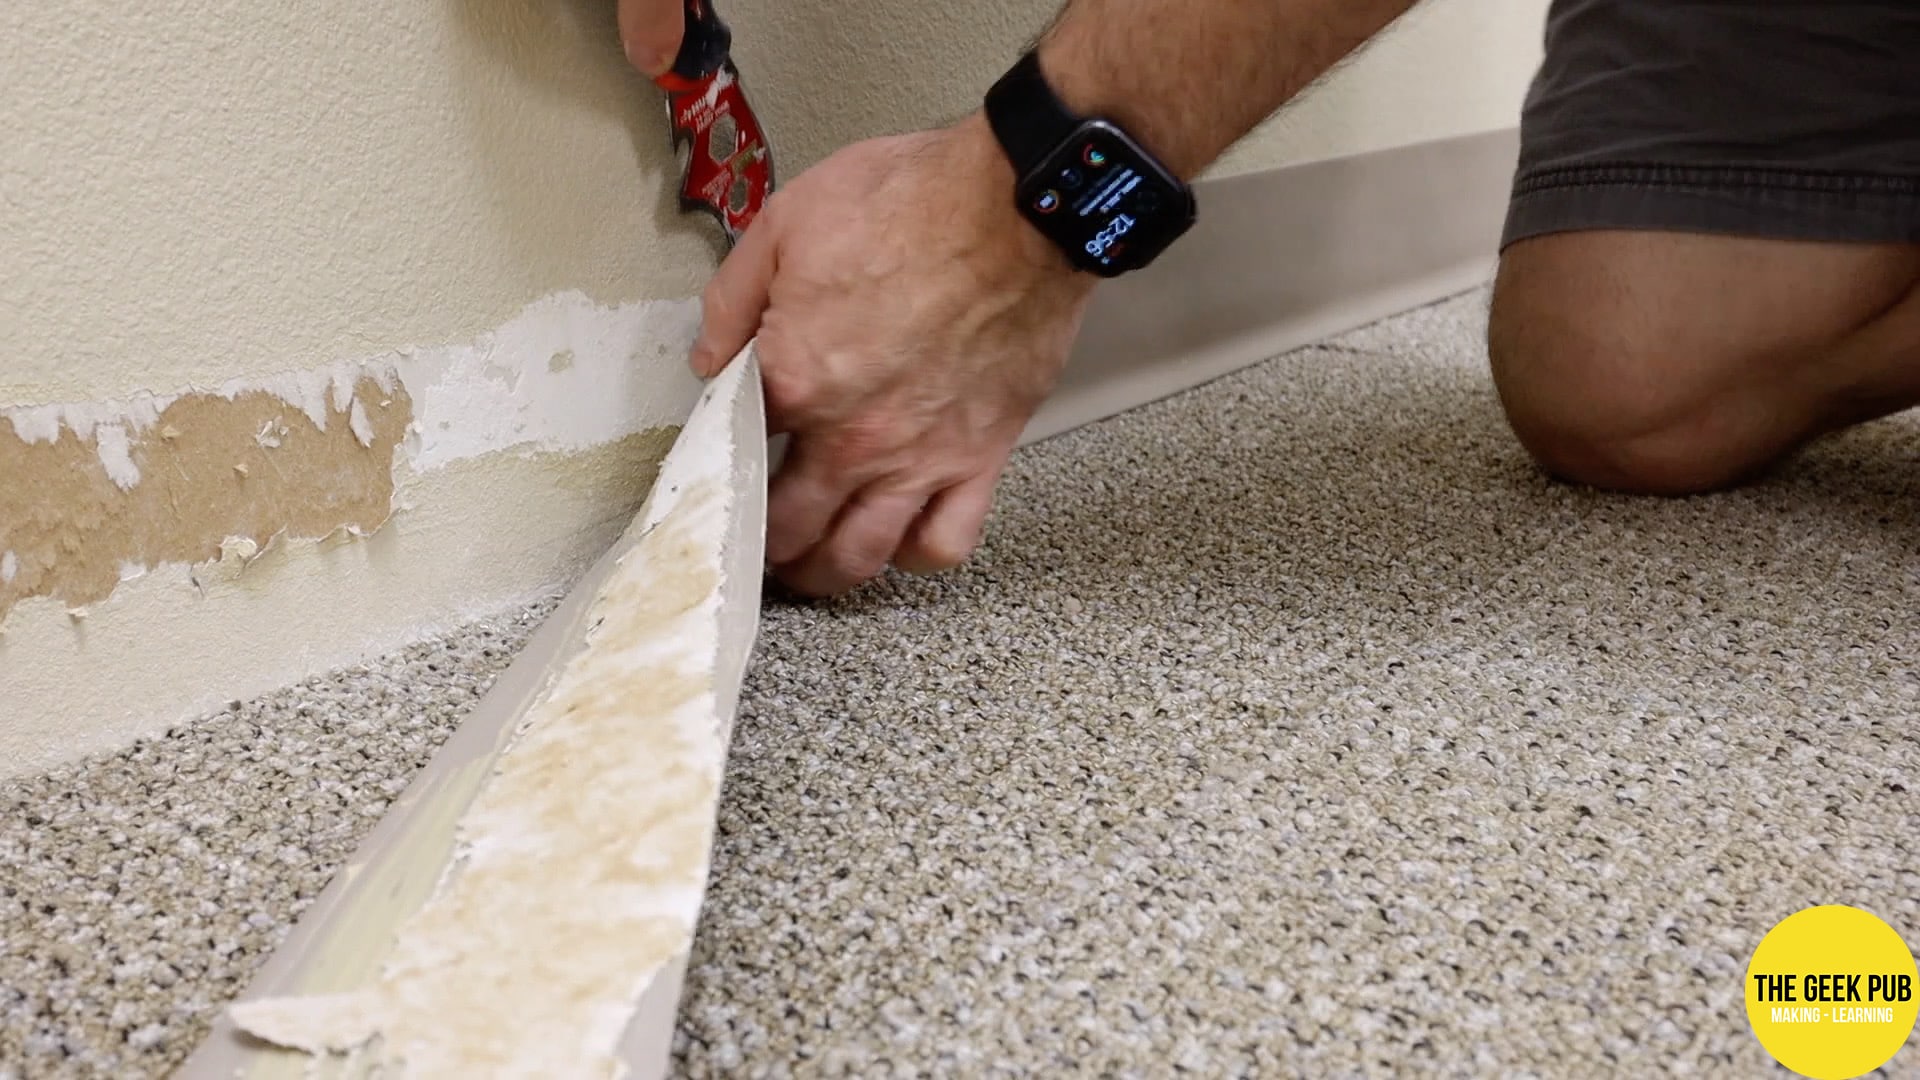
The next chore ahead of me was to remove the ugly brown rubber base molding on the walls. It was gross and dirty, and was definitely not going to match the new paint. Rubber base molding is typically glued to the drywall. This means that you must be careful when removing it. Otherwise you’ll pull the paper off your drywall. That’s going to happen, but we need to keep the damage below the molding. I found that pulling down on the molding and using my 5 in 1 scraper tool made easy work of an otherwise tedious job.
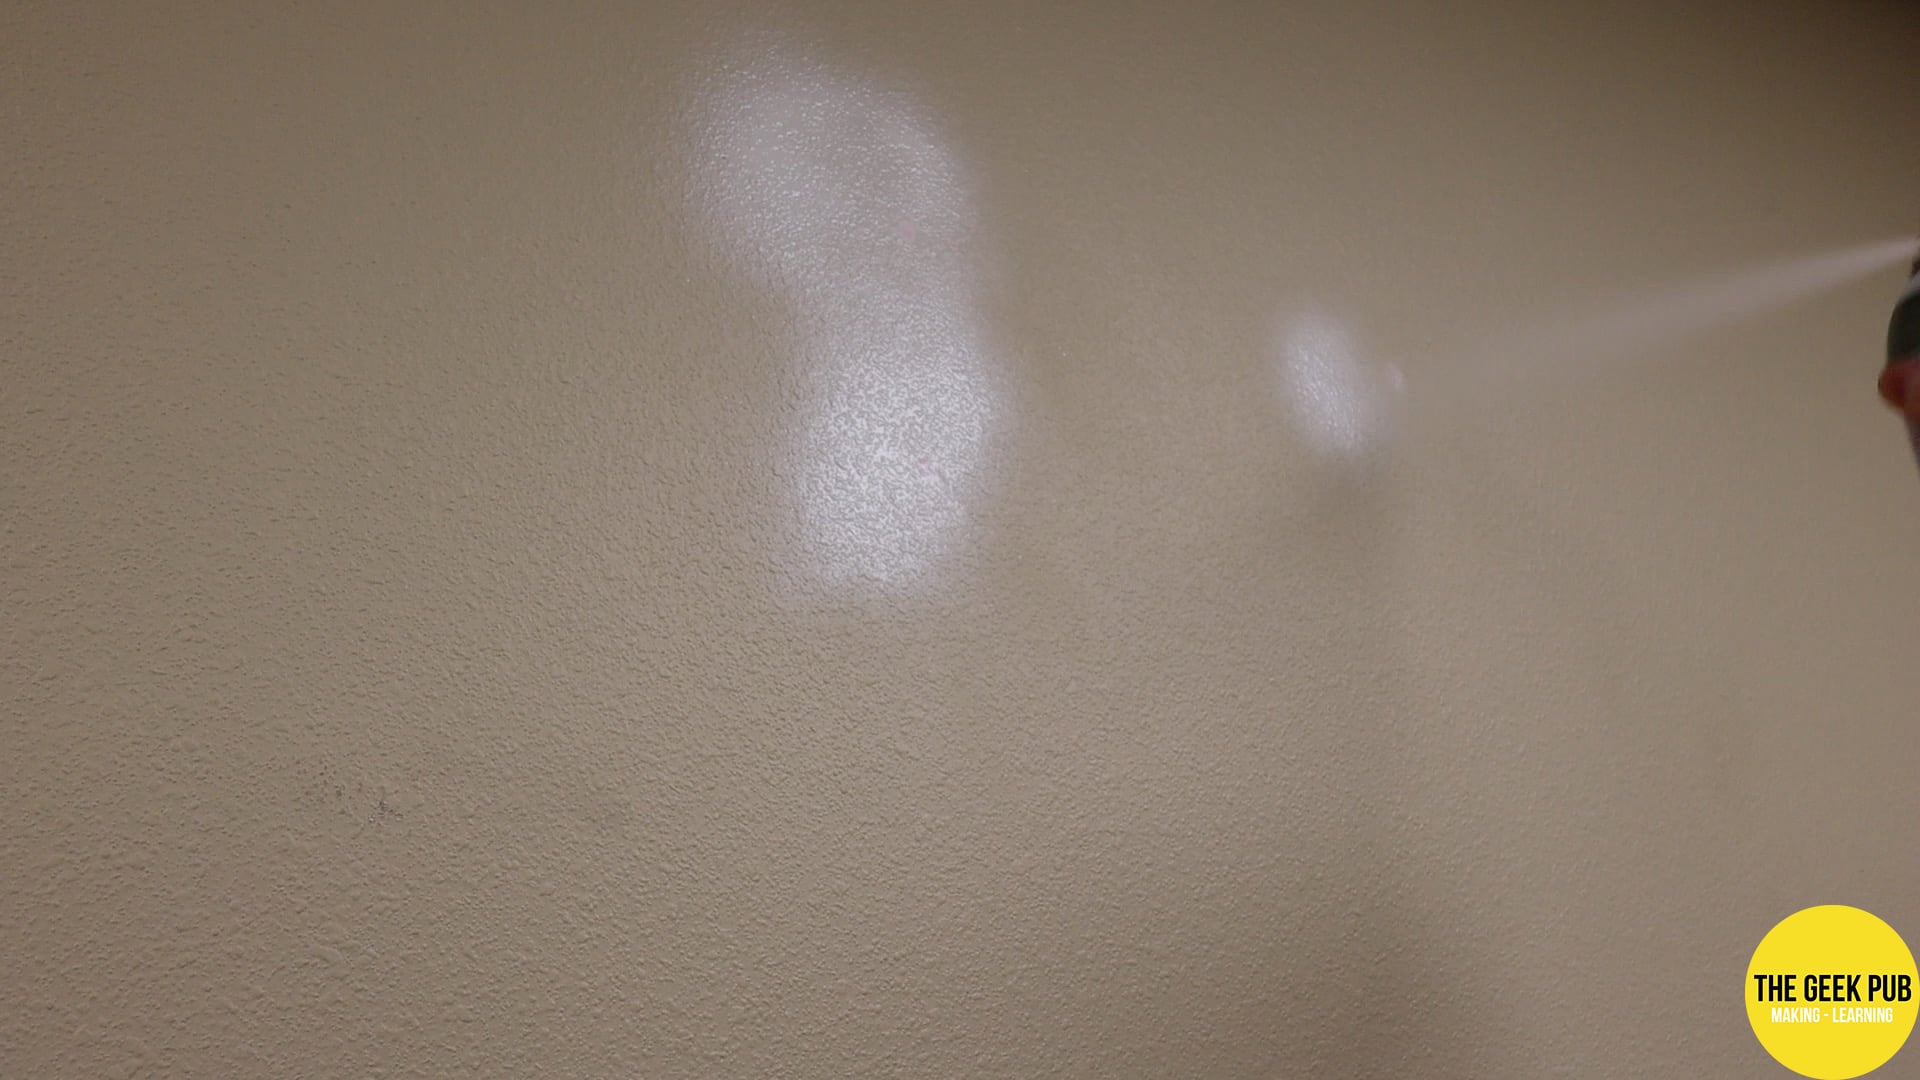
And with all that done, I started painting the set. I chose the color Light French Gray from Sherwin Williams. It something better than white, gives just a tad bit of contrast to the walls, and makes for a more please appearance on camera.
Constructing the YouTube Set: Credenza Build
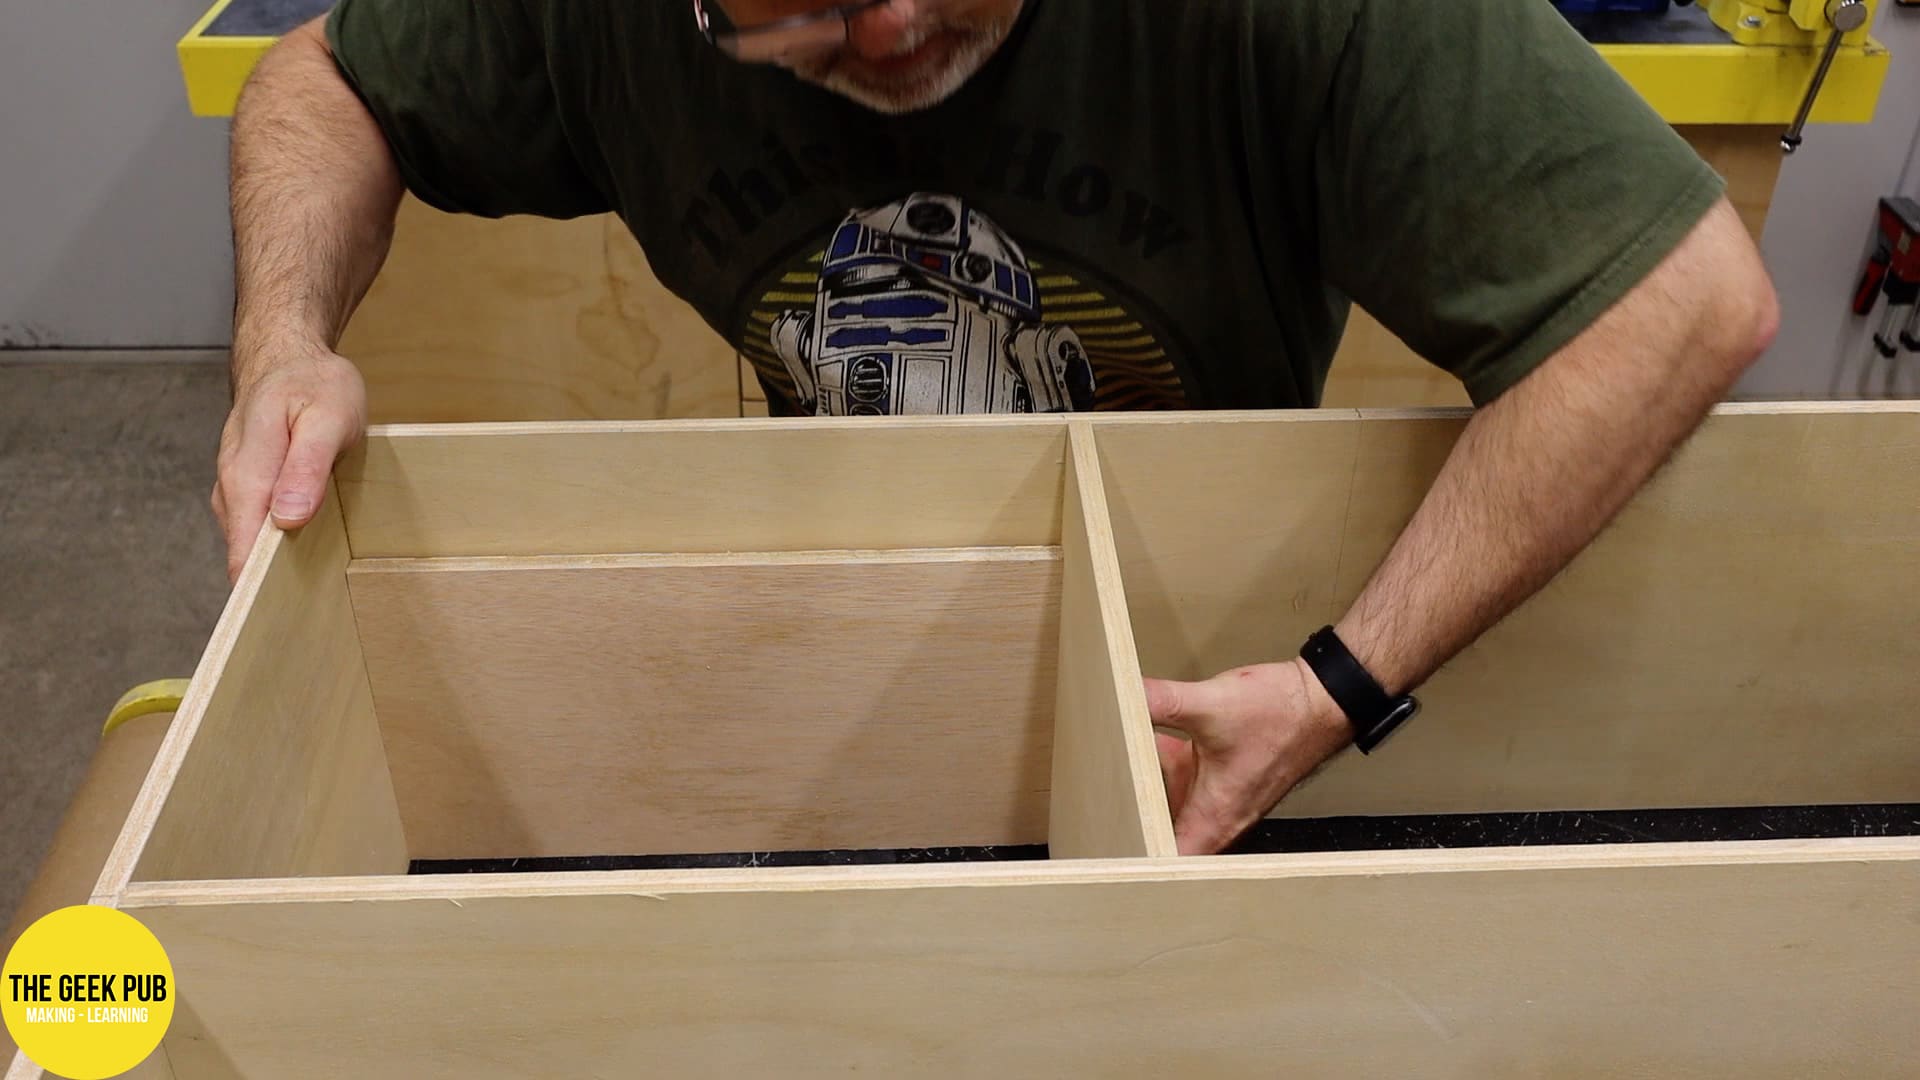
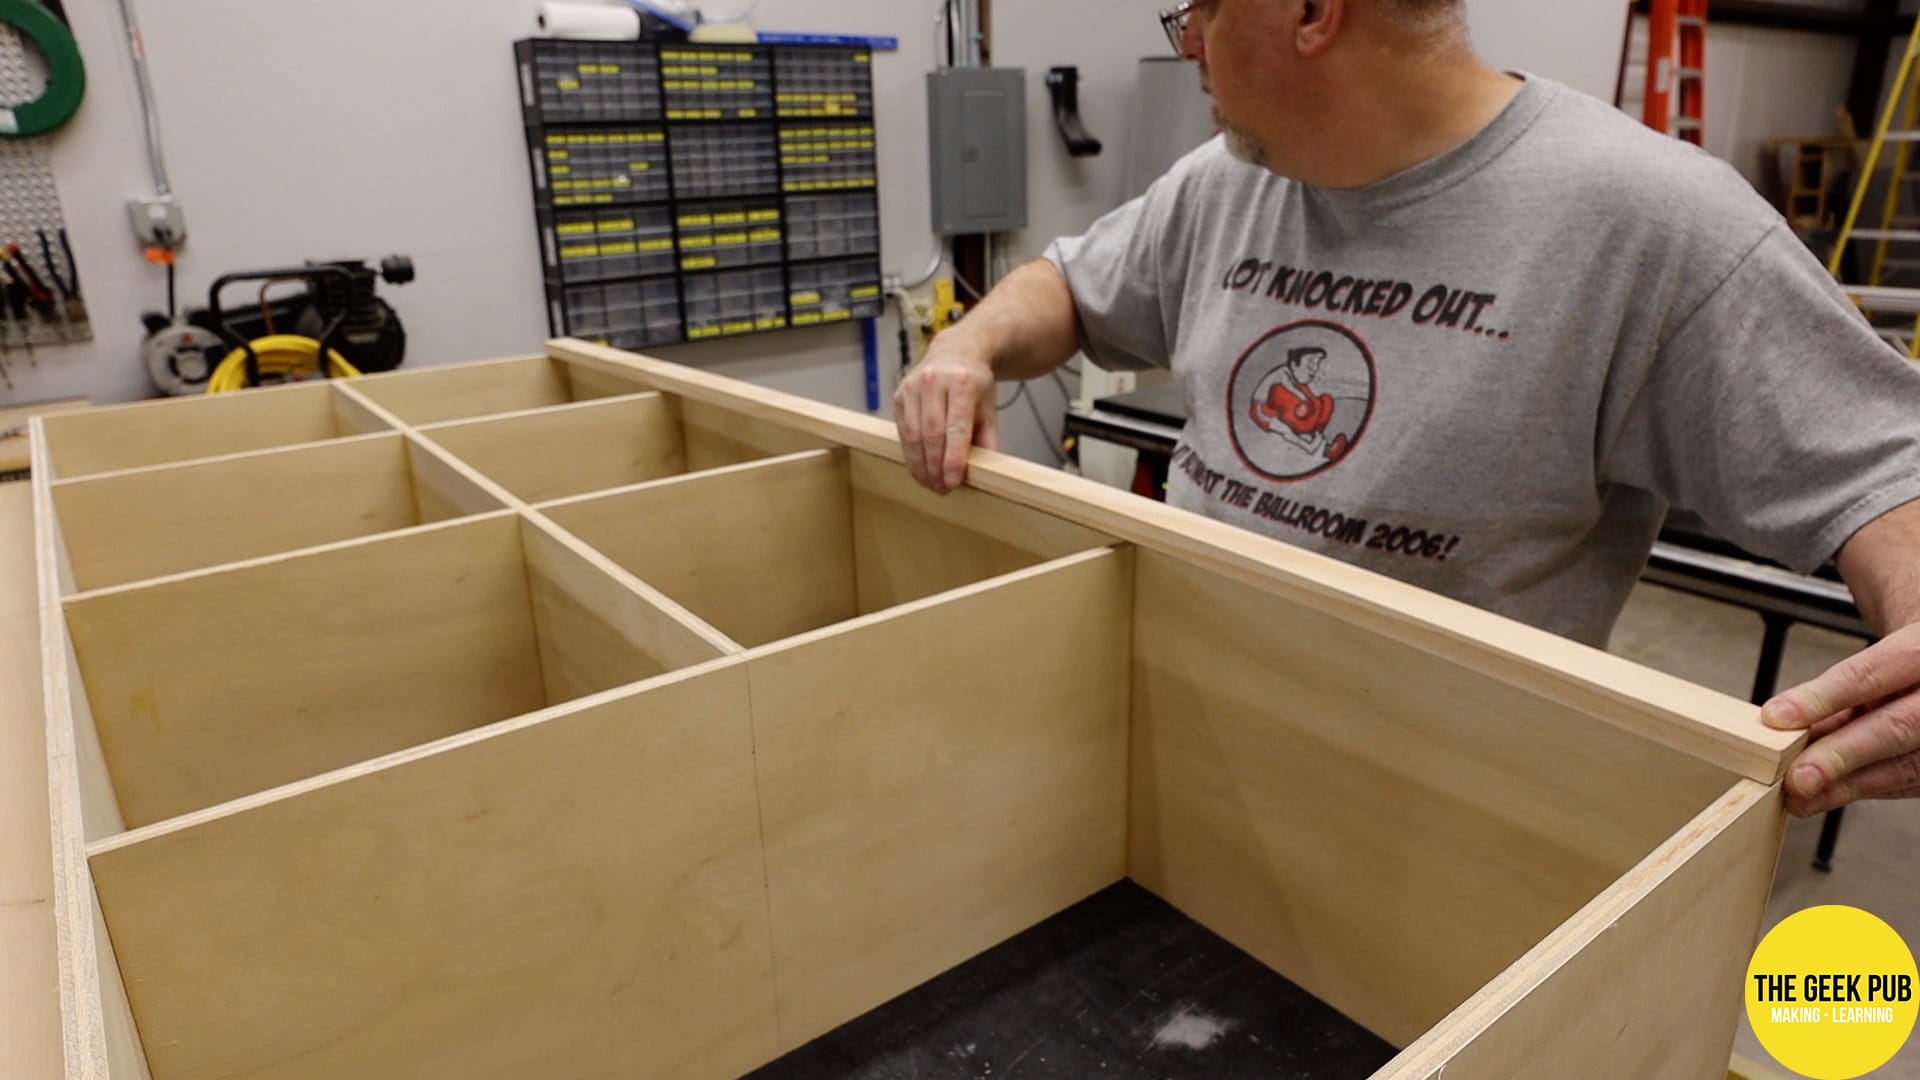
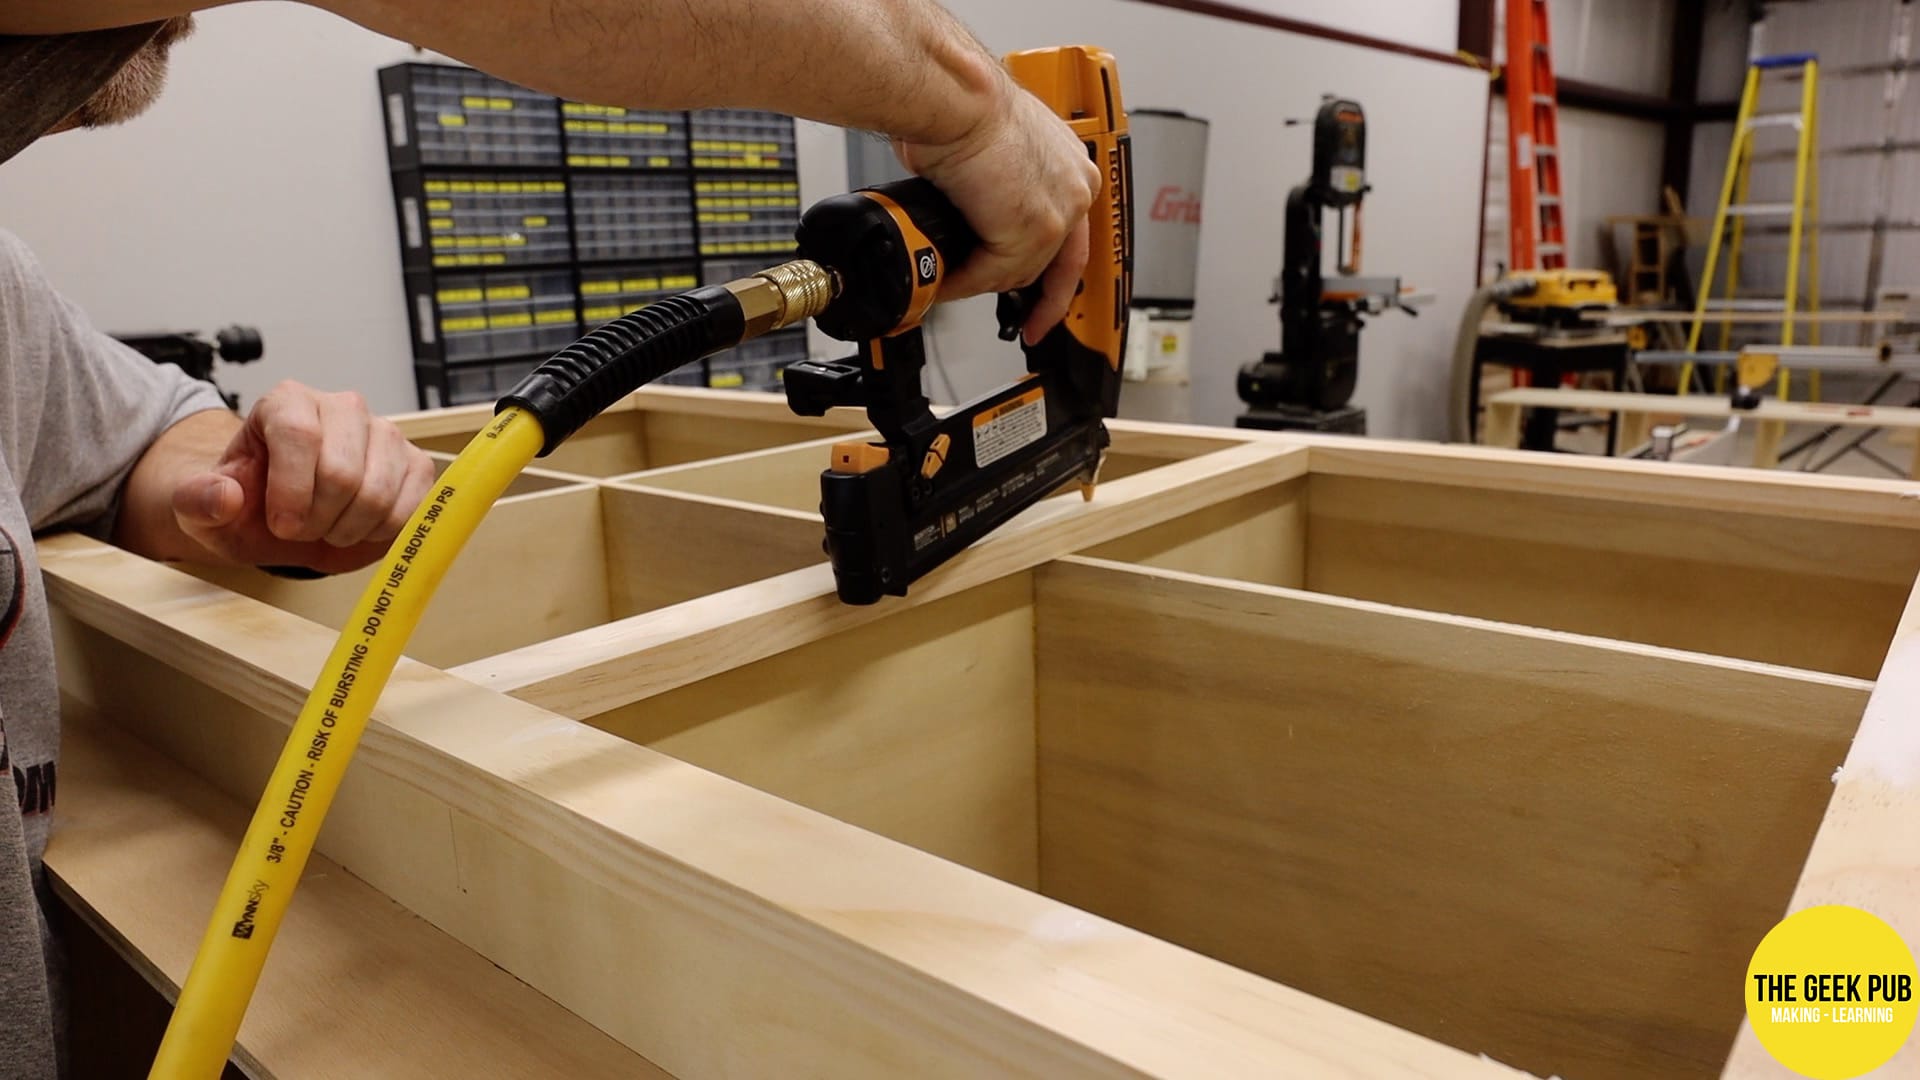
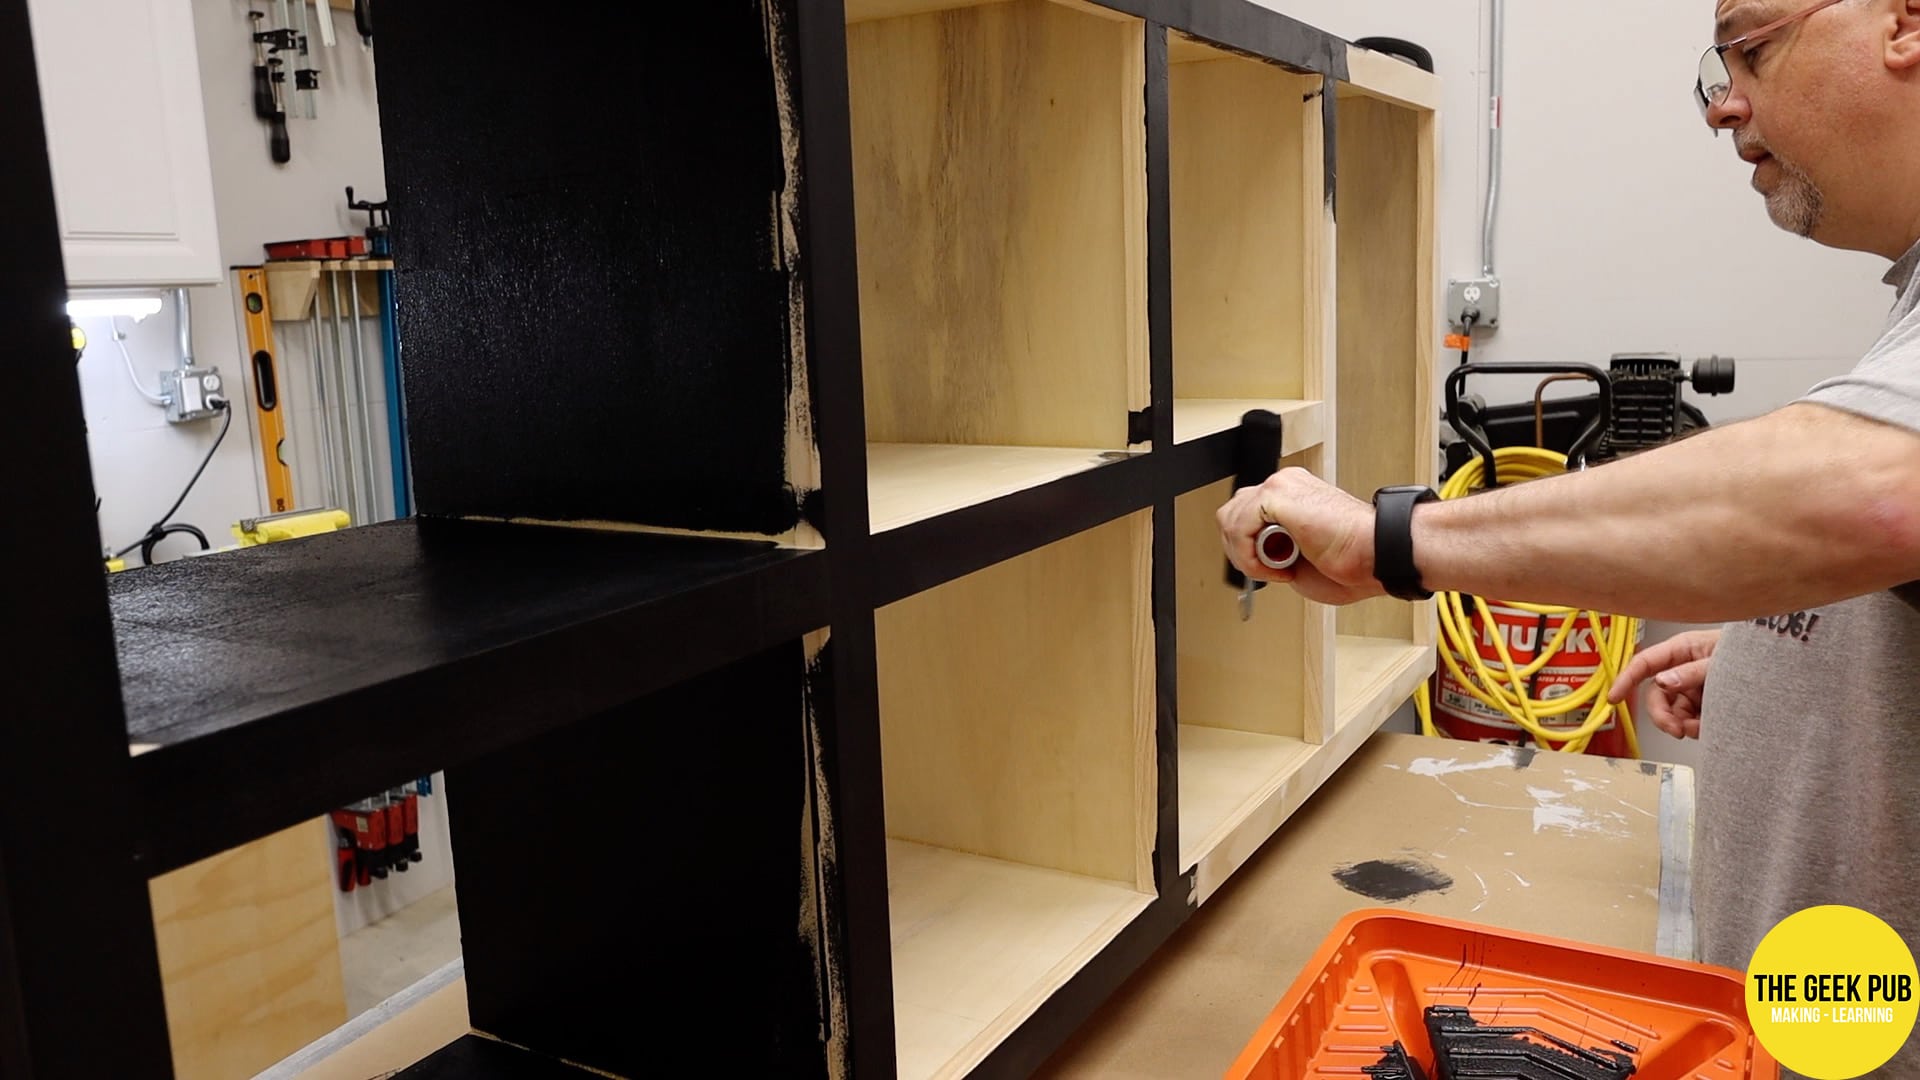
Next up in building a YouTube Studio set, is the credenza. This is the piece that will form the lower backdrop of the set. I wanted it to have some cubbies for displaying props and décor behind me. But it also needed a place to hide some of the cabling, an Apple TV, and small PC using for controlling the TV that will be wall mounted above it.
I go into a lot more detail in the video above if you’re interested. I constructed the credenza from 1/2″ plywood (13mm) with glue and brad nails. To give it a nice front appearance and hide the ugly plywood layers, I built a face frame from 1×2 cabinet grade pine (25mmx50mm).

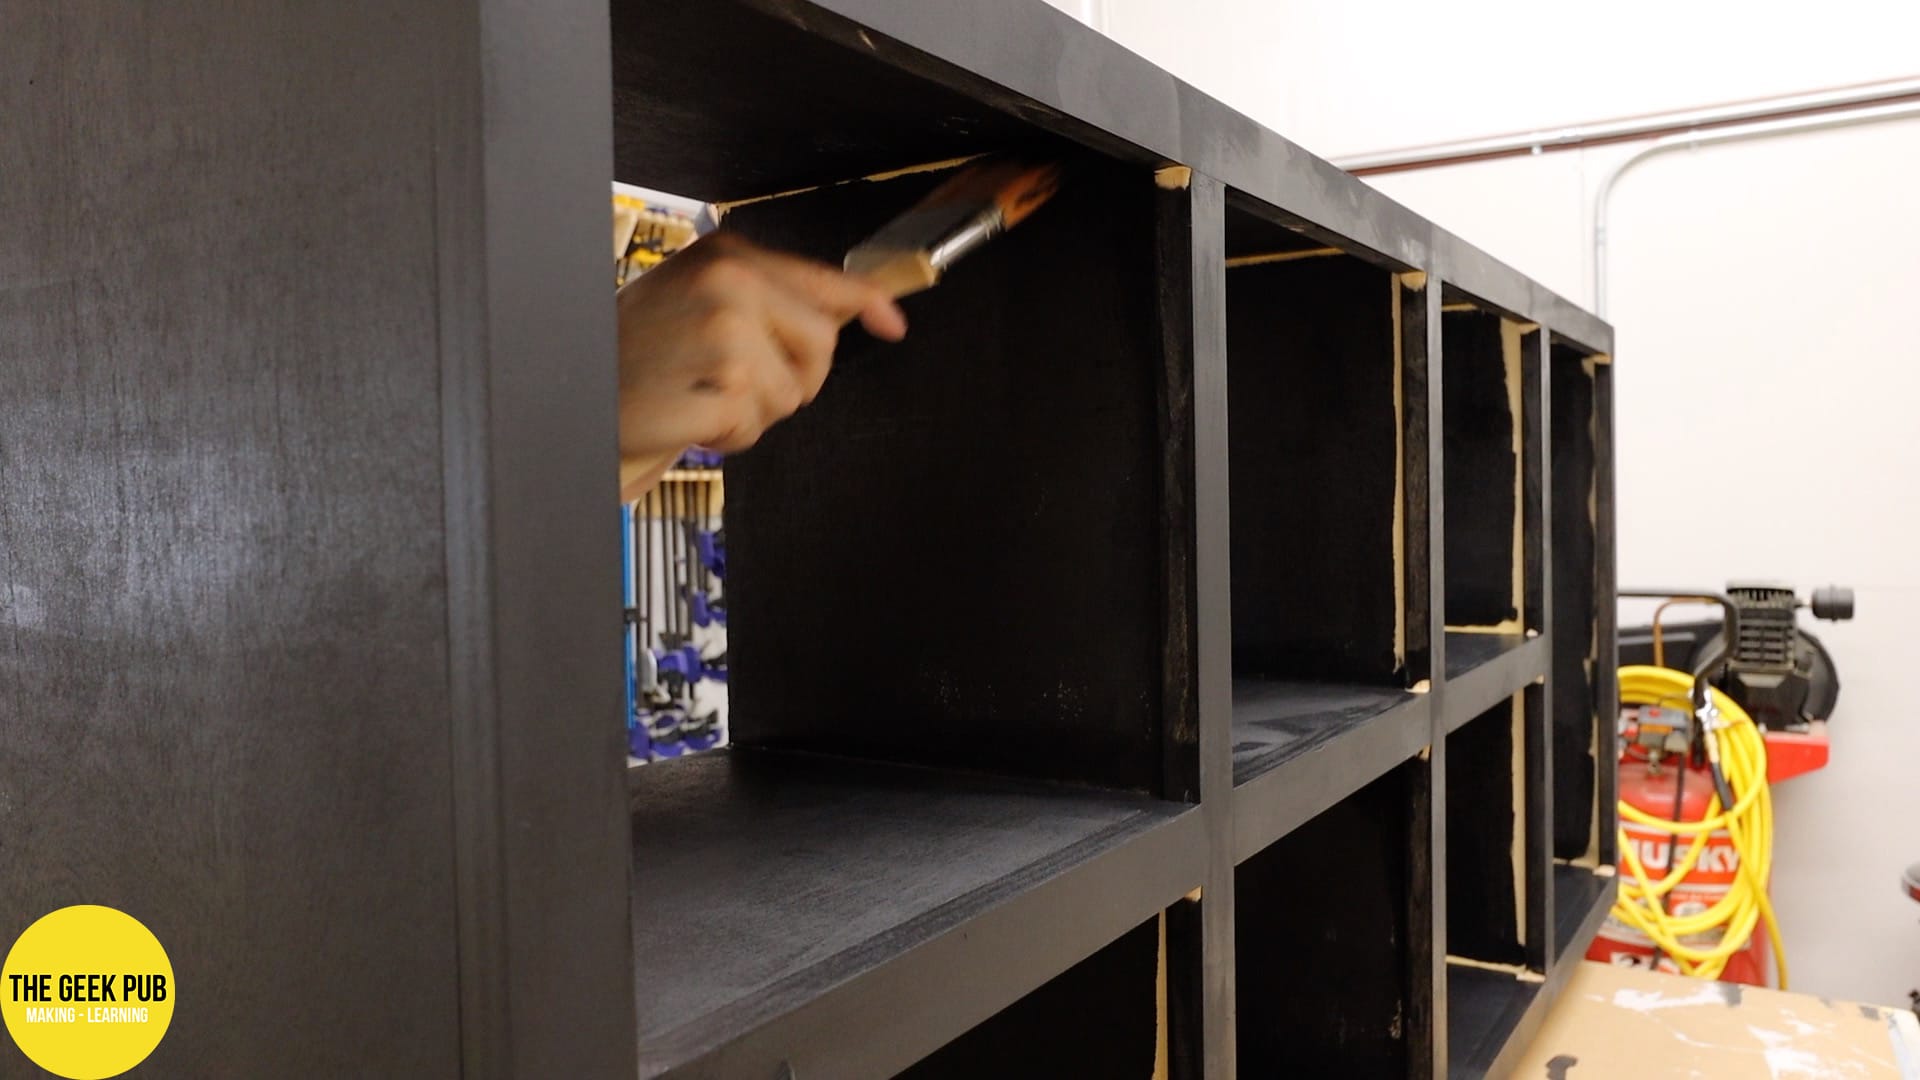
I then painted the cabinetry with a Tricorn Black from Sherwin Williams. This is a nice and dark black in their “ultradeep” series. I thought the black would make a super nice contrast to the light gray. I want all the color of my set coming from the items and props on display, as well as the RGB LED lighting we’re going to add later!
I decided that rather than spray the credenza I would just roll it with a foam brush. Setting up the paint sprayer is a huge pain in the rear and I felt I could roll it just as fast. And I did. And it turned out fine. Building a YouTube Studio set for the win! I did use a small brush to the cut-in work though, being careful to quickly go back over those areas with the foam rollers to remove the brush marks.

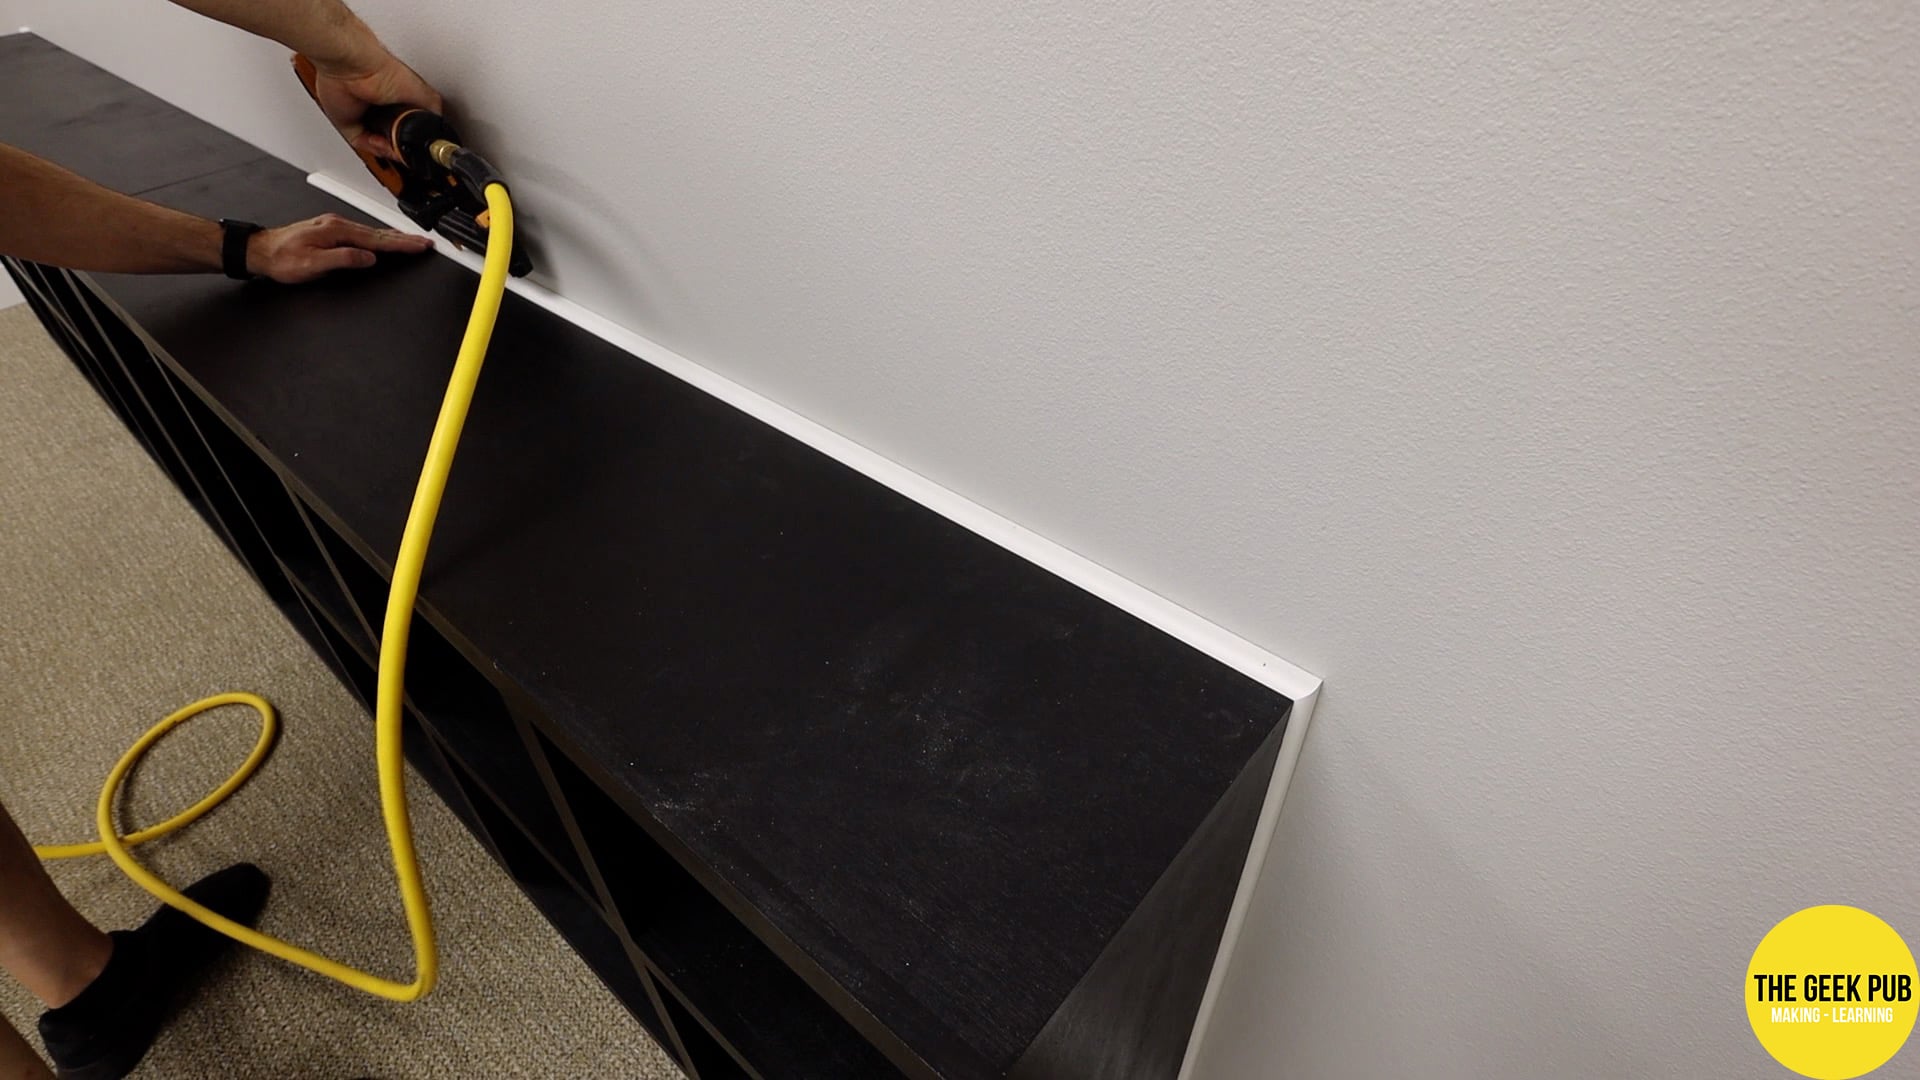
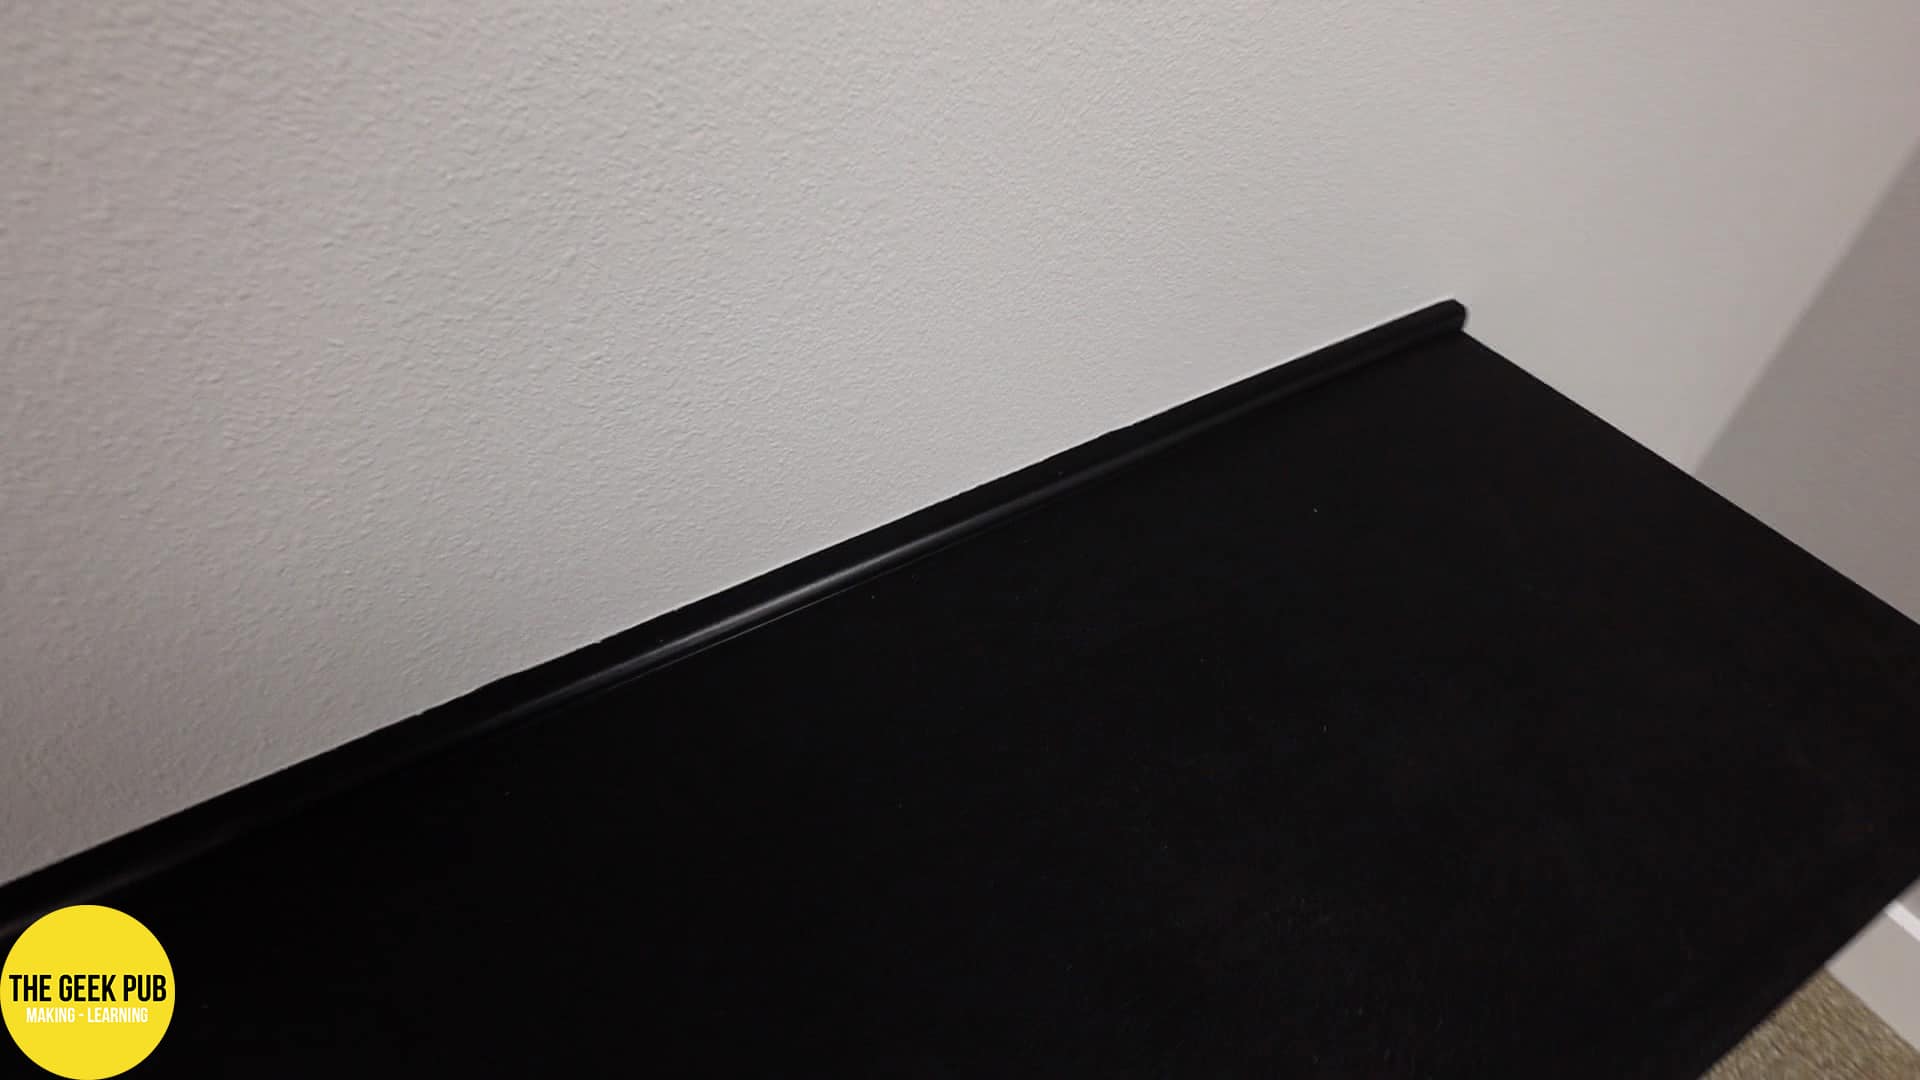
Since drywall is never straight and to give it a nice clean look I installed some scribe molding between the credenza and the drywall to hide the gaps and cracks.
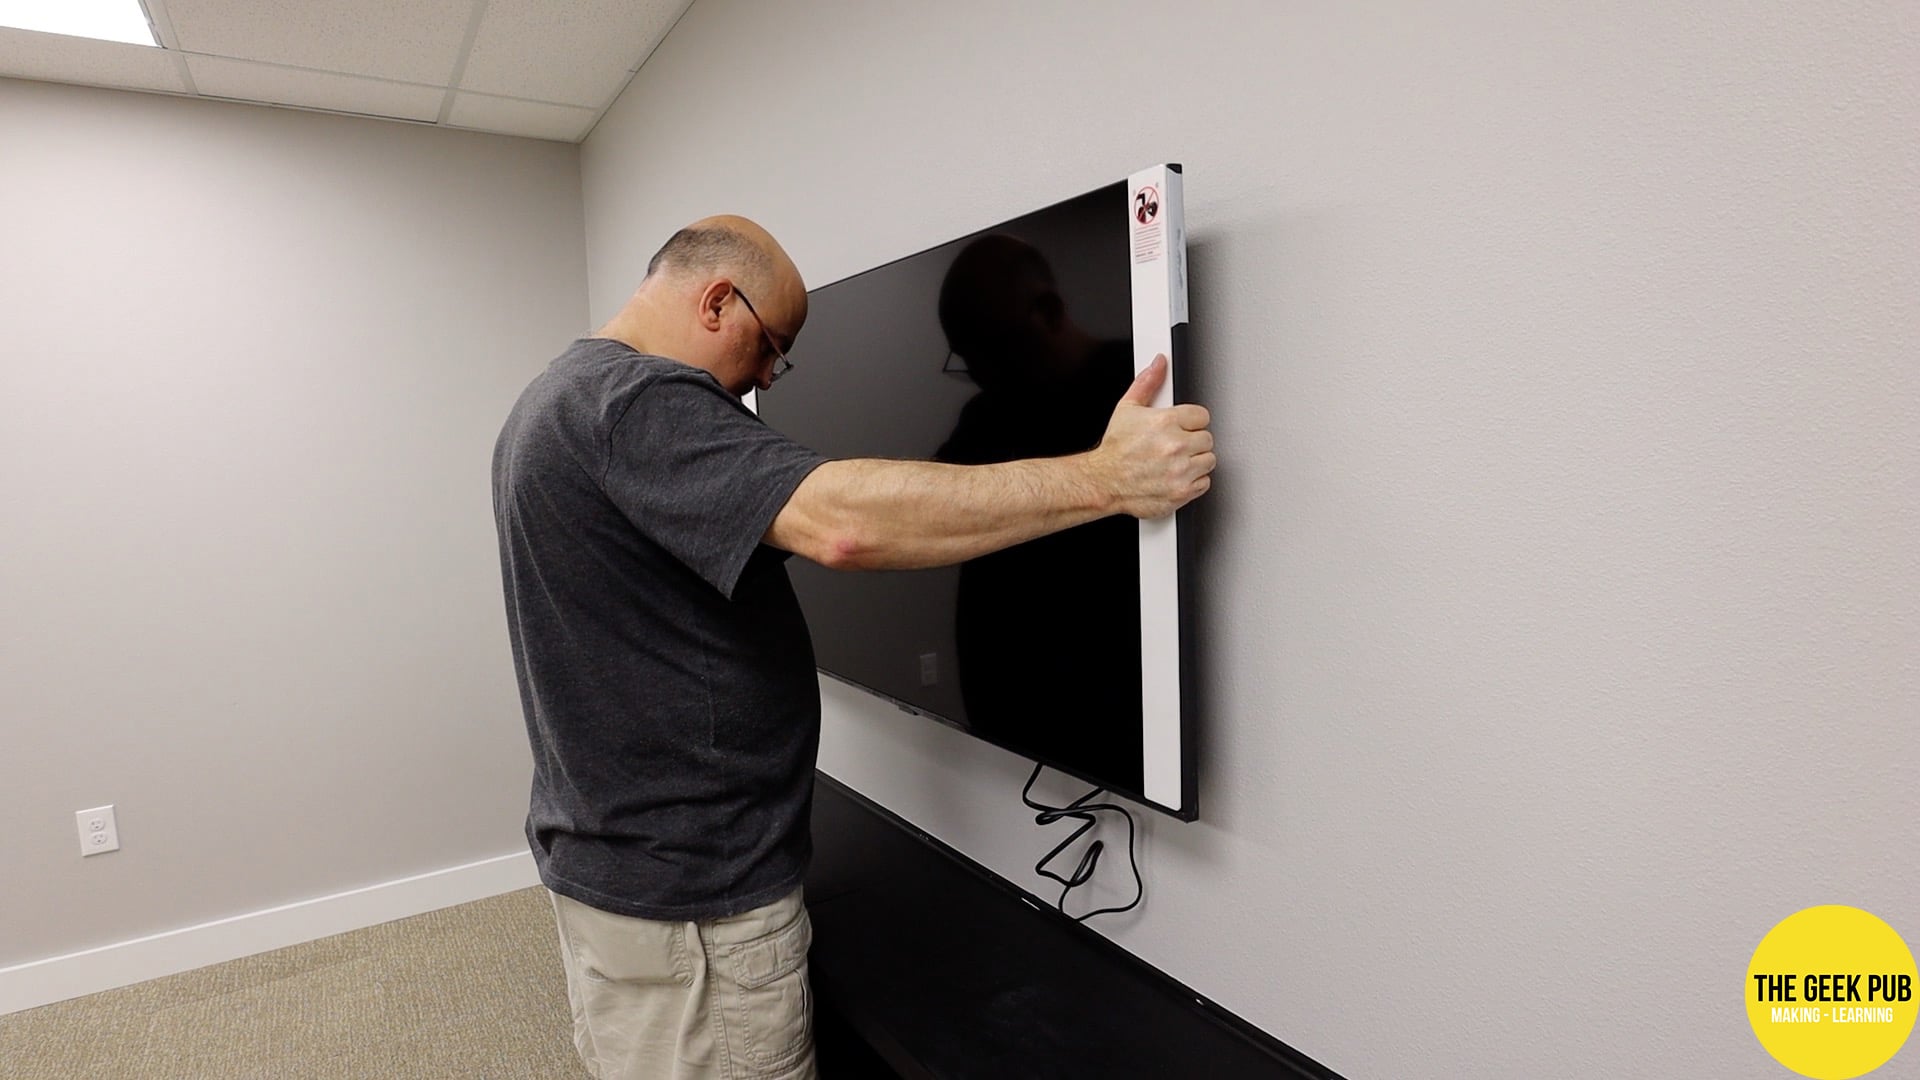
Hanging the TV for the YouTube Set
At this point in building our YouTube studio, we need a TV. It will be the centerpiece of the set and be the perfect place to show off more details or photography of the current topic!
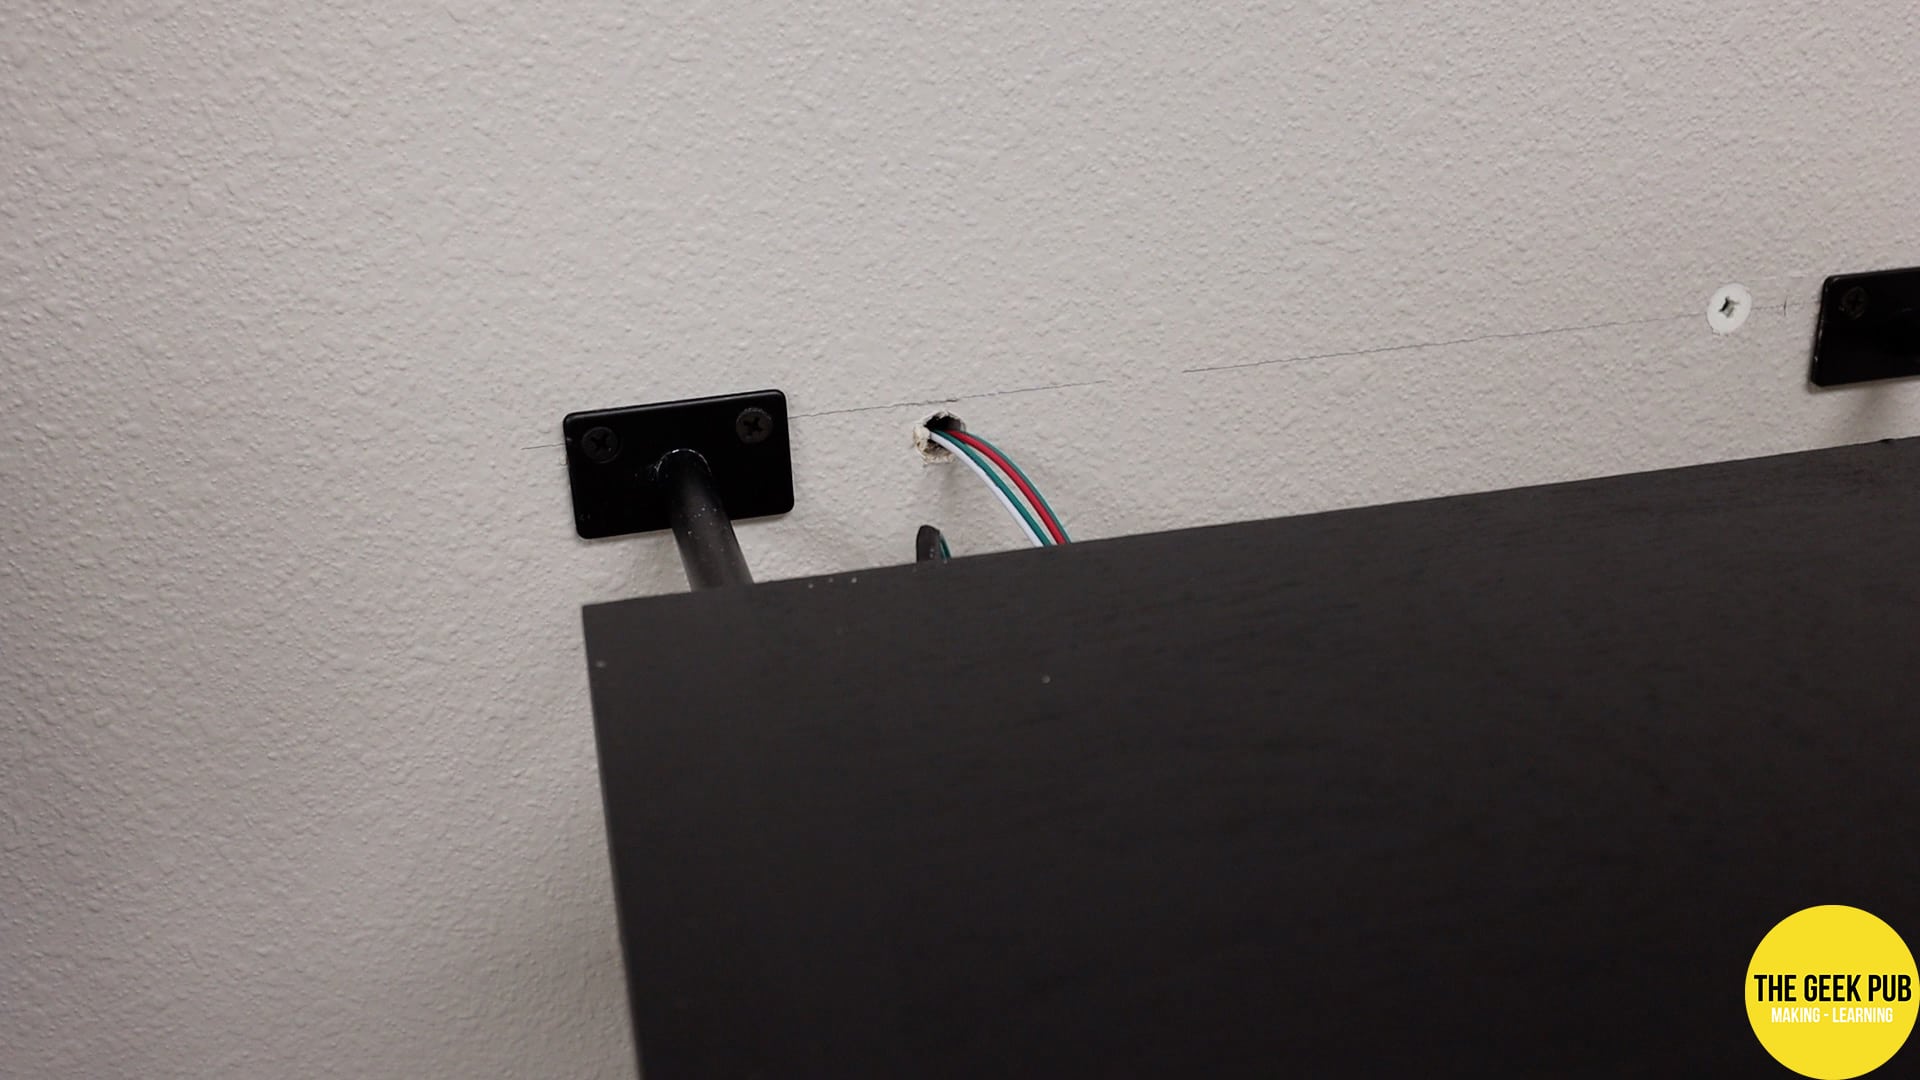
I go into all the detail of how we installed it in the video, but for brevity it’s stud mounted and all of the cables are run inside the wall for a really clean look.
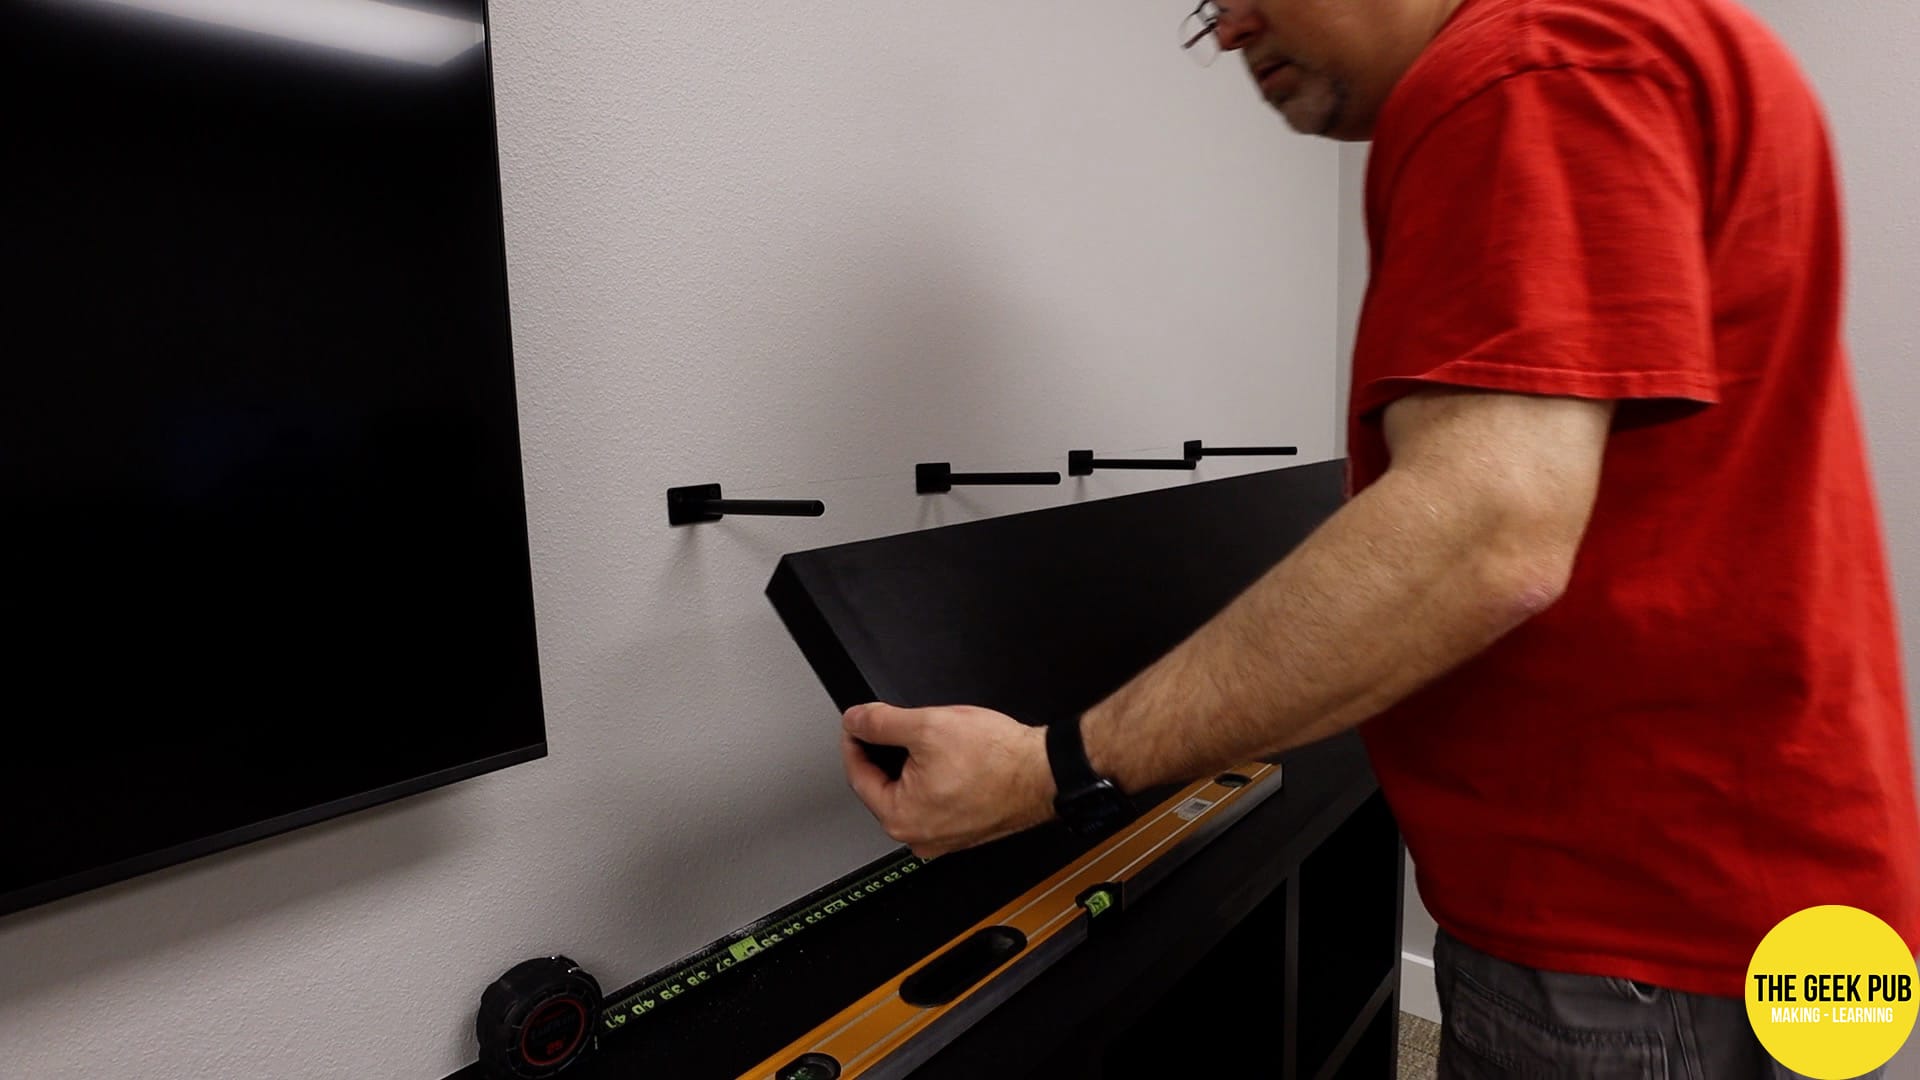
Floating Shelves for the Studio Set
With that awesome TV on the set, its time to add some floating shelves on each side of it to give us some additional space to display props and décor items for our backdrop.
Floating shelves are awesome. They look very modern, and since there are no sides there won’t be anything to block the camera, regardless of how we’re shooting that day. And with floating shelves you can do some other cool tricks with lighting!
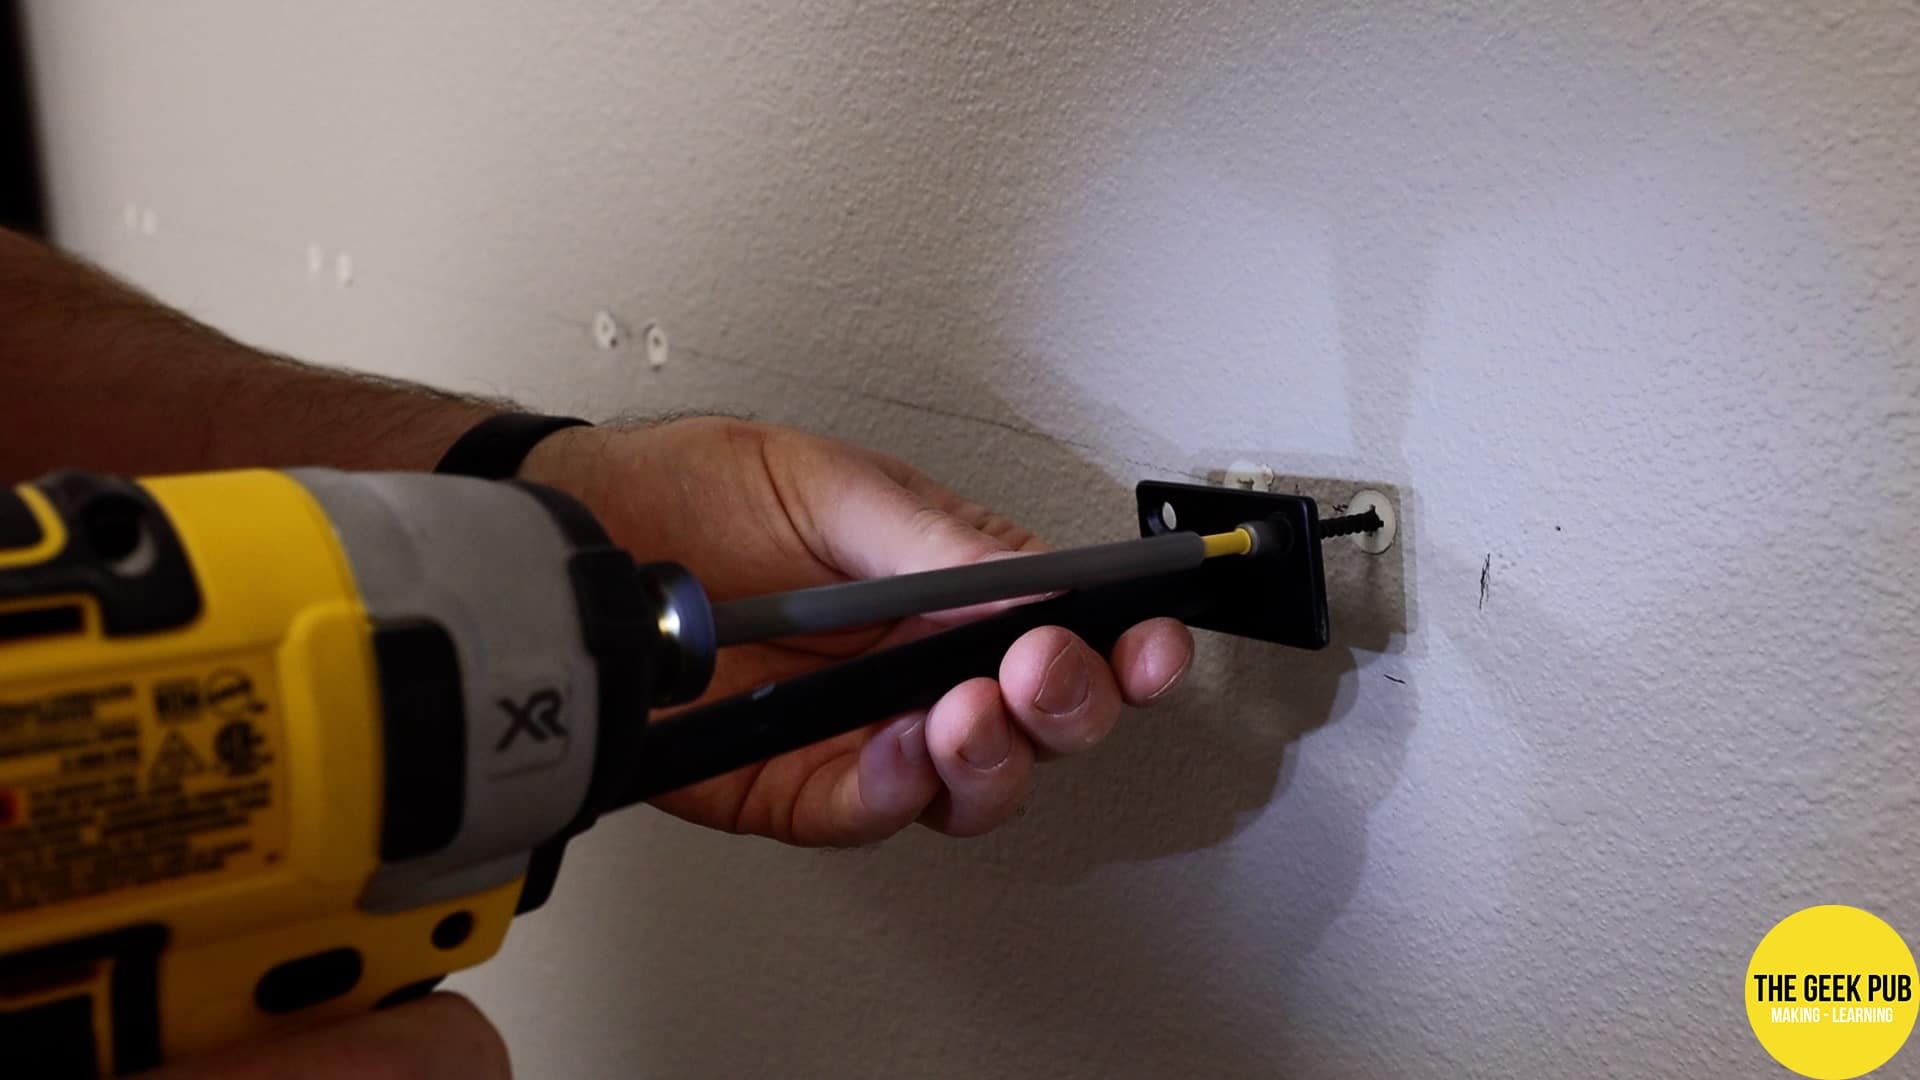
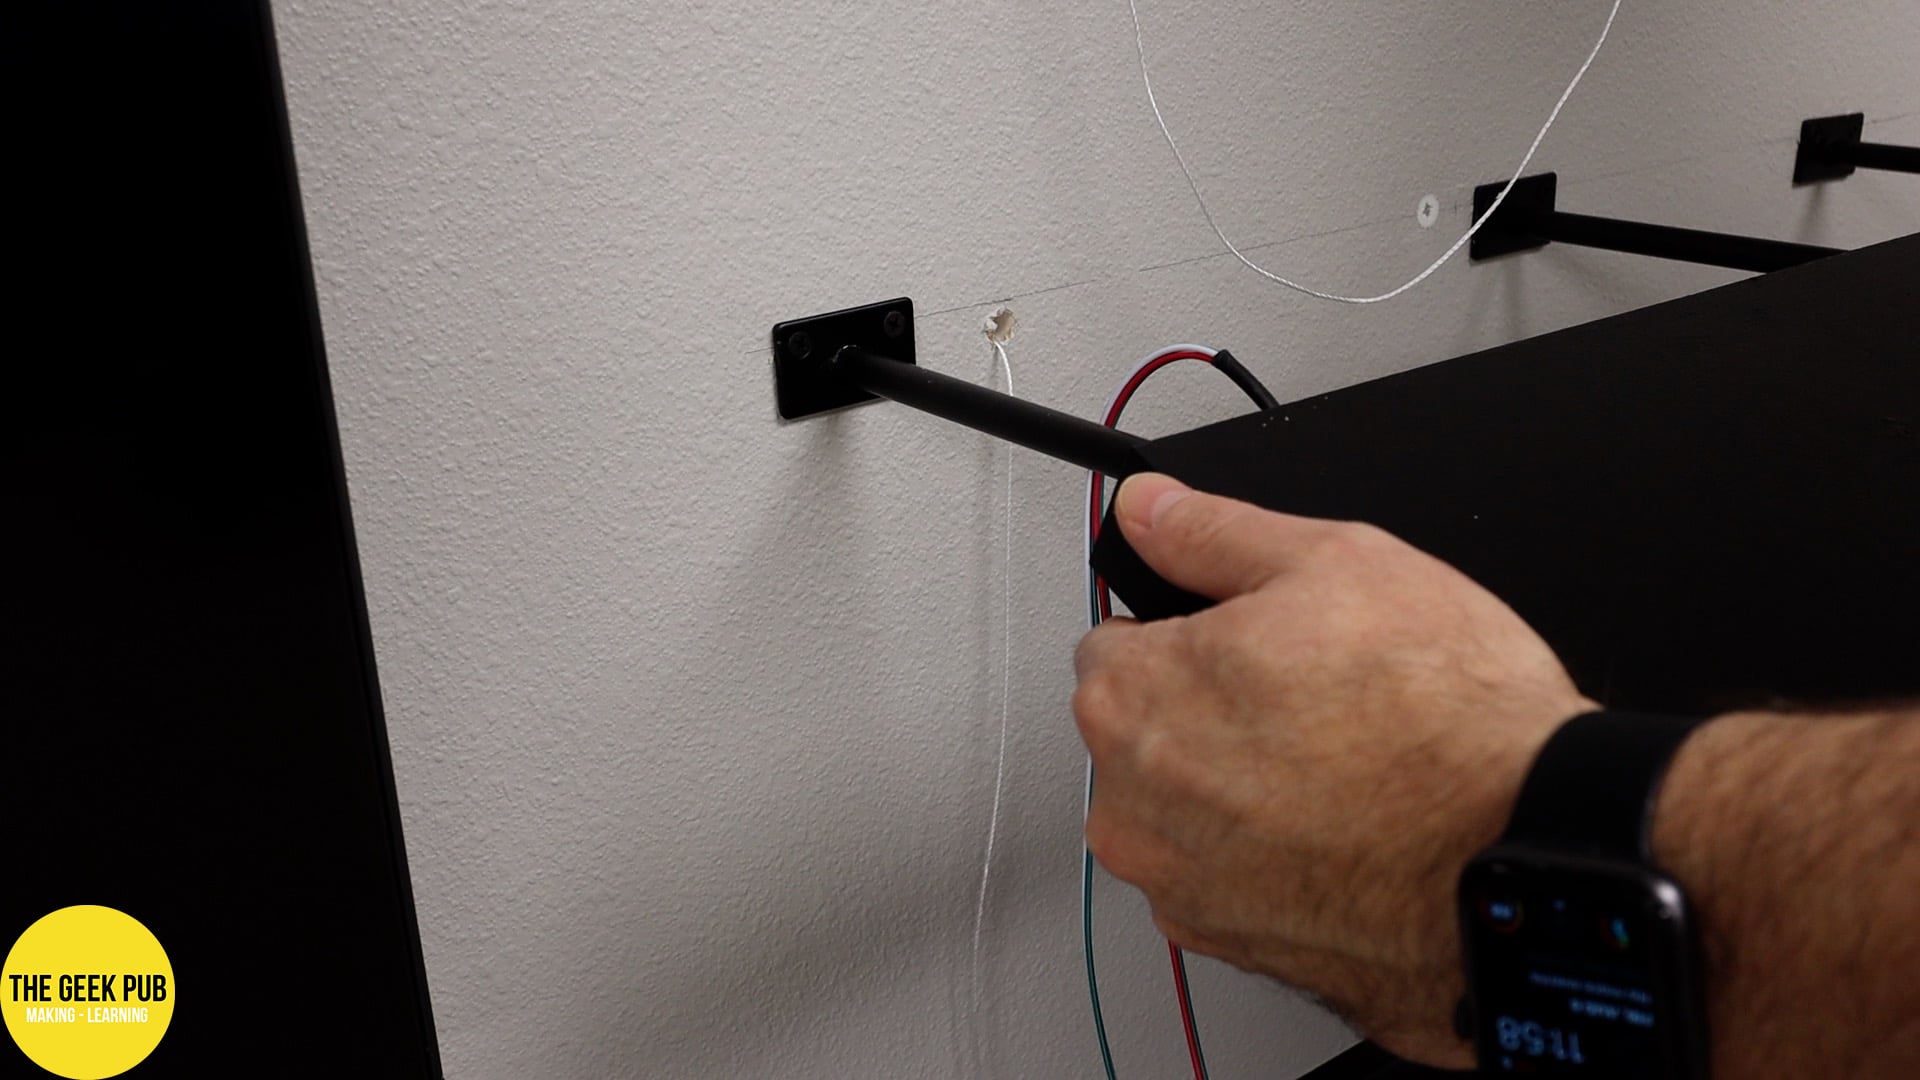
I constructed the floating shelves out of the same plywood and 1×2 pine the credenza is made from and painted them with the same black paint. Floating shelves just mount on pegs that are attached the wall. I tried where I could to put the peg’s screws into the studs, Where that was not possible, I mounted them using screw in drywall anchors.
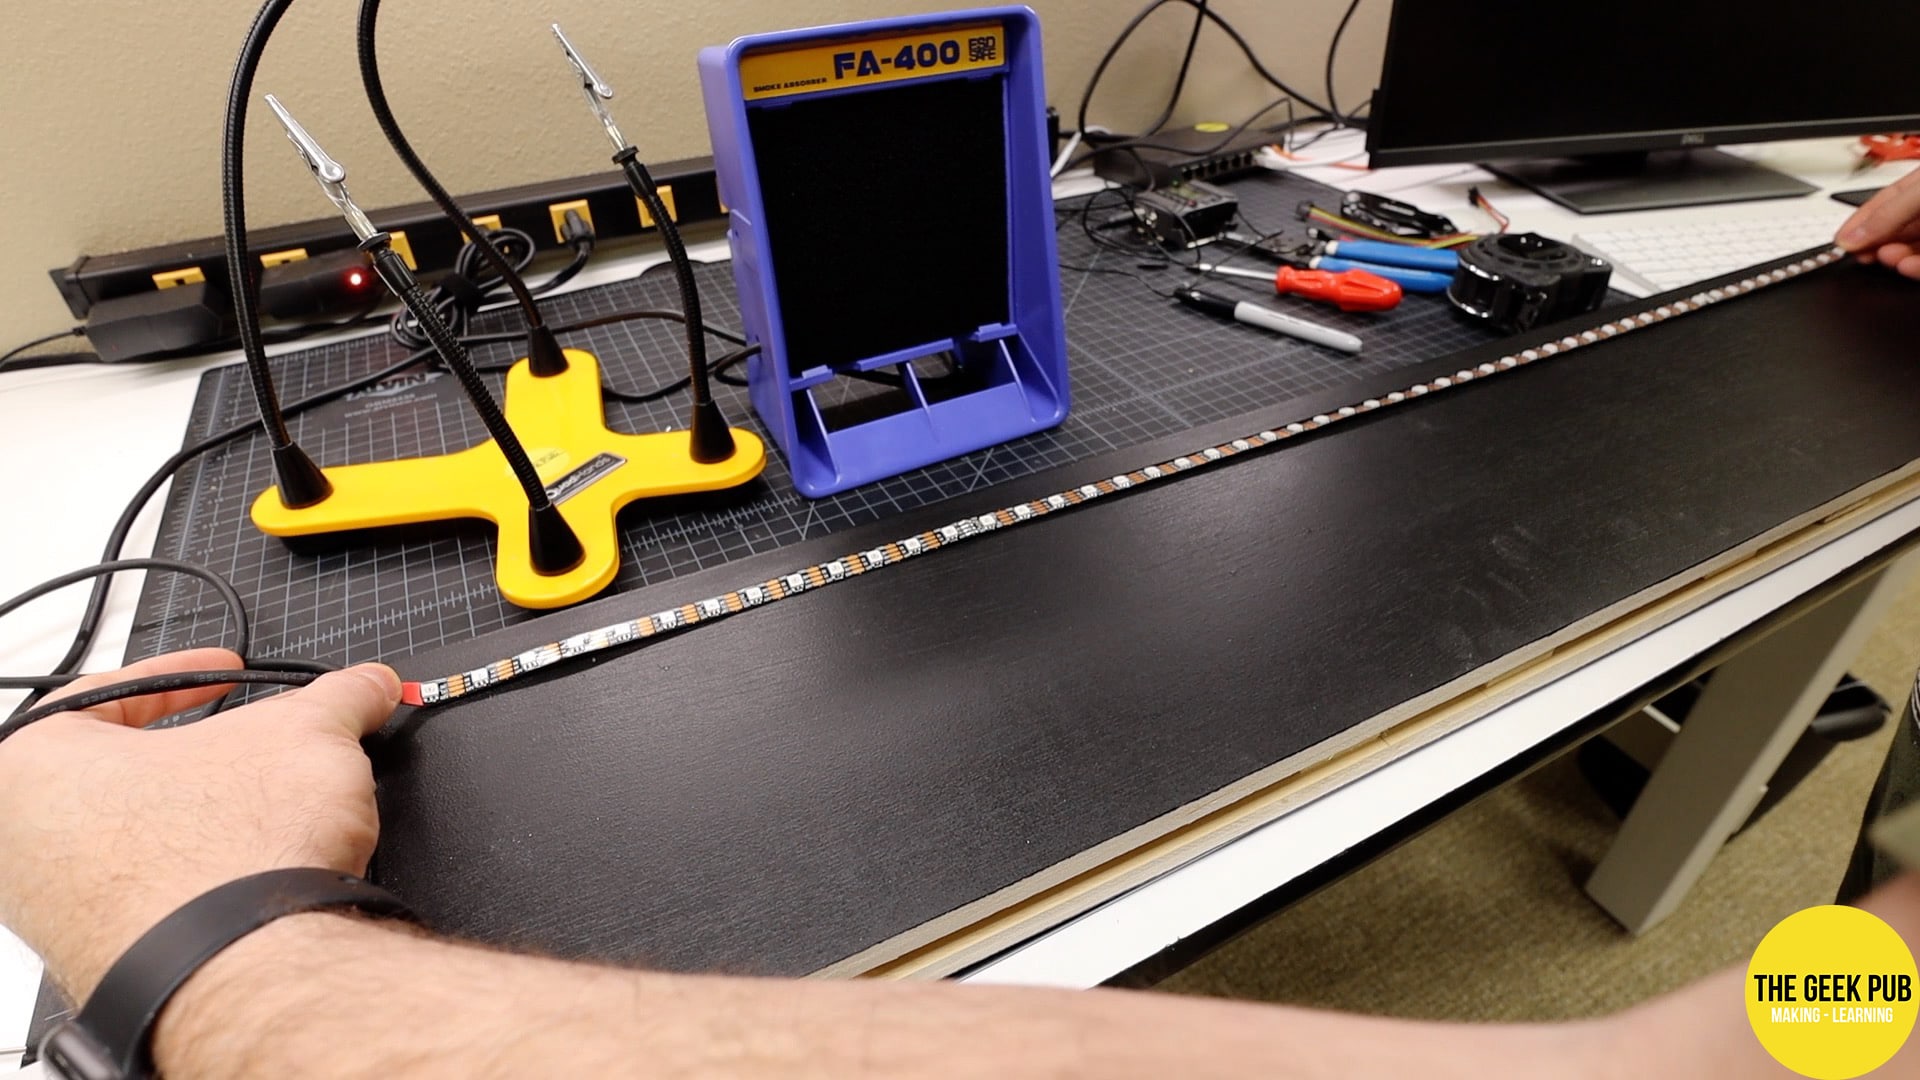
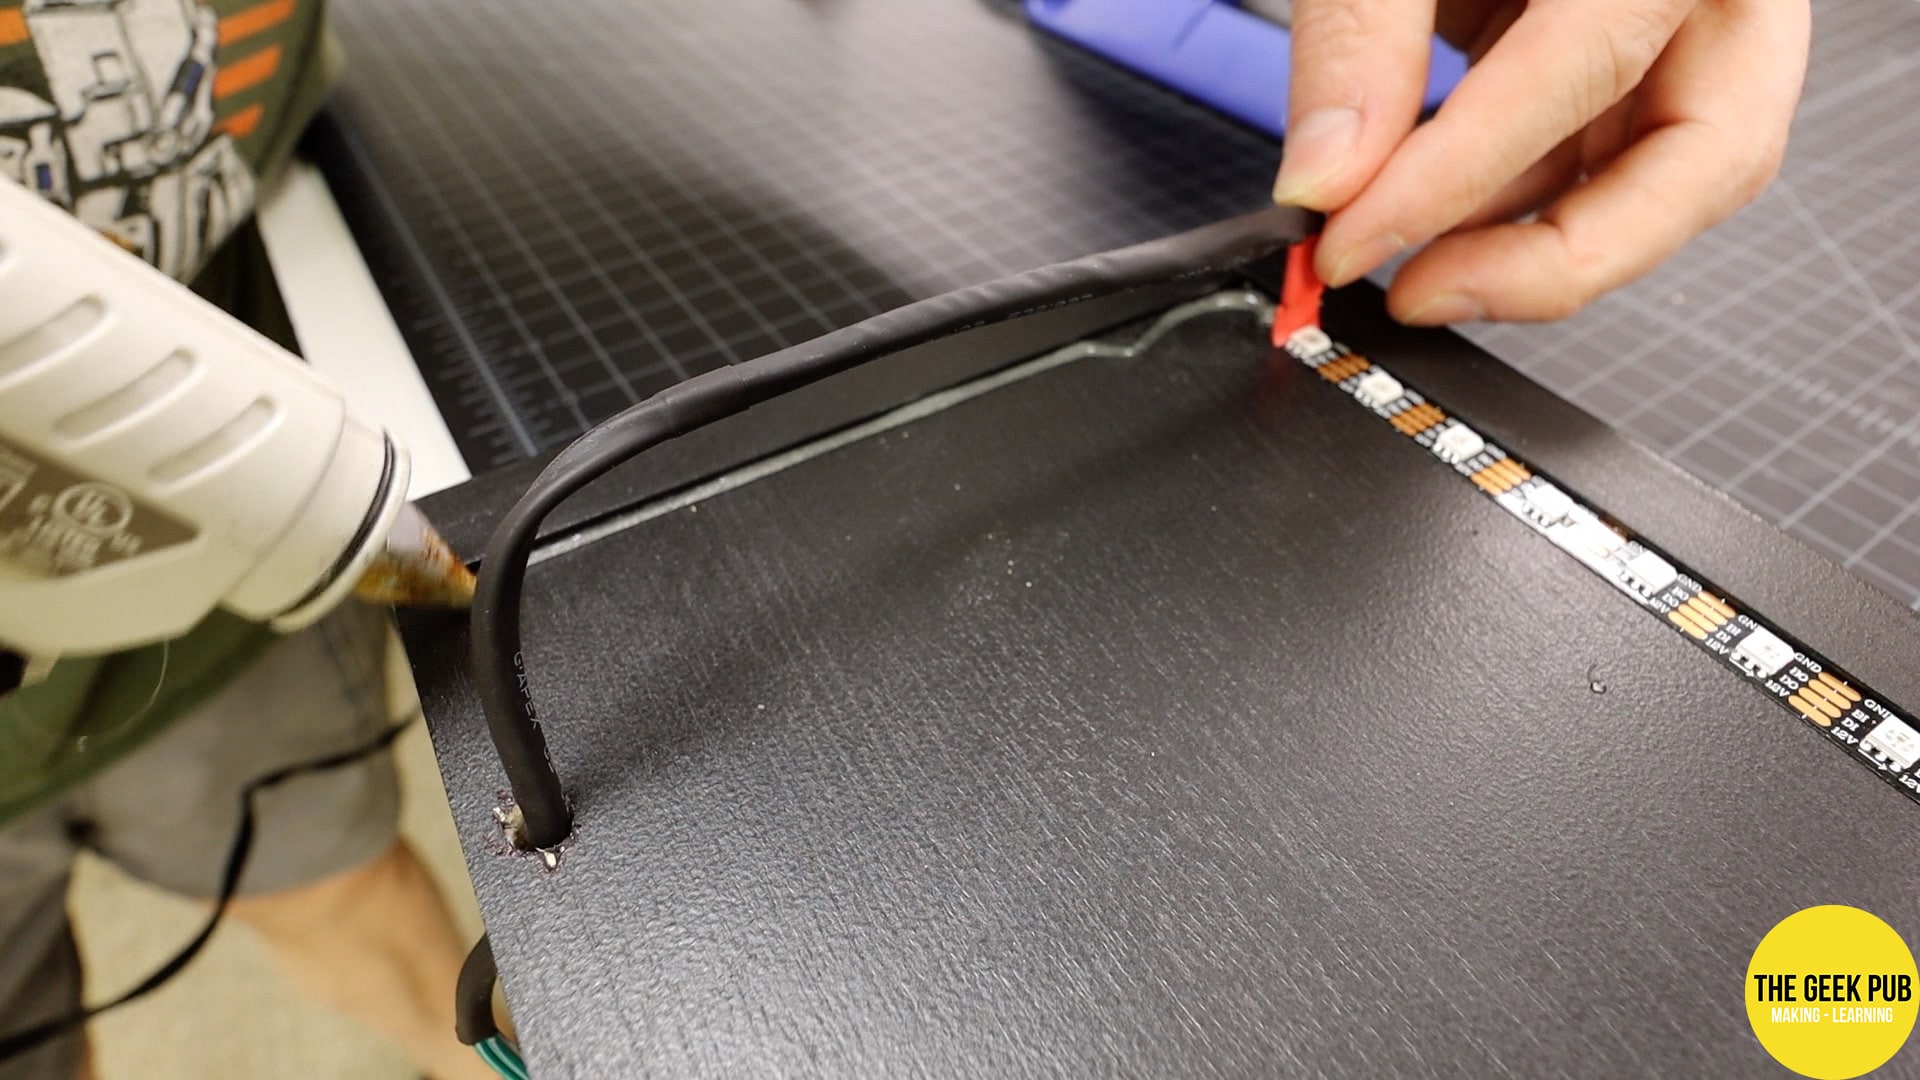
Adding WS2813 RGB LED Lighting
The next thing I did on the YouTube studio build was to install WS2813 LED lighting under all of the floating shelves, and inside each of the twelve 14×14 boxes in the credenza. I installed the lights on the front lips, so that the LED light would cast over the front of anything sitting on the shelf. This of course makes it look awesome on camera.
I ran the 12v wiring for the LED lights inside the walls for a super clean look. Keep reading for the reveal. These turned out amazing!!!!
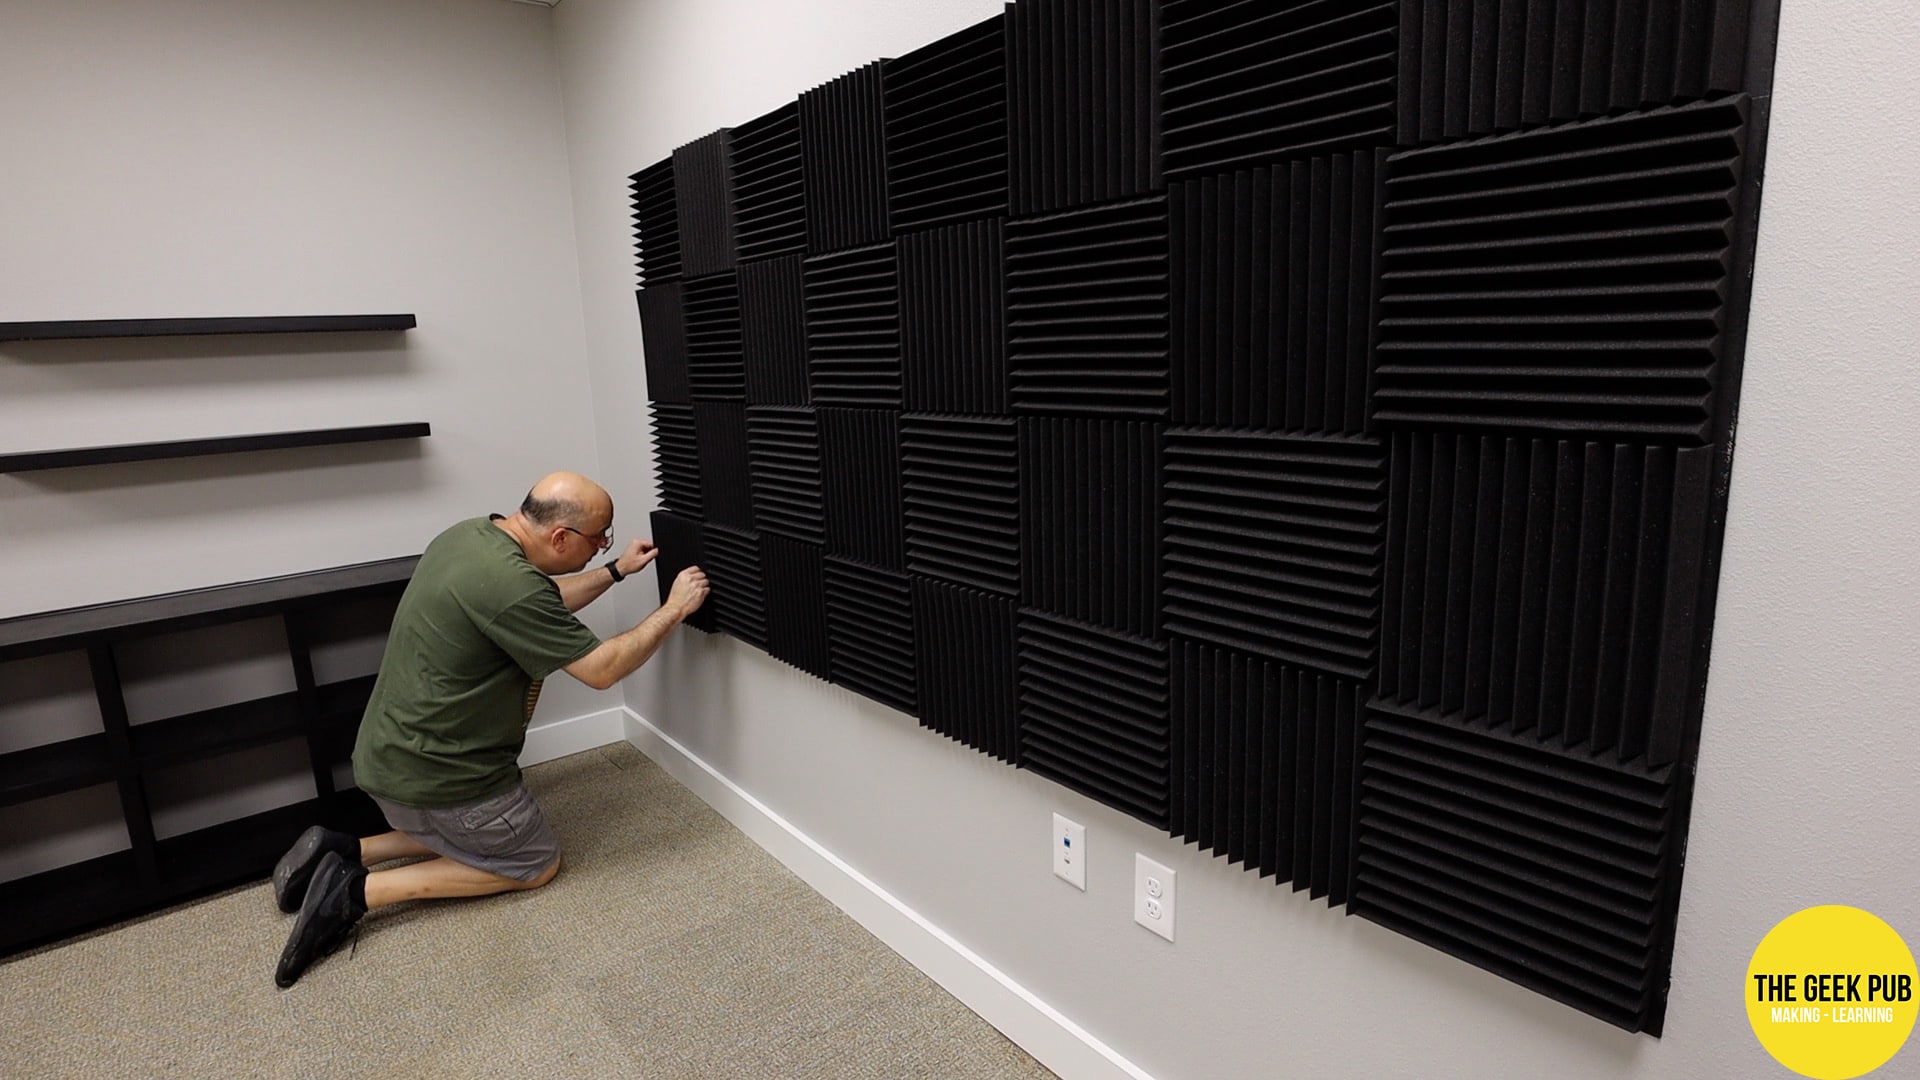
Installing Acoustic Foam Panels
When building a YouTube studio set, one of the things you’ll need to address is echo sound deadening. Since the studio room in my case is mostly bare walls outside the set itself, I would definitely need to deal with this. The echo was simply unbearable.
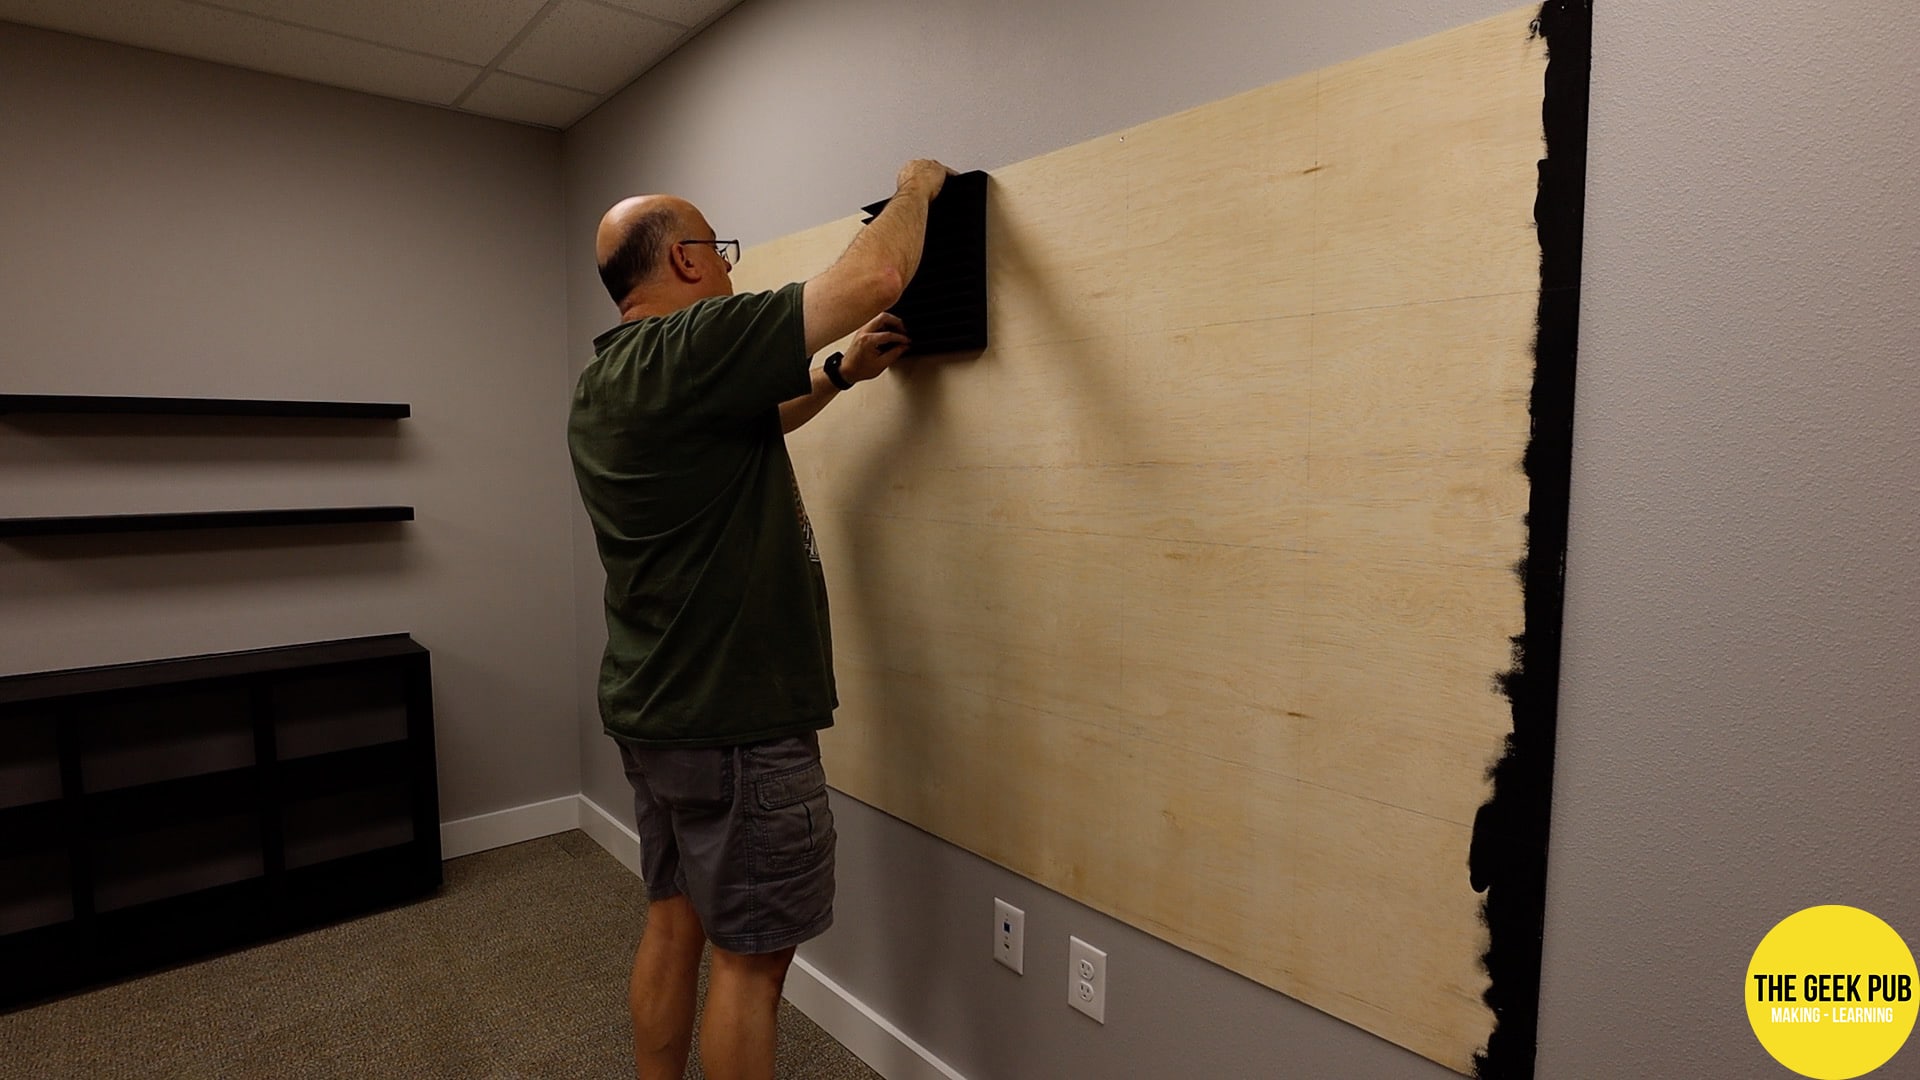
I chose to go with a 2″ thick, 12×12 tile that I got from Amazon. And trust me, it was hard because most of what is on Amazon is nothing more than packing foam and sucks big time.
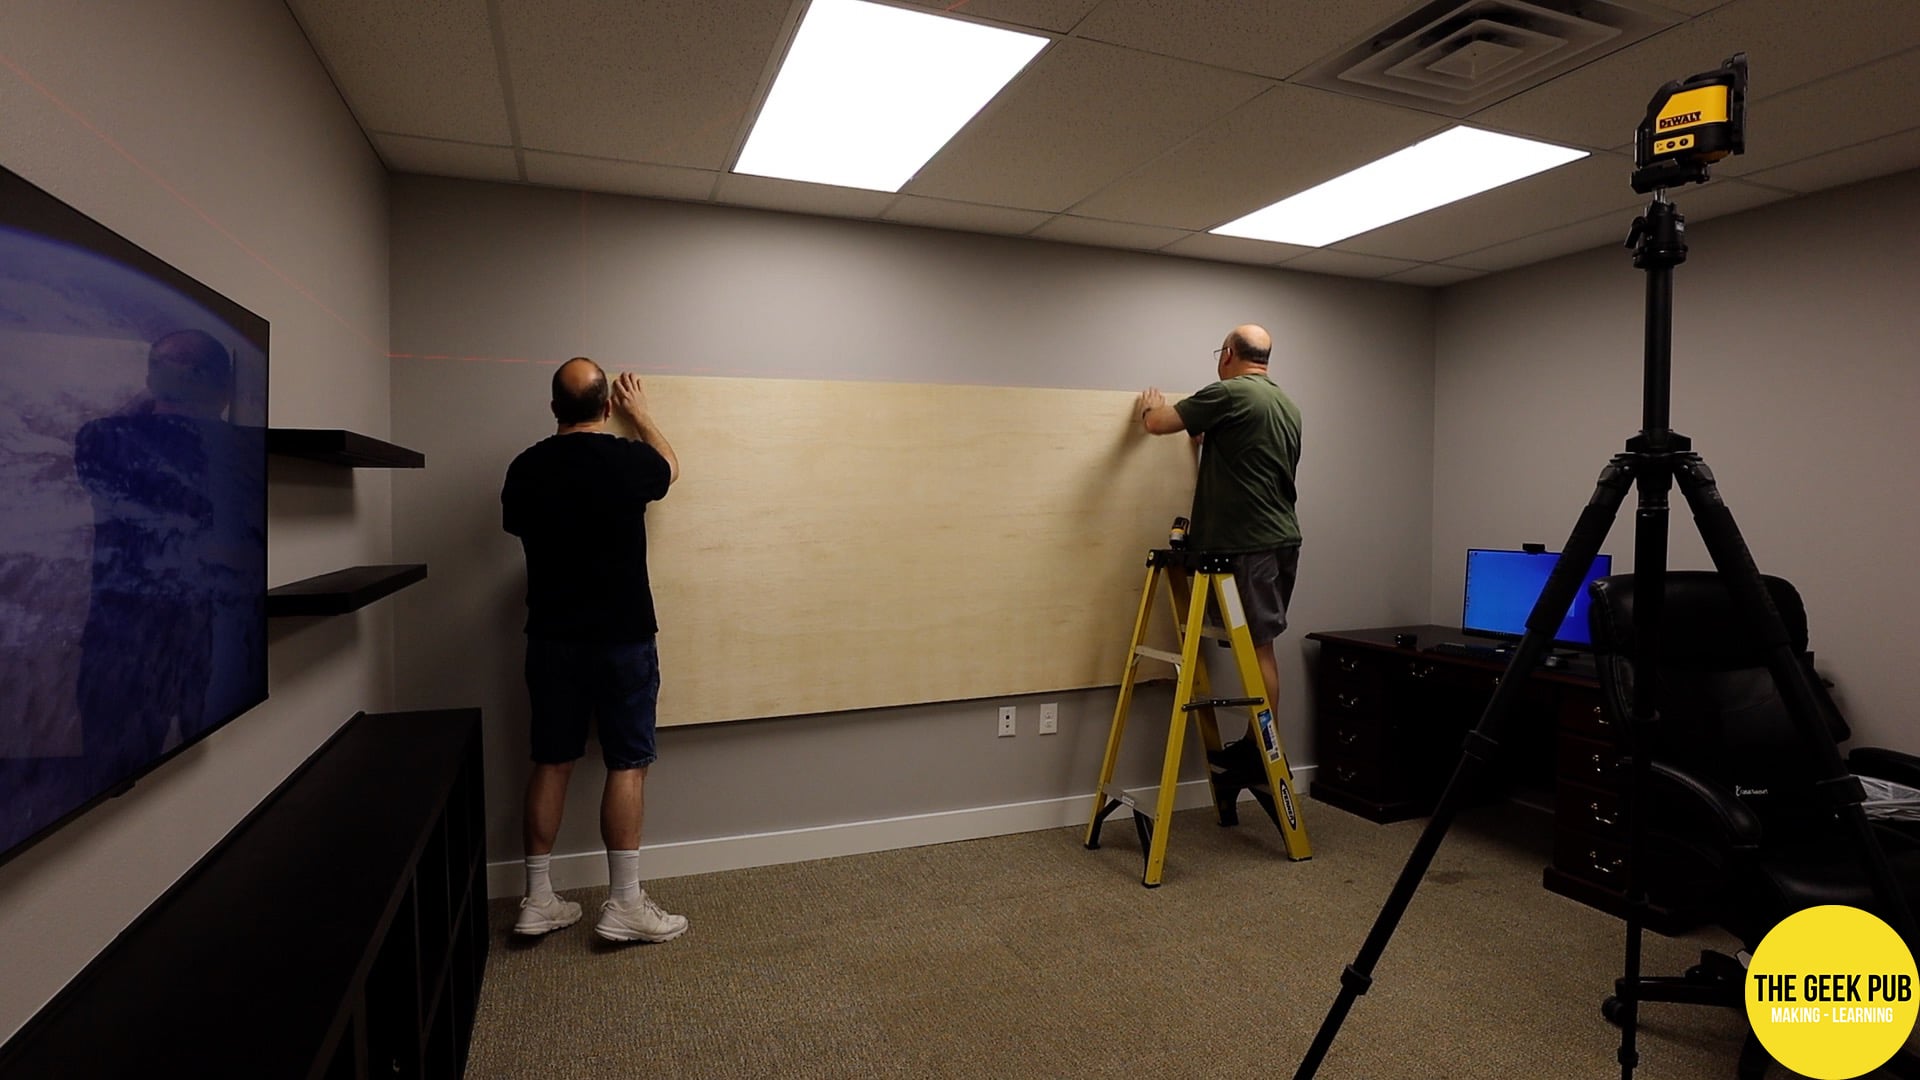
I installed a sheet of plywood on the wall first. This is so that if I ever want to move or completely remove this panel the walls won’t be covered in glue and I can easily patch a few screw holes. Using some 3M Super 77 spray adhesive I attached the panels to the plywood being sure to turn them 90 degrees every other tile for proper echo cancellation.
The Completed YouTube Studio Set
Oh man. Building a YouTube studio set was a tough job, but am I ever happy with how this turned out. You really need to watch the video to get the effect of the RGB lighting and all of the animation it can do. It’s simply amazing!
Of course, 99% of the time our set will just be with neutral white or light blue lighting.