Blog
Raspberry Pi Unifi Controller Setup

Ubiquiti (and their Unifi gear) have become my go to for just about anything network related. Their gear is feature rich, rock solid, and seems to really “just work”. We couldn’t be bigger fans. Since Unifi gear runs a Software Defined Network (SDN), it is not configured like traditional routers and switches via a command-line or on-device web GUI, rather it is configured from a controller running on a separate computer. This controller has its own web GUI and allows you to configure the entire network, a single device, or access a command-line interface if needed. Normally you’d need to buy a cloud controller, setup a dedicated virtual machine, or install the controller on your desktop PC. In this tutorial, we’ll go through the very simple process of setting up a
If you’re interested in learning more about Unifi, check out my Home Network Tour.
Running the Unifi Controller on a Raspberry Pi
The Unifi controller uses the Java Runtime Engine. This means it can be installed on a multitude of platforms, even platforms of different hardware architectures. This makes setting up a
Parts List for this Tutorial
Here’s a handy parts list for you if you don’t already have a
- Raspberry Pi 3 (kit) / Raspberry Pi 4 (kit)
- Micro-SD Card for Raspberry Pi
- Ethernet Cable
- Raspberry Pi 3 Power Supply / Raspberry Pi 4 Power Supply
- Pi Heatsinks
- Raspberry Pi 3 case / Raspberry Pi 4 Case
- Keyboard/Mouse
For this tutorial we used the
Getting the Raspberry Pi Unifi Controller Ready
Before we install the Unifi Controller software, it is important that we update the
To update Raspbian to the latest version, we need to run the following commands:
[code language=”bash”]
sudo apt update
sudo apt upgrade
[/code]
If your
Once your
[code language=”bash”]
sudo apt install rsyslog
[/code]
Installing the Java Runtime Environment
As mentioned, the Unifi controller requires the Java Runtime Environment (JRE) to execute. The JRE is like a middleman between the controller software and the independent CPU architecture of your device (in our case a
[code language=”bash”]
sudo apt install openjdk-8-jre-headless
[/code]
Installing the RNG-TOOLS (Optional, sort of)
The Unifi support forums are loaded with complaints of the
Start by running the following bit of code to install rng-tools.
[code language=”bash”]
sudo apt install rng-tools
[/code]
Now we need to edit the configuration to make a quick change:
[code language=”bash”]
sudo nano /etc/default/rng-tools
[/code]
Find the line with #HRNGDEVICE=/dev/hwrng and remove the # from the front of the line. To look like this:
[code language=”bash”]
HRNGDEVICE=/dev/hwrng
[/code]
The
The last thing we need to do is restart rng-tools (or just reboot the
[code language=”bash”]
sudo systemctl restart rng-tools
[/code]
Installing the Unifi Controller on the Raspberry Pi
It’s now time to actually install the Unifi controller onto the
[code language=”bash”]
echo ‘deb https://www.ui.com/downloads/unifi/debian stable ubiquiti’ | sudo tee /etc/apt/sources.list.d/100-ubnt-unifi.list
[/code]
In order to access that repository, we need to add the keys that Ubiquiti publishes on their website. This prevents imposters from posting fake code to the repos.
[code language=”bash”]
sudo wget -O /etc/apt/trusted.gpg.d/unifi-repo.gpg https://dl.ui.com/unifi/unifi-repo.gpg
[/code]
Once again we need to update Apt. There are new repos now available that it doesn’t yet have lists for:
[code language=”bash”]
sudo apt update
[/code]
Finally we really can install the Unifi controller with one simple command!:
[code language=”bash”]
sudo apt install unifi
[/code]
The great thing about installing Unifi like this is that it automatically gets installed as a service (and hence will automatically start every time the RPi is rebooted). It takes all of the configuration work out of it.
That’s all there is to it! If you already know how to setup a Unifi Controller, then you’re golden at this point. If not, keep reading and we’ll walk you through getting started with a
Configuring the Raspberry Pi Unifi Controller
To access your new Unifi Controller you’ll need the IP address of your
[code language=”bash”]
hostname -I
[/code]
In our case the IP address is 192.168.2.125. So we enter:

If you skip the “s” in https you will get an error telling you so. You will also likely get a security error from Chrome. Click advanced, and then click “proceed to [YOUR.PI.IP.ADDRESS] (unsafe)”. It’s perfectly safe since we know for sure it is our device.
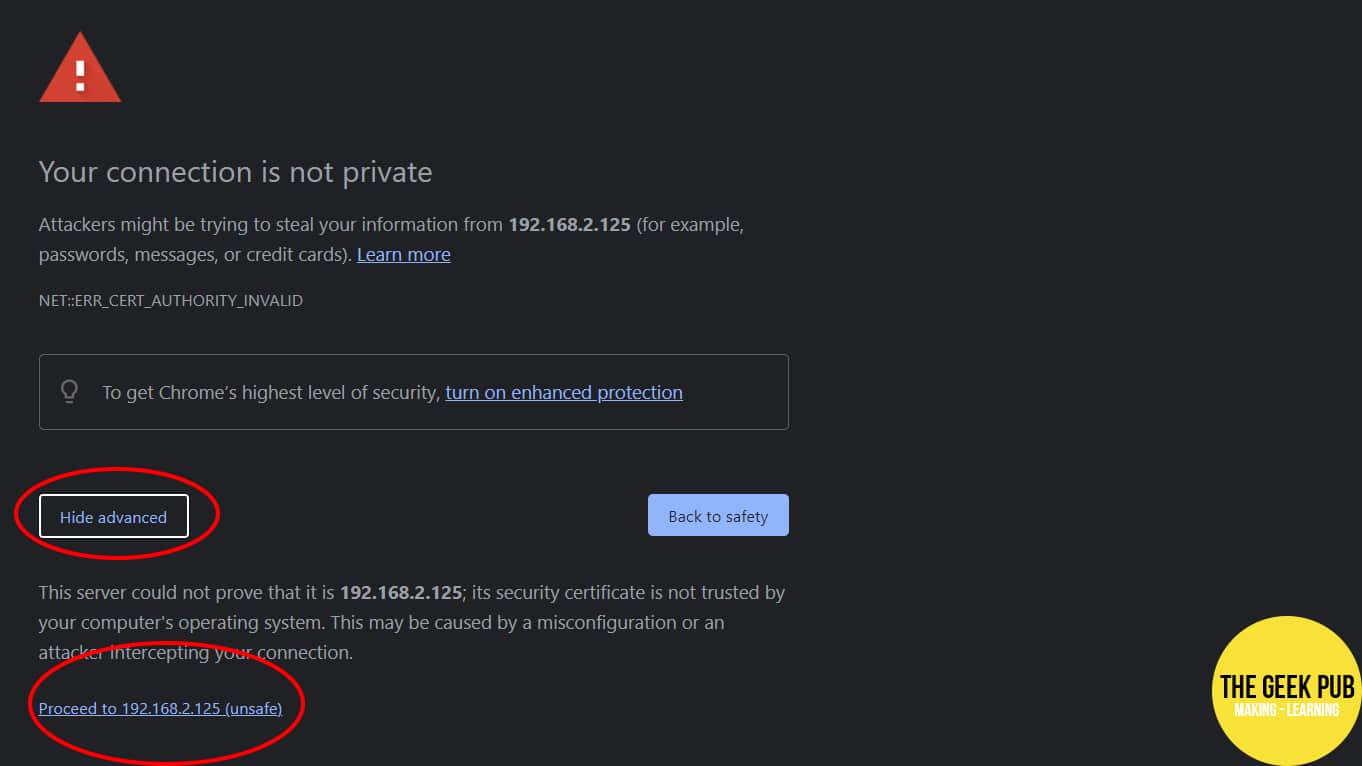
Once you click proceed you should you’ll be greeted with new Unifi controller setup screen!
On this screen you’ll need to enter your new Controller Name, click agree to the EULA, and then click next. In our case, we’re going to name the Controller “GeekPubUnifi”.

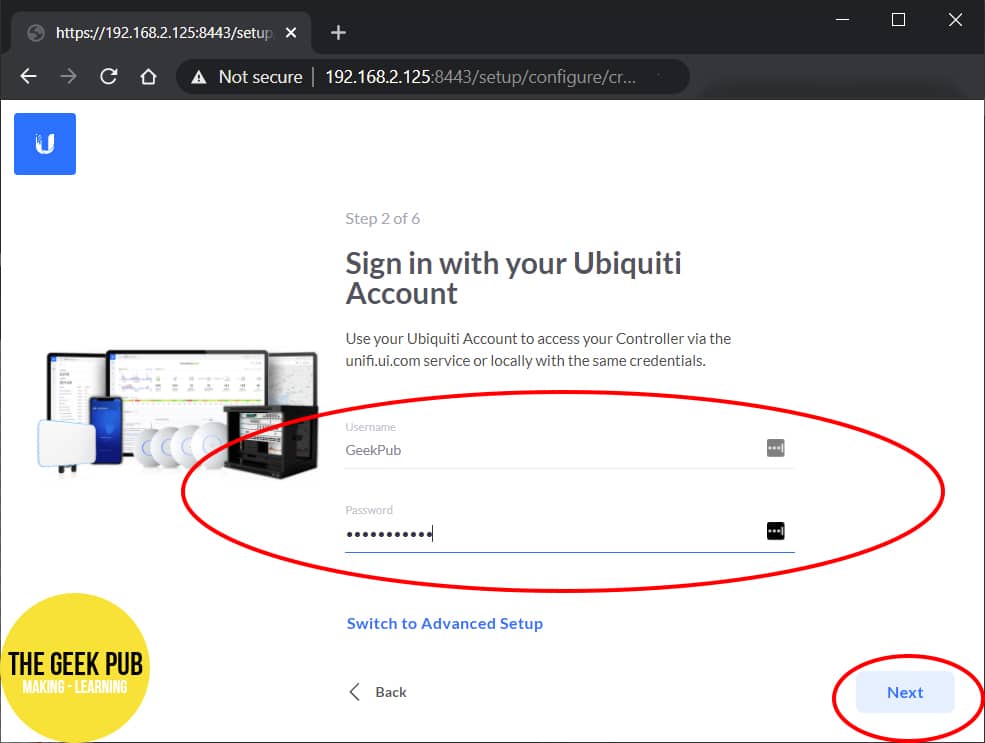
Next up Unifi will ask you for a username and password. Either use your UI account, or click Switch to Advanced Setup and create a local account.
Whatever you like will work here, but select a super strong password. This is your network controller after all!
Once done click next.
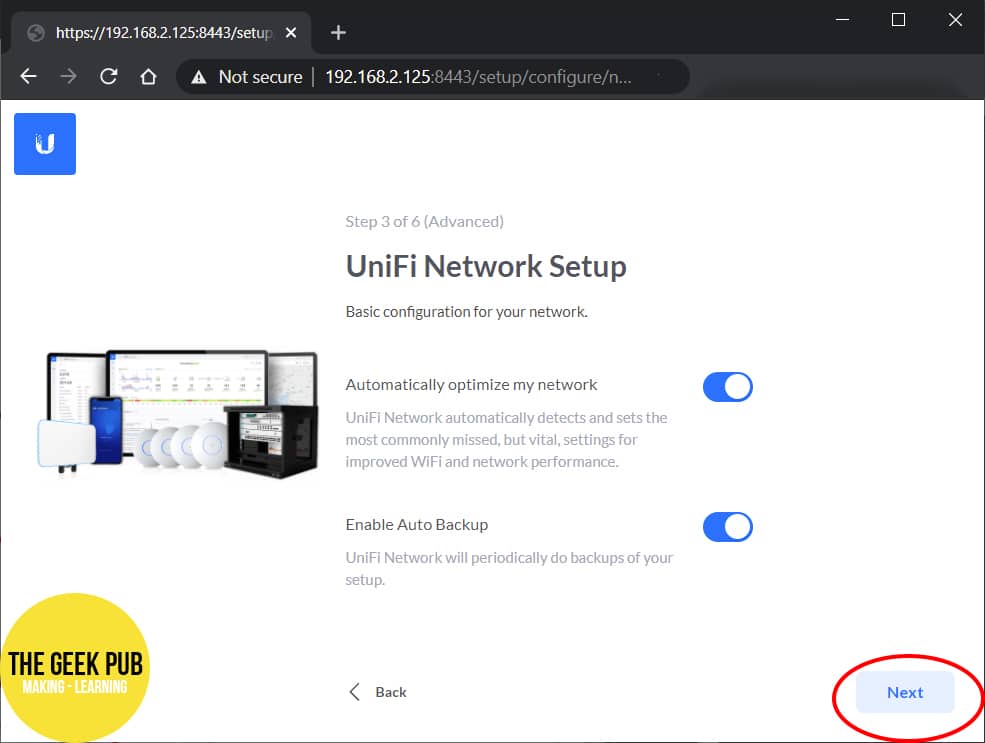
On the next screen the
And then click next.
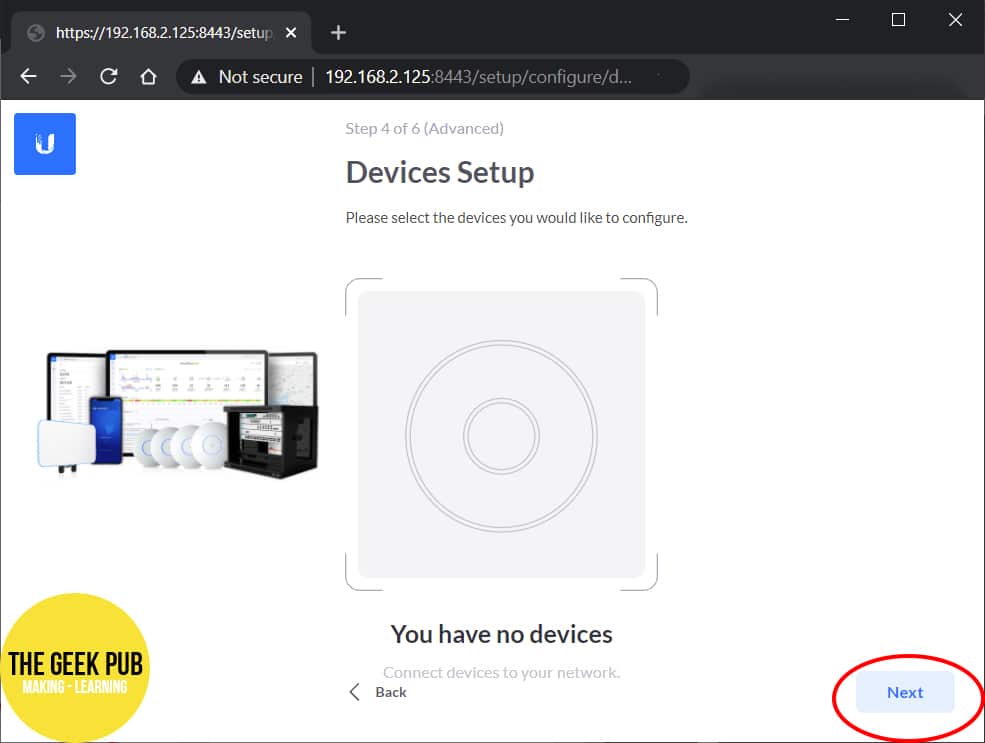
At this point you’ll be configured with the option to configure new devices. In our case we don’t have any devices on the network that are not already adopted by a controller. If you have un-adopted devices, you’ll see them here! If you’re moving your devices to this controller, you’ll need to “forget” them in the old controller first.
Click next.
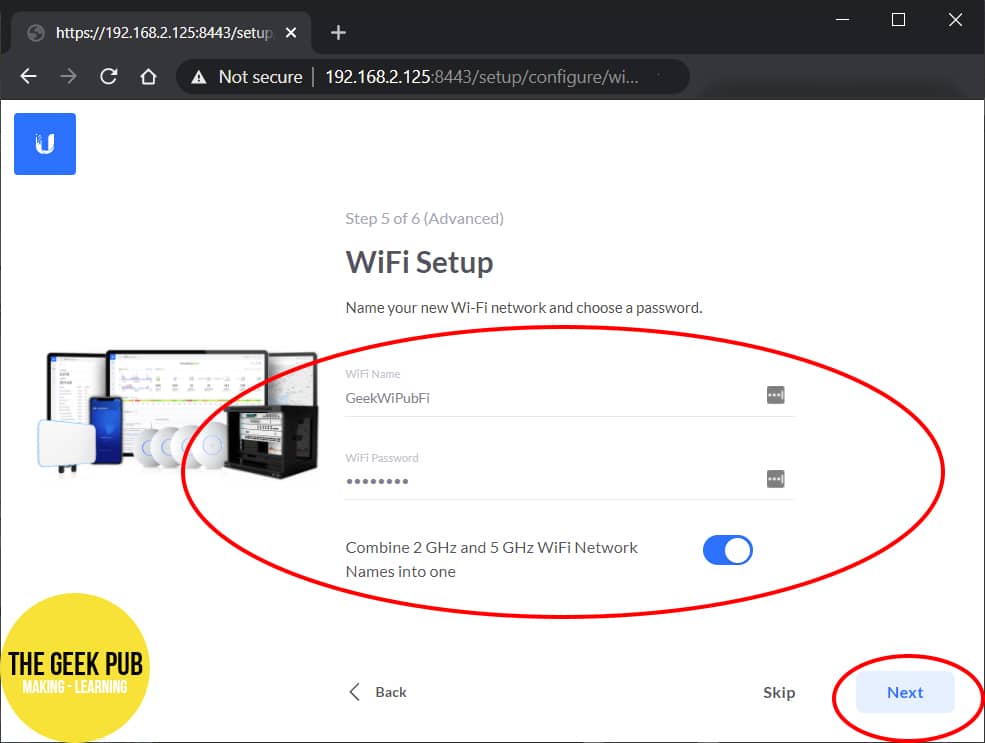
And now it is time to configure your WiFi settings that will get propagated to all Unifi Access Points on this Controller/Site combination. If you don’t plan to use Unifi APs you can click skip. Otherwise, enter the name of your network and a password. The name will be your SSID, so choose wisely.
I highly recommend keeping your 2.4Ghz and 5Ghz in sync by clicking “Combine 2 GHz and 5 GHz WiFi Network Names into one”.
Then click next.
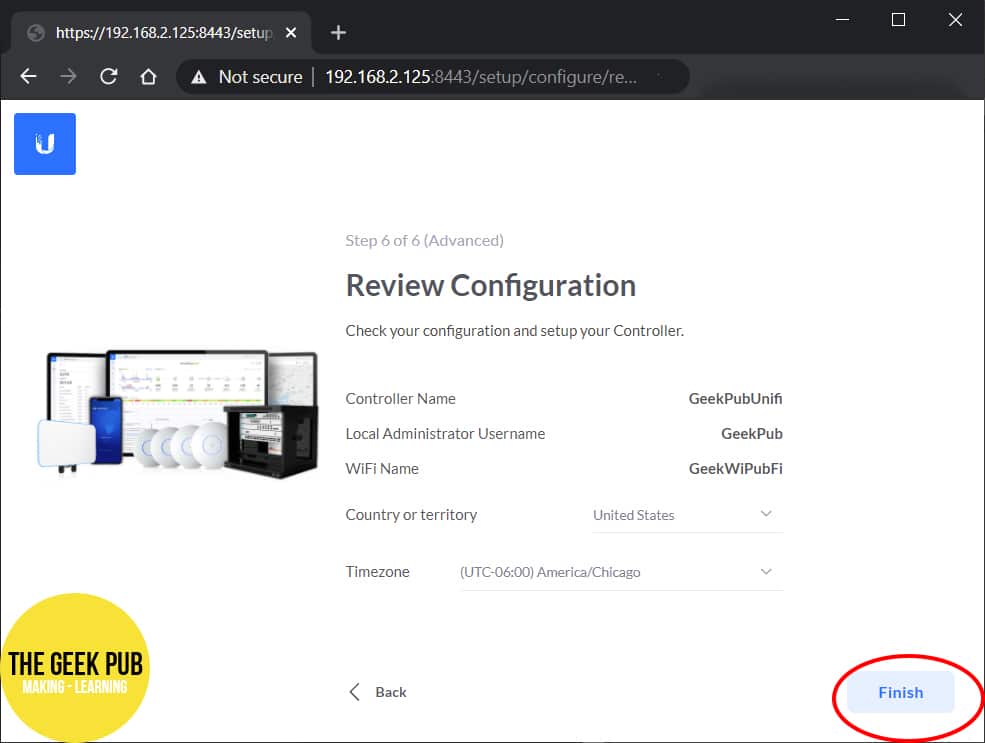
You’ll now be offered the chance to review your settings and make any changes. You can change the Time Zone and Country here if it is for some reason incorrect.
Click finish when done.
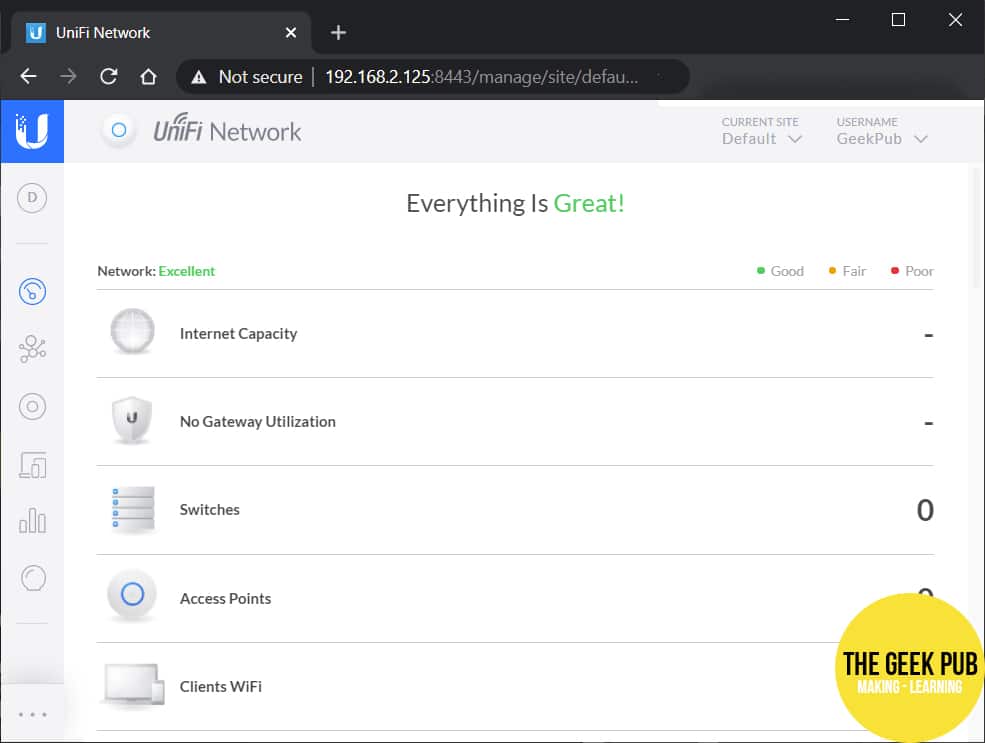
And with that you are done! You now have a
Getting Help with your Raspberry Pi Unifi Controller
We love helping our awesome fans and community. If you run into a problem with this tutorial drop a comment below and we will do our best to help you out.


4.5
If you’re having trouble, leave a comment and we will try our best to help you out!
Would it be possible to access this remotely when you’re not on the same LAN?
If you have a UI.com account. Yes.
i seem to get a mongodb dependency issue