Blog
How to Use a Multimeter (Tutorial)
Many of you may not be familiar with just how handy a multimeter can be! A multimeter is a handy electronics meter that test voltage, resistance, and continuity in its most basic form. More advanced multimeters can even measure capacitance and temperature. In this tutorial, we’re going learn the basics of how to use a multimeter! If you need help selecting a multimeter, we have an article on our picks for the best multimeter.
How to Use a Multimeter
Now let’s get started learning how to use a multimeter! We’re going to start with measuring DC voltage.
How to Measure DC Voltage with a Multimeter
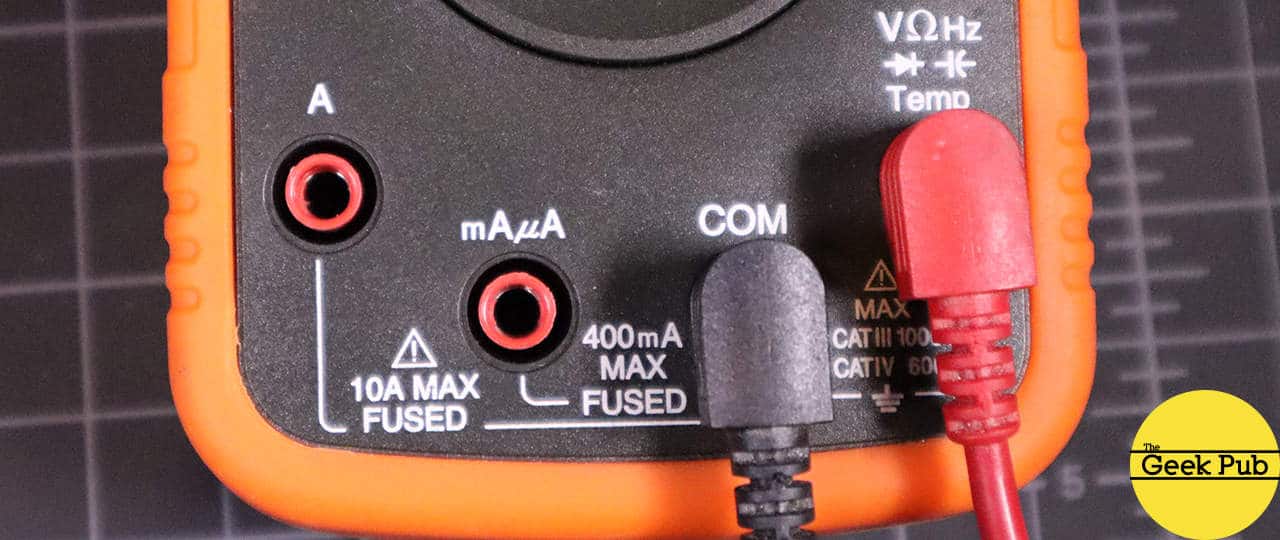
To measure DC voltage we need to first make sure our probes are connected properly. The black probe’s lead should be plugged into the COM or common banana jack on the multimeter. The red probe’s lead should be plugged into the V or voltage banana jack on the meter. Generally, the black lead will always be plugged into the common jack and never moved. The red lead will move depending on the operation you are doing, so its always good to check it before you begin. Should you have it plugged into the wrong jack, you could short something out or even damage your meter.
Now switch the rotary dial on your multimeter to the voltage setting for DC. This symbol is represented by a sold line with a dotted line below it (⎓). (AC is represented by a sine wave symbol, or squiggly line ∿).
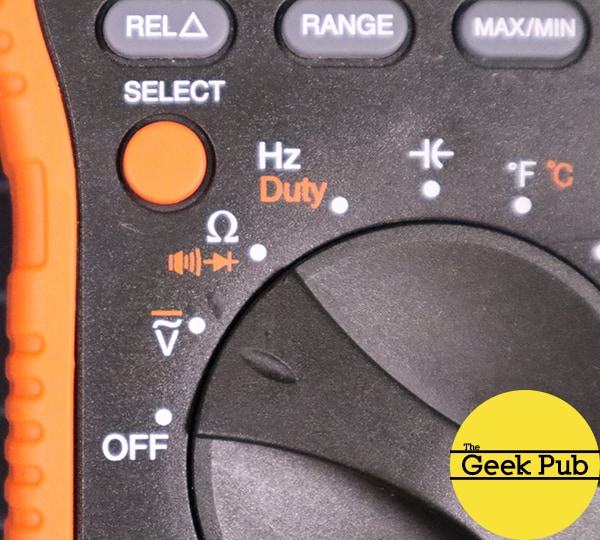 Some multimeters, like the one I am using only have one setting for voltage on the rotary dial, and either auto-select AC/DC or have a separate select button. In my case I simply turn the rotary dial to V for voltage, and then press the select button one time to switch from AC to DC voltage measurements.
Generally multimeters that auto-select AC or DC will also have an override button as flaky circuits could be detected as AC when they are actually DC.
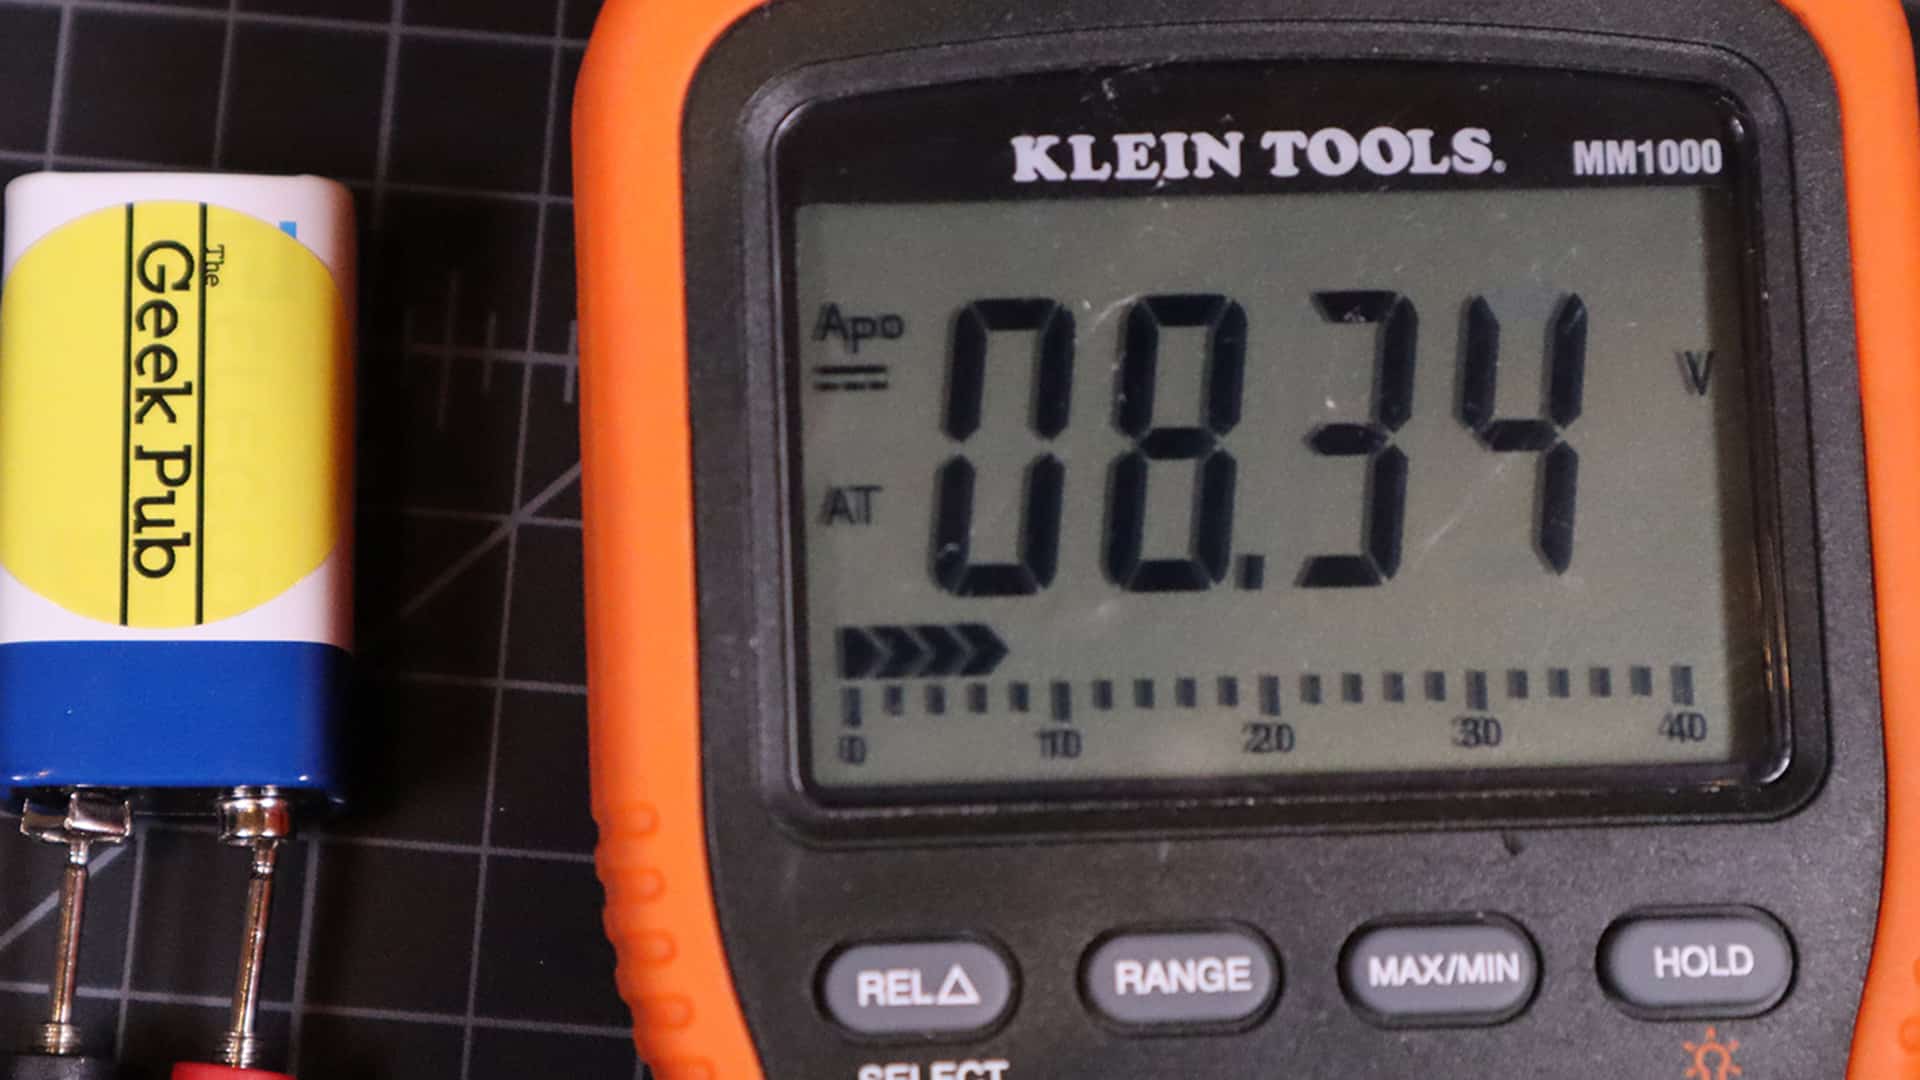
Next up you’ll want to pick something to measure the voltage on. I am going to use a 9V battery for this illustration. On a 9V battery, positive is the smaller terminal, while negative is the larger terminal.
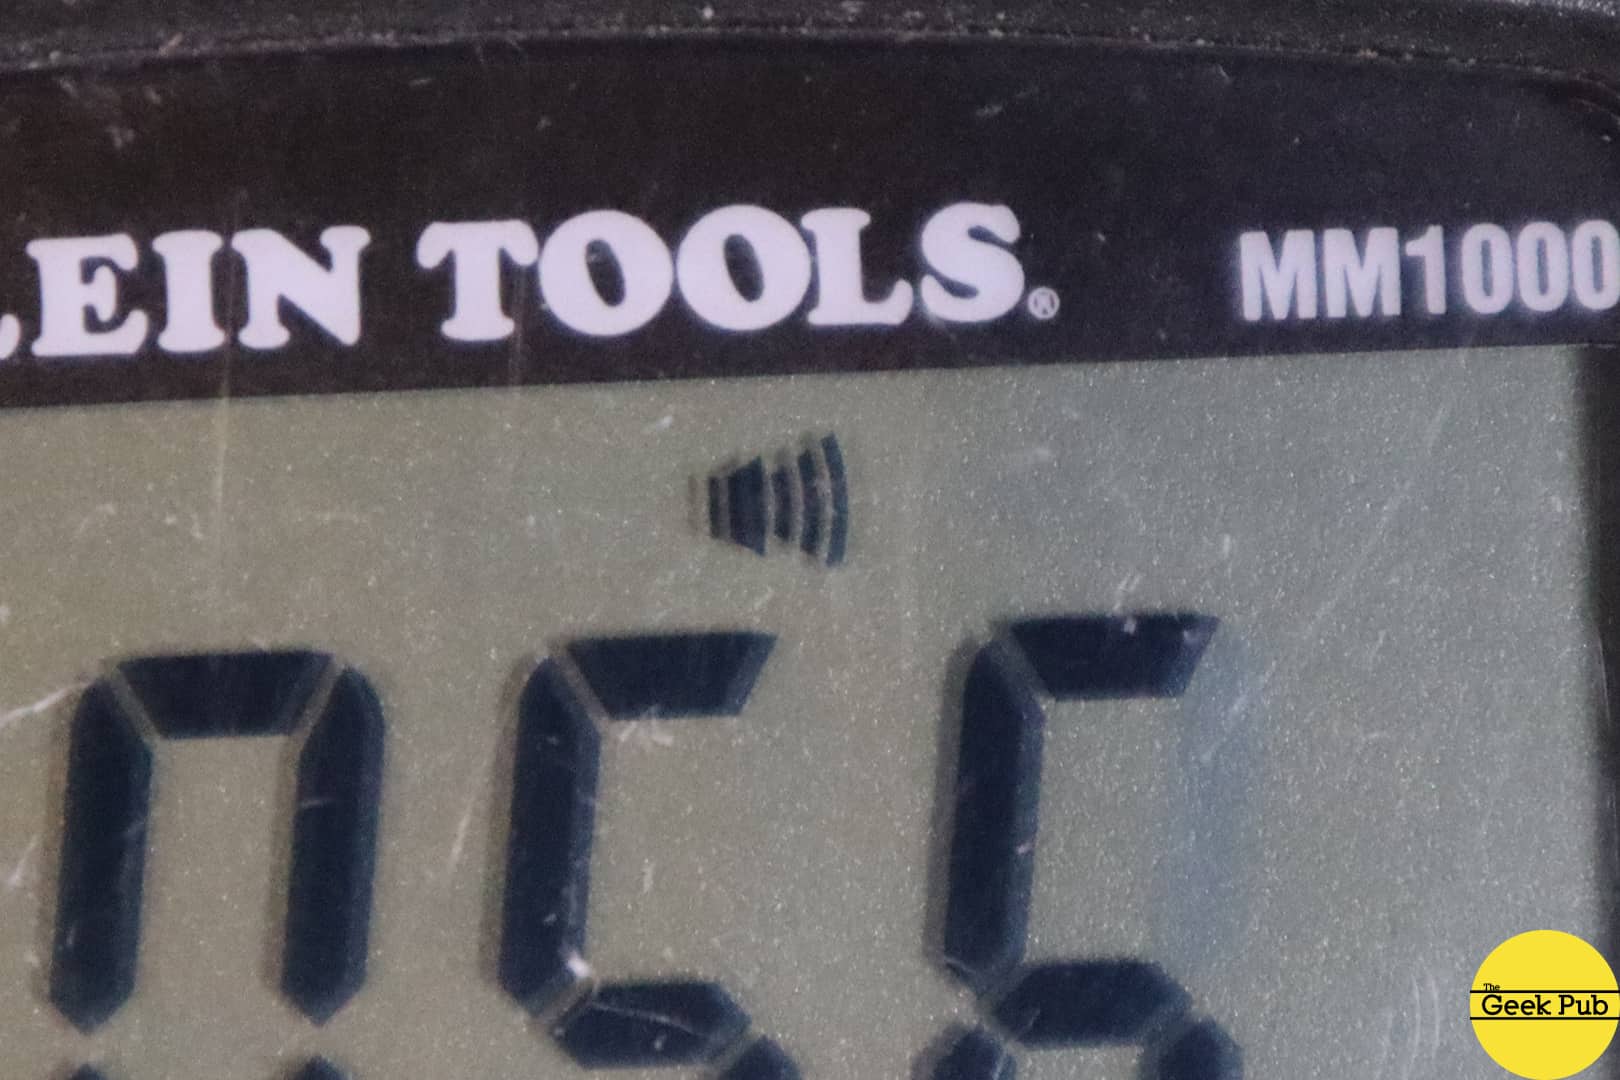
Touch the black probe to the negative terminal, and the red probe to the positive terminal of the battery. If your 9V battery is good, you should see a reading of around 9.6 volts! If you see below 9V your batter is likely ready to go to the recycling facility.
You can see in the picture below, my Geek Pub brand battery (j/k) is ready to take that trip as its only reading 8.3 volts!
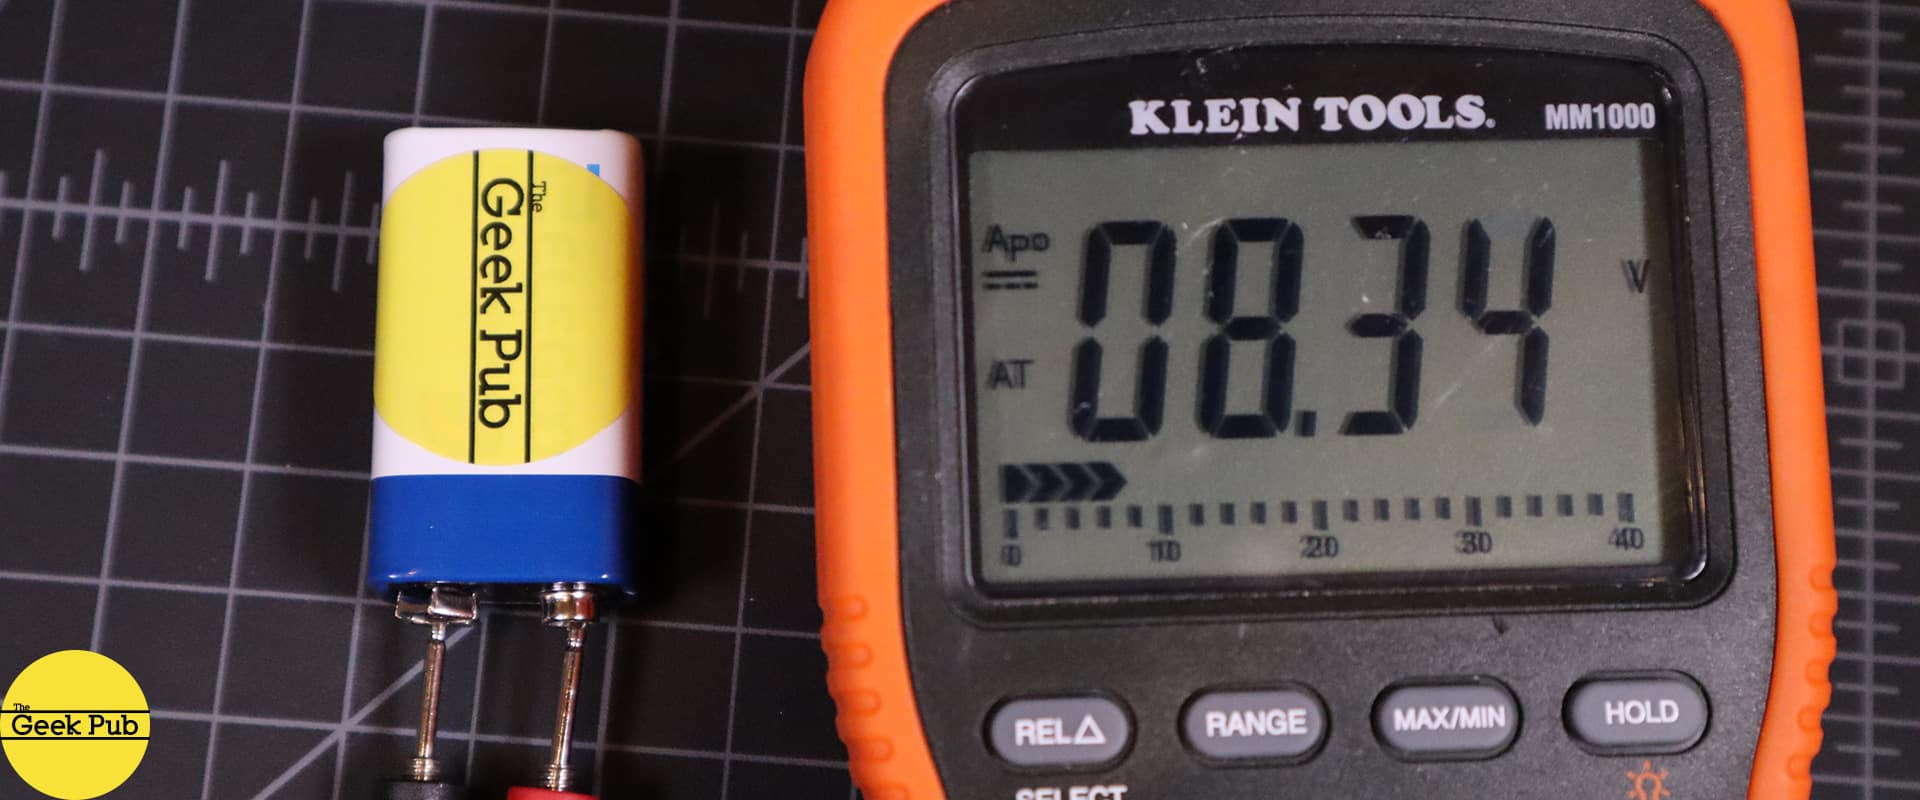
If you see a negative reading on your multimeter, it means you have the wires backwards either at the battery or at the banana jacks on your multimeter. Sometimes we just don’t know the polarity of a battery, and this is a great way to check it!
Beyond batteries you can check voltages anywhere on just about anything. You can even check the voltage on the circuit board of an Arduino or
RELATED: Which Multimeter Should I Buy?
How to Measure AC Voltage with a Multimeter
The next in learning how to use a multimeter is to learn how to check AC voltages. The setup is basically the same. First, make certain your red lead is plugged in to the V or voltage banana jack and not one of the others!
Move the rotary dial on your multimeter to the AC position, or if its like mine, move it to the voltage position, and then press the select button until you see a sine wave symbol (∿) on the dial. Everything else is exactly the same as the DC setting.
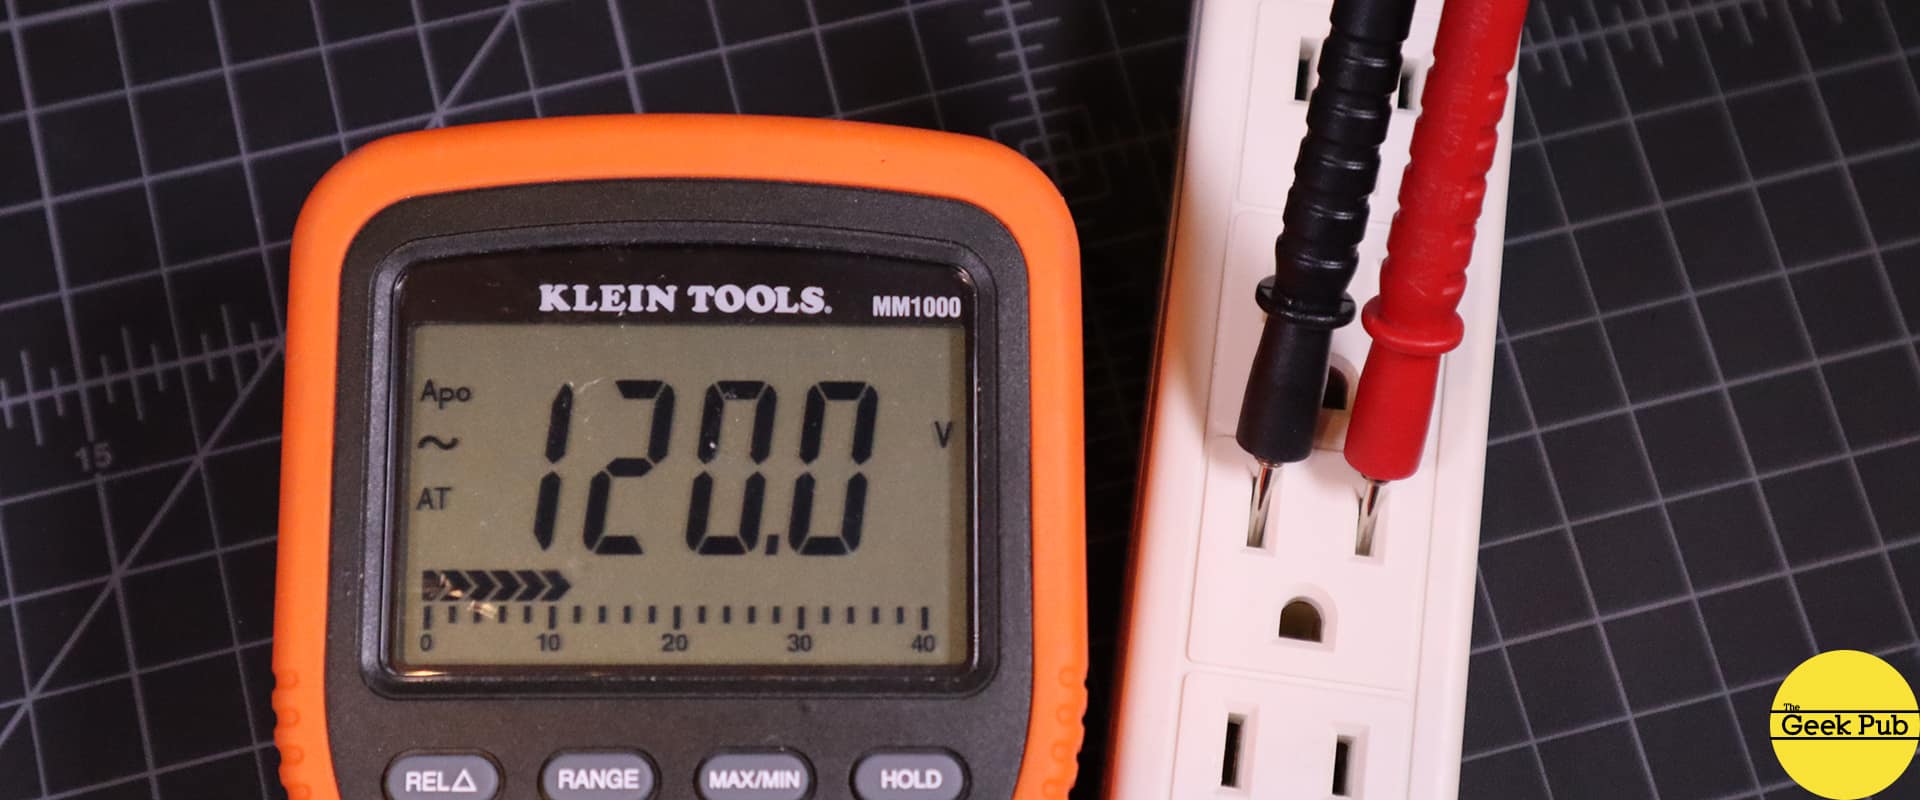
Touch the probes to an AC voltage source. In this case I am measuring the 120 volt AC mains in my home.
Warning: When measuring high voltage, high current sources it is critical that you do not accidentally make contact with ground or in any way short the two probes together. The result will damage the probes, your meter, trip breakers, and possible cause injury or death! Use caution.
In my case I see a reading of exactly 120 volts and everything looks good (a slight variation from 120 volts is normal).
RELATED: What is Voltage? Basics 101
How to Measure Resistance with a Multimeter
Now let’s learn how to measure resistance with a multimeter! It’s super easy to do and something you’ll probably do pretty often with your meter!
On most multimeters the V or voltage banana jack is also the same jack used to measure resistance. It is represented by the Ω or Ohm symbol. Measuring resistance is just like measuring voltage, only with some minor differences. Almost all materials have some resistance. Metals like copper and aluminum have very low resistance and pass current easily. Some materials like rubber or PVC have very high resistance. So high in fact they make great insulators.
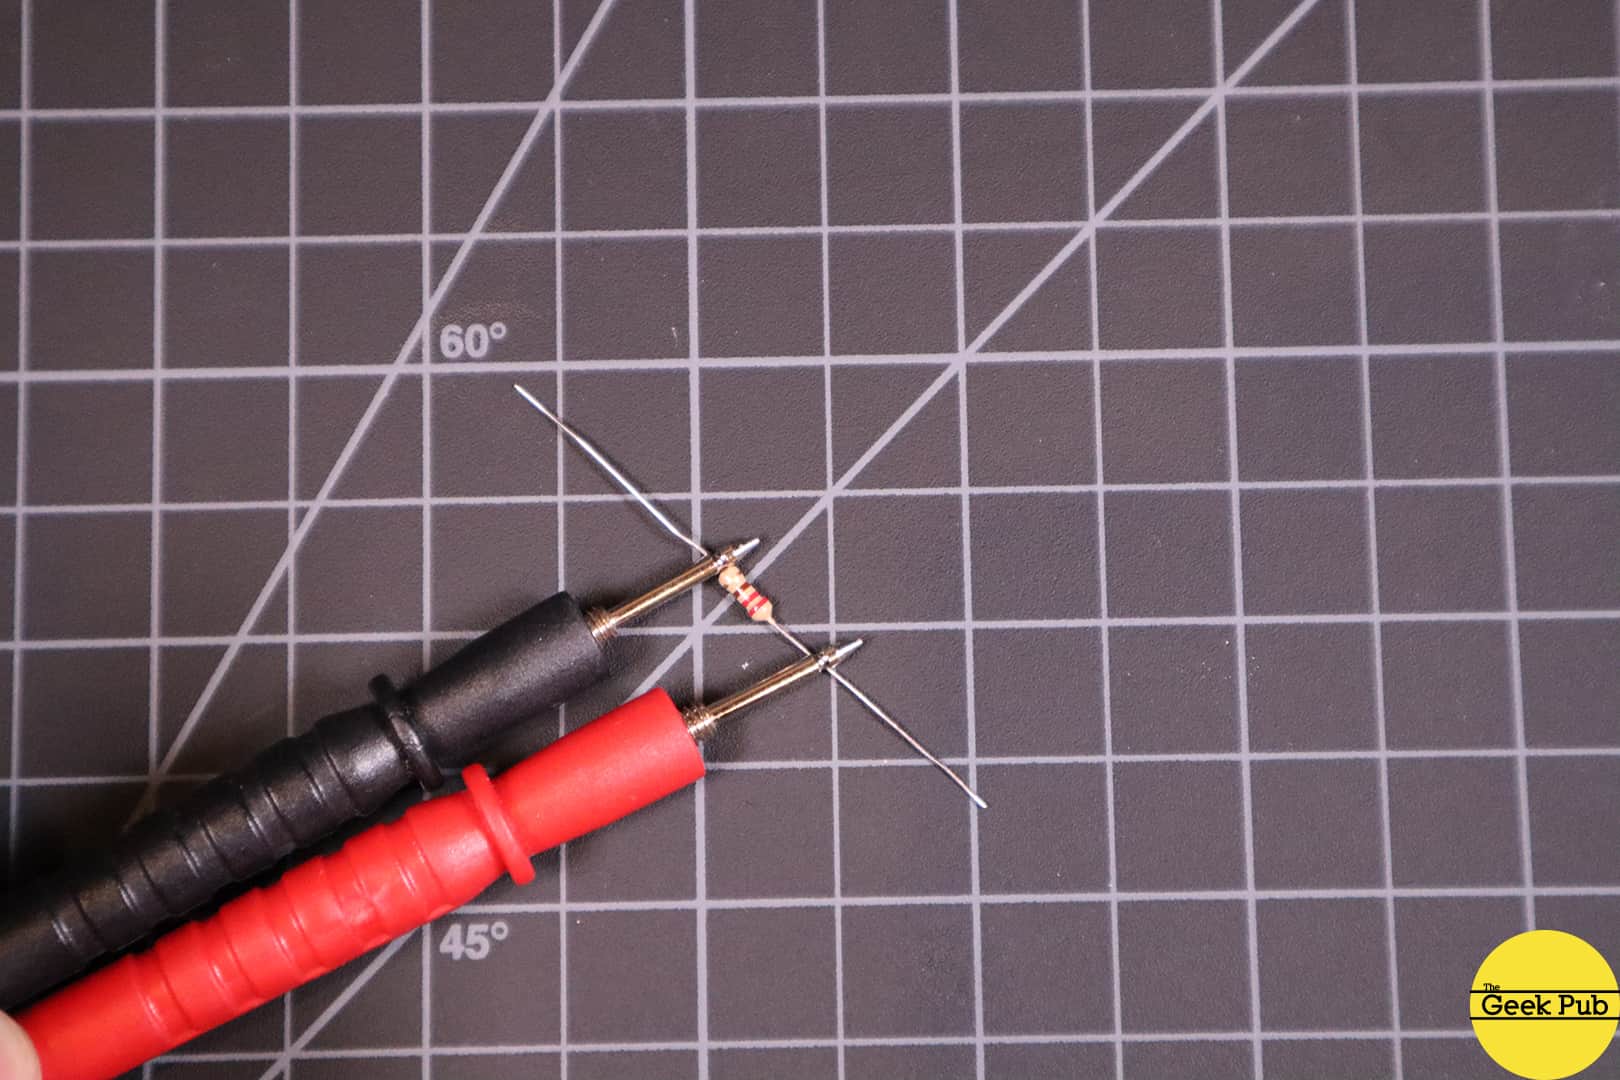
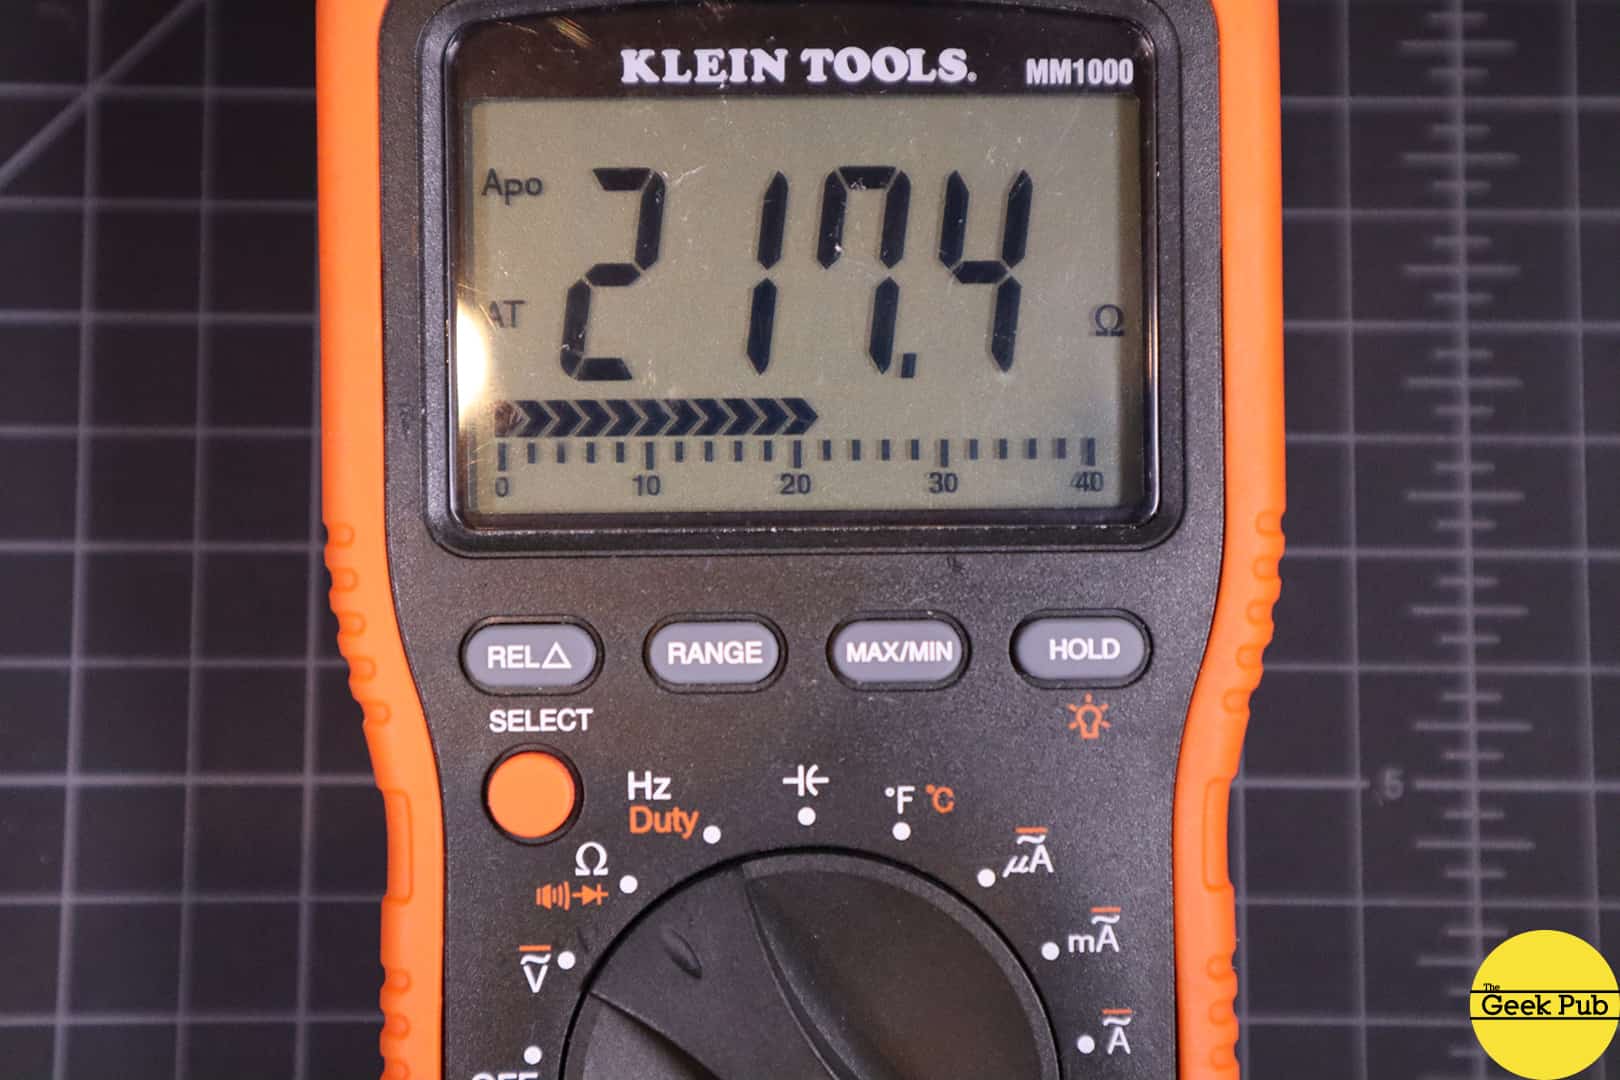
To measure the resistance of something you simply press the probes to what you want to measure. For example, to measure this resistor, we simply touch the probes one to each lead and you can see the value of it is 217.4 Ohms. Which means this is a 220 Ohm resistor when you account for the manufacturing tolerance of +/- 5% in most resistors.
One thing to know about measuring resistance is that in most cases you cannot measure the resistance of a component while it is still soldered to the board. You’ll need to remove it. This is because other components on the board can affect your readings, such as capacitor that still has a charge. Additionally, every component on the board, including the traces has some level of resistance naturally and you will likely pick up their values as well depending on how you measure the resistor.
How to Measure Continuity with a Multimeter
Checking continuity is hands down the most common use of my multimeter. I would guess 9 out of 10 times I use it, I just need to check continuity of some circuit or wire.
Continuity basically means that there is no resistance or 0 Ohms resistance on a connection. Checking continuity is a great way to check that something is grounded, or to make sure a wire is not broken in the middle somewhere. It’s also a quick way to sort wires in wiring harness and label them when the colors don’t match or or cannot be trusted (or if you happen to be color-blind like The 8-Bit Guy).
Another fantastic use of continuity mode is to check for broken copper traces on circuit boards. Like when repairing your trusty Commodore 64!
To use continuity on your multimeter, make sure the red probe’s lead is connected to the continuity banana jack. On most multimeters this will the same as a the resistance jack (labeled Ω). Set the rotary knob to continuity (like my meter, may also just be the resistance setting, and require a press of the select button).
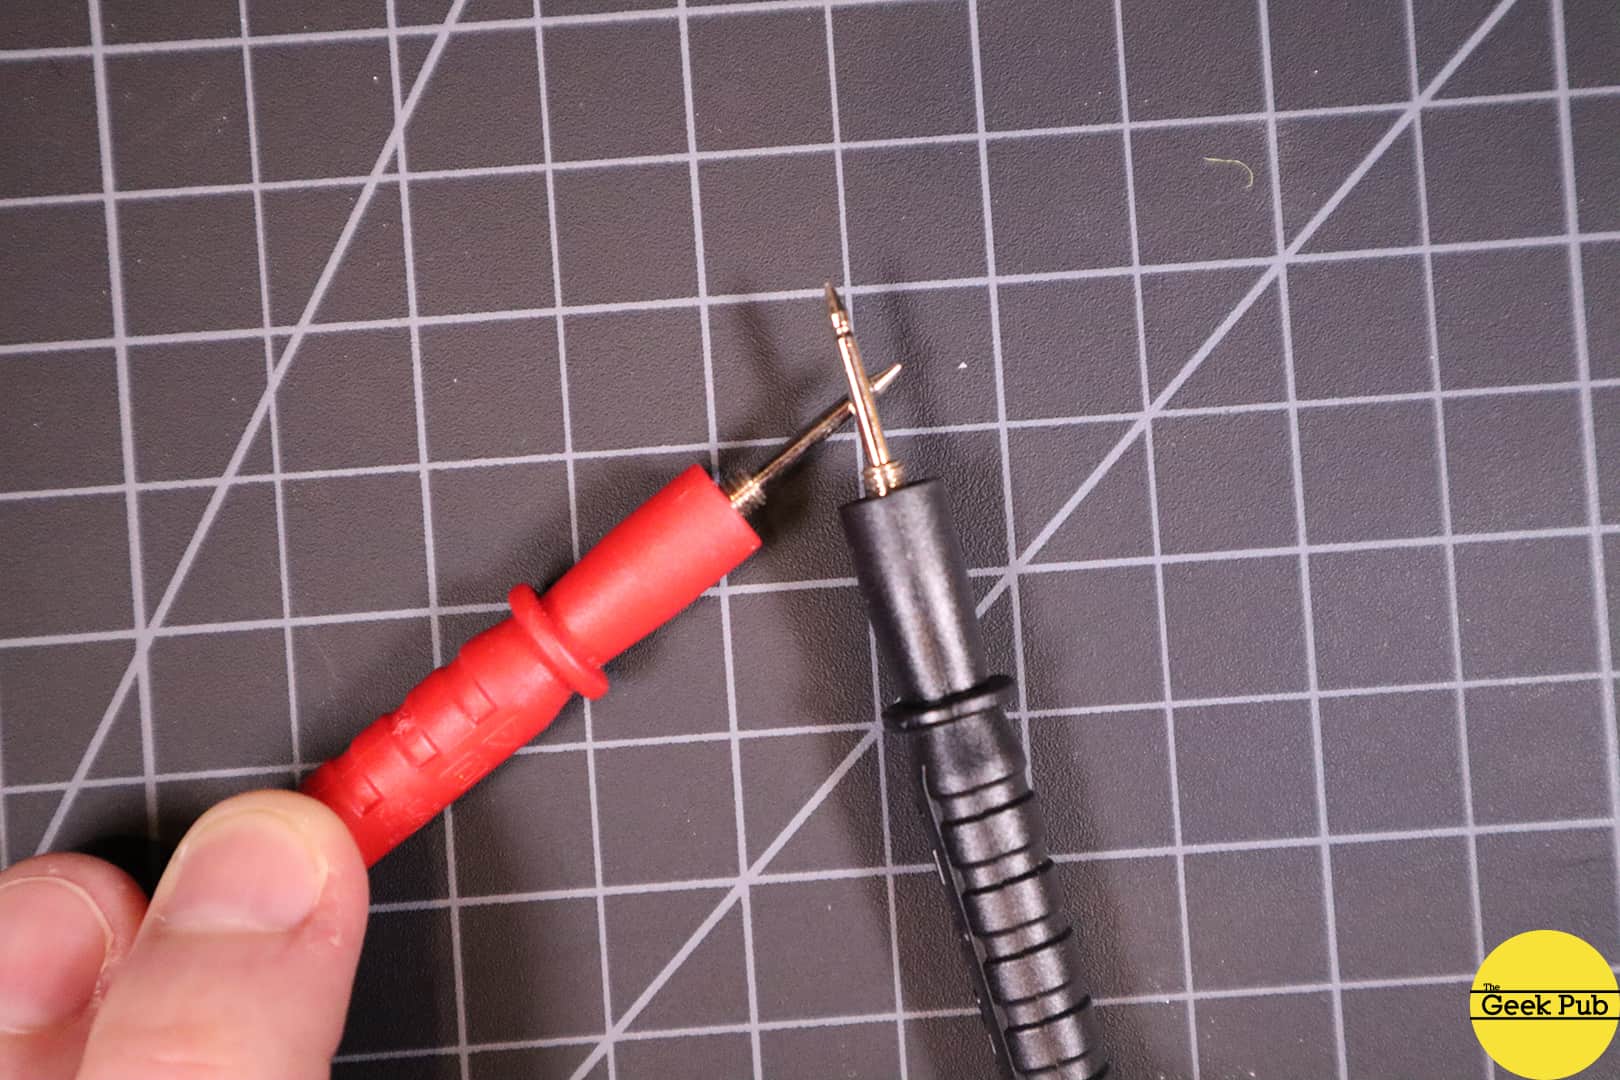
Once you’re in the correct mode, touch the two probes together. You should hear a beep from the meter and see continuity reference on the meter’s display. Now, try touching the probe tips to anything you like. Try something metal. You should hear a beep. Try something plastic. No beep. It’s easy to check for continuity and its something you will use all the time!
How to Measure Current with a Multimeter
Here’s were everything gets different. As we learn how to use a multimeter in this tutorial, take note that the you’ll need to make several changes in the way you use the multimeter to measure current.
First, make sure the red probe is connected to the meter’s A or ampere banana jack. This is very important. If you make a mistake here, you could fry your meter. Always double check this before taking measurements with your meter!
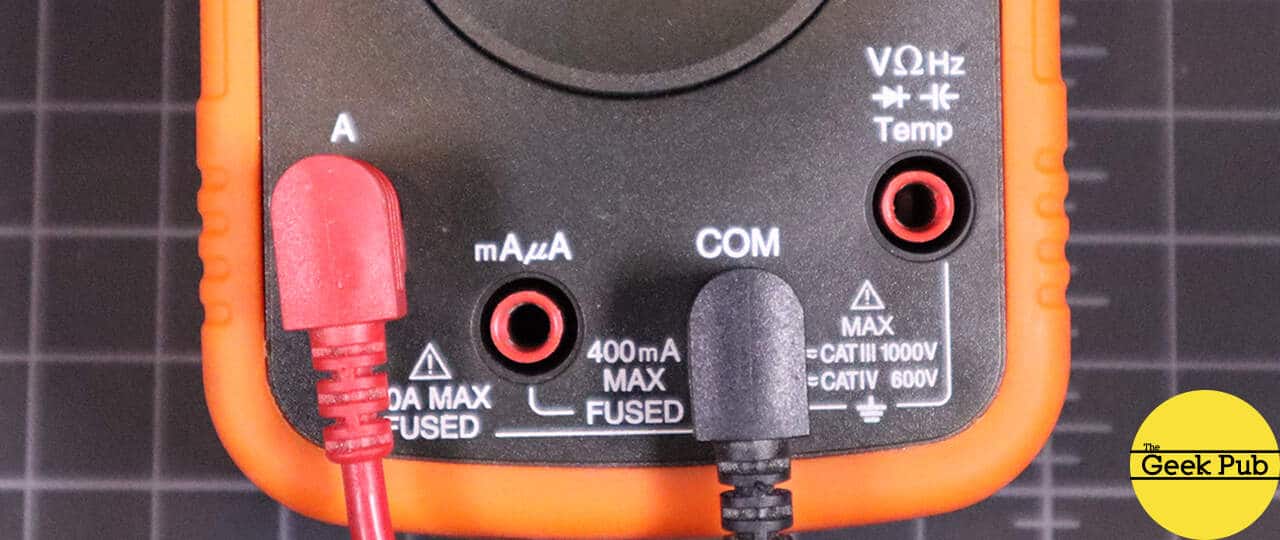
Note: Some multimeters have two jacks, one for amps, and one for milliamps and microamps. If you’re measuring something small, use mA jack as it will give more accurate readings, otherwise use the A jack. It’s a good idea to start with the amps and if the reading is below 400mA to switch. If you put too much current through the 400mA jack you will pop a fuse in your meter.
 RELATED: What is Current? Basics 101
Turn the rotary knob to the mA or A selection depending on which banana jack you selected.
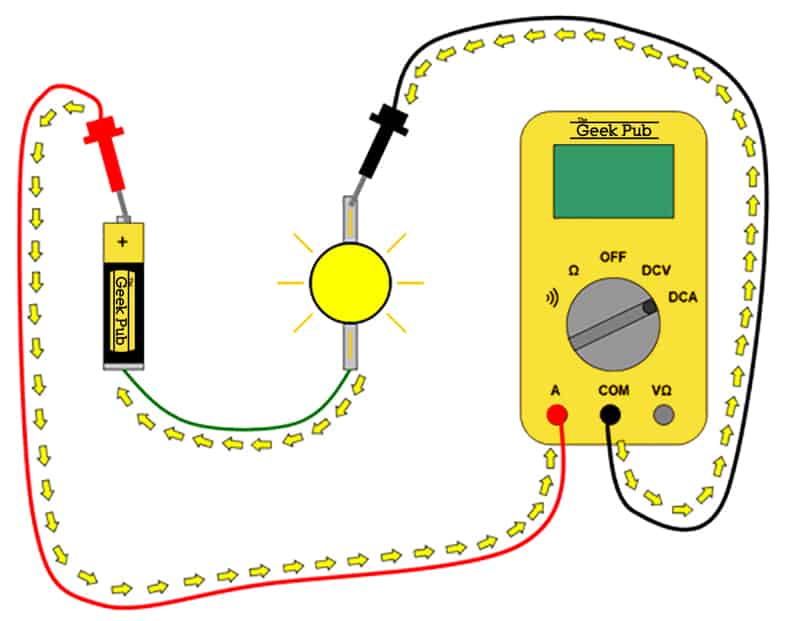
Here’s where things get tricky. To measure current you need to place you meter in series with the circuit you wish to measure. That’s right. The meter has to become part of the circuit!
In some situations this can be painful as it will require you to cut a wire and splice the meter into the circuit. Be careful in these situations, especially if the circuit is high voltage such as 120 volt or 220 volt AC mains in your home!
Sometimes you can find a switch in the circuit (such as a light switch in your home) and tap into the circuit at this location easily.
If you need help buying a multimeter, check out our picks for our favorite multimeters on Amazon!


4.5
5
0.5