Blog
Setting up WordPress on a Raspberry Pi
If you followed our previous article about configuring a
Project Parts List
In case you’re not already setup with a
- Raspberry Pi Model B+*
- Micro-SD Card
- USB Thumb Drive
- Raspberry Pi Power Supply
- Raspberry Pi Case
- USB Card Reader
Setting up WordPress on a Raspberry Pi
At first you might be wondering why anyone would want to run WordPress on a
To install WordPress, we first need to setup the
Preparing Raspberry Pi Lamp Services
I’d like to point out before we begin that almost every error we see setting up WordPress on a
Step 1: Boot your
[code language=”bash”]
sudo apt-get update
sudo apt-get upgrade
[/code]
Step 2: Install the Apache web server software. This is the actual server software which will allow your
[code language=”bash”] sudo apt-get install apache2 -y [/code]
Step 3: Install PHP. This is the software that will allow your Pi web server to execute scripts and process code.
[code language=”bash”]sudo apt-get install php7.0 libapache2-mod-php7.0 -y[/code]
Step 4: Now it is time to install MySQL, the database that will store all of the information in your WordPress site. The first command installs the MySQL server while the second command will secure the installation and create your root account and password.
[code language=”bash”]
sudo apt-get install mysql-server php7.0-mysql -y
sudo mysql_secure_installation
[/code]
Step 5: Change to the html directory of your web server and remove the existing contents.
[code language=”bash”]
cd /var/www/html
sudo chown pi: .
rm *
[/code]
Step 6: Download and extract the latest version of WordPress.
[code language=”bash”]
wget http://wordpress.org/latest.tar.gz
tar xzf latest.tar.gz
mv wordpress/* ./
rm -rf wordpress latest.tar.gz
rm -rf index.html
[/code]
Step 7: Change ownership of all of the WordPress files to the www-data service account.
[code language=”bash”] sudo chown -R -f www-data:www-data /var/www/html [/code]
Step 8: At this point we highly recommend a reboot of your
[code language=”bash”]
sudo reboot
[/code]
Step 9: Now that everything is installed we will need to set up a database to connect to. Use the MySQL command to log in, use the –p flag for the password and –u for the username. Do NOT use a space between the flag and text.
[code language=”bash”]
sudo mysql -uroot -ppassword_you_chose_in_step_4
create database wordpress;
[/code]
If you typed everything correctly you should she the response Query OK, 1 row affected (0.00).
Step 10: Create a MySQL service account for WordPress to use and grant it full permissions on your WordPress database.
[code language=”bash”]
GRANT ALL PRIVILEGES ON wordpress.* TO ‘your_service_account_name’@’localhost’ IDENTIFIED BY ‘your_new_password’;
[/code]
And now press CTRL-D to exit the MySQL command line administrator.
Step 11: In a web browsers on another computer, browse to the IP address of your
- Database Name: wordpress
- User Name: username you chose in step 10.
- Password: password you chose in step 10.
- Database Host: localhost
- Table Prefix: wp_
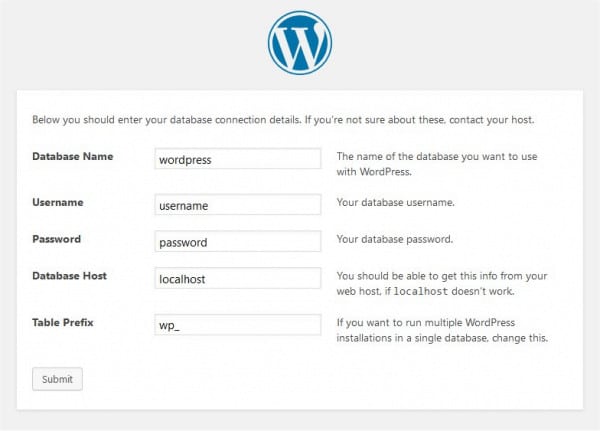
Once you’ve entered the information, click ‘submit’ and you’ll be greeted with the initial WordPress site configuration page where you can configure your admin account, password, and the name of your WordPress blog!
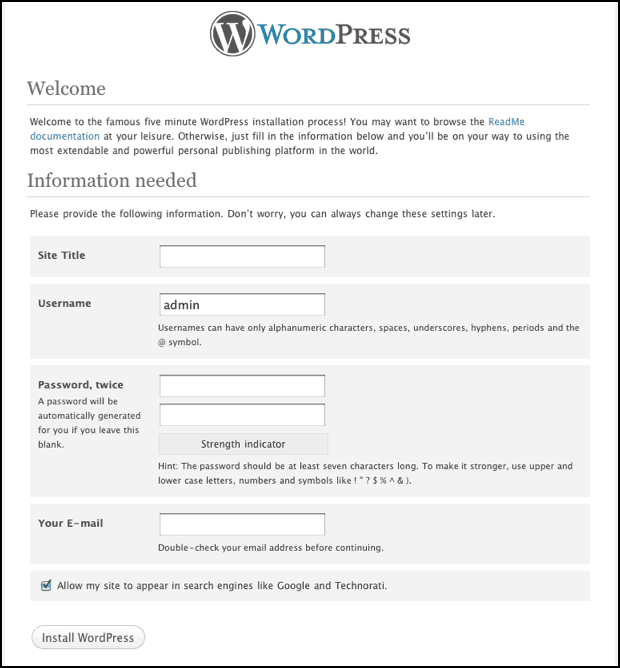
Enter the details and click ‘Install WordPress’. Your job is done! You know have a


0.5