Blog
How to make The Brain of Morbius (Brain in a Jar)

Making the Brain of Morbius Prop
[adinserter name=”TopOfPost”]This one’s for the Doctor Who fans! If you ask a random sampling of Doctor Who fans who their favorite classic Doctor is, its usually somewhere between 50% to 60% in favor of Tom Baker. Tom Baker’s quirky character and charm bring out the best in the Doctor. One of the most iconic episodes from Tom’s run as the Doctor is The Brain of Morbius. This episode feature Morbius, a Timelord who was executed for his crimes. It turns out however that Morbius wasn’t dead after all. Before his execution, his brain was removed and placed into a jar (yes, he was a brain in a jar) awaiting a future point in time to steal a compatible body to insert it into.
Making the Brain of Morbius Prop is pretty simple and only requires a few tools. It’s a great prop to have around for any occasion, but of course, its fantastic to have around for Halloween!
Making the Brain of Morbius Step-by-Step
Making the Brain of Morbius prop can be made with hand tools or power tools. At the minimum you’ll need a hand-held hacksaw and a screwdriver. Additional tools are not necessary but will make the job easier.
Step 1: Acquire the Components
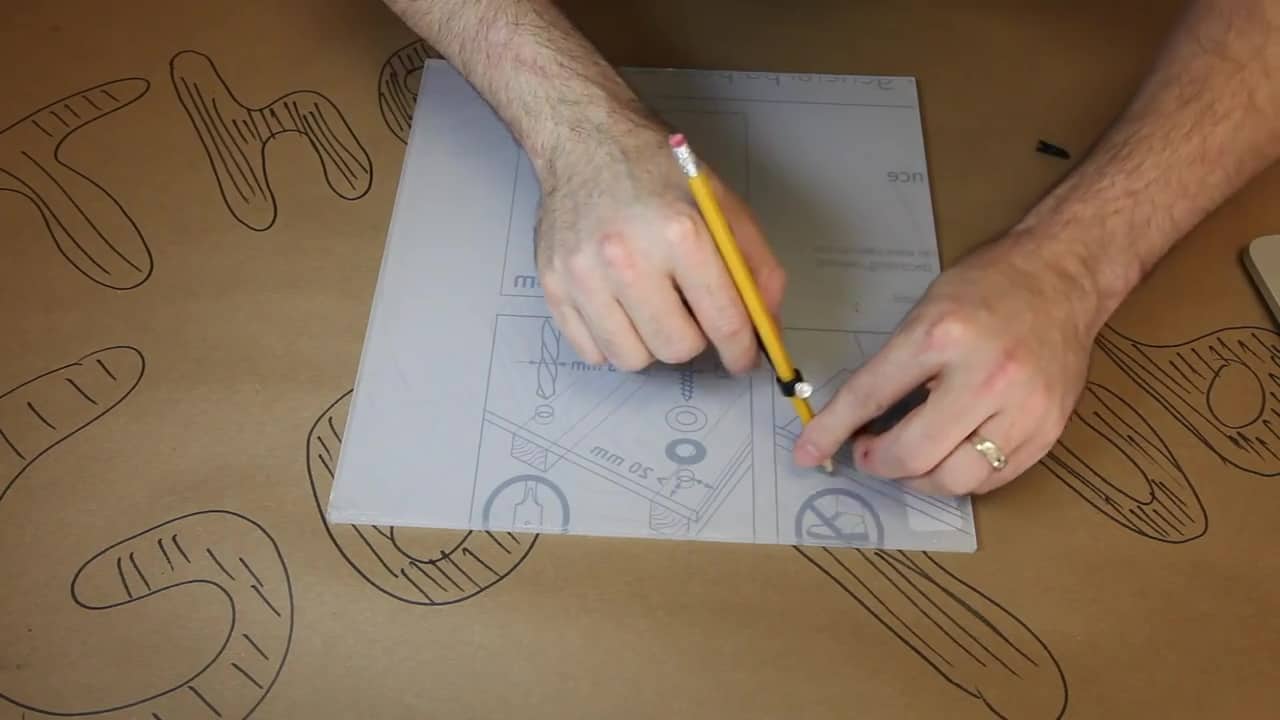
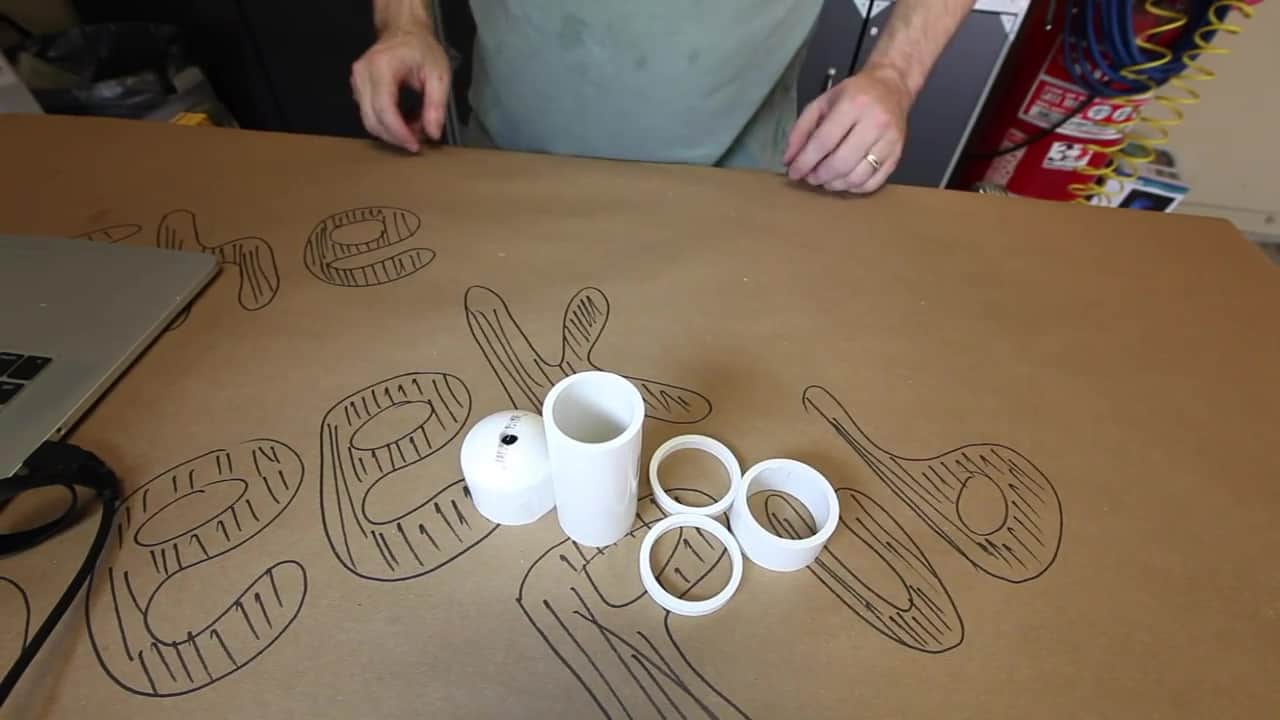
To build The Brian of Morbius prop you’ll need a few components:
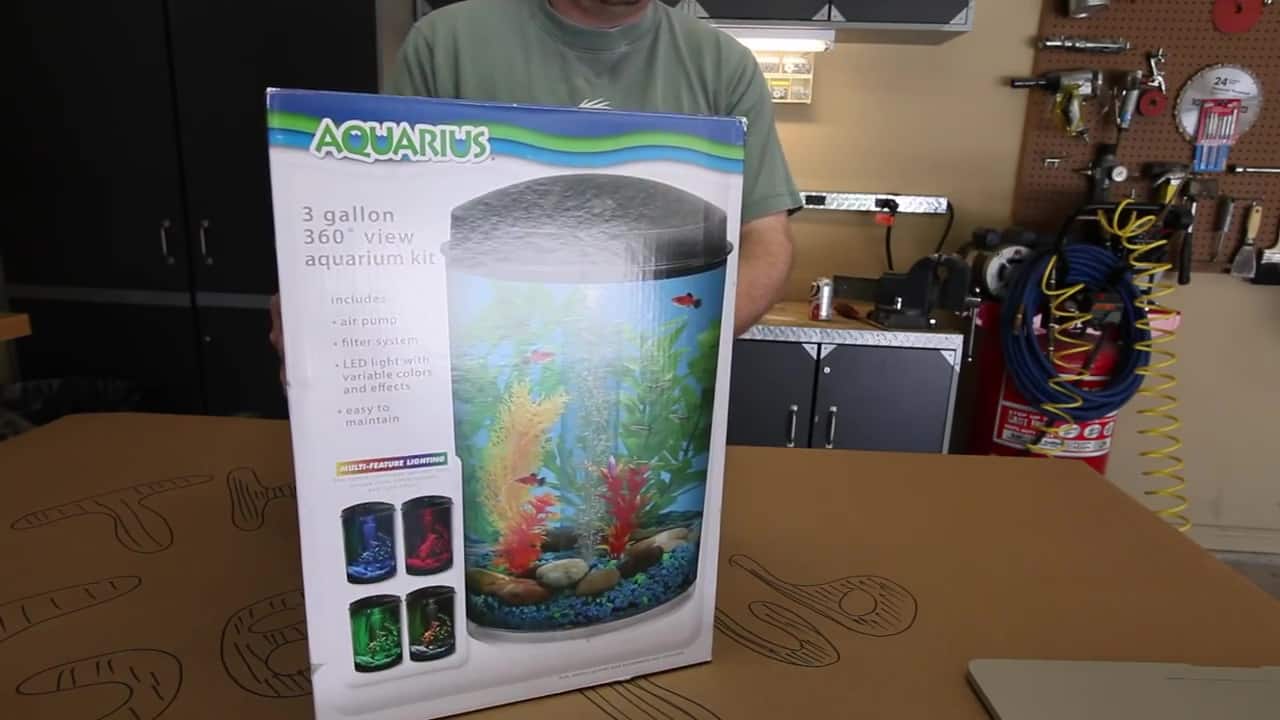
- Small round fish aquarium, roughly 3 gallons
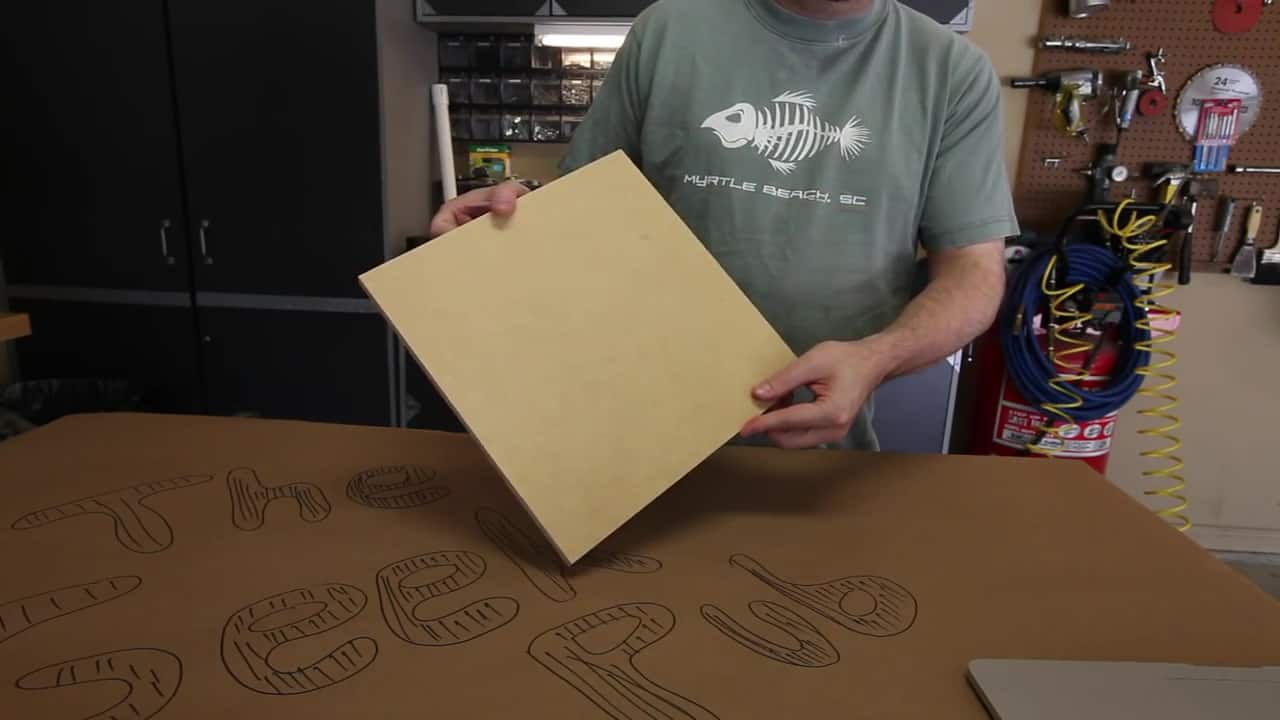
- 12 x 12 section of 1/2″ MDF
- 12 x 12 section of acrylic sheeting
- 12 x 12 section of 1/32″ aluminium sheeting
- 2″ PVC Pipe, and cap
- Bronze color brads
- Gold paint
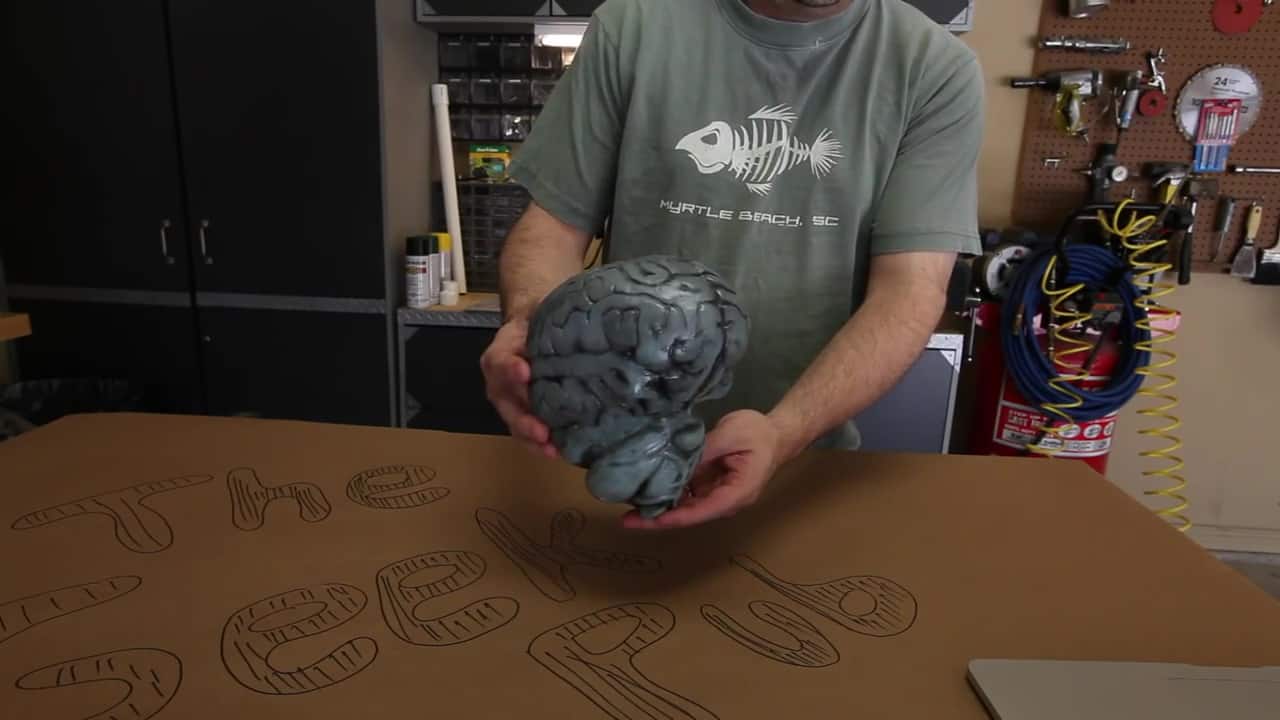
- Rubber brain
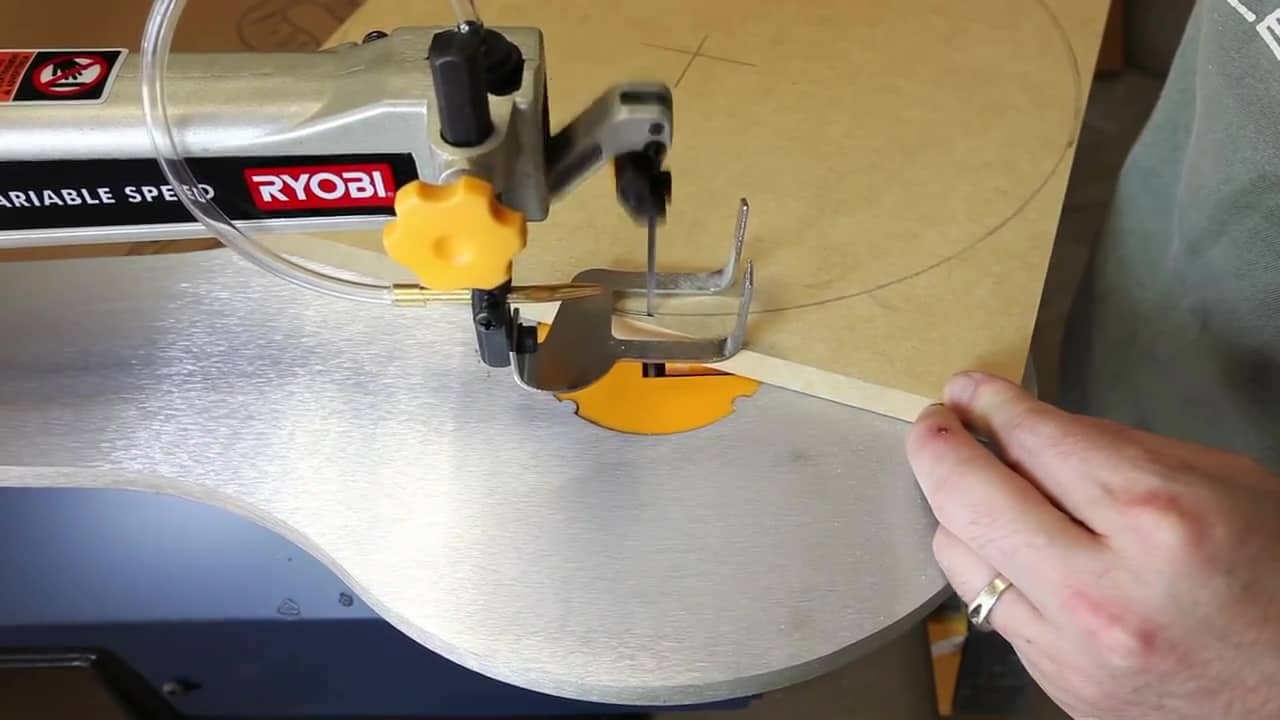
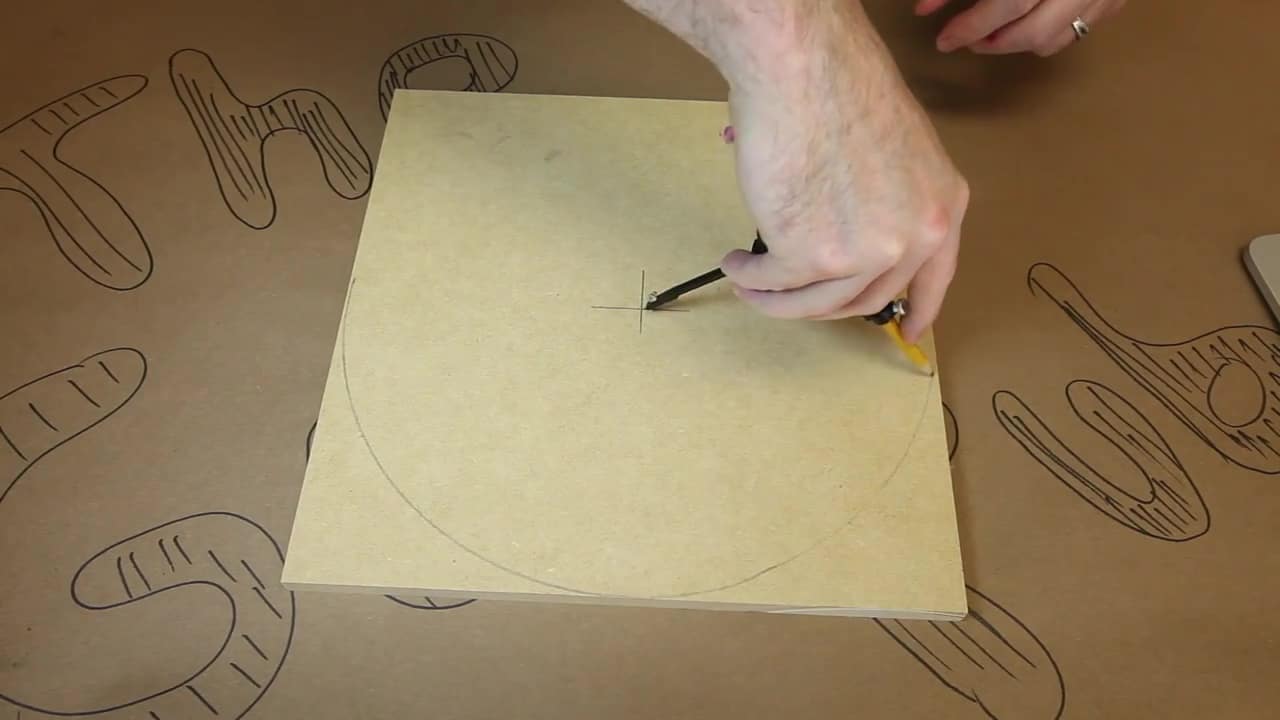
Step 2: Cut Circles
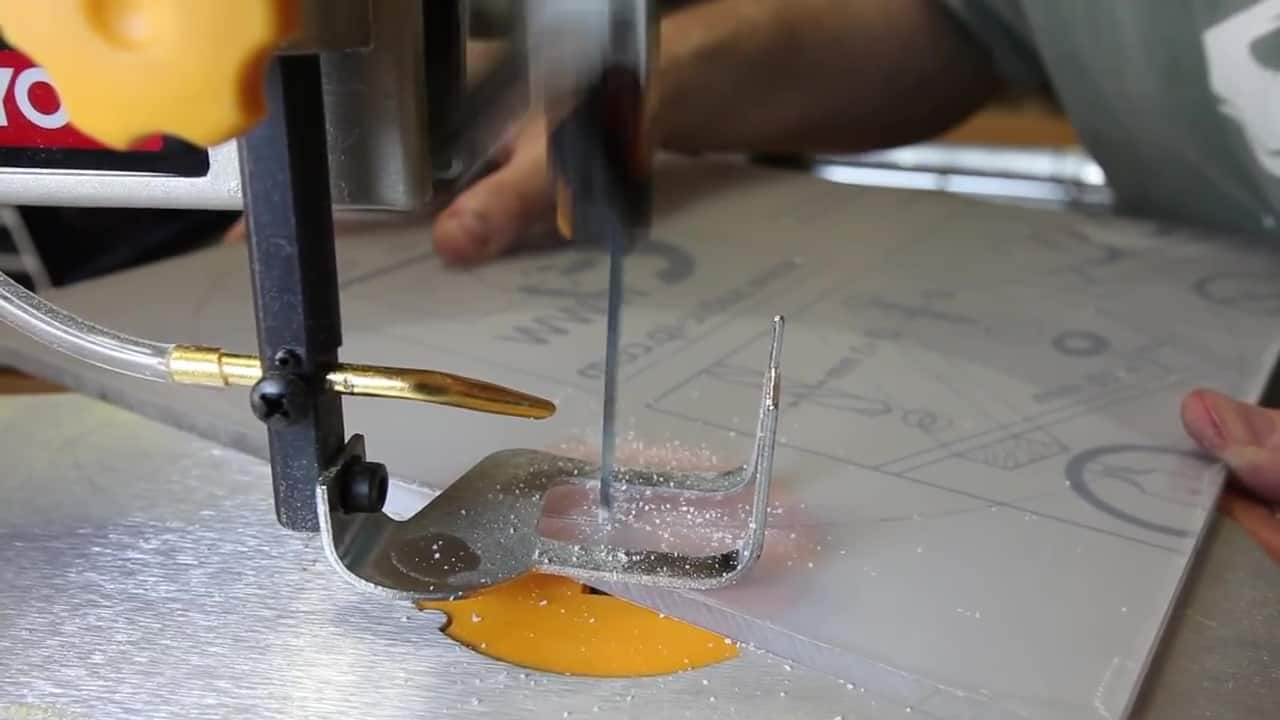
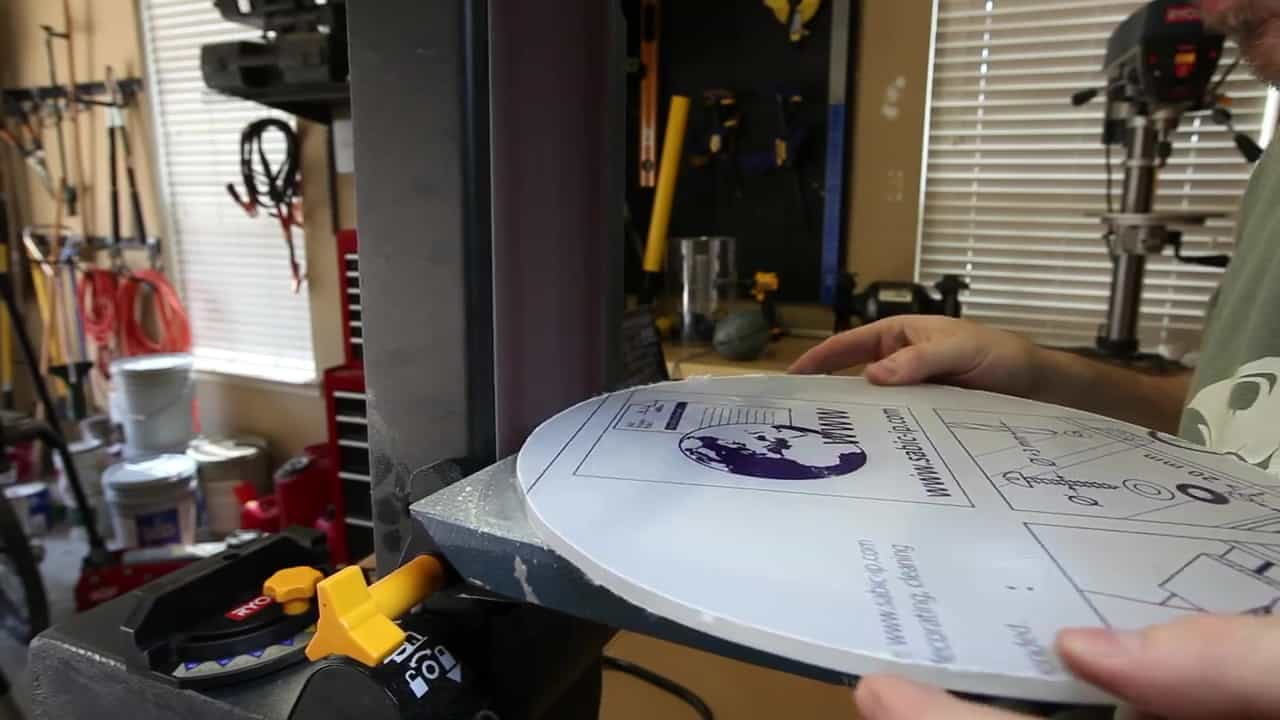
Use a compass to draw the circles. Using a band saw, jigsaw, or handheld hack saw, cut out a 12″ circle from the MDF and acrylic sheeting. Cut about 1/16″ away from the line to allow you to sand it smooth in step 3. The MDF will serve as the base of The Brain of Morbius Prop. The acrylic circle will serve as the lid (replacing the lid that came with the fish aquarium.
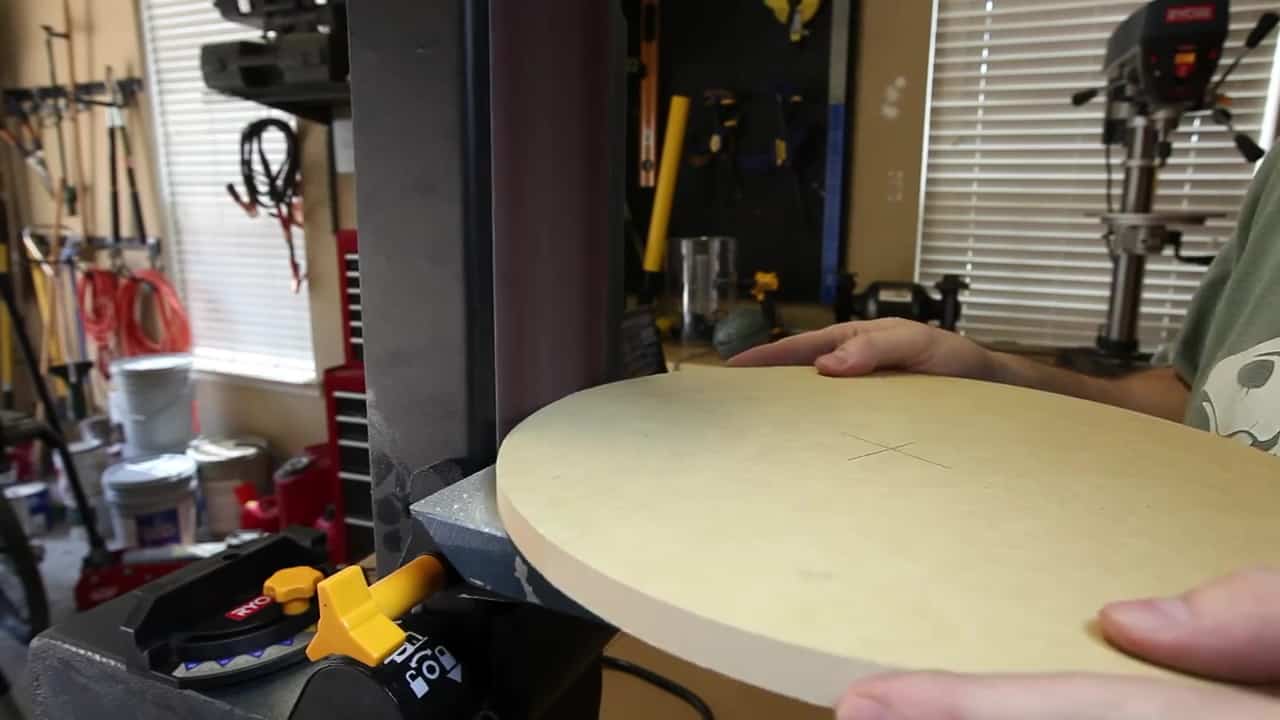
Step 3: Sand the Circles
Using a belt sander if you have one to sand the circles down to the lines you drew with the compass. You could also use a disk sander. If you don’t have any powered sanders, just glue some sandpaper to a piece of scrap wood and do it by hand. It will take a little longer, but the effect will be the same: a perfectly round circle with smooth edges. When you’re finished, its a good time to go ahead and paint the circle. A bronze satin finish, or a hammered bronze spray paint will help it to look more authentic.
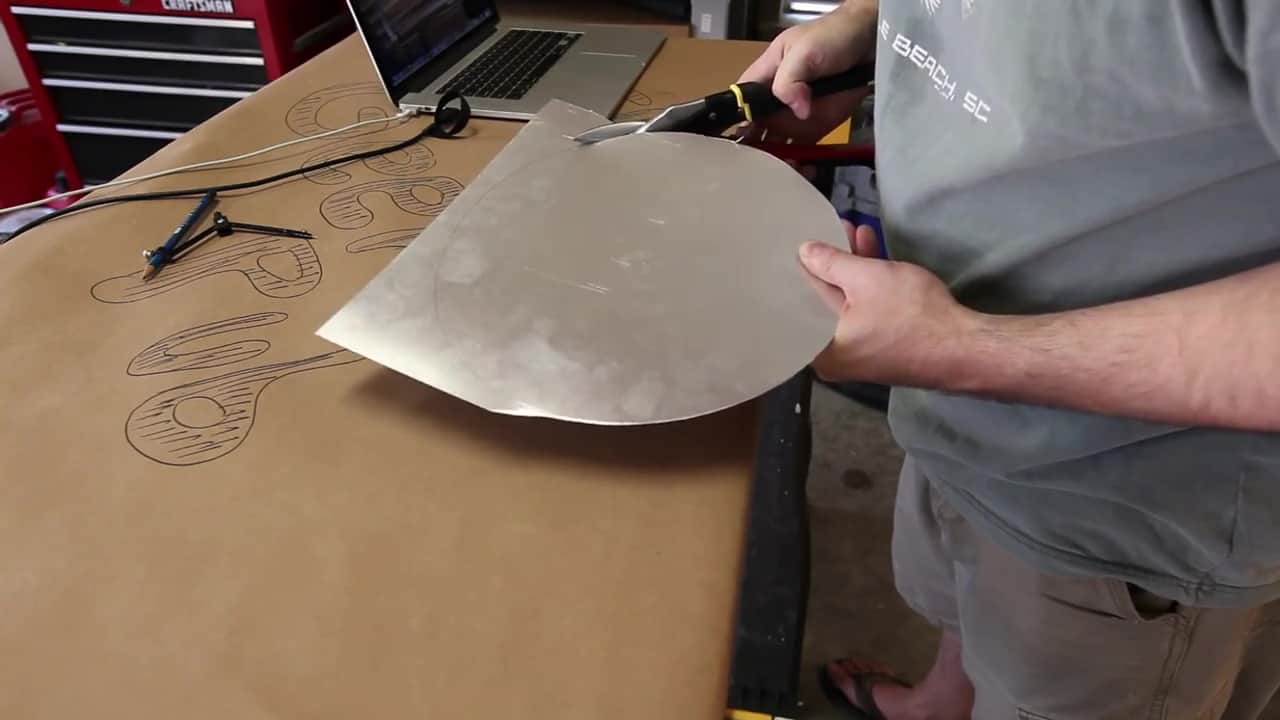
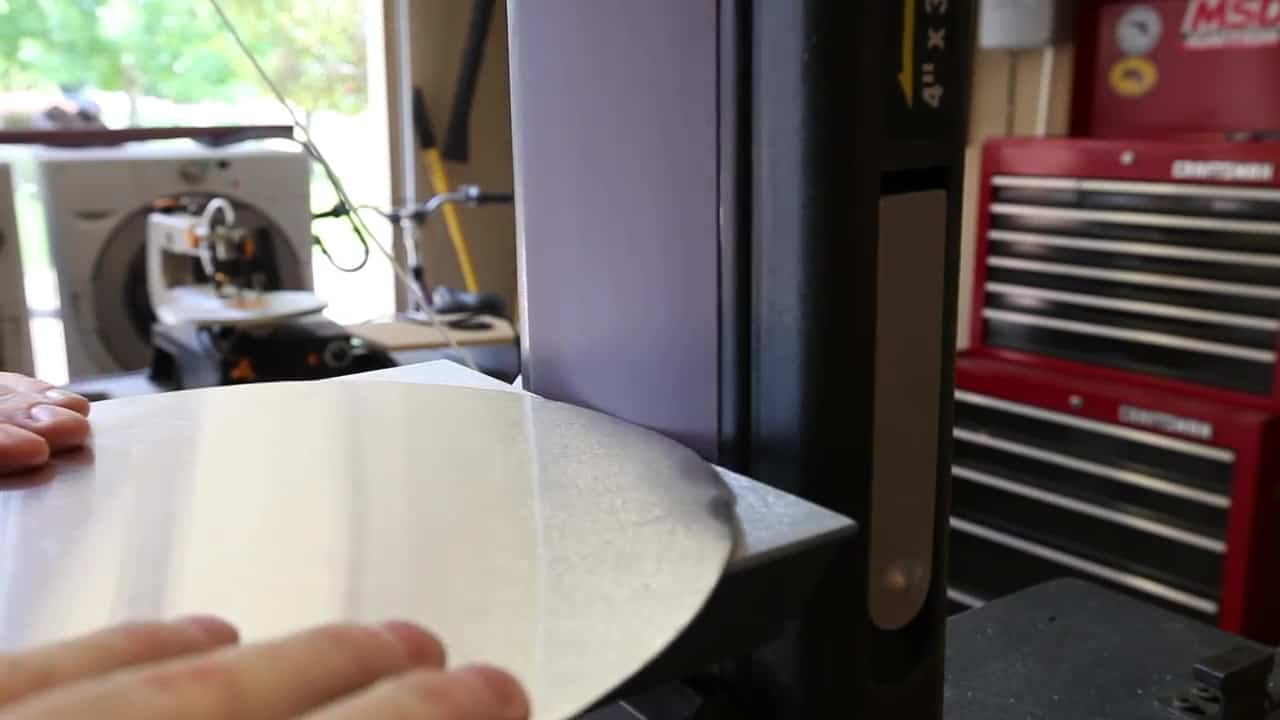
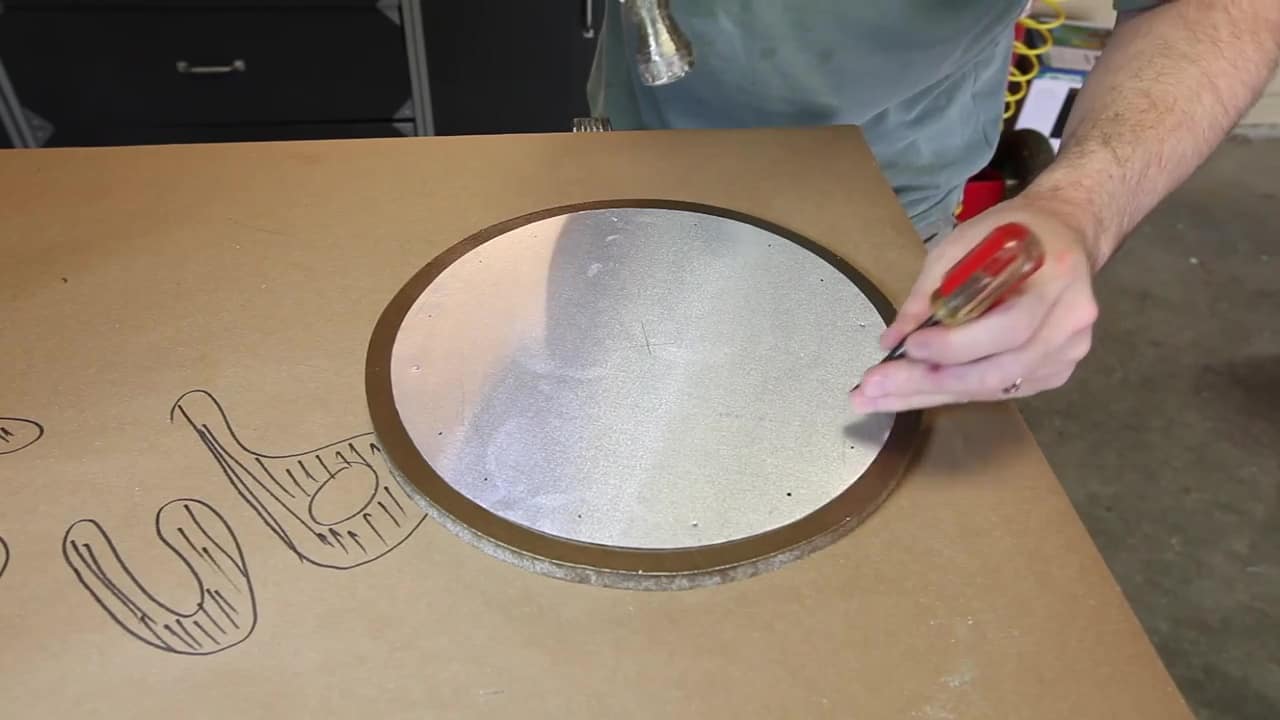
Step 4: Make a smaller Circle from the Aluminum sheet
Make a slightly smaller 11 inch circle from the sheet of aluminum. You can cut this disk out with some strong scissors or a hack saw, but what works the best is aircraft snips. This will lay over the top of the MDF and be centered, leaving roughly a 1/2 inch section of the MDF exposed around the outside. Be sure to use some sand paper and remove any burs or sharp edges with sandpaper.
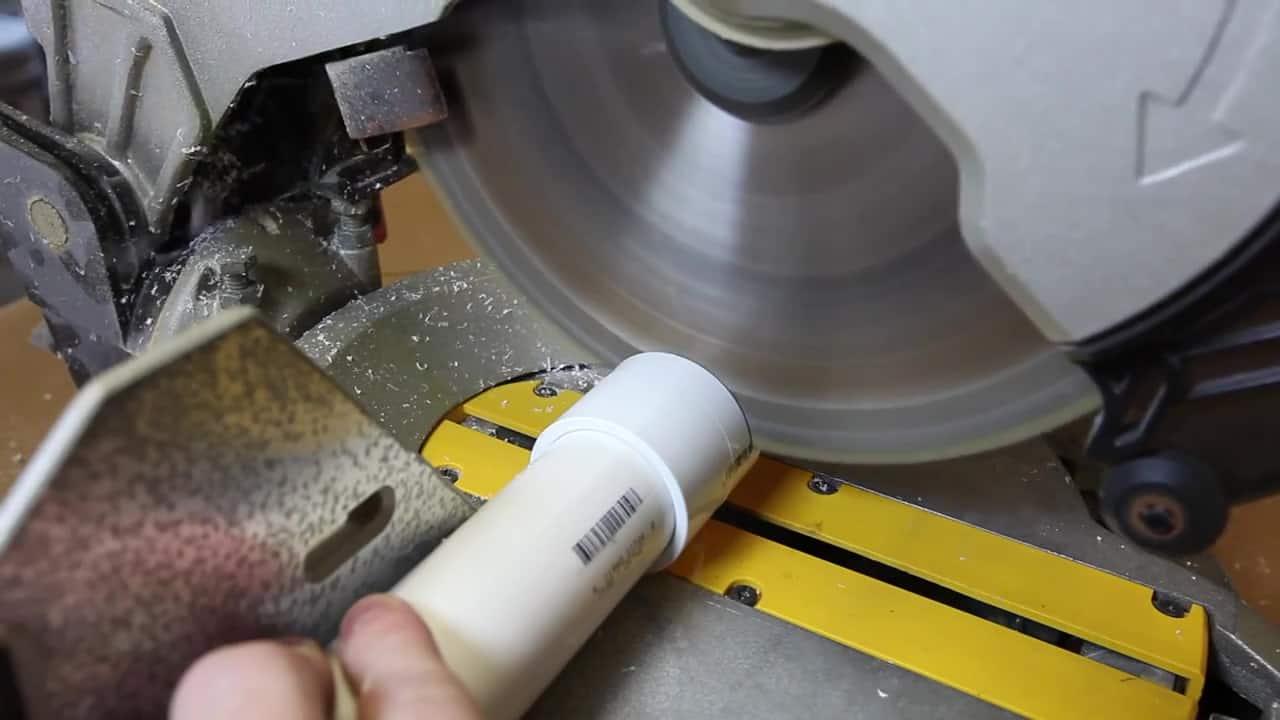
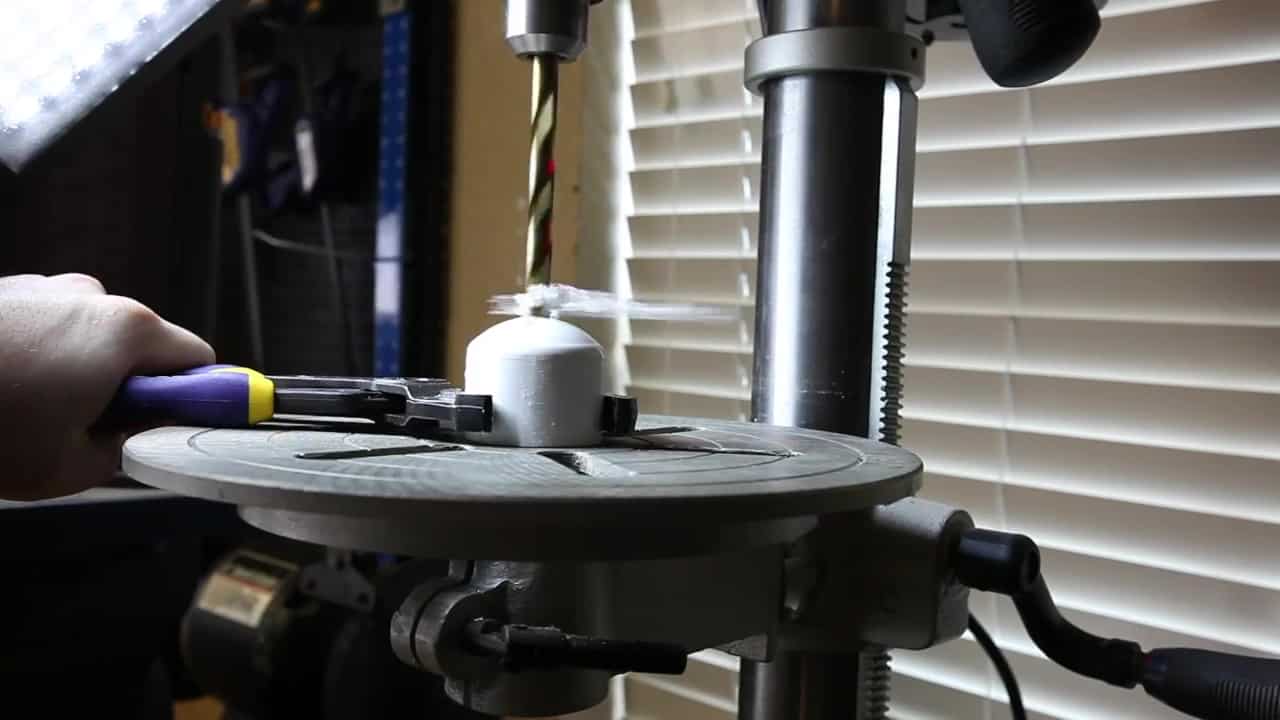
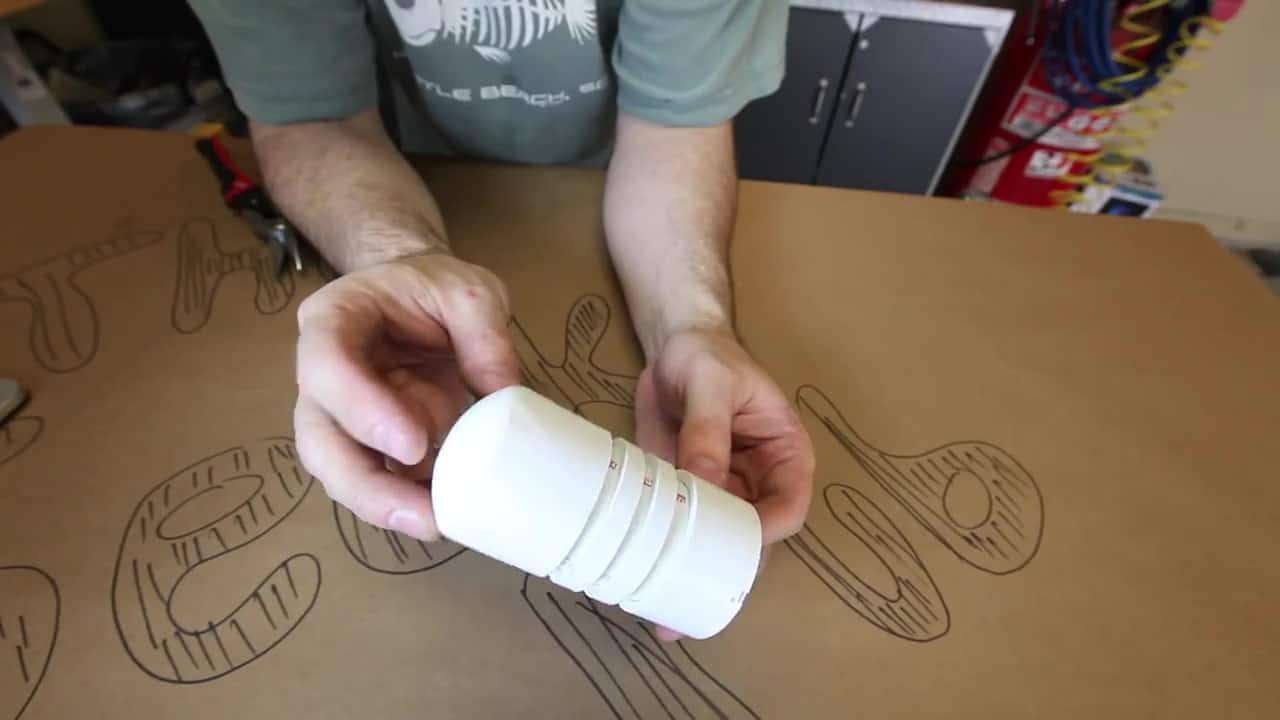
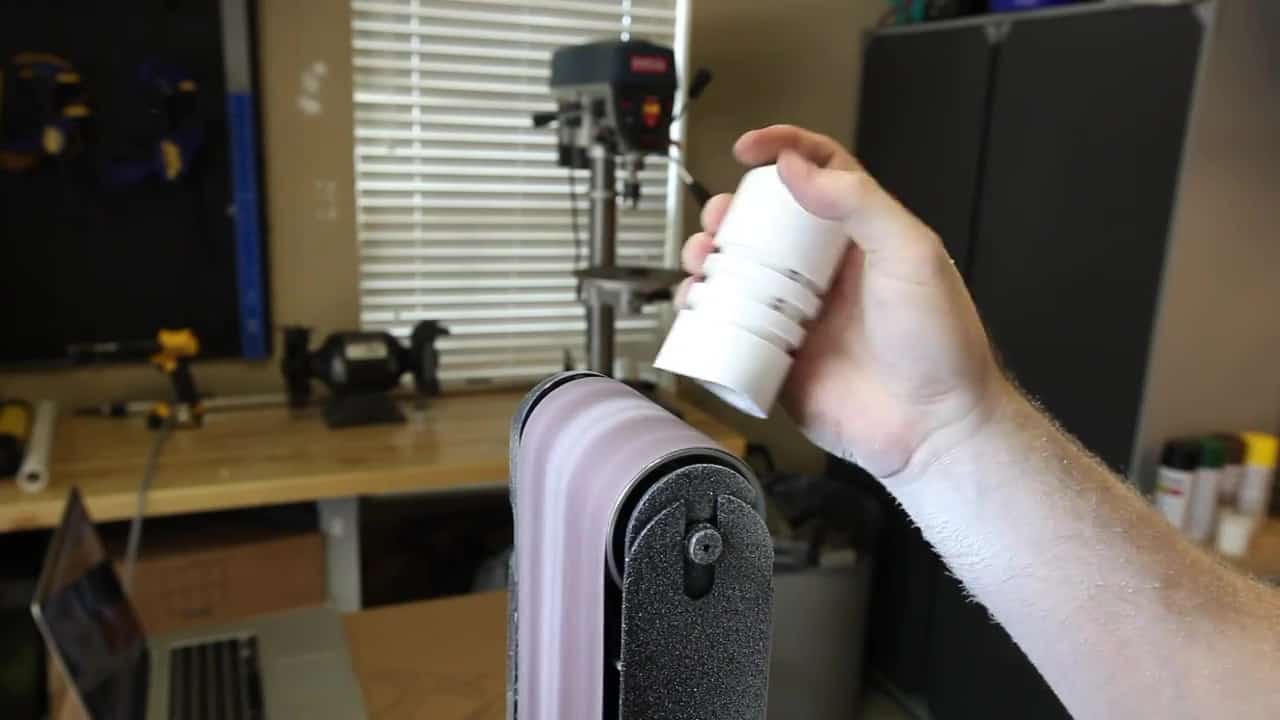
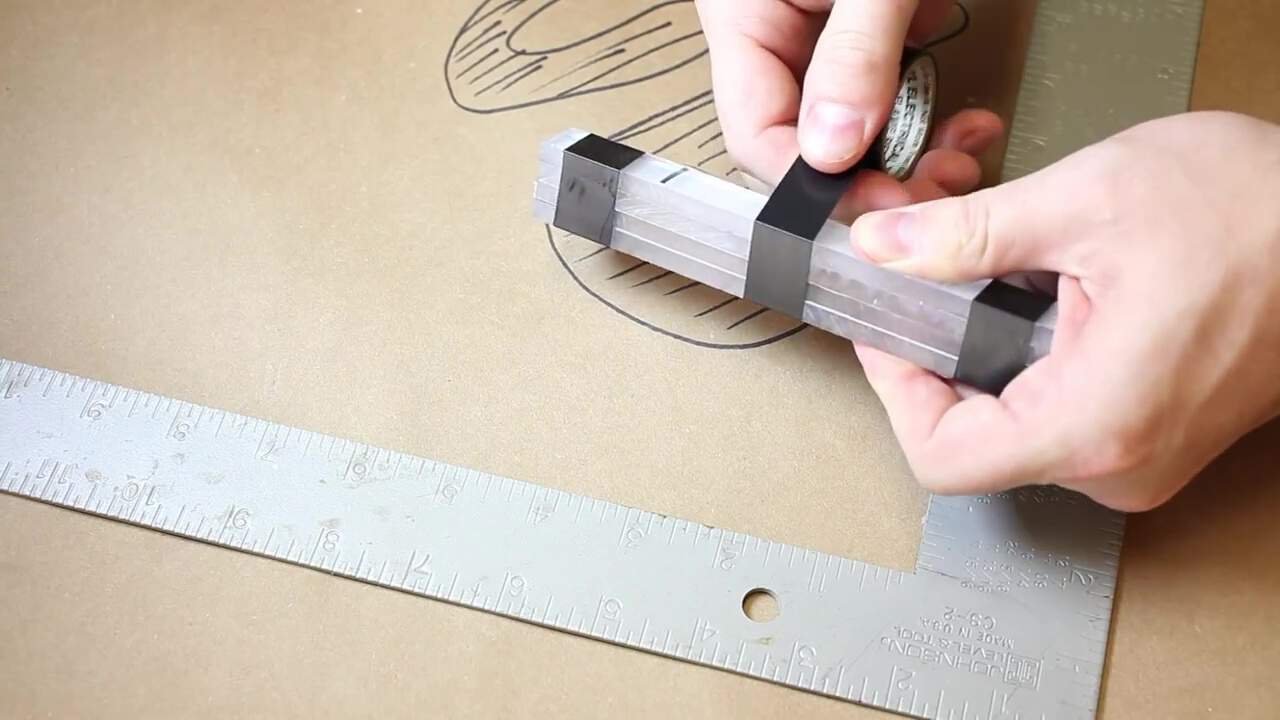
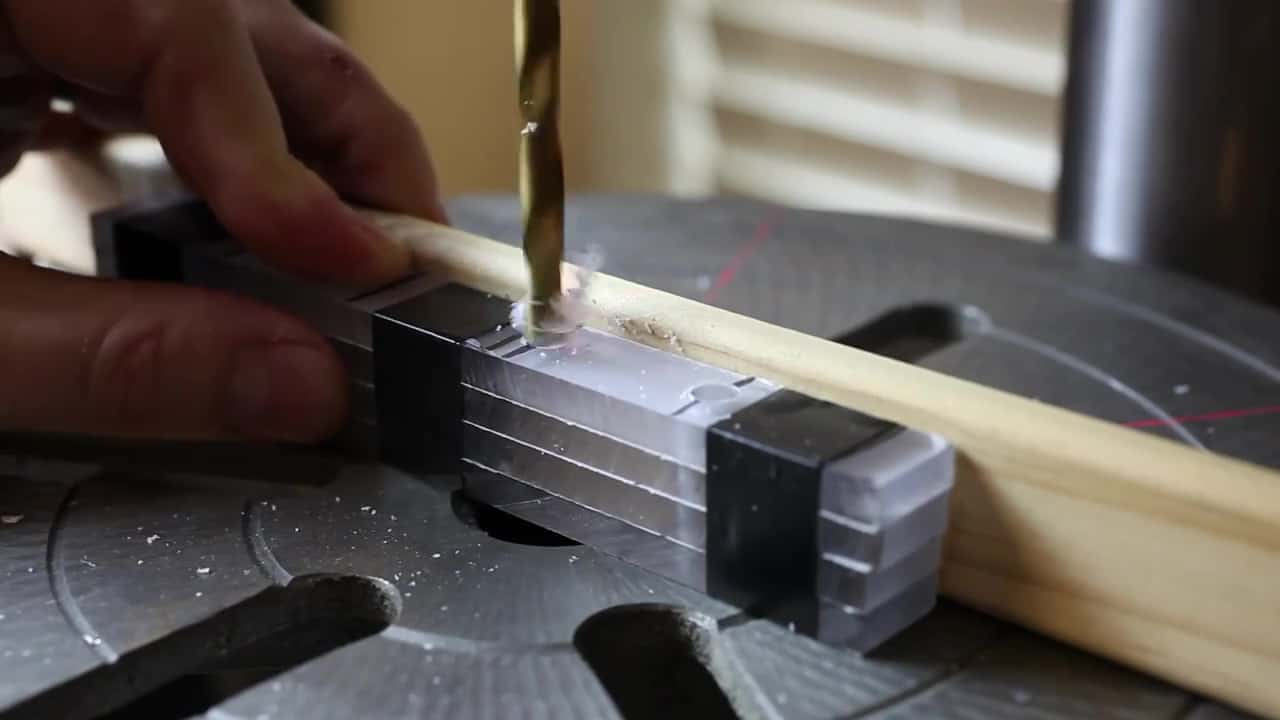
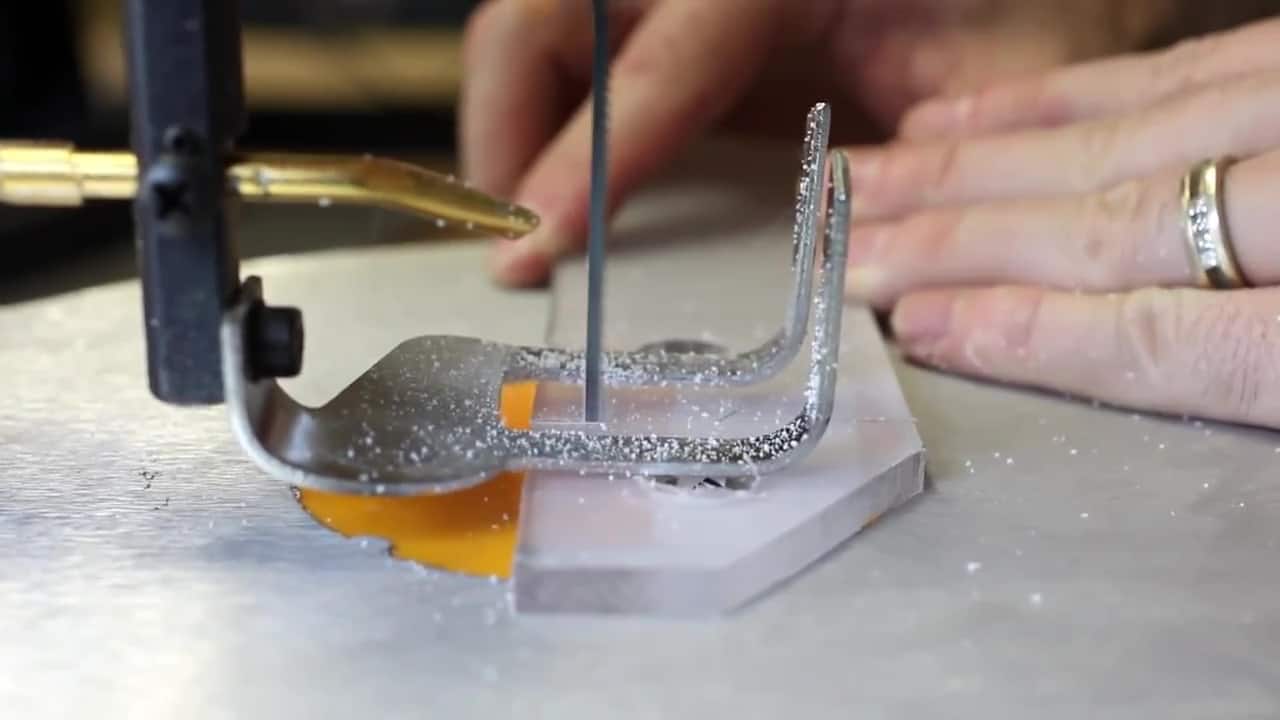
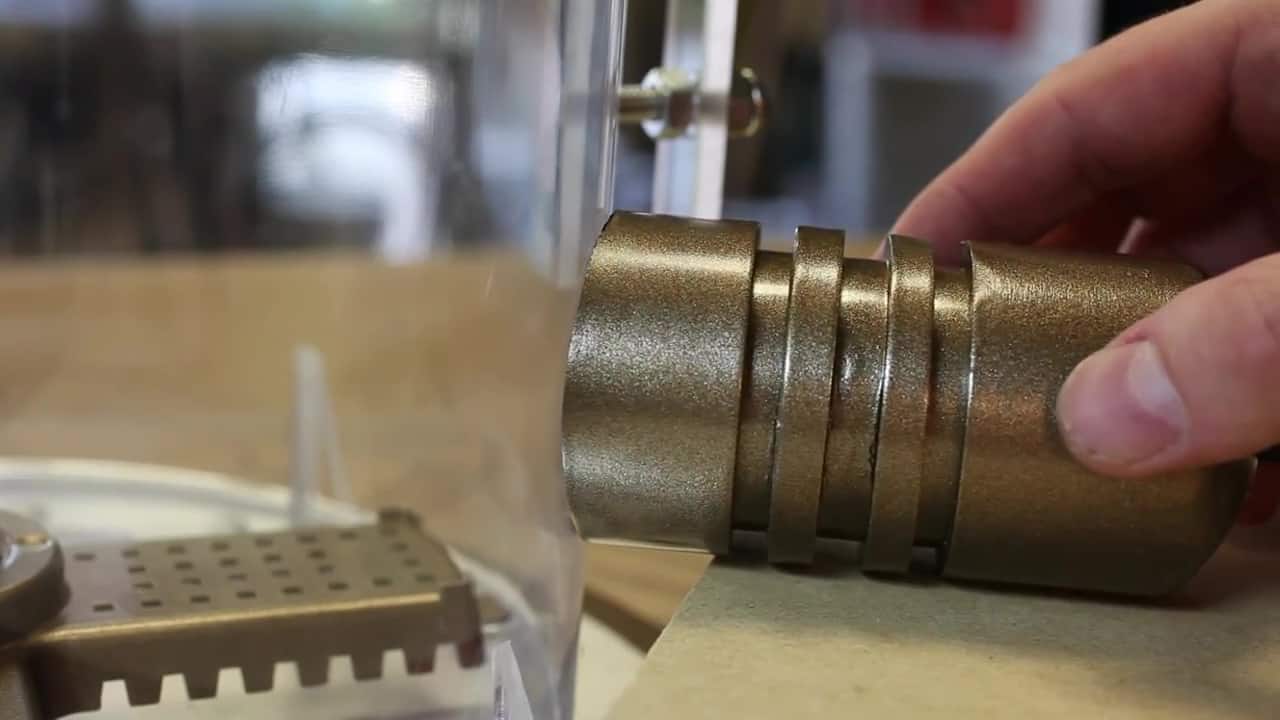
Step 5: Make the Futuristic Hose Adapter
The side of Morbius’ brain jar has some kind of futuristic looking hose and pump adapter connected to it. To make this, you’ll need the section of PVC pipe, the PVC coupler, and the PVC cap. Cut a couple of 1/4 inch sections off of the coupler and glue them together to look like the pictures below. Since this will be attached to the side of Morbius’ brain jar, you’ll need to sand the inside of it to a curve so it fits snugly against the curve of the aquarium. Drill a hole in the end of the PVC cap to accept the “hose”.
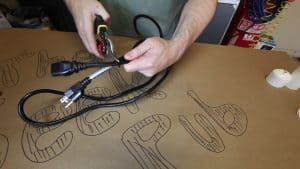 Step 6: Cut the cord
Cut the ends off of an old electrical cord (both ends so that a kid can’t plug it into the wall later). One end will go into the futuristic PVC adapter we made earlier. The other end will simply be hidden behind something where you place the prop in your home.
Step 7: Assemble the Base
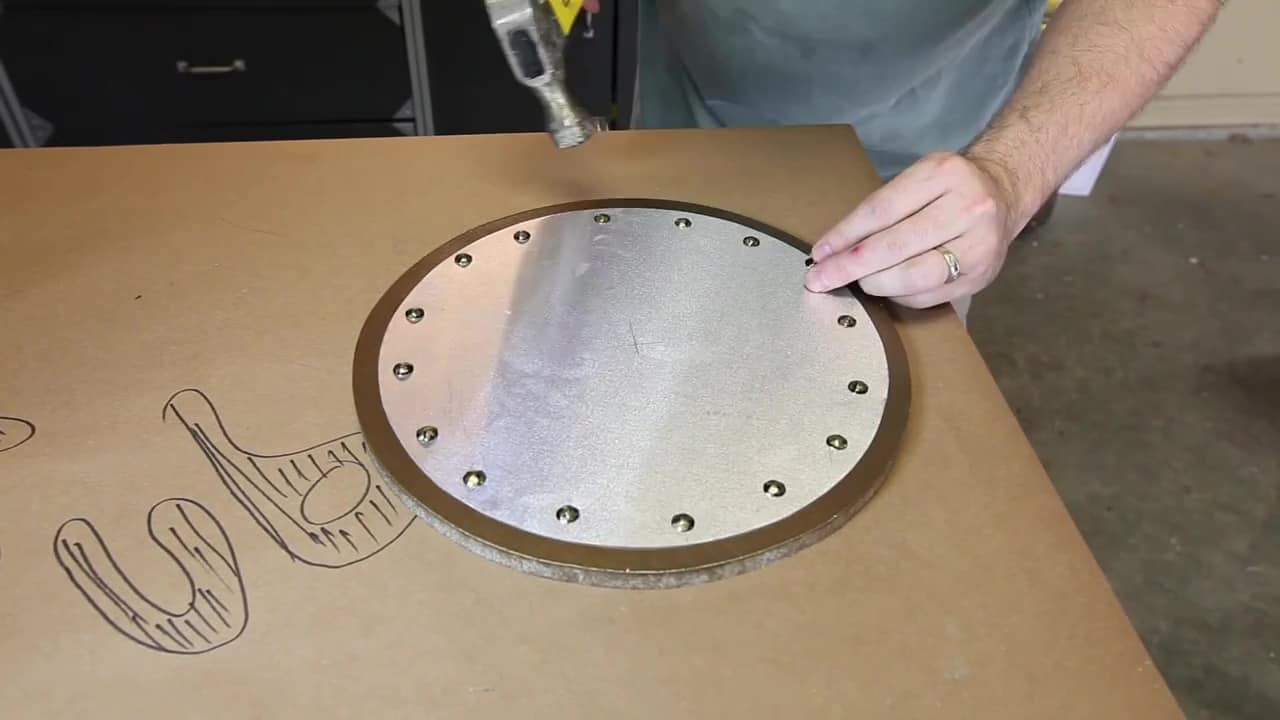
Using some spray adhesive, caulk, or other glue, attach the aluminum disc to the center of the MDF disc, leaving about 1/2 inch of MDF exposed around the outside. Evenly space and install some bronze brads around the outside of the disc to resemble rivets.
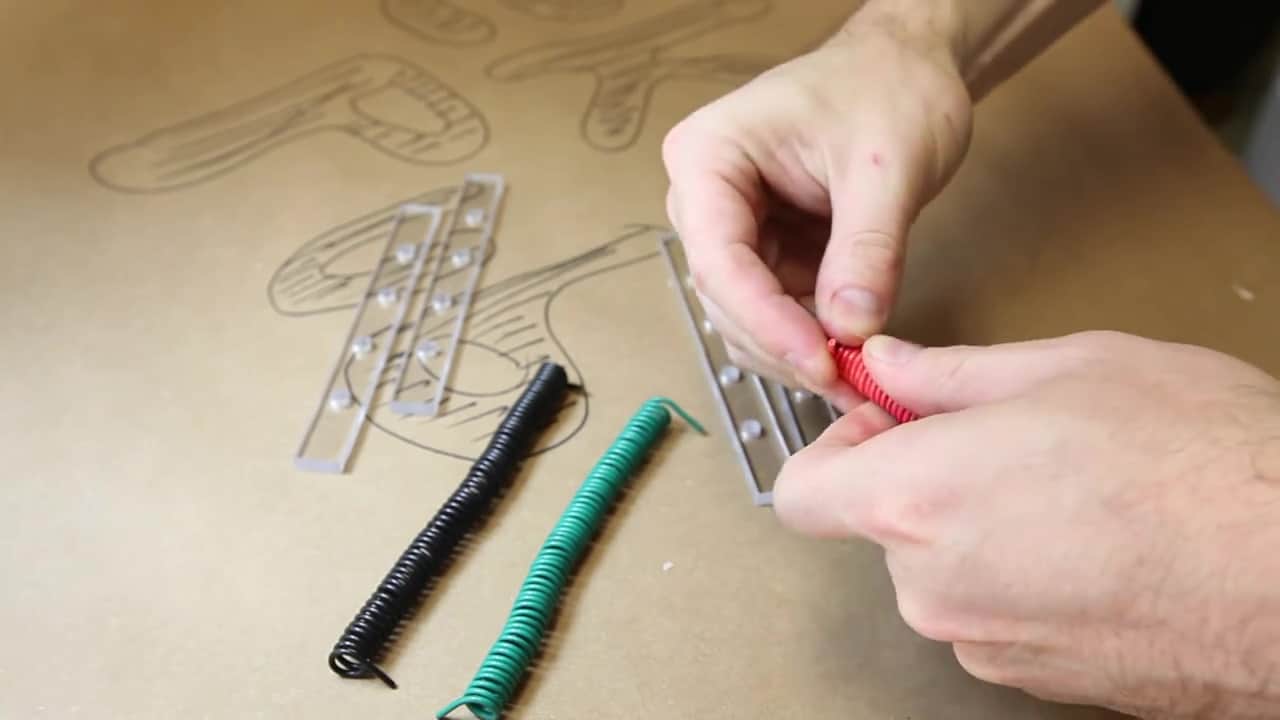
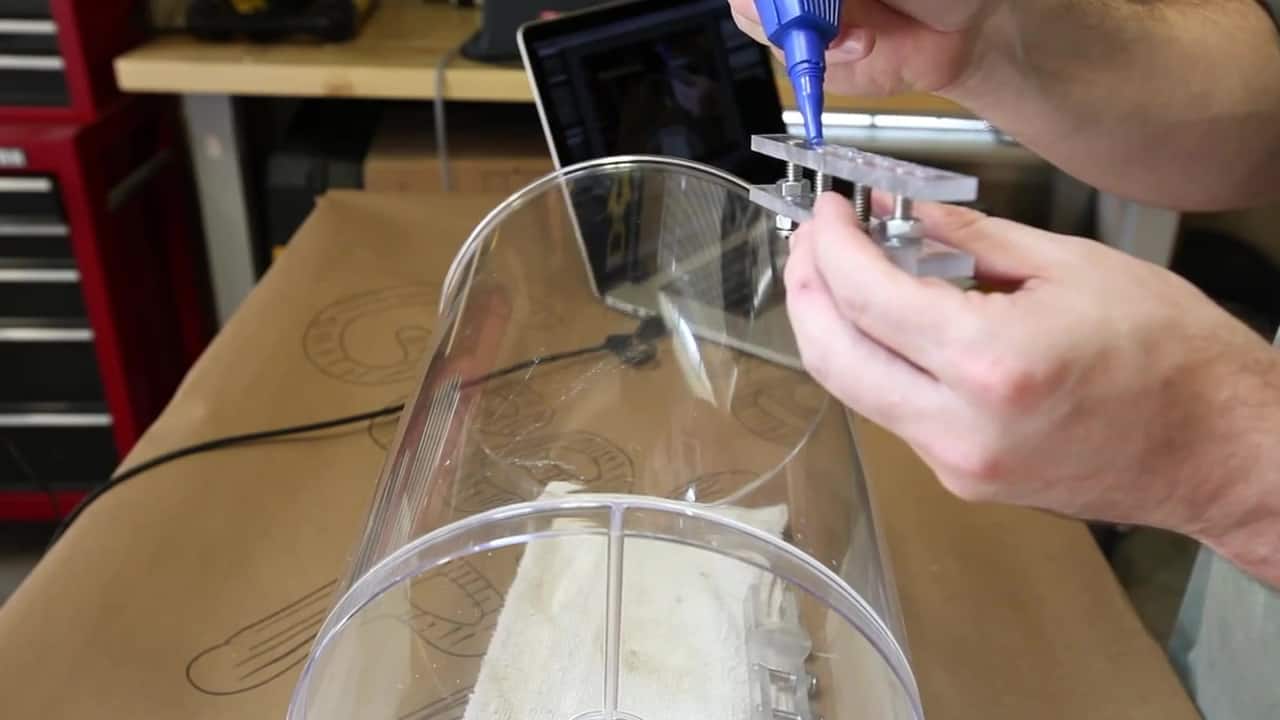
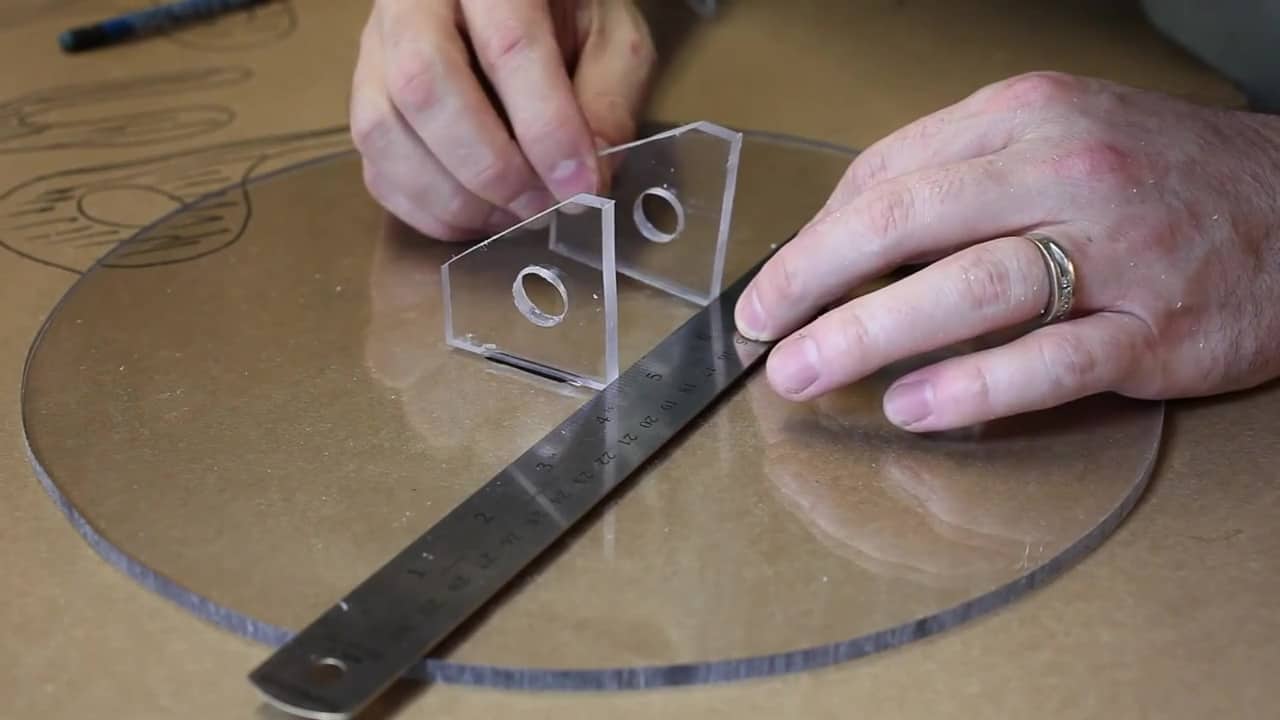
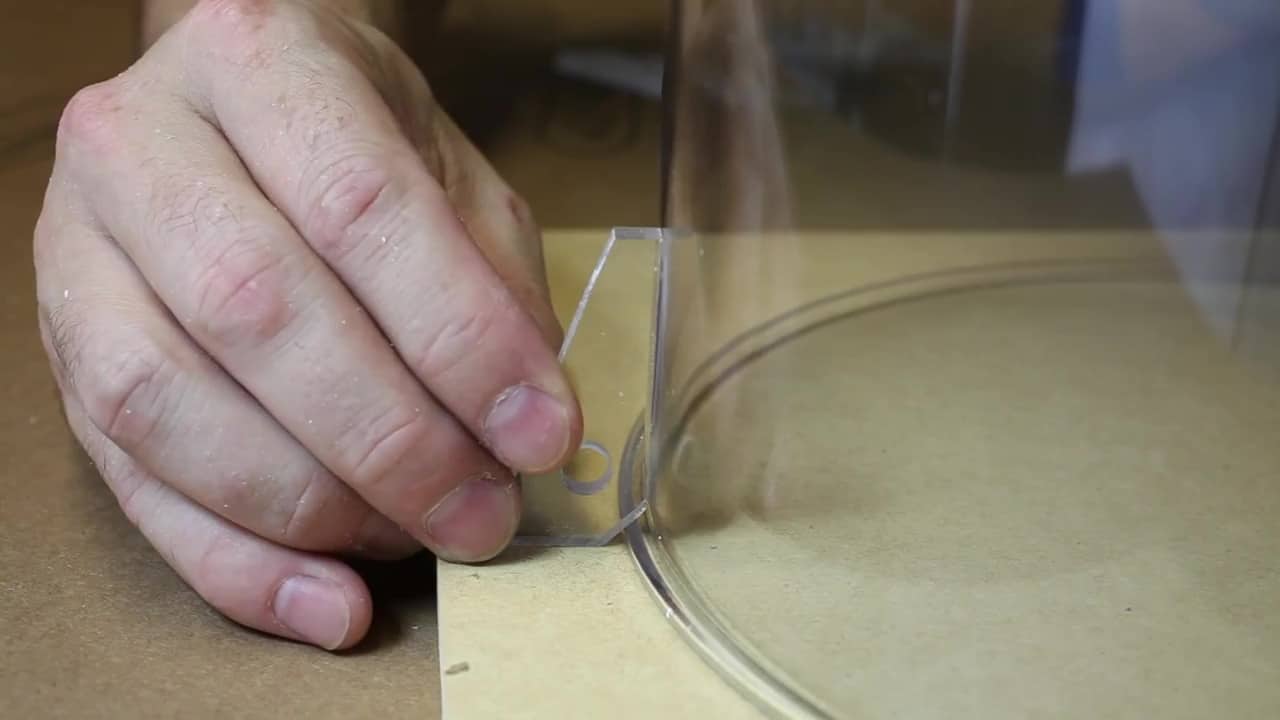
Step 8: Create the Brain Electrodes
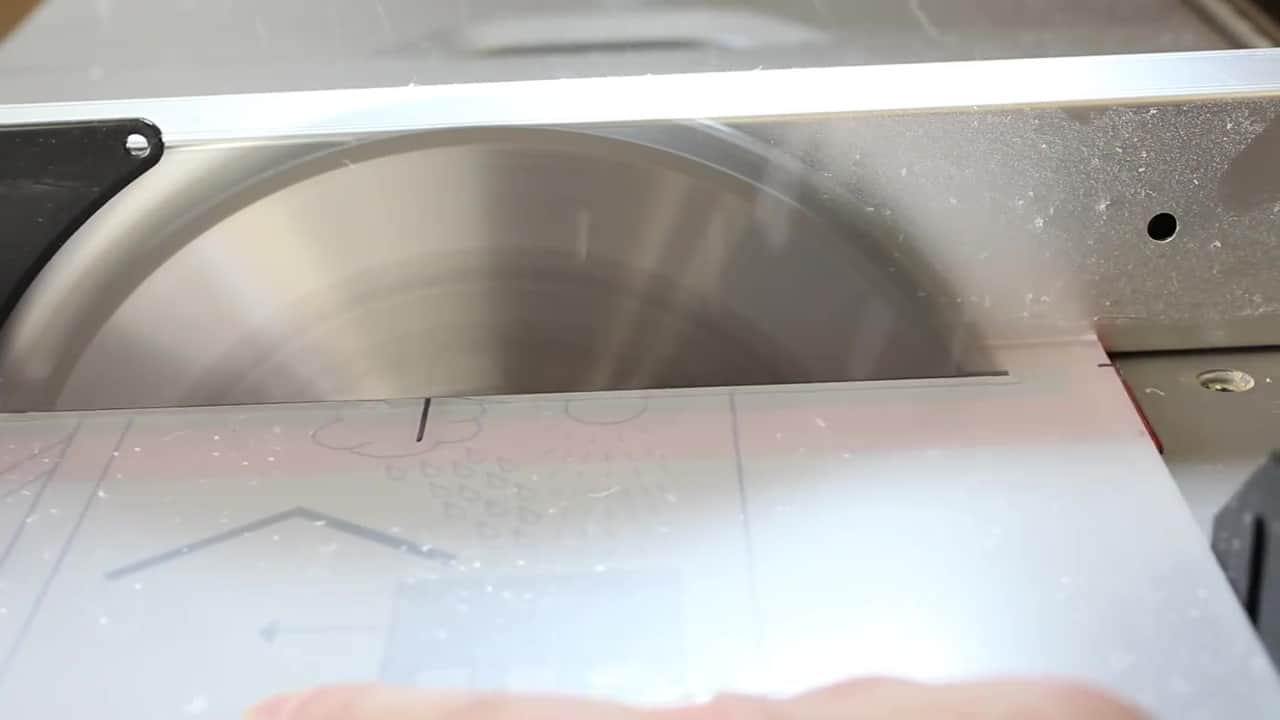
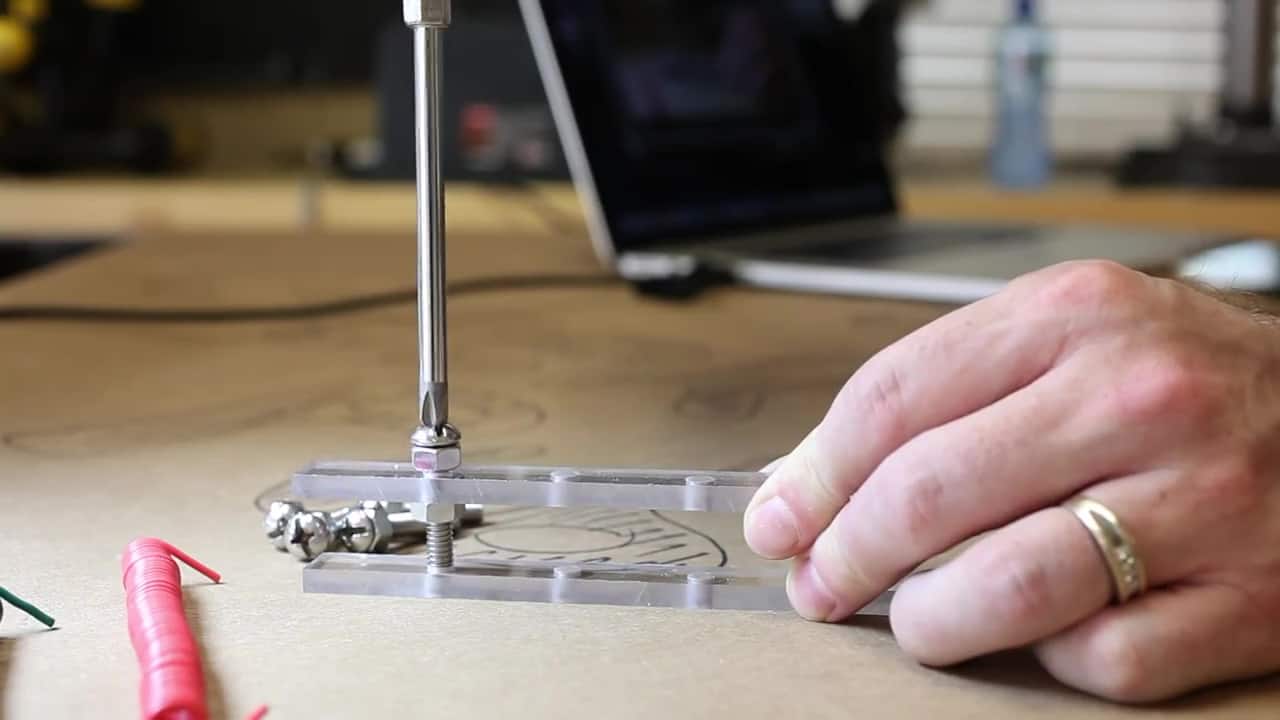
Using the table saw, or a handheld hack saw, or band saw, cut out four sections of the arcylic sheeting. Stack them together and drill them out on the drill press. Drill the holes slightly smaller than the size of screws you purchased so they will have a snug fit. When assembled these become the brain electrodes.

Step 9: Finish and Glue the Components On
Using some CA glue (“super” glue), attach the electrodes to the side of the jar. Cut out and install any of the additional decorative pieces that you want on your brain jar. The original Brain of Morbius had different pieces depending on which scene was showing, meaning multiple props were used in filming, likely at different times, and they were not identical. I chose to install all of the decorative pieces. Again, attache them with CA glue.
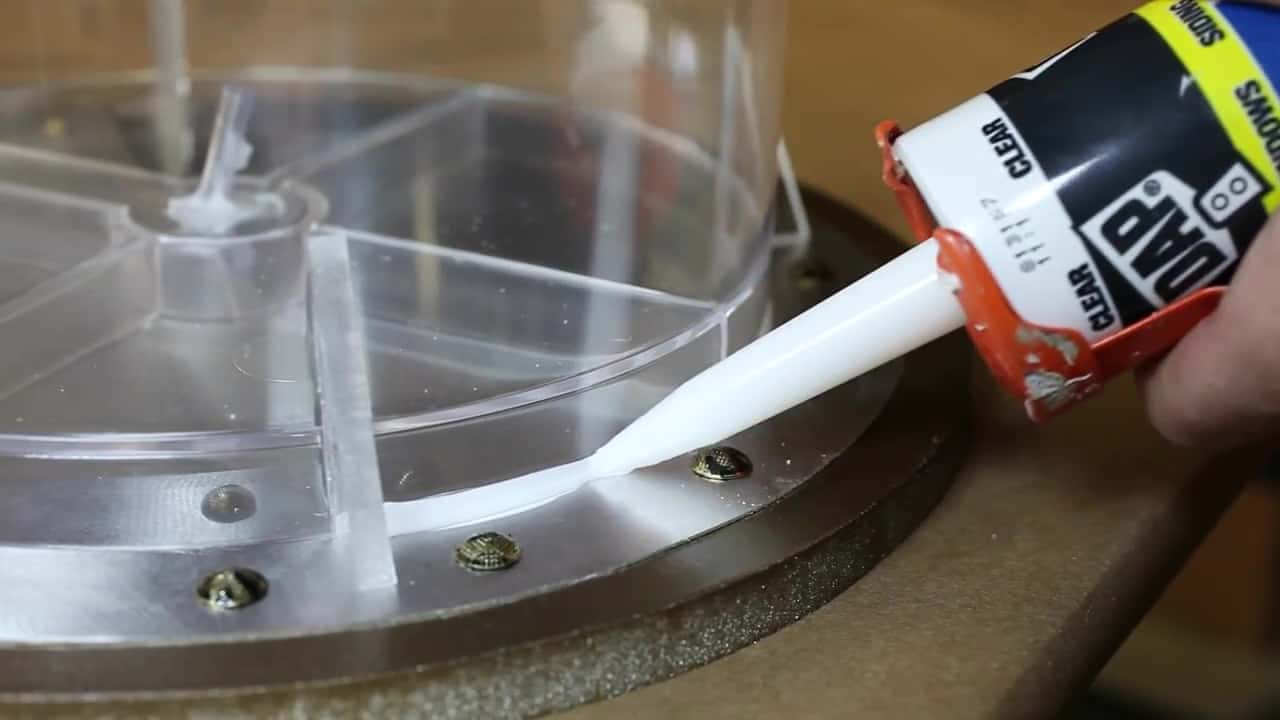
Step 10: Attach the Aquarium (now a Brain Jar)
Using some clear silicone caulking attach the brain jar (aquarium) to the base. Then attach the futuristic looking PVC hose adapter to the side of the jar using some CA glue.
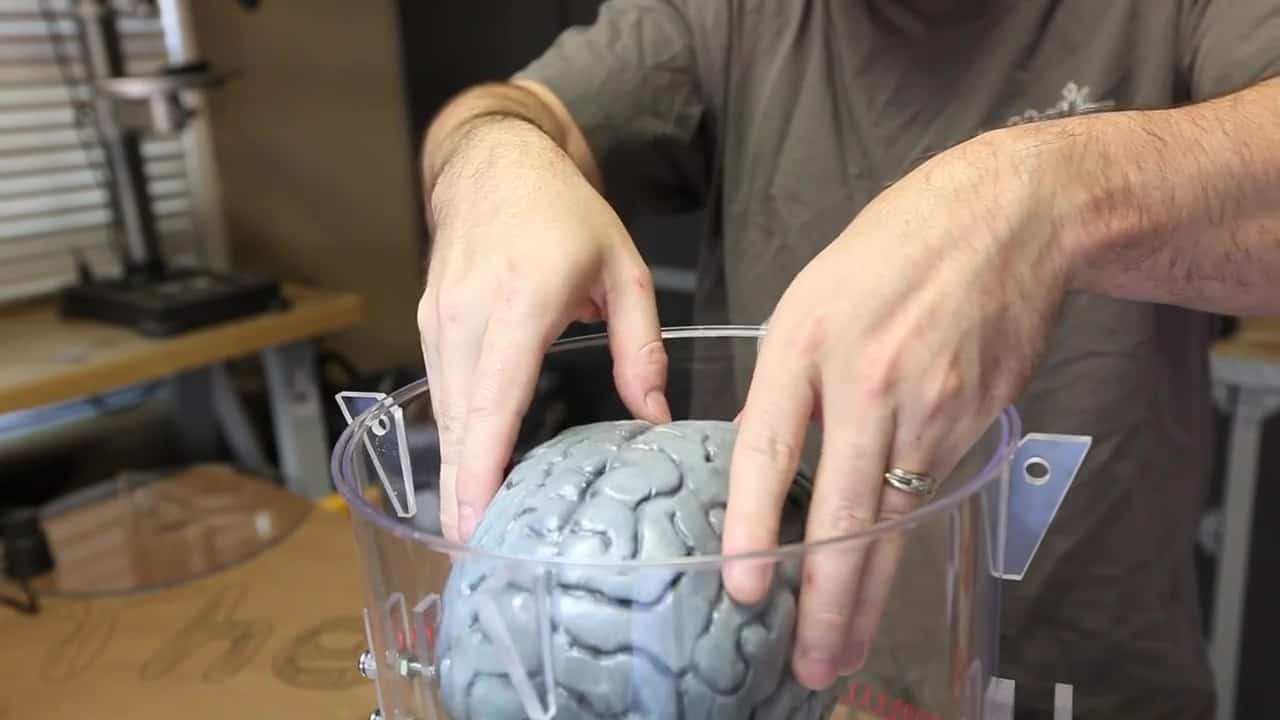
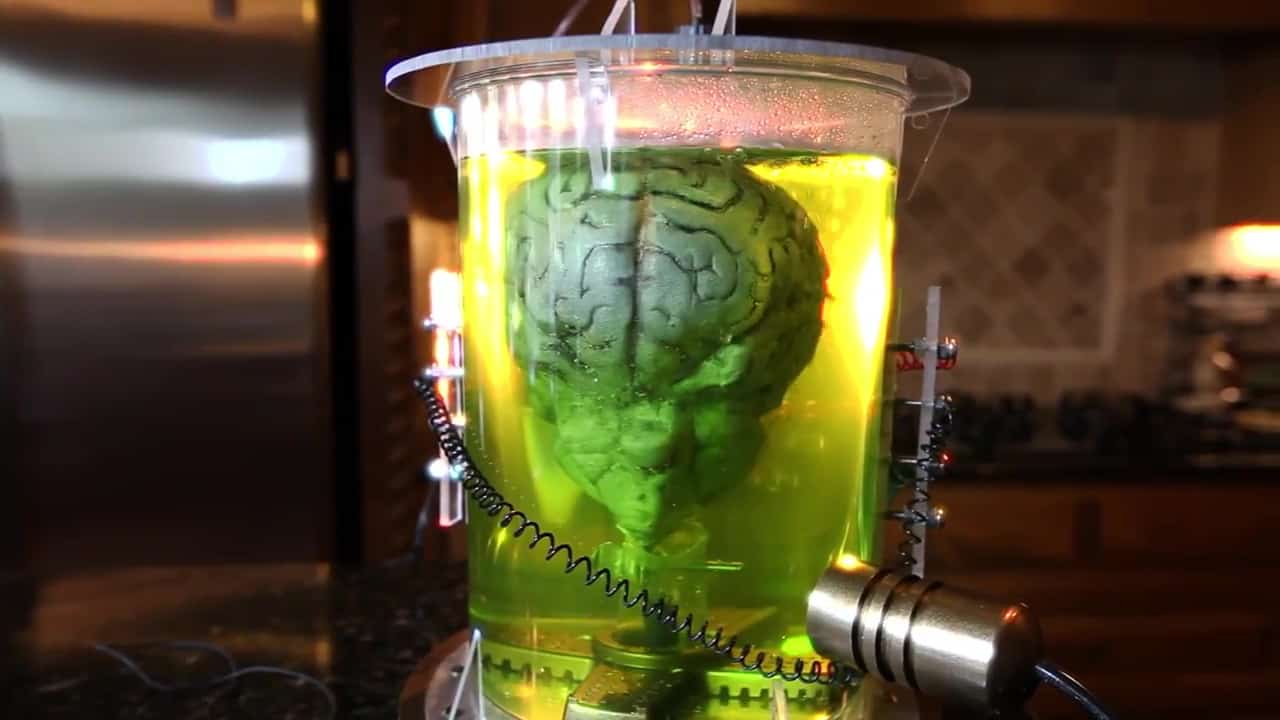
Step 11: Insert the Brain!
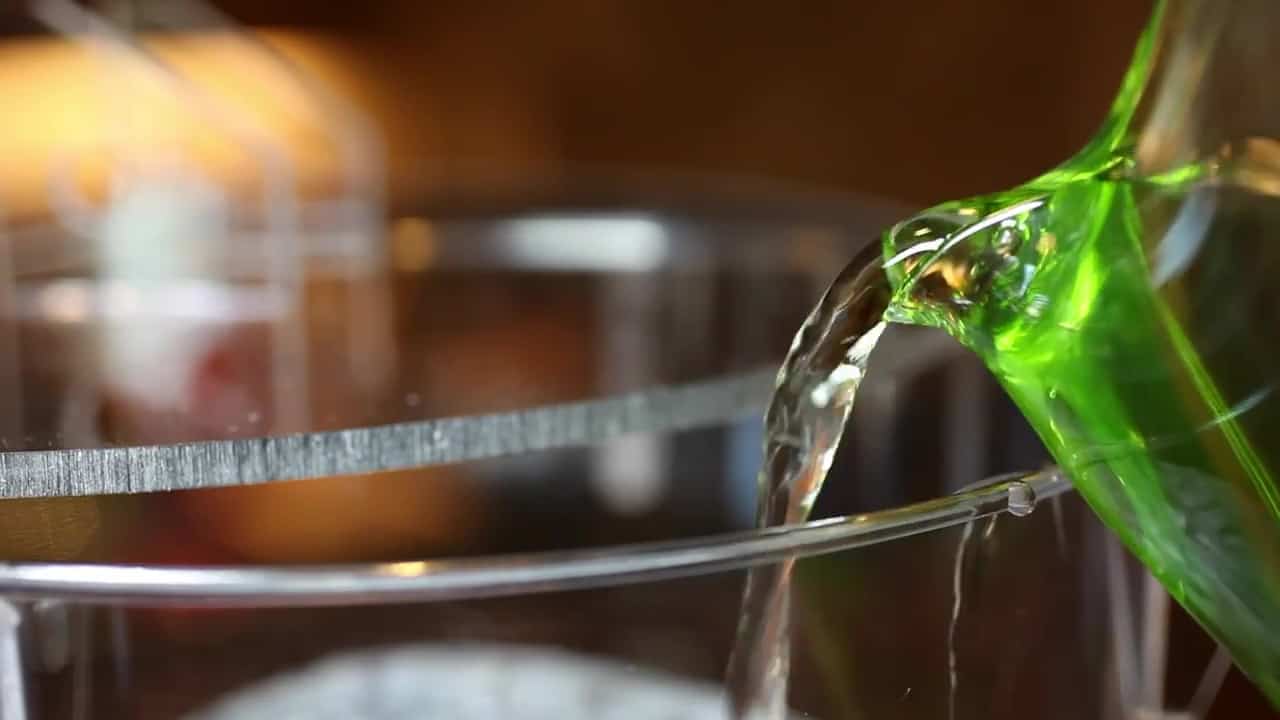
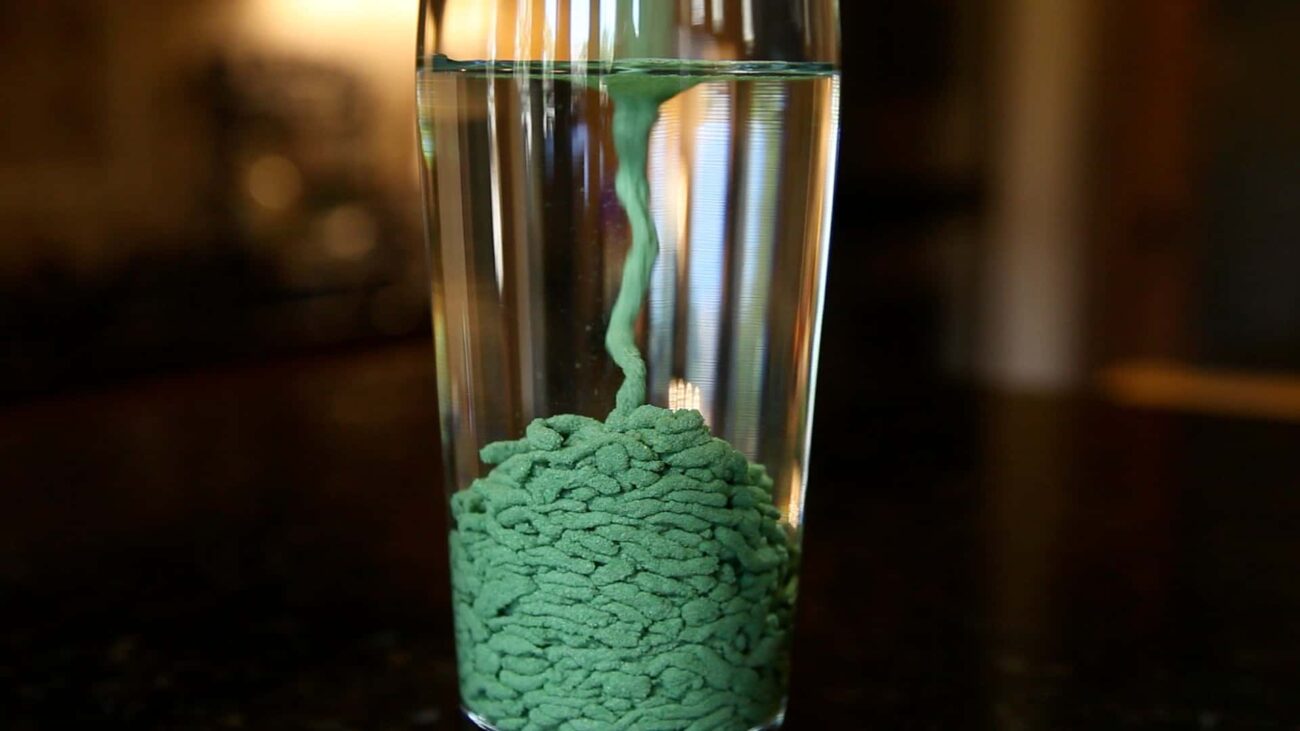
Insert the brain into the jar. If your brain floats you may need to secure it to the bottom of the tank or poke some holes in it to allow it to fill with water if it is made from plastic. The brain I chose was rubber and filled with foam, meaning I had to glue Morbius to the bottom of the jar to keep him from floating. In another container mix water with some yellow and green food coloring and fill the brain jar up with newly created brain juice!

The Finished Brain of Morbius Prop
And that’s all there is to it! You’ve created your very own Brain of Morbius TV prop that you can keep around the house and bust out when you want to show you’re a true Doctor Who fan!
Video Transcript
Hi guys! It’s Mike from The Geek Pub and this episode is for you Doctor Who fans, because we’re going to make The Brain of Morbius. The 1976 episode of Doctor Who entitled the Brain of Morbius is probably one of the most iconic episodes of the series. The episode features Morbius, a “brain in a jar” so to speak; and with halloween right around the corner, it’s a great time to make it!
To make our brain, we’re going to need a 3 gallon fish aquarium with a pump and LED light, a piece of 12″ square acrylic sheeting, a 12″ square piece of MDF, a sheet of aluminum, some PVC fittings, and of course, a rubber brain! You can see the complete parts list at TheGeekPub.com. To get started find the center of our MFD square and then use a compass to draw a 12″ circle. We’ll need to repeat this process with acrylic sheet.
Then using a scroll saw on medium speed slowly and carefully cut out both the MDF circle and the acrylic circle, leaving a little excess. We’ll use our belt sander to clean up the shape, remove any excess material, and smooth the edges.
Now use the compass again to make a smaller 11″ circle on the aluminum sheet. We’ll cut this out using a pair of aircraft snips, and then back to the belt sander to remove any metal burrs. On the miter saw, we need to cut our pipe fitting into three sections, two small, and one large and then cut a three inch section of pipe.
Follow this by drilling a hole into the end of the PVC cap. When finished, the pieces should look like this, and when assembled they’ll form this futuristic looking device. Then using our belt sander, sand a slight curve into the end so that it will fit nicely against the rounded tank. Cut the ends off of an old computer cord. This will go through the hole in the PVC cap.
Take the MDF circle (now painted bronze for aesthetic reasons) and place the aluminum disc in a centered position on top of it. Then using a center punch, make sixteen evenly spaced punches through the disc and into the MDF. Now gently insert 16 bronze brads into the holes with a hammer, while using care not to bend them or damage the sheet. The result should look like this!
Using a square, measure off four 6″ by 5/8″ pieces of acrylic and cut them out on the table saw. Mark them with four evenly spaced lines, and then tape them all together firmly. Using our drill press drill a 1/4″ hole at each mark.
Take some solid core wire and wrap it around a pencil to make some tight coils. Then remove them and set them aside for later use. Using some machine screws and bolts insert them through the holes in the acrylic slats we made earlier and screw them down with a screwdriver. Makes sure not to tighten the nuts however, as we’ll do that in a later step.
When you’re done you should have two sections that look like this, and we’ll use super glue to attach them to the tank. Now back to the band saw, cut out the various decorative pieces and attach them using super glue. A complete list of these can be found in the description. Using a clear silicone sealer, attach the base of the tank to the top of the disc and then attach the futuristic tubing device to the side. Attach the wire coils we made earlier, to the side slats, and then gently… insert the brain!
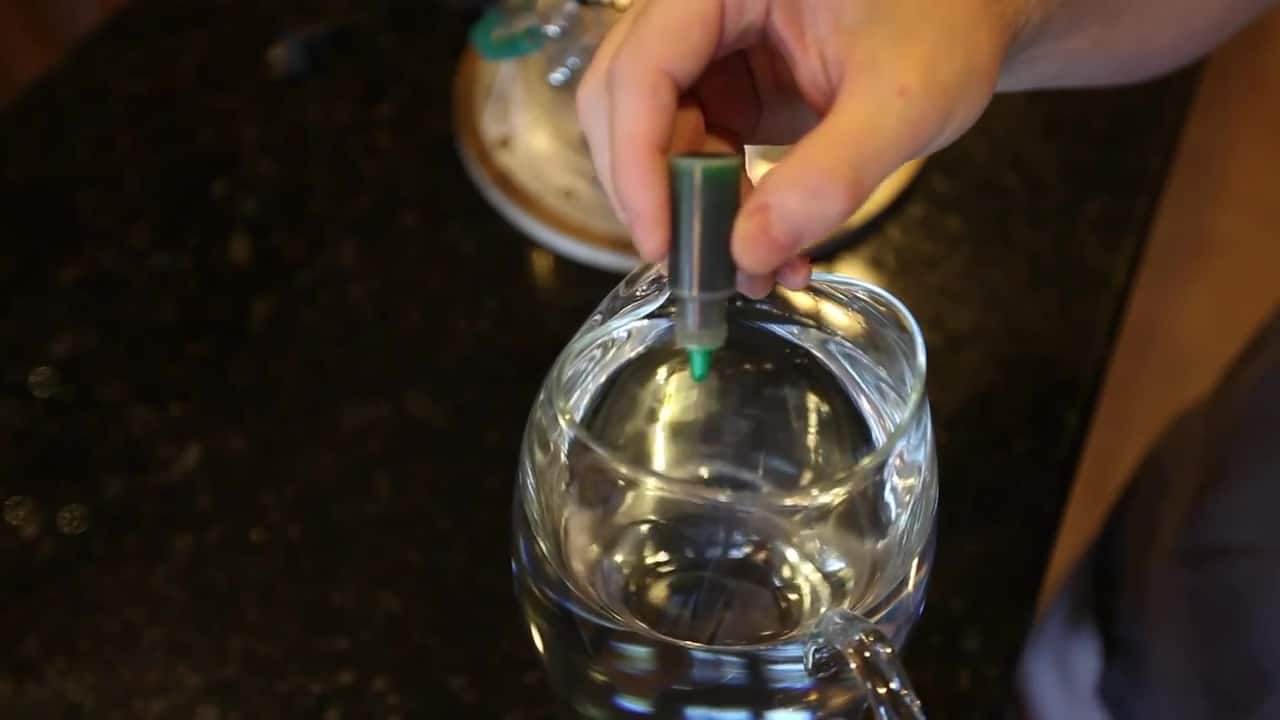
And now we need some brain juice! Fill up a container with cold water and add one drop of green food coloring, followed by two drops of yellow food coloring. Stir this mixture for 5 to 10 seconds. Then slide the lid open gently and pour the green juice into the brain jar. Once its full you’re done! Plug in the aquarium pump and you’ve got “The Brain of Morbius!”
You’re regular friends will be amazed and your Doctor Who friends will think you’re the coolest guy in town when you bust this guy out at your halloween party, or just about any other time. Heck, you can even keep Morbius on the coffee table! Just don’t have a mind bending contest with him! Well hey guys! Thanks for watching! And if you enjoyed this episode please like and subscribe to my channel on YouTube.
I am a Timelord of the first rank! What are you if you don’t subscribe?


5