Blog
How to make a Penny Battery
In a previous article, I showed you how to make a battery out of a potato. What we learned is that the potato doesn’t make the electricity, but rather a chemical reaction between the copper and zinc do, and all they need is an electrolyte between them. In this tutorial we’re going to learn how to make a penny battery which works on the same concept, just without the potatoes!
Watch the Penny Battery Video
Check out this handy video we put together on making a battery out of pennies. It’s super simple and fun science experiment!
How to Make a Penny Battery
To make a battery out of pennies is super simple, but the science behind it might not be all that easy to understand at first. It might help to read our articles on voltage and current to get a good idea of how electricity works. In a nutshell, batteries are nothing but devices that hold potential electrical energy that can be created via a chemical reaction! We’ll put those principles to use in our penny battery!
Parts List for this Project
Here’s a quick parts list for this project to help you get started:
RELATED: Buying a Multimeter
A multimeter isn’t necessary for this project, but it makes it more fun. We also have a fantastic multimeter tutorial if you need some help!
Let’s Make a Battery out of Pennies!
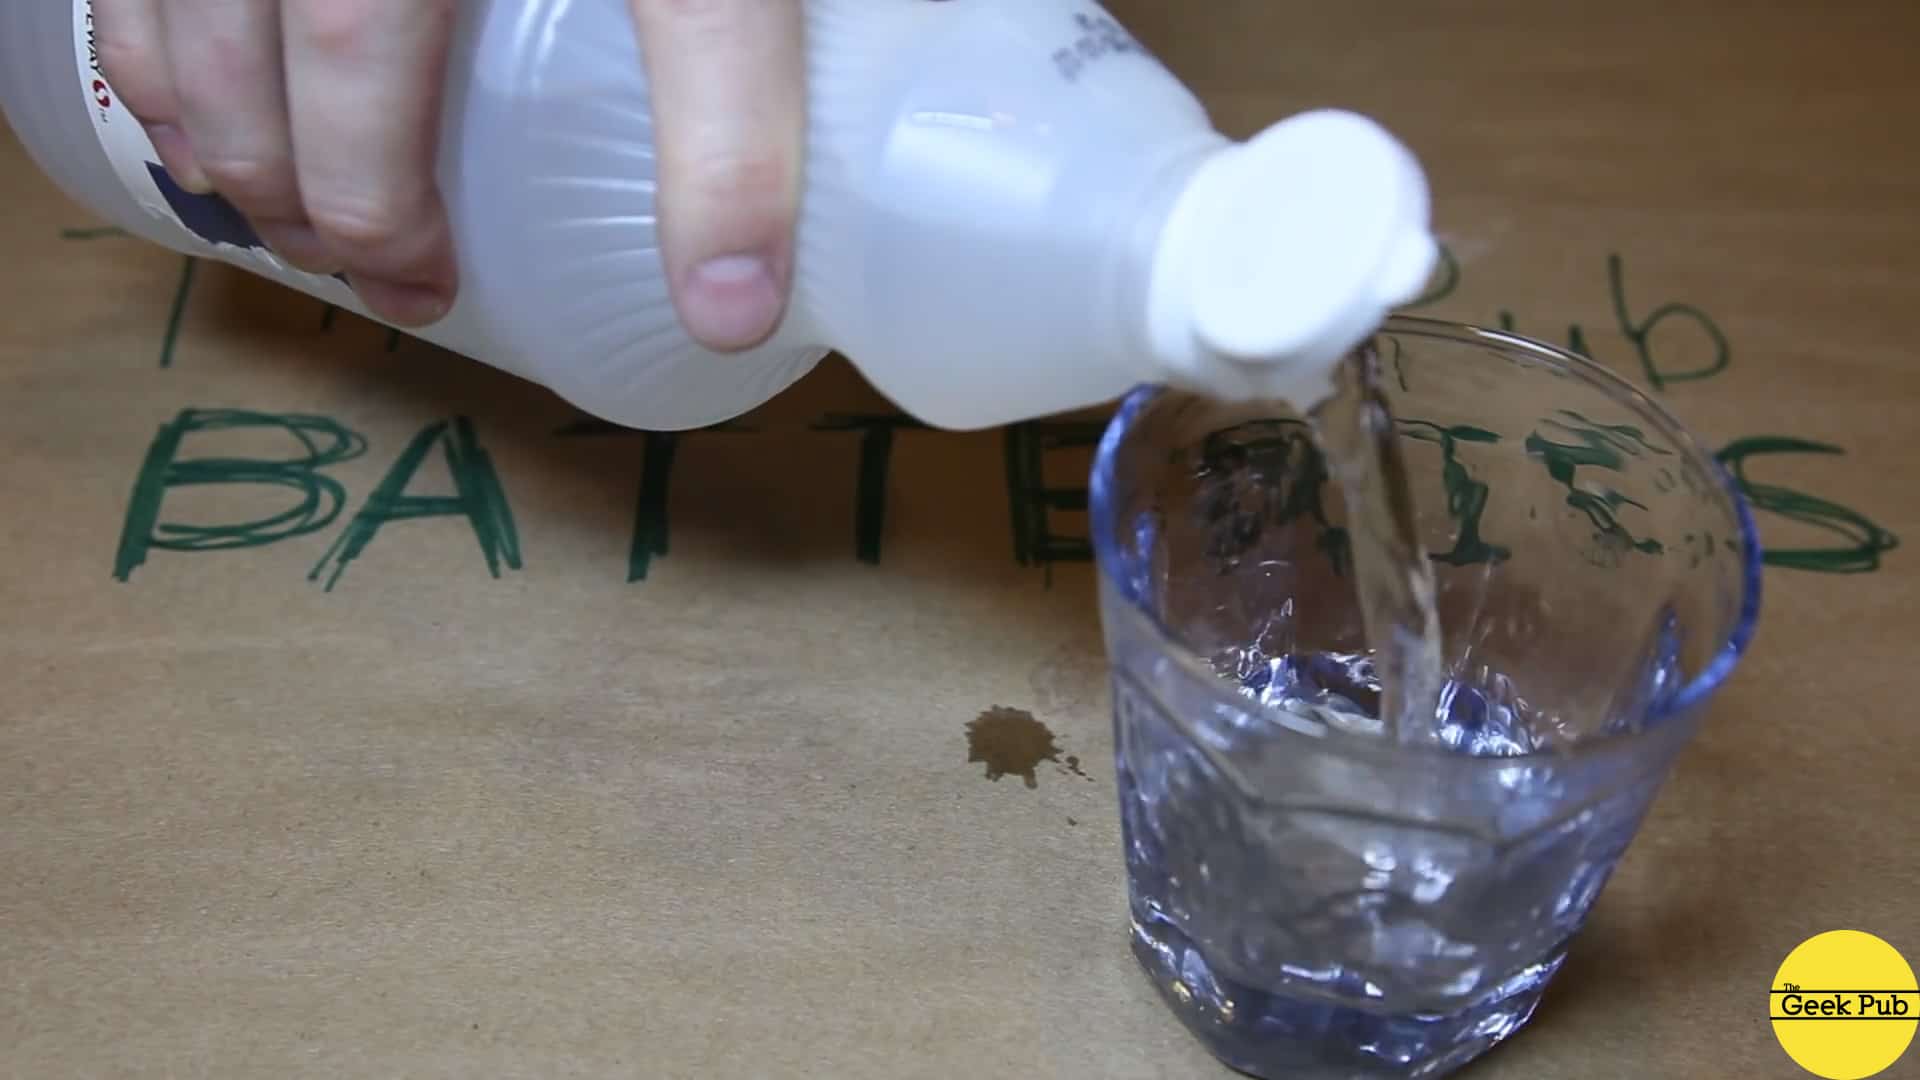
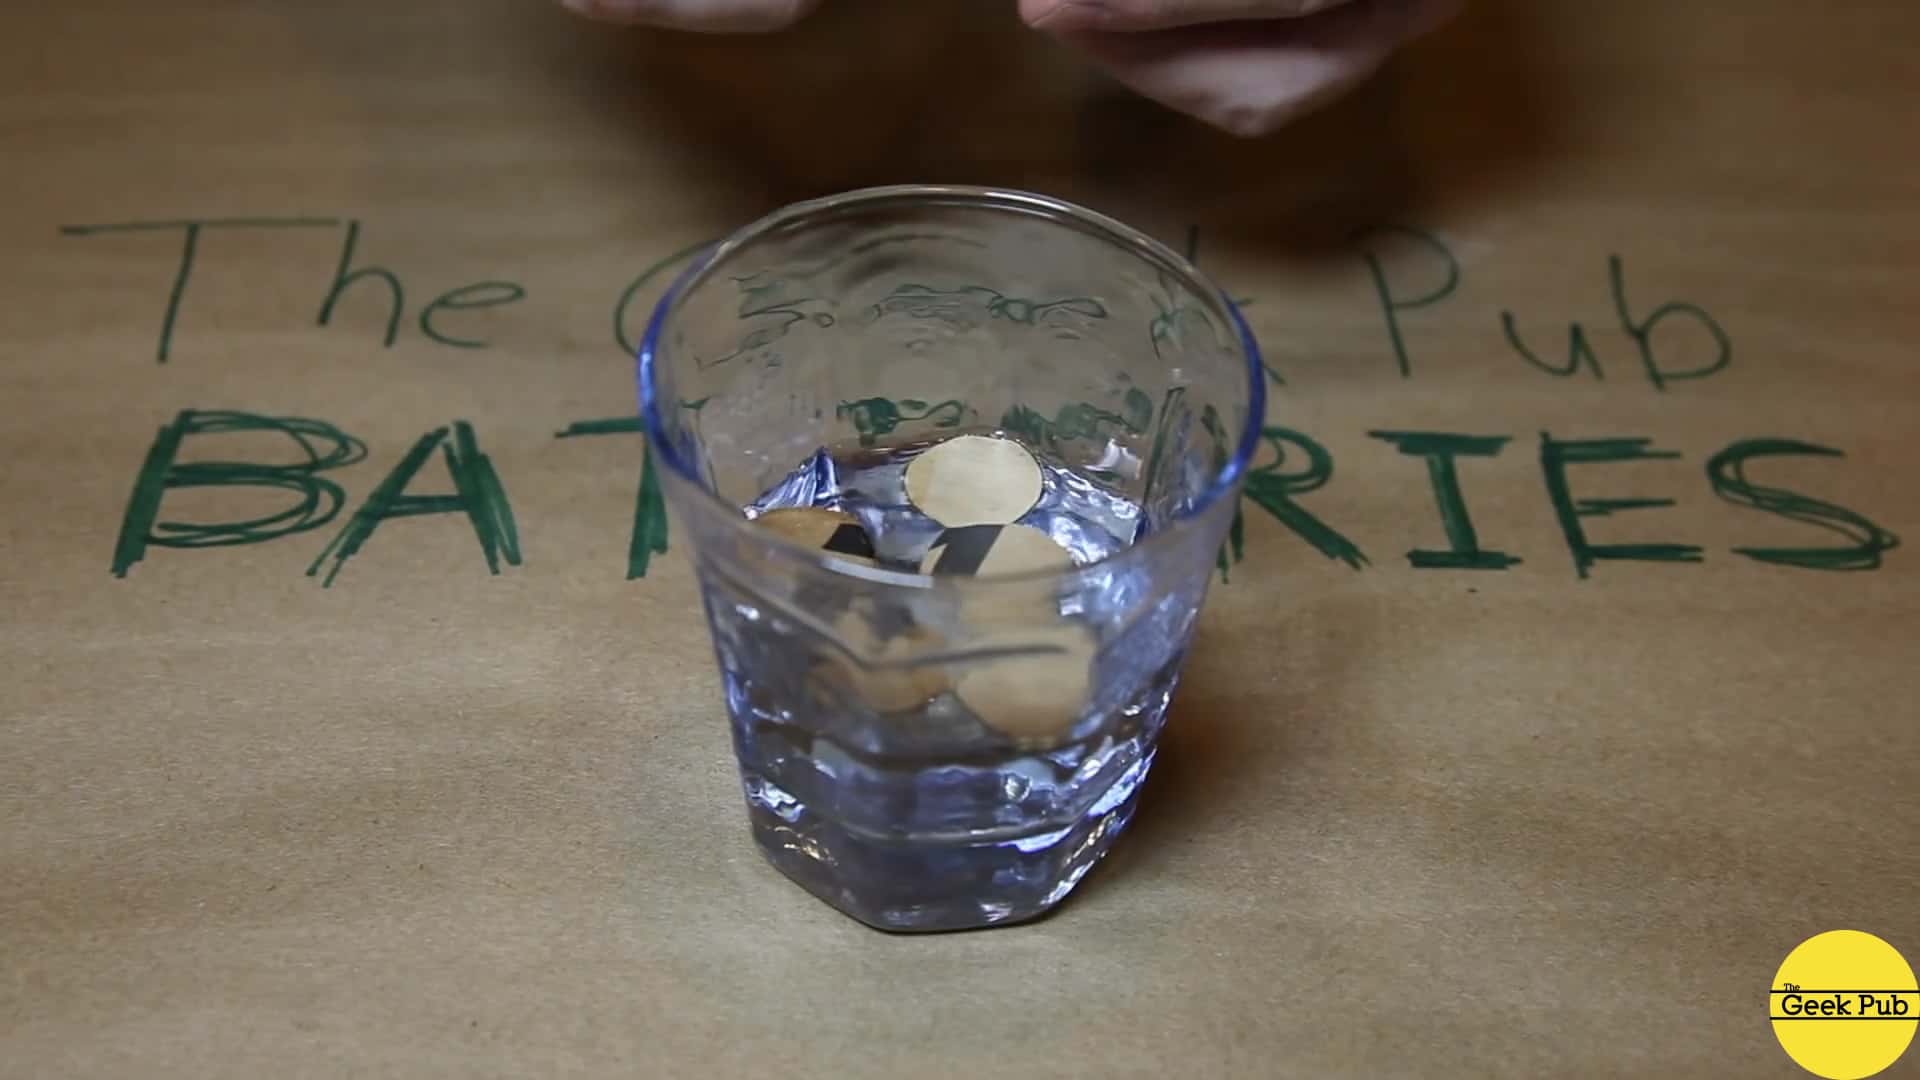
Step one is to pour some vinegar into a small glass or similar small container. This vinegar will be the electrolyte in our project. Vinegar is considered to be a weak acid. There are other acids which are better electrolytes, but not safe for kids and hobbyists to experiment with at home.
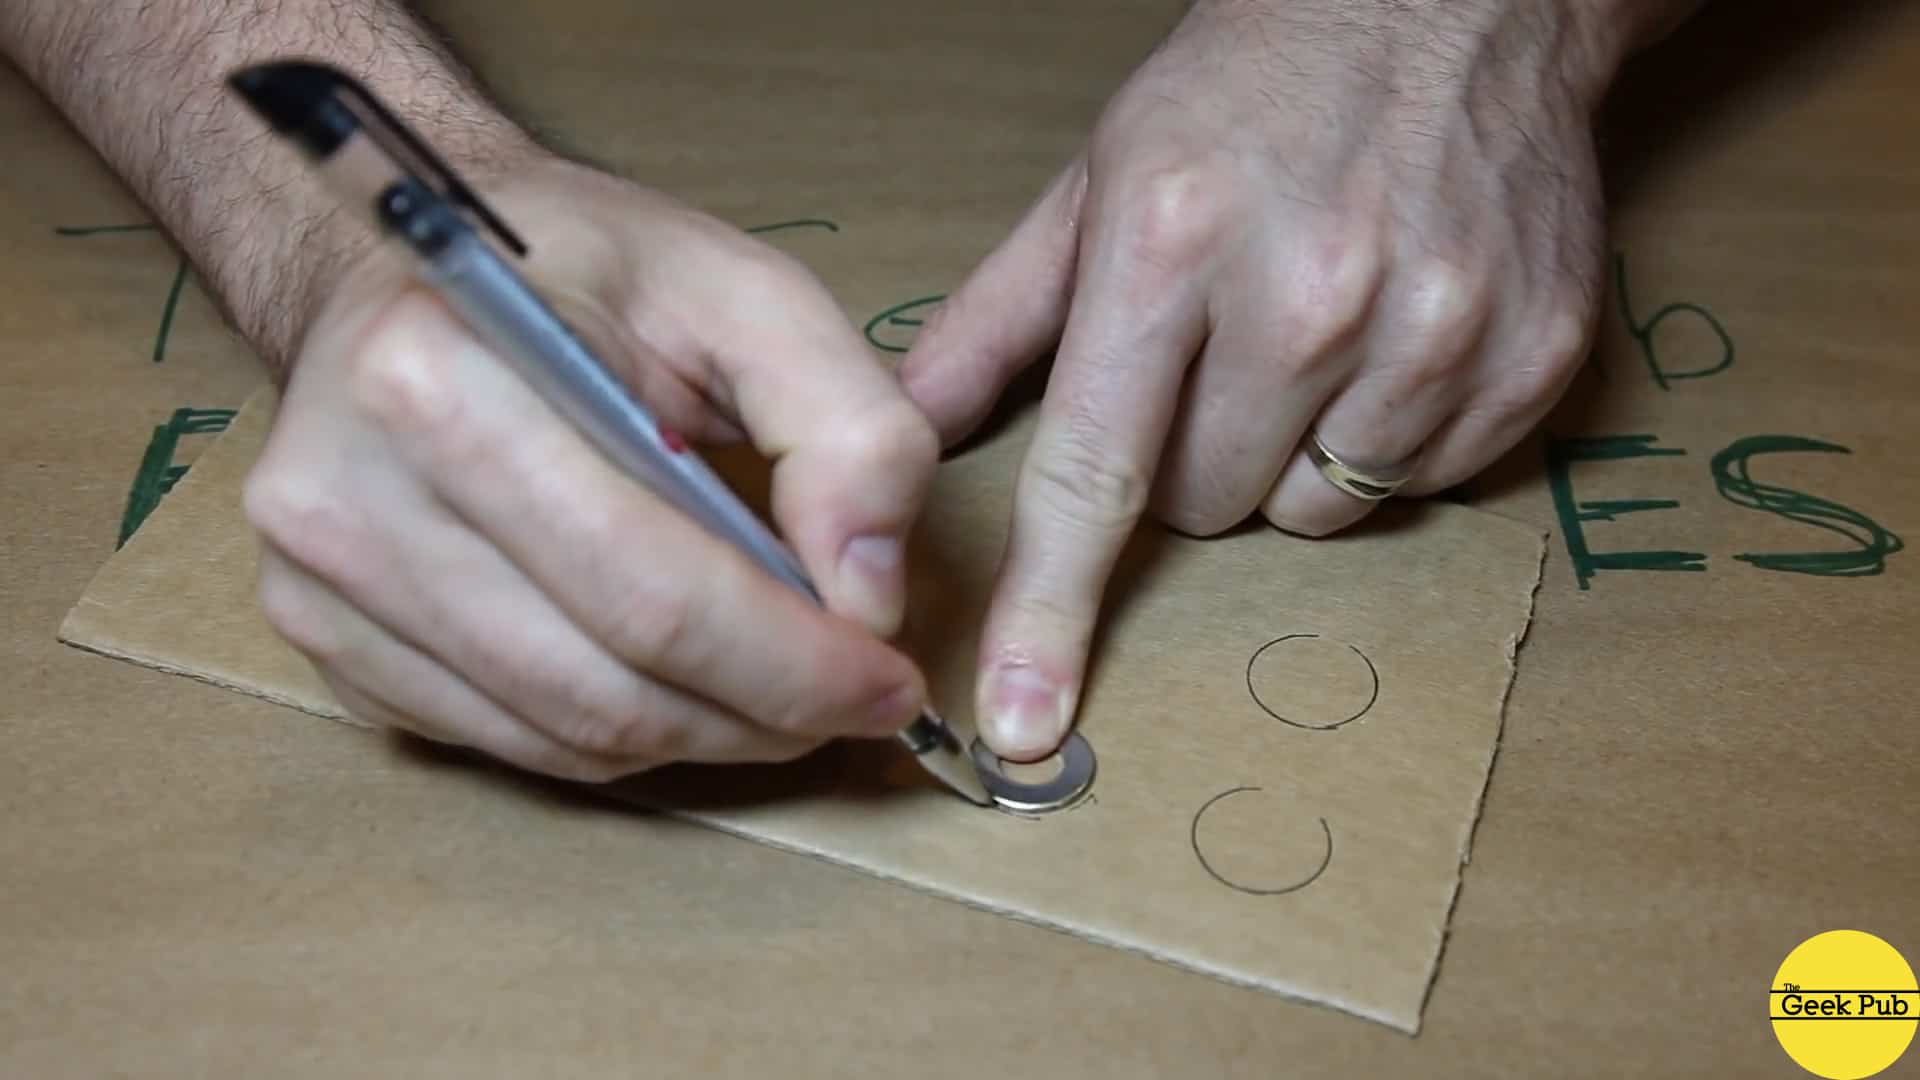
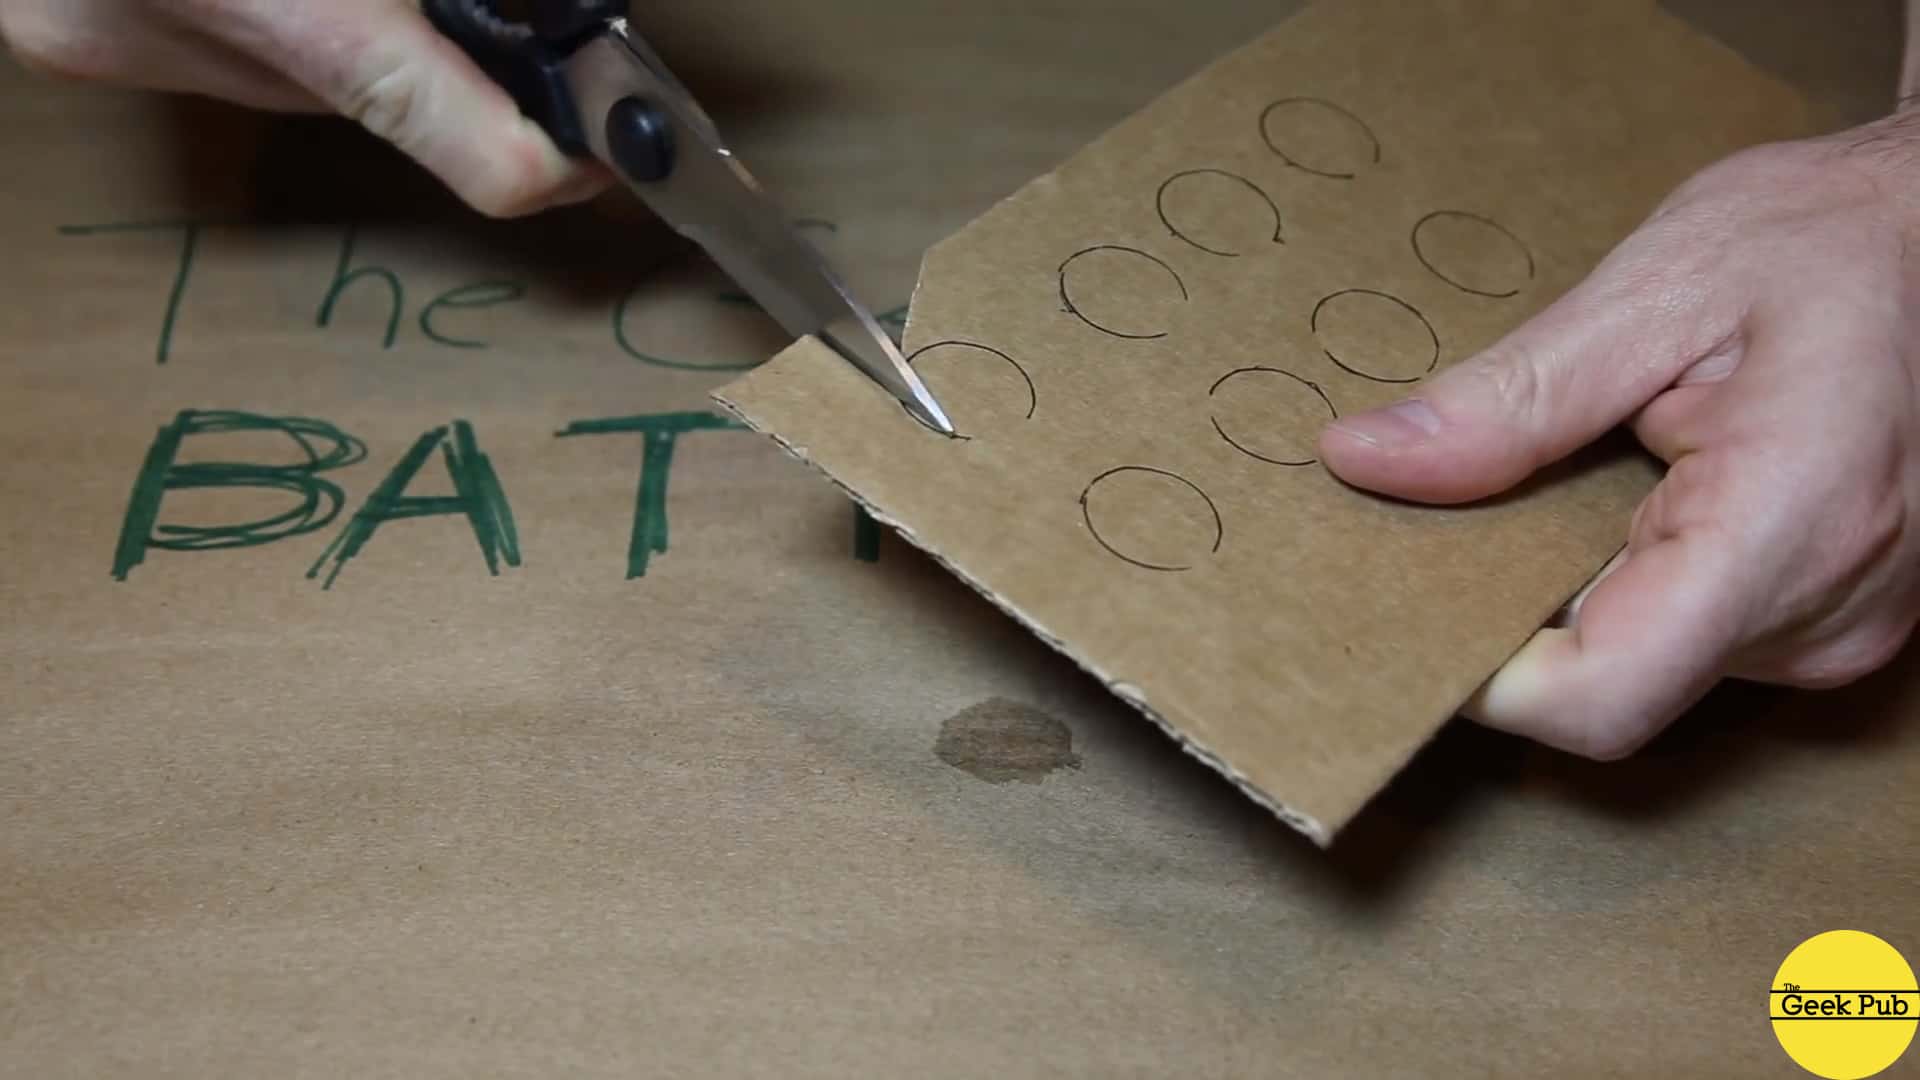
Take your sections of cardboard and use the washers to trace out circles. You’re going to need several of them, so trace it a few times and then cut them out with some scissors or a razor knife.
Put the cardboard circles into your glass of vinegar and stir them up a bit. These need to soak for at least two minutes. I’d suggest you stir them every 30 seconds or so for the best results.
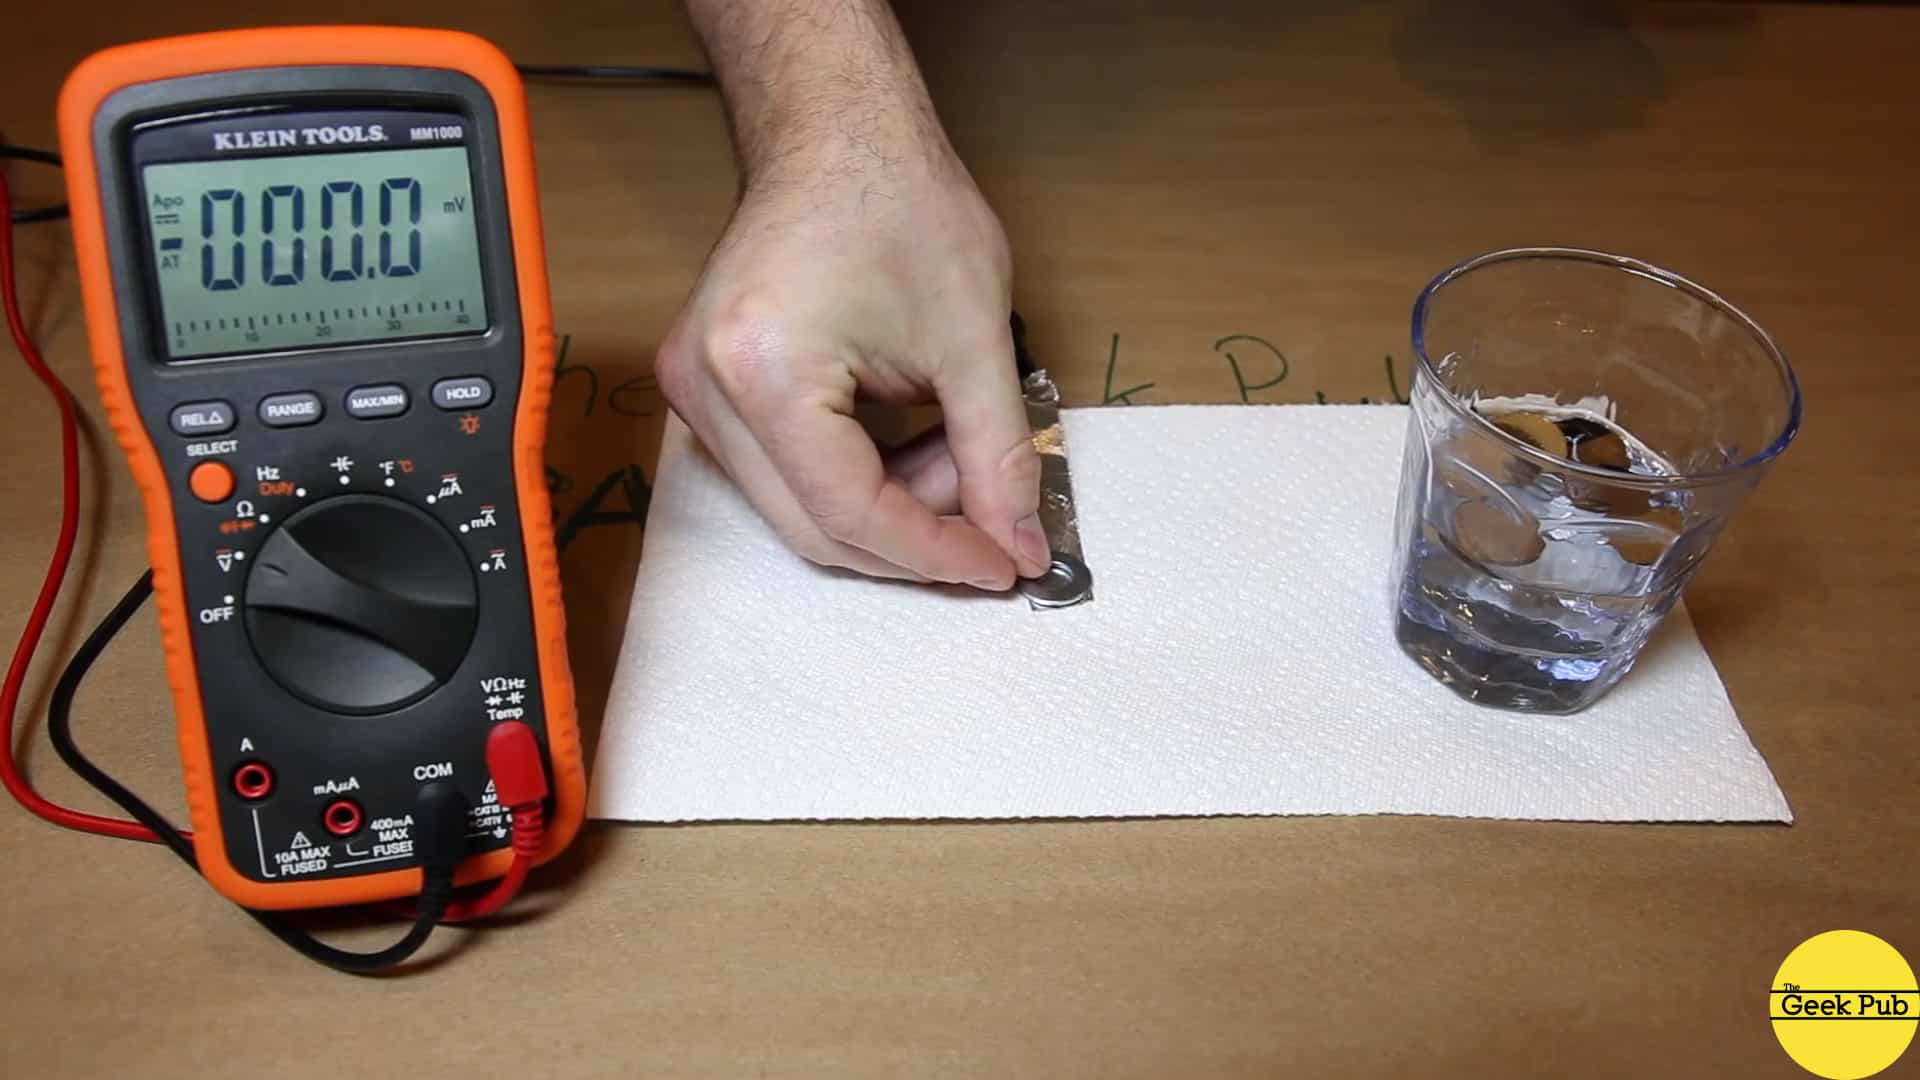
Make a small strip from aluminum foil and lay it out on a paper towel. Connect one end of it to the ground lead on your multimeter. This is technically optional, but will make it easier to check the voltage of the penny battery. At the other end of the aluminum strip, set a zinc washer onto it.
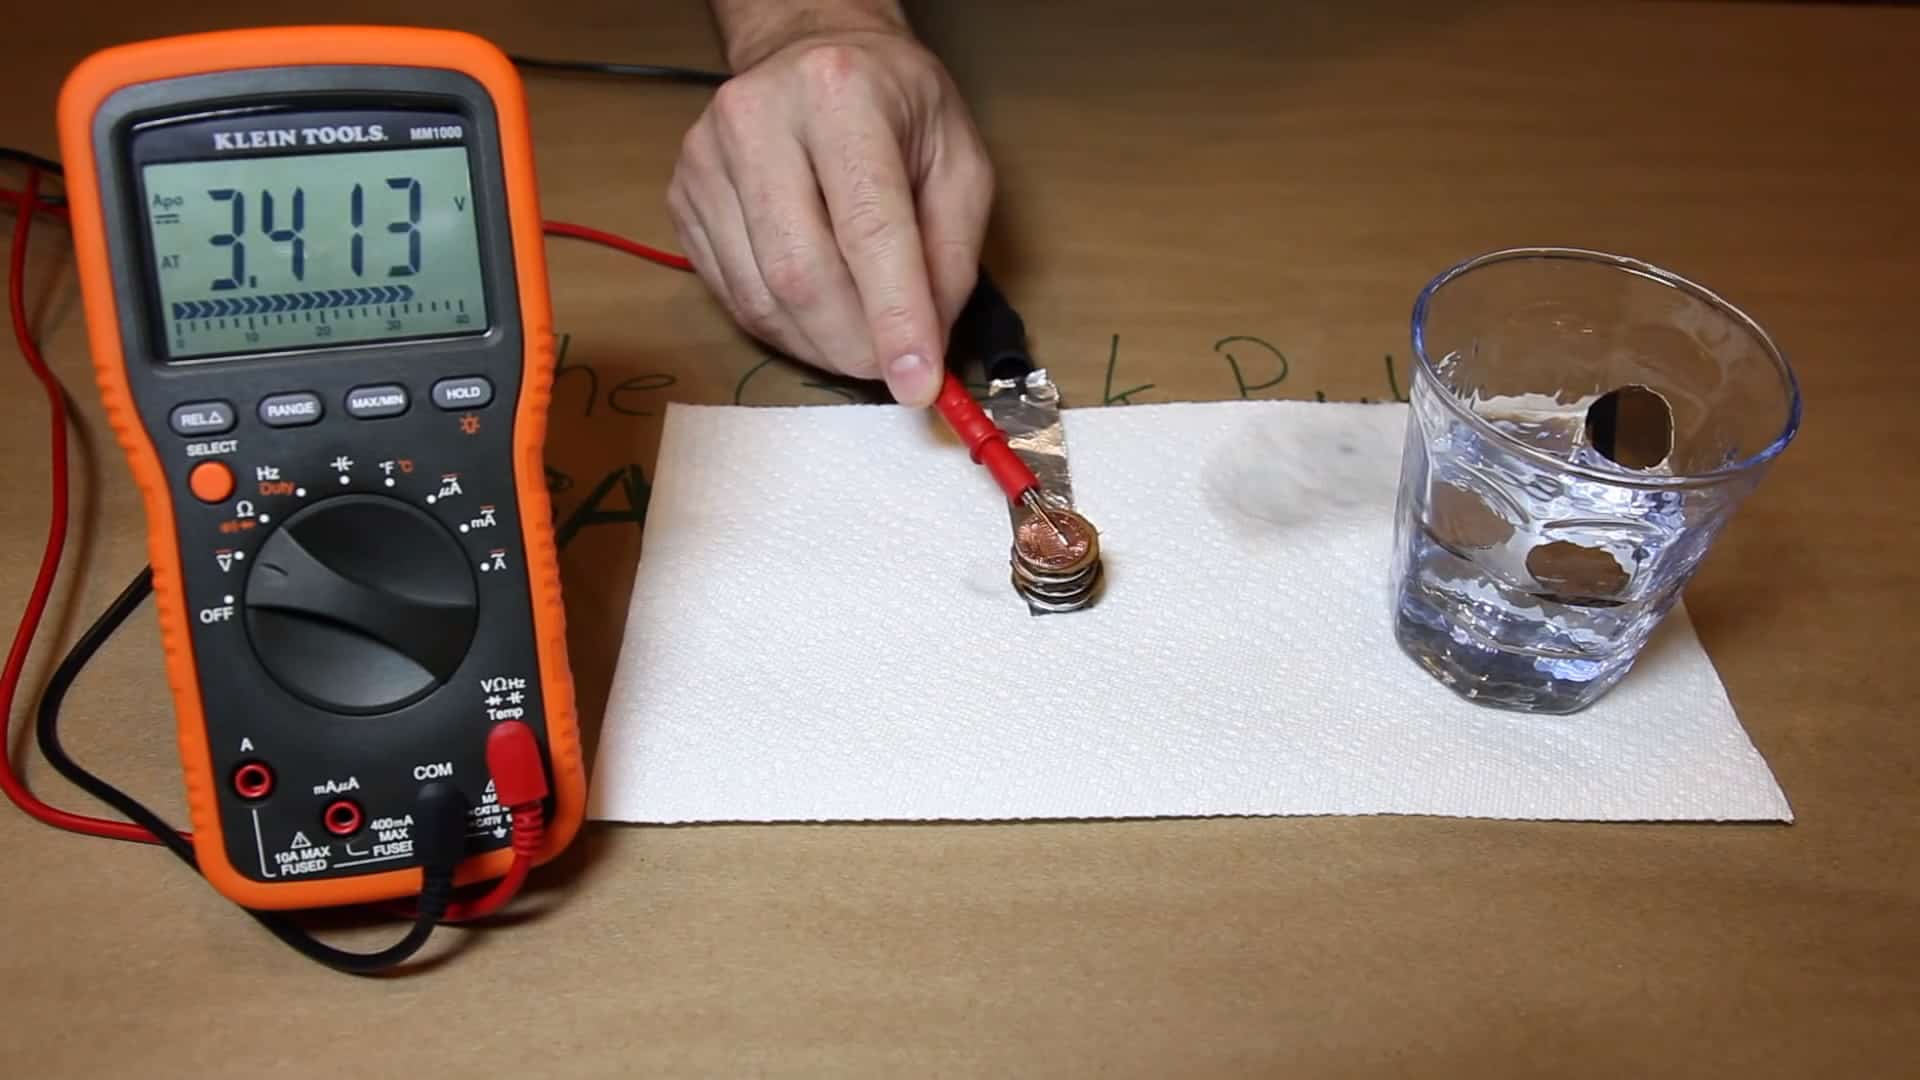
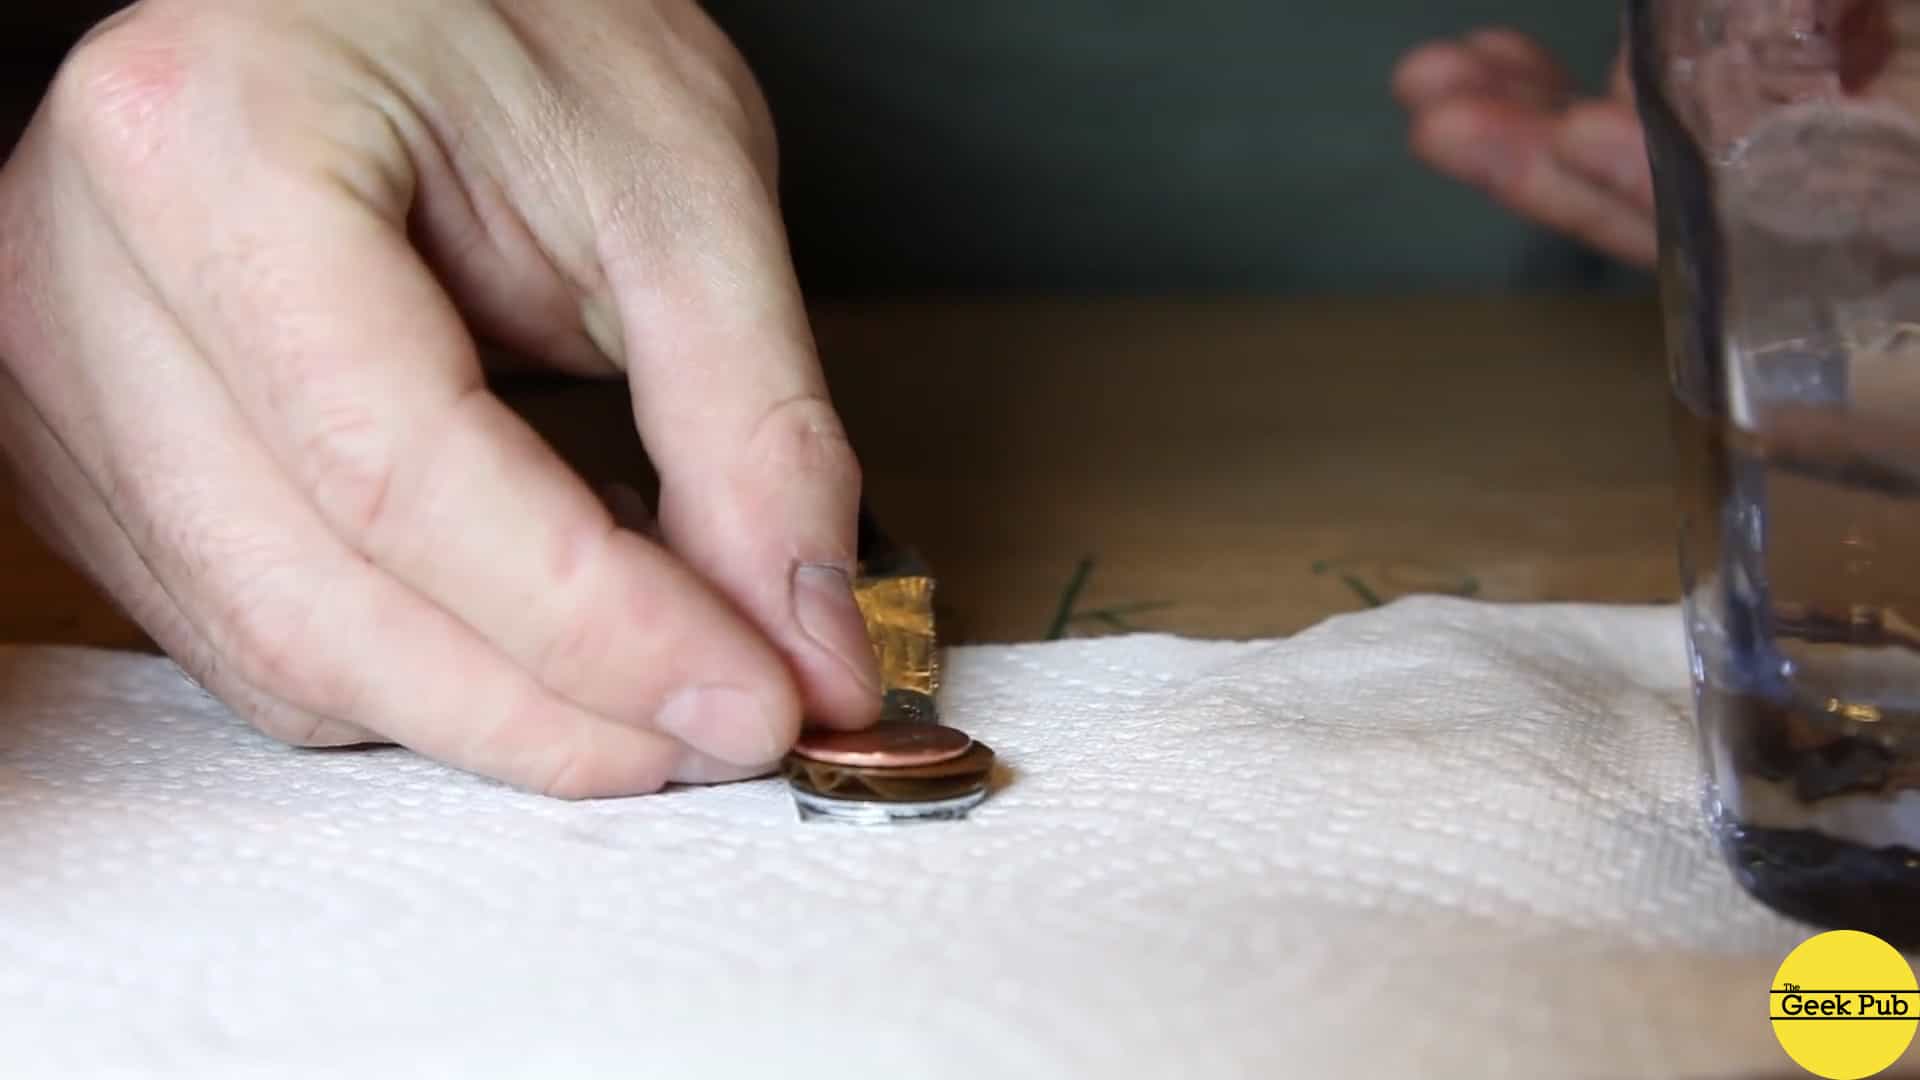
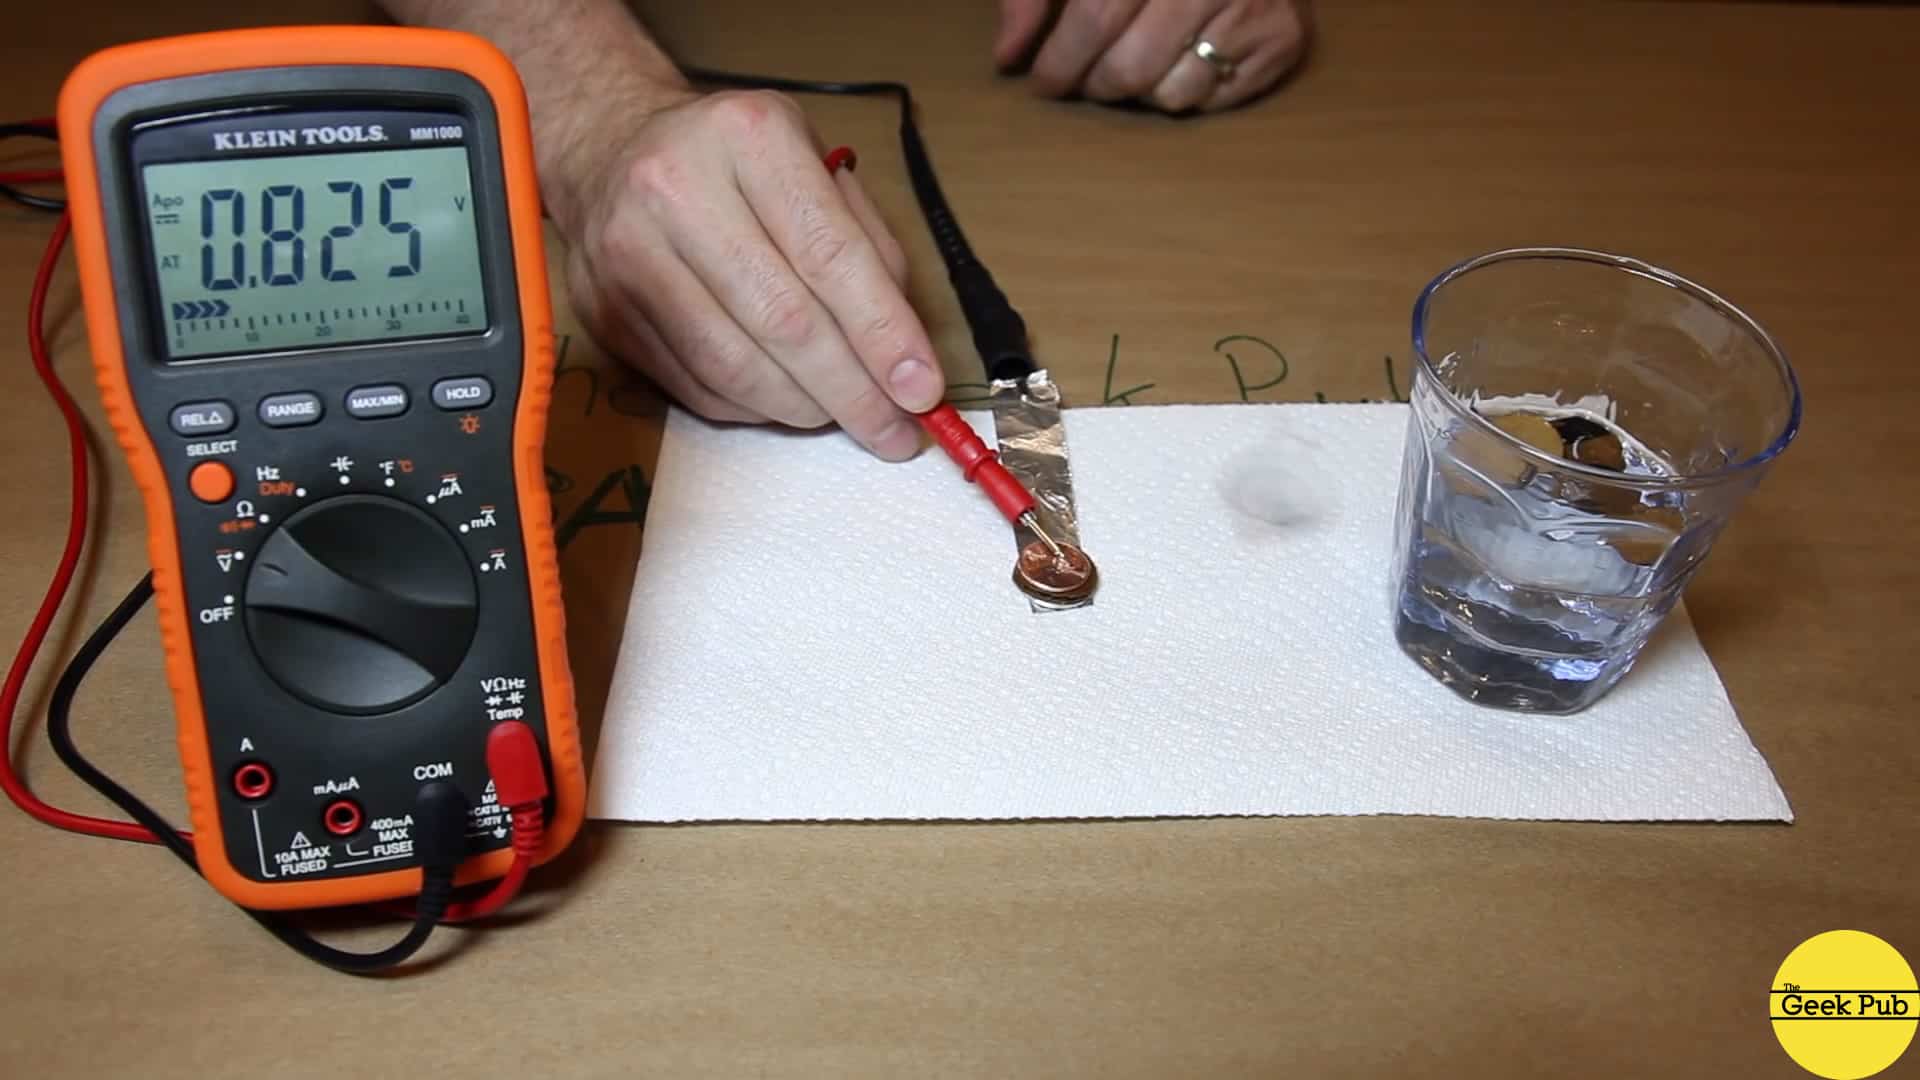
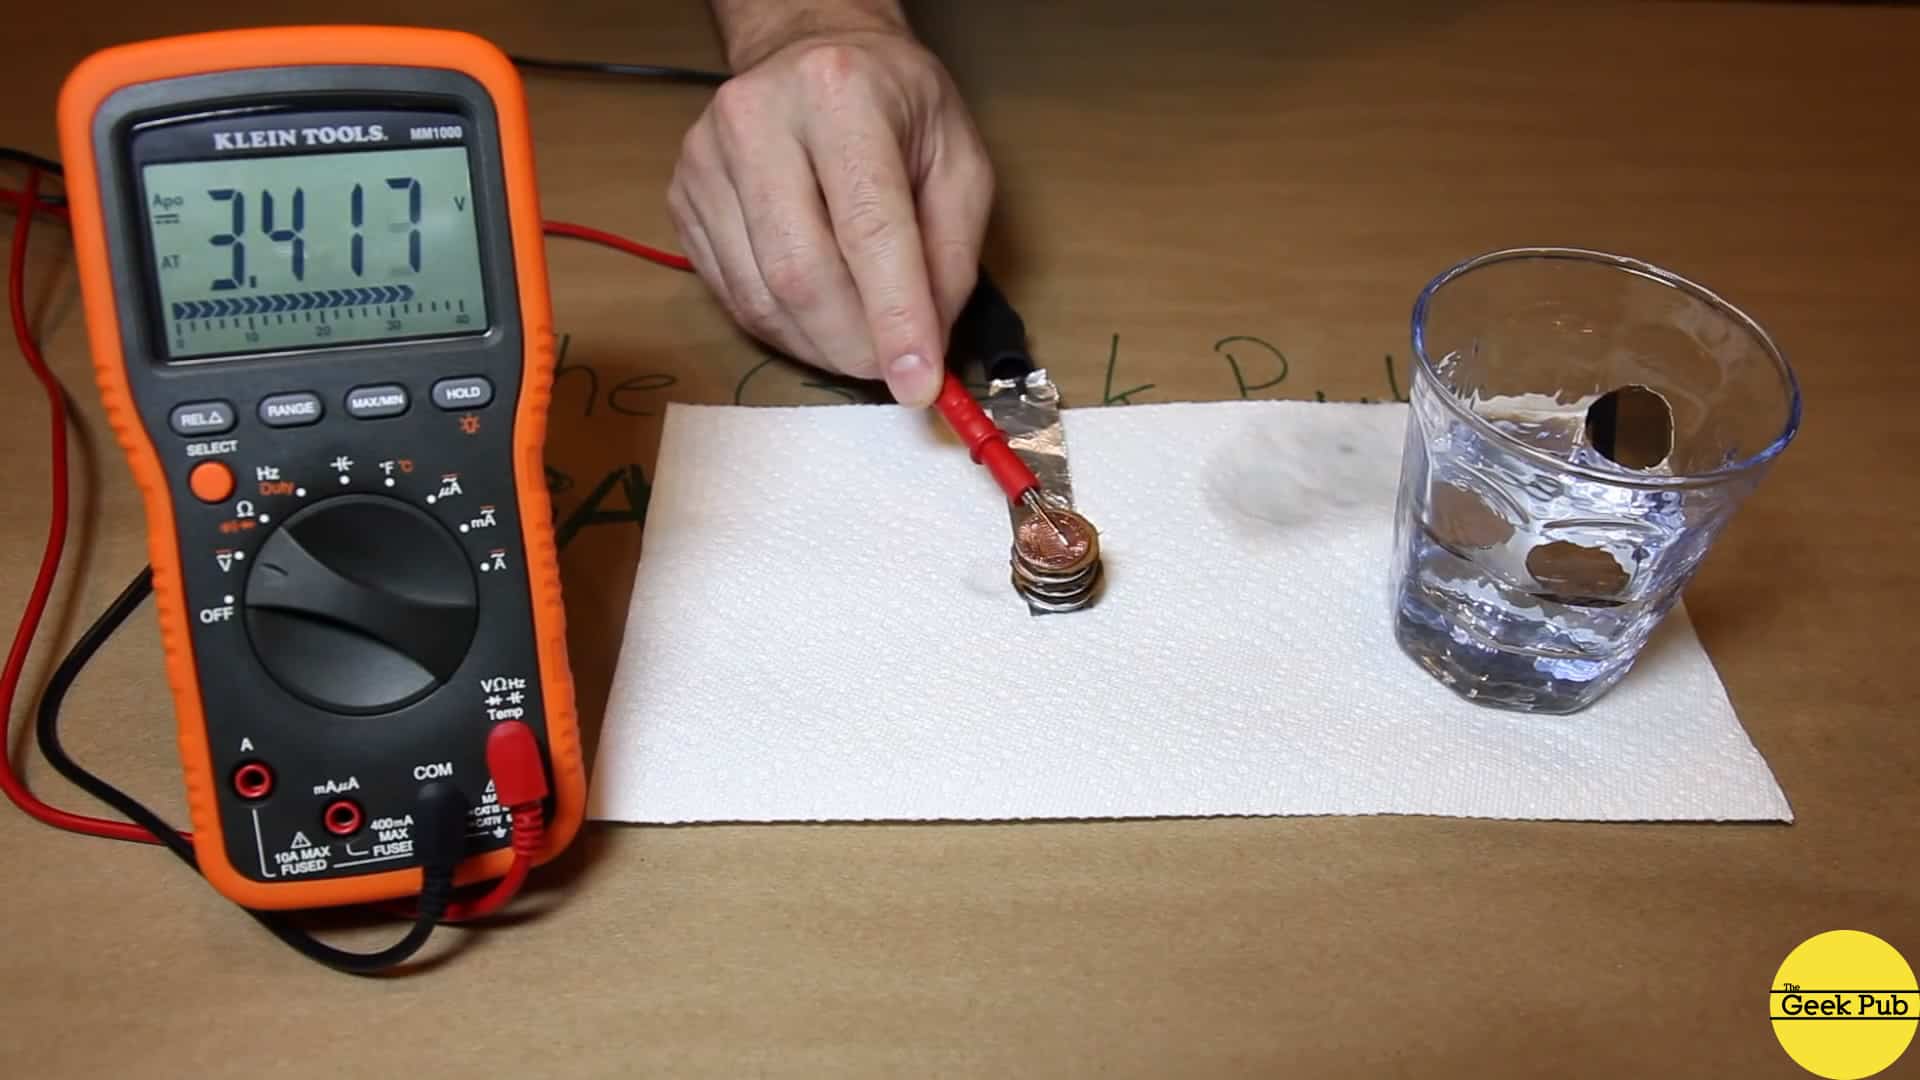
Blot dry one of the cardboard circles using the paper towel, but don’t dry it out. And then place it on top of the zinc washer. Finally, add a penny on too of the cardboard. If you touch your multimeter to the penny you should get just under 1 volt. In my case I got 0.8 volts. That’s really incredible when you think about it!
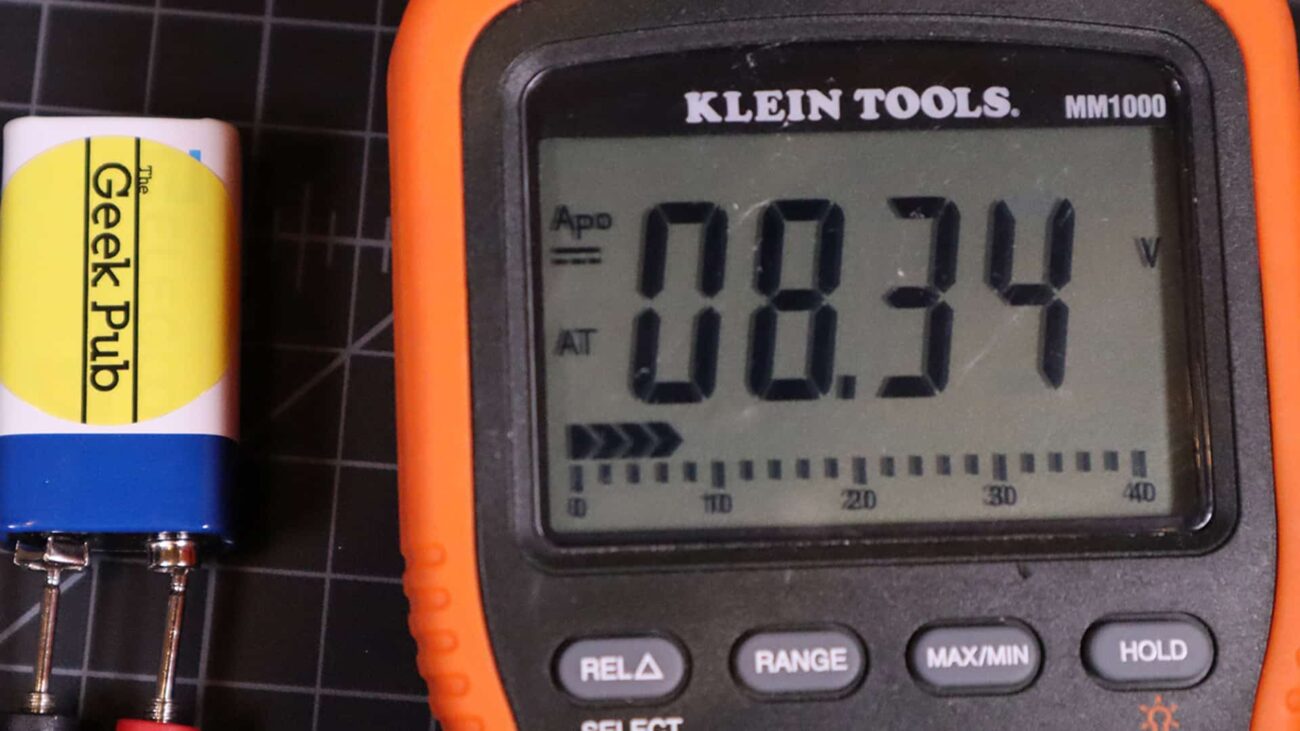
To make it even more powerful, lets add two more cells consisting of a zinc washer, cardboard circle and penny stacked on top. If you measure it again you should get somewhere between 3 and 4 volts. In my case I get 3.4V! I’m super impressed!
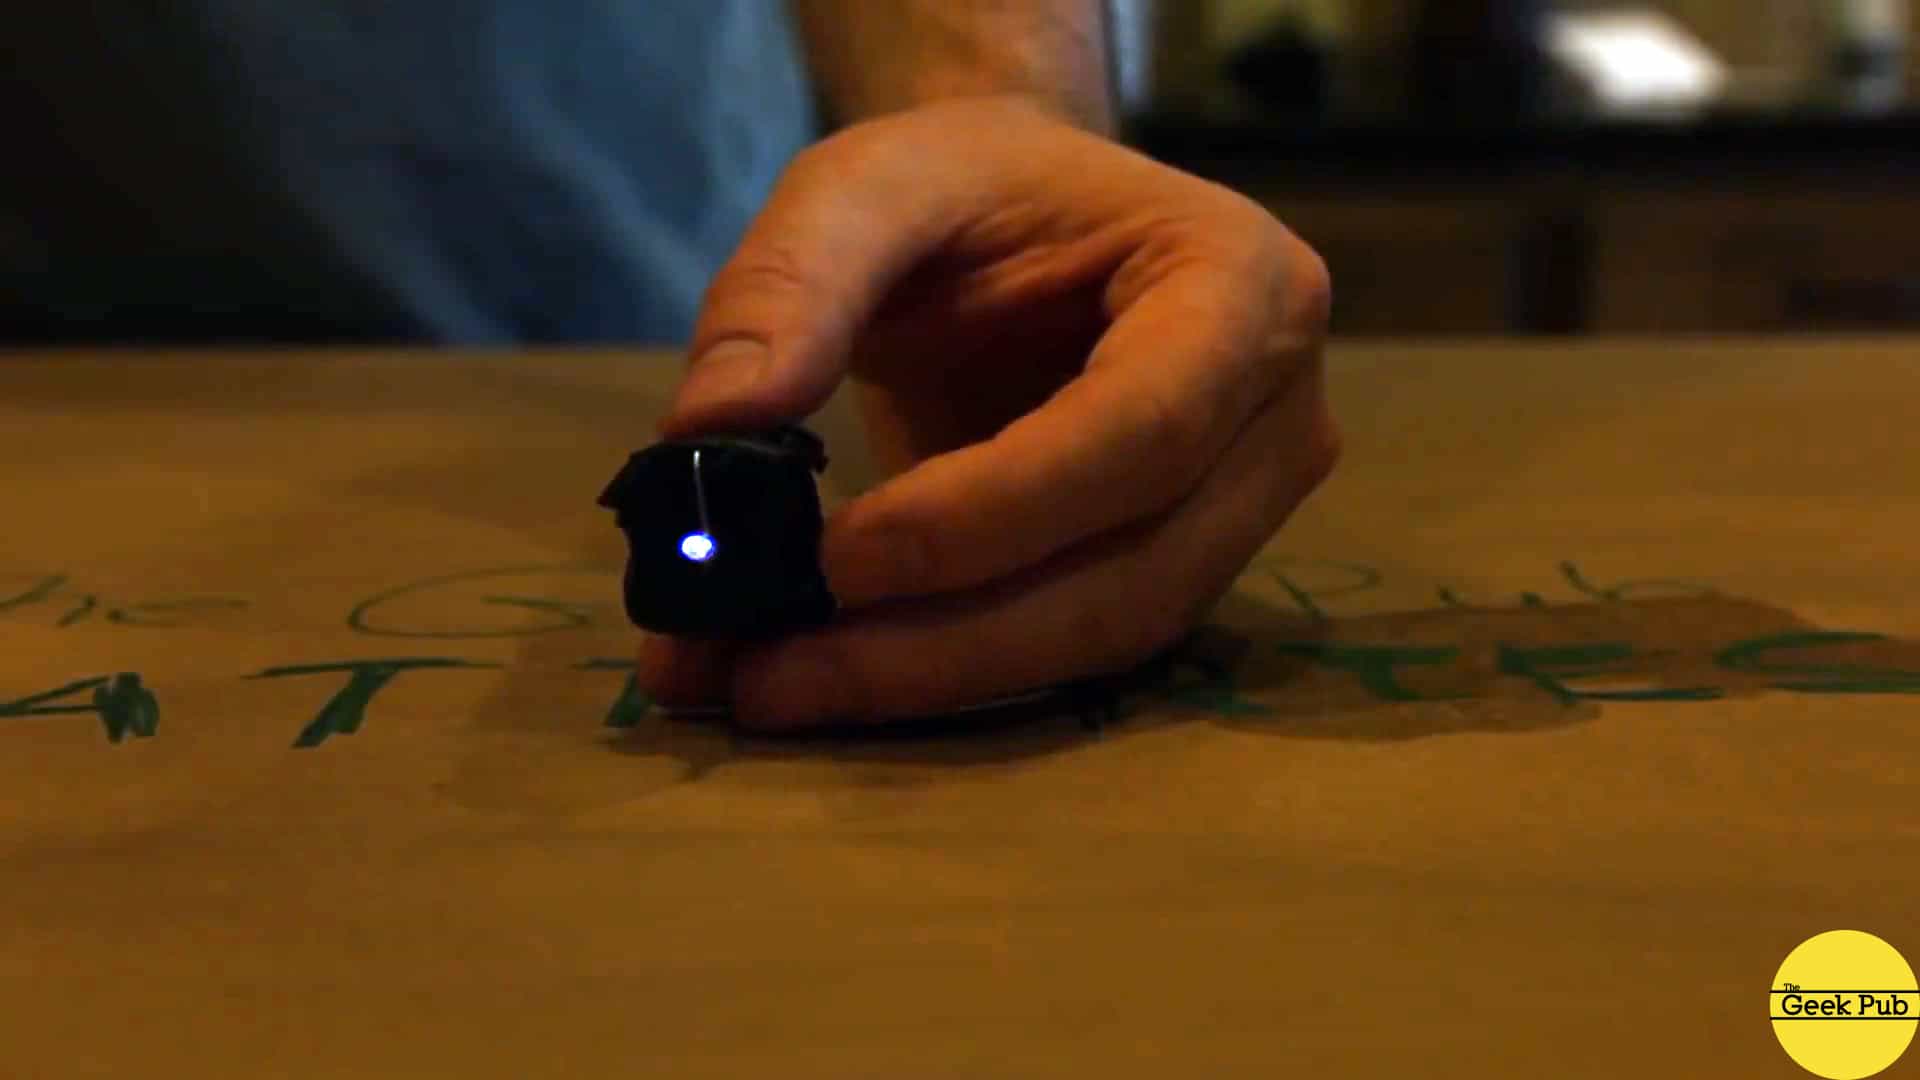
To keep it all together, I wrapped my penny battery with a couple of strips of electrical tape. Then I gently inserted a blue LED from the potato video and it lights right up!
And that’s how you make a potato battery, without the potato!
Amazingly, 24 hours later, its still going strong and I can’t help but wonder, “How long will this thing last?” (Update: It lasted about 72.5 hours!)
More Details on How Penny Batteries Work
Now that you’ve completed the project, let’s talk just a bit more about how the penny battery works and its all because of the chemical composition of the metals.
Penny batteries work by converting chemical energy of the two different metals interacting with an electrolyte. In the case of the penny battery that electrolyte is the vinegar. The cardboard simply acts as a substrate that holds the vinegar in place, but has no effect on energy creation.
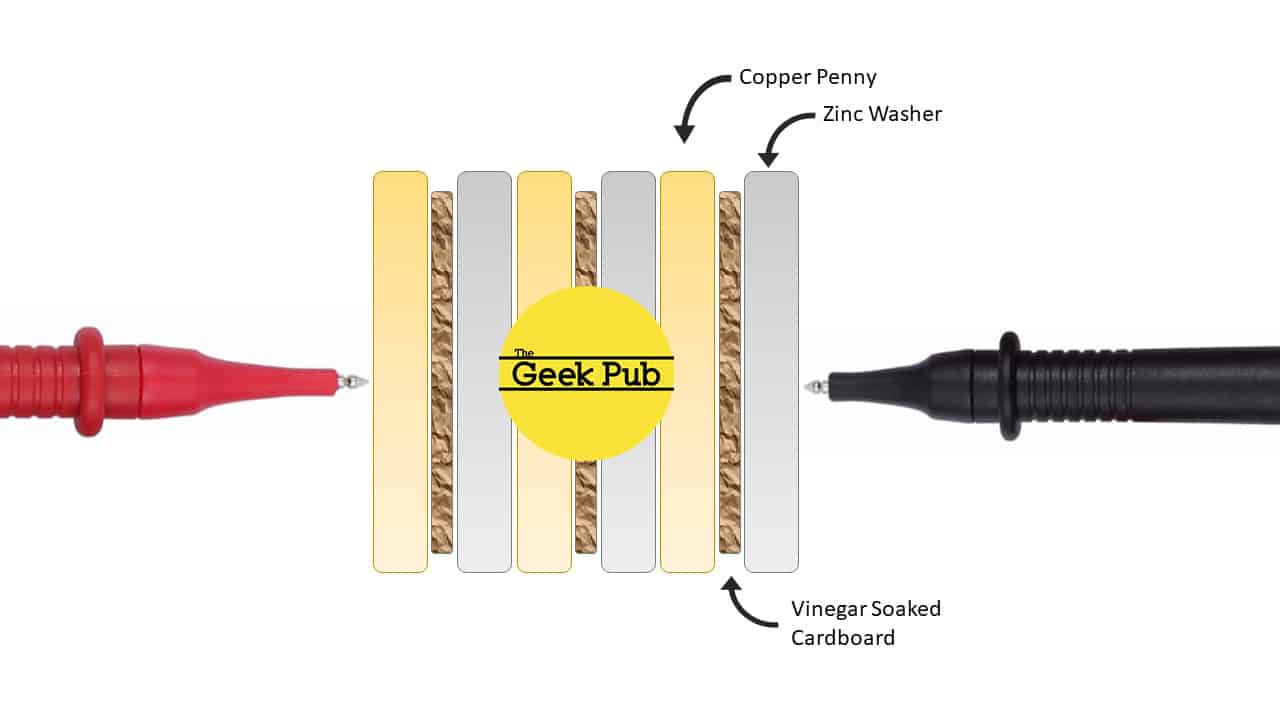
The copper in the penny, and the zinc in the washer’s surfaces serves as the electrodes. An electric current is created when the wire connects both metal surfaces and completes the circuit. This could be your LED or it could be the connection of your multimeter’s test probes.


4.5
I have so got to make me one of these! Neat!
interesting. so you can make a battery out of penny! what would happen if you put 400 of these in series? could you get an significant current to flow through them?
I suspect so! Maybe I will do a video on that!